roverv8rod
Part of things
 the little devil inside :)
Posts: 95
|
|
|
|
|
Concernong the seat belts, have you tried to wiggle the belthousings, as they only come out when in the correct position, this is the way the belts work, there's a small ball inside them, that has to be free from the sides, to free up the reels. If not in position, the little ball prohibits the reel from loosening, thus acting as a stop, in casus, when you brake hard, or have a shunt, the little ball is also not free, prohibiting the reel to become free, and your belt keeps you in place......
Just try to put them in position, before replacing a maybe perfect seatbelt.
Cracking car, BTW.
Chris
|
| |
|
|
|
|
Nathan
Club Retro Rides Member
Posts: 5,626
Club RR Member Number: 1
|
|
Oct 13, 2009 11:29:10 GMT
|
|
Looking good mate, glad you got the floor bit sorted.
|
| |
|
|
ChasR
RR Helper
motivation
Posts: 10,194
Club RR Member Number: 170
|
|
Apr 12, 2010 18:26:22 GMT
|
Well, with me needing another car again for when the main daily is off the road (as it is now) for those out of work times, the MGB has been rolled out of storage. I plan to get it roadworthy and then tidy it up instead of doing it in one go where other problems always crop up from the car not being used etc. etc. So what is between it and an MOT? General running. Overheating Brakes Electrics Seatbelts General running? The dizzy originally didn't move off 10 degrees BTDC at any revs. Now after stripping the dizzy down and cleaning it, it does move, but not as much as I expect it to. Maybe it will improve when the car gets used, or maybe the Britpart ignition kit is causing part of these issues... It can't idle well without the choke but considering the ignition is not working right, I can't really see much point in setting it up to run poorly. Overheating? Basically it would go to near the red of the gauge and almost touch it with no signs of the fan cutting in. The wiring for the fan is fine and I've had two thermoswitches but I have been informed that the gauges can overread. On the basis that the oil pressure gauge looks awful (it's rusty inside on the face etc.) I've ordered a dual capilliary gauge to see what temp the car is really doing (hoses and rad are all evenly hot). Here is what the dual gauge will be replacing: 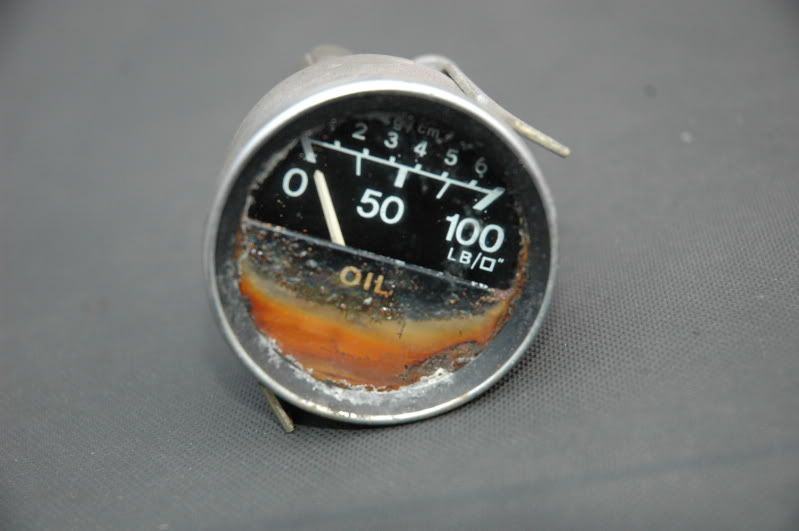 Electrics? ATM the indicators don't work and with the sidelights on, all of the rear lights come on when the brakes are employed. I'm guessing I have many earths to chase and sort. Ho Hum. Brakes? I can't seem to stop one pipe (a Goodridge braided item) from leaking at the back. I know the old pipe didn't come off without a fight, so maybe that's got something to do with it. I'll have another go at sealing it. Ideas? I'm guessing PTFE etc. will only really be a short term cure. Seatbelts refuse to come out completely. No chance of it passing an MOT like that. Any tips on rebuilding the seatbelt assemblies? With less doom and gloom let's concentrate on the positives, I've set the valve clearances so that it is hopefully a little quieter now (is that possible lol) and have obtained another door. Progress on the inside has also started. Here is the rest in pics: Floor's painted and the start of interior reassembly. Guess which gauges I cleaned up out of them...: 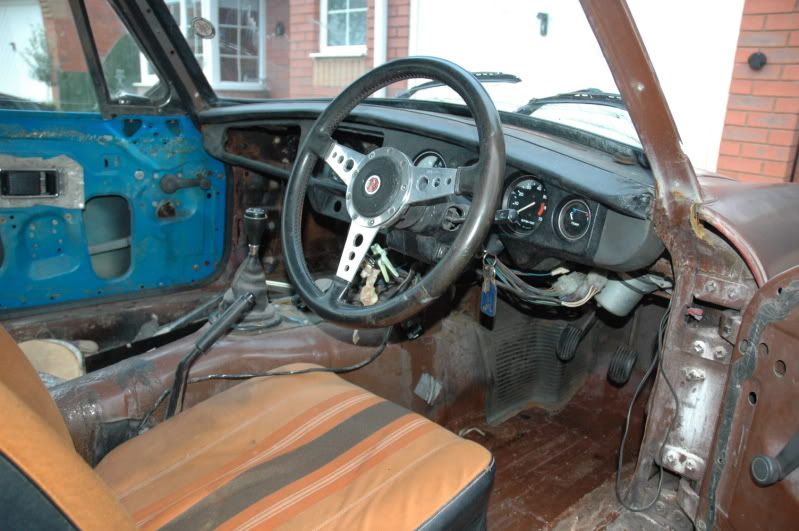 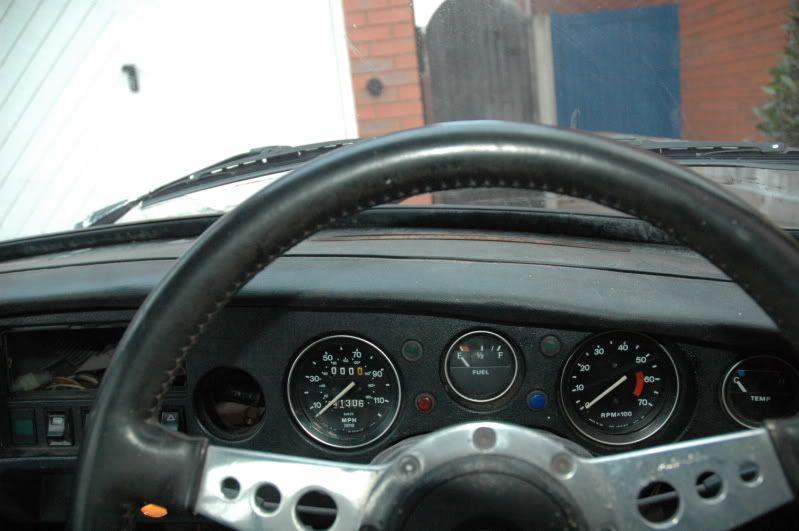 And finally, the door that had been giving me quite a few problems. I suspected that my previous door had been poorly reskinned. Was this the case? The old door when shut completely (or rather wrestled shut): 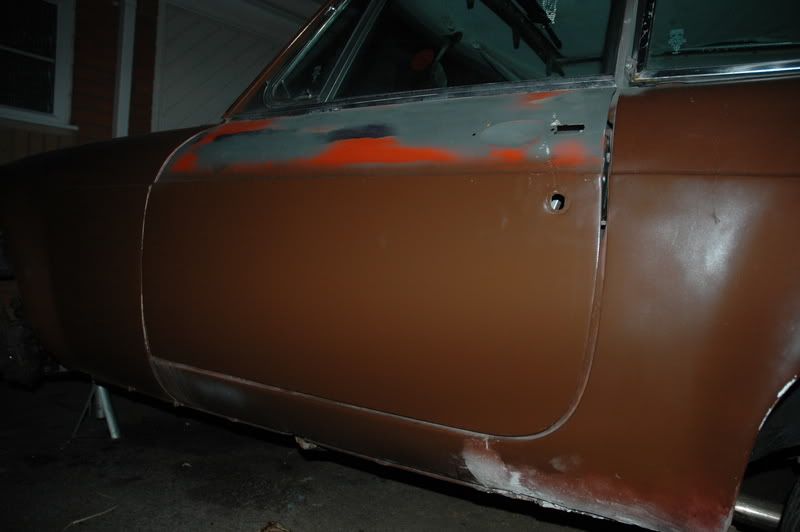 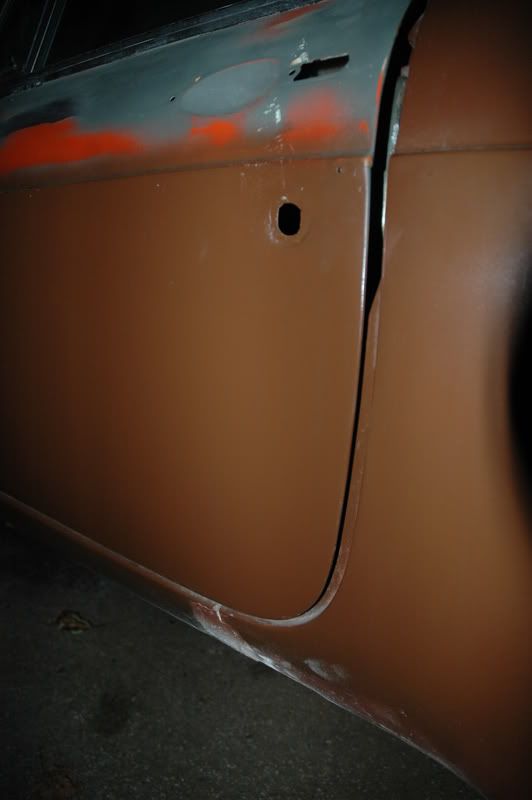 And the new original item: 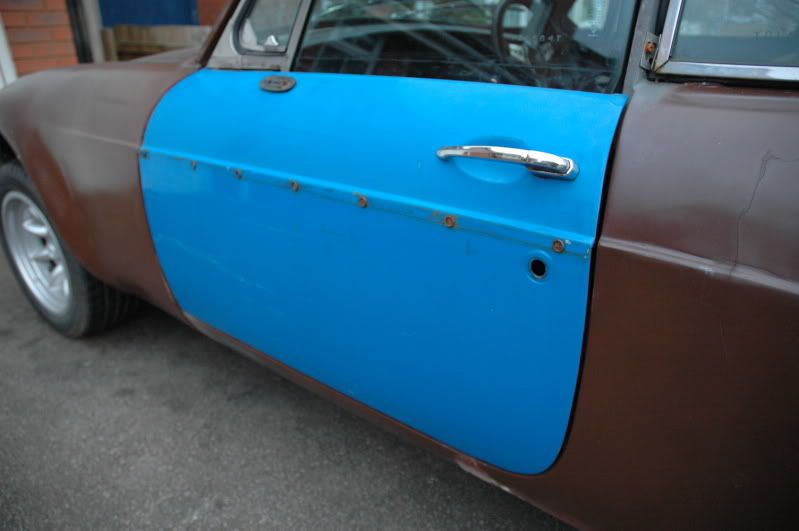 Much better fitting all round. Lord knows how a reskin could go so wrong on the previous door... Still it's a rust free door LOL. Now to quit the procrastination and sort out the real issues. |
| |
Last Edit: Apr 12, 2010 18:29:57 GMT by ChasR
|
|
|
|
|
|
|
|
good to see a revival on this one - not far to go now!
|
| |
wanted, 25th hour. Required daily, cash waiting
|
|
Nathan
Club Retro Rides Member
Posts: 5,626
Club RR Member Number: 1
|
|
Apr 13, 2010 10:55:24 GMT
|
|
Good going fella.
As for the lights issue, check the Stalk I had this same problem and it was down to the indicator connectors being gumed up. Worth a try.
Glad you got the door sorted fella, will look forward to seeing this.
Mine comes out again next month with a few additions.
|
| |
|
|
ChasR
RR Helper
motivation
Posts: 10,194
Club RR Member Number: 170
|
|
Apr 13, 2010 21:09:10 GMT
|
|
Well, things are slowly looking up, or so they seem to be.
Brake leak is sorted, but the O/S Wheel cylinder was seized badly but in a strange manner. It bled perfectly but it didn't brake, no matter what we did to the cylinder (Plus Gas, hammer, screwdrivers etc.). A new one will be getting fitted tomorrow, but otherwise the brakes are great on the other corners.
Coolant has been drain with the rad and engine flushed. All free flowing and all is well with no rusty deposits. Just need to (AFAIK) clean out the expansion tank, fit the capillary sender, and fill up with coolant and vent the system.
I oddly enough have a spare stalk Nathan, so I'll try renovating that item and seeing if matters improve.
|
| |
|
|
luckygti
Posted a lot
I need to try harder!
Posts: 4,912
|
|
Apr 13, 2010 21:34:48 GMT
|
Glad to see this getting some love Chas. About time  Sorry to see that the Porsche has gone, lovely car that. This'll be even better when it's done  |
| |
|
|
ChasR
RR Helper
motivation
Posts: 10,194
Club RR Member Number: 170
|
|
Apr 22, 2010 23:10:45 GMT
|
|
Well, more progress.
I have switched the steering bosses around so I now have cancelling indicators again (when they work...).
Engine has also been seen to. Valve clearances were set very carefully as were the carbs. Dizzy is also working well now. Result, a very sweet running B Series that idles well and has a great exhaust note for a B Series with no real misfires to the note. Very happy with that. I suspect I may have to make them uber lean though for it to pass the MOT.
Electrics have also come on quite a way. I changed most of the bullet connections a year ago, but the fuse box connections I neglected. I've changed all of the fuses and tried to clean the fuse box up the best I can. Now I have a working horn and hazards, but the indicators still do not work (the relay needs testing first) but bar that the stalk now works as it should. Cooling fan also cuts in (the lack of power to the fan was the cause).
Brakes have also been sorted. Great feel to them and everything is consistant and firm.
So what's left now?
Indicators
Seatbelt (hopefully I can obtain a used working seatbelt reel (mine has seized it appears)
Small amount of welding
and then it's a case of putting it in for an MOT and tidying it up. Or so the theory goes...
A video and pics may be coming soon....
|
| |
|
|
Nathan
Club Retro Rides Member
Posts: 5,626
Club RR Member Number: 1
|
|
Apr 23, 2010 10:55:29 GMT
|
|
WHOOPPP WHOOOPPP So we shall be seeing this soon then!!
|
| |
|
|
ChasR
RR Helper
motivation
Posts: 10,194
Club RR Member Number: 170
|
|
Apr 23, 2010 20:58:32 GMT
|
|
It seems so. I now have working indicators and my gauges work after a replacement fusebox. The underside of the old one was not a pretty sight.
Sunday will be me chasing Earthing issues (rear lights), and maybe taking a look at the driver's side seatbelt reel.
Once that is done, it will be the final hurdle... Welding the last couple of bits to finish it off for an MOT.
|
| |
Last Edit: Apr 23, 2010 23:02:43 GMT by ChasR
|
|
|
|
|
|
|
|
|
|
|
Its finally looking like a proper car again and now has at least one seat and does not smoke as much now I am sure Chas will be along to give a sit rep! Does sound the dogs danglies though  |
| |
|
|
|
|
|
|
|
|
lol cool, look forward to seeing it one day maybe.
|
| |
|
|
ChasR
RR Helper
motivation
Posts: 10,194
Club RR Member Number: 170
|
|
|
|
There is an update but not a massive one by any feat. Electrics as far as I can tell seem to be fixed. The indicators were down to the rear lights not earthing properly. Now that has been sorted, and they work perfectly, as does the horn etc. Even the fan works for the engine so it can now keep its cool . The front end closing panels for the chassis legs (to finish off the Chrome Bumper conversion have been welded up, and sealed too with the Grille ready to go in. But before that I will need to offer up the Sebring Valance and adapt that to fit the bodykit. Although I have been told that I will not need the valance for the MOT, but time will tell... Two of the 4 holes I have repaired. Cut the rust out and replaced the metal to near factory spec. The other two I am now trying to do when I get a chance. The windows all fit great where the old rear window didn't (somebody had tried to repair it but quite poorly (it also explains why the car used to leak badly from that window in the past). Not much trim is left to put on outside (that can wait for the MOT), but it's getting there slowly. I've been diverting too much attention lately to the Pug and my other daily as of late(2004 Mondy). |
| |
|
|
ChasR
RR Helper
motivation
Posts: 10,194
Club RR Member Number: 170
|
|
|
|
|
Well, the MOT is booked... Wish me luck LOL.
It's taken a while to get it this far anyway.
|
| |
|
|
Davenger
Club Retro Rides Member
It's only metal
Posts: 7,272
Club RR Member Number: 140
|
|
|
|
|
Good luck dude.
I'm sure it'll be fine
|
| |
|
|
Nathan
Club Retro Rides Member
Posts: 5,626
Club RR Member Number: 1
|
|
|
|
|
WICKED mate.
Really looking forward to seeing this.
|
| |
|
|
ChasR
RR Helper
motivation
Posts: 10,194
Club RR Member Number: 170
|
|
|
|
|
Well, the result came in today.
It failed... on the following:
1) Headlamp aim N/S
2) Brake pipes twisting on the front
3) Parking Brake has no reverse travel
4) Steering system has play.
Headlamp I'll leave for MOT man to sort.
The brake pipes was down to them catching the damper most of the time and bunching up on full lock.
After some investigation it seems that my kit (from 5 years ago) never came with some P Clips, which secure the pipes to the Crossmember. Luckily, my LPG shenanigans means that I have plenty of P Clips, so I'll be mounting them in tomorrow. (I think the Spax kit changed quite a few times over its life in development.
The Steering play was a strange one. He thought it was the UJ in the column but that also it could be the collapsable steering column. He let me take off his column and UJ off his car which are play free, so hopefully that will be sorted (rack on the car is new).
The Parking brake reverse travel thing I am at a loss on. I think he means the brake isn't returning, but I cannot be sure. It seemed to be when I checked it but I guess I'll need to query that.
So I best get cracking on these final bits!
|
| |
Last Edit: Aug 4, 2010 22:12:16 GMT by ChasR
|
|
ianc
Part of things
Posts: 23
|
|
|
|
|
hello mate. no reserve travel means excess travel.. needs adjusting.. cheers ian..
|
| |
|
|
ChasR
RR Helper
motivation
Posts: 10,194
Club RR Member Number: 170
|
|
|
|
Well, I've done a little more to it today. I had a chat with the MGOC about the Spax kit. After going through a couple of places (Technical and Parts) who had only once come across the problem, I was put through to the workshop. He basically told me that the Spax brake pipes needed a bit of trial and error in the fitment (going from lock to lock many times) and fitting a P Clip (which back when I bought my kit wasn't supplied) and it's looking better now. Steering play was down to the collapsable steering column. I've had a play with it and taken out the play from the collapsible parts but kept the MOT man's rack aside just in case. The handbrake travel I thought would mean me adjusting a seized square ended adjuster. Fortunately, the previous owner to me changed the handbrake cables and it had a normal cable type adjuster  . A twiddle with that later and it now comes on at 3 notches. Now to wait and hope. |
| |
|
|
|
|


 Sorry to see that the Porsche has gone, lovely car that. This'll be even better when it's done


 . A twiddle with that later and it now comes on at 3 notches.