|
|
|
Jan 11, 2024 16:00:20 GMT
|
I'd agree with last post regarding welding. Most of what the amatuer restorer will be doing is basically butt welds with stitches, which isn't particularly difficult after a little practice. Continuous welds on thicker material is perhaps harder to learn and you might get some good stuff from a course there. I've not had to do much of that aside from on my friends VW T25 rustcamper, the rear suspension on those is a beautiful rust trap but the steel seems to be 3mm or greater in some areas. Basically a body-on-steel-girder structure! If you get it wrong, grind it back and do it again. Really not that scary. You've got me browsing the internet for 2-stroke Saab 96s. 
Bbbbbbbbbbbbbbbzzzzzzzzzzzzzzzzzzzzzzzzzzzzzzzzzzzzzzzzzzzzzzz.
|
| |
Last Edit: Jan 11, 2024 16:02:20 GMT by halkyon
|
|
|
|
|
|
|
Jan 11, 2024 17:52:52 GMT
|
|
|
| |
|
|
|
|
|
Jan 12, 2024 10:19:26 GMT
|
I'd agree with last post regarding welding. Most of what the amatuer restorer will be doing is basically butt welds with stitches, which isn't particularly difficult after a little practice. Continuous welds on thicker material is perhaps harder to learn and you might get some good stuff from a course there. I've not had to do much of that aside from on my friends VW T25 rustcamper, the rear suspension on those is a beautiful rust trap but the steel seems to be 3mm or greater in some areas. Basically a body-on-steel-girder structure! If you get it wrong, grind it back and do it again. Really not that scary. You've got me browsing the internet for 2-stroke Saab 96s. 
Bbbbbbbbbbbbbbbzzzzzzzzzzzzzzzzzzzzzzzzzzzzzzzzzzzzzzzzzzzzzzz.
For me the welding was the easy part of rust repair, it was the actual fabbing and shaping of the replacement metal I'm not good at >_< I can also highly recommend grabbing a welder and some old body panels and having a play. |
| |
|
|
|
|
|
Jan 12, 2024 20:50:18 GMT
|
Lots of food for thought there, thanks all. Being able to weld is certainly appealing, for now I am going to keep my fingers crossed that I don't find any reason to do so! A couple of mishaps to report: Firstly when I got back from the garage I realised the headlight trim was coming adrift. 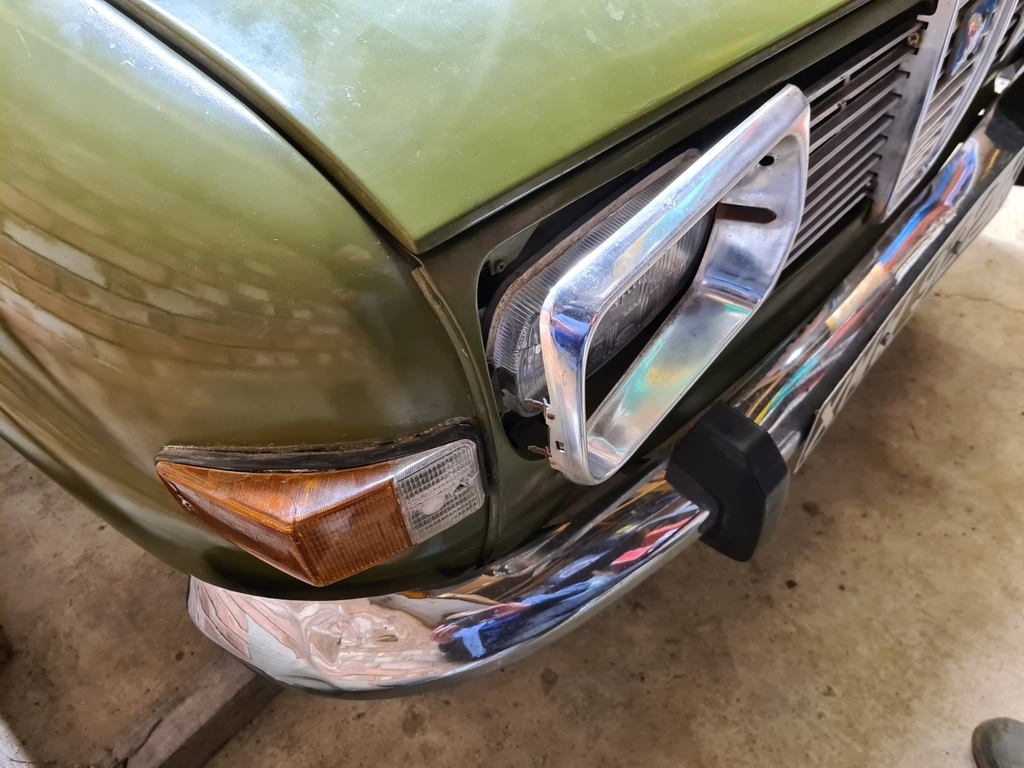 You might remember I'd adjusted this headlight to sit better, well it looks like I disturbed something when putting the trim back- oops. Then when I went to open the bonnet, the release cable came loose and pulled through- double oops, how I am I going to get the bonnet open? Actually its not too hard, no dramatic holes to be cut like you see people doing sometimes. Remove the grill (which I need to do anyway to sort the headlight trim) and the release leaver is right there- phew, sorted and opened in 5 mins. Release cable threaded back and re-clamped as tight as I possibly could. So on to the headlight trim. This is held in place by screws one side (which were still in place and stopping it completely disappearing) and on the other side 2 small prongs that push into holes. 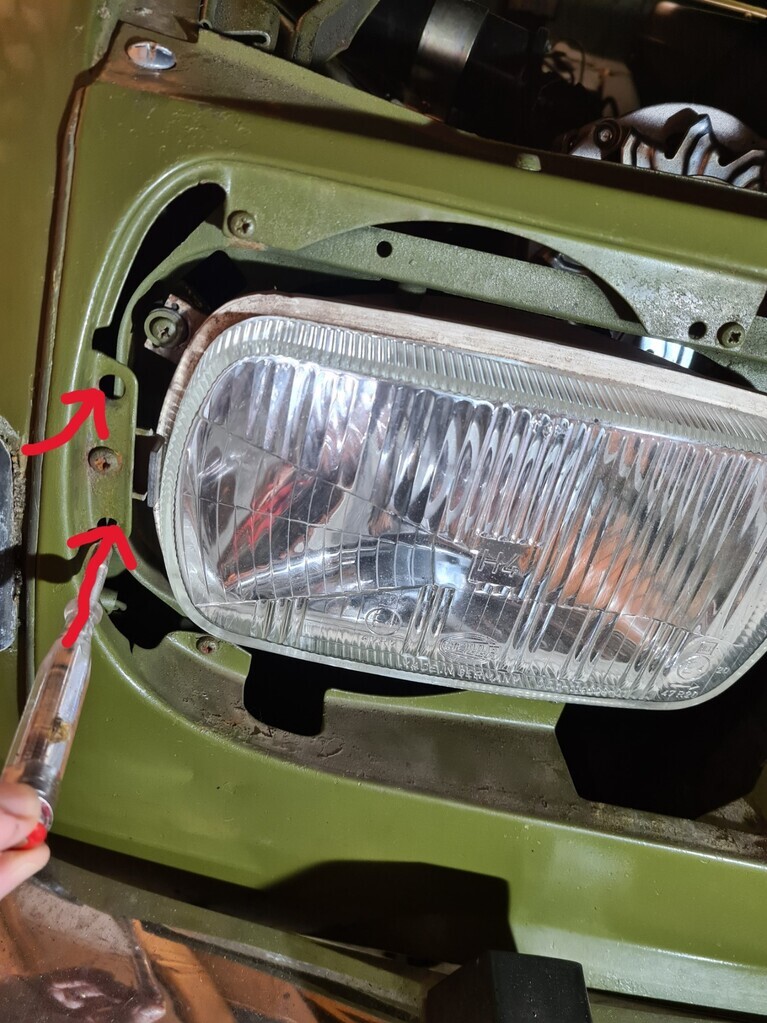 The issue seems to be the holes should be filled with little rubber grommets to keep the prongs held tightly- the rubber has long gone- tiny bit left on one prong only, so the fit is loose. The holes are 8mm, so I'll look for some replacement grommets to fill that hole- I'll do both sides. I'm starting to build quite a list of things that need doing once I have done that and finished the undersealing. I think I mentioned before the rhythmic ticking on the over-run, it seems to be road speed related and disappears if the clutch is depressed or if the freewheel is operational. Basically its there when the wheels are able to push the engine as it were. That sound seems to be getting louder (or maybe I am just more conscious of it), so I want to get to the bottom of that- I'm wondering engine mounts or suspension bushes- all the rubber items are past their best on this car. The other sound is a loose metallic clunk from the nearside front wheel- I need to check nothing has come loose down there, I noticed this for the first time driving to the garage for the welding- this is the most urgent item. Lastly when at the back I noticed the grommets (there is a theme here!) where the handbrake mechanismm enters the rear brake drums are disintegrating, so those need replacing. I have the new grommets, hopefully fitting will be straightforward. When I spotted those needed replacing I did wonder if getting new ones would be possible- they are a pretty unique shape, not round. But no problem- so far I am very impressed with parts availability for this 50 year old car- long may it last. So plenty to be getting on with, just need to brave the cold in the garage! Cheers Nigel |
| |
|
|
|
|
|
Jan 13, 2024 20:37:04 GMT
|
Small update: 8mm grommets ordered, from an electical supplier but the dimensions match, so should work. I've found the source of the new loose metallic clunk: 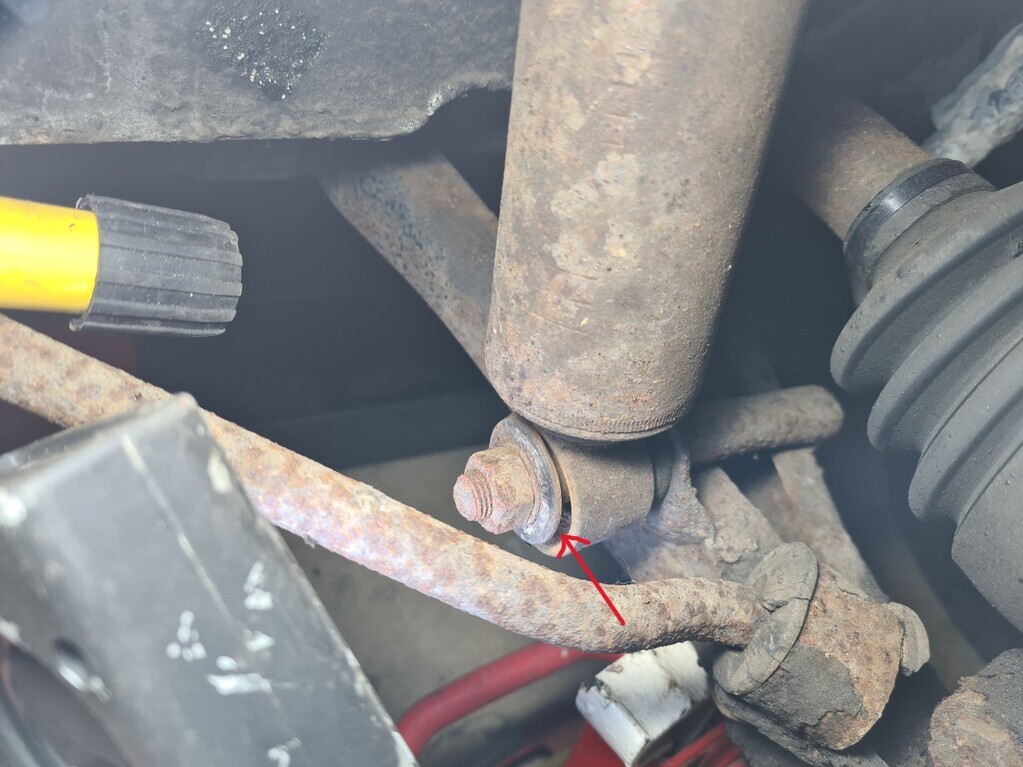 Basically the bush at the bottom of the damper is AWOL The damper moves around in my hand and the clunk it makes is exactly the sound I could hear. I think I had an axle stand under this point, and for quite a long time too, while I was doing the rust treatment and paint underneath, so I imagine those forces from an unusual direction finished it off. So more rubber to order, I'll have to consider whether to replace the dampers too while I am at it, they aren't leaking, but look pretty old. You can also see in the pic that the bushes for the anti-roll bar are past their best, I'd noticed that before but its not urgent, however, while I am ordering parts perhaps I'll do them too. These jobs do expand don't they  Right, off to compare prices! Cheers Nigel |
| |
|
|
melle
South West
It'll come out in the wash.
Posts: 2,013
|
|
Jan 16, 2024 17:55:11 GMT
|
|
If you find ARB bushes other than Powerflex please give me a shout, I could do with a set for my 95.
|
| |
www.saabv4.com'70 Saab 96 V4 "The Devil's Own V4" '77 Saab 95 V4 van conversion project '88 Saab 900i 8V
|
|
|
|
|
Jan 16, 2024 20:03:45 GMT
|
melle This is the only source of a full rubber set that I could find linkI have not used this company before and my browser is warning its an insecure site. Otherwise it seems to be polybushes or Skandix has the Bush for the lower suspension arm but not for the body. I'm still pondering how much to replace and then how best to collate the order, so nothing ordered yet myself. Cheers Nigel.
|
| |
|
|
melle
South West
It'll come out in the wash.
Posts: 2,013
|
|
Jan 16, 2024 20:25:17 GMT
|
Thanks for the link. I'm not buying from that site, the product may be OK but the owner is an absolute dick I don't wish to deal with again. The bushes look like they're direct copies from OEM bushes, if done in the right rubber, that's a clever idea. Don't bother with Skandix bushes, they're most likely from "Professional Parts Sweden" (aka "Scantech") and of utter rubbish quality. Someone on the V4 forum had ARB bush sets made in the Czech Republic about a decade ago (scroll down the page a bit); I have a set on my 96 and they're superb, I only wish I'd ordered multiple sets! There are still dimension drawings on the forum if you want to make your own. The shock absorber bushes are generic (as you've probably already found), they're used on e.g., Saab 900s. |
| |
www.saabv4.com'70 Saab 96 V4 "The Devil's Own V4" '77 Saab 95 V4 van conversion project '88 Saab 900i 8V
|
|
79cord
Posted a lot
  
Posts: 2,617
|
|
Jan 16, 2024 20:27:34 GMT
|
|
So many suppliers only list parts by car model ratherthan dimensions these days it's difficult to buy generic rubber bushes commonly found across many cars!
|
| |
|
|
|
|
|
Jan 16, 2024 20:27:36 GMT
|
|
Good info, thanks!
|
| |
|
|
|
|
|
|
|
Jan 18, 2024 21:30:28 GMT
|
Fitted the grommets 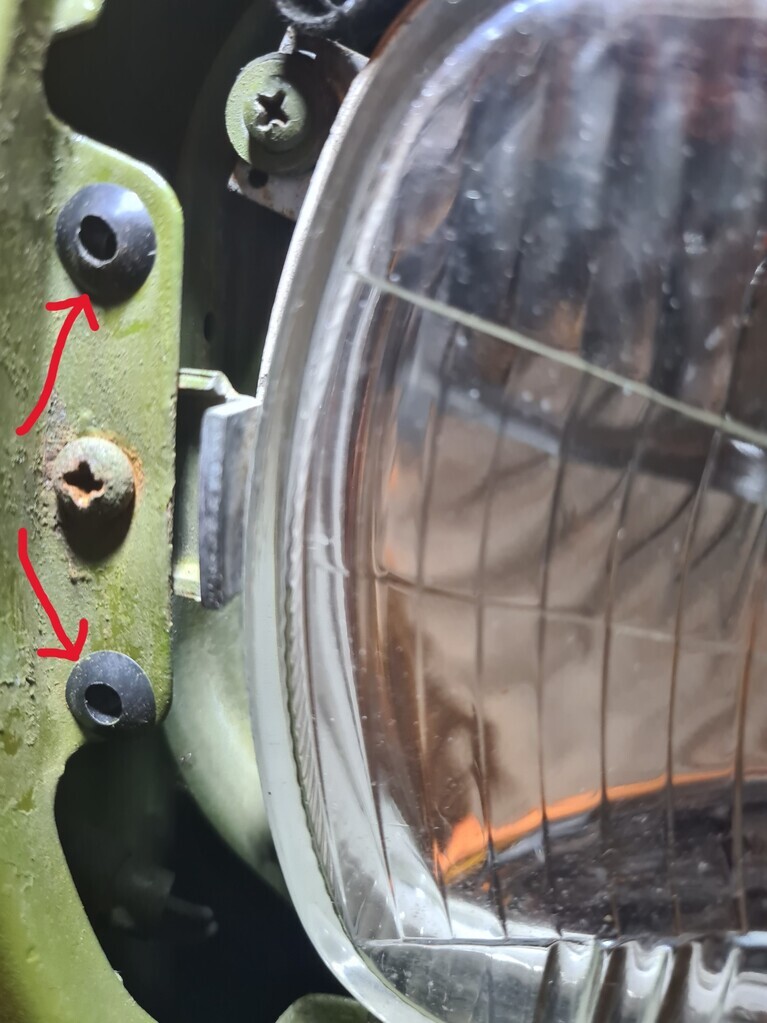 Prongs on the trim push in quite nicely 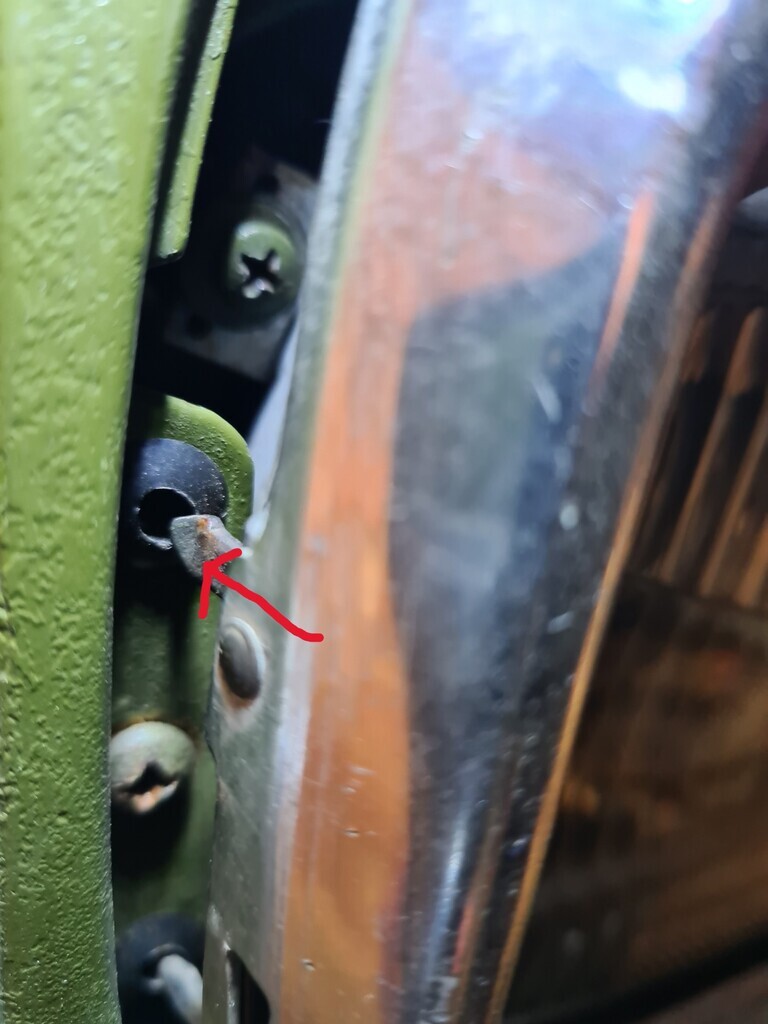 Trim then sits very well, looks good. 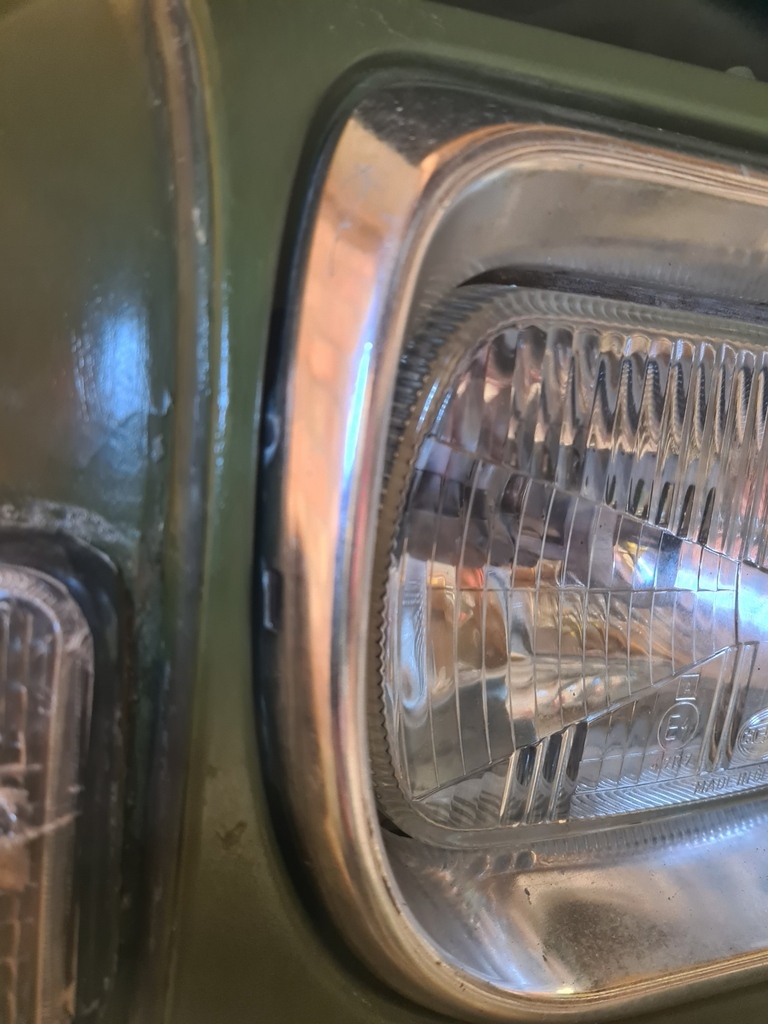 Hope it stays in place this time  Did both sides, the other side is secure, but does not sit quite as well- perfectly acceptable though. Looking at the light itself I think its pointing down too much, so the trim will need to come off for some adjustment at some point. Happy with this though- teeny, tiny win! Cheers Nigel |
| |
|
|
teaboy
Posted a lot
   Make tea, not war.
Posts: 2,127
|
|
Jan 18, 2024 21:57:05 GMT
|
|
Little victories, Nigel.
|
| |
|
|
jamesd1972
Club Retro Rides Member
Posts: 2,922  Club RR Member Number: 40
|
|
Jan 18, 2024 22:08:18 GMT
|
|
They all count !
James
|
| |
|
|
|
|
|
Jan 21, 2024 20:05:45 GMT
|
Back to finishing off the underside protection. Firstly get it up in the air again with the wheel off. 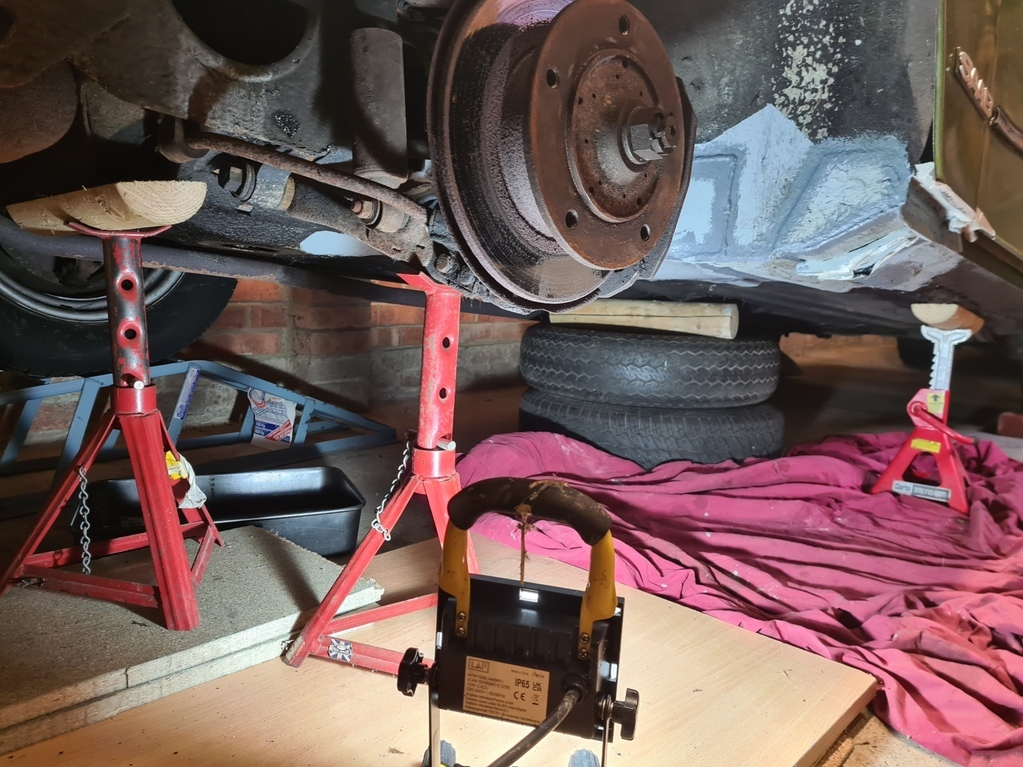 Can you tell I'm nervous about going underneath- 3 axle stands and a stack of wheels just in case  It seemed a bit more precarious lifting it to this height this time, took a couple of stabs and repositioning of the jack until I was happy to lift to the full height, but then all went well. Masking up 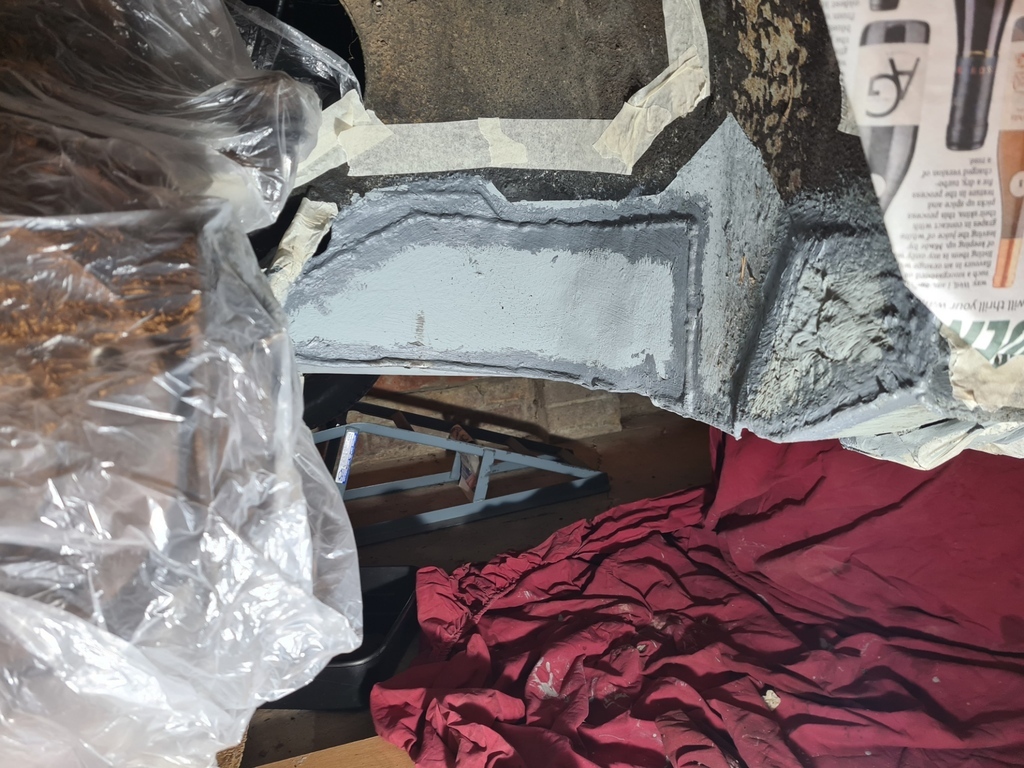 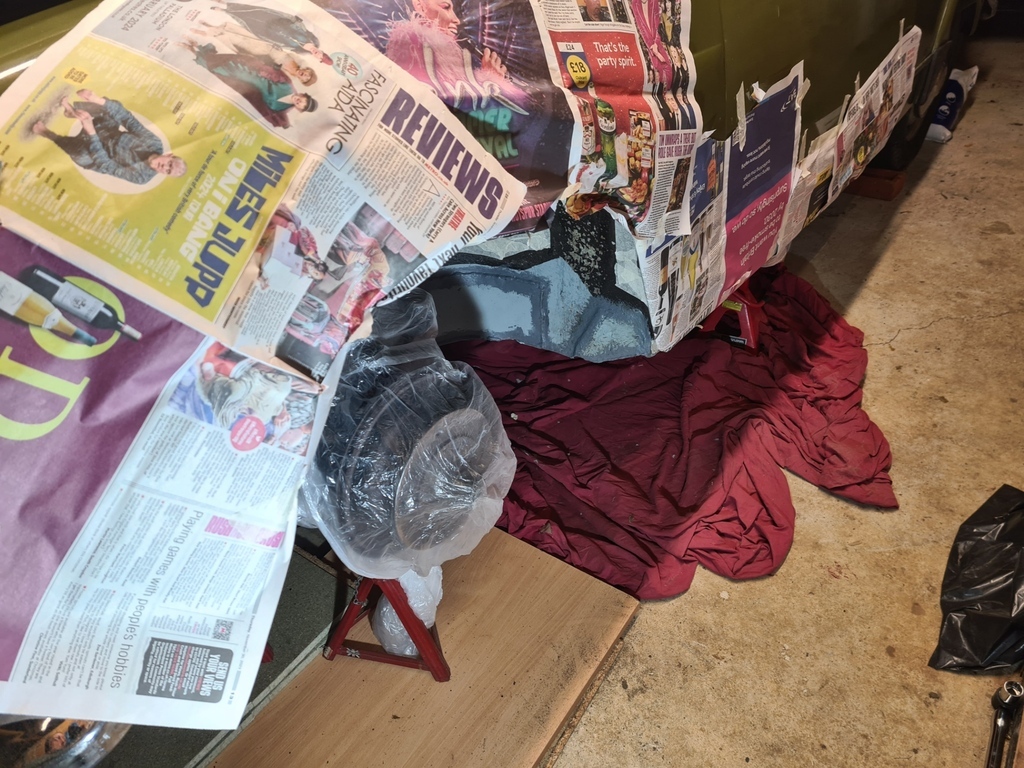 Then apply the (black) stonechip 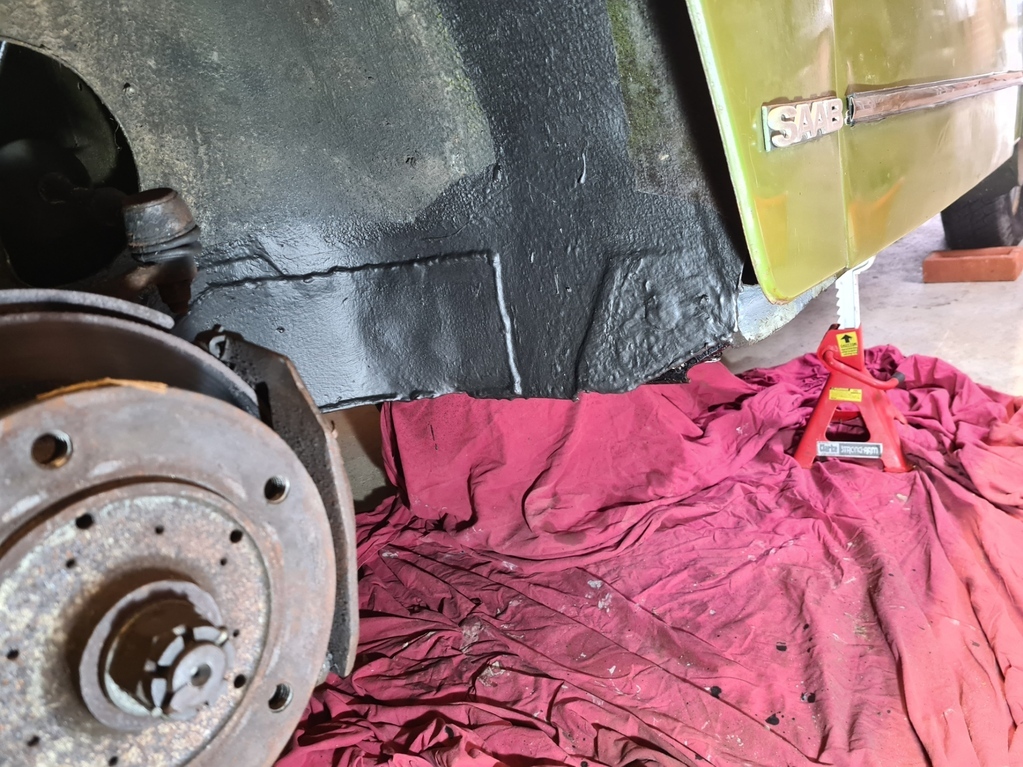 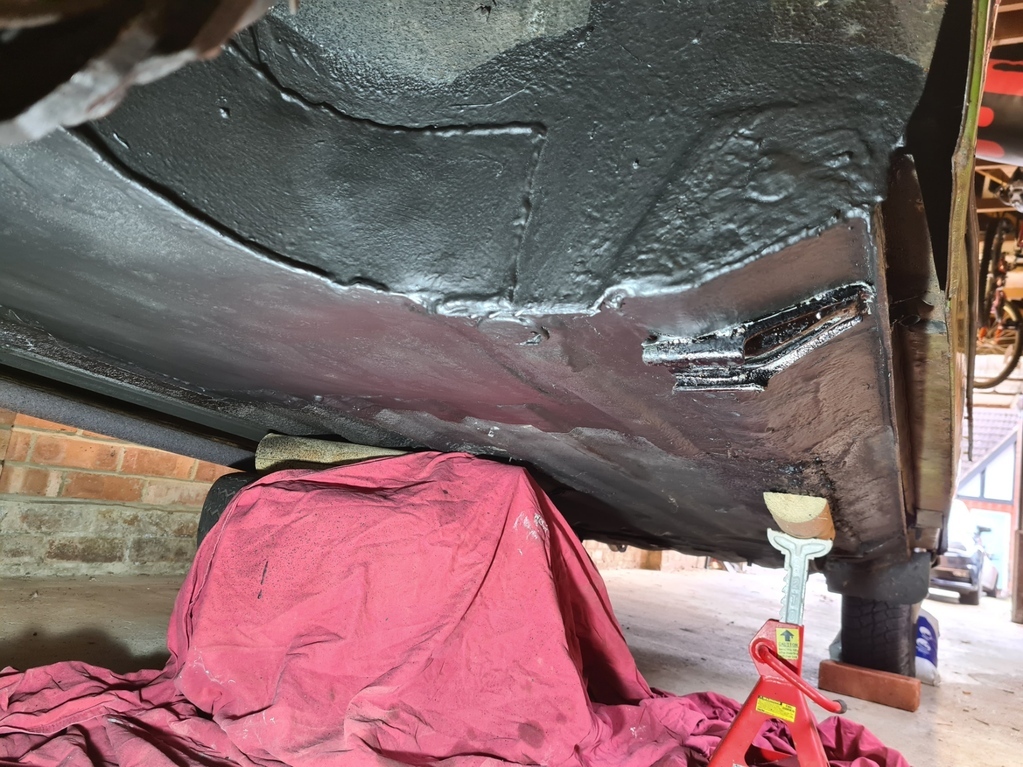 Used a whole 500ml spray can, its dried nicely and coverage looks good- maybe one or two slightly thinner spots that I'd go over again if I had anything left in the can, but still definitely covered. Dampers now ordered along with new bolts and washers to fit them. Decision still pending on when/how to do the antiroll bar bushes. Cheers Nigel |
| |
|
|
|
|
|
Jan 28, 2024 16:59:30 GMT
|
While I wait for the dampers (ordered from Autodoc- despite the UK web address and prices in £'s I did not realise they would be coming from Berlin, so they will take a little longer than I thought to get here), I thought I'd do the handbrake grommets on the rear drums. I've had these for a while, just not fitted them. This is the old nearside one- hanging by a thread basically! 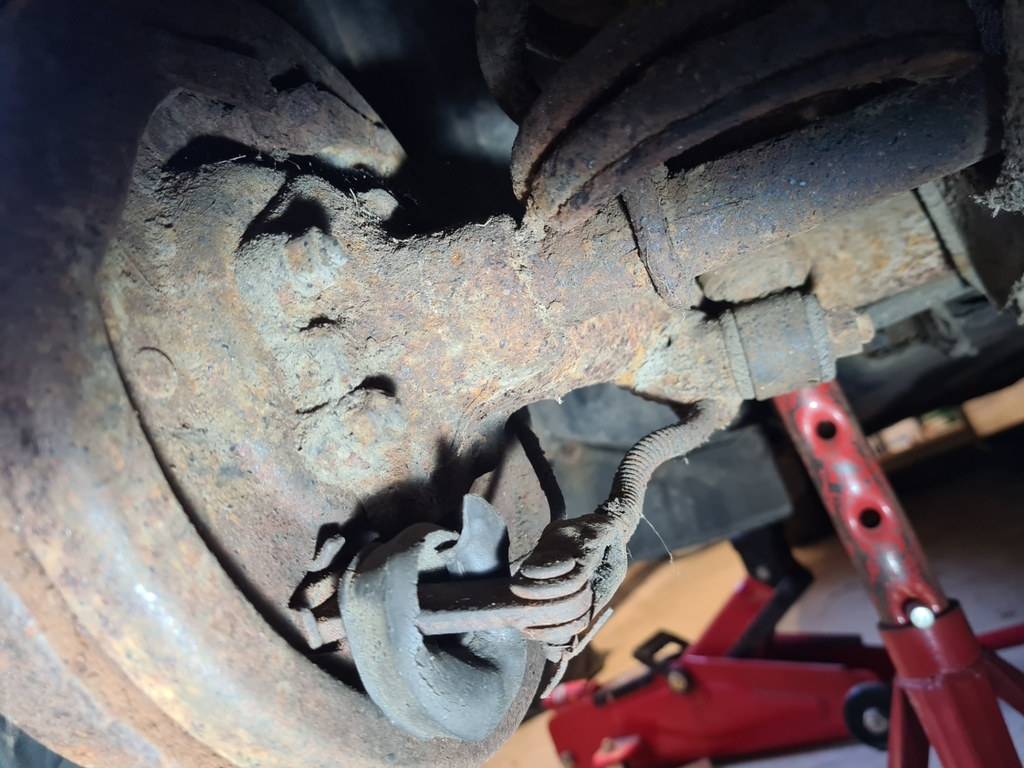 Old vs New 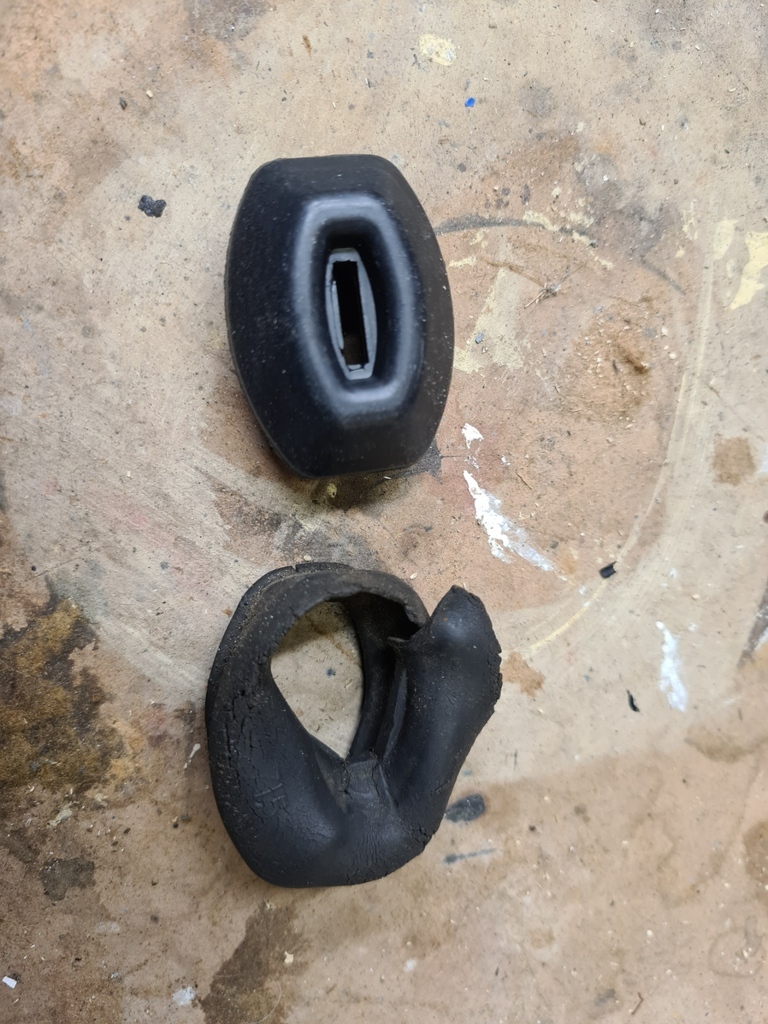 New one in place 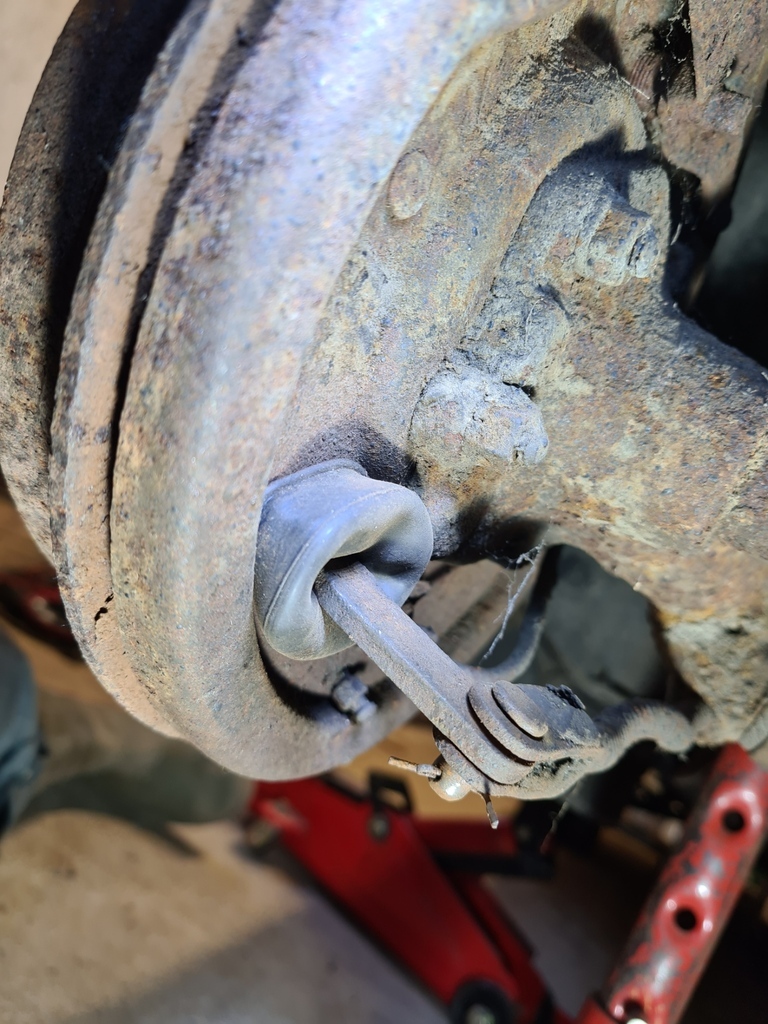 Offside was a repeat, just with one small hiccup. To get the new rubber in place, the handbrake cable has to be detached from the lever that goes into the drum. Its simply held in place with a cotter pin which in turn is secured by a split pin. On the nearside the split pin pulled out with a bit of wiggling, and the cotter pin came out with couple of gentle taps. On the offside not so lucky, the split pin snapped off at both ends, so could not be pulled out. I managed to cut the stubs of the split pin off flush so the cotter pin would then come out, then with a combination of drilling and driving it out with a blunt nail, managed to remove the remains of the split pin. Here is the cotter pin, and my replacement "split pin" to put it back together again. 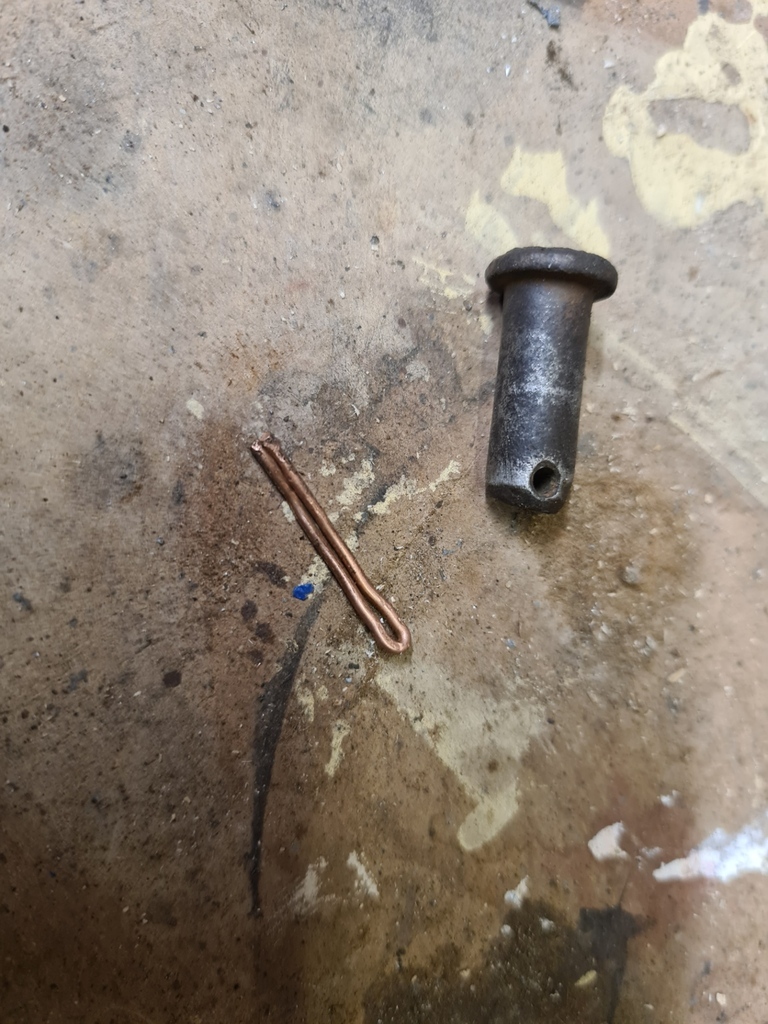 This is where they go 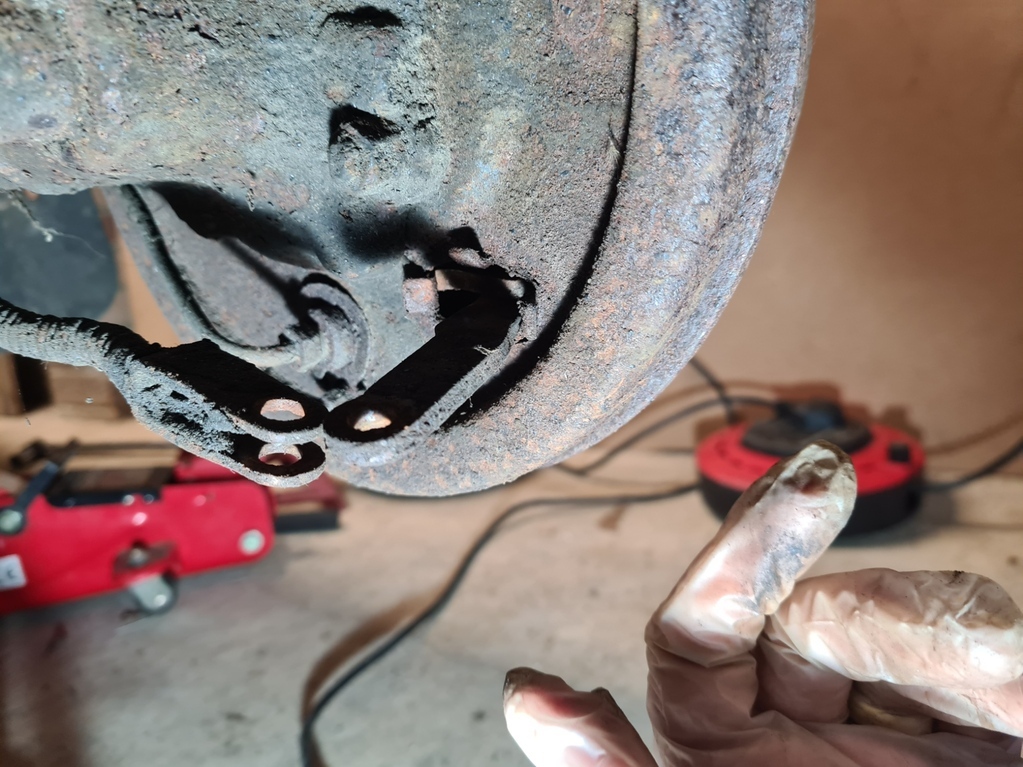 and all back together 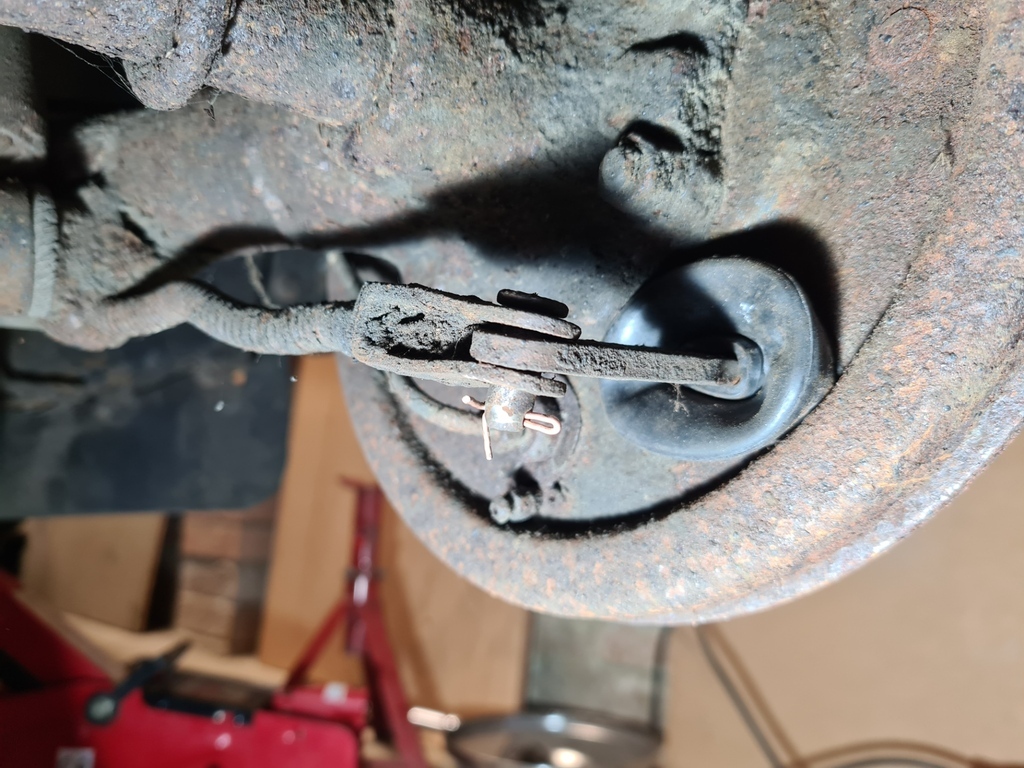 Split pin aside this side was easier as I'd learnt the knack of hooking the rubber over the 4 little tabs that hold it in place- went on first time on this side. Success! Cheers Nigel |
| |
|
|
melle
South West
It'll come out in the wash.
Posts: 2,013
|
|
Jan 29, 2024 18:32:51 GMT
|
|
I hate those boots... They're standard Lockheed parts also used on many British cars, but decent quality ones don't seem to exist. I always wonder why no one makes them in high quality rubber/ silicone; I'd be happy to pay a bit more if I don't have to change them every other year.
|
| |
www.saabv4.com'70 Saab 96 V4 "The Devil's Own V4" '77 Saab 95 V4 van conversion project '88 Saab 900i 8V
|
|
|
|
|
|
|
Shocks are now here (I know they don't do any shock absorbing, that's the springs job and that they actually damp, but everyone calls them shock absorbers not dampers). Whatever they are called (!) they are here, so time to fit them: Here is one of the new ones 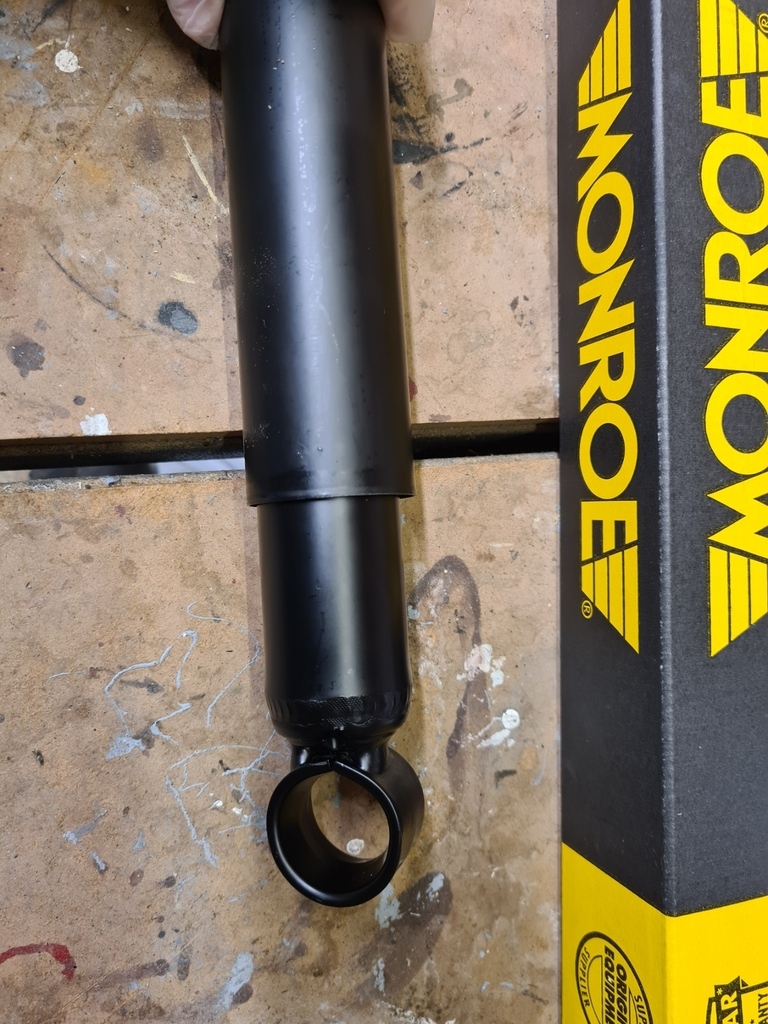 But no bushes in it, the picture on the Autodoc site did show bushes fitted. Oh well, order some bushes too (from Malbrad, I've bought lots of Saab bits from them and they always send them out really quickly). Now with bushes ready to fit 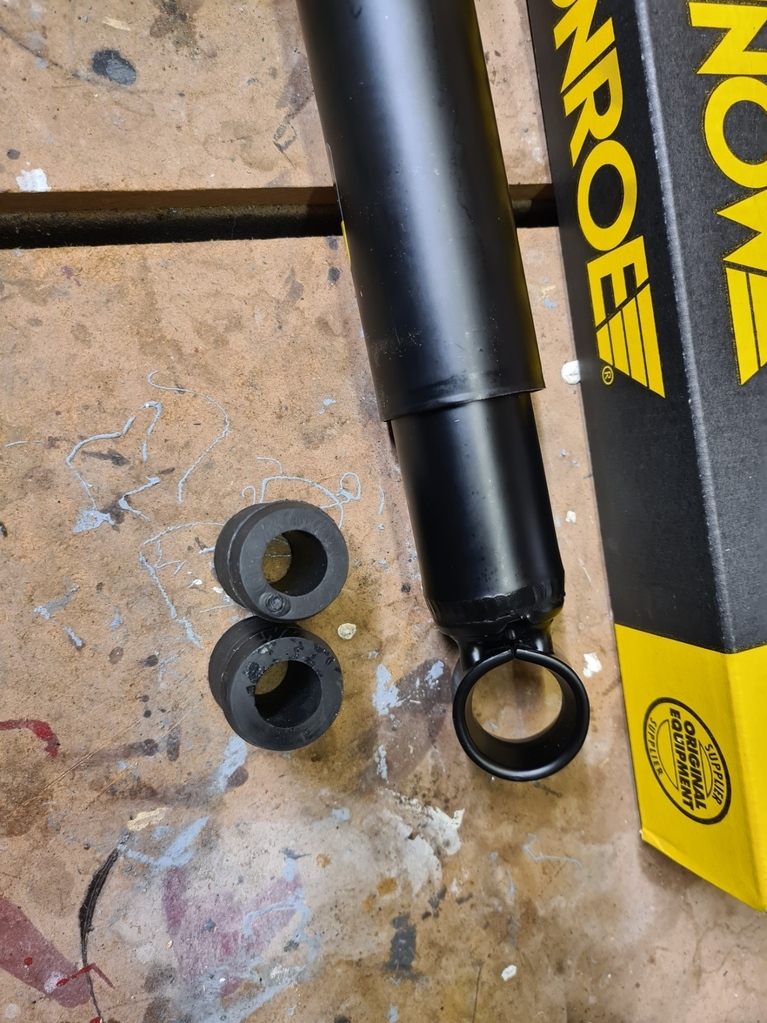 Now I'd heard lots of horror stories about how hard it was to push the bushes in. I did try clampimg round the outside with a jubilee clip and then pushing the bush in using the vice, but all that did was distort the bush. BUT, a liberal smear of washing up liquid (thank you internet for that idea) and they can be pushed in by hand- simple  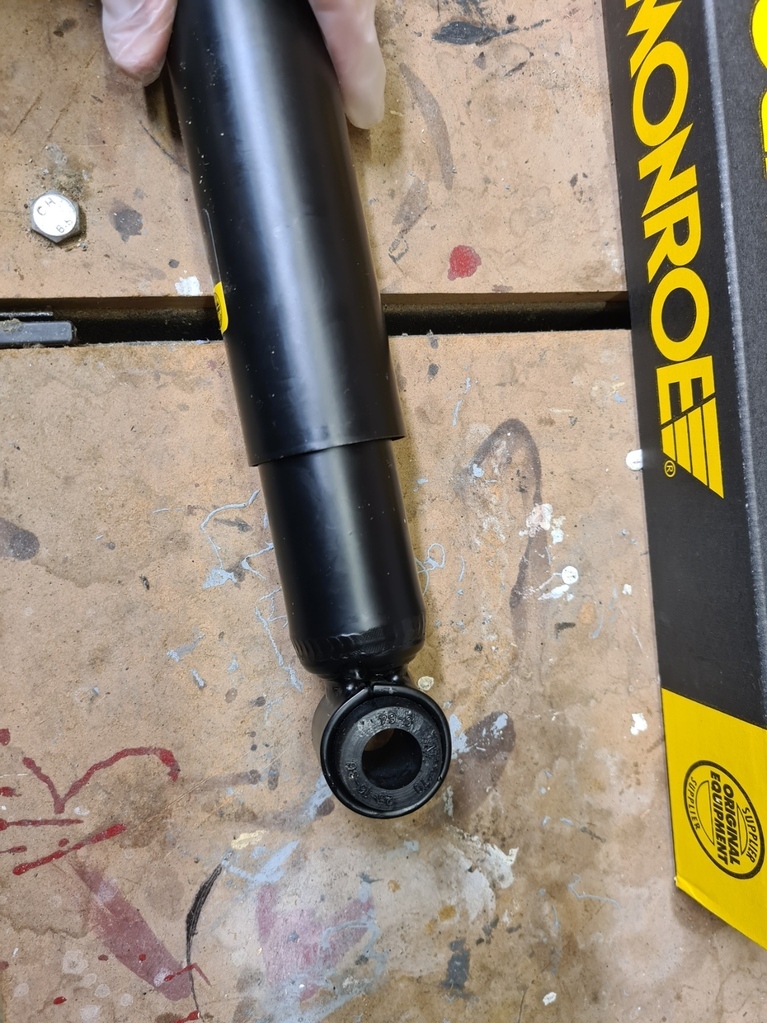 Remove the old ones, this is the drivers side, all detached and loose, just hanging there ready to pull off. 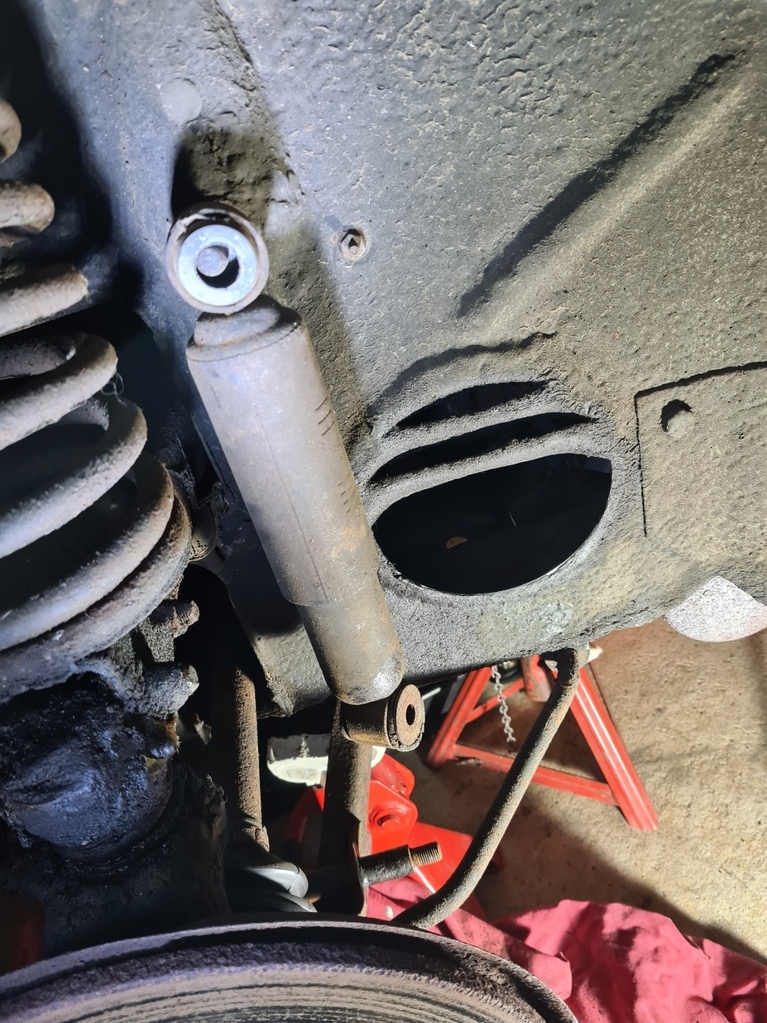 No stuck bolts, came off fine. New vs Old 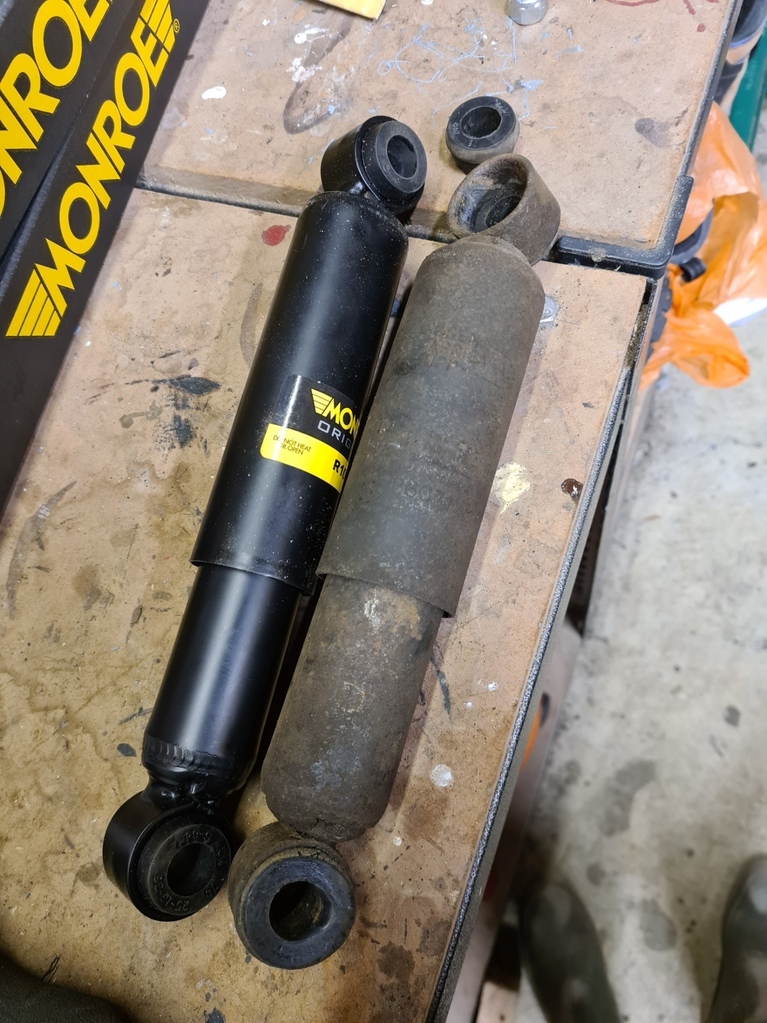 New went on nicely, so nicely in fact that I got carried away and finished that side without taking a picture. I was going to put on new nuts and washers, but in the end the existing ones were in ok condition and looked more meaty than the replacements I had bought, so I re-used the old ones, with the exception of new spring washers, as the old ones of those had no spring left in them. On to the passenger side, this was the side where the bottom bush was completely missing, same procedure, all went well. Remembered to take a picture this time 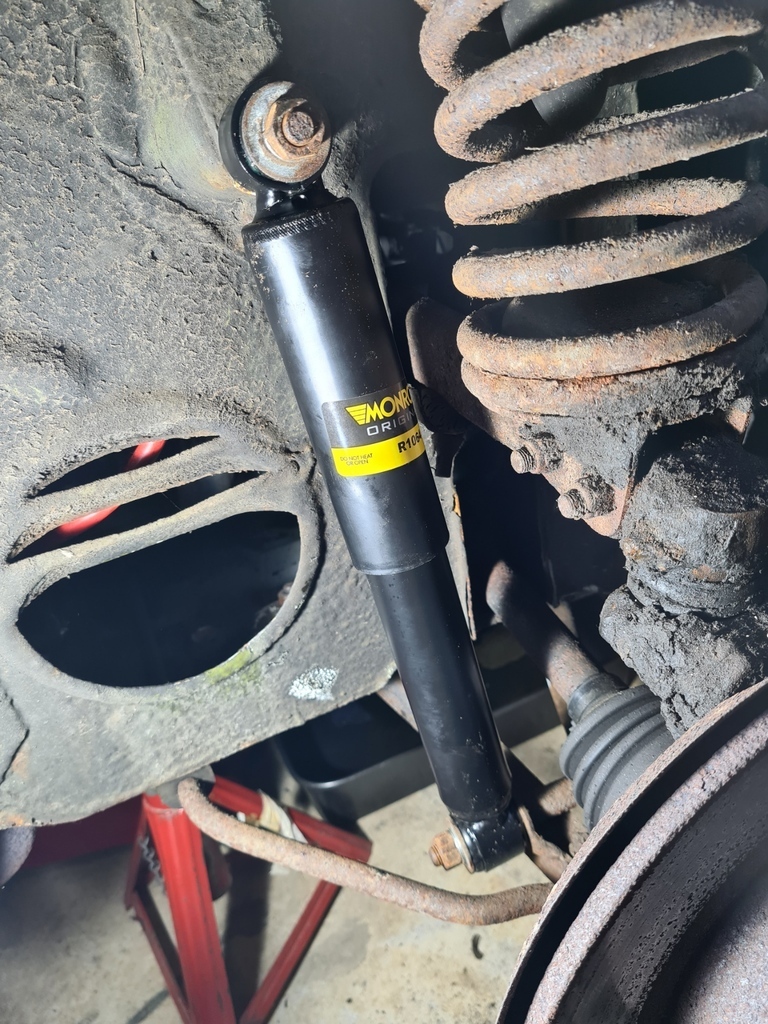 Then tidying up and putting away the packaging I found these in the box 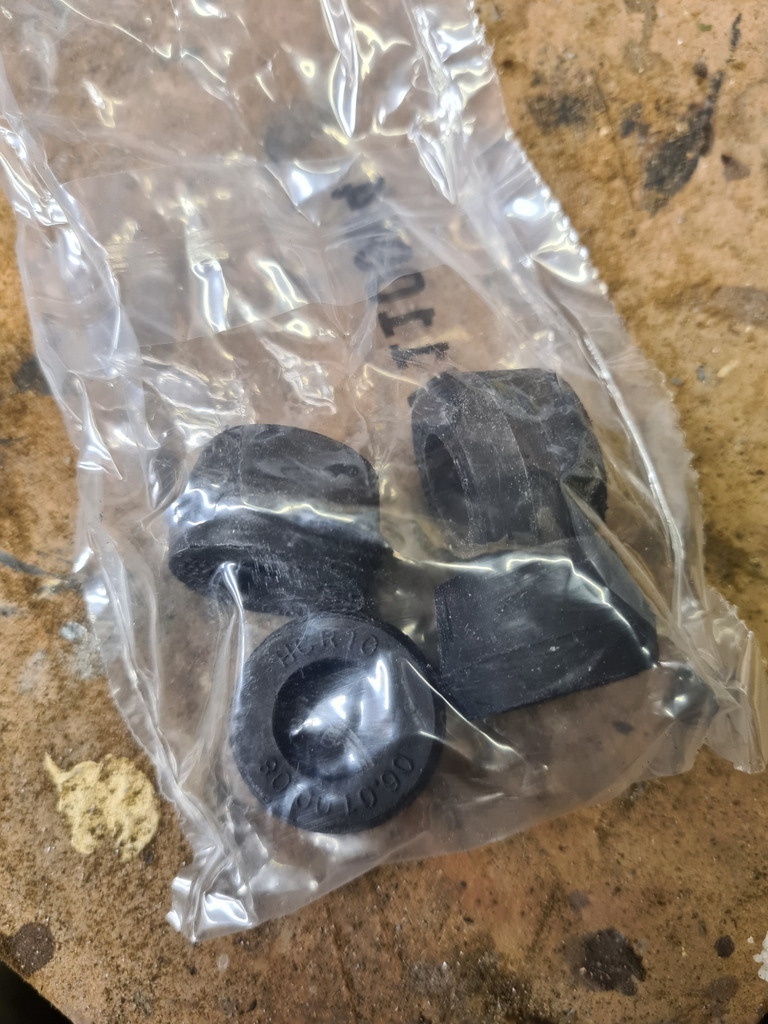 doh! 2 piece bushes, so would have been easier to fit than the single piece ones I used. Oh well, guess I have spares now! Quick after completion shot, shows why the Saab being really narrow is so useful- even in my single width garage I could get to both sides without needing to reposition the car 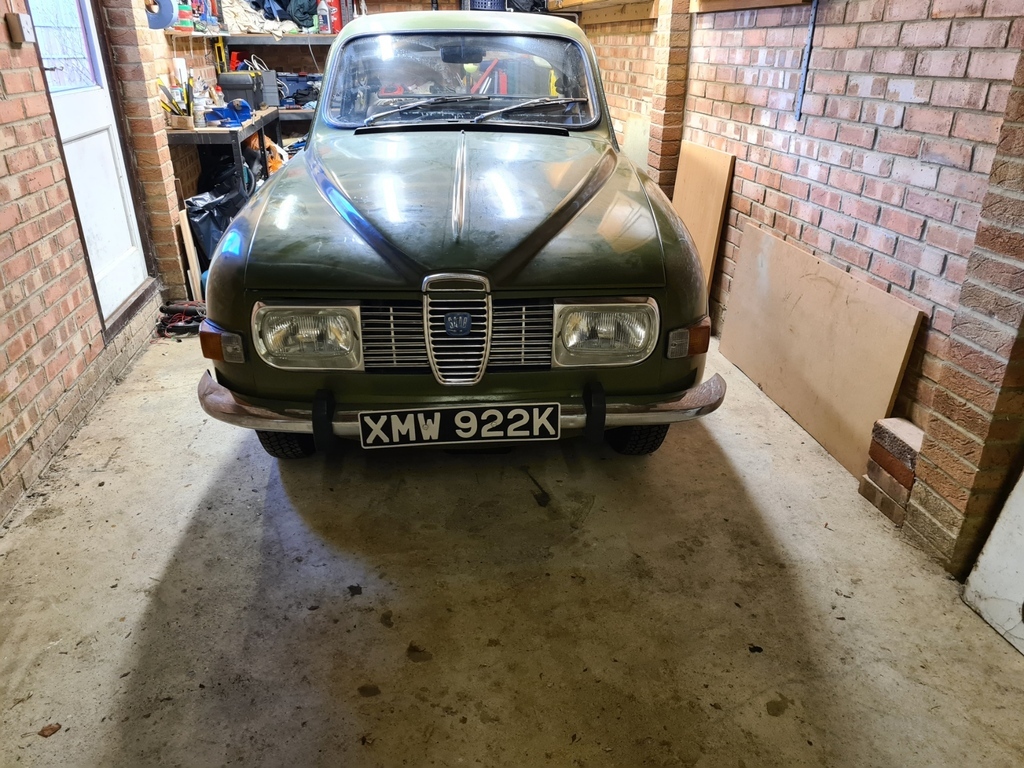 Then a test drive showed that the "new" clunk has now gone, so it was definitely because of that missing bush. The rhythmic knocking on the over-run is still there though, I'm thinking the next thing to replace might be the engine mounts to see if that helps- just feels like the car is pushing the engine when it coasts. There are 3 mounts: one each side underneath at the front that I think can be replaced fairly simply (that will jinx it) but a third is at the back of the gearbox, between the gearbox and the bulkhead. I'll probably do the simple 2 first to see if that helps (and perhaps the tiny bushes on the engine steady bars) as it looks like the engine and gearbox would need to come out to get at the one on the bulkhead. Talking of engine out though, my little oil leak has got a lot worse, I could actually watch it dripping out under the car after my test drive. Still hard to work out where its coming from though- best current guess is the rear of the engine between the engine and gearbox, so perhaps the rear crank seal. With a torch and mirror I can see a little way in through an opening and past the ring gear and it is very mucky/oily in there indeed. That too would be an engine out job  and would be a big step up the challenge scale for me! Before I consider doing that though, I need to check its not the crank case getting pressurised and pushing the oil out due to a blocked breather. When I was flushing the cooling system a while back and was looking at all the hoses, I noticed a breather hose from a rocker cover had come off, I think it had been off for some considerable time as the surrounding area was "nicely" misted with oil. I put it back on, but it's a straight hose being asked to make a very tight 180 degree turn (I think that's why it has popped off), so forcing it back on might have caused a constriction and its not breathing- well I can hope its that simple anyway- I'll need to look further. Well, all these little jobs keep me busy and interested (and learning), which was the point of getting an old car, so that's a good thing right? Cheers Nigel |
| |
|
|
|
|
|
Feb 11, 2024 17:41:43 GMT
|
Time to investigate the oil leak. As its suddenly got worse, my thinking is something must have changed, the only thing changed recently has been putting a breather pipe that was not connected, back into place. Sounds a good theory, maybe its blocked, pressurising the block and oil is being pushed out passed the rear crank seal? The breather system works as follows: There is an intake via the right hand (driver side) rocker cover, originally would have been fed from the air filter, but as I have a replacement Weber carb and different air filter, its just pulling in directly now (was like that when I got it). Then air is extracted from the other rocker cover, sucked into the inlet manifold. Here is the intake 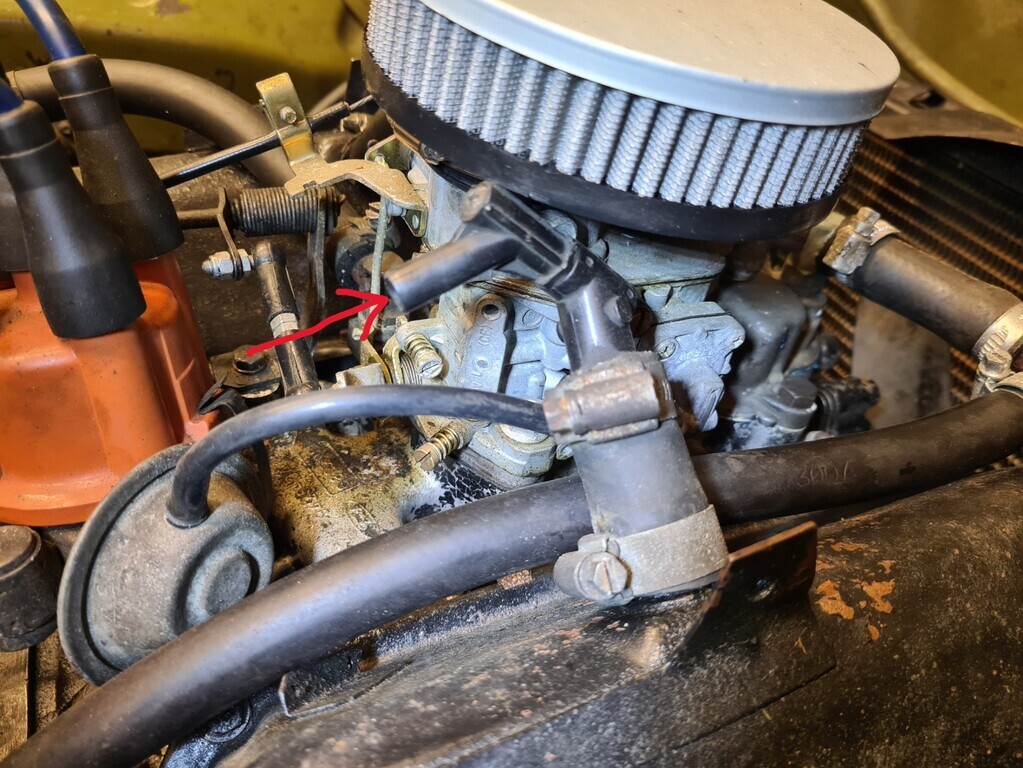 and the extraction 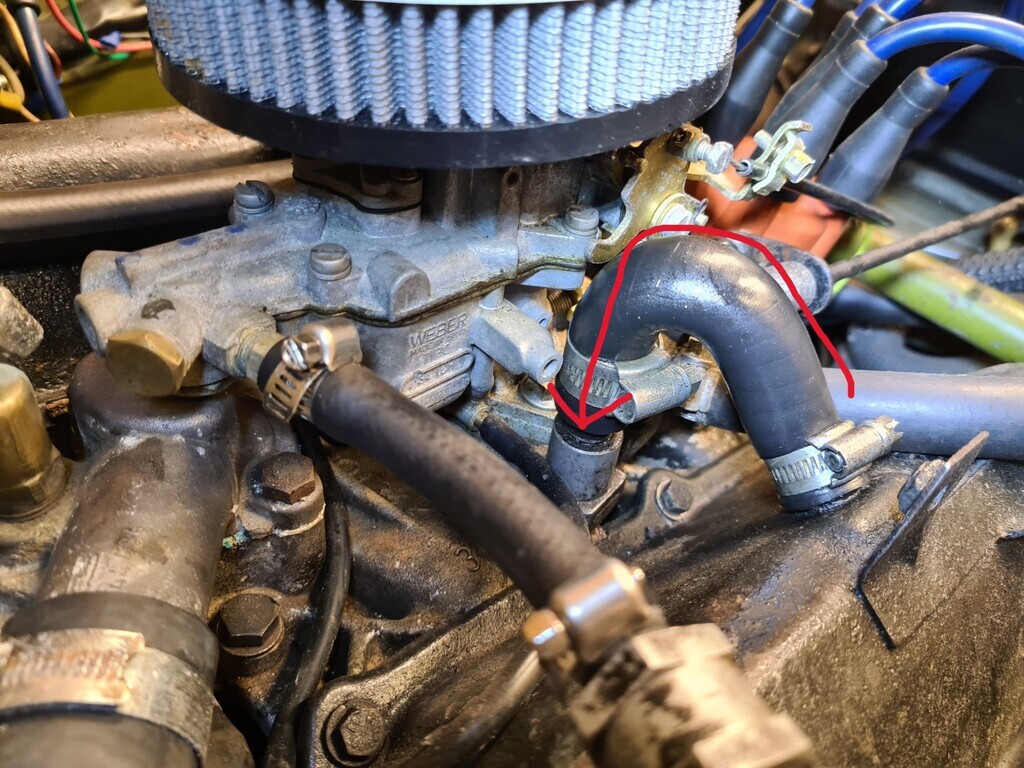 First thought was that the recently attached extraction pipe might be blocked, its a tight bend. I took it off, along with a little one way valve that it feeds through into the inlet manifold 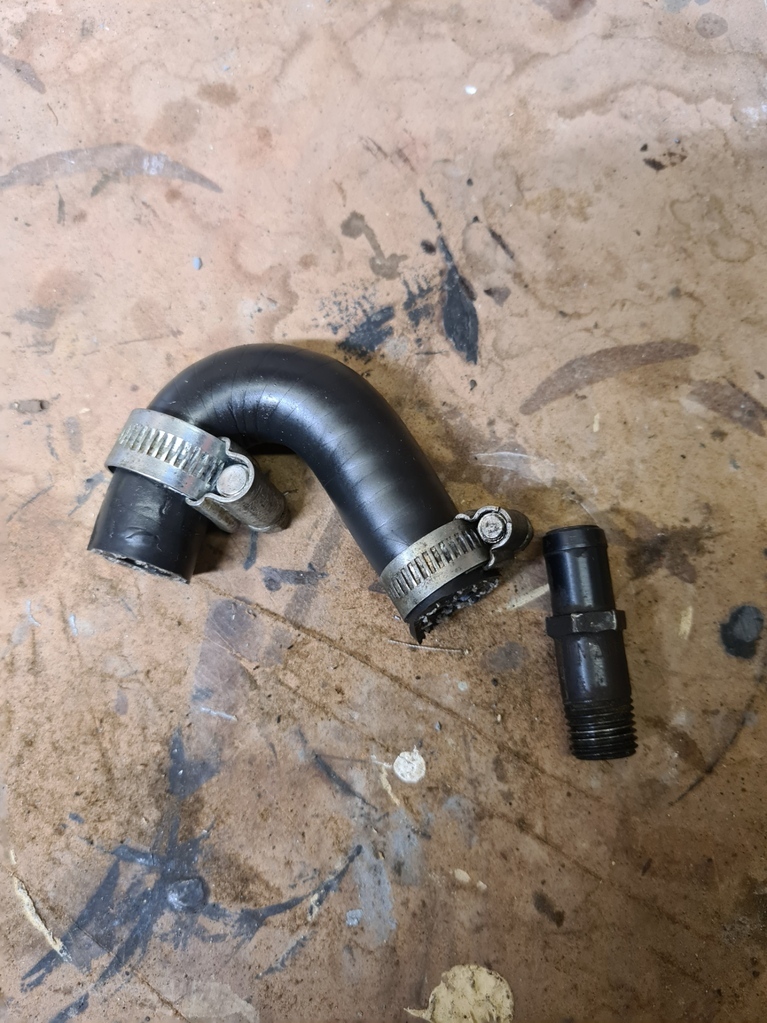 Not obviously blocked and the valve worked cleanly, but I gave it a bit of a clean up anyway. Second thought was that the inlet might be restricted. whilst the extraction was disconnected this would not matter and it would all be open to atmosphere, but with it connected up as a sealed system, maybe the inlet is the issue? Here is the inlet 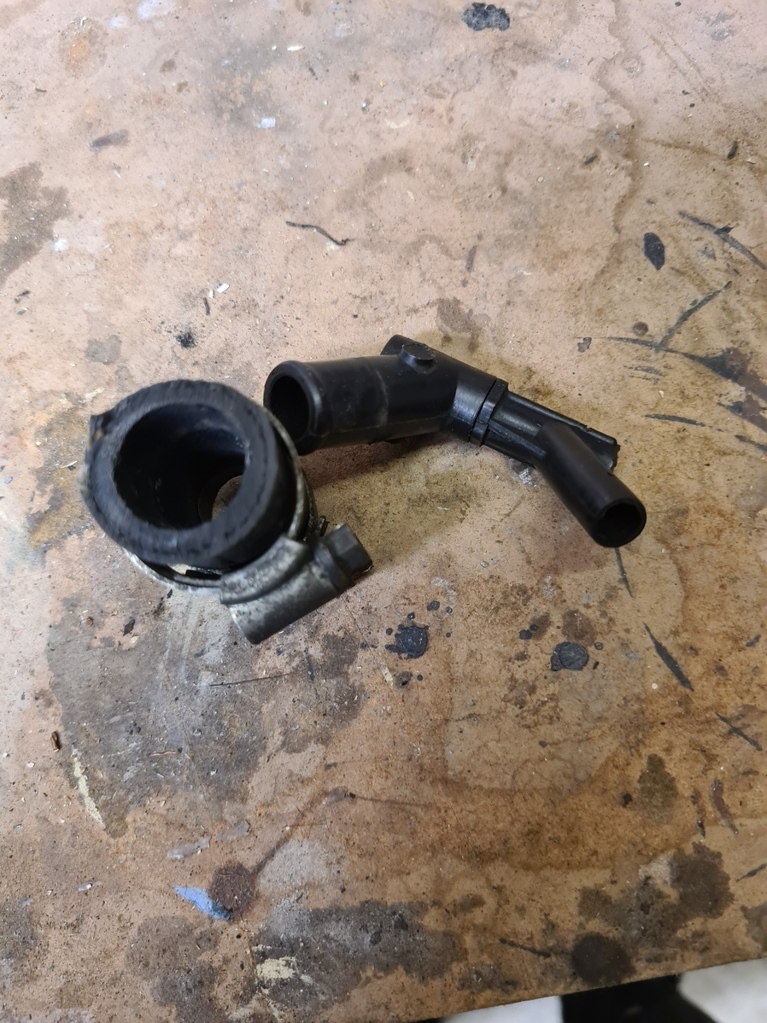 Its quite big, but has had a much smaller plastic end added to it- in fact its even more restrictive than it looks as there is some sort of adjuster screw blocking it further. Its all non original and all looks pointless. So next step was to to put the extraction side back together 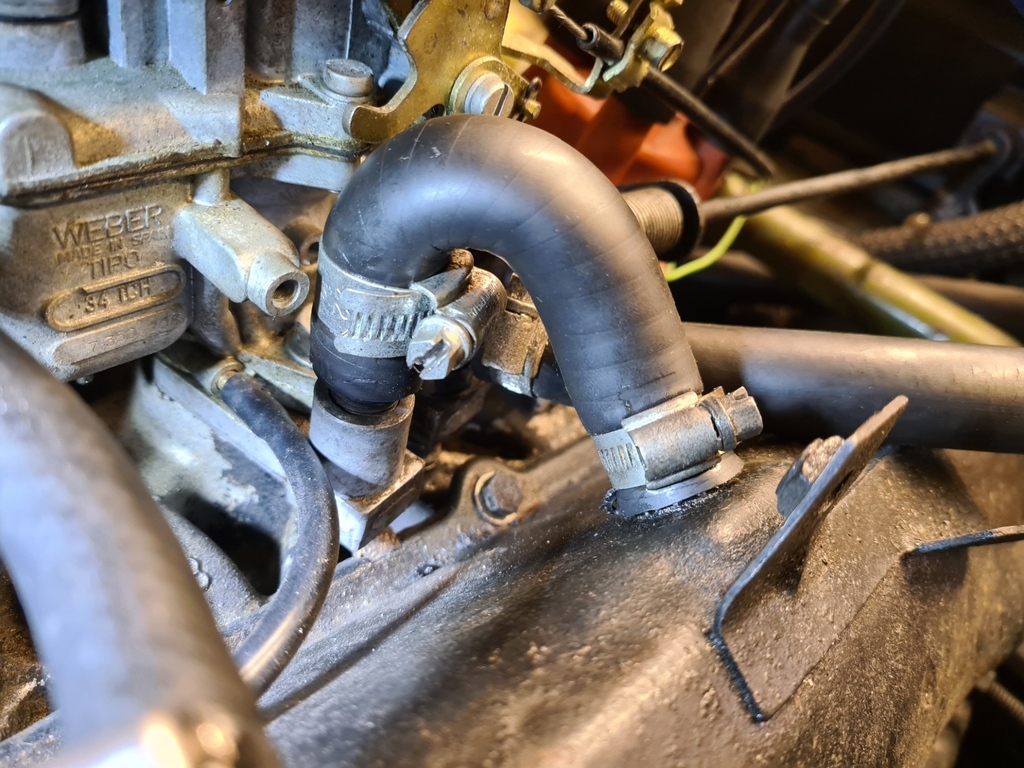 and the inlet side, but just leaving the nice big rubber pipe open 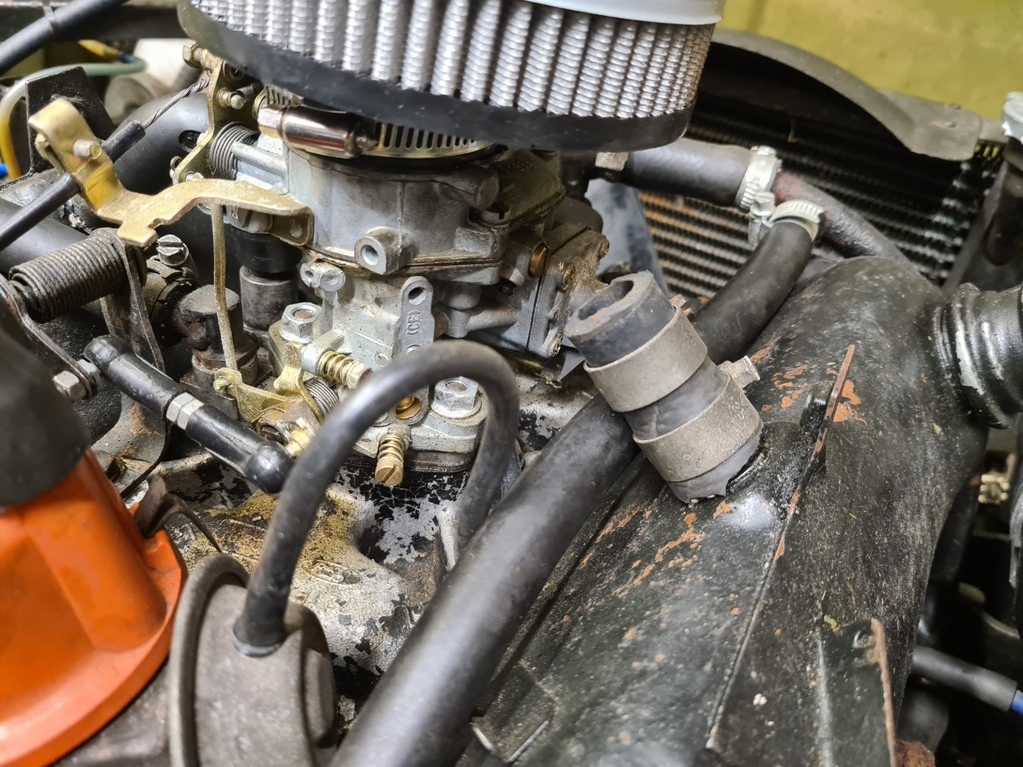 Then to test this theory, I placed sheets of blue roll paper under the engine, resting on the fixed underneath panel, to hopefully show where any leaks land. Left it running on the drive for 20 mins (and adjusted the tickover down a bit whilst I waited), no signs of drips. Went for a 30 minute drive, this will be better test really, with some revs and load applied rather than just tickover. No sign of any marking on the blue roll. I keep a drip tray under the car, so have cleaned that out too and left it in place, lets see if anything appears. Immediate observation once back from the drive was a tiny drip underneath (maybe from the sump plug itself but I'm not sure) but certainly the massively increased rate of leak seems to have stopped. Lets see if I've found the cause, need a bit of time to be sure. If the inlet restriction is the issue, I'll get some sort of little air filter to put on the end that pipe, so its fed, not restricted, but a little bit protected. Cheers Nigel |
| |
|
|
melle
South West
It'll come out in the wash.
Posts: 2,013
|
|
Feb 11, 2024 21:35:36 GMT
|
Good work, but...  I would connect the off-side rocker cover vent hose to the air filter housing, the system currently doesn't work as the PCV (positive crankcase ventilation) system it's supposed to be. In my view, the air filter's too small, I would fit something bigger. |
| |
www.saabv4.com'70 Saab 96 V4 "The Devil's Own V4" '77 Saab 95 V4 van conversion project '88 Saab 900i 8V
|
|
|
|
|
Feb 11, 2024 21:52:11 GMT
|
|
Ah yes, I have been pondering more myself, and as you say, it's not now a closed loop system.
Current air filter would have to go anyway if I want that in the loop- there is a cut out to use to connect a breather, but it's tiny, I think it would restrict all over again.
More thought required- thanks for the pointers!
Nigel.
|
| |
|
|
|
|


 and would be a big step up the challenge scale for me!


 I would connect the off-side rocker cover vent hose to the air filter housing, the system currently doesn't work as the PCV (positive crankcase ventilation) system it's supposed to be. In my view, the air filter's too small, I would fit something bigger.