|
|
|
Jun 11, 2023 12:54:59 GMT
|
So having just posted in the "at the pumps" thread, its time to start one dedicated to the car in question. I've been lurking on here for many years and finally decided it was time now to buy something appropriate or it was just never going to happen. it needed to be cheap, simple, narrow (so it fits in the garage with a bit of room to work on), and ideally something a bit different. Step forward my Saab 96 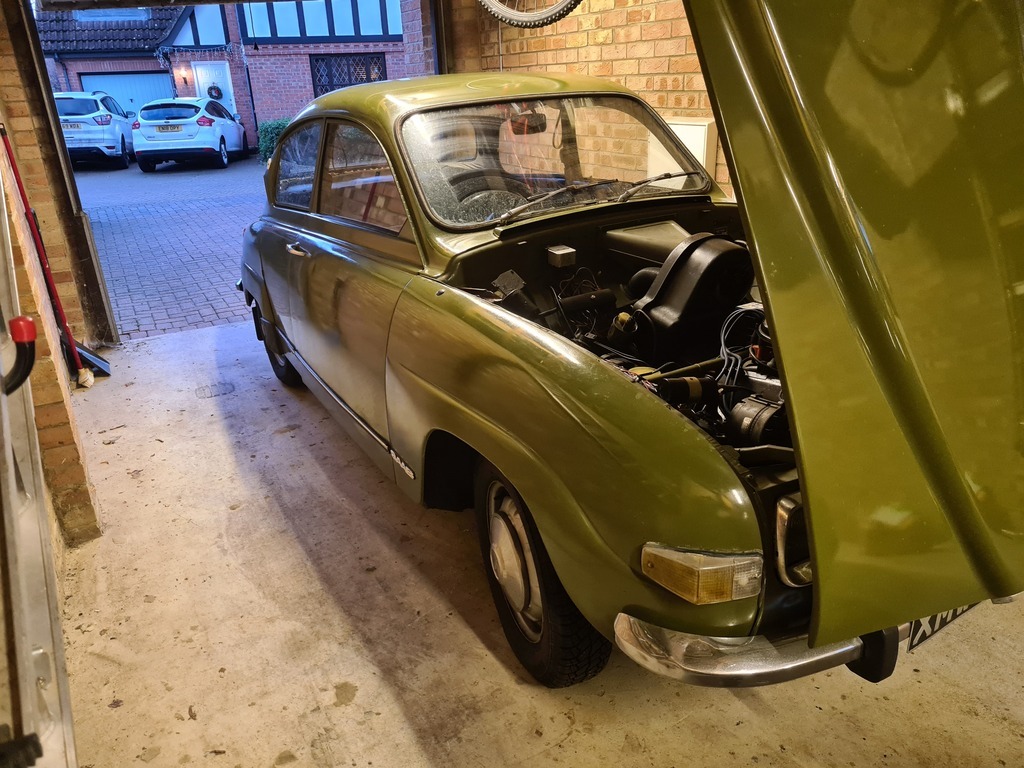 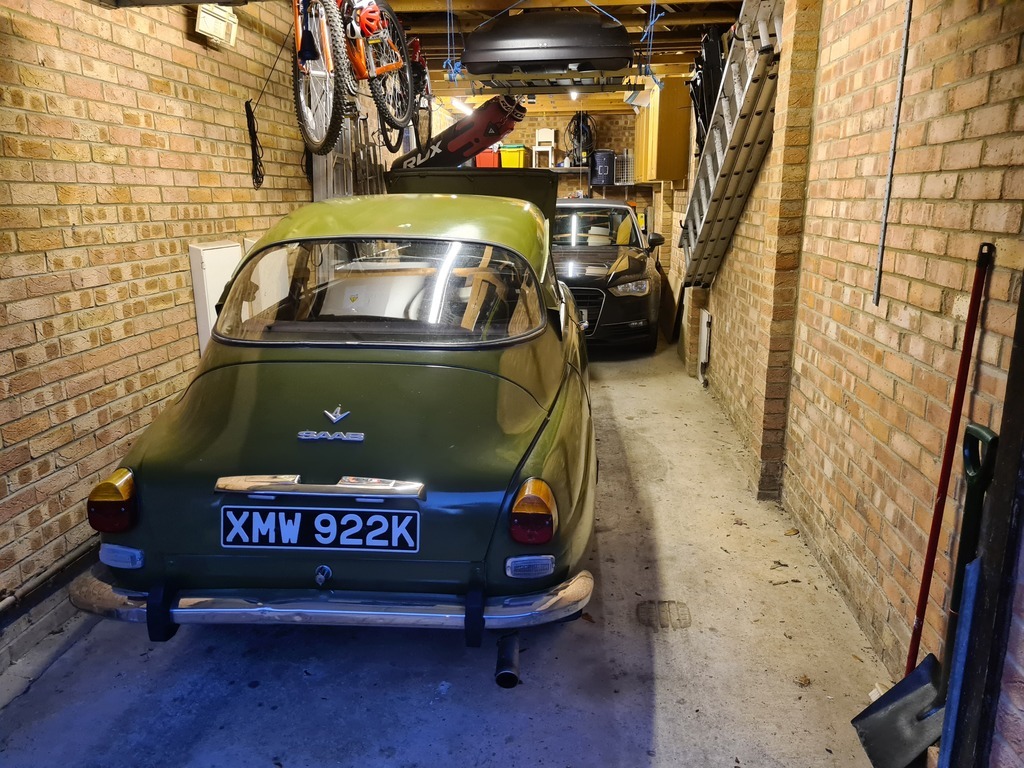 Its a very scruffy example for sure, but that's all part of the appeal. Before viewing I was thinking it would be a car to smarten up, but having now got it, I rather like it in its "honest" state. Its had a bit of mechanical attention and some welding by the seller, so I was hoping it would be reliable, but as we shall see that was being slightly optimistic! Nigel |
| |
|
|
|
|
|
|
|
Jun 11, 2023 13:01:21 GMT
|
Misplaced optimism? Well on the journey back from collecting it (Sittingbourne to Chelmsford) all was going well. We managed the M2, M25, Dartford Tunnel and A12 all without mishap- trundling along at an indicated 55mph- speedo seems to under-read- satnav was showing just under 60- no problems. But then only 200 yards from home, this happens: 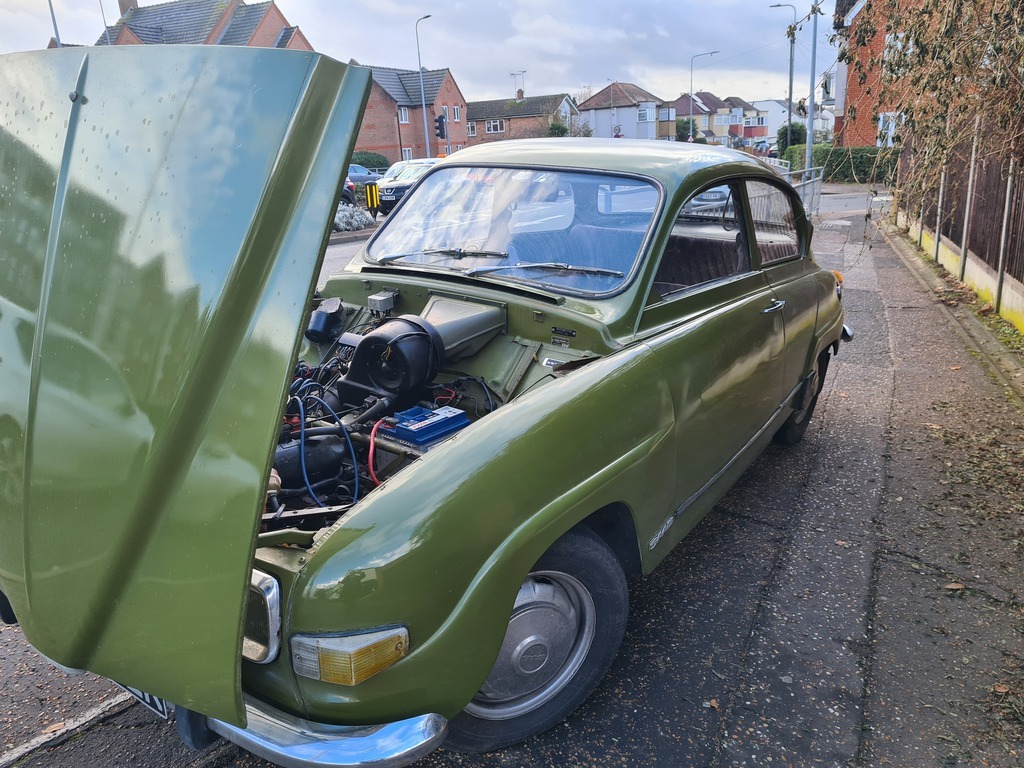 |
| |
|
|
|
|
|
Jun 11, 2023 13:05:14 GMT
|
|
Everything electrical was dead, not even the hazards would work.
Luckily I was on a slight slope and (once all the traffic I was holding up had wriggled past me) I was able to gently roll back onto the pavement and call recovery.
90 minutes later, after the shortest recovery ever ( the flatbed driver found it very amusing) I was home, investigations needed to commence.
|
| |
|
|
|
|
|
Jun 11, 2023 13:22:51 GMT
|
|
Great car, with excellent heritage and admirable engineering; will be a useful machine when the basics have been sorted.
And “somewhat scruffy” is for me the best condition for a classic/ye olde car. Make them too perfect and much of the joy goes away.
I will be following your story, thanks for sharing it here.
John
|
| |
|
|
zeberdee
Club Retro Rides Member
Posts: 1,046  Club RR Member Number: 2
Member is Online
|
|
Jun 11, 2023 13:37:15 GMT
|
|
Nice buy . I do like these .
Hopefully it’ll turn out to be something simple , it usually is on older stuff .
Looking forward to your updates .
👍
|
| |
|
|
|
|
|
Jun 11, 2023 13:42:46 GMT
|
|
What a lovely Saab and looking forward to seeing how it goes. Annoying that it decided to stop so close to home but now it's seen the garage it will hopefully feel more settled 😁
|
| |
|
|
|
|
|
Jun 12, 2023 14:33:56 GMT
|
Thanks all for your comments and interest. Setting aside the dead electrics for a moment, what have I bought? 1972 Saab 96, this is front wheel drive, has a V4 engine from Ford in Germany (its a different V4 to the one from Ford in GB) and unusually has a column gear shift for the 4 speed gear box, along with a freewheel device. So far I have not tried the freewheel as I quite like the idea of still having engine braking, but the column gear shift is great fun. Picture below, its the oversize "stalk" to the left of the steering wheel Instead of a steering lock, the gearbox has to be in reverse before the ignition key can be removed and then remains locked in reverse until the key is back in 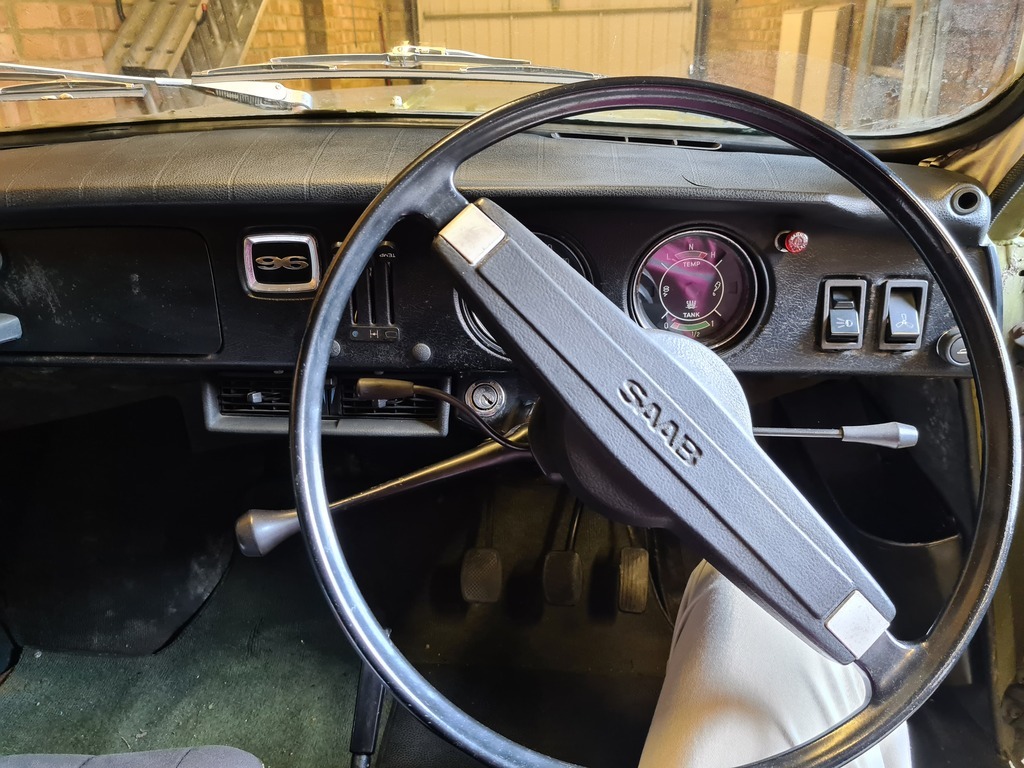 A few more pics of flaking paint and perished rubber which illustrate why I called it scruffy. Having said that I drove home from collecting it in the rain and did not spot any leaks 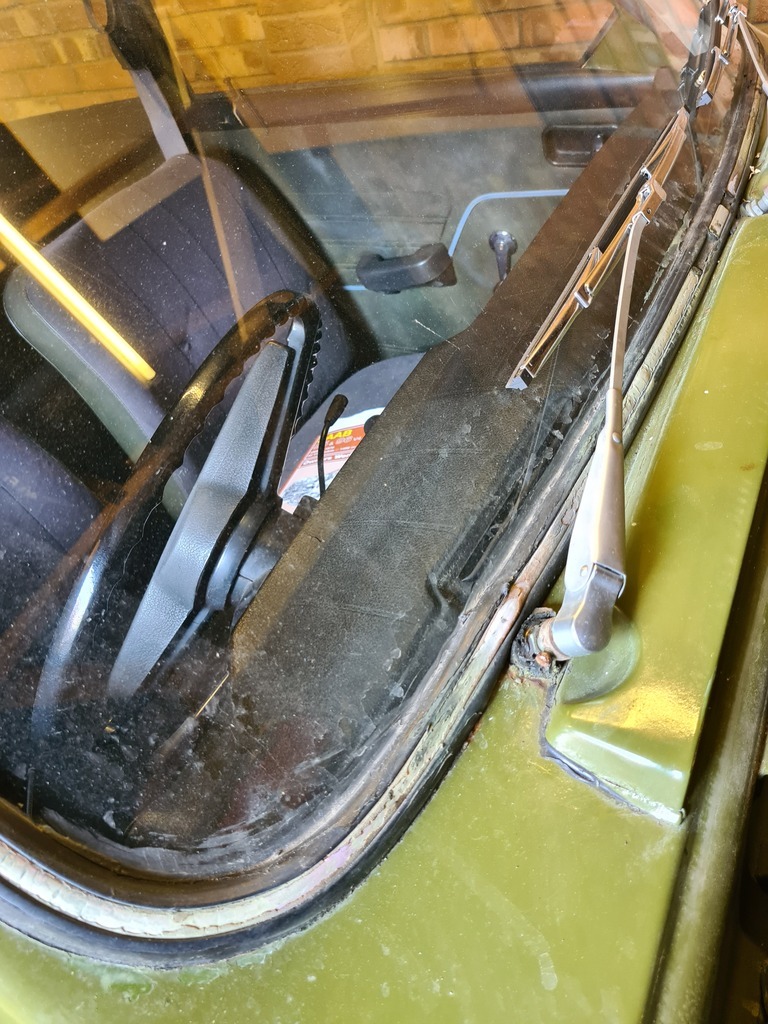 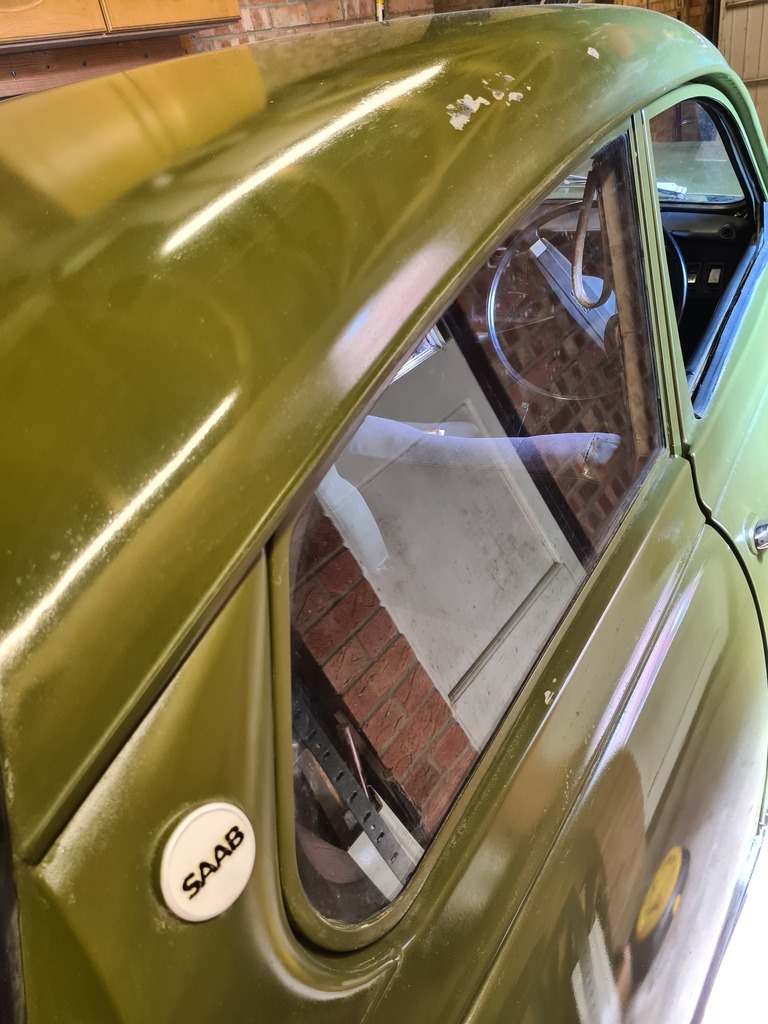 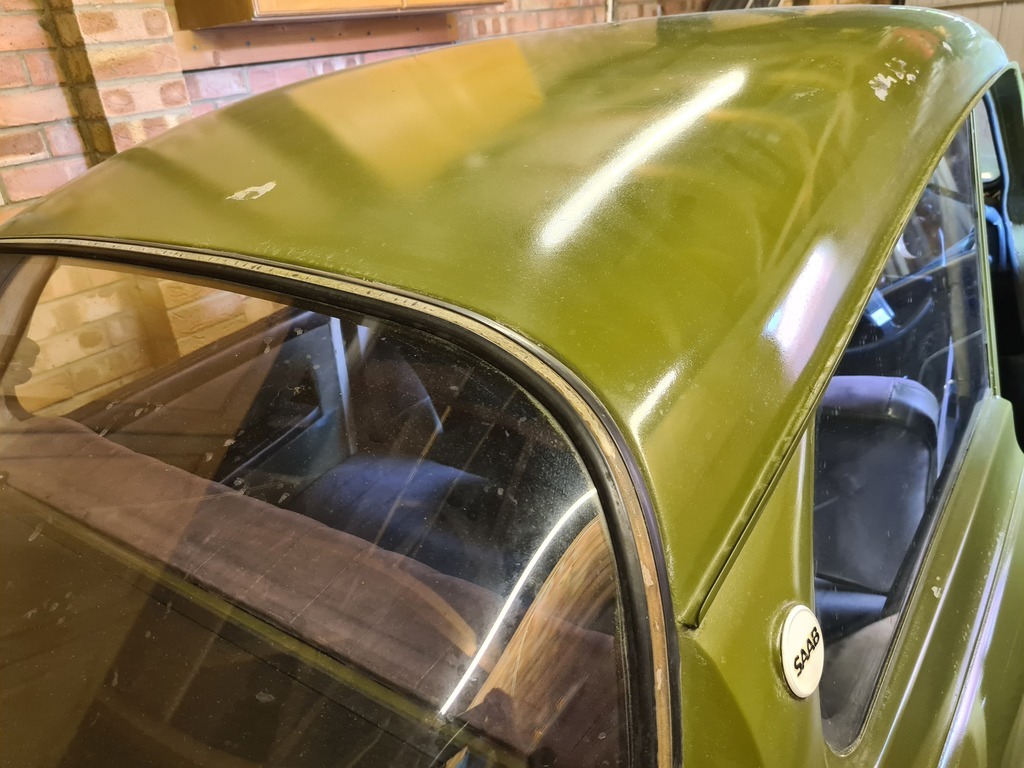 The inside is a bit smarter, I'm pretty sure these are not the original seats 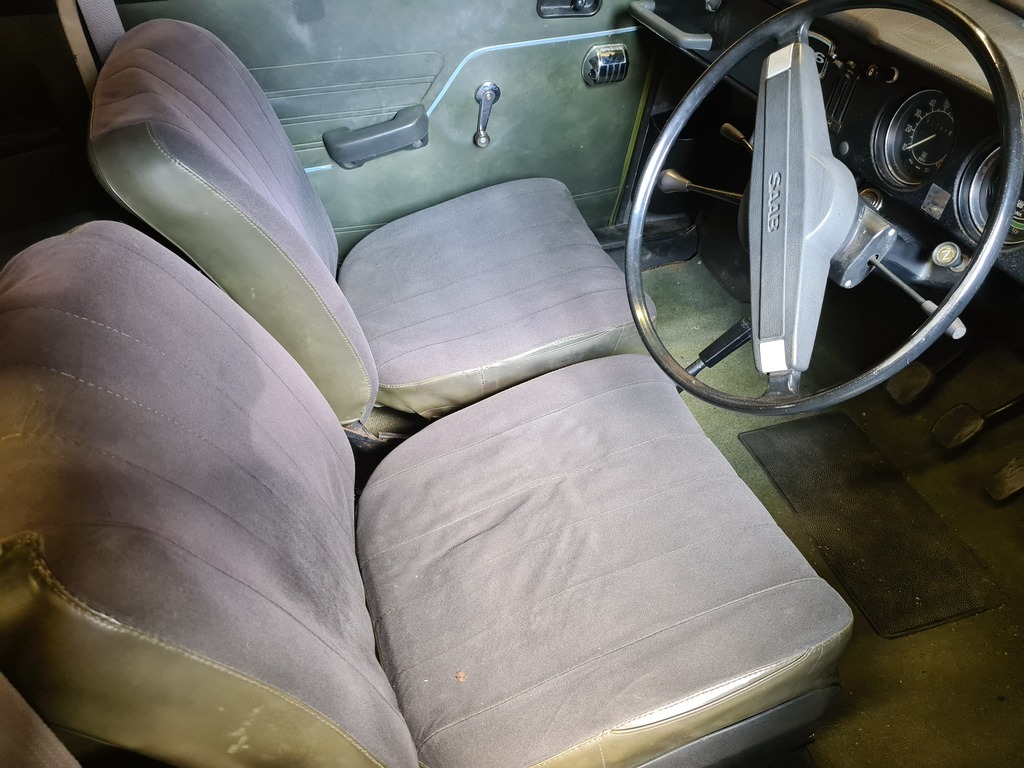 But the headline does need some work around the rear window- I wonder if that can be done without removing the glass? Low priority anyway! 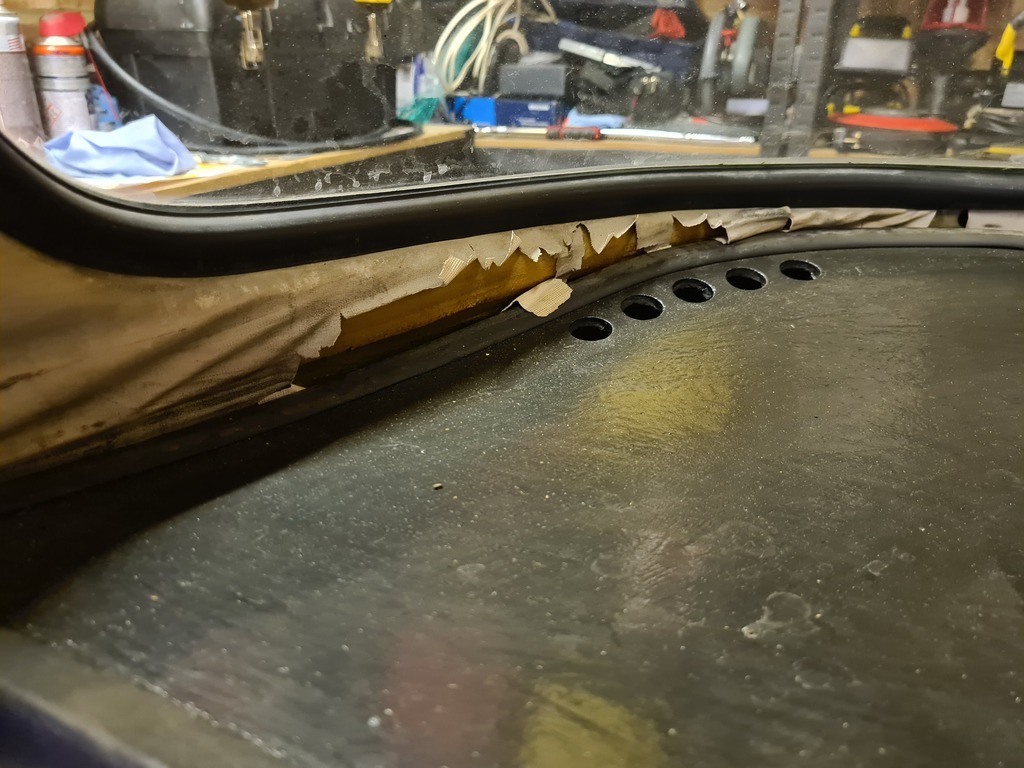 Last idiosyncrasy, the seat belt fastenings have an unusual arrangement by which they clip to a shared hoop to secure: 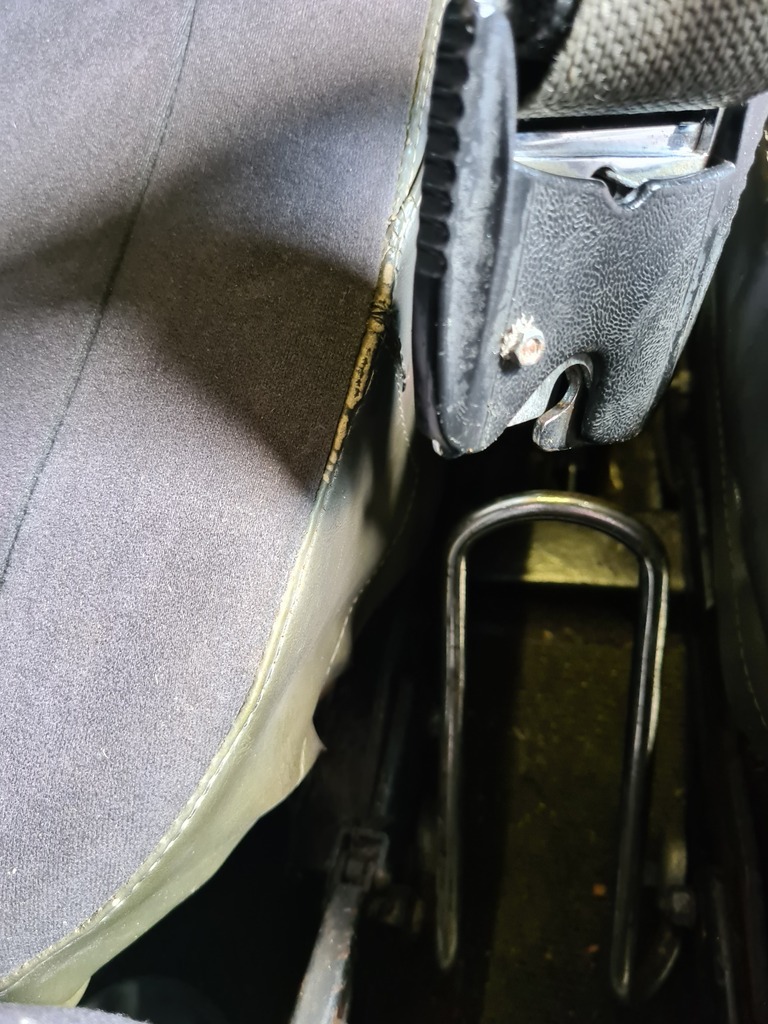 Thanks for reading. Nigel |
| |
|
|
|
|
|
Jun 15, 2023 14:03:51 GMT
|
Back to the electrics then, first step was a new battery- the recovery driver had tested the old one and stated it was dead on 1, probably 2 cells. So nice big battery purchased and fitted. I'm not particularly experienced at sorting out cars (part of getting the Saab is to learn), but I do have a multimeter, so all connected up and lets switch on. Car starts- excellent! Battery is charging- 12v, 13v- looks good 14v, 15v ?? 16v, 17v, 18v- now the battery is spitting out liquid- not good at all, quick switch off! Looks like the charging system is doing its best to fry the battery. Thinking about it, on the drive home, I had the lights, wiper and heater all on, maybe they were able to take some of the excess voltage and allow me to get as far as i did? Further investigations needed- the Saab has an alternator that has an external regulator. This pleased me as maybe I could just replace the regulator if that was the problem. Here is the regulator, the little silver box next to the coil: 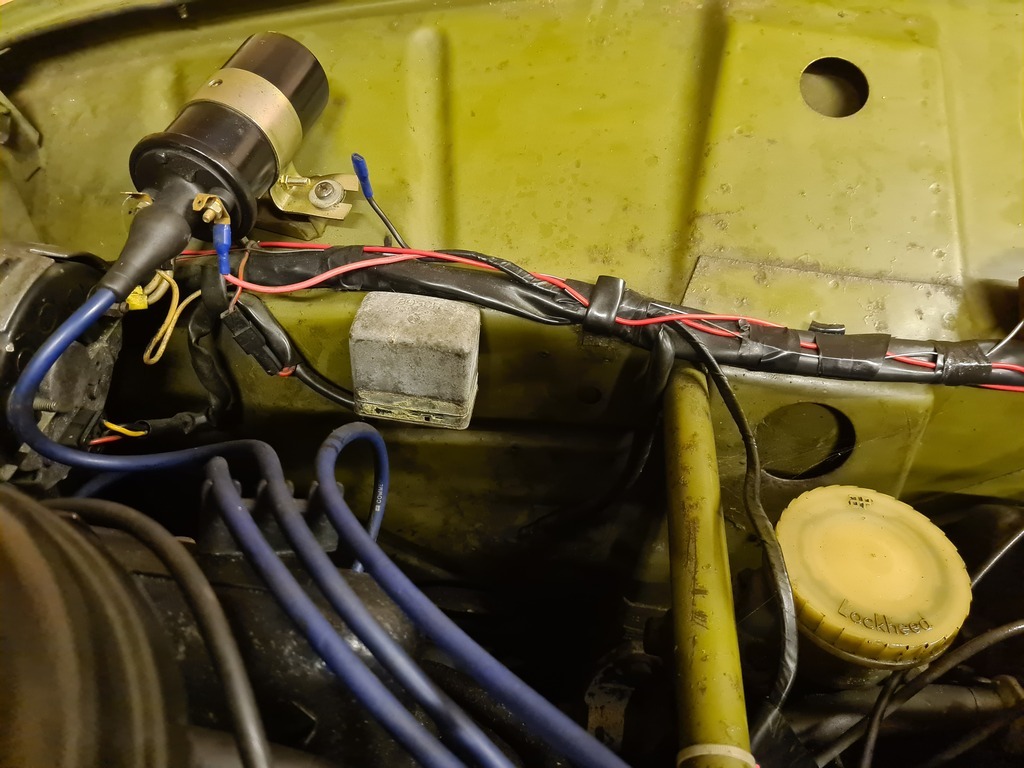 I didn't really know how to test the regulator, so the easiest thing was to replace it with a new one. Old next to new, a straight swap 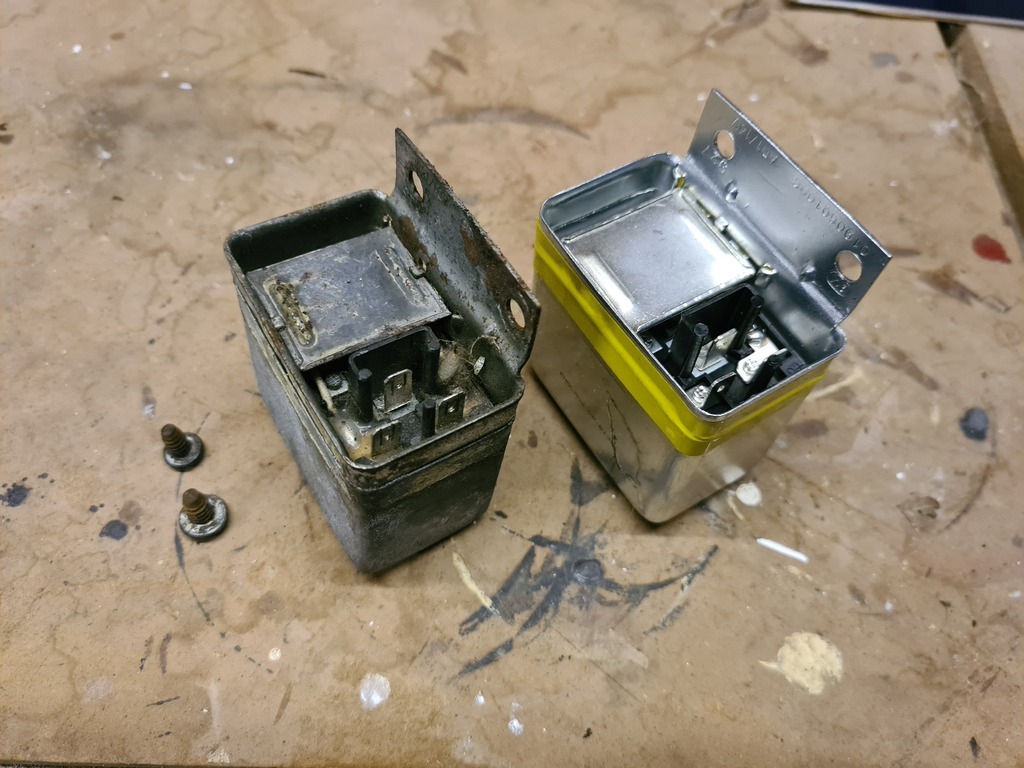 Back to the multimeter again and a test switch on No joy, still unregulated voltage, rising rapidly :-( Oh well, maybe its going to need to be a new alternator, the original certainly looks like it could be the original and replacement uprated ones are available, with built in regulators. Original (?) alternator: 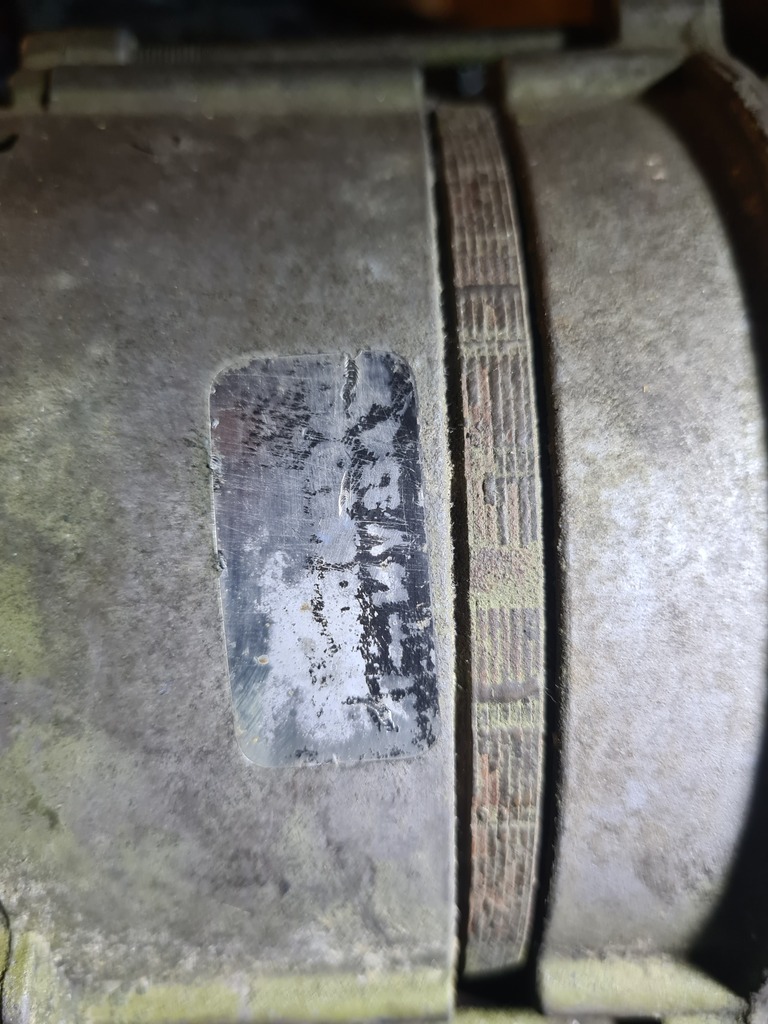 New next to old: 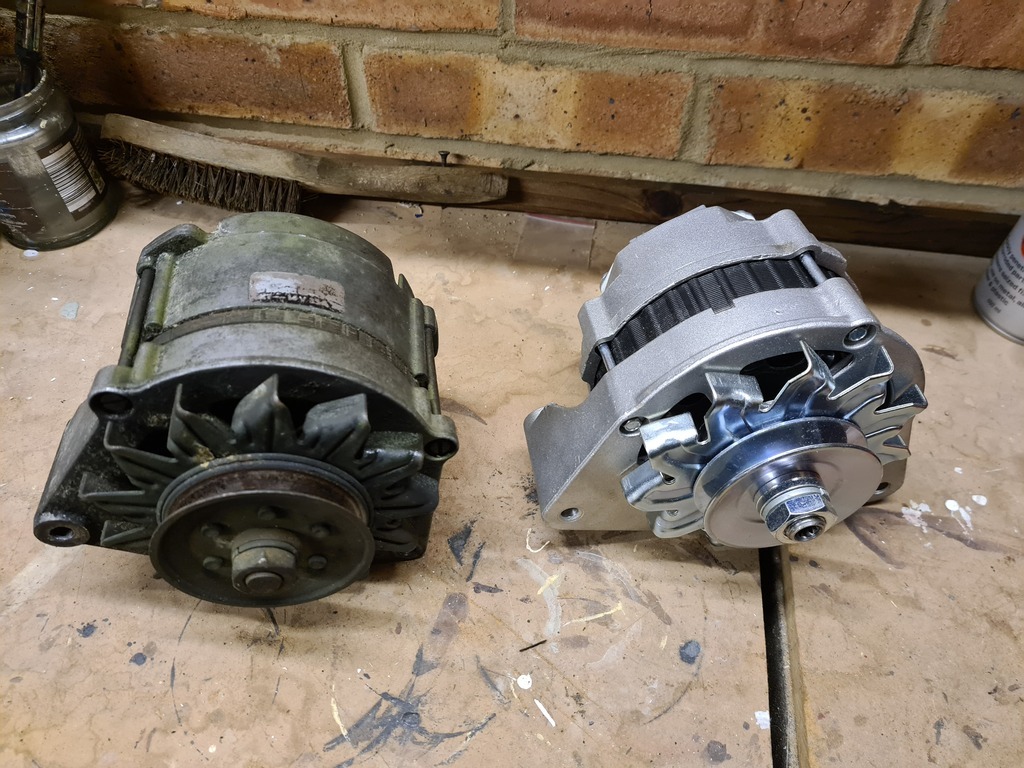 Its a direct replacement, except it looks like from the angle of the fan blades that its intended to spin the other way. I checked with the Saab parts seller whether this mattered, and was assured that it did not not. Actually its not quite a direct replacement as the external regulator is no longer needed, so that and its wiring needed to be removed. Not too bad to do as it simplifying the set up, removing some no longer needed connections and routing one direct to the alternator The red wire with blue bullet connector in the picture below 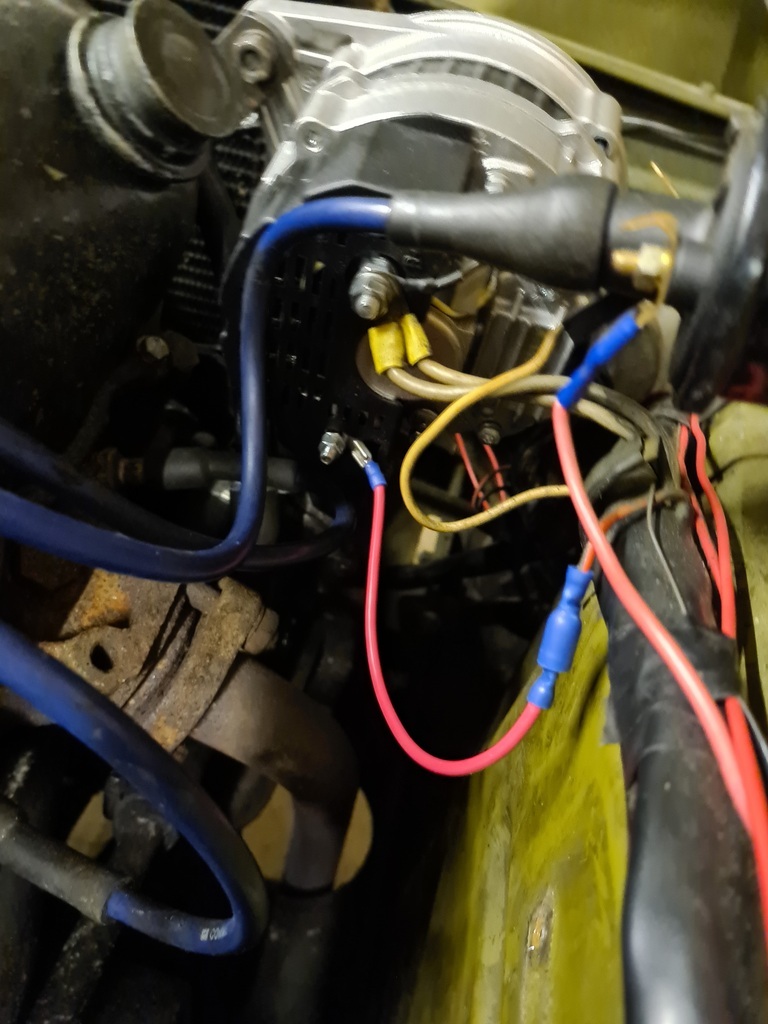 Time for another try! This time, no overcharging, rather instead, no charging at all, dash ignition light does not go out and the meter shows no output from the alternator. There was a big pause at this point whilst I wondered what to do..... |
| |
|
|
|
|
|
Jun 15, 2023 14:18:20 GMT
|
Research and some self tuition required then. In looking into Saab 96's before buying it I had found a lot of useful online resource. As well as there being a surprising number of parts suppliers, some really helpful people have posted lots of useful stuff on line The 3 main things I have benefited from have been a copy of the factory works manual, a copy of the factory parts manual and a beautifully drawn colour wiring diagram. My approach now was to take that lovely wiring diagram and edit it to create a version showing just the circuit I needed- I needed to keep this really simple so i did not get confused Here it is 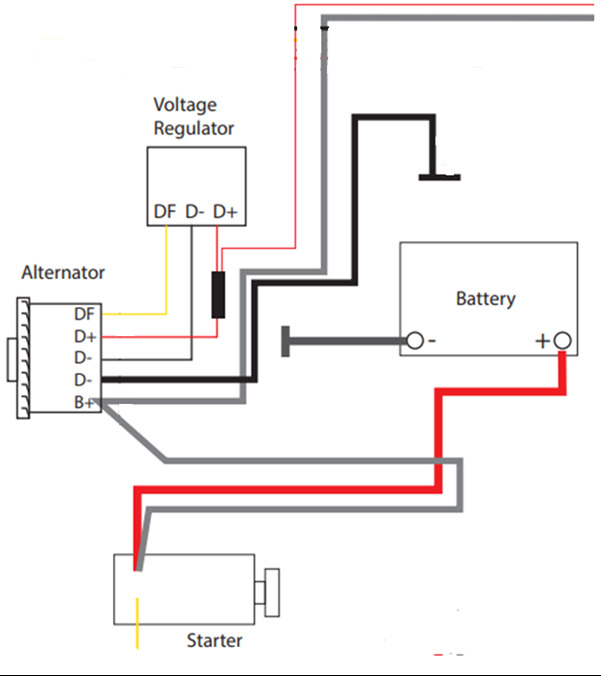 So using this I checked i had not done anything silly in these changes to remove the regulator Couldn't find anything, so checked again. and checked again, still nothing I went through each step in the circuit for continuity, checked the circuit from the warning light, still nothing. Getting a bit disheartened at this point and am googling autoelectricians. Then on a completely unrelated car site, spotted someone with the same problem Their solution was to rev the engine harder! Ok, lets try that Result, it worked, lovely 13.8V output, put some load on- headlights, heater, still stays at 13.8v Brilliant :-) It must have needed a bit of an extra initial "kick" to get the charging coils started. Very happy now, I can go for a drive! Nigel |
| |
|
|
|
|
|
Jun 15, 2023 19:18:33 GMT
|
|
That's a pretty cool car, I'm looking forward to reading about the ownership 😊
And nice (and lucky) electrical problem solving 👍
|
| |
|
|
|
|
dikkehemaworst
Club Retro Rides Member
Posts: 1,640
Club RR Member Number: 16
|
|
|
|
|
Great car!! Missed out on a 95 some years ago and that still bugs me in my sleep.
And please solder the wires, bulletconnectors are whibblepoo
|
| |
|
|
|
|
|
|
|
|
Lovely.
Right down to the colour.
|
| |
|
|
|
|
|
Jun 18, 2023 15:04:27 GMT
|
Thanks all for the comments, appreciated, and if you do see me doing something that seems dumb, do let me know! Anyway, very excited, first drive (apart from collection) off we go! Just a short loop to start with for 30 mins or so, getting the hang of the gears again (which are fine), and remembering what unassisted steering is like- this is the first front engined car I've had with no power steering - I've had "arm powered" steering before but its either been rear engined (Imp) or mid engined (X1/9) and having the weight of the engine at the front makes a big difference- you definitely have to steer "properly", with the car always moving before turning and using both arms- none of this twirling the wheel with one finger stuff! So after a short drive, pop the bonnet and apply the meter- 13.8v and steady- excellent. We carry on. Then a niggle in my mind- I can't hear the indicators? Test at the next junction, no clicking, no flashing tell tale- whoops, thats not good, I must have disturbed something when trying to get the alternator working. So head home feeling rather vulnerable and aware that no one can guess what my next manourvre will be. Back home and time to investigate, first step is to create another cut down version of the wiring diagram, covering just the indicator and hazard circuit: 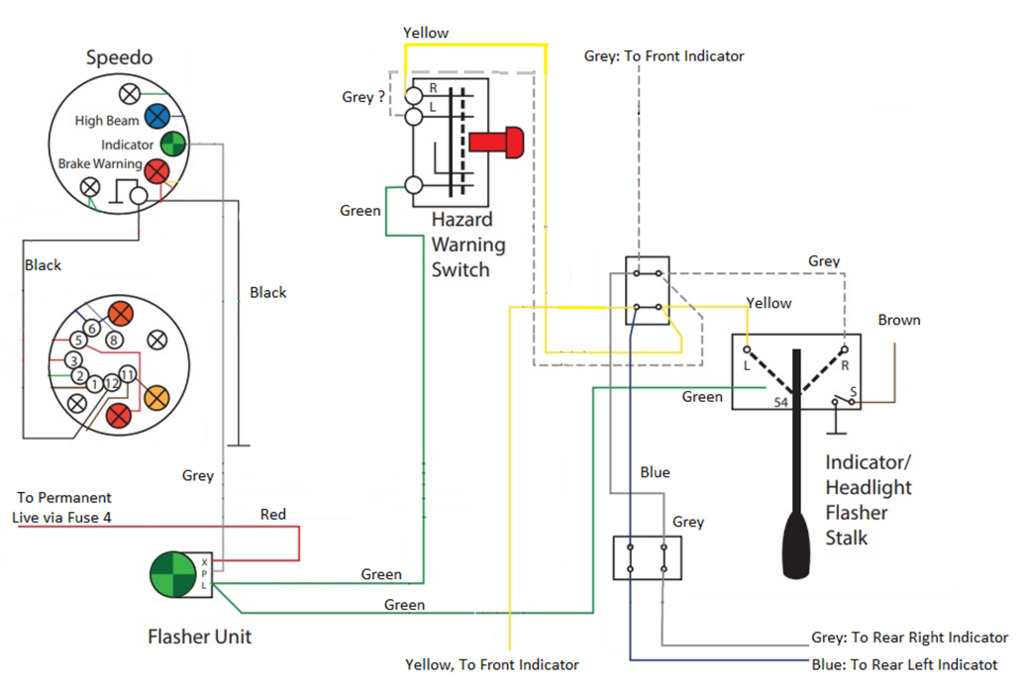 First suspect is the flasher relay, this is a traditional device using a coil and flexible metal strip, new ones are available but seemed a bit pricey for what they are, modern electronic ones are about a 3rd of the cost, so I ordered one of those. Once it was swapped in, no change :-( Ah, not so straightforward. Following the circuit from live +'ve on the battery, the first component after the fuses is the flasher relay, its been swapped but checking it with the multimeter gave me some really odd results: Indicators off- nice 12v on the input, and 0v on the output as you would expect Indicators on, Ov on both the input and output- WHAT, where have my volts gone?? The best theory I could think of now was that I was measuring to earth, and that it was not a true 0v, just 0v difference between these 2 points and earth- ie the earth was also getting 12v via a short- all electrical issues are earth related right? So I needed to find the short to earth and I had a suspect in mind, one of the rear lights had a badly fitting rubber seal, so perhaps there was some corrosion inside causing a short? Taking it apart I found some incorrect bulbs (brake bulbs in the rear light fittings- now corrected) but no obvious issues. Long story short, especially as there are no pictures of electrical fault finding, I checked every section of circuit bit by bit, to all 4 light units, to the hazard switch, to the column stalk. Nothing. Discussing this over the fence with my neighbour (retired electronic engineer) he mentioned "you've got high resistance somewhere else in the circuit", so my earth theory was probably rubbish! One more bit of fiddling cleaning up the fuses and would you know it, I've got indicators again! Wish I'd started there- so it seems the rule is: if its not an earth issue, its a bad connection at the fuses. One other tiny thing I fixed whilst messing about in all the light fittings was the amber lenses for the front indicators. These had faded to almost no tint at all, but a quick coat with some modelling paint gave pretty much the exact colour required- another idea I found on line somewhere. 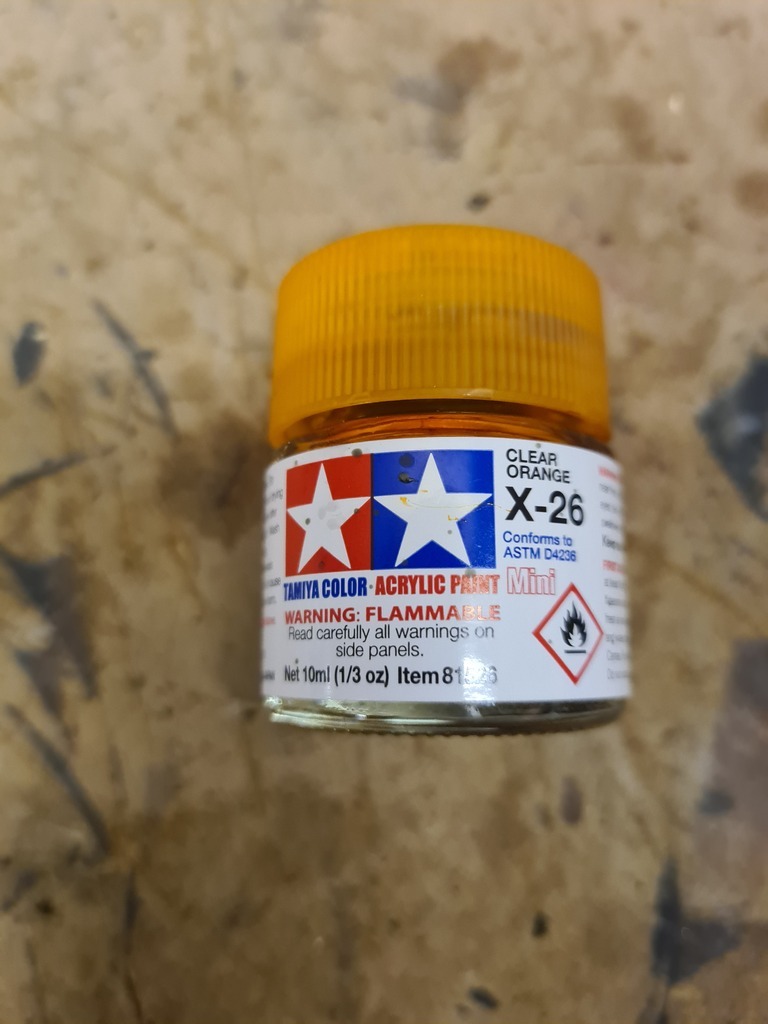 Excellent, immediate running issues fixed, before doing much else the next step will be a full service, I think its needed: 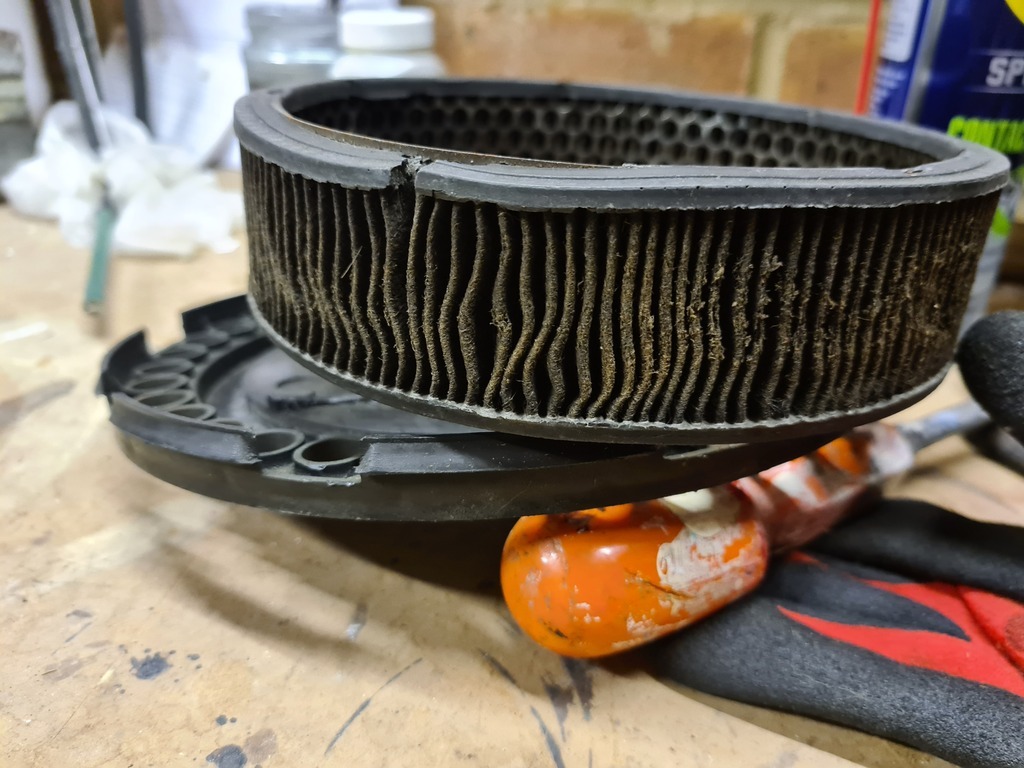 Thanks all for reading. Nigel |
| |
|
|
|
|
|
|
|
Working through the service then: Engine Oil, Gearbox oil*, Engine Oil filter, Air Filter, fuel filter. Plugs and points to follow- it runs really well but I'm pondering putting in Powerspark electronic ignition- any views? * Gearbox oil because with no dipstick I have no idea of the level or when it was last changed and it could be a source of the oil leak and there is also a "clicking" sound on the over-run that I wonder if its gearbox related- disappears when the clutch is dipped, I can't feel any play in the CV joints and its no worse on corners, its a niggle though so I'd like to locate the cause. Anyway, I digress... Engine oil easy, plus new filter and drain plug. Air filter proved tricky- its got an aftermarket filter fitted that I could not source a replacement for- no luck online, thought I'd rummage in Halfords to find a close match on their shelves, but turns out they barely keep any in stock, Eurocarparts would not attempt to look for a match for me- very unhelpful. So a different plan needed, I'll just replace both the housing and filter, need to check the size on the carb, had a look and found this: 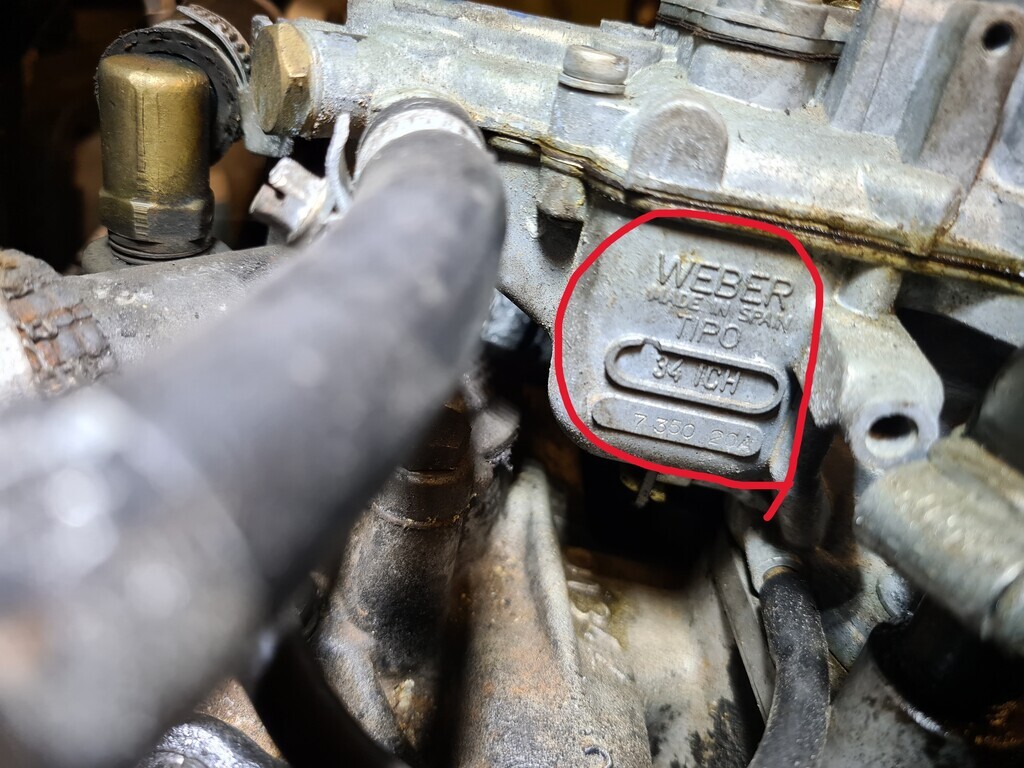 Excellent, its had a carb (performance?) upgrade, a nice bonus, now its easy to get a new filter. Its silver, not sure on the colour, it might get painted black at some point. 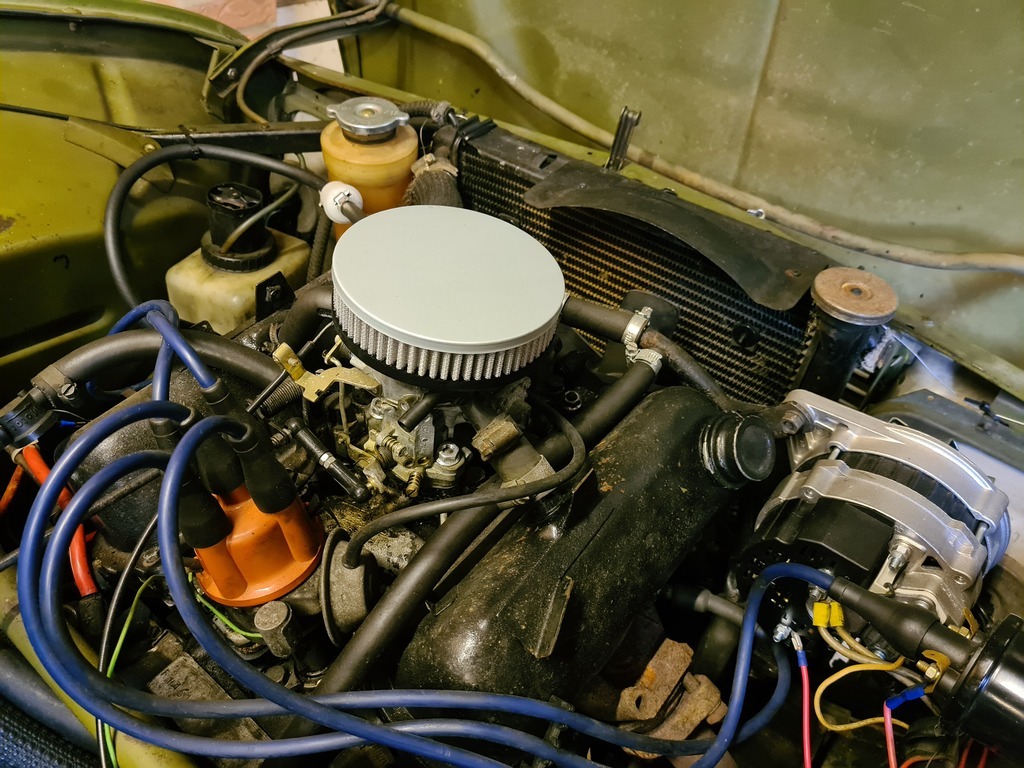 Gearbox oil next, before I drain it, I need to make sure I can get the filler plug open. Its reasonably accessible once the battery is removed- red circle below 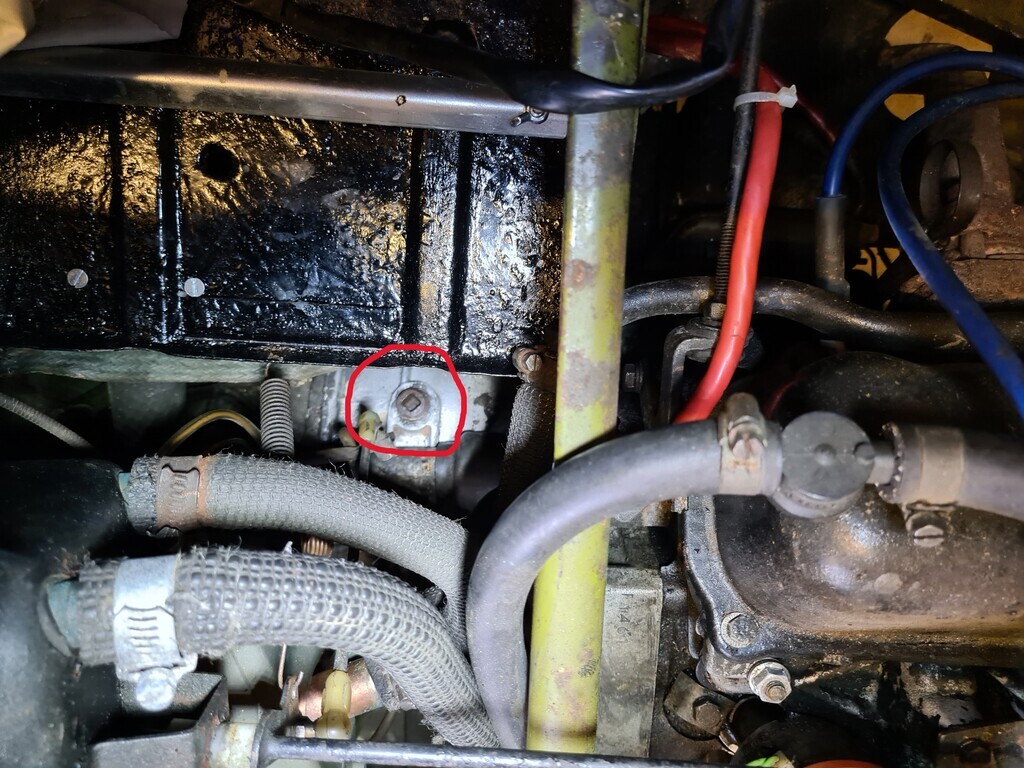 But i couldn't get it undone, its angled so that a straight extension bar hits the battery tray, with an angled bar I could not get enough leverage Built a little modelling clay dam around it and soaked for a few days in penetrating oil- no change. I could get a very short ratchet bar on it directly, but again not enough leverage to undo In the end the solution (which I am sure will happen many times) was to buy a new tool- extending ratchet bar- short to get in place, then extend to get more leverage- that worked- phew! Bar in place and extended, circled red below, just enough movement to undo a few clicks at a time. 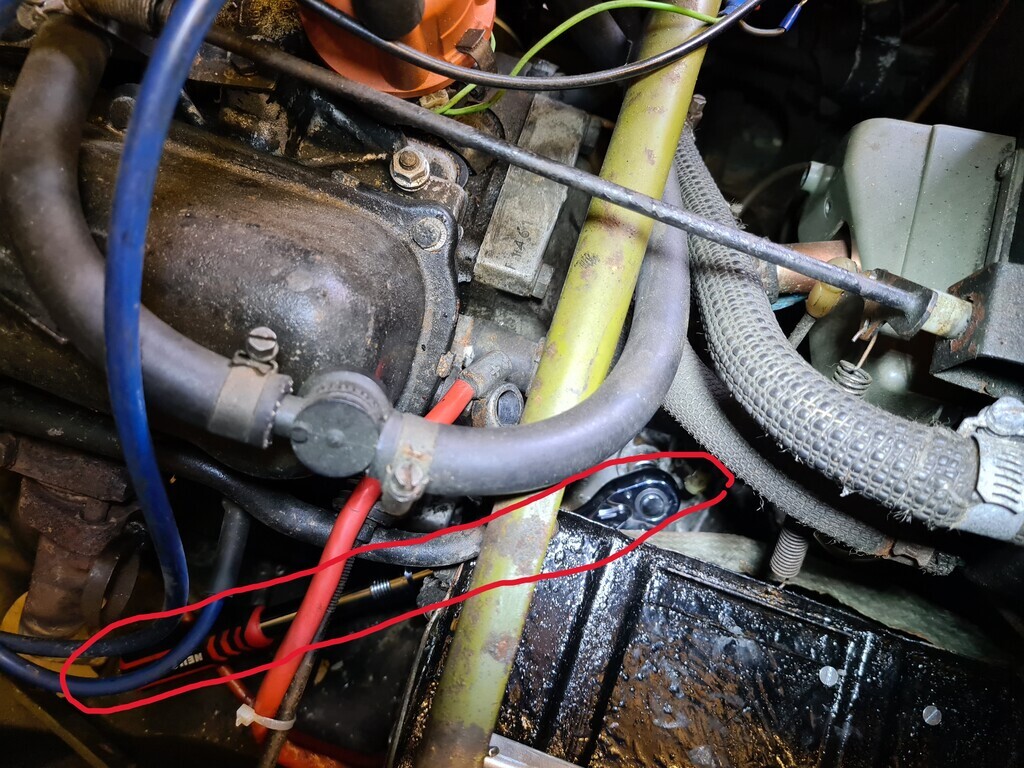 So out comes the old gearbox oil- yuk, dirty and green! 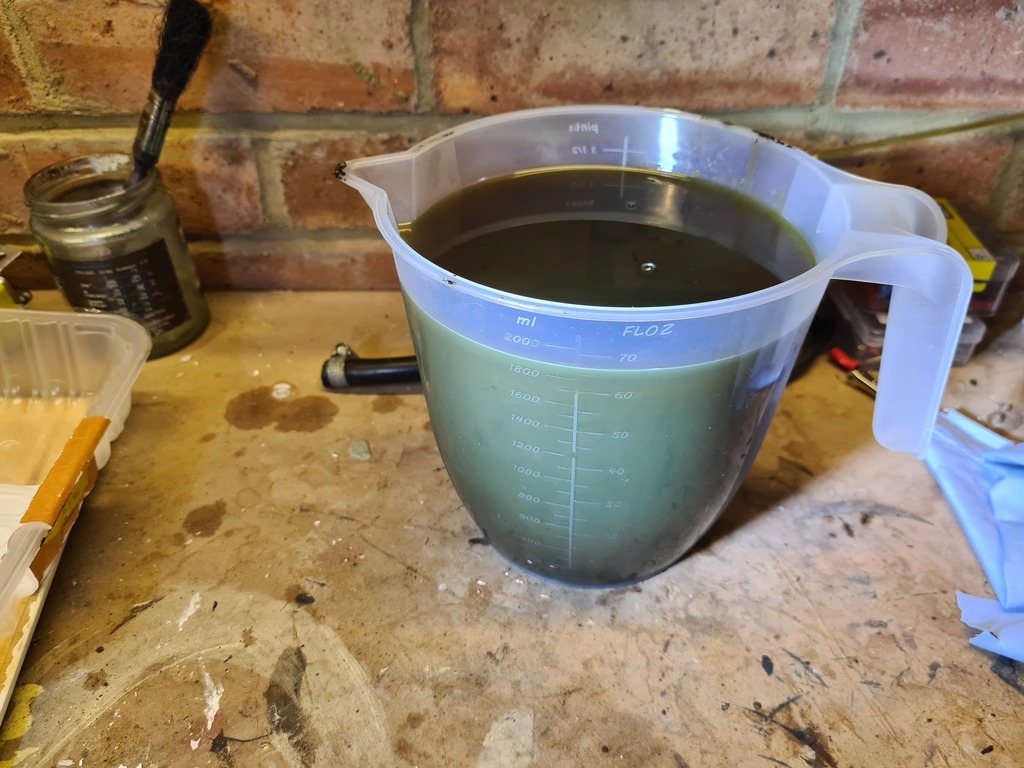 To be replaced with this 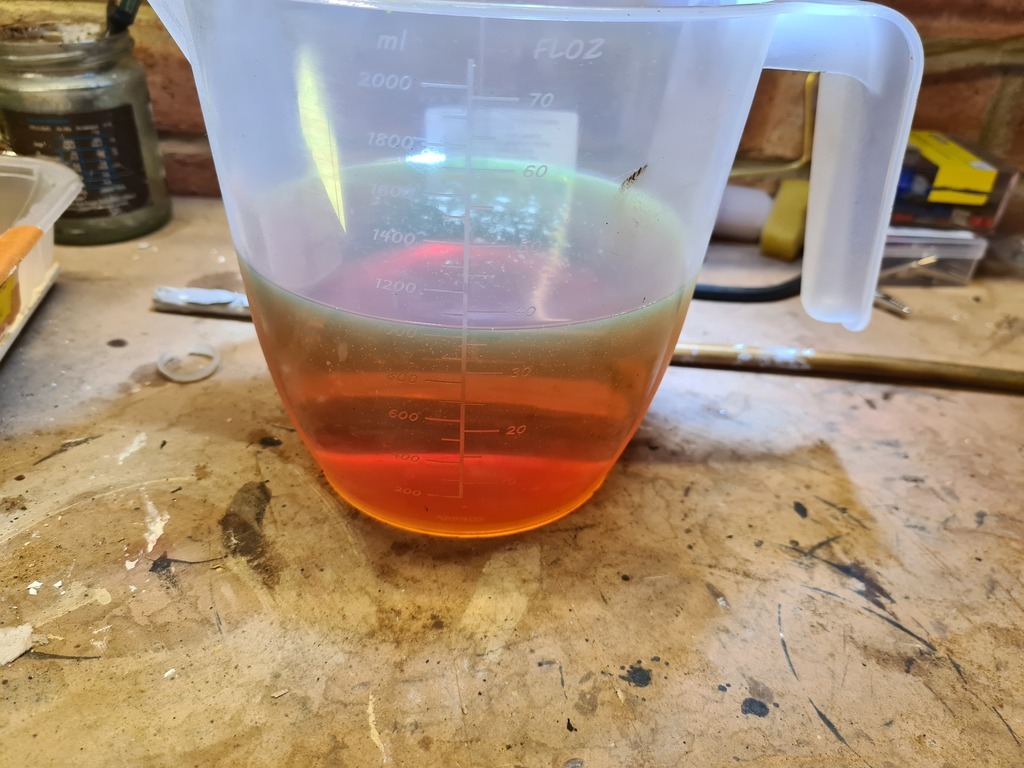 Success! Onto the fuel filter, there are 2 in line for some reason, but I decided just one new one would be fine. As soon as I started moving the fuel lines around to remove the old filters, the connection on the fuel pump started leaking- not good, never mind new fuel lines seems a good idea anyway, especially in the engine bay, so to be double safe Ethanol proof lines purchases (£14 per metre- ouch!), but it does feel lovely and pliable. Lines replaced along with the clips, trying to make as gentle a curve as possible, and as far away from the exhaust as I could. 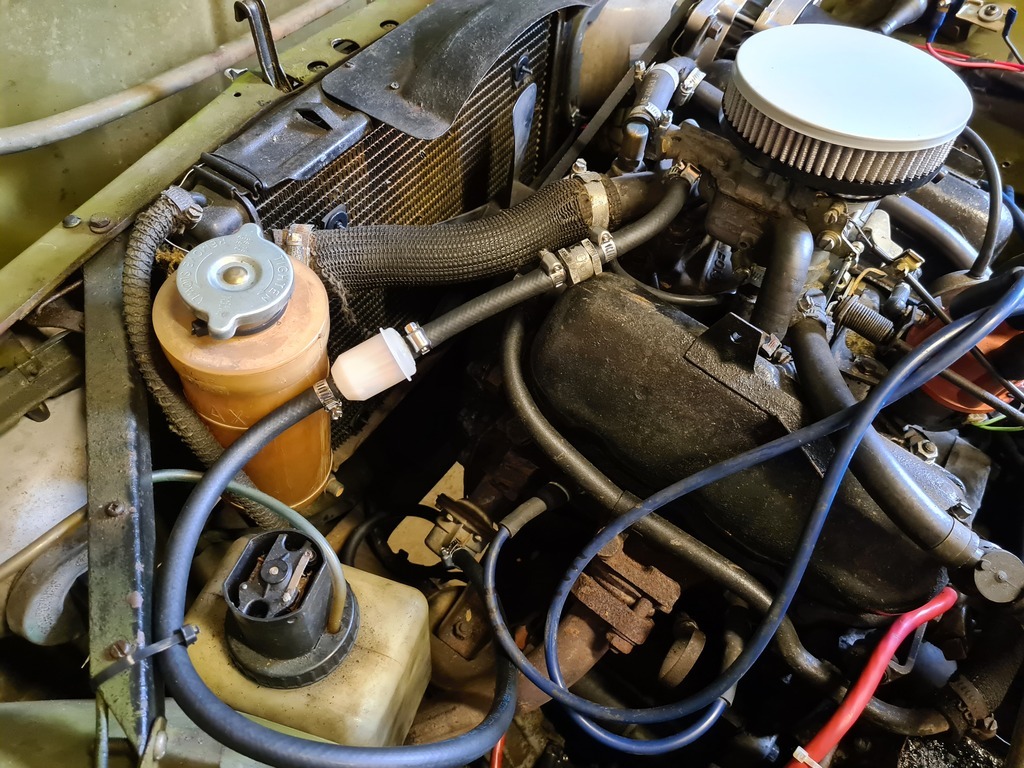 So now good to go, wanting to check for leaks and prime the new fuel lines I took the HT lead off the coil to then just spin the engine over for a bit. Woops, connector from lead to coil came apart in my hand when I pulled it, seemed to go back together OK, but new leads might now be a good idea. Spun over a few times, then reconnected the HT leads and good news- engine starts- hurray, I have not messed up the fuel pipes or the HT leads  Next job will be a good clean up of the engine bay to try and locate where the oil leak is coming from. Thanks for reading Nigel |
| |
|
|
hagus
Part of things
 
Posts: 35
|
|
|
|
|
Just a quick note for you, those seats may or may not be original to that car, but they are the correct type! I had a 95 when I was 16, ahem, and my mate had a couple of 96’s, one which he still has! Spent a lot of my teens on one of these things!
We used to call the 96’s Cornish Pasties btw, for obvious reasons 🤣
“You in the Pastie?” 🤣🤣🤣
|
| |
|
|
|
|
|
|
|
|
I’d urge you to leave the points ignition alone. As you said, it works well. Many a good car has been made less good by adding a solution to a problem that doesn’t really exist. The little electronic modules which replace points are not without their own issues. My advice is to buy a service set of replacement ignition parts (while you still can) and just have them on hand.
Great car.
John
|
| |
|
|
|
|
|
|
|
|
I'm partial to a bit of Swedish (cars and ladies) so this wee one is now on my bookmarks.
|
| |
2005 Volvo C70 2.4T Convertible. 40k miles, FVSH, one prior owner. My toy.
2010 Mini JCW Convertible. Wife's toy.
1991 Yamaha FZR600, one of only 20 Kocinski edition models.
MINI Cooper S Electric '3' - My daily scoot.
Peugeot 2008 HDi120 - Dog van.
Polestar 2 - Wife's daily.
Dacia Jogger Extreme hybrid dog van replacement ordered, due Jan '24.
|
|
|
|
|
|
|
We used to call the 96’s Cornish Pasties btw Brilliant! The little electronic modules which replace points are not without their own issues. Good point, there is a lot to be said for "if its not broken, then don't fix it", luckily points are available easily enough. I remember the aftermarket electronic module on my x1/9 giving up the ghost on me back in the '90's, so am definitely wary. I'm partial to a bit of Swedish  |
| |
|
|
|
|
|
Jul 25, 2023 15:57:47 GMT
|
Moving on to the clean up, 2 areas initially: The clutch master cylinder and the "floorpan" under the engine. I had not noticed this before, but there is a small pool of fluid on the clutch master cylinder, the level inside is low too. 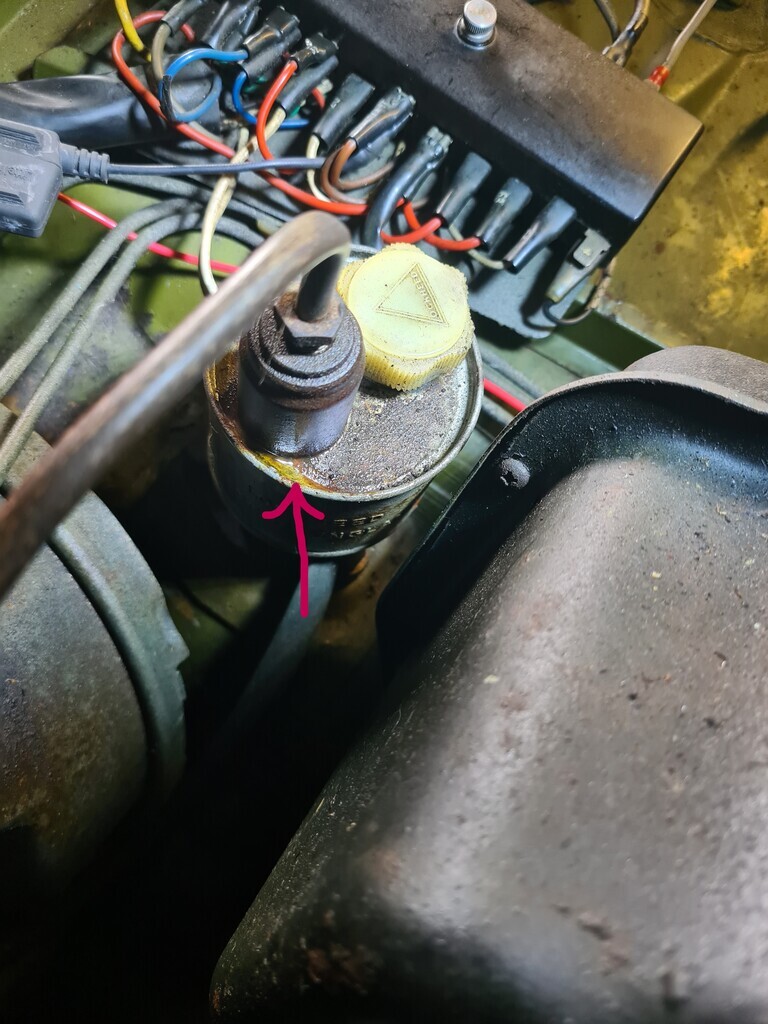 I don't think this leak can be big enough to be the source of the dripping underneath, but needs sorting anyway. So bit of a clean up, top up and I'll keep an eye on it for now. I have sourced a rebuild kit for the master cylinder, but won't open it up until I am sure its a current leak as it were. 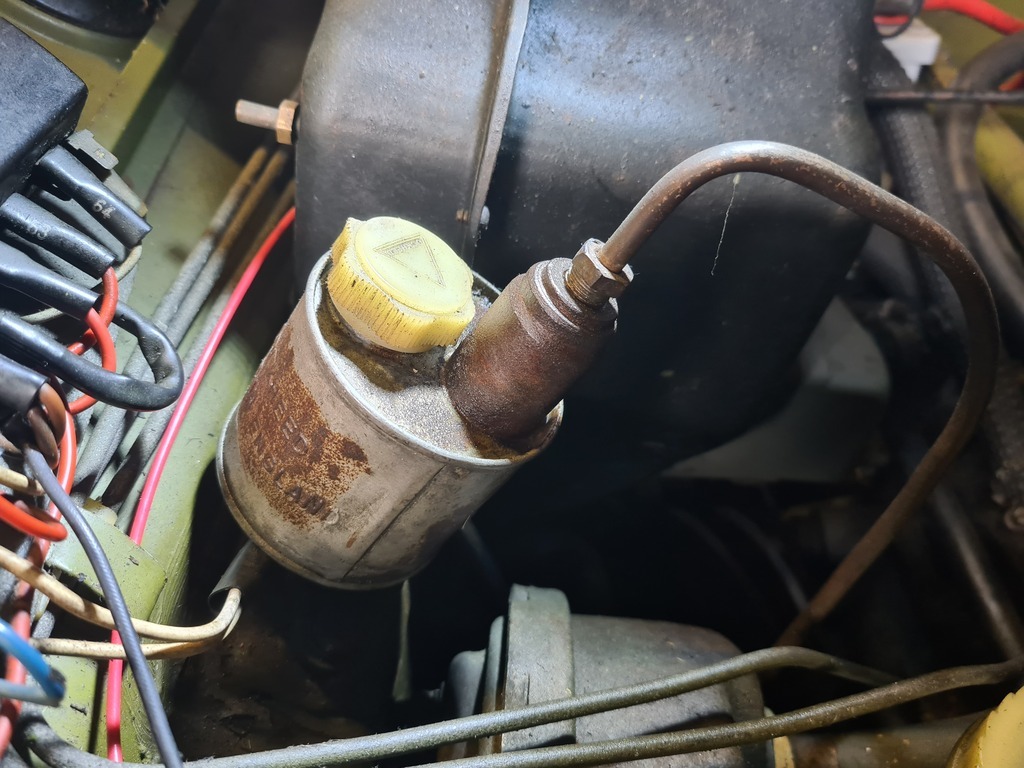 Odd looking design- really does look like a tin of beans! To explain what I mean by "floorplan", basically the floorplan extends all the way under the engine, its not removable like an undertray and is a fixed and welded part of the body structure. There is no access to anything in the engine bay from underneath, there are just small access holes to drain the engine and gearbox, and a handful of drain holes. There are also small access holes from inside each wheel arch. Its from the gearbox access hole that the drip is coming from, but as the oil from the gearbox was equal to the stated capacity, I don't think the gearbox itself is leaking. The problem with this "floopan" arrangement is that there is now 50 years of dropped bolts, junk and a general thick sludge stuck in the couple of inches between it and the bottom of the engine. Dirty section of floorplan, showing one of the drain holes: 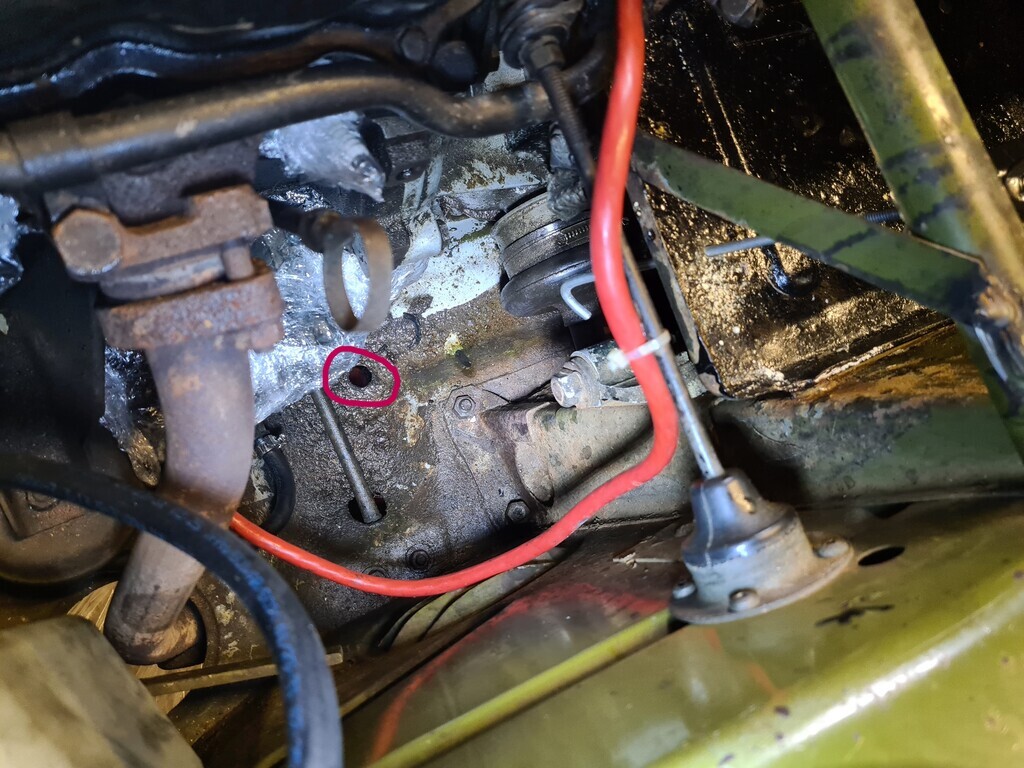 Cleaned up on one side: 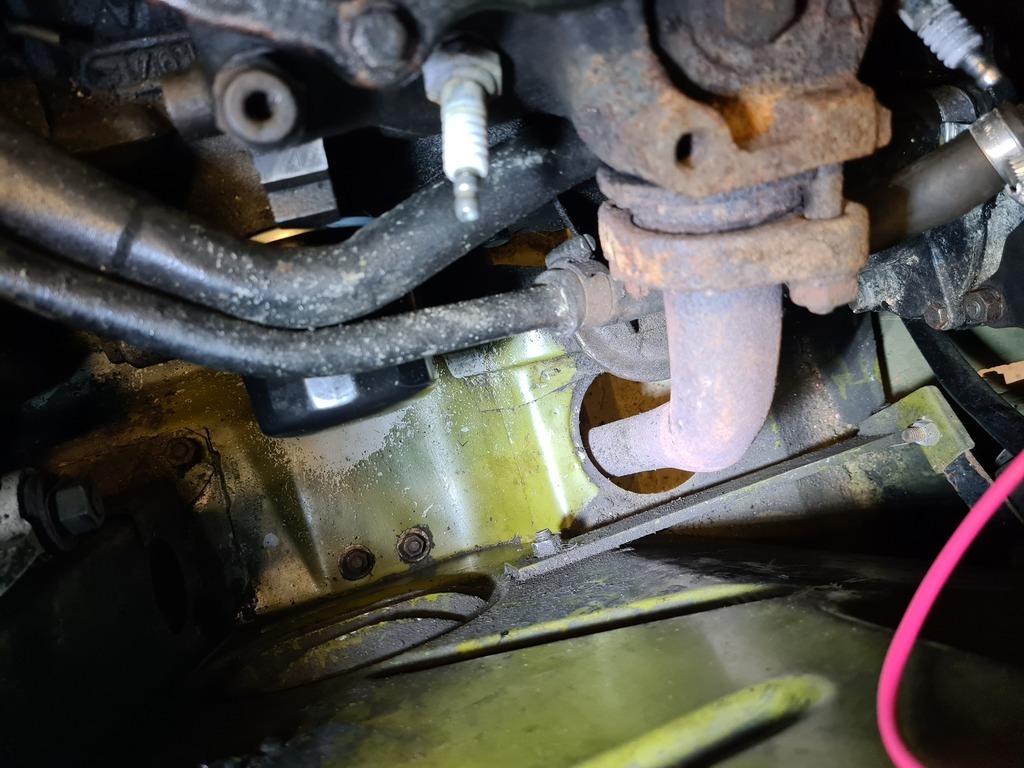 Its ok to clean up each side of the engine, but you'd need to be double jointed to clean under it, which unsurprisingly is where its worst. I've heard of people using pressure washers in the engine bay, but did not like the idea of high pressure water having the chance to enter any electrics, so I decided to set up just a garden hose on one side and a "wetvac" on the other to suck out the hopefully loosened gunk and water. To try and prevent oily water all over the garage floor I placed a container under each drain hole. Container to catch the mess, underneath a section of the engine bay floorplan: 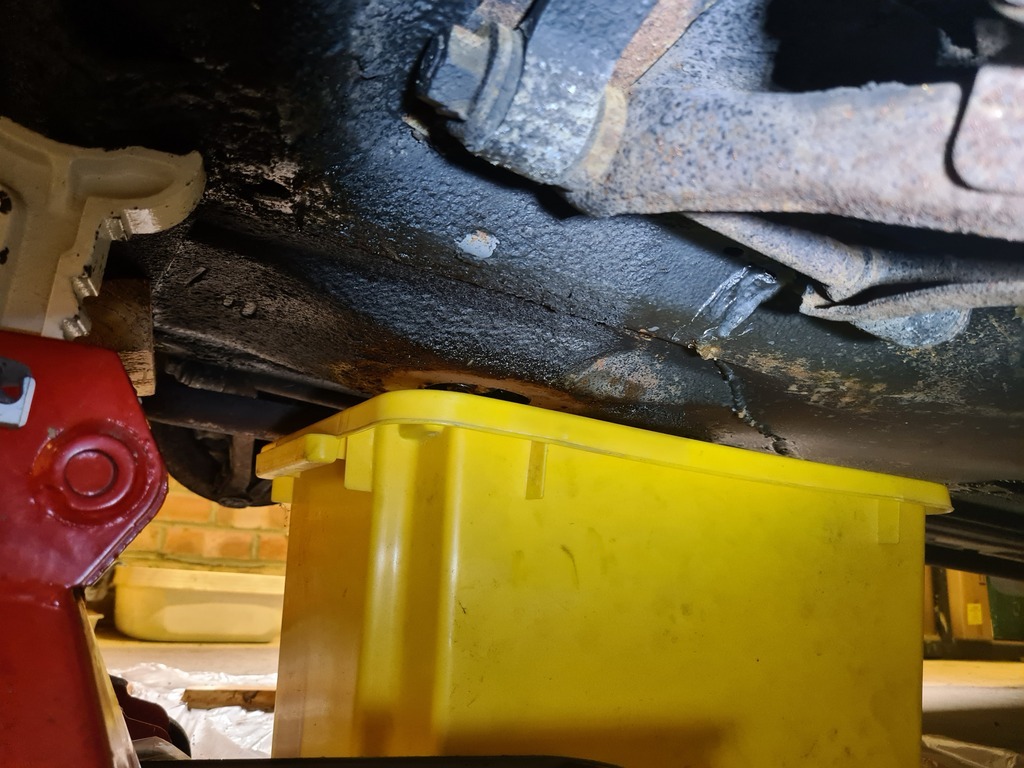 I tried to keep the water spray to the bottom of the engine bay and luckily all the electrics (except the starter) are set right at the top. I did cover them all as well to try and be double safe. This all worked pretty well, lots of very dirty water: 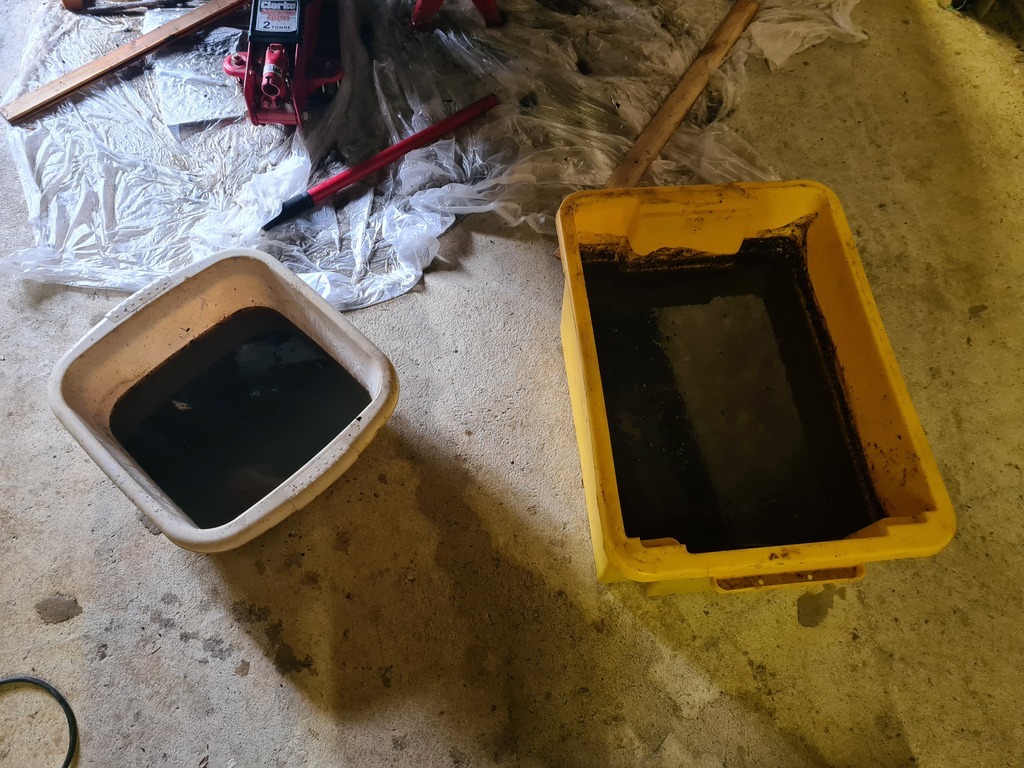 And it mostly ended up in the containers or Vac, not all over the floor- success! 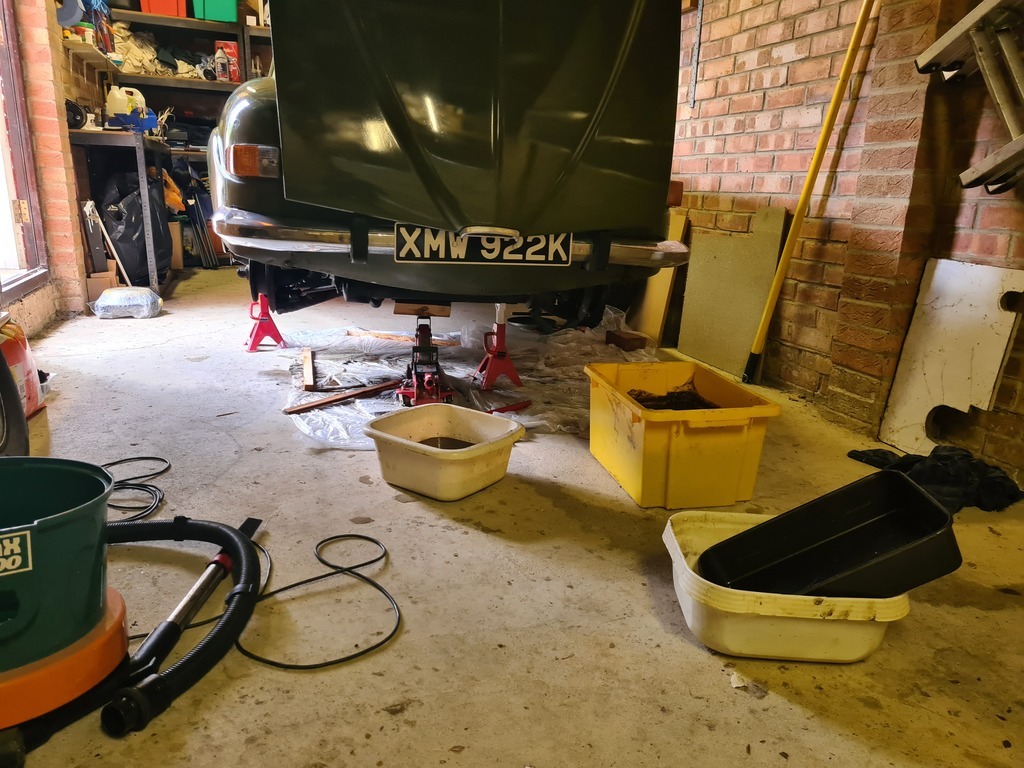 Using the Vac worked quite well for drying inside the engine bay too. After a bit of a tidy up, it was time to see if I had messed up the electrics at all- would it start? It did, brilliant! so gave it a bit of a run to heat up and hopefully drive out the remaining moisture. This was a really mucky job, which I'd been putting off, but most of the filth was contained. Hopefully with a cleaner "floor" in the engine bay, I'll be able to see where the oil leak is coming from. Thanks for reading Nigel |
| |
|
|
|
|
|
Jul 25, 2023 20:17:33 GMT
|
|
What a nice car you got! Success with your next steps. Bookmarked.
Last week I visited the Saab museum in Trohättan, while on holiday in Sweden. There I discovered what a fantastic make these cars have been. I never realised how special they were until I saw this interesting automobilia heritage on display!
|
| |
|
|
|
|


