|
|
|
|
|
Update 4. Parts Collecting
Not long after getting the car, I was speaking to Mark who had the list of most of the odd little bits I needed, and so one weekend I went up to see him. My friend Liam was giving me a lift up there so I could get my first proper ride in a Capri (the first being in a Tickford but about 8 years prior). I'd finished working on the car for the day and was met by this site outside
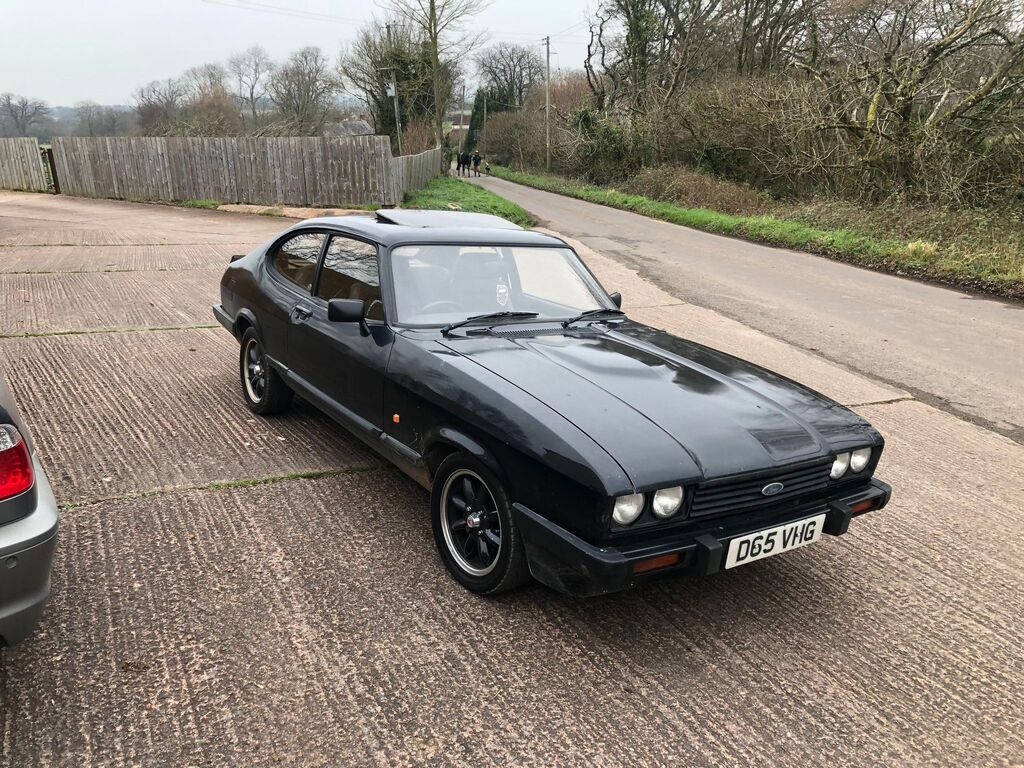
We drove on to meet Mark, around 45 minutes or so away, and he gave me a lift to the unit in his 2.0s, which is stunning, and gave me a lot of inspiration for how I'd like mine to eventually look one day, albeit in Silver. I believe the story was he was offered it after it had sat in a garage for years, had the welding done, got it painted, new suspension etc. 7.5 inch RS Style alloys and lowered all round, an RGA spoiler with a RS style front lip to finish it off. The result is one of the best looking cars I think I've seen, although I'm biased with he MK3 Capri being one of my favorites 
The interior was pretty immaculate and the same could be said for under the bonnet. This really made me realise what sort of direction I wanted to go in (for now), a nicely cleaned up engine bay, keep the Pinto with a decent exhaust, K&N filter and electronic ignition. I definitely need to wrap my exhaust manifold, dress and tidy up a lot of it and paint the rocker cover. 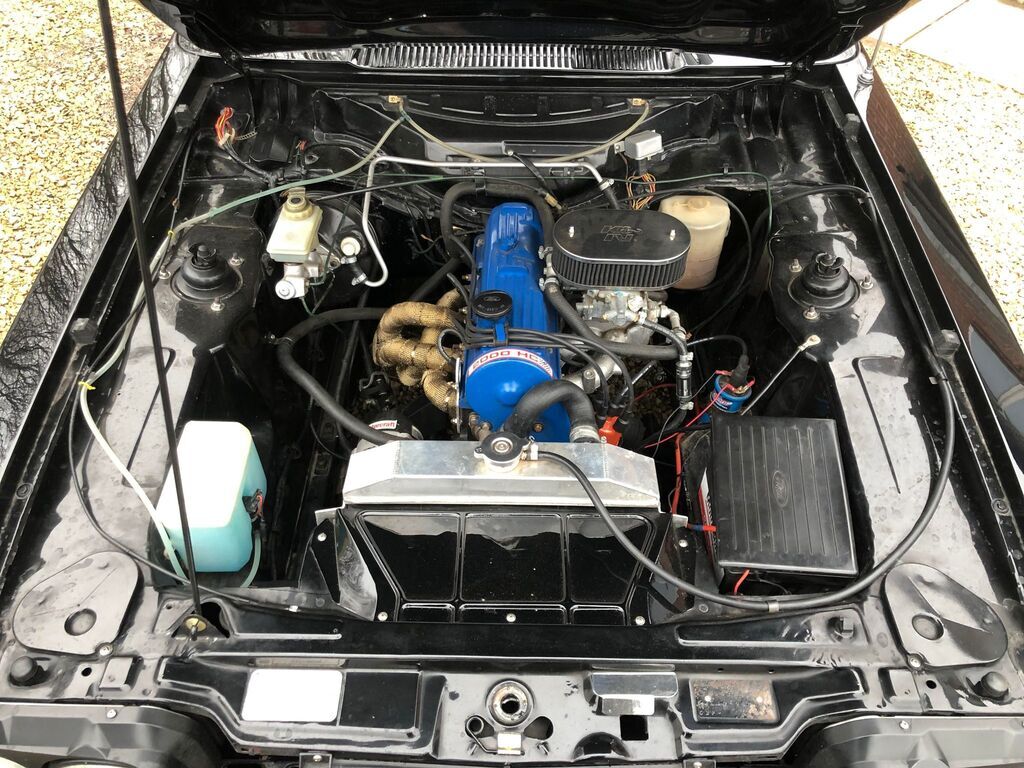
Mark always has a decent amount of parts so if you ever need any give him a shout, he's broken a few rotten cars with the last being this Mk2, which made me feel a lot better about the condition of my Mk3!
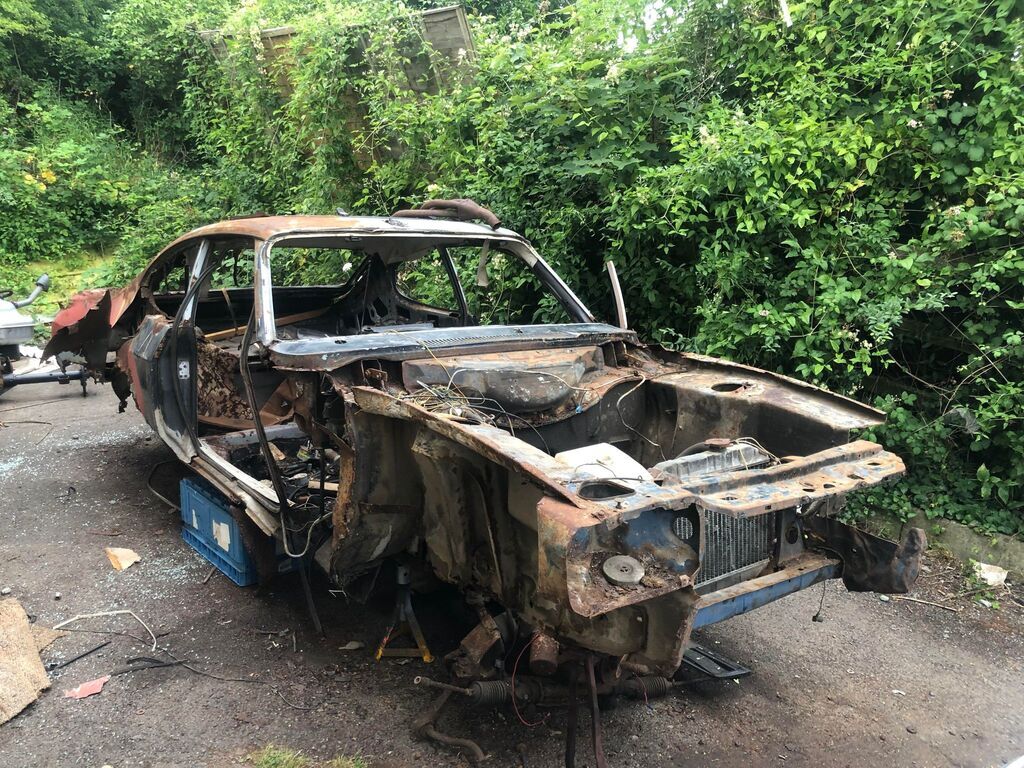
In the end I went up twice for bits, and I came back with a straight rot-free bumper, early Mk3/mk2 seat belts, steering wheel and black door cards, a spare rear bench seat, a random assortment of caps, screws and clips, lights, trims and such. I sent off a number of bits to be powder coated such as the fan shroud and bumpers, and then made the biggest purchase yet of a full Recaro interior that had seen better days, but that's for next time.
Cheers readers! Jack.
|
| |
MK3 Capri 2.0, Starion Widebody, Midget 16v, E46 Coupe, E46 Touring 330
|
|
|
|
|
|
|
|
|
Update 5. Recaro Interior
Finally getting towards fun stuff now, sorry everyone!
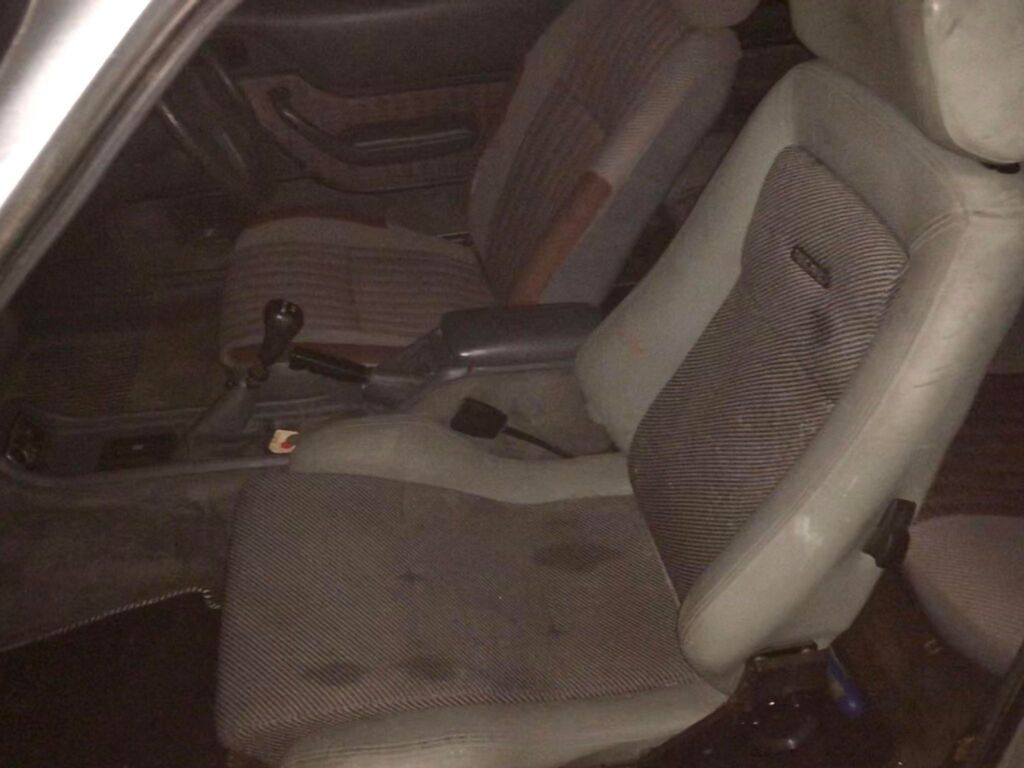
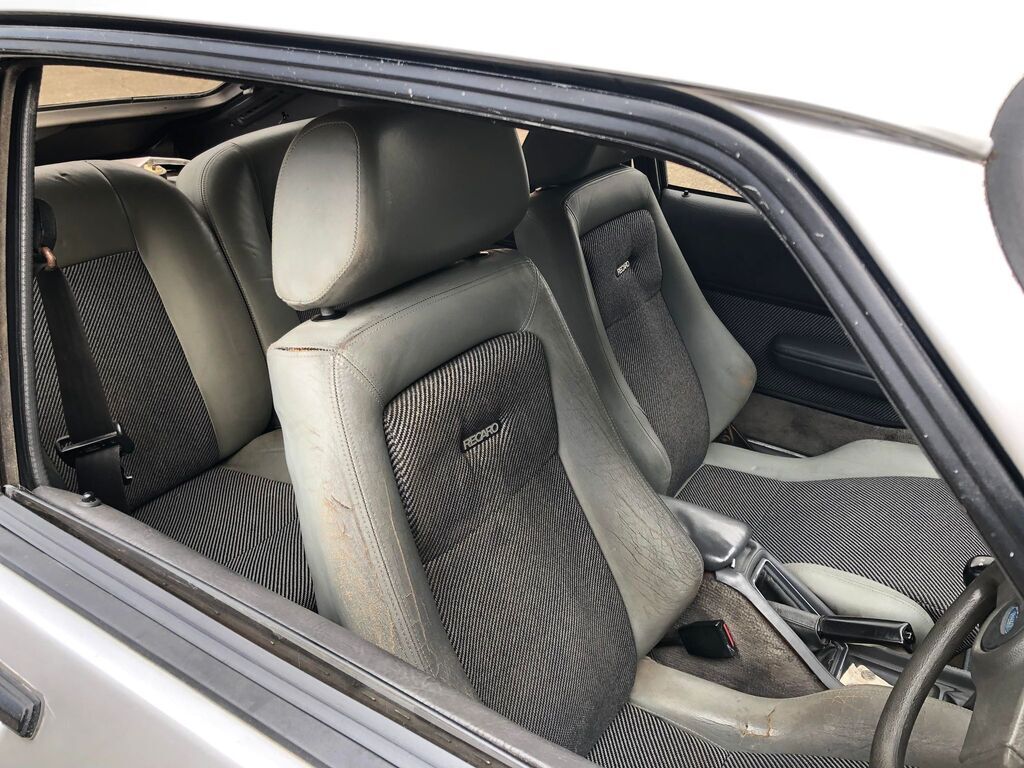
When the car arrived it had the standard Laser interior, which was in good shape bar the front seats having some weird bolster material sewn on and the carpets being filthy with nearly 40 years worth of oil, mud and grime being soaked into them.
Since getting the car I always knew it had to have Recaros, and seeing full interiors from 2.8s and 3.0s' going for anywhere up to and over £1000 I wasn't holding out too much hope, until on a Facebook group I saw these for sale for £400, only issue was they were in Kent, the complete opposite side of the country to me!
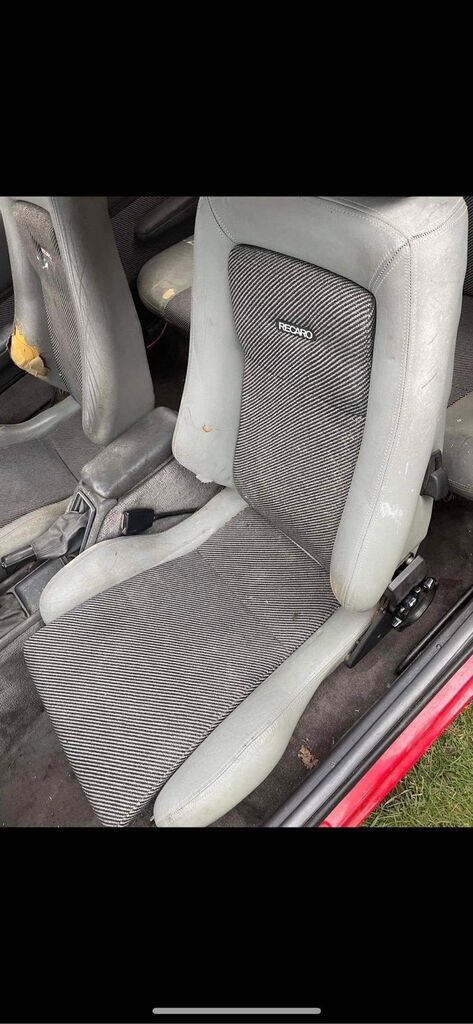 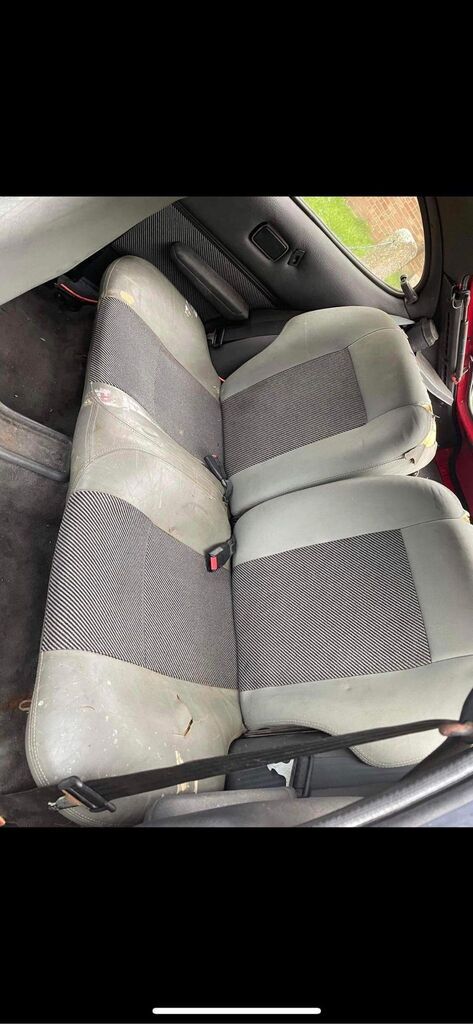
But having all of the door cards, and some spare rear backrests, I worked out a courier with him and they were mine! They arrived in the back of a van the following week, and I squeezed them into my and a friends car at work and couldn't resist trying one in when getting them back.
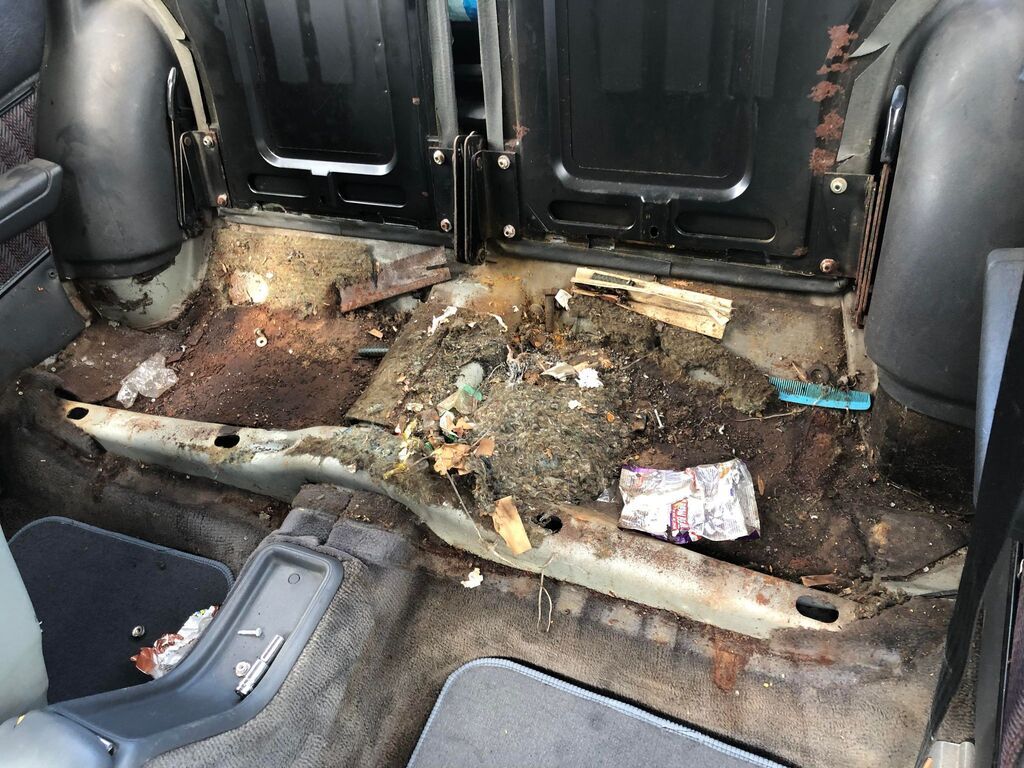
That weekend I trial fitted all of the interior, even though it would be coming back out to sort the floor pan and sills etc. The rear bench comes out with two screws at the bottom and lifts up and out. The back rests have to be tipped down, open the little flap in the carpet on the back, pull out the bung and undo the 10mm nut, then it slides off. Door cards are all just held in with screws through the bottom of the armrest and clips. There has definitely been a mouse family living in here at some point!
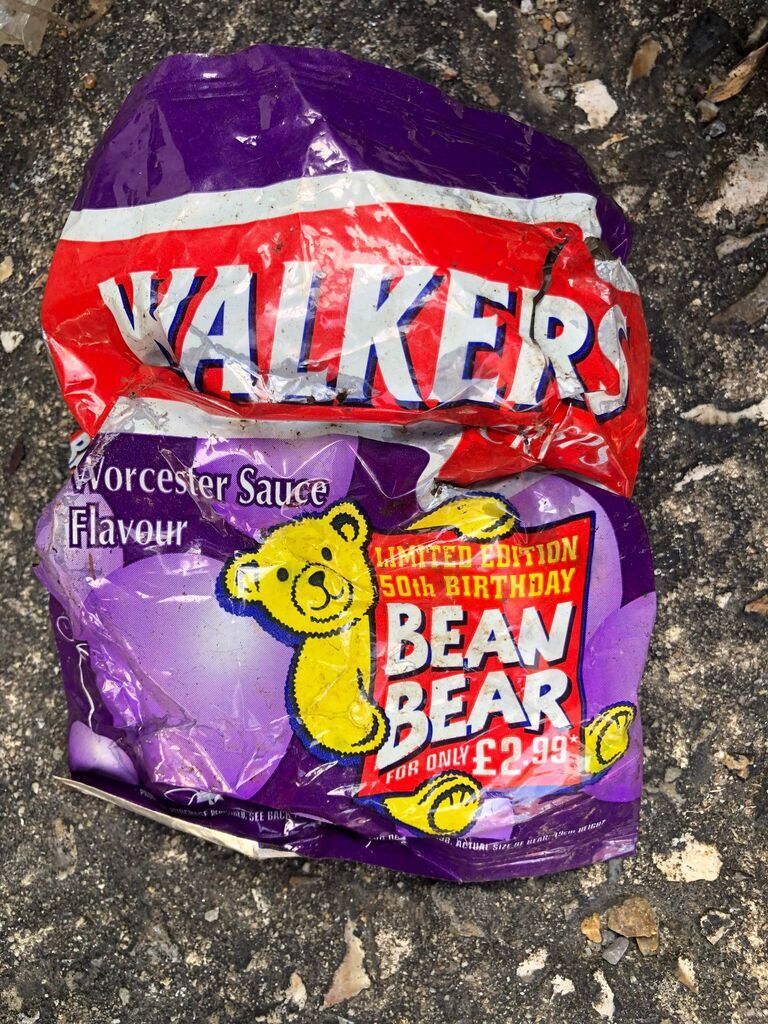
Even found something to eat under the seats! These expired before I was even born!
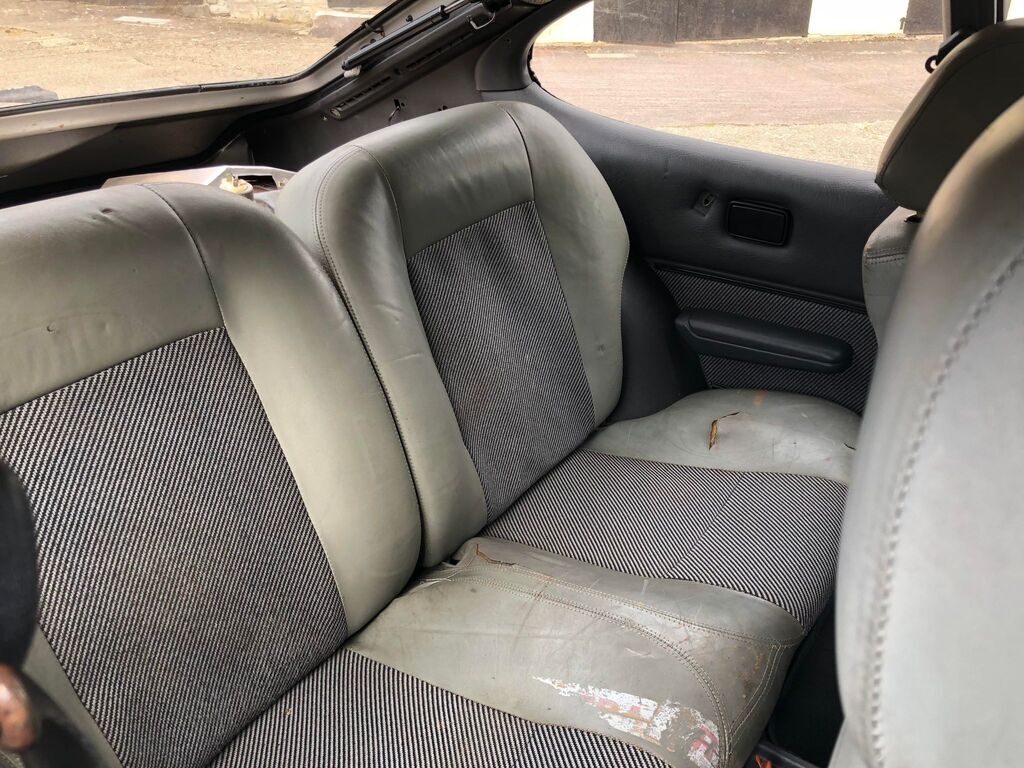
Rear seats in, and looking better(ish)
Front seats are easy, 4 bolts and...
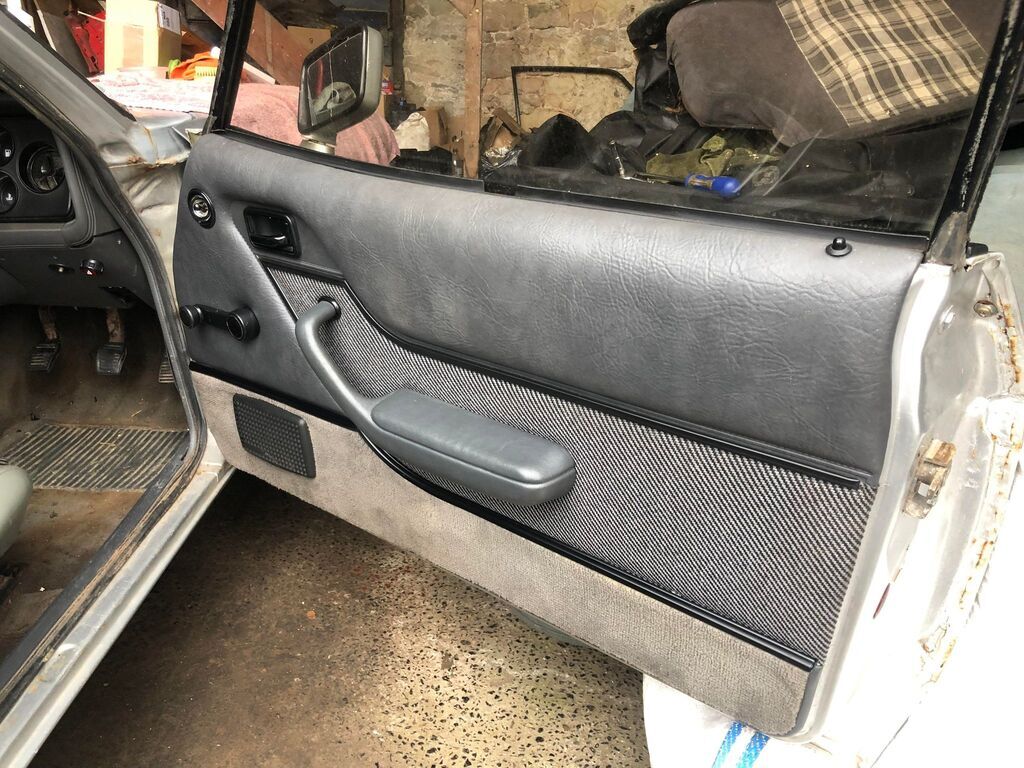
The front door card removal is as follows, undo the two screws in the armrest and tilt it round 90 degrees and it'll pull out, pop the cap out of the window winder and unscrew/remove, slide the black trim around the door handle back and remove, then slowly pop the panel off of the door and undo the speaker wires.
So they look good, but they're tatty, so in a future update will be trying to restore the seats at home with the aid of a leather repair and dye kit, what could go wrong...
Next time - Starting the bodywork.
|
| |
MK3 Capri 2.0, Starion Widebody, Midget 16v, E46 Coupe, E46 Touring 330
|
|
|
|
|
|
|
Update 6. Bodywork
This ones going to be pic heavy so I'll try and keep the text to a minimum.
Found a second hand N/S wing, as the pattern ones are pretty terrible. Managed to fit this in the rear seats of my E46 Coupe!
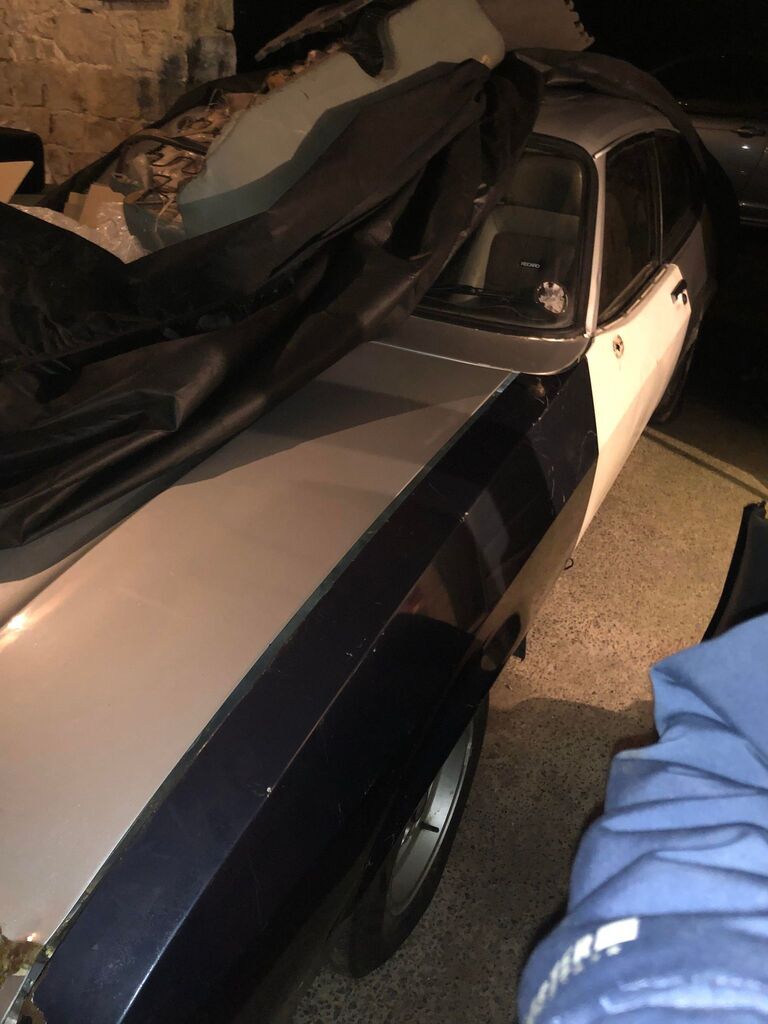
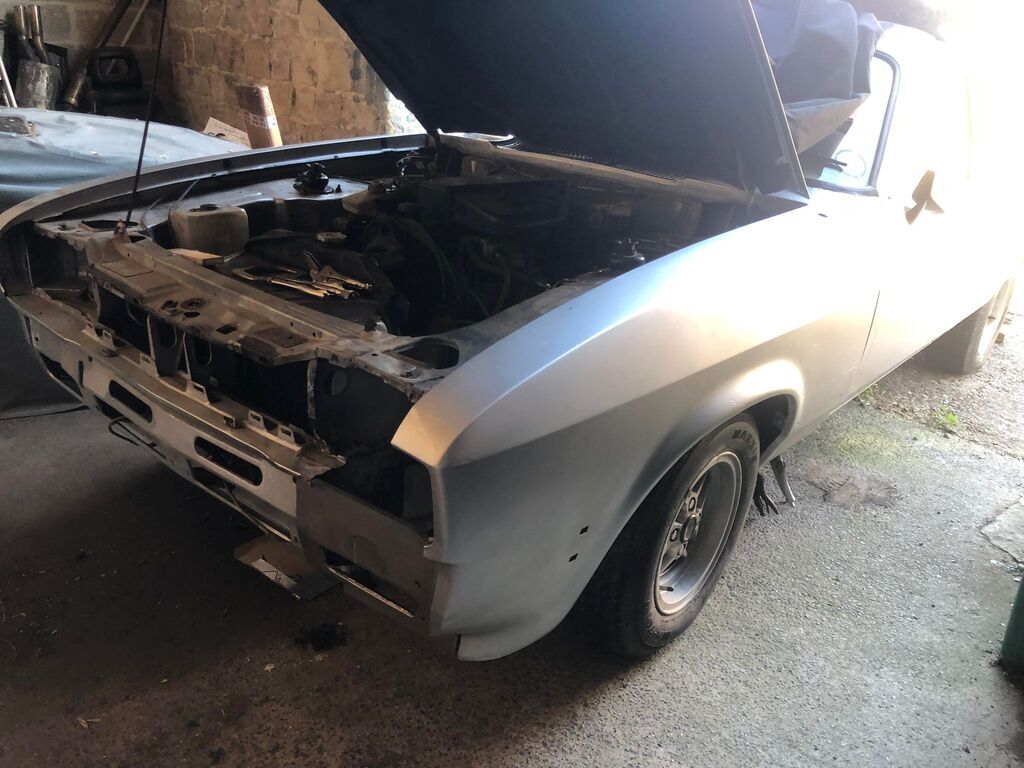
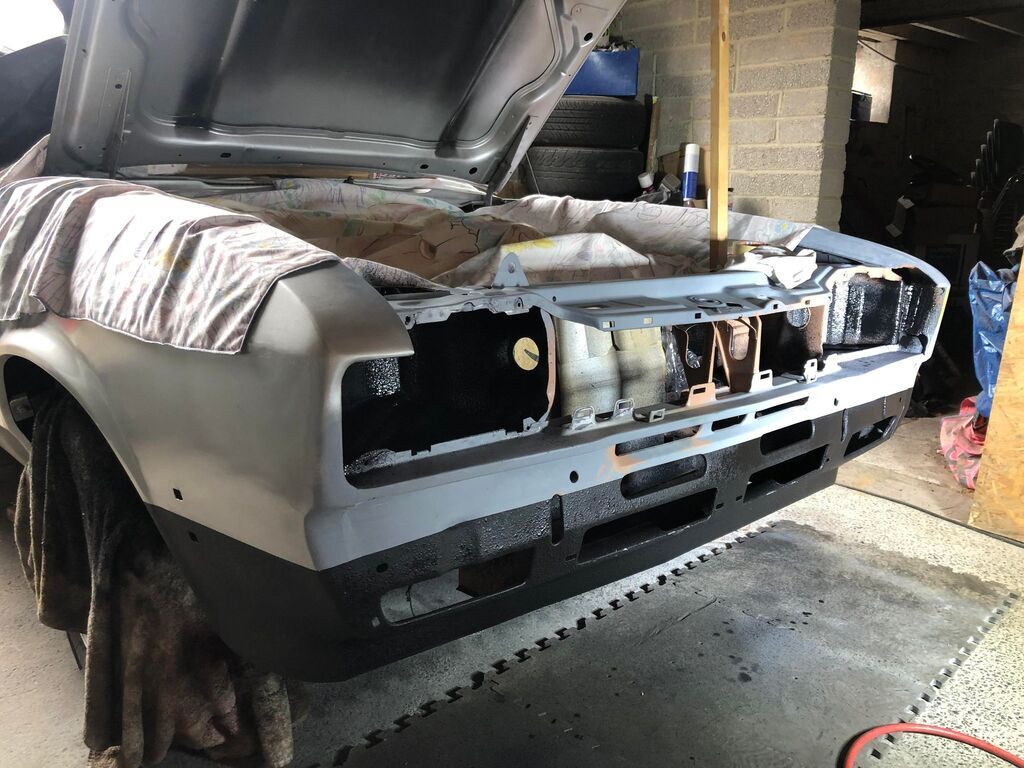
Now to repair the ditch-damage, I was also going to be needing a front valence, a headlight bucket and bonnet, so I hopped on Magnum panels. Not much luck there, so I moved onto ex-pressed panels and found you need to sell one of your vital organs to buy anything. So when one day I heard about a company called Steadspeed Restorations through one of the groups, I had to ask! They make all of the panels by hand, and did me a good deal on all of the bits I was needing bar the bonnet. I then struck some luck and Martin from Capri Gear was kind enough to chop up an old bonnet for the exact piece I needed!
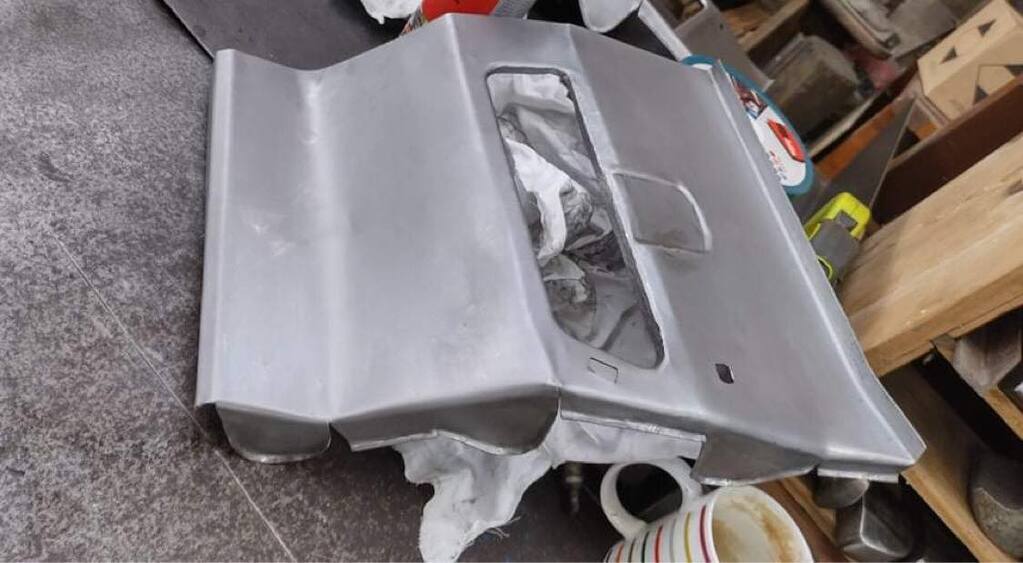
The damaged sections were chopped off, and the new panels were offered up, trimmed, offered up again etc etc...
With (a lot) of help from my Dad, the panels were welded on, primed, stonechipped and painted silver, and for the first time in about 7/8 months I could see the car with the front end in one piece!
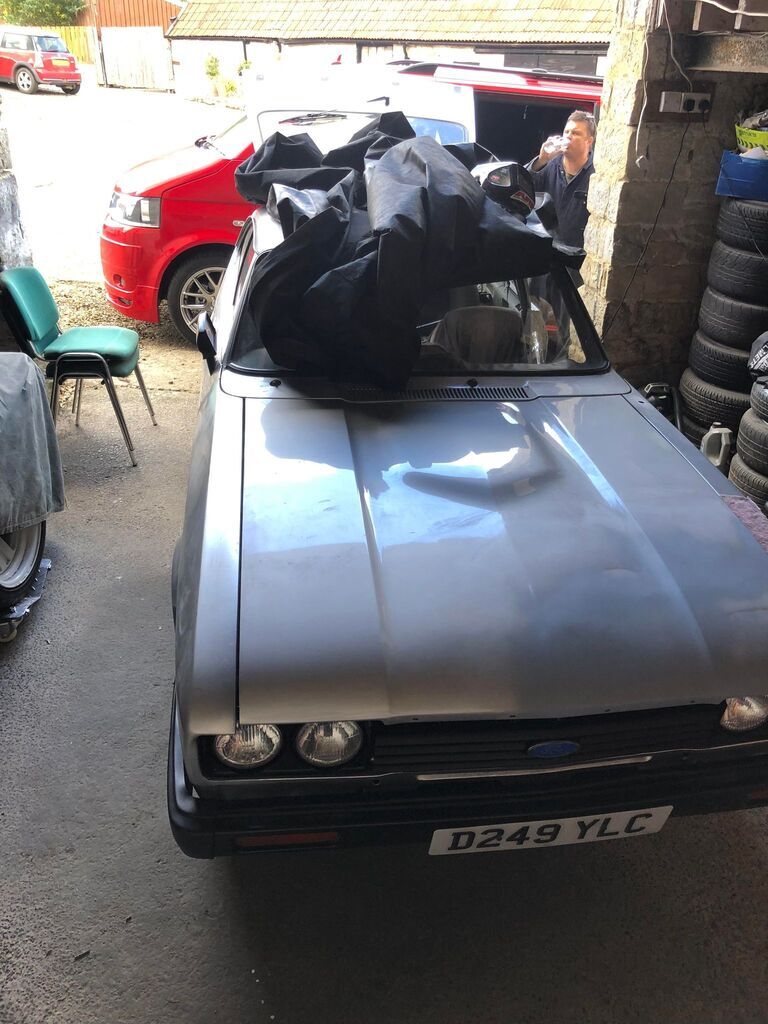
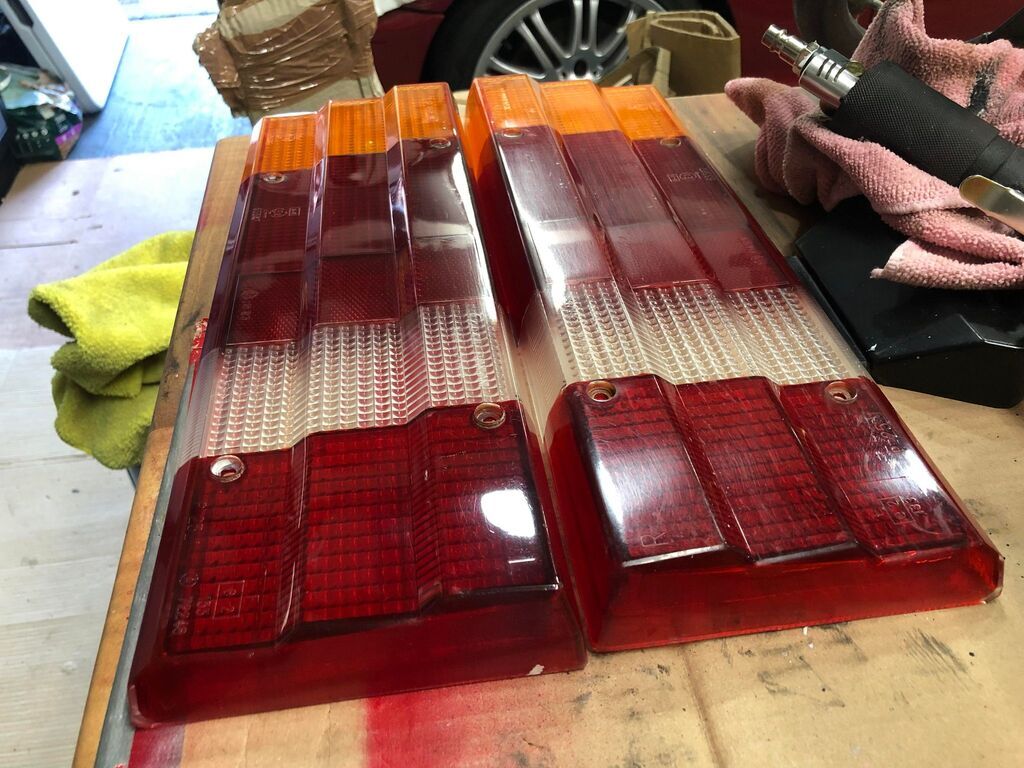
Whilst the bodywork was going on, the front and rear lights were removed and restored, which started with cleaning the rears and removing the lenses.
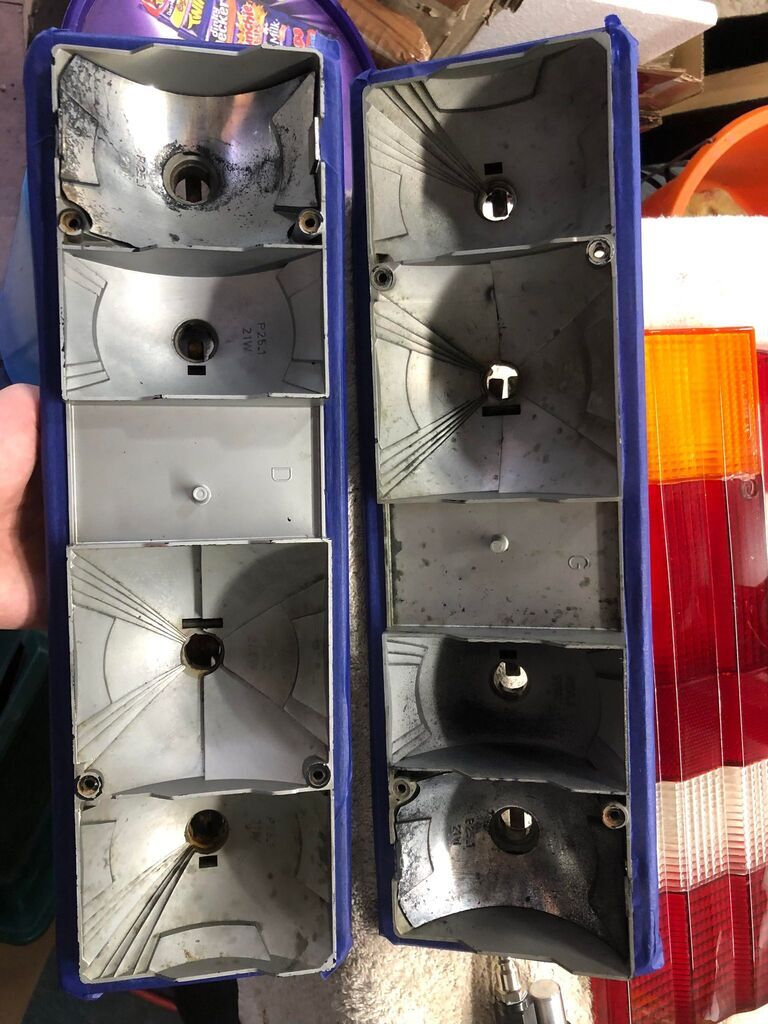
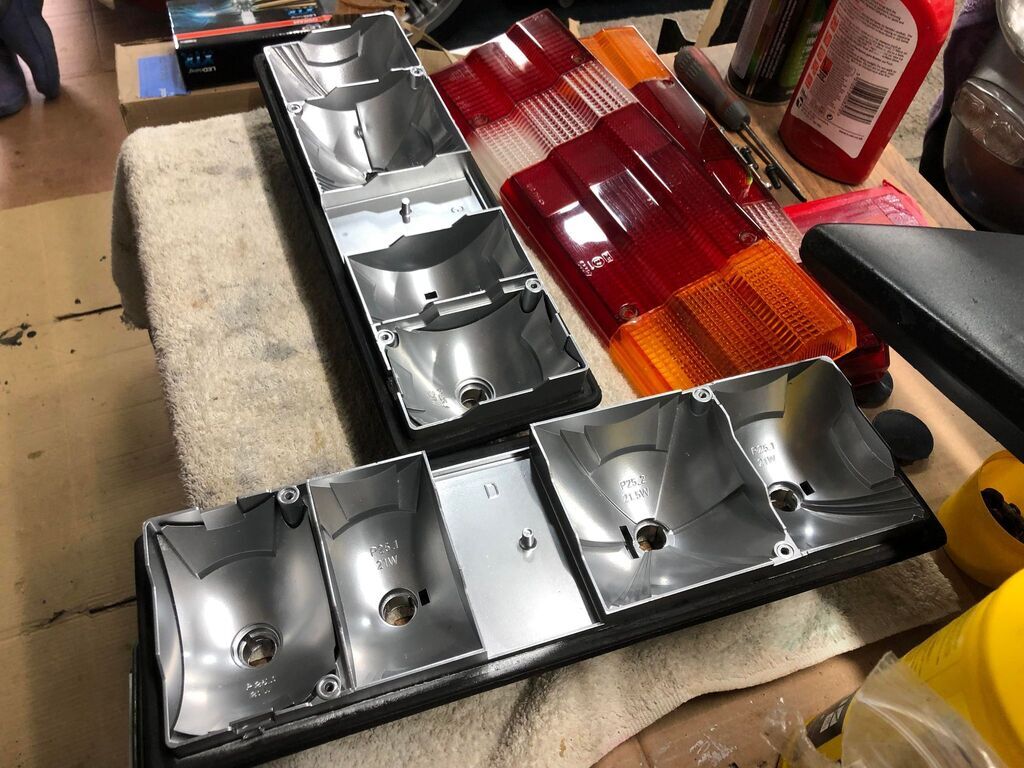
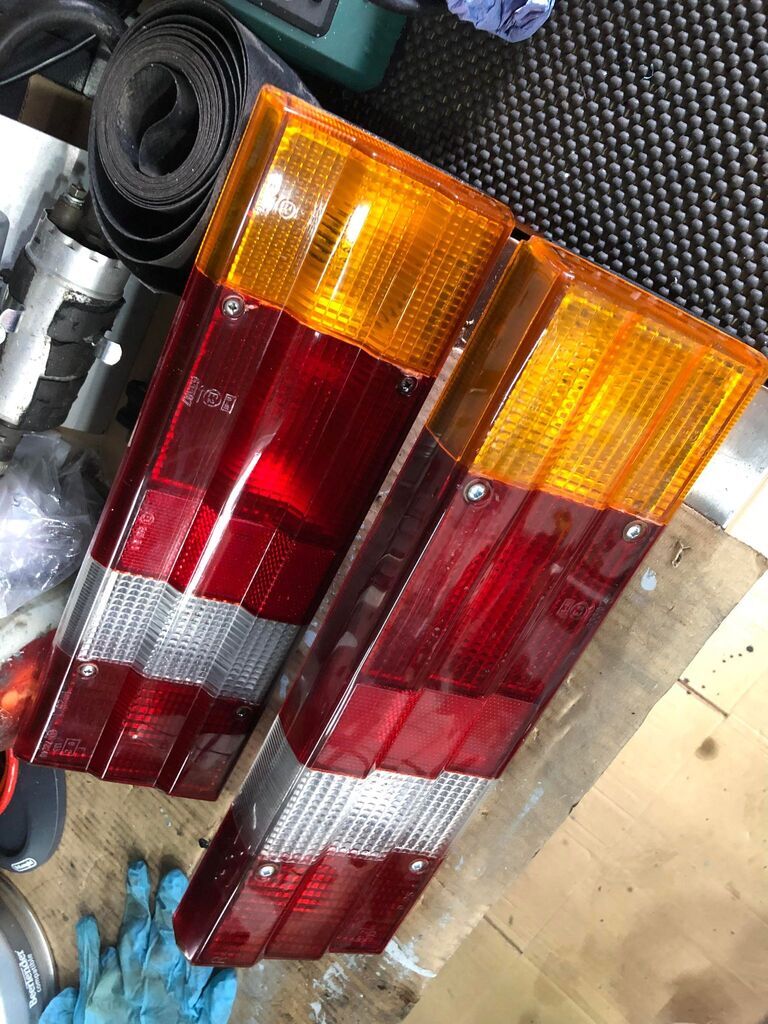
The lenses was wet sanded, compound and polished back to a nice shine and the insides were repainted chrome and looked 110% better for it. New stainless screws and the gasket cleaned and softened and these were ready to go back on after the car is painted.
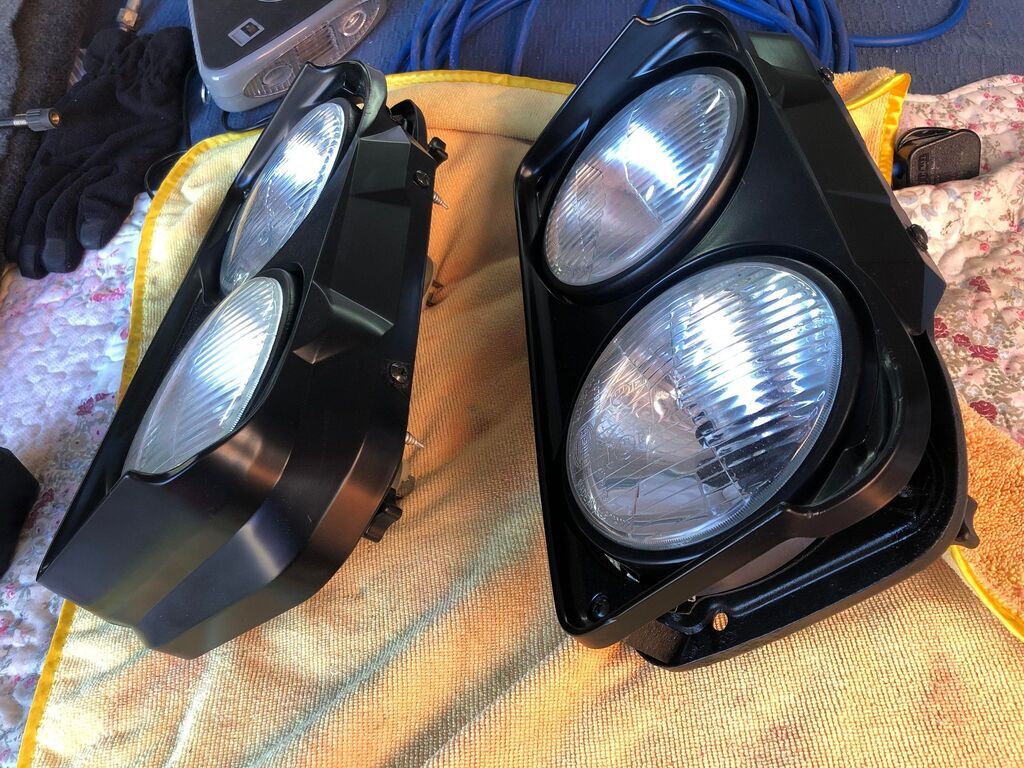
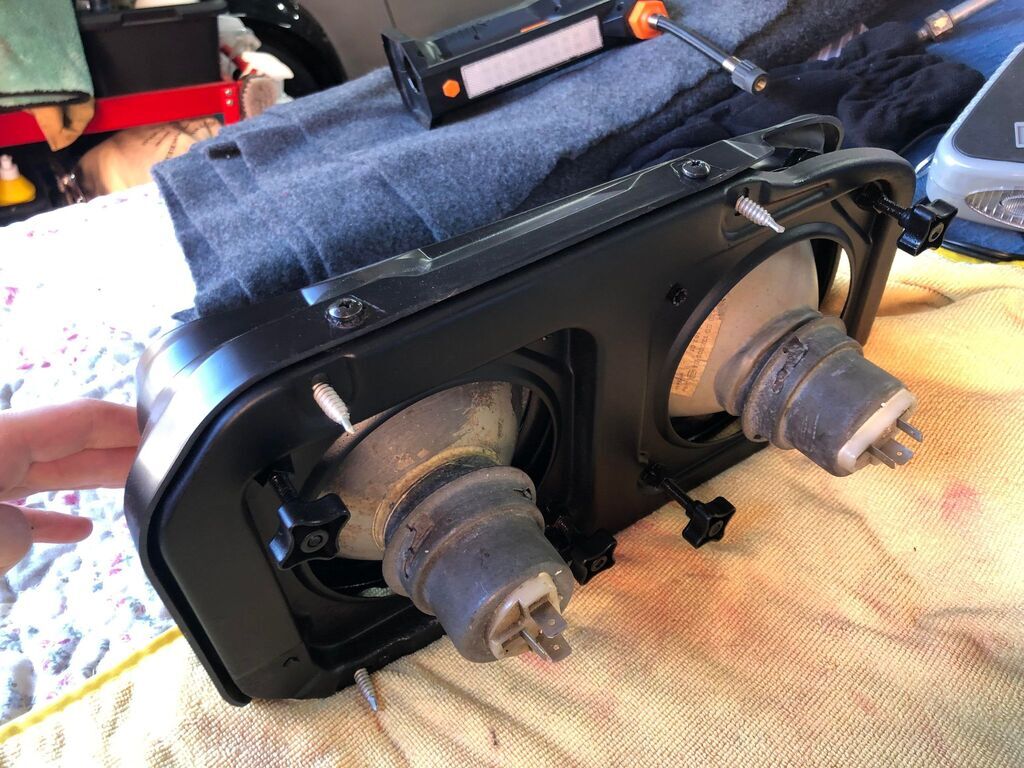
The fronts had a similar treatment, they were fully disassembled, all screws and threads greased, backing plates and rings painted, glass polished and cleaned, new bulbs and back together!
That's it for this one, next time I'll be picking up some of the rarer bits I needed to find and a few sets of wheels...
|
| |
MK3 Capri 2.0, Starion Widebody, Midget 16v, E46 Coupe, E46 Touring 330
|
|
ToolsnTrack
Posted a lot
   Homebrew Raconteur
Posts: 4,128
Club RR Member Number: 134
|
|
|
|
|
Coming together nicely!
|
| |
|
|
|
|
|
|
|
|
Thank you! Progress has slowed now for the winter but it'll get there
|
| |
MK3 Capri 2.0, Starion Widebody, Midget 16v, E46 Coupe, E46 Touring 330
|
|
eurogranada
Europe
To tinker or not to tinker, that is the question...
Posts: 2,556
|
|
|
|
|
Looks good. Well done.
I'm curious to see how much better you are going to get the interior and which route you take to get there!
|
| |
|
|
|
|
|
|
|
Update 7. More Parts Collecting
So as with any project car, the more parts the better. This meant collecting a whole bunch of extra bits. So after talking to a friend whilst we were over in Le Mans for the classic 24 hour, I agreed on coming over to buy some bits. I had to go around my car and try to make a list of all of the bits I needed, which is harder than it sounds, I always miss multiple things!
Once there, I was greeted with this beautiful sight, his Tickford Capri.
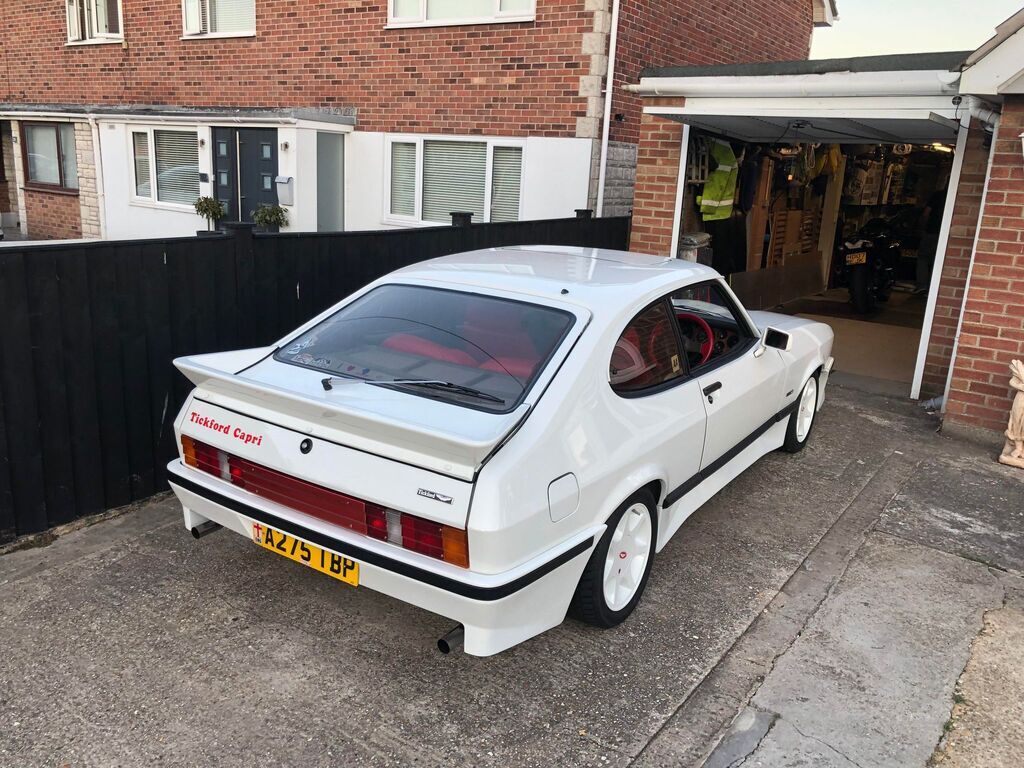
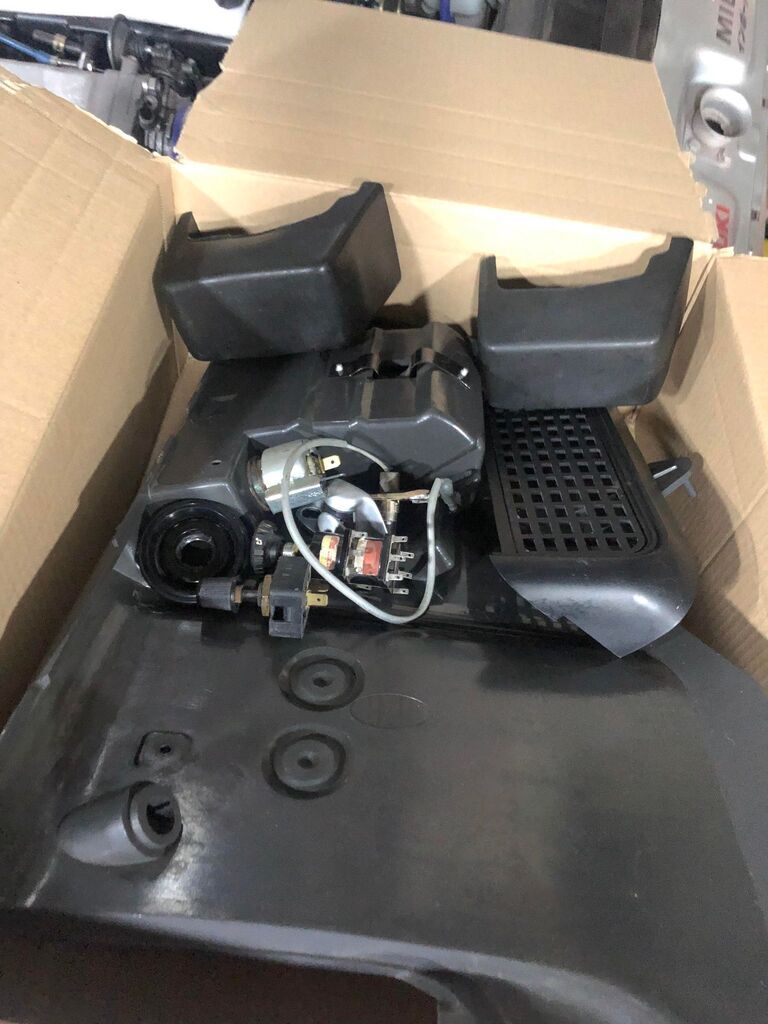
He had everything I needed especially all the little fiddly bits, like the speaker fader knob, an un-cracked ashtray panel, the dash light dimmer, over-riders, plate lights and a few other trims pieces.
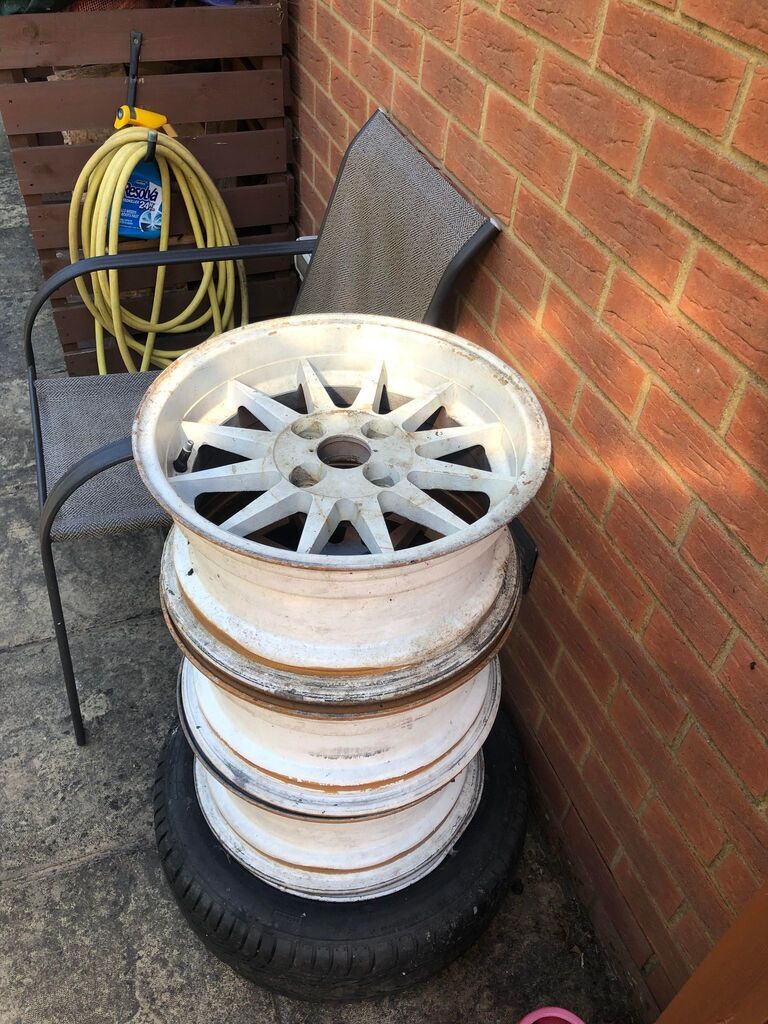
I also got a set of 2.8i Special wheels
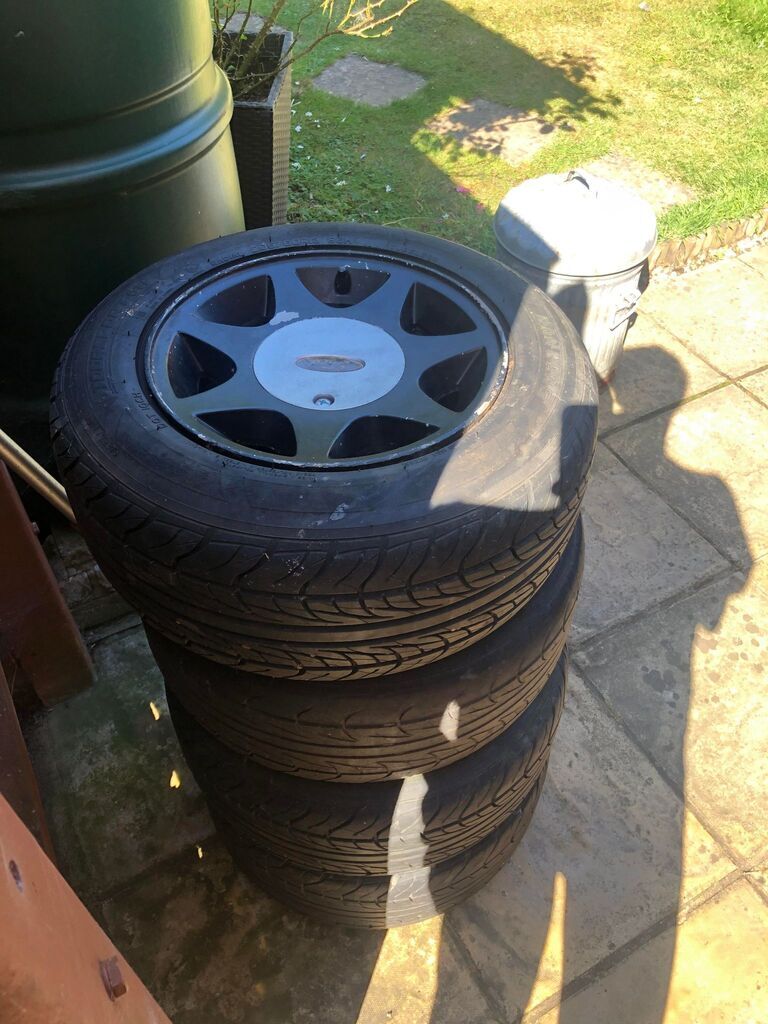
And a set of these, they're 15" and believe they are MIM alloys? They look a bit like Quattro wheels haha
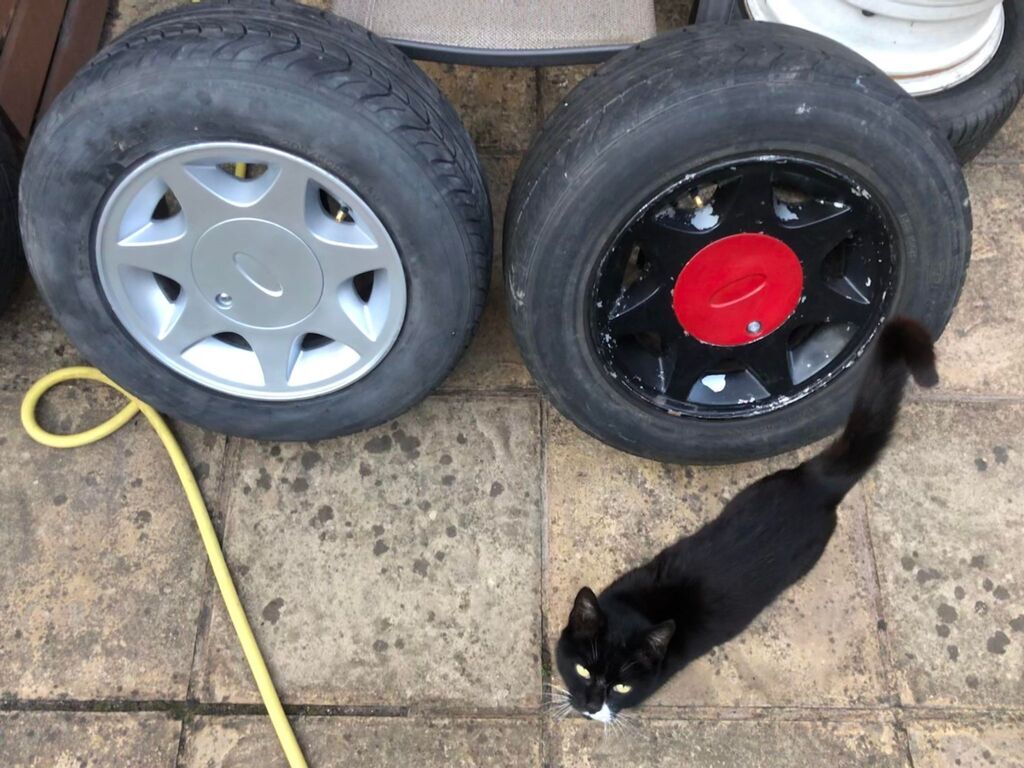
But for now, until I get a set of the 7.5j RS4 Alloys from JBW, the Special alloys will be going on. But they definitely can't go on like that. So the first thing we did the day after getting them was to sand them down and try some hyper silver paint on them, and that made a huge difference (the cat didn't help)
The rest of them were sanded down, sprayed up with a few coats of silver, followed up with a number of coats of lacquer, and we have the following result.
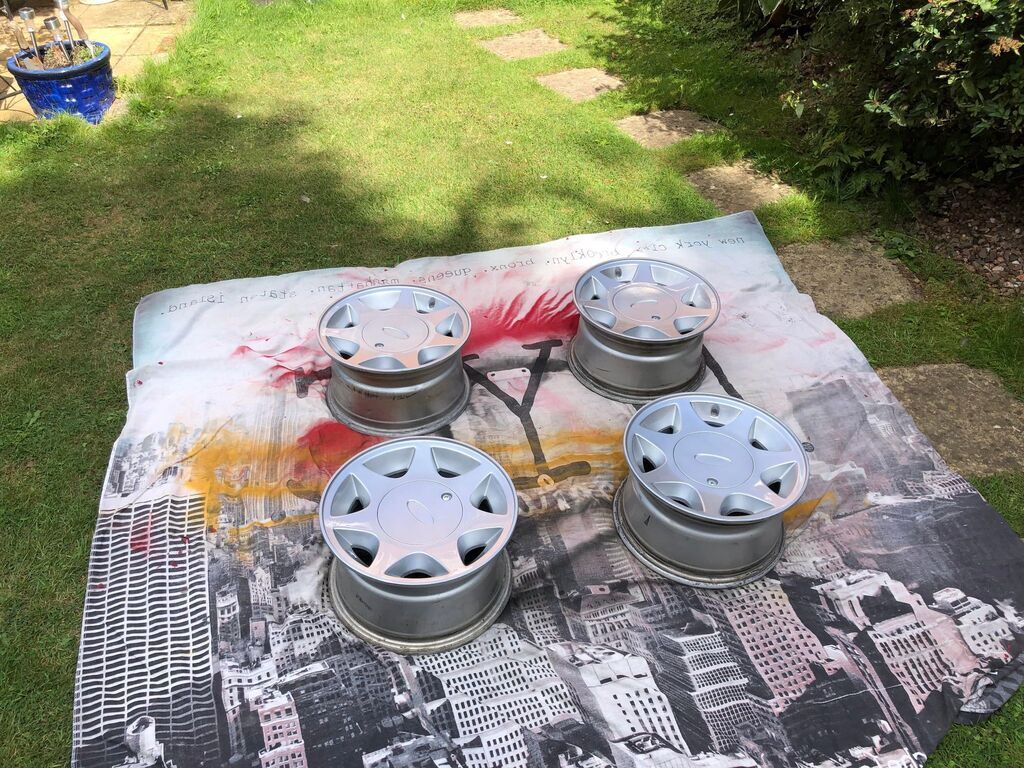 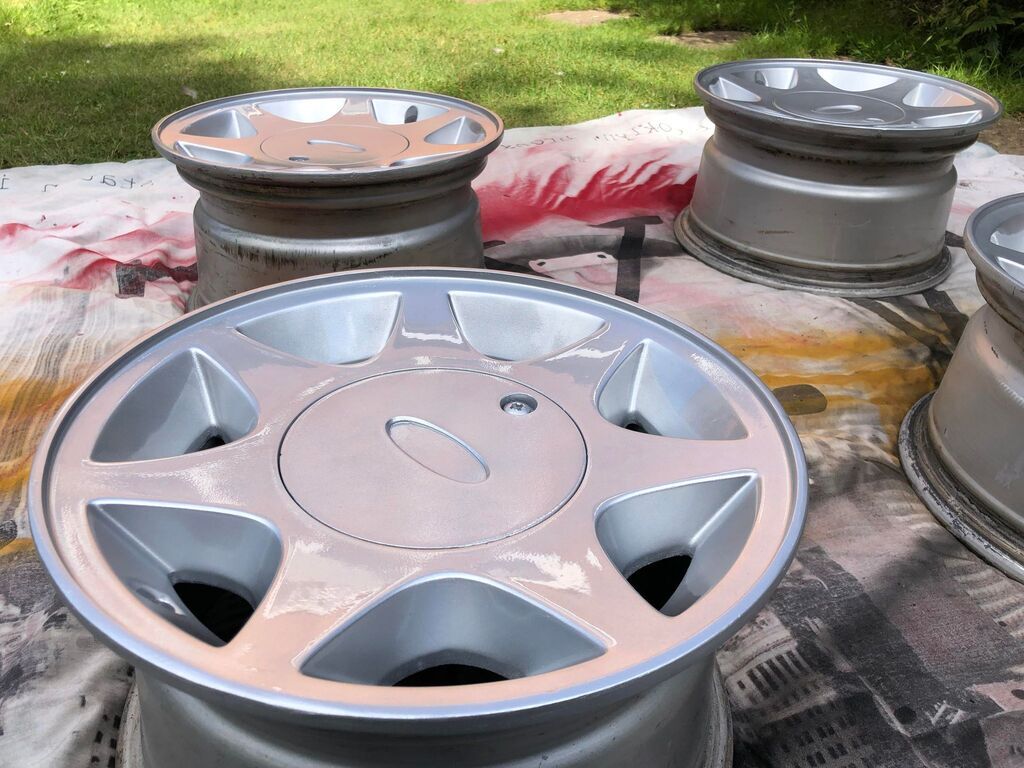
They needed a slight flat and polish after the paint had hardened, but they didn't look bad at all. They just need new badges and tyres!
Cheers all
|
| |
MK3 Capri 2.0, Starion Widebody, Midget 16v, E46 Coupe, E46 Touring 330
|
|
|
|
|
|
|
|
I have to say, that Tickford is truly a thing of beauty and, in my opinion, the nicest looking of all the body kits that were available for the Mk3 Capri,
Liking the work / finish on the 2.8I Special wheels,
Nigel
|
| |
BMW E39 525i Sport
BMW E46 320d Sport Touring (now sold on.)
BMW E30 325 Touring (now sold on.)
BMW E30 320 Cabriolet (Project car - currently for sale.)
|
|
|
|
|
|
|
Update 8. Electrical Woes
It was time to go through some of the electrics, as problems were evident as soon as I got the car. The wipers worked but the washers didn't, the horn didn't work and all lights worked except the clocks.
So I had a look at the horn first, some interesting wires for the earth tells me someone has been here before, so they were removed, who uses red wires for an earth? The connector on the horn was corroded and all it took was a bit of 60 grit to get it working again!
Next were the washers, these work by having constant voltage, and then the column stalk earths it out when pressed (if I remember correctly, this was 6 months ago!) and we found using a multi-meter that the stalk was earthing no problem, it was that there was no voltage. So with the use of the wiring diagrams on A400 MOD, we found the correct number fuse for the washers, only to find they were wired into the wrong location.
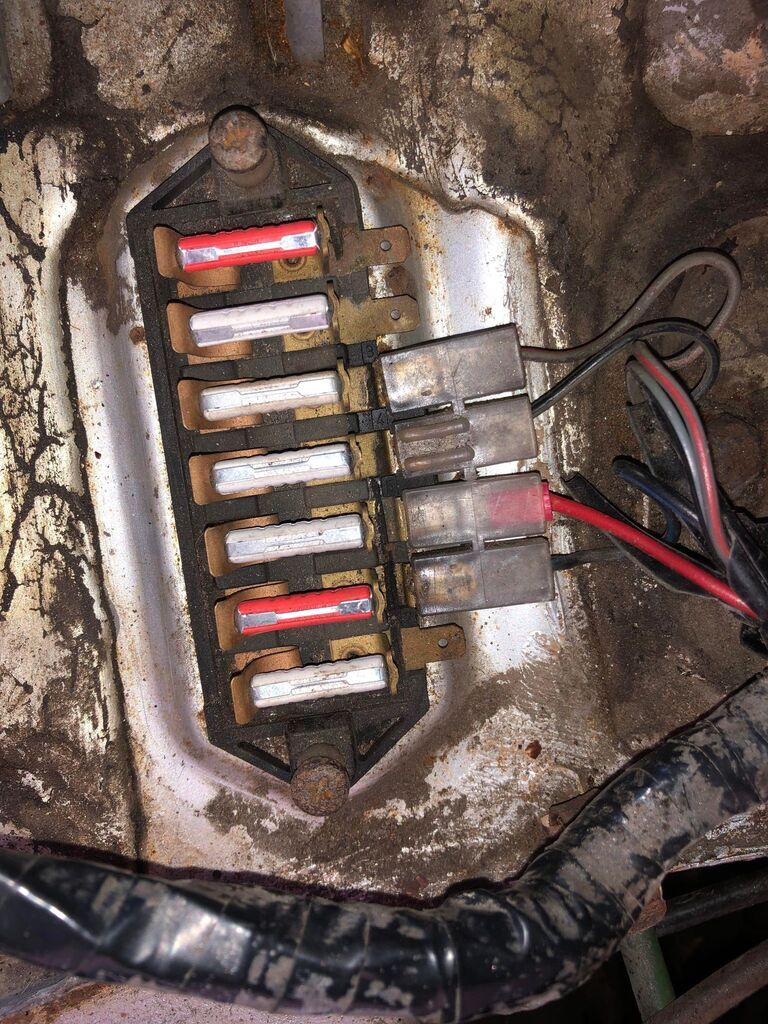
Not only that, but when the terminal that it was connected to was pushed down, the blower came on! So it was best to take the fuse block out and check all connections, and it's a good job it was...
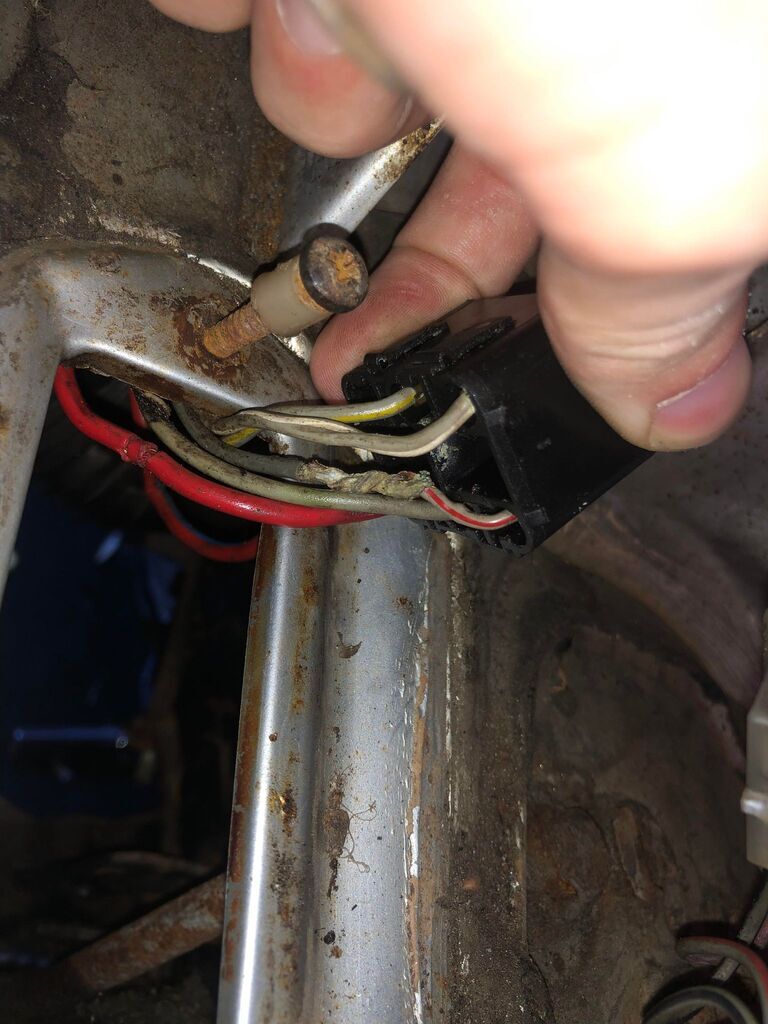
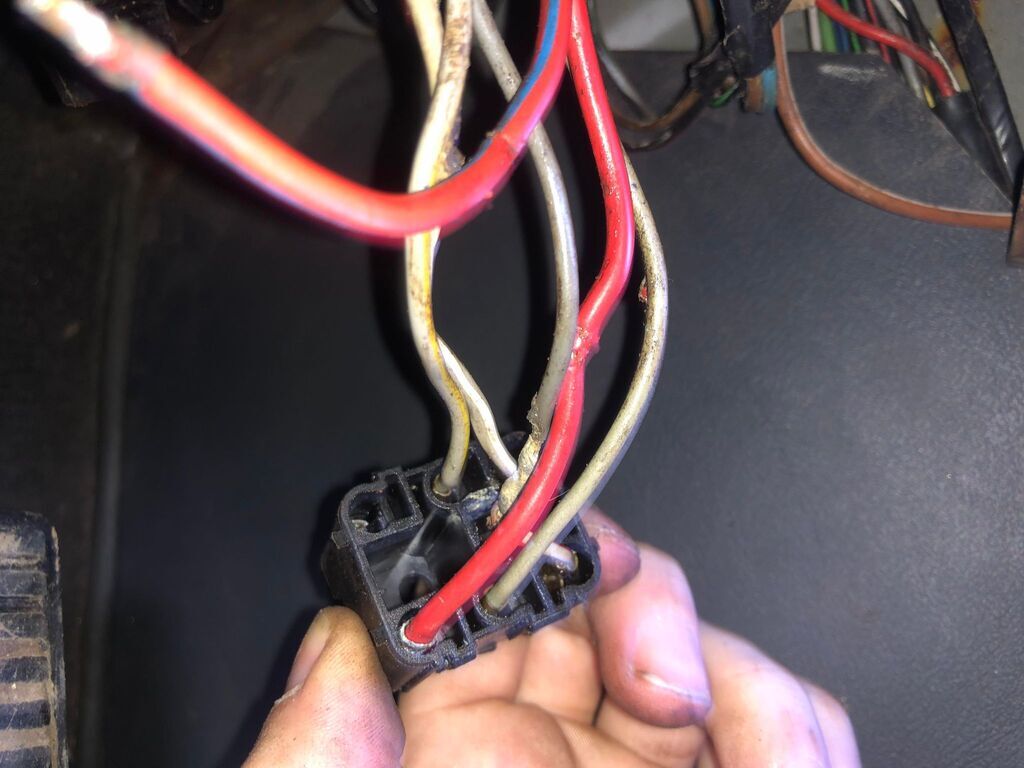
The wire that feeds the main battery run and the washers had fallen out of the plug and was swinging away behind the dashboard, and god knows what was going on with some of the others...
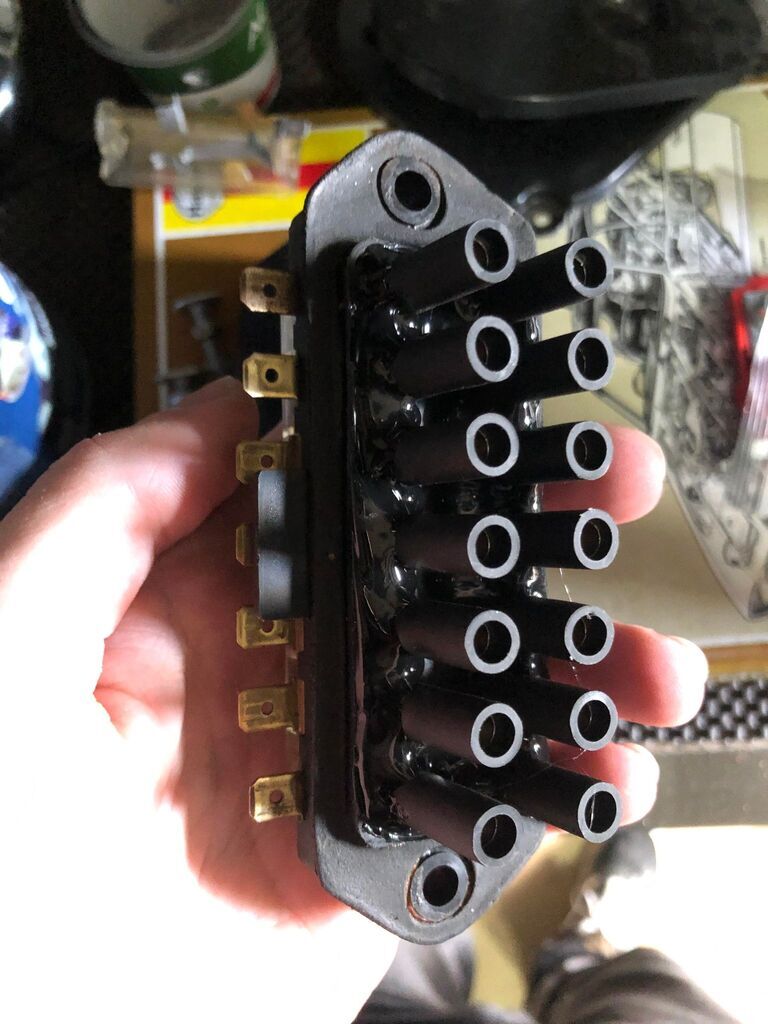
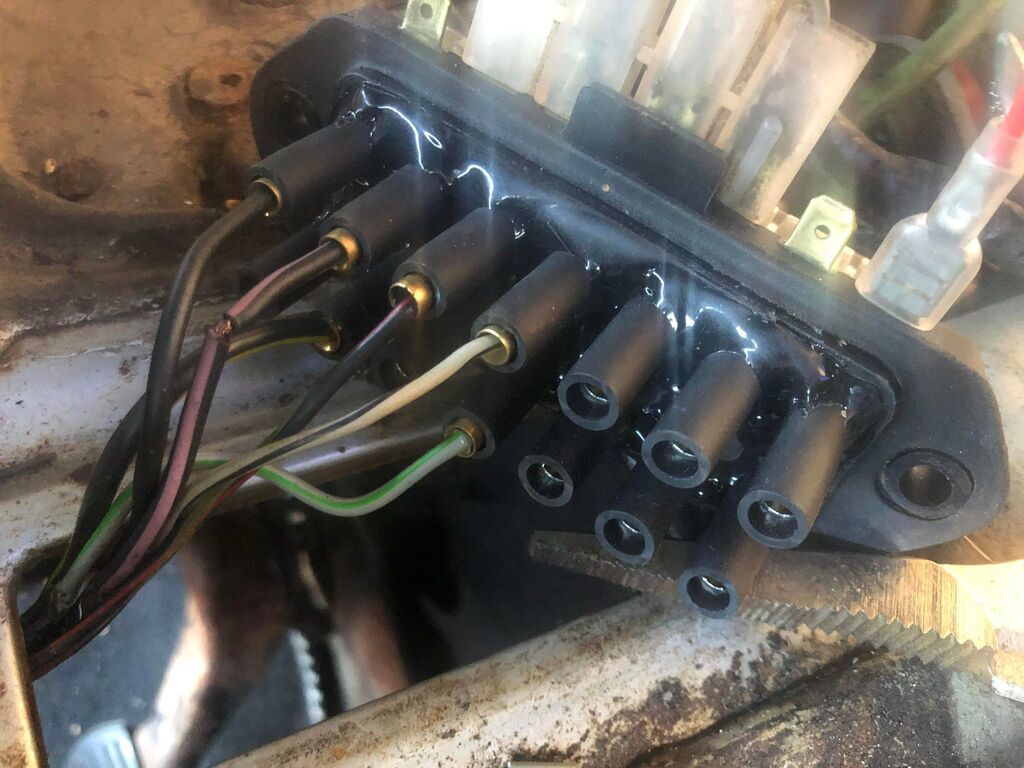
So to rectify all of this, the connectors and the first inch or two of the wires were chopped off, and some brass bullet terminals were ordered. They were then crimped on ready to go into the fuse block which has been disassembled, cleaned in white vinegar, greased and had the bullet connectors pushed onto the bottom side, with silicon to fill the gaps and stop them from moving.
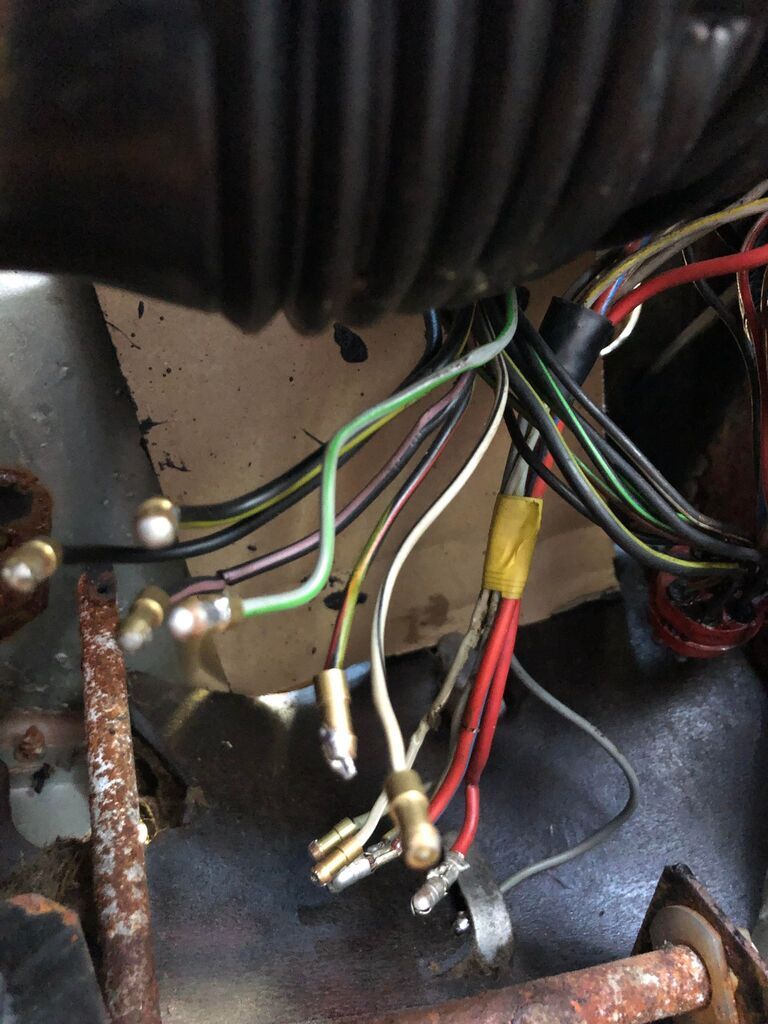
When refitting, it was a case of looking at the extremely helpful images on A400 MOD, to make sure everything was wired in the correct place, screw the fuse-block back down, and refit the spade connectors that had been cleaned and re-wired where needed.
The result was fully working electrics on the car! Which is a relief. I also took apart every connector that could be found on the interior, under the bonnet and in the boot, cleaned it all with scotch-brite and WD40, and refitted with dielectric grease which should mean they will never corrode again. I replaced the old blown bulbs on the back of the gauges with green LEDs but don't have any pictures yet, but they look great and the dimmer still works!
Next time, painting the engine bay...
|
| |
Last Edit: Dec 12, 2022 8:50:34 GMT by xjdmidget
MK3 Capri 2.0, Starion Widebody, Midget 16v, E46 Coupe, E46 Touring 330
|
|
eurogranada
Europe
To tinker or not to tinker, that is the question...
Posts: 2,556
|
|
|
|
|
Did you insulate the bare copper visible on at least the black/violet wire? Tha grey/greenish one doesn't appear to look too great a little further down either...
You wouldn't want a loom fire/burn (ask me how I know).
|
| |
|
|
|
|
|
|
|
Dec 12, 2022 12:25:05 GMT
|
Did you insulate the bare copper visible on at least the black/violet wire? Tha grey/greenish one doesn't appear to look too great a little further down either... You wouldn't want a loom fire/burn (ask me how I know). have done! the picture was just of the trial fit, it because someone who fitted tow bar wiring in the past used scotch-locks, now its all heat-shrunk  |
| |
MK3 Capri 2.0, Starion Widebody, Midget 16v, E46 Coupe, E46 Touring 330
|
|
eurogranada
Europe
To tinker or not to tinker, that is the question...
Posts: 2,556
|
|
Dec 12, 2022 15:02:29 GMT
|
|
Good to have that peace of mind...well done.
|
| |
|
|
|
|
|
Dec 22, 2022 15:28:54 GMT
|
Update 9 - Painting the Engine Bay
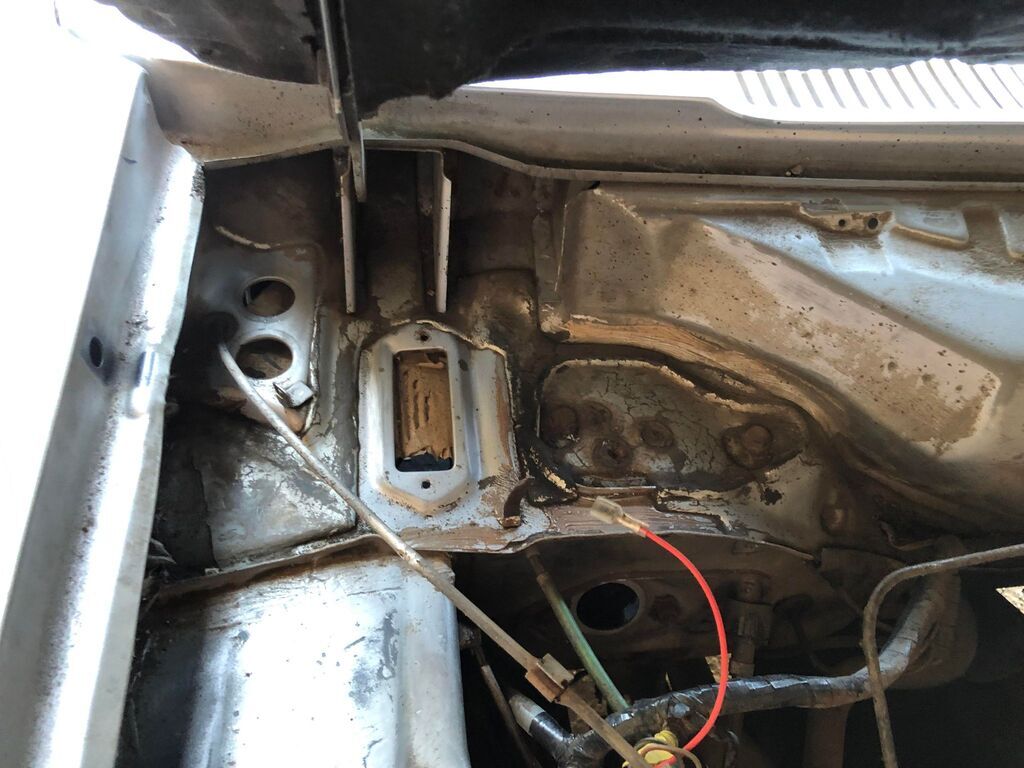
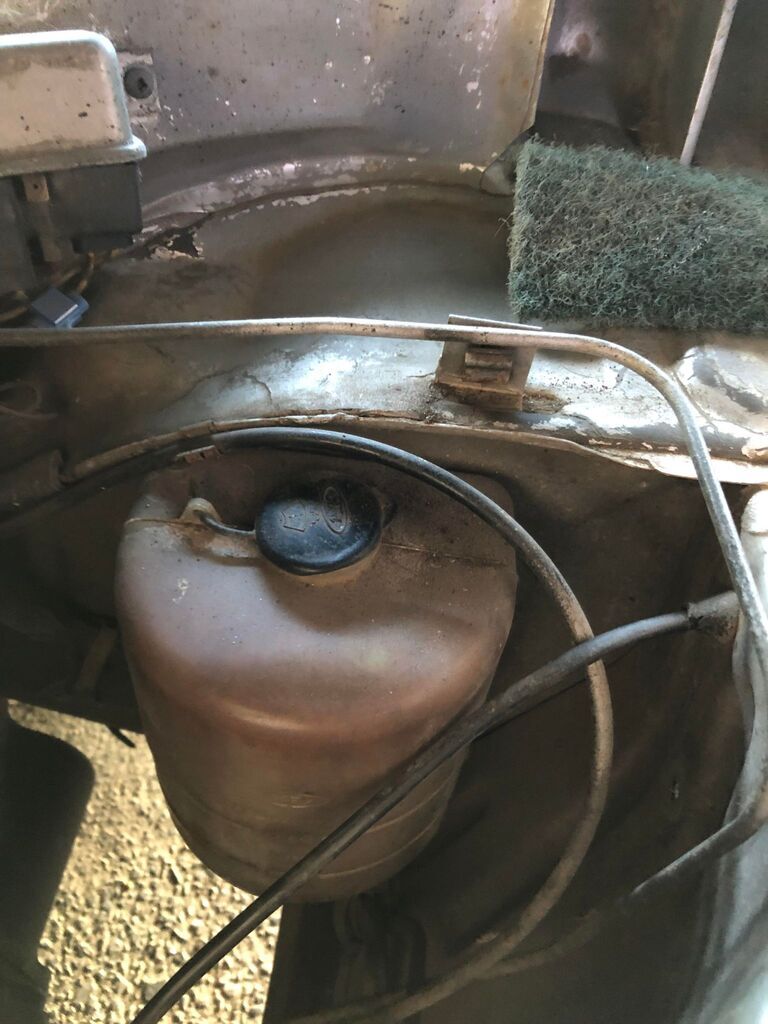
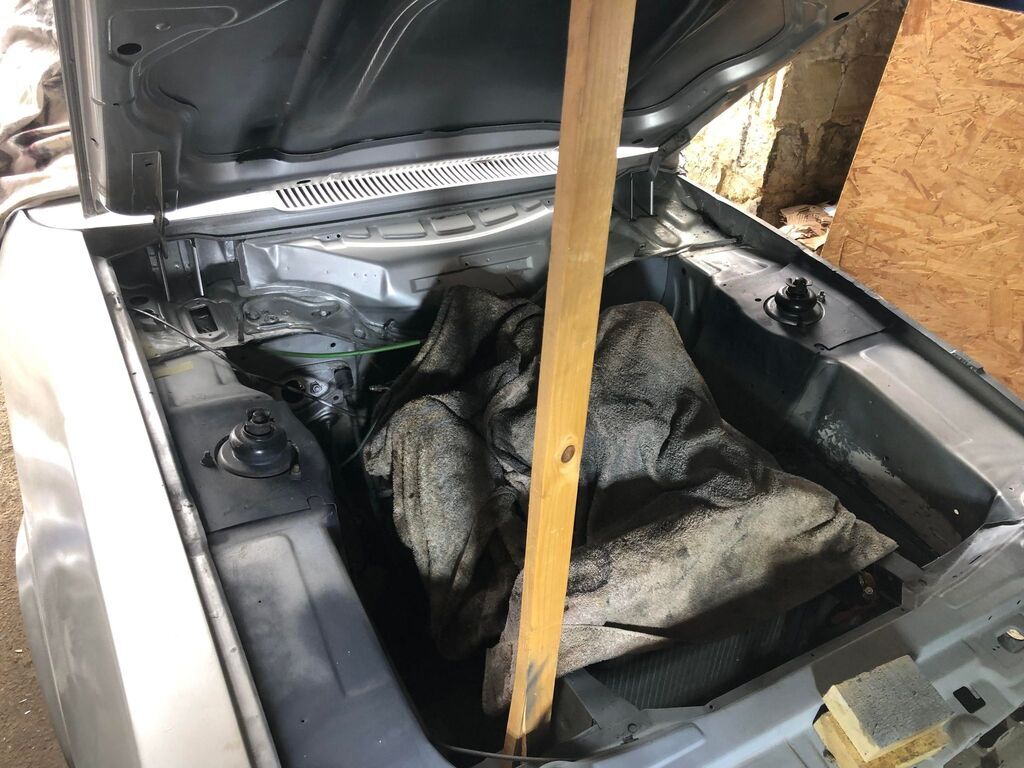
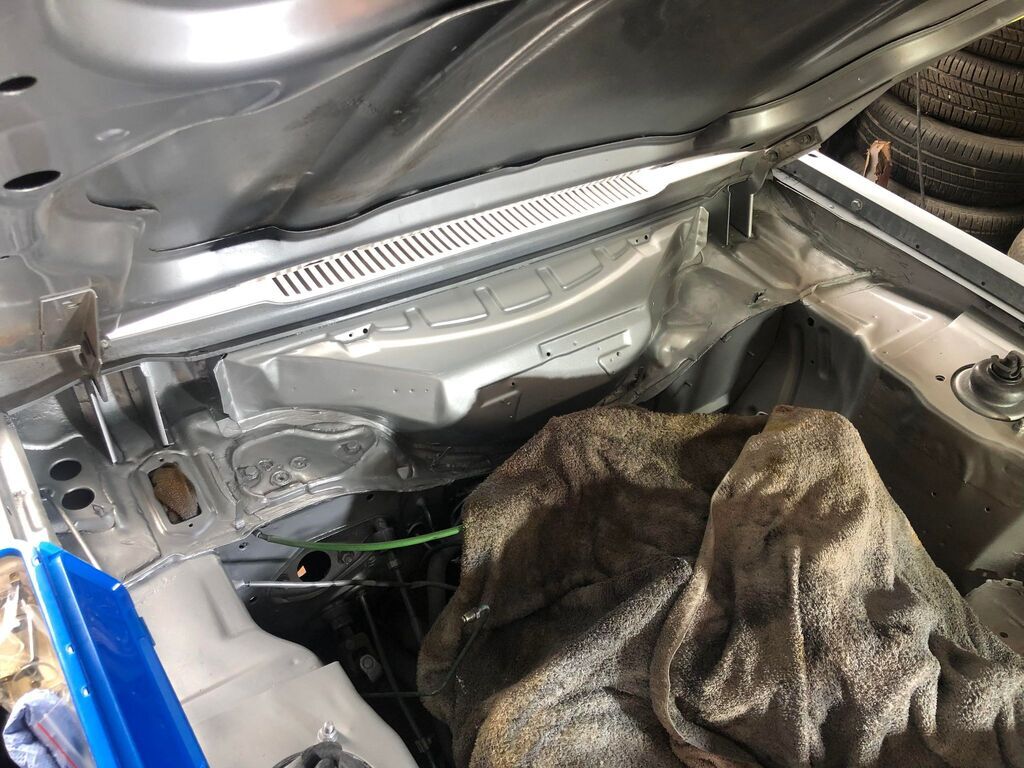
So the engine bay was ready to be painted, and the first job was to remove everything in the way, namely the washer bottle, coolant tank, brake booster, all wiring and plugs, the fusebox, vacuum lines and brake lines. Don't worry, the strut tops will be getting painted black soon! So here it is before stripping.
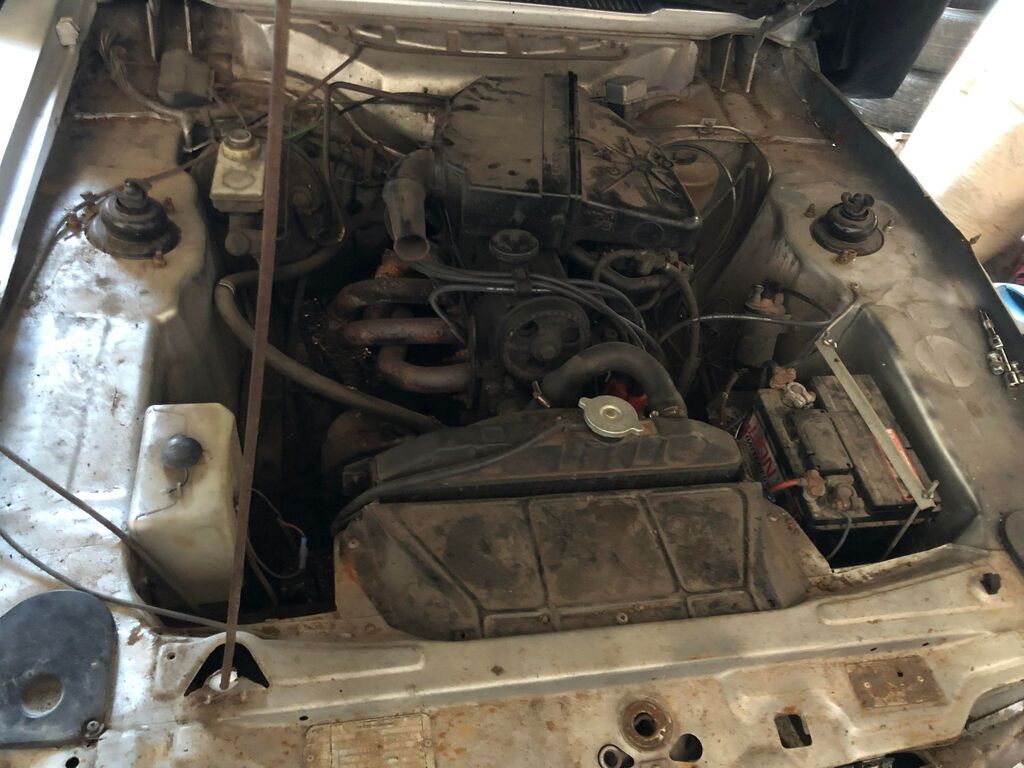
Plugs, booster and fusebox gone
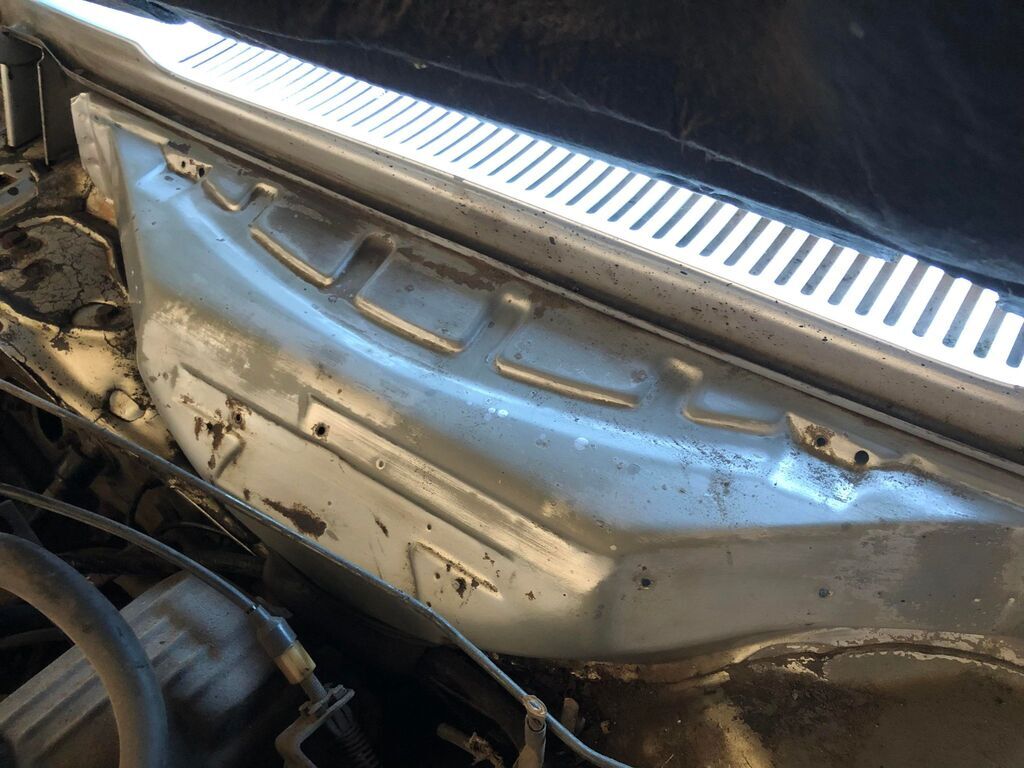
All areas and initially sanded down using different grit scotch brite, resulting in a lot and cut and stabbed fingers due to Ford love of razor sharp clips and tangs 
The bulkhead was then stripped of pipes, relays and wiring and had the same treatment
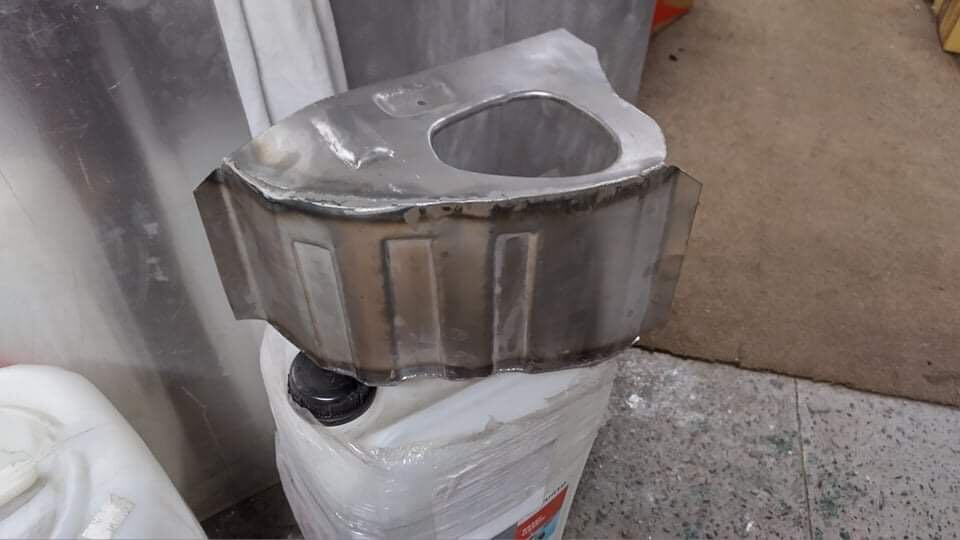
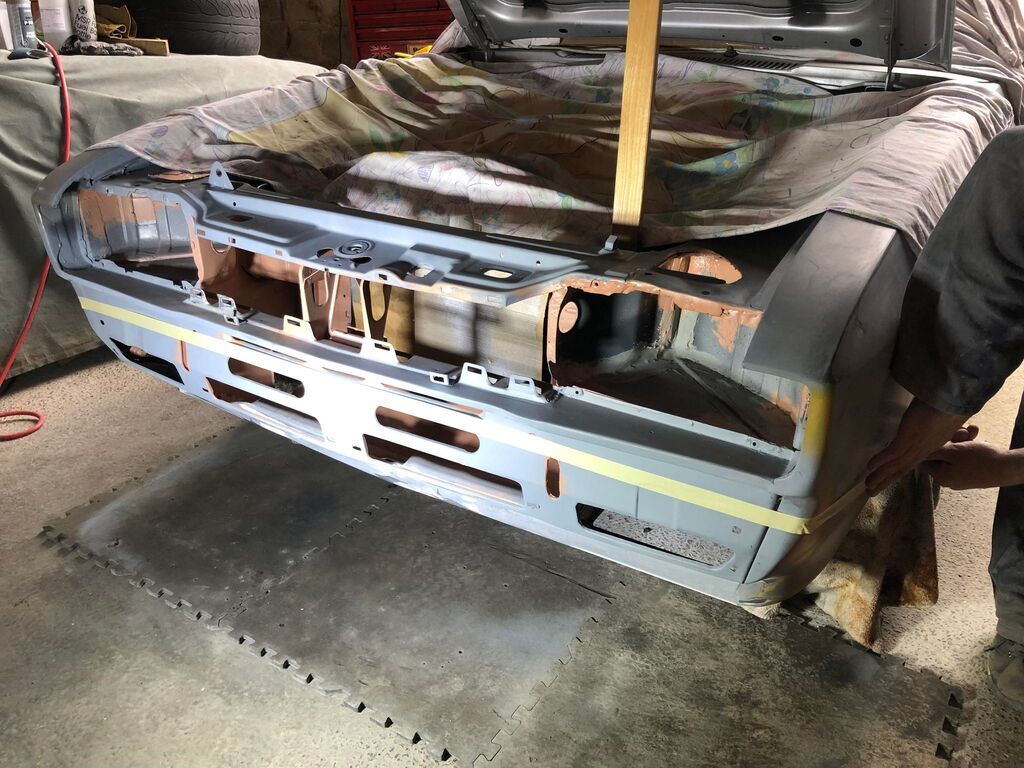
The inner wings were sanded down, the strut reinforcements were welded on, and everything down to the chassis legs was primed and scuffed ready for silver.
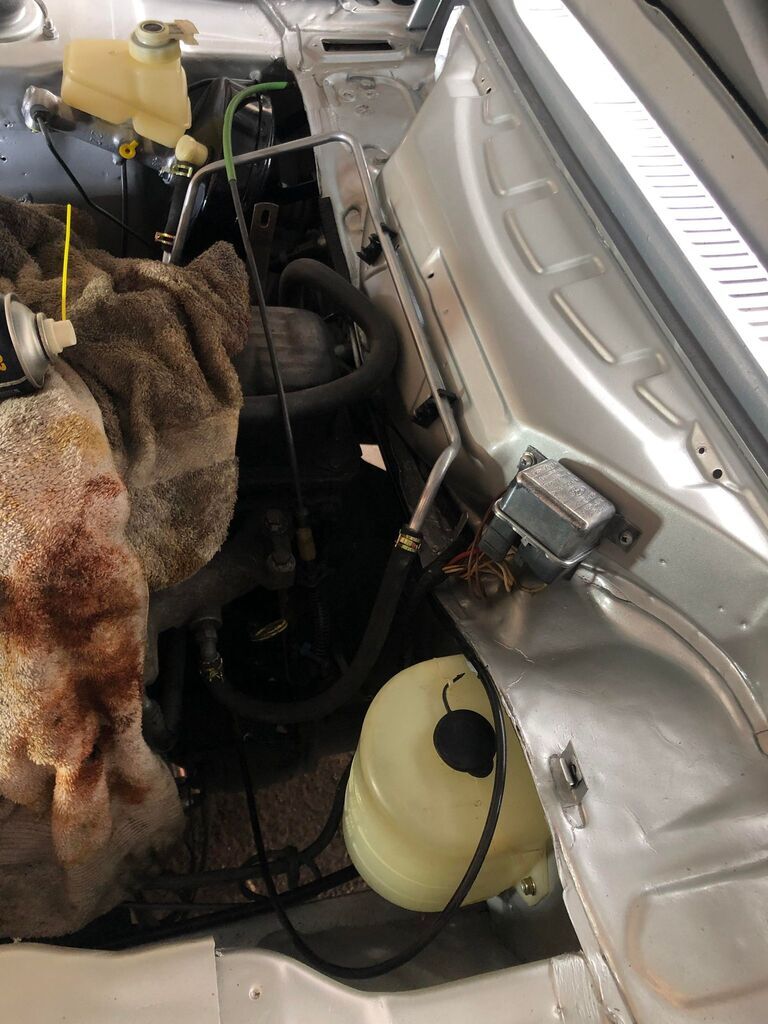
The first coats of Strato Silver were applied and left to dry for a couple of days, and it was good to see the bay in one colour at last! In the meantime, parts were being restored ready to go back on after paint, such as the coolant and washer tanks, the wiring was all cleaned up, headlamp relay polished and new washer hose and clips were ordered.
After a couple of coats of Silver, the whole engine bay was given several coats of clear lacquer, which despite not yet being polished, looked fantastic, but has been left for a longtime to harden off before it gets polished.
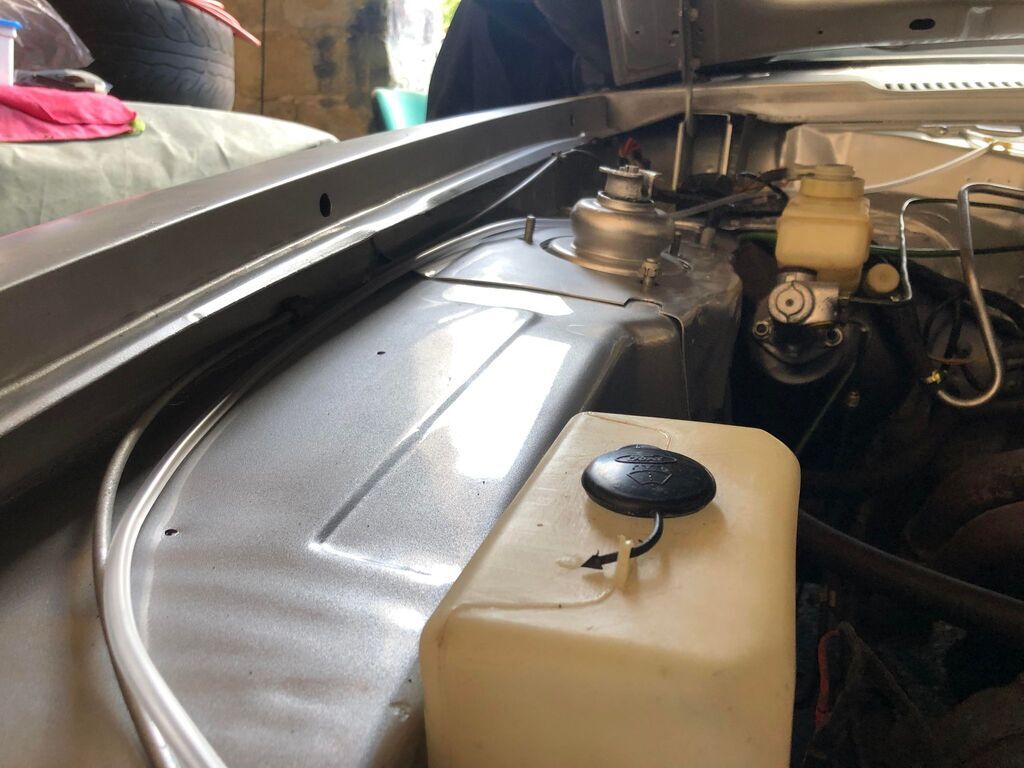
The new brake lines were added painted in the OEM green, and the engine bay was done! Well for now anyway, there's a few things to do with the engine, including paint, wrap and filters...
But that's it for now, hope everyone has a good Christmas and New Years, and cheers for reading!  |
| |
Last Edit: Dec 22, 2022 15:34:57 GMT by xjdmidget
MK3 Capri 2.0, Starion Widebody, Midget 16v, E46 Coupe, E46 Touring 330
|
|
|
|
|
|
|
Update 12. Boot and Pedals
The next job after the engine bay was to tidy up the boot and the interior, which was needed anyway as under the boot-flooring was a biohazard. It was full of everything from fuses to money.
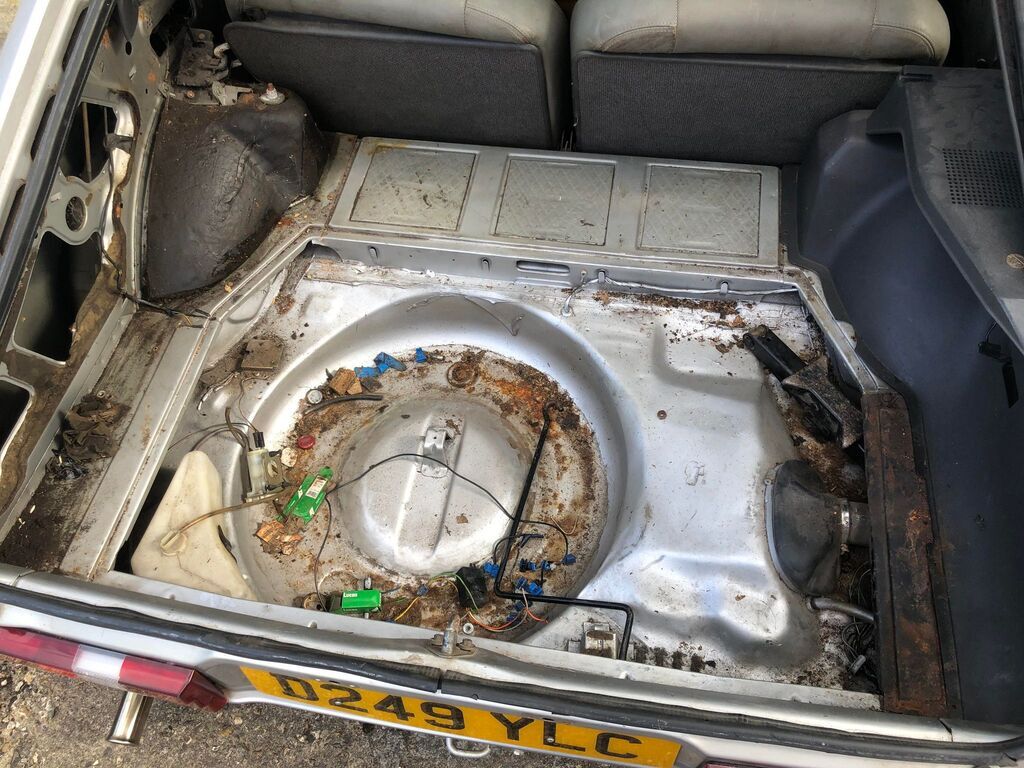 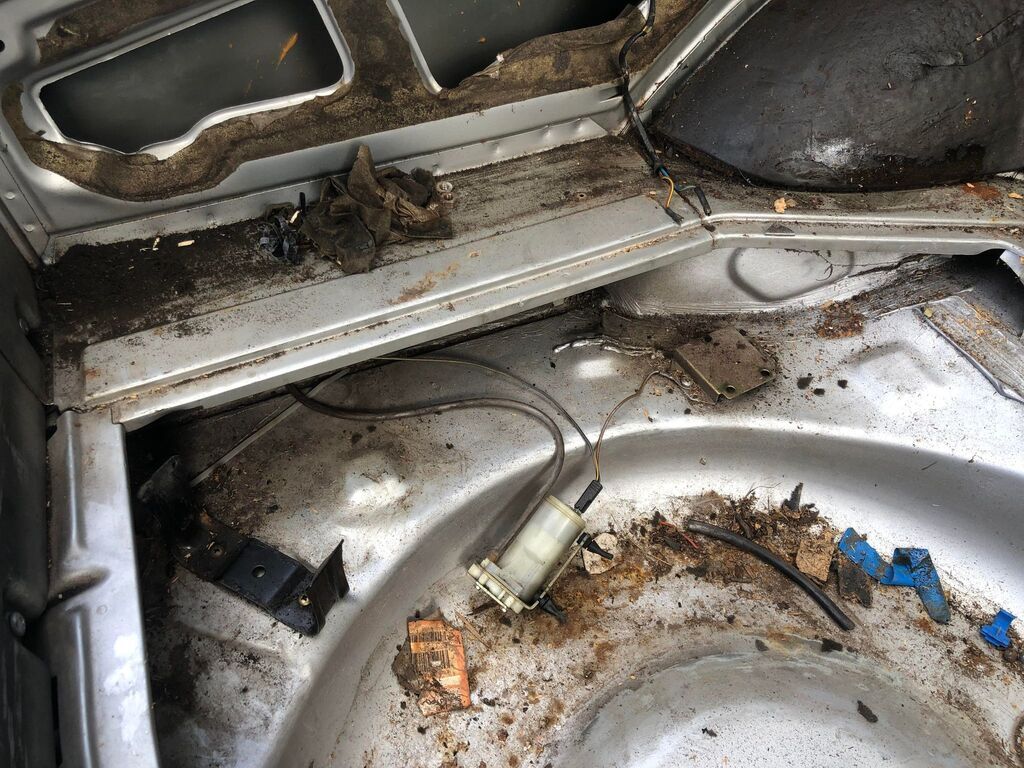
The washer bottle, wiper motor and pipes were removed, the tow bar/caravan wiring was taken out, the Rover 214 jack and anything that could be taken off came out. The drain bungs were also taken out as they looked a little sorry for themselves as there had clearly been water sitting in there for a bit of time.
Any surface rust was ground back to bare metal and treated with the trusty rust converter.
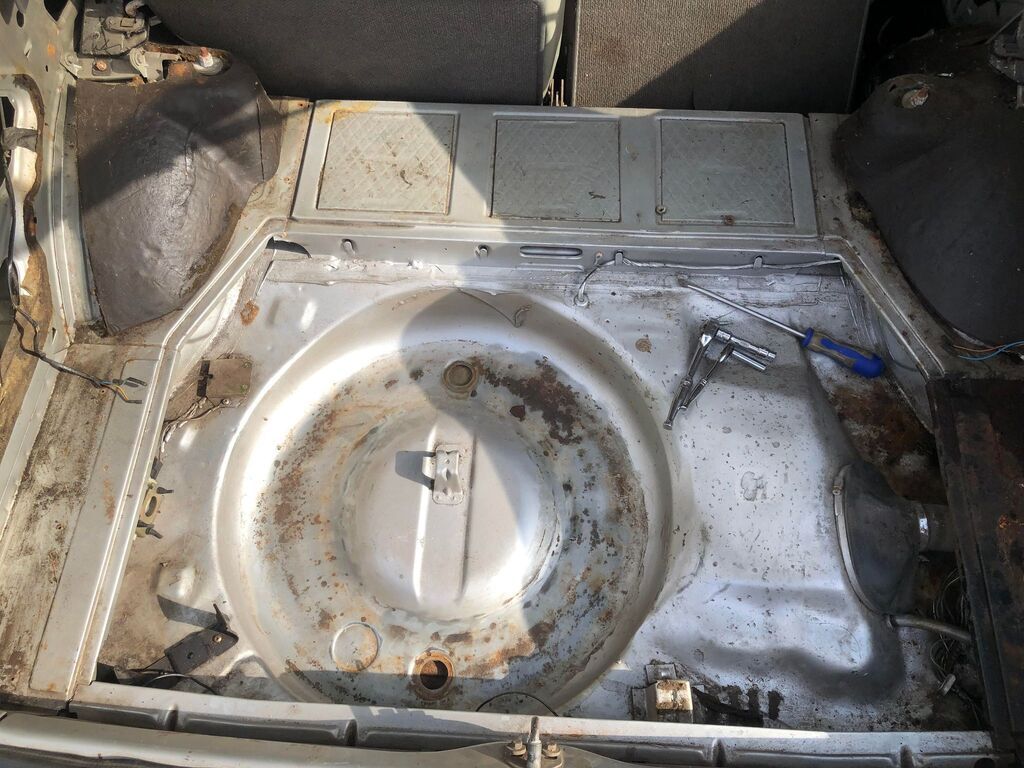
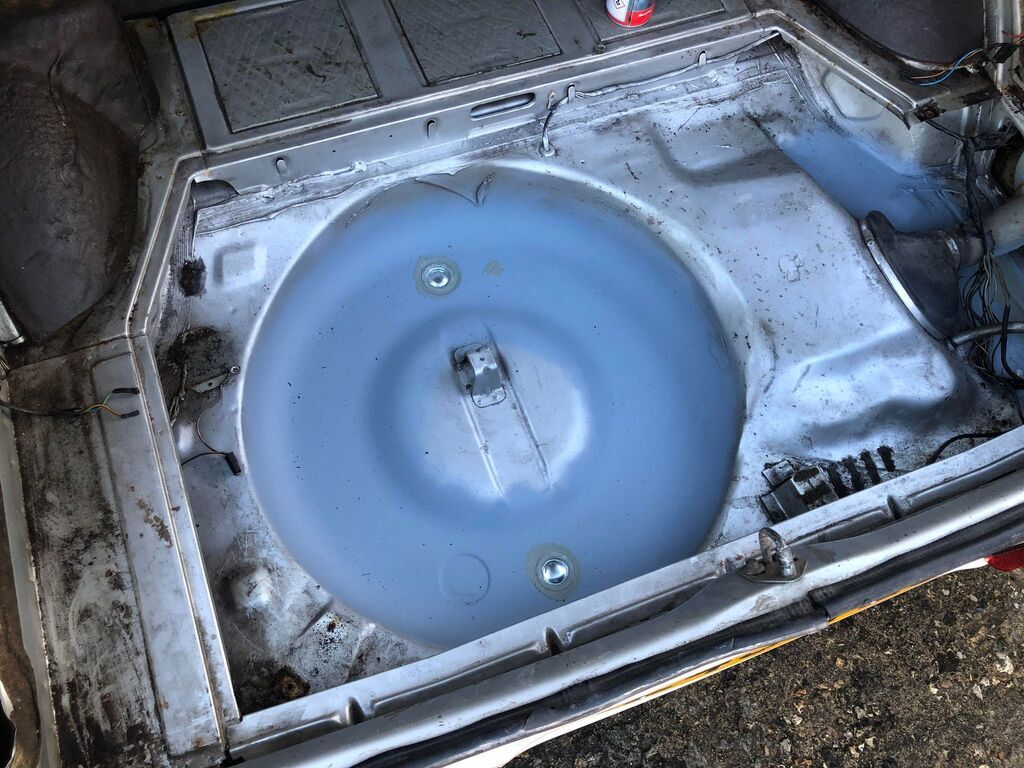
Next was to epoxy prime the ground bits of the boot, which once dried, the entirety of the floor was degreased and keyed up with scotch brite ready to be treated to a bit of silver. The new bungs were also seam sealed into position.
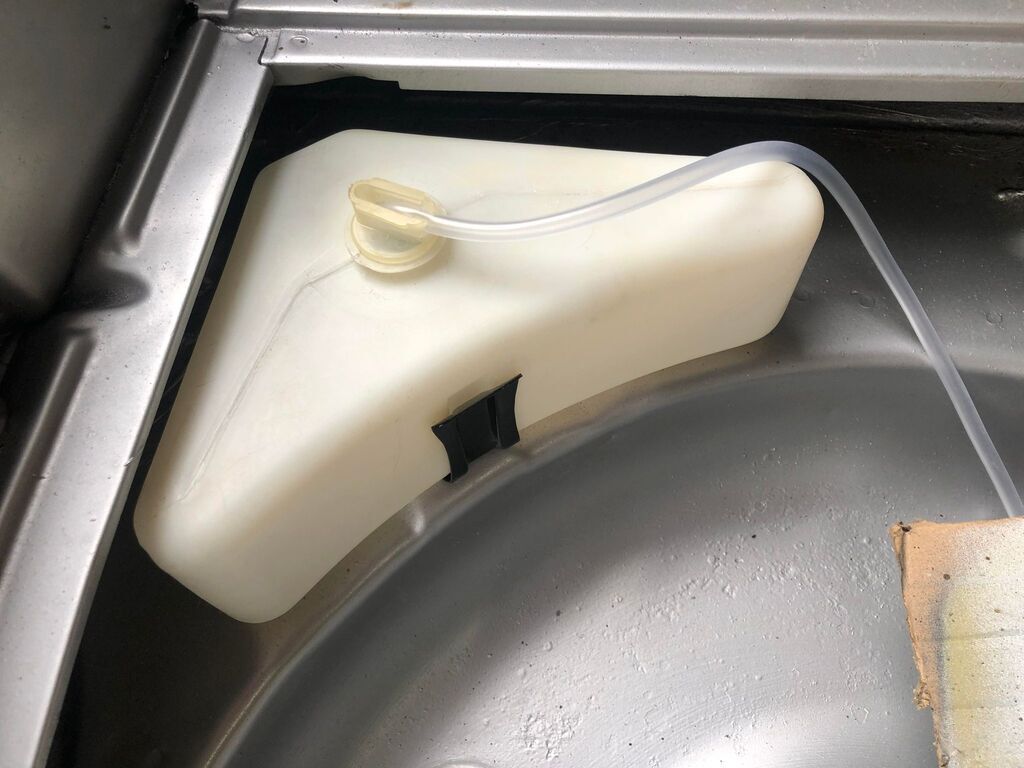
The washer pump and motor were refitted, looking as good as new with he new washer pipe being fed up the C pillar and along the roof to the jet. 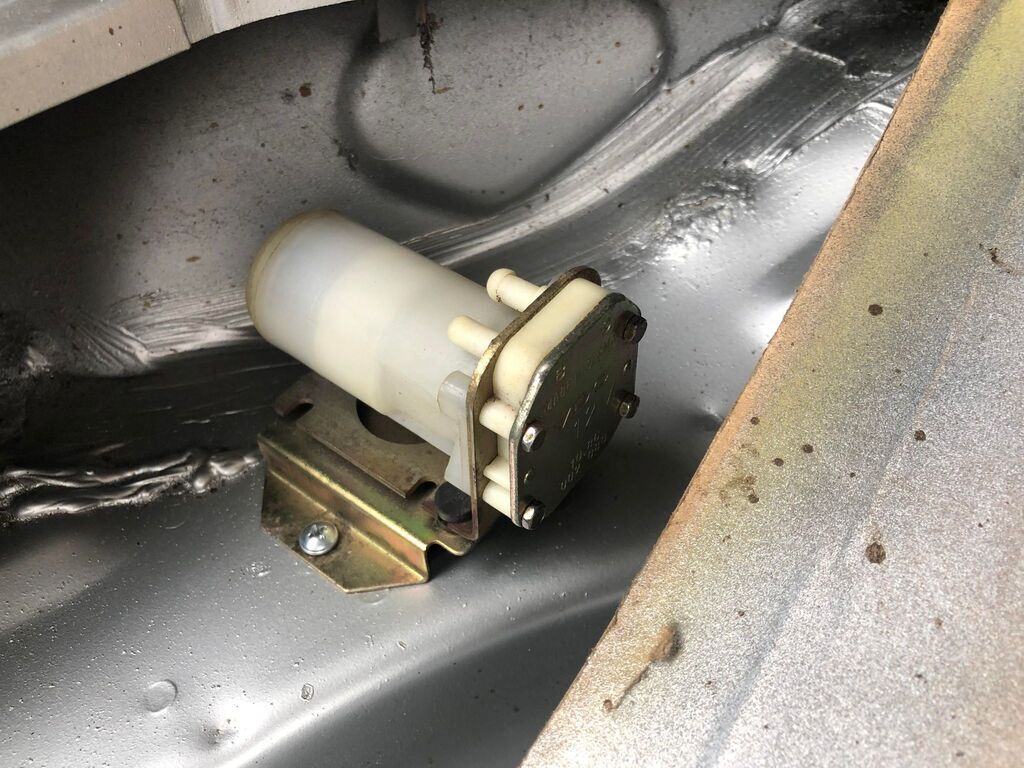
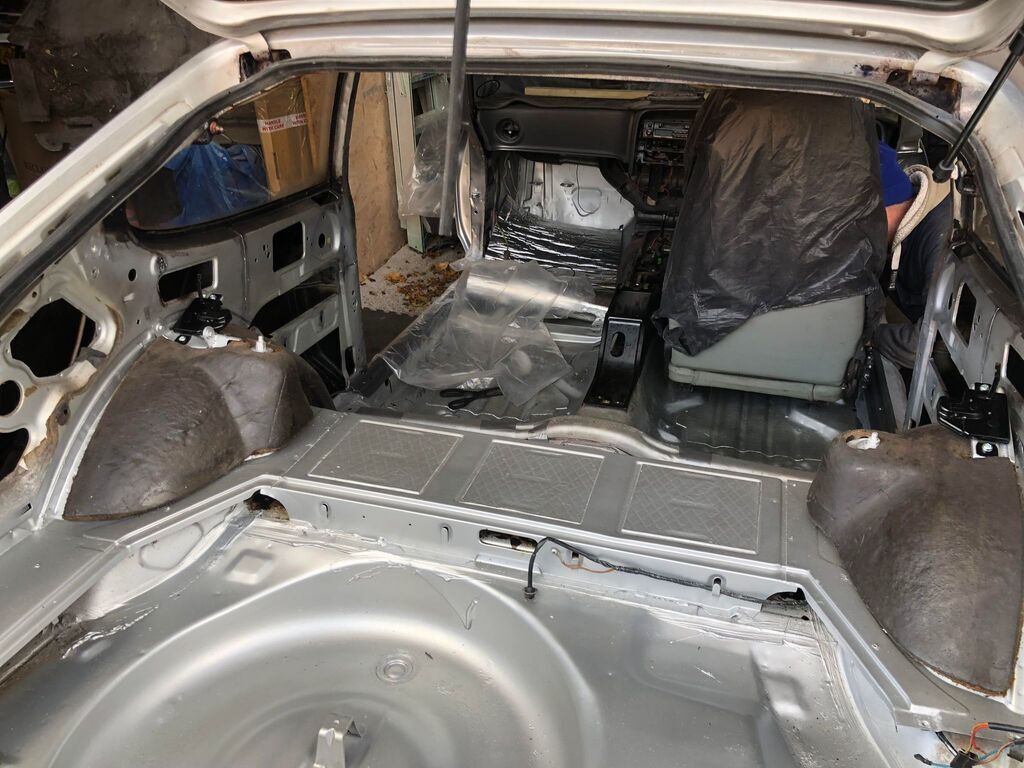
The floor was then painted in silver, which sadly I only have this poor photo during the process and sorting out the floor, before everything went back together and all the work was covered up!
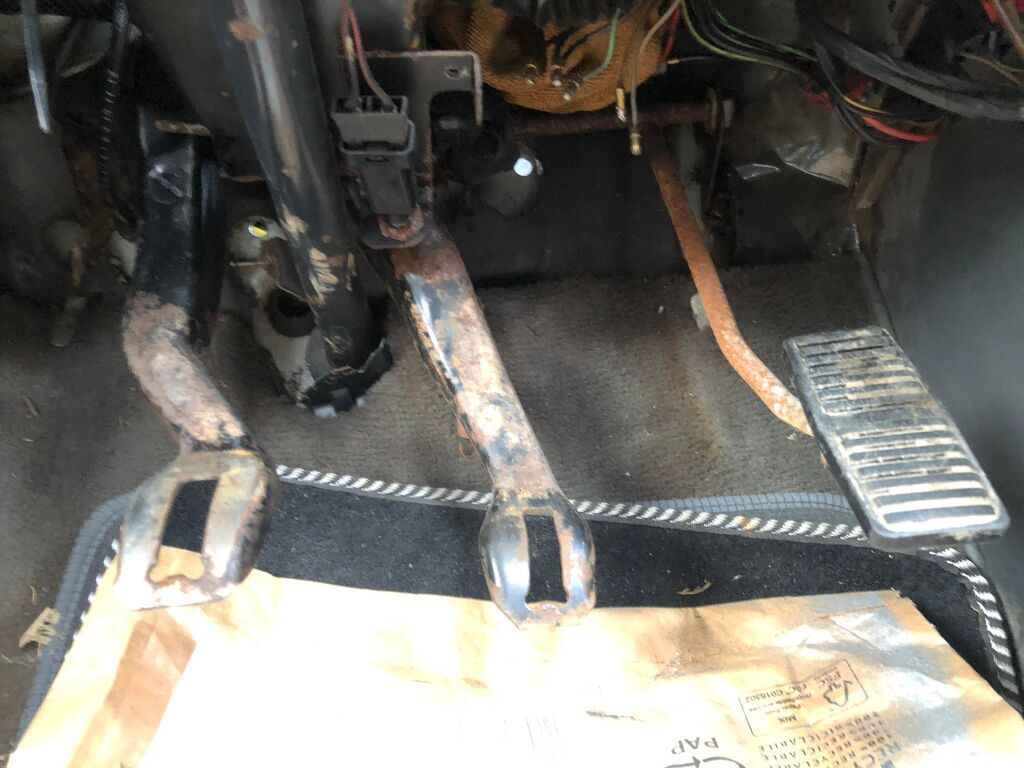
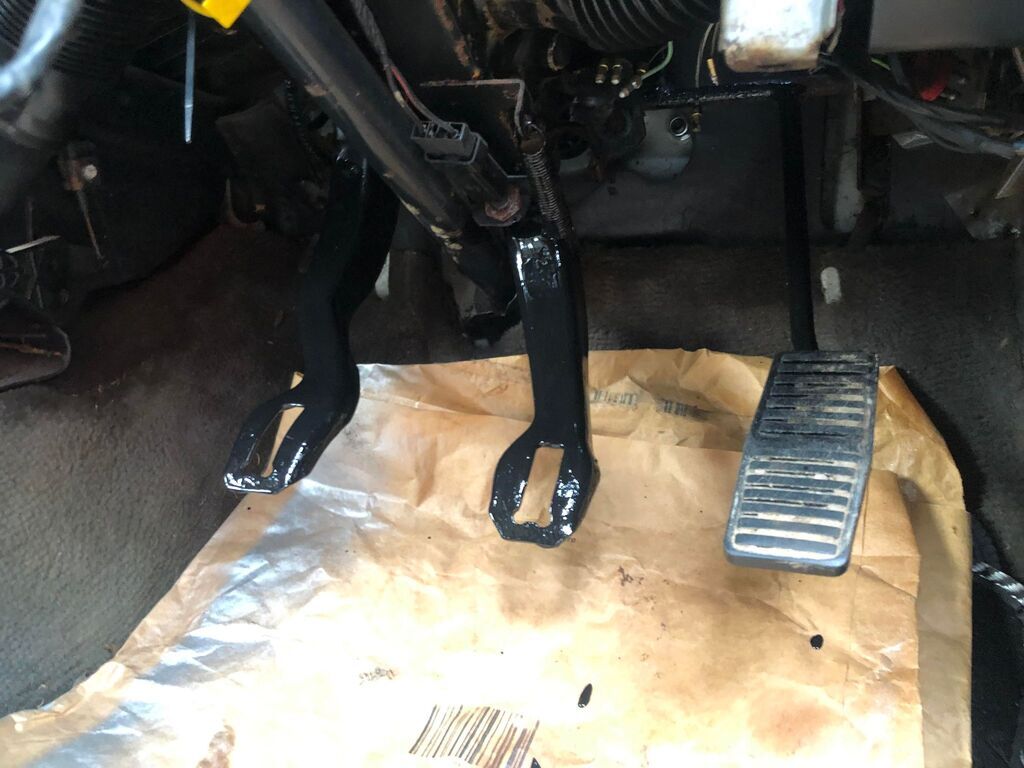
Whilst doing this the pedal arms were also ground back, treated and painted as they looked terrible and were caked in corrosion.
So next up in the floor and dashboard, which took a bit of time but was well worth doing! Cheers
|
| |
MK3 Capri 2.0, Starion Widebody, Midget 16v, E46 Coupe, E46 Touring 330
|
|
|
|
|
|
|
Update 13 - Fuel Lines.
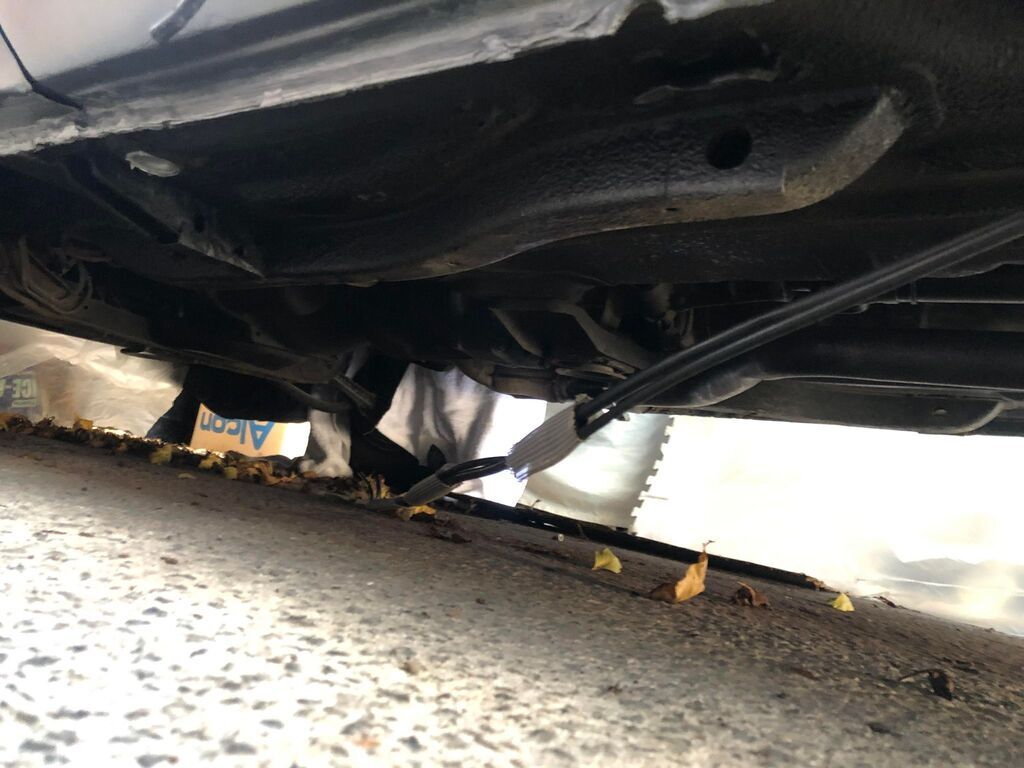
As with any classic car the fuel lines should be checked and replaced if any signs of age or damage show. On the Capri the fuel lines have rubber/braided hoses that come off the tank sender unit and connect to plastic pipes that attach along the bottom of the floor. They are then attached to metal lines by the front cross member and then finally hoses to the carb.
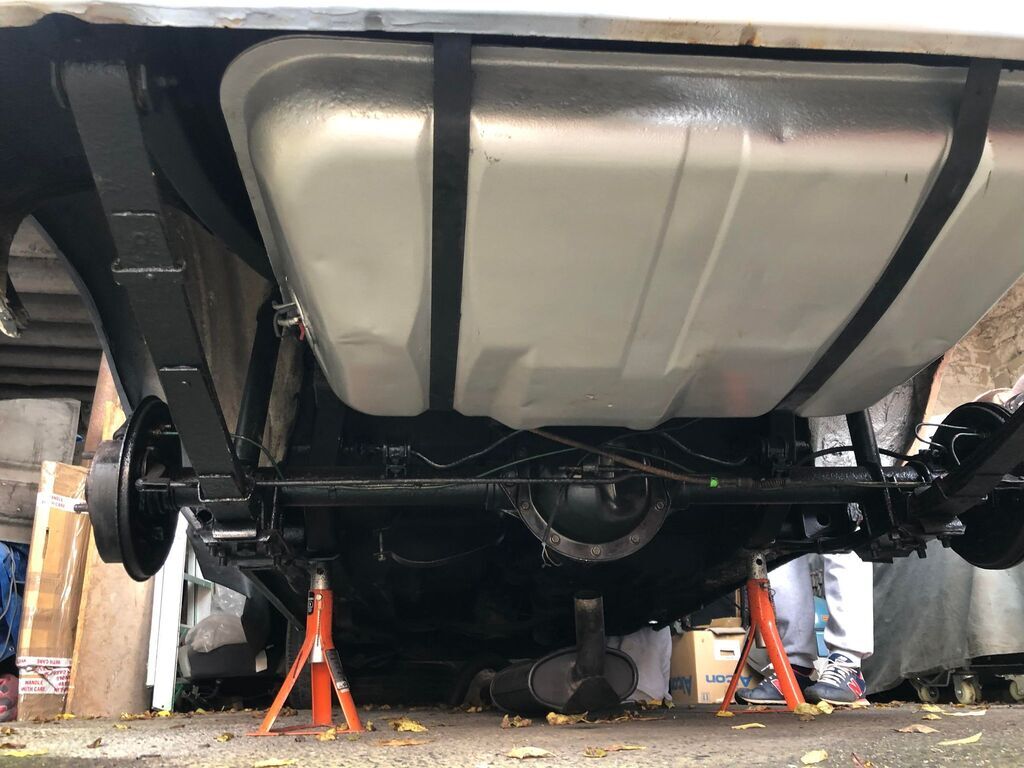
The tank was dropped to be cleaned out and painted, and the fuel lines were dropped so the floor could be rustproofed and have the hoses replaced.
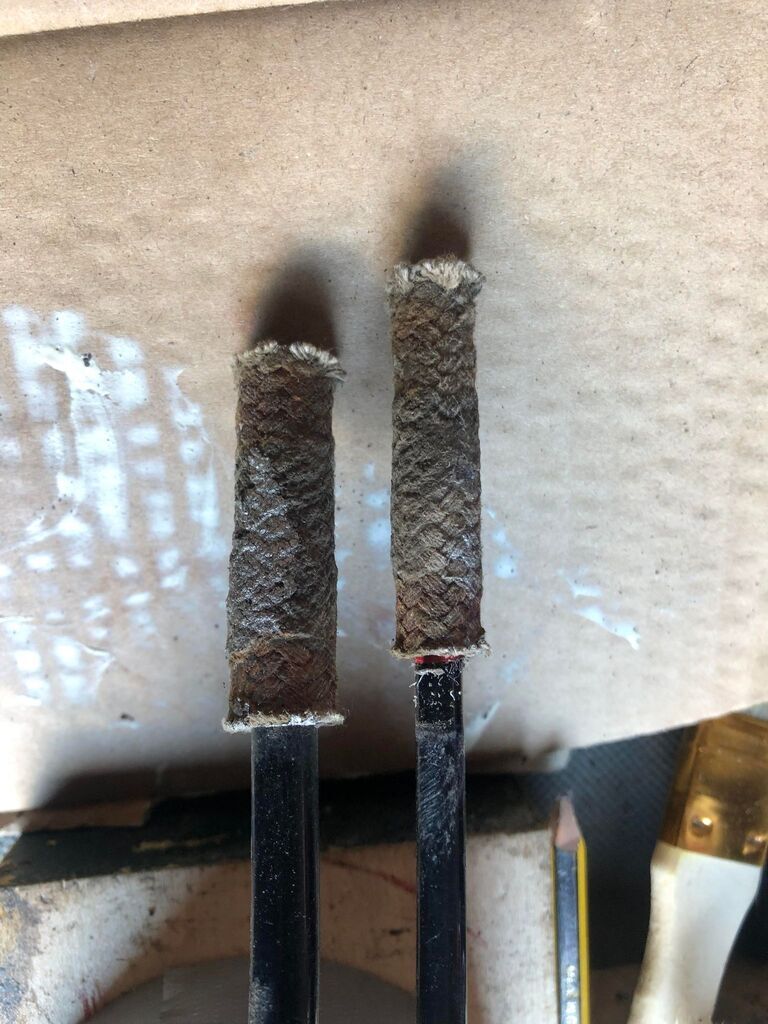
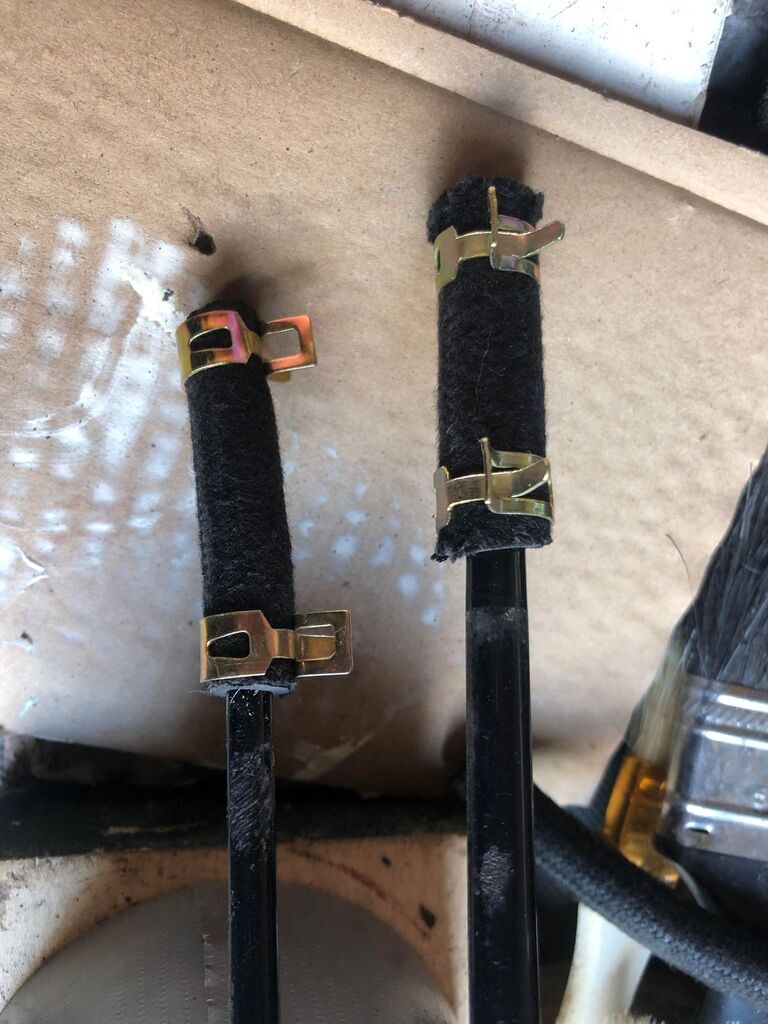
New clips were fitted as the old ones had turned to dust.
The tank was then fitted after itself and the straps had been painted, annoyingly didn't take any before photos but here are the afters. 
The plastic lines could then be clipped back to the floor, and the hoses at both ends could be reattached.
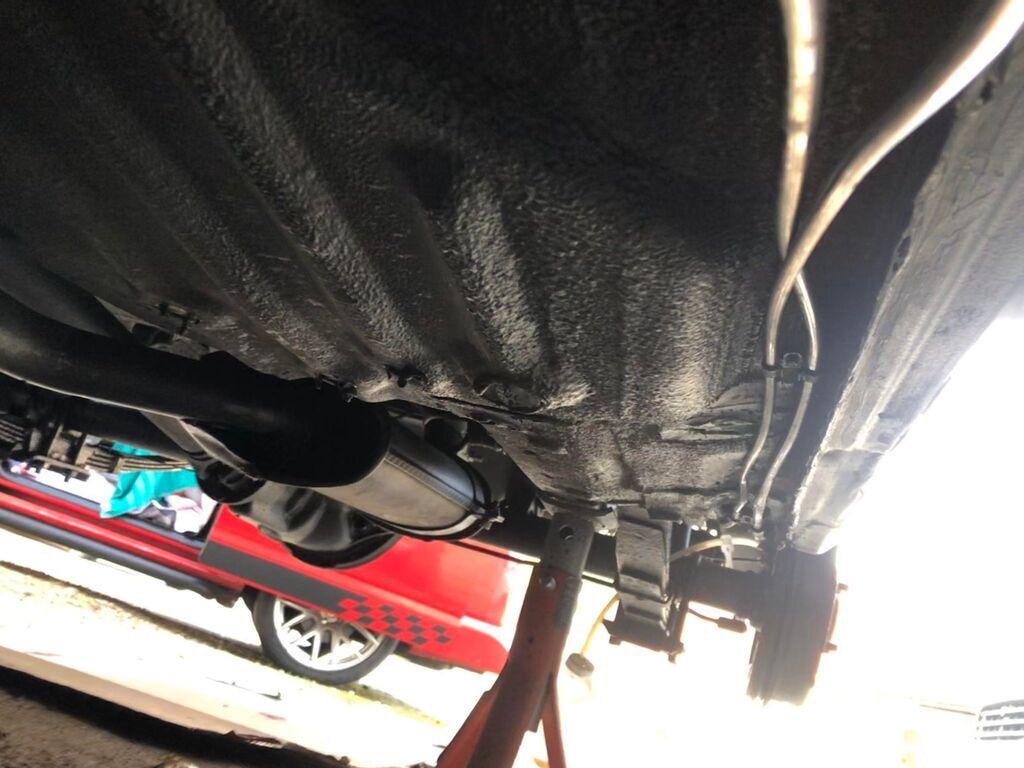
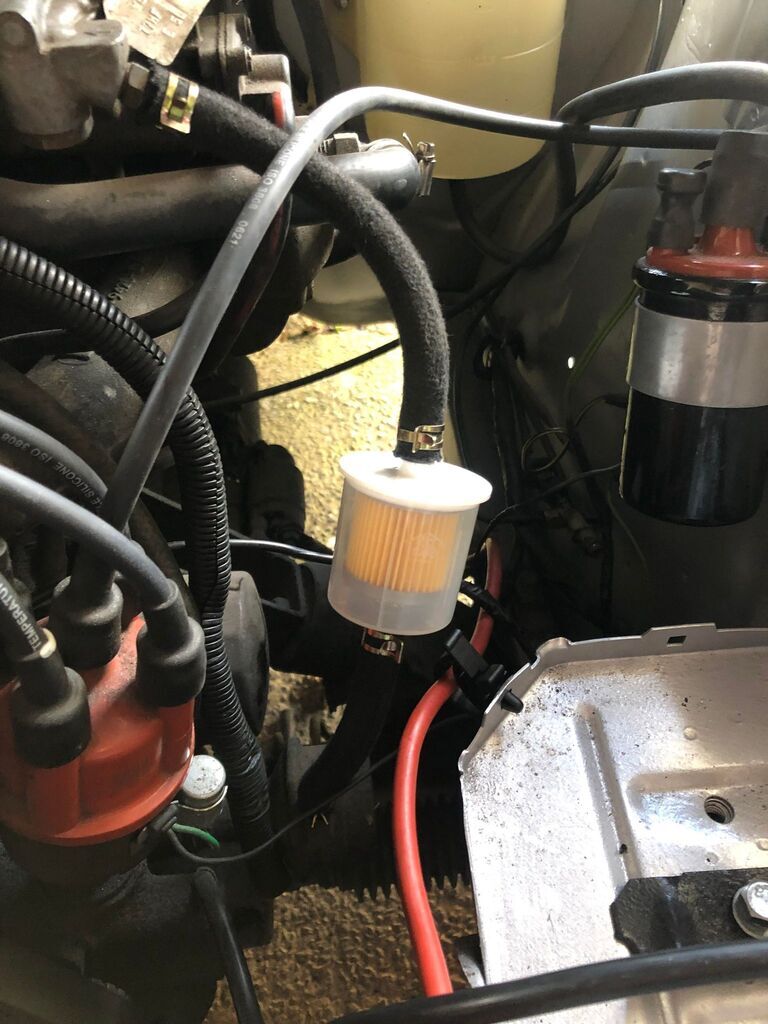
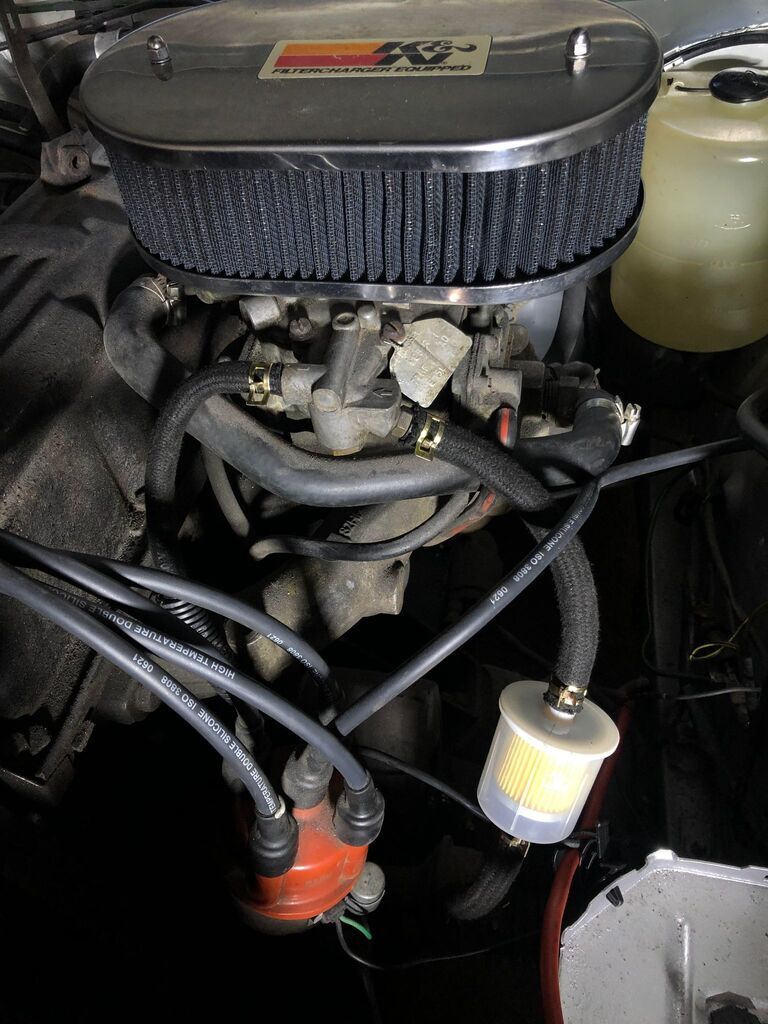
New fuel lines in the engine bay were fitted, along with a clear in line filter to keep an eye on fuel.
Now with the K&N filter acquired at the NEC in November, the engine would slowly start to look better...  |
| |
Last Edit: Jan 4, 2023 10:05:50 GMT by xjdmidget
MK3 Capri 2.0, Starion Widebody, Midget 16v, E46 Coupe, E46 Touring 330
|
|
|
|
|
|
|
|
|
Update 14 - Floorpan
Now when I purchased the car, I had a decent look underneath and felt all the bits I could reach to ensure the floor and sills were not rotten, and that the front and rear quarter damage was the only body work bits needing the most attention. It all seemed pretty decent and as shown in the last update has come up really well. 
The idea was to fully strip out the inside - bar the dashboard, and clean and repair everything inside, but for today I will just concentrate on the floorpan and surrounding areas.
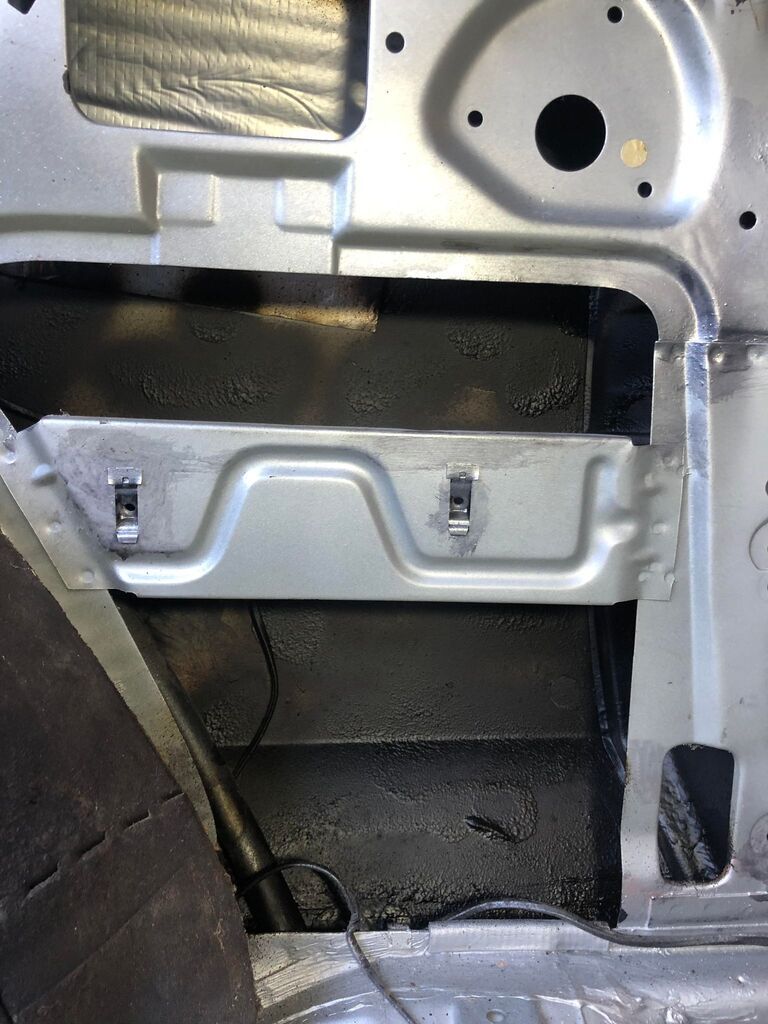
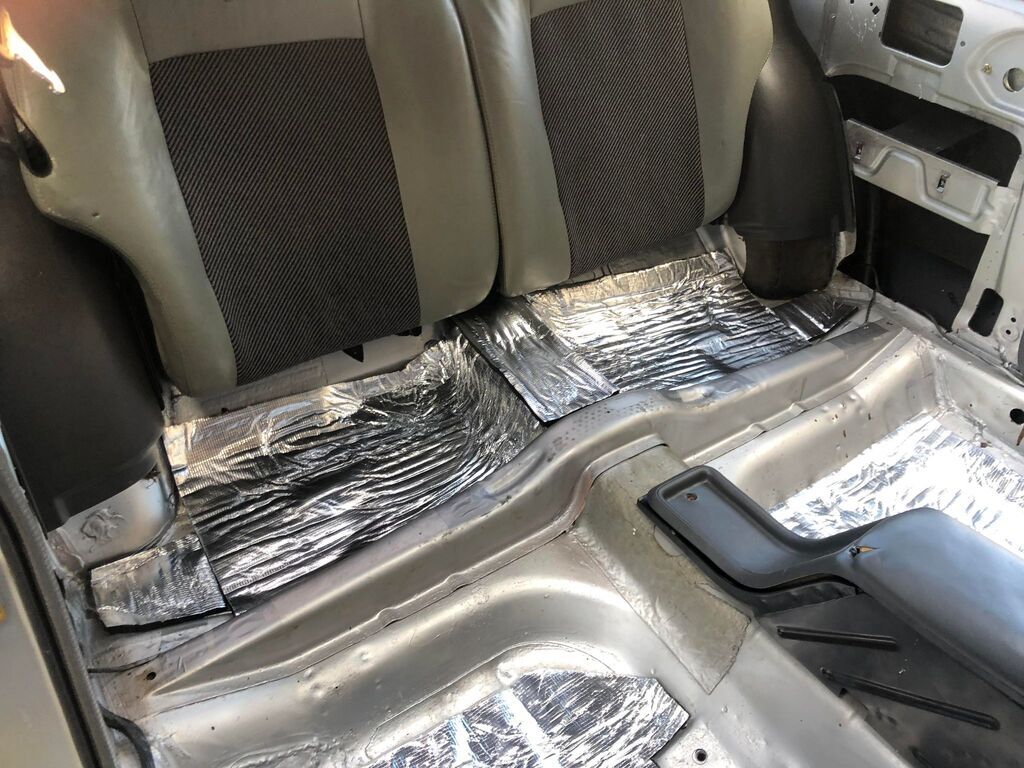
The seats and carpet were pulled out, the insulation, door panels, mouse nests, crisp packets and wood saws, to reveal that the floor pan and inner sills were in pretty decent condition! There was about three spots that needed attention, which were in the back two corners where the spring hangars must trap dirt and moisture underneath, which I have seen on other Capris, so this was chopped out and welded up, and on the drivers side there was a bit needing repairs where the toe board joins the floor pan. Again repaired, sealed both sides and epoxied. The pan was scuffed up, degreased and painted silver leaving it like this  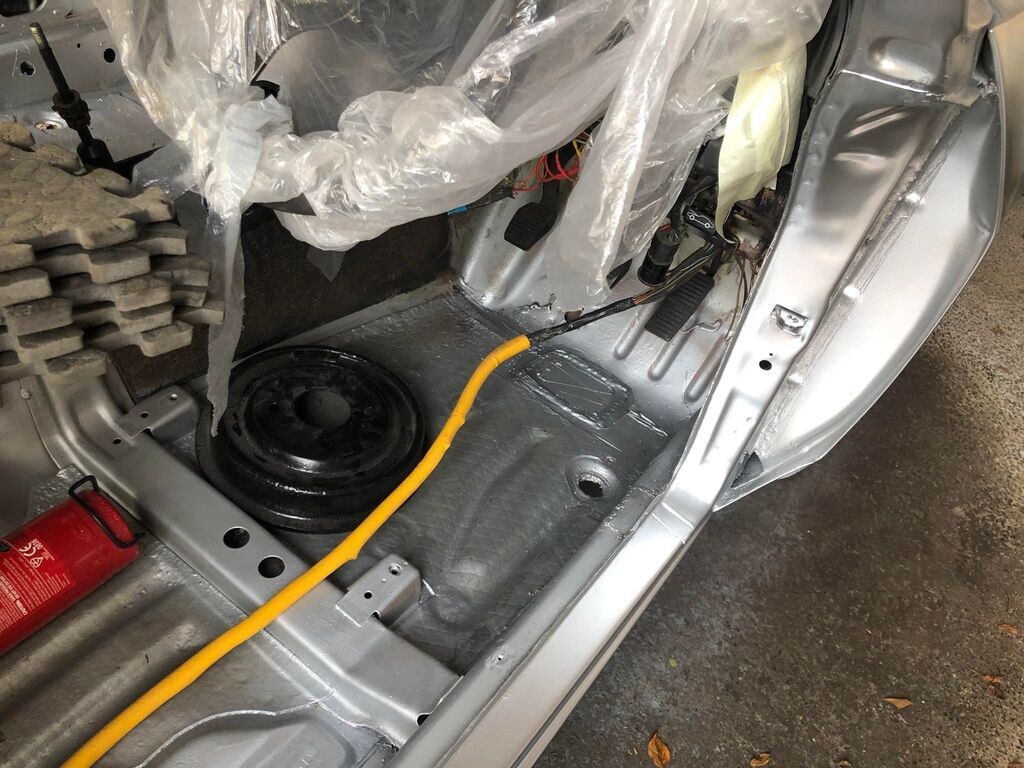 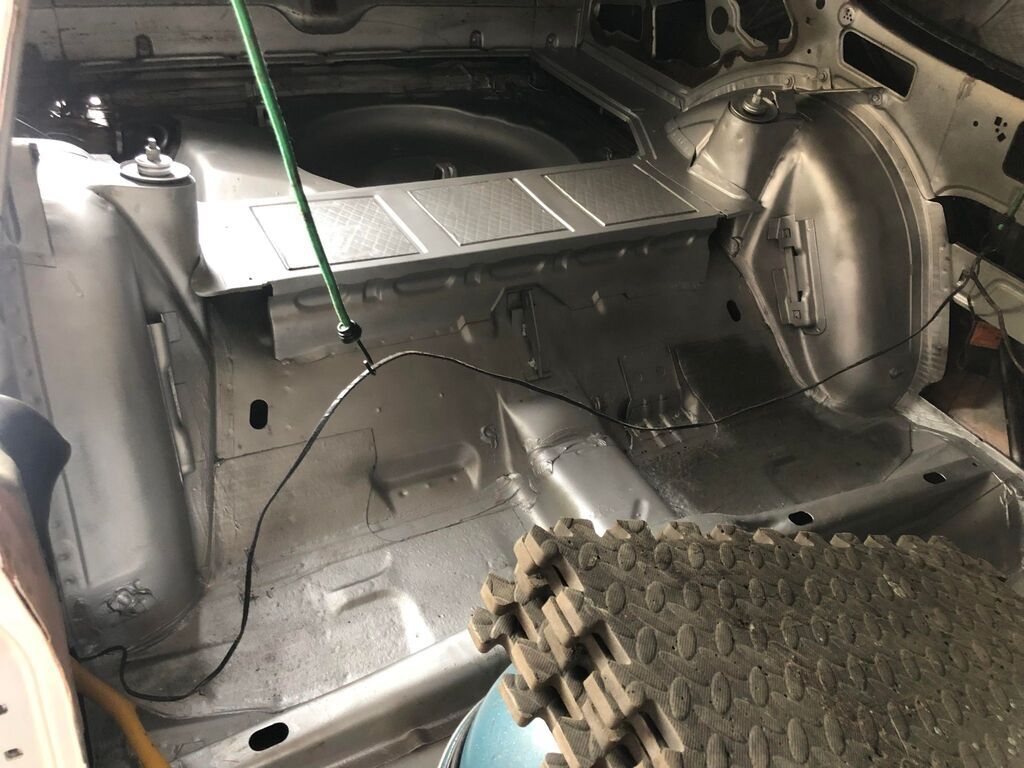 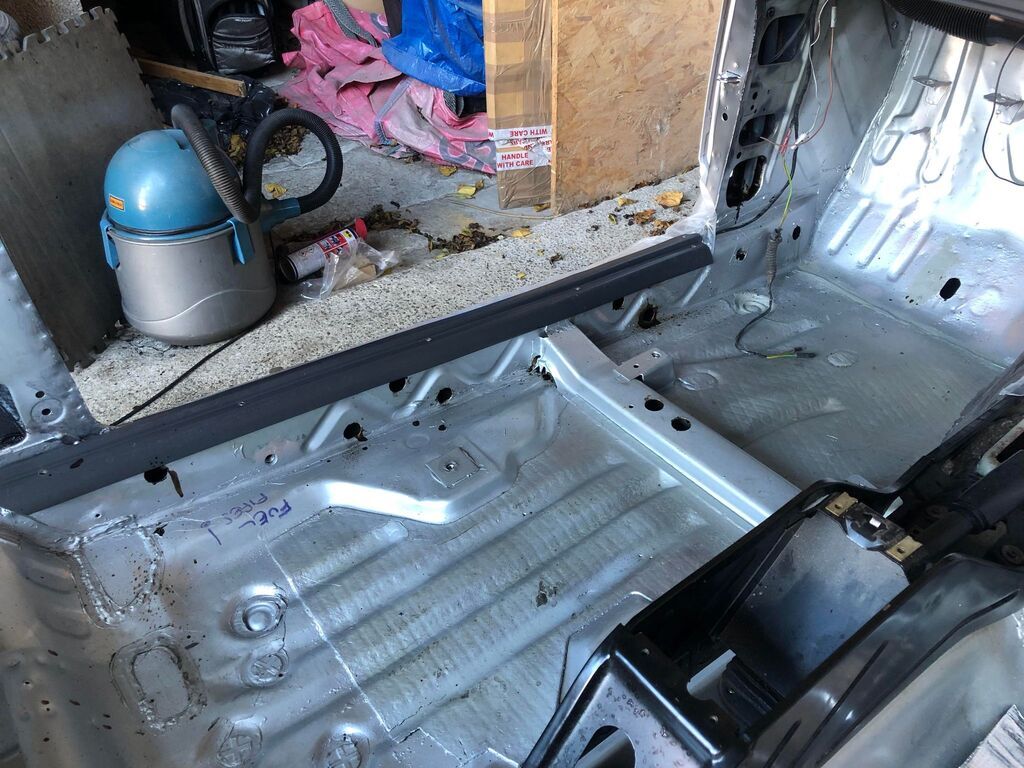
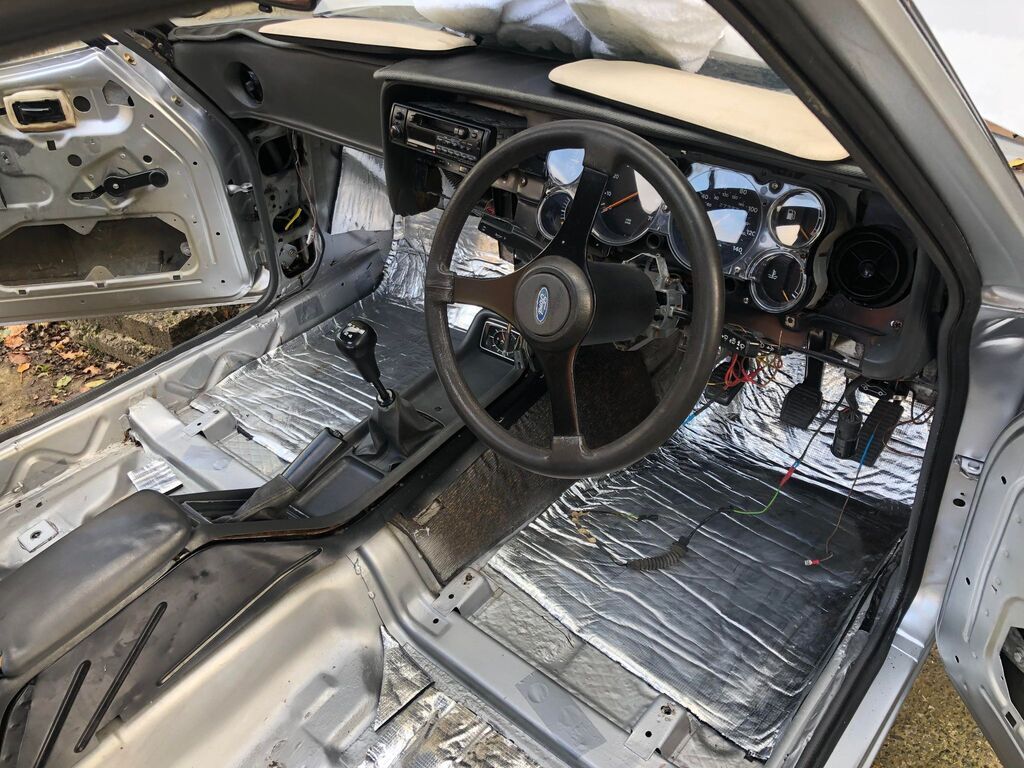
The next step after painting and sealing was to fit sound deadening foam pads everywhere I could, and to replace the insulation that was been removed from the floorpan, so some decent stuff was ordered and stuck inside the doors, rear quarters, floorpan, under the rear seats and on the roof. Then this was followed by soaking every hole, joint, crease and internal space with Dynax wax, cavity wax and some sort of protection, so the car probably weighs a bit more but should last longer than me.
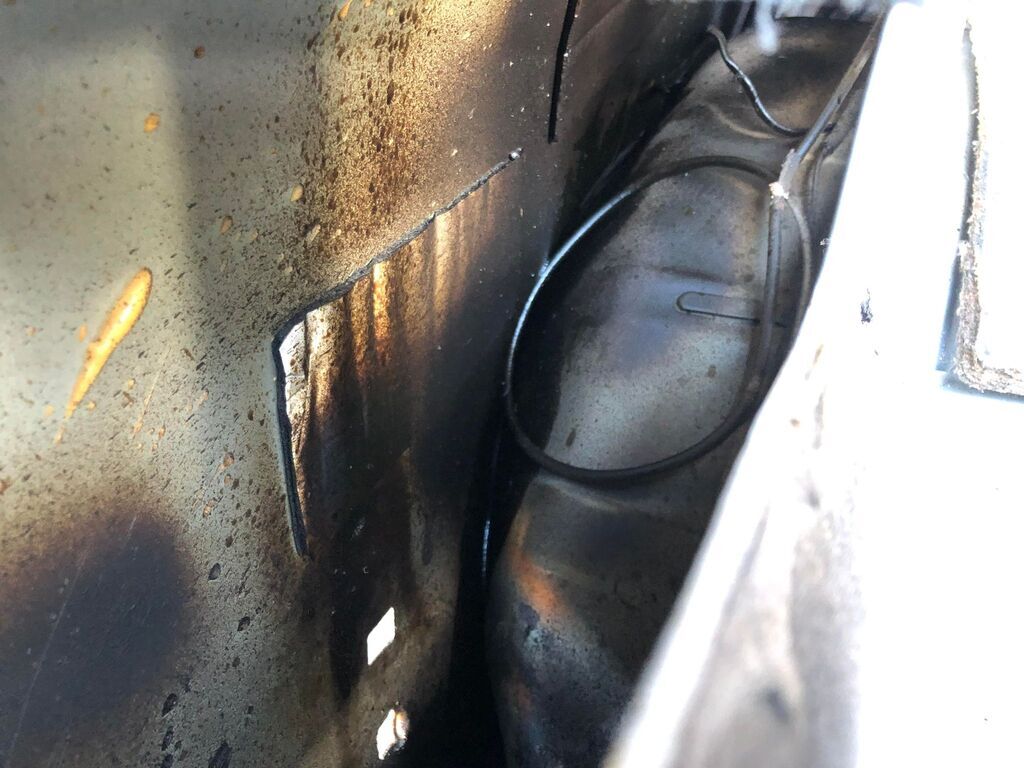
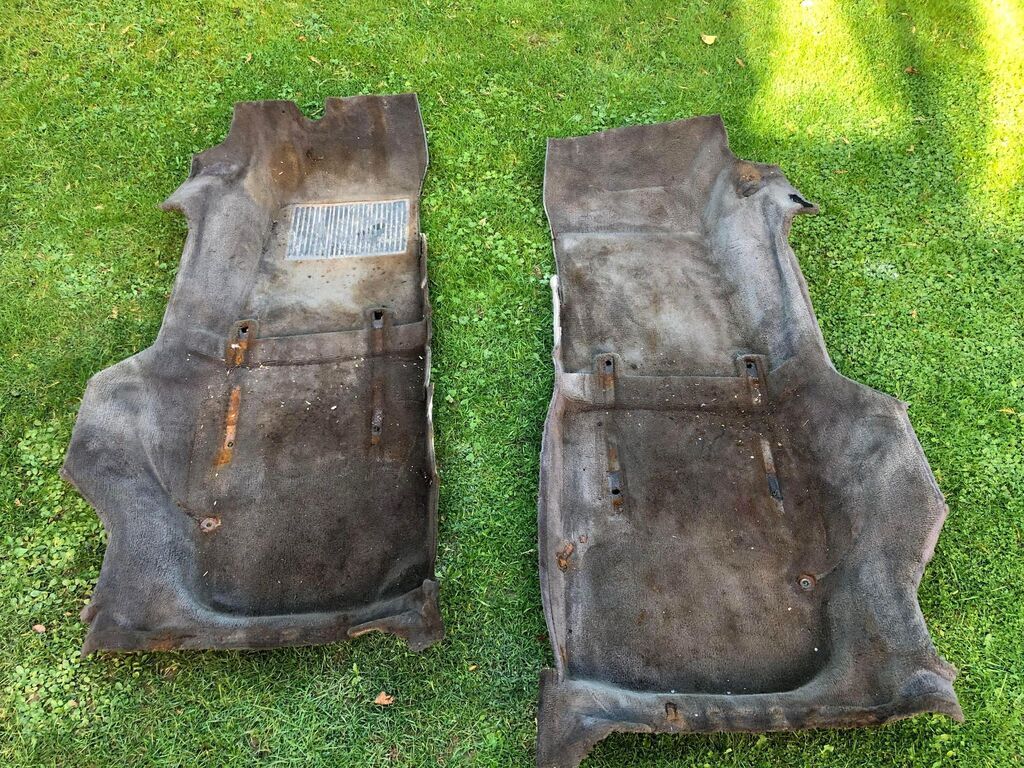
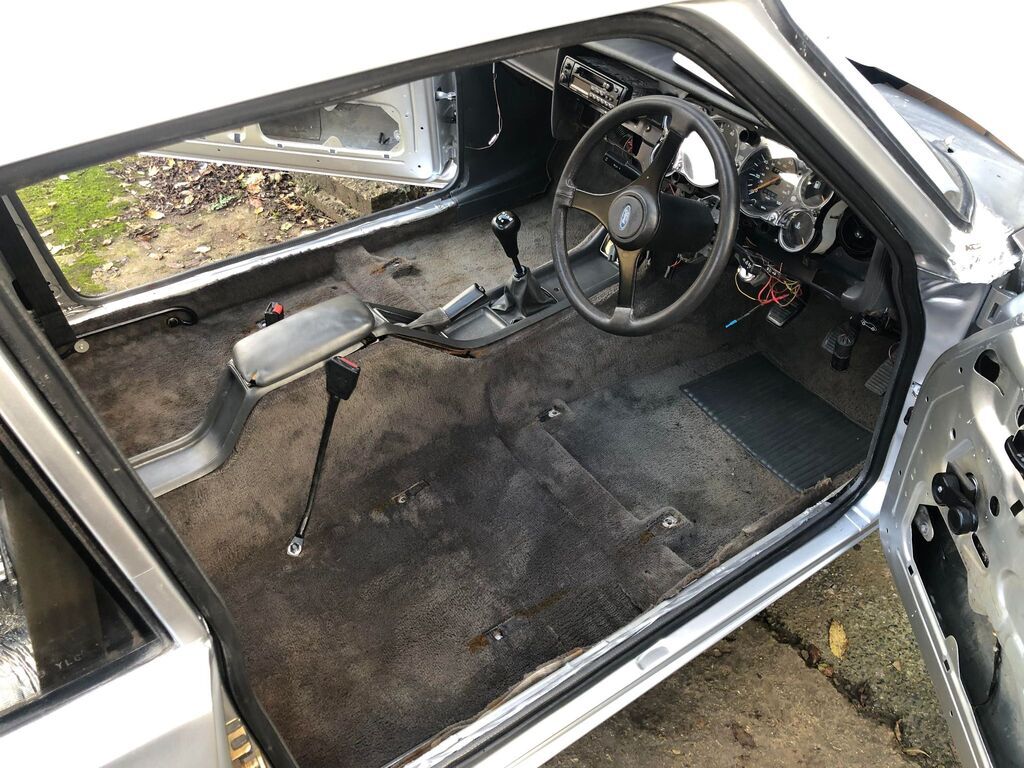
The carpet was then hoovered, jet weshed, degreased multiple times, shampooed and left to dry, with it now looking and feeling a lot, lot cleaner and fluffier. (This is the before)
 Finally got my 3.0s Steering wheel in after painting it, and the center console had been removed, cleaned, the clock restored and the gaiters repaired.
The door shuts and A pillars have been painted and the doors have also been restored which I will make a post on in the future, maybe the next one? Over the next few updates will be getting the jammed sunroof open and repaired, the doors, and stripping and repairing the rear end. Cheers all!  |
| |
Last Edit: Jan 6, 2023 11:14:43 GMT by xjdmidget
MK3 Capri 2.0, Starion Widebody, Midget 16v, E46 Coupe, E46 Touring 330
|
|
Sammo
Club Retro Rides Member
Posts: 1,461  Club RR Member Number: 103
|
|
|
|
|
This is looking really good. My Nan had a gold Mk3 Capri for a short while when I was a kid and I loved it. To my young brain it was a sports car! I always said I’d get one, one day but so far (30 years later) I still haven’t. Maybe one day!
Keep going, you’re doing a great job!
|
| |
Follow Me On Instagram - @parttimecartinkerer
|
|
|
|
|
Jan 12, 2023 13:05:27 GMT
|
This is looking really good. My Nan had a gold Mk3 Capri for a short while when I was a kid and I loved it. To my young brain it was a sports car! I always said I’d get one, one day but so far (30 years later) I still haven’t. Maybe one day! Keep going, you’re doing a great job! Thanks Sammo, I've had more people than I can count come over and talk to me about the car and memories they got of them, and its not even left the barn!
Update 15 - Sunroof + Headlining.
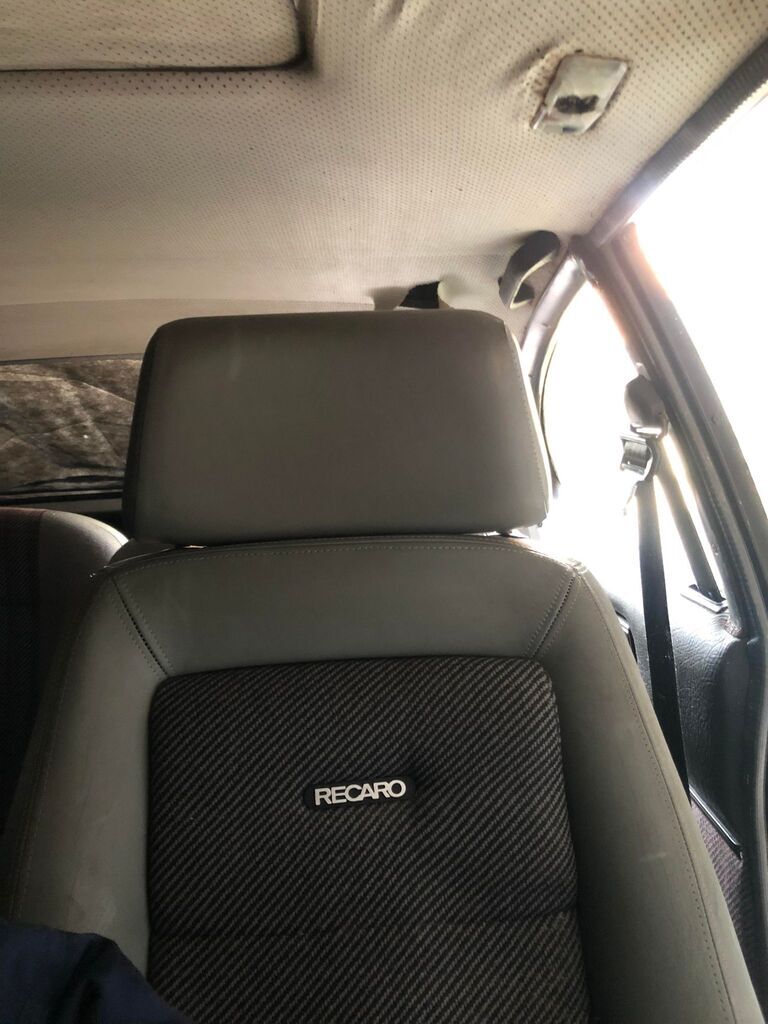
When the car was purchased, there was no sunroof handle, the rare, expensive and relatively brittle bit of a Capri they all seem to be missing. I managed to get one from Mark, but my joy was shortly lived when I discovered that the sunroof was completely seized shut, and probably has been for the best part of 20 years. Now I didn't think this would be required, but the decision was taken to start pulling apart the headlining in order to cover the entire cable for the sunroof cassette in PB Blaster.
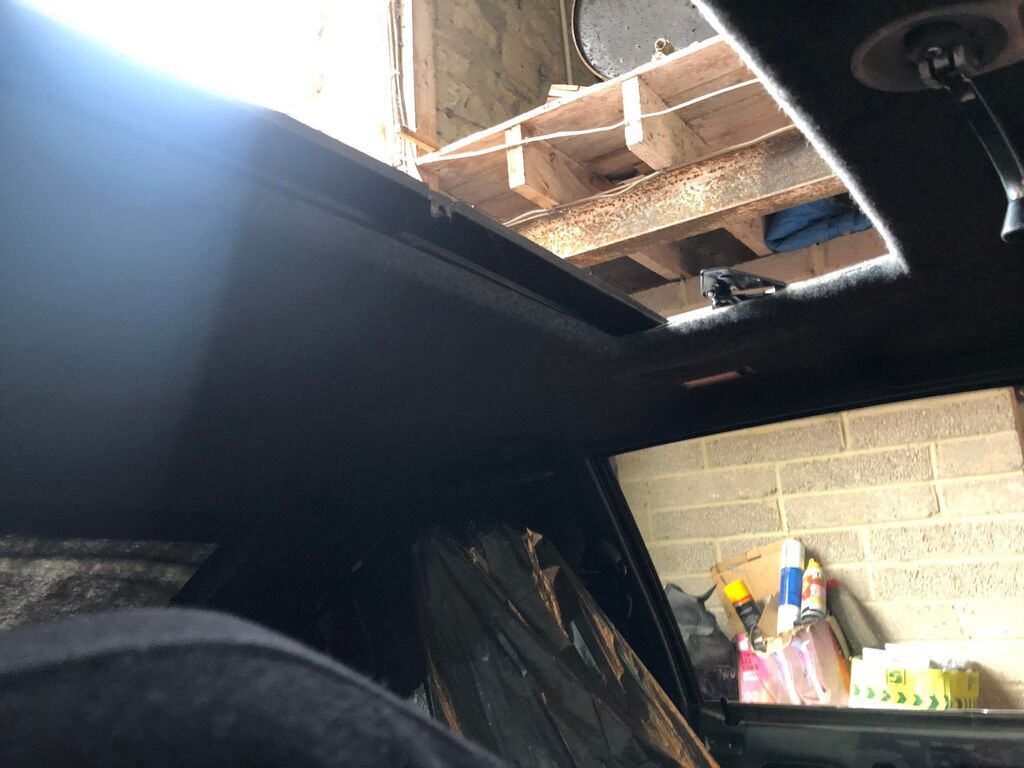
As can be seen below, the headliner was ripped, saggy and discolored so was on the list to be replaced anyhow.
All trim was removed such as the handles and visors, and the liner was slowed peeled down to reveal the sunroof mechanism was revealed, and didn't look that bad, but was soaked anyway to try and release it. The trim on the sunroof was popped off and the insides were revealed.
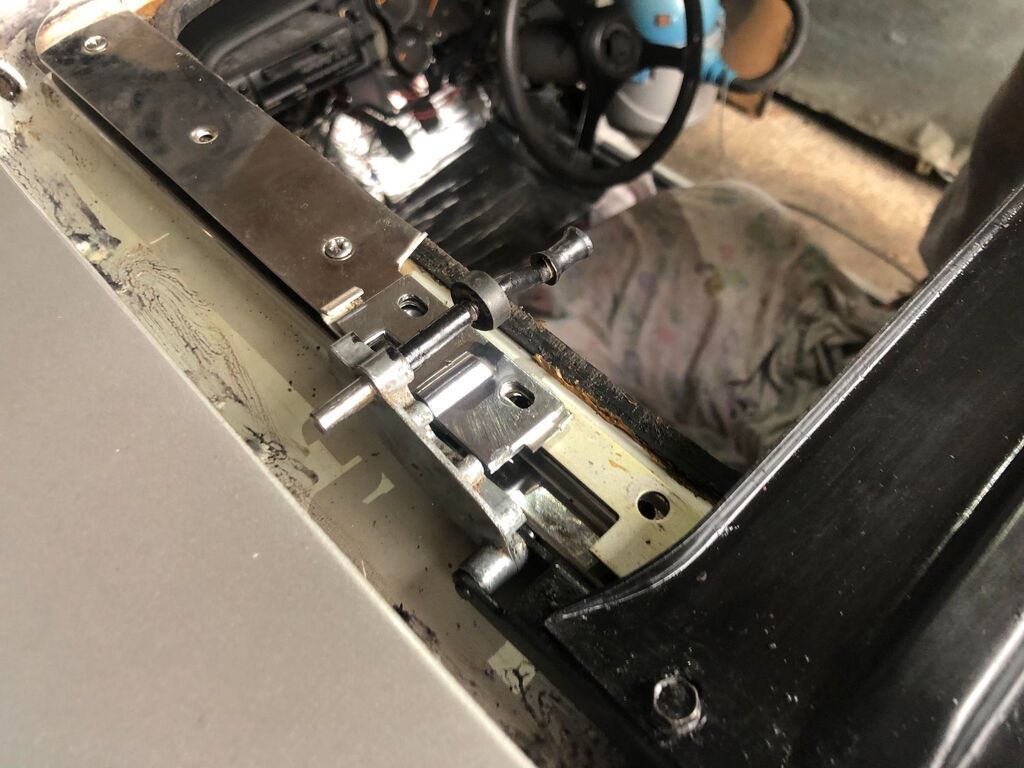
The internal section of the sunroof seemed to all be fairly decent, so it was time to try a bit of brute force now we know nothing seemed to be rusted solid on the bottom! After some lubrication  and some man handling, the sunroof was starting to slowly move, and after working it back and fourth a little, eventually started to free off for an inch or two. This revealed how much crud was inside! Loads of WD40 and PB Blaster were funneled into the workings, and before long it started to free off even more, so the bolts that hold the metal panel in were undone, and it was able to slide out from the front! 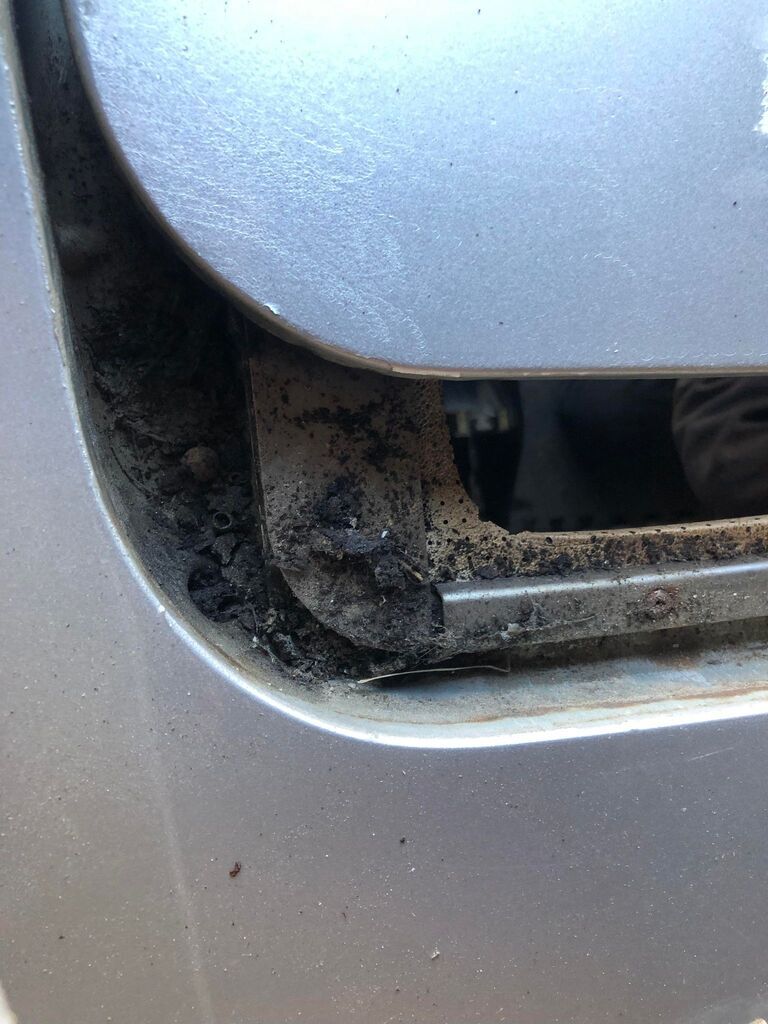 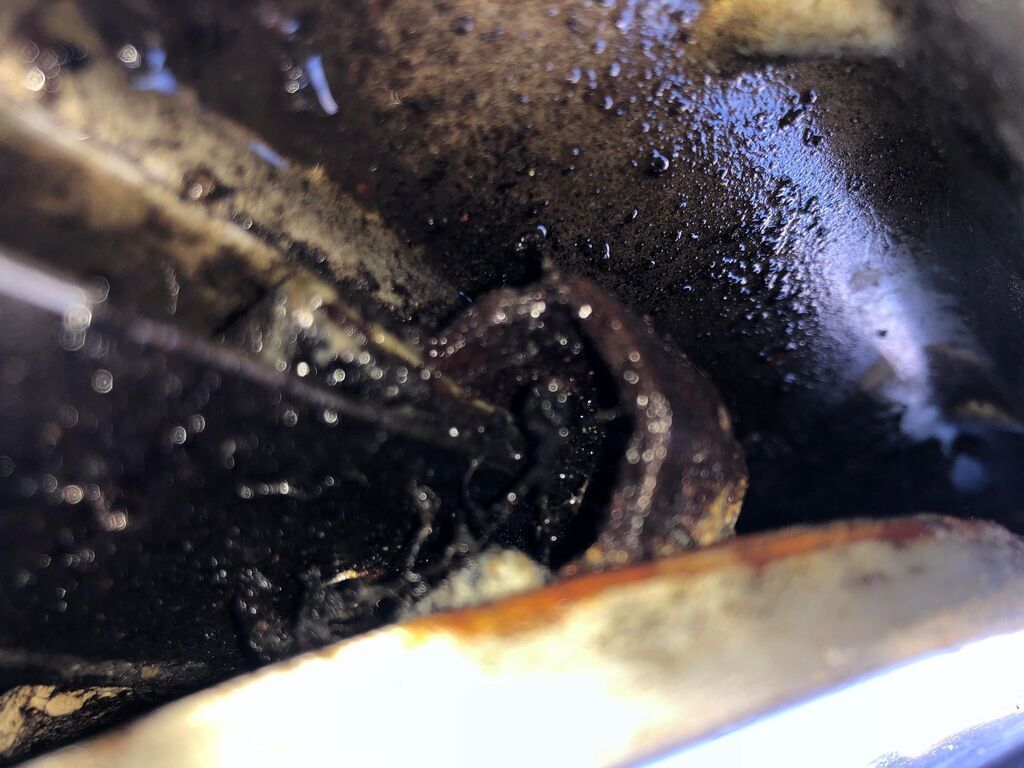 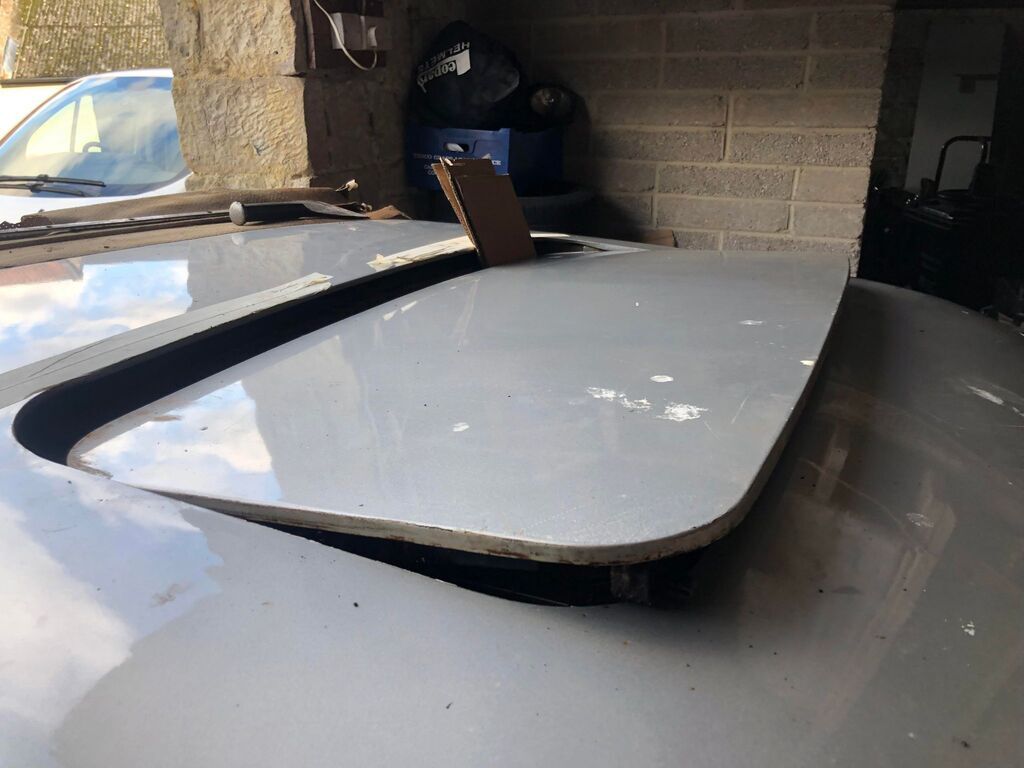
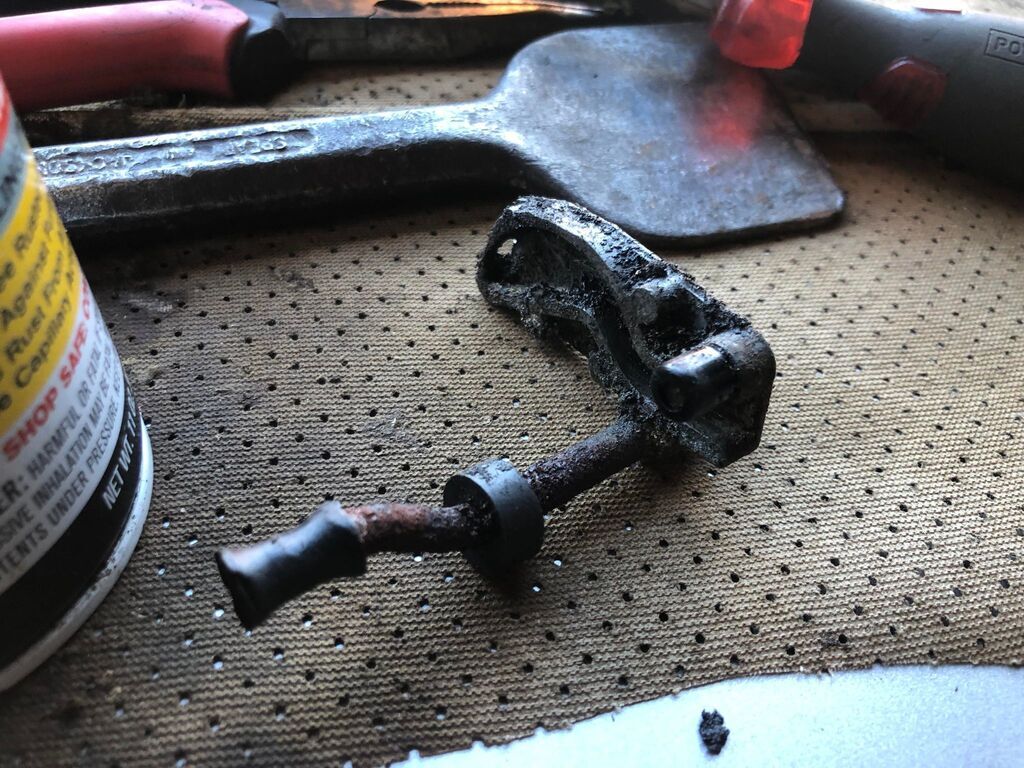
Once off, we found possibly the root cause of all of this, one of the cast pieces for tilting and the runners had snapped and was jamming the mechanism up.
The cleaning of what I presume to be 30 year old mud and mouse debris was cleared up, all pieces for the sunroof were taken out, cleaned, greased, and test fitted in place, which not only looked much better, but meant that the cassette moved smoothly and easily back and fourth. This left the broken piece, which was traced onto aluminium, cut out and riveting to the snapped original, which meant it was usable once more.
The sunroof panel is being repainted as it has DA sander marks in it from the previous respray it had once upon a time, and it did get a little scuffed in the free-ing off. But with some left over Vel-trim from my Dads VW T5, a new headliner was stuck in over some more of the shiney backed some deadening. It looks good, will help with noise in the car, but I still think it needs a moon crater perforated headliner again at some point. 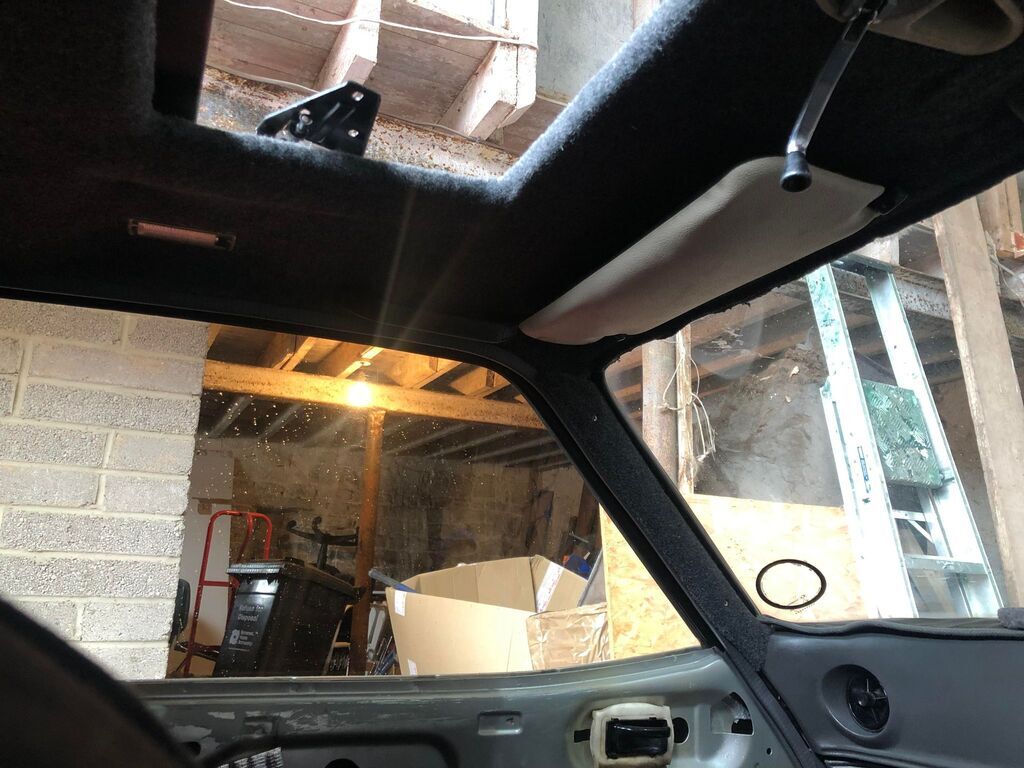
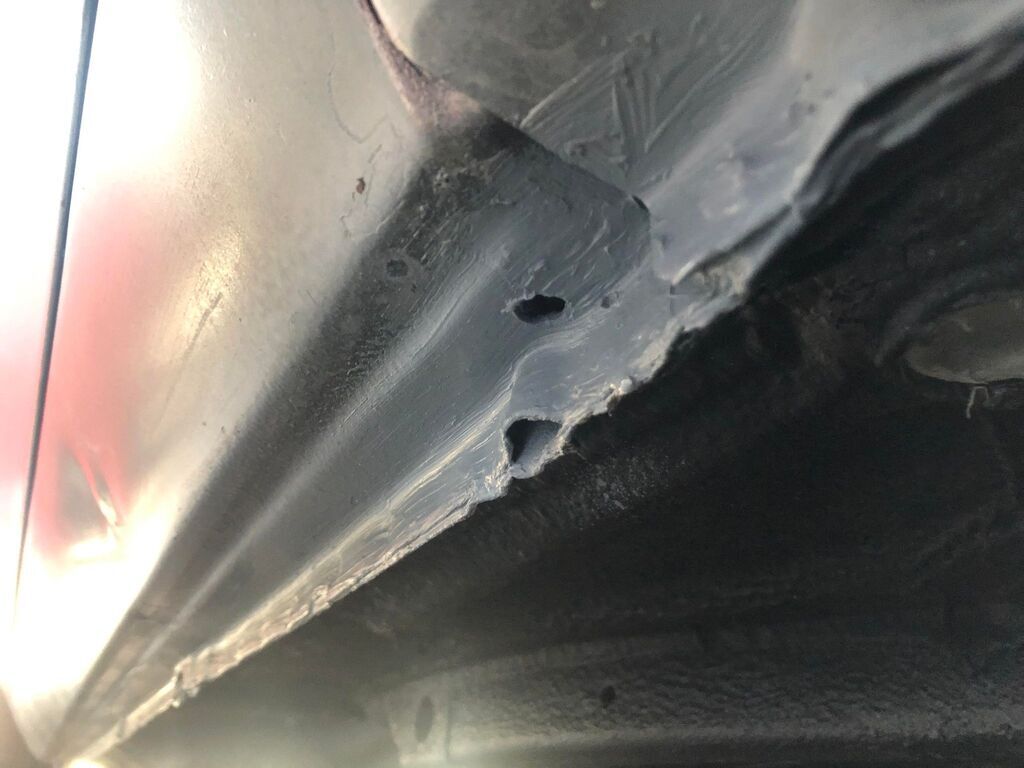
One last job was to reattach the sunroof drain pipes that had come off, clean out the drainage system and extend them out from the inside of the sill as factory, so that they don't fill up with water and rot out in the future, a must do for any old Ford. Pipes were extended through these holes but i didn't have a picture!
Thats it for now, a break was taken during the freezing spat of December, so the car hasn't been touched in almost two months, but with work starting again tomorrow, hopefully it wont be long until paint and an MOT. Cheers all
|
| |
Last Edit: Jan 12, 2023 13:09:06 GMT by xjdmidget
MK3 Capri 2.0, Starion Widebody, Midget 16v, E46 Coupe, E46 Touring 330
|
|
|
|
|
Jan 24, 2023 17:36:03 GMT
|
Update 16 - Small Update
Whilst waiting for the weather to dry up a bit, and warm up, it was decided to try and tackle all the other small issues and prep the car ready to be painted as soon as the weather permits.
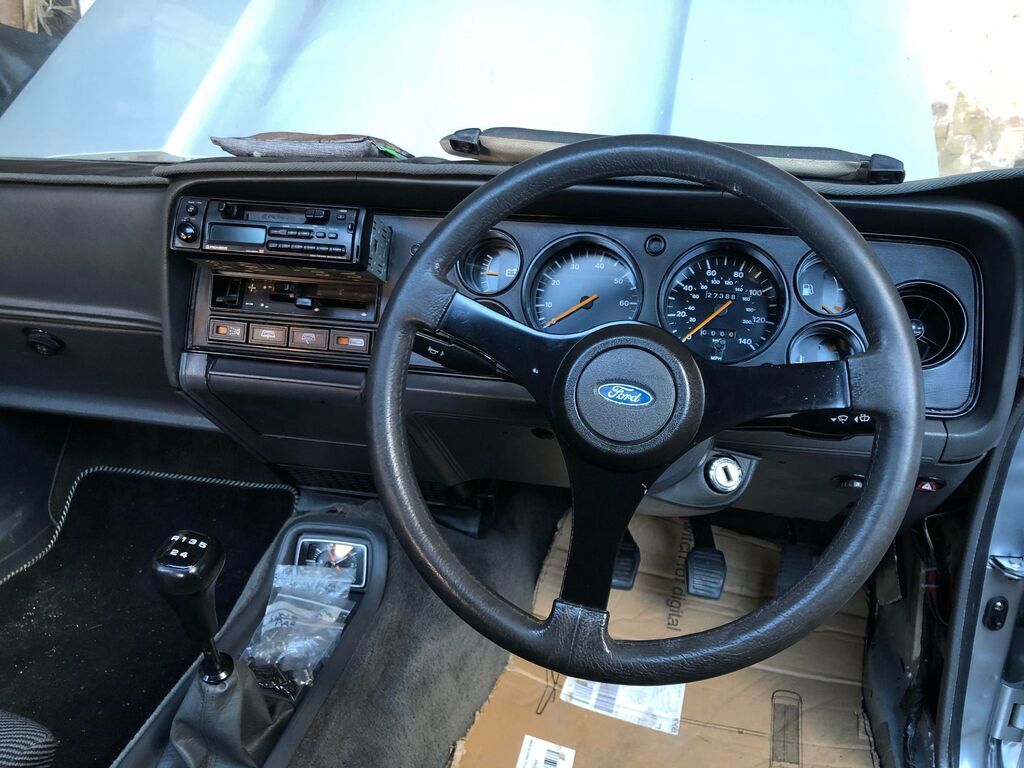
The first job was to put all of the dashboard and trim back together which was a case of screwing on the ashtray section, the hazard warning section, followed by the steering column cowling. New screws used and it looks great, however the radio still needs to be wired up/plugged in hence why its sat awkwardly.
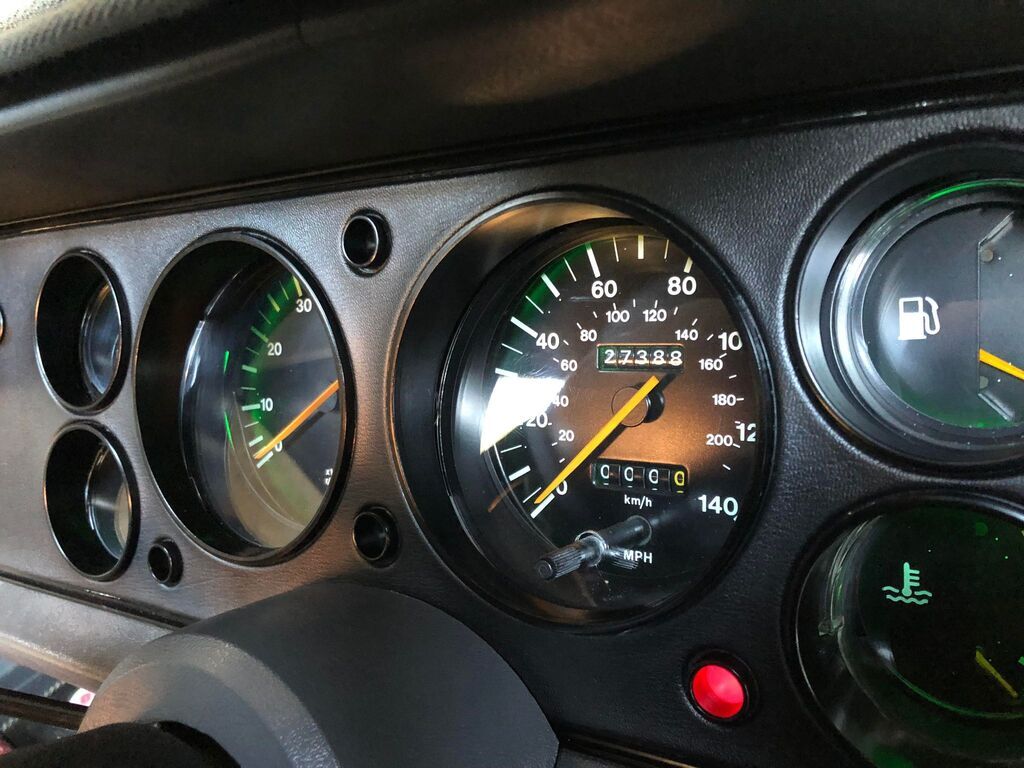
Then a little test of the green LEDs fitted a while ago, pretty tricky to see in broad daylight but they work witht he dimmer as well!
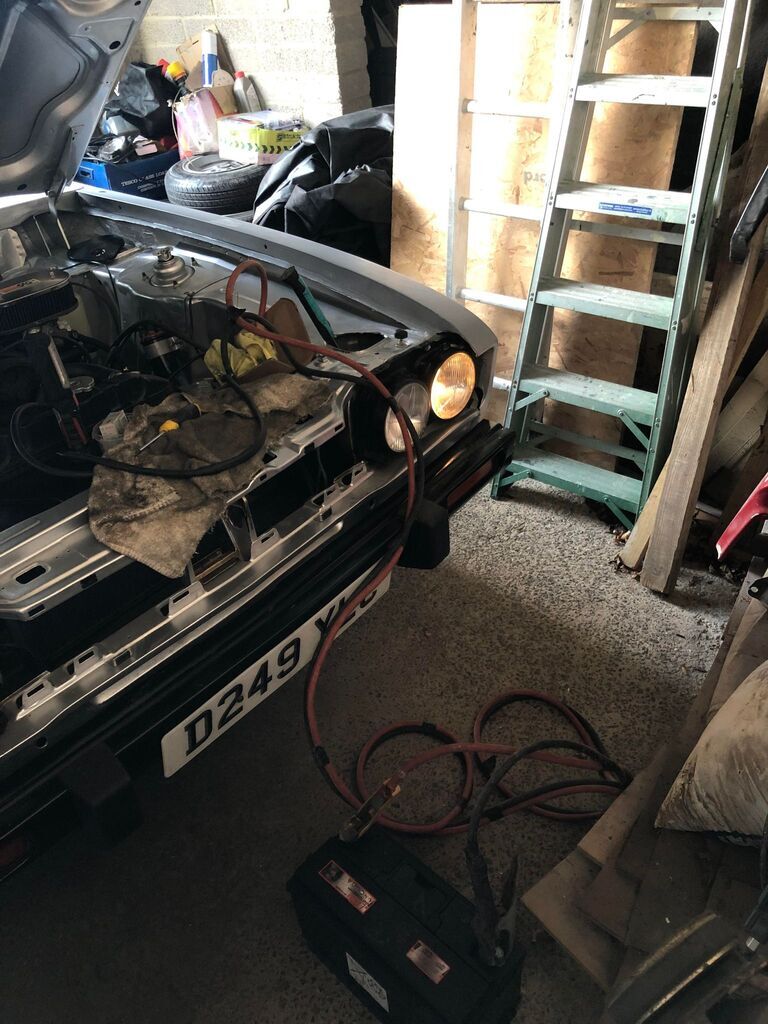
A few little wiring bits were tidied up, the horn was fitted (and works), but the next "big" job was getting all of the headlights working. At the start we had only one sidelight, one dipped beam and one main beam. All bulbs were replaced for new ones before which meant something was a miss elsewhere. One dipped beam failure was caused by the fuses on the bottom of the relay not being cleaned up of the green oxidation on them, must be the only electrical connection that wasn't cleaned! One Main beam was a faulty bulb, and one sidelight was because of a voltage drop on Fuse 3 in the box. This was corrected by re-joining the connection with solder, the result is a full set of lights! Next up will be the rear lights, tracking, lowering spring and many hours of sanding...
 |
| |
MK3 Capri 2.0, Starion Widebody, Midget 16v, E46 Coupe, E46 Touring 330
|
|
|
|




























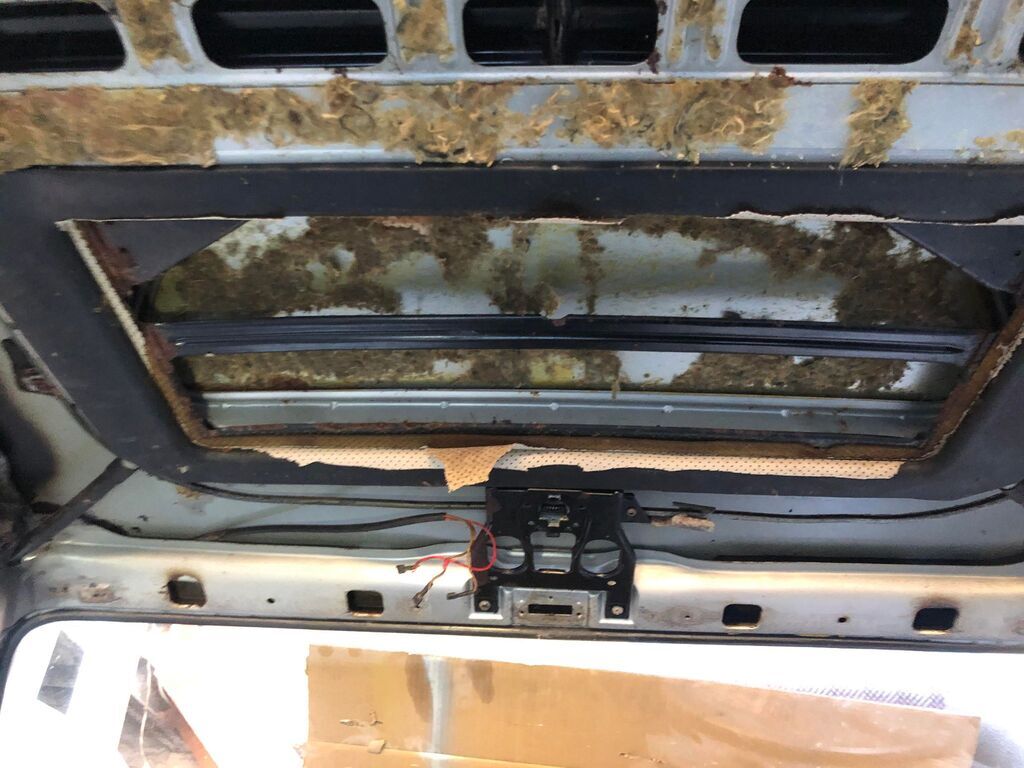
 and some man handling, the sunroof was starting to slowly move, and after working it back and fourth a little, eventually started to free off for an inch or two. This revealed how much crud was inside! Loads of WD40 and PB Blaster were funneled into the workings, and before long it started to free off even more, so the bolts that hold the metal panel in were undone, and it was able to slide out from the front!


