|
|
|
Sept 4, 2024 21:07:03 GMT
|
|
|
| |
MG TA Nr 1932, MG YA Nr 1675, Spartan Kit Car 3.0 V6 Essex
Story how to build a carbon hardtop
" MG TA hardtop " you find it on mgexp
|
|
|
|
gazzam
Part of things
 
Posts: 738 
|
|
|
|
Cheers guys. With the enforced wait for another controller, I thought I might as well paint the plasma table. The leftover paint from the Healey tank would do nicely. Thinned it with some acrylic thinners so it would spray, took the table outside, cleaned with wax and grease remover and masked bits of it. Here’s the result, can’t wait to get the electric bits finished. 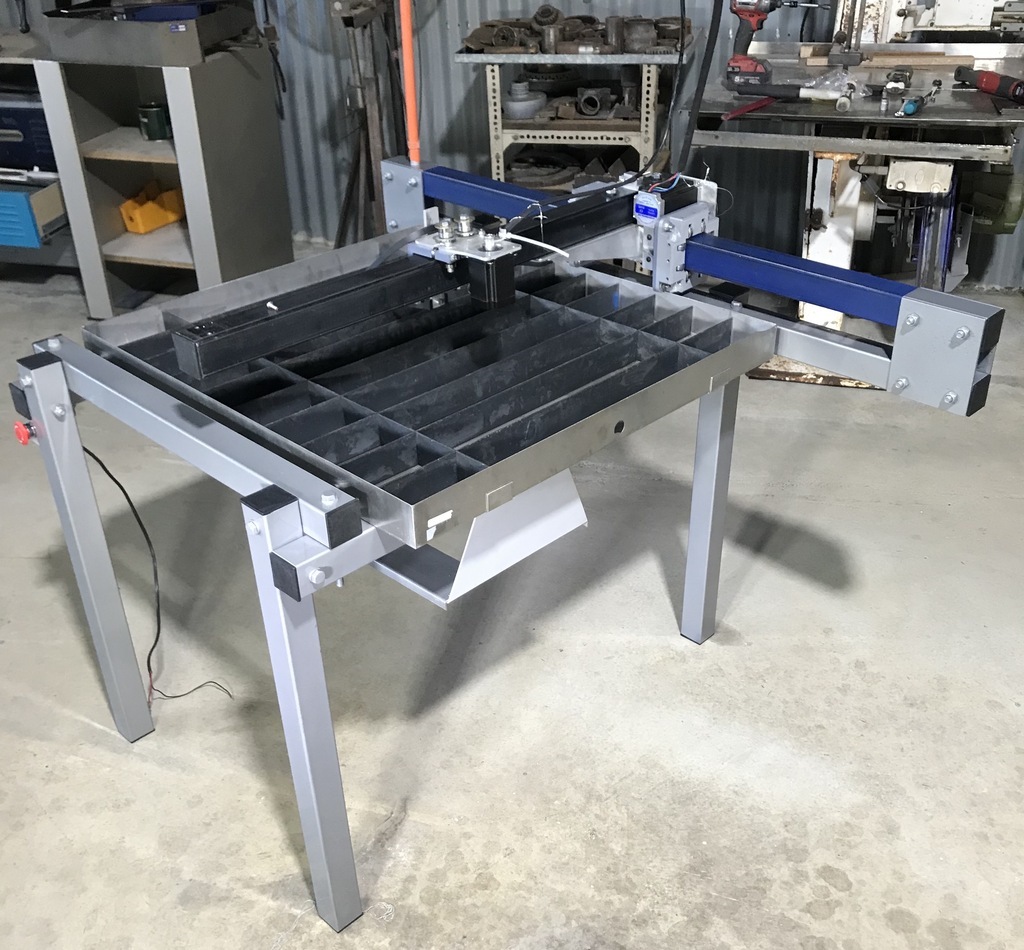 Quite pleased with that, for how little effort was involved. I should mention that it appears possible to restore the controller to factory settings, but the vid I partially watched confirmed that it was much more sensible to spend $13 on a replacement. Did a little bit of fiddling with the Triumph. Don’t think I’ve owned up to it on here previously, but the fit of the rear windscreen was very poor. Somehow I missed fitting it before painting it. It needed extra clearance along both sides and the forward edge. 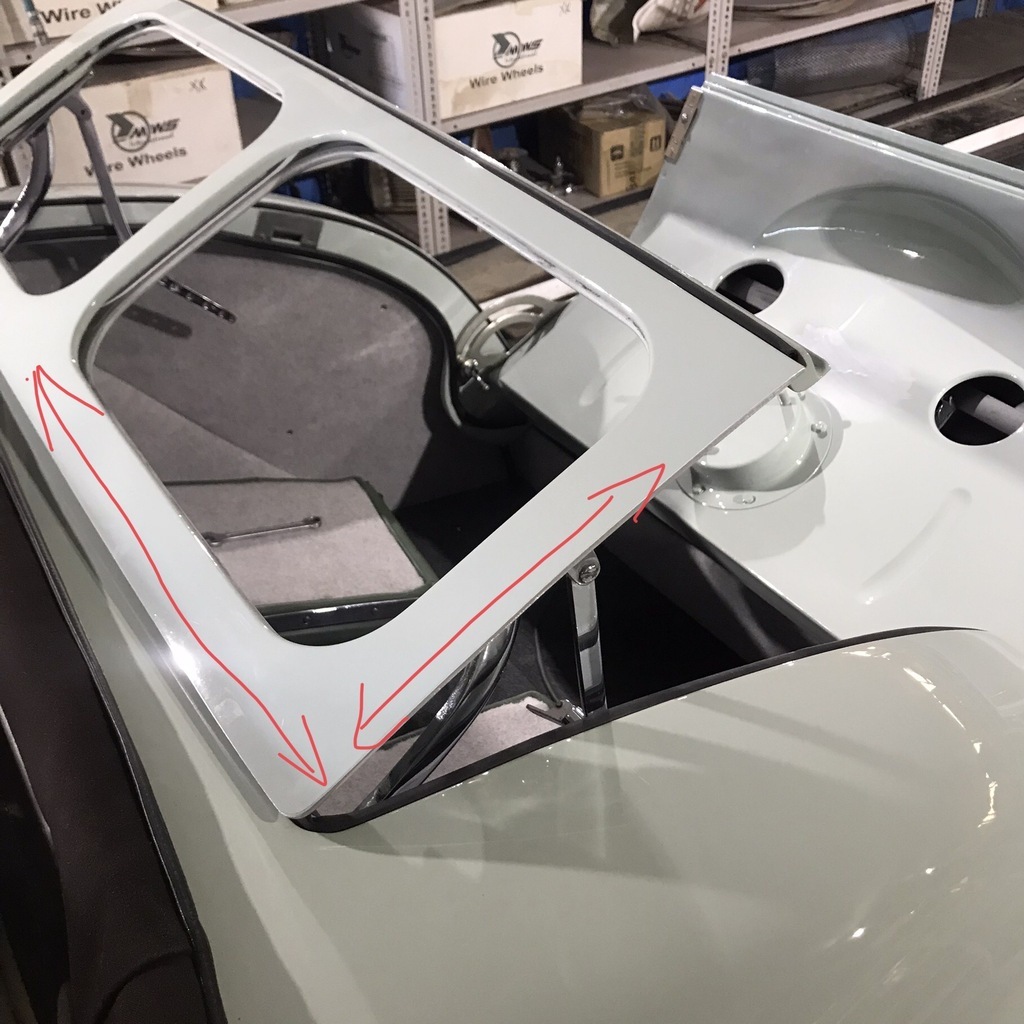 It’s a lovely ally casting so it was just a matter of grinding a few mm off, where required. And of course, repainting it. Next job is to add some bits to the bonnet, then the spray gun fun starts again… Also I want to try and remove the scratches in the glass. There are lots of them, and some quite deep. 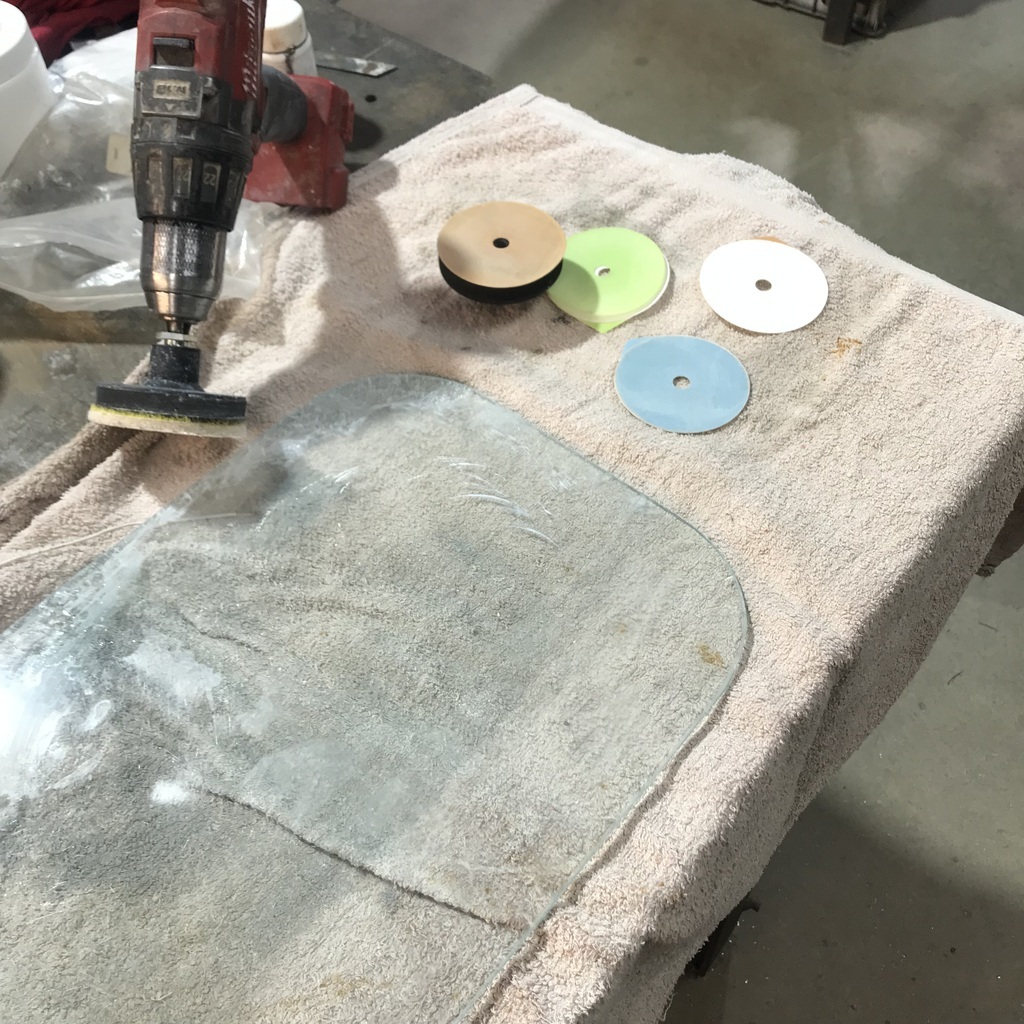 Looks like the car was used as a storage bench at some time in the past. Thanks. |
| |
|
|
|
|
|
Sept 5, 2024 11:08:13 GMT
|
|
I have total admiration for your efforts, talents and tenacity! I go back to slide rules and log tables so, despite keyboard bashing for many years, I restrict my IT to .....asking my grandson!
|
| |
|
|
gazzam
Part of things
 
Posts: 738 
|
|
|
|
Thanks Phil. You’re lucky to have someone to ask, with so much of this stuff knowing who to ask is a big problem. I too used log tables, though I wouldn’t know where to start with them now! Back on the Triumph, adding the small pieces to the corners of the bonnet. I had made a template of each corner using the dirty-finger tracing method, before taking the bonnet off the car. 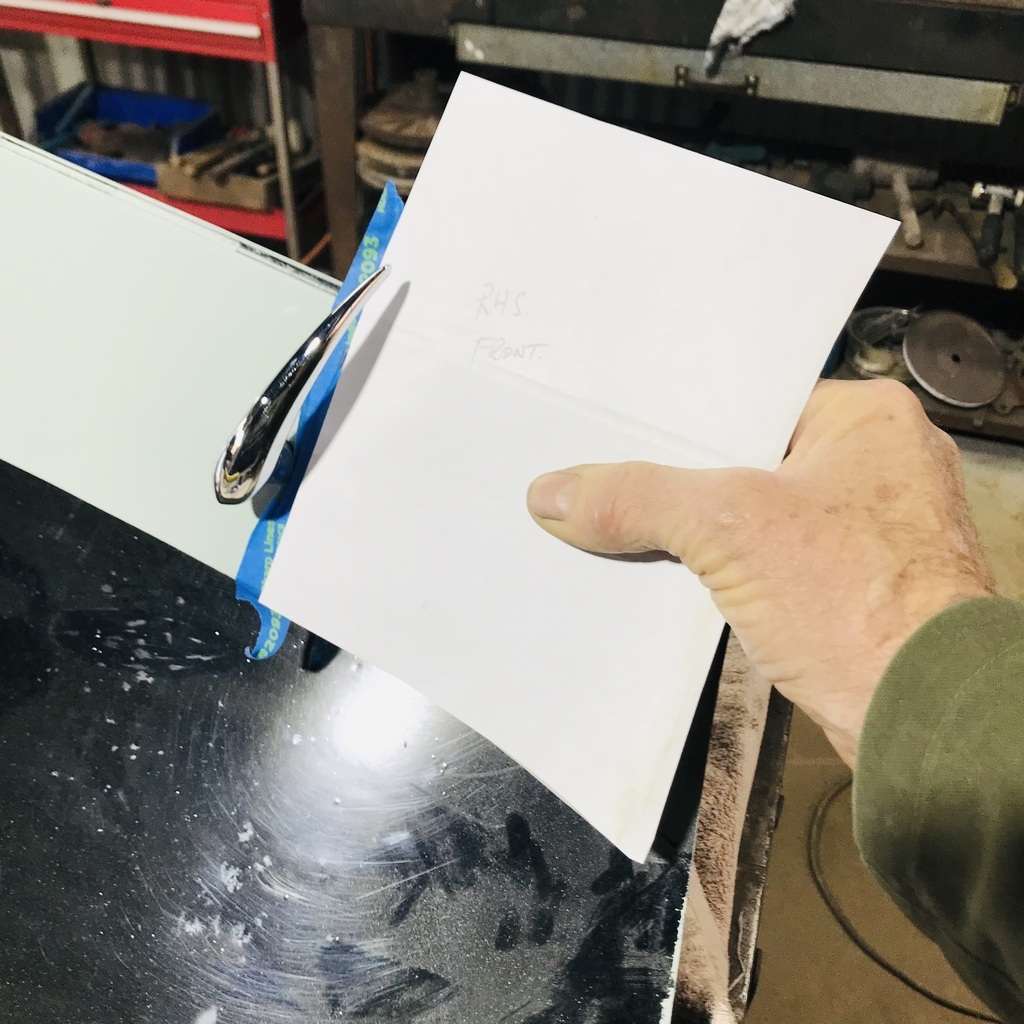 Found a piece of aluminium the same thickness. Sanded both bits back to shiny metal and clamped it in place. 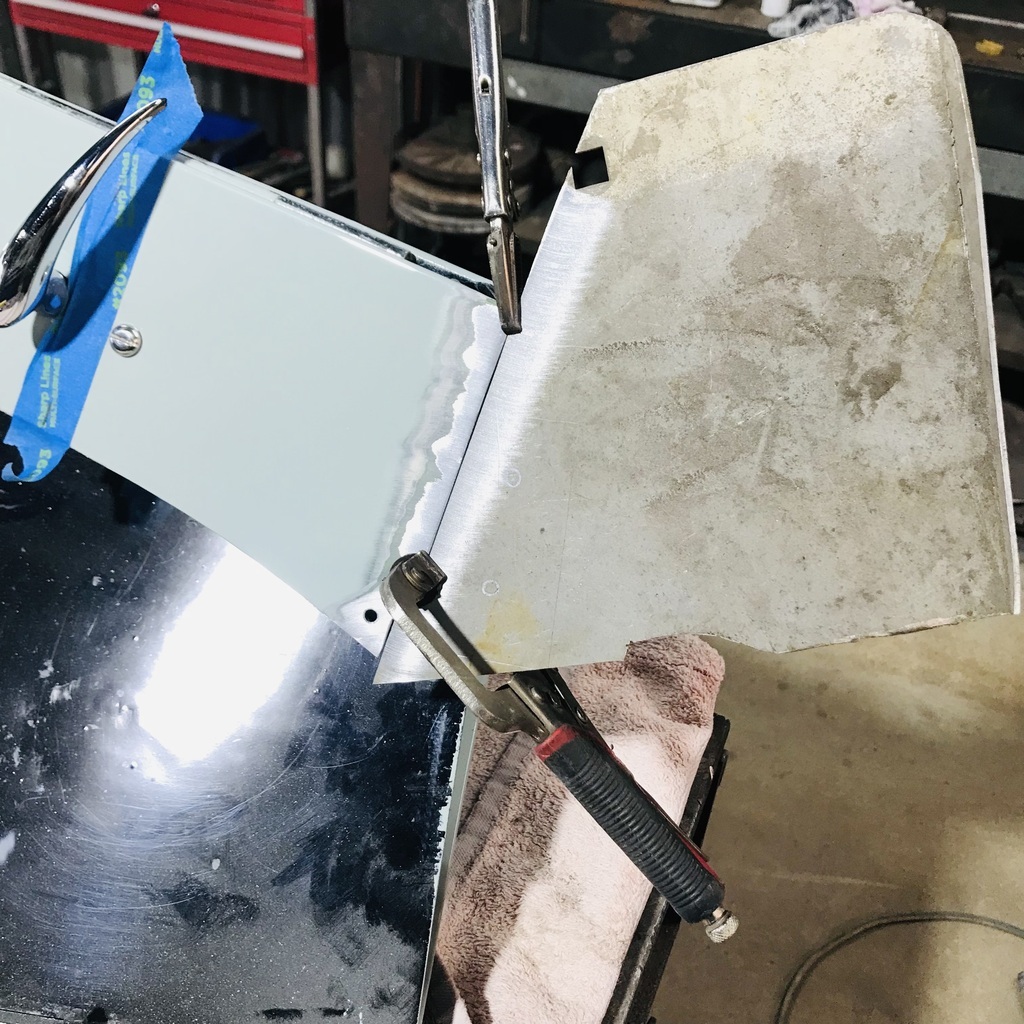 And that’s the last pic I took because anger and frustration do not a photographer make. You guessed it, the tig was not cooperating. I eventually got the bit of ally stuck on, but there would have been a lot of satisfaction in taking a BFH to the bl00dy tig. I tried four different filler rods, varying the amps from 40 to 75, and the ac balance from 3 to minus 3. Really, nothing made any difference. I just cannot get the base metal to form a nice shiny, or even dull, puddle. It just looks like I’ve been visited by a metal eating pigeon. And it just takes so long, all damn day to do a couple of short welds. While I’m having a whinge, does anyone else have a problem with their welding helmet pulling their hair? The thing I’m using now is a Weldclass, upper range, and it pulls my hair. I thought it might be because I needed a haircut, but it still does it even after a visit to the barber. And it damn well hurts. This is a replacement for the one I threw to the ground in frustration last time I couldn’t get an ally weld to happen. The hair pulling is why I bought a better one, hoping the thing might be less painful. Anyway, time to get off my soapbox. Thanks. |
| |
|
|
|
|
|
|
|
|
I had the same problem welding the 1960 Landrover I used to have, then I saw a TV program where a pro had thecsame issues on a Landrover, the alloy they used had a lot of impurities in it apparantly.
|
| |
|
|
teaboy
Posted a lot
   Make tea, not war.
Posts: 2,125
|
|
|
|
|
I wear a hat when I’m welding.
They are just a thin skull cap type thing, not a top hat. 😀
|
| |
|
|
75swb
Beta Tester
Posts: 1,052
Club RR Member Number: 181
|
|
|
|
|
Yeah, old landrovers are brimabright or something, which I think is an ali-magnesium alloy? Either way I'm not looking forward to repairing the corroded rear light holes of my series 3. I wonder if this is similar, and welding new pure ally to older either intentionally or unintentionally less pure material is part of the issue?
|
| |
|
|
|
|
|
Sept 8, 2024 19:42:29 GMT
|
|
Trying to weld to old aluminium is always a nightmare due to impurities.
Maybe time to think about bonding on a repair panel with one of the new 3M panel adhesives the modern car makers use?
I was also going to advise wearing a thin skullcap for the welding helmet.
|
| |
|
|
|
|
|
Sept 8, 2024 19:47:40 GMT
|
|
That's what I did for subsequent repairs, cut the damaged area back to flat non corroded metal, bonded a piece in from behind then another piece on the front to fill the hole, fine for areas you can't see from behind but not ideal for the single skinned bonnet and doors.
|
| |
|
|
gazzam
Part of things
 
Posts: 738 
|
|
Sept 10, 2024 6:48:28 GMT
|
|
Thanks for the replies men, I’ll look for a scullcap. Maybe it could be fixed semi permanently to the helmet, to make it a bit more convenient.
I eventually got it welded. And once the pigeon droppings are ground back, it looks normal.
Now to strip all the paint off.
Then, once I have the clutch back and the motor/gearbox back in, a trial fit.
Then paint.
Sounds so easy doesn’t it?
Thanks.
|
| |
|
|
|
|
Tamber
Part of things
  Shattered. Held together by spite and tape.
Posts: 336
|
|
Sept 15, 2024 23:30:38 GMT
|
Trying to weld to old aluminium is always a nightmare due to impurities. Also, apparently, the oxide layer that forms on aluminium slowly grows thicker over time, so even if good quality aluminium was used back when a part was made... several decades later, the layer of oxides will be quite thick (as far as oxidation layers go), and the oxides are denser than pure aluminium, so tend to sink into the weld pool rather than floating on top. (I ran into a similar problem when I tried to weld to the manifold on the RL, ended up having to use modern adhesives instead.) It's always a bit of a losing battle, trying to weld older parts up like that, unfortunately. But there's ways around it, these days! |
| |
-< Welder. Allegedly a mechanic. Bodger of Things >-
* 1958? Bedford RL - Progress: Glacial.
* 1994 Skoda Favorit - It's baaaaaaaack!
* 2018 Herald Classic - Gone!
|
|
gazzam
Part of things
 
Posts: 738 
|
|
Sept 18, 2024 8:40:44 GMT
|
|
Cheers Tamber, it’s good to have an excuse!
Not much photo worthy in this update, but a milestone nonetheless. The plasma moved!
But not for long. And now it’s telling me 'access denied'
Computers are great when they work. More stuff to learn.
And the Triumph clutch should be home tomorrow.
Today I finished heatgun stripping of the bonnet. Now it needs chemical stripping to finish getting it back to bare metal.
Thanks.
|
| |
|
|
|
|
|
Sept 18, 2024 19:53:15 GMT
|
|
Hello
" Now it needs chemical stripping to finish getting it back to bare metal.
"
what do you use for it
Regards
Franz
|
| |
MG TA Nr 1932, MG YA Nr 1675, Spartan Kit Car 3.0 V6 Essex
Story how to build a carbon hardtop
" MG TA hardtop " you find it on mgexp
|
|
gazzam
Part of things
 
Posts: 738 
|
|
Sept 19, 2024 22:36:10 GMT
|
Franz, “Now it needs chemical stripping to finish getting it back to bare metal.” I’m just using paint stripper. Got the clutch back. It looks like new. 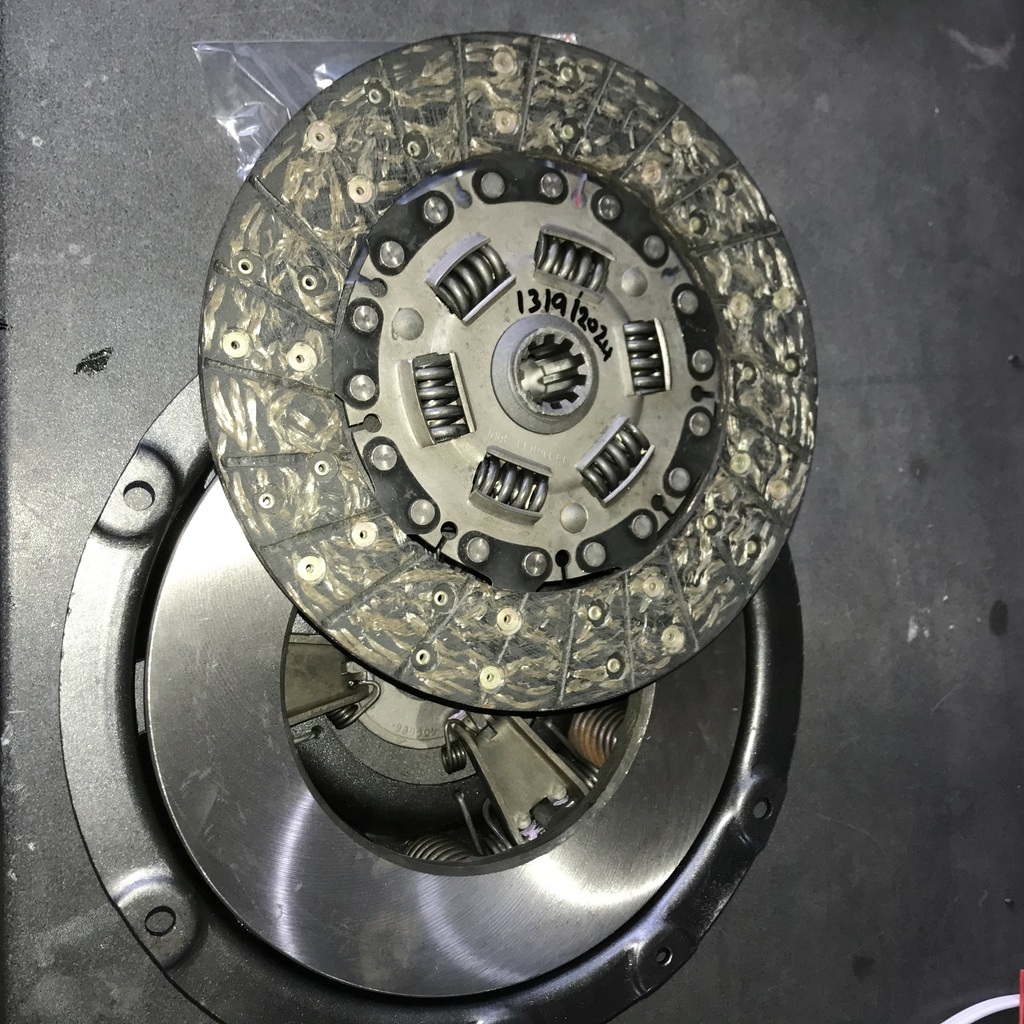 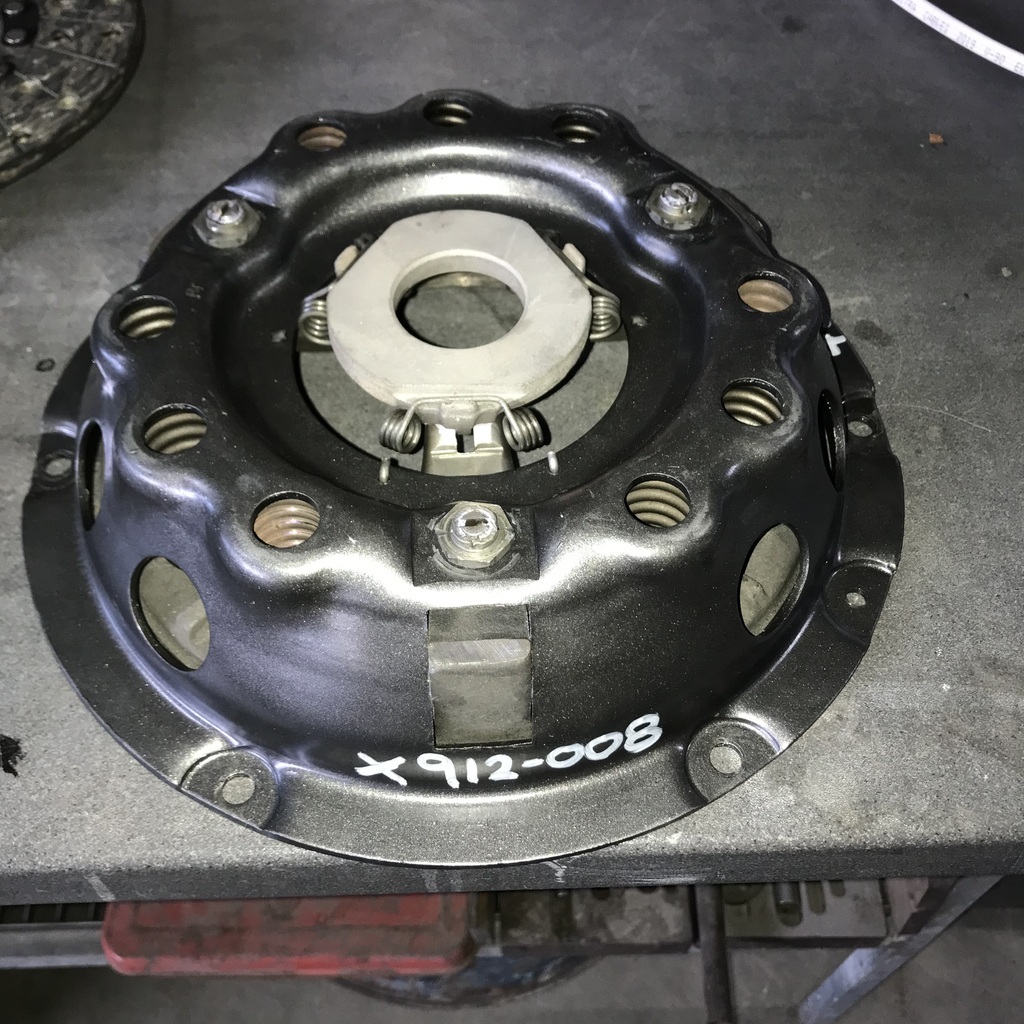 On the plasma front, it occurred to ne that the problems were with the Bluetooth side of things. So I hooked up with a USB cable, and suddenly it’s reliable. And the jog amount seems accurate. Now I have to figure out how to get a CAD drawing into it. I was hoping that it might just happen, as it did with the 3D printer. But apparently not. At least I’ve stopped pulling my hair out. Thanks. |
| |
|
|
gazzam
Part of things
 
Posts: 738 
|
|
Sept 21, 2024 7:07:31 GMT
|
It lives! The plasma, that is. 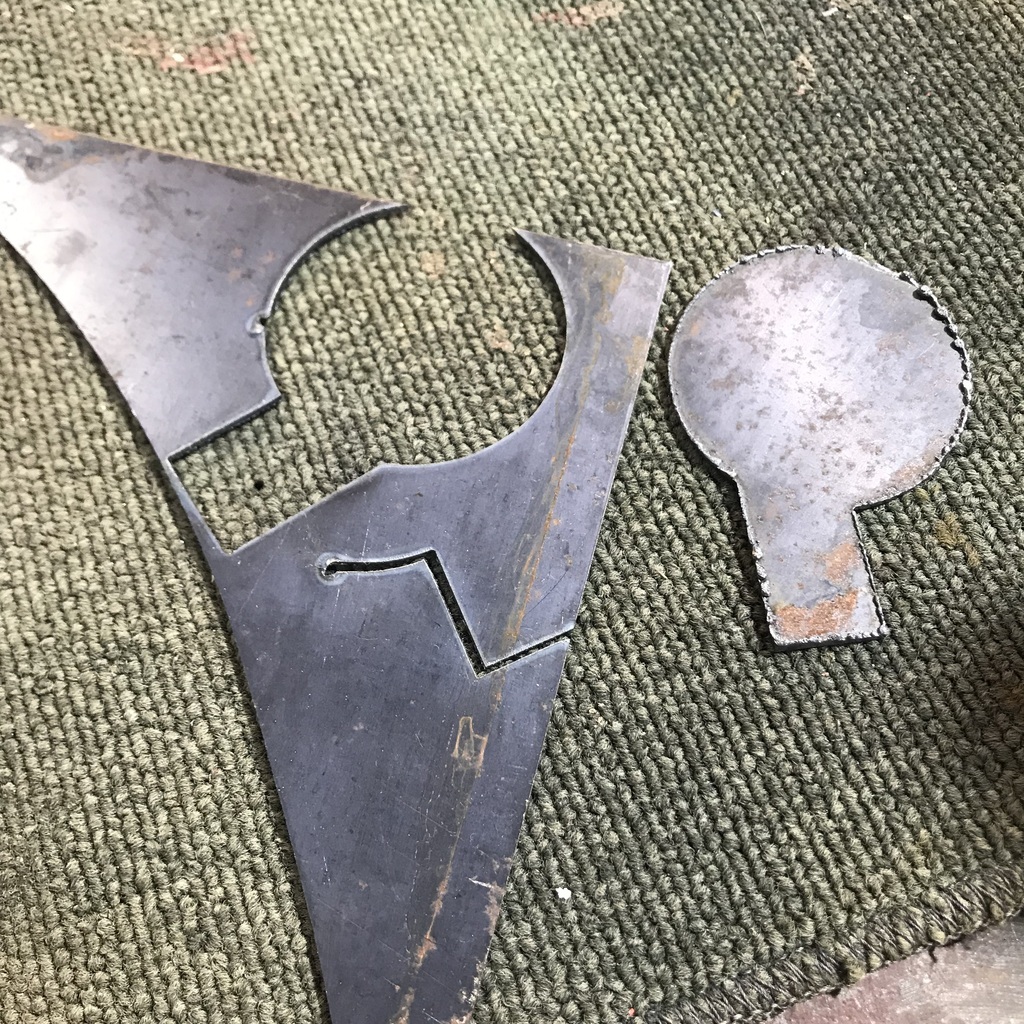 That’s the very first cut. It’s 2mm steel, and the slag is not too bad. The second attempt, 3mm this time. 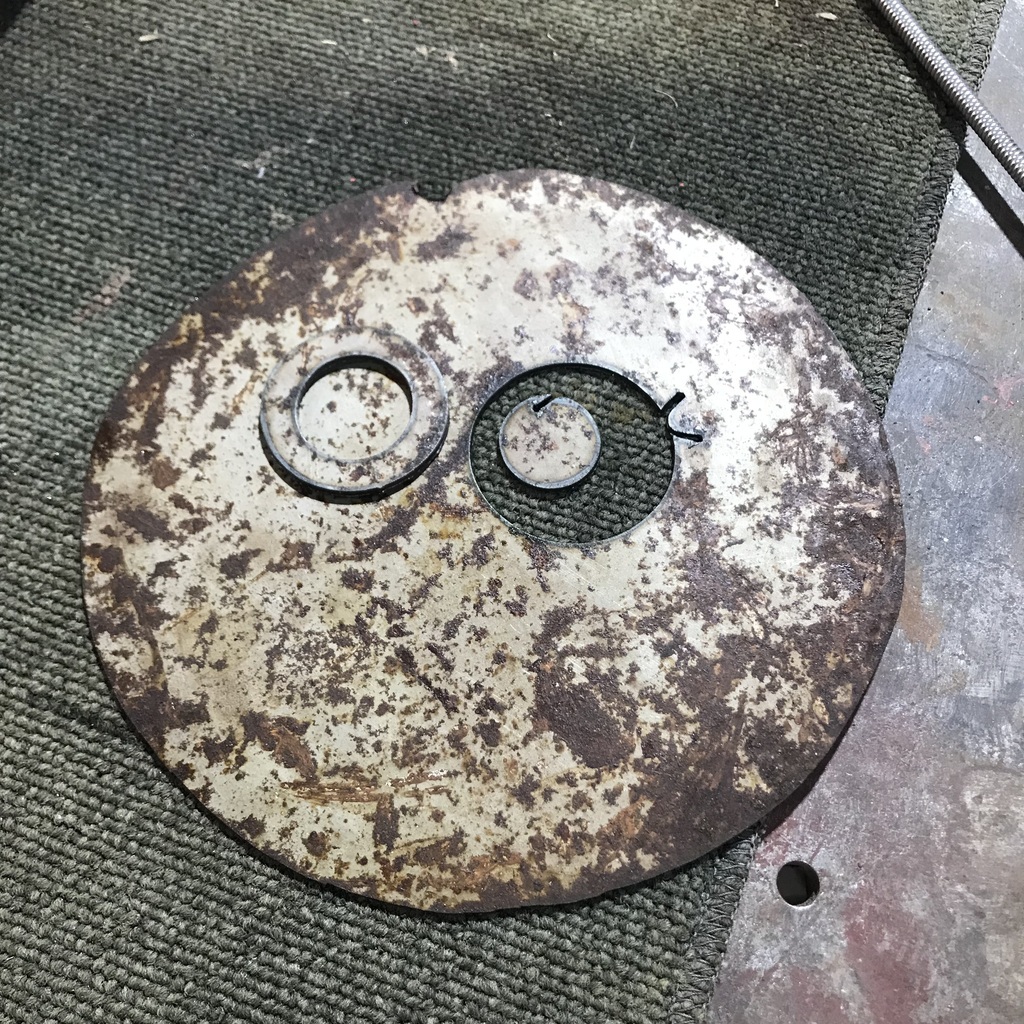 And the back view. 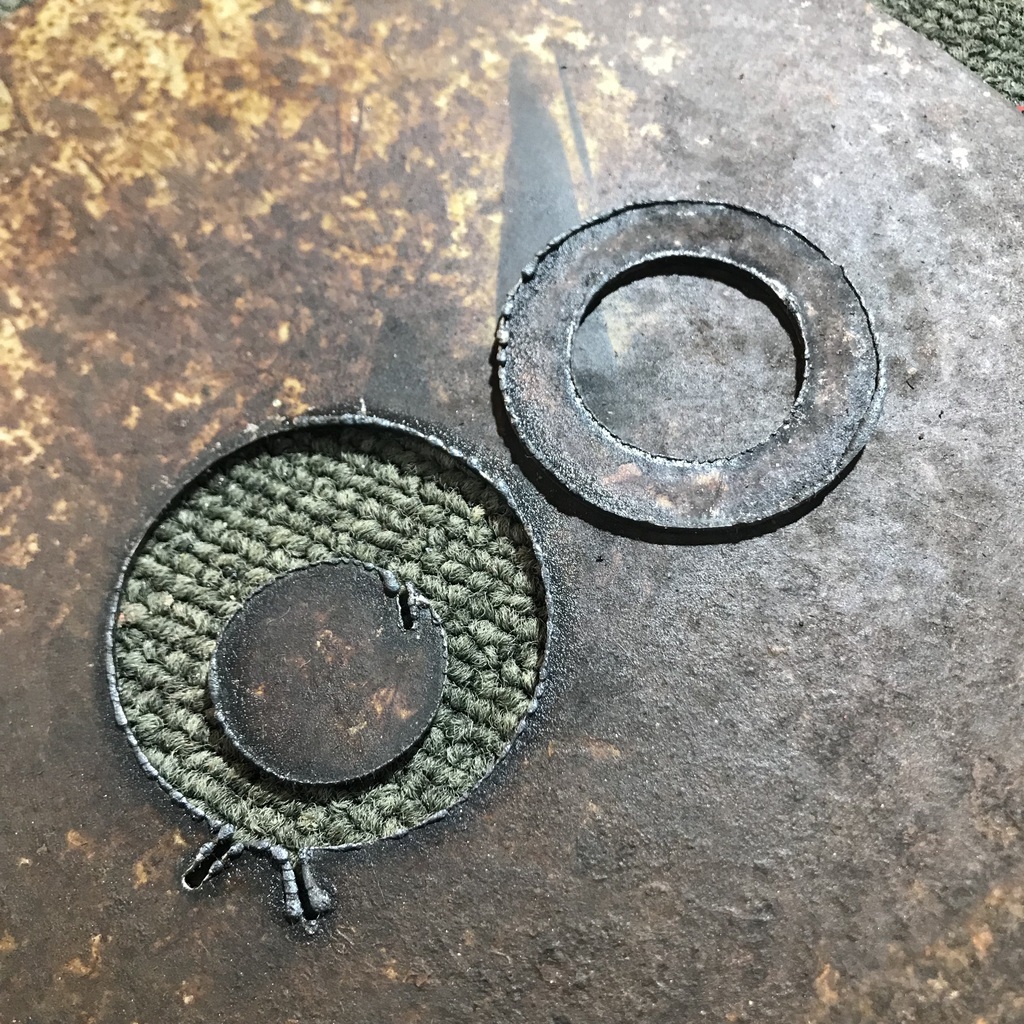 Again the slag isn’t too bad. I haven’t played with any settings at all. Just guesstimated the torch height. Speed is at whatever the default is. There’s plenty of experimenting to be done. But I’m totally chuffed. I had to reload Fusion 360 onto my computer. I deleted it when I decided to go with Onshape for 3D printing. I couldn’t find anything about using Onshape with the plasma controller, so I just took the path of least resistance and went with Fusion. Then I watched a Fusion tutorial, just the basics of 2D. Much easier with one less dimension! The confusing bit for me is getting the design from Fusion to the plasma processor. That just happened with the 3D printer, it was pretty much a non event. But I’m sure it will get easier with a bit more experience. Might have an ale to celebrate! Cheers. |
| |
|
|
gazzam
Part of things
 
Posts: 738 
|
|
Sept 22, 2024 7:29:03 GMT
|
Did some fiddling with the plasma to get the cutting dimensions correct. Action photo. 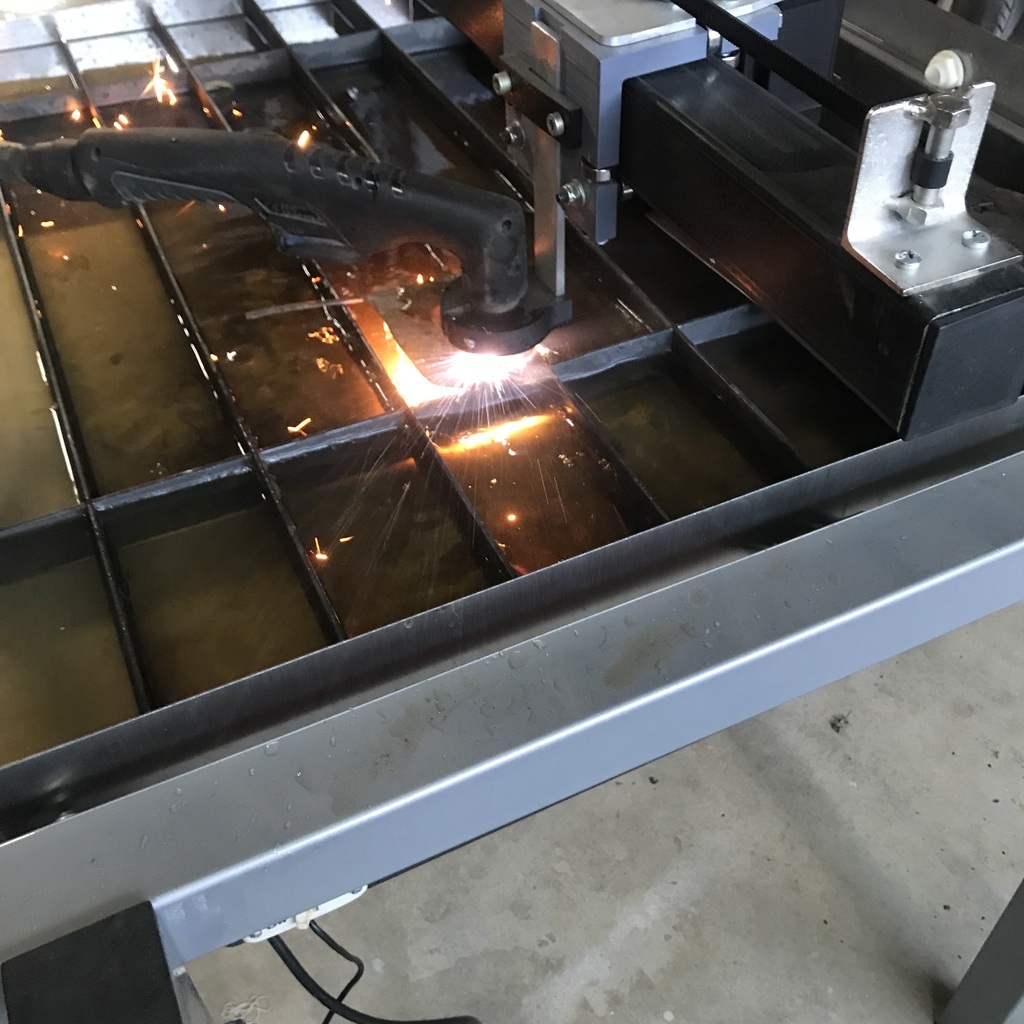 It allows for the cut thickness, so if the cut thickness setting is wrong, the final dimension will be wrong. I have it pretty close now, but you have to remember, these bits are plasma cut not machined. Anyway, I was able to get these made. 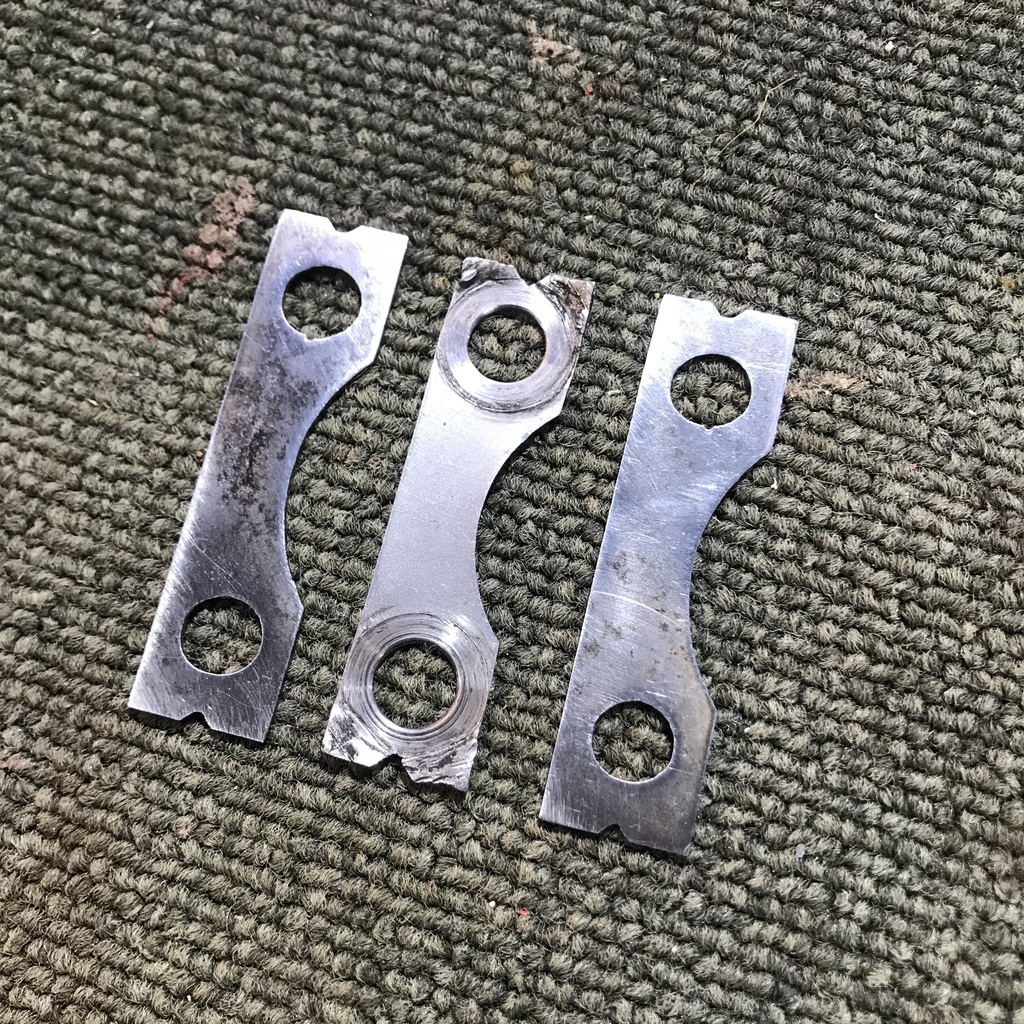 The centre one is the original. My two have had the slag sanded off the back, but the edges, including the holes, are as cut. So I’m pretty pleased with that. I know they would be very fiddly to cut out by hand. They’re lock washers for the flywheel bolts on the Triumph engine. I removed the flywheel because there was a drip of oil under it. This is the seal setup behind the flywheel. 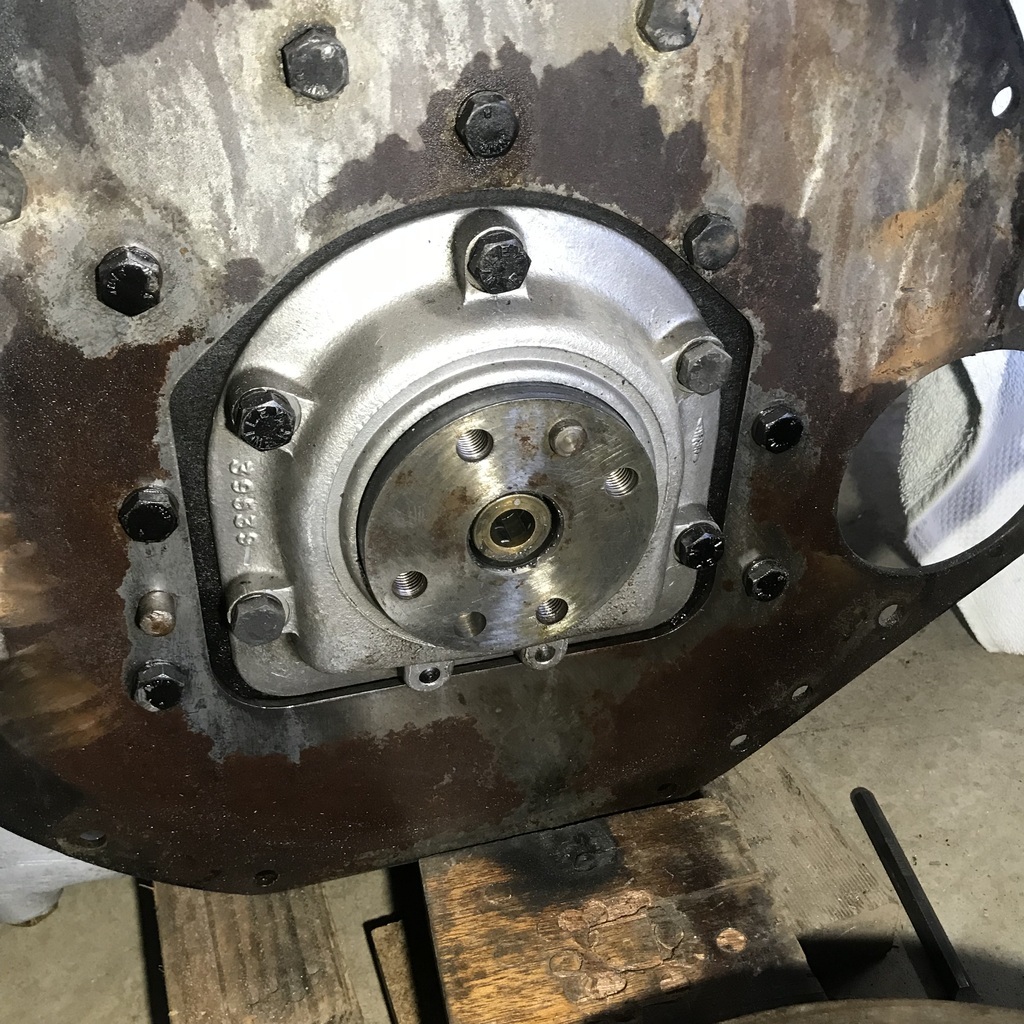 Anybody know what I’m likely to find behind that ally cover? The sectional drawing of the engine in the owners manual shows what looks like a scroll in there. Thanks. |
| |
|
|
|
|
|
Sept 22, 2024 16:06:06 GMT
|
|
There could well be a scroll in there. Triumph were prone to this. They work pretty well in the dynamic state provided properly centred and not worn/damaged. They do loose a few drops when first stopped or if parked on steep slopes.
|
| |
1967 Triumph Vitesse convertible (old friend)
1996 Audi A6 2.5 TDI Avant (still durability testing)
1972 GT6 Mk3 (Restored after loong rest & getting the hang of being a car again)
|
|
glenanderson
Club Retro Rides Member
Posts: 4,352
Club RR Member Number: 64
|
|
Sept 22, 2024 16:57:33 GMT
|
|
Lots of stuff in the pre/post war era were never really designed to be oil tight by modern day standards. The ethos of “as long as it’s not pouring out” was pretty much the standard…
|
| |
My worst worry about dying is my wife selling my stuff for what I told her it cost...
|
|
teaboy
Posted a lot
   Make tea, not war.
Posts: 2,125
|
|
Sept 22, 2024 18:01:19 GMT
|
This is fantastic, but what is most impressive is that it manages to cut the steel without damaging the carpet below.  |
| |
|
|
gazzam
Part of things
 
Posts: 738 
|
|
Sept 23, 2024 9:33:07 GMT
|
The carpet is wet, Tea. That helps. Did a bit on the Triumph today. Started paint stripping the bonnet. 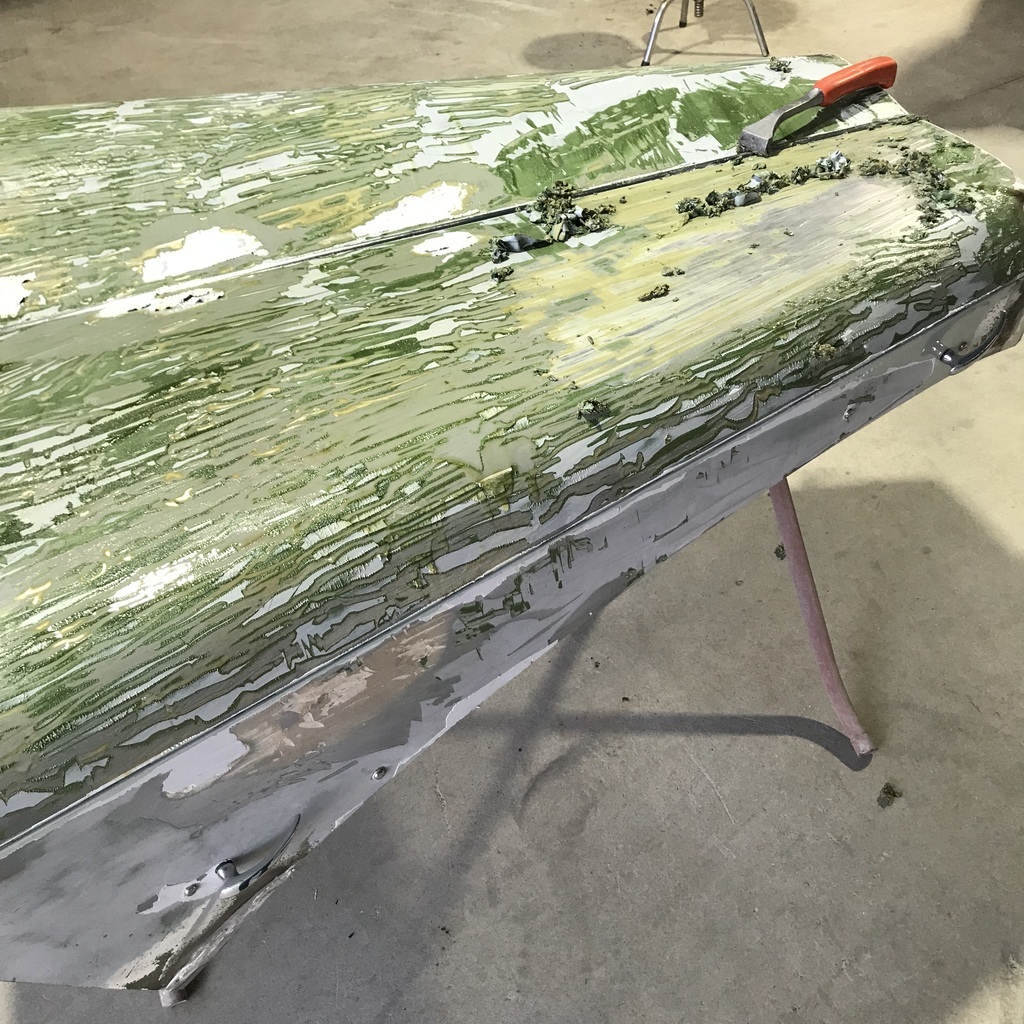 And on to the clutch. Attempted to remove this housing, 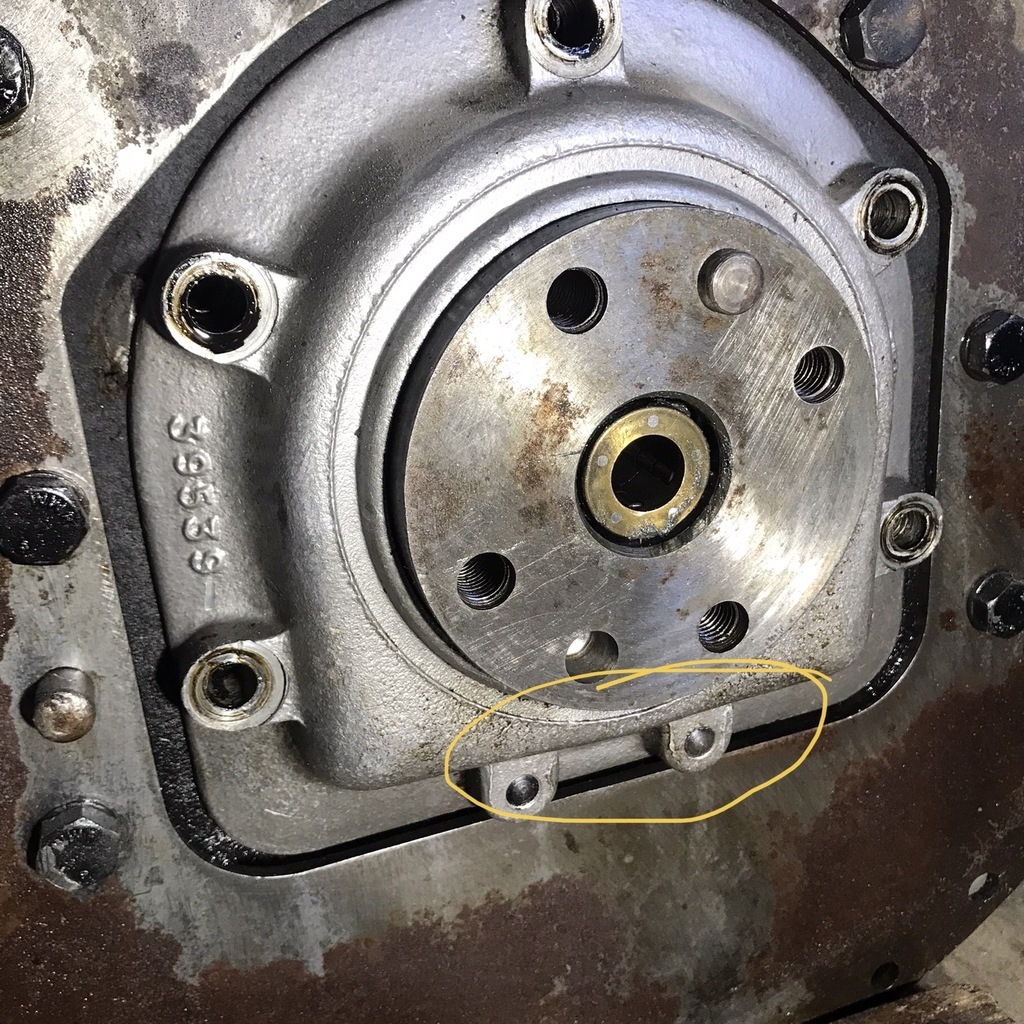 but was not successful. The things circled are the ends of bolts that come through from inside the crankcase. They are shown in the sectional drawing in the manual. And I wasn’t pulling the sump to get at them! I don’t think it’s needed. If it was leaking, the inside of the flywheel would have been wet with oil. But all it had was a strip of oil that I reckon was the result of having the engine pretty much hanging by it’s nose when I was getting it out of the car. So I’ll drop the oil before I get it vertical on the way back into place. Clutch is on. 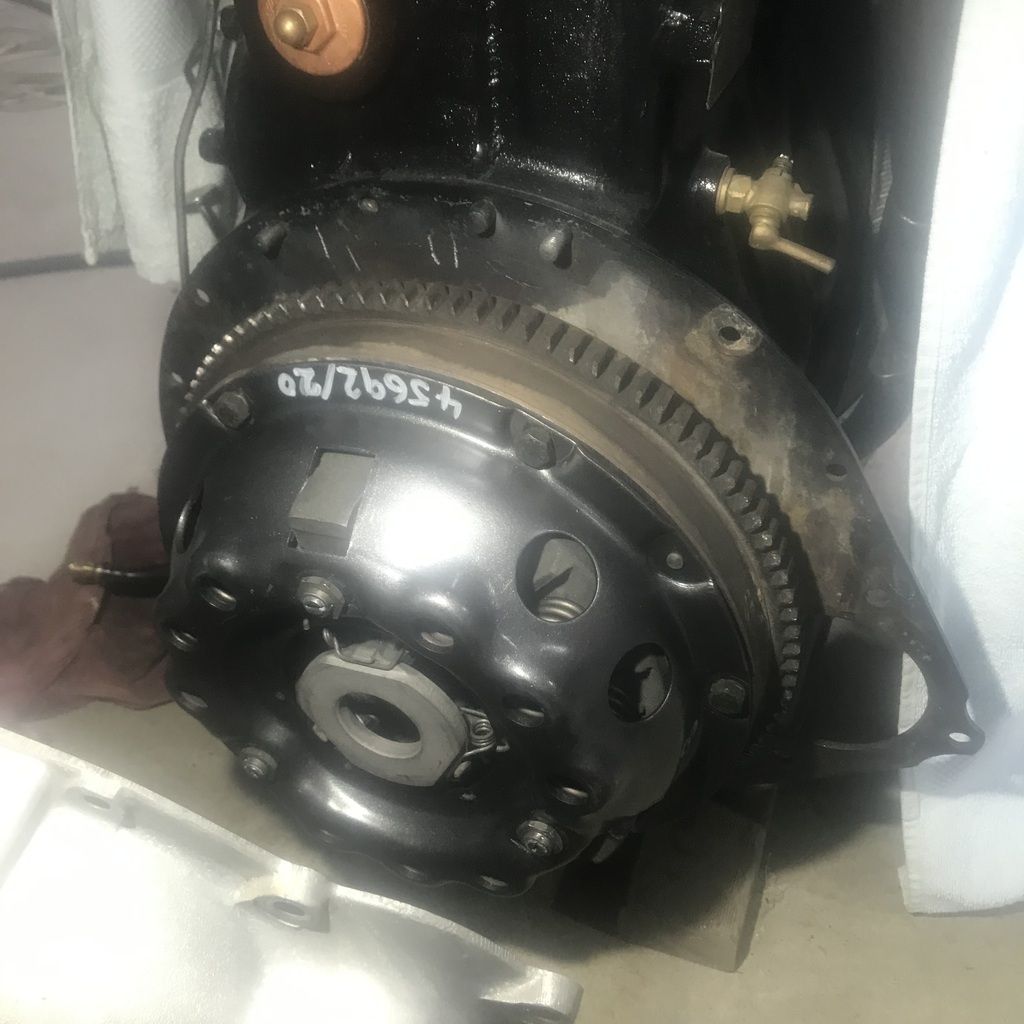 And so is the gearbox, though I didn’t take a pic. Might get it back in the car tomorrow. Thanks. |
| |
|
|
|
|


