gazzam
Part of things
 
Posts: 740  Member is Online
|
|
|
|
Made one of the brackets that hold the stepper motors. Started by making a 38mm hole in a piece of 4mm ally, for the boss on the motor. 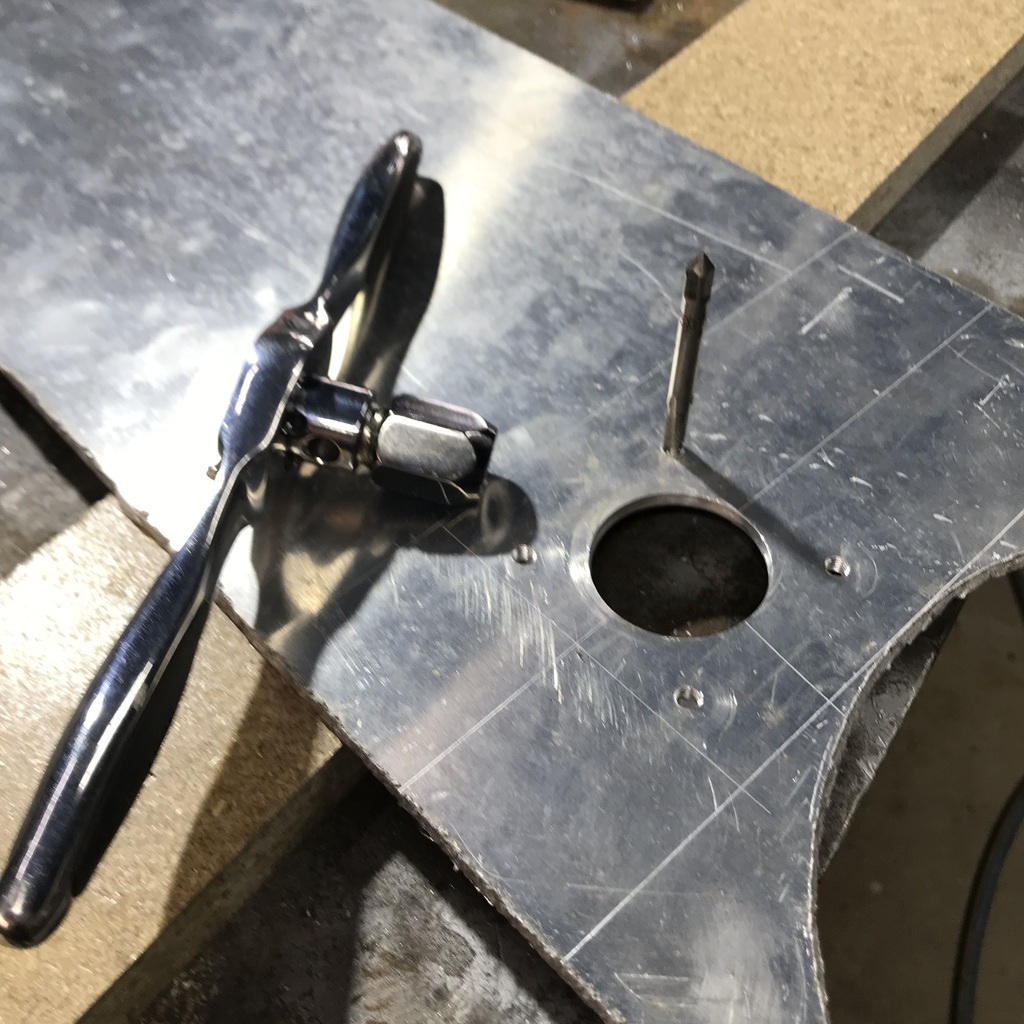 Get the hole done, then mark the mounting holes using the motor as a template. Tap them and then cut out the rest of the bracket. Less chance of getting the hole in the wrong spot then… Almost finished here. 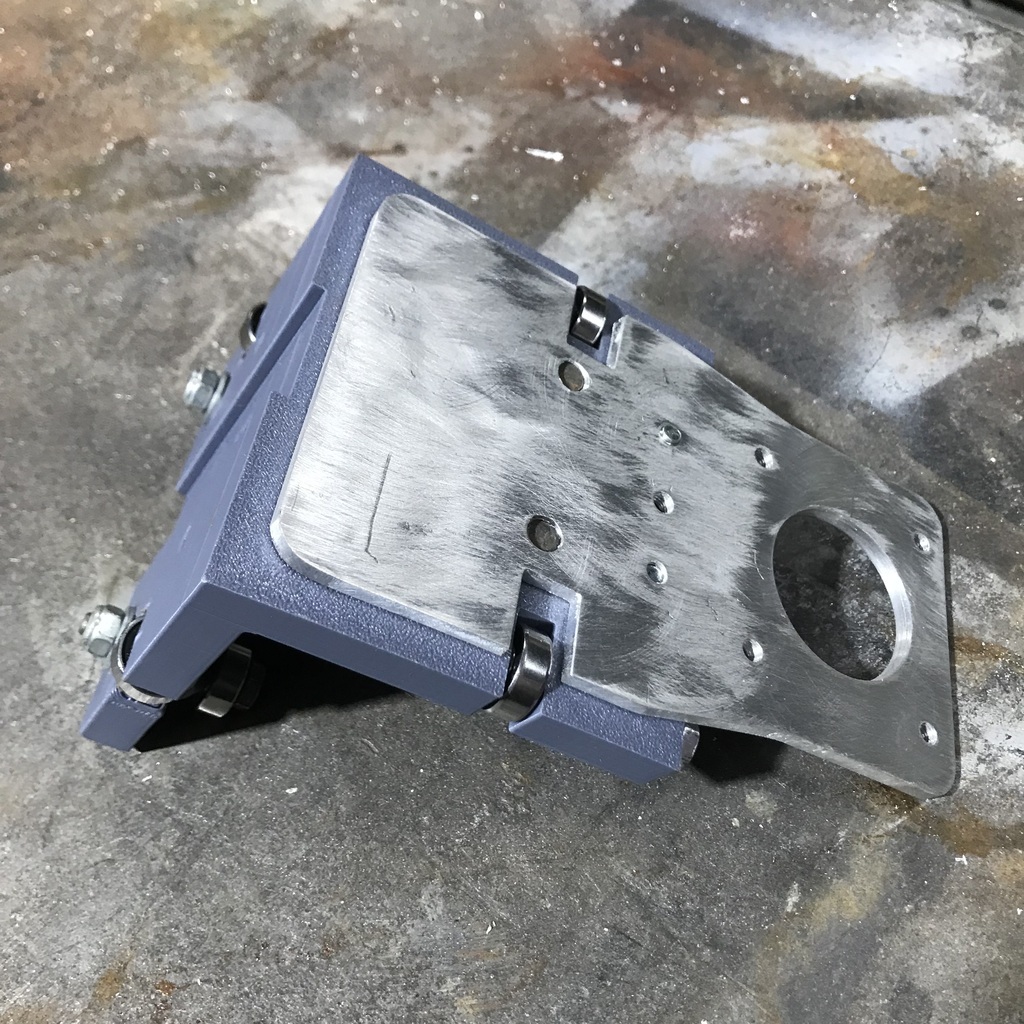 Cut some pieces of 5mm ally to make the gantry for the Y axis. Don’t I sound like I know what I’m doing? 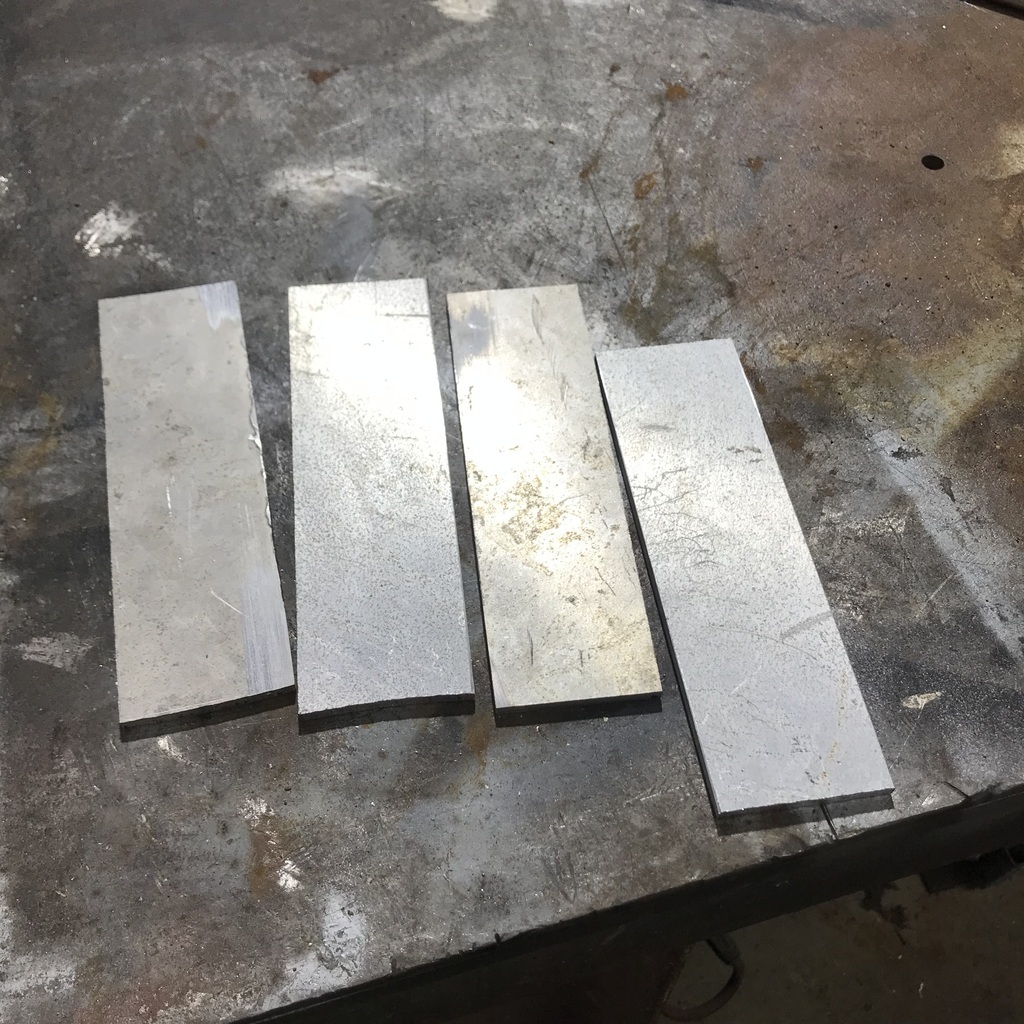 Clamped the ally bits into the printed pieces to tack them together. 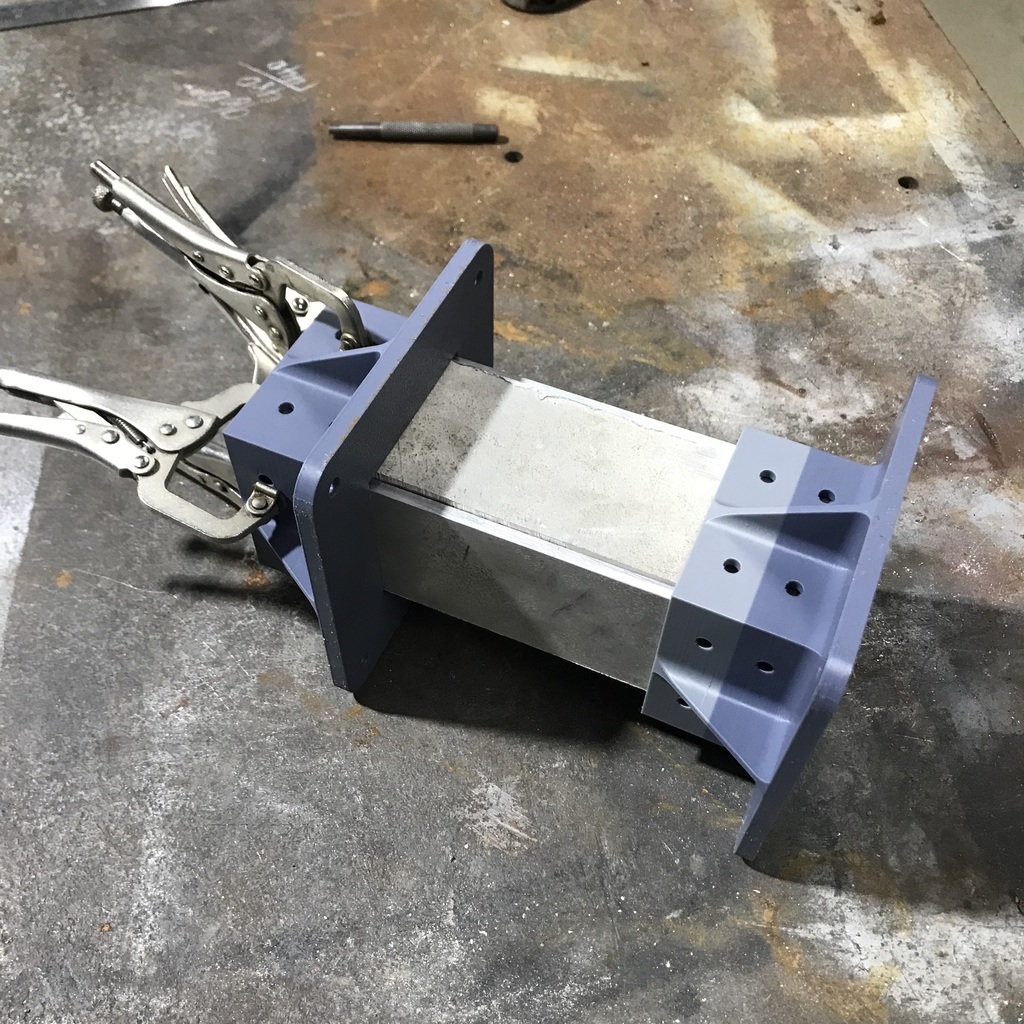 At that point the grinding stones arrived, so I changed projects. I drilled some holes and bolted them to the improvised grinder. 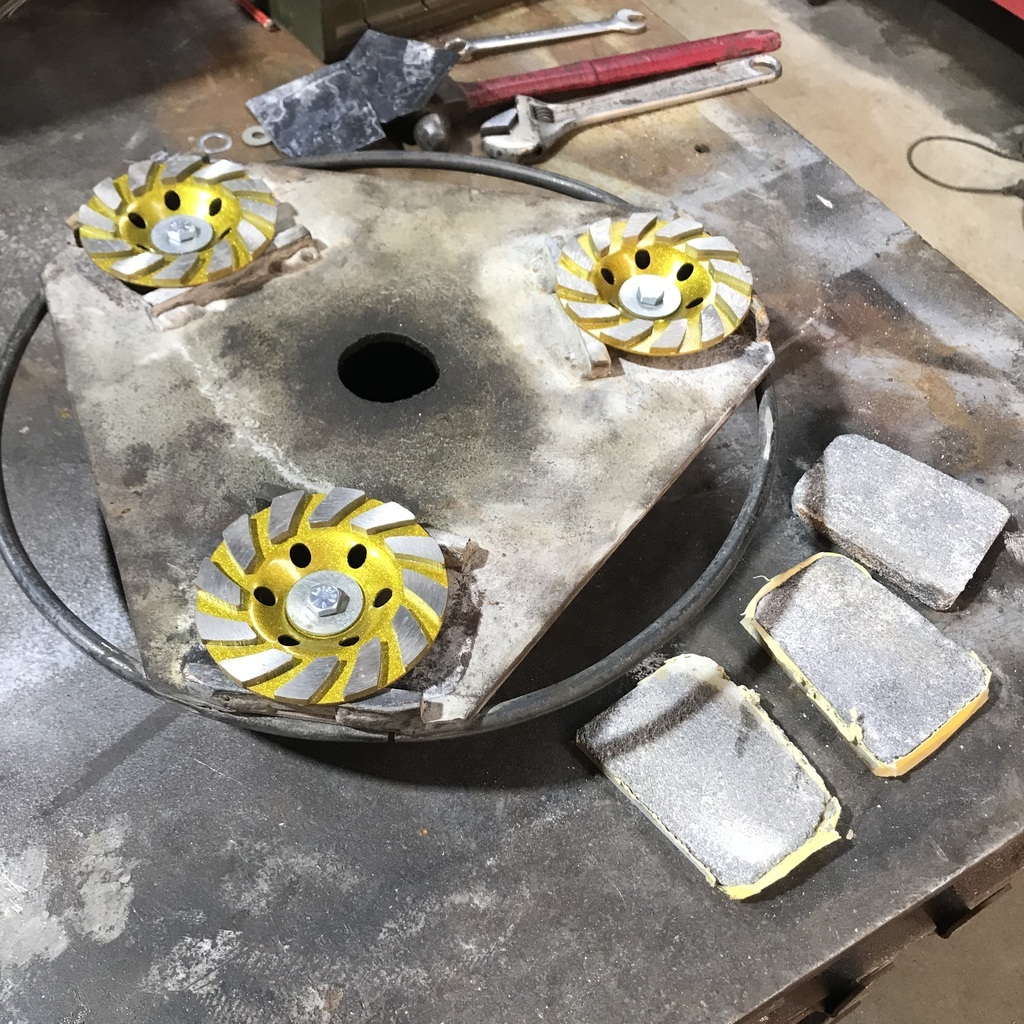 Finished grinding the new concrete and put the last few bits of shed furniture into place. I’m putting a tick against the shed job! Back onto the plasma cutter tomorrow. |
| |
|
|
|
|
|
|
|
|
|
|
Can you show the ground concrete? I'm needing to do this on my garage floor - some details of how good/easy/hard it is would be useful. What about corners?
|
| |
|
|
teaboy
Posted a lot
   Make tea, not war.
Posts: 2,125
Member is Online
|
|
|
|
Can you show the ground concrete? I'm needing to do this on my garage floor - some details of how good/easy/hard it is would be useful. What about corners? You need to put a cupboard or something in the corners. 😀 |
| |
|
|
gazzam
Part of things
 
Posts: 740  Member is Online
|
|
|
|
Mark, Grinding concrete isn’t particularly difficult or fun. Quite messy. I’ve had a fair bit of experience with it over the years. We did a terazzo floor in our laundry. Helped a pro do the floor of the retail area of my bike shop. Not concrete, but we levelled a granite ‘floater’ to be the centrepiece of our lounge room. You need a machine like this. Or larger. 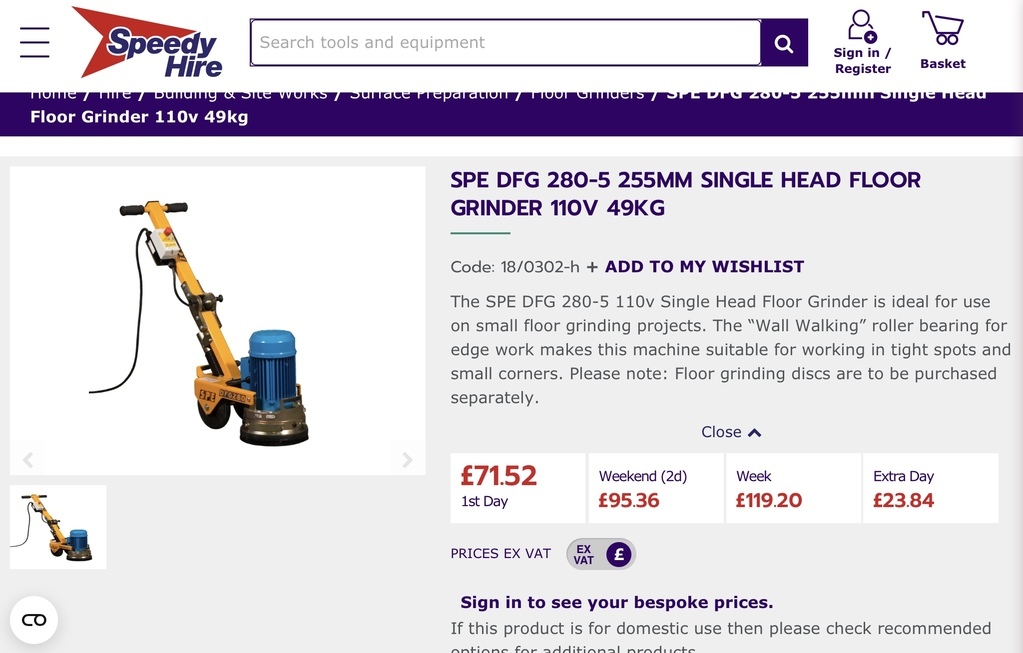 And you need diamond stones, carborundum is a waste of time on old concrete. This is the join area on the floor of the shed, old stuff on the right. 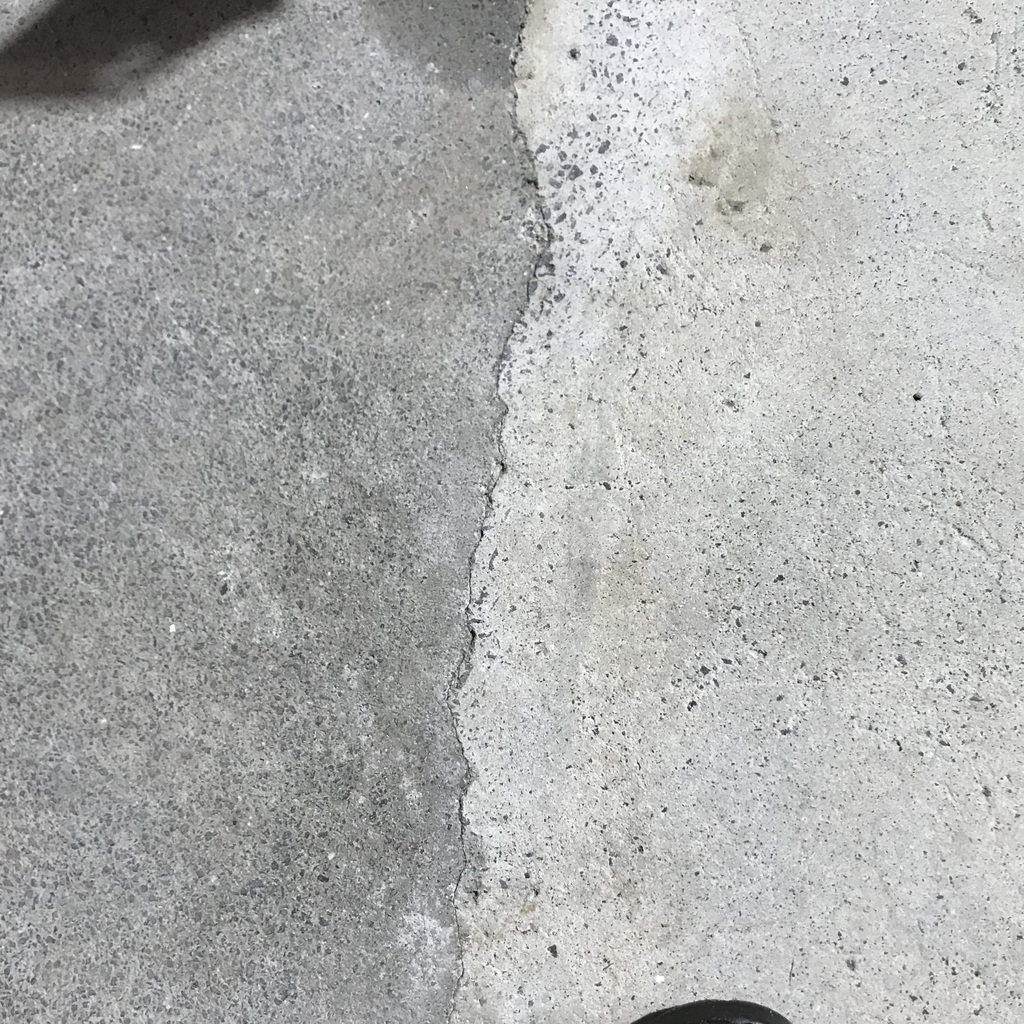 The machine in the pic would get quite close into the corners. If you need to get right in, a 4” angle grinder with a diamond wheel will do it. If you need any more details, just ask. Cheers. |
| |
|
|
|
|
|
|
|
|
It is so impressive to see and read about the variety of jobs that you tackle. Total respect and admiration.
|
| |
|
|
gazzam
Part of things
 
Posts: 740  Member is Online
|
|
|
|
Thanks Phil, I’ll have a go at most things, probably mainly because I reckon it’s easier to save a quid than make one. But the satisfaction of doing something yourself, that ends up half decent, that’s priceless. That sounds like a credit card ad, but it’s true. Very nice of you to say though. Back to the plasma. Before trying to tack together that thing from the last post, ‘the gantry’, I thought I’d see whether the welder was going to cooperate. 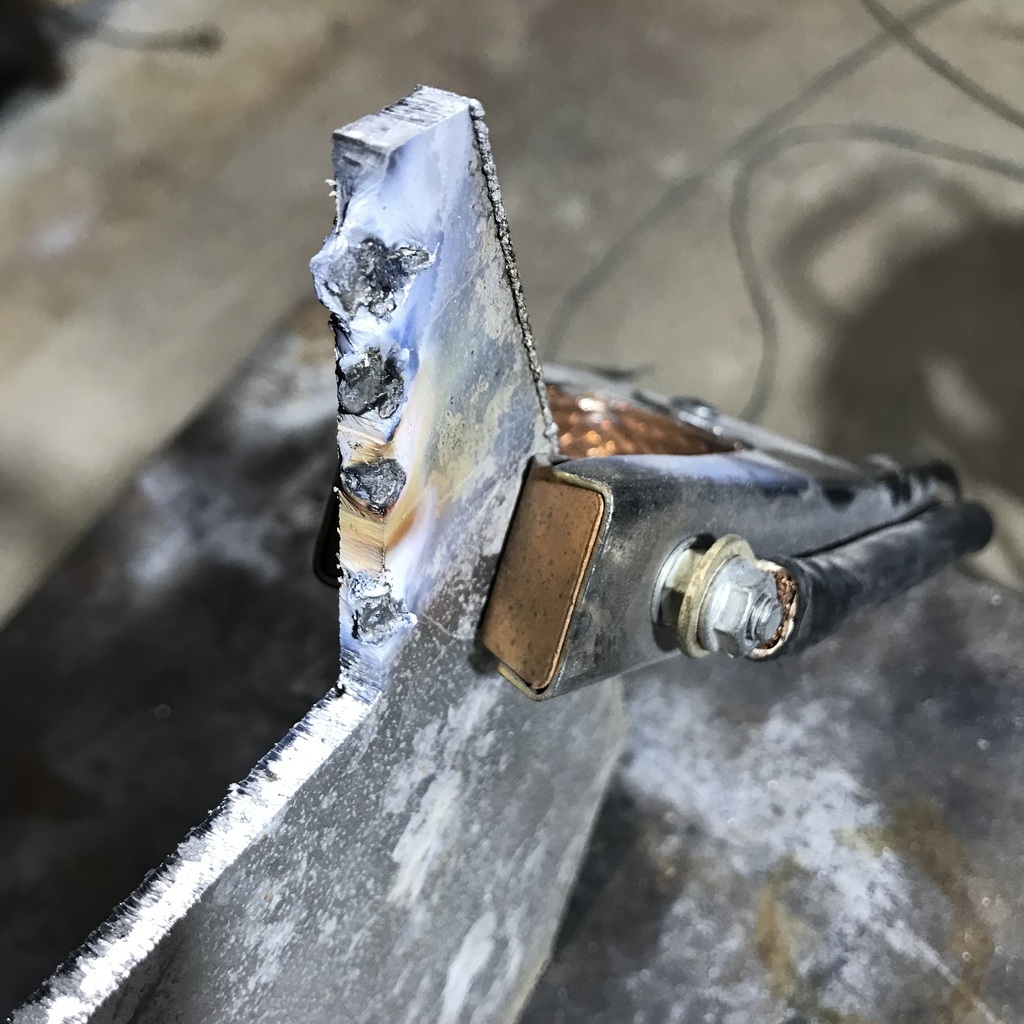 That would be a ‘No’ then. Rather than walk away, or kicking the TIG off the cart, I rang a very helpful bloke from the crowd that makes them. When I say ‘make’ I really mean design. Because like everything else, they are made in China. At least I think their headquarters are in Tamworth NSW. Anyway, this chap was very helpful when I was having problems with the foot pedal. To the extent that he came to my shed, a 20km drive, each way. Which was good, because he found out I wasn’t a whinger. It got me some cred. And he said I needed to use a bigger electrode and more amps. He was, of course, right. But I don’t understand why it was behaving as it was. Anyway, what he suggested worked. 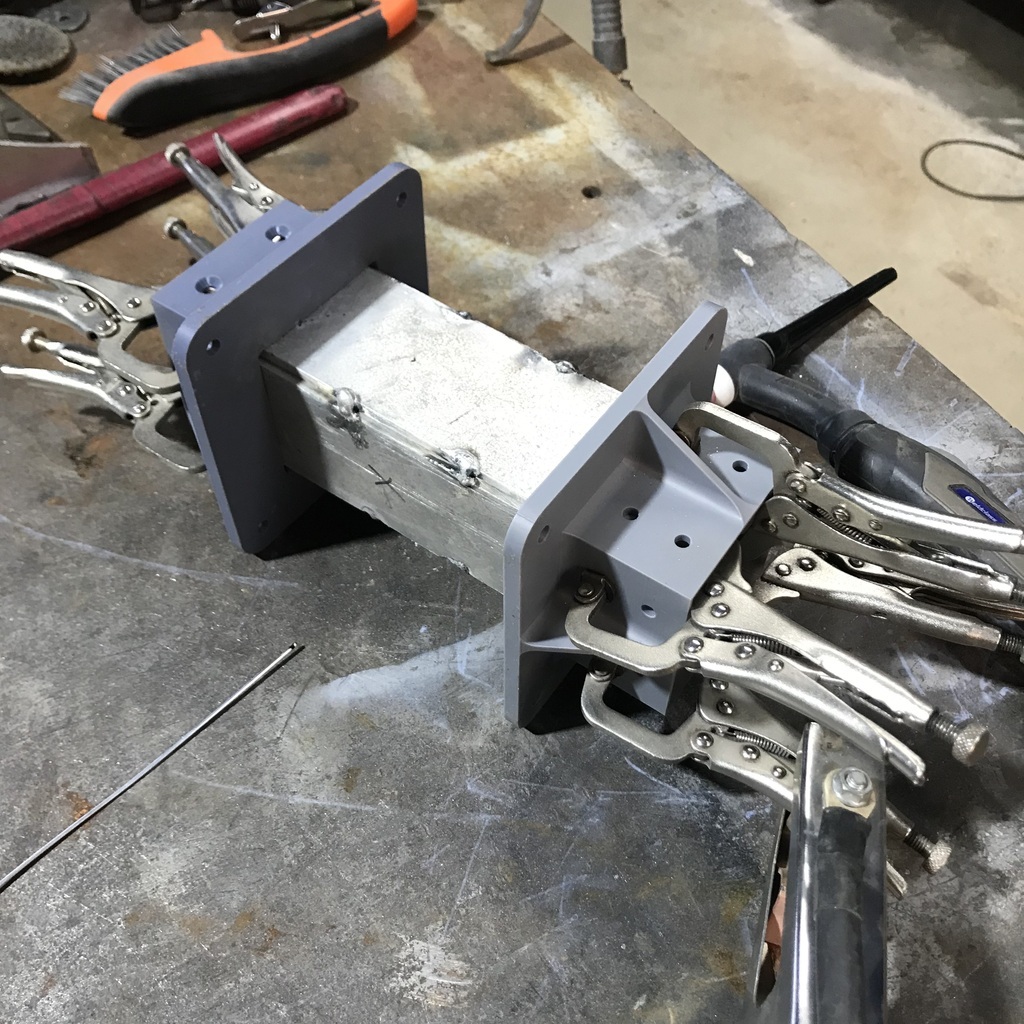 I was quick with the blow gun after each tack, to avoid melting the plastic. Got it all welded up, with the occasional nice weld! 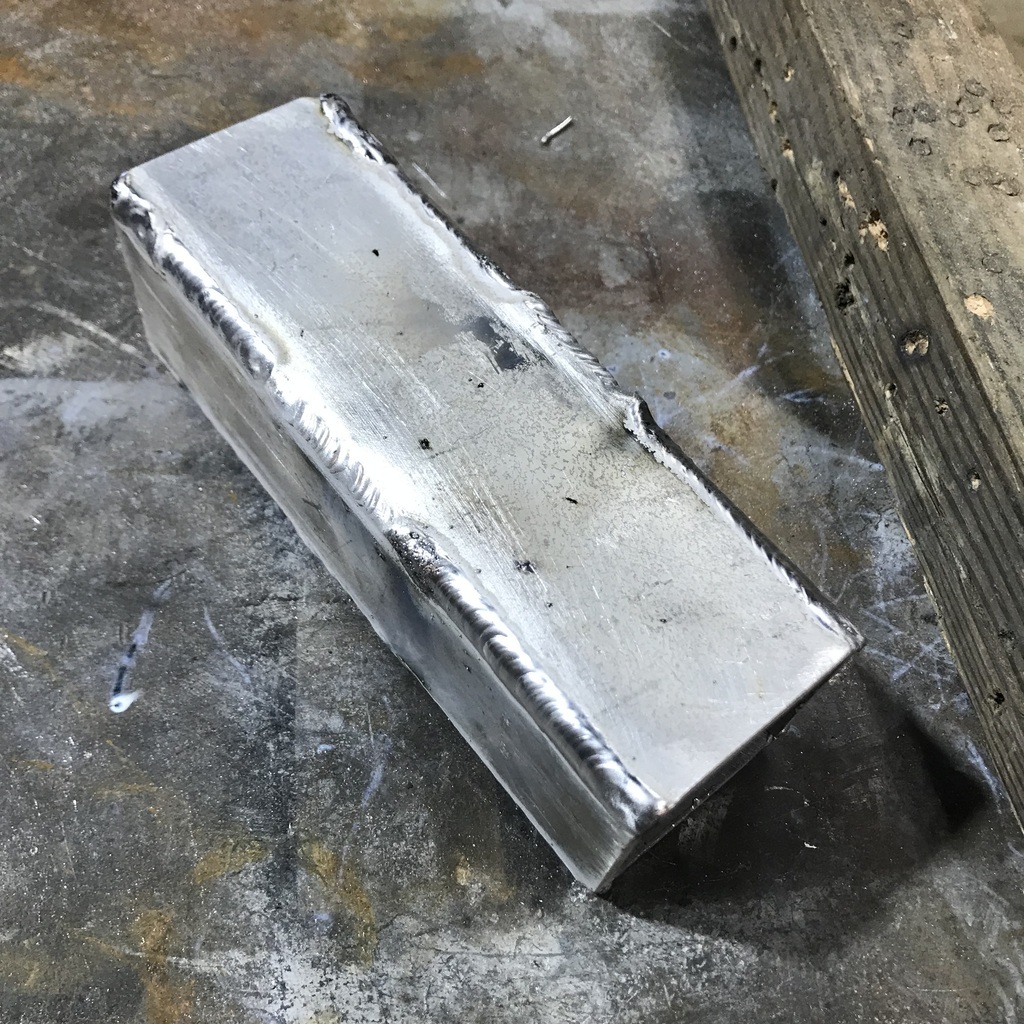 Of course it shrunk a little so I used some shim steel to pack it out for a nice tight fit. That’s the reason for the letters, so I could get the shims back in the right spots. I drilled and tapped right through the plastic and shims into the ally, 32 holes in all. Then tacked on the other bits that hold the X axis. 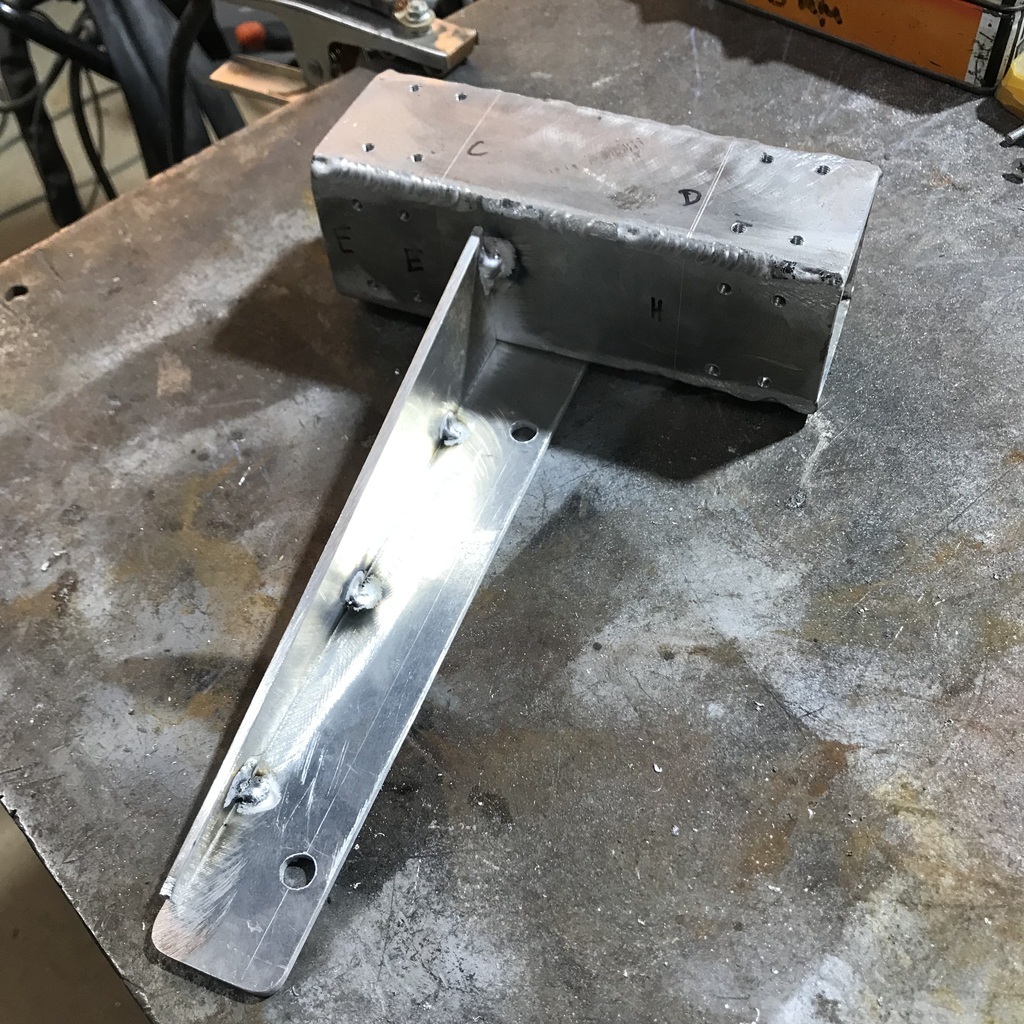 Next job was to insert 8 little bearings into this printed piece. 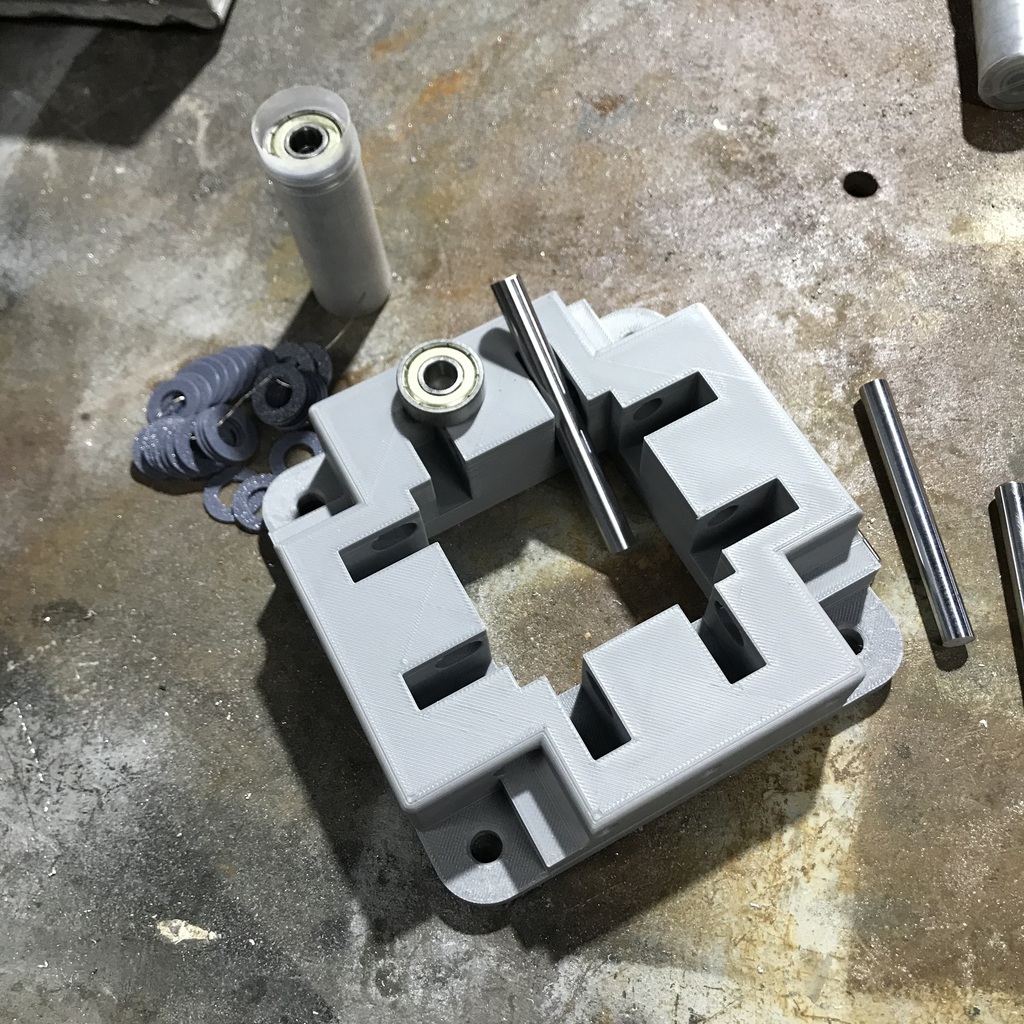 But the Chinese bearings came to bite me a second time. I bought some off Temu, seduced by the price. They were 608zz bearings, so supposed to be 8mm ID. I measured those at 8.1+ So I bought some replacements from Amazon. They won’t go onto the 8mm rod, without heavy persuasion. At least I can send the later ones back, I bought the Temu ones months ago. So tomorrow I’ll go to the bearing shop in Tamworth and pay 5 times the price, but at least they’ll fit. Thanks. |
| |
|
|
|
|
|
|
|
|
Excellent as usual, I know we are different parts of the world but how do you get on with the workshop below ground for damp/water?
|
| |
|
|
gazzam
Part of things
 
Posts: 740  Member is Online
|
|
|
|
Gtviva, I’ve had a few minor problems with water over the last couple of years. No damage, just a wet floor in places, from water seeping through the walls. It’s been unusually wet for the past four years, normally quite the opposite here. The whole floor is sloped toward one corner and I have a sump in that corner. This works well when washing a car inside. The latest excavation was really to get more floor space, but also to make the place look more like a workshop than a rabbit burrow! It’s had the added benefit of making it brighter, due to the lighter coloured wall. Back to the plasma table. Well I was wrong about the local bearings fitting. I forgot to take the rod with me and only found when I got home, that they won’t go on it either. I measured the rod at 8mm, but only with ( Chinese ) vernier calipers. So I’ll use the first ( and cheapest ) bearings and see how that goes. Anyway the gantry looks like this when assembled. Ready to slide on the Y axis square tube. 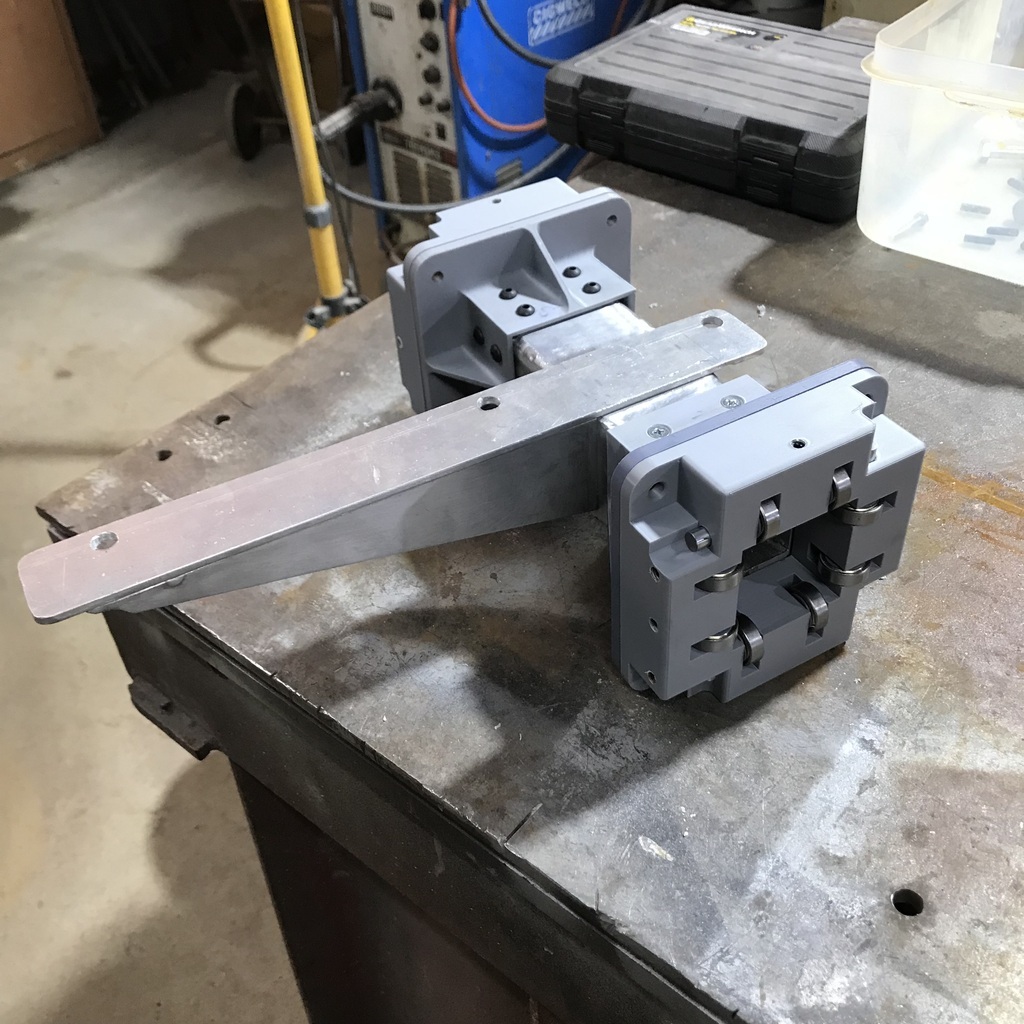 It’s quite a clever design. As is the table frame. These printed pieces are pushed into the square tube. 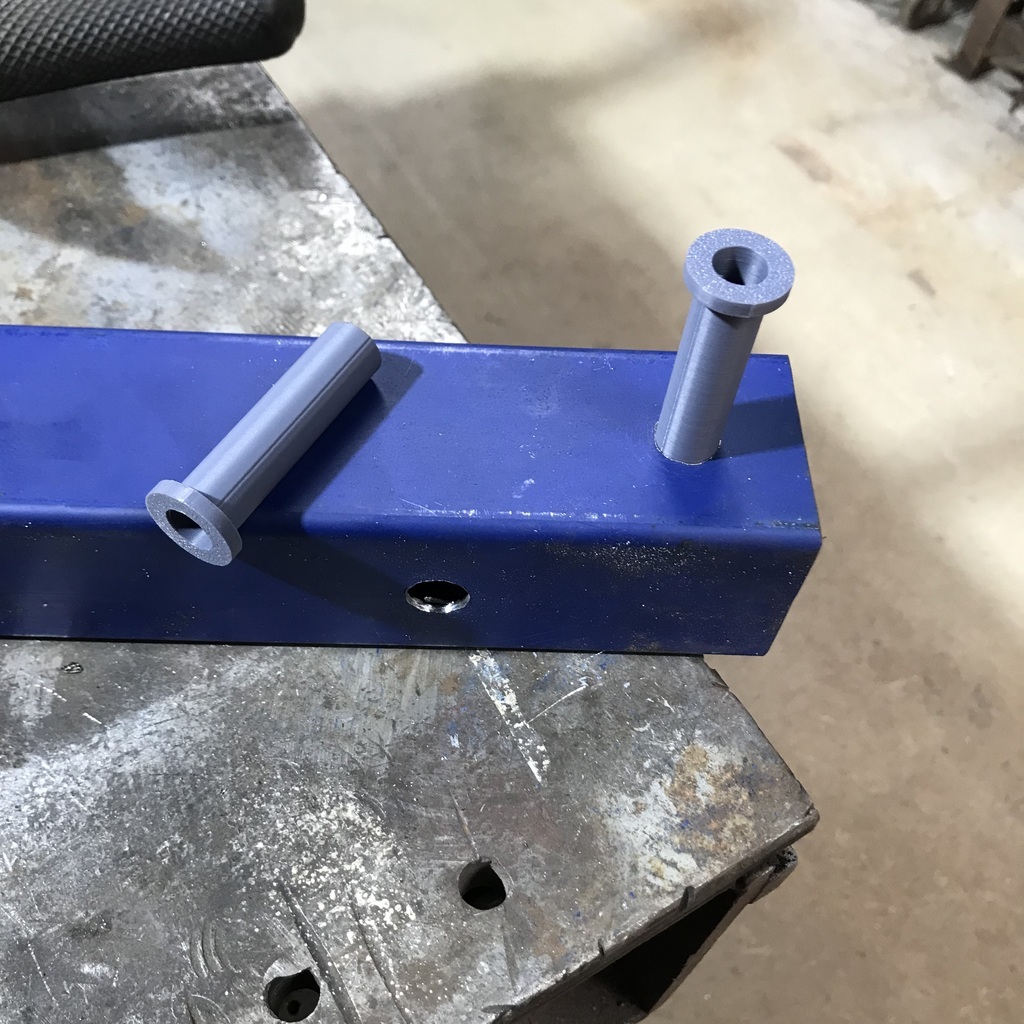 Then the tubes are bolted together, forming a very strong corner joint. 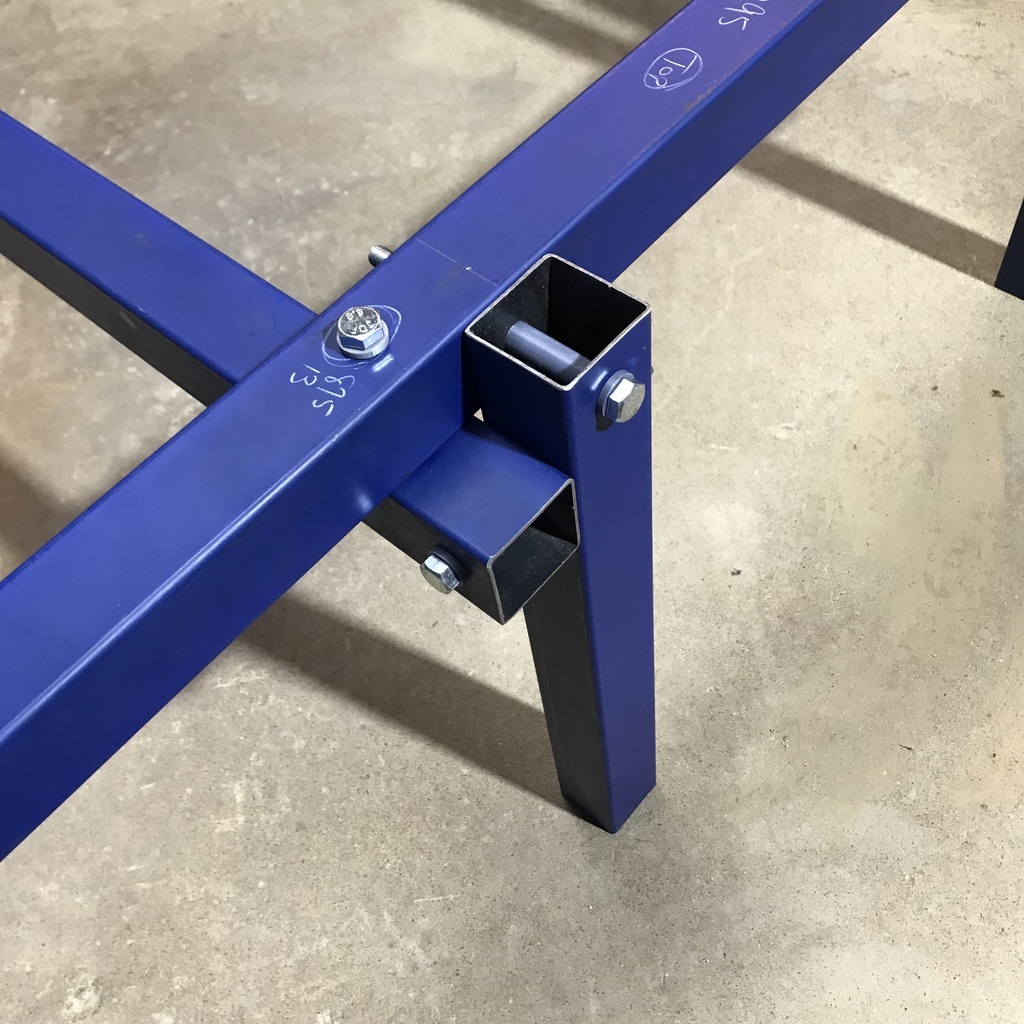 And the table assembled. It’s remarkably rigid. 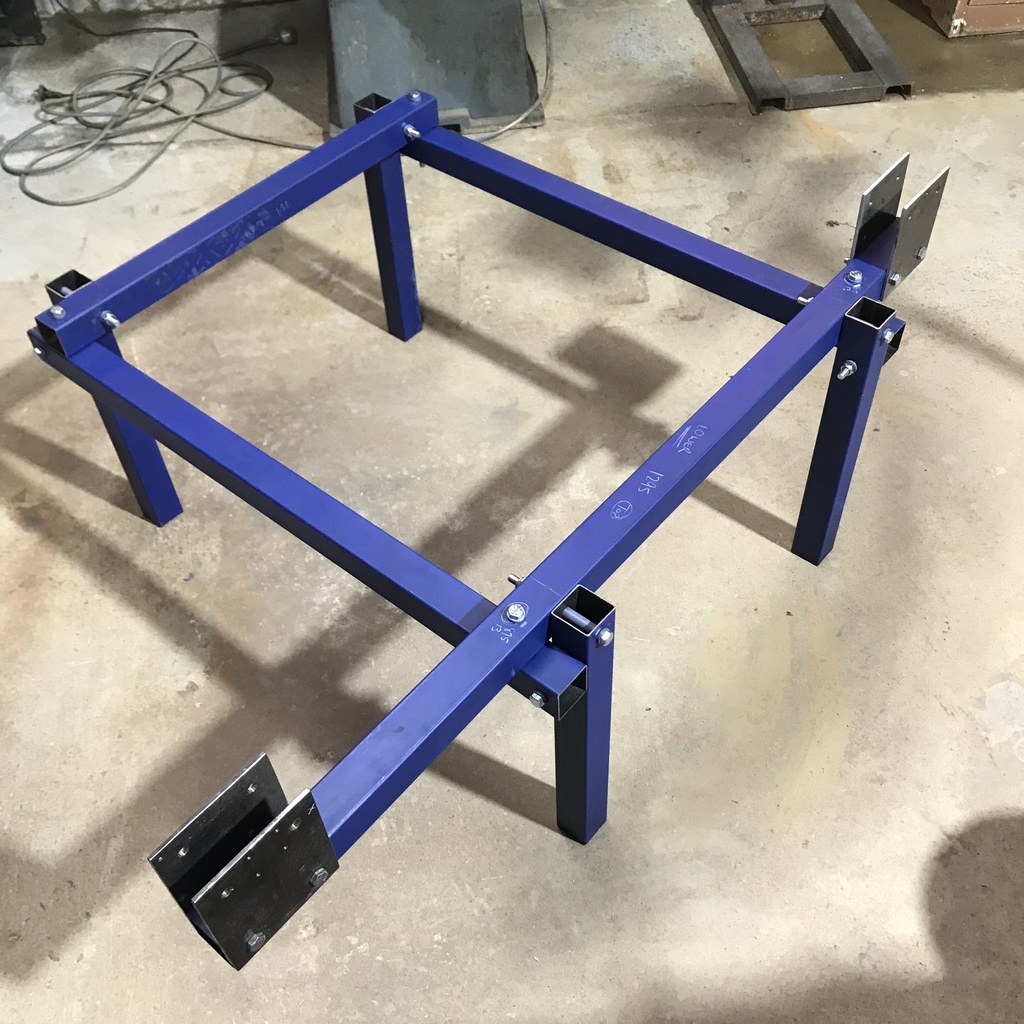 The Y axis is yet to be bolted in between those upright plates. This will make more sense when you see it completed. I’m pretty much ready to start mounting the stepper motors and drive belts. Then the wiring of drivers etc. This is where the plans I bought will face the big test! Also today had the Healey fuel tank strapped to the cement mixer, getting the inside clean so it can be sealed. But forgot to take a picture. Thanks. |
| |
|
|
gazzam
Part of things
 
Posts: 740  Member is Online
|
|
|
|
Had the Healey tank on the mixer until early afternoon. First with a cleaning solution and later with a rust remover. Because it is so flat, I had to turn the tank around so that the abrasive media was acting on either the top or the bottom. That was easy, just a matter of releasing the straps and turning it over. It was strapped to a couple of pieces of timber, which were strapped to the paddles in the mixer barrel. 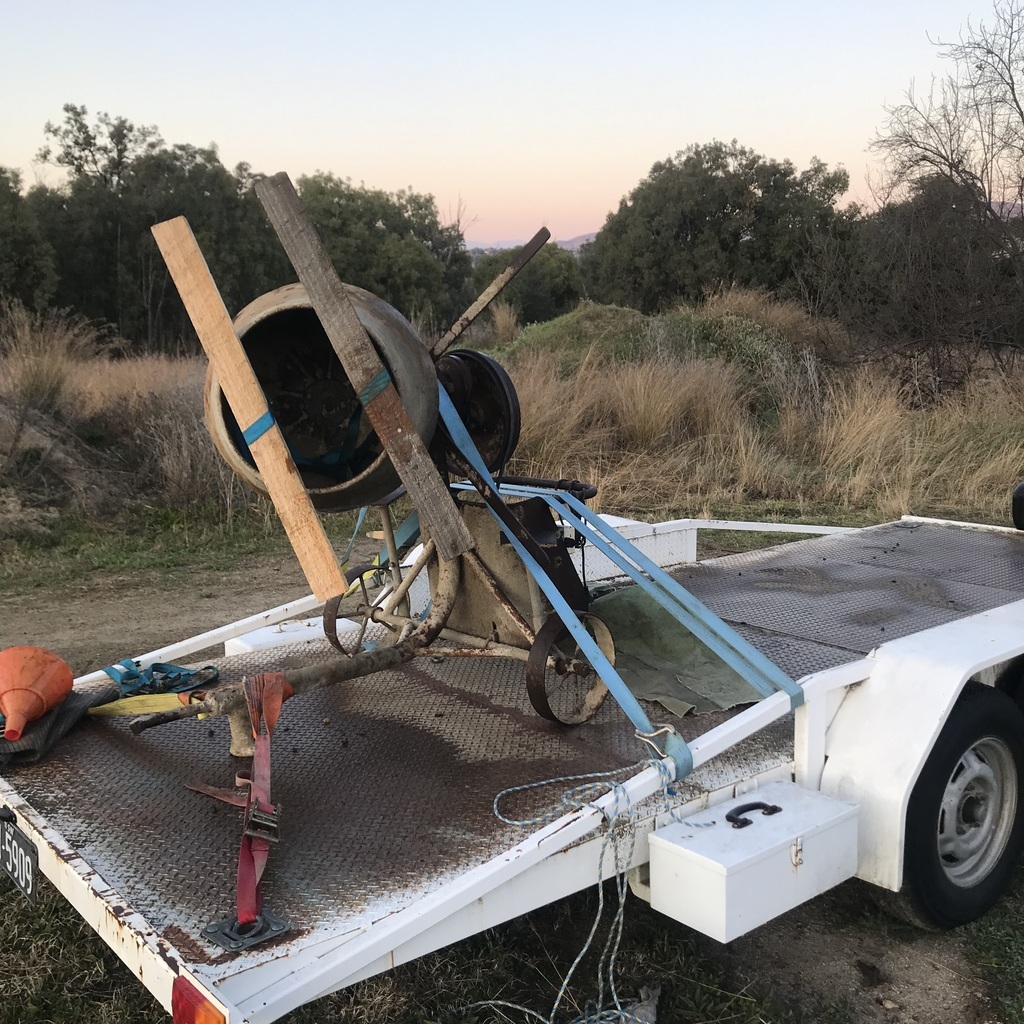 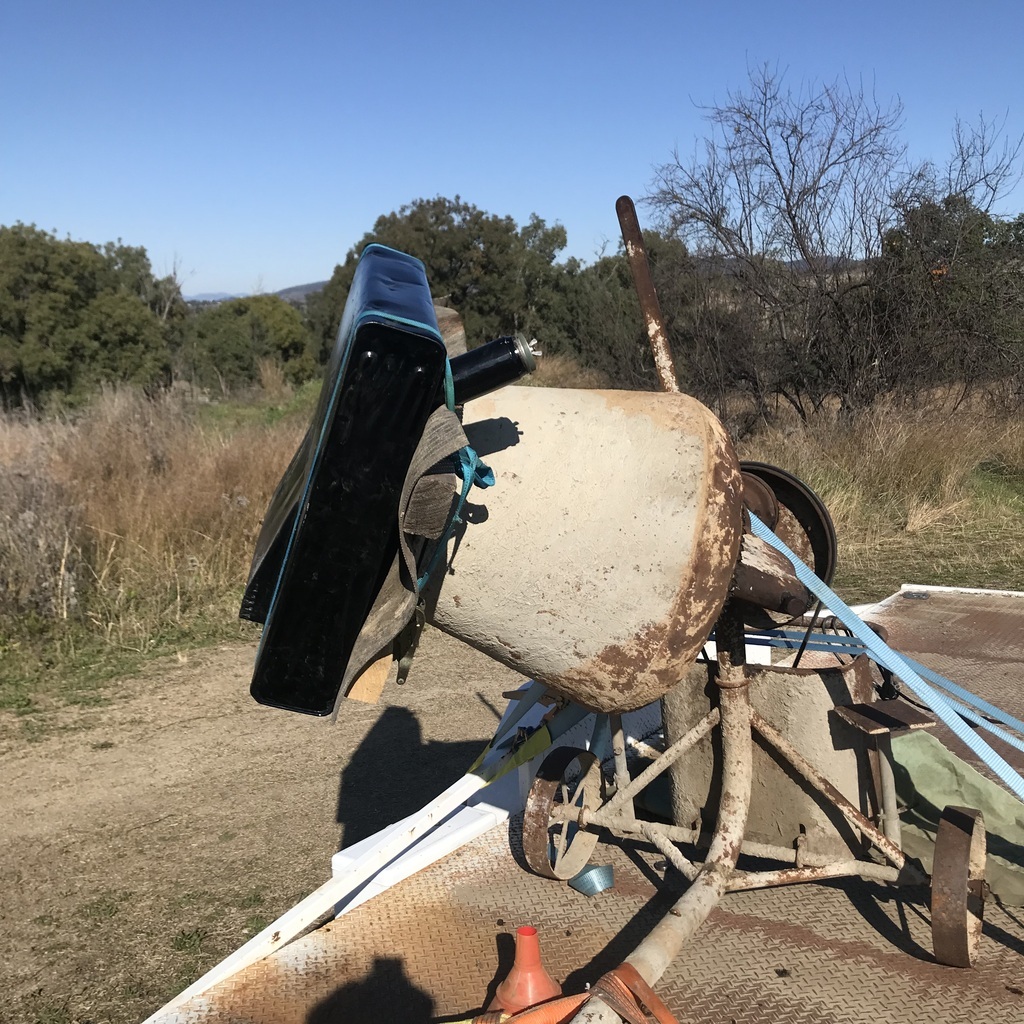 The mixer is on the trailer because it’s a borrowed one. I loaned mine to a mate, and he’s not finished with it so it was easier to just borrow another. Don’t even have to clean it! But I did treat it to some grease. Fiddled with the plasma machine in between times. Got the X axis gantry in place. The X is bolted onto the yellow circled bit. The red arrow is is the Y axis movement. 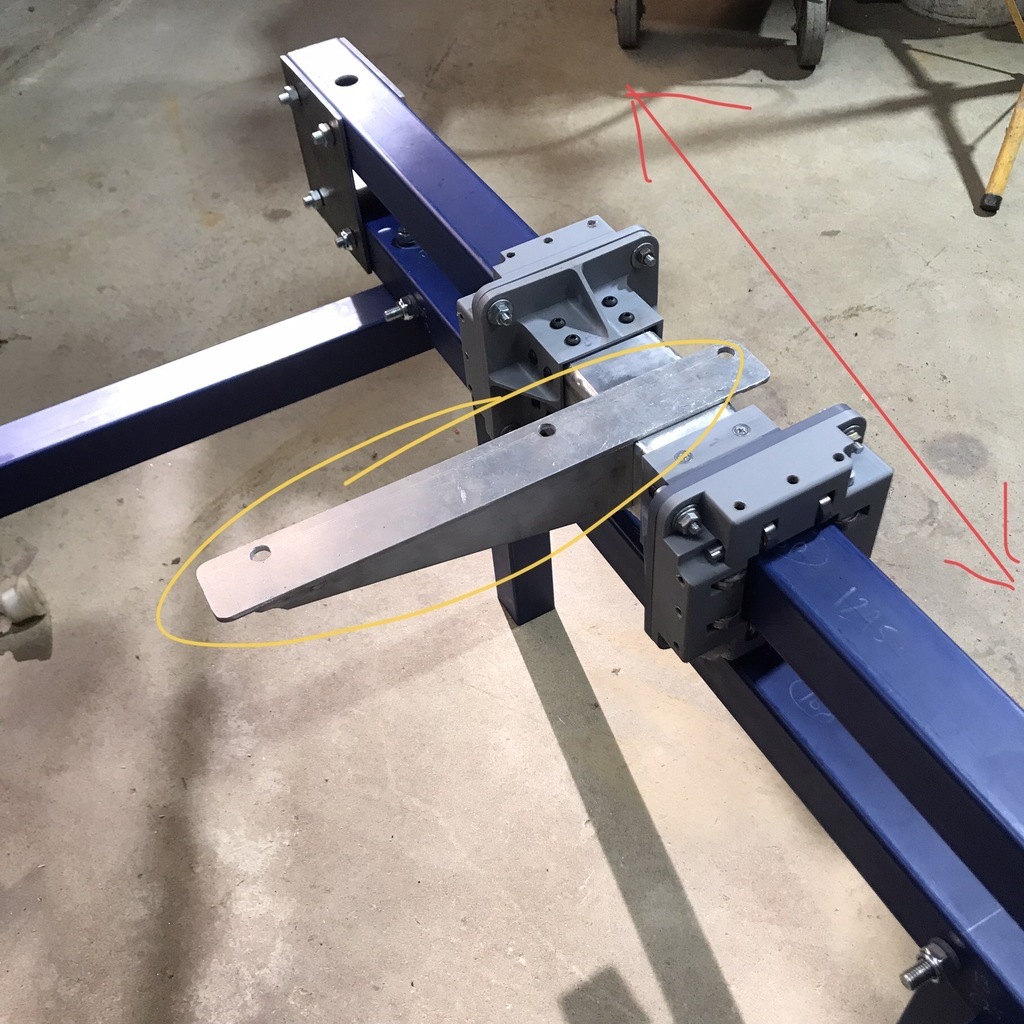 Once I was happy that the tank was clean enough, I flushed it with rain water that I caught from a plastic sail. My version of de everything water. Then force dried it with the heat gun. Then tipped 750ml of sealer in, closed it and started to rotate it. Drained about 250ml and then let it sit. And the view into the Healey tank. Through the gauge sender hole. That dent is nowhere near as bad as it looks! 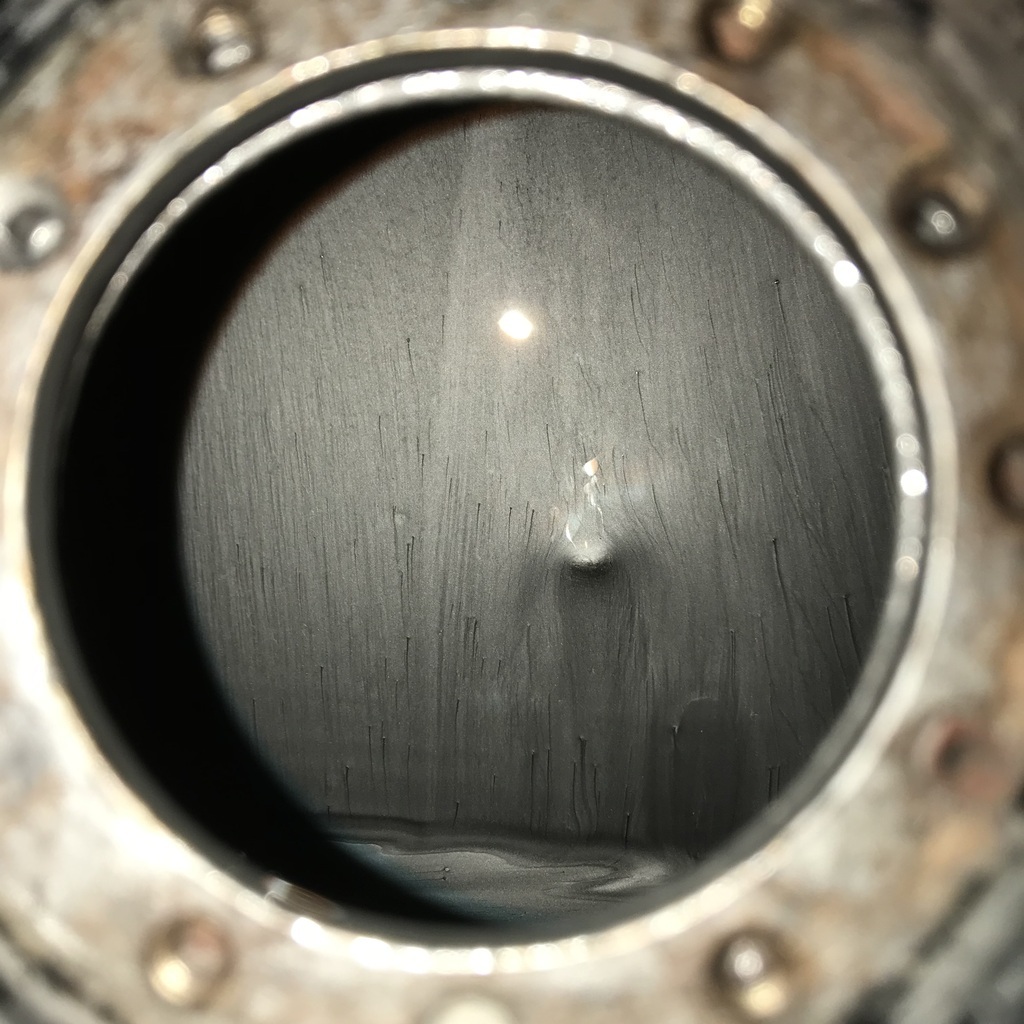 And down the filler neck. 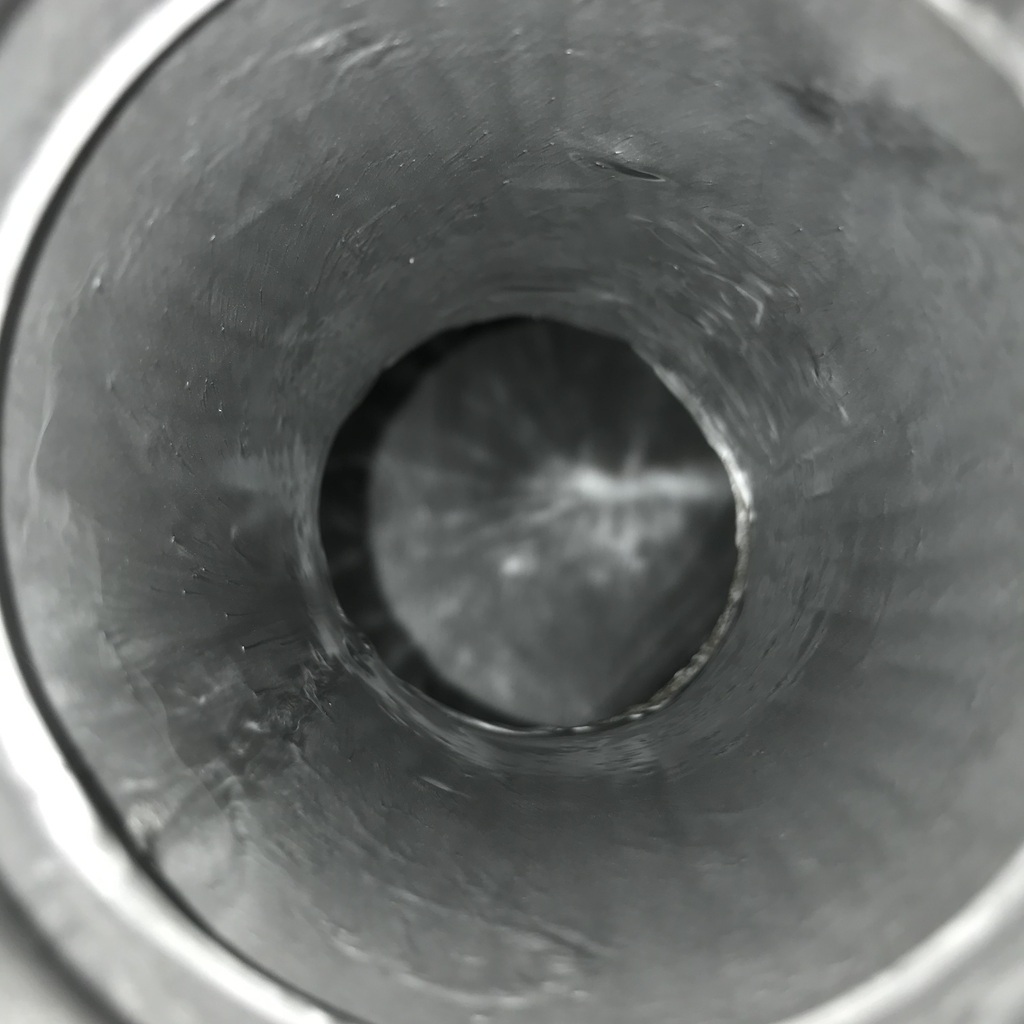 Photos of paint drying. Can’t get much more exciting than that! Thanks. |
| |
|
|
gazzam
Part of things
 
Posts: 740  Member is Online
|
|
|
|
Even though I can’t put fuel in the Healey tank for another 3 days, it can go back in the car. I needed to tidy up some of the hardura boot lining. It had gone out of shape in a couple of places, from being soaked with fuel. So the heat gun softened it and some spray adhesive kept it in place. Before shots, just for the record. 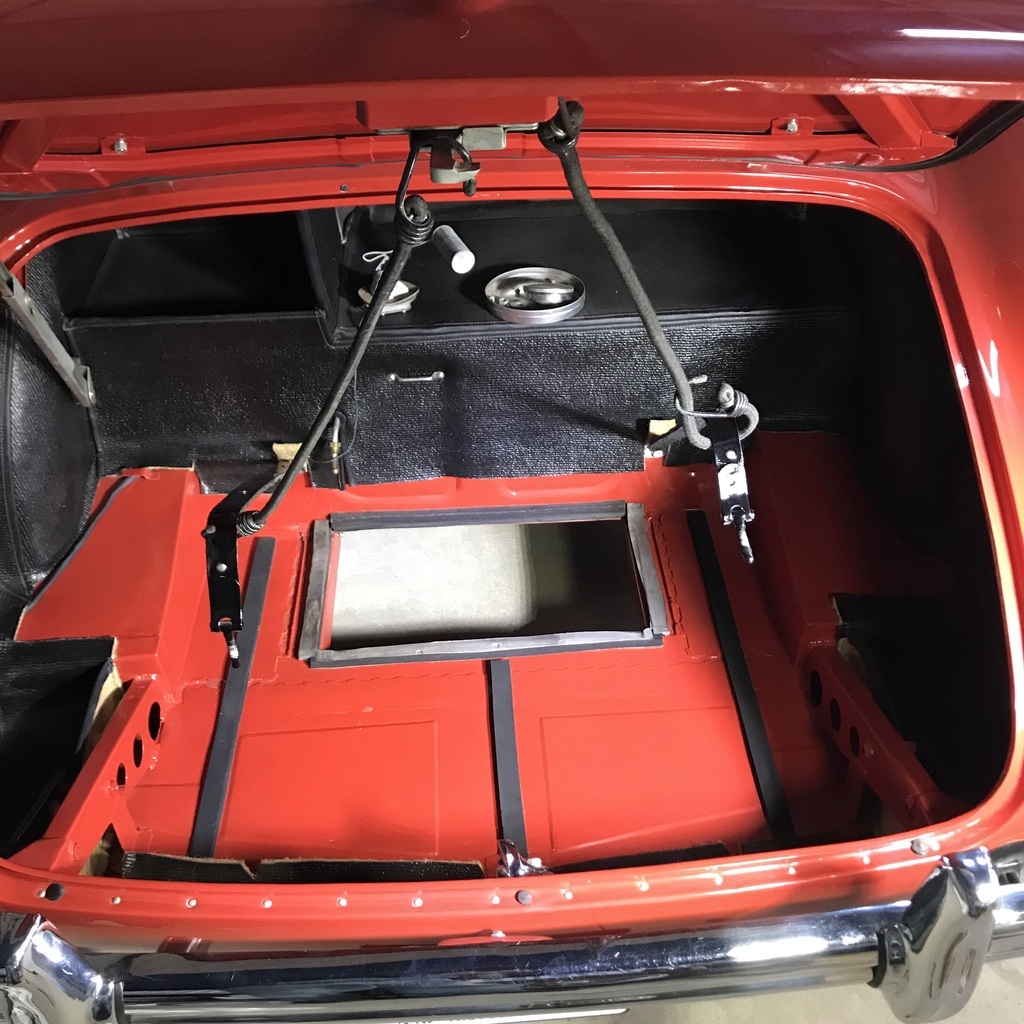 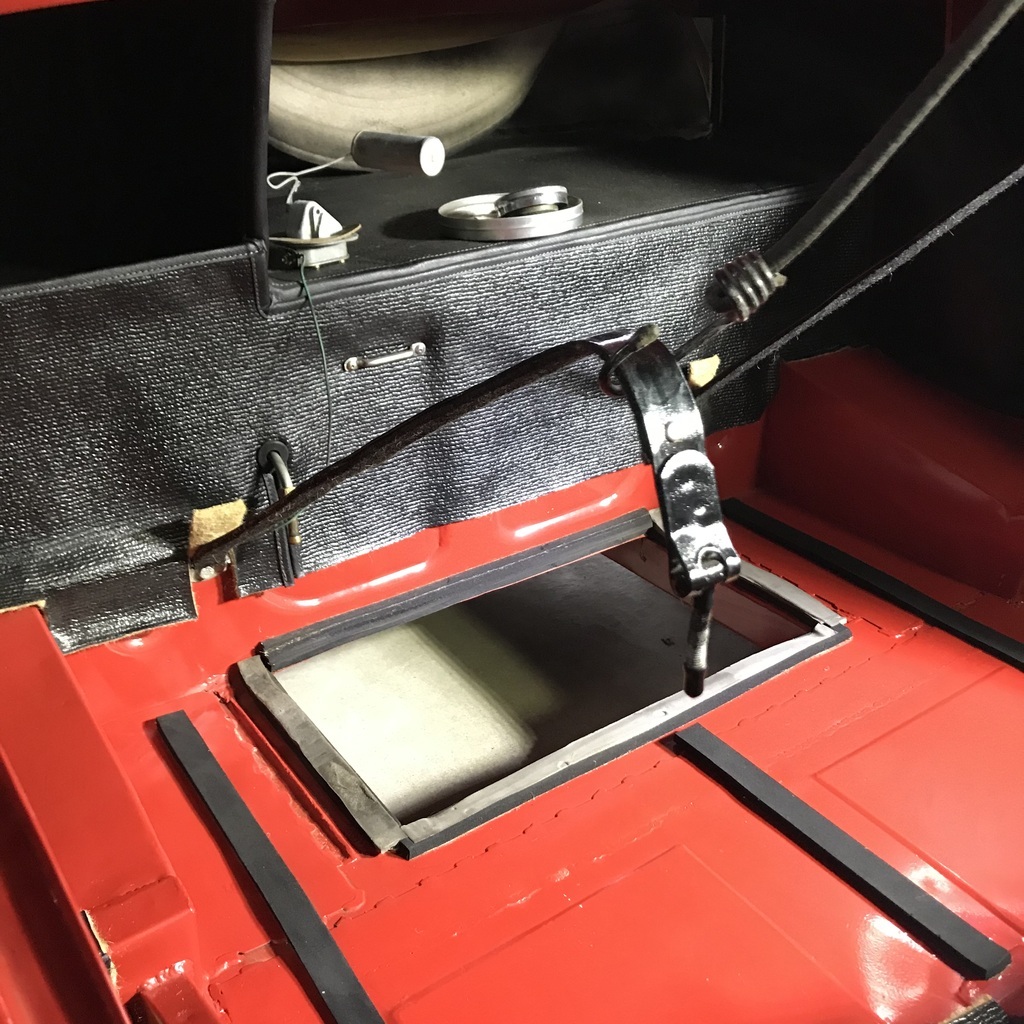 And the tank in place. 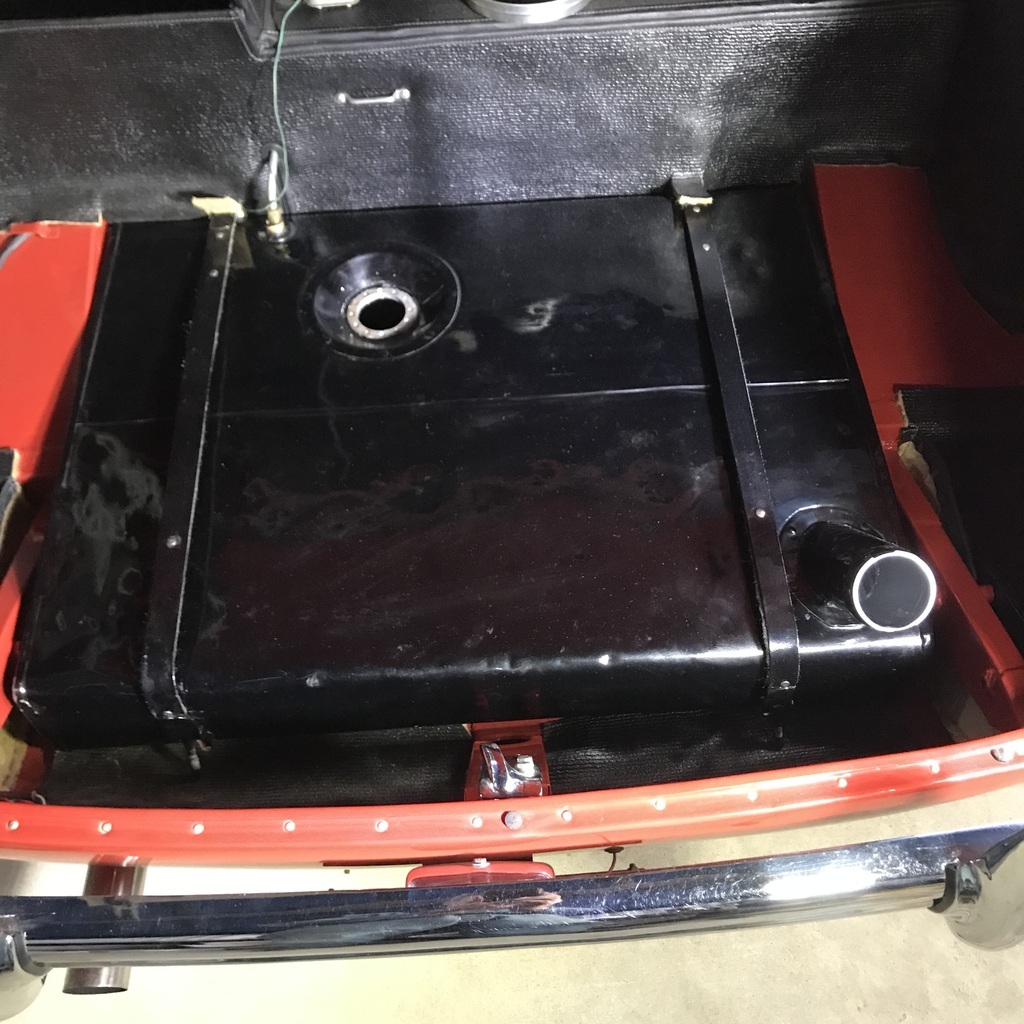 This would have to be one of the easiest tanks to remove / replace. Fuel line right on top. On nut on each of the two straps, easy to get at. And the sender unit. I’ll leave the sender out and the cap off for a few days in the interest of curing paint. At least that’s more interesting than pics of drying paint! Thanks. |
| |
|
|
|
|
gazzam
Part of things
 
Posts: 740  Member is Online
|
|
|
|
Today I got back to the Triumph. Well, the shed is done, the Healey is finally cleaned, just needs time for the fuel tank sealer to cure. The plasma cutter has come to a halt because there has been an upgrade released. It’s a change of controller and appears to be worth doing. I’ve ordered some more bits, and have to wait for them to arrive. So I can put the Triumph back at the head of the queue. I have a list, not very long, of jobs to be done. Easiest first, change the headlights over to LED. Not that I am likely to drive it at night, but I do like to drive with lights on. And rather than fit relays to lower the current through the 70+ year old switches, it’s easier to fit LEDs. Man, do they look different! Before it looked as if there was a dying candle in each light. Now they are super bright and white. 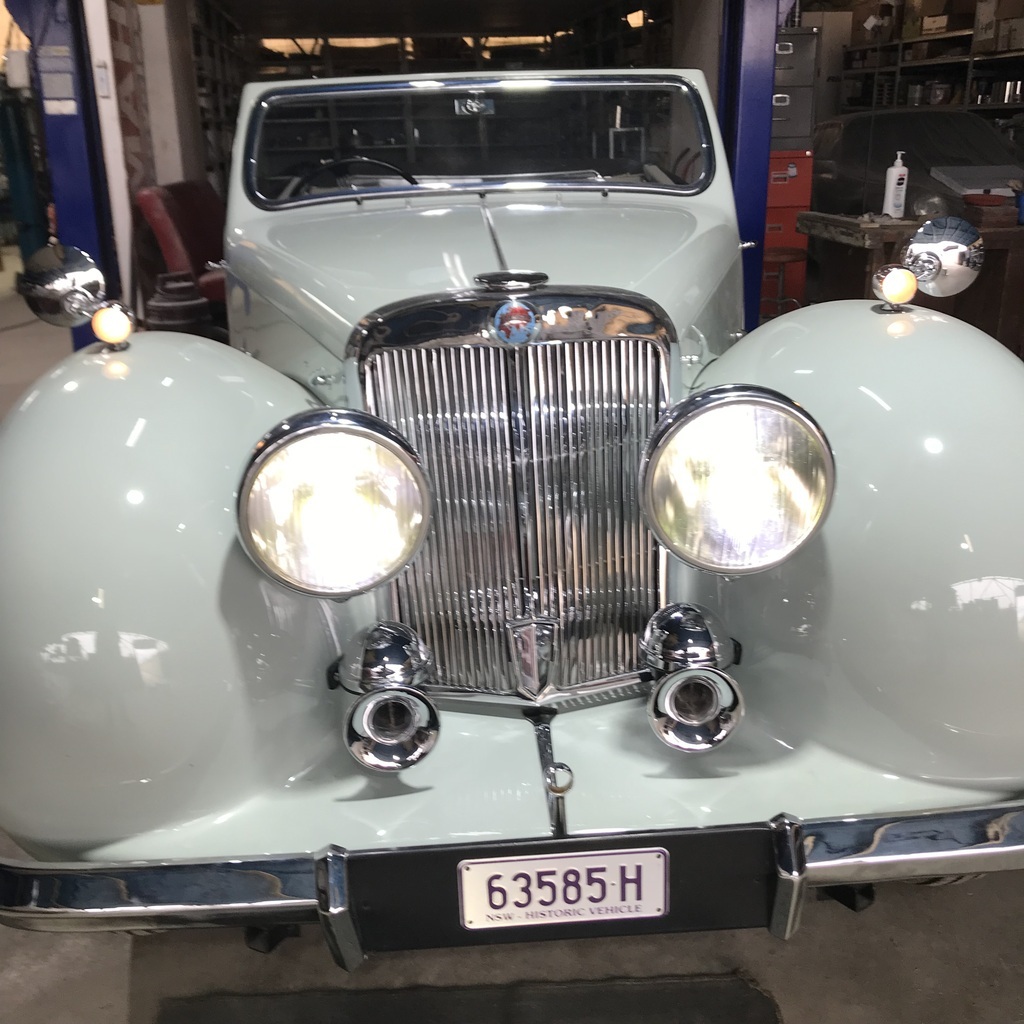 That pic doesn’t really do them justice. Then I moved onto installing the front suspension bump stops. You may recall I cast these in a plaster of Paris mould eons ago. 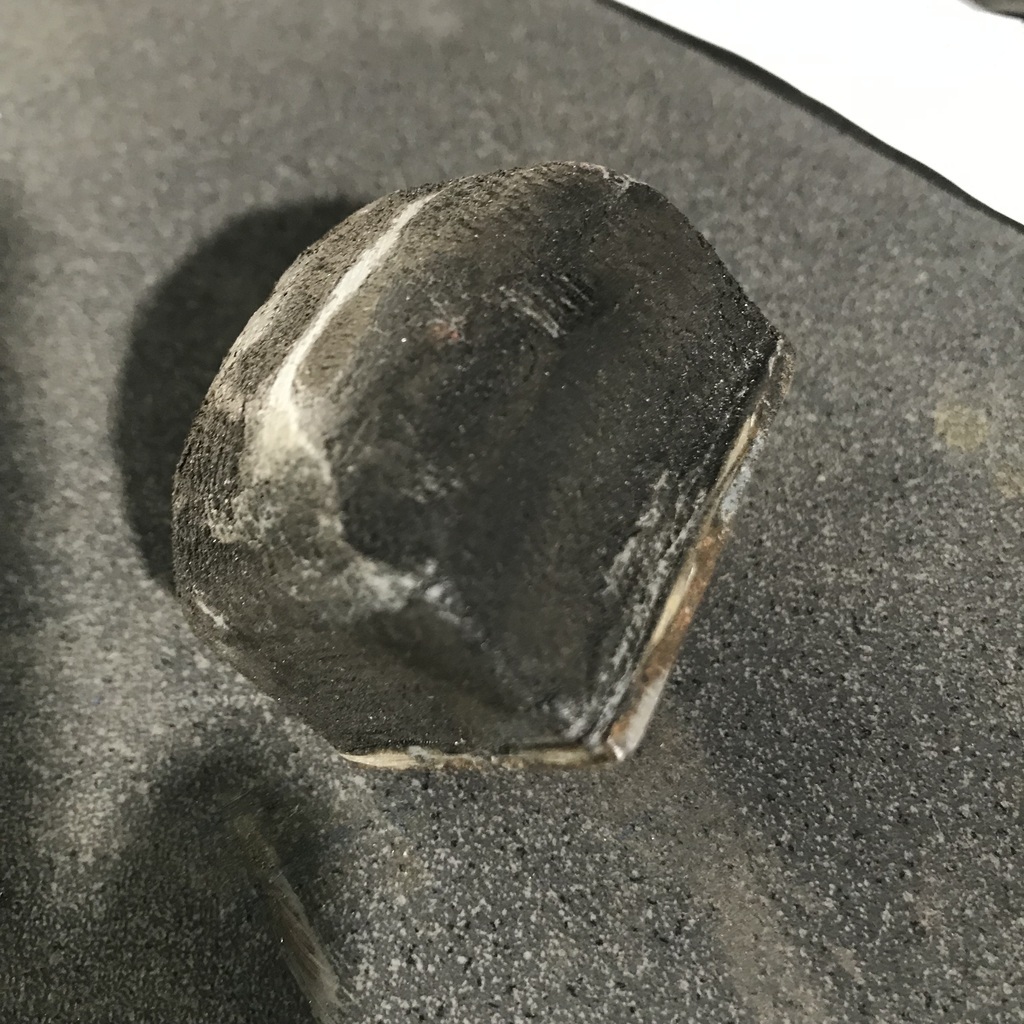 I reckon they should be set by now so it’s time to fit them. What an awkward spot. I had to modify a spanner to get at the nuts. 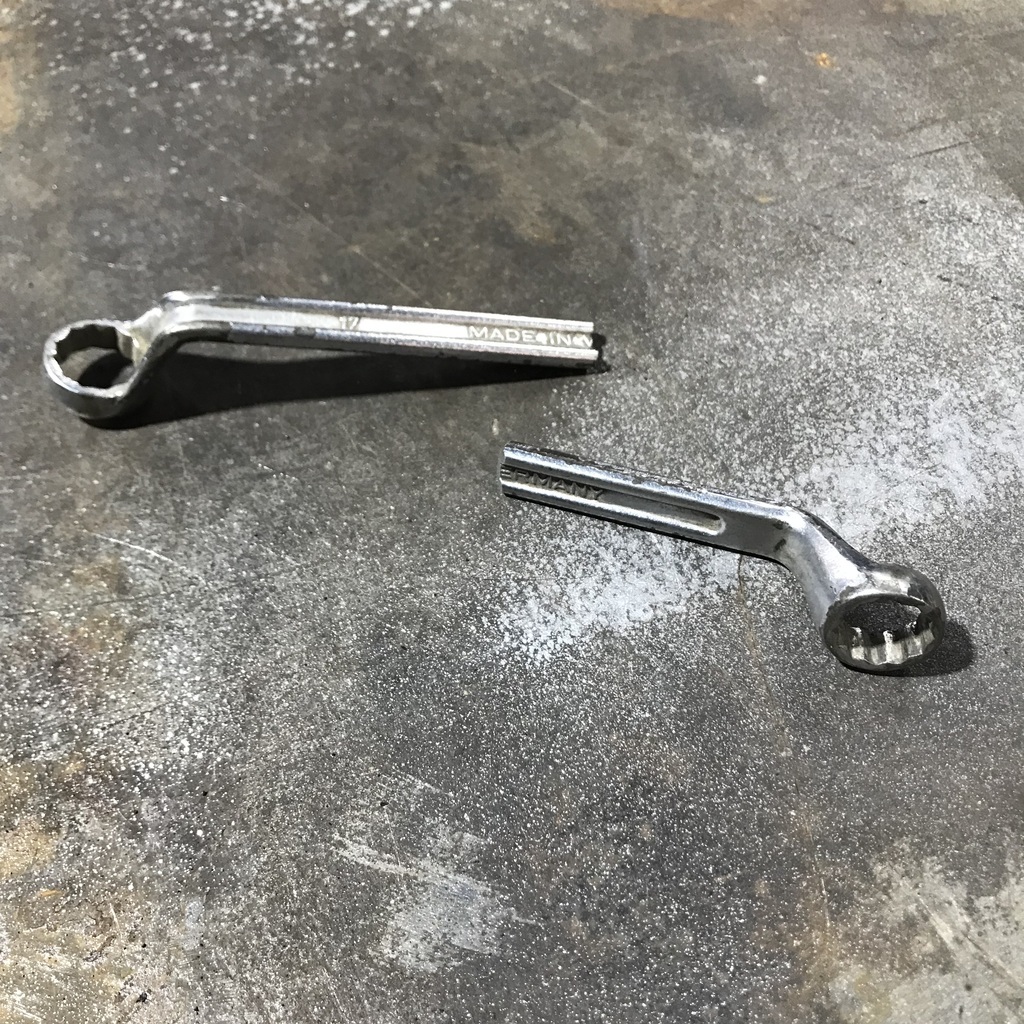 Here’s the action shot. Bump stop arrowed, modded spanner circled. 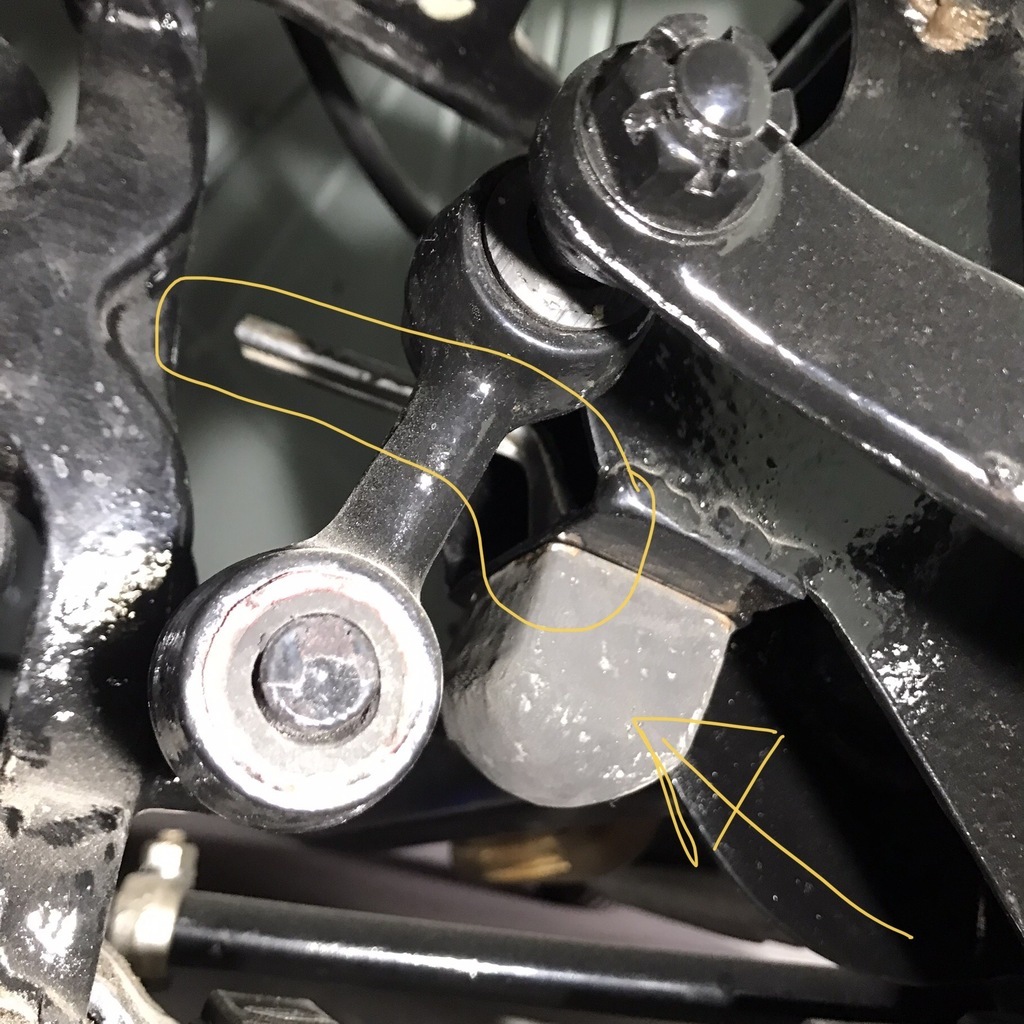 Next is to get the electric fan working. I found a sender on the web that I think will work. It’s 1/8 BSP and will go into this brass plug. 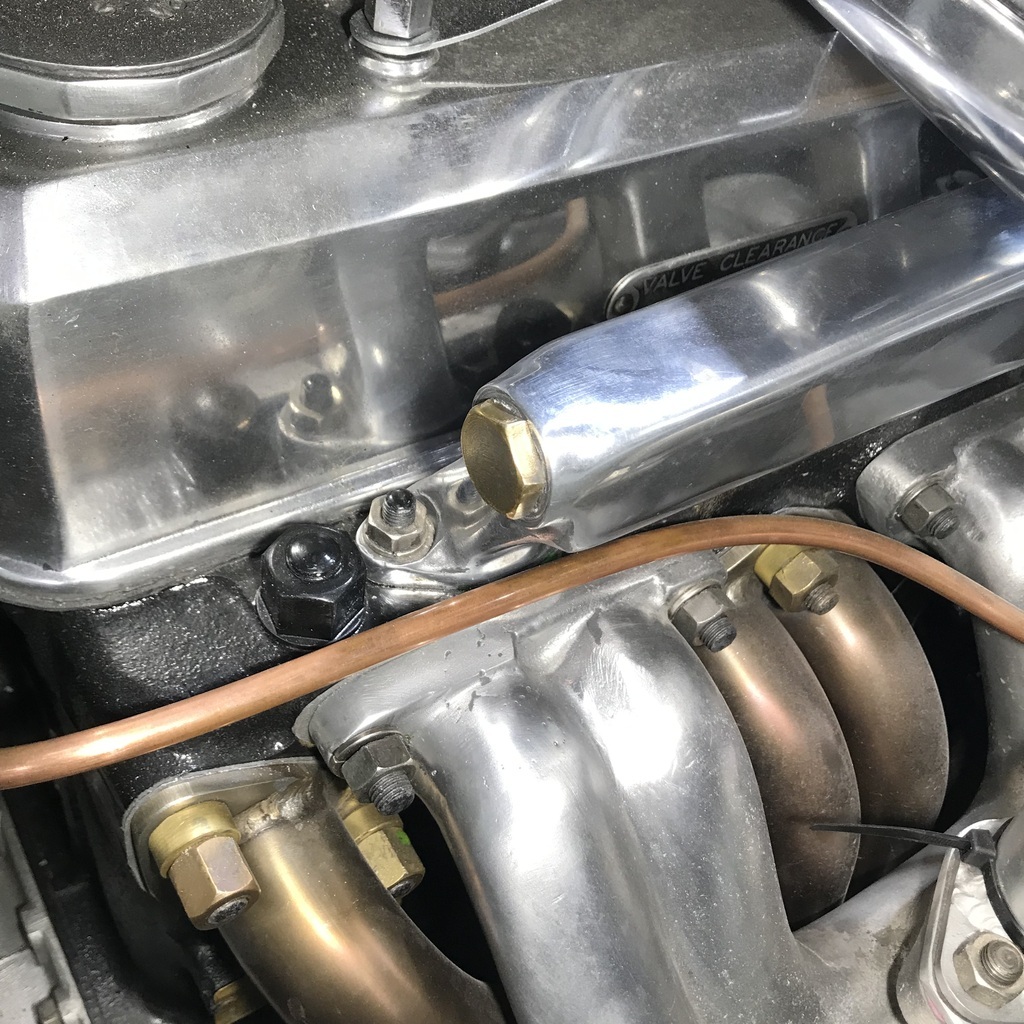 In the lathe to drill a 5/16” hole. 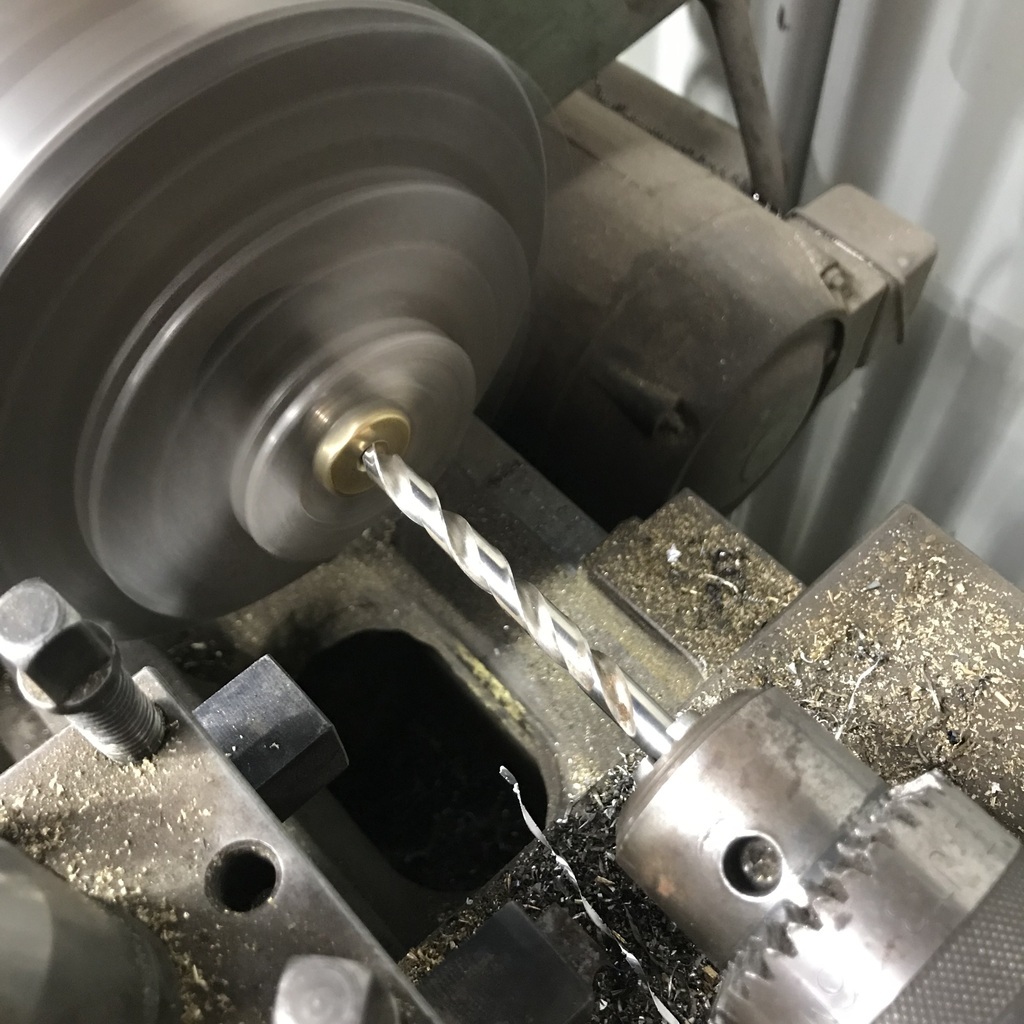 Then tapped. 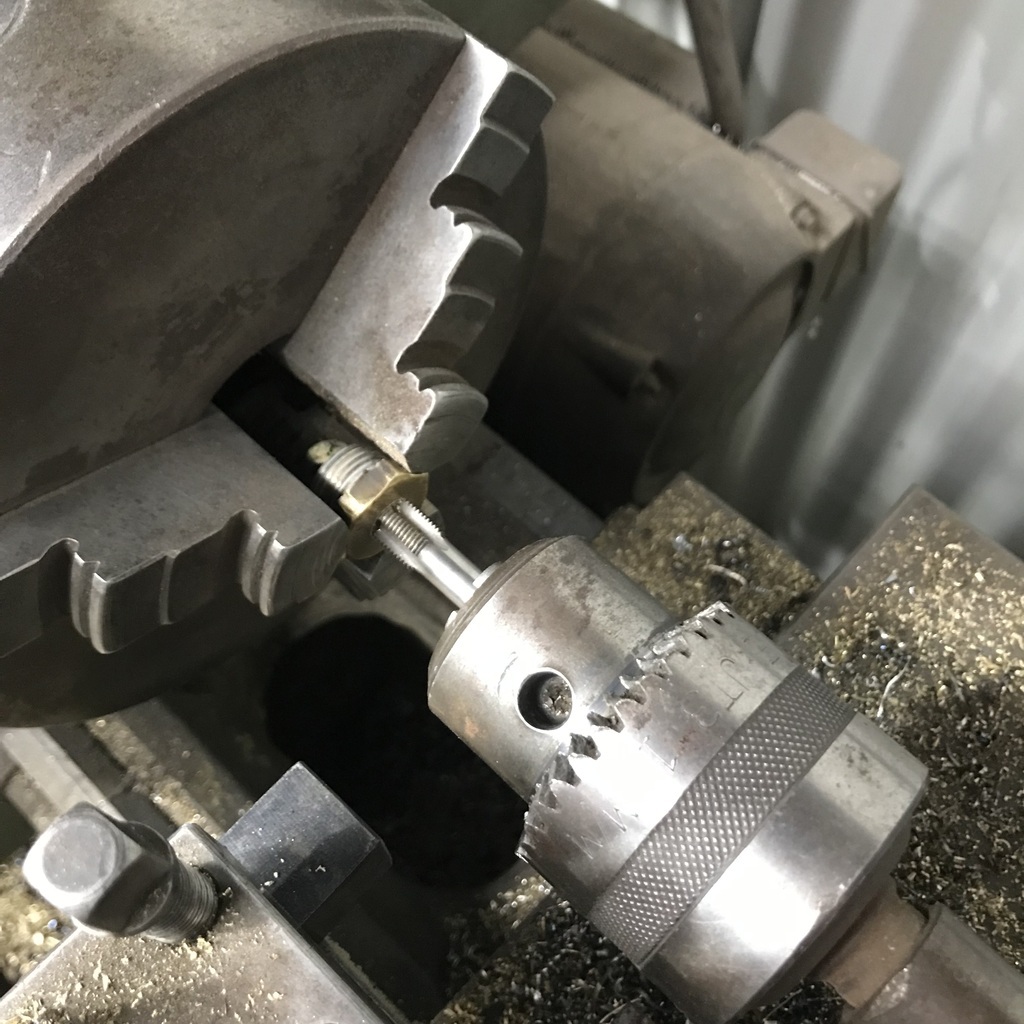 And with some sealer on the threads, back in place with the sender. 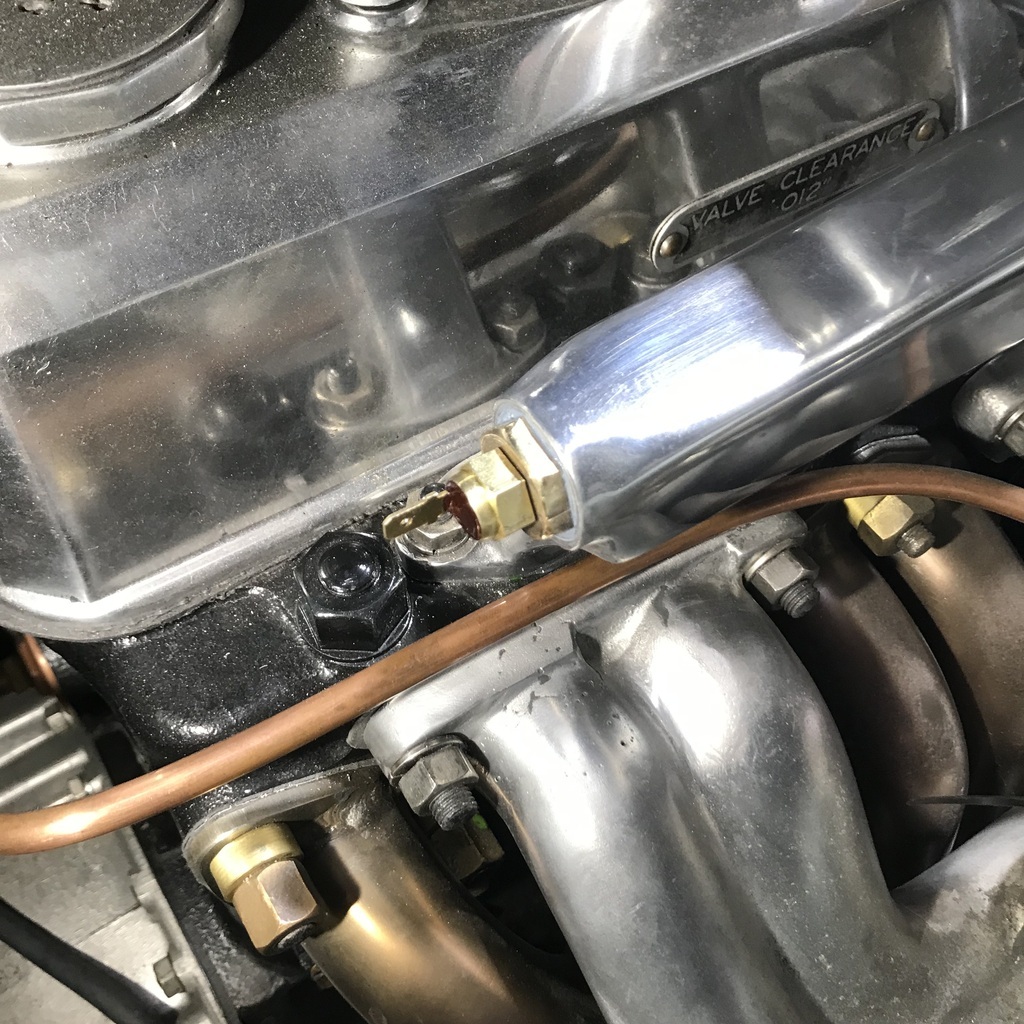 Now I need to faff about with wiring, trying to make it look decent. Always a headache. But I think I have a plan. Thanks. |
| |
|
|
gazzam
Part of things
 
Posts: 740  Member is Online
|
|
|
|
Fan wiring took ages, but I’m happy with the result. I used a relay with the sender unit, and an override switch. There were (and still are) nice heavy wires that had been put into the harness some time in the past. They were used for the 100 watt sealed beam spot lights that I discarded. About 4 inch, I remember they were popular in the 70's, I never liked them. Much preferred the larger Hellas of the time. Anyway I used one of those wires for the fan. The battery supply to the relay is equally heavy wire. 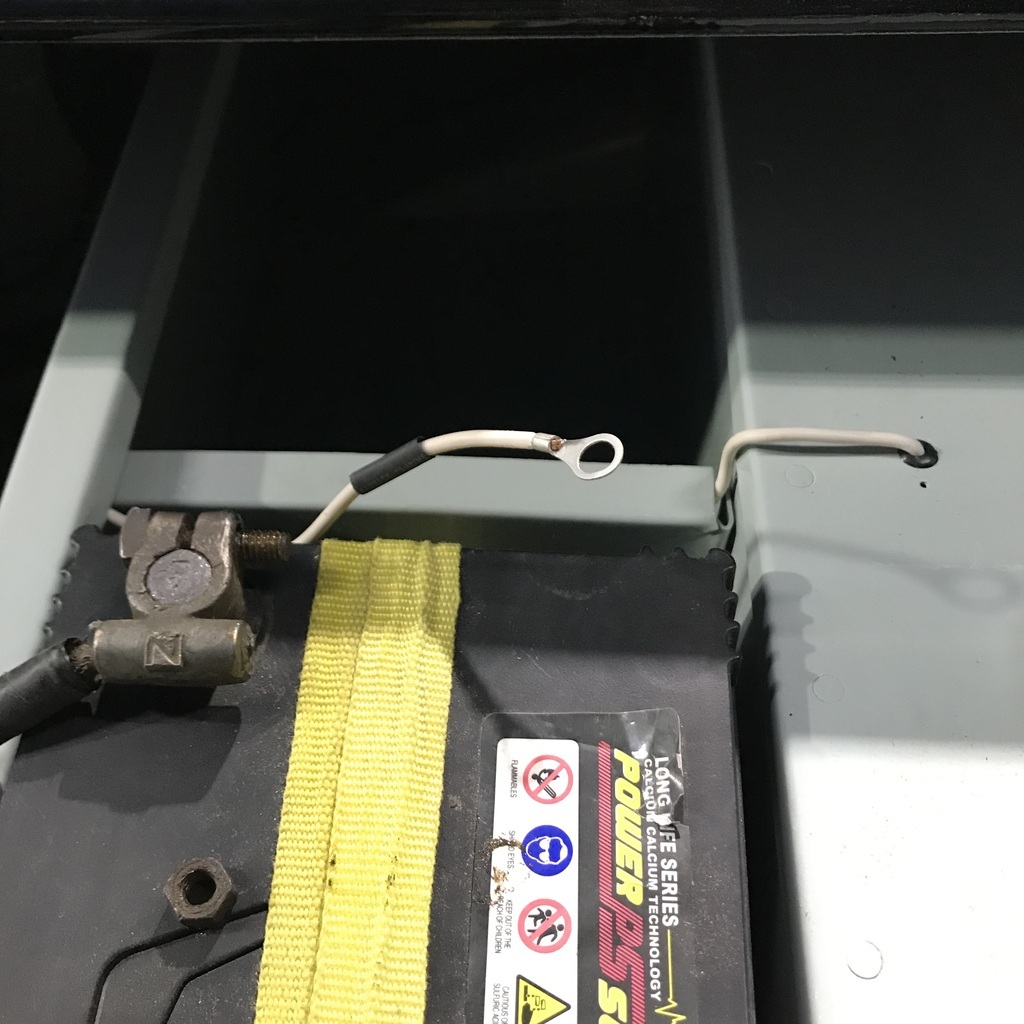 And in place. I still need to do something with the battery terminals. Just can’t lay my hands on any that tick the boxes. 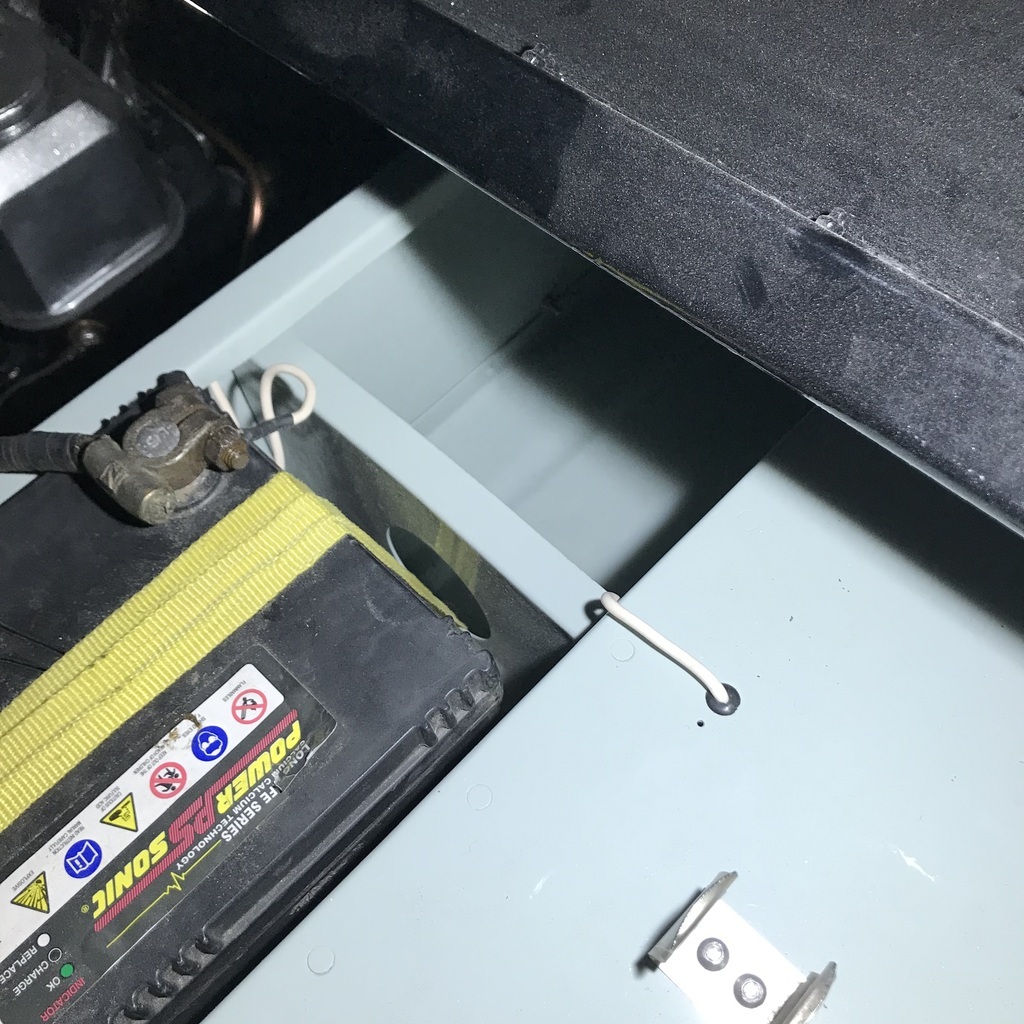 And I need to get or make a nice leather strap to replace that yellow thing! The switch found a home up under the instruments. Easy to reach, but can’t be seen from the seat. 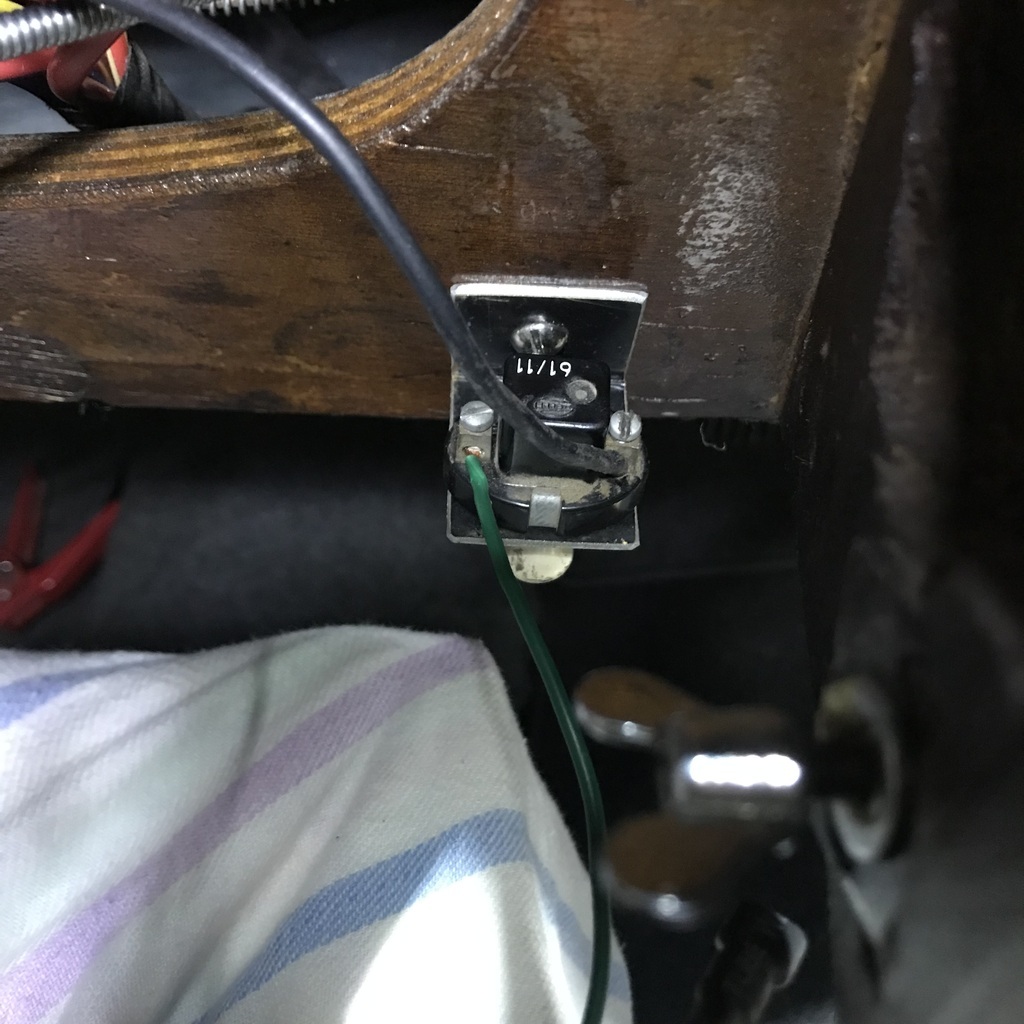 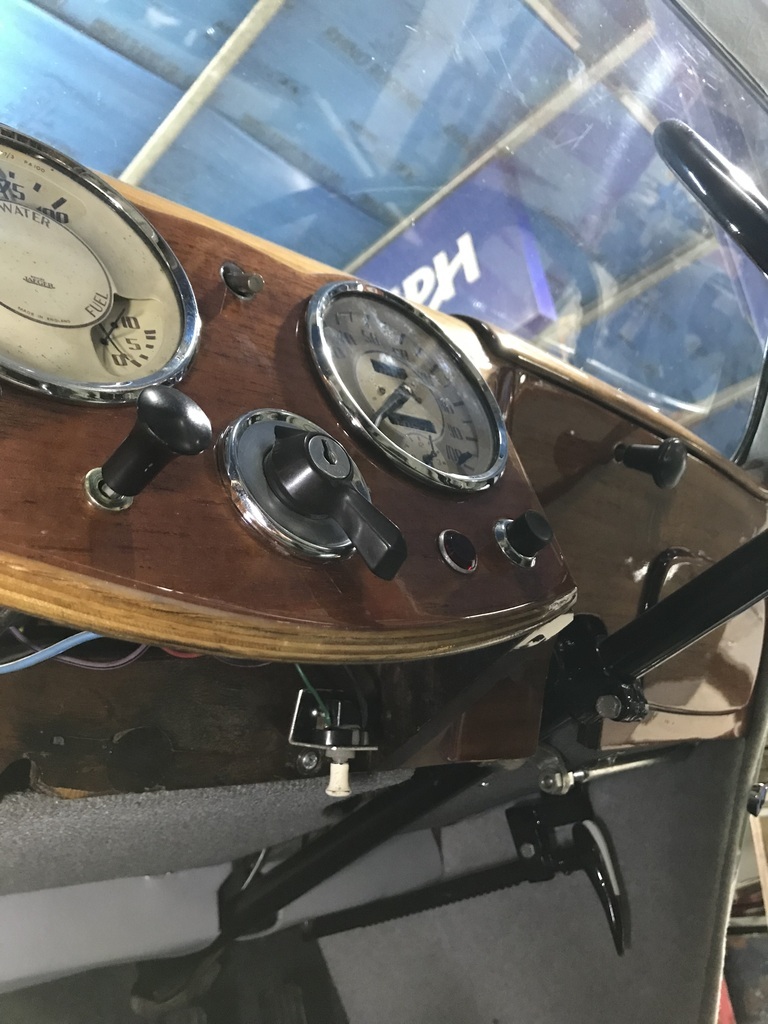 While I was underneath doing the wire to the fan, I discovered the supercharger drive belt was routed on the wrong side of the tensioner. So I don’t think it was getting much boost on the one short drive I’ve had. If it isn’t raining tomorrow, I’m keen to take it for a drive… And that’s it for Triumph news today. Thanks. |
| |
|
|
jimi
Club Retro Rides Member
Posts: 2,223 
|
|
|
|
|
|
| |
Black is not a colour ! .... Its the absence of colour
|
|
gazzam
Part of things
 
Posts: 740  Member is Online
|
|
|
|
It was raining till early afternoon, so I dropped any idea of taking the Triumph out for a drive. We have almost a kilometre of dirt road to get to the highway, so even though the sun came out, there were muddy patches that would make a real mess of the fresh underside. So that can wait till tomorrow. I finished putting the Healey boot back together. 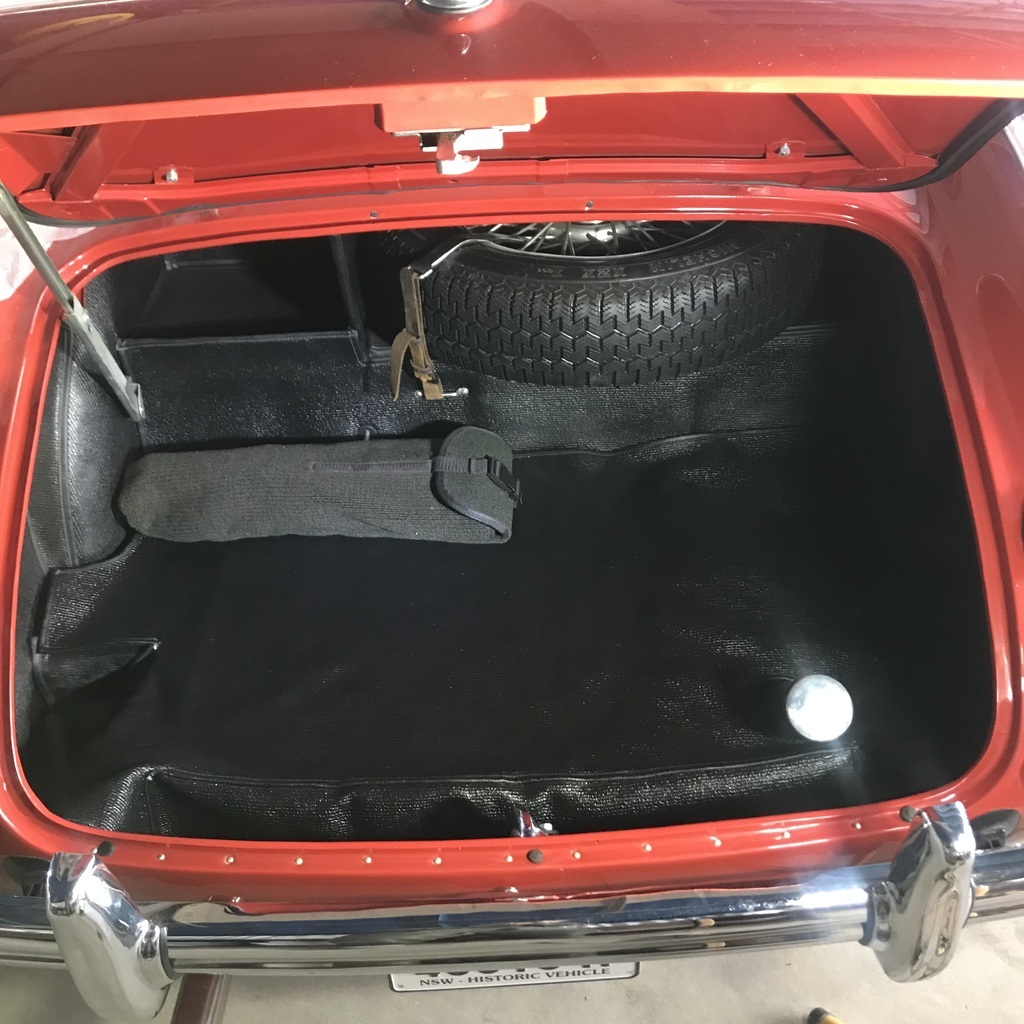 Here’s a pic of the spare tyre cover in the cabin. 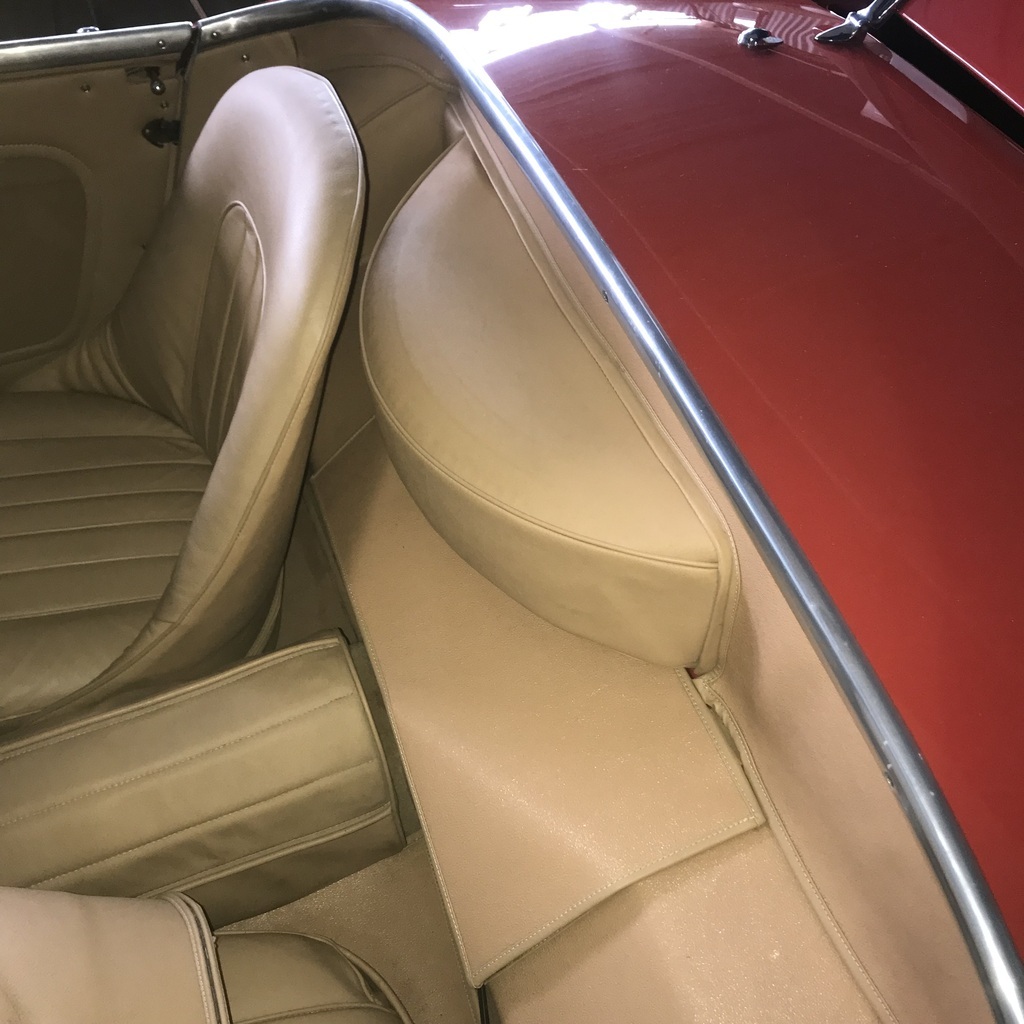 I like that bit of the car design very much. It is a part of the reason I didn’t bother putting the hood back on. And then I had a small job to do with the skid steer. Pretty much any excuse to get it out for a play… When that was done and the rain had stopped, I gave it a wash and greased it. 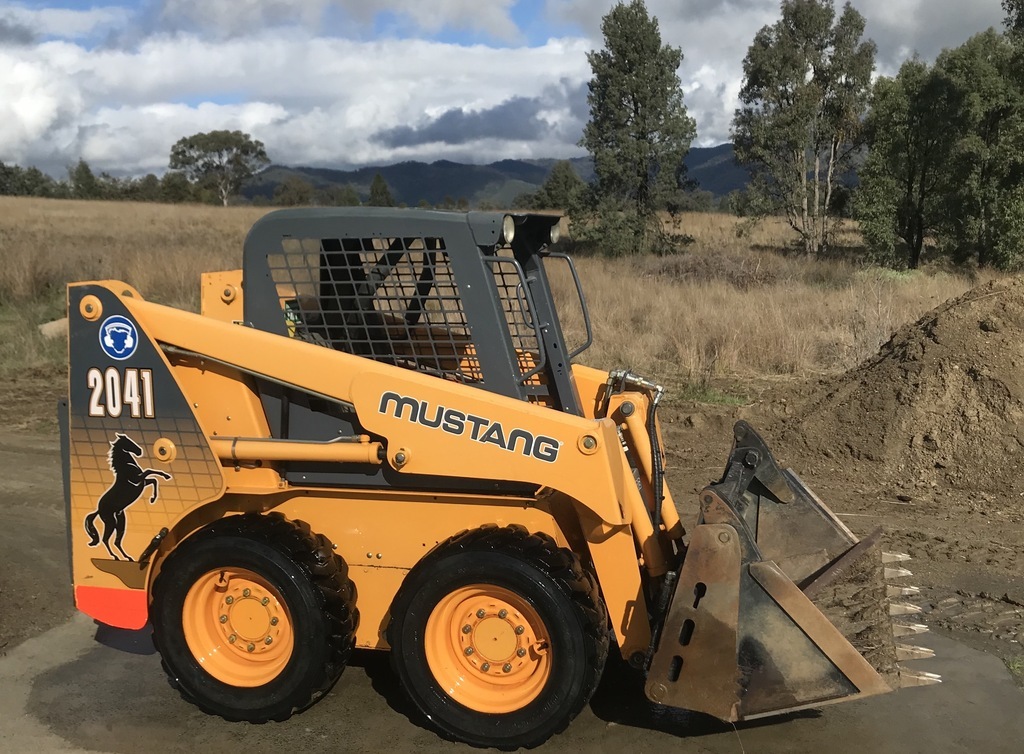 I got the Triumph tools out to see what needed to be done. This lot all need attention. 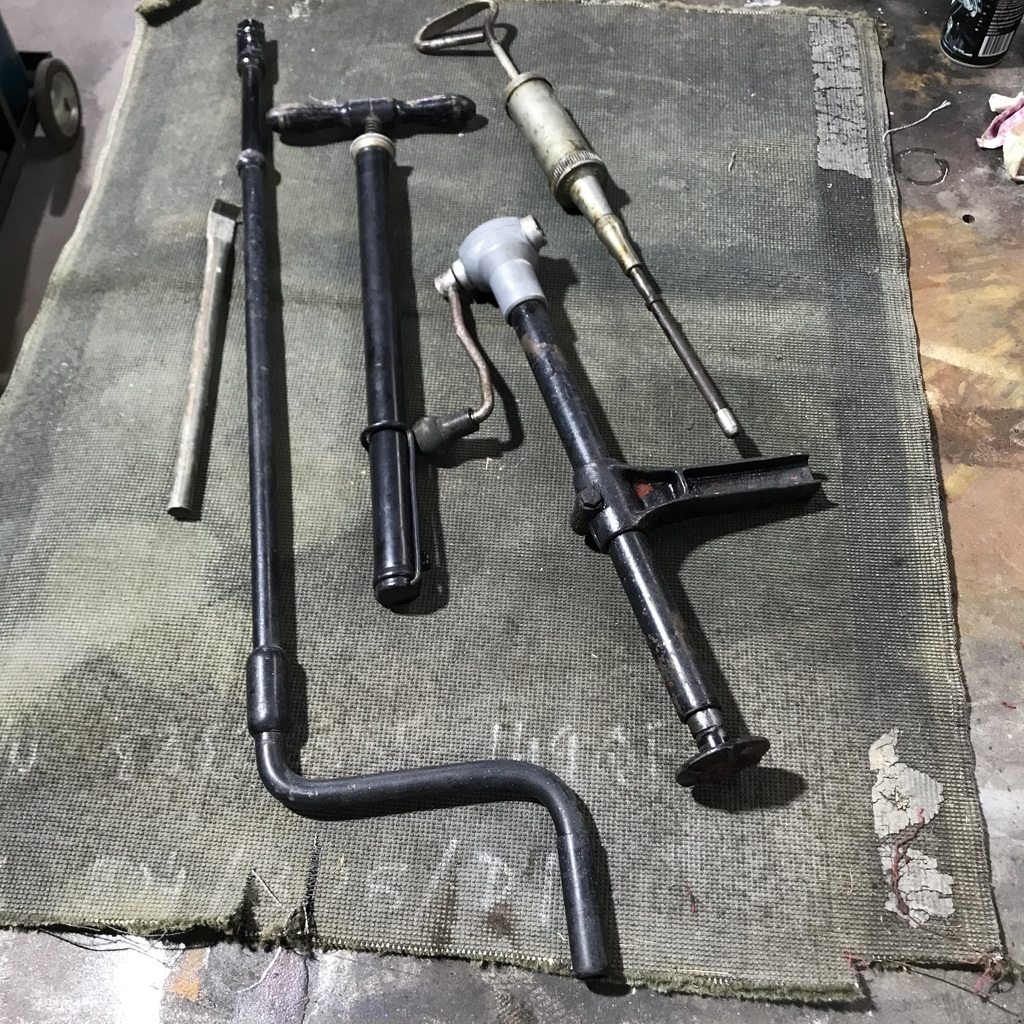 The wheel brace is fine so it’s back in the car. 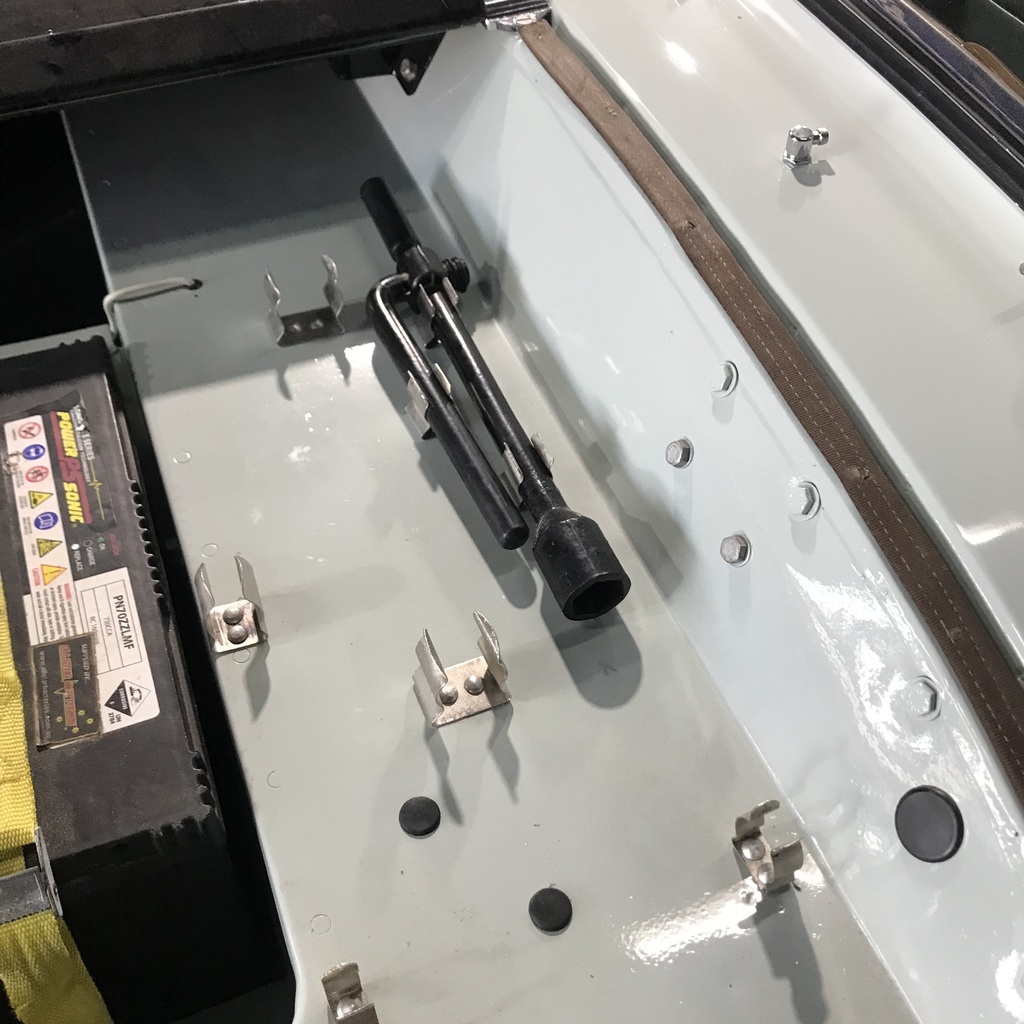 The jack needs some plating and paint, the other bits just need paint. The only pieces that will be in the car are the jack and the wheel brace. I can’t see the point in carrying around the tyre pump, grease gun or crank handle. The latter in particular weighs about 20 cwt. I’ll just tidy them up for the rare occasions when the car is in our club show. Took the jack apart to make the various bits pretty. It has to live in the engine bay after all! 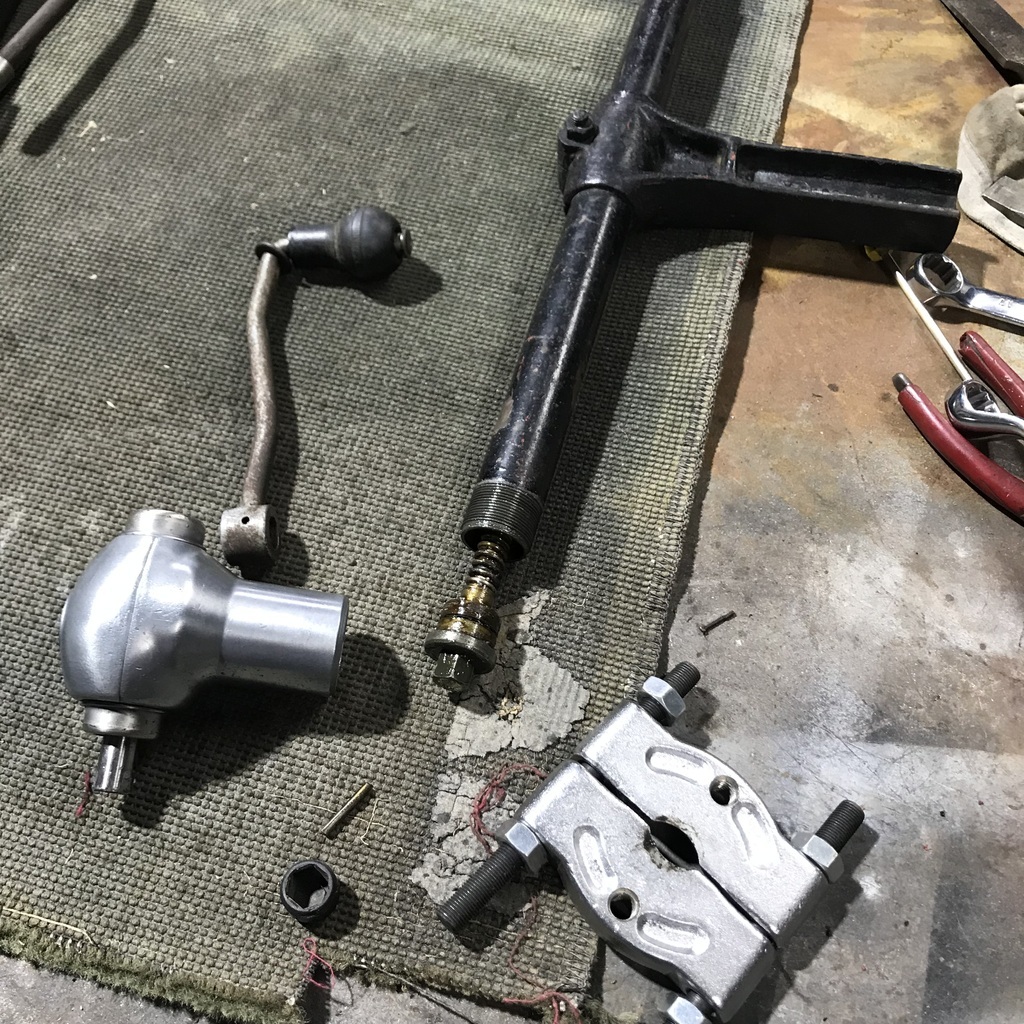 Thanks. |
| |
|
|
jamesd1972
Club Retro Rides Member
Posts: 2,921  Club RR Member Number: 40
|
|
|
|
|
We used an old leather belt to hold the battery down on the Tractor, looks OK - but needs a nice bit of saddle soap now.
If you have any horsey places nearby lots saddle, stirrup straps etc. are strong and would look good as well.
Still in awe of what you do.
Best
James
|
| |
|
|
gazzam
Part of things
 
Posts: 740  Member is Online
|
|
|
|
Thankyou James. Is saddle soap the same as leather dressing? Went to take the Triumph for a short test drive this morning, but was stymied by a muddy puddle, that couldn’t be avoided. So I put it back in the shed and got the skid steer out again and fixed the road. Started on a battery hold down strap. Cut a piece of 3mm plate to go with an old belt. 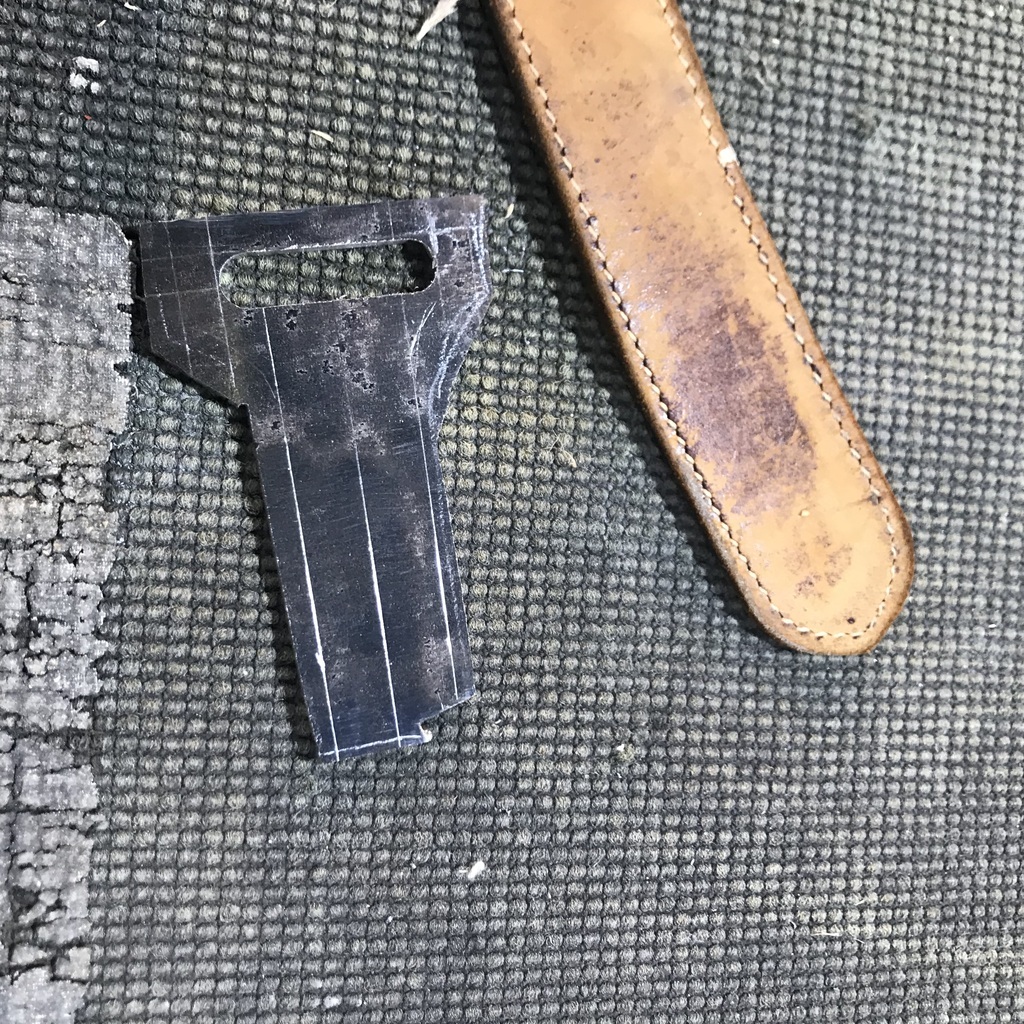 Got it to shape and then used it as a template to scribe a second one. Bent the ends to hook into the brackets on the car. 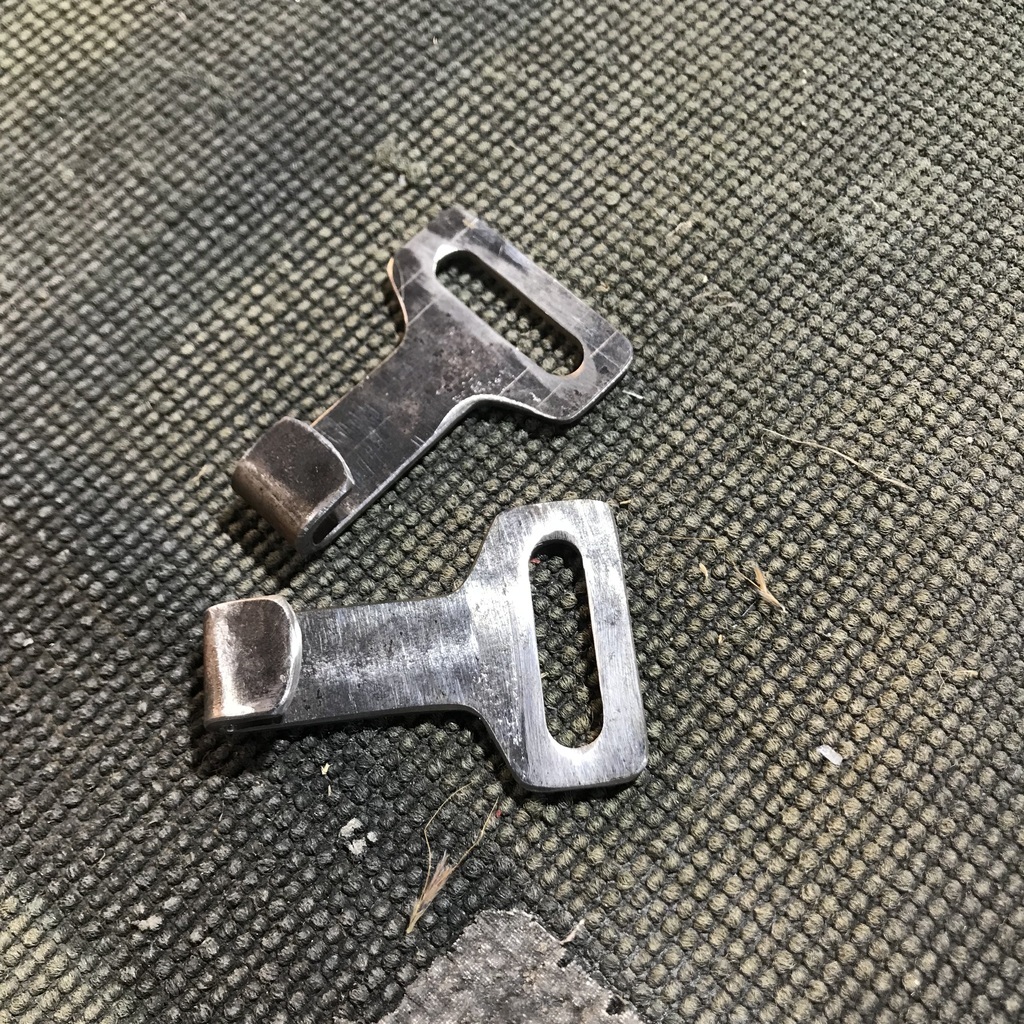 I’ll plate them tomorrow, then I can make the belt. By now the road was dry, so I went for a short drive. Not great, I must admit. Was struggling to get it to run on all cylinders. As I returned to the shed, I found the possible reason. Lying on the road was the supercharger drive belt. It surprises me that it can actually suck air through a non turning blower. Also the clutch is very heavy and shuddering. So I have some work to do. I’ll get it on the hoist tomorrow and check the clutch linkage, as well as the supercharger drive. Very disappointed. Thanks. |
| |
|
|
glenanderson
Club Retro Rides Member
Posts: 4,353
Club RR Member Number: 64
Member is Online
|
|
Aug 16, 2024 11:03:15 GMT
|
|
Liked for support, not for the issues.
|
| |
My worst worry about dying is my wife selling my stuff for what I told her it cost...
|
|
|
|
|
Aug 16, 2024 12:08:21 GMT
|
Cut a piece of 3mm plate to go with an old belt.  Ah! if only you had a CNC plasma cutting table............... |
| |
|
|
jamesd1972
Club Retro Rides Member
Posts: 2,921  Club RR Member Number: 40
|
|
|
|
|
Saddle soap is a general conditioner / cleaner / waterproof coating. Everything to do with horses goes manky quickly so this rubbed into leather bits if you are doing a proper job of looking after your tack.
James
* all second-hand knowledge -I was generally in charge of poo collection and electric fence when there was a pony in the field.
|
| |
|
|
gazzam
Part of things
 
Posts: 740  Member is Online
|
|
|
|
You’re spot on Mark, exactly the type of thing it would be perfect for. Unfortunately it’s not yet up and running… Did that place have diamond stones? Cheers James, I’ll see if I can get some. I put the belt back on the supercharger drive. All looks ok, but I haven’t run it. Plated this lot. 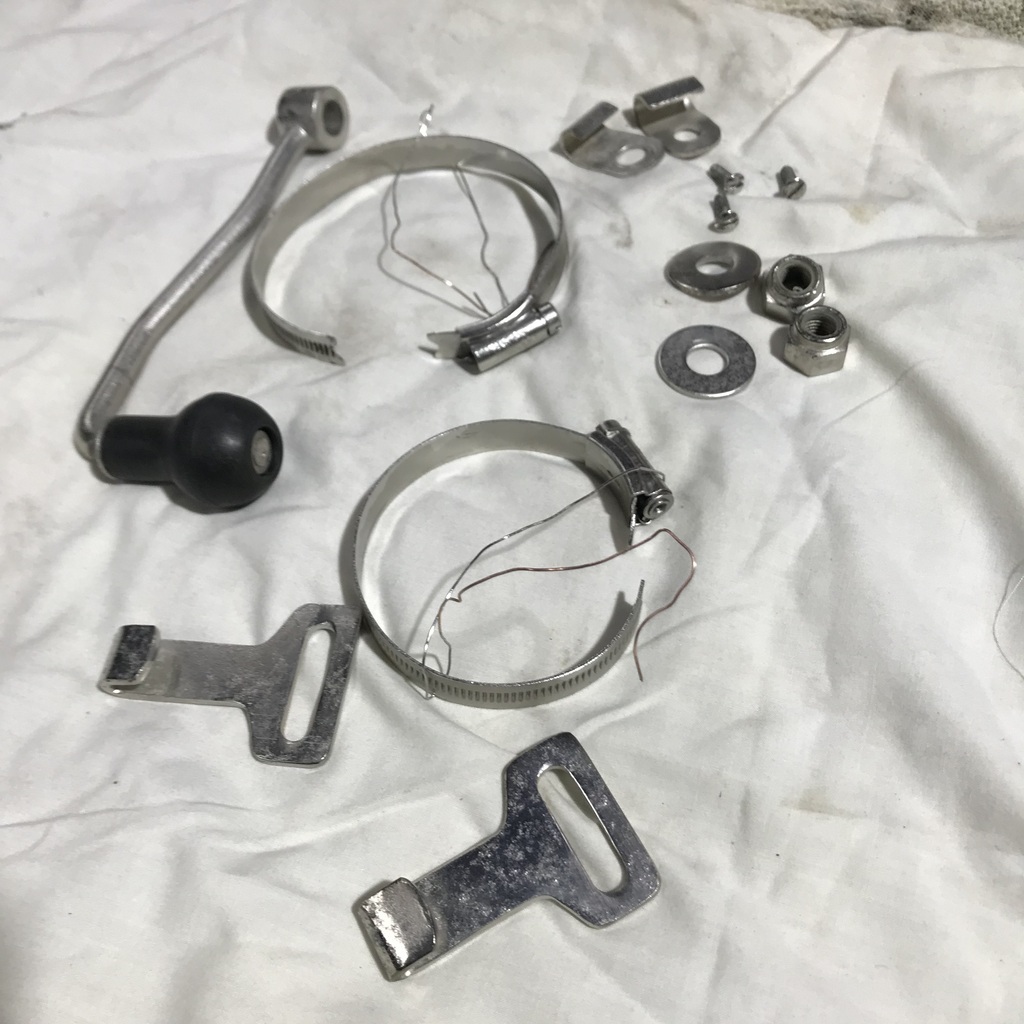 Once I have those two top radiator hose clamps back on, I can replace the coolant and drive it. Hopefully this time the supercharger will actually be turning! As for the clutch shudder, I’m thinking I’ll put a new clutch in it. Like I probably should have done, before I put it back together. Looks like it’ll be easier to pull the engine and gearbox out, rather than separating them in situ. I’m wondering how difficult it will be to actually get a clutch for a 1948 Triumph with a non original gearbox. Thanks. |
| |
|
|
|
|


