|
|
|
|
|
Instead of being able to plan things, anticipating problems and hopefully avoiding them, I have to react to what is there. Fixing problems as I come across them. And this chop is a mess. Its much worse that I thought it would be ( this turned into one of the most difficult chops I've done, eventhough a chop on a '32 Coupe is usually one of the simpler ones...) I got the upper/front doorgap (A pillar) close to where I want it, on the right hand side. 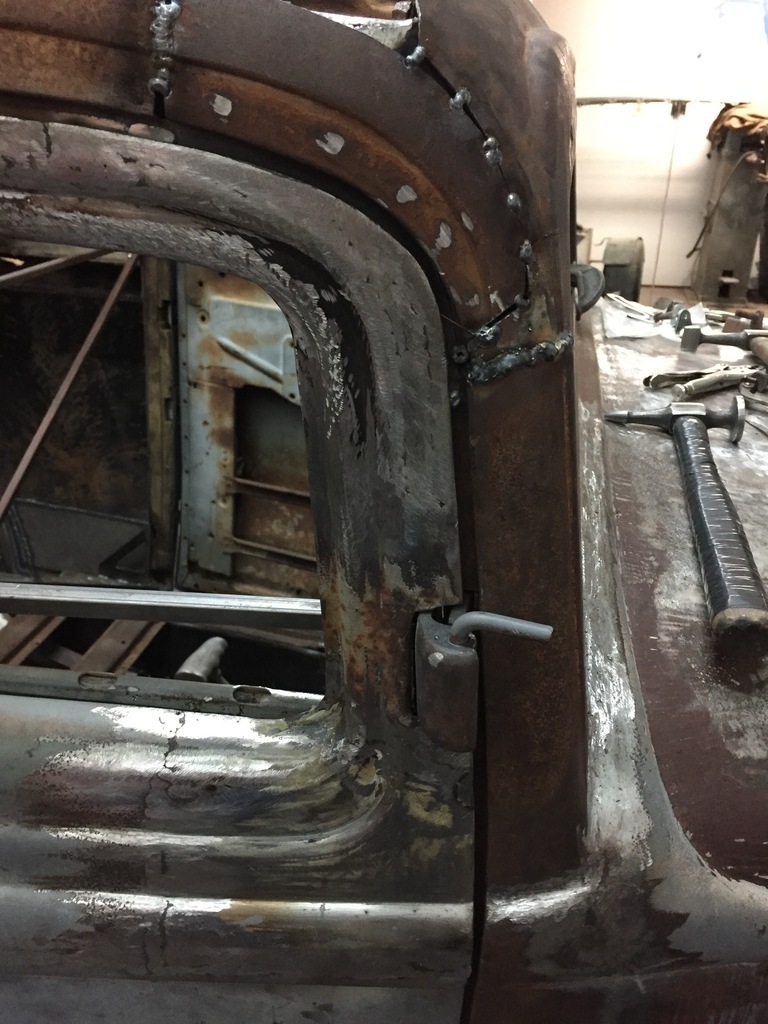 When I did the same on the LHS, the results were not good. 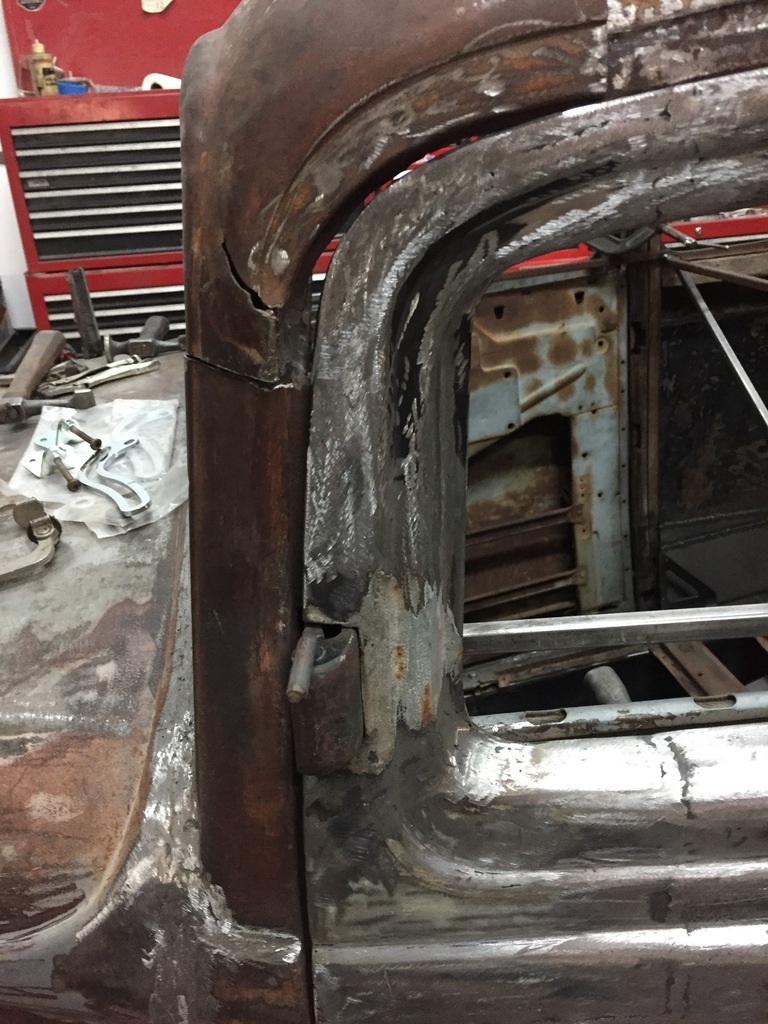 To check if it was the A pillar on the door or on the car, I made a template of the RHS door. And checked what was going on on the LHS. 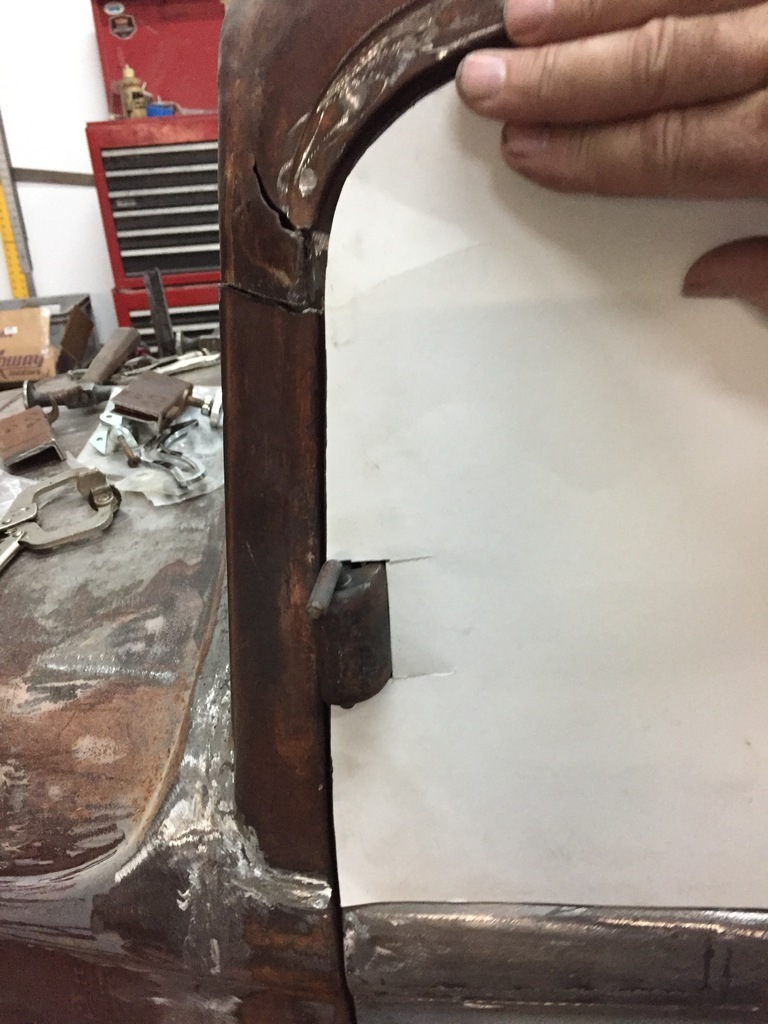 Cool. Its the door. That is easily corrected... I just have to extend the lip on the leading edge a bit.  I had to do a lot of work to those upper/front corners to compensate for the chop ( the pillars are tapered quite a bit ), and the lengthening of the roof ( because I did not lean the windshield back). |
| |
|
|
|
|
|
|
|
|
|
But I'll do that later. I still have a lot of bracing inside the car, so finetuning the gaps makes no sense, until those are out ( just incase things shift a bit when they come out...) These are the sliders that hold the windshield open & closed. 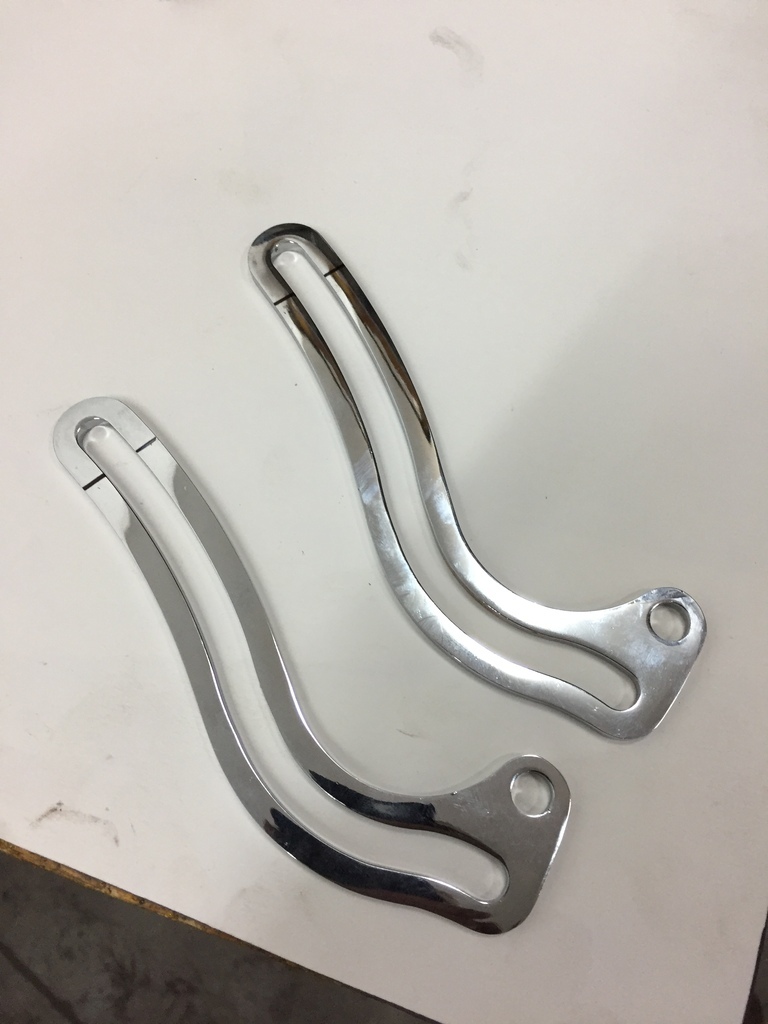 Here they are in a stock application ( random pic off the net). 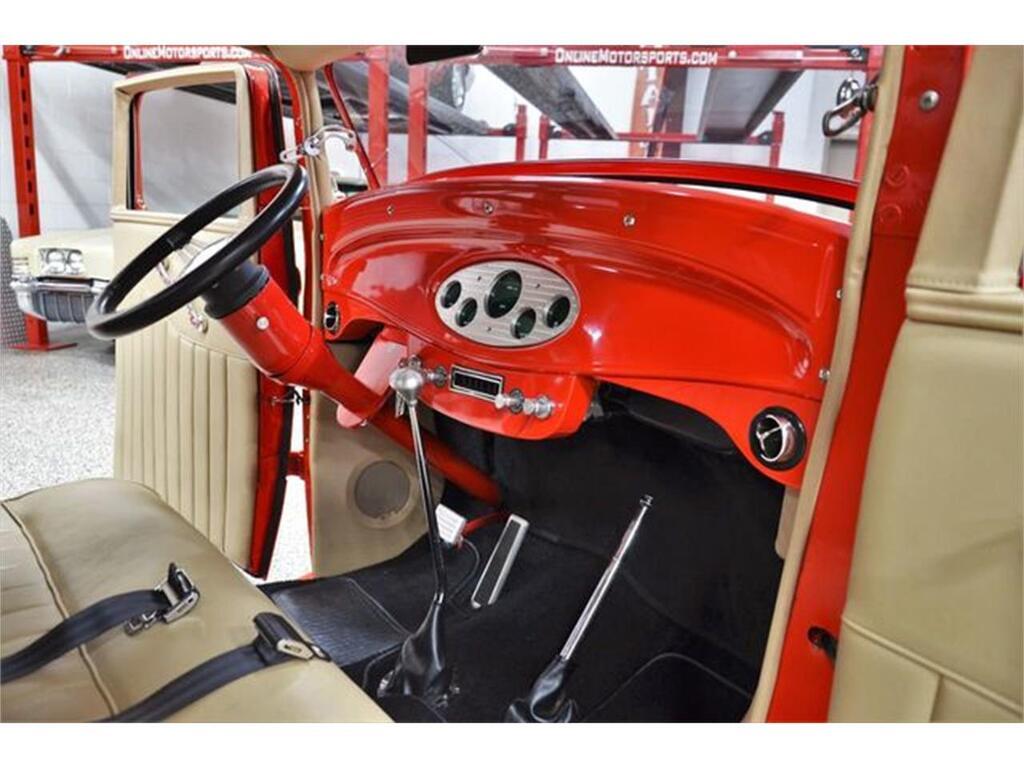 Because of the roofchop, I have less windshield height, so I had to shorten them. 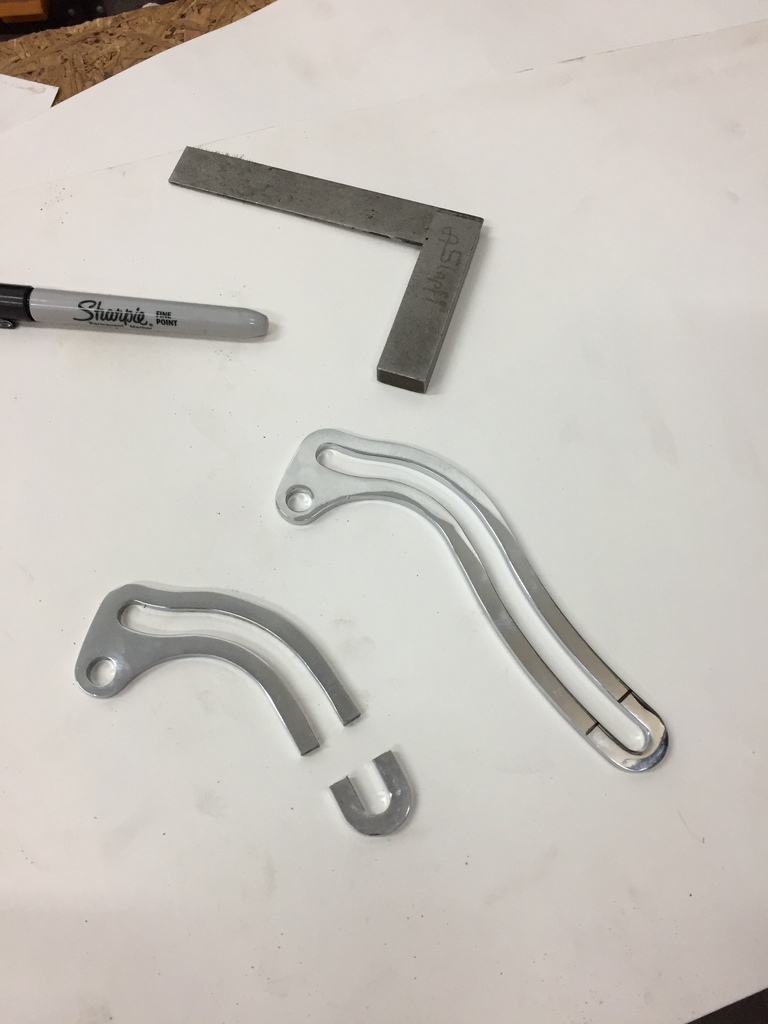 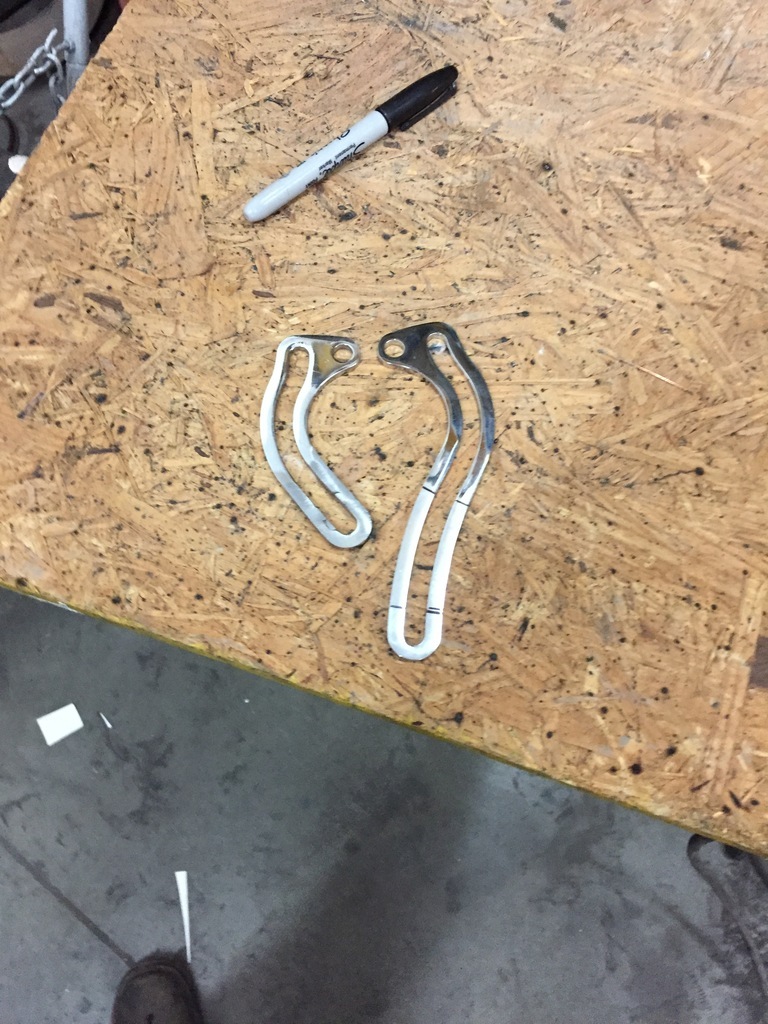 The spot where they attach to the A pillar had to change too. So I cut part of both pillars out, in such a way that by using them upside down on opposite sides I could do a lot less cutting and welding.  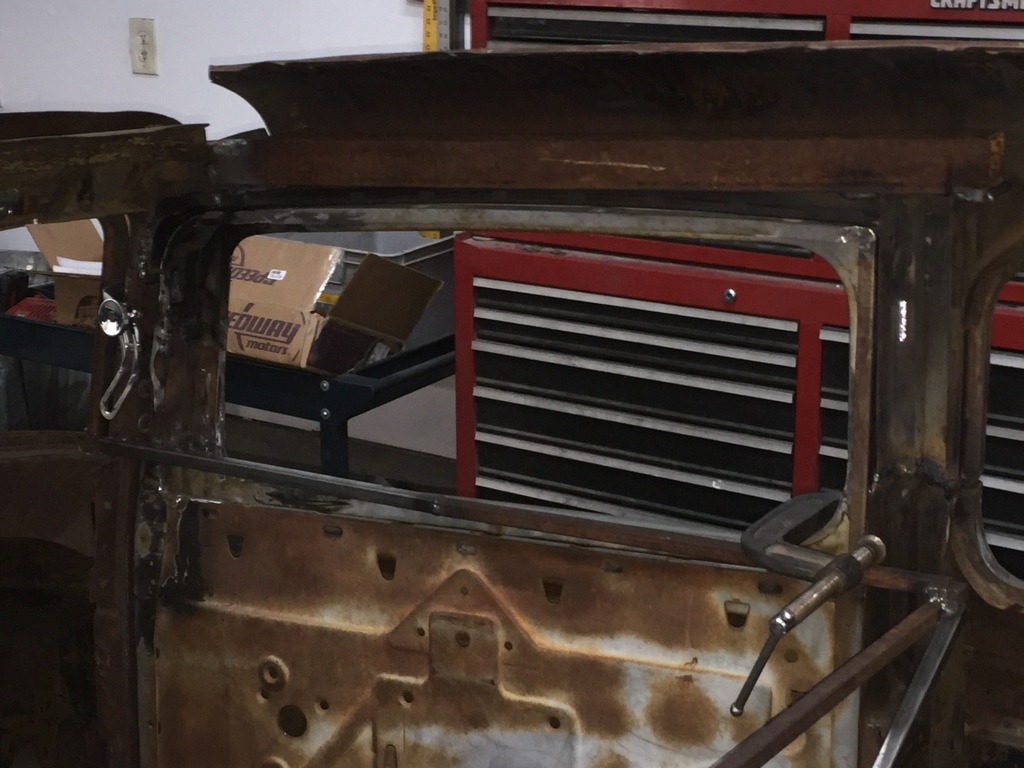 And since the windshield frame was out, I could finish the welds of the new header panel. 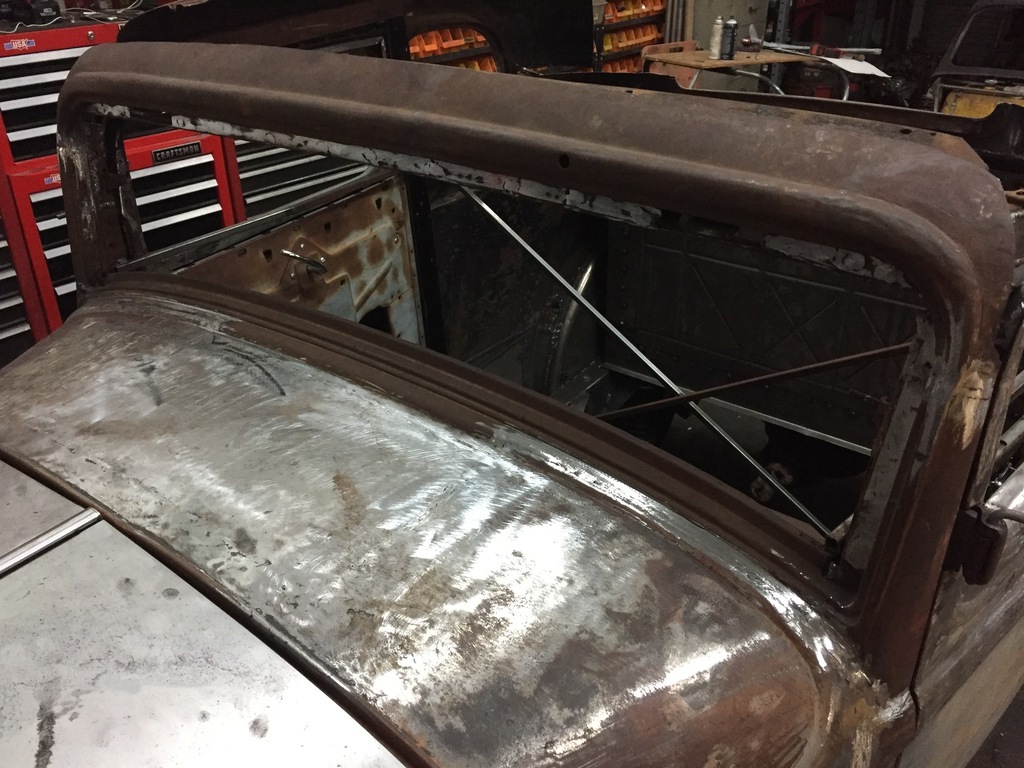 |
| |
|
|
|
|
|
|
|
Inside the roof there is structural wood. It connects the A pillar and the B pillar, and also is part of the system to hold the upholstery. That may have been fine for the first 20 years this car was on the road. But since then things got loose, the wood was no longer taking up the force it needed to, making the outside skin work too hard, resulting in lots of stress cracks. Also, it was cut for the chop. And left loose, because wood is tricky to weld... 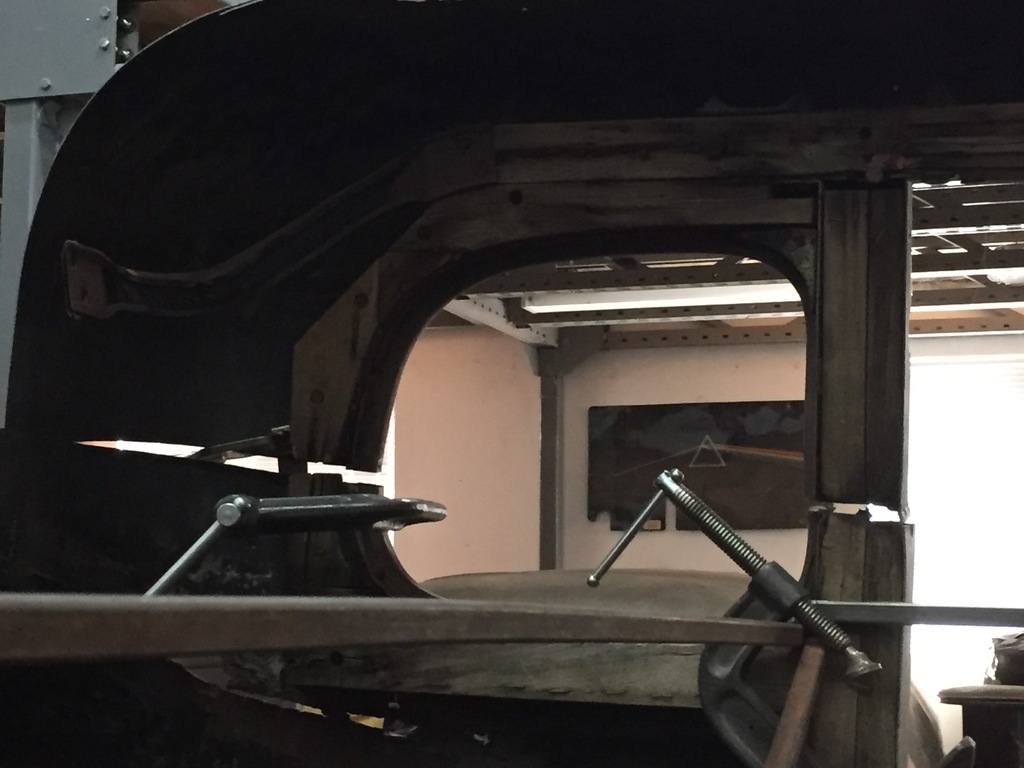  So I took the wood out.  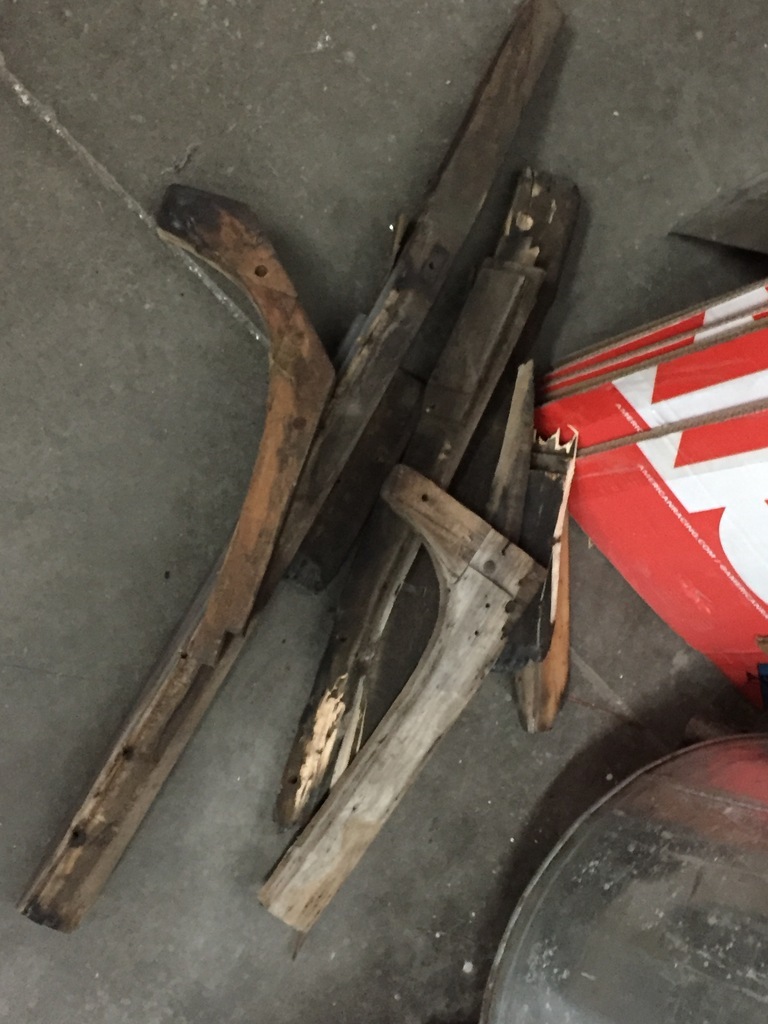 I like steel better anyway...   And since I'm starting over, I can make some changes with the new re enforcements, the interior, and the garnish moldings. ( I have a plan.... More on that later... ) |
| |
|
|
|
|
|
|
|
Doorgaps are not done yet, but are getting better. 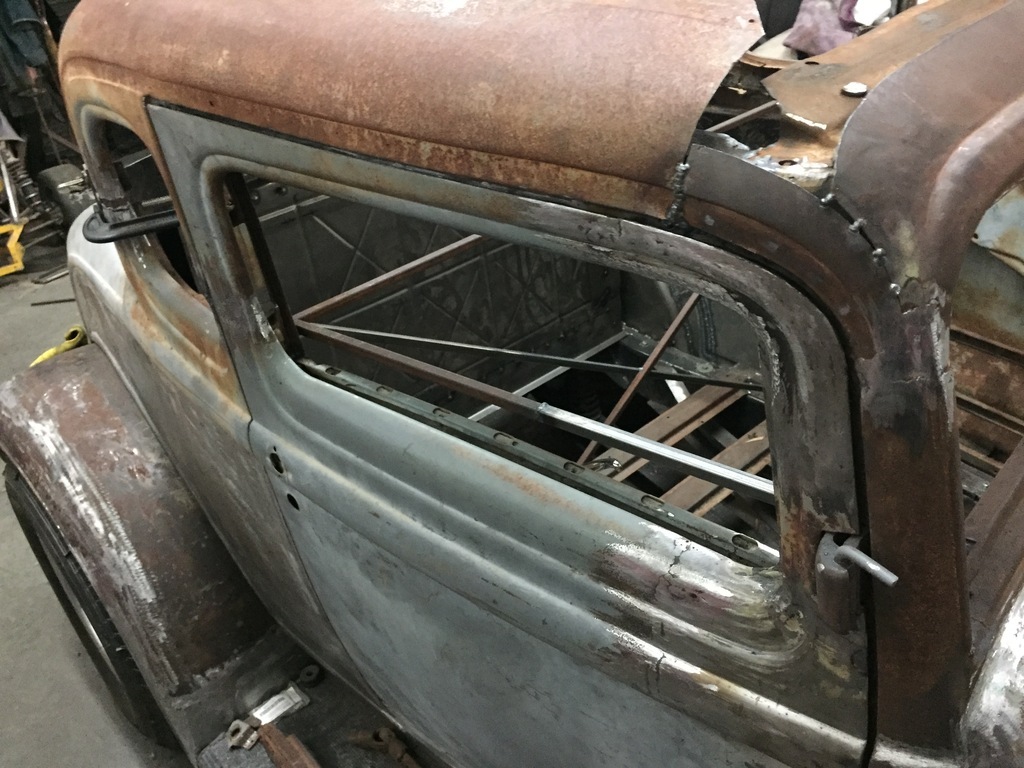 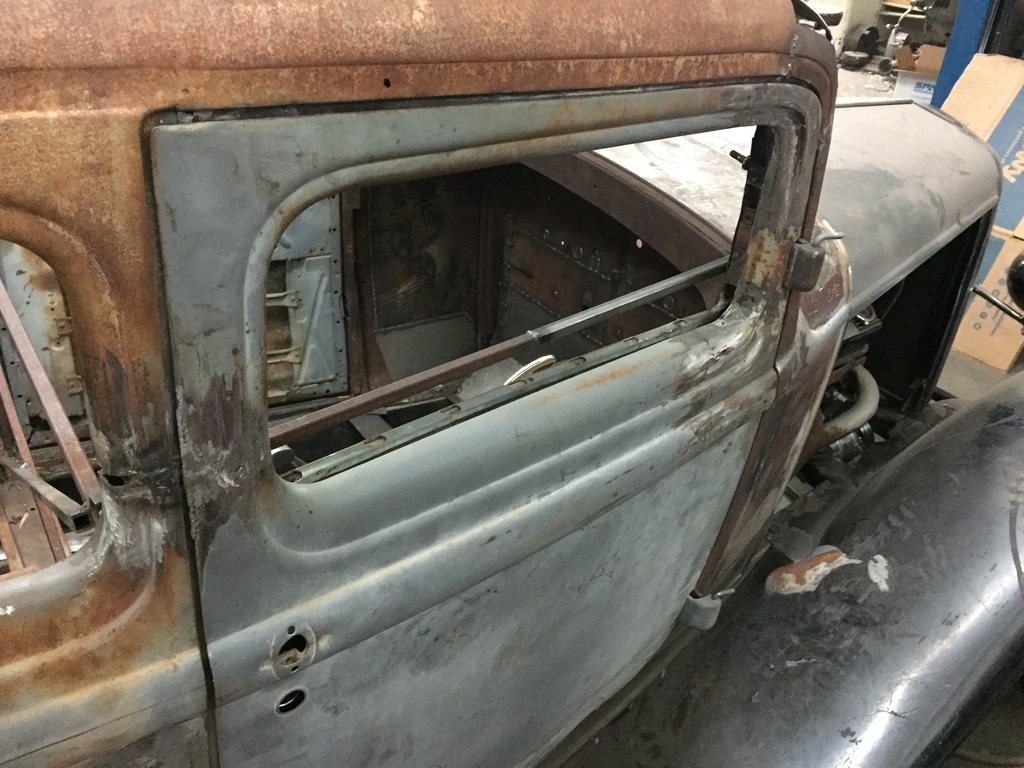 Next problem is the 1/4 windows. Again, they have a lot of taper in them. So nothing lines up after the chop. I cut a piece of 1/4" aluminum as a nice strong straight plate to check the fit.  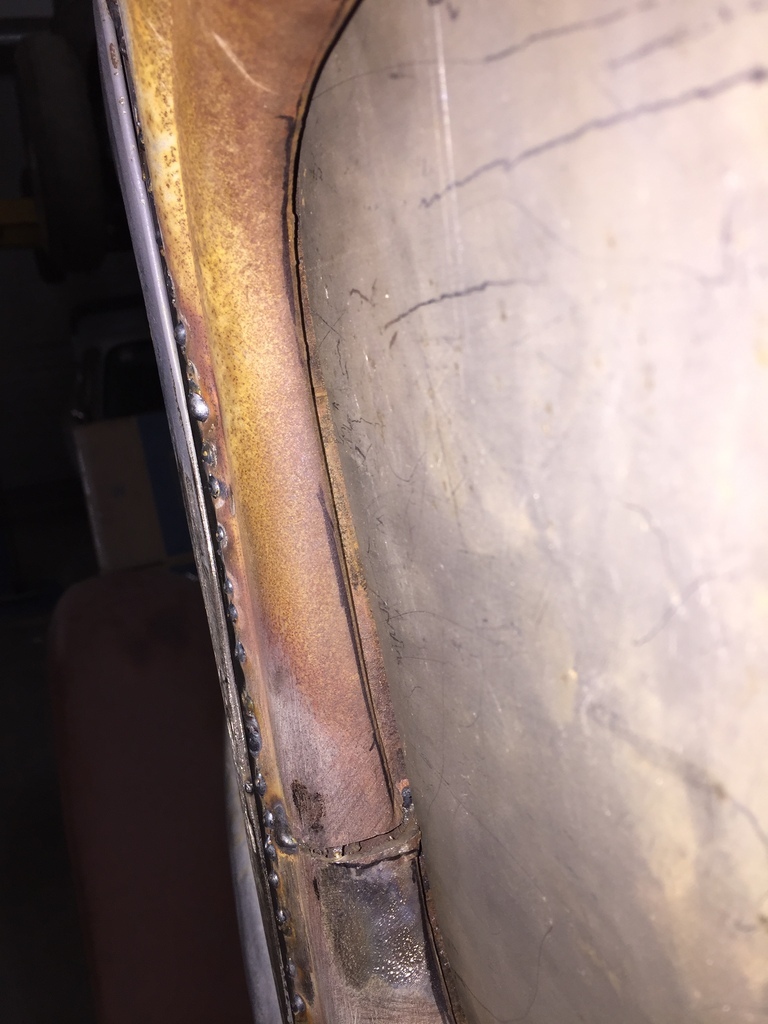 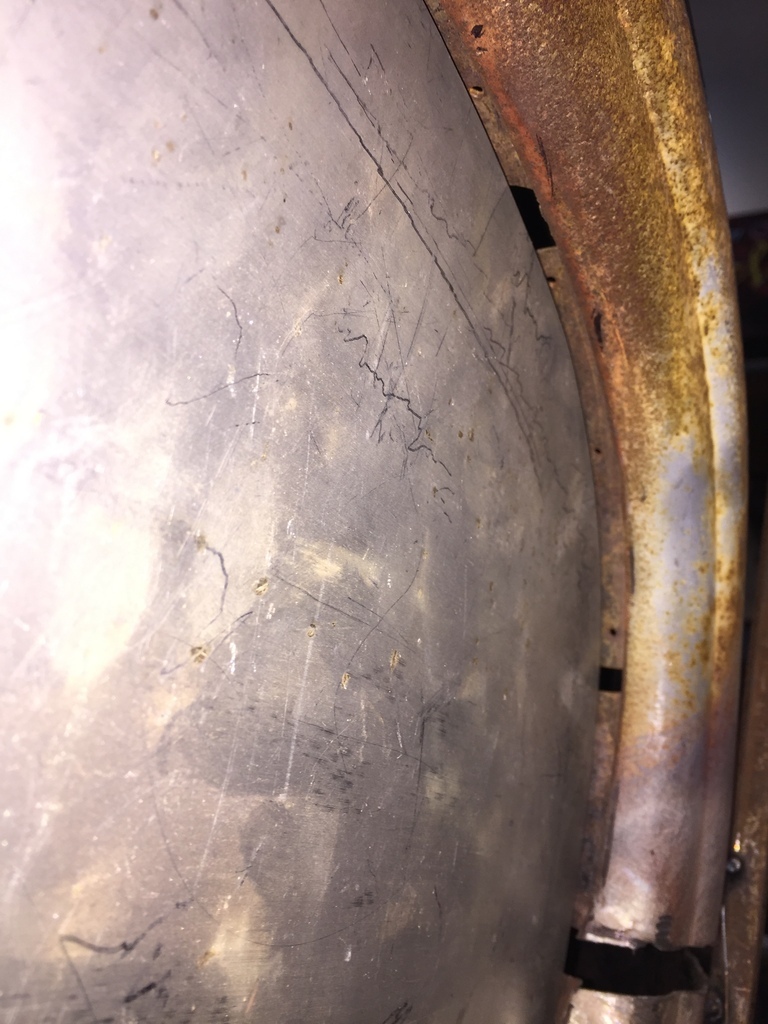 If the aluminum plate won't lay flat, the glass wont either. So I had to do a bit more cutting. 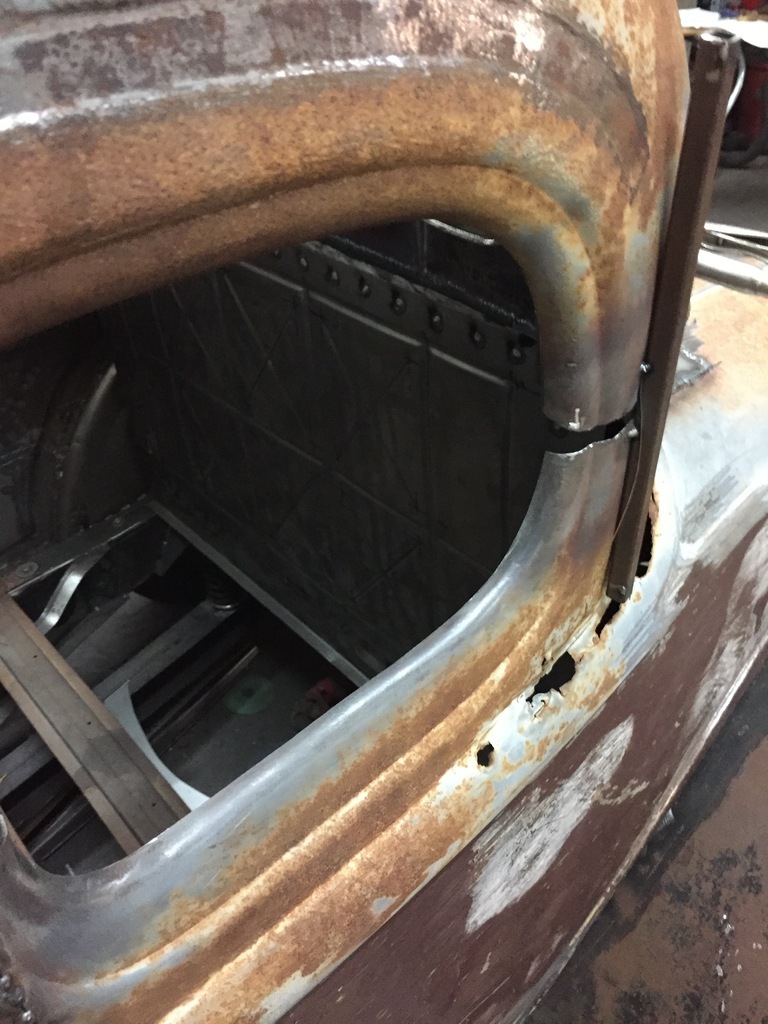 And welding. 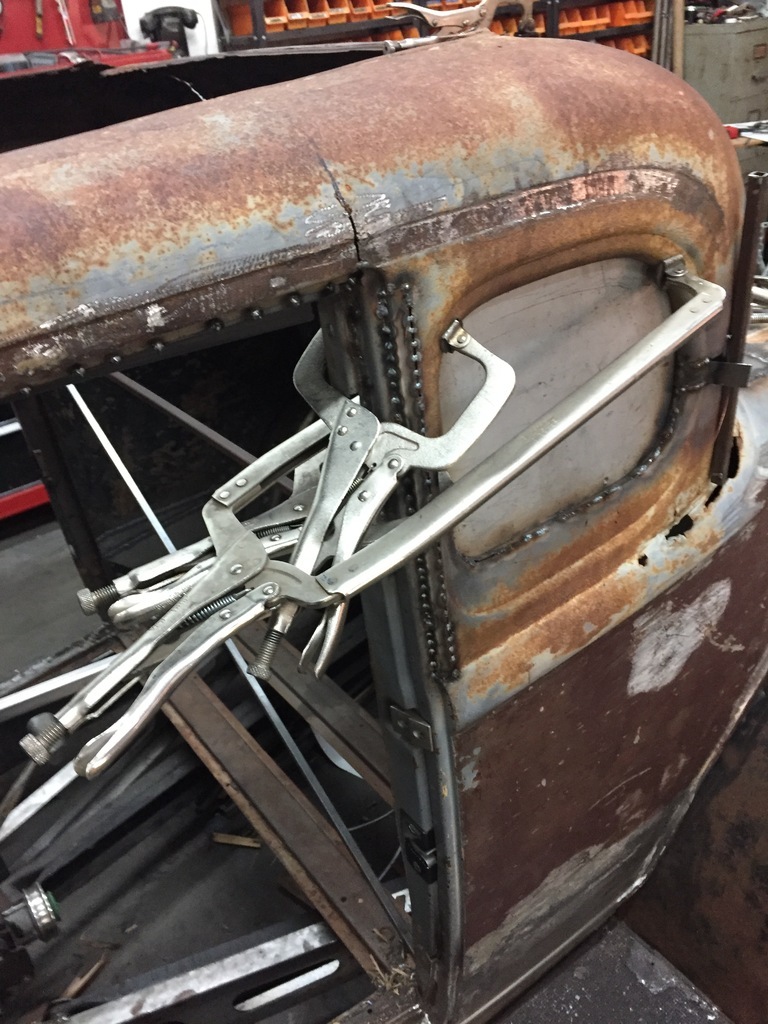 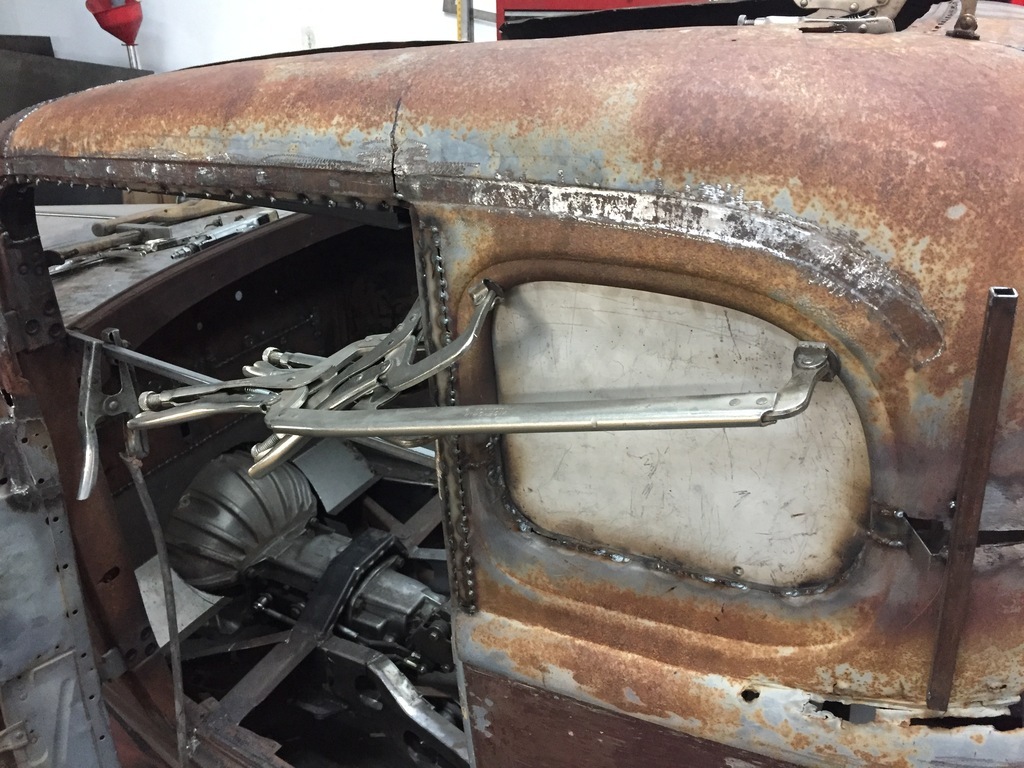 |
| |
|
|
|
|
|
|
|
Doing some more work to the doorgap. 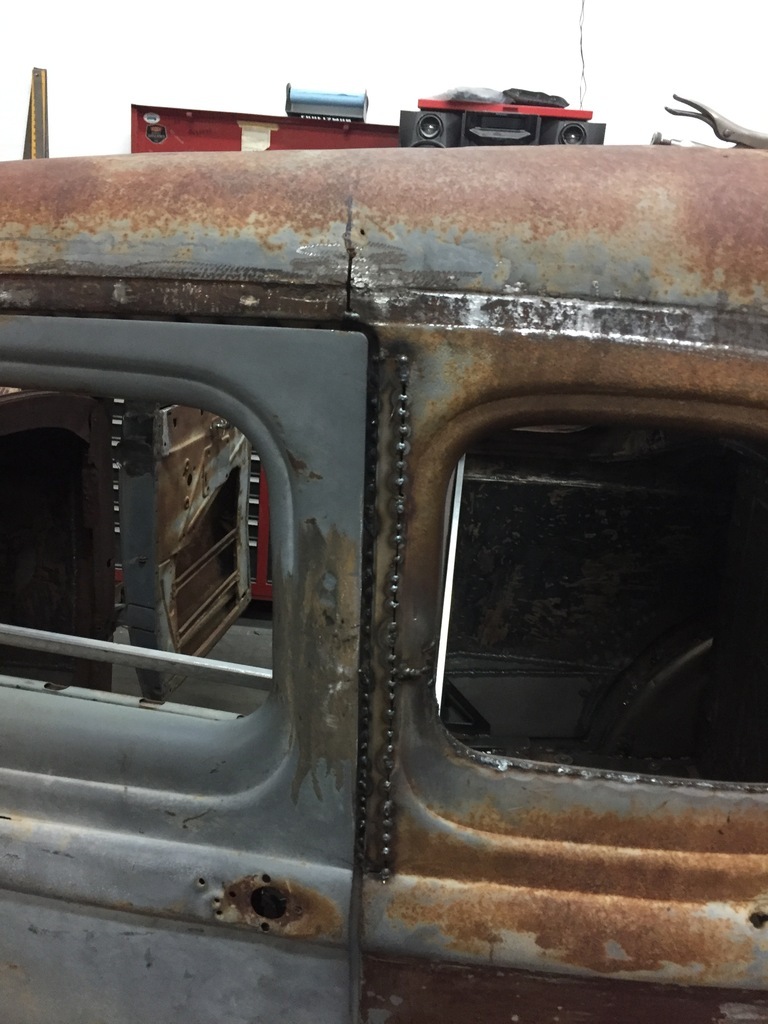 And starting to re attach the top ( I welded in a 3" wide strip to get rid of the warped sheetmetal the previous guy left). 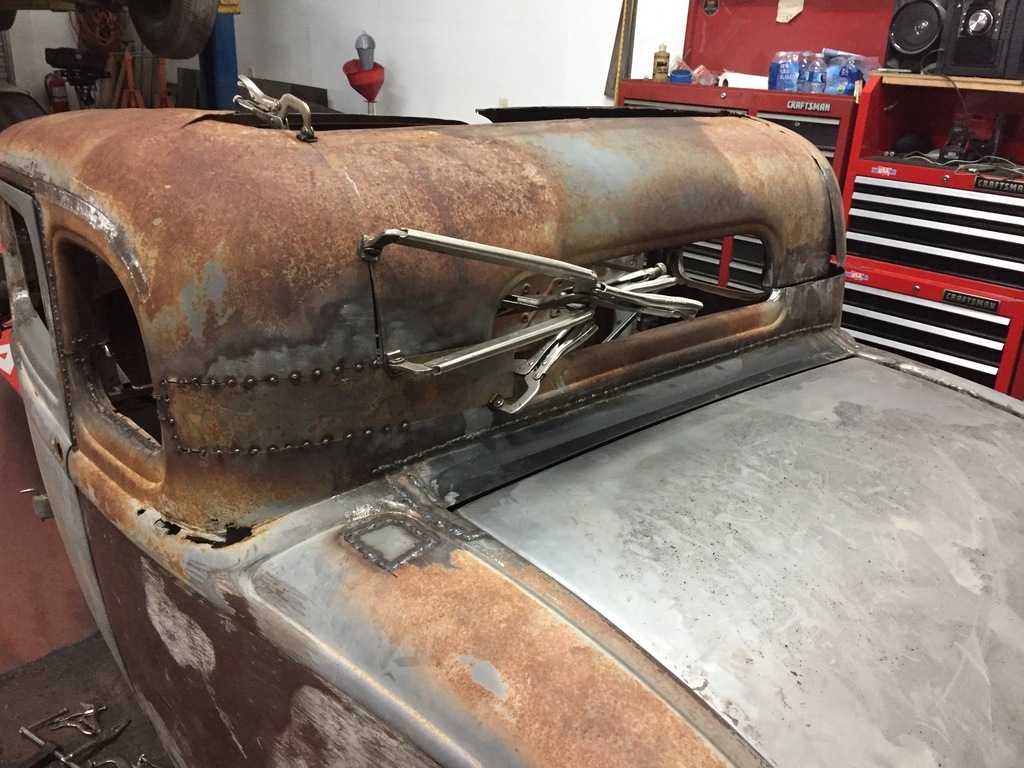 Only tacked, for right now. I don't want to get too far ahead of the right hand side... |
| |
|
|
75swb
Beta Tester
Posts: 1,043
Club RR Member Number: 181
|
1932 Ford 5W Coupe.75swb
@75swb
Club Retro Rides Member 181
|
|
|
|
I've said it before but that's a heap of work! Nicely done. I didn't necessarily notice all of the faults in the pictures early on, but the rectification is visibly better!
|
| |
|
|
|
|
|
|
|
|
Incredible.
I look at the flipping the glass opener support sections and shortening the guides, knowing they need to be invisibly repaired and wonder if one could ever put a value to the brain power, experience and actual real time labour.
99.5% of people will never know, guess of see what has gone into this build.
I guess you are not counting hours or keeping a strict record of costs.
You would just expire in a puff of smoke if you did.
|
| |
|
|
|
|
|
|
|
|
The only thing wrong with this build is there are not enough superlatives to avoid repeating them,
Brilliant doesn't even begin to describe the work here, (& on the pick up,)
Nigel
|
| |
BMW E39 525i Sport
BMW E46 320d Sport Touring (now sold on.)
BMW E30 325 Touring (now sold on.)
BMW E30 320 Cabriolet (Project car - currently for sale.)
|
|
|
|
|
|
|
|
"And left loose, because wood is tricky to weld..."
I wouldn't bet against you being able to do it though.
|
| |
|
|
|
|
|
|
glenanderson
Club Retro Rides Member
Posts: 4,261
Club RR Member Number: 64
|
1932 Ford 5W Coupe.glenanderson
@glenanderson
Club Retro Rides Member 64
|
|
|
My '37 Ford Model Y had similar structural wood in the body structure, with exactly that issue of shrinkage over time and subsequent stress cracking of the metalwork at the pillars. I resolved the issue by selling the car. Wasn't too difficult. Certainly easier than what you're undertaking! |
| |
My worst worry about dying is my wife selling my stuff for what I told her it cost...
|
|
jamesd1972
Club Retro Rides Member
Posts: 2,906  Club RR Member Number: 40
|
1932 Ford 5W Coupe.jamesd1972
@jamesd1972
Club Retro Rides Member 40
|
Aug 14, 2023 10:21:28 GMT
|
|
Brilliant as always, understood that you have the time and are doing this because you want to but could you possibly share your thoughts on what kind of $ do original project / finished 5W Coupes go for ?
Kind of want to know you are doing OK for the hours going in !
James
|
| |
|
|
|
|
|
Aug 14, 2023 11:01:12 GMT
|
Thanks guys. jamesd1972, value's on '32s have been strange lately. Used to be that anything with a "Henry" body was as good as money in the bank. The saying was "you cant buy it too expensive, you just bought it too early" But value's seem to have tanked a bit lately. I don't know if this is a post Covid thing, or if people are moving away from building Hot Rods ( or even cars in general)... So as a payed by the hour project, I'd be way upside down on it... Doesn't really matter... Its my dream car ( OK, one of my dream cars... ) After Covid, I was tempted to sell it at one point (just a body with a pile of collected parts for it). And the reality of the ( then) market value meant I wouldn't even have broken even on what I had. So I built it instead. That decision ( this one as well as the truck build) meant I had to postpone my racing some more. ( each time I stop racing for a while I'm surprised to find how much more time I have for other things. It tends to kind of take over and dominate every day life...) But that's OK too ( for now). Getting these cars from back burner - some time in the distant future projects - to usable cars is very gratifying too. It also cleans up the yard from a couple of dead cars ( which is important to my wife). And as these cars are taking shape, I can get rid of some of the extra parts I've hoarded for them. So I think these are all positive things. Even if, strictly going by resale value ( not that I'd want to sell, anyway) per hours spent I'm coming up short... |
| |
|
|
|
|
|
Aug 14, 2023 11:50:30 GMT
|
|
Fantastic work as usual. Tongue in the cheek question - no suicide doors or dickie seat?
|
| |
|
|
|
|
|
Aug 14, 2023 16:13:09 GMT
|
Thanks dadstaxi. Semi serious answer... Suiciding the doors is possible, I've done them for customers. But the back of the doors have a lot of curve to them, and they are only a couple of inches deep. So when combined with hidden hinges ( those 2 mods usually are done together) it takes up a lot of interior space. Or when you'd do it with exposed hinges, they would have to stick out a lot to be able to open. I like the original hinges, they are a visual clue that this is a actual body from 1932. Same with the drip rails, BTW. A nice modification would be to clean that area up with just a little stylized lip. But that is what they do to fiberglass cars ( so they come out of the mold easier). Doing the original driprails ( repro parts) is another headache I've been thinking about and trying to work out how to do... As far as a dicky (rumble) seat, the rear passenger footspace is gone, because that is where I put the gastank. And besides that, its hard enough to find anybody who'll be a passenger in a car of mine, let alone more than 1... |
| |
|
|
|
|
|
Aug 14, 2023 18:20:34 GMT
|
|
Some more thoughts about building a Hot Rod, right now.
Apparently, big conglomerates have been buying up some of the larger names (as far as Hot Rod parts), and killing off & liquidating the parts of those operations that are not profitable enough.
( it looks like Holley is one of the last ones to do a death spasm fire sale...)
And small Mom & Pop business are going the way they go when there is no new generation that is willing or able to take over.
It looks like we are loosing a lot of the resources we rely on.
So its probably a good thing I'm doing this right now.
For example, there was never any doubt I was going to use a Walker radiator in the '32.
I have one in my '28, and eventhough it was expensive it was money well spent.
But being a big ticket item, I didn't buy one in the past couple of years.
I didn't want to spend that much to just have it sit on a shelf.
When it became time to order one, I found out Walker was gone.
( I guess there was some sort of a sale of the company & name, it all went bad, lawyers got involved.
Net result, no more Walker rads, at least for the foreseeable future...)
Fortunately, I was able to buy one that had only been used as a mockup.
( at which time it got damaged, but being a high quality brass radiator, I can repair it...)
|
| |
|
|
|
|
|
|
|
I think I've mentioned this before, but I like to do a lot of planning and I take a lot of measurements before I do a chop. I determine the exact centerline of the roof, and mark it out. And I lay out exactly where my cuts will be. This part of the chop can take a day. I don't touch it until I'm happy with it, and only then will I start cutting. The extra time spent here is more than saved at the later stages of the roofchop, when everything will have to line up again. Looking at TV shows, I've learned this is all wrong. Apparently you need to start cutting right away, preferably with a Reciprocating Saw ( because its quick and not accurate), while loudly proclaiming you never measure anything. Whoever did the original chop on my coupe apparently preferred that method... So I'm still playing catch up because of the mess they made. This is a 5 window coupe, meaning it has 2 pieces of sideglass on each side, a back window, and a windshield. None of those were the same size and shape from side to side, or symmetrical ( for the front & rear ones) When I'm working with irregular shapes like that, I like to use templates. Its a quick and accurate way to check from side to side, and with the windshield & backglass you can check it by folding it in half ( that allows you to make the template symmetrical, so when you fold it flat again you can check the opening on the car. Here are some of the templates I used. 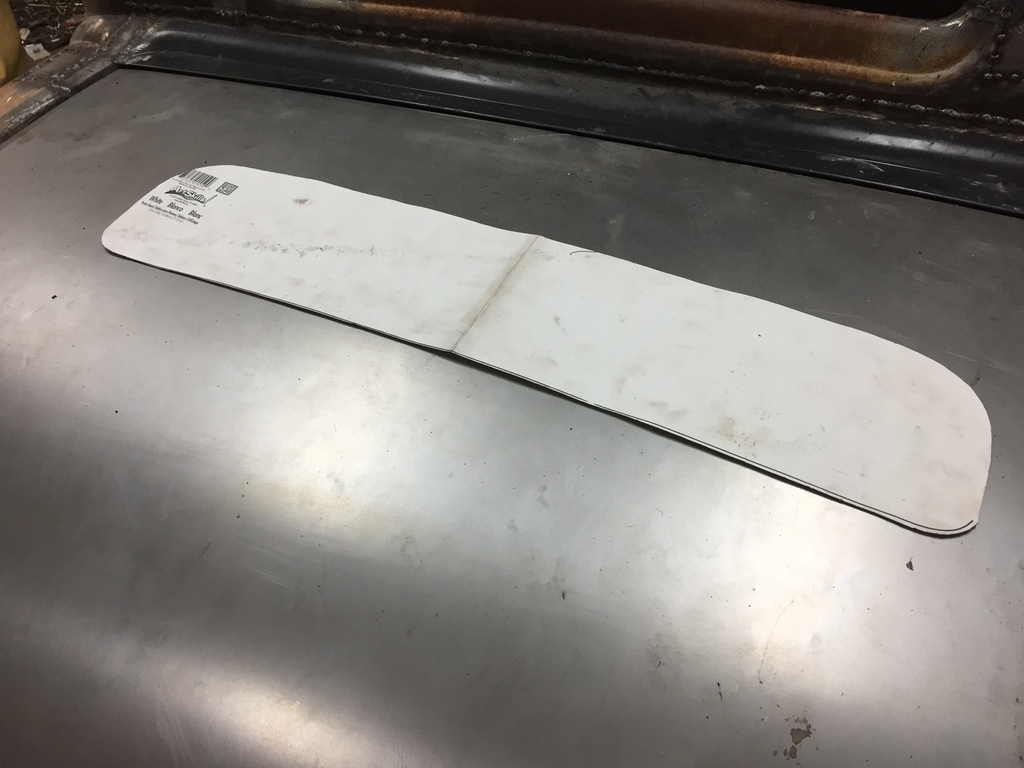 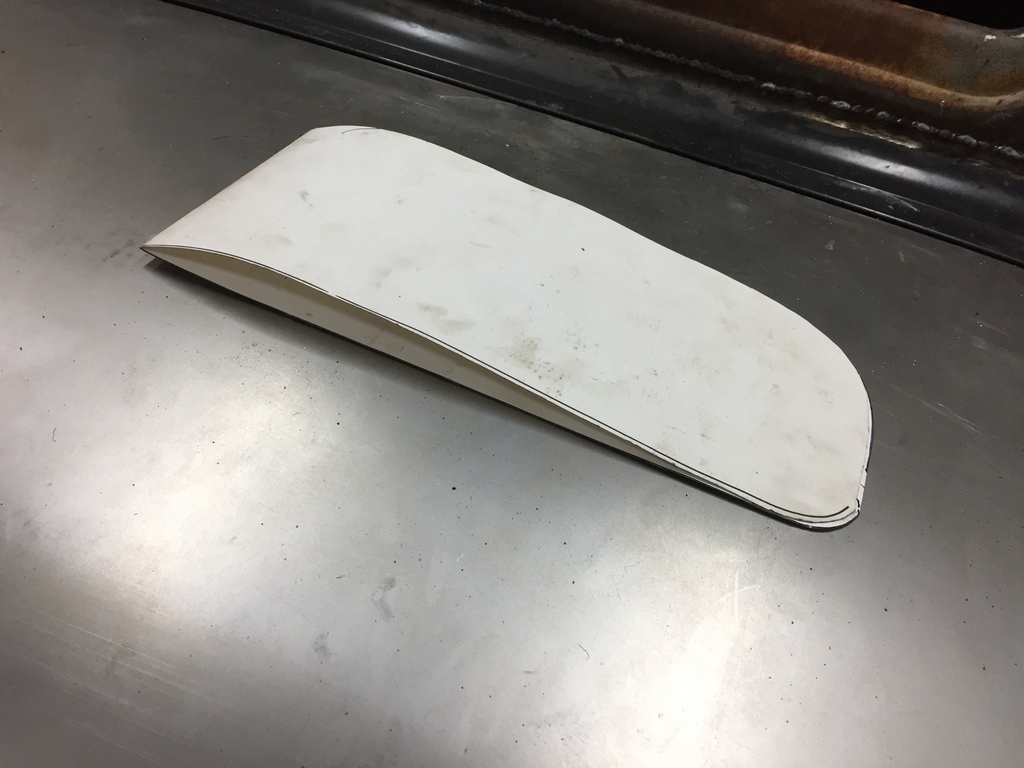 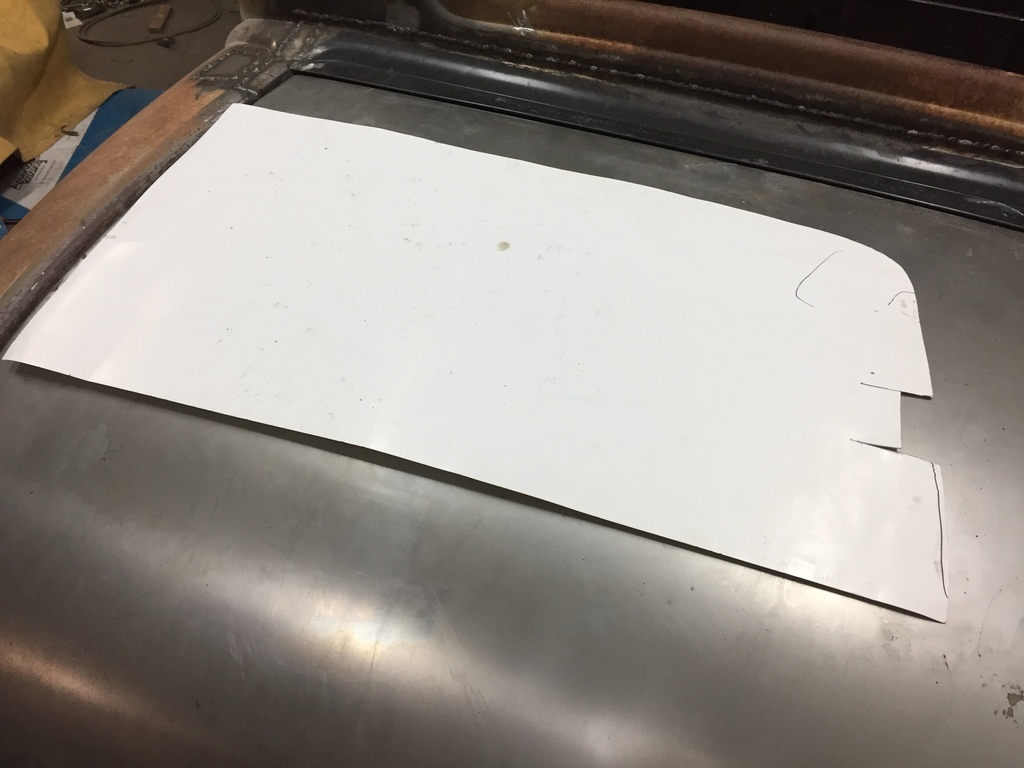 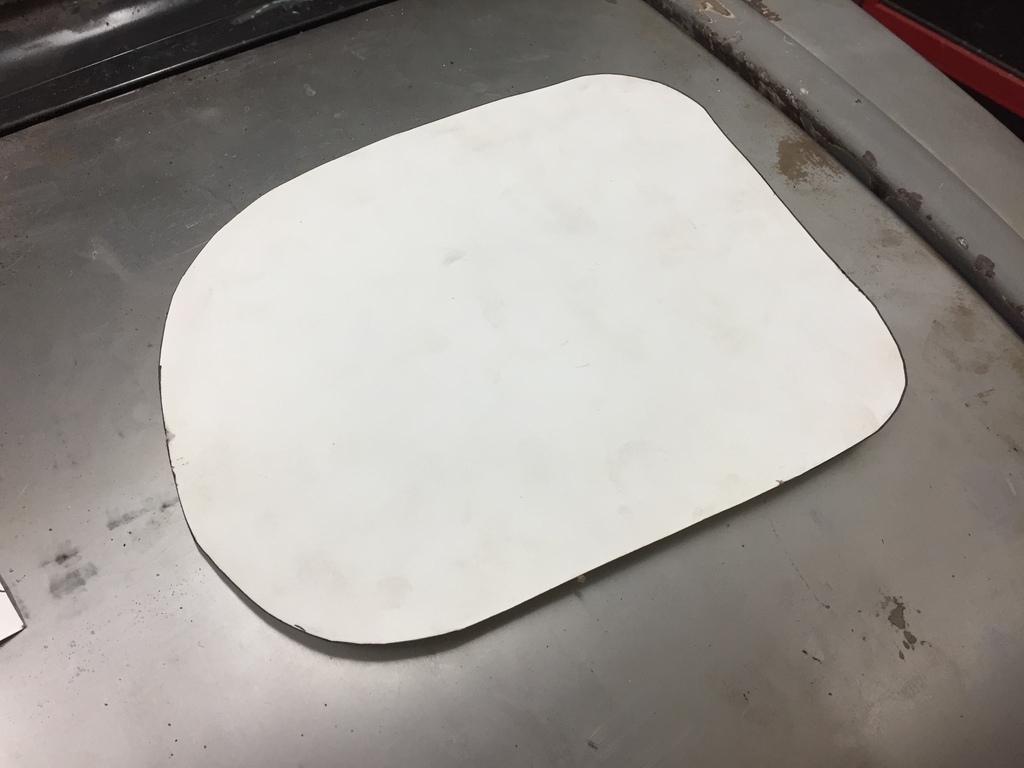 |
| |
|
|
|
|
|
|
|
The openings are now all within 1/16" of each other, which is probably about what it was when the car was new. So now I could do a little more work to the B pillars ( only tack welded at this point) 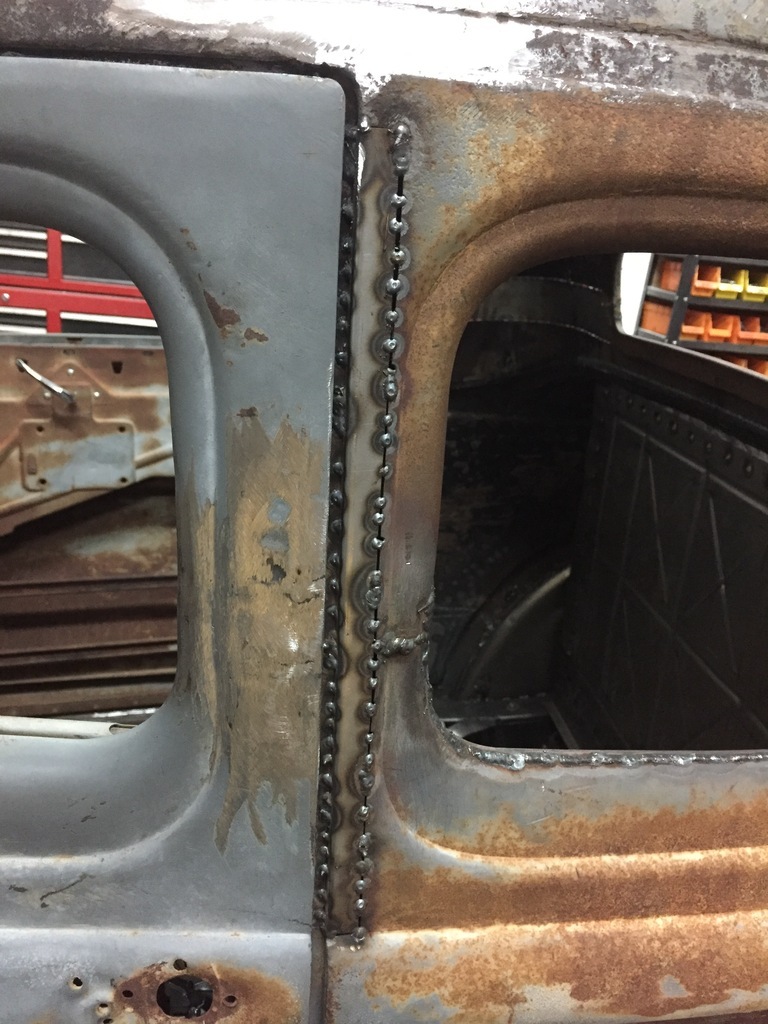 Both sides.  And the top of the door jamb. 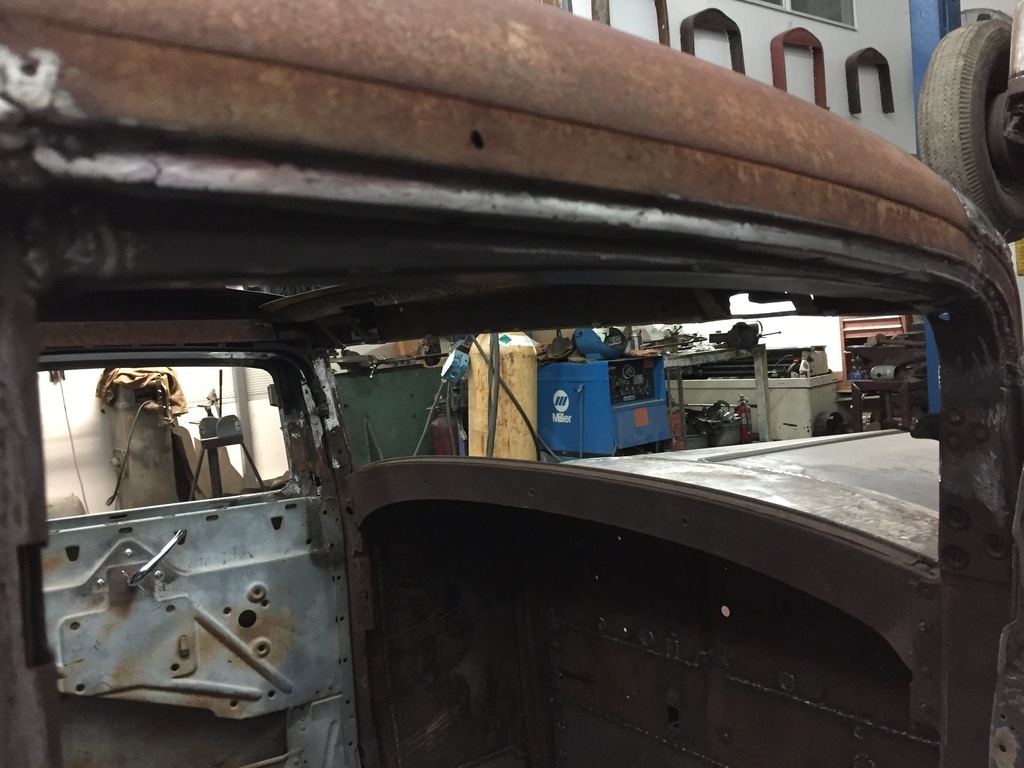 |
| |
|
|
|
|
|
|
|
The back of the roof was next. One of the things that went wrong with the earlier chop was that it had a angle chop, the wrong way. It was chopped more in the back than the front. And it looked horrible. So I took a little more out of the front (just enough to get the windshield frame symmetrical, a little over 1/4"). And I added some to the back ( about 3/8" on left side, a little over 1/2" on the right. To straighten it out). The roofskin was massively warped , with really nasty welds. To get rid of all of that and fill the gaps, I welded in a 3" wide strip on each side. 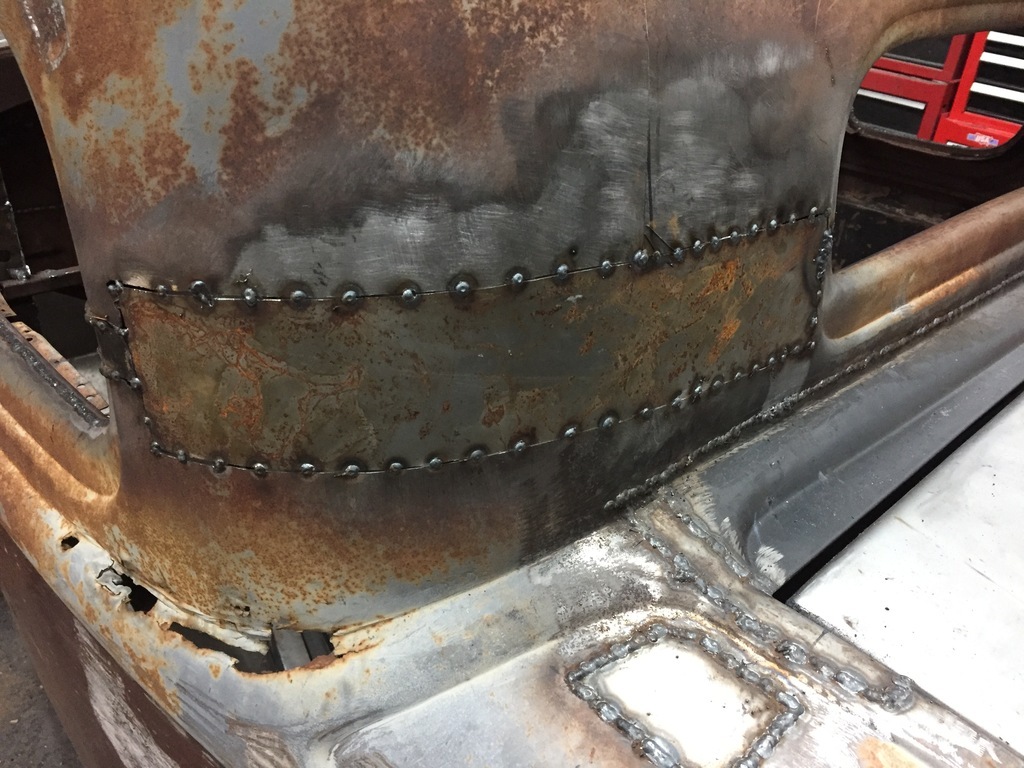 And I started to repair the rear window opening. 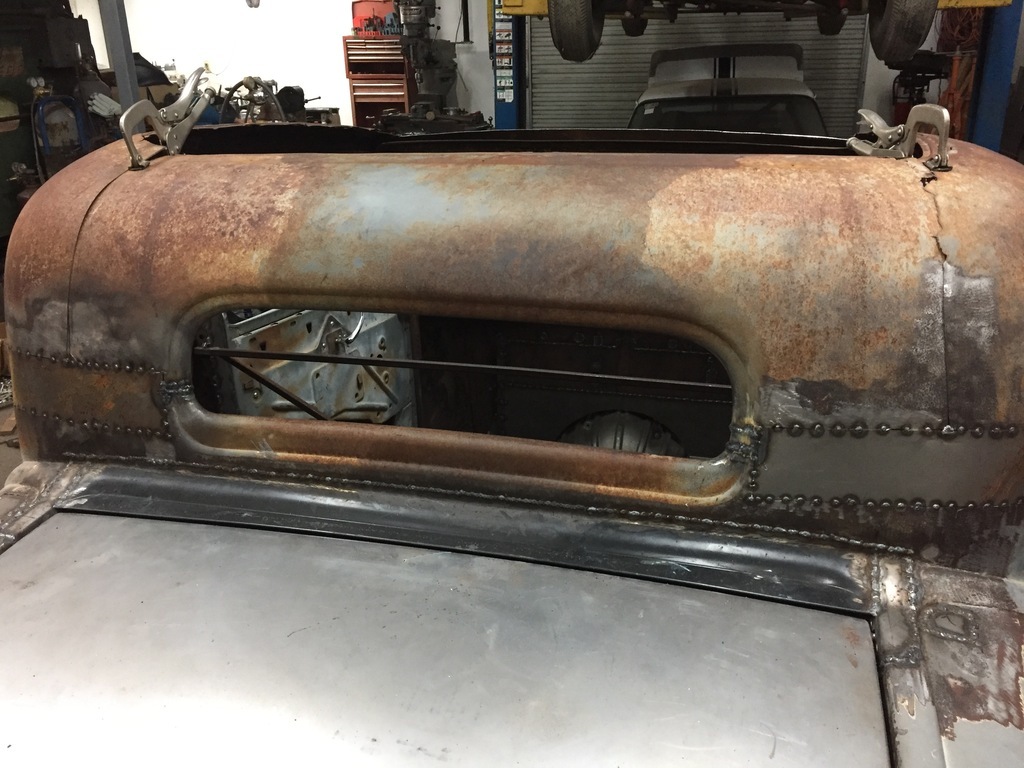 |
| |
|
|
|
|
|
|
|
I Welded in strips to strengthen the B pillars ( now that the wood is gone). 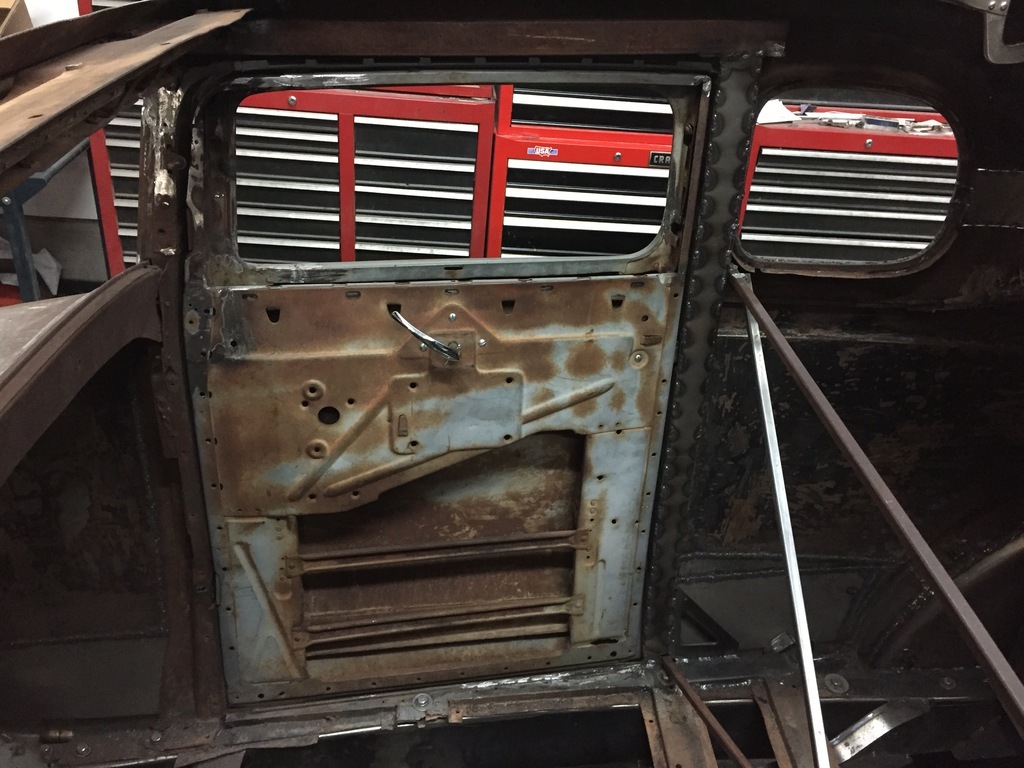 And I took some of the bracing out. I also put the new door latches and dovetails in. So I don't have to clamp the doors shut anymore... 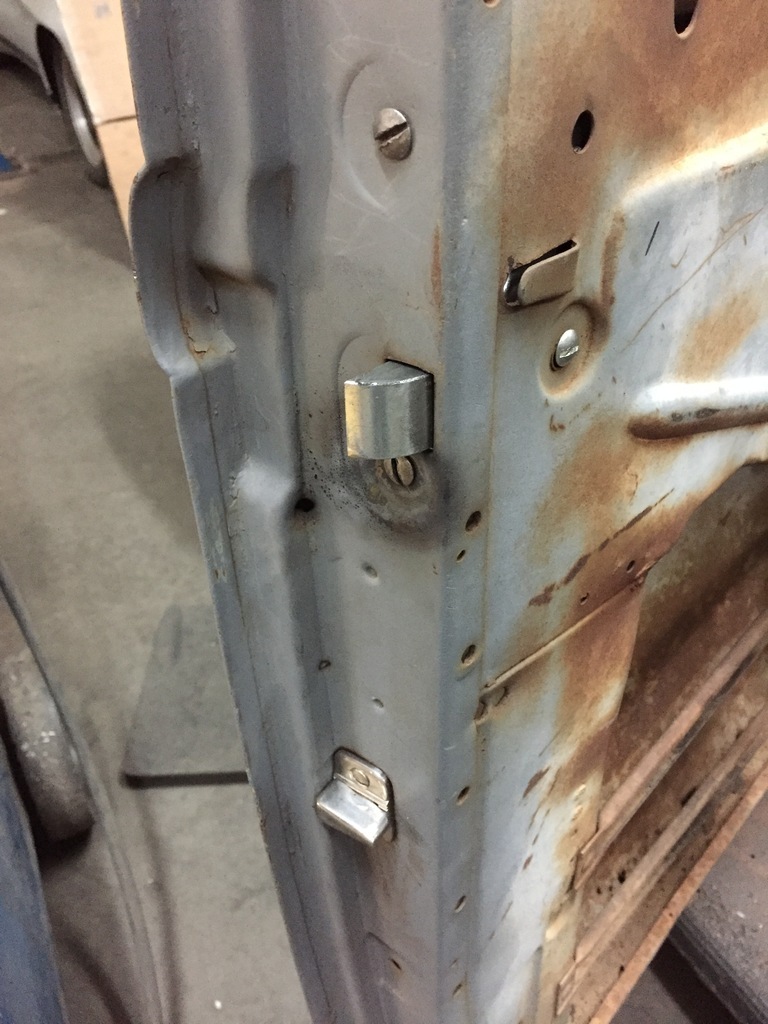 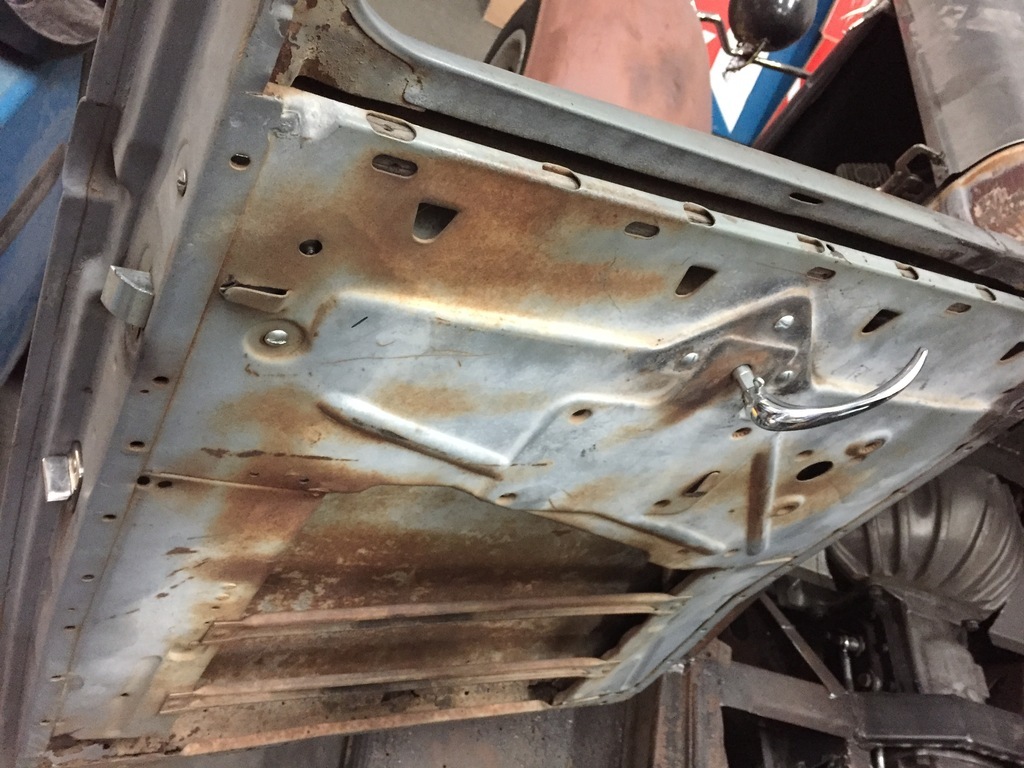 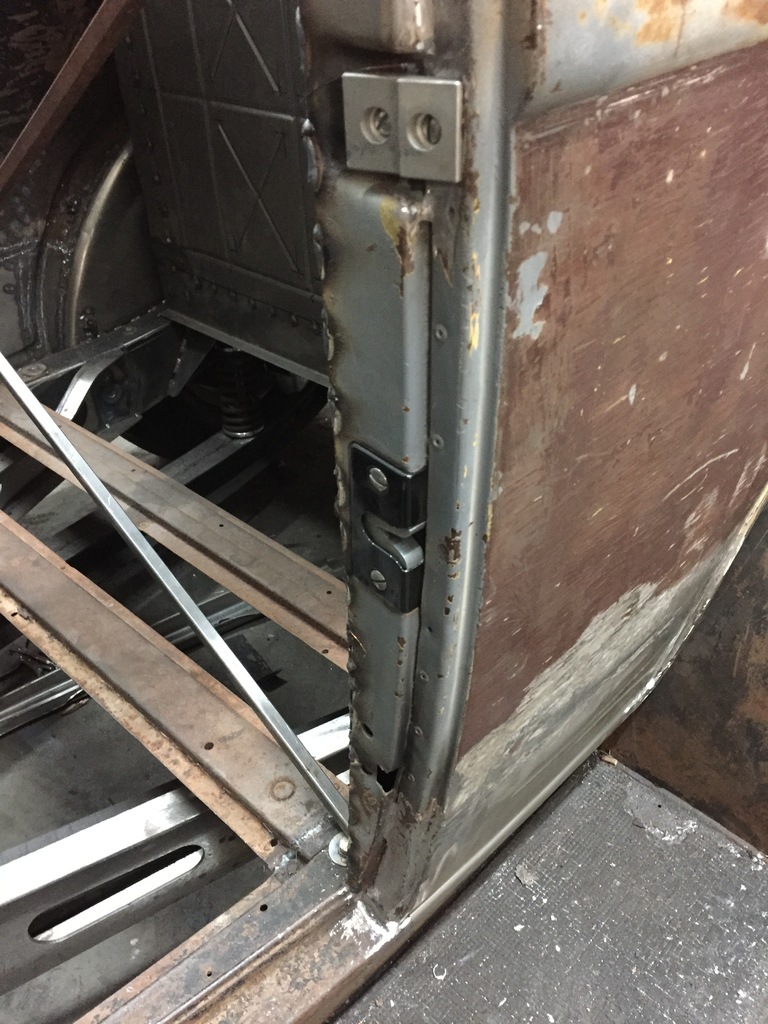 Its slowly starting to take shape... 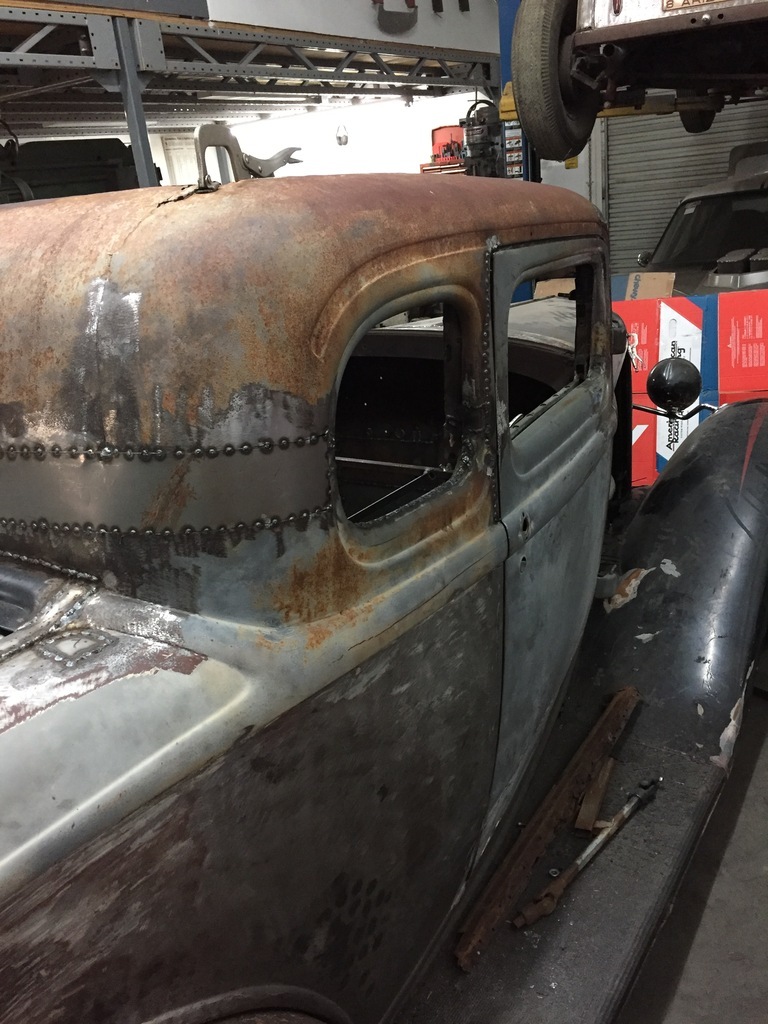 |
| |
|
|
|
|


