|
|
|
|
|
OK, where was I before we got so rudely interrupted...  It seems like quite a while ago that I made this adapter to mate a Monza style cap to the gastank I bought at a swapmeet. 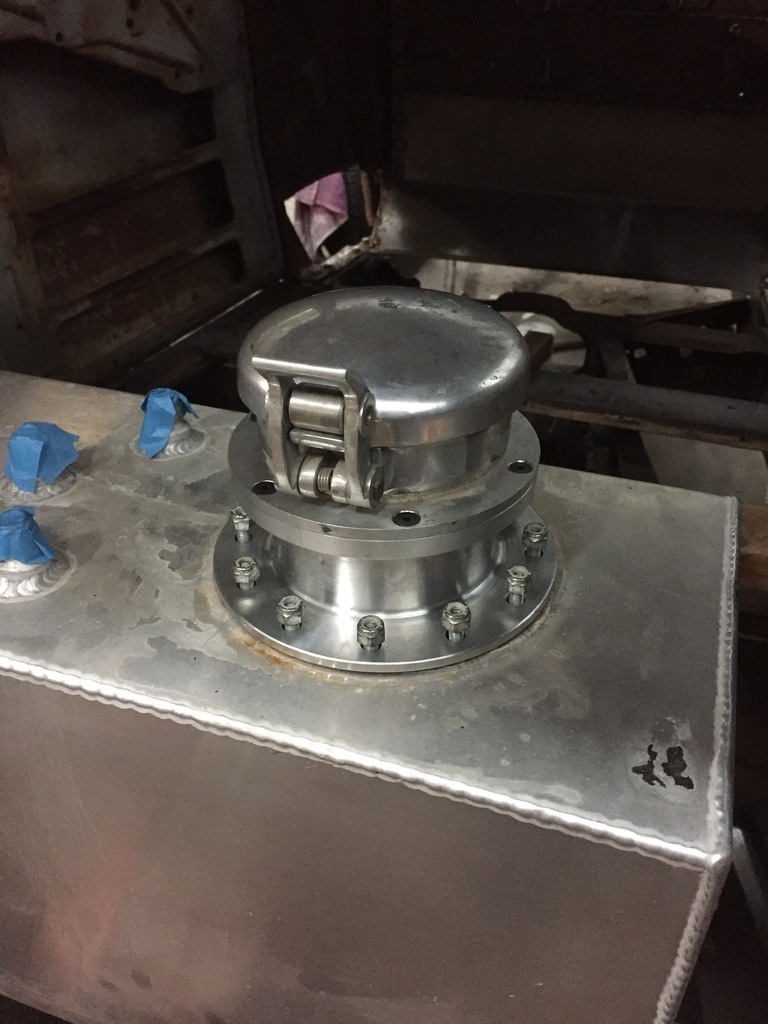 And the more I looked at it, the less I liked it. Its too tall, too chunky. Its just not the look I'm after... So I made a new one. 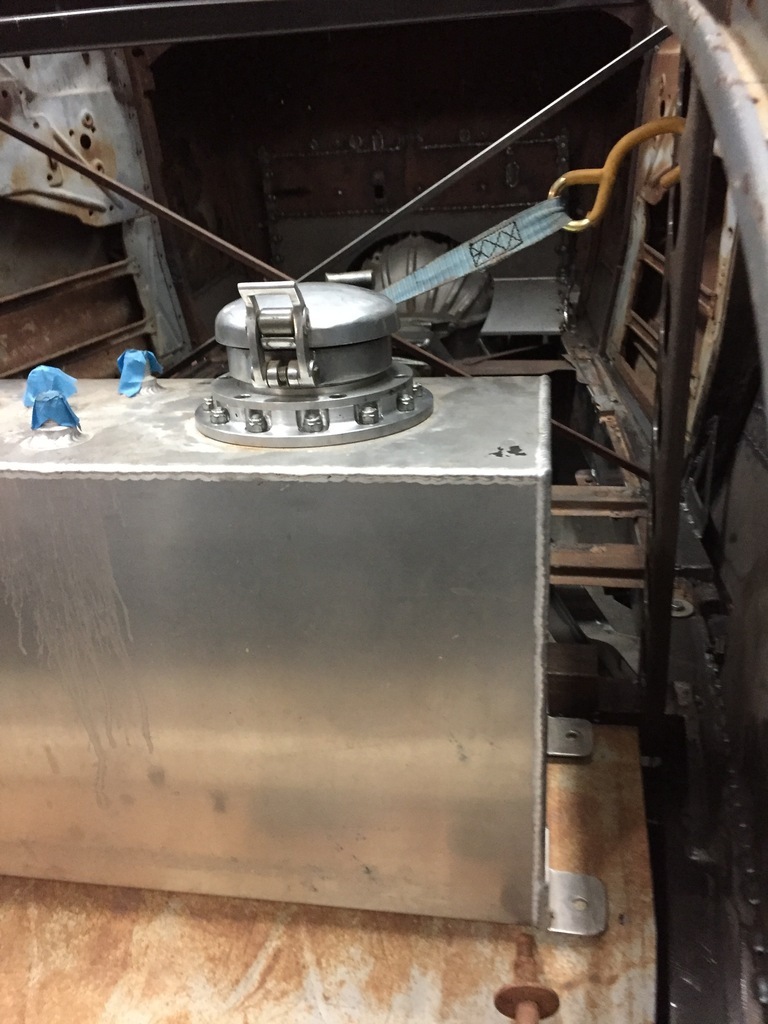 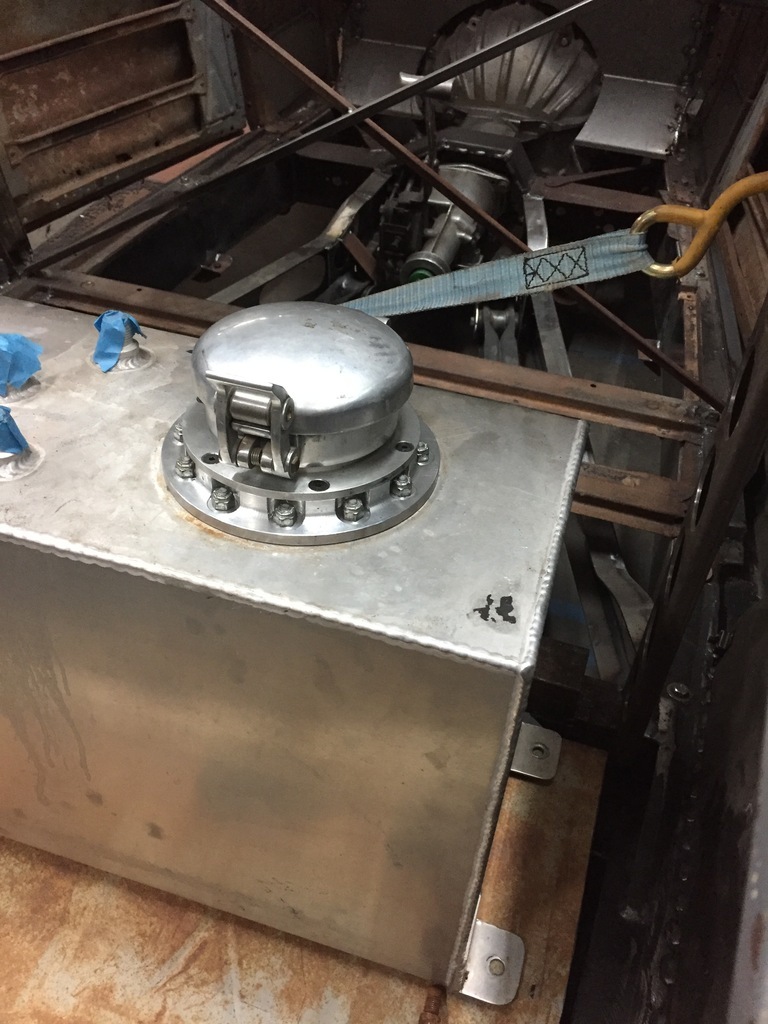 |
| |
|
|
|
|
|
|
|
|
|
Next is the RHS rear fender. Its already bobbed, front & back. 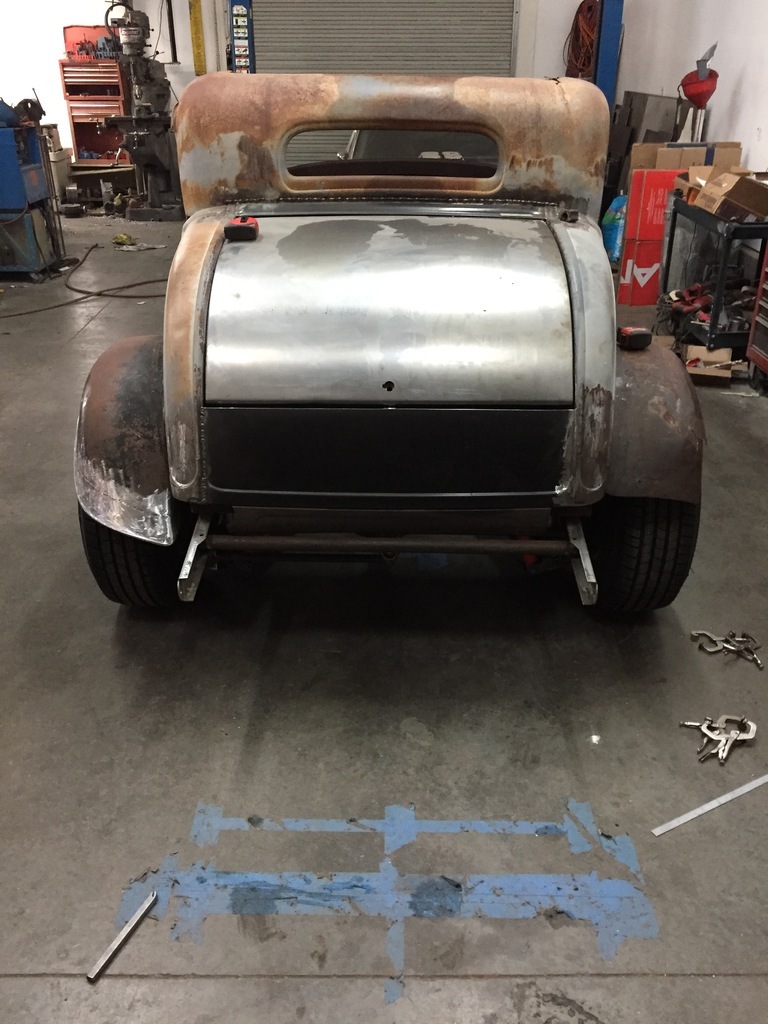 But I want the back bobbed in a different way, and the front not bobbed at all. So using a template, I matched the outline of the LHS rear fender in mirror image. 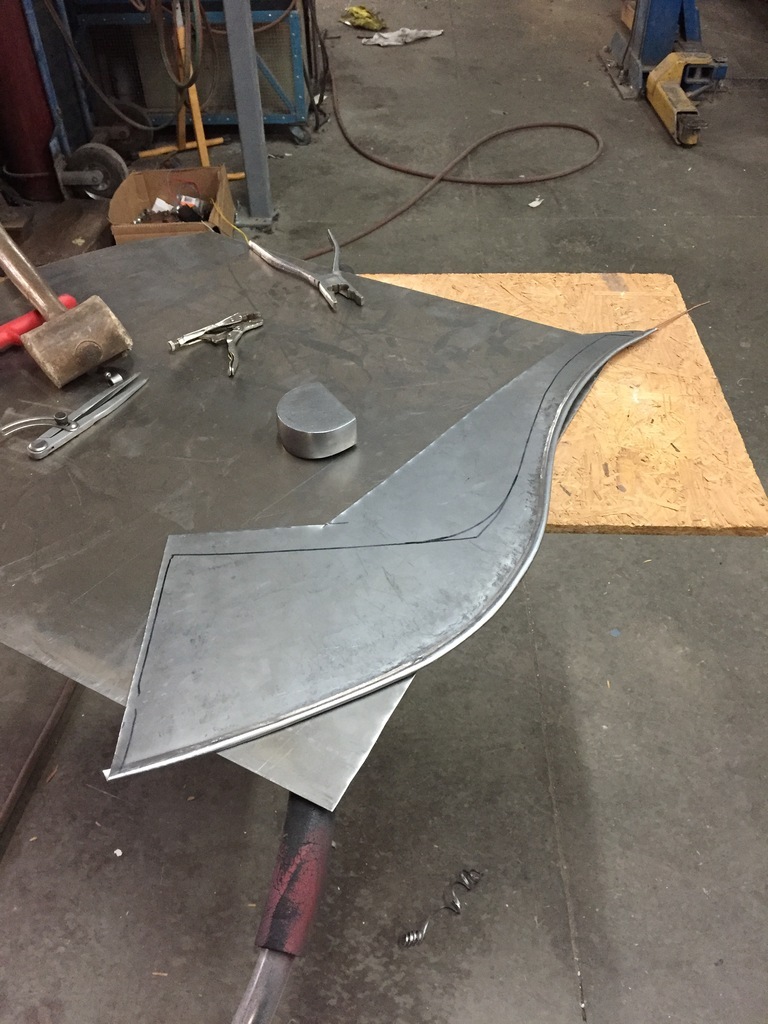 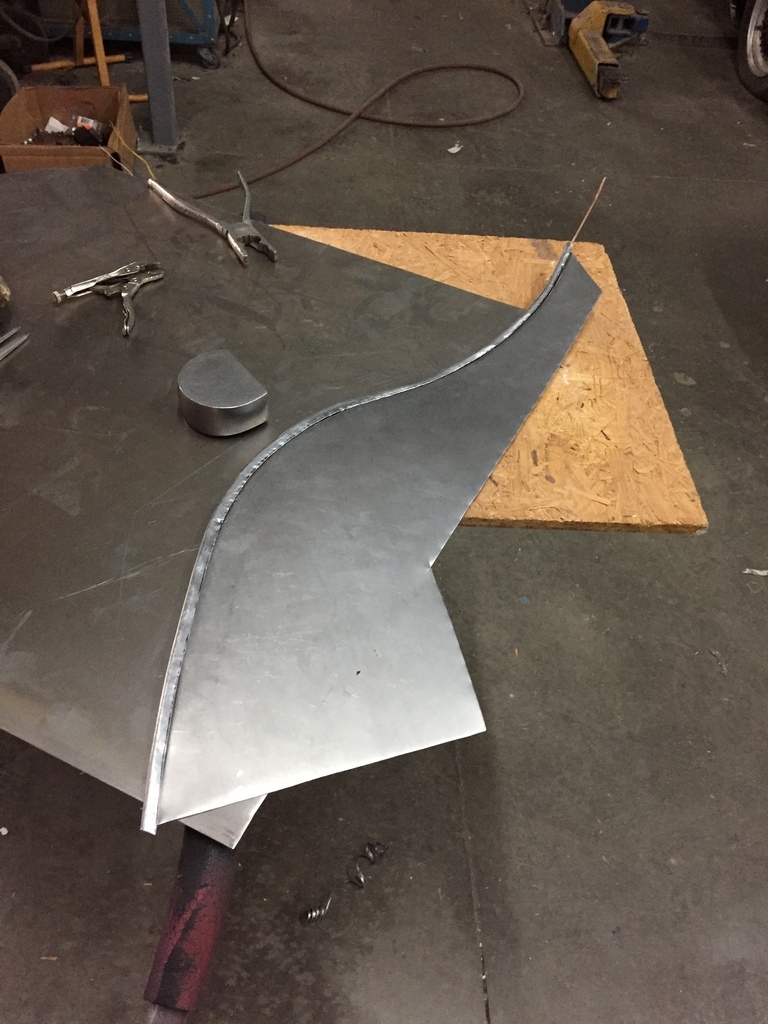 I put the bead in, and the wire, and folded over the edge to trap the wire. Like I have done on the LHS fender. |
| |
|
|
|
|
|
|
|
So that gave me the outline. I could now start to shape the part to match the curve of the RHS fender. While taking constant measurements to ( hopefully ) make it match the LHS rear fender. Same angle on the trailing edge lip, where it aims at the rear frame horns, same amount of bulge of tire showing, same angle of the rear slope, etc. Basically hours of making very small adjustments, bending, re bending, and repositioning until I was happy with it... 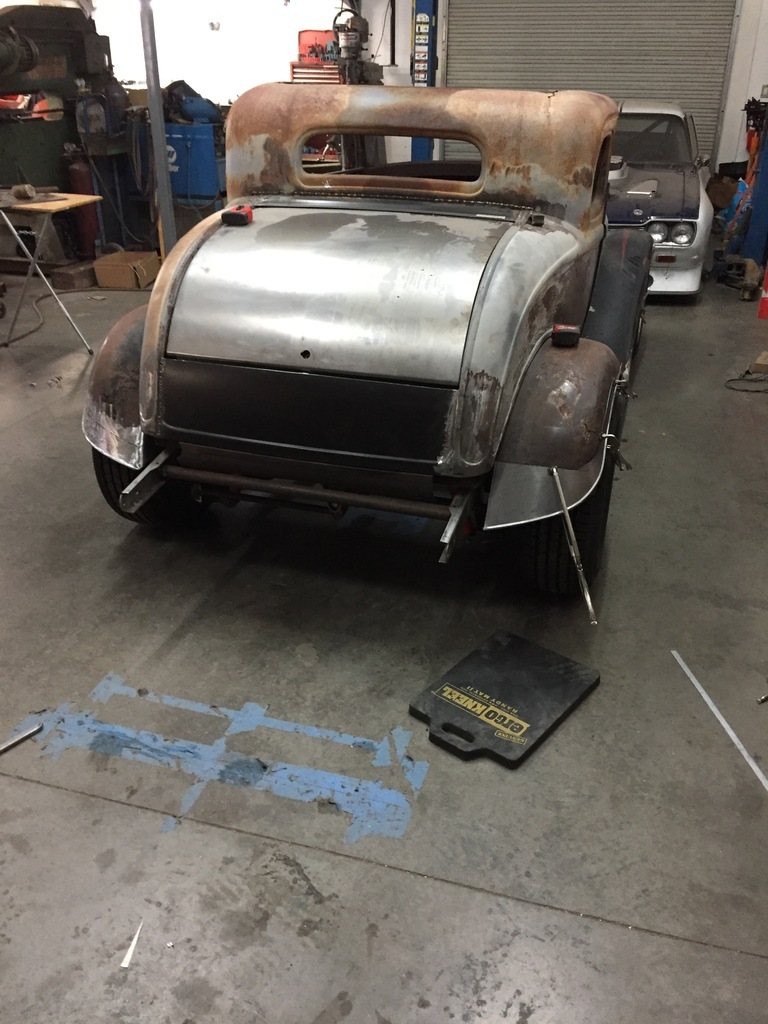 Then I tacked it in. 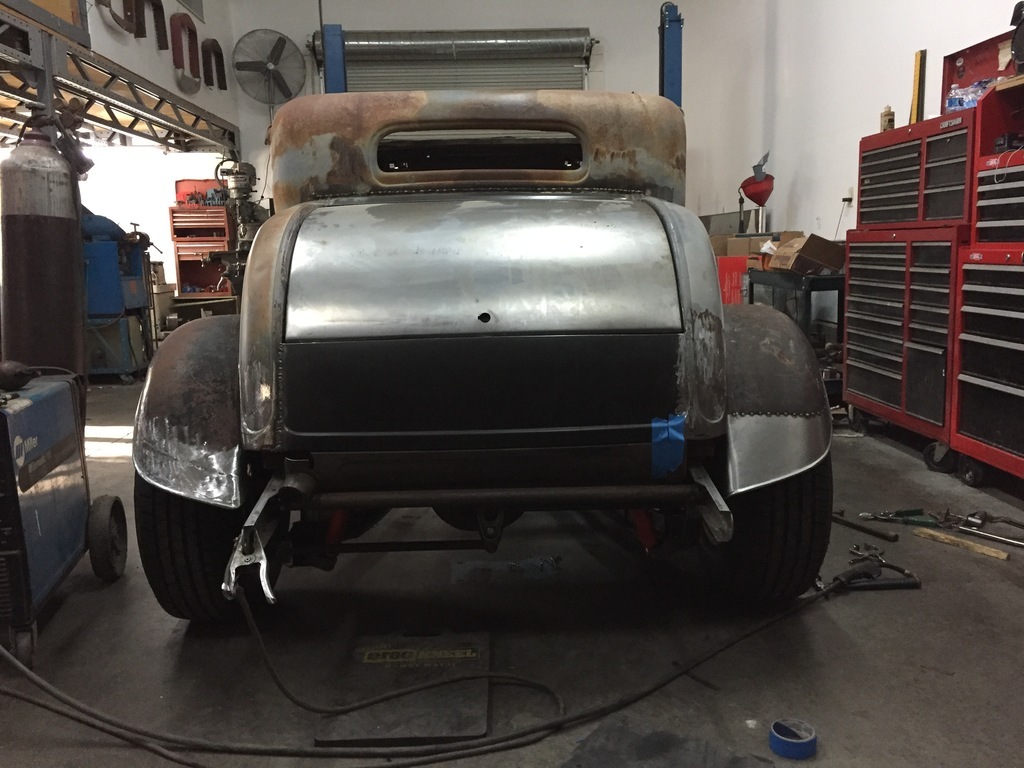 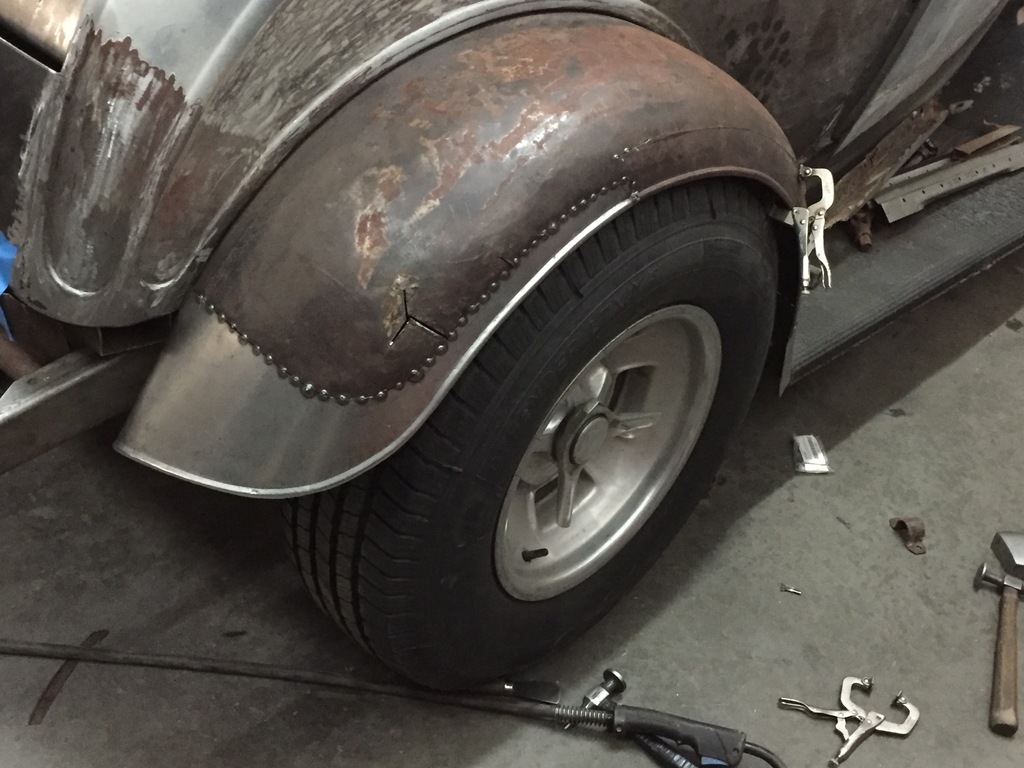 This fender has been through a lot ( damage, bad repairs, etc), so the radius wasn't right It didn't follow the wheel diameter the way I wanted it ( match the LHS ). So I made a relief cut along the edge. 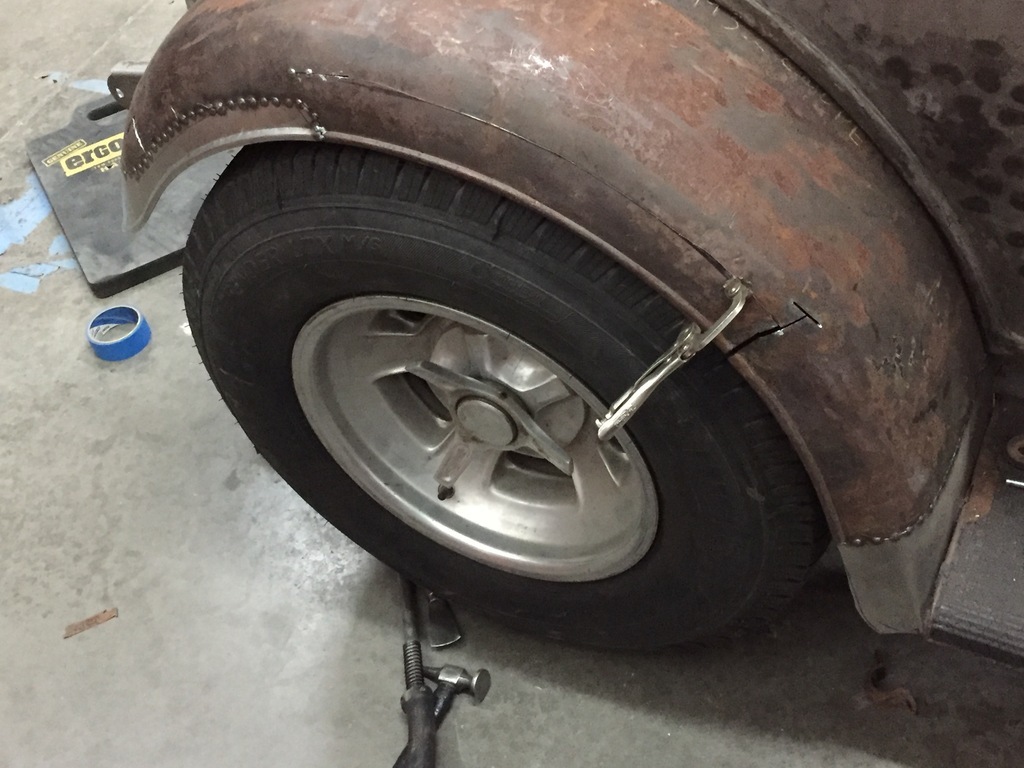 Fixing that will be next. |
| |
|
|
mylittletony
Posted a lot

Posts: 2,339
Club RR Member Number: 84
Member is Online
|
1932 Ford 5W Coupe.mylittletony
@mylittletony
Club Retro Rides Member 84
|
|
|
|
Yay for updates!!
Knowing your pace, this'll be done by August
|
| |
|
|
|
|
jamesd1972
Club Retro Rides Member
Posts: 2,835  Club RR Member Number: 40
|
1932 Ford 5W Coupe.jamesd1972
@jamesd1972
Club Retro Rides Member 40
|
|
|
|
Skills and concentrating on details = top level builds.
That rear view looks great - what are you going to do to the frame ends as tank now inside ?
James
|
| |
|
|
|
|
|
|
|
Thanks jamesd1972. I'm going to move the spreader bar forward so it fits close to the rolled pan. Like it used to fit close to the gastank. And I'll cut the rear framehorns to match that. Usually, with bobbed rear fenders, they get eliminated completely. But I don't want to do that. I still want them to be there, just not sticking out as far... |
| |
|
|
|
|
|
|
|
|
I stopped a little early.
I'm trying to work out a deal with somebody who is interested in some vintage British performance parts I have.
So I had to dig them out to take lots of pics to send to him.
Which led to a bit of reorganizing in my engine shed.
And when I was getting things done for the '60 Truck, I ran into somebody who does CNC machining.
I have some ideas for a future project, but I had to do some measuring to make sure I'll ask for the right thing.
( basically, I want to make a vintage carb look like another vintage carb.
It wont fool anybody who is looking close, but at first glance it will look "right")
|
| |
|
|
|
|
|
|
|
But I did get some stuff done on the '32. I copied the edge of the LHS rear fender from the runningboard back, to a little beyond where the RHS one was bad. 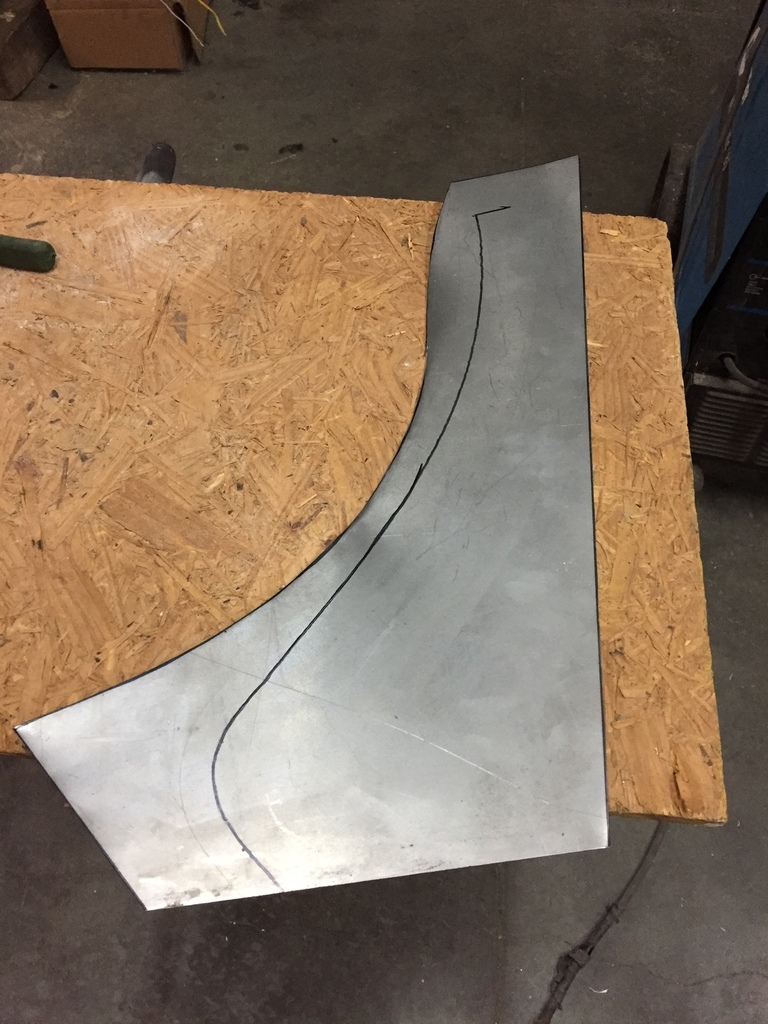 I rolled the bead in it. 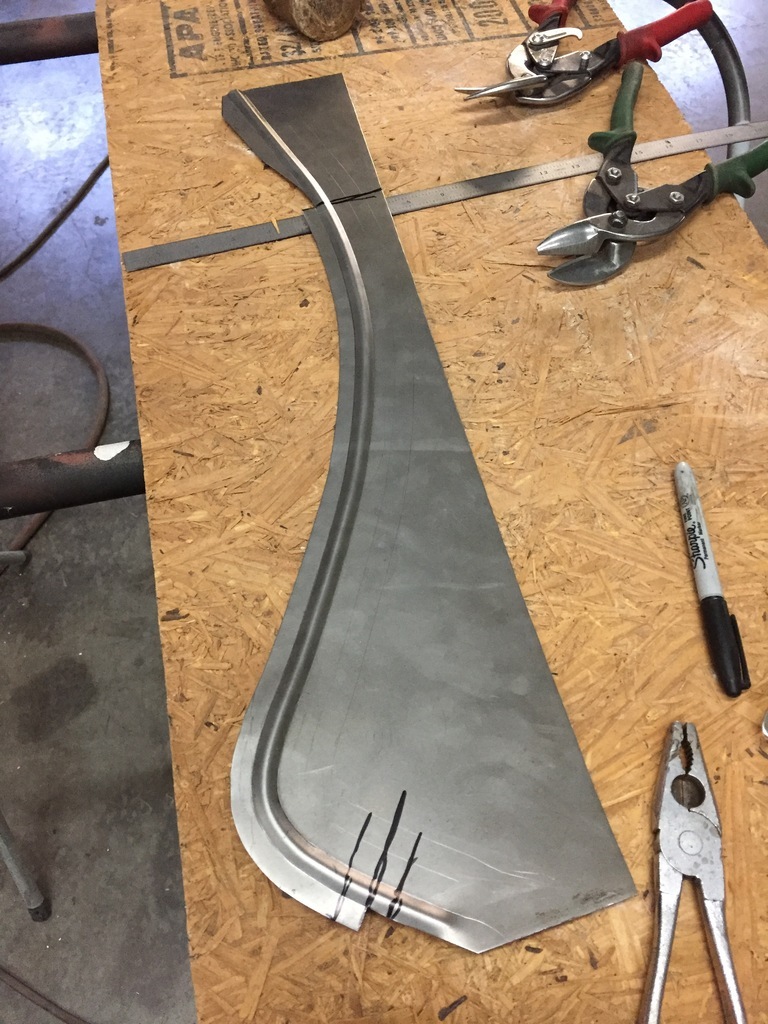 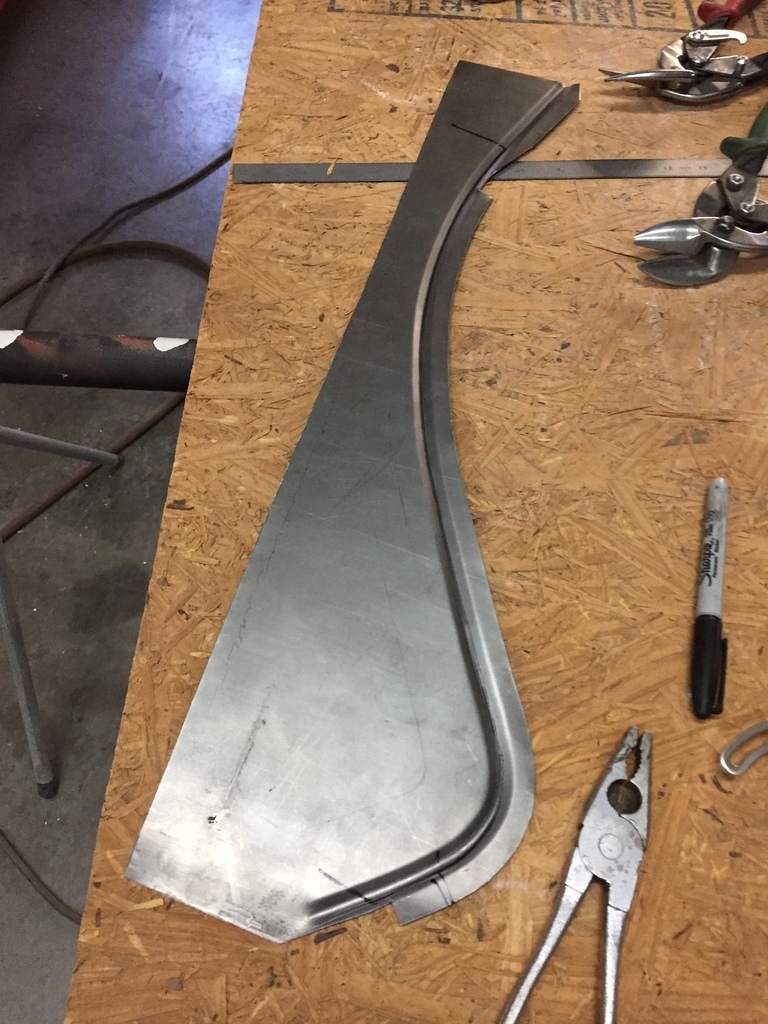 Where the bead had a tight radius, I annealed the metal ( used a oxy acetylene torch to get it cherry red and let it cool down slowly, to get it soft and easier to work with ). 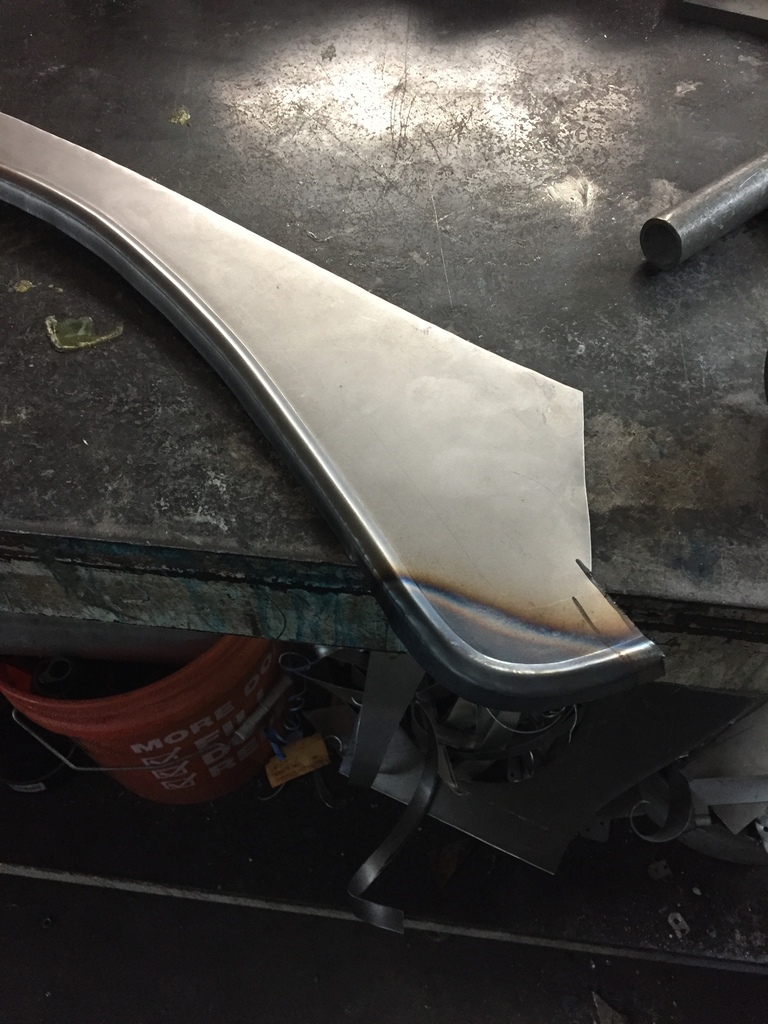 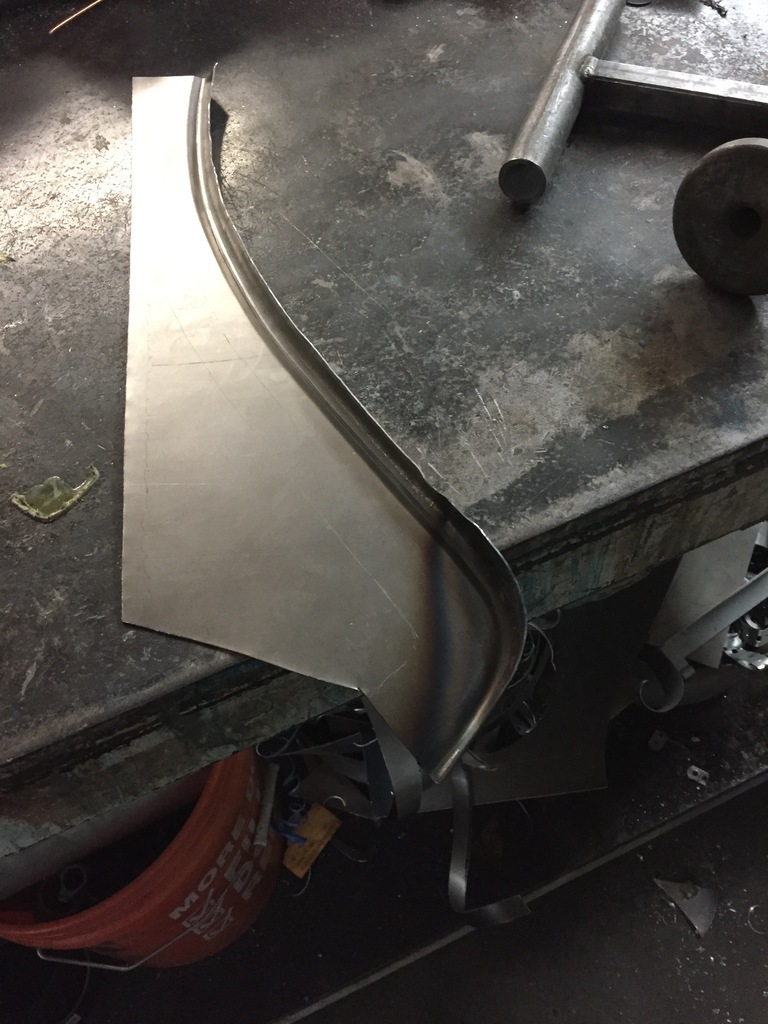 |
| |
|
|
|
|
|
|
|
So now I could fold the lip over the rest of the way, trapping the wire in for a wire edge. 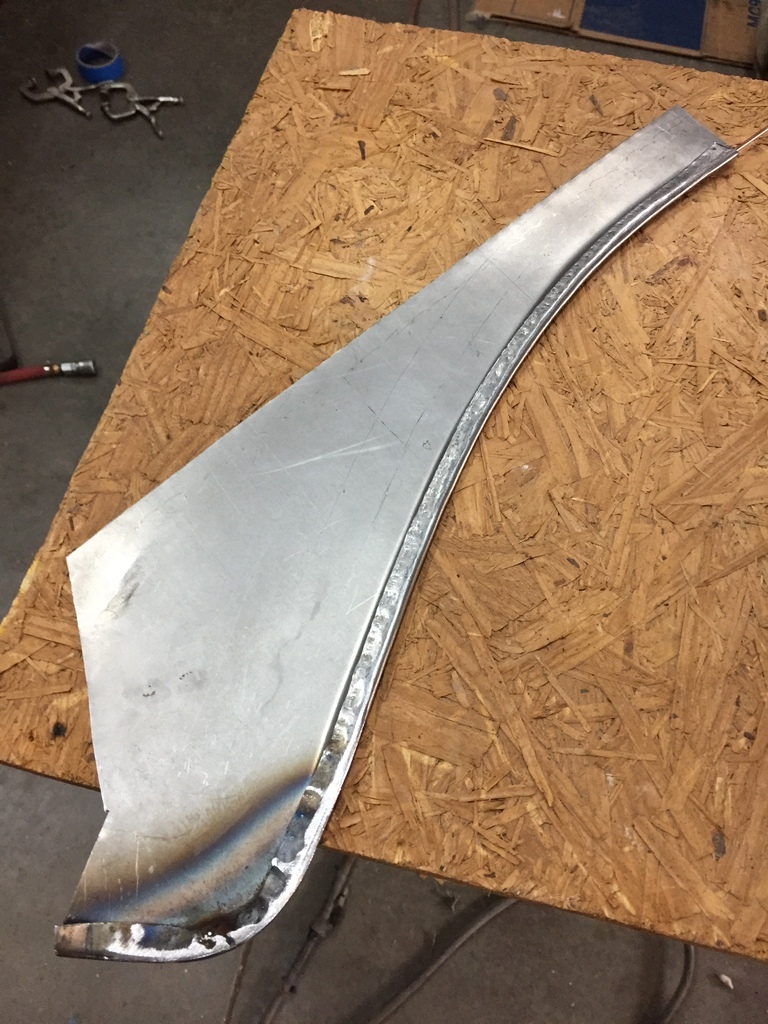 And tack it into the fender ( sorry, I forgot to take pics...) |
| |
|
|
|
|
|
|
|
|
|
Making a rolled pan for the rear of one of these cars is tricky. I've seen some that had drop dead gorgeous metal fab work, but the shape was just wrong. I guess the trick is to not make it look too heavy, or convoluted, attracting too much attention to itself. So this is what I came up with... I started with an original 1932 gastank. It has a distinctive shape, with a distinctive bead in it. And your eye is trained to expect it on the back of a 1932 Ford. 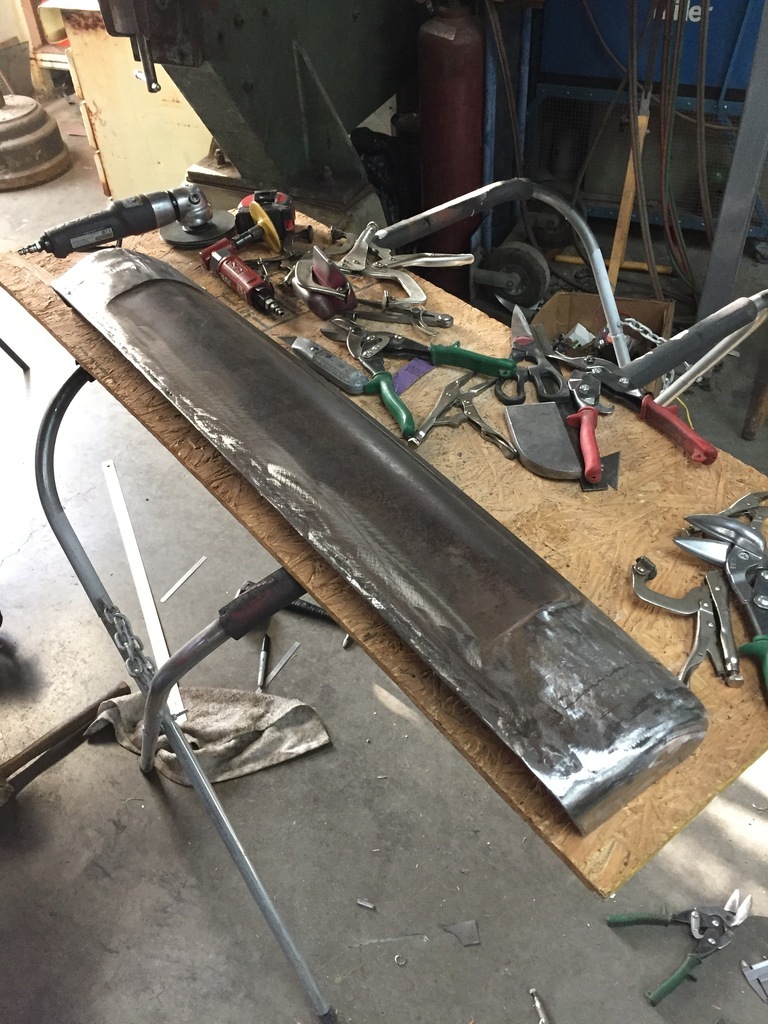 I recontoured it so it matched the trailing edge of the body, with ( what is left of) the gastank turned a 1/4 turn down. Finished the edges, etc. 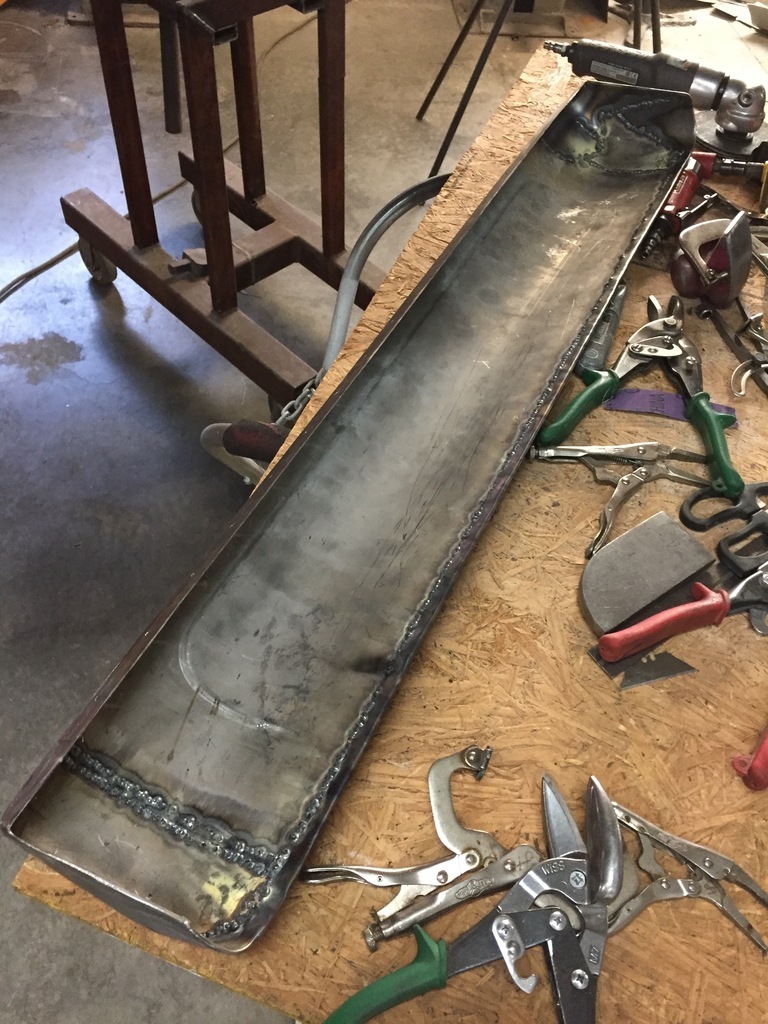 Because it is based on an original tank, it fits perfectly between the original frame horns. 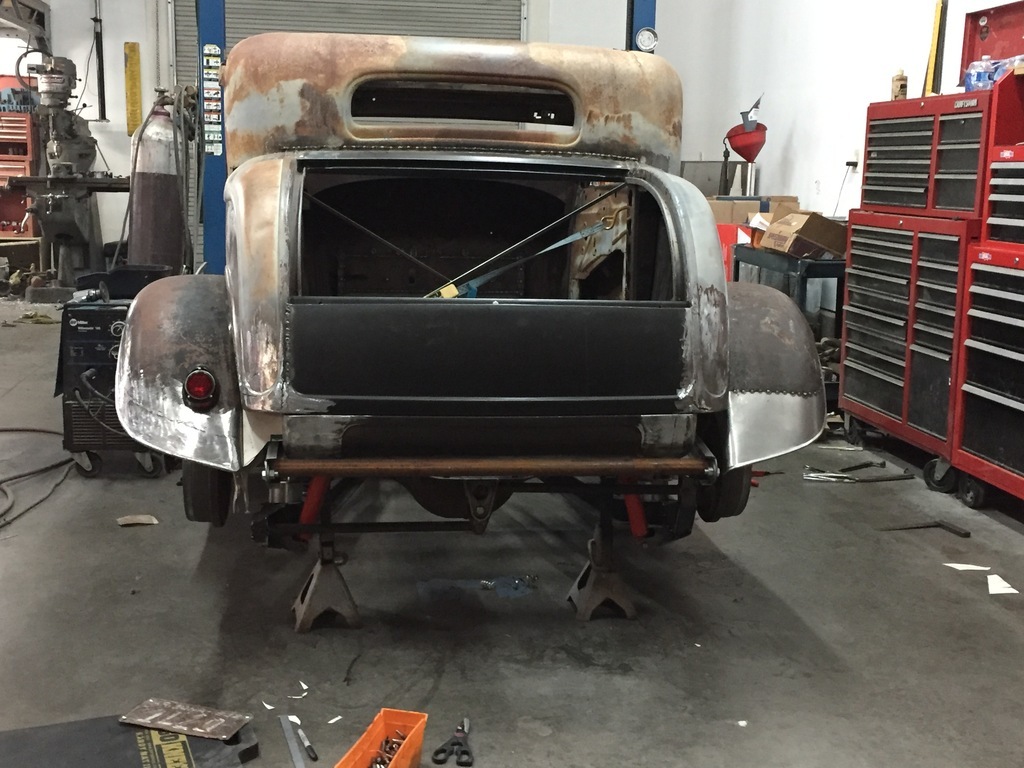 I shortened the frame horns by 5 7/8", so the spreader bar tucks in close to the rolled pan. This what it looked like before. 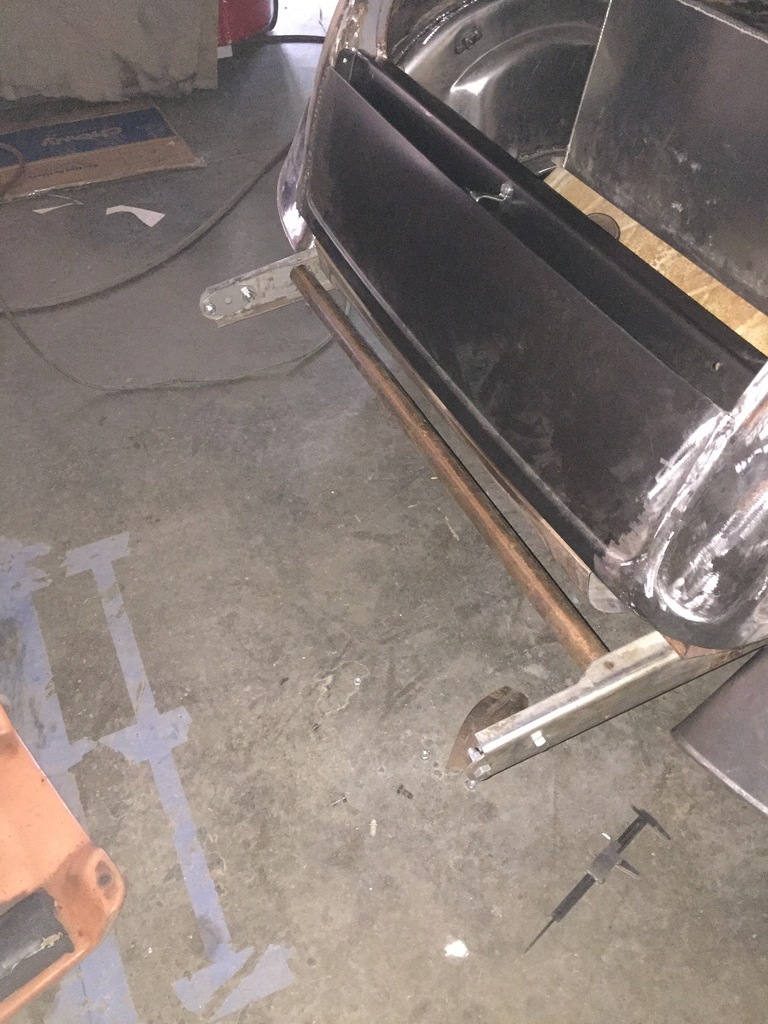 I then realized it needed a little bit more. So I made a cardboard template for a little filler piece between the fender and the rolled pan. 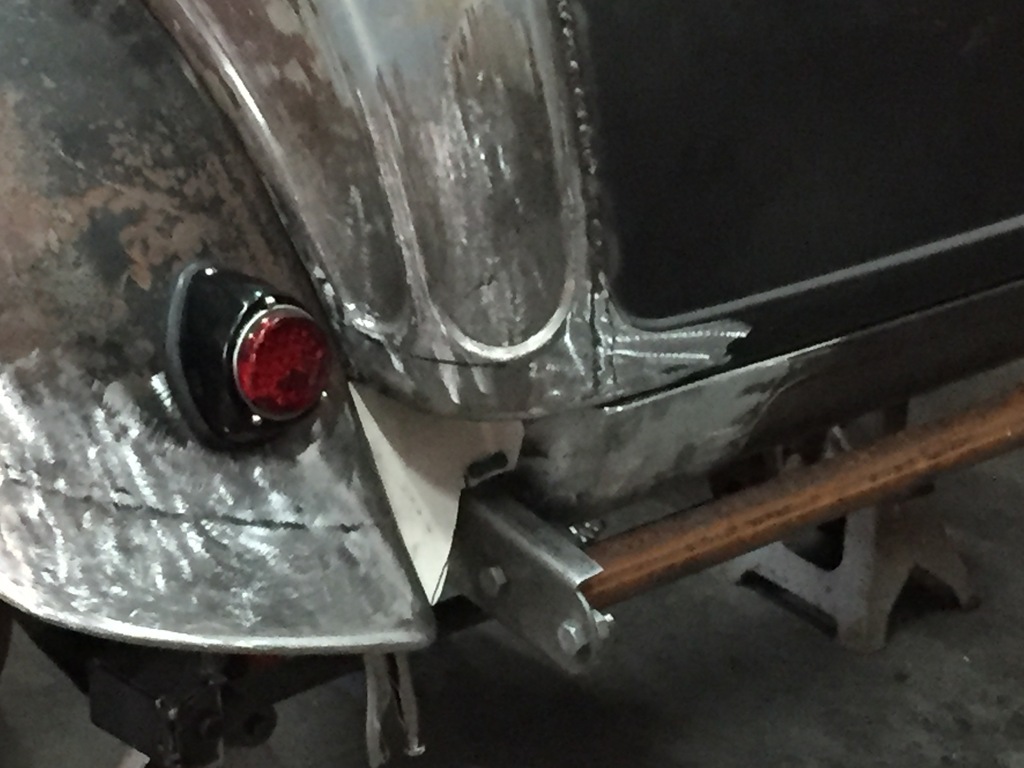 |
| |
|
|
|
|
|
|
|
I made a very simple license plate bracket that bolts to the driver side fender. 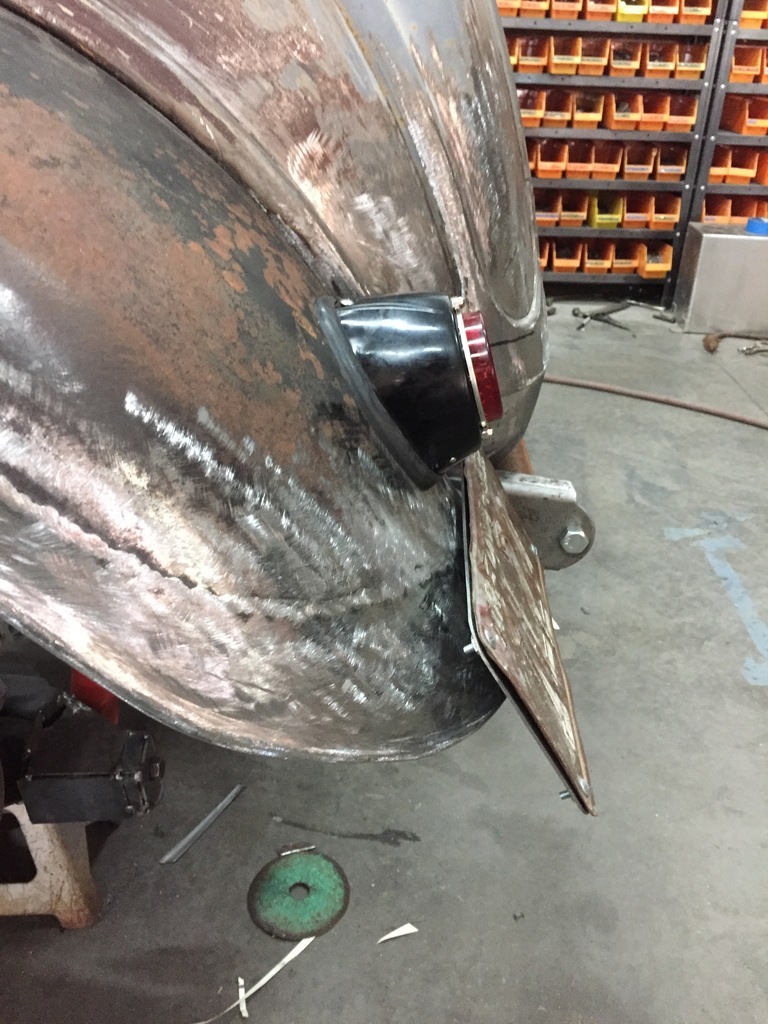 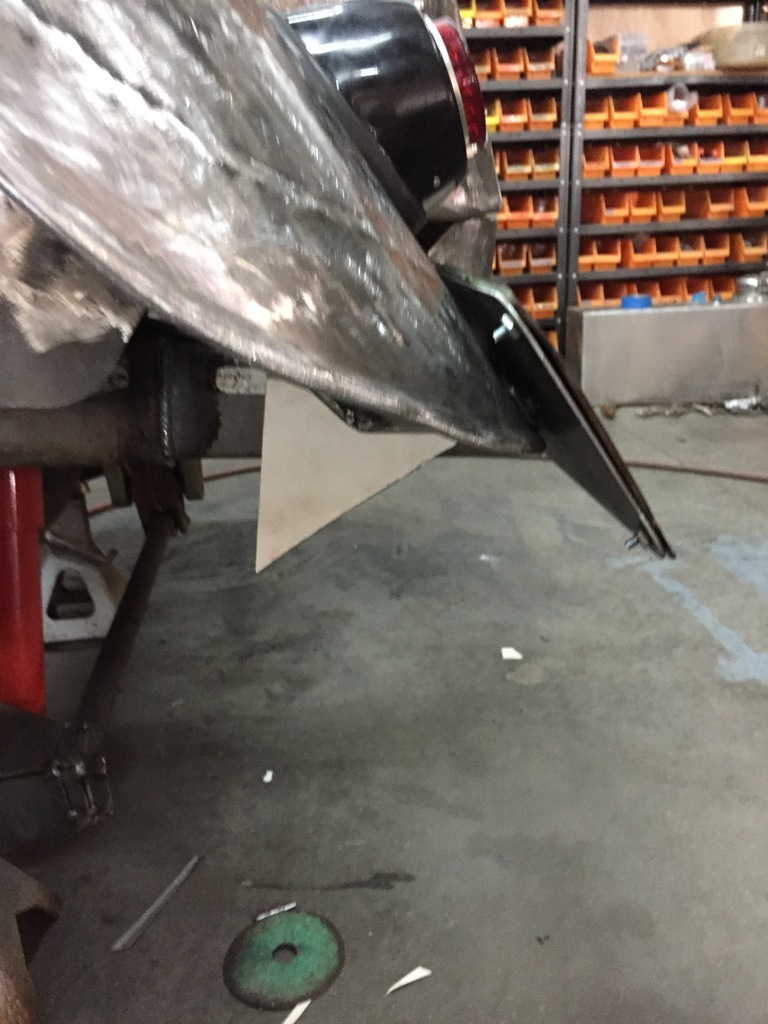 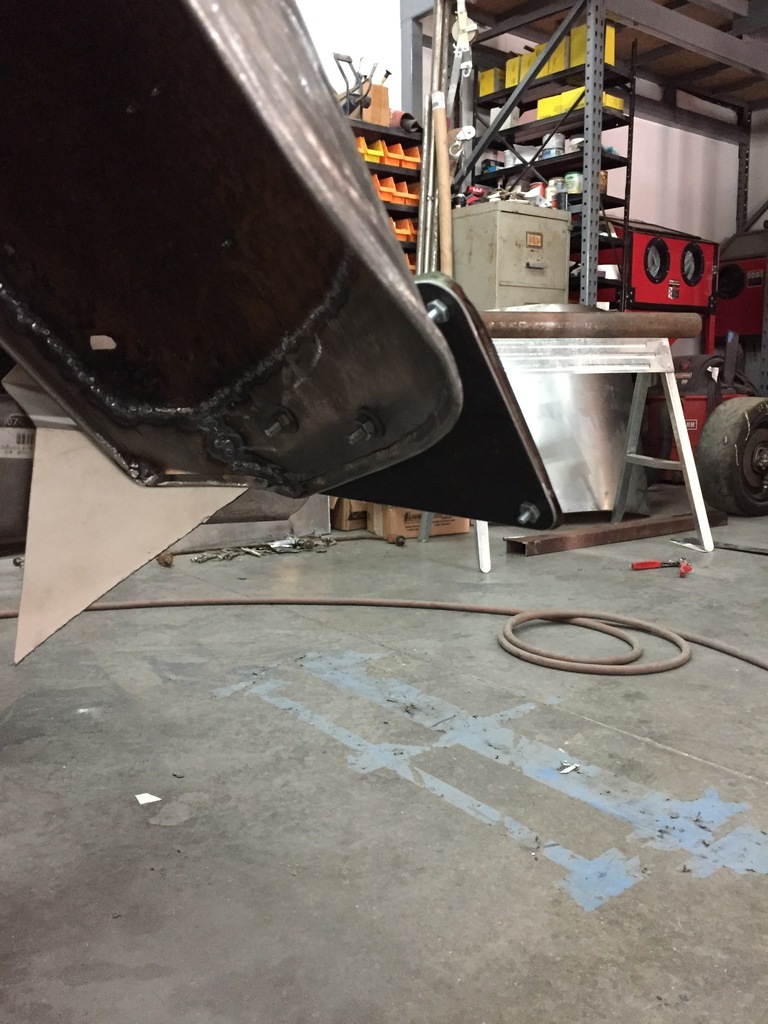 The middle of the plate is centered exactly under the tail light. 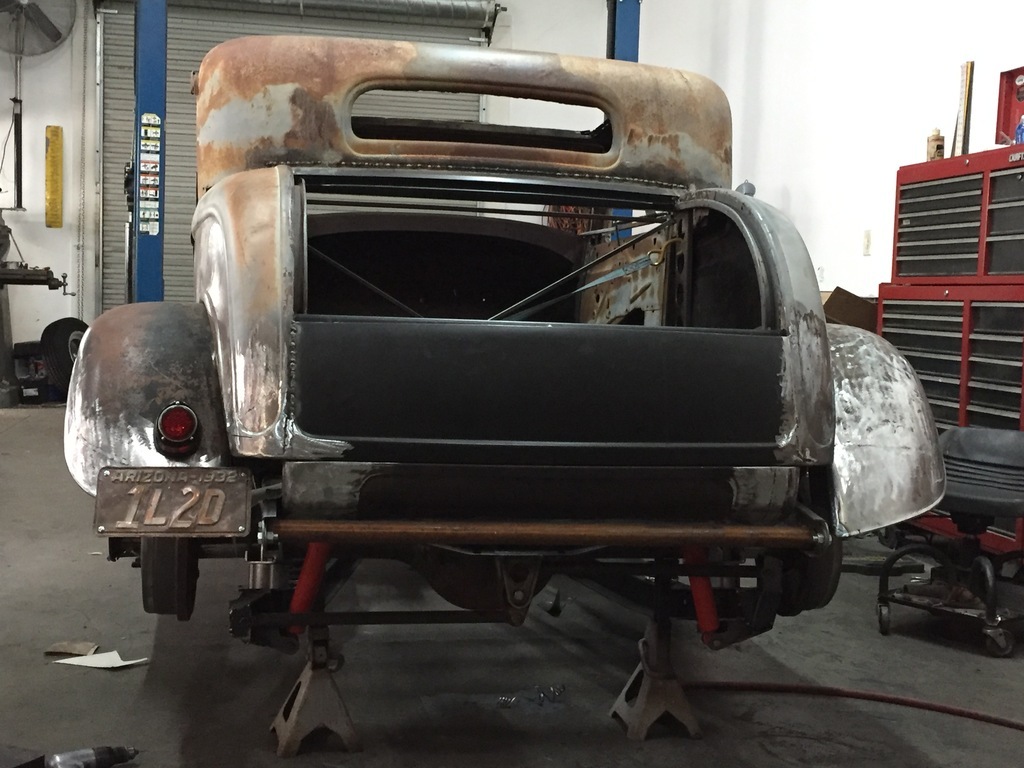 I made a new spreader bar, but its not welded in yet. 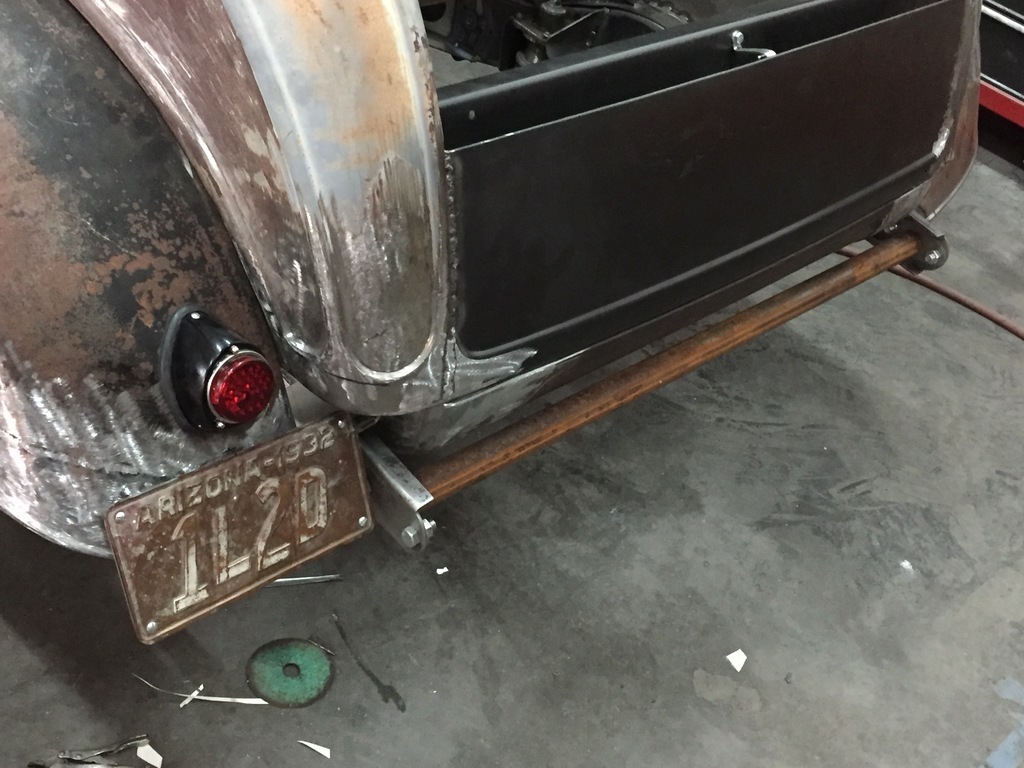 And I started on the repairs of the RHS rear fender. 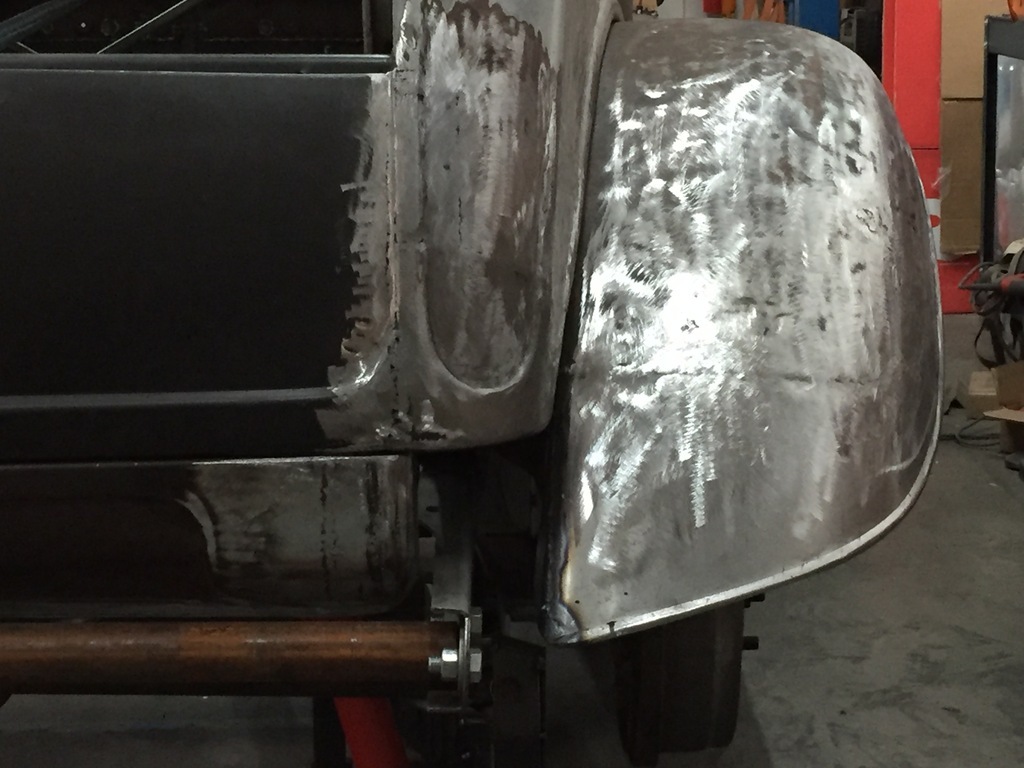 |
| |
|
|
|
|
|
|
|
|
……… 3 - 2 - 1
And I am back in the room.
How did I miss all the recent updates?
Ahh yes, work sucking the joy out of my soul.
Incredible work as always.
The annealing and folding together of that patch piece….. amazing.
As for the rest of your work, as always, on a different level.
|
| |
|
|
|
|
|
|
|
|
"The middle of the plate is centered exactly under the tail light."
Attention to details ...again !
|
| |
|
|
|
|
|
|
|
Thanks guys. |
| |
|
|
|
|
|
Jul 10, 2023 10:05:54 GMT
|
|
As usual I am full of admiration for your work but having run out of superlatives, I seem to have stopped commenting - sorry.
May I ask how do you stop the rolled wire edge becoming a rust trap?
|
| |
Last Edit: Jul 10, 2023 10:06:38 GMT by dadstaxi
|
|
|
|
|
Jul 10, 2023 10:48:55 GMT
|
Thanks dadstaxi. I guess you don't... To do the repairs, I had to open up some of the original wire edge that was done in 1932 and I did find some surface rust on the inside of the sheetmetal and on the wire. I'm pretty sure Ford dipped the entire fenders in a bath with paint back then, so I'm guessing sealing it as well as possible is the best option. To keep oxygen from the sheetmetal. I don't remember ever seeing real rust problems at the wire edge on a early Ford fender though. But lots of cracks. Where the crack goes right across the wire ( breaking it), and several inches into the fender itself. And when repaired, those spots stay a problem. Because the weakening of the wire is not really fixed. What I've done here is not try to weld the wire at the spots where old meets new, but having them overlap within the edge at the splice. I'm thinking that will give additional strength at that spot ( the cracks usually are on the same spot on the fender, because of movement and work hardening ), without adding tension from welding the wires. So I guess my focus has been more on fixing the cracks and trying to prevent new ones in the future, than on the rust. But I will seal the edge as well as I can later. |
| |
|
|
|
|
|
Jul 10, 2023 20:22:18 GMT
|
|
That roll pan looks really proper. Nice trick to use some fuel tank Very tidy.
|
| |
|
|
|
|
|
|
|
|
This won’t rust for the same reason the planes at Davis-Monthan AFB don’t corrode.
Lovely work as ever.
John
|
| |
|
|
|
|
|
|
|
Thanks guys. jjeffries, true... As far as rust goes, this is one of the best places to be. Its hard on rubber parts and interiors though... |
| |
|
|
|
|


