adam73bgt
Club Retro Rides Member
Posts: 4,867
Club RR Member Number: 58
|
|
Apr 24, 2023 20:58:24 GMT
|
Didn't take a photo but got the cam covers back on, a little dab of silicone in a couple of places held the gasket in place while I lined up the covers, and got all the bolts torqued up. Slight issue when I came to fit the first of the breather covers, one of the screws barely got tight and promptly snapped.. Turns out they're aluminium screws and it's best to replace them rather than re-use. So I have some stainless steel replacements on the way. Remains to be seen if I can carefully extract the remainder of the snapped screw without having to take the cam cover back off. While I wait, I decided I might as well make a start on stripping the front suspension since I have the parts. I've covered most of this before when I was doing the spring and damper changes but I've gone a bit further this time and removed the hubs as I have new wheel bearings to go in, I also took the brake dirt shield off while I was there to give better access to the lower ball joint and because you can only remove the screws with the hub removed.  2 out of 3 screws came undone, last one was drilled. Not bad. I've got the upper control arm off, the taper was very eager to remove itself from the knuckle which then resulted in the ball joint spinning rather than the nut, so I resorted to cutting the nut off with a hacksaw. Found a little surface rust up where the upper arm pivots, so gave it a bit of a wire brush, clean up and some Hydrate 80 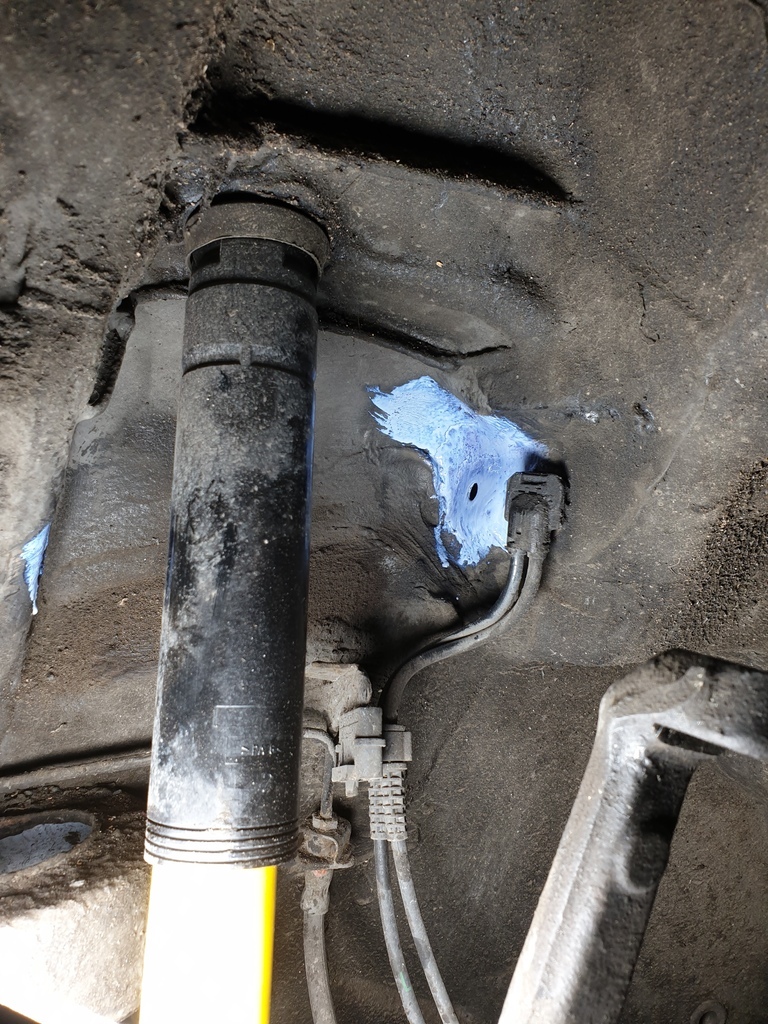 Will chuck some paint on there then get the upper arm in as I could do with hanging the knuckle from it while I remove the lower control arm. I did also do a bit of scraping at the underseal to see how far the arch rust has spread, just so I can get an idea of what will need cutting out |
| |
|
|
|
|
adam73bgt
Club Retro Rides Member
Posts: 4,867
Club RR Member Number: 58
|
|
Apr 25, 2023 21:49:24 GMT
|
Weather was nice today, so spent a few hours after work on the Chrysler again. Put some zinc paint over the Hydrate 80 from yesterday, need to find some suitable top coat to chuck on then that particular bit is all good. I'm a bit stuck with the suspension on the Passenger side now, so started poking about at other bits I'd been meaning to get at. First of which is the two underbody braces that tie the front subframe into the body of the car. Fairly simple to get them off, 3x big torx screws per brace. My reason for removing them was that the paint was flaking off them in places so was going to get them blasted and repainted. On closer inspection, the Drivers side brace in particular has really suffered with rust 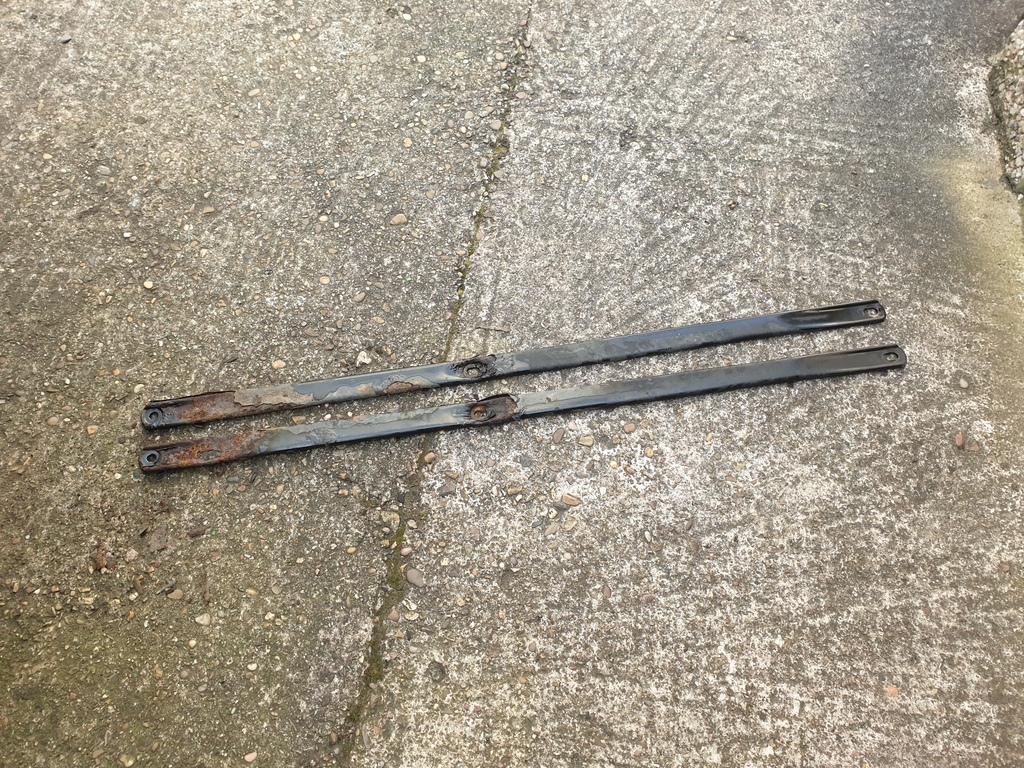 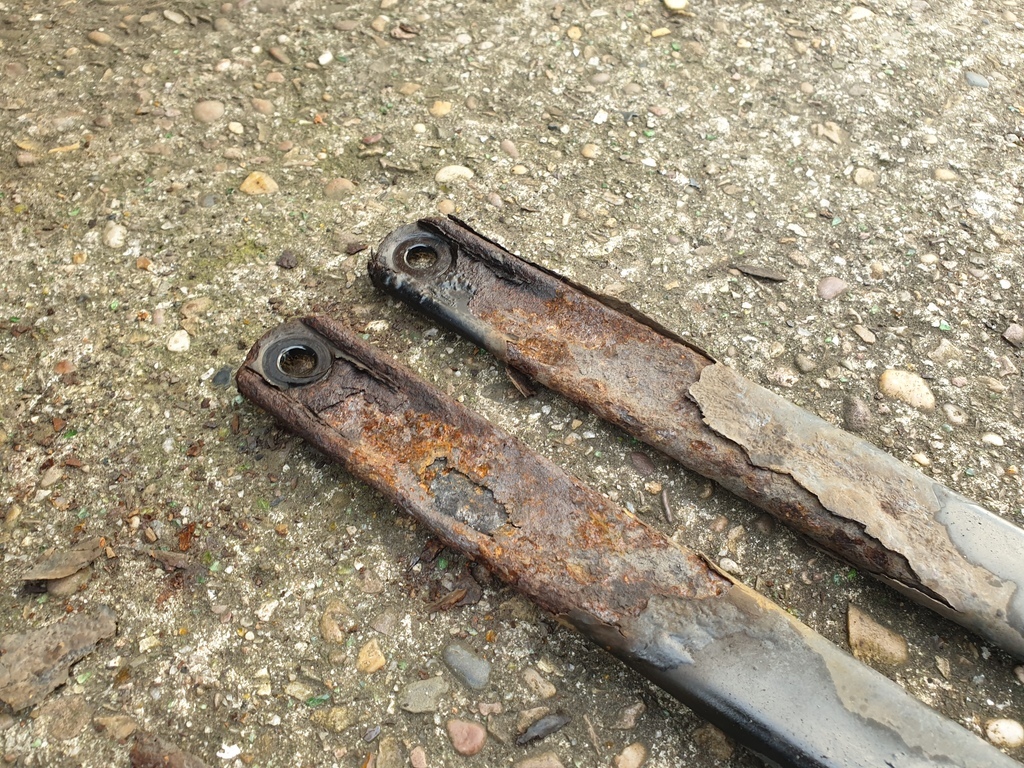 If I get that blasted, I don't think I'll get much back! So I think I'll track down a replacement. My other concern was that the body above these may have started rusting out also, but thankfully it appears solid, with just some surface rust to clean back and paint 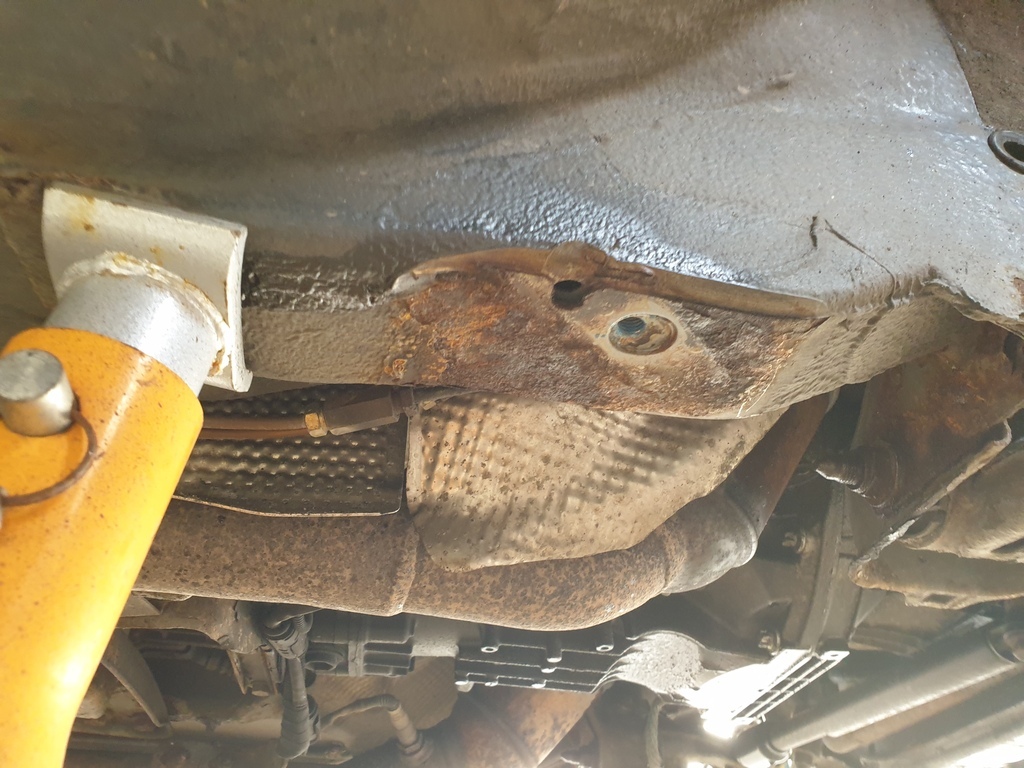 It's a similar story for much of the underside really, there's lots of little bits where the underseal has cracked a bit with surface rust starting underneath. It's not terrible, but is time consuming to go round and find all the bits to be sorted. The base of the radiator support could do with a good tidy up as well so I've been debating removing the radiator to make a good job of that... Before I get carried away with bodywork, I did make a start on stripping the Drivers side front suspension while I was down there, until I got stuck at the same point as the other side, the bottom ball joint for the lower arm. I thought I'd bought a correct copy of the Mercedes tool but it doesn't fit on properly 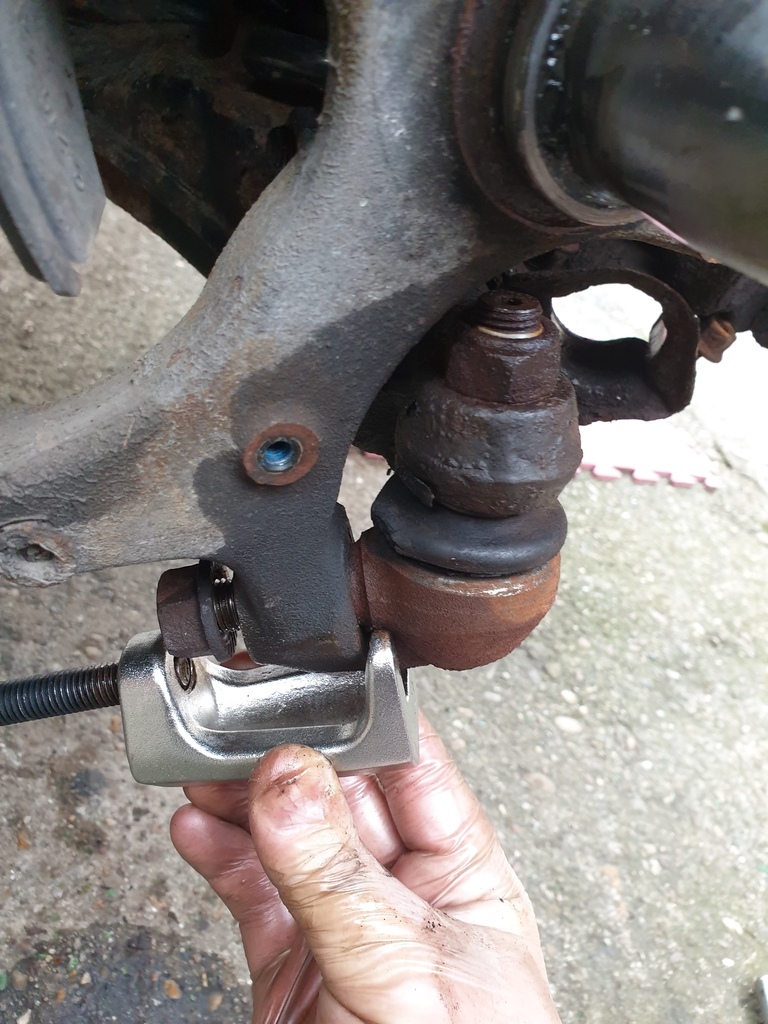 I'll need to find another tool. To end on a couple of high notes though, I was thankfully able to remove the remains of the snapped screw from the cam cover using some pliers on the tiny bit of screw that wasn't quite flush with the cover. Bonus of it snapping at such a low torque being that it didn't need much effort to remove! Secondly, I thought I'd have a look at the Drivers Side engine mount before I put coils and HT leads in the way. I spent a while trying to get spanners on the nut and while I managed to get one in there, I couldn't get enough force on it to turn the upper bolt. The workshop manual is no help, only mentions that the engine cover assembly needs removing first. After a bit more fiddling I managed to get a 16mm socket on the bolt, and by peering through a gap between the exhaust manifold tracts I could just about see it, so proceeded to construct a convoluted collection of extensions. As the gap in the manifold was only big enough for 1/4" drive extensions, I had to put a 3/8" UJ on the 16mm socket (I don't have any 1/4" UJ's), place that on the bolt head and hold it while I fed through a 1/4" extension, with a 1/4" to 3/8" adapter on the end and connected it up, with that in place I could add another extension and adapter or two up to my ratchet and get the thing undone at long last 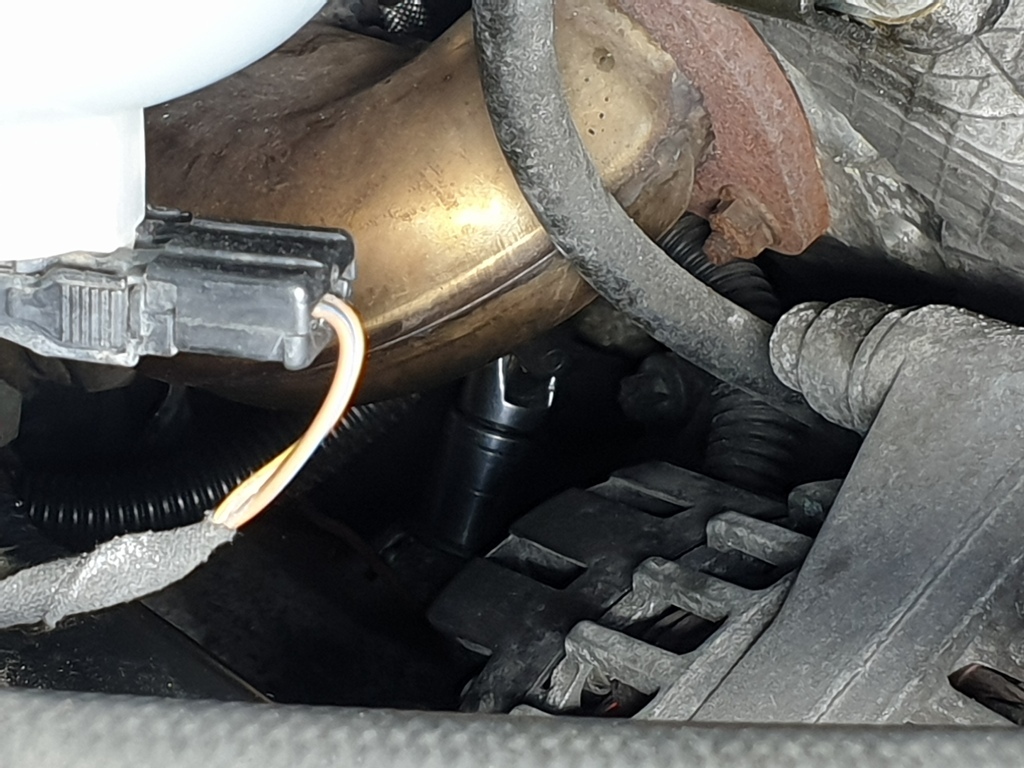 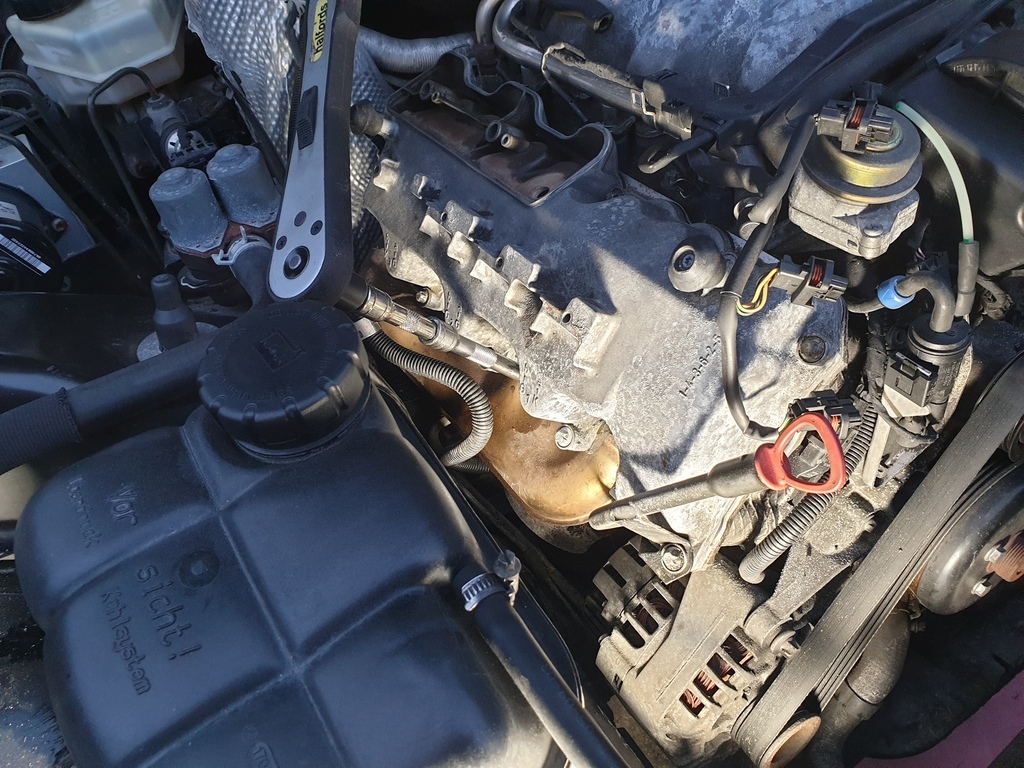 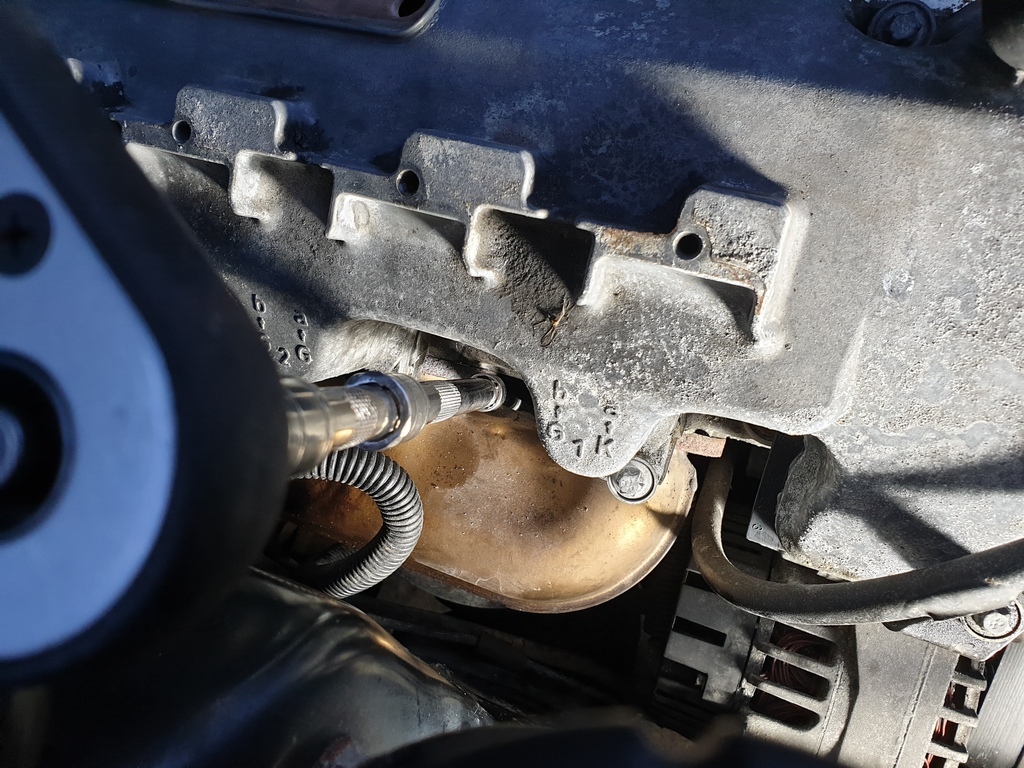 Was quite happy with that  ran out of light though so will fetch the mount out another day. While I was under the car I also noticed a lot of oil, some of it might be from the cam covers but I think there might be some leaking from the sump seal as well, so shall have to clean it all up and see if it leaks again. |
| |
|
|
|
|
|
Apr 25, 2023 22:27:28 GMT
|
|
I wouldn't be concerned about the rust on those bars. A good going over with a wire brush on an angle grinder would sort them out, along with a rush killer and paint.
The only reason those bars are fitted is because the Crossfire used the R170 SLK chassis and those bars are there to give a little reinforcement as the SLK is a convertible.
|
| |
Still learning...still spending...still breaking things!
|
|
ChasR
RR Helper
motivation
Posts: 10,194
Club RR Member Number: 170
|
|
Apr 25, 2023 22:28:59 GMT
|
|
I have a balljoint splitter that may do the job.
Given that I'm local, I'm happy to drop them off, or assist (y).
|
| |
|
|
bstardchild
Club Retro Rides Member
Posts: 14,893
Club RR Member Number: 71
|
|
Apr 25, 2023 22:29:19 GMT
|
I wouldn't be concerned about the rust on those bars. A good going over with a wire brush on an angle grinder would sort them out, along with a rush killer and paint. The only reason those bars are fitted is because the Crossfire used the R170 SLK chassis and those bars are there to give a little reinforcement as the SLK is a convertible. beat me to it - was gonna say it was a legacy of SLK underpinnings and with the crossfire being a tin top they probably do very little |
| |
|
|
|
|
|
Apr 25, 2023 22:43:21 GMT
|
I wouldn't be concerned about the rust on those bars. A good going over with a wire brush on an angle grinder would sort them out, along with a rush killer and paint. The only reason those bars are fitted is because the Crossfire used the R170 SLK chassis and those bars are there to give a little reinforcement as the SLK is a convertible. beat me to it - was gonna say it was a legacy of SLK underpinnings and with the crossfire being a tin top they probably do very little Very rare I beat somebody to it!  |
| |
Still learning...still spending...still breaking things!
|
|
adam73bgt
Club Retro Rides Member
Posts: 4,867
Club RR Member Number: 58
|
|
Apr 25, 2023 23:05:27 GMT
|
Yes good shout on the reason for the bars being there in the first place, that was my thinking as well. I know the convertible Crossfires (and I expect the SLK's also) have an extra bracing bit at the rear of the car that they didn't even bother fitting to the coupe Crossfires so there's probably not much difference in them being there or not. I was only going to blast them as I'm thinking of getting the lower control arms done as well to save a bit of effort, there's a local place that does blasting pretty cheap. One of the braces will be fine but the other does look like it's gone through, for completeness sake I'd like them fitted on the car at least haha I don't expect another one would cost much if it isn't reusable in any case. Thanks ChasR I'll give you a shout sometime, worth a go before I go and buy another tool! |
| |
|
|
adam73bgt
Club Retro Rides Member
Posts: 4,867
Club RR Member Number: 58
|
|
May 27, 2023 23:06:02 GMT
|
Monthly update time, I got the Drivers side engine mount swapped out, was a bit arduous to get it out from the bottom of the engine bay and get the new one in place but it's there and all torqued up. The new and old mounts looked quite different but I'm not sure if that's just a difference between brands rather than the old one being visibly failed. 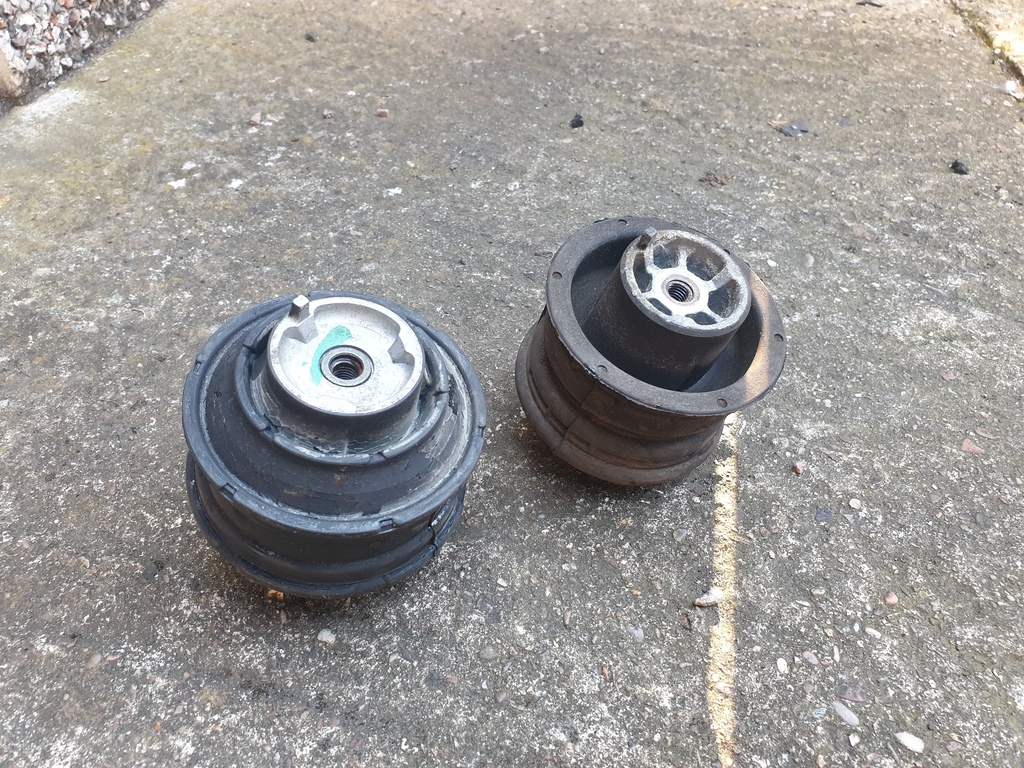 New on left, old on right. Following that, ChasR came over and with some ingenious use of a puller, an impact gun and a hammer, we got the bottom ball joints to release their hold on the tapers. 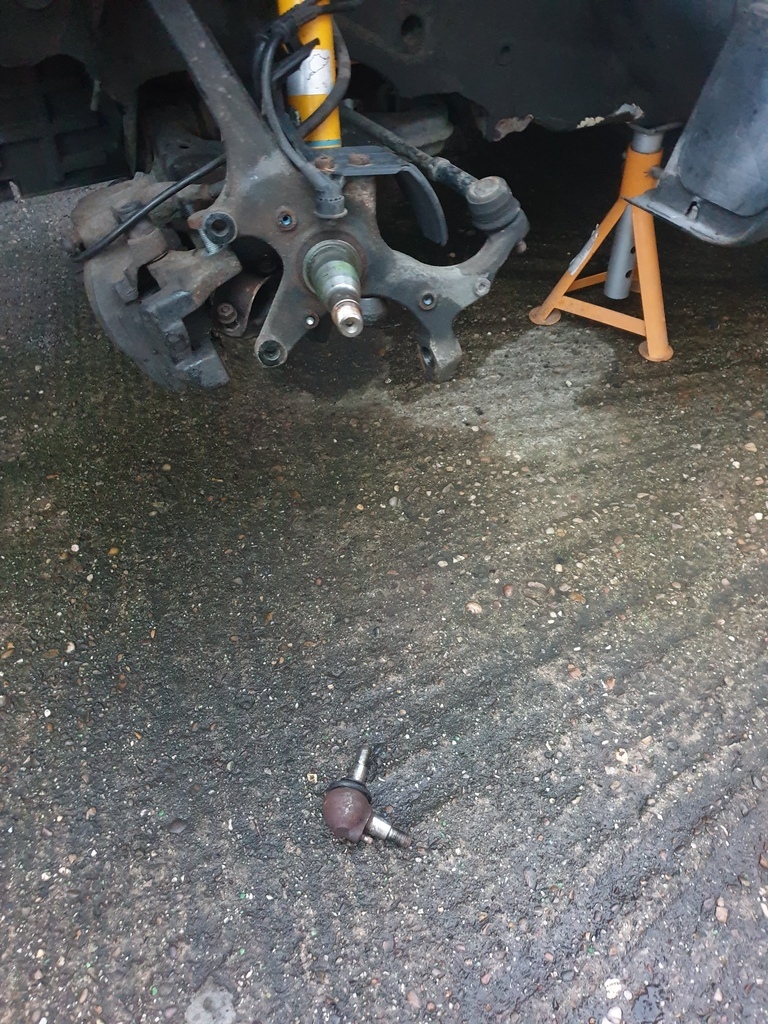 Then had a holiday in Belgium with my gf, included a trip to the Autoworld museum in Brussels which I need to make a thread about 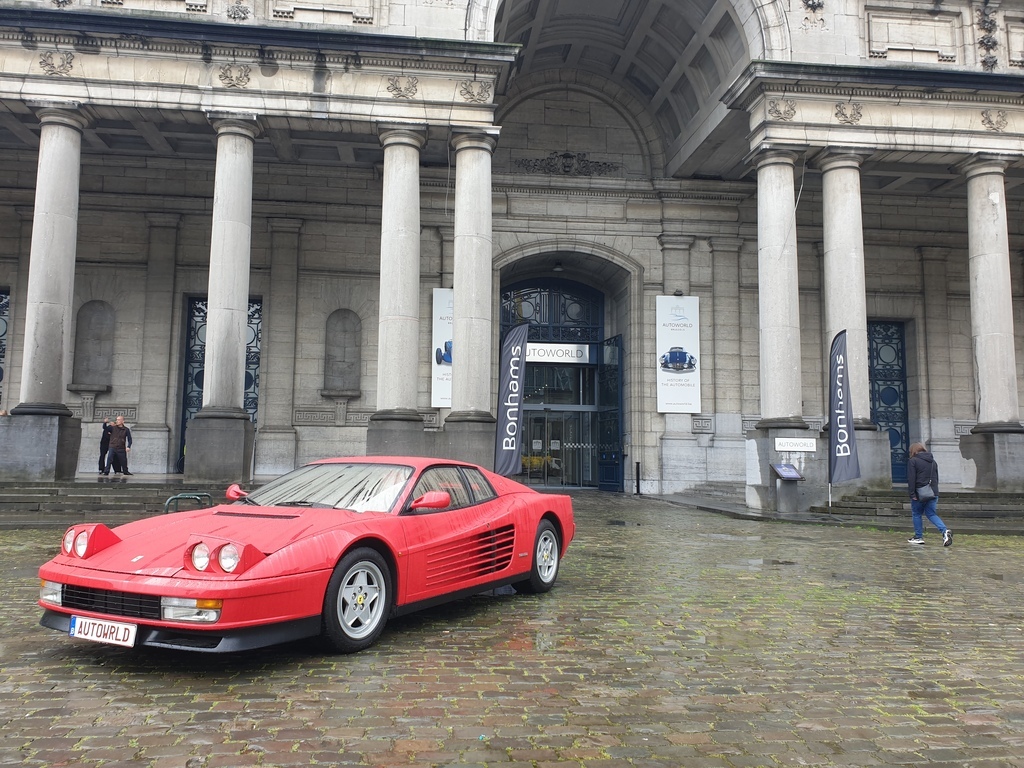 Since getting back, the Almera needed an MOT, which went well... 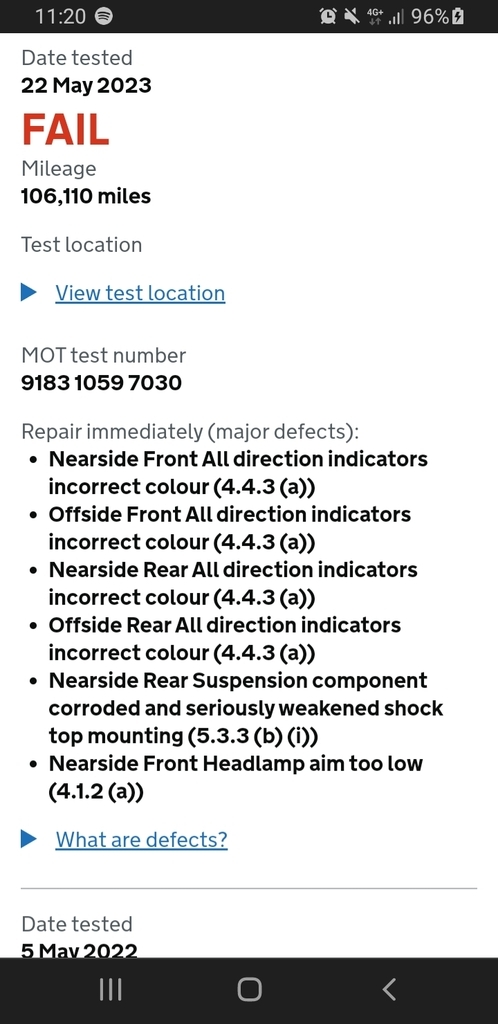 I had noticed the indicators were a bit pale but didn't think they were fails, pretty easily sorted anyway aside from the usual thing that seems to plague all modern-ish cars, one of the front headlight/indicators has decent access behind it, but the other side requires you to contort your hand and get cut up on metal edges but got there in the end. The garage sorted the headlight level, and for speed, I let them take care of the rear suspension top mount. This is what the old one looked like 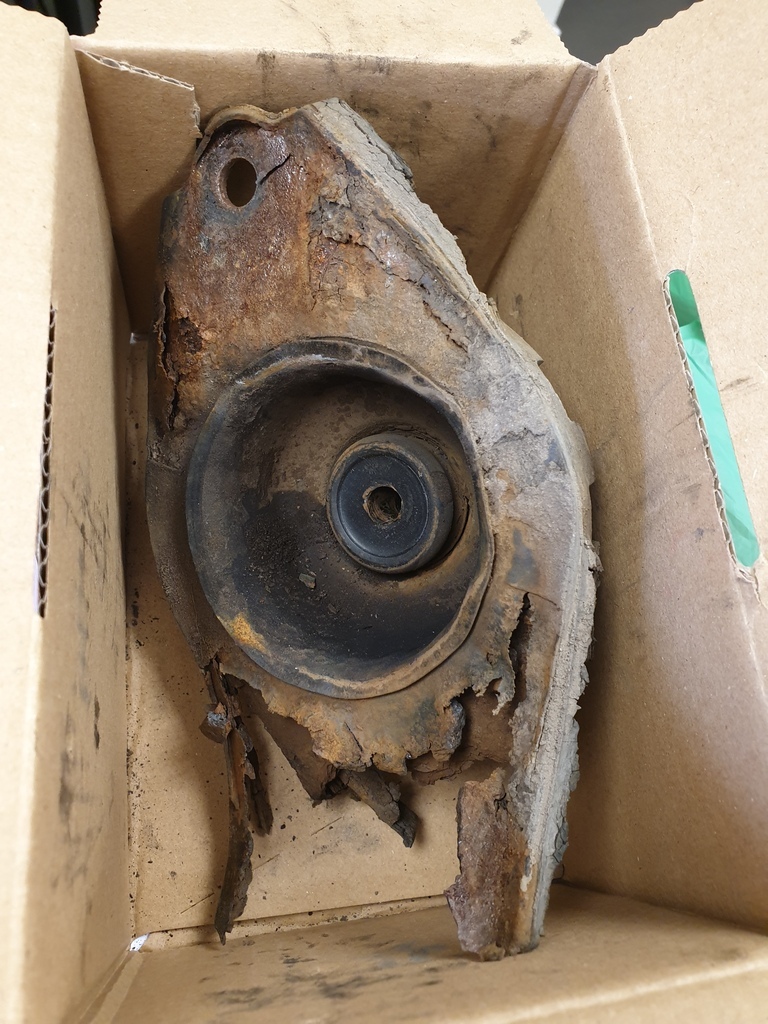 2 things that were amazing here, firstly how that was still managing to hold the strut to the car, and secondly how none of that rust had transferred to the car's body! It did explain the occasional knocking and other odd noises from the rear end, and I'm sure it's more stable at motorway speeds now. Sticking with the Almera, I finally treated it to a full clean. Found a couple of broken bits of glass under the rear seat but all the windows look original so not sure where that's come from! Found 21p and a broken wavy washer which explains why the drivers seat buckle flops around, so that will be an easy fix. 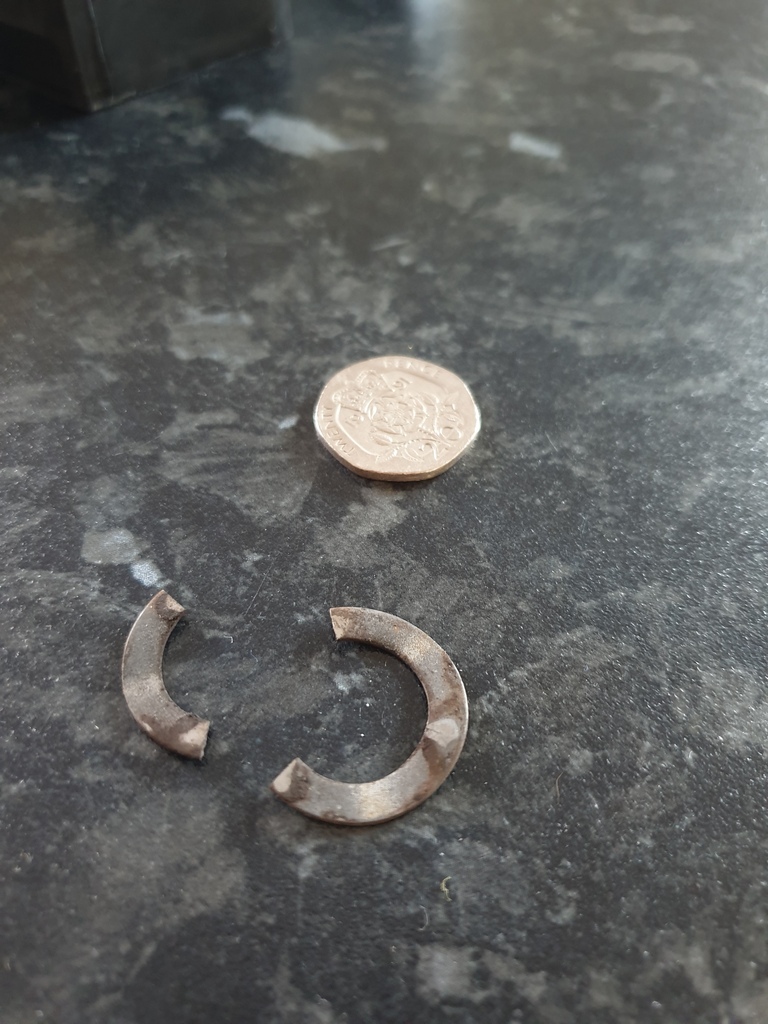 The seat backs of both front seats do wobble a bit, and I noticed that someone had wrapped tape around the pins they lock on after being tipped forward as an attempt at a fix, so I might see if theres a fix for that. I'd also been looking forward to cleaning the engine bay, as it all looked nice and original, but just really filthy  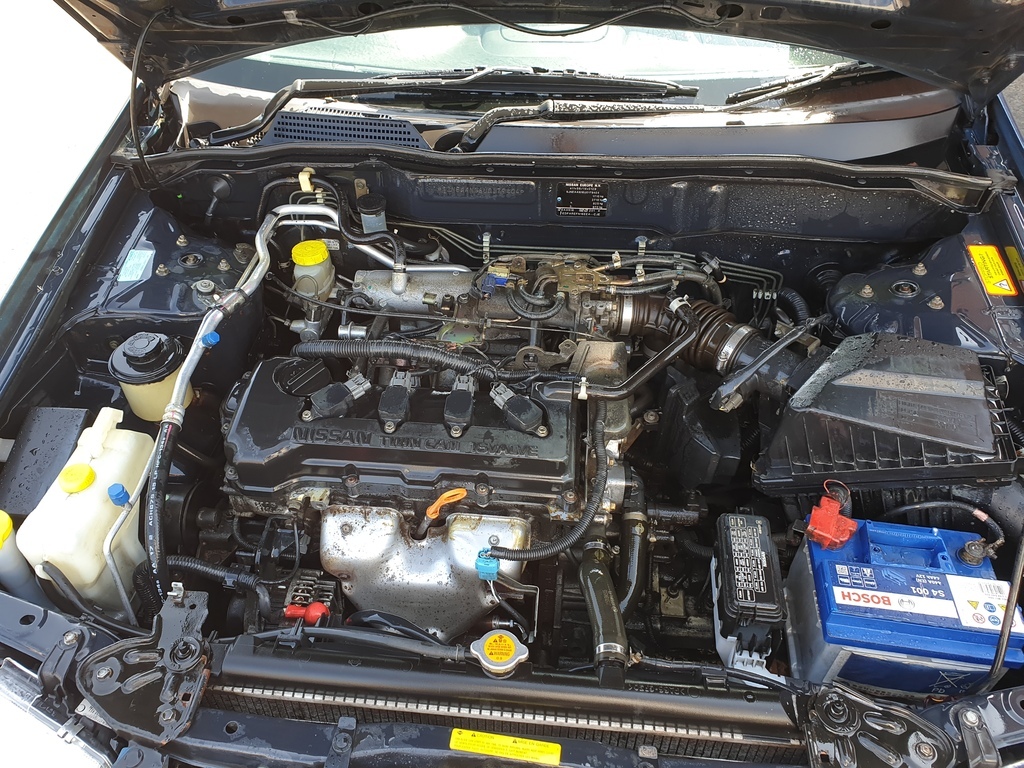 It shines up nice for a cheap runabout  Anyway, back on to the Crossfire. Got the remaining suspension parts off, the lower arms, and the knuckle and upper arm on the Drivers side. 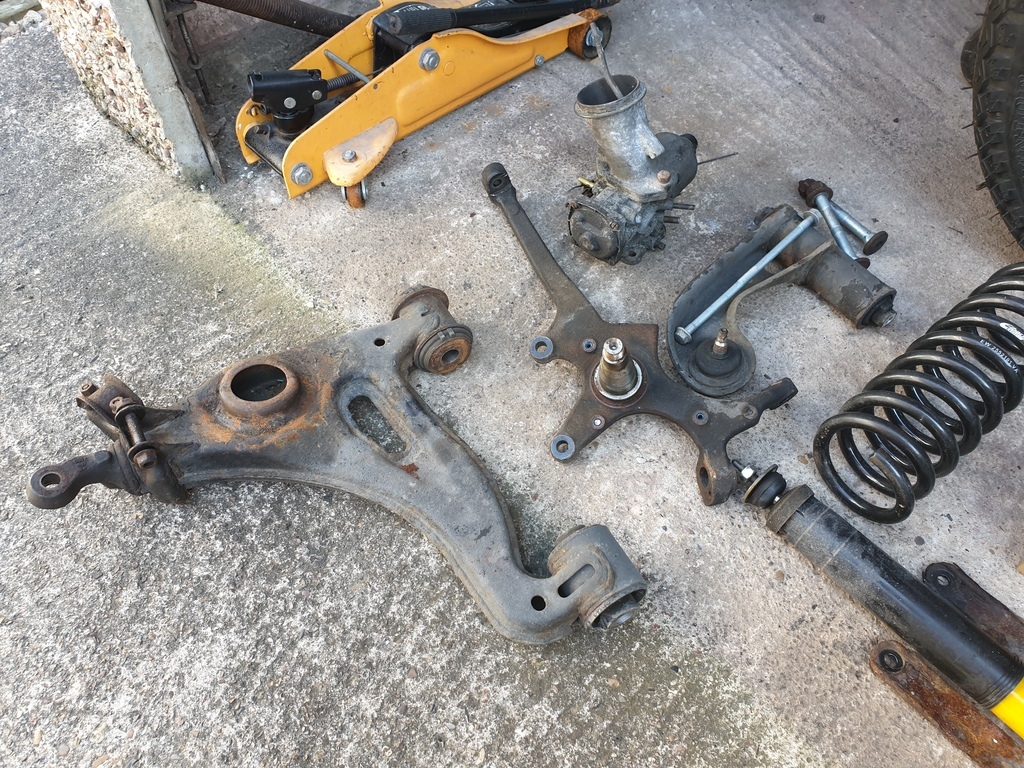 Getting the upper arm out on the Drivers side is a bit of a pain as the long bolt and nut that runs through the "shock tower" has the nut completely hidden on one side, and you have to move the coolant expansion tank to be able to remove the long bolt from the other side 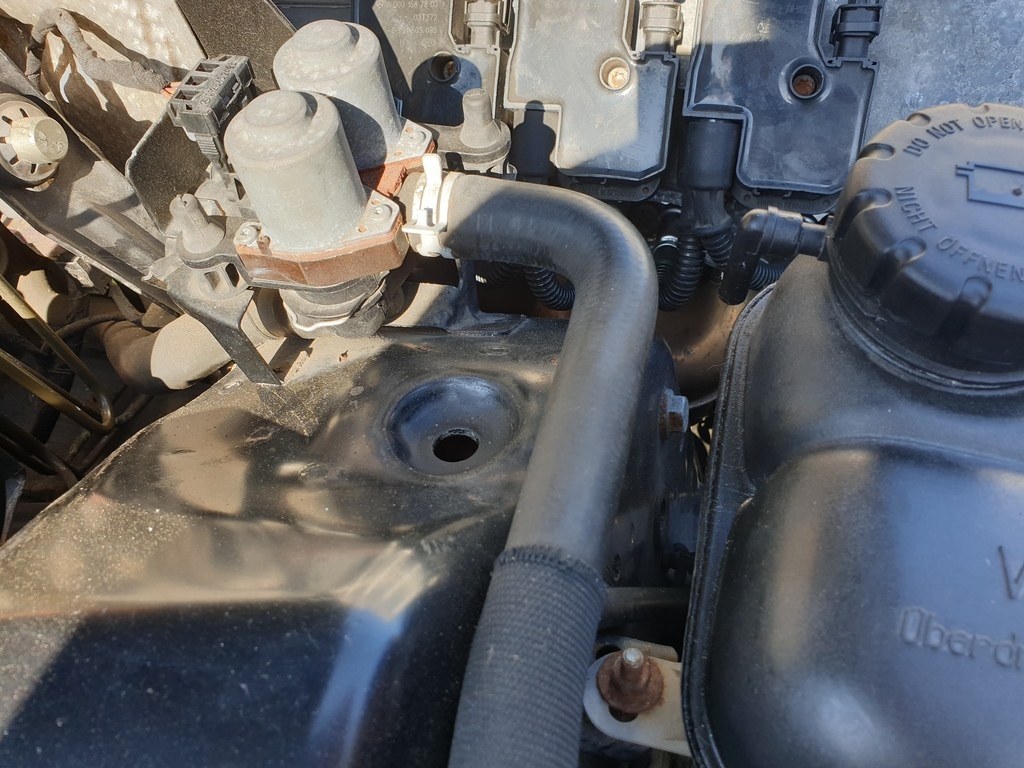 Also bizarrely found a pair of glasses deep in the engine bay (not mine) that looked like they'd been there for years 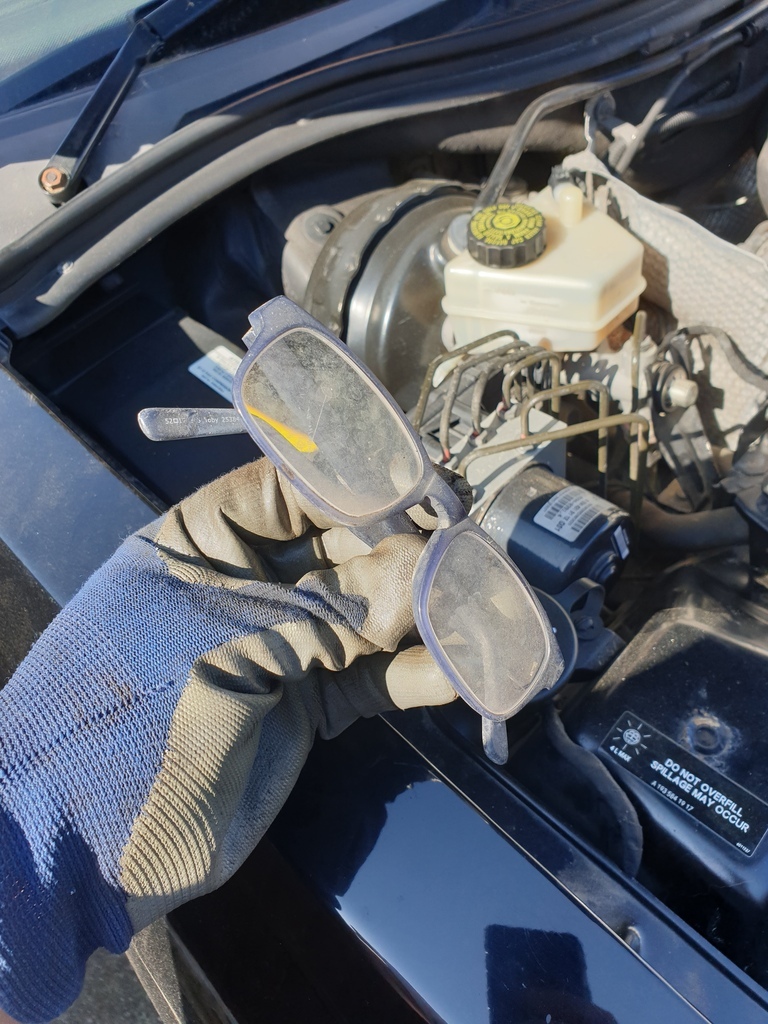 After some faffing, got the suspension all off as I say. Had a bit more of a poke at the arch rust on the Drivers side, it's certainly worse than the Passenger side but can wait for another day. While I was doing odd jobs on the car, I got the windscreen surround panels off 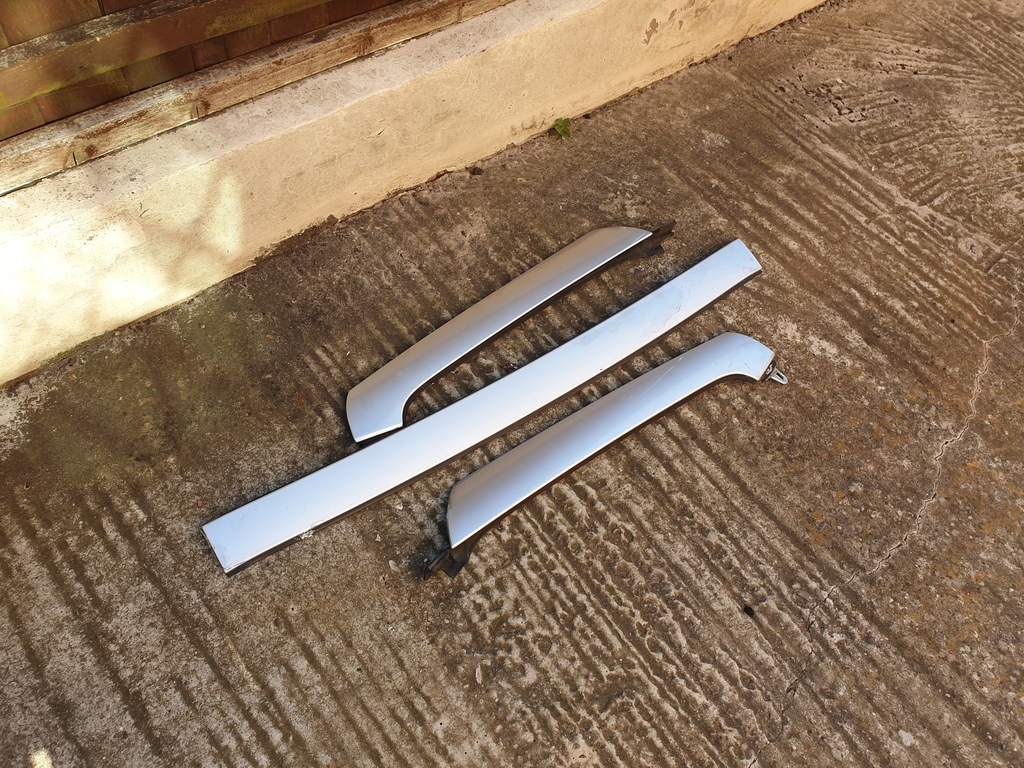 The paint is damaged on them from when a previous previous owner had stuck chrome strips on them. So they need paint and I'd like to go black with them to match the rest of the car as a bit of a different look. There was also a couple spots of rust hiding under the central surround panel but it seems to be surface so I'll deal with that now as well  Trying to get back into making more of a concerted effort with the ongoing projects as I've been slacking! |
| |
|
|
|
|
|
May 28, 2023 11:06:43 GMT
|
|
Great stuff. You're car will be transformed with the new suspension. Have a look inside the lower arm bushes, there's a good chance the void bushes are shot/broken.
Keep up the good work.
|
| |
Still learning...still spending...still breaking things!
|
|
adam73bgt
Club Retro Rides Member
Posts: 4,867
Club RR Member Number: 58
|
|
May 29, 2023 22:04:20 GMT
|
Great stuff. You're car will be transformed with the new suspension. Have a look inside the lower arm bushes, there's a good chance the void bushes are shot/broken. Keep up the good work. I'm hoping so! The old bushes certainly are looking past their best, no doubt they're originals so 20 years old now.. 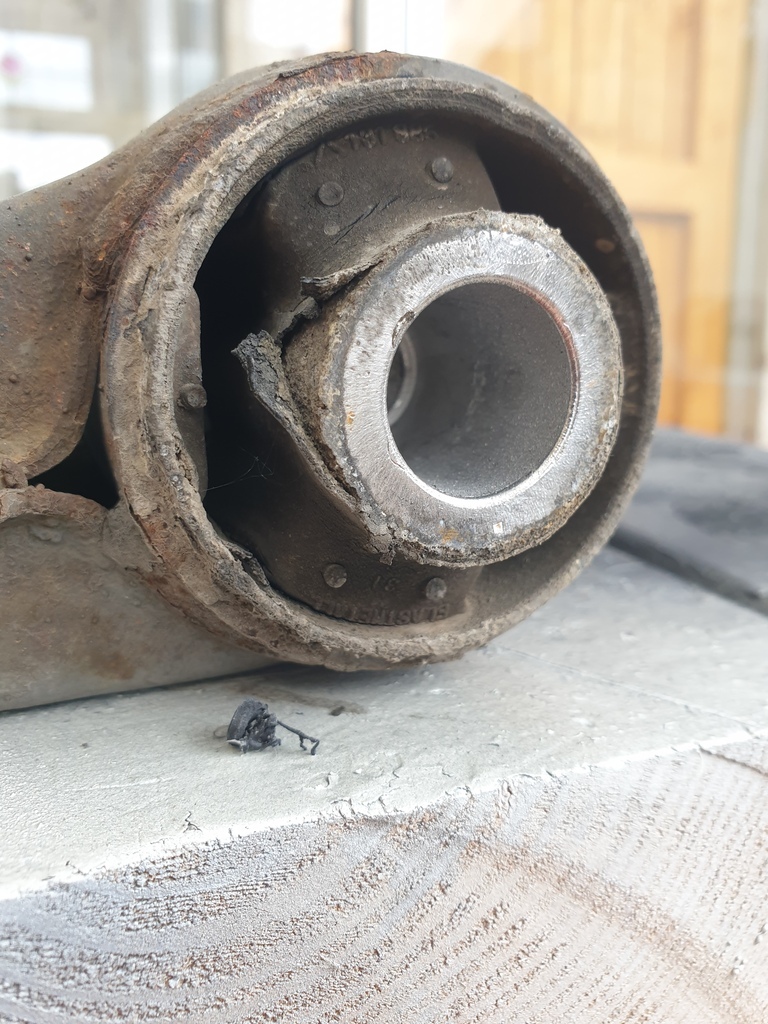 Just currently trying to devise the best way of getting them out as they don't really fit on my press, will get creative with threaded bar before resorting to the more destructive methods Last bit of Crossfire work for the weekend was to try and degrease the oil leaks from the underside and give it a bit of a general jet wash as it was starting to look a bit nasty 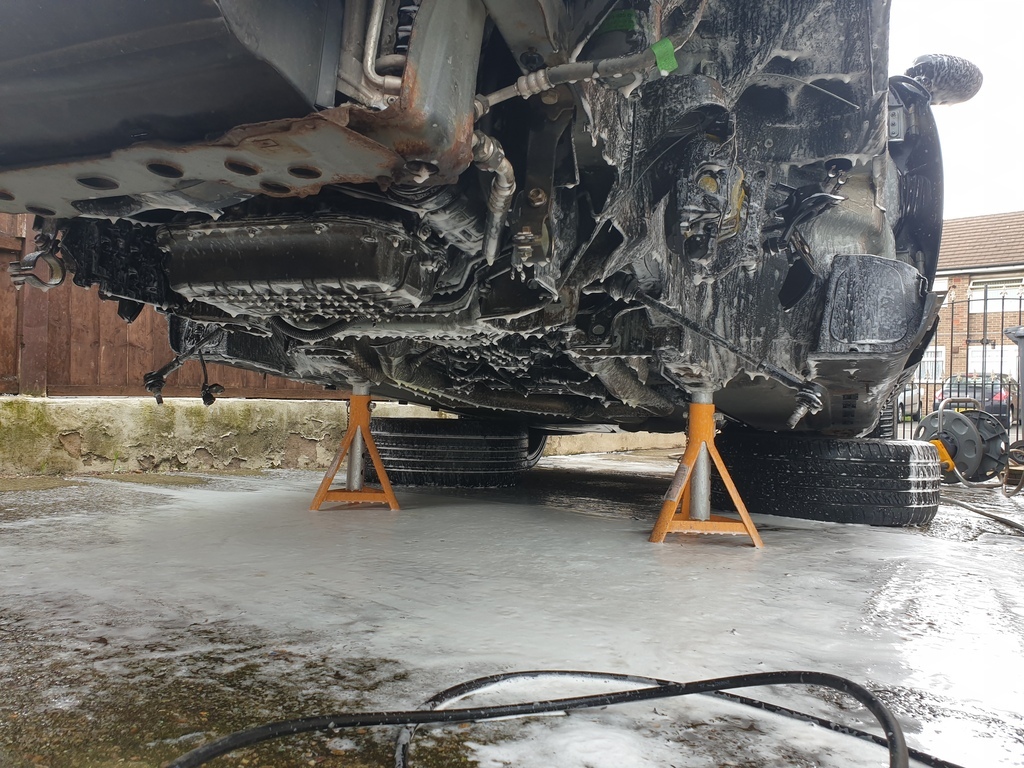 |
| |
|
|
|
|
|
|
|
May 30, 2023 11:03:34 GMT
|
|
I have spare set of lower arms with bushes removed, maybe fit K-Mac at some stage.
And like you didn't have a suitable puller for the bushes. I managed to knock them out somehow, iirc it wasn't too difficult.
|
| |
Still learning...still spending...still breaking things!
|
|
ChasR
RR Helper
motivation
Posts: 10,194
Club RR Member Number: 170
|
|
|
|
Some good progress there. I'm glad I could help. The heat also helped with the above . Wow, that top mount was rusty! If you have access to an SDS drill, they have a hammer chisel setting on some of them, which could prove handy for pushing the bush in on itself, which will release it . |
| |
|
|
adam73bgt
Club Retro Rides Member
Posts: 4,867
Club RR Member Number: 58
|
|
|
|
Just a couple of photos to give you all an idea of how the lower arm bush removal is going... 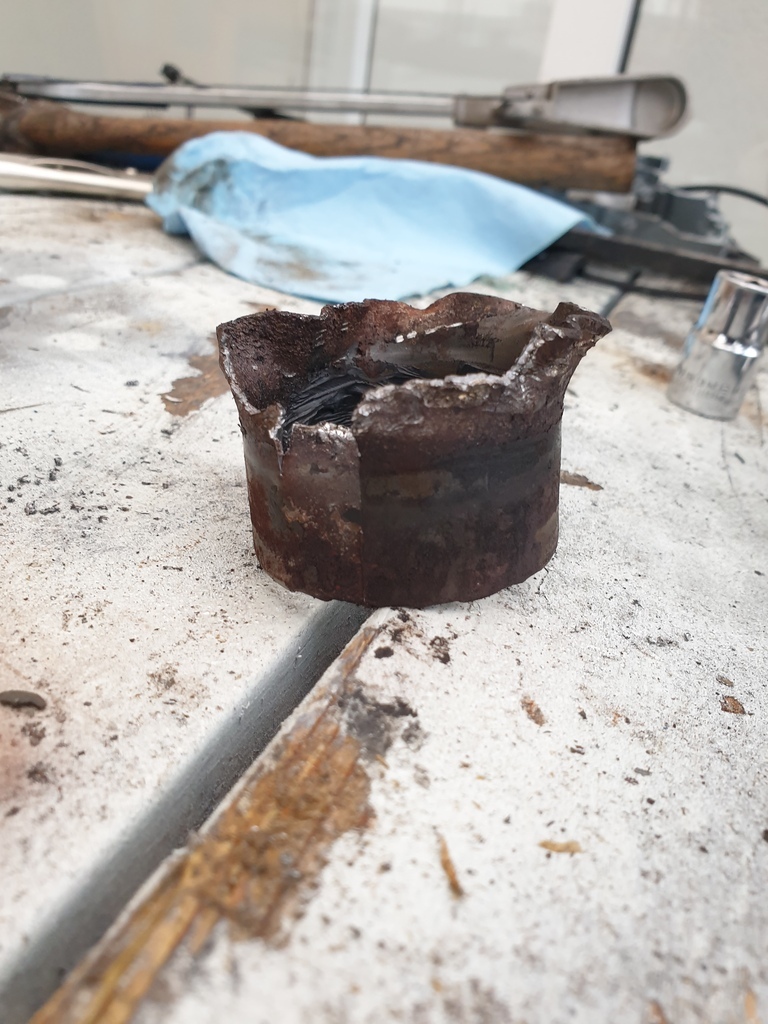 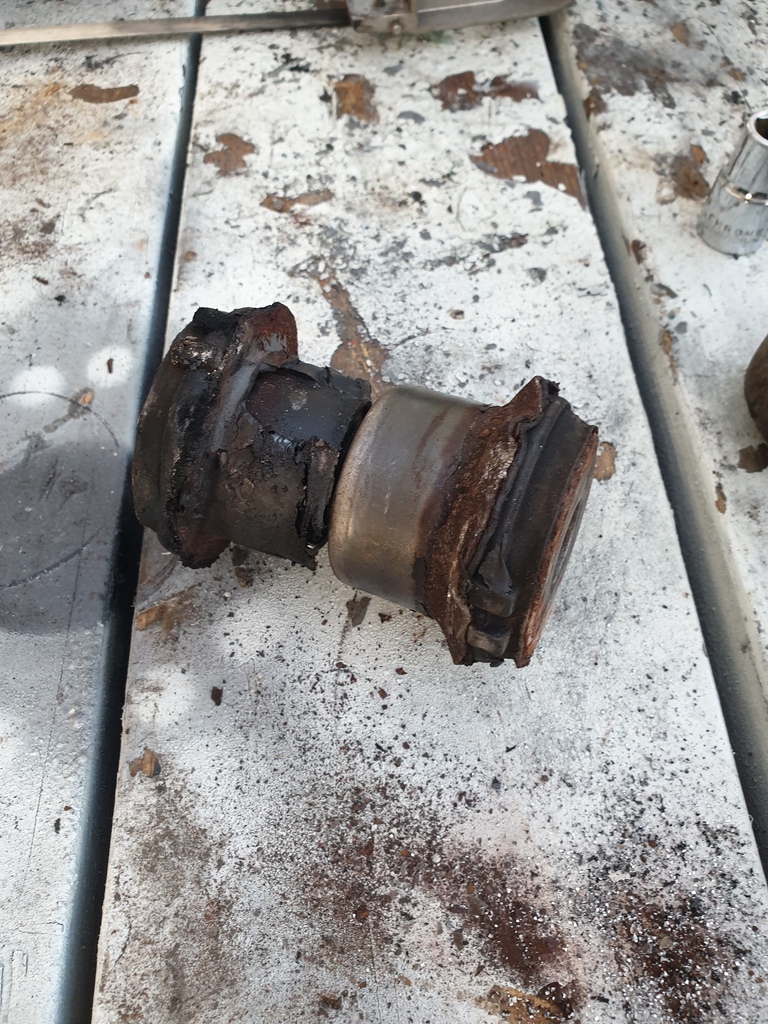 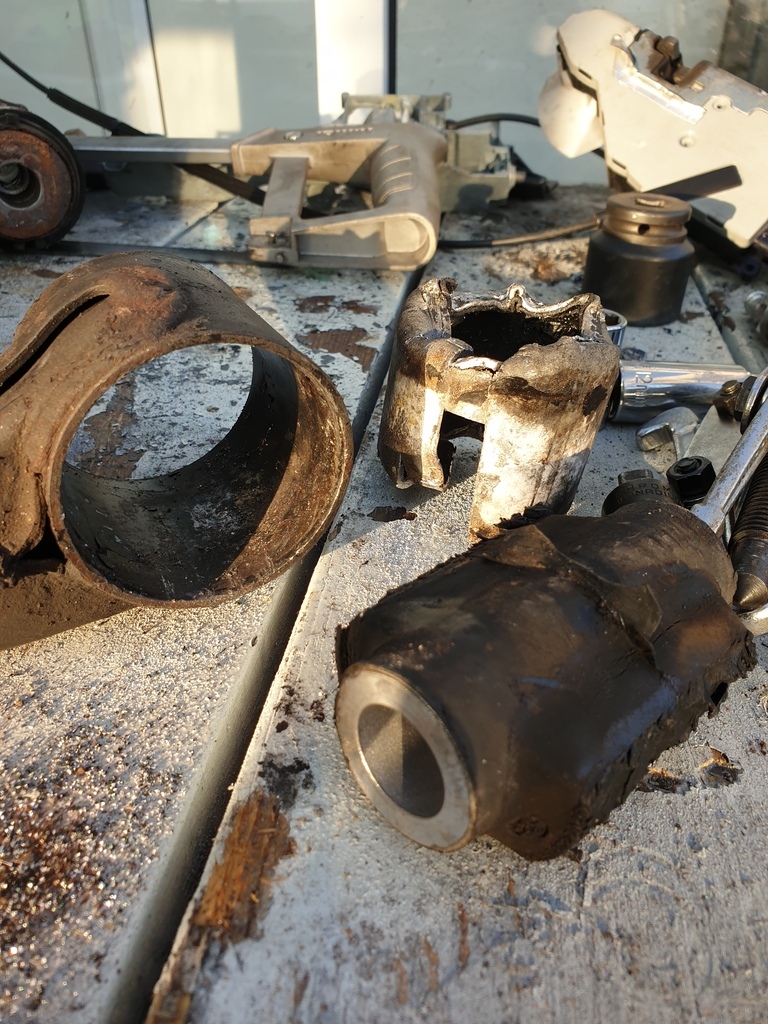 They're putting up a fight but I'm on the last one out of the four now. The other void bush that I didn't take a photo of was totally knackered so it's a good job I'm changing them. Shall soon be wire brush and paint out for the lower arms, and the underside bits of the car that need it, do the sump, finish oil change, drop car and shuffle it over so I can get the Drivers wing off, before getting the car back up again to tackle the holes. |
| |
|
|
|
|
|
|
|
Just a couple of photos to give you all an idea of how the lower arm bush removal is going... They're putting up a fight but I'm on the last one out of the four now. The other void bush that I didn't take a photo of was totally knackered so it's a good job I'm changing them. Shall soon be wire brush and paint out for the lower arms, and the underside bits of the car that need it, do the sump, finish oil change, drop car and shuffle it over so I can get the Drivers wing off, before getting the car back up again to tackle the holes. Yeah, reckoned the void bushes were gone. Deadly on a sweeping A or B road at high speed. Sudden understeer, real sudden. Ask me how I know...🙂 |
| |
Last Edit: Jun 6, 2023 12:42:53 GMT by Woofwoof
Still learning...still spending...still breaking things!
|
|
adam73bgt
Club Retro Rides Member
Posts: 4,867
Club RR Member Number: 58
|
|
|
|
|
😬 that bad eh? Good job I didn't push too hard when driving at the nurburgring then 😅
|
| |
|
|
|
|
|
|
|
😬 that bad eh? Good job I didn't push too hard when driving at the nurburgring then 😅 Ha,ha. If it did understeer, say at 90mph+, all you'd need to do is, get quickly off the throttle, don't brake and hope the next bit of road is straight! 😁 |
| |
Still learning...still spending...still breaking things!
|
|
adam73bgt
Club Retro Rides Member
Posts: 4,867
Club RR Member Number: 58
|
|
Jun 19, 2023 22:10:19 GMT
|
Bit more progress. I finished up my dealings with the lower arm bushes... 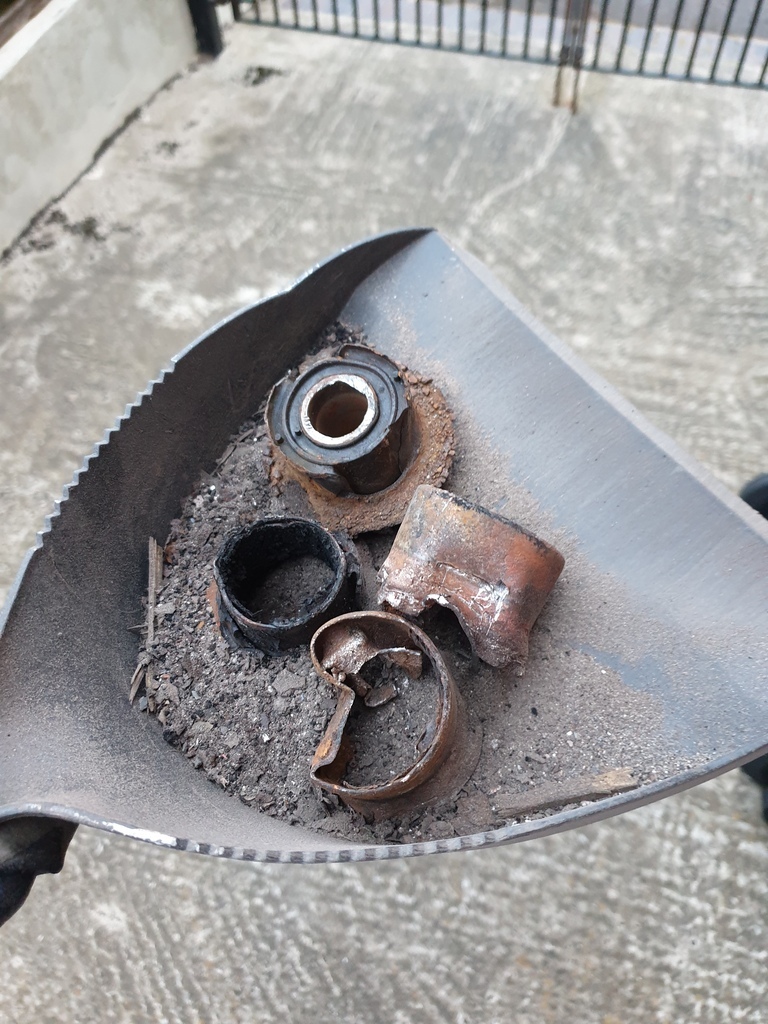 Gave the arms themselves a fairly rudimentary going over with a wire brush before some etch 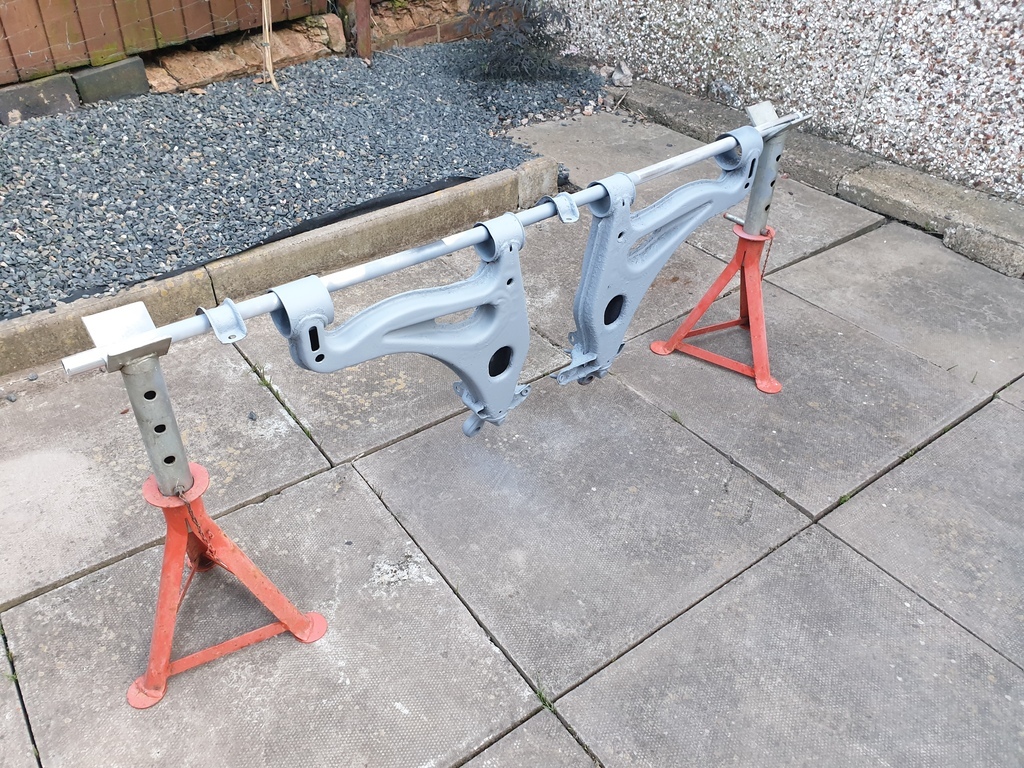 and some black paint, I really laid this on thick, too thick in reality, but it's protected and looks good enough for something that isn't seen  With the wire brush and drill out, I spent most of a day rolling about under the car trying to attack every surface rust spot before it can develop into anything else. Which then got a going over with Hydrate 80 before some more black paint brushed on 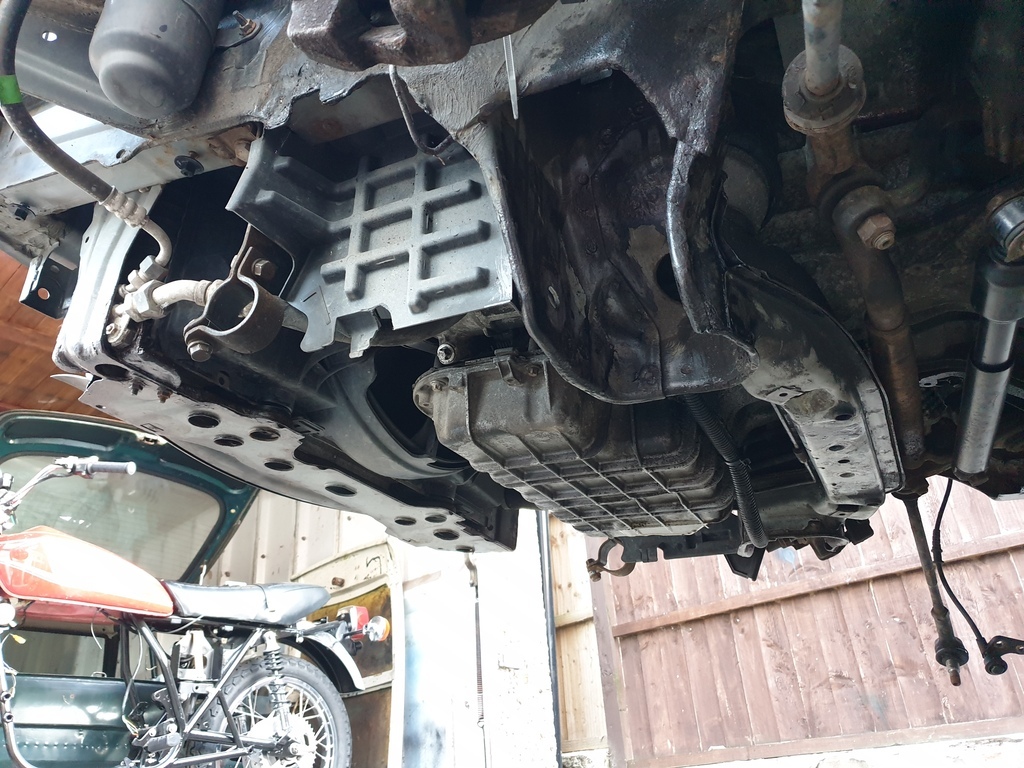 Arms now have lovely new polybushes installed with plenty of grease 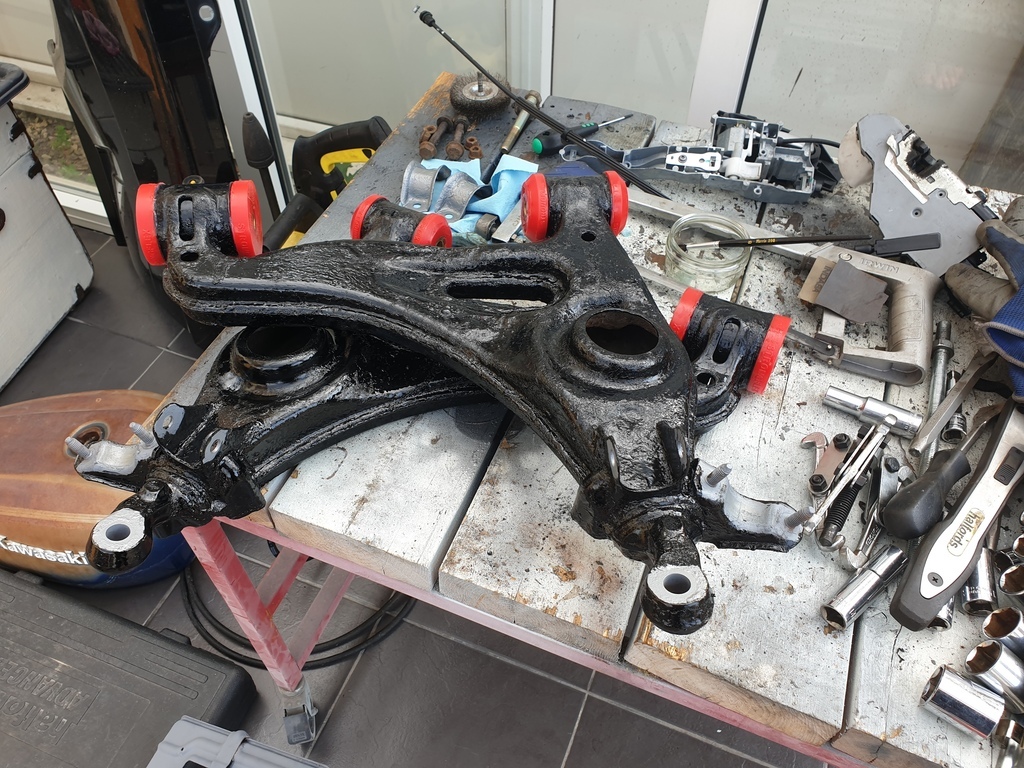 I was about to chuck these back on the car but there are a couple of jobs still that will be easier without the arms in the way. One is the sump which I keep meaning to get to, but firstly I removed the earth strap that goes from the body to the bellhousing which is well past it's best 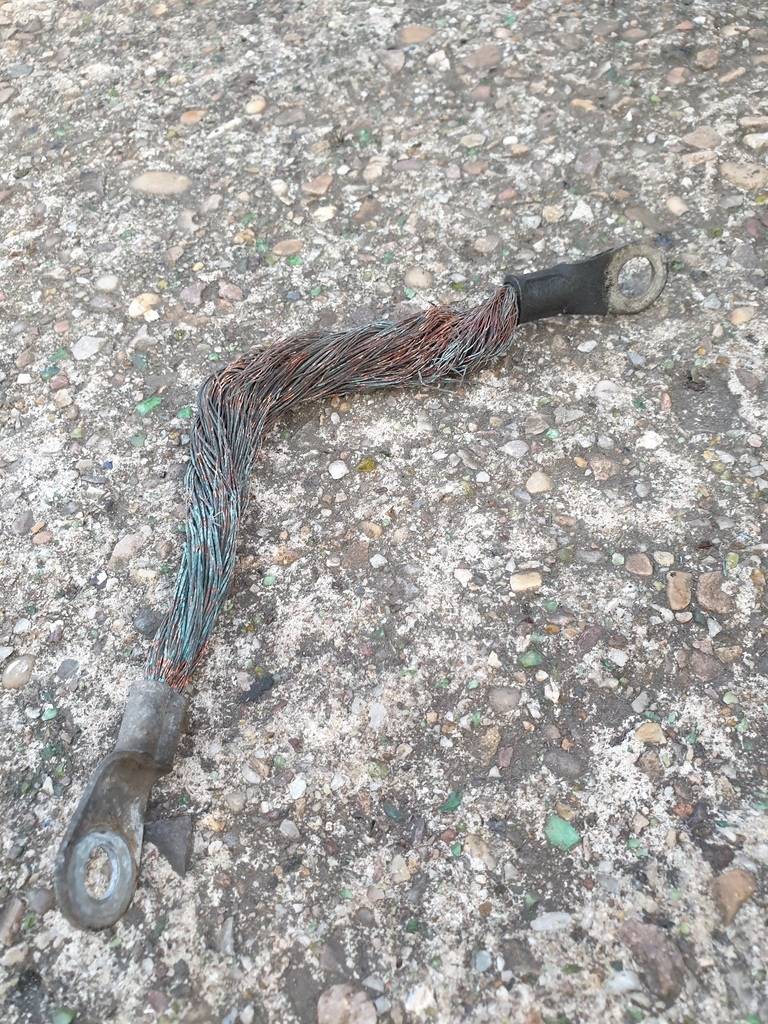 And I've almost removed the idler arm from the steering, to change the bush, I just need to break the taper on the ball joint to get it off 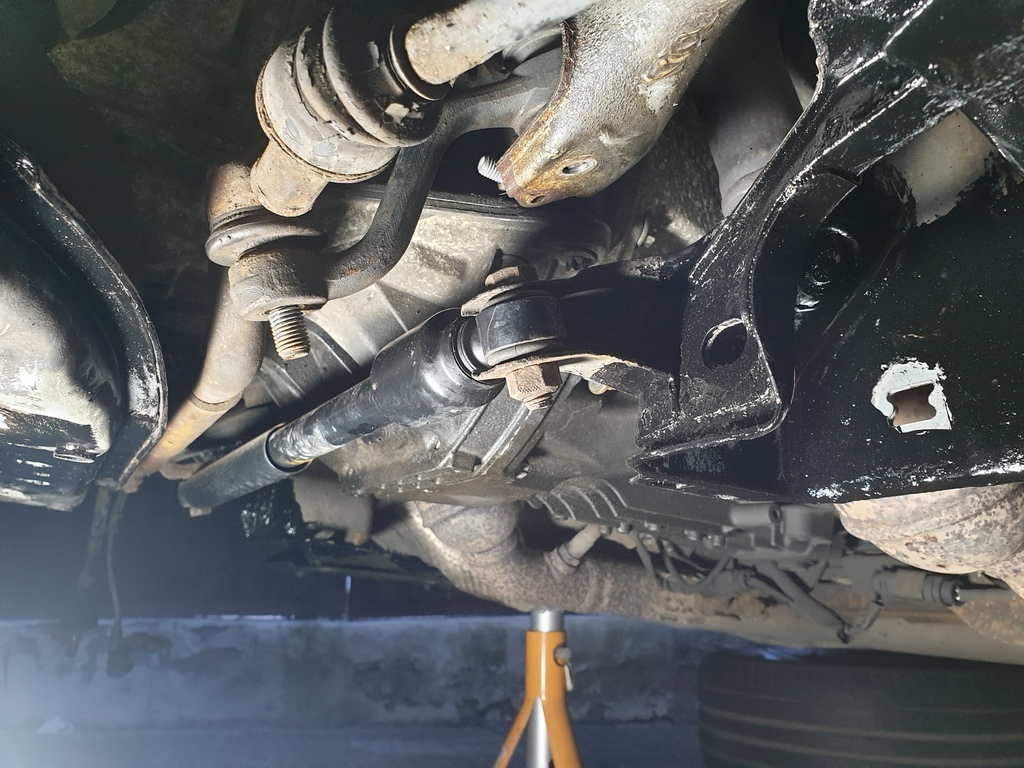 So still slowly ticking off the various jobs |
| |
|
|
adam73bgt
Club Retro Rides Member
Posts: 4,867
Club RR Member Number: 58
|
|
|
|
Broke the taper on the idler arm to centre link ball joint, but also pierced the boot, the other boots were looking pretty old so figured since I'm this far in, lets just get a new centre link 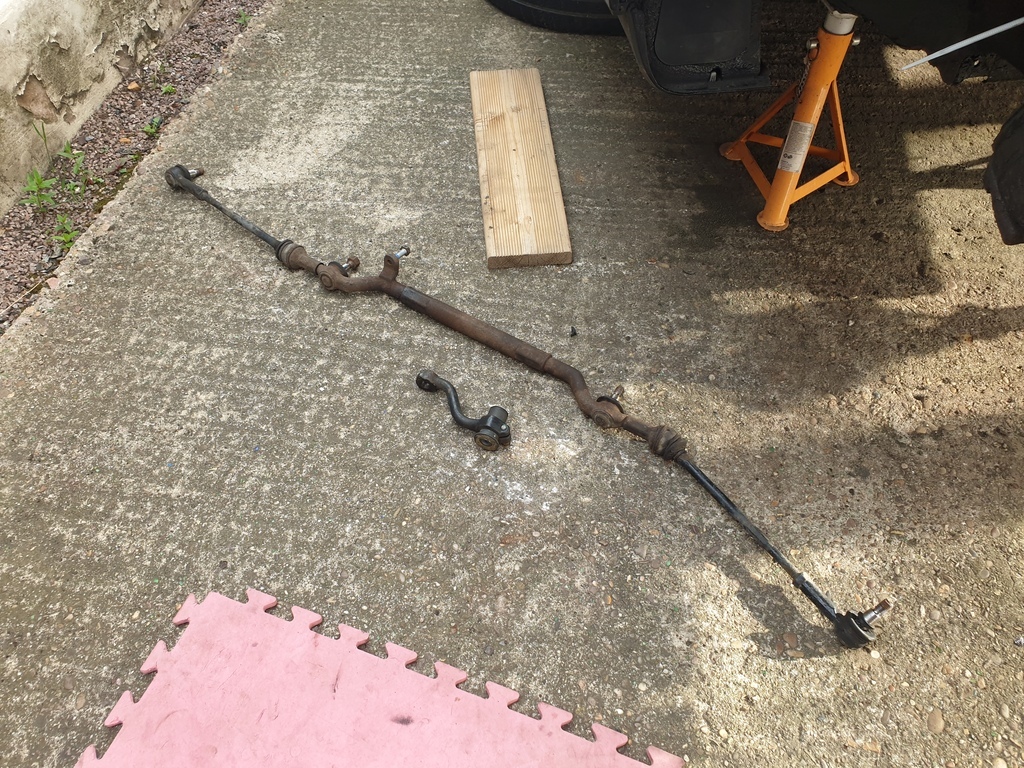 Pretty easy to drop the old one out, nice shiny new one arrived quite quickly and got fitted after I'd refitted the idler arm  I hadn't anticipated that the idler arm has a pinch bolt to hold the bush in place, made replacing the bush really easy, I just made sure I set it at the correct height in the arm before torquing the pinch bolt 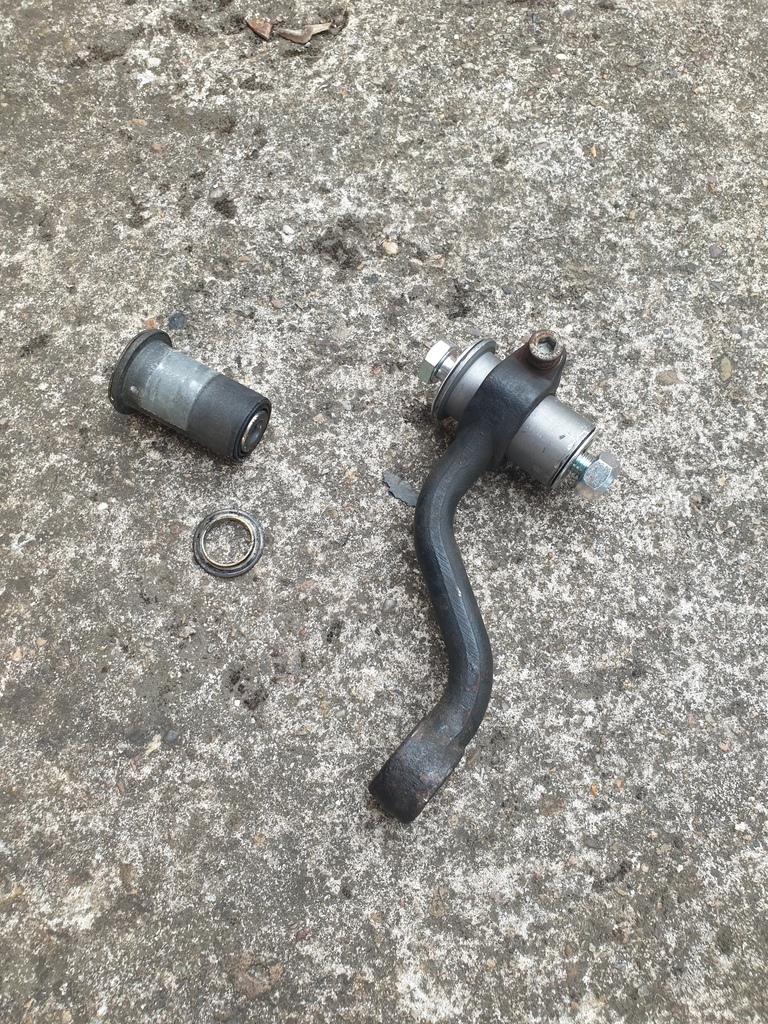 Heat shield for the idler arm had been encrusted in old leaked oil and dirt so got a clean off and a quick spray before refitting. While under the car I also whipped the lower sump off 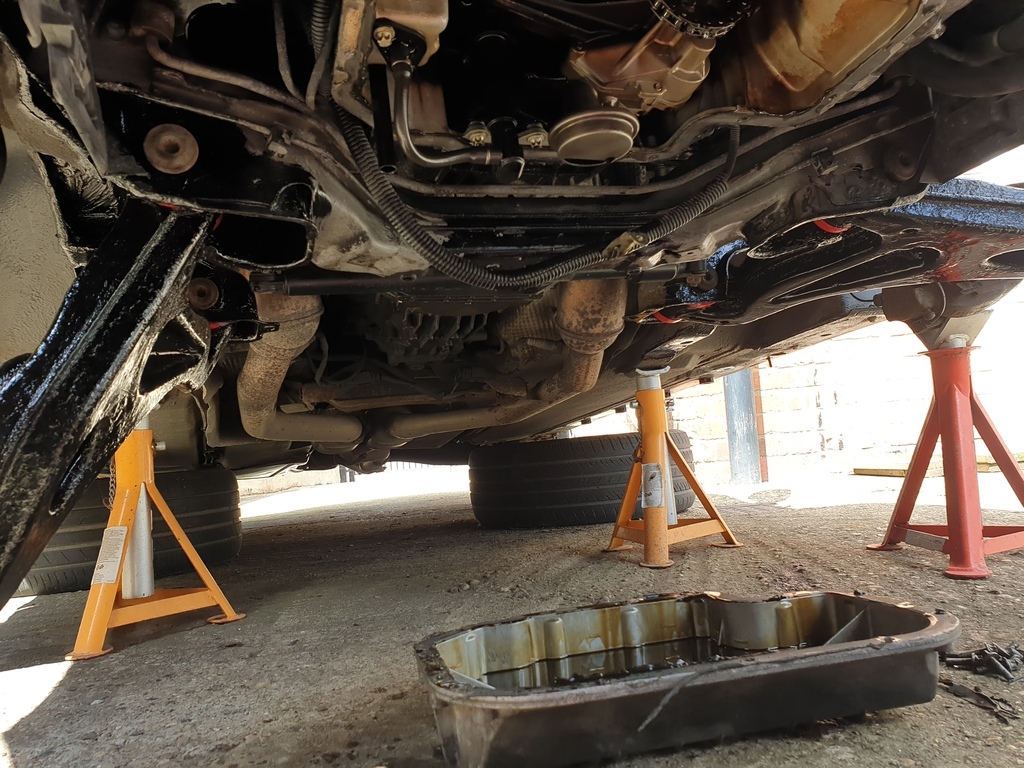 Spent a good amount of time cleaning it as there was some slightly sludgy looking oil in the bottom of the pan, and the mating faces needed a good clean up with brake cleaner and a razor blade to prep them for resealing. Refitting the sump was a bit fun, trying to line up the bolt holes while not smearing the bead of sealant all around the top of the pan, but got there in the end 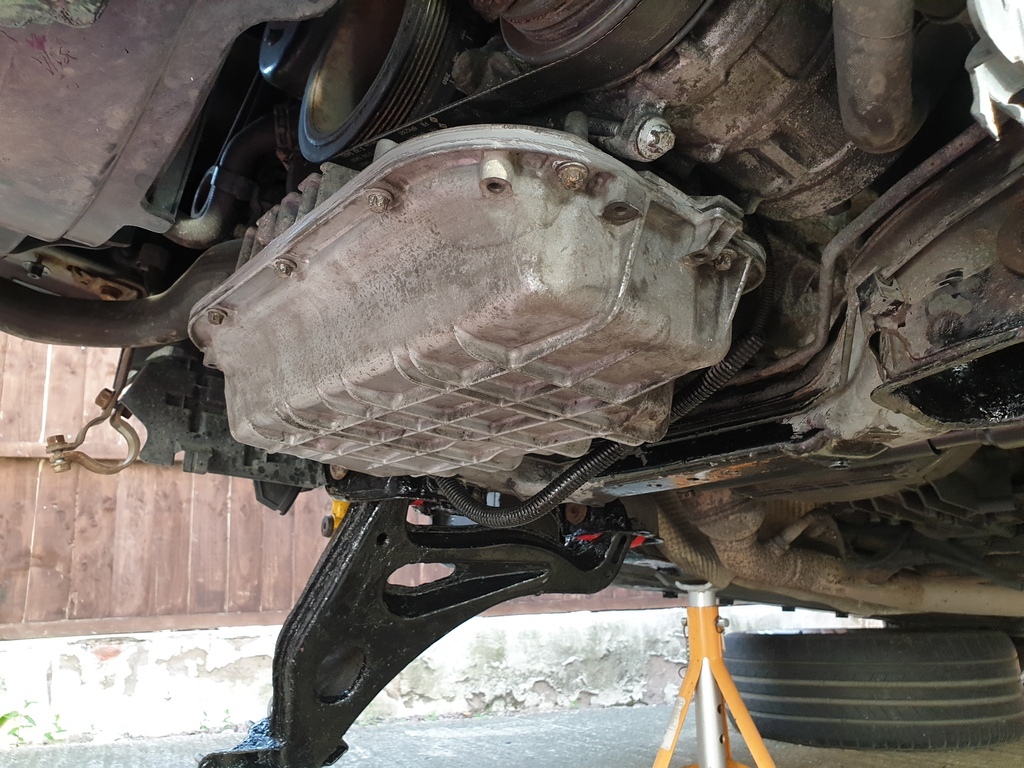 I'll continue building up the suspension tomorrow, had to drill and tap one of the brake dirt shield holes in the knuckle as the remains of the old bolt was not coming out.. Another issue I've been pondering is fitting my wheel adaptors. I encountered an issue with these before going to Germany last year in that while they're designed to fit the Chrysler centrebore, they aren't deep enough to accomodate the hub nut cap. 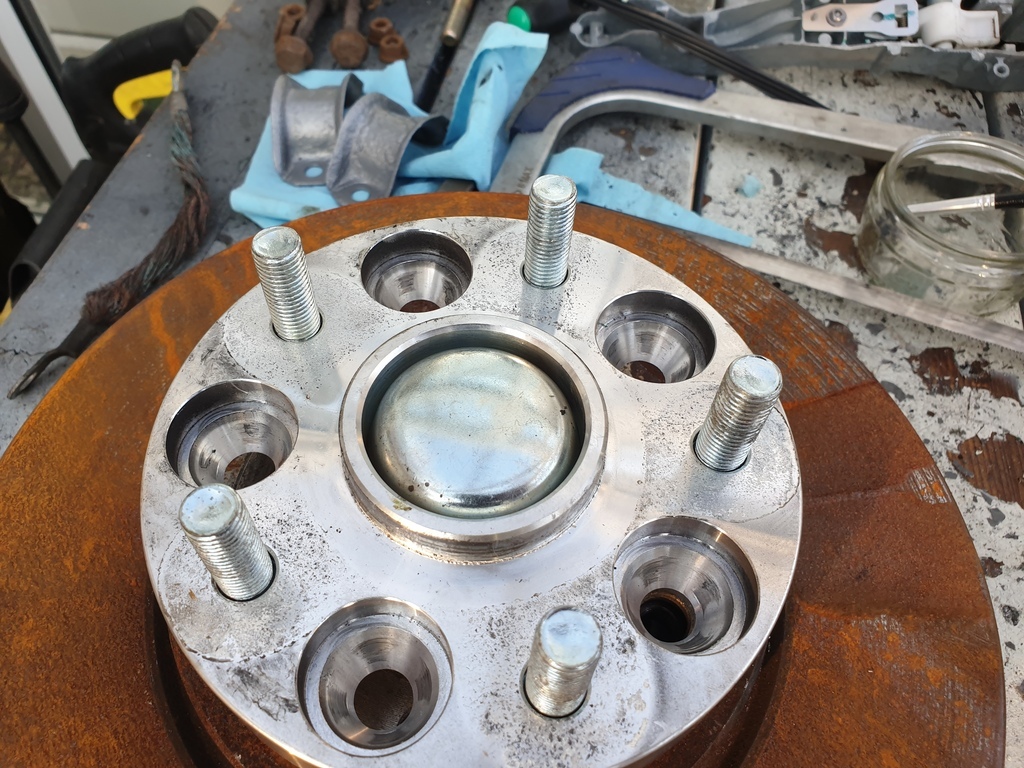 I would like to fit the hub nut caps so I think I shall have to open up the bores in the adaptors which will mean losing the spigot for locating the wheel but since I'm running studs and taper nuts, I think it should be fine. Lastly, finally got the H&R front anti roll bar on order which is probably the last missing piece of the front suspension. Got a couple of days off work as well so be good to make some further progress |
| |
|
|
|
|
|
|
|
Great to hear you got the front bar, it really does make a difference. You're 50 max bends will become 60! |
| |
Still learning...still spending...still breaking things!
|
|
adam73bgt
Club Retro Rides Member
Posts: 4,867
Club RR Member Number: 58
|
|
|
|
Great to hear you got the front bar, it really does make a difference. You're 50 max bends will become 60! I'm rather throwing the kitchen sink at the chassis mods so I'm hoping it should all combine for a big difference! Was rather hoping the bar would have arrived by now but it seems to be somewhere between here and Germany still.. In the meantime a bit of Almera related news as it was due a service. It might be the only car I've owned that has a legitimately full service history, but it would seem the cabin filter has been overlooked like it is in many cars. 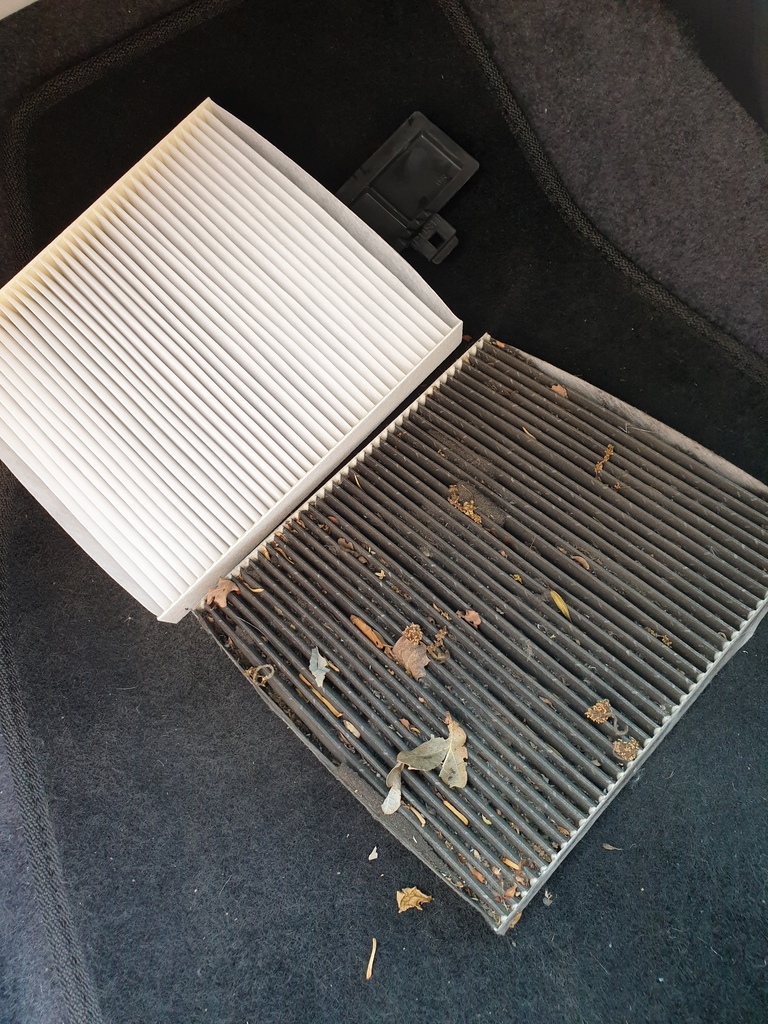 It's located behind the glovebox and is easily changed over, the air coming from the vents smells a bit fresher now. There is an annoying squeak from the blower motor especially on the 1st speed so I may yet go back and drop the blower out to see if I can sort that. Pulled it onto the drive behind the Crossfire to do an oil change, wasn't too had although with the plug and filter being on the back side of the engine, found it easiest to take the drivers front wheel off for access. Of course I had to take a moment to balance on one of the 17" alloys I currently have up for sale on there.. 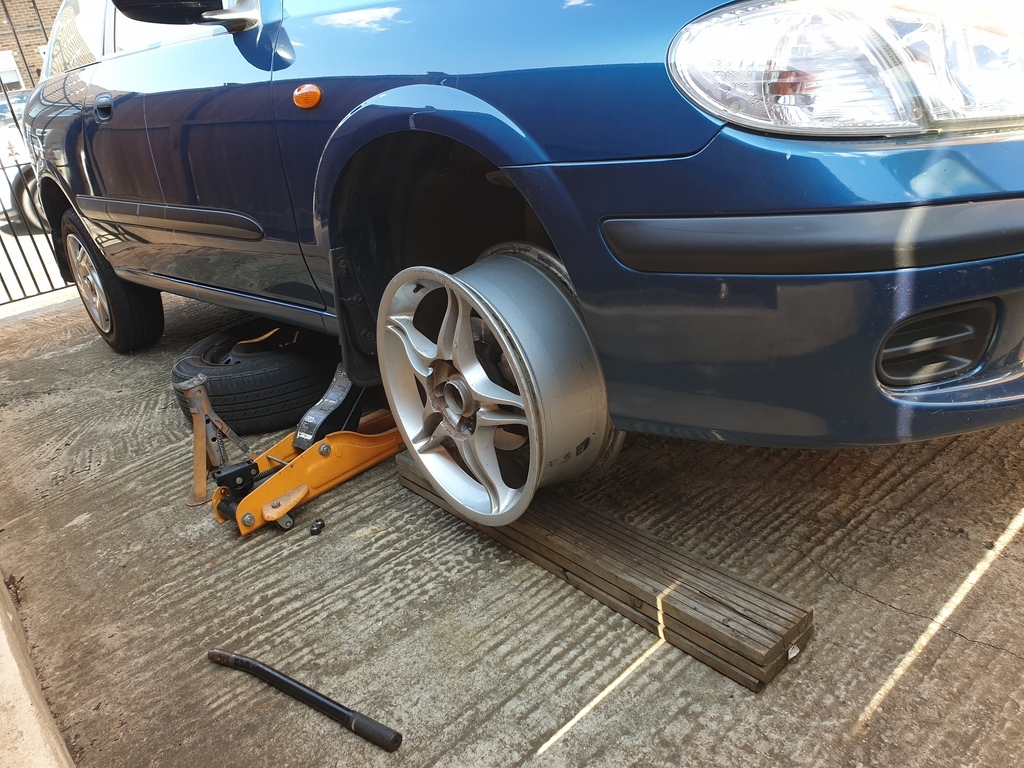 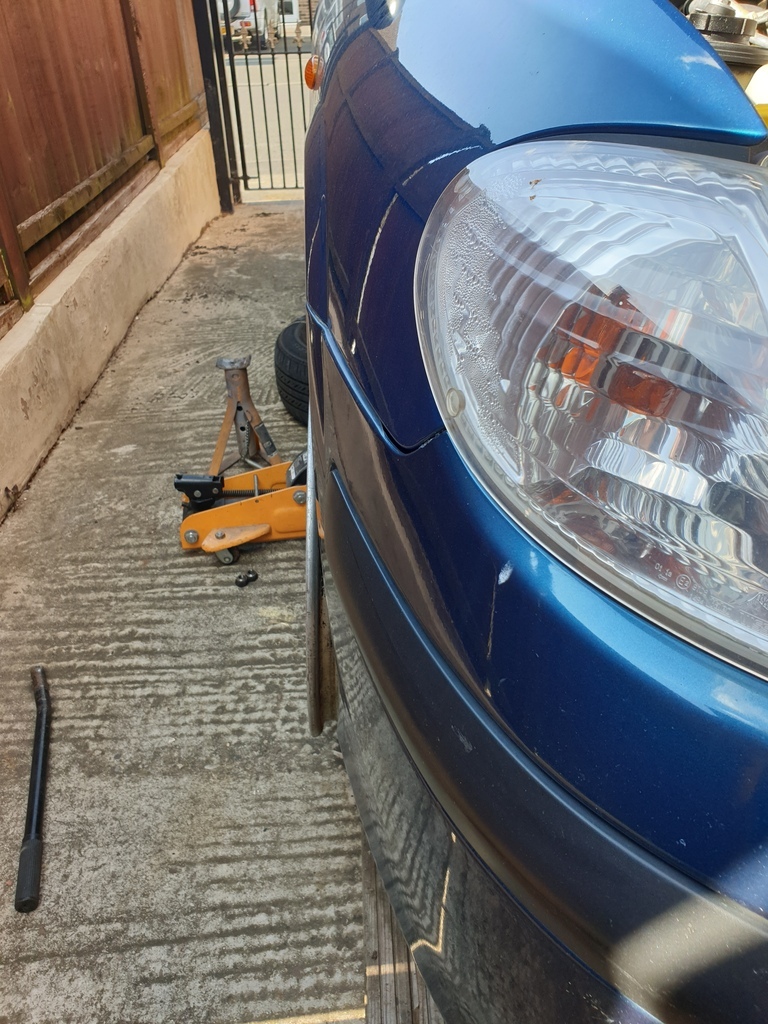 Annoyingly they sit almost perfectly on there 😂 did have some thoughts of a last minute scramble to make the Almera a bit cooler for RRG, but the fact I've got a centre cap missing for the alloys has cooled that notion for now. Maybe once the Crossfire is back on the road, I'll do a little tinkering.. One last thing I did do was replace the cup holder. The old one never retracted fully so I assumed it was broken 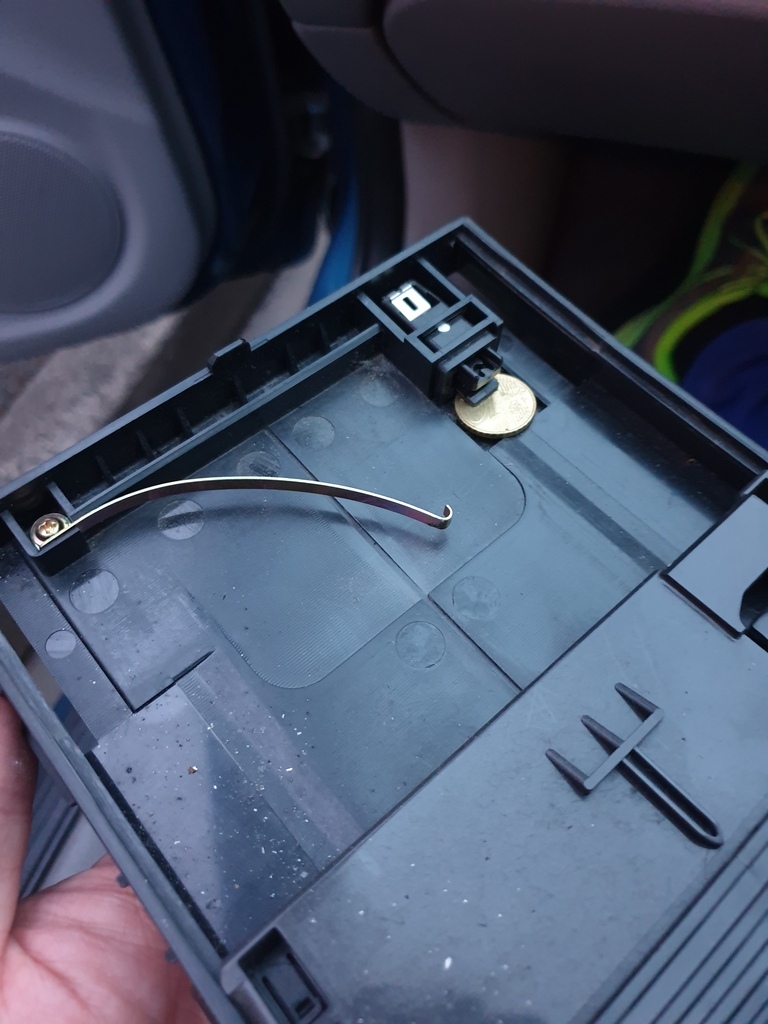 Turns out there were a couple of euro cent coins jamming the latch and with those removed it worked fine 😅 I have fitted the new one for now though as it's a slightly different design that actually extends itself out whereas the original had to be pulled out after being unlatched. I have made good progress on the Crossfire as well, got my new engine earth strap in place before I forgot about it 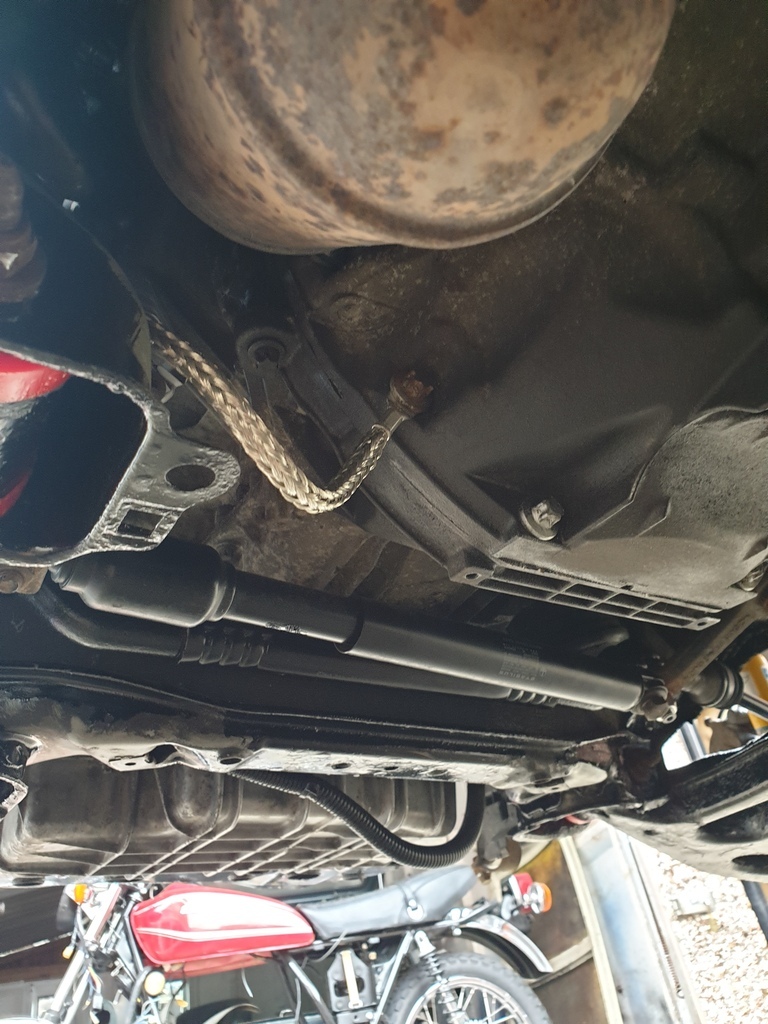 And the front suspension is all built up again on both sides, the only bolts remaining to be torqued are for the upper control arms to the body. Wheel bearings are all packed with grease and hubs refitted, just need to put the dial indicator on to set them up. Last job done last night was changing the front brake hoses which was a bit more of a faff than it needed to be. The hoses go through a hole in a bracket that also acts as a cooling scoop 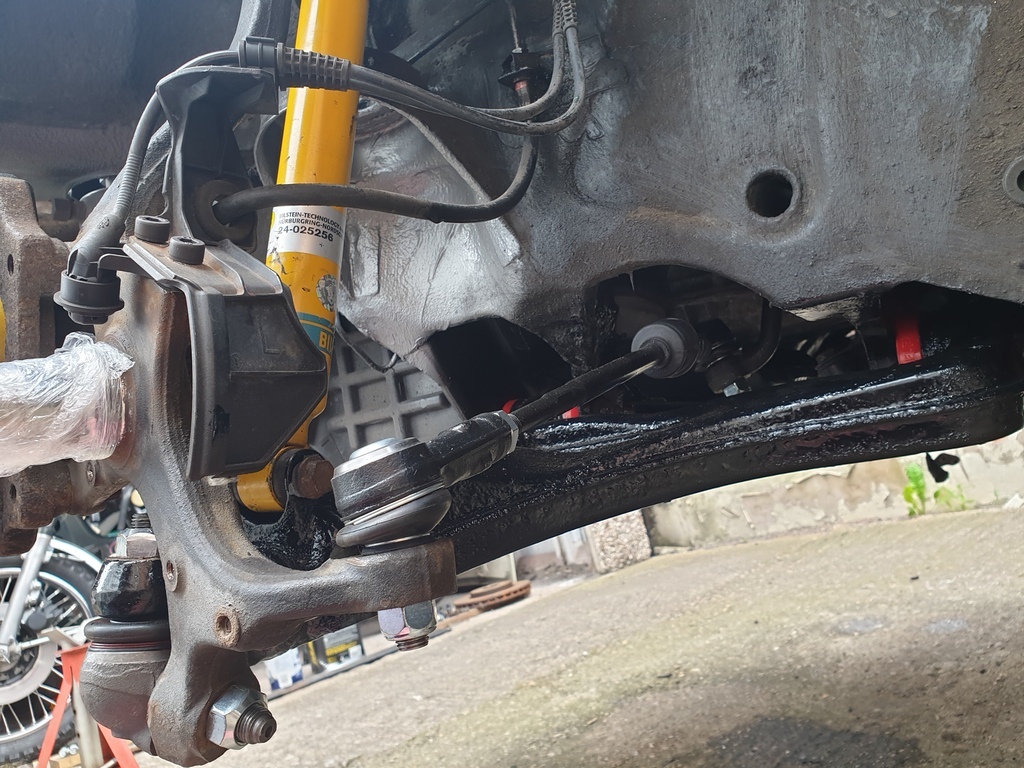 The caliper end of the hose seemed to go through this a bit easier, but since the hoses thread straight into the caliper with no banjo, the other end has to be undone first, so there was brake fluid going everywhere and thanks to the previous owner dousing everything in underseal, the hoses were almost stuck in place 😂 Got there in the end though, just need to bleed the system and refill. So I really can't put the bodywork off any longer now 😂 |
| |
|
|
|
|


 ran out of light though so will fetch the mount out another day. While I was under the car I also noticed a lot of oil, some of it might be from the cam covers but I think there might be some leaking from the sump seal as well, so shall have to clean it all up and see if it leaks again.


