adam73bgt
Club Retro Rides Member
Posts: 4,872
Club RR Member Number: 58
|
|
Nov 16, 2022 11:23:25 GMT
|
Picking bits out of your hair, knuckles, thighs, neck and many other places. Still the best thing to doin preventative maintenance. Good luck, been wet here for 5 days and more expected. Yes, short term pain for long term gain I hope! Certainly glad to have caught it when I have Yeah the rain doesn't help, but at least it doesn't rain under the car 😅 a smart thing to do would be to roll the axle into the garage so I could at least do that in the dry.. not sure why that's only just occurred to me 🤔 |
| |
|
|
|
|
|
|
|
Nov 16, 2022 11:45:59 GMT
|
|
You have space in your garage?
|
| |
|
|
adam73bgt
Club Retro Rides Member
Posts: 4,872
Club RR Member Number: 58
|
|
Nov 16, 2022 12:03:30 GMT
|
|
Might have just enough room behind the MG that I keep tripping over
|
| |
|
|
adam73bgt
Club Retro Rides Member
Posts: 4,872
Club RR Member Number: 58
|
|
Nov 20, 2022 21:46:23 GMT
|
An update on the weekend's progress. My Friday afternoon/evening was spent wire brushing and scraping at the underside to reveal the extent of the rust. I was fully kitted up with goggles and a mask and yet was still finding bits of dirt getting into my eyes and everything, not a pleasant job. This scene from the Simpsons describes it fairly accurately Eventually I managed to reveal the extent of most of the rust spots, it seems as though the underseal has cracked in a few places and the moisture and rust has just creeped underneath. Thankfully no holes but I started poking a bit near to the end of the Drivers side sill and a fair bit of the inner sill came away on the large piece of underseal I peeled off... 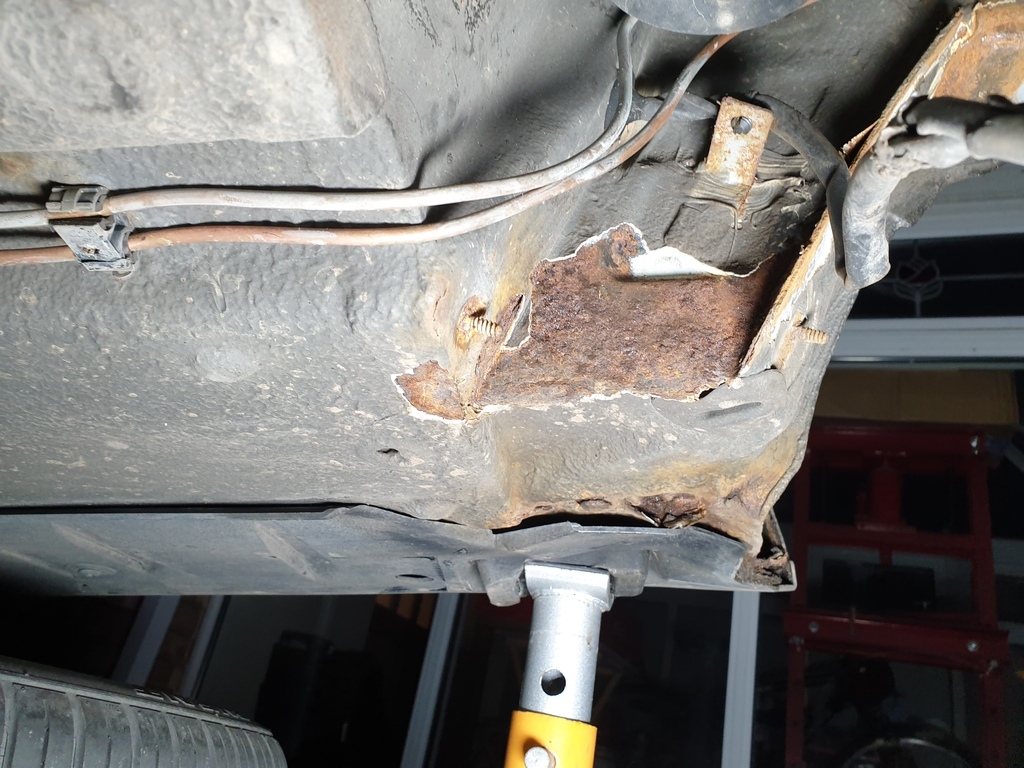 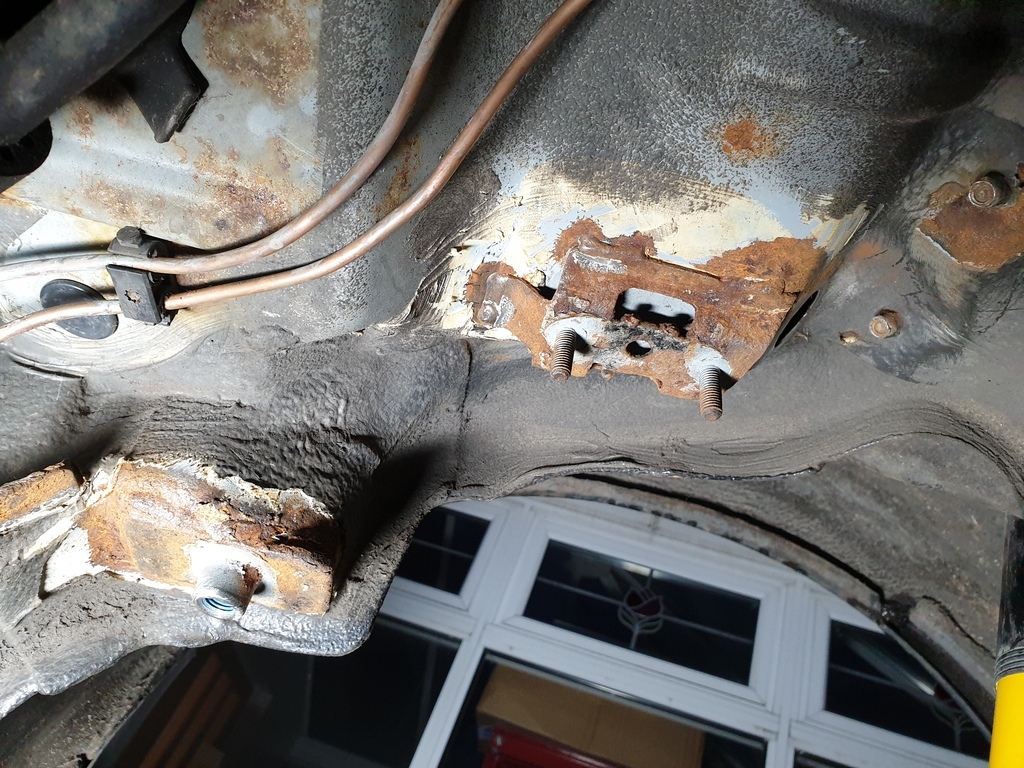 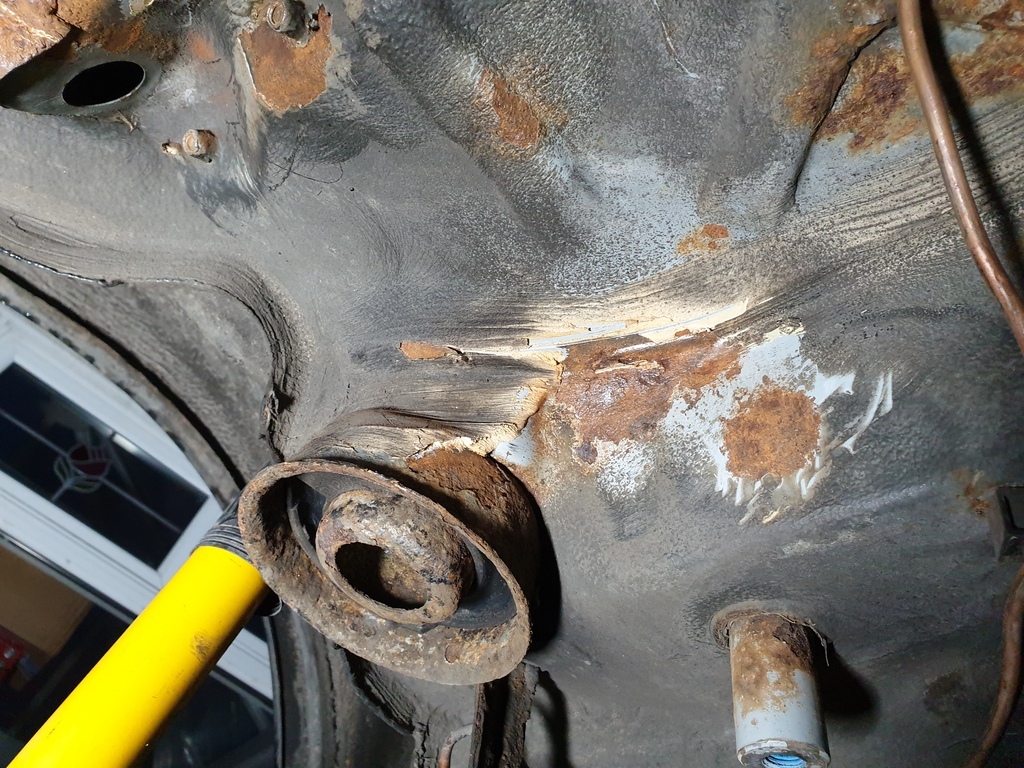 For the sake of my own sanity, and wallet, I've ignored the sill for now, and concentrated on the surface rust bits that I can only get to while the subframe is off. Anything lower down can be sorted later on. Yesterday, I decided I didn't want to crawl under the car and continue scraping at rust and underseal so started on the subframe itself. 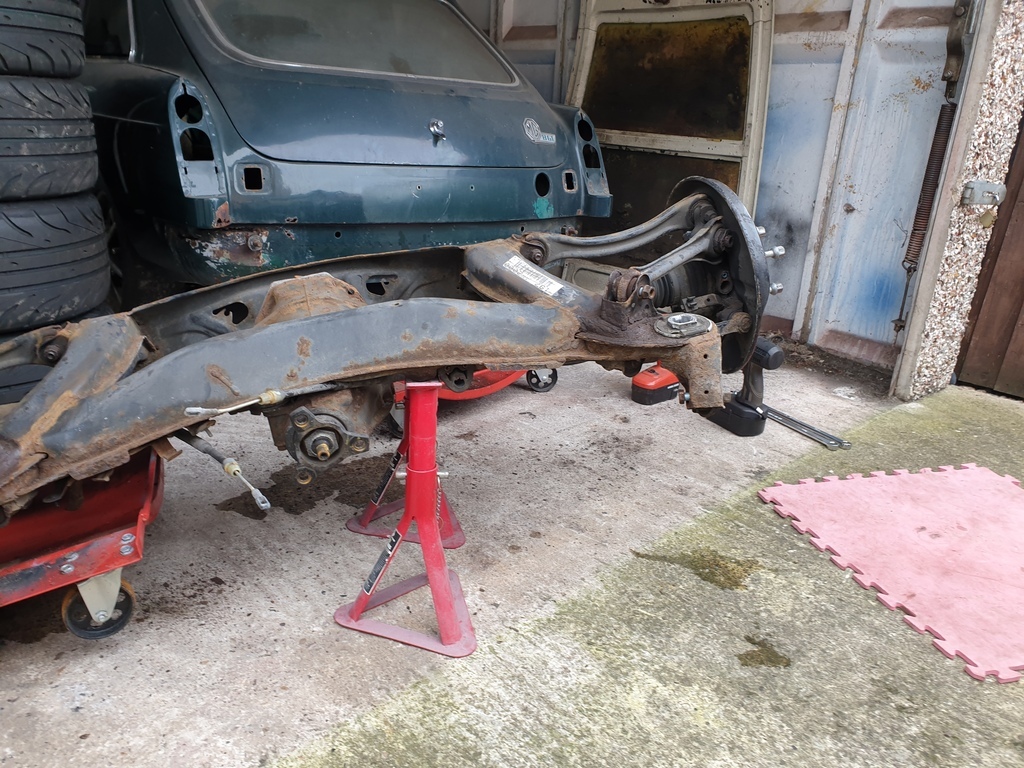 As you can see I made a little space in the front of the garage behind the MG to work on it. My plan was to remove all the suspension arms and the subframe bushes. My original plan of cutting the subframe bushes out was quickly foiled so I have a puller kit on order for those, but was still able to remove all the arms. Now, there's a bit of a long running "meme" of how mechanics hate engineers when it comes to certain design choices. I don't like to jump on the bandwagon of these being a former engineer in the automotive field myself, but I can't really understand why Chrysler/Mercedes decided to use an internal 12 point drive head on most of the suspension bolts. Not only did I have to buy some sockets to fit these, but a shallow, multi-point drive head coupled with years of corrosion and road dirt means they're a recipe for stripping  Plus the one above is just pointed at the back of the brake dirt shield. I wasn't about to go and pull the drive flange to take the dirt shield off for better access! For the crustier ones like above, I actually just used some molegrips to hold the bolt head while I undid the nut and found this to be a pretty successful method. I did have a bit of trouble with the toe link on the passenger side as I foolishly broke the taper for the ball joint end before the nut was off which then just spun the ball joint, but I got there in the end.  There wasn't actually any play in the bushes, they were all rock solid, but glad to be rid. Handily the rear arm kit I bought comes with all new hardware as well. To finish off one side of the subframe I wire brushed the worst bits of rust and chucked some Hydrate 80 on  And as I decanted out way too much of it, I chucked some on the underside of the car as well.  As you can see there are a couple of bits I need to dig out the underseal a bit more before coating. Then moving forward to today, I was going to paint half the subframe before stripping the other side, before realising that was a silly idea and removing all the arms from the other side. With the learning from yesterday, this went much more smoothly 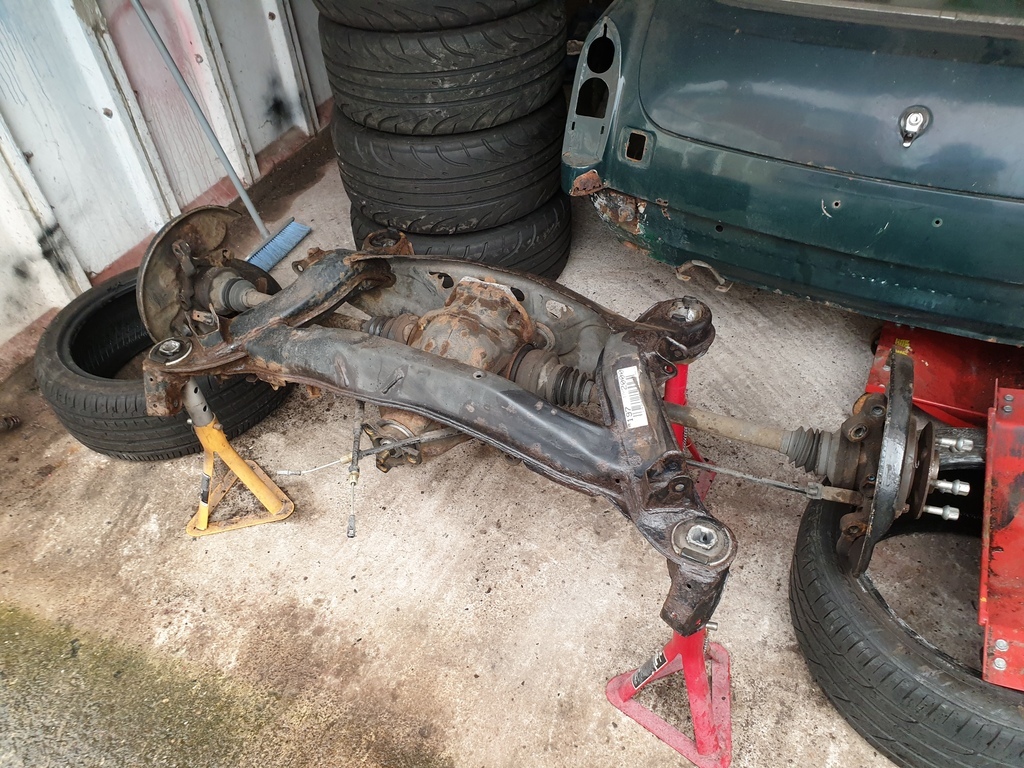 So all the arms are off, I've wire brushed the drivers side of the frame, just need to hydrate 80 it. Then I'll give it a little prep for paint, and once painted I can start putting the new arms on. The bottom arms are the only ones being reused, I'm currently soaking those in some deox c on the bush end to try and help when it comes to pressing out the old bushes, then they can be painted up as well. Hopefully my ARB and bushes don't take too long to turn up as I need to get them on first once the painting phase is out of the way, plus I've still got the front end to do once I'm done messing around with all of this  |
| |
|
|
adam73bgt
Club Retro Rides Member
Posts: 4,872
Club RR Member Number: 58
|
|
|
|
Bit light on pics but progress has been a bit slowed by the postal strikes this last week or so along with a mistake on my part. Firstly the subframe bush tool I bought turned out to not be a subframe bush tool. Going back to the ad, it was very poorly written and the case when it arrived turned out to be labelled as a rear wheel bearing tool instead... I've hung onto it as with some other bits I think I can make it work on the subframe bushes, but those bits are stuck in the post! My anti roll bar arrived from Germany after I did a bit of chasing up. I thought that because it was being delivered by DHL that it wouldn't be affected by the strikes, I later realised that DHL were doing the delivery into the UK, after which Parcelforce were taking over. They've sent me a letter (not that I've received it) to tell me what I need to pay for customs charges, I decided it was quicker for me to go to the depot after calling ahead and collect it rather than waiting for the letter, then them to deliver. Anyway, quickly chucked it in place loosely on the car 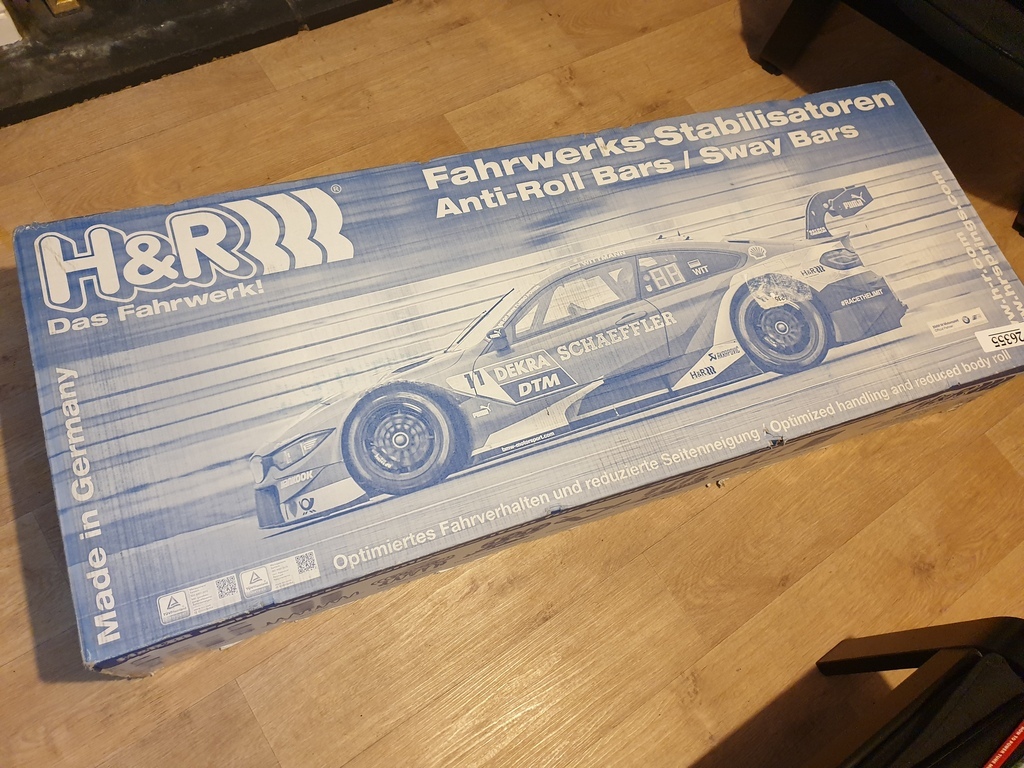 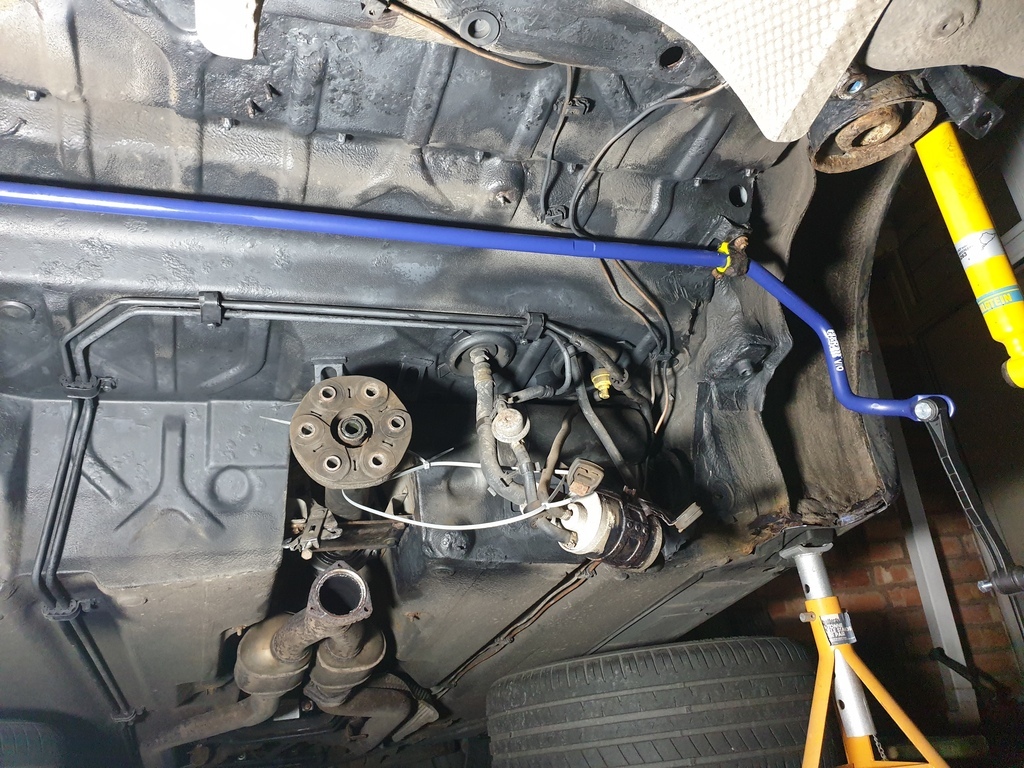 Still waiting for new nuts to bolt it down securely, also swapped on polybushes to replace the rubber ones it came with. You can also see that I've been going around with the satin black paint over the hydrate 80, I've done this under the car and also on the rear subframe so I'm about ready to start hanging the suspension arms back on it loosely at least for now. Hopefully the post will get back to normal this week 🤞🏾 |
| |
Last Edit: Dec 5, 2022 14:26:48 GMT by adam73bgt
|
|
|
|
|
Dec 29, 2022 17:04:06 GMT
|
|
A gentle nudge, don't want you slipping too far down the running order...
|
| |
|
|
adam73bgt
Club Retro Rides Member
Posts: 4,872
Club RR Member Number: 58
|
|
Dec 29, 2022 18:45:16 GMT
|
A gentle nudge, don't want you slipping too far down the running order... Haha a well timed nudge as I actually made some progress on it today. I had let things slip a bit in the lead up to christmas, tried a few evenings on it but even wrapped up, working in -4 degrees just felt stupid So where did I get to? I'd been waiting for some threaded bar and associated hardware to try and press out the subframe mounting bushes. Long story short, this didn't work. It did however show me something curious. When I first noticed the play in the subframe mountings, it was the passenger side front bush that I noticed the issue with. Before I tried the threaded bar pressing out technique, I had drilled some holes in the drivers side bush as a plan to remove the metal bit suspended by rubber in the centre, and hack the bush out that way. So when it came time to use the threaded bar, I started with the drivers side. I set it all up, kept tightening for a while, took it all off to see what progress I was making, but the bush hadn't moved at all. However I did see this 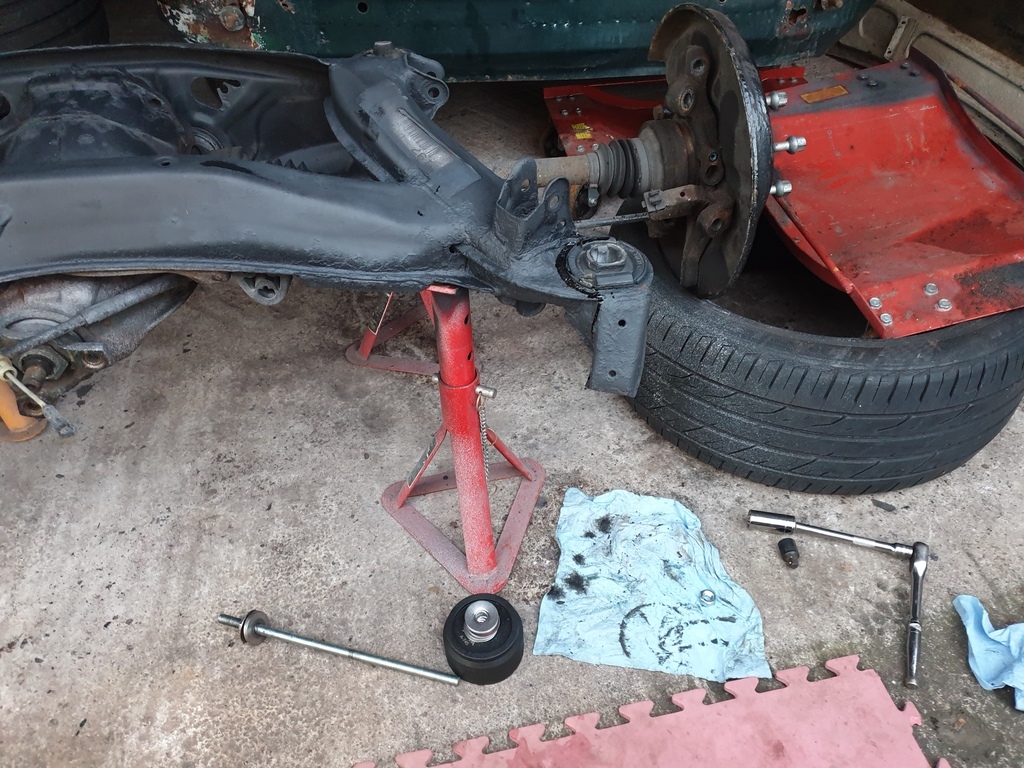 There was oil running out of the bush. I didn't know these were meant to be oil filled, and the weirdest bit was when I was messing about with drilling the drivers side bush, no oil came out at all! They're all getting replaced so it's a bit academic, but it had me confused Seeing the bar wasn't working, I resorted to the messy business of drilling, burning, cutting the things out 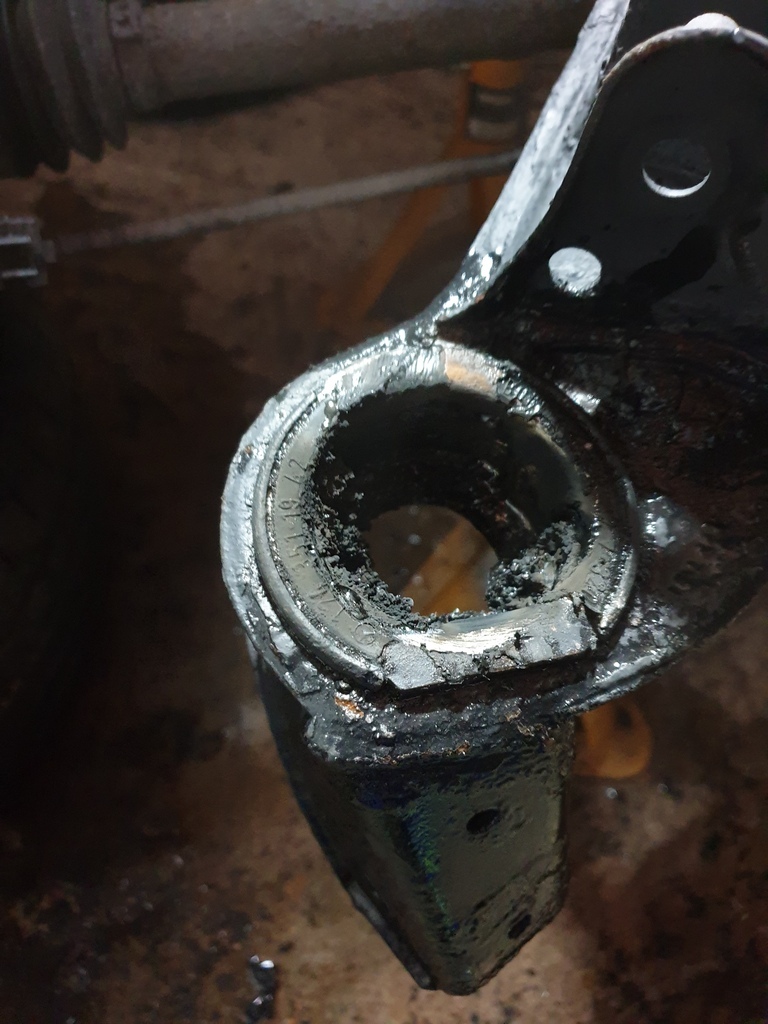 But I was losing a bit of mojo and not making much progress. Now however, I have new hacksaw blades, a good chisel, hammer and pry bar and I actually managed to get the two front bushes out today 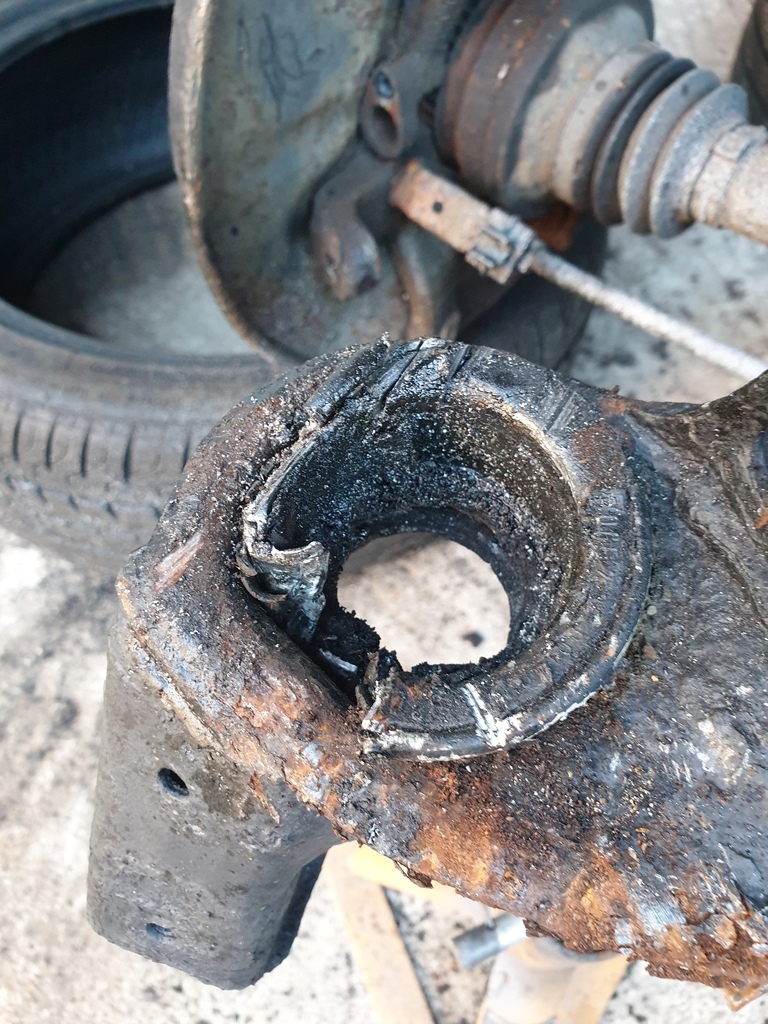 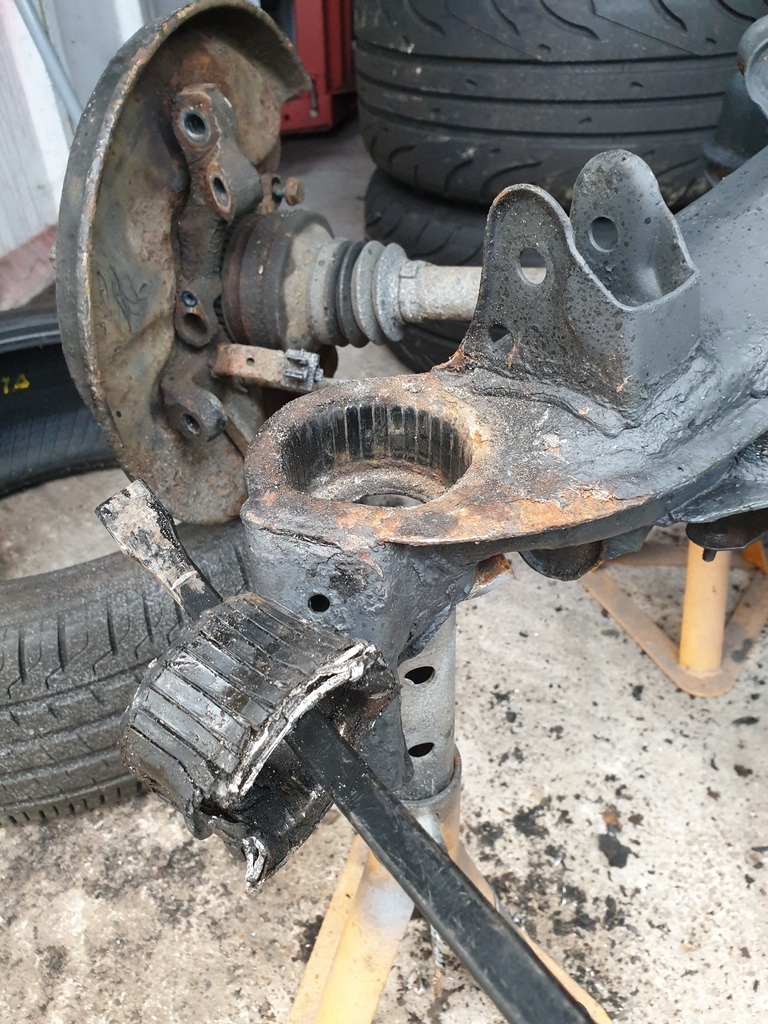 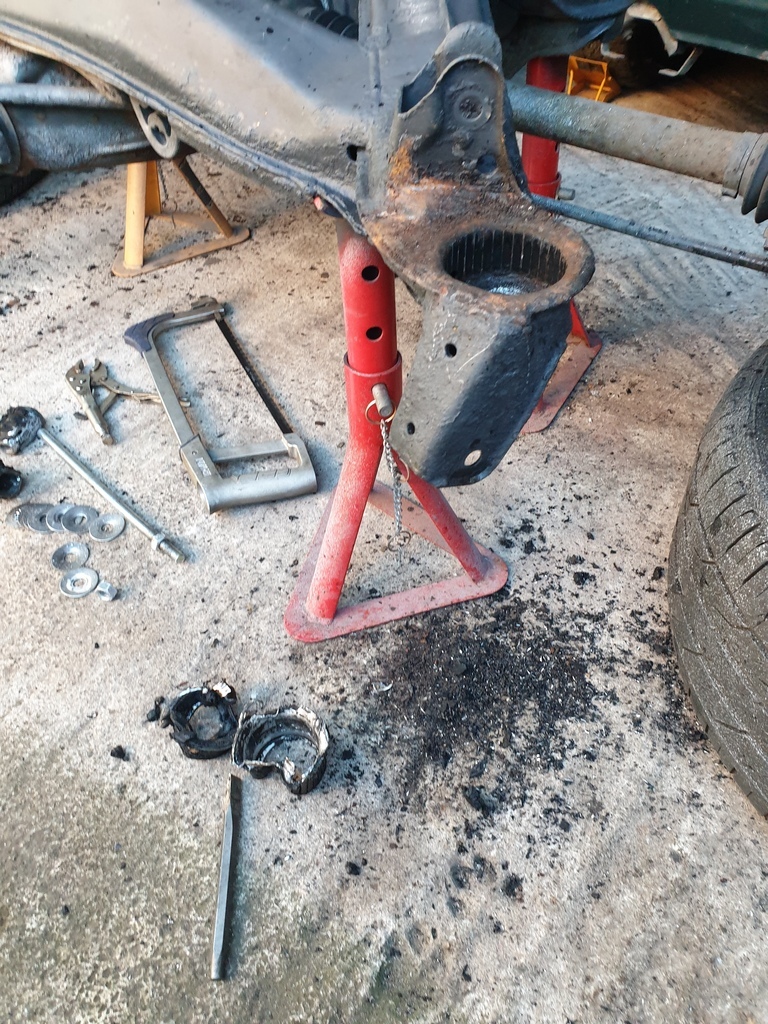 As you can see they didn't come quietly A quick test fit of the new bush showed that fits in perfectly though 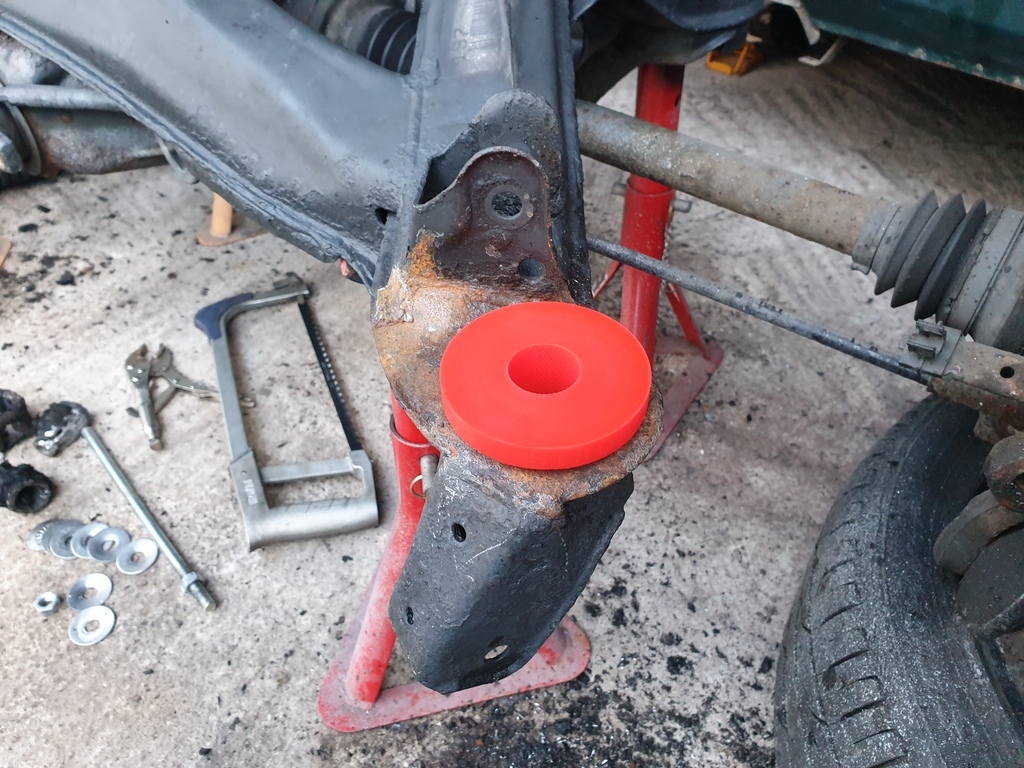 So gave both holes a quick wire brush and a good couple of coats of satin black again. Now I'm focused on the rear bushes which are installed from the other way so are a bit of a pain. More drilling, cutting, prying should hopefully see those out though. I've also been trying to get the bushes out of the rear lower control arms but they've damn near fused themselves to the arm, so those need a fair bit more work with the press and likely some heat to persuade them out. I had to use some holiday at work so I'm not back until the 9th, and while the bus is convenient, I'm very much suffering from withdrawal symptoms of not having my own car (although I do have the very generous loan of my gf's 207 at the moment but it's not the same haha) so I'm determined to get the damn thing back together! |
| |
|
|
|
|
|
Dec 29, 2022 22:54:51 GMT
|
|
Good work. The car dismantlers next door to where I work use a BBQ to burn out bushes. I thought I was in for a Ukranian burger when they wheeled it out, but then they filled it with wishbones...
|
| |
|
|
adam73bgt
Club Retro Rides Member
Posts: 4,872
Club RR Member Number: 58
|
|
Dec 31, 2022 15:03:36 GMT
|
Left the remaining subframe bushes for the moment as it's looking like I ideally need to tackle them from the other side, but that means the diff would likely leak everywhere out of it's breather, but then I was also going to change the diff oil while I've got good access to it, so that requires a bit of thought. I have been tackling the lower control arms though, as mentioned in my last post, the bushes and arms had corrosion on them to the point it was a bit hard to see where the bush started and the arm ended It soon became clear that removing the bush intact wasn't going to happen, but after much faff I've got them out. The key seemed to be using the press to push the crush tube out of the rubber of the bush, then using my trusty hacksaw to carefully cut through the bush outer and hammer/chisel the remains out 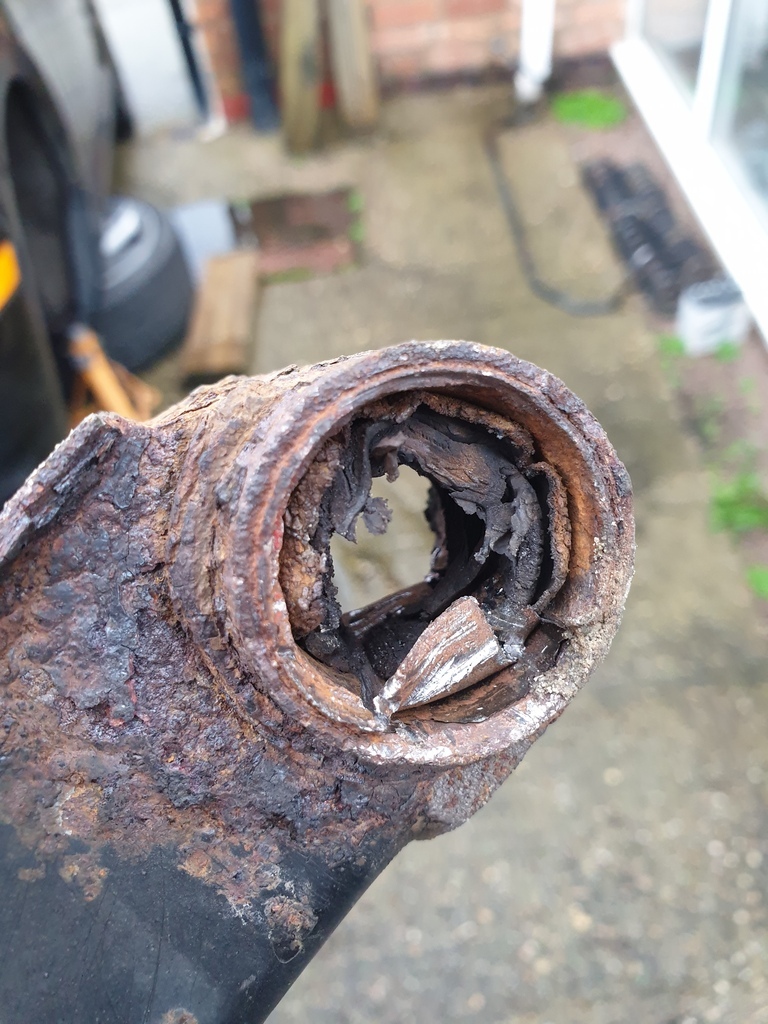 The first one put up a fight mostly because I didn't quite cut through the bush enough, the second one was much smoother 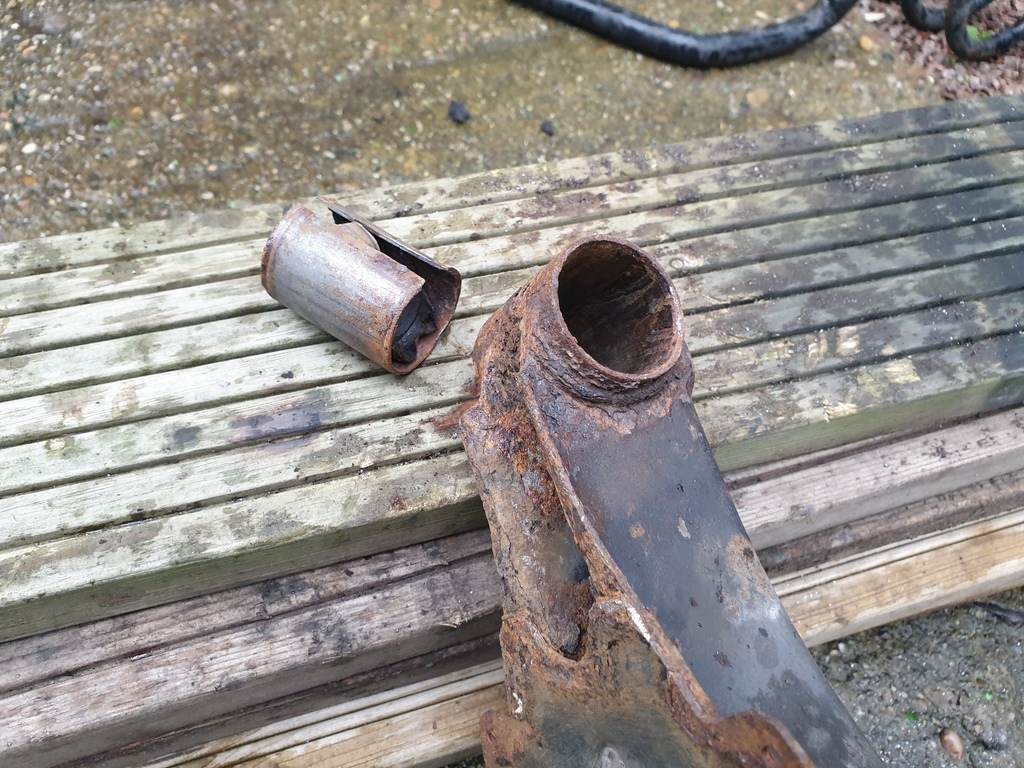 I've given both arms a quick going over with a wire brush and after a rinse, they're having a little soak in some Deox C to get rid of some of the rust. Ideally I'd blast them but it's not really worth the time and effort at the moment, they're solid and useable. They'll get a few coats of black paint, then I can install the polybushes ready for reinstallation. I would have got more done but I picked up an unfortunate extra Christmas present from seeing family this week  Second bout of Covid for me this year, so hopefully that means I'll get over it more quickly this time?... I'll aim to keep the progress up anyway |
| |
|
|
|
|
|
Dec 31, 2022 19:28:27 GMT
|
|
Feel better soon
|
| |
|
|
|
|
adam73bgt
Club Retro Rides Member
Posts: 4,872
Club RR Member Number: 58
|
|
|
|
Thanks! Wasn't too bad in the end, more of an inconvenience than anything, there was one day where I spent about half an hour in the garage before saying f this and headed back to the sofa Feels like it's taking ages to get anywhere with this but tarted up the lower arms and they've got their poly bushes ready to go now 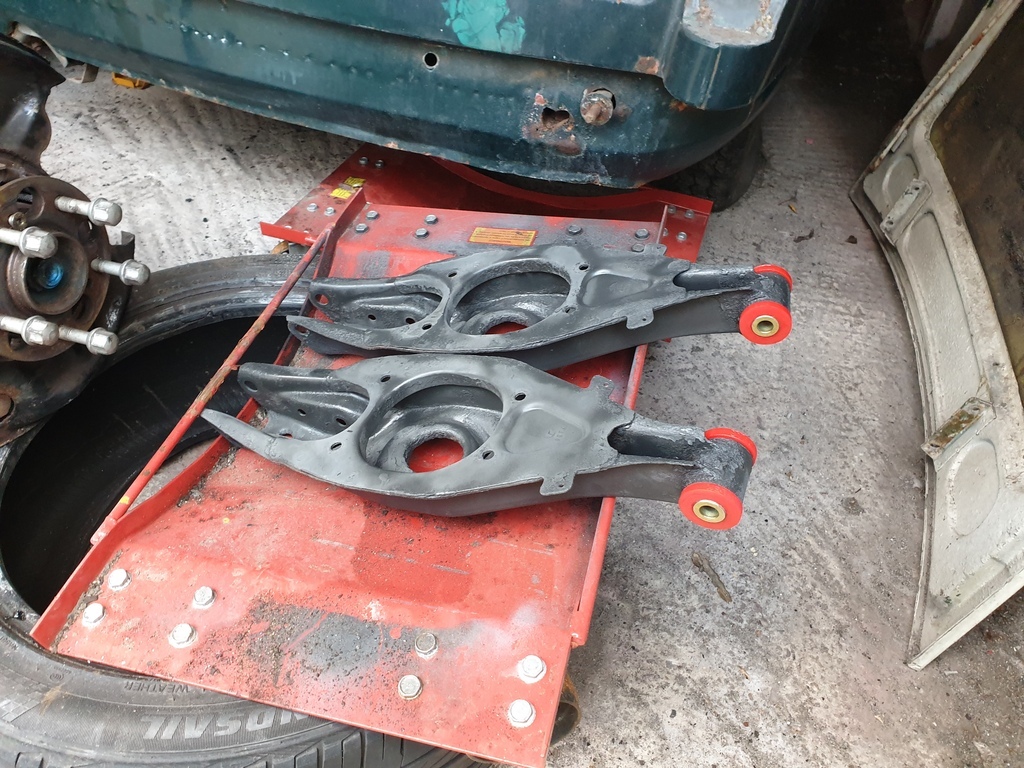 I've started putting the new arms on as well to make me feel better about the lack of progress 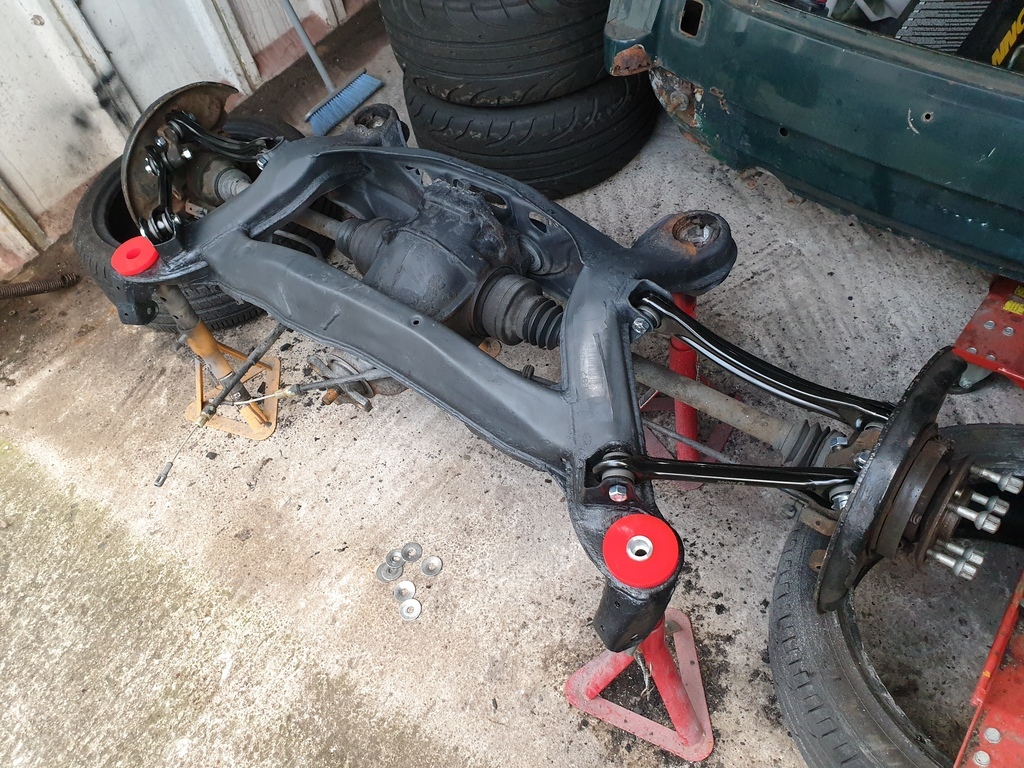 And finally tonight got one of the rear rear subframe bushes out, took a fair bit of heat, chisel and pry bar action 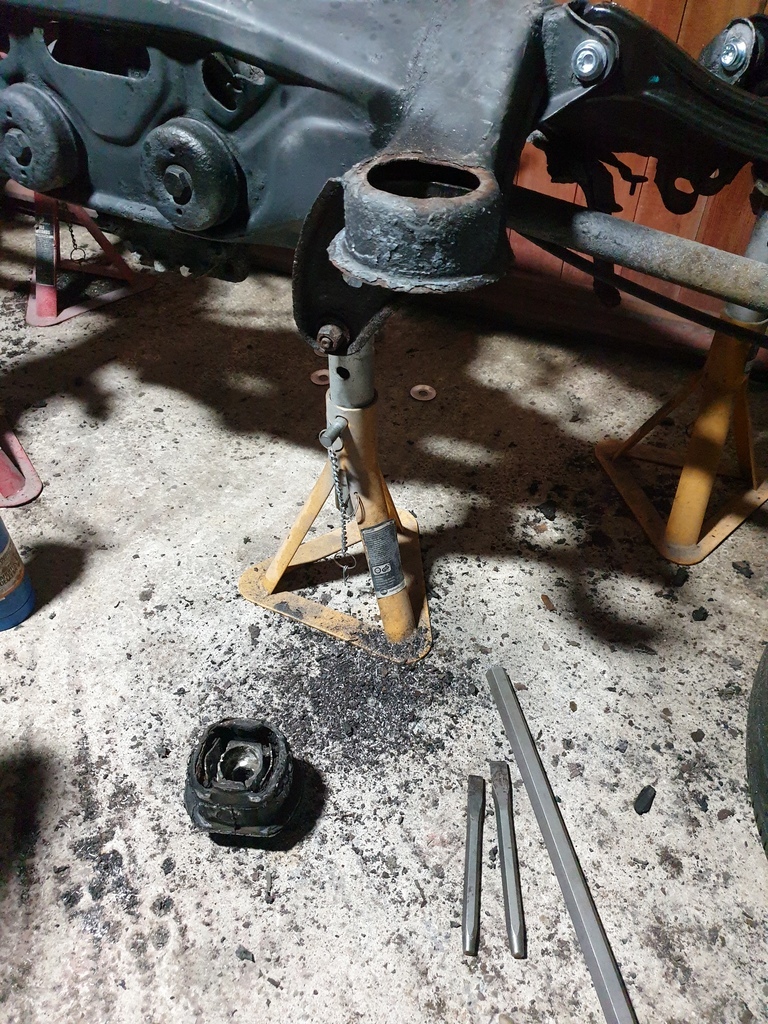 Hopefully the other will be a bit easier now I've got the method in mind, might even be able to hang the subframe back on the car before long! |
| |
|
|
|
|
|
|
|
This is ace dude! Having been through all this subframe/arm/bush funtimes on my S124, I both feel your pain and admire your perseverance. I'm about to do it all over again (on my W201) - please send help  |
| |
|
|
adam73bgt
Club Retro Rides Member
Posts: 4,872
Club RR Member Number: 58
|
|
|
|
Thank you! It feels a bit silly that it's taken so long, I bought a part worn winter tyre locally back in November and at the rate I'm going, I'll have no need for it once the car's back on the road I better have the sharpest driving Crossfire in the UK once I'm done haha At least I proved myself right from yesterday, having persuaded the 3rd subframe bush out and perfected the technique, the last bush only took about half an hour to get out, the key is heat 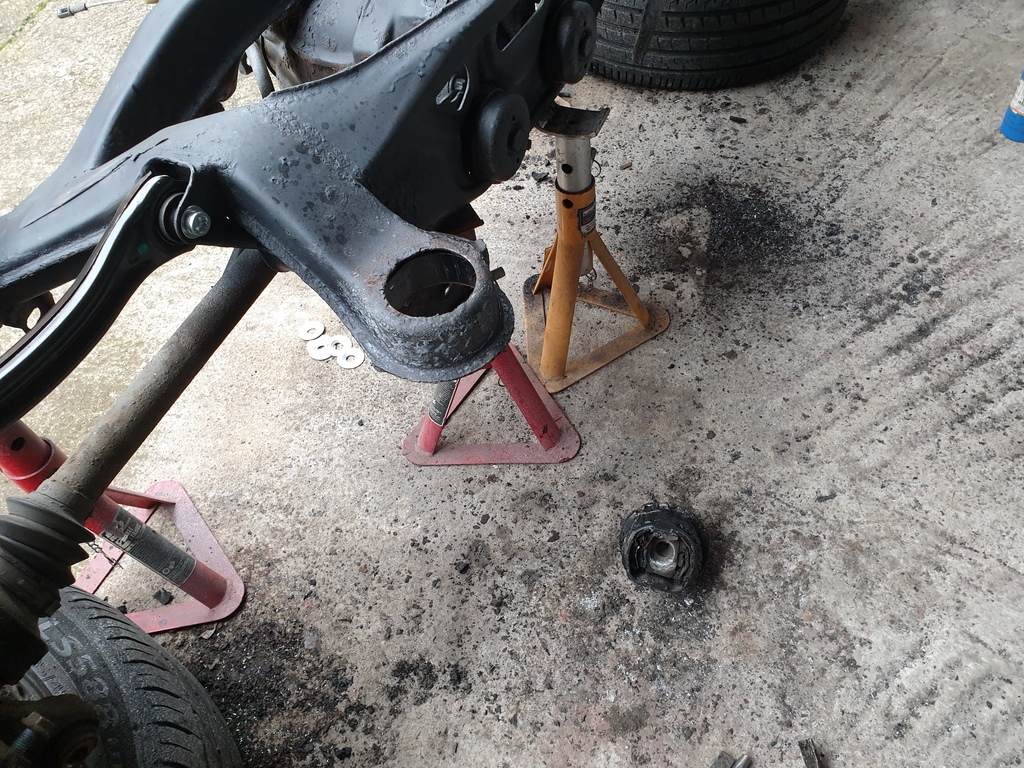 Won't look like much in photos but made some good progress today, was partially distracted by clearing out the scuttle drains on my gf's 207, but after getting that subframe bush out, I gave any effected areas a quick go over with the wire brush, then some brake cleaner and a couple coats of paint. My current paint of choice is some random Volvo dark grey I had as I ran out of Satin black haha By the end of the day, I've now got all the arms loosely in place 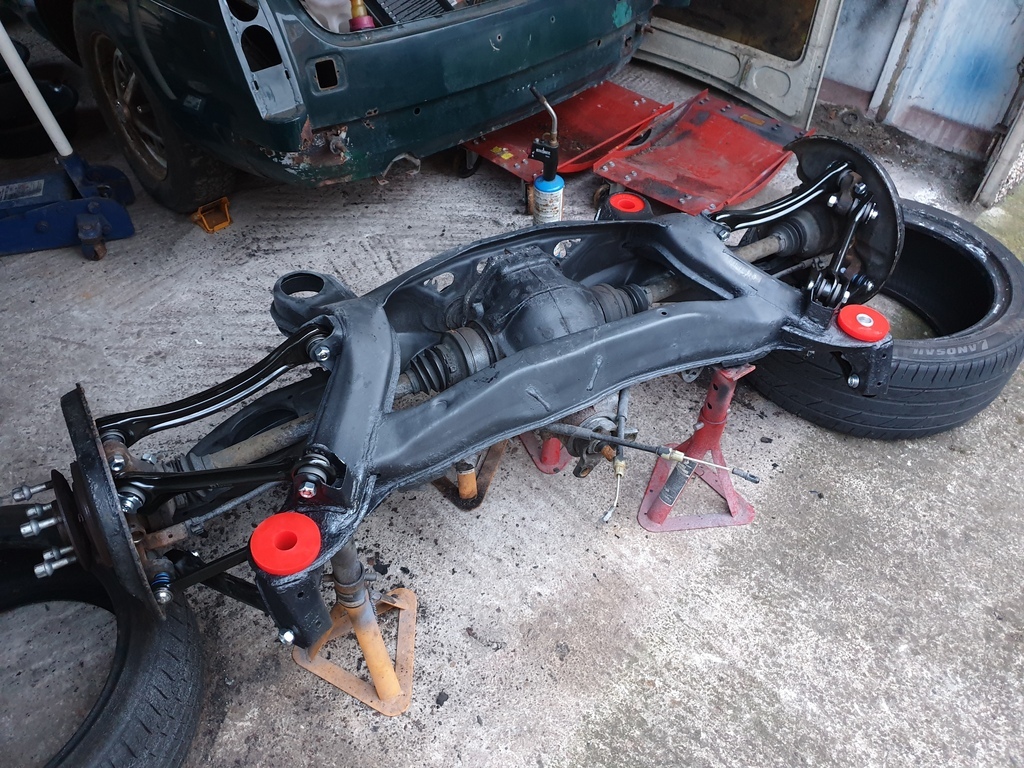 I really want to tighten them up with the subframe off the car as the access will be so much better, but I am also mindful of trying to have the arms at something representative of ride height as I torque it all up. I also put a bit more paint on the underside of the car as there was a bit of flash rust in places where I'd only put a thin covering previously, I've also gone over with a coat of stone chip to finish things off. 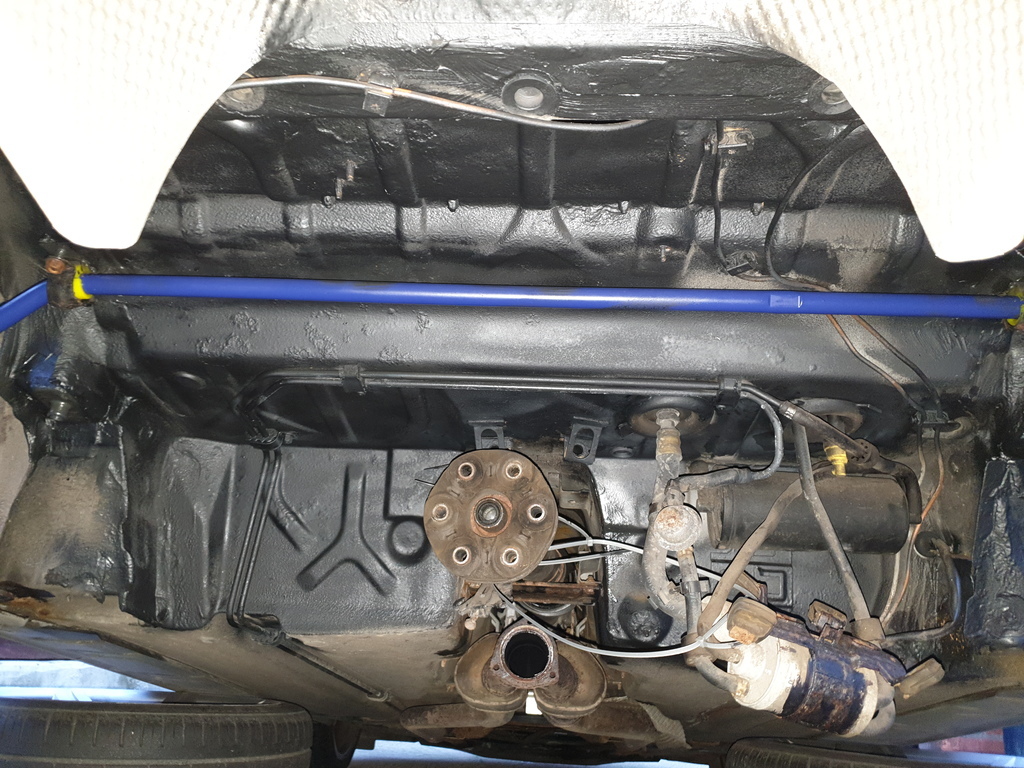 I just need to sand back some overspray on the spigots that the subframe locates on and I'm pretty much ready to put it back in place, which will be a huge step forward! |
| |
|
|
|
|
|
|
|
 That's what you get when all the arms are tight, not torqued just tight. Great for off road but otherwise useless I resolved the problem simply by driving the car for a mile with some weight in the boot. Then ran it up on ramps and tightened as many bolts as I could, another drive and jacked it up again and took the wheels off and torqued all the bolts to spec. Job done. BTW vital that you get the toe adjusted correctly, it makes a big difference when set right. |
| |
Last Edit: Jan 6, 2023 22:05:55 GMT by Woofwoof
Still learning...still spending...still breaking things!
|
|
adam73bgt
Club Retro Rides Member
Posts: 4,872
Club RR Member Number: 58
|
|
|
|
Haha was going to ask if that was with the arms all tightened at full droop Yeah one of my first stops will be getting the tracking done as obviously the toe will be all out now. It may also dictate if I have to upgrade to an adjustable upper arm in the future if I can't get enough adjustment out of the eccentric bolt! |
| |
|
|
|
|
|
|
|
|
You'll have no problems getting the rear to settle to the correct height, it just takes a bit of messing about with if you don't have access to four post lift.
I didn't need rear adjustable camber arms and the stock adjustable toe arm has enough adjustability even if it's a crappy design. Then again I set the car up for road use so didn't go too low, used No.3 spring pads alround with 30-35mm Eibach springs.
Ideally, I should have fitted aftermarket adjustable camber & toe arms, the Hardrace one's look the business but expensive so I made do.
|
| |
Still learning...still spending...still breaking things!
|
|
adam73bgt
Club Retro Rides Member
Posts: 4,872
Club RR Member Number: 58
|
|
|
|
Bit of a headscratcher, I've been trial fitting the crush tubes of the subframe bushes as I wanted to solve any issues now, rather than find issues when I'm delicately balancing the whole subframe on a jack under the car haha I did get some overspray on the mounts, so I've been sanding the paint back off these 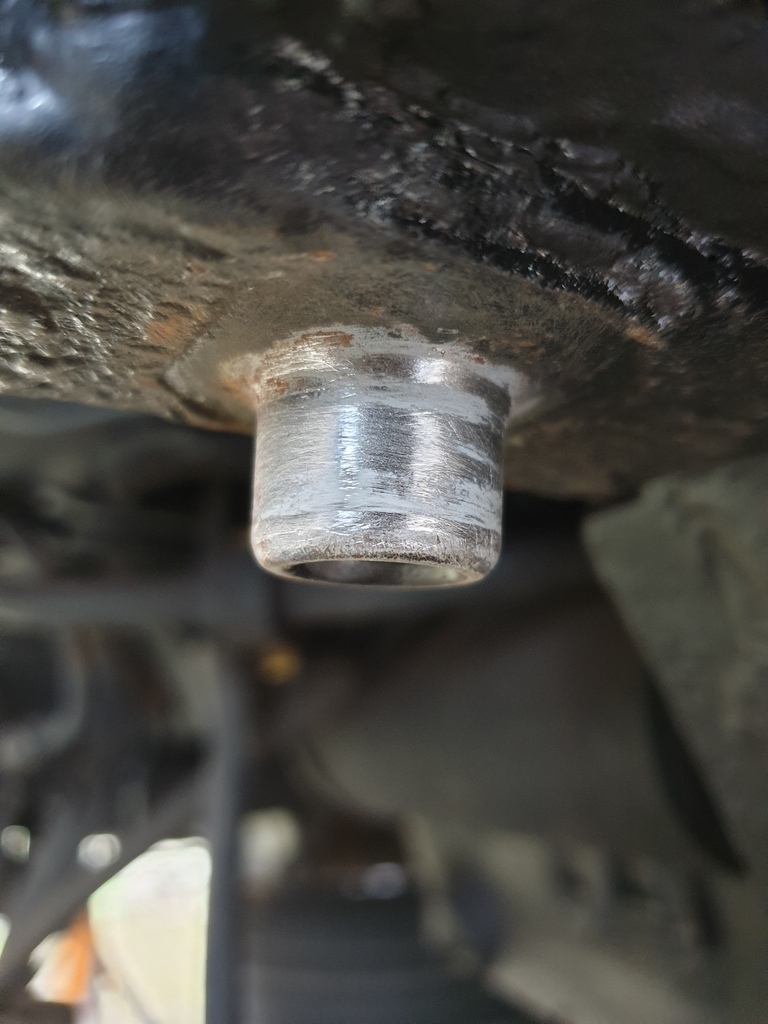 With the crush tube in place, there's a gap at the top 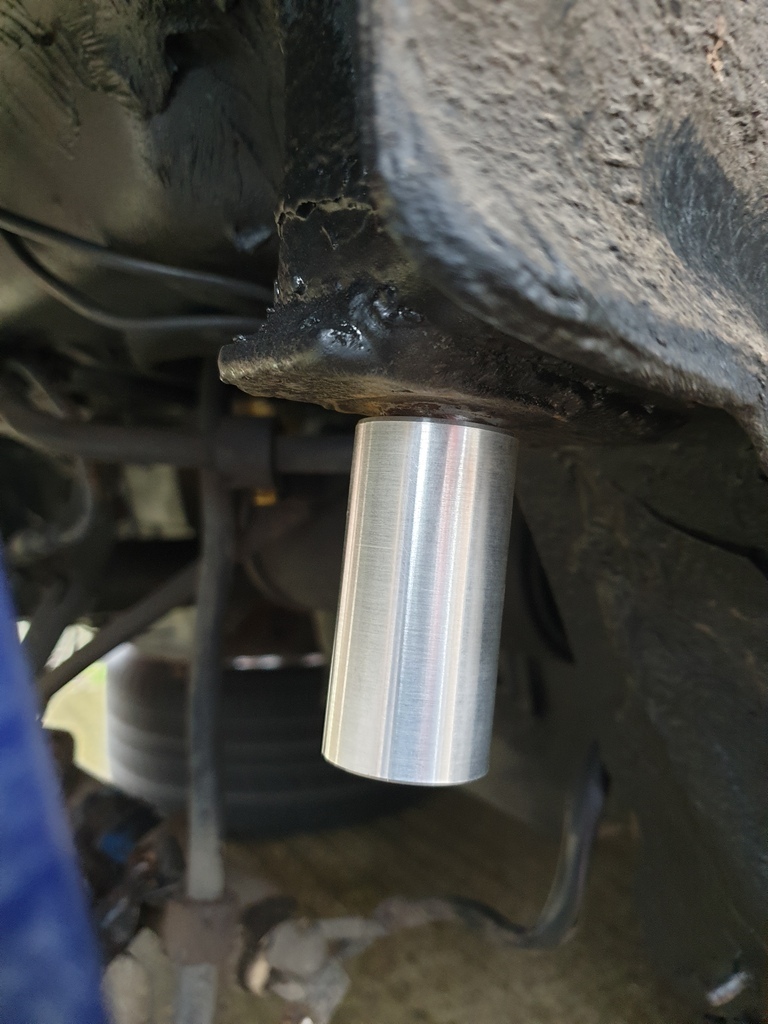 There is a radius on the inner diameter of the crush tube but it is much smaller than the radius on the mount on the car 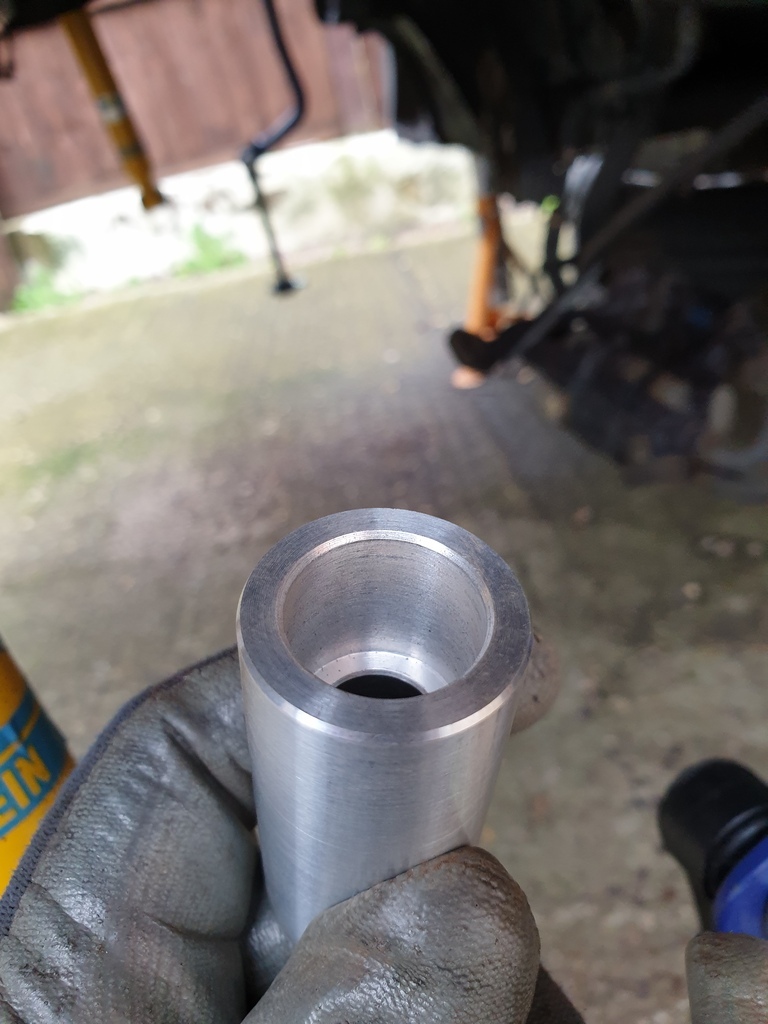 Now I suppose as I actually tighten up the bolt through the mount it would probably reduce that gap a bit, but it just didn't look quite right to me. I don't want to go modifying any parts if it causes an issue later though! |
| |
Last Edit: Jan 8, 2023 19:34:15 GMT by adam73bgt
|
|
|
|
|
|
|
|
How does it sit with the bush on the crush tube?
|
| |
Still learning...still spending...still breaking things!
|
|
adam73bgt
Club Retro Rides Member
Posts: 4,872
Club RR Member Number: 58
|
|
Jan 15, 2023 22:02:11 GMT
|
How does it sit with the bush on the crush tube? I finally got round to trying that today and I think it's all fine, it's a bit hard to judge as the subframe bush is in two parts and there's a thickness of the subframe material to account for but I'm pretty sure it'll be alright. Not many of photos of progress made today but it was mostly little things as I've not had a lot of time for car tinkering. Finished removing paint from the subframe mounting points, put some washers on some of the suspension arm joints, fitted up new brake hoses to the rear calipers. I did notice one thing while messing about under the car, which is that I had put the anti roll bar on the wrong way round, so corrected that and put some new nyloc nuts on, glad I noticed that before the subframe went on 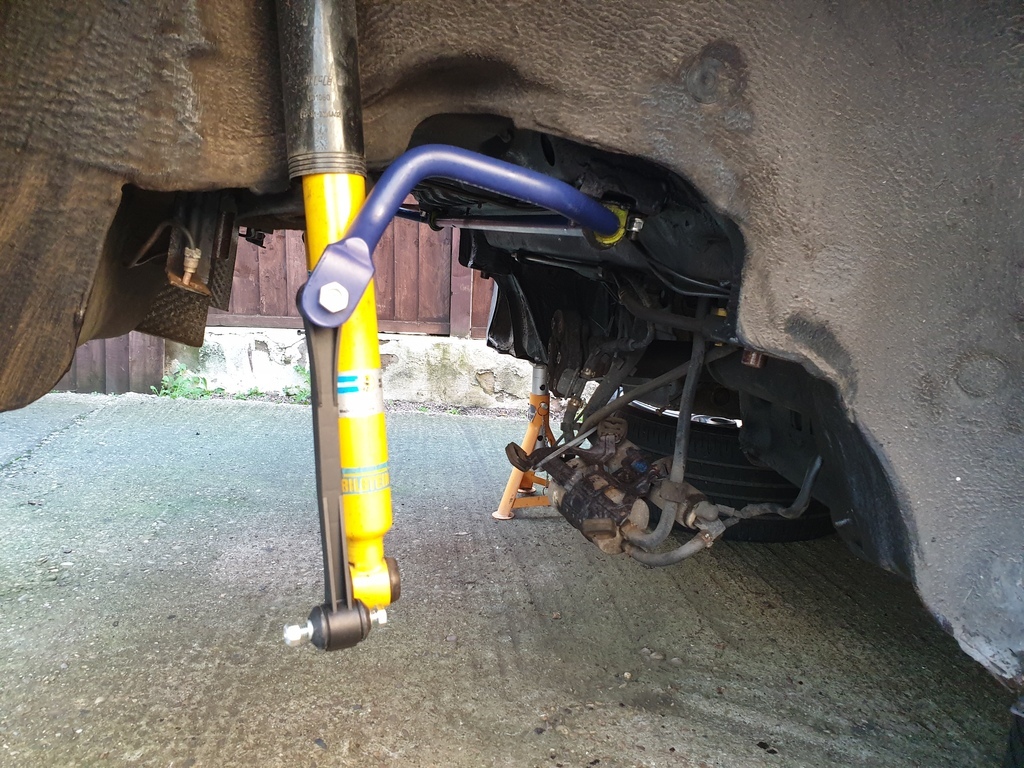 So it's pretty much ready for the subframe to go back on, just as we're about to get a freezing week again, joy of joys |
| |
|
|
|
|
|
Jan 15, 2023 22:39:30 GMT
|
|
I think it will fine once the opposite side is the same.
Good progress. It won't be long now.
|
| |
Still learning...still spending...still breaking things!
|
|
|
|


