adam73bgt
Club Retro Rides Member
Posts: 4,993
Club RR Member Number: 58
|
|
|
|
A new project, not that I really needed one as I've been hoping to get my MGB back on the road this year but can you have too many projects really?  I've done things all a bit backwards really, people usually go from bicycles, to a project moped or scooter, then big bikes, then cars. While 2022 marks 10 years since I got my MGB, my first proper project bicycle was in 2020, and now here is my first project motorbike! I only got into biking a few years ago, which is odd because my dad, grandad and uncle have always been into bikes, and since pretty much as long as I can remember, November has always seen a yearly pilgrimage to the Motorcycle show at the NEC. I think some reluctance from my mum meant that dad didn't really push for me to get a bike as soon as I was old enough, then being at uni in Coventry meant that I didn't need a bike, and if I did have one, it would no doubt be nicked in short order. Once I got over the age for the Direct Access scheme, I went and got my CBT, nipped around on a Honda CB125F for a bit 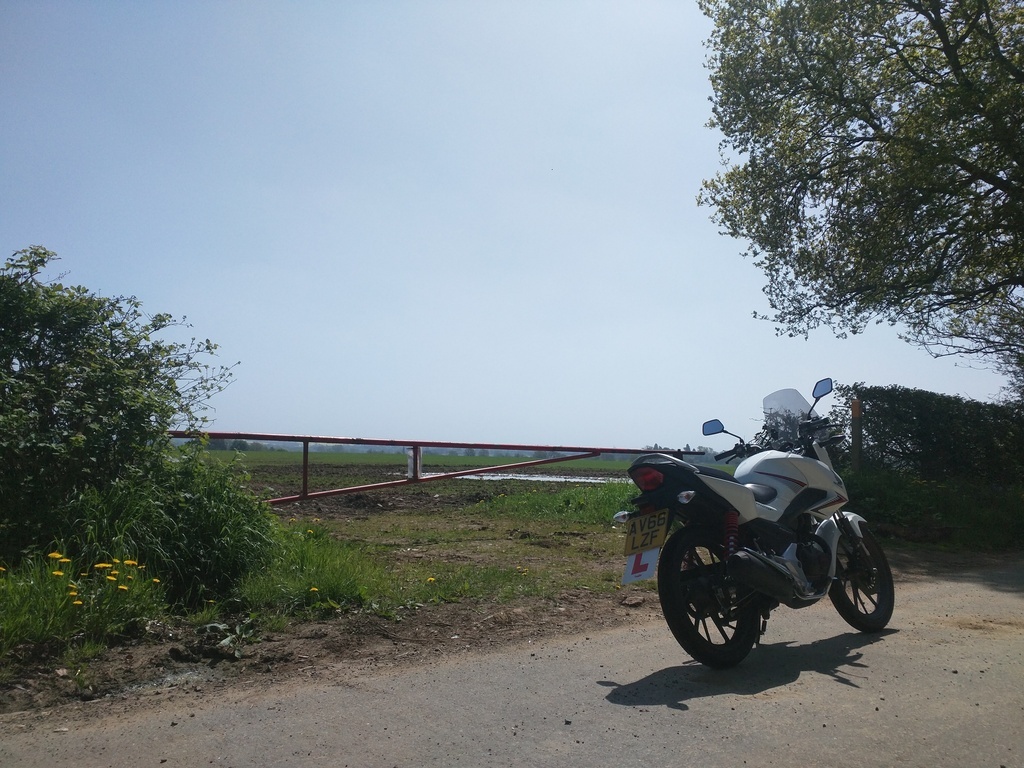 Did a weeks crash course and got my full bike licence on New Years Eve 2018, after which I bought my Suzuki GSX600F, a sensible starter big bike, with enough power to scare myself and enough practicality to go on a little biking holiday to Scotland with my dad in 2020 when there was a bit of respite from Lockdowns. 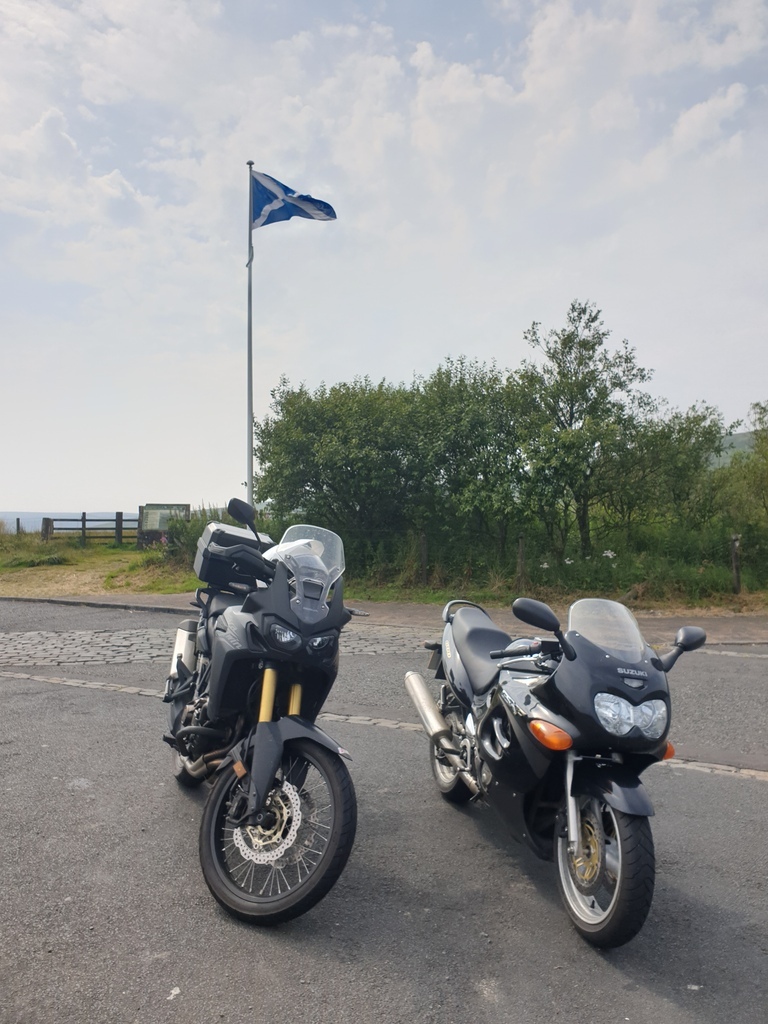 As nice as the Suzuki is, it's a bit too sensible and I was getting the itch for a change. Plus while it's a fairly simple bike by modern standards, I wanted something a bit classic that I could spanner on. As I was growing up, my grandad had a BSA Thunderbolt and a Honda 400/4, the sound of him starting the BSA is something that has stuck with me, to a child it sounded thunderous! Prices of BSAs and Hondas are a little more than I wanted to spend for a first project, so I found myself not looking for a specific model but for whatever I could get, pre 80 for not a lot of outlay. Which brings us to the 1979 Kawasaki KZ400 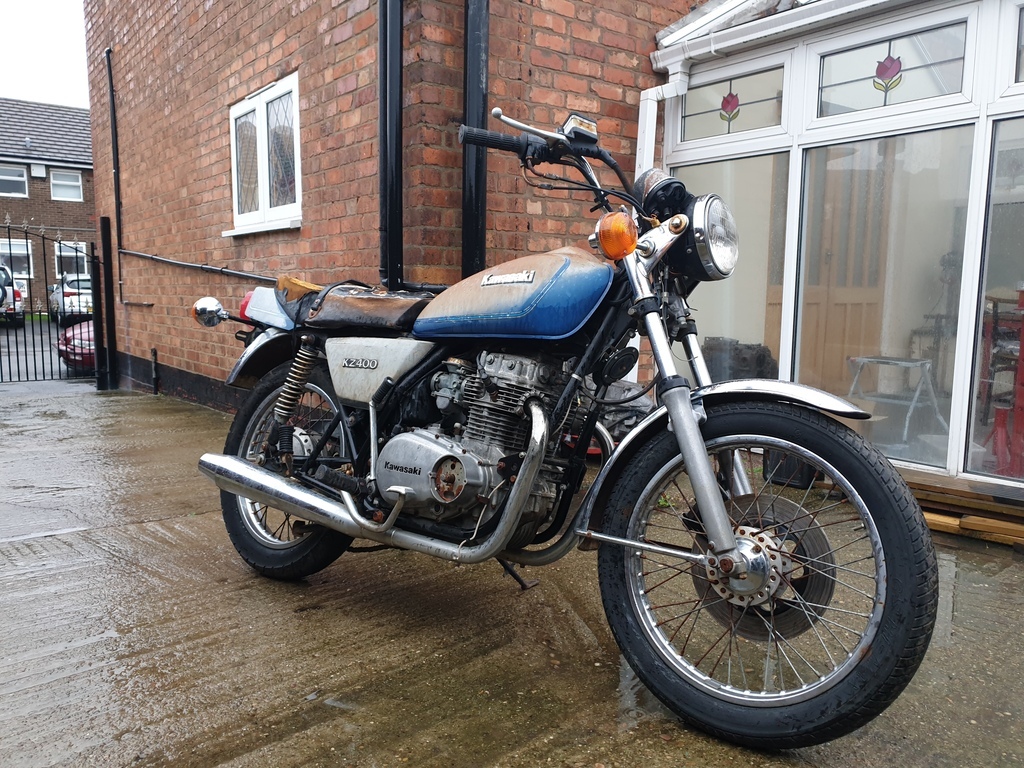 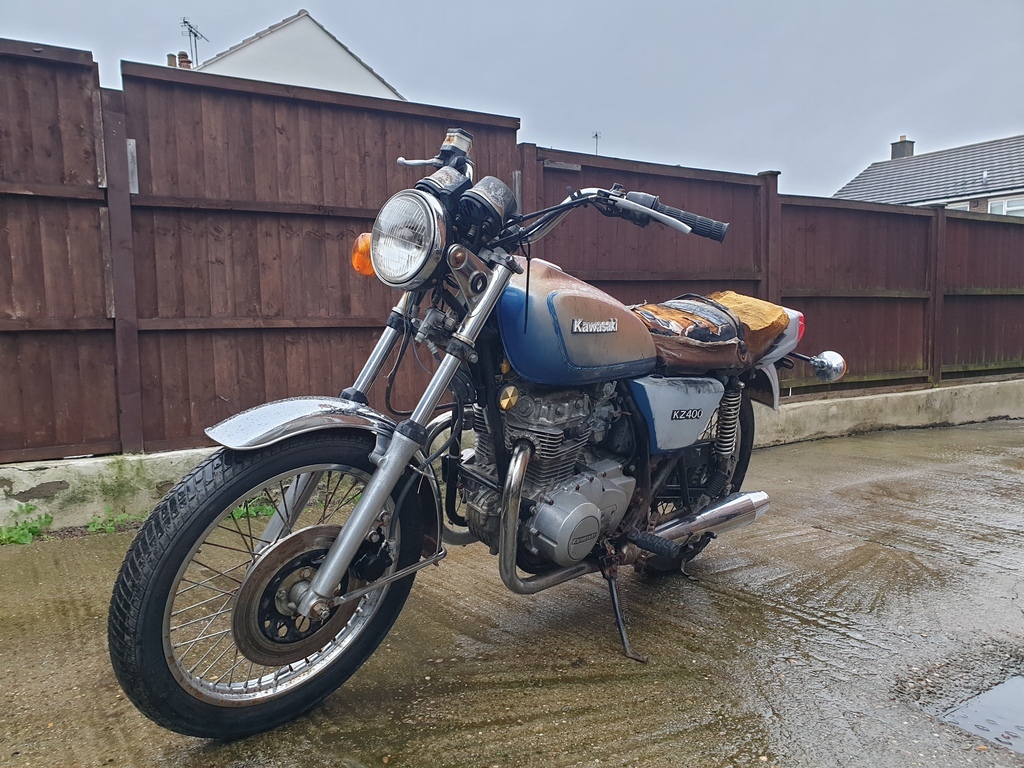 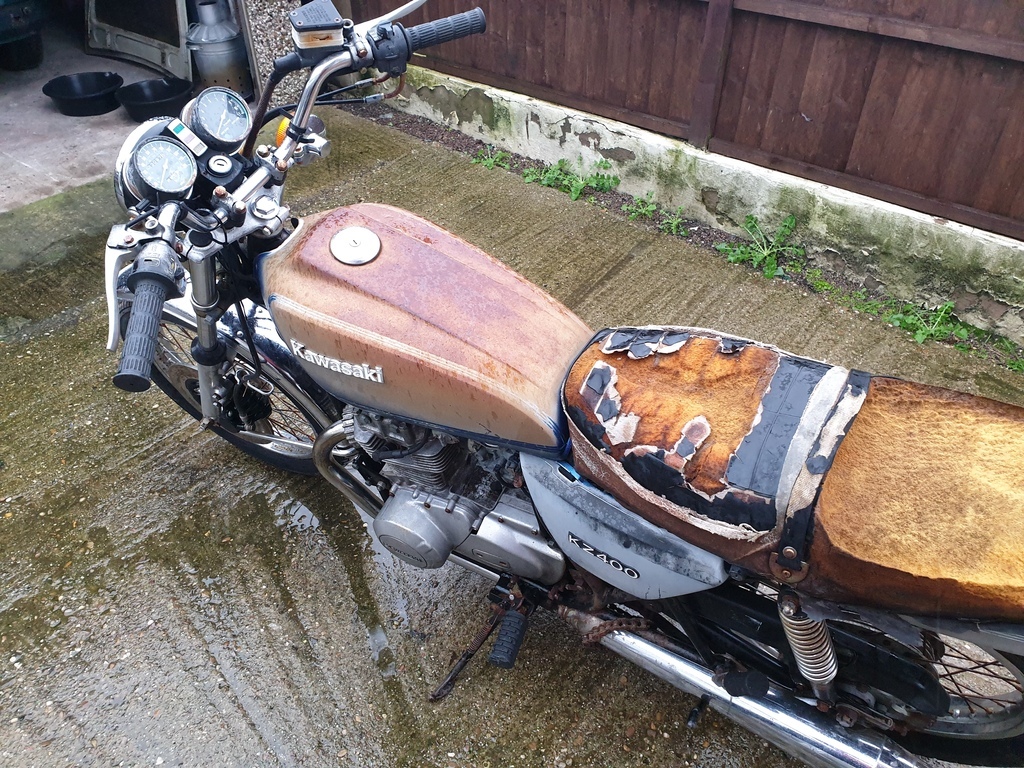 It was cheap, and fairly local, so before Christmas I nipped over to Mallory Park to have a look. I'm a novice but could see some bits were missing/damaged, went away and spent the evening researching parts availability and prices, called back the next day and bought it. It got delivered this morning which meant I've had a few weeks to do some reading about the model. Being a "K"Z400 means that it's an American import. Here, this bike would have just been the Z400. They were made from the mid-70s to the early 80s as a commuter bike pretty much. I think the engine is rated at about 35bhp, so no rocket ship but should make for a nice classic/retro that will keep up with traffic no issue. As a 1979, mine is a later model which had some changes to the badging, the bodywork and seat amongst other things. It does thankfully retain wire wheels for that classic look rather than the cast wheels which appeared a year or two later. 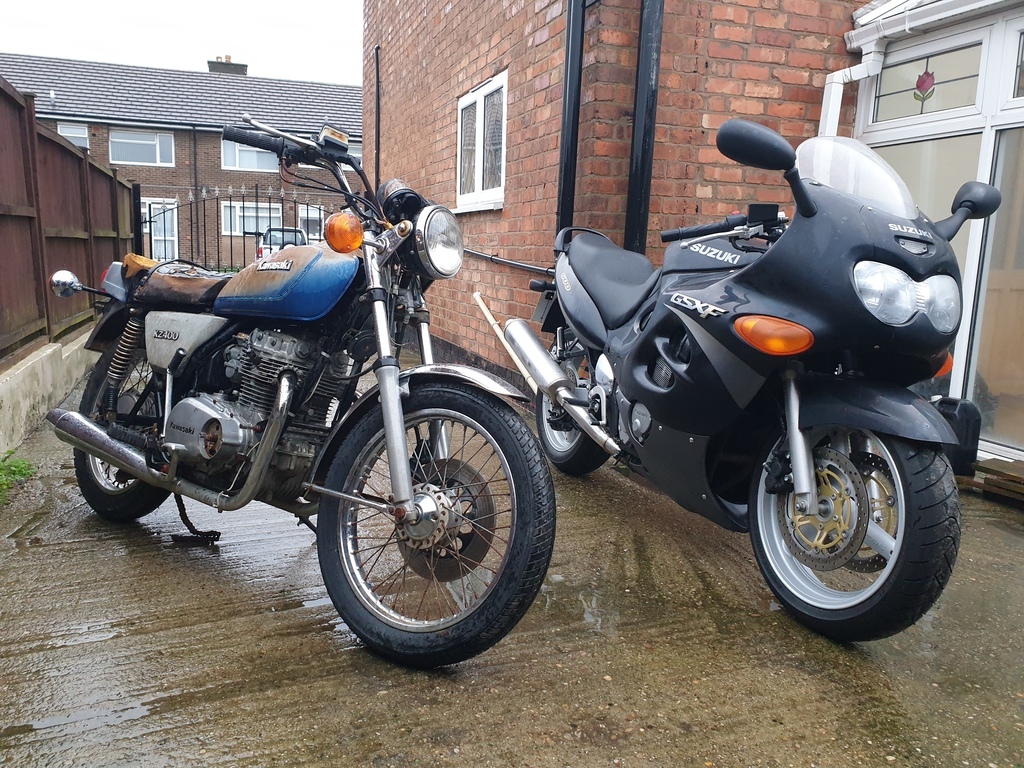 After a little shuffling, the KZ is in the garage ahead of the Suzuki, so I can start looking more closely at what I've bought. I bought it knowing the engine is seized, so I got on with whipping the spark plugs out and spraying a good dose of penetrant spray and ATF in the bores, hoping that I can at least get things moving a bit after a soak. One of the HT leads snapped in my hand, so the first of many items for my shopping list 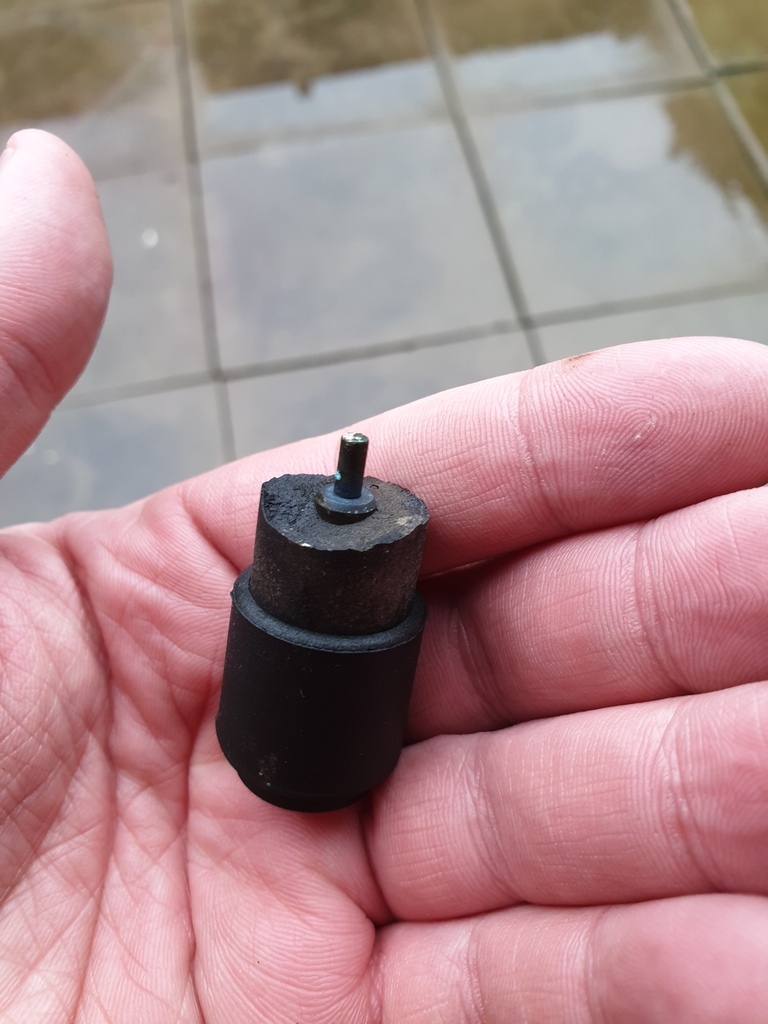 Spark plugs don't look awful, I am running this project on a bit of a budget, time will tell if I just give these a quick brush to get the thing running when the time comes  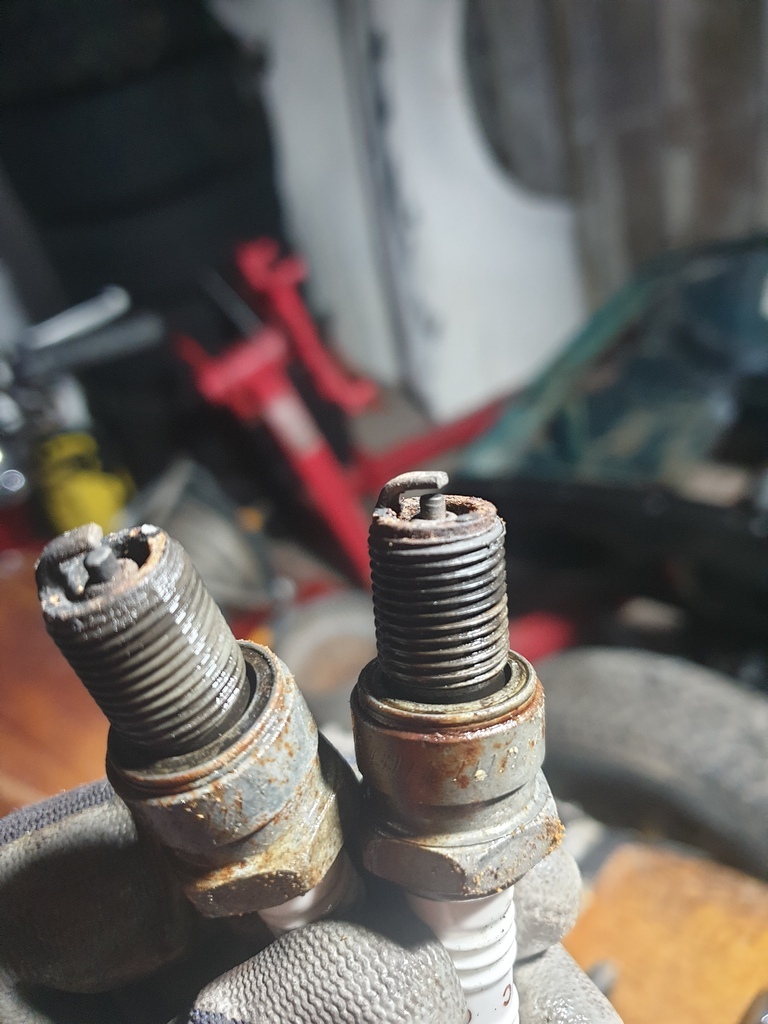 The Seat base is rotten as well as the cover/foam, so will need a whole replacement seat 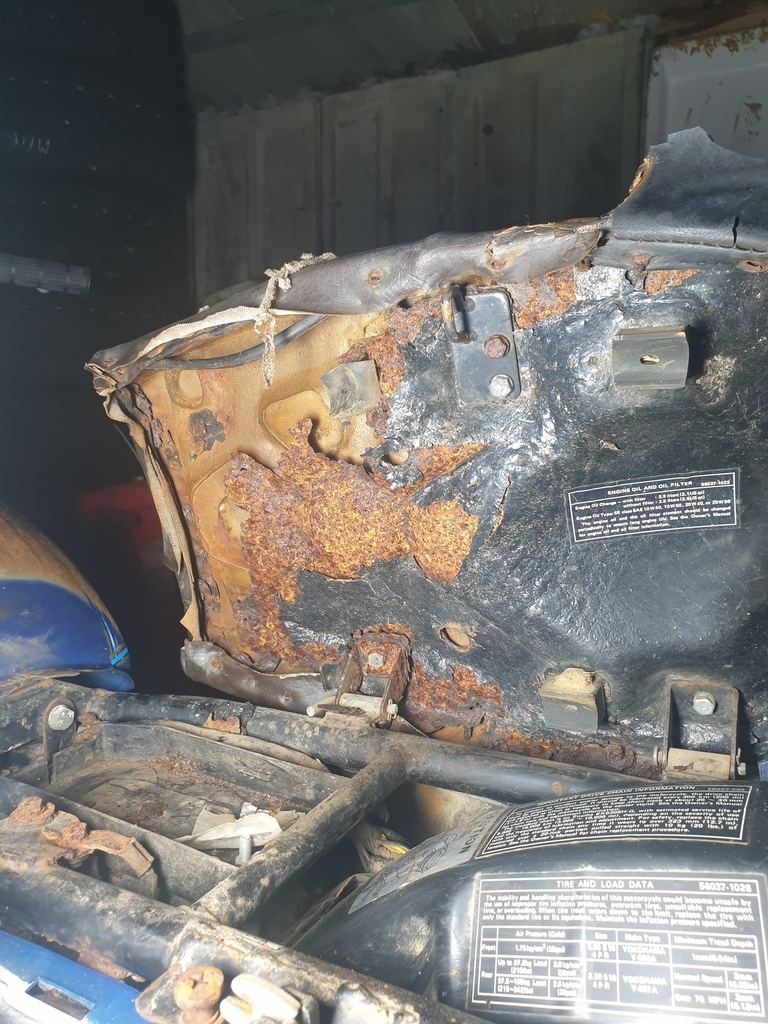 Looking up to the controls, the throttle and carbs are free which is nice, the choke lever moves also. The brake master is stuck solid and clearly the UV light has destroyed the plastic reservoir so that will be replaced. 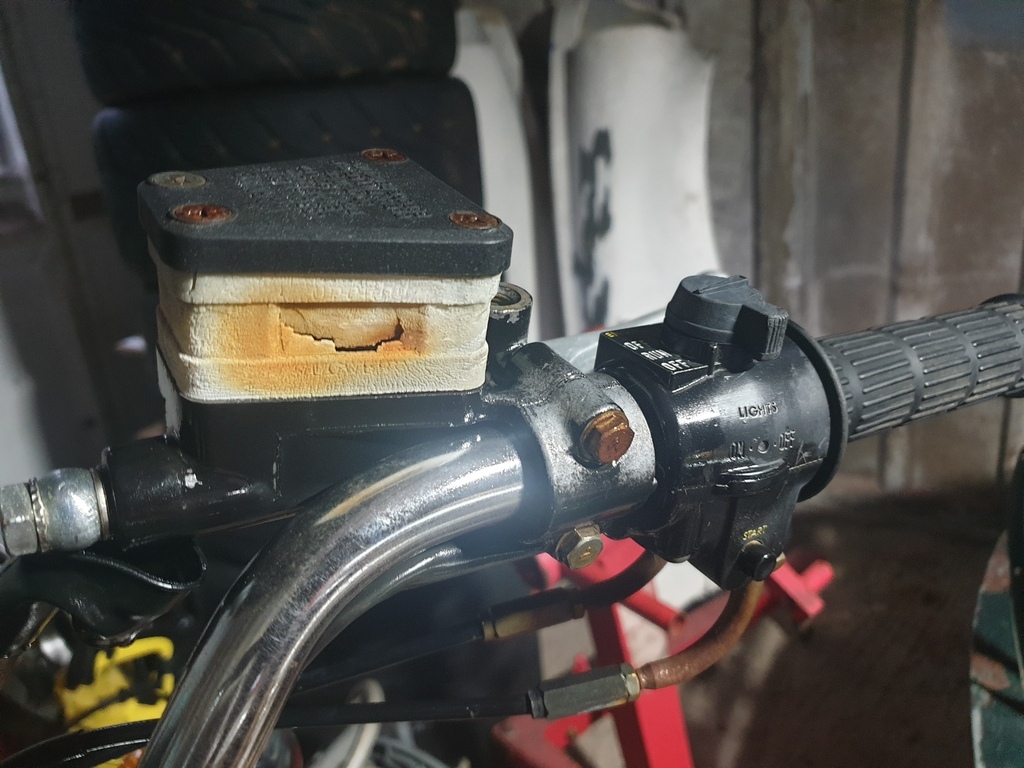 The master switch is fairly stuck and the light switch appears to have been snapped off. I'll either see if I can get parts to fix this or just replace with another unit. On the other side, the switchgear is similarly sticky or broken, in addition to a snapped clutch lever. 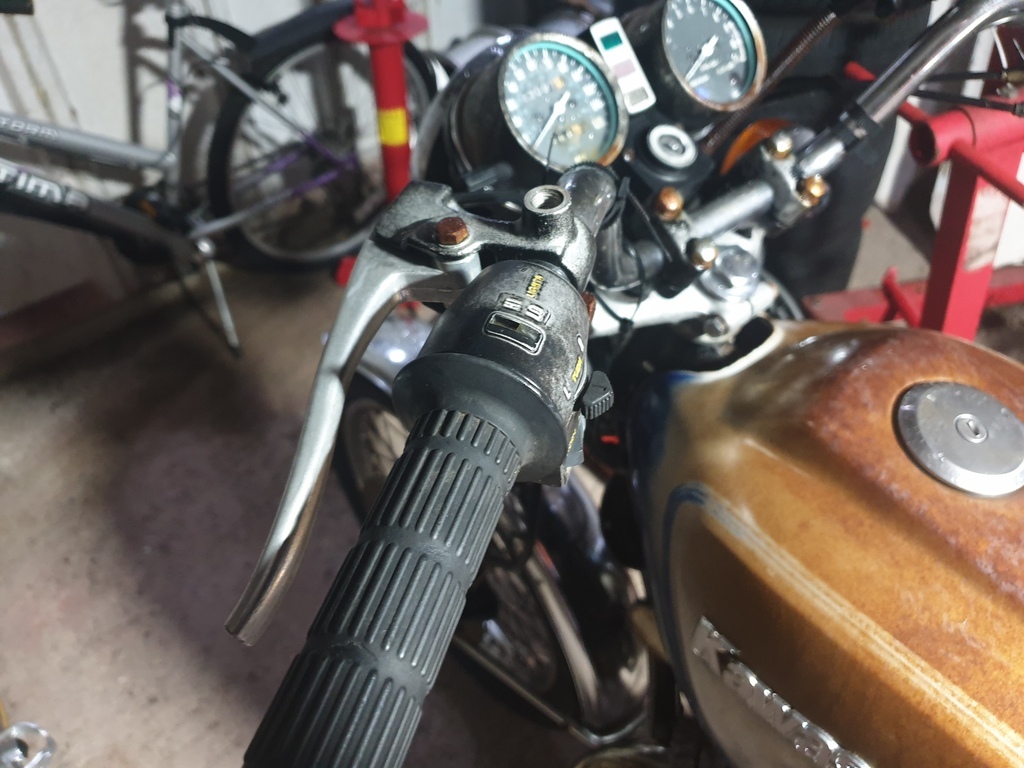 The rubber grips on both sides are in decent condition though. I think the odometer reads only 20 something thousand miles so that could tally up. I only have a loose plan of attack for this bike, I don't want to blow it totally apart like I have with the MG for fear of creating too much of a hurdle to get over. So I'm going to attack it in smaller chunks. With that in mind, I set about removing the seat because it's junk and would allow me to remove the tail fairing and rear light assemblies which seemed like reasonable fist small "chunks" to tackle. With the seat removed, the tail piece is held in by two bolts and then two pins on the fairing (cowl?) slide into rubbers on the frame. The cowl had some items hidden inside that the importers hadn't seen. Firstly is the original owners manual, it's quite chewed up either by mice or the (thankfully dead) wasps that had been setting up small homes in the cowl, but is actually readable. I will get another in future thats a bit better condition. 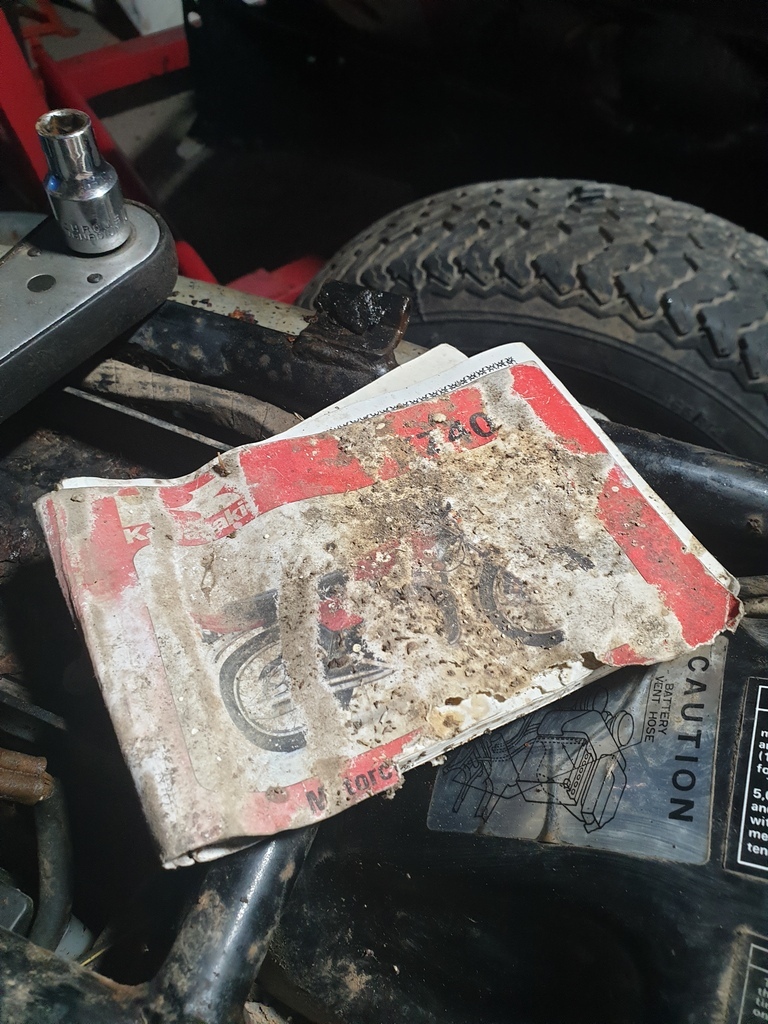 Now, in addition to a glove in there (which I initially thought was a sock) there was another bit of paper tucked away. This appears to be the bike's most recent registration from May 1997 in Sonora, California 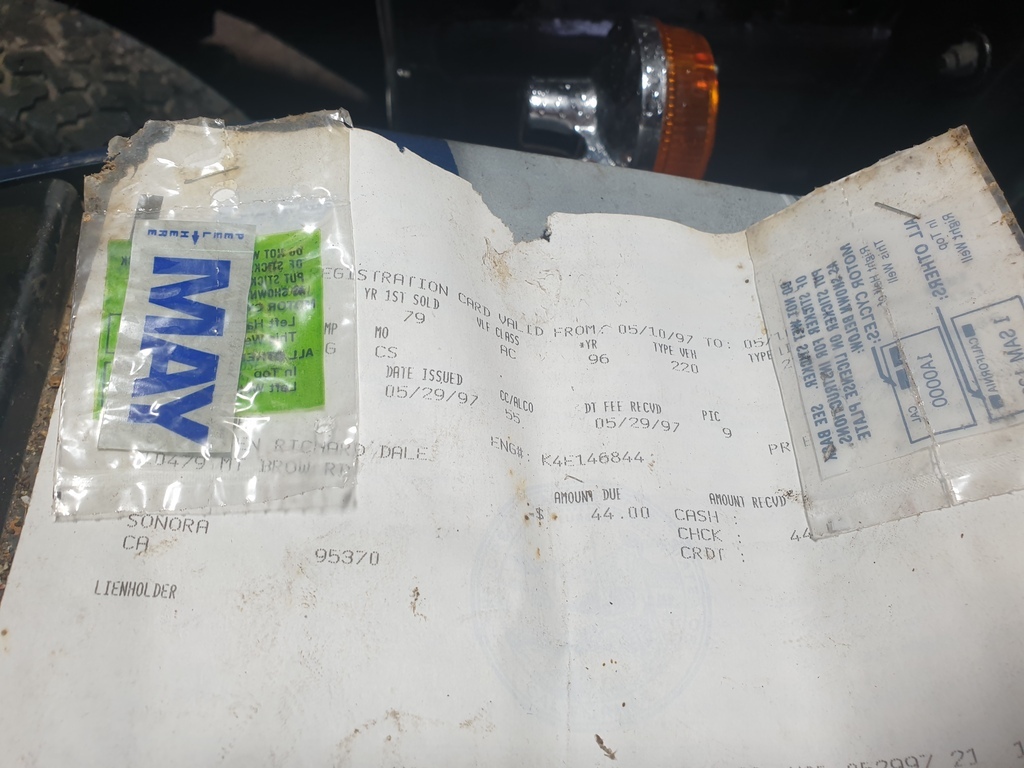 While this is my first ever import vehicle, even when buying UK vehicles, I love little bits of documentation like this that help piece together a vehicles history 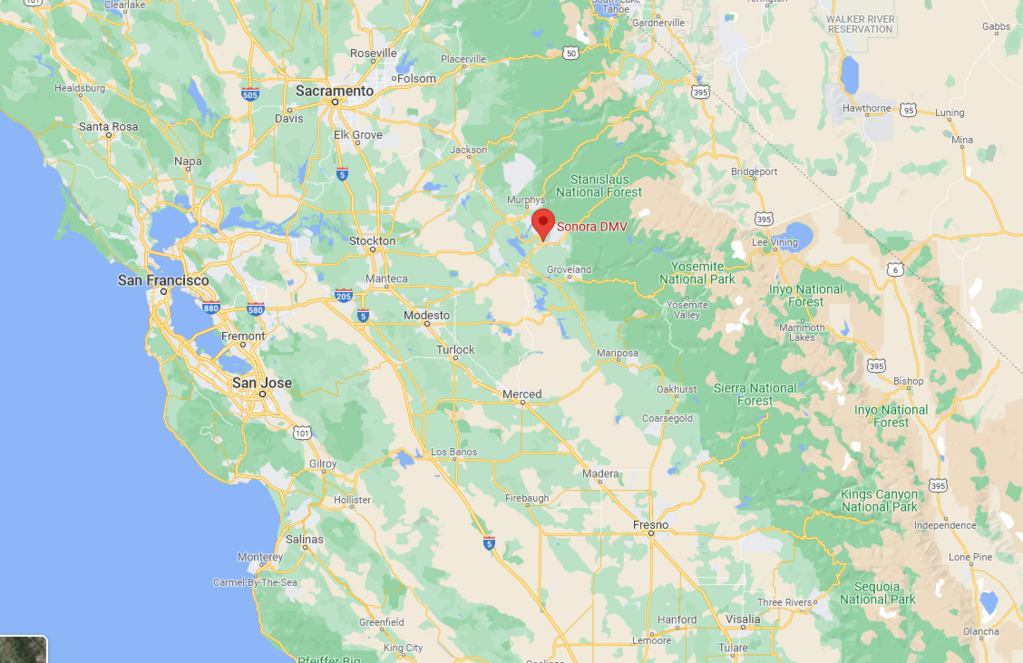 In a previous life it could have been blatting around the Yosemite National Park for all I know! With the tail section removed, you can really see the effect of the sun bleaching on the paint, the blue bit was covered by the seat  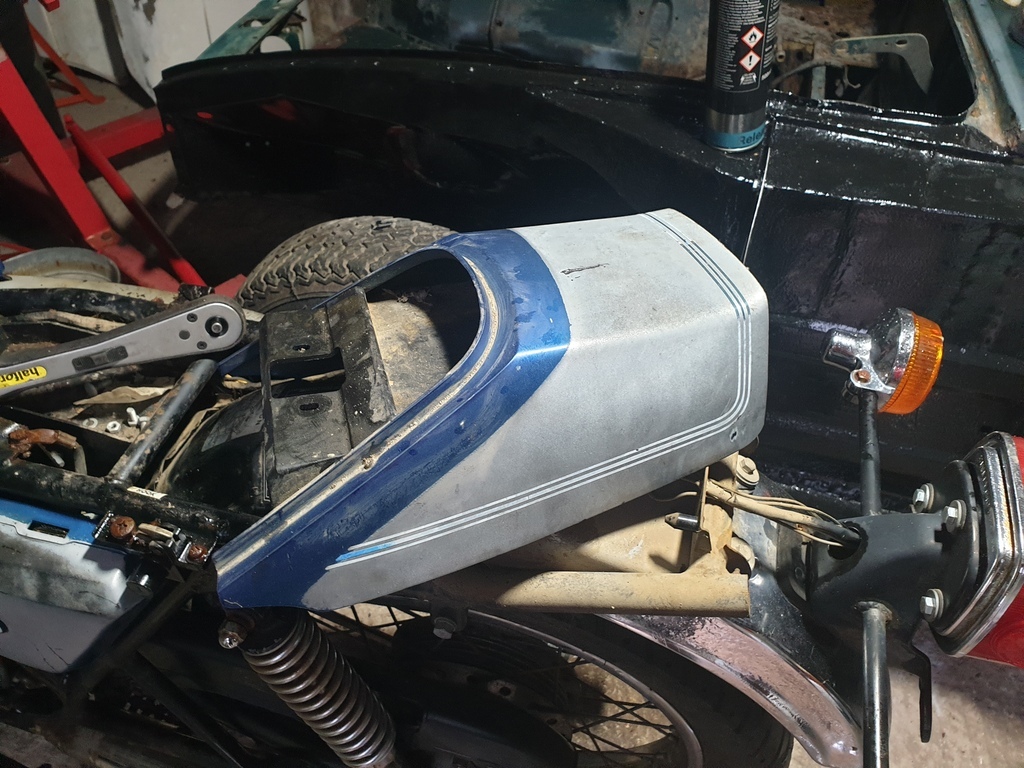 At first, to keep costs down, I suspect I'll run with the "Patina" look, but the bike will eventually deserve a full repaint. The rear lights were removed after undoing two bolts (should be three but one had snapped in the past it appears) and undoing some very tight bullet connectors. It remains to be seen if the wiring can be salvaged, if I'll have to add any bits or if I'll just start from scratch. 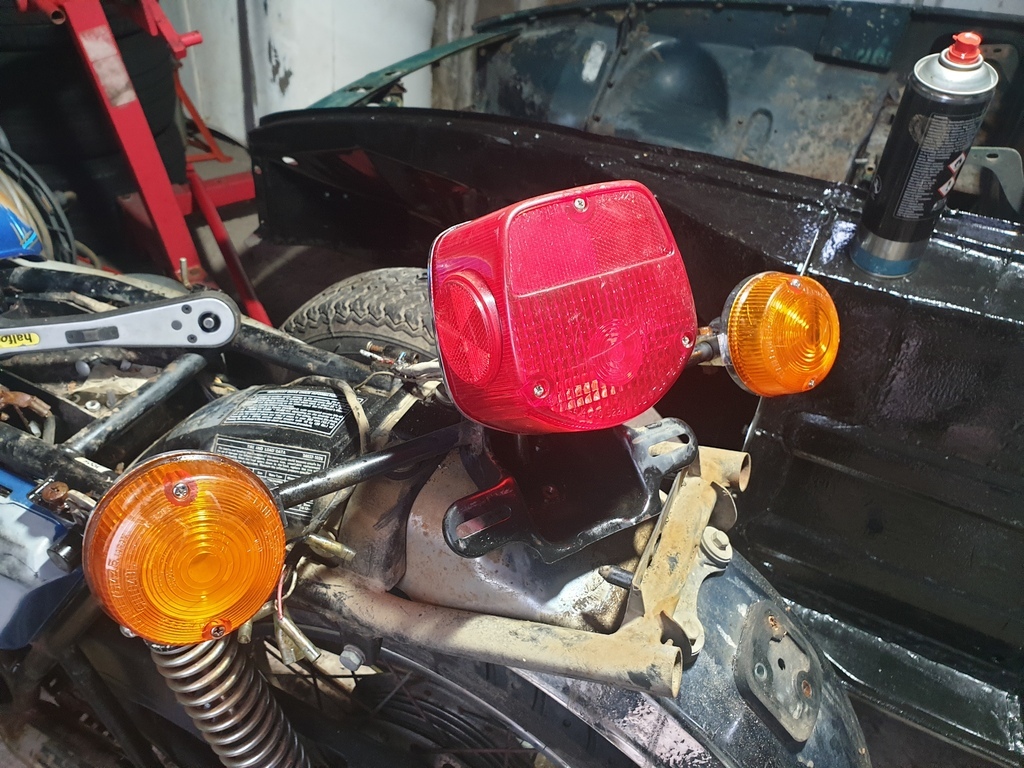 And there we have an introduction to my KZ400  My overall plans for the bike are a sympathetic restoration to make it a rider, I'm not going all concours spec, nor am I going to turn it into a cafe racer or a scrambler, should just be a nice retro rider  |
| |
Last Edit: Jun 12, 2023 20:29:00 GMT by adam73bgt
|
|
|
|
adam73bgt
Club Retro Rides Member
Posts: 4,993
Club RR Member Number: 58
|
|
|
|
Got a second wind after a rain shower passed over and stripped the bike down a bit more Got the side panels off and revealed a very old and dead battery as well as a slightly crusty battery tray, though I think most of the detritus is fallout from the rotten seat pan 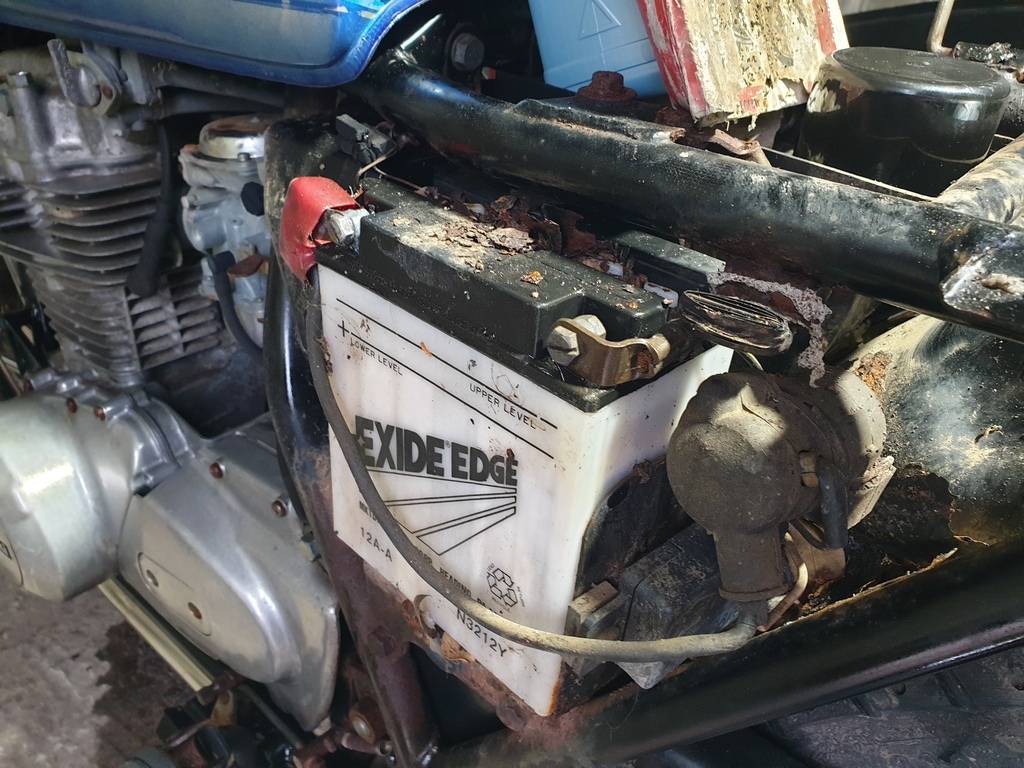 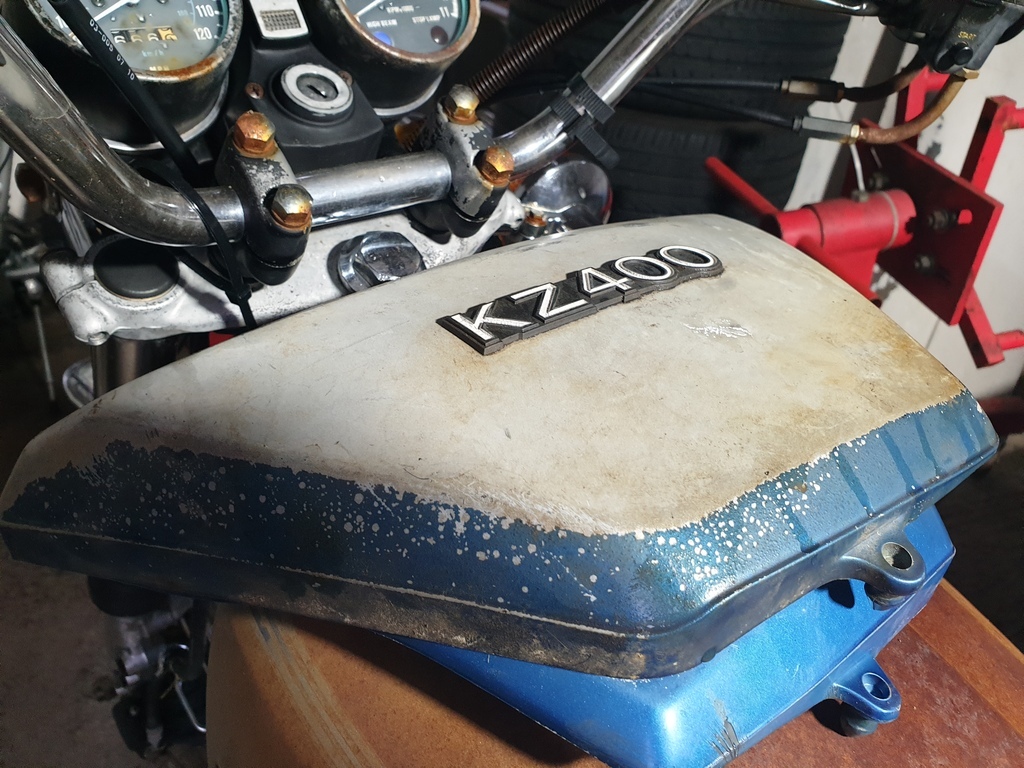 The rear mudguard comes out in two pieces, the rear chromed steel half and the plastic front half 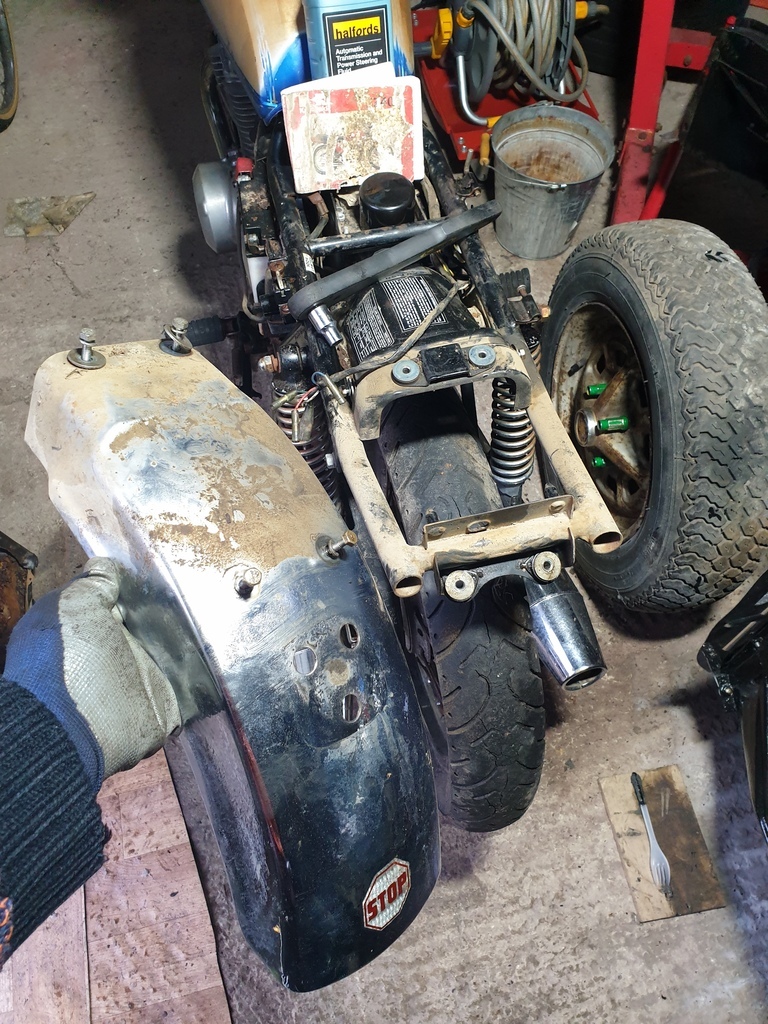 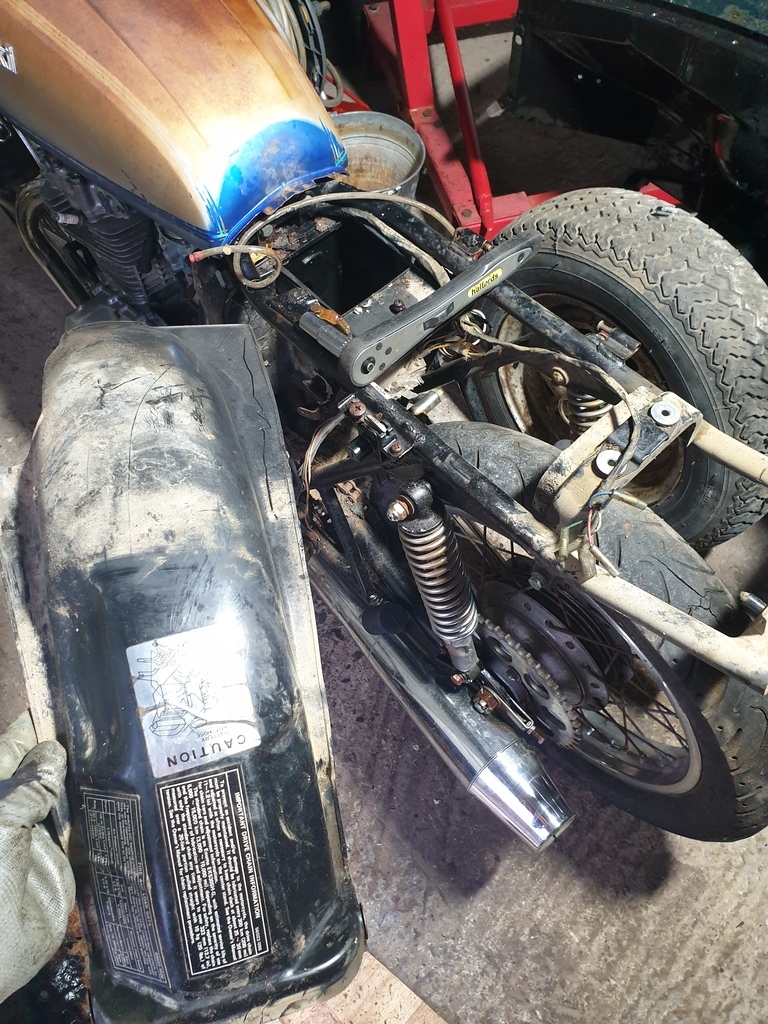 I removed the top cover from the air filter housing and found further wildlife evidence, seems that a United Nations of spiders, wasps and mice called this home at one time or another  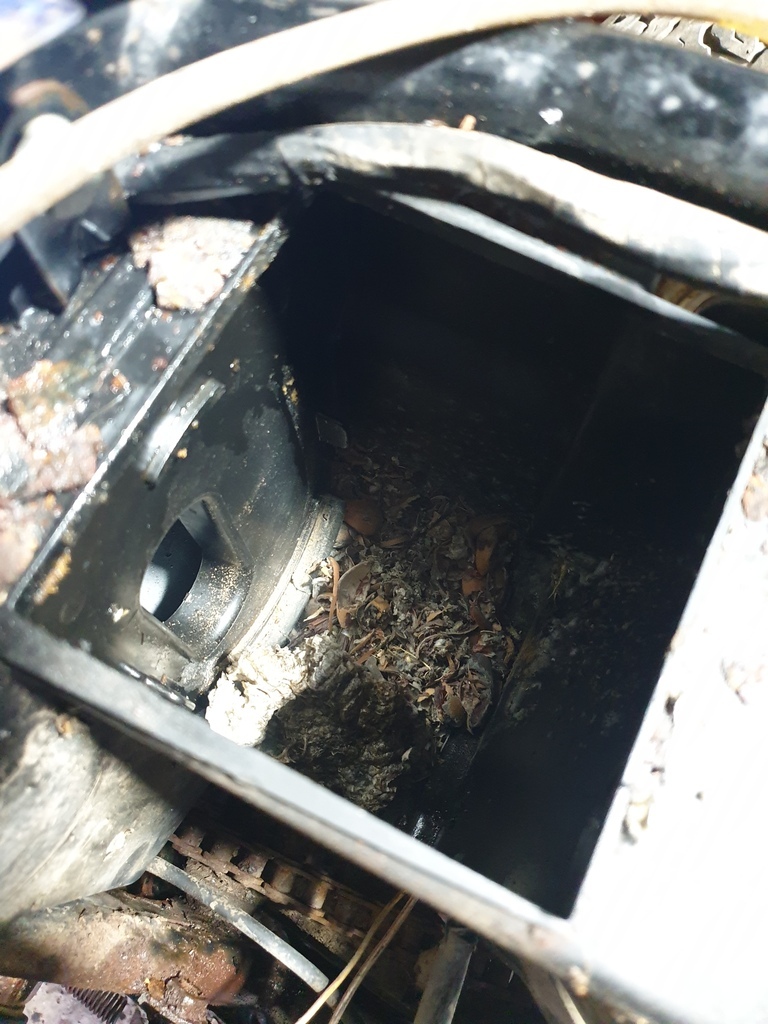 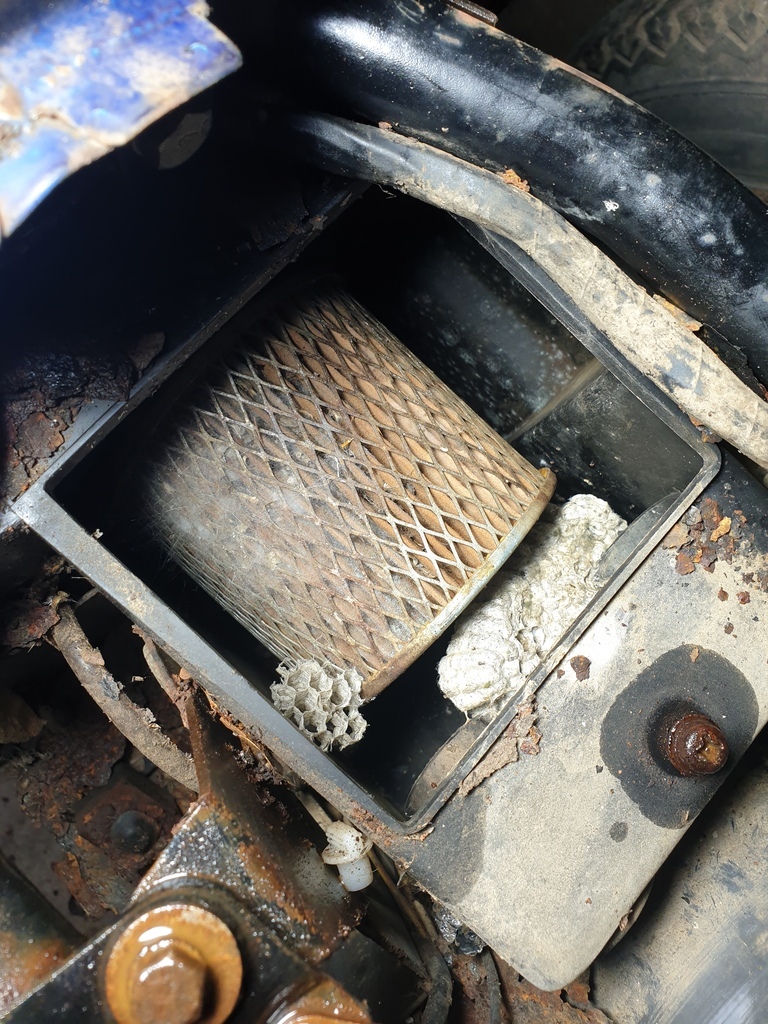 Fuel tank was next, the rubber lines to the fuel tap were rock hard, and I'll be replacing them with Ethanol safe items anyway, the fuel tap itself is also stuck solid, hopefully I'll be able to open and rebuild it. The tank itself came away fairly easily after the bolts were removed, and it was lightly persuaded off the rubber mount. 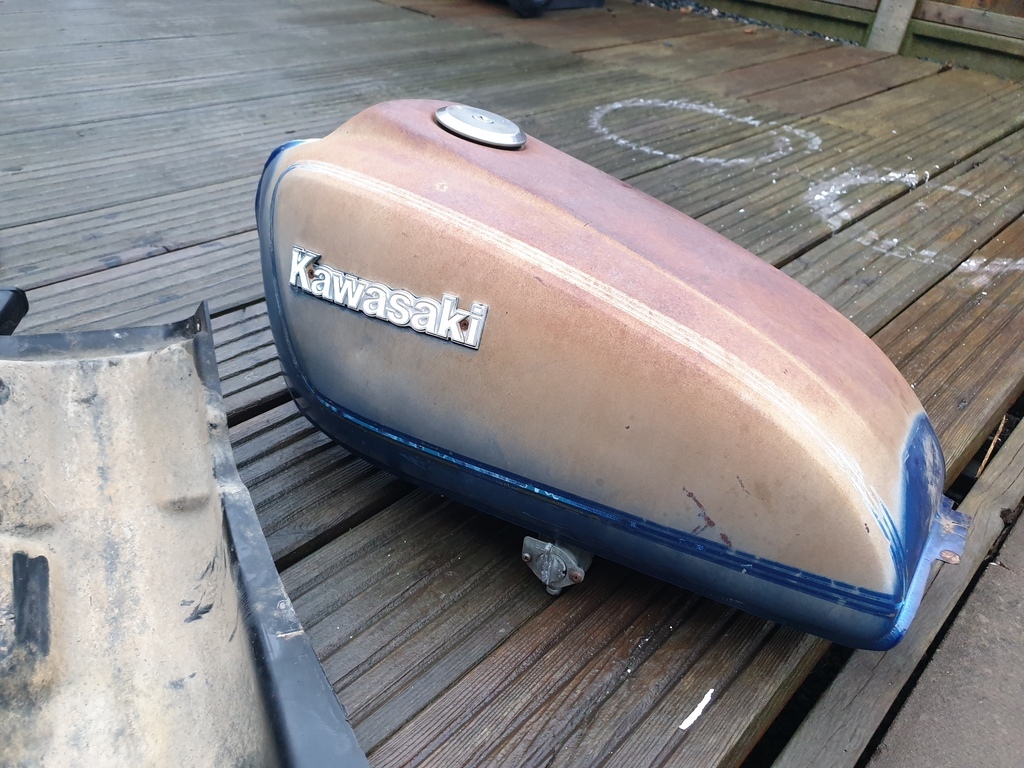 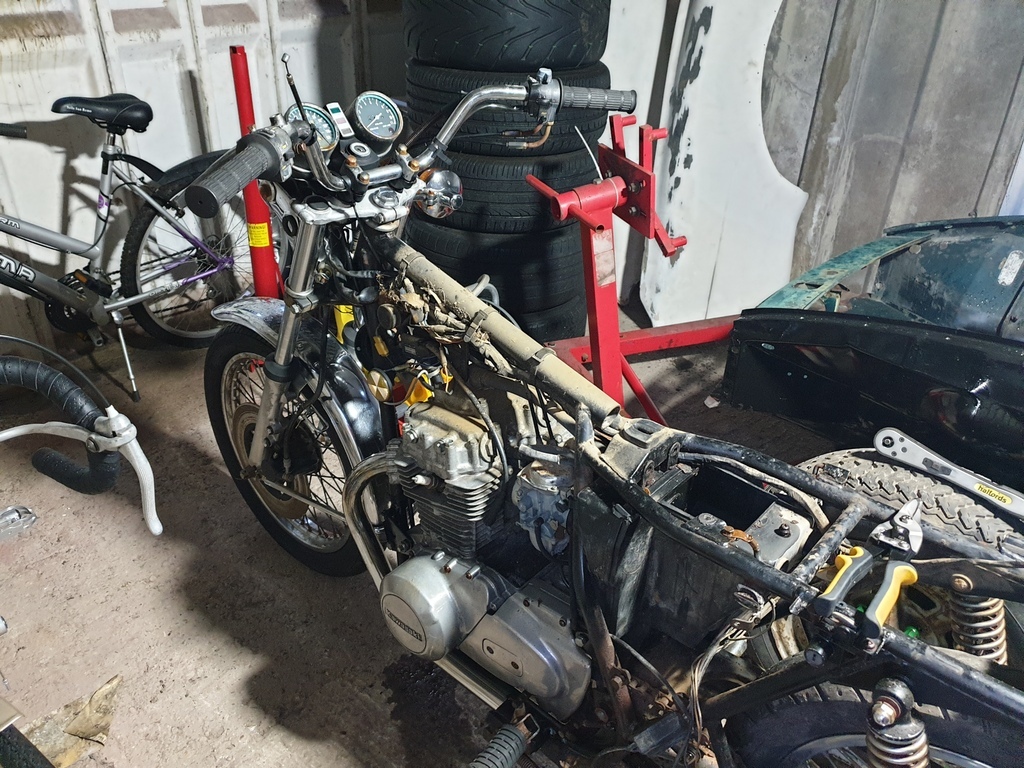 The tank is actually in quite nice condition from the outside, aside from the California sun tan and a couple tiny dents. There is something rattling around inside the tank though (which when I later removed the fuel tap, appeared to be a lump of rust...) and I don't have any keys, so will be a while before I can get the cap off and have a proper look to see if it will be useable. Most importantly, the frame appears to be in really good condition, the crustiness of the battery tray is a bolt on item so can be restored or replaced separately. I finished up for the day by washing up the bits I'd taken off, seized engine aside, I'm feeling somewhat confident that I haven't just thrown money away on this bike  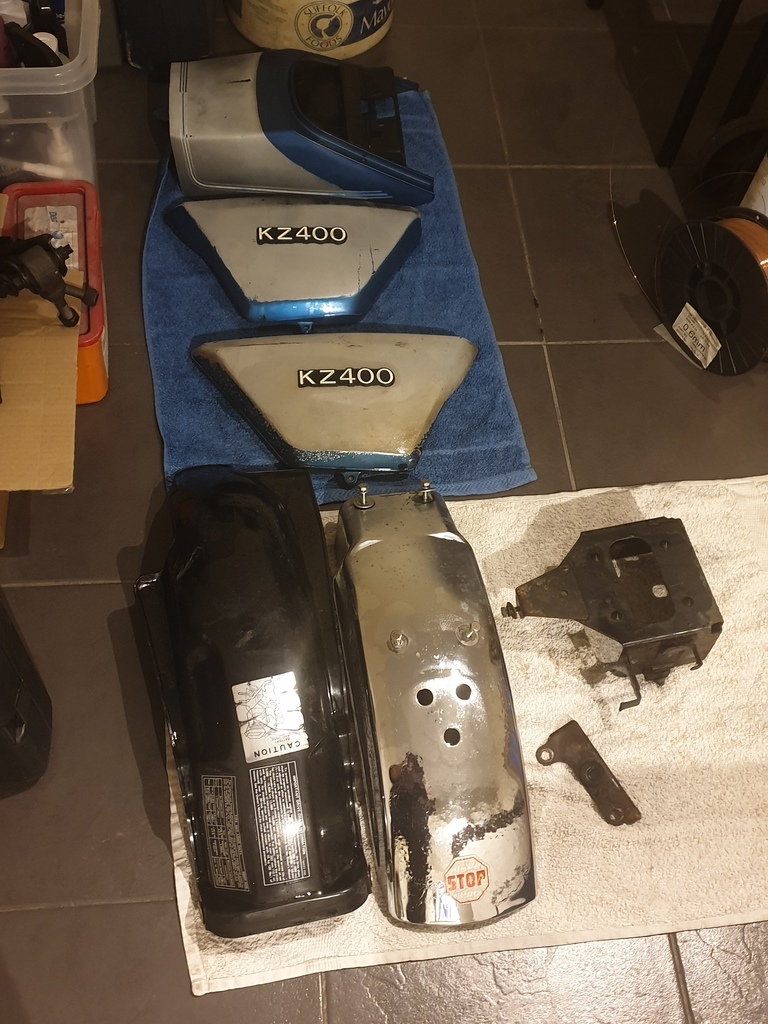 Last curious thing I noticed after washing the tail section, what I thought was sun bleaching of the paint seems to be washing off! 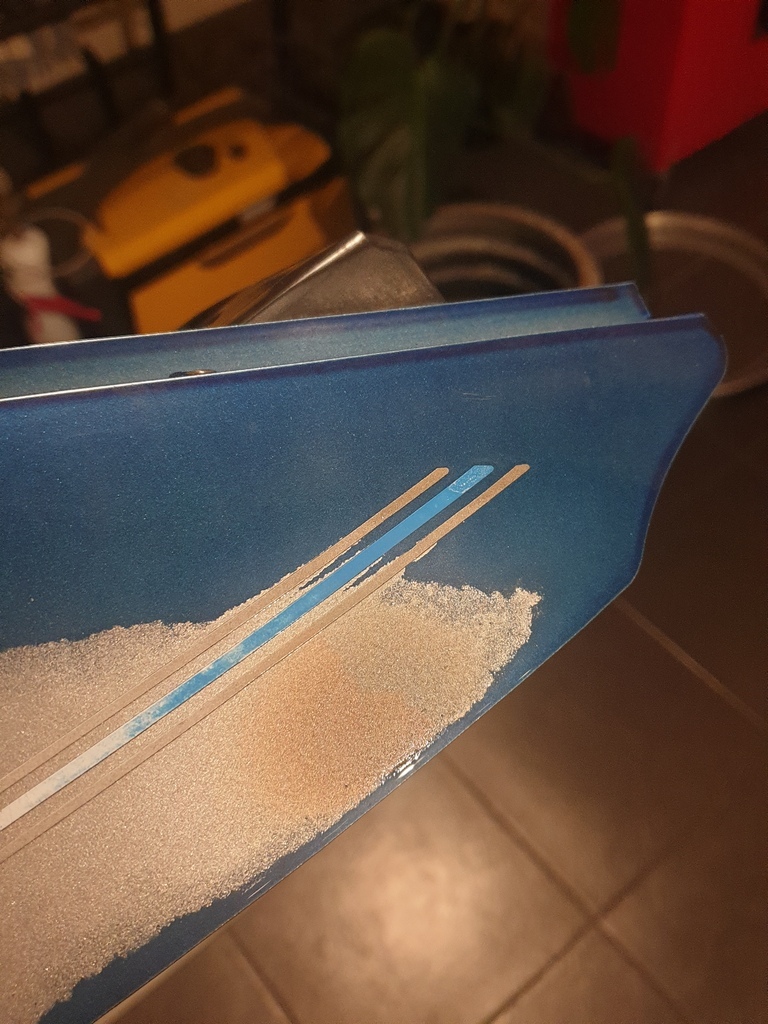 Looks like someone threw some silver paint over the blue, I'll try and carefully take just the silver off to see what's underneath as I'm curious  |
| |
|
|
|
|
|
|
|
Loving this. We've got an old GN250 that's being done up as a rolling resto. My last bike was an RRV Fireblade, but I now totally get the appeal of an affordable classic bike. 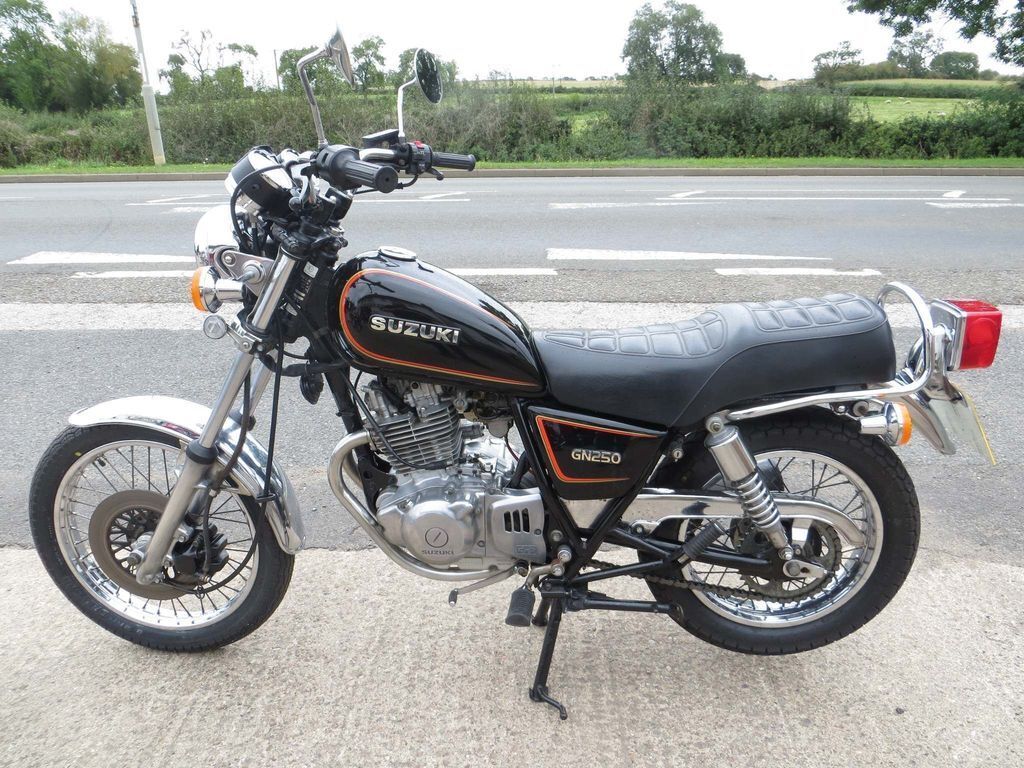 |
| |
|
|
93fxdl
Posted a lot
   Enter your message here...
Posts: 2,019
|
|
|
|
Many years ago a friend of mine had a z400, wouldn't set the world alight but good solid reliable transport in all the years he had it, only two failures, split carb diaphragm and exhaust rust. don't think there's any performance parts available except later models had a larger 440 engine Be careful you started with one bike, now have two, not long and you will have a collection Ttfn Glenn 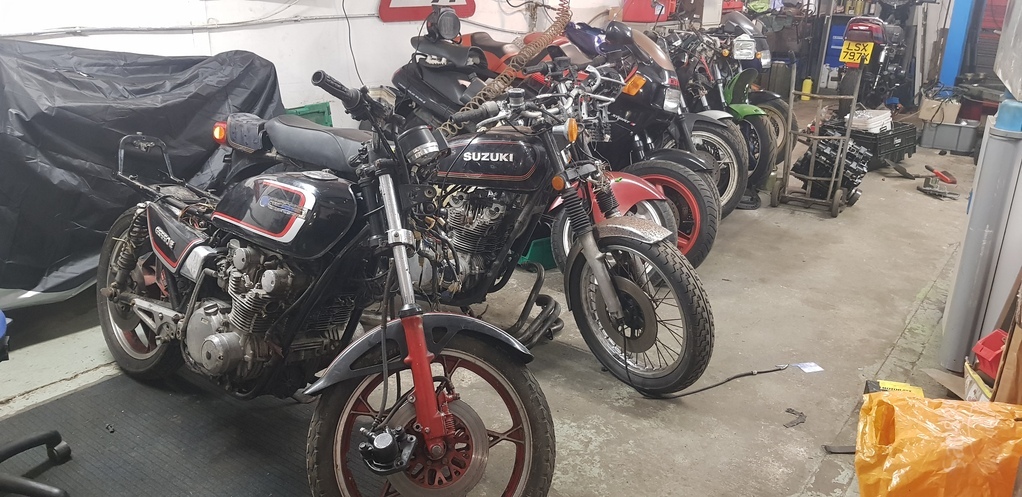 Ps if you have an address where it lived, try looking on street view, you may see it parked in it's old home |
| |
Last Edit: Jan 8, 2022 20:40:18 GMT by 93fxdl
|
|
adam73bgt
Club Retro Rides Member
Posts: 4,993
Club RR Member Number: 58
|
|
|
|
That looks really nice tubthumper  Yeah I've still got time for the more modern stuff but I think in general in the bike world you can get so much more for your money than you can with cars so just trying to enjoy what I can while that's still the case! 93fxdl Yeah I'm not expecting to win any races, but if it sounds/looks good enough then it should be a nice thing to ride about on, do a little commuting in the warmer months etc. Or if I get bored, then sell and see what else I can get. Haha the Suzuki is meant to be getting sold, but a combination of bad time of year and them being quite commonplace meant I wasn't quite getting the offers I was hoping for for it, so it'll hang around for the time being. At least bikes don't take up as much room though... I did also just have a quick look at the address on streetview but I couldn't see much, it's a bit remote and it seems the google cars haven't been past since 2007 so the image quality leaves a lot to be desired! I didn't do much on the bike today really, as I've been trying to work out why my daily Honda is trying to shake itself to death  I did take a moment to chuck a long 17mm spanner on the engine to see if it would budge at all, and to my surprise it turned! With the plugs out, it would even shoot out a bit of the ATF that I'd chucked in the bores so that seems promising  Was able to kick it over too, so that seems to work, which is good as the starter motor is one of the missing parts |
| |
|
|
93fxdl
Posted a lot
   Enter your message here...
Posts: 2,019
|
|
Jan 10, 2022 12:03:34 GMT
|
|
|
| |
|
|
|
|
|
Jan 11, 2022 19:22:26 GMT
|
|
Like that, has style 👍
|
| |
Bicycle x1
Alfa Giulietta (now wife's)
Alfa 156
BMW 630i
Honda rc36
|
|
goldnrust
West Midlands
Minimalist
Posts: 1,887
|
|
Jan 11, 2022 20:03:54 GMT
|
|
Nice! Should be a great project.
Have you ridden any older bikes Adam? If not you’re in for a treat, it’s just like the difference between modern cars and classics. Old bikes are worse in the measurable ways, but there’s so much character and connection to the machine through it’s more agricultural technology. Like cars you can also get a bit closer to he performance limits without riding at stupid speeds, and modern performance bikes are so insanely fast and capable, that has to be a good thing.
I think you’ve got a good bike to start with there. That era of bike you’re starting to get some mod-cons which do make it a bit easier to ride, front disc brake for example, but you’re keeping a lot of the classic styling. Definitely a win to have the spoked wheels.
You’ll find there’s so little to a bike, compared to a car, that even if you do end up blowing it all apart it’s no where near as daunting as the MG. Still makes sense to work your way round it a bit at a time.
If that is official paperwork from California, it might help you confirm the manufacturing date when it comes to getting it UK registered (presuming it’s not). It was surprisingly straight forward when I registered my Suzuki (also an American import) but I was definitely helped by having the US title for it.
|
| |
|
|
adam73bgt
Club Retro Rides Member
Posts: 4,993
Club RR Member Number: 58
|
|
|
|
Thanks guys  goldnrust goldnrust no I've not ridden any older bikes at all, I'm really looking forward to it though precisely for the reasons you say! I'm not a particularly fast rider so I'm hoping it should suit me well Yeah you're right, it's a nice balance of old and "new", I'm not expecting the brakes to be fantastic, but hopefully newer pad materials should help there, and it's even got such luxuries as balance shafts and electric start! (well once I find a replacement starter...) I think the most complex bit will be the wiring, identifying what's missing or damaged etc. but even that won't be too stressful having looked at the wiring diagram I've left the registering in the hands of the place I bought the bike from, I know there's a write up on here somewhere about how to DIY it but I just thought for a first time, I'd avoid the hassle! |
| |
|
|
Davey
Posted a lot
   Resident Tyre Nerd.
Posts: 2,348
|
|
|
|
|
Will be watching this with interest. looks like a fun project, I am getting hankerings for old bikes.. Especially after playing Ride4 for hours over Christmas.
Keep on it!
|
| |
K11 Micra x3 - Mk3 astra - Seat Marbella - Mk6 Escort estate - B5 Passat - Alfa 156 estate - E36 compact
Mk2 MR2 T-bar - E46 328i - Skoda Superb - Fiat seicento - 6n2 Polo - 6n polo 1.6 - Mk1 GS300
EU8 civic type S - MG ZT cdti - R56 MINI Cooper S - Audi A3 8p - Jaguar XF (X250) - FN2 Civic Type R - Mk2 2.0i Ford Focus - Mercedes W212 E250
|
|
|
|
mrbig
West Midlands
Semi-professional Procrastinator
Posts: 505
|
|
Jan 13, 2022 10:00:03 GMT
|
|
Looks awesome, I think the patina look will suit the bike well actually! I'm guessing it came from Huggys Speedshop as you viewed it at Mallory? They are quite local to me and import all sorts of amazing bikes from the States. They aren't that far from me, so I do like to have a wonder up and browse from time to time.
|
| |
1969 German Look Beetle - in progress
|
|
adam73bgt
Club Retro Rides Member
Posts: 4,993
Club RR Member Number: 58
|
|
Jan 17, 2022 22:56:43 GMT
|
Thanks guys  Yeah that's right I got it from Huggys, it was a bit of a misty murky evening when I went so I didn't get a proper nose about but there was certainly a lot of cool stuff there, bikes and a couple cars and pick-ups out front as well A small-ish update on the bike front, I got to stripping down the tailight assembly, was pretty straightforward, the pinch bolts for the indicators had been wedged in a bit so will need replacing, but otherwise fine. First job I tackled was to remove the rusted in bit of bolt in the tailight carrier  I made a bit of an ordeal of it; drilled it most of the way through, then tried a stud extractor which seemed to push the end of the bolt out rather than extract it, penetrant sprays, a bit of blow torch heat, but eventually got the little stub turning a bit, wouldn't turn all the way out but got it in the end with pliers 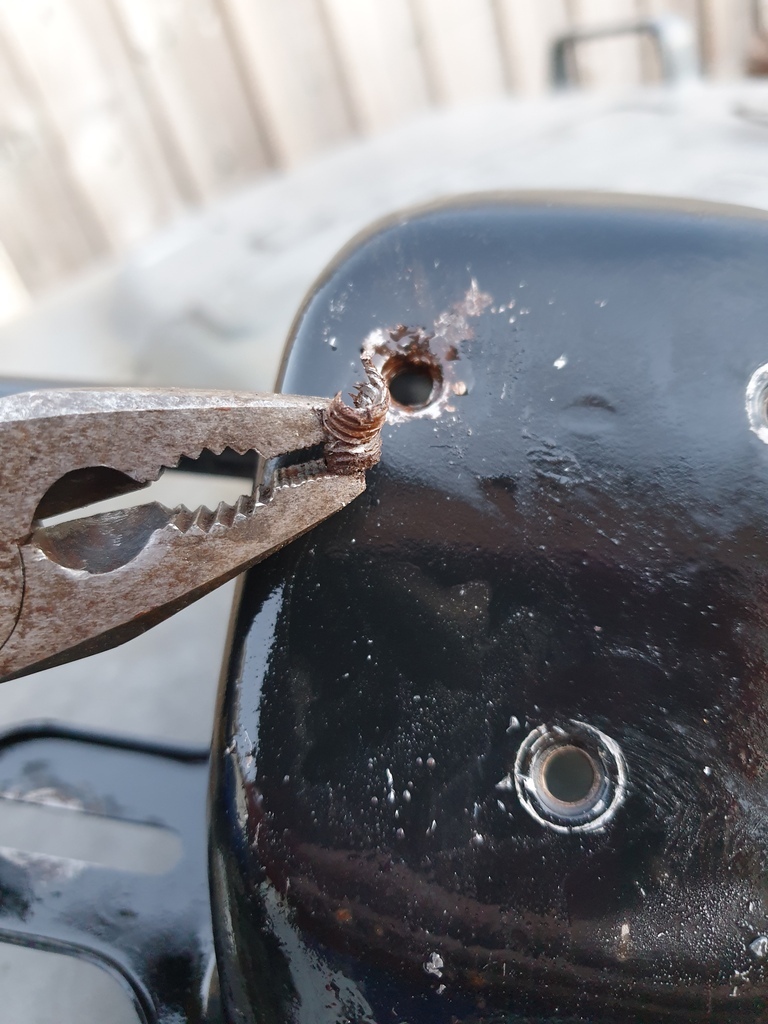 The captive thread in the carrier actually looks to have survived as well, I've given it a clean and a dip in Deox C and it's waiting for me to hydrate 80 the little bits of surface rust I can't quite get to, then it'll get a shot of black. The indicators and tailight themselves came apart fine, the rubber seals are shot on all of them and annoyingly aren't really available in the UK, I could buy replacement pattern lights but theres a bit of patina to the originals and I don't really want to throw away useable items on this project, so I'll be making up a list of stuff to order from CMSNL at this rate to get some free shipping!  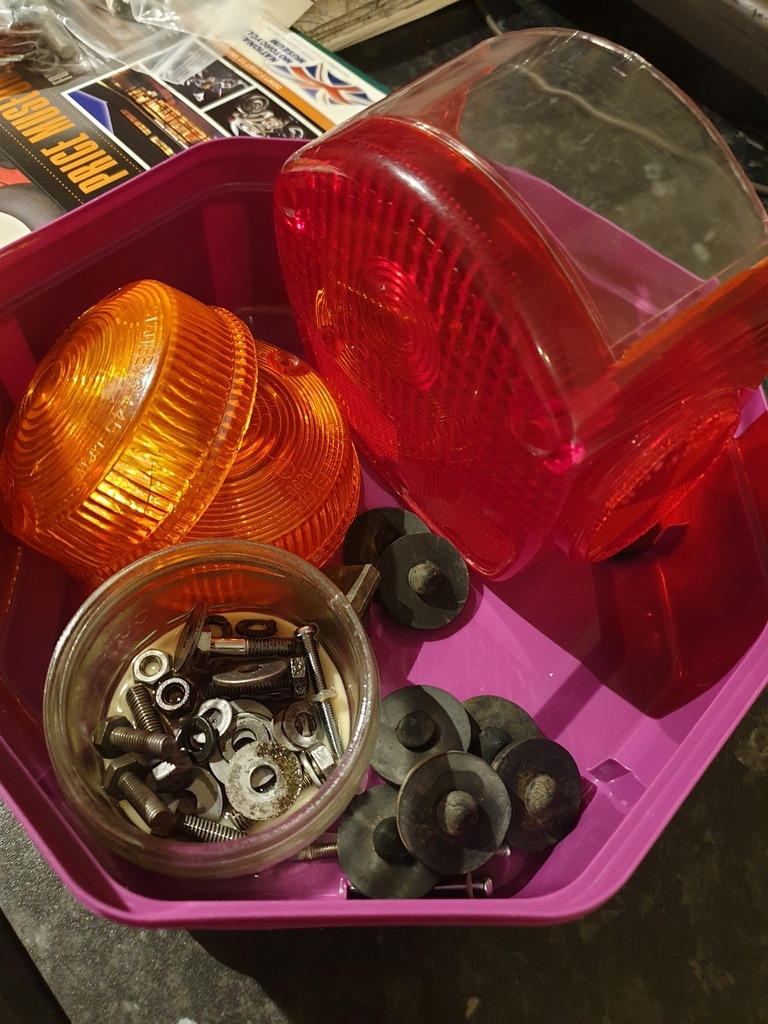 On the bike itself, I briefly tried to salvage the handlebar grips as they actually looked in decent nick, but there was no way they were coming off without a fight, replacements are cheap, so I cut one off 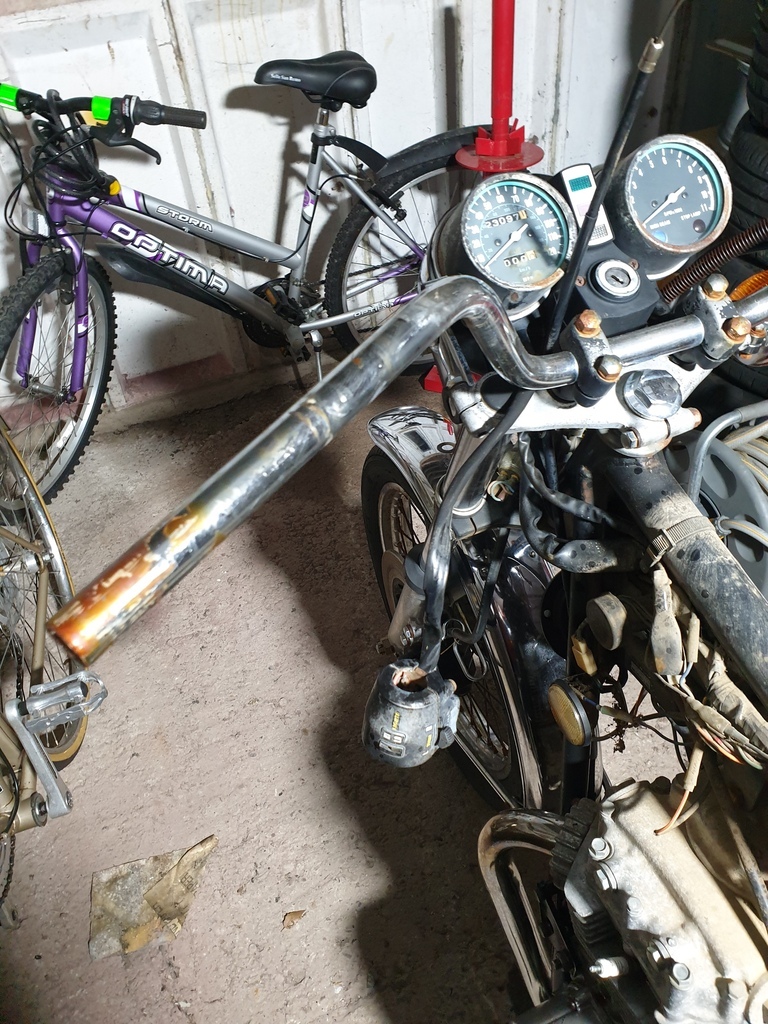 The other came off with the throttle, after I made a right faff of undoing the throttle cables... Then I essentially picked at a few more bits that would come off reasonably easily before I got too cold and went in 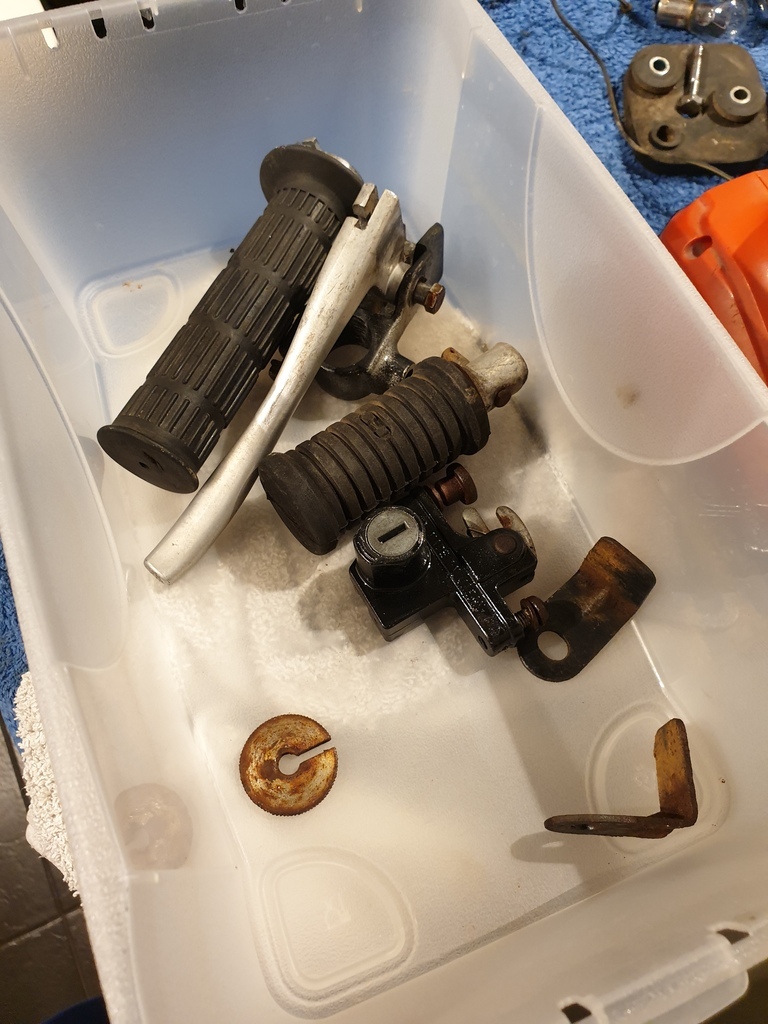 The clutch lever on closer inspection looks as though someones smoothed the end, deliberately shortened or trying to make the best of a snapped lever? I'll replace it either way. The foot peg rubbers are in decent nick, they all seemed a bit loose and rattly though so will investigate there, and the helmet lock could come in handy when I'm getting a key made to test it works at the key cutters. I need to get in touch with a key cutter actually to see what they can do, I've got a code on the locks, so I assume they can cut from that? Next jobs are finishing a bit of cleaning up on the rear mudguard, and trying to salvage the battery tray. I'll also be trying to remove the carbs, I got close but I think some very hard and aged rubber was defeating me.. |
| |
|
|
93fxdl
Posted a lot
   Enter your message here...
Posts: 2,019
|
|
Jan 18, 2022 19:55:34 GMT
|
|
For replacing the rubber seals around the light lenses try looking for cut to length rubber seals in whatever section you need.
For the carb rubbers, try warming them with a hot air gun, and when refitting soak in hot water
The loose footrest can be caused by worn pin or holes, the stop on the end of the peg can wear causing drooping also the rubber can also act as the retaining spring, so if it sticks on the metal peg, again it causes sloppy pegs, also width of peg compared to mounting bracket
Ttfn Glenn
|
| |
Last Edit: Jan 18, 2022 20:02:55 GMT by 93fxdl
|
|
adam73bgt
Club Retro Rides Member
Posts: 4,993
Club RR Member Number: 58
|
|
Jan 21, 2022 20:15:17 GMT
|
For replacing the rubber seals around the light lenses try looking for cut to length rubber seals in whatever section you need. For the carb rubbers, try warming them with a hot air gun, and when refitting soak in hot water The loose footrest can be caused by worn pin or holes, the stop on the end of the peg can wear causing drooping also the rubber can also act as the retaining spring, so if it sticks on the metal peg, again it causes sloppy pegs, also width of peg compared to mounting bracket Ttfn Glenn I hadn't considered that it would be possible to buy a length of seal, I was thinking of some wayt of cutting them out from a sheet haha, I may consider that  May be a bit late for that with the carb rubbers  Yeah I need to take a closer look at the pegs, clean them up and see what's what. There's certainly evidence of the bike having been down on both sides at some point in it's life so the pegs may have taken a bit of punishment also! I continued taking bits off in the garage yesterday, decided that actually I just needed to get on and blow the whole thing apart, then I can make a big list of what I need to buy and can do it in one or only a few goes, rather than buying little bits here and there. Didn't take so many photos as cold, and most of the photos I did take weren't great as they were more reference pics for me to look back on when reassembling! I did get the carbs out though after I levered them off the rock hard rubbers 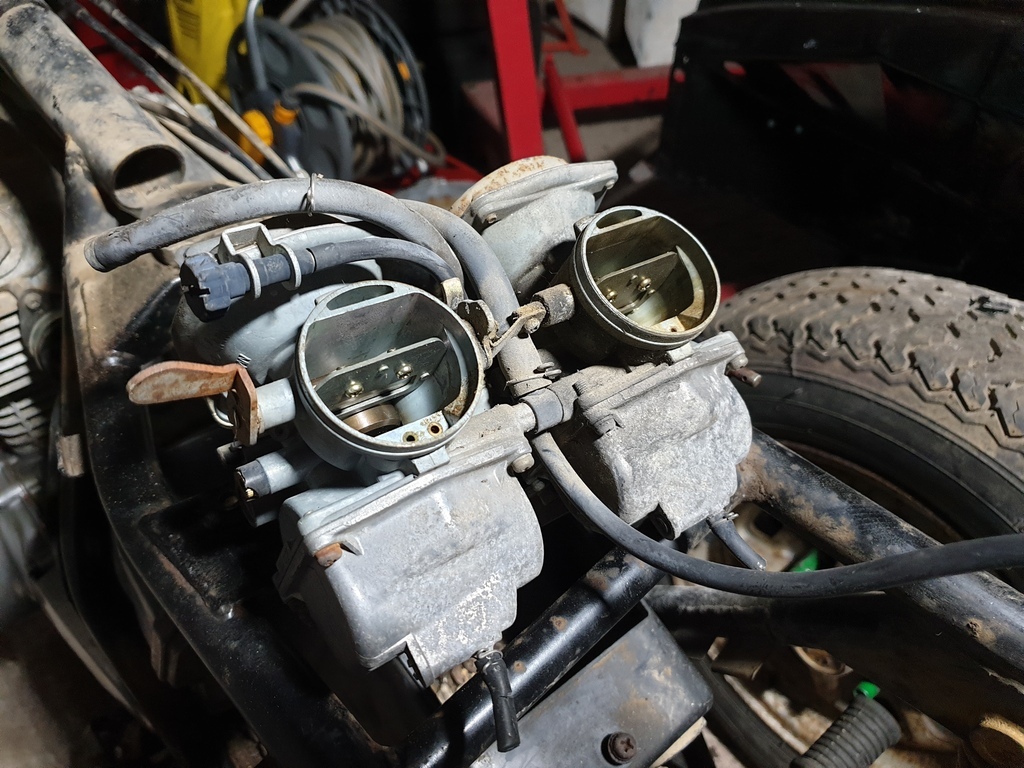 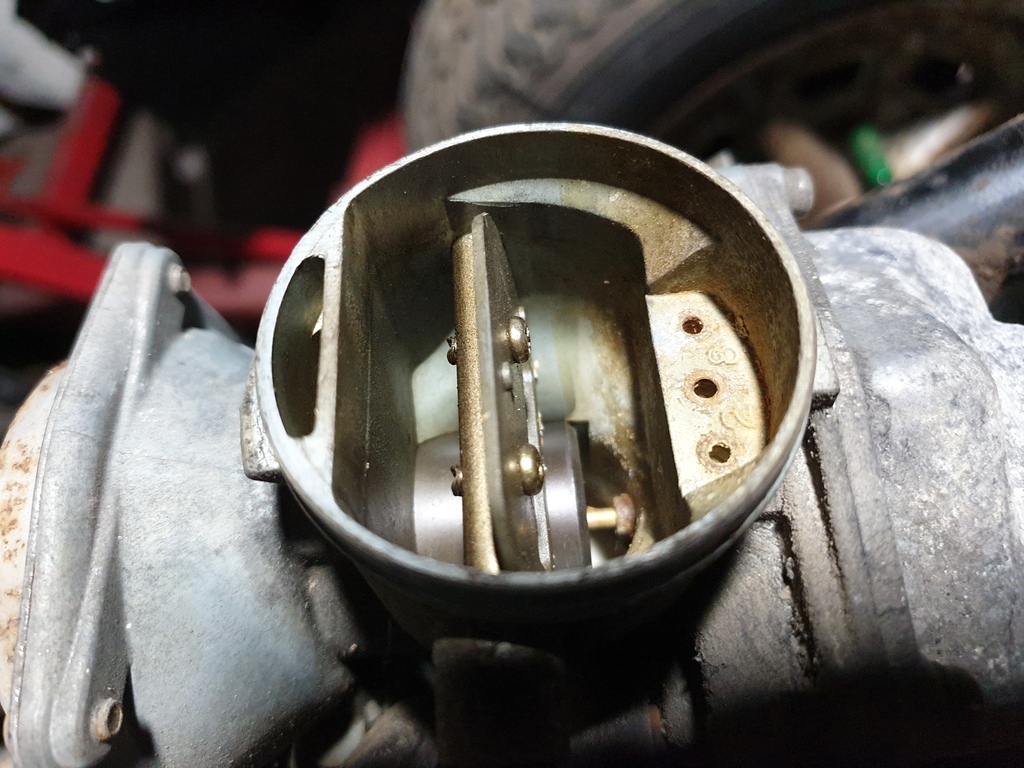 The throttle and choke moved which was a good sign, but I could also see a fair bit of grot, particularly in the right hand carb, more on this in a moment... I didn't really have much of a plan, just a few spanners to wind down with after work, so I moved up to the front of the bike, got the one front indicator off along with the front brake hoses and caliper, only snapped a couple of bolts too which was nice 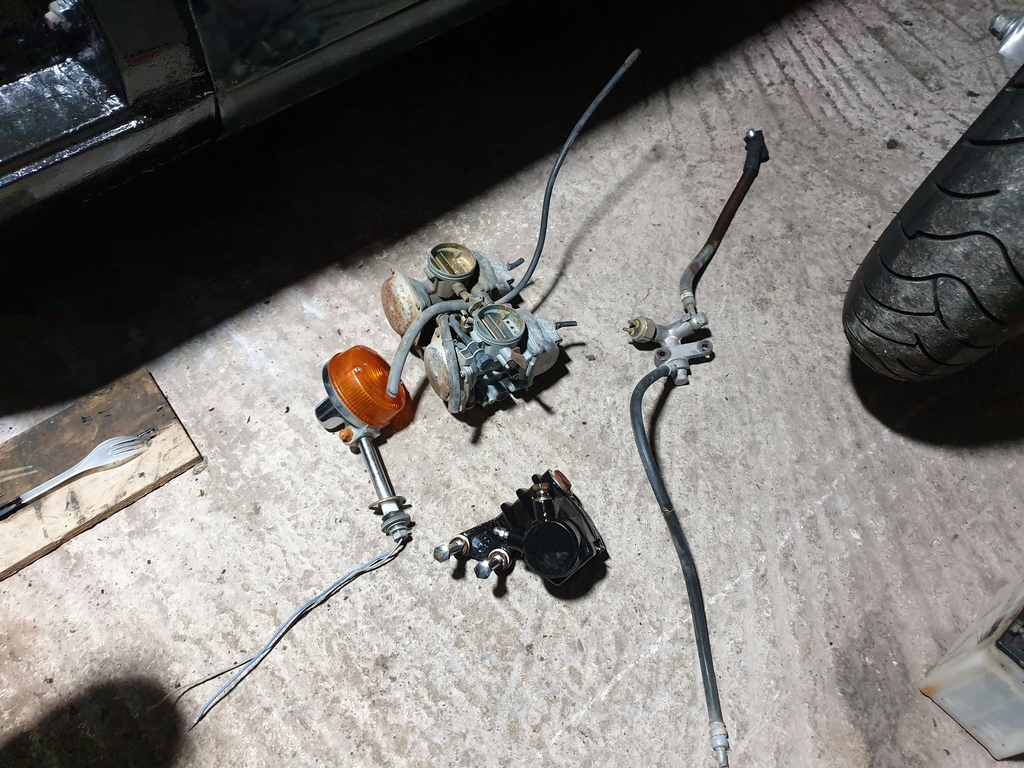 Front mudguard off as well, this and the rear one aren't in particularly great shape with plenty of rust starting underneath and making its way through, but I'll be able to clean them up and make them usable for now 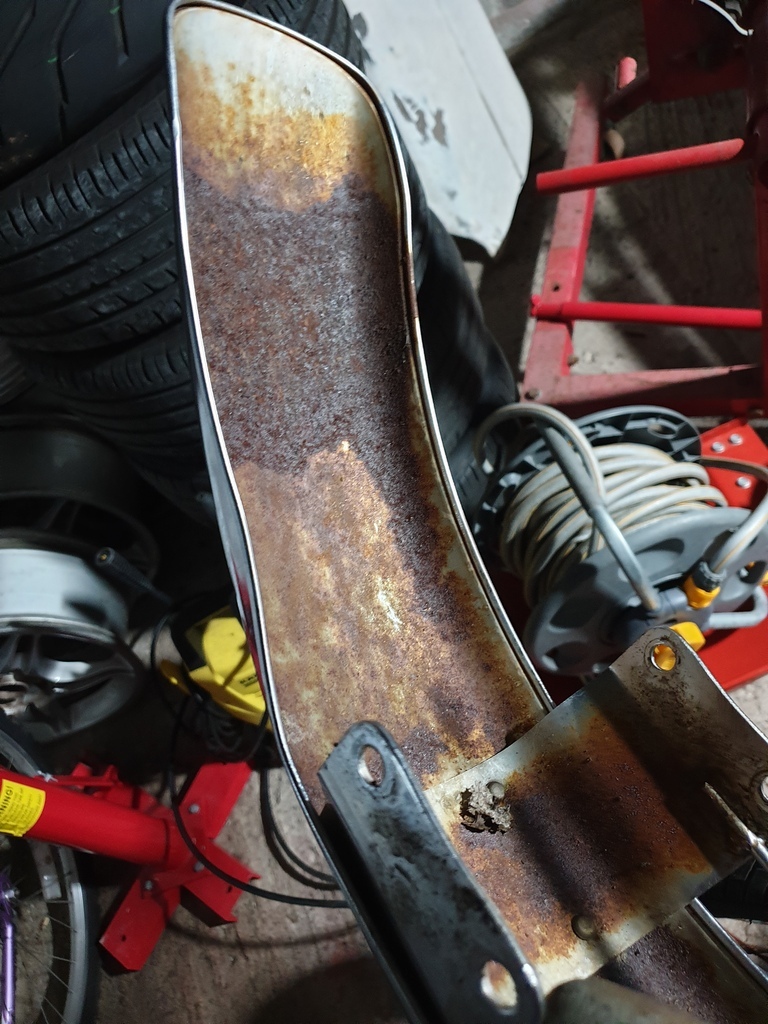 The Fork dust seals have gone the way of 90% of the rubber on the bike thanks to years of exposure to the California sun 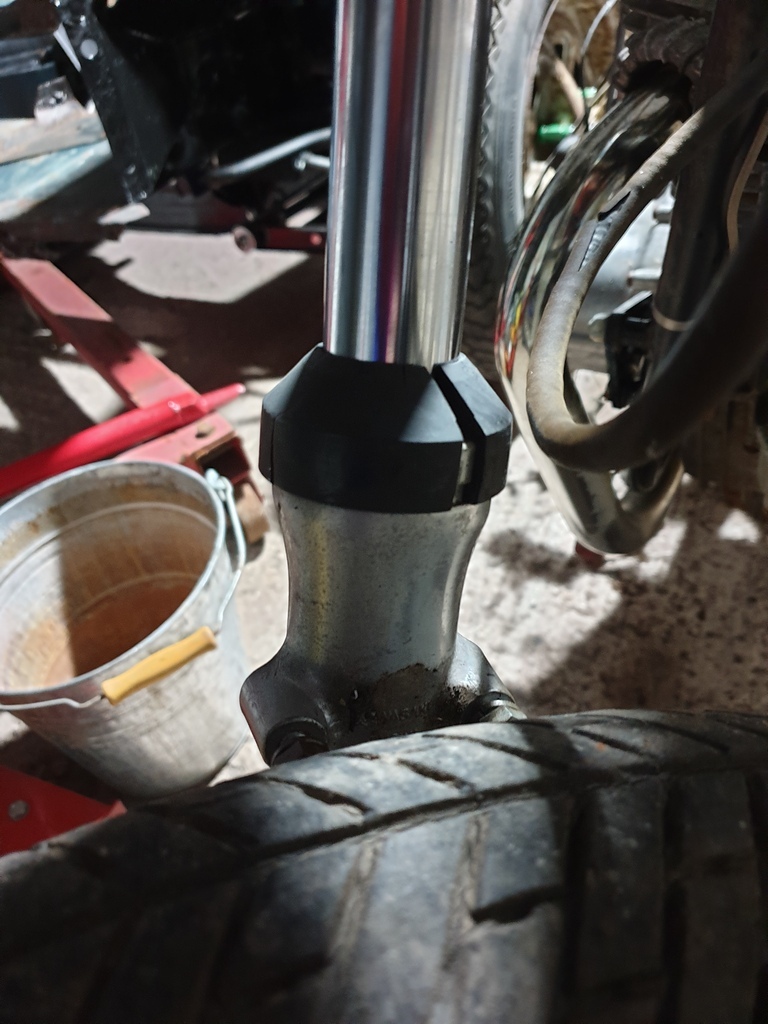 Ah yeah, those carb rubbers, an impressive amount of cracking even by this bikes standards haha 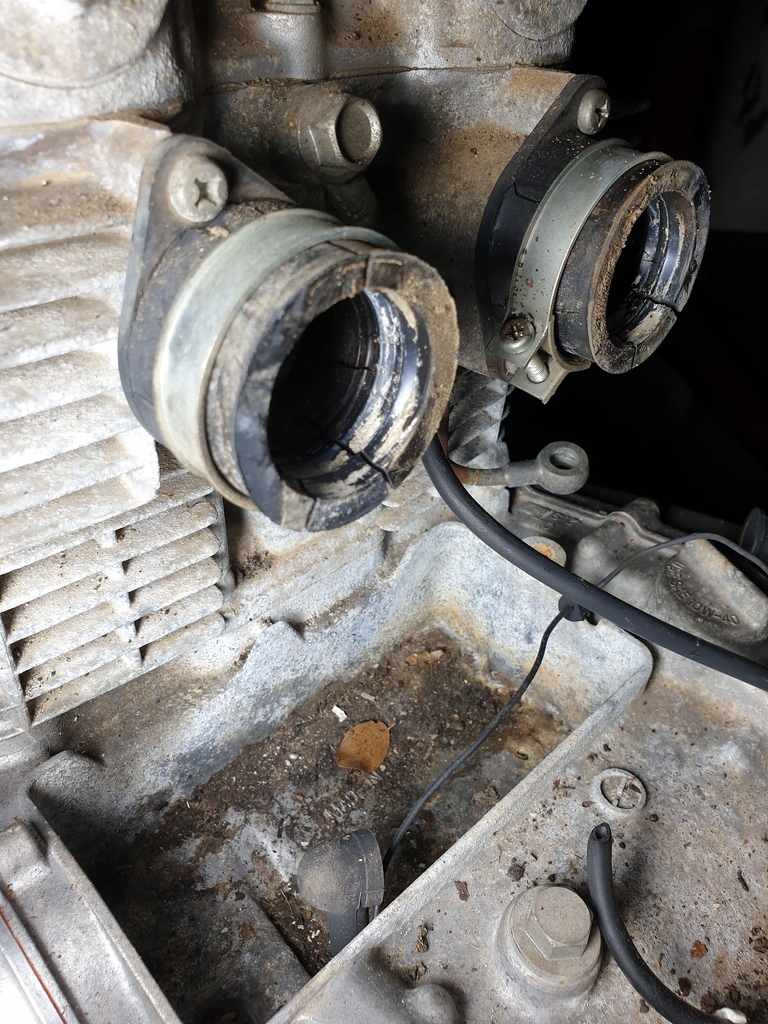 The hose clamps were probably holding them together.. By this point I was getting cold so shifted indoors, and I just had to take a little peek inside the carbs to see what would be awaiting me... 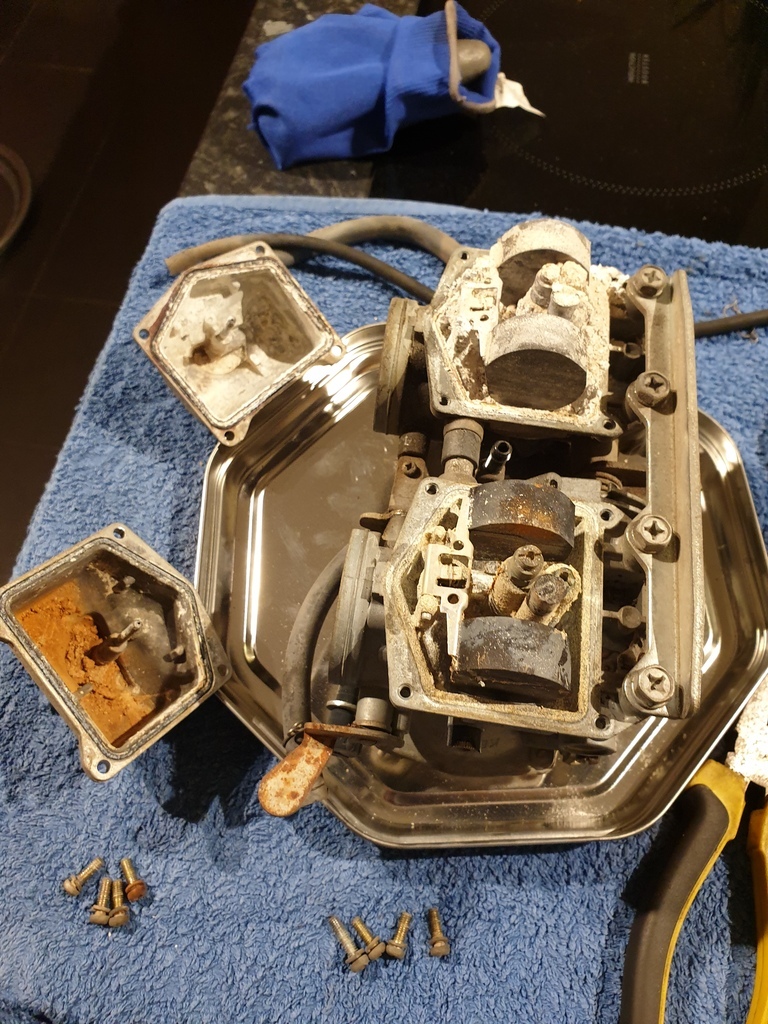 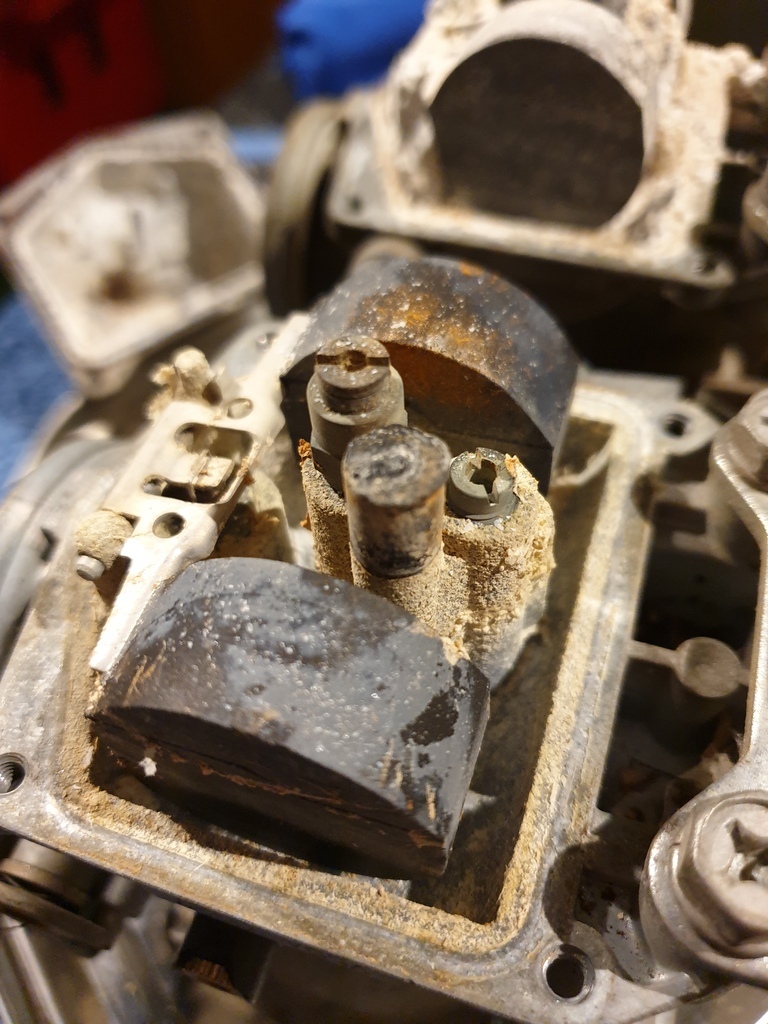 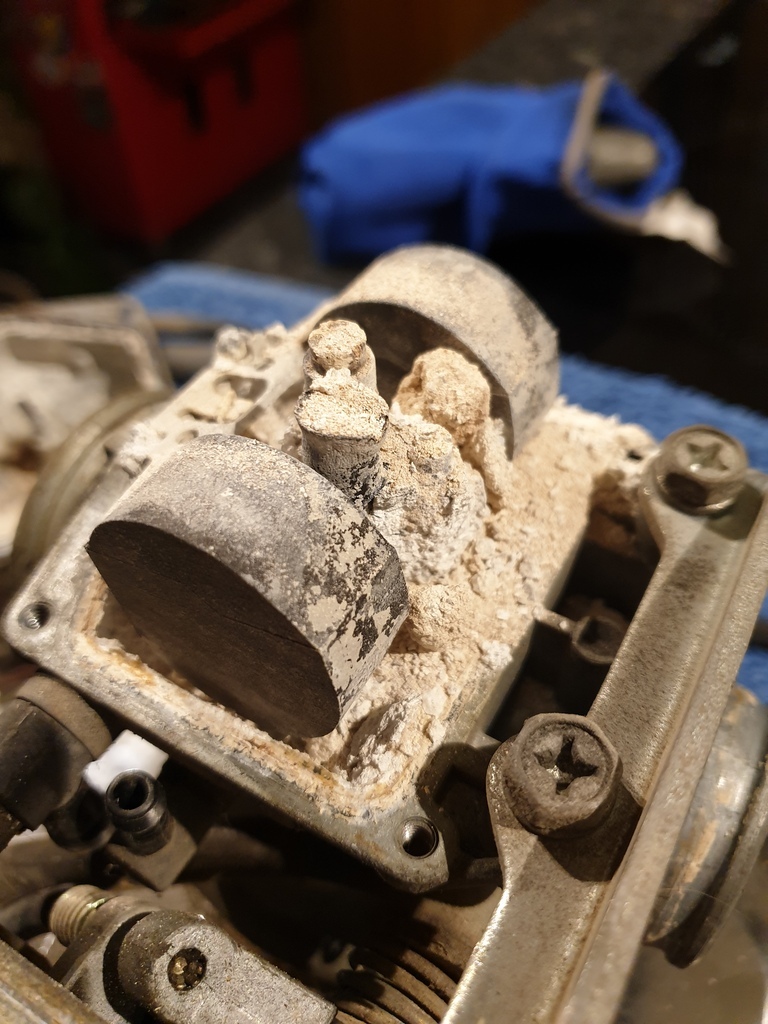 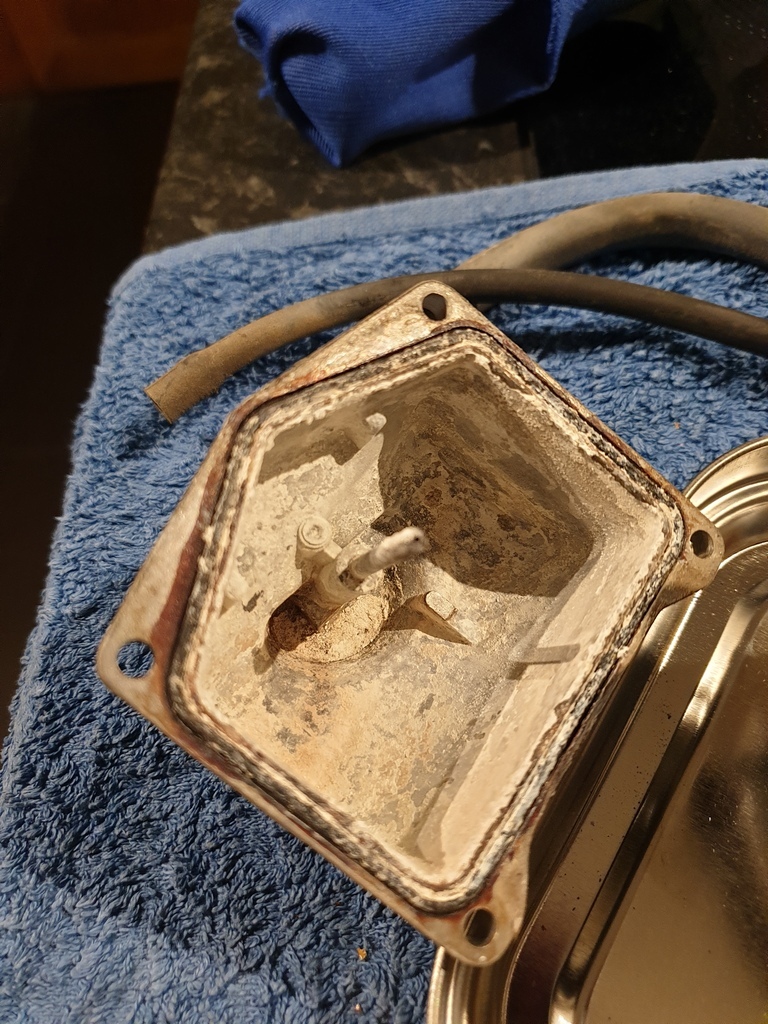 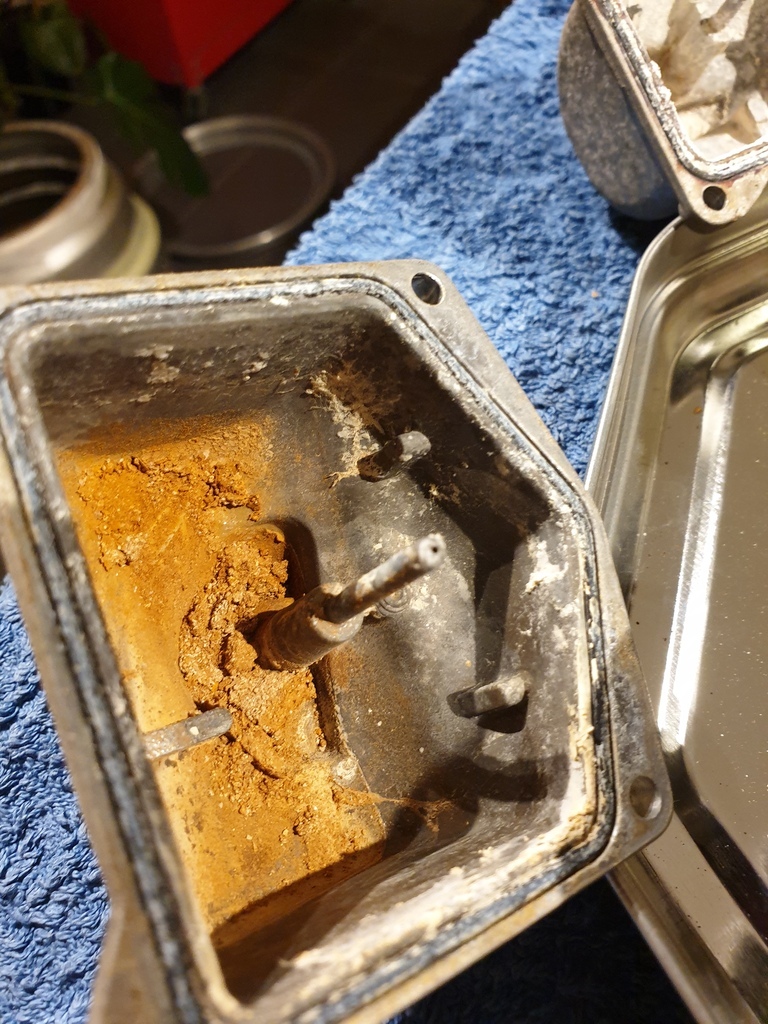 I've done a few sets of carbs in my time, but I think these are comfortably the worst I've seen so far! I'm actually looking forward to getting stuck in and seeing if I can resurrect these, might finally treat myself to an ultrasonic cleaner. I did also check the tops as I know the rubber diaphragms can be a bit pricey for these, 50% good news, one was fine, the other is torn 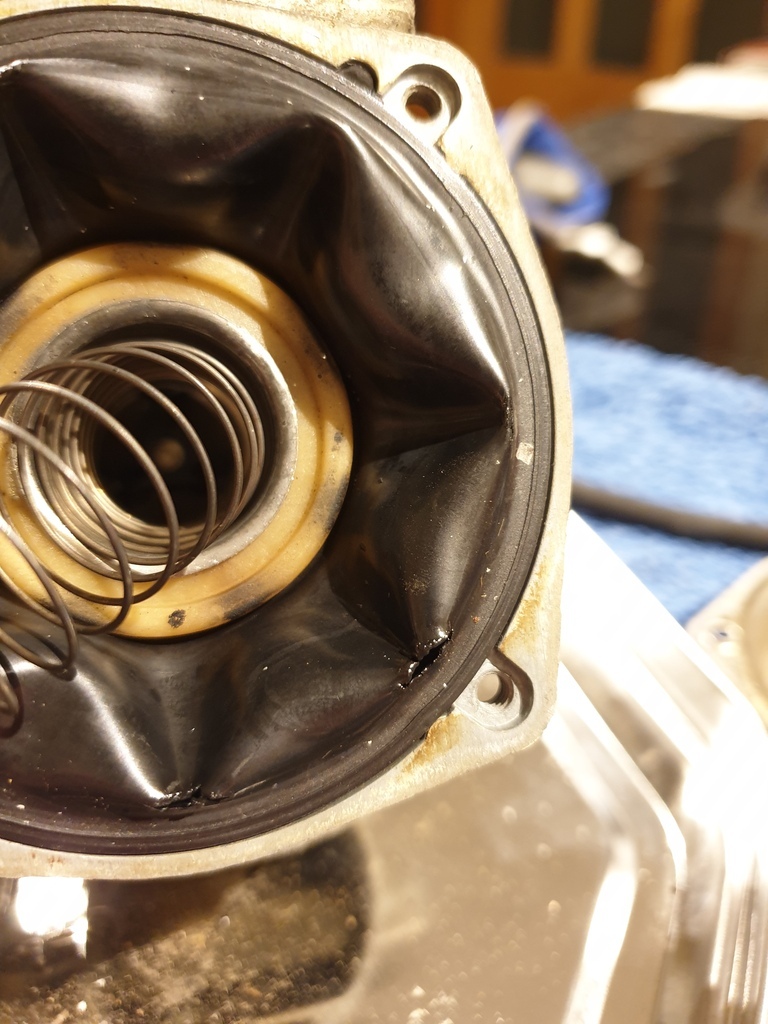 I'll delve further into the carbs at a later date. Fast forward to today and rather than use my time trying to fix a few issues with my daily driver, I thought lets get the bike out and really crack on. I have a half day on Friday at work, so had a few daylight hours to play with, which helps the motivation. I started with getting the exhausts off 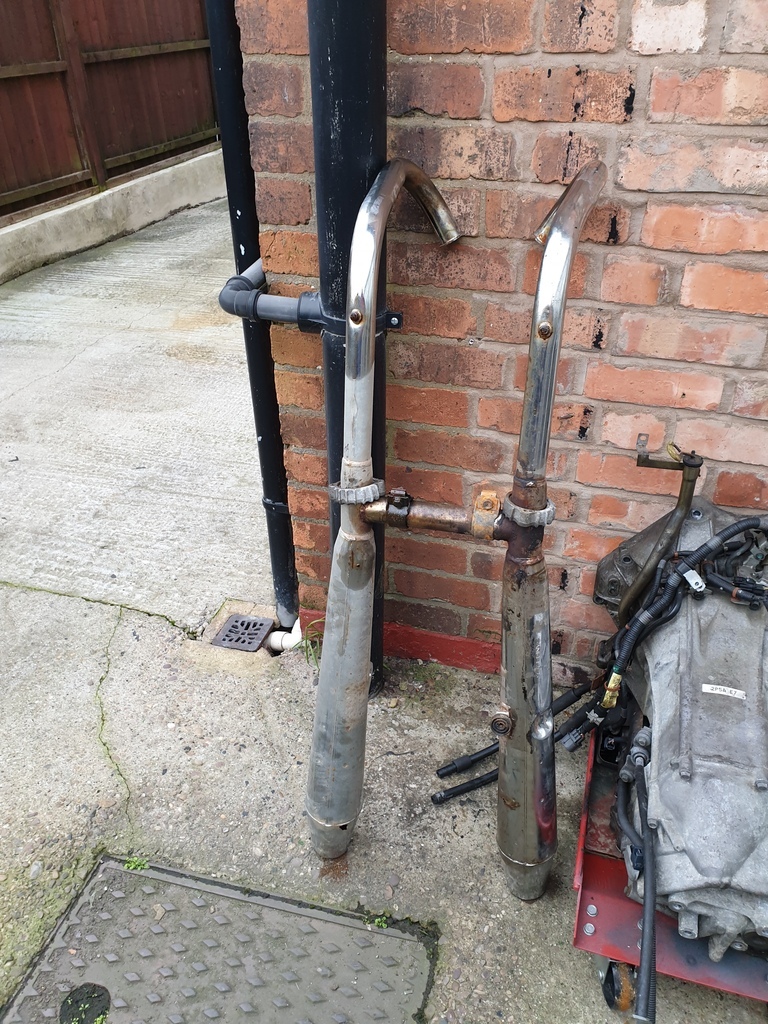 Both silencers are rust holed so I don't know how much of this will be reusable but I'll put them to the side for now as it'll be a while before I need to worry about exhausts. From there, I just kept taking bits off really, foot pegs, headlight and gauges, and then I started getting the wiring all out, working from the back to the front. Taking off anything else as required as I went 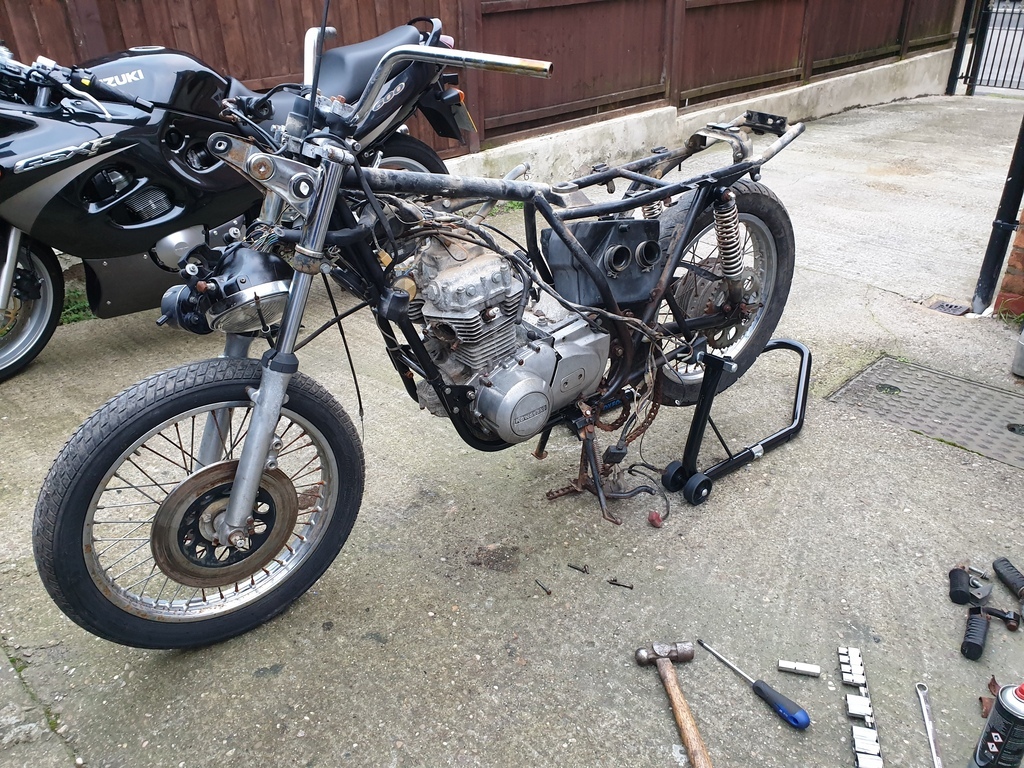 Paddock stand came in quite handy as I got one of the engine side covers off to remove the remains of the near solid chain 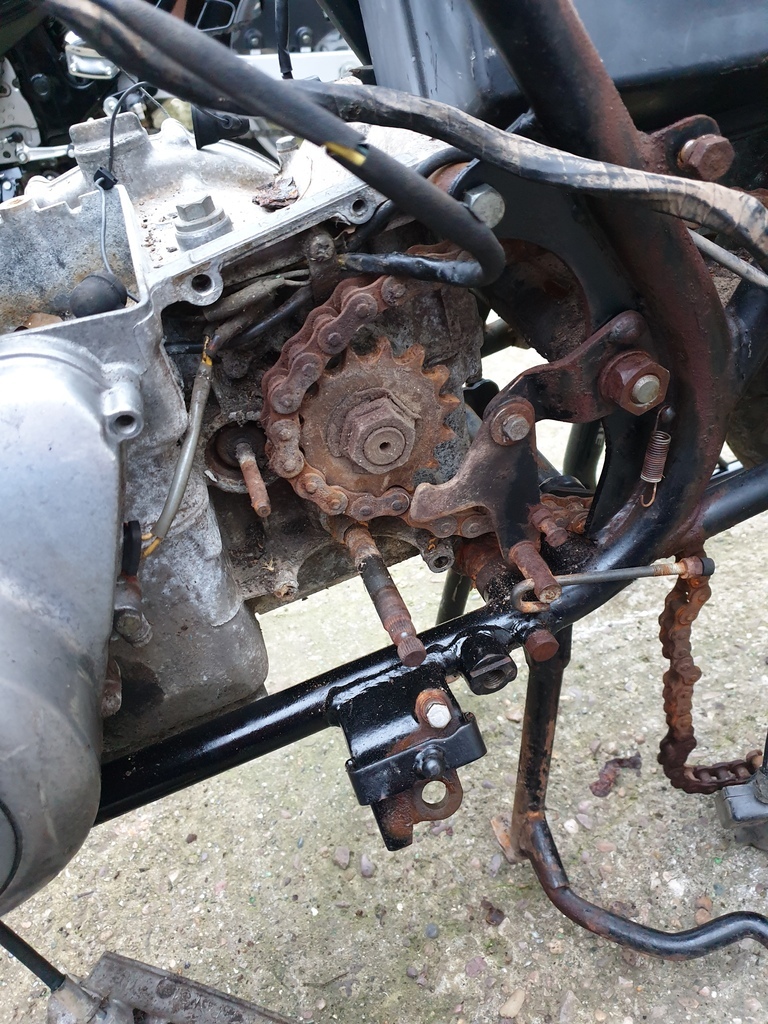 Eventually, I got the wiring loom off with headlight and gauges attached 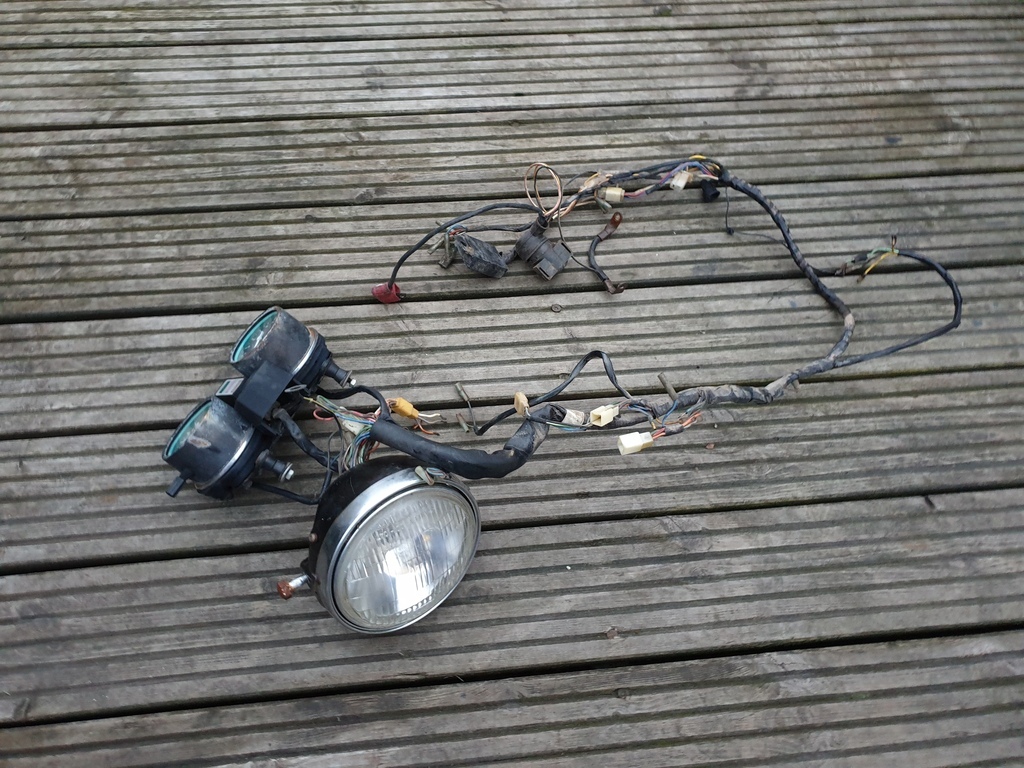 Despite there being some evidence of mouse activity with a few of the plastic plugs having nibble marks, the wiring seems largely intact. The plastic seals around the bullet connectors really seem to have done their job as well, as very few of the connectors had any rust on them at all once split open. The wiring to the ignition switch has been cut by someone, and a few wires around the headlight area had been pulled out for some reason, but it shouldn't be hard to go through all the wiring and finding any issues. Not too much left to take off now 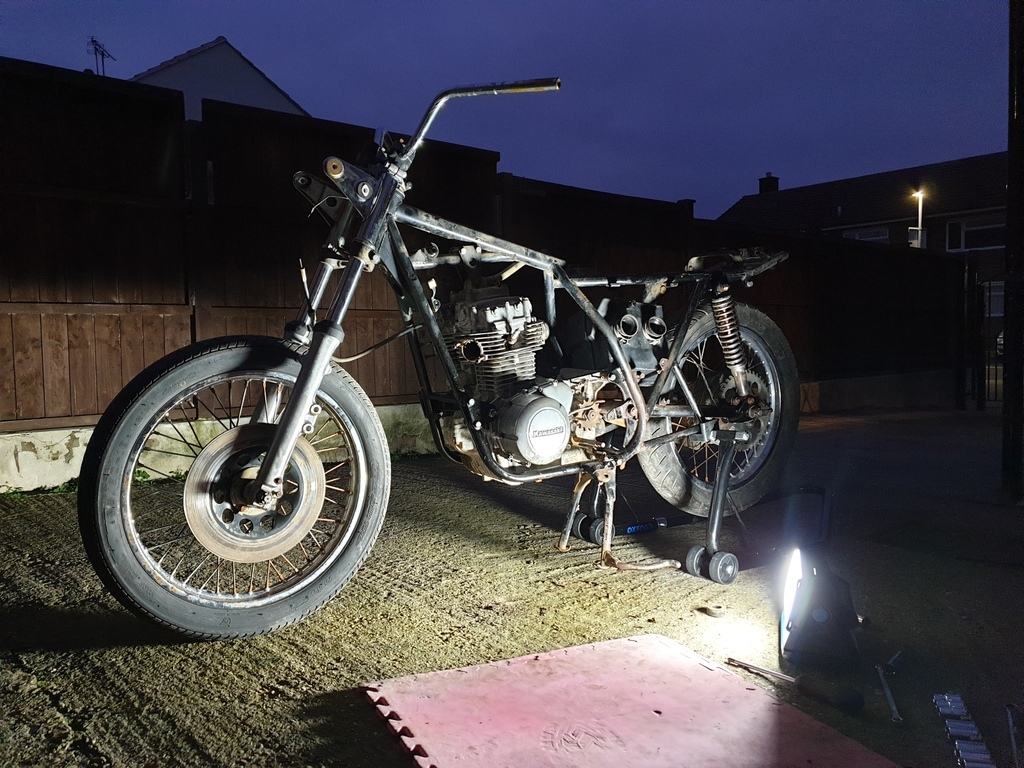 Last job for the evening was to drain the oil. I actually drained a fair bit of water first, before the black oil followed, so that's fun  I'm certainly in no doubt that this engine will need fully stripping down, I have also been keeping an eye on another Z400 engine on ebay which may be useful as a source of parts so we'll see what happens there. For now, I'll get on with manhandling the engine out, then front and rear suspension until I can get it down to a bare frame  |
| |
|
|
adam73bgt
Club Retro Rides Member
Posts: 4,993
Club RR Member Number: 58
|
|
Jan 22, 2022 21:26:50 GMT
|
A bit dodgy as a one man job, but got the engine out  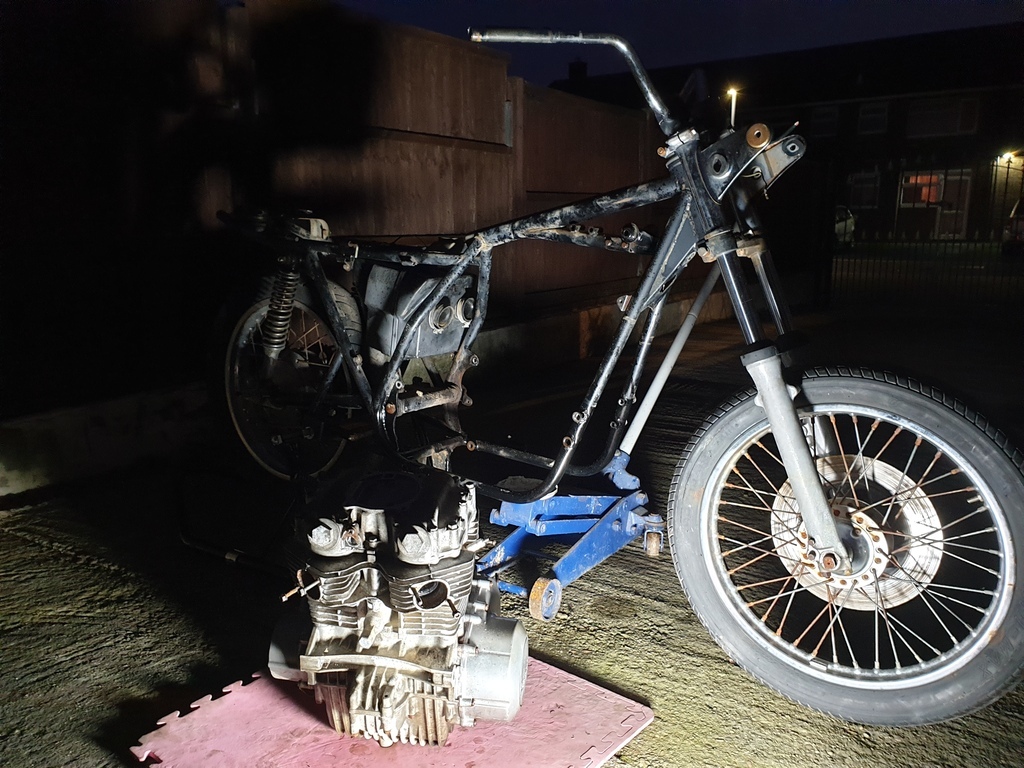 |
| |
|
|
goldnrust
West Midlands
Minimalist
Posts: 1,887
|
|
Jan 22, 2022 23:16:08 GMT
|
|
Yes always one to warm your back up before attempting!! Still, much easier than lifting a car engine out with just your muscles! Haha.
Think it’s sounds like the right move to strip it right down and start from scratch. Fingers crossed for you there’s Nothing too nasty hiding in the engine.
How is parts supply for old Kawasakis? I’ve never owned one (Honda / Suzuki are my go to Japanese bikes)
|
| |
|
|
adam73bgt
Club Retro Rides Member
Posts: 4,993
Club RR Member Number: 58
|
|
|
|
|
I shall have to devise a smarter plan for installation or find an assistant if I don't want to scratch my frame or the engine up!
Parts wise there doesn't seem to be a huge amount of sellers in the UK, there's a few bits floating around, I'll see where I come up short as I get ordering stuff. Certainly seems to be some options in Europe or the US if I get really stuck though
|
| |
|
|
|
|
|
Jan 23, 2022 10:34:05 GMT
|
|
Great project. I'm a sucker for bike resto's... my lack of progress on my Morris Oxford station wagon will testify to that.
Finding parts for old bikes can be a pain, god knows what it would be like without the internet. I remember the olden days of trudging round the multiple breakers that Leeds seemed to have back then.
These days it's patience and sitting on the computer.
Good luck with it.
|
| |
|
|
adam73bgt
Club Retro Rides Member
Posts: 4,993
Club RR Member Number: 58
|
|
Jan 25, 2022 21:51:47 GMT
|
Thank you  Yeah I remember my grandad finding parts for his BSA easier to find than for his Honda, this would have been in the early 00's when he wasn't on the internet at all, certainly much easier these days! Having done a bit of searching, I think I should be OK for getting parts, biggest outlay will probably be a seat and exhausts, but will see when the time comes Having not completely wrecked my back from the engine removal, I came back and all but finished off dismantling my "rolling shell". Started with the rear as it was up on the paddock stand 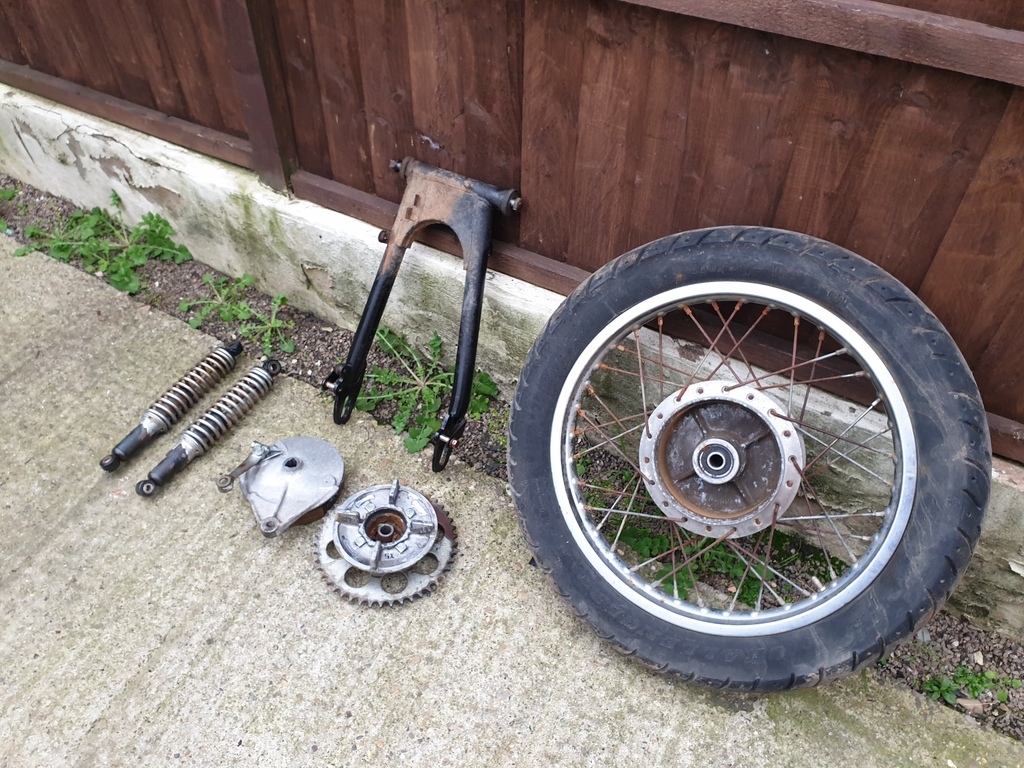 Everything came apart pretty easily, the swingarm pivot bolt had signs of grease even if it smelled old and horrible  Which is more than can be said for the rear wheel bearings... 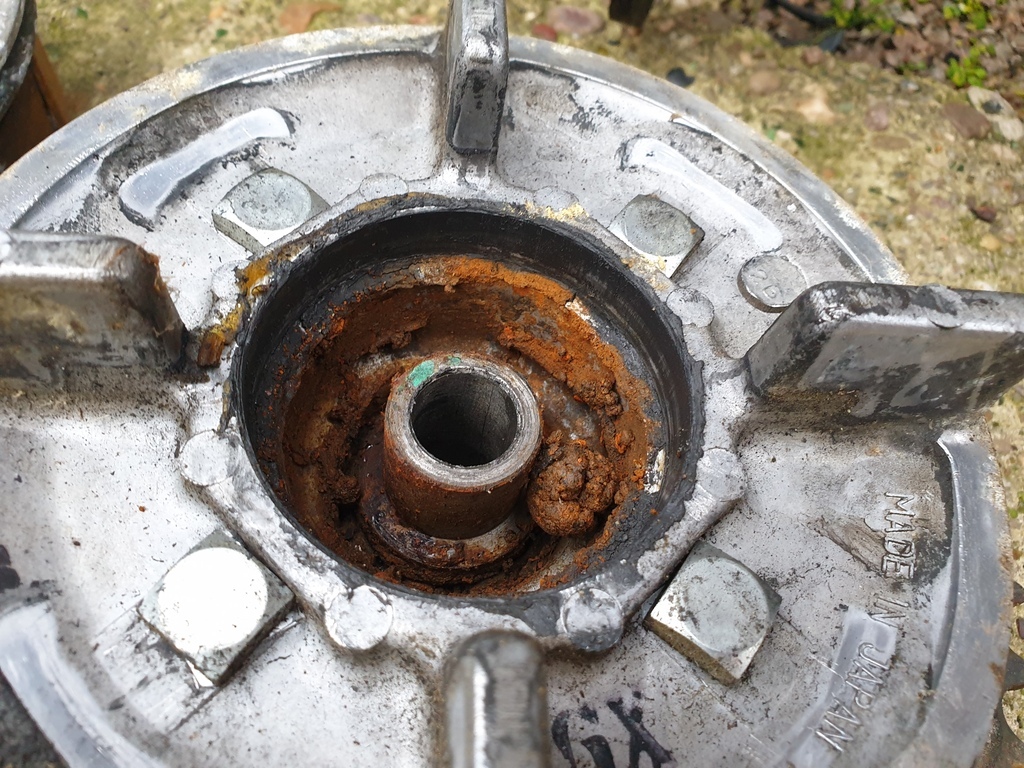 What a mess. Needless to say, I'll be replacing front and rear wheel bearings with updated sealed units, which appear to be quite readily available. The cush drive rubbers don't look awful to me? But since I'm here, I think it makes sense to get some new ones in there 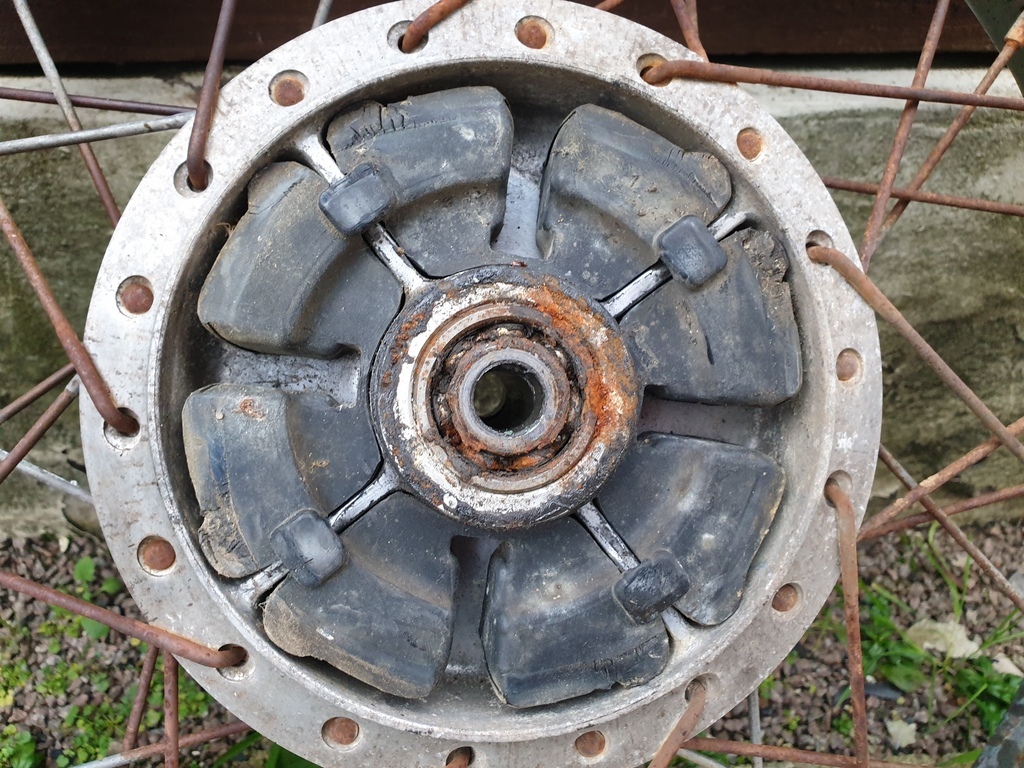 A bit of a similar story with the rear brake shoes, they may well clean up, and there is some material left there, but I feel like it would be a false economy to not just put some new shoes in while I've got the chance. 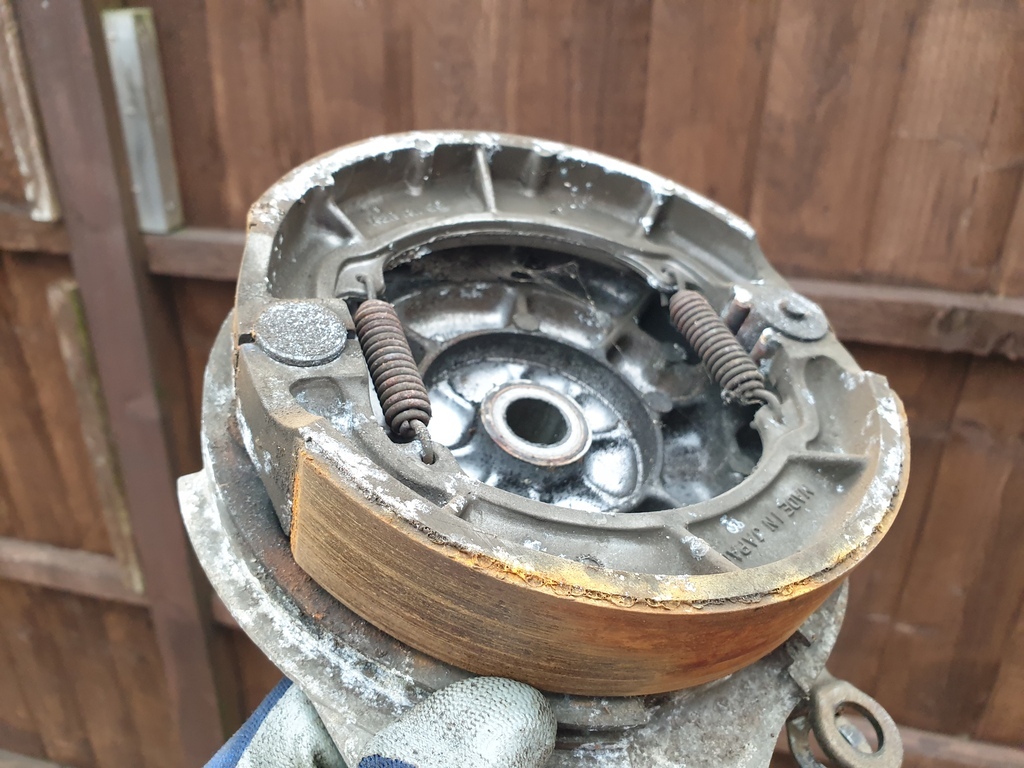 I need to get the junk rear tyre off so I can get stripping the wheel down and see what length spokes I need to get, the outer rim has a couple bits of pitting but I think it'll clean up perfectly fine for my purposes. I then got the front forks out, these do have some rust pitting on them so I'll need to get some parts there, I'll be having a go at rebuilding the internals anyway 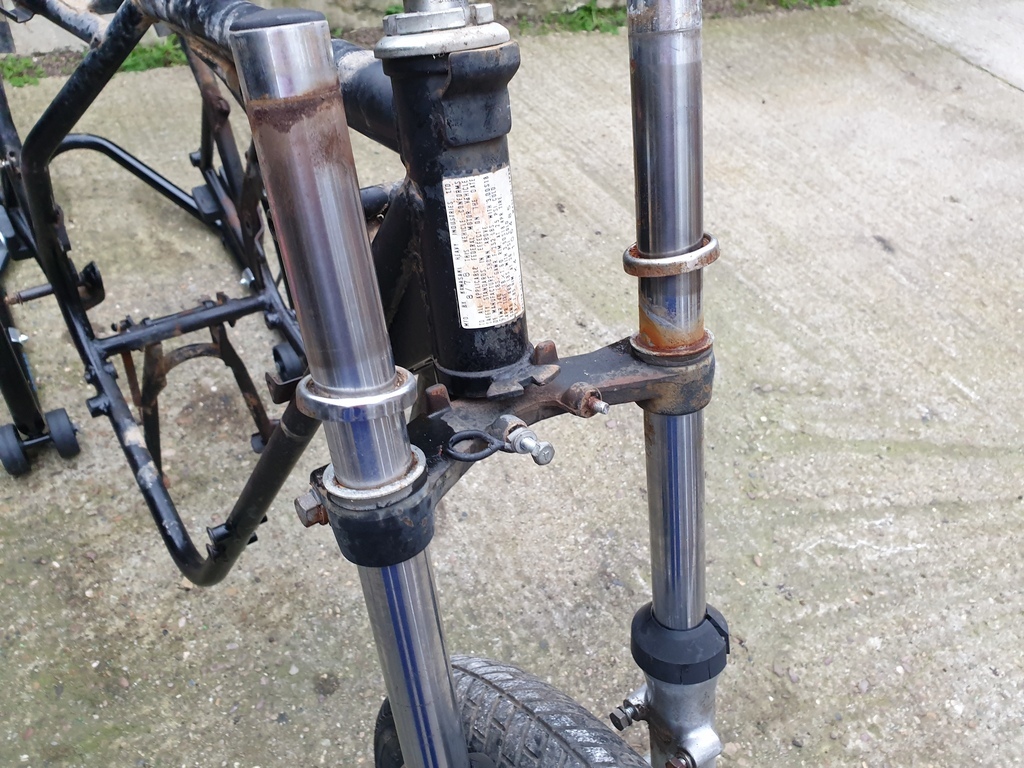 (You can also see the stub of a snapped off bolt that held the brake hose junction block thing) Soon enough I was left with a frame, and a bunch of parts 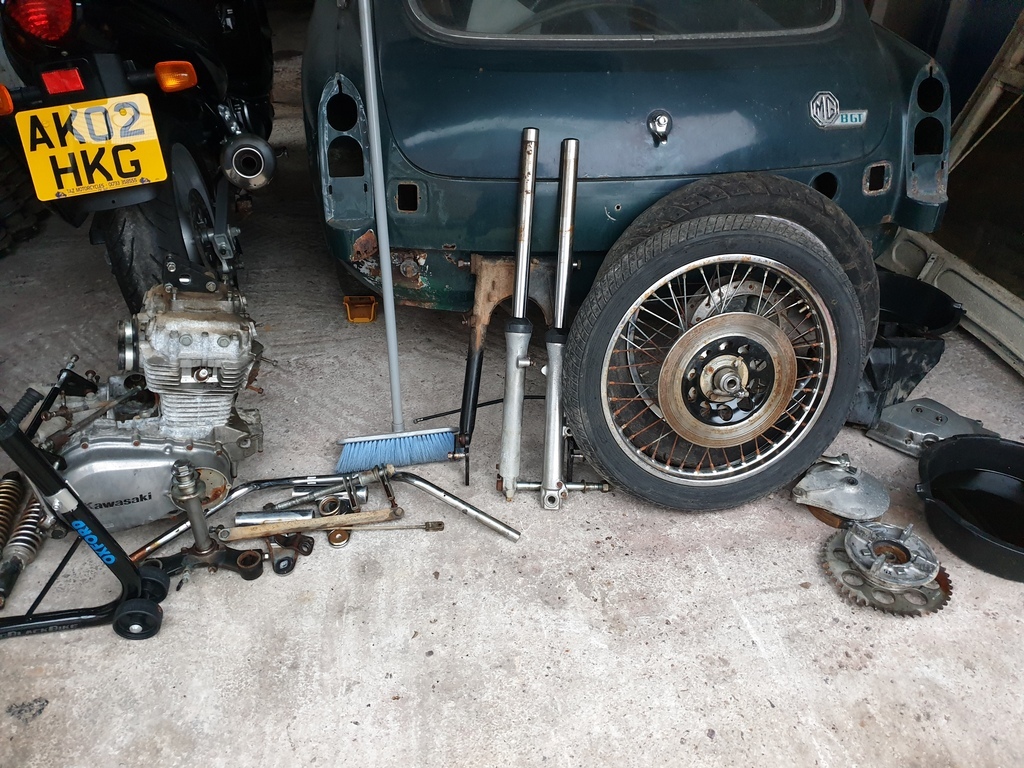 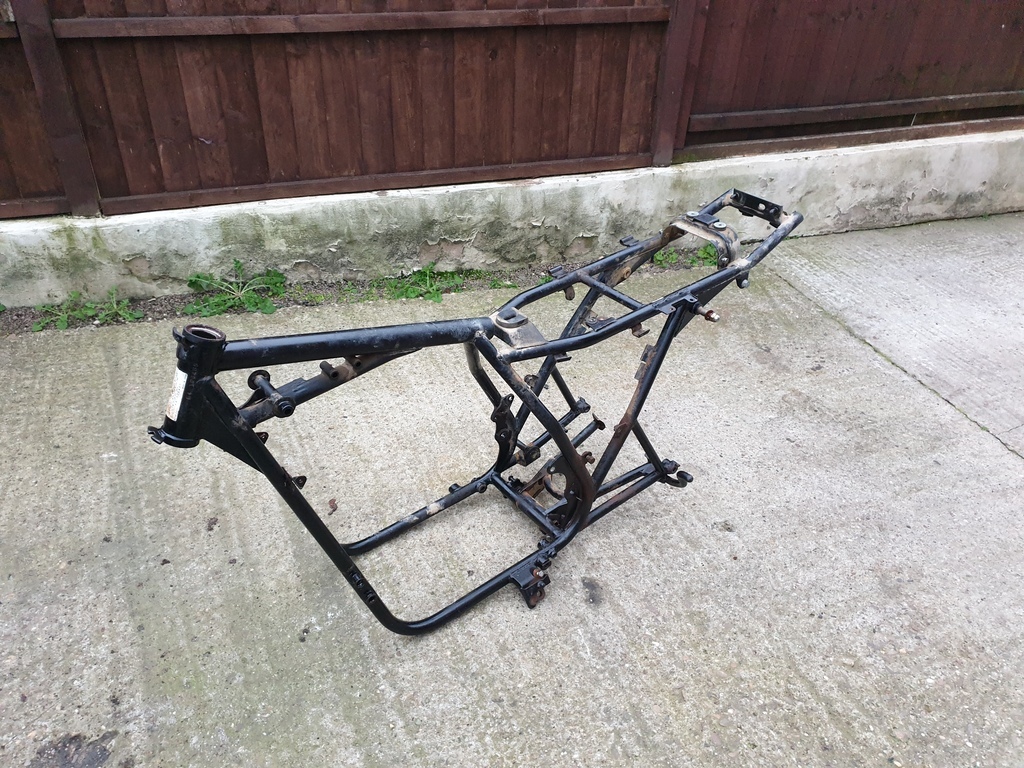 The eagle eyed may have noticed that the frame isn't quite completly stripped as it stands... The centre stand, or more specifically it's pivot, was refusing to budge. I've left it to soak with some penetrant and will likely get some heat involved to persuade it off. Oh also, the steering head bearings had lovely ancient rock hard grease like the rear wheel too 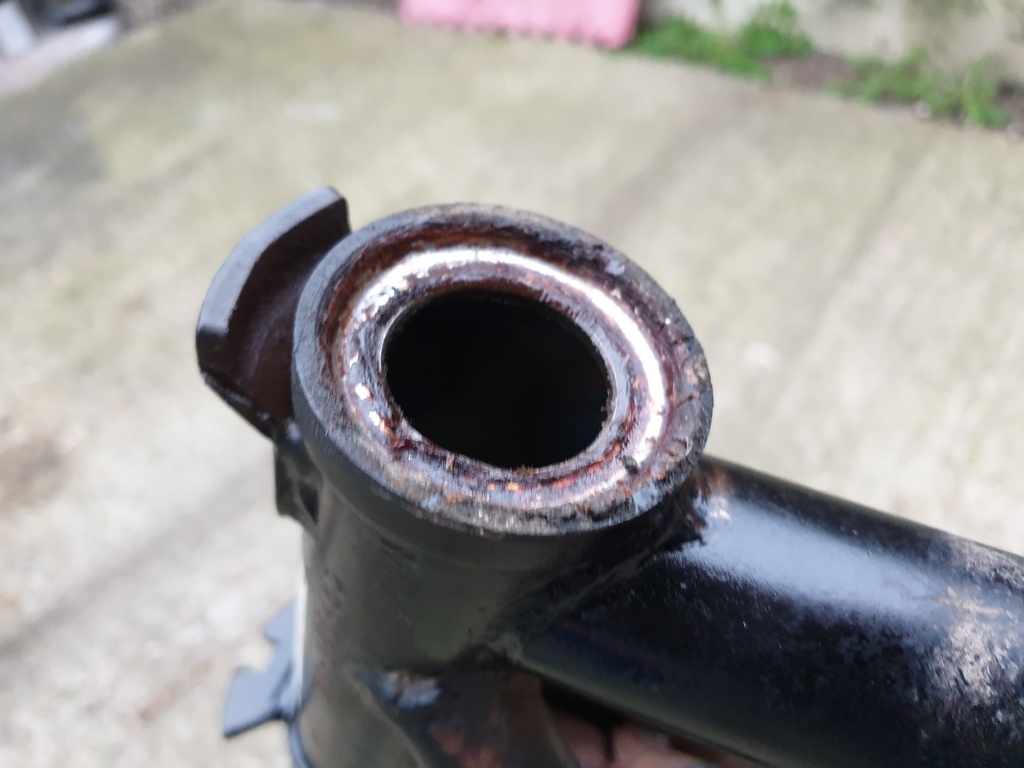 And are of the old ball bearing type, so I'll get the races out and replace them with tapered bearings instead. My next jobs now are a lot of cleaning! Of all the parts and the frame, there are a couple of snapped bolts to drill out of the frame as well which I'll take care of before touching up the frame paint with some more black. Before I go tearing into the engine, I expect I'll do a bit of "installation is reverse of removal" and sort the wheels and suspension first so I can make it a rolling frame again as it just makes logistics a bit easier. |
| |
|
|
93fxdl
Posted a lot
   Enter your message here...
Posts: 2,019
|
|
Jan 26, 2022 12:22:09 GMT
|
|
Save some wedge by repairing the fork legs, clean the rust off, decgrease, fill the pits with jb weld, sand smooth, jobs done,
Ttfn Glenn
|
| |
|
|
|
|


 My overall plans for the bike are a sympathetic restoration to make it a rider, I'm not going all concours spec, nor am I going to turn it into a cafe racer or a scrambler, should just be a nice retro rider


 My overall plans for the bike are a sympathetic restoration to make it a rider, I'm not going all concours spec, nor am I going to turn it into a cafe racer or a scrambler, should just be a nice retro rider


 Was able to kick it over too, so that seems to work, which is good as the starter motor is one of the missing parts


