jonomisfit
Club Retro Rides Member
Posts: 1,788
Club RR Member Number: 49
|
|
|
|
Nice work with your cabinets! It makes a big difference to get more organised in the garage, makes life easier. I have also got a bunch of Stanley boxes for keeping small stuff in, have had them for years and never gotten around to build a holder/cabinet for them.. Should add that to the list. Best regards, David Having it properly organised should make a big difference for me. The other advantage the cupboards will bring is cutting down the dust that gets on everything! |
| |
|
|
|
|
jonomisfit
Club Retro Rides Member
Posts: 1,788
Club RR Member Number: 49
|
|
Dec 17, 2022 21:29:59 GMT
|
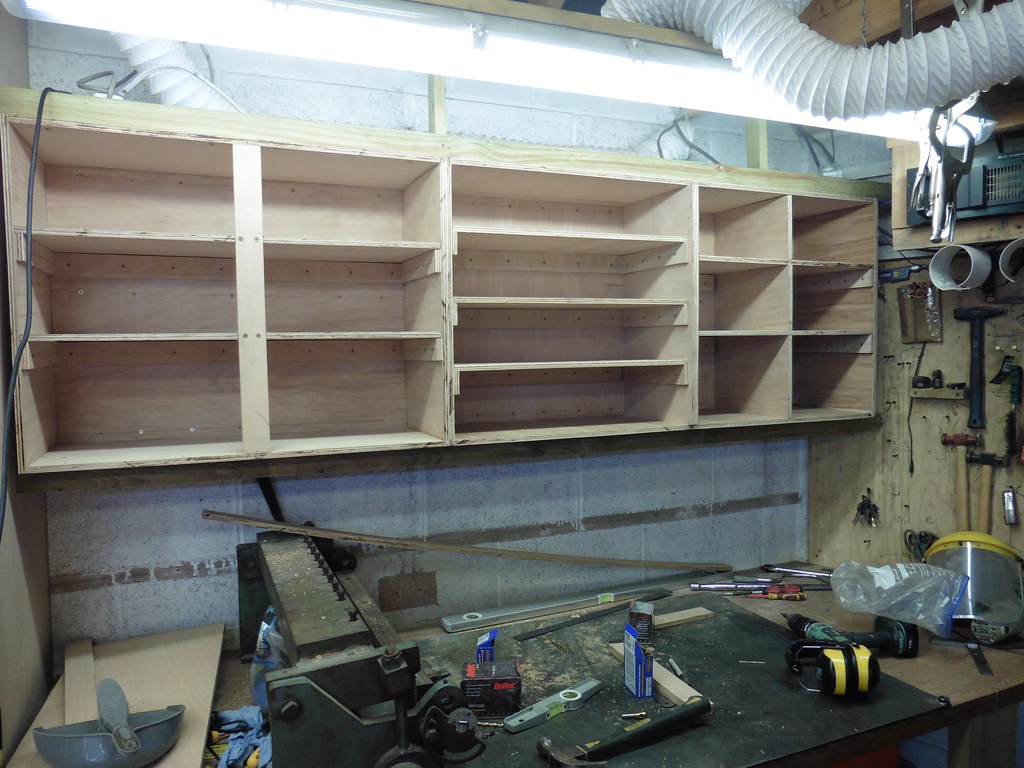
Well, that was cold.... so much so my camera has mainly refused to work. I got a couple of pics though. I cut some wood to make the cabinets up. and started prep to glue and screw the joints  P1070133 P1070133 by jono_misfit, on Flickr the camera didnt work for a while, but mainly more cutting, glueing and screwing, and I ended up with some carcasses 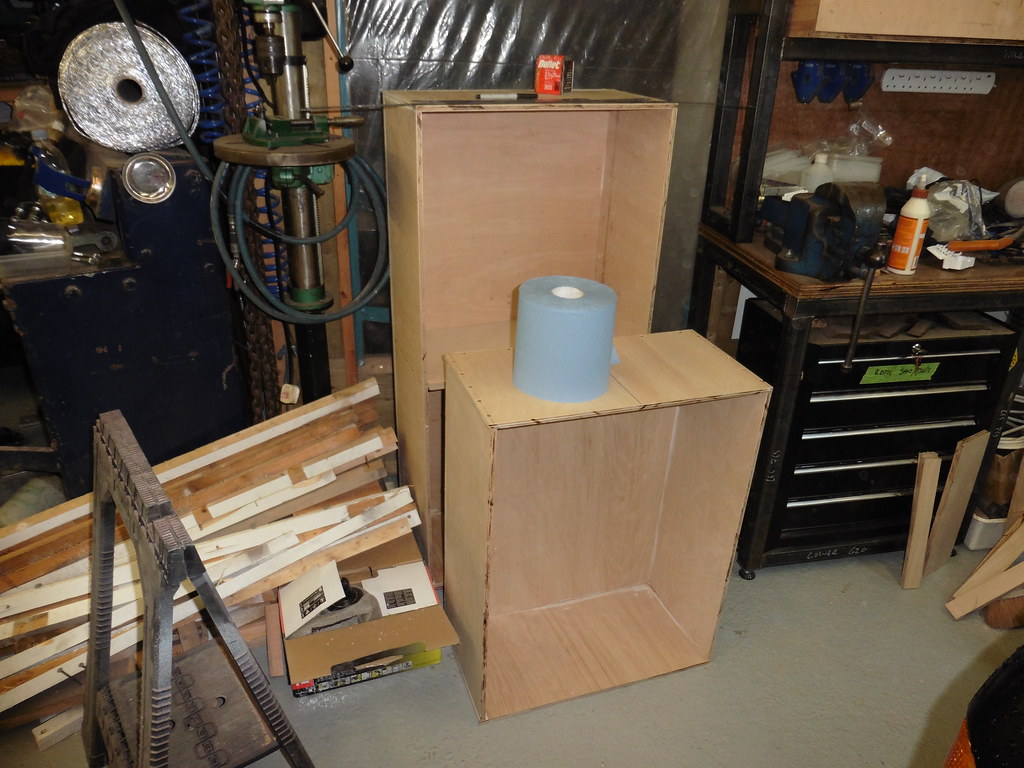 P1070136 P1070136 by jono_misfit, on Flickr removed all the things off the shelves and stripped them off the wall  P1070135 P1070135 by jono_misfit, on Flickr put battons up on the wall to mount the cabinets.  P1070137 P1070137 by jono_misfit, on Flickr first cabinet on with a couple of screws.  P1070138 P1070138 by jono_misfit, on Flickr second, larger, cabinet on the wall  P1070139 P1070139 by jono_misfit, on Flickr and a load of screws added  P1070140 P1070140 by jono_misfit, on Flickr and started on the shelves  P1070141 P1070141 by jono_misfit, on Flickr I wanted full width shelves on this, so added a centre support to the front to support the shelves and hopefully stop them sagging too much.  P1070142 P1070142 by jono_misfit, on Flickr Other shelf support to make up next time, before top supports and doors. |
| |
|
|
jonomisfit
Club Retro Rides Member
Posts: 1,788
Club RR Member Number: 49
|
|
Dec 21, 2022 20:59:46 GMT
|
|
|
| |
|
|
jonomisfit
Club Retro Rides Member
Posts: 1,788
Club RR Member Number: 49
|
|
Dec 22, 2022 18:59:53 GMT
|
Fitted the last door  P1070151 P1070151 by jono_misfit, on Flickr hinges all work  P1070152 P1070152 by jono_misfit, on Flickr Then added handle / hide the wonky edges strips  P1070153 P1070153 by jono_misfit, on Flickr Made a start on additional electrics (must get fire extinguisher recharged and some additional)]  P1070155 P1070155 by jono_misfit, on Flickr copex in the corner to protect the cables a bit  P1070156 P1070156 by jono_misfit, on Flickr and a socket at the middle of the bench  P1070157 P1070157 by jono_misfit, on Flickr temporarily relocated this socket whilst I work out what i'm doing with them in this area  P1070158 P1070158 by jono_misfit, on Flickr and relocated this one up here (still to clip the cables)  P1070159 P1070159 by jono_misfit, on Flickr and put one on down here.  P1070160 P1070160 by jono_misfit, on Flickr I need to buy some new sockets (these are old ones dragged out a box) so these are only on temporarily at the moment. |
| |
|
|
bstardchild
Club Retro Rides Member
Posts: 14,968
Club RR Member Number: 71
|
|
|
|
Organisation is looking great  I saw an awesome home built storage for the fatmax storage boxes on a thread elsewhere 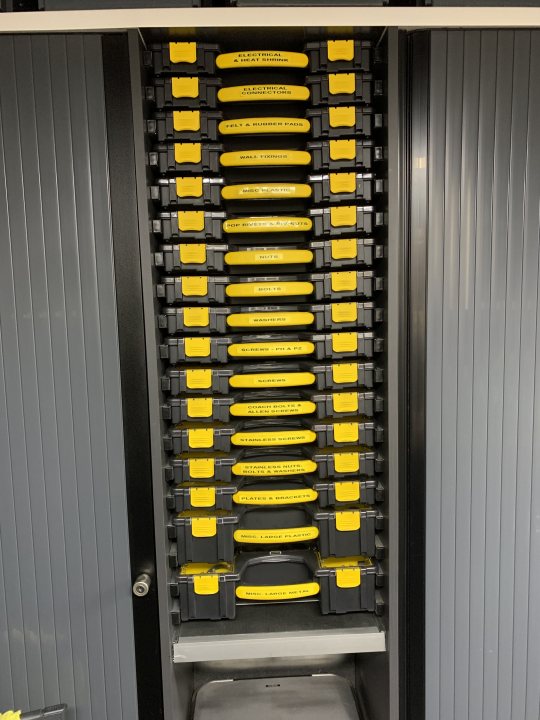 Using rails to hold the boxes rather than shelves to increase the storage space One question on the cabinets was there a reason for the three different sizes of storage - ie you had in mind objects or items for the spaces or just that it would give you flexibility? |
| |
|
|
jonomisfit
Club Retro Rides Member
Posts: 1,788
Club RR Member Number: 49
|
|
Dec 29, 2022 18:03:44 GMT
|
|
That's a neat rack.
Flexibility is the reason for the 3 difference in the cupboard size and shelving. I vaguely know what needs to go in them but not what shape it all is.
|
| |
|
|
jonomisfit
Club Retro Rides Member
Posts: 1,788
Club RR Member Number: 49
|
|
Dec 29, 2022 21:35:54 GMT
|
I started filling the cabinets back up with things. Mainly to get the right things in the right cabinets, then i'll sort out the right things in the right place in the right cabinets.  P1070161 P1070161 by jono_misfit, on Flickr  P1070162 P1070162 by jono_misfit, on Flickr 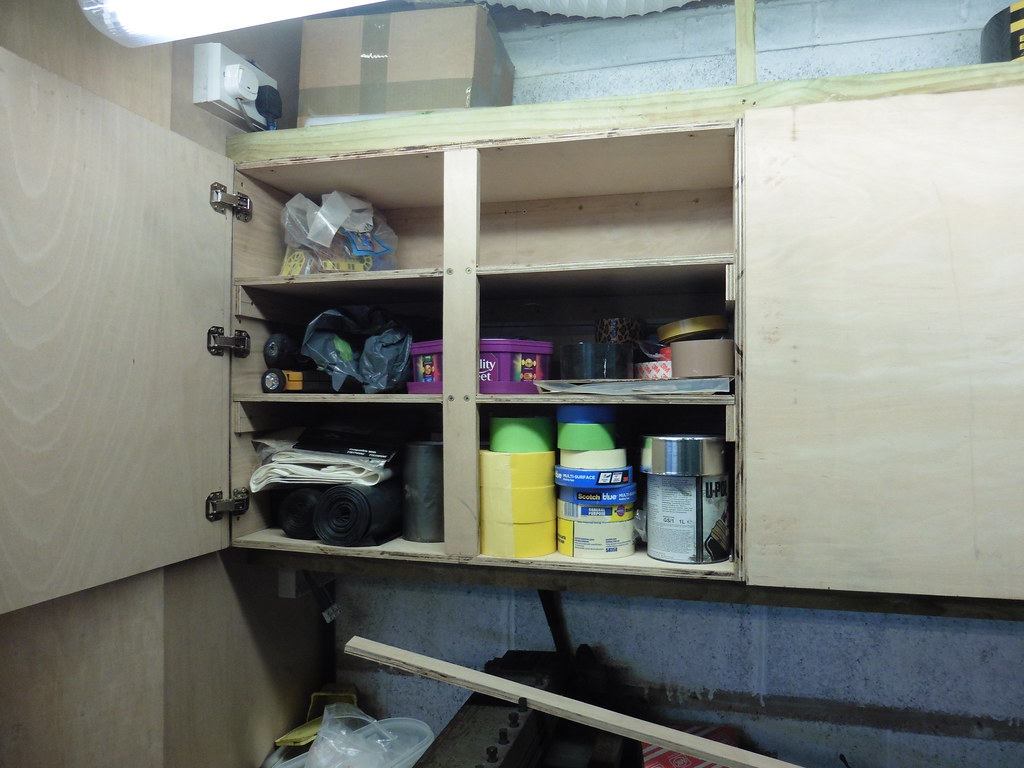 P1070163 P1070163 by jono_misfit, on Flickr added a countersink tool holder  P1070164 P1070164 by jono_misfit, on Flickr right, i#'m fed up of this big lump getting in the way on the various benches. 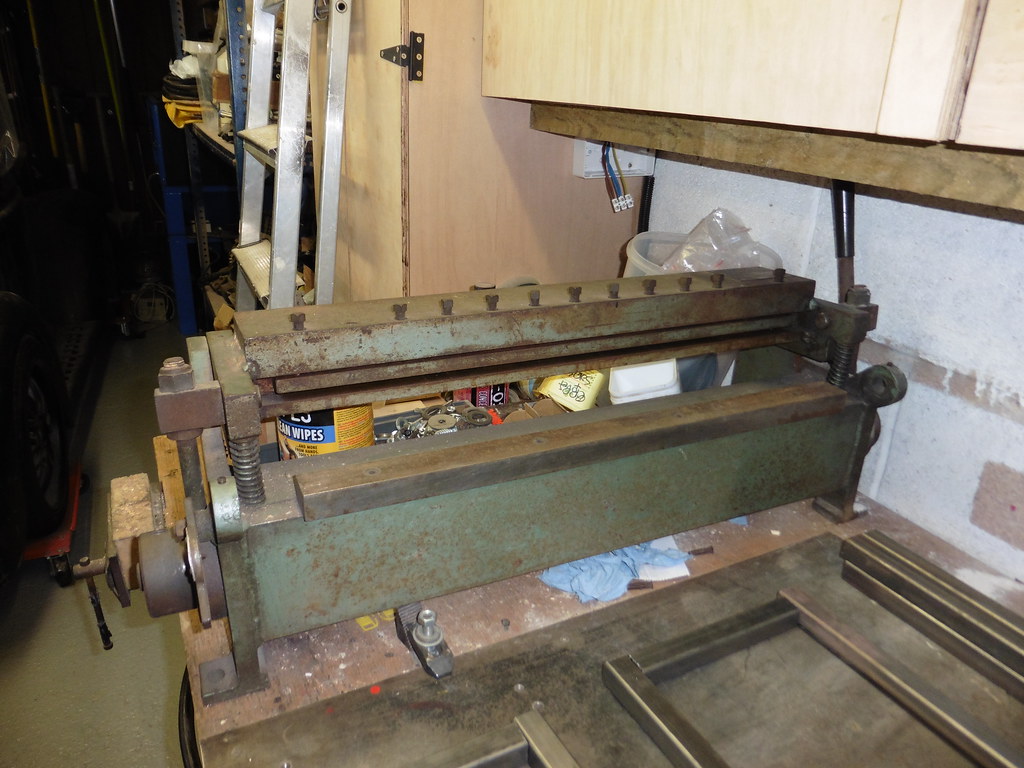 P1070165 P1070165 by jono_misfit, on Flickr I weighs a LOT, well over 50kg, so need something fairly sturdy to hold it. cut some 25 x 2mm box to size  P1070167 P1070167 by jono_misfit, on Flickr Started tacking  P1070168 P1070168 by jono_misfit, on Flickr forget to take pics for a bit.... then try it in position  P1070169 P1070169 by jono_misfit, on Flickr it was a bit wobbly, so I added some additional diagonals 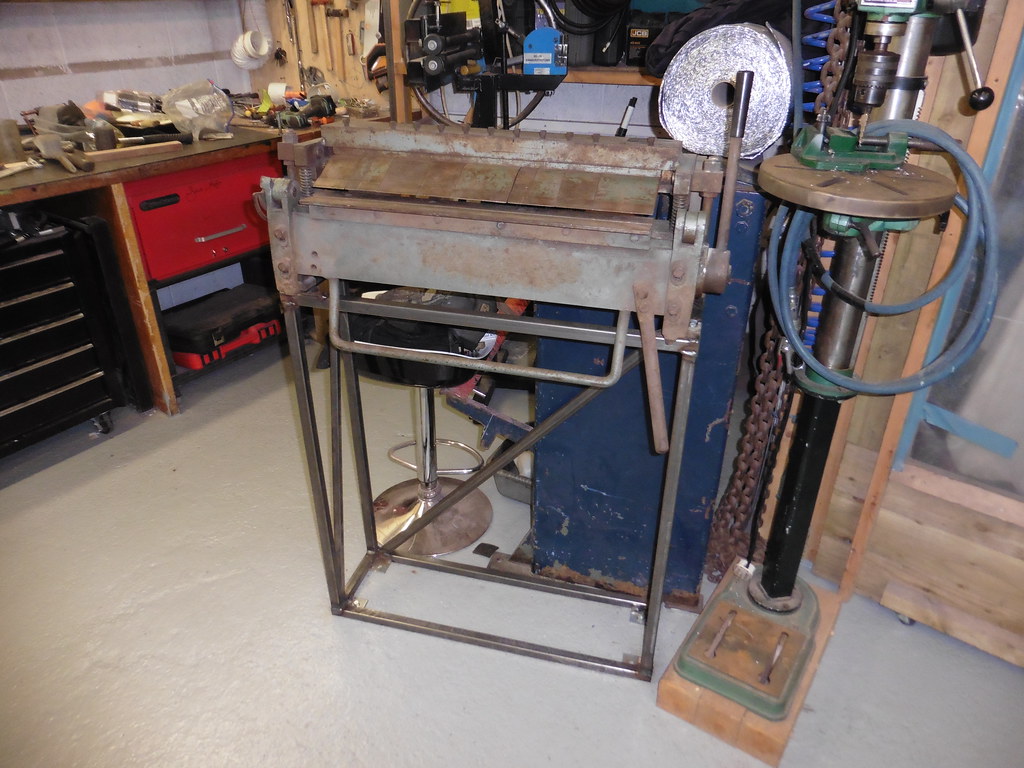 P1070170 P1070170 by jono_misfit, on Flickr its fairly out the way and is now useable again  P1070171 P1070171 by jono_misfit, on Flickr I need to weld in some supports so I can fit a couple of shelves under it as well. I may as well make use of the space, plus it'll help stiffen it further. I positioned it quite carefully so that the rigth hand side just (by mm's) clears the sheet metal guilloten hood, so that full length bits of metal can be inserted. I got a belt sander disc sander ages ago and its mainyl sat round getting in the way. So dug out some brackets I had and fitted it to the wall.  P1070172 P1070172 by jono_misfit, on Flickr as tight as I can get it to the wall so it doesnt stick out far, and I may well shorten the brackets as if I do then it wont stick out further than the steel rack does.  P1070173 P1070173 by jono_misfit, on Flickr In the mean while I've stuck red tape on it reduce how often I walk into it... then started on a prototype piece of wood for holding the files out the way  P1070174 P1070174 by jono_misfit, on Flickr I think i'll try cutting it with the router and see if I can make a neater job. |
| |
|
|
|
|
|
Dec 29, 2022 22:51:07 GMT
|
Organisation is looking great  I saw an awesome home built storage for the fatmax storage boxes on a thread elsewhere  Using rails to hold the boxes rather than shelves to increase the storage space One question on the cabinets was there a reason for the three different sizes of storage - ie you had in mind objects or items for the spaces or just that it would give you flexibility? All of my similar boxes are stored on their edges, not flat like that. Which means the rails aren't needed, but each box can be pulled off the shelf without a stack of other boxes coming with it. You only need to build the shelf to take the biggest box. And I label them with a permanent marker..... |
| |
|
|
jonomisfit
Club Retro Rides Member
Posts: 1,788
Club RR Member Number: 49
|
|
|
|
I made a quick rack for storing the files... which turns out I had a few more than I thought.  P1070175 P1070175 by jono_misfit, on Flickr I then spent a while sorting out the stuff spread all over the benches, and finally got to the point of being able to see the benches again.  P1070176 P1070176 by jono_misfit, on Flickr |
| |
|
|
jonomisfit
Club Retro Rides Member
Posts: 1,788
Club RR Member Number: 49
|
|
Dec 27, 2023 19:02:59 GMT
|
The madness of festivities subsided and I had an hour today so did a job i've been meaning to do for ages. A bit of paint on the cabinets I've made as they are starting to get some damp marks to them. Only seems to be happening to the 1/2" hardwood ply, not the 3/4" hardwoon ply. No idea why.... Also they were starting to get covered in dirty finger marks. The paint i chose is wipe clean.  P1080190 P1080190 by jono_misfit, on Flickr  P1080191 P1080191 by jono_misfit, on Flickr  P1080192 P1080192 by jono_misfit, on Flickr I also put an extra light in under the bench to get a bit more light fopr working at it.  P1080188 P1080188 by jono_misfit, on Flickr  P1080189 P1080189 by jono_misfit, on Flickr All needs another coat or two. |
| |
|
|
|
|
jonomisfit
Club Retro Rides Member
Posts: 1,788
Club RR Member Number: 49
|
|
Dec 29, 2023 19:12:41 GMT
|
Cabinets given another coat of paint and looking a lot better.  P1080193 P1080193 by jono_misfit, on Flickr  P1080194 P1080194 by jono_misfit, on Flickr  P1080195 P1080195 by jono_misfit, on Flickr whilst I was doing workshop things I fettled the lathe. Of late it has been suffering horrifically with chatter on any material at any speed. Even worse than normal. I feared the headset bearings are shot so did some investigating but it turns out the top side and cross side nuts to threads have a lot of play in them. I ordered some new ones from myford and fitted them. What a difference. Should have done that years ago. The lathe will now happily cut steel with a long stick out with no chattering, and as a first for me I can use the parting tool without the machine trying to tear itself apart! To celebrate I cut a 2mm sliver off some 25mm thick wall tube with a lot of stick out and no tail support. Worked fine!  P1080197 P1080197 by jono_misfit, on Flickr I am pleased. Still need to get a bigger lathe though.... |
| |
|
|
jonomisfit
Club Retro Rides Member
Posts: 1,788
Club RR Member Number: 49
|
|
|
|
|
If it was me I'd either prep and paint the steel, or if varnishing I'd use a poly eurethane based one.
I'd want something soft / flexible as otherwise it'll likely spall with any knock.
|
| |
|
|
jonomisfit
Club Retro Rides Member
Posts: 1,788
Club RR Member Number: 49
|
|
|
|
I upgraded the blast cabinet. Additional LED lights to make it a bit brighter, changed the protection film, and fitted a pedal operated bottom fed blast gun. 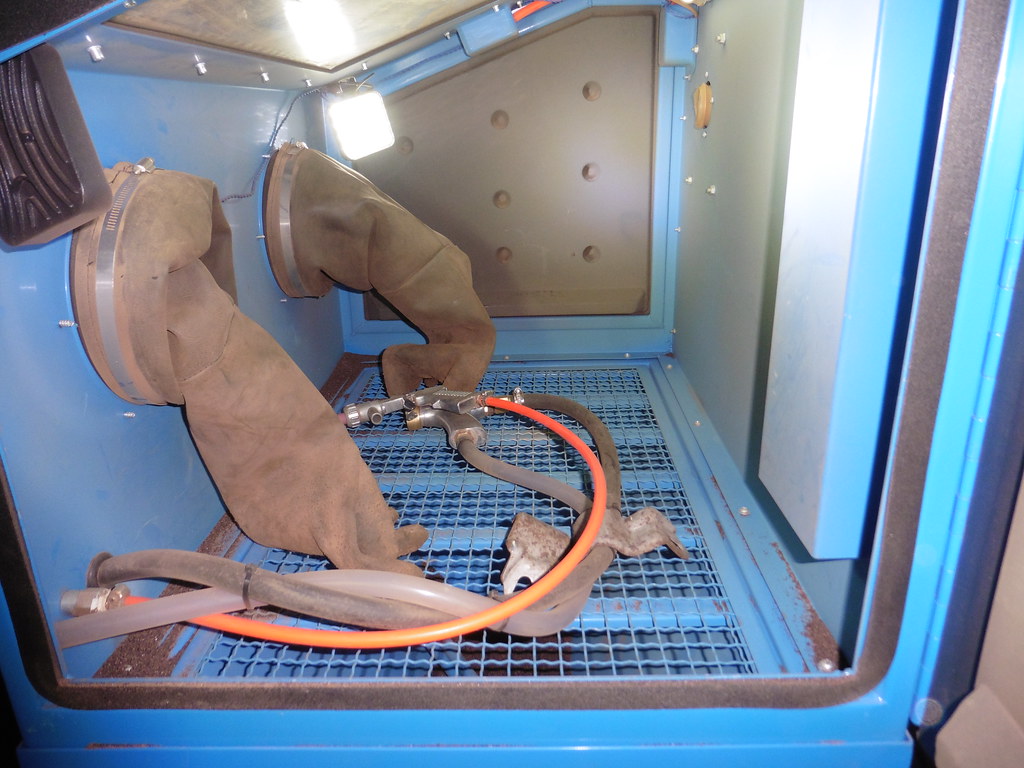 P1080423 P1080423 by jono_misfit, on Flickr  P1080431 P1080431 by jono_misfit, on Flickr  P1080432 P1080432 by jono_misfit, on Flickr works a lot better than the old gun which has now been re-purposed for blow down duties. Foot pedal has an annoying guard on it that my boot doesnt fit in, so will need to modify it a bit |
| |
|
|
jonomisfit
Club Retro Rides Member
Posts: 1,788
Club RR Member Number: 49
|
|
|
|
I went to turn the CNC lathe on back in feb, and it started before the computer died and did lots of bleeps. Decoding it says the motherboard clock had gone.... Which is an issue.... as I don't have the install files / license for the software, just the installed version. I found the exact model PC on ebay and orderd it for princley sum of.... £30... It didnt arrive.... I found another for £36... which did arrive after a couple of weeks. I swapped the hard drive from the old one into the new one and booted it up. After a few restarts it sorted itself out and booted thankfully. I needed to re-set up a few things and it took quite a lot of effort to get the PC communicating with the CNC machine again but got it sorted in the end. Did a quick design and turned some plastic as a trial  P1080686 P1080686 by jono_misfit, on Flickr  P1080685 P1080685 by jono_misfit, on Flickr then tried some mild steel  P1080687 P1080687 by jono_misfit, on Flickr Finish was good, and size came out pretty much spot on after adjusting some tool offsets. Then set up the drilling / boring tools and gave them a go, then played about with cutting some curves.  P1080688 P1080688 by jono_misfit, on Flickr Tomorrow I'm going to play with the thread cutting bits and then the bit I really really hate.... parting..... I may flip it into mill mode and try that out as well, as I've never tried the mill. The reason for getting it up and running again as I have something in mind I want to make, and i'm not sure if I can do it with this, or if I should sell it and buy something else, or sell it and buy a bigger manual lather and CNC convert my little milling machine. |
| |
|
|
jonomisfit
Club Retro Rides Member
Posts: 1,788
Club RR Member Number: 49
|
|
|
|
I experimented more with the CNC machine. I set it up and turned some threads. 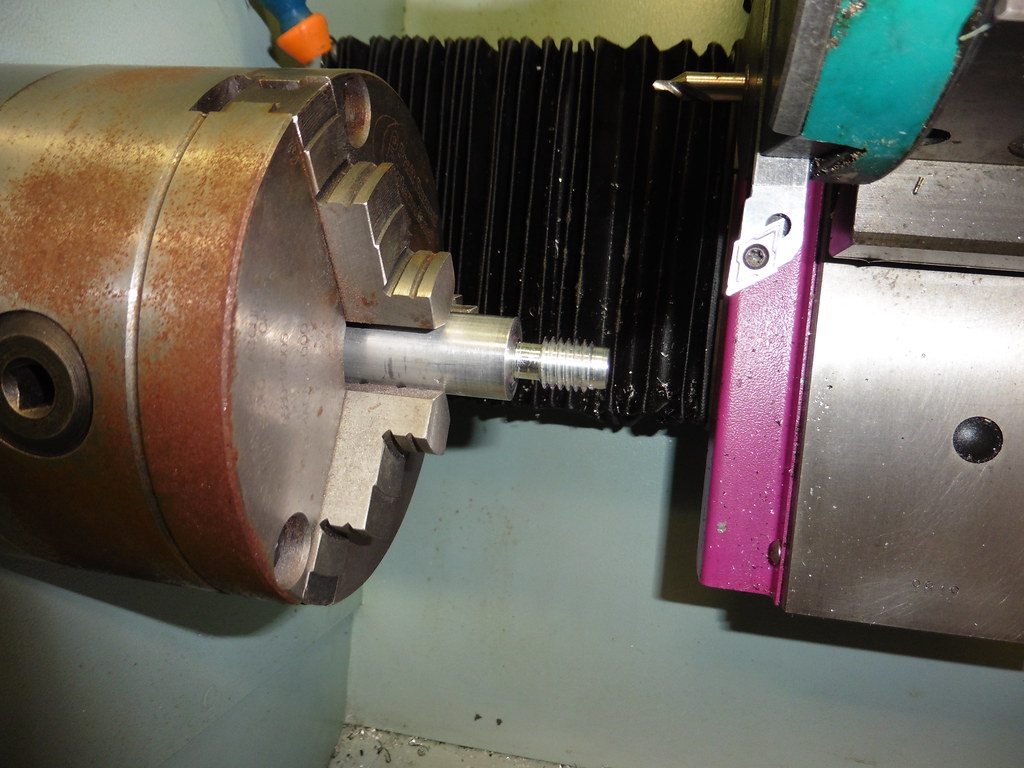 P1080689 P1080689 by jono_misfit, on Flickr which came out fairly well. Maybe a bit tight on the OD.  P1080690 P1080690 by jono_misfit, on Flickr I sorted out the coolant pump and got that running, then tried out some other bits and shapes.  P1080691 P1080691 by jono_misfit, on Flickr  P1080692 P1080692 by jono_misfit, on Flickr chip breakers are not working on the inserts....  P1080694 P1080694 by jono_misfit, on Flickr Then decided to give it a challenge and try cutting some EN24. Its only meant to do mild mild steel, and 24 is an alloy so a lot tougher. It did well, so I can use it to cut some parts I want 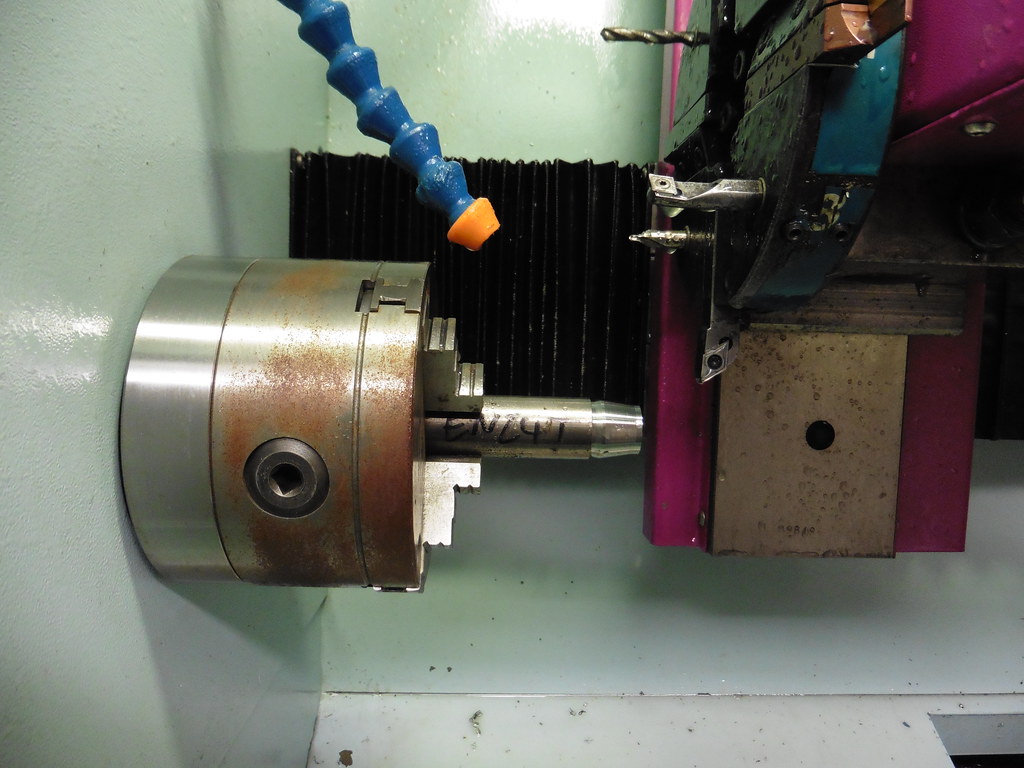 P1080695 P1080695 by jono_misfit, on Flickr then decided to flip it to mill mode and try that out.  P1080696 P1080696 by jono_misfit, on Flickr set up a block of 50x50 ali, did a very basic design and set it to work with only minor trepidation about breaking cutters...  P1080697 P1080697 by jono_misfit, on Flickr  P1080699 P1080699 by jono_misfit, on Flickr some of the cutters are tiny... 2mm..... the main bulk removal was done with a 8mm cutter.  P1080700 P1080700 by jono_misfit, on Flickr I need to re-set the origins as its about 1.5mm out in 1 direction, and .5mm in another.  P1080701 P1080701 by jono_misfit, on Flickr 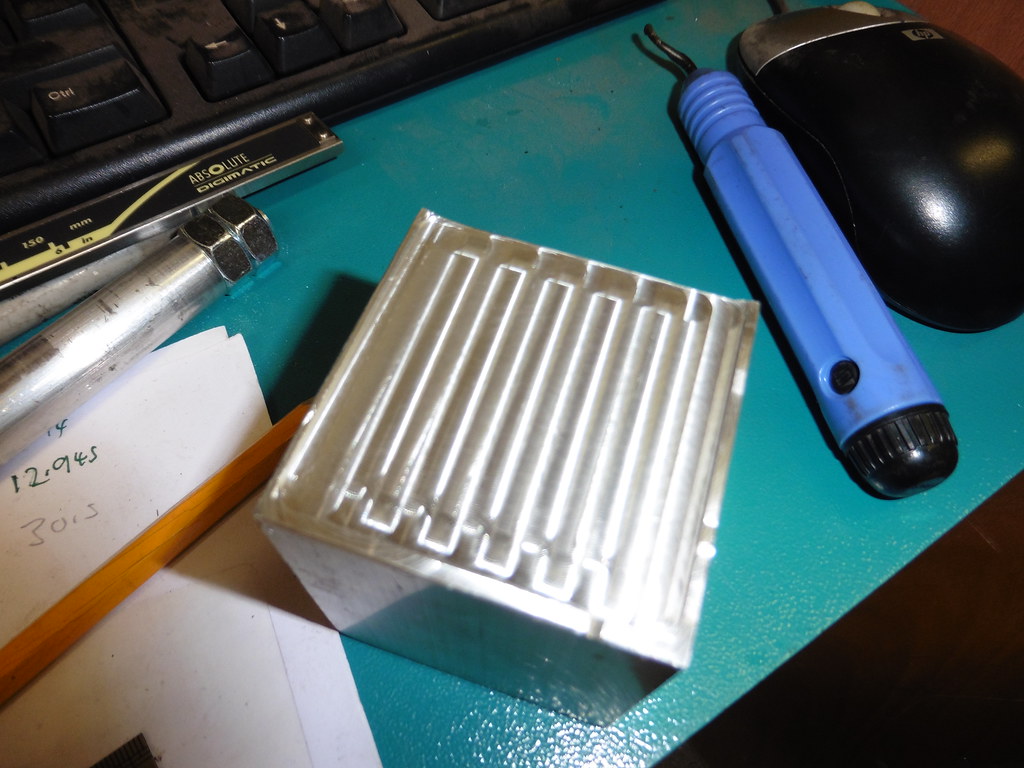 P1080703 P1080703 by jono_misfit, on Flickr Surface finish is not bad. This was in basic layered 2D milling. Will try something more interesting next time. Apparently I can do proper 2.5D milling as well, so will look into that as well. |
| |
|
|
|
|
|
|
|
|
Looking good dude, nice work!
Might be an idea to clone the hard drive in case that fails...
|
| |
|
|
jonomisfit
Club Retro Rides Member
Posts: 1,788
Club RR Member Number: 49
|
|
|
|
|
Good shout.
|
| |
|
|
jonomisfit
Club Retro Rides Member
Posts: 1,788
Club RR Member Number: 49
|
|
Jul 24, 2024 20:00:24 GMT
|
I was getting fed up of all the wheels I have getting in the way, so embarked on making a tyre/wheel rack for the wall. Will go here.... in the one remaining piece of spare wall real-estate.  P1080845 P1080845 by jono_misfit, on Flickr  P1080846 P1080846 by jono_misfit, on Flickr It'll mount down onto the existing steel work racks as well as being fixed into the wall.  P1080847 P1080847 by jono_misfit, on Flickr making the support arms, ther tubes allow the wheel support bars to pass through, so I can dismantle it all if I need to.  P1080848 P1080848 by jono_misfit, on Flickr goes like so  P1080849 P1080849 by jono_misfit, on Flickr  P1080850 P1080850 by jono_misfit, on Flickr Tacked on to check clearances and its about 200mm clear of my head cantilever arms are a guarantee to break, so add a tension strut to carry the load up to the upper rawl bolt.  P1080851 P1080851 by jono_misfit, on Flickr I added some clamp bolts to hold the wheel bars in place doesnt stick out too far and gives good clearance for whatever I'm up to, plug gets the wheels out the way.  P1080852 P1080852 by jono_misfit, on Flickr I had visions of the rawl bolts failing and the whole rack tumbling down on to the rally car, so decided to add in some struts to carry some of the load up to the roof beams  P1080853 P1080853 by jono_misfit, on Flickr  P1080854 P1080854 by jono_misfit, on Flickr Support arms just slide on, so remove a bolt and off they come. I also decided to add a better support from the tyre rack to the steel racks  P1080855 P1080855 by jono_misfit, on Flickr The centre of mass of the wheels is about 10mm forward of the tip of the steel rack lower foot, so whilst it does have a slight overturn moment it should be fairly low load on everything else keeping it held back. Gets the wheels nicely out the way |
| |
Last Edit: Jul 24, 2024 20:03:36 GMT by jonomisfit
|
|


