|
|
|
Dec 28, 2021 23:39:56 GMT
|
The replacement solid state regulator for the dynamo finally arrived after being held up in the pre-Christmas post and was hastily fitted with high hopes of a working Seven. Alas it was not to be, no change, nada. Balls. Determined not to be beaten I braved the rain and pulled the assembly again before relatives descended and car time was halted. 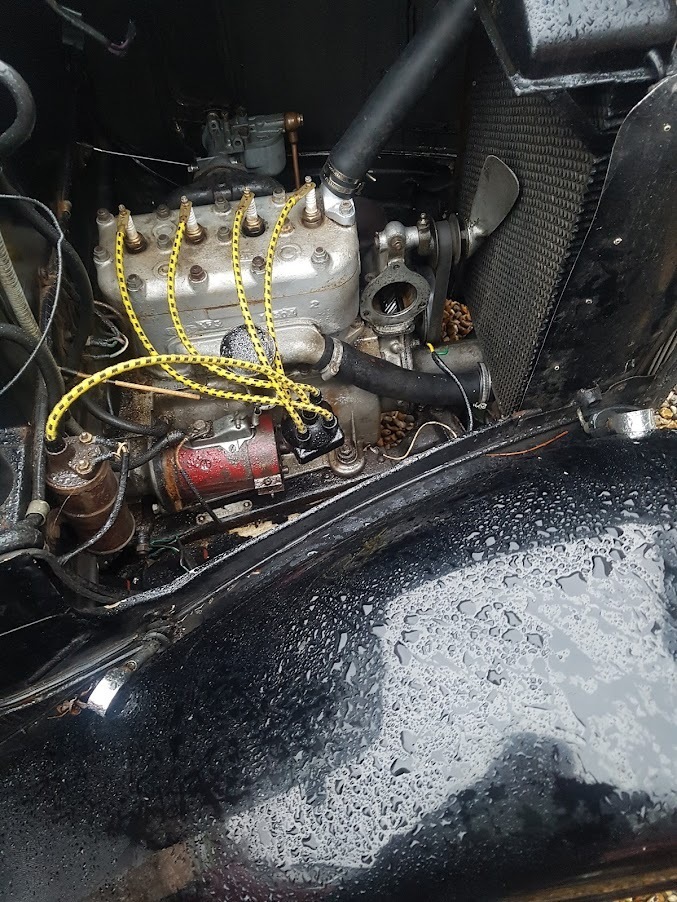 After a few days of too much food and drink I got back out into the garage to investigate further. The first test was to put the dynamo on the lathe and spin it up, as per these instructions www.themagnetoguys.co.uk/dynamo-motor-testThis was not promising, 0.5v max with the Myford at full speed. Next I pulled the battery from the car and attempted to motor the dynamo on the bench. Initially nothing happened, but after tapping one of the brushes it burst into life and span away happily... Interesting. Back on the lathe and the output was the same. At this point I walked away to regroup, research and have a cup of tea. Refreshed, and armed with some more information from some very old websites I set about stripping the dynamo down again, making an effort to actually take photographs this time. First off is the distributor angle drive. Two long screws hold the entire assembly together. 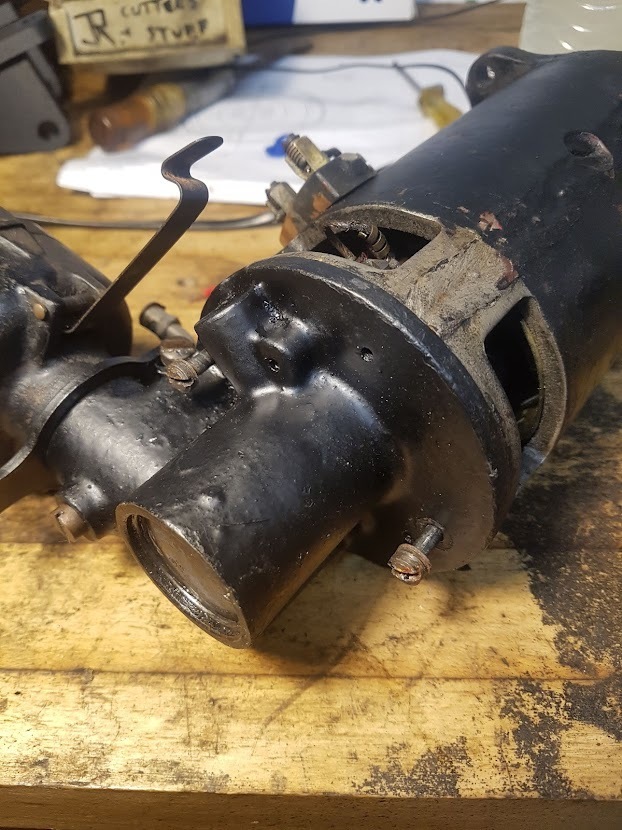 The end plate needs to be removed. This is a little fiddly with a small spring clip holding in a plate. The clip pries out at the plate is easiest to remove with a magnet. 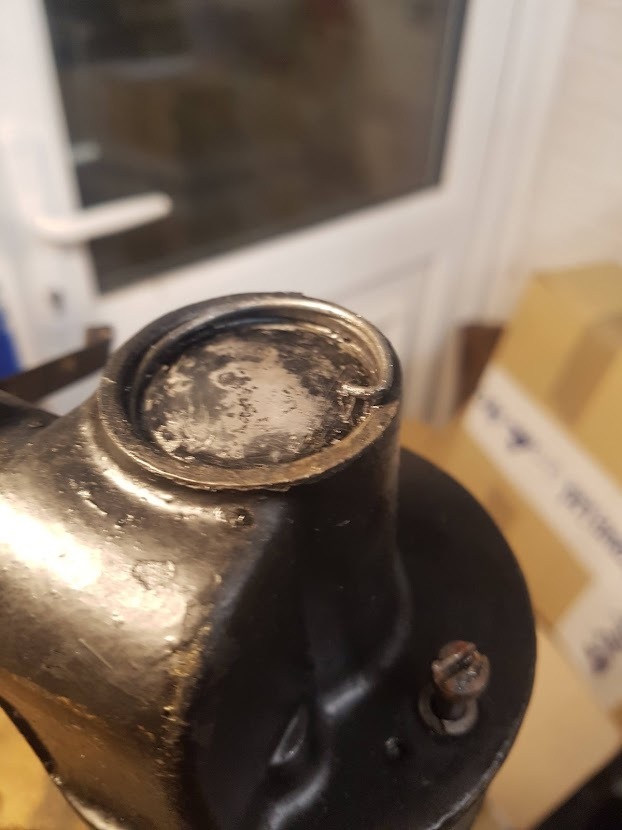 I then put the drive gear in soft jaws in the vice and undid the retaining nut on the shaft. 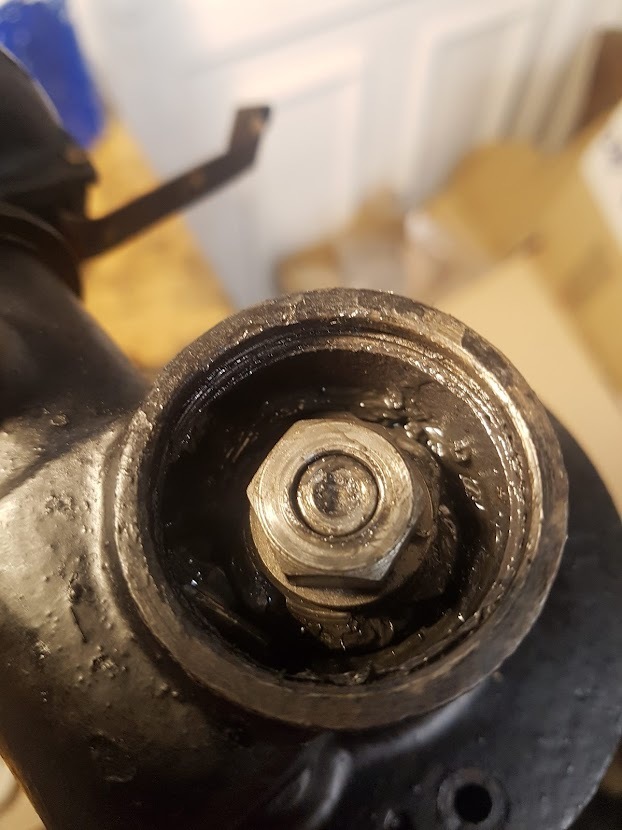 The gear is not a very tight fit on the shaft but is on just well enough to stop it from being possible to pull the assembly off by hand. Rather than risk damaging anything with screwdrivers or a hammer I used a bearing puller. I find that this can be much more easily controlled if care is taken not to apply too much force and means that the pulling force is being applied in the right direction. 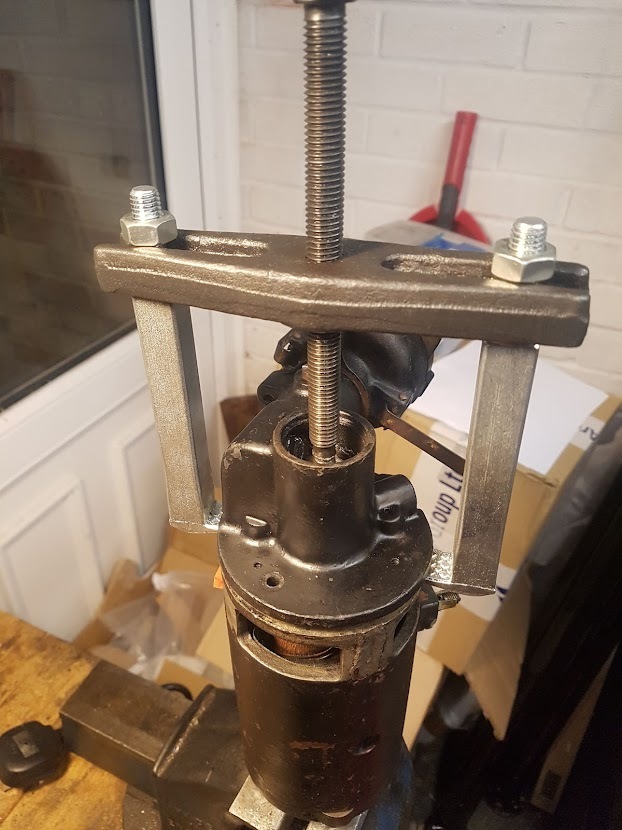 Disconnect the wires going to the brushes first... 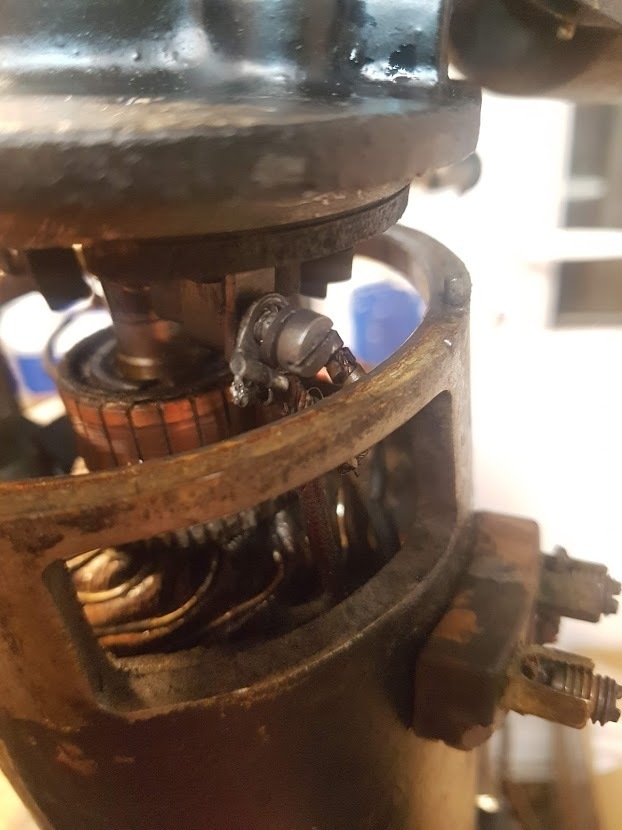 The assembly can now be removed, revealing the commutator and armature shaft. 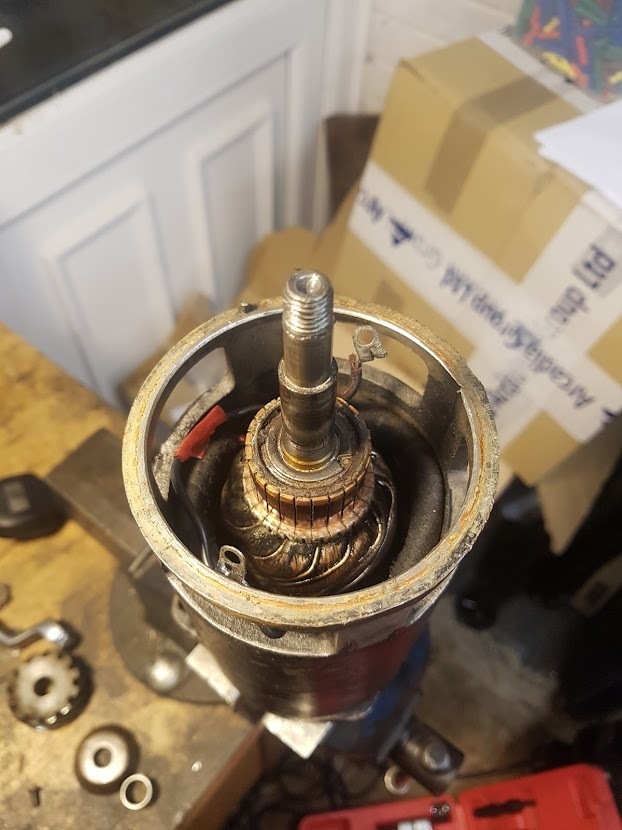 The brushes are mounted to the inside of the angle drive housing. This has been converted to 2 brush. The third brush goes in the top holder which can be rotated to 'tune' the reduced output. 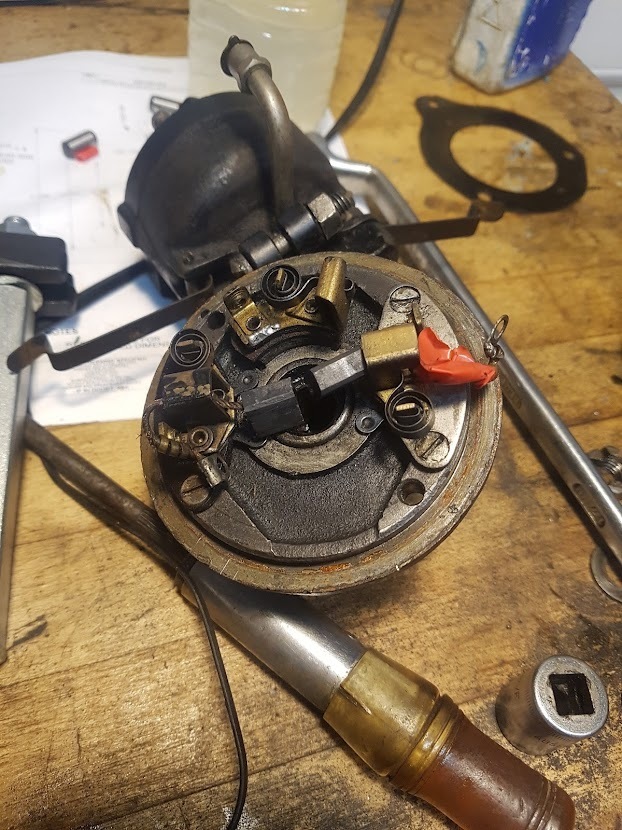 The body holding the field coils and shoes is also free to remove leaving the armature and front bearing housing 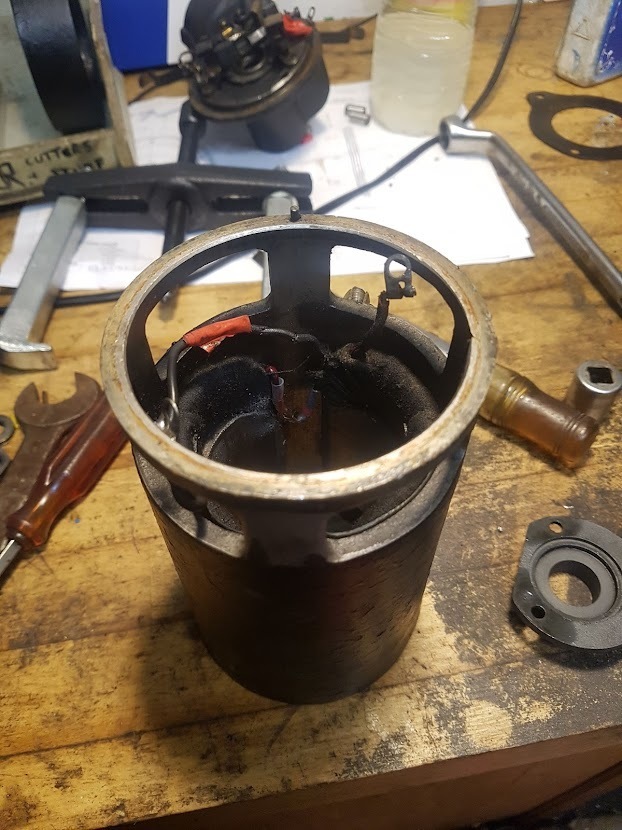 With the drive gear removed the cover can be take off 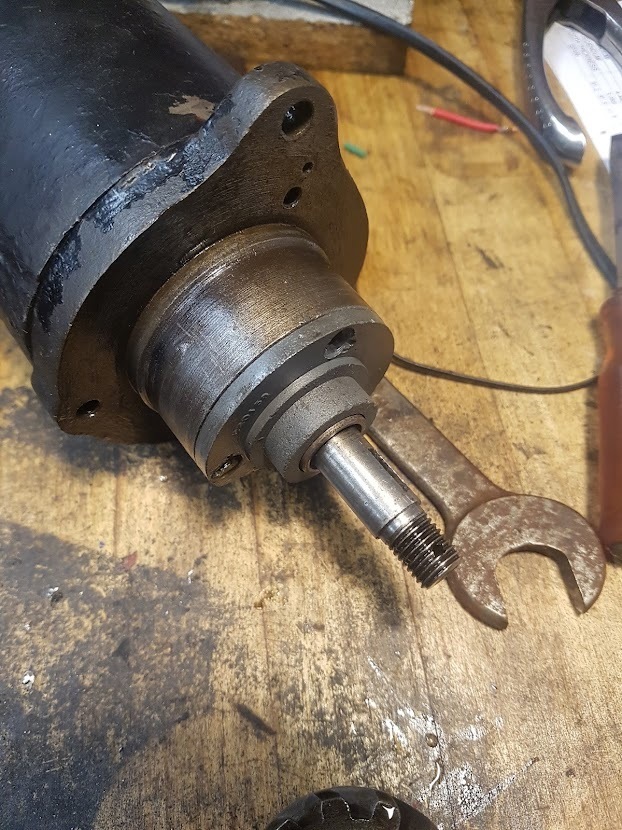 Leaving the bearing. The shaft was again put in the soft jaws and the puller utilised. 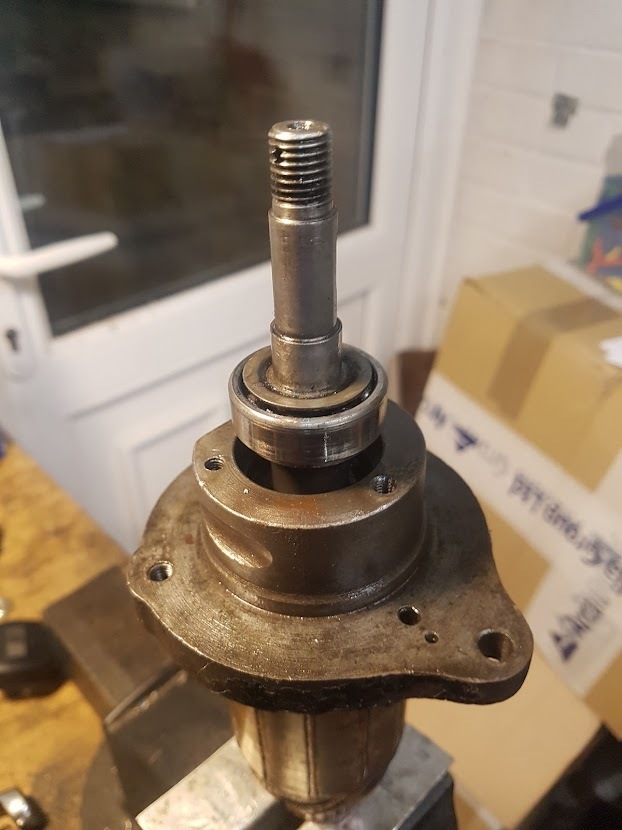 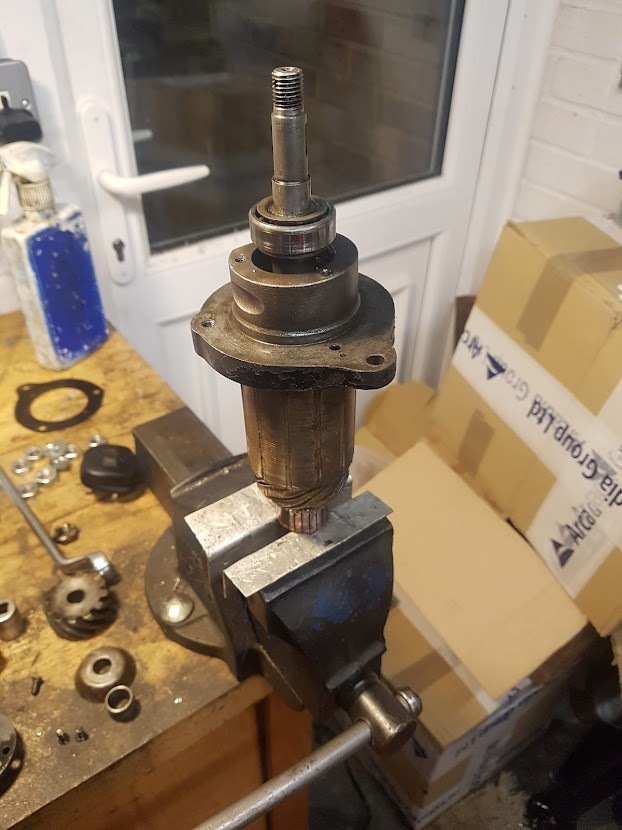 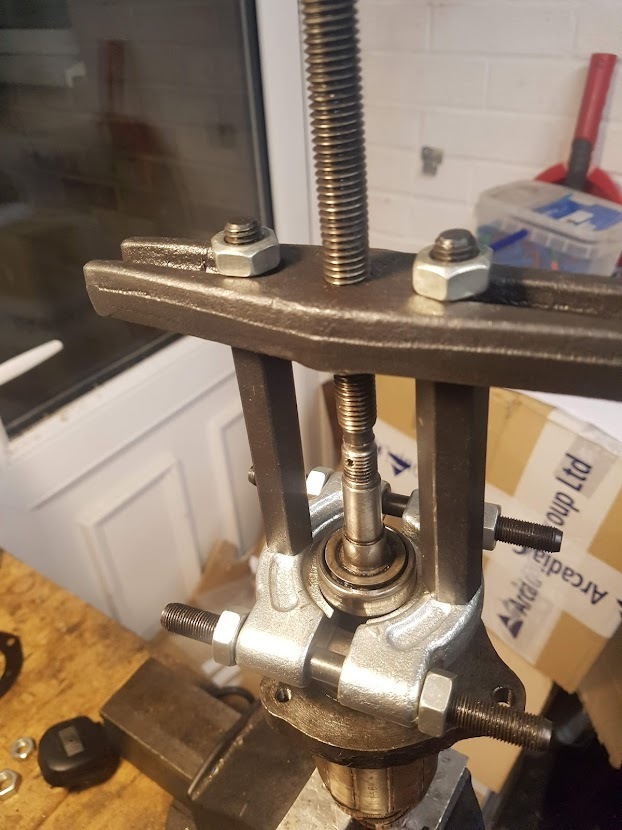 The felt seal has done its job very well, there is very little oil inside the dynamo 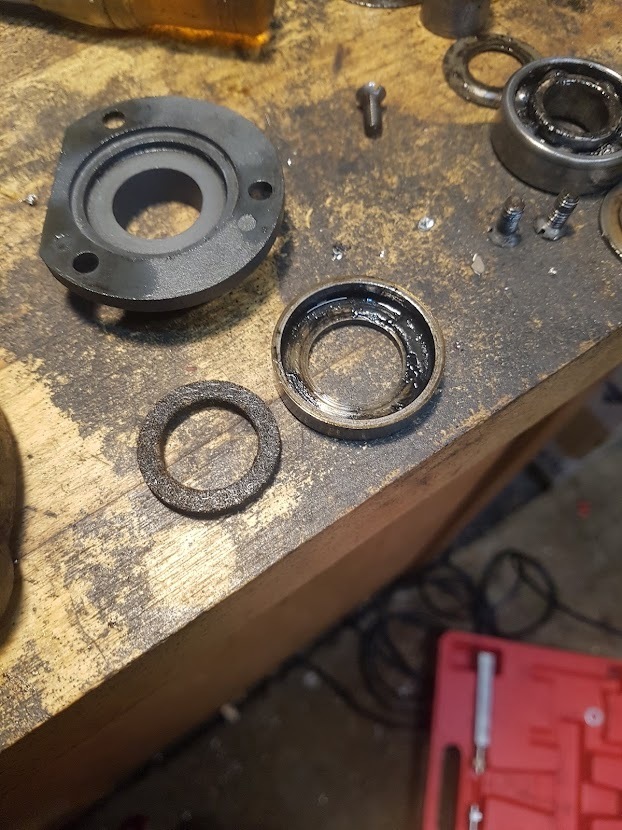 When I first stripped and reassembled the dynamo in its current 2 brush configuration some of the insulation on the internal wires was getting brittle and one wire broke when dismantling, so I repaired it with a solder connector. Access meant this was my only option. It seems that this has come in contact with the armature which could explain the malfunction, and also the mystery as to why it worked initially. 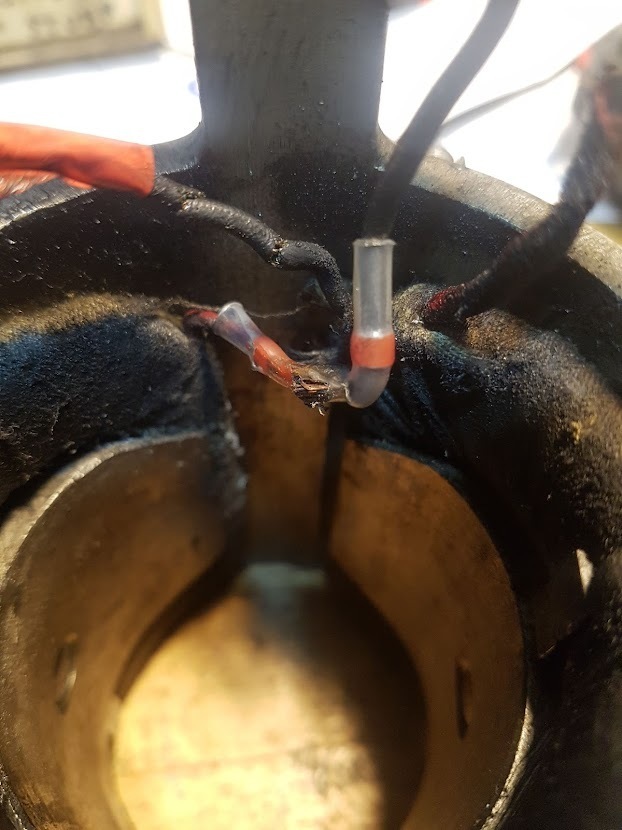 The commutator didn't look in bad shape so I left it alone first time around. I really don't want to be in here again any time soon so took the opportunity to reface it. 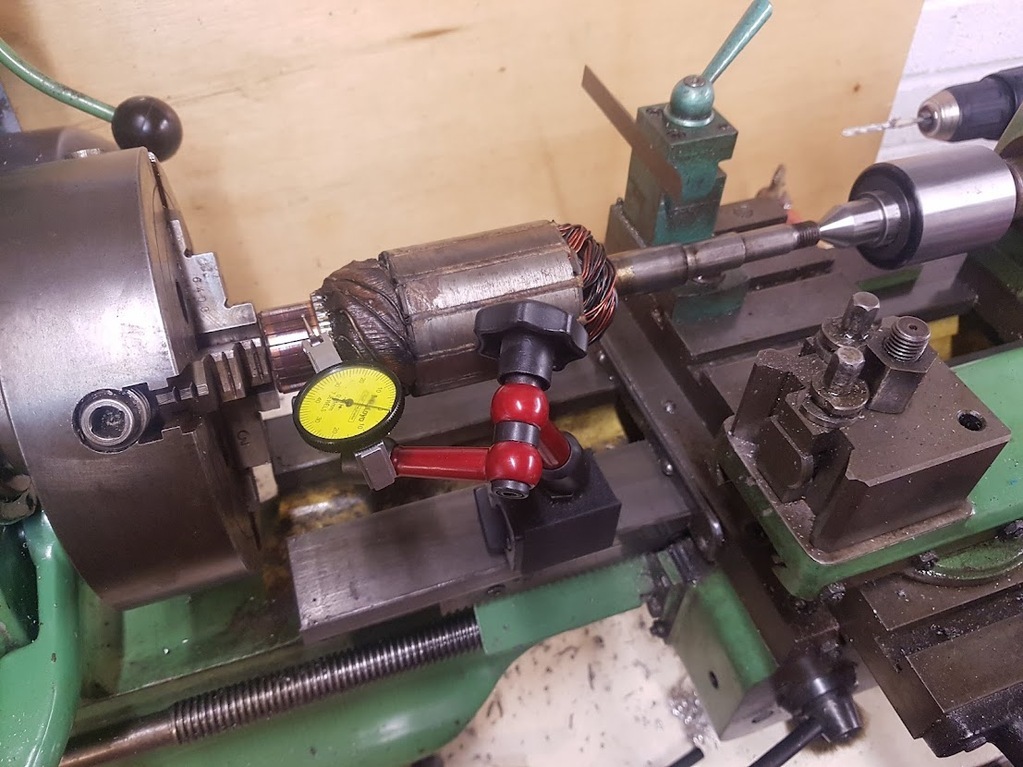 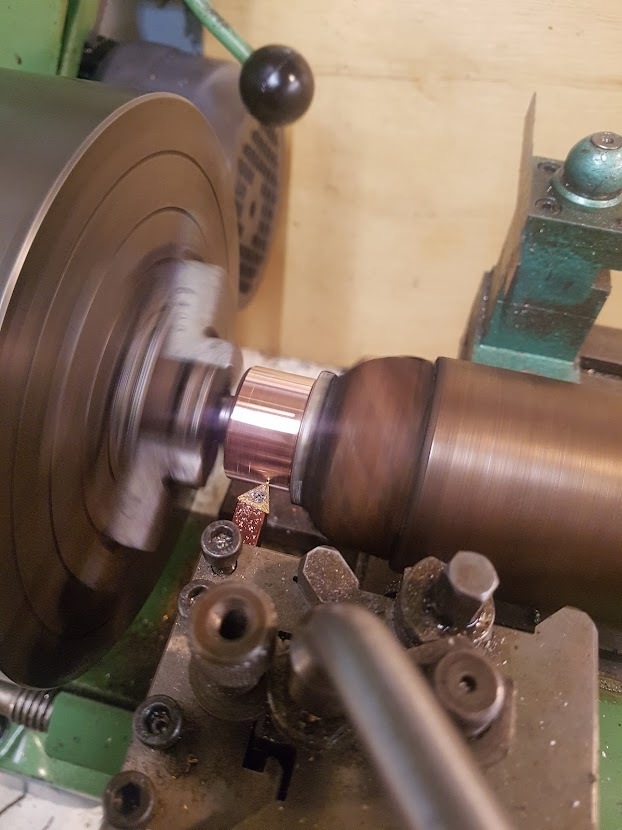 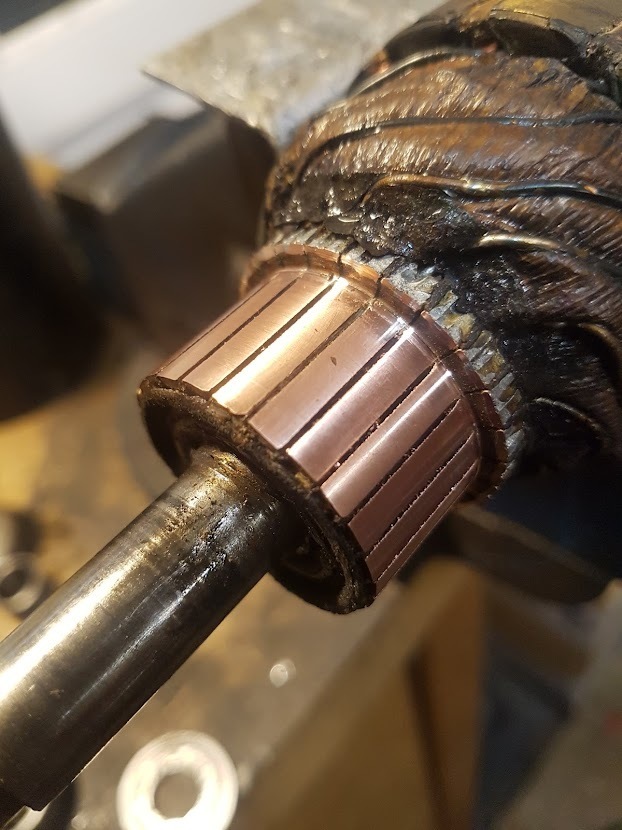 I cleaned the gaps between the segments with a junior hacksaw blade cut in half. I will try and replace the brushes but they appear in good shape bar the insulation so I put some heat shrink on for good measure. 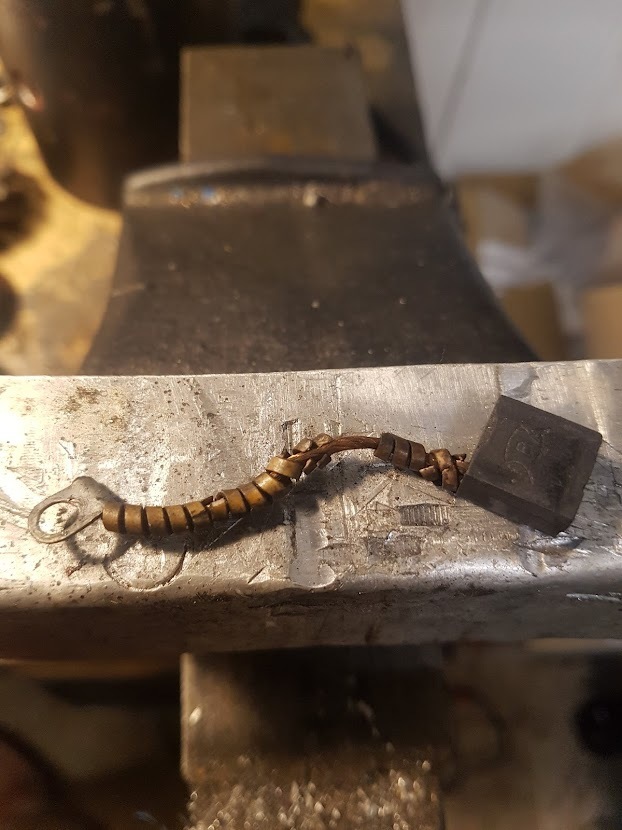 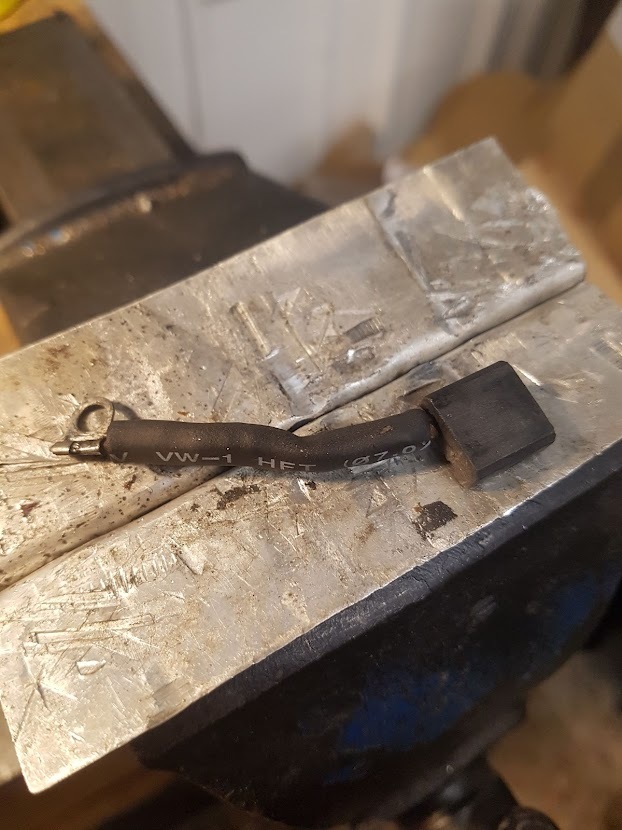 There is still plenty of meat left in them and the contact faces are good so at very least they will make good spares. 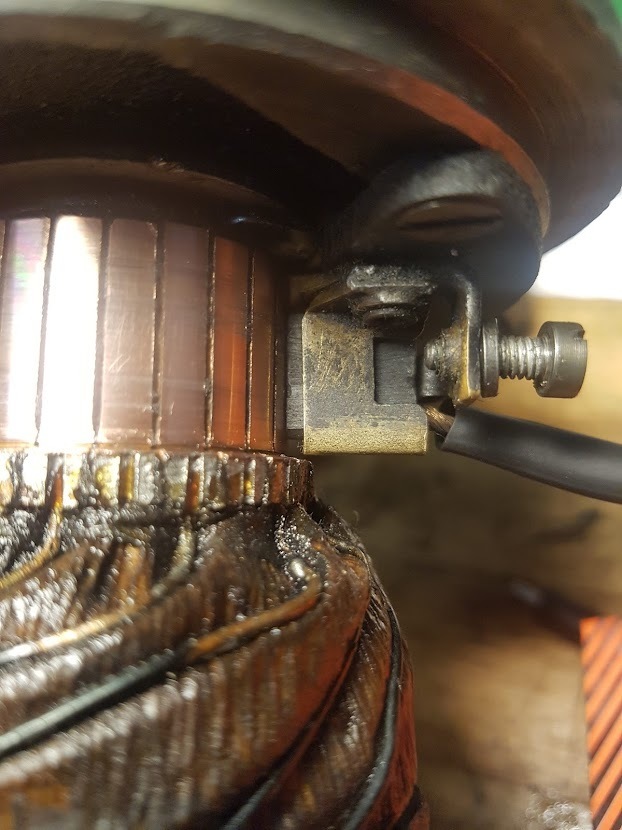 This leaves just the field coils. If the internal wiring in the coils themselves is in a state similar to that of the wires inside the dynamo, which is likely, they are probably not going to be working as well as they should. I never intended to replace them but while researching I came across a UK supplier making them new, they even have them in stock... eics-products.co.uk/shop/classic-and-vintage-parts/c35-6-volt-field-coils/ I have no idea how hard they will be to replace and there is conflicting information on the procedure. Going by this site it would appear they are held in only by shoes, which are screwed from the outside, other sites suggest the coils must be 'burnt out' prior to replacing. I guess I will find out tomorrow when I can get the impact driver out... www.dynamoregulatorconversions.com/field-coil-testing-and-winding.php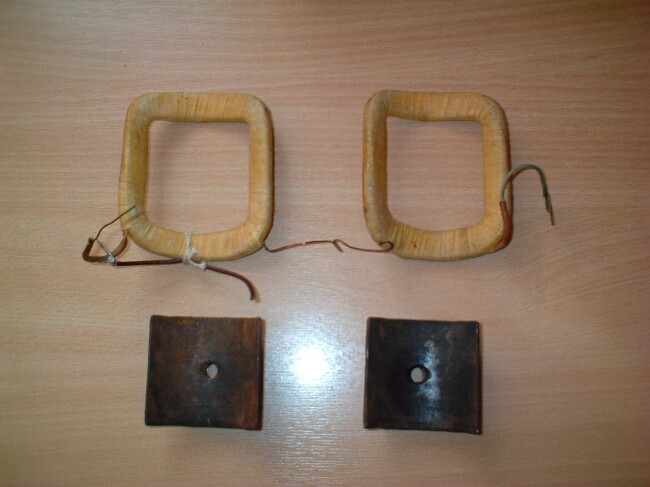 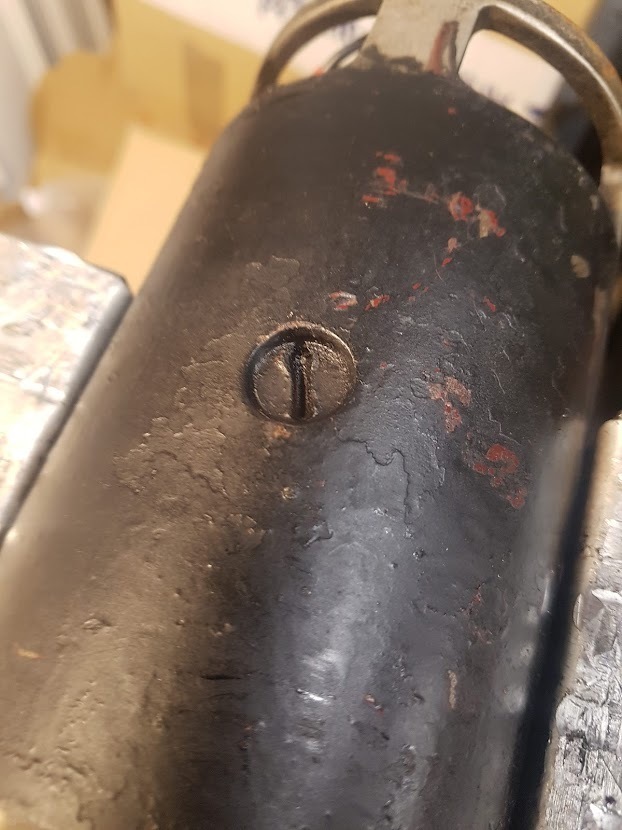 Thanks for looking! James |
| |
|
|
|
|
|
|
|
|
|
|
It's amazing just how many things are available these days. Try finding field coils in 1993.
|
| |
|
|
|
|
|
|
|
|
Sweet little car.
|
| |
1994 BMW 525i touring
2004 BMW Z4 sorn and broken
1977 Ford Escort
1982 Ford Capri getting restored
1999 Mazda B2500 daily driver.
|
|
dikkehemaworst
Club Retro Rides Member
Posts: 1,636
Club RR Member Number: 16
|
1937 Austin Seven Rubydikkehemaworst
@dikkehemaworst
Club Retro Rides Member 16
|
Dec 29, 2021 10:35:51 GMT
|
It's amazing just how many things are available these days. Try finding field coils in 1993. They were there, but in those days, I did a lot of car trips to Beaulieu and flights to Hersey from Holland. If you couldn't find it there, you were screwed..... |
| |
|
|
|
|
|
Dec 30, 2021 17:21:27 GMT
|
Parts availability is very mixed, as is the quality. Most parts seem to be made as cheap as possible and it shows. Not much fits out of the box. There are a lot of suppliers all selling the same stuff and there is a good amount about used, however many of the used parts appear to have been used more than once... As the cars have never been worth much it seems a lot of parts that were 'worn out' in the 50s and then held onto found there way back onto cars in later years as they were now much better than the very worn out parts in service! That said, support seems very good. I am yet to have to ask for any information because it has all covered before on the 'Austin Seven Friends' forum. Back to the dynamo, the field shoe screws were in very tight but a few good blows with a drift got them out. The shoes and coils then pulled out without any bother. 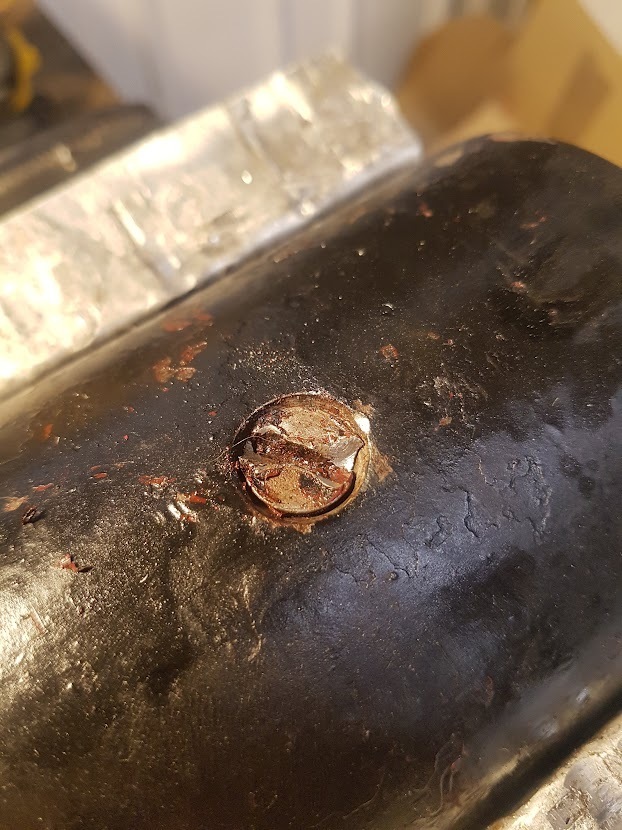 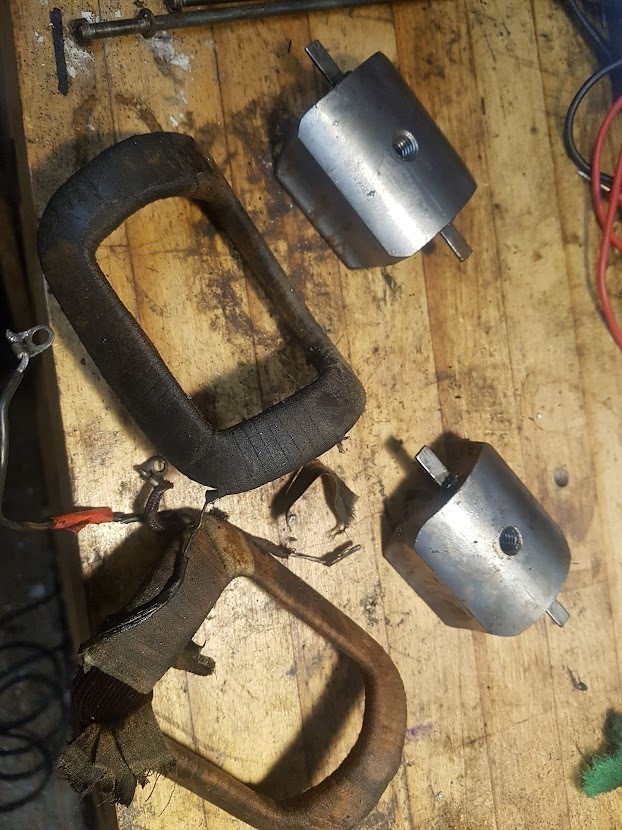 I have ordered a set of new coils from EICS which will hopefully arrive soon. I have checked and the resistance is 2.6 ohms off the shelf so they should be fine with the DVR2 regulator. The two screws didn't survive so I have ordered some new 1/5" long 3/8 BSW countersunks and also have a new nose bearing on order. Interestingly for the time this is a metric size, 15x35x11 (6202) so a new SKF sealed bearing is only a few quid. I will have to run a calliper over some more parts of the dynamo to see if Lucas were working entirely in metric - bar the thread sizes. I seem to recall Cricklewood Bentleys were designed in this manner. Back to pacing back and forth waiting on the postman! Thanks for looking James |
| |
|
|
|
|
|
Jul 11, 2022 22:53:18 GMT
|
Time for a thread revival. Basically nothing went very well and I got very annoyed with the whole thing so didn't feel like writing about it as well as pulling my hair out trying to get the damned thing working again! The new coils arrived and looked good. Unfortunately they didn't fit. After head scratching and frustration it transpired that Lucas made two variants of the C35 dynamo with different shoes depending on the application. Cars have the little ears while motorcycles are fitted with smaller shoes and coils without the ears. The more you know... 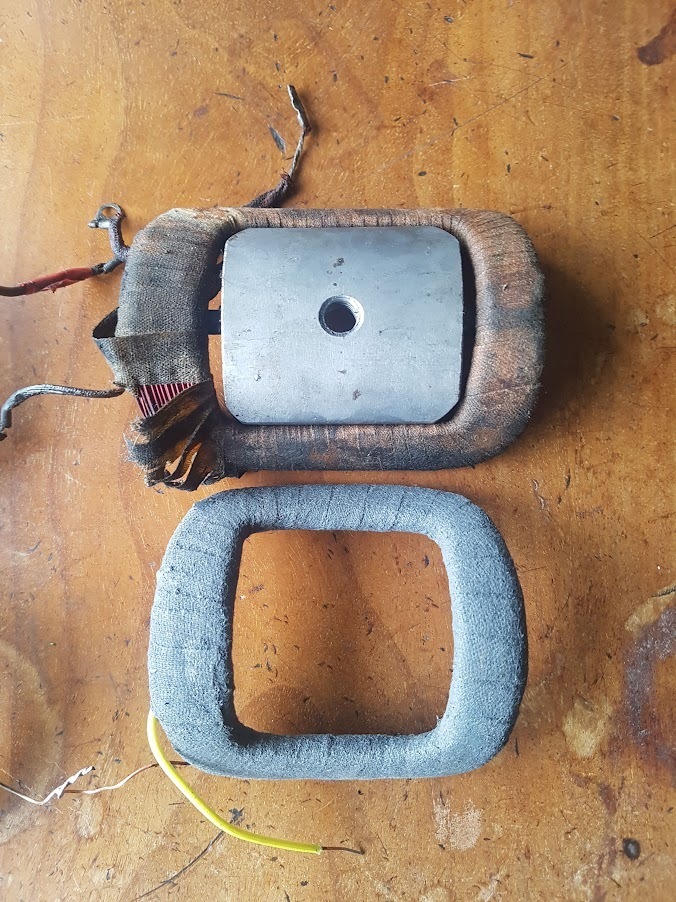 I was a bit cheesed off at this stage and asked for advice from the club. Unfortunately the responses were somewhat less than helpful and left me feeling even more cheesed off. Thankfully Ian at EICS was really helpful. He had tooling to wind coils of the right size and had them on the shelf, but only to suit a 12 volt conversion with different resistance and number of turns. I am not an electrical engineer by a long shot and do not claim to have any real understanding of the workings of a dynamo. What I found know was that the output of the dynamo is relative to the resistance and number of turns of wire in the coils, and speed. I also found that while output can be increased it also increases heat inside the assembly and can shorten the life. My car is running mostly LED bulbs now so I was quite happy with 10 amps at 6 volts, pretty much what the C35 was designed for. This is a little complicated because the solid state reg needed a minimum resistance higher than the original 1.5 ohms (I had fitted an inline resistor which is inefficient) and also because I had converted to a 2 brush setup. I am writing this from memory after some gin so please do not take any of it as gospel! Further research and measuring confirmed; - The original coils from the C35M have 90 turns and (when new) a resistance of 0.75 ohms / coil giving a maximum output of 13 amps in 2 brush form (2 amps higher than the Lucas spec so at risk of overheating or reducing life) - Scaling from this I calculated that I would require 275 turns and 1.25 ohms / coil. This is controlled by selecting a suitable wire diameter. This would give a maximum output of 10 amps which would keep my dynamo happy, and not overload the regulator. I passed this on to EICS who didn't laugh at me but instead set to work making me some custom coils. They also offered to assemble them into my dynamo and test it for me, which I took them up on. A few weeks later and it was back looking as good as new. Note: I know now a more expensive regulator may have been better suited to the job. The DVR2 adjusts voltage to the coils in the dynamo to keep the battery voltage constant (7 volts I think) but does not sense amperage. This means a flat battery would draw maximum amps from the dynamo and potentially damage the regulator. The DVR3 regulator (confusingly sold by a different company) does the same but also limits the output current by dropped coil voltage, protecting the battery and the regulator. Having one of these would have made life easier as I could have overspecced the dynamo to give a higher potential output and got full charge at lower rpm. 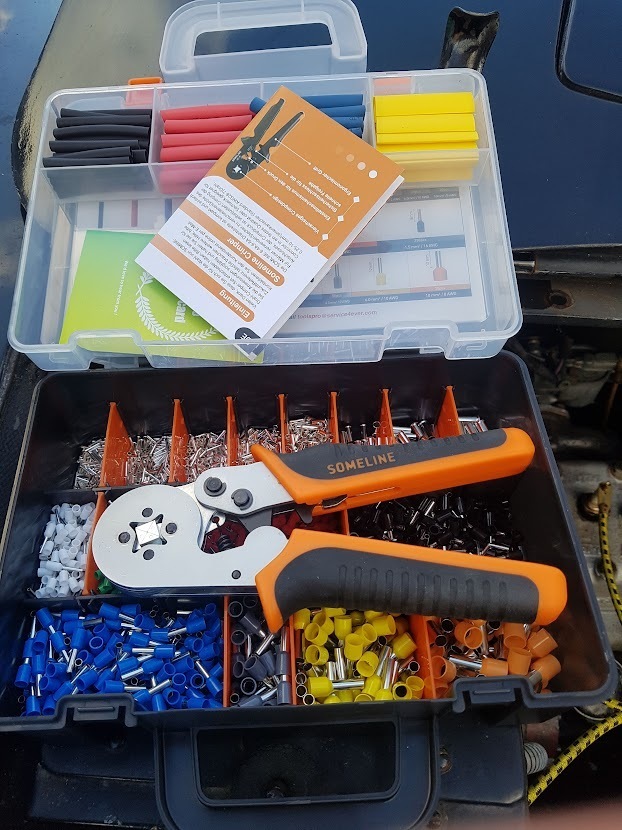 I hate the screw down connectors on the car which chew up the wires, corrode, look horrible and seem to fully justify all the Lucas stereotypes so invested in a shoelace crimper to sort them out. I won't win any concourse prizes with them but at least the terminals stand a chance of working... 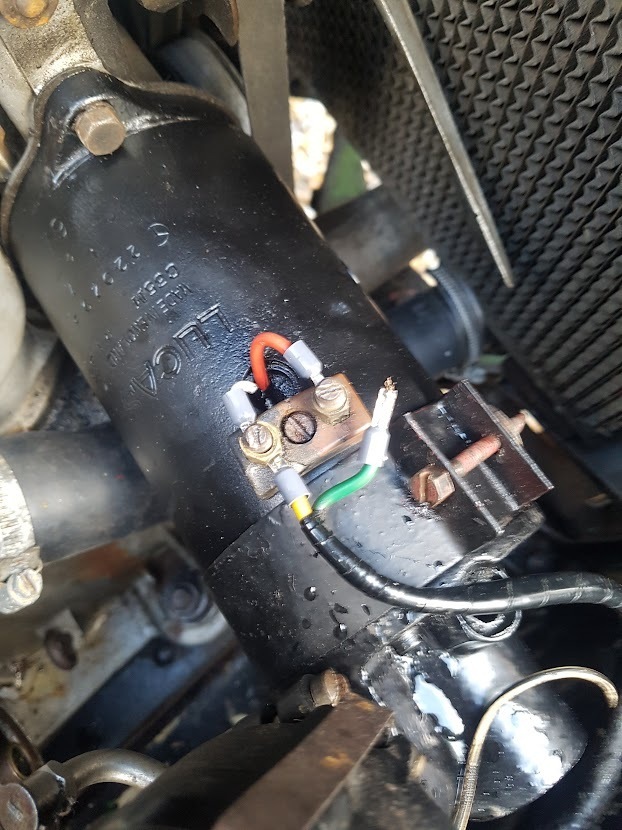 Dynamo back on the car - fired her up, set the timing and went for a drive. I checked and adjusted the timing. I checked again and went over the whole engine, filled the tank with fresh fuel and replaced the plugs but could not get it running right. After playing around I could get it to idle and pull away but not work under load at any real engine speed. If I wound in some timing it would pull okay but idle badly, struggle to start and not want to pull from idle. I pulled the distributor (again) and stripped it down, thinking something may have failed locking the advance. 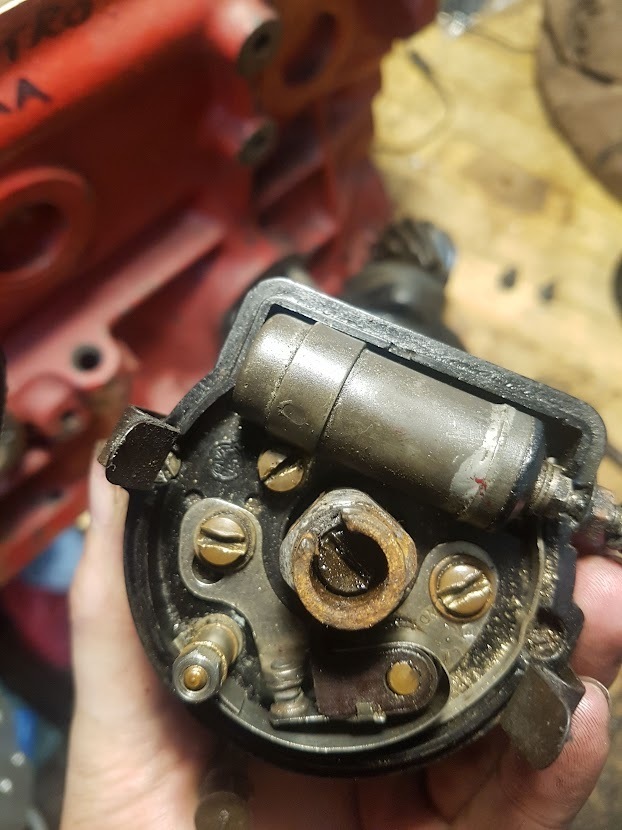 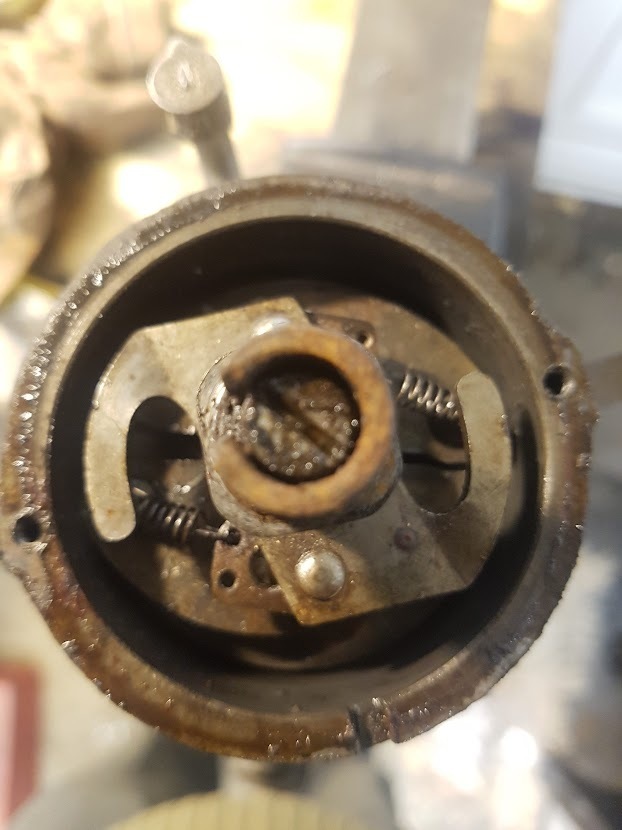 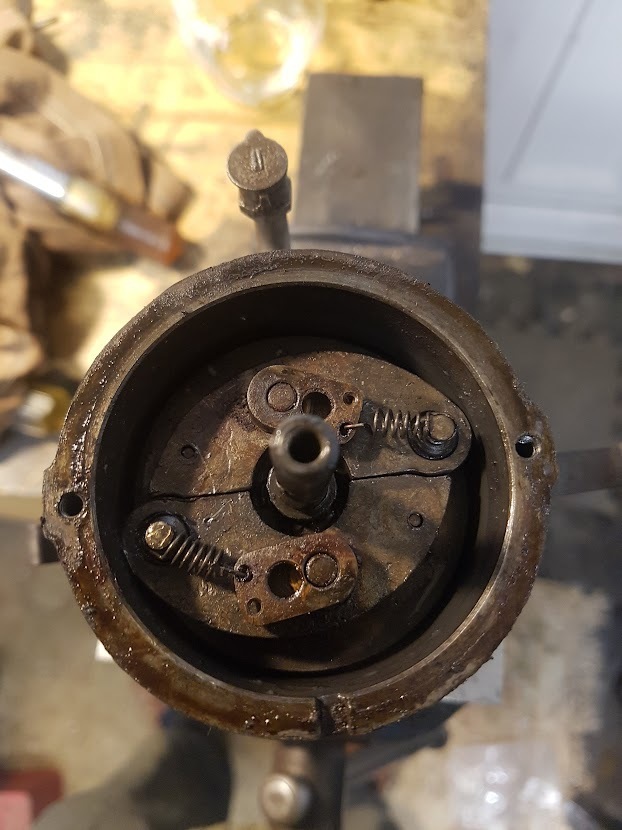 Nothing was obviously amiss. Everything was clearly worn but not broken so I lubricated, reassembled and refitted but to no avail. With the car having been off the road for some time it is hard to judge whether it was worse or had always run poorly and I had been more forgiving. Regardless it was clearly not right! I came across some club articles which discussed advance curves being unsuitable for modern fuels, with maximum advance coming in far too early. The prescribed solution was to either drill holes in the bob weights or replace the distributor with a modified Bosch unit from a 60s Beetle. Whether it was found after exhaustive dyno testing that the Bosch unit happened to have the perfect curve or if someone found it sort of fitted and ran better than a knackered Lucas unit is hard to say... I am probably being unfair and the reality likely is somewhere between the two. My advance curve was certainly not working and the Bosch one well regarded. Rather than get happy with the pistol drill and hope for the best I shipped my tired old dizzy to the excellent folks at H & H Ignition Solutions requesting my dizzy be refurbished and the advance curve modified to match that of the Bosch. A few weeks later and for a very reasonable amount of money my distributor was back looking as good as new. The body was painted and all the components re-plated. What was most interesting was that H&H had the Lucas spec for the advance curve as supplied new, which was pretty much identical to the Bosch curve... 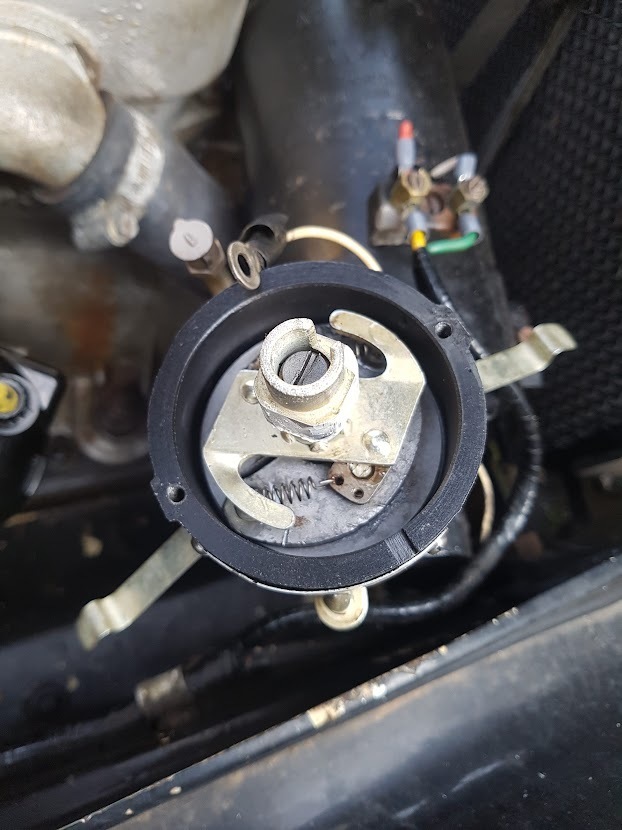 This is the only photo I have to hand. I went to fire the car up and see if it had made any difference and hit yet another obstacle - empty fuel tank. Grudgingly I poured in a gallon of 98 and she fired up right away and seemed to run well. The tank had other ideas and was leaking fuel all over the drive. Anyone got a lighter? Thanks for looking James |
| |
|
|
|
|
|
Jul 12, 2022 13:59:49 GMT
|
|
Clever stuff. Don't forget you have decades worth of bodges to sort out and the car may not have even worked all that well to start with, so I'd say you're winning, even if it may not always feel like it.
|
| |
|
|
tofufi
South West
Posts: 1,462
|
|
Jul 12, 2022 15:20:56 GMT
|
I've always hankered after something this sort of era. Perhaps when I've a lathe and a comprehensive workshop... Keep up the great work  |
| |
|
|
logicaluk
Posted a lot
   Every days a school day round here
Posts: 1,373
|
|
Jul 12, 2022 19:14:28 GMT
|
|
I just want to say great car, love the way your thinking about repairs vs modifications. I've got a hankering for a prewar car but I don't see one in my future any time soon.
Keep up the good work.
Dan
|
| |
|
|
|
|
|
Jul 12, 2022 22:12:38 GMT
|
I am sure it comes as no surprise that I didn't torch the poor thing, but did have to walk away for a few weeks. I then dropped the fuel tank and cleaned it up. There was a little bit of surface rust but no holes. Inside also looked okay. After poking around and filling it with water the leak was traced to the drain fitting which was soldered in. The solder had cracked so I redid it. Not my best work but it should do the job. 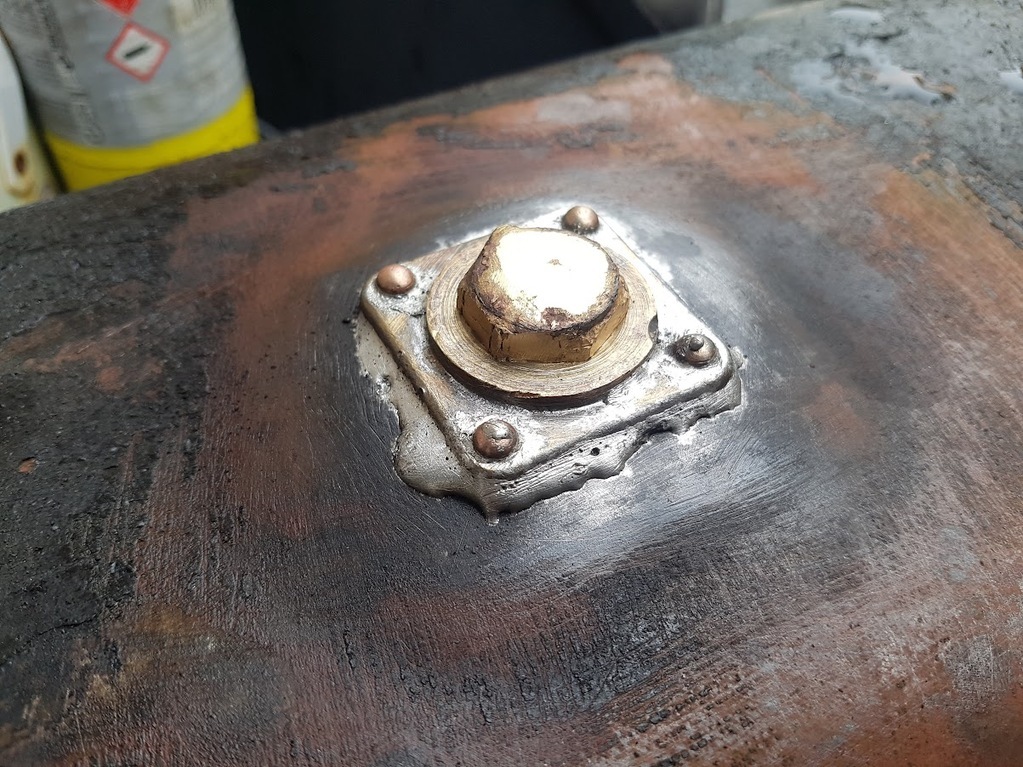 The inside was then given the POR15 treatment of marine-clean, etc and then seal. Outside was painted in epoxy. Coating the tank inside and out should hopefully give it another few decades of life before it needs looking at again. I also stripped down the sender which was seized and freed it up. The fuel gauge has never worked and just reads full so I was hoping this may have been the cause. I also added an extra earth cable which had sorted the Midget gauge but to no avail... That can wait. The tank went back on and the fuel line was replaced. I also fitted a new viton filler hose to replace the slightly tired one that came off... 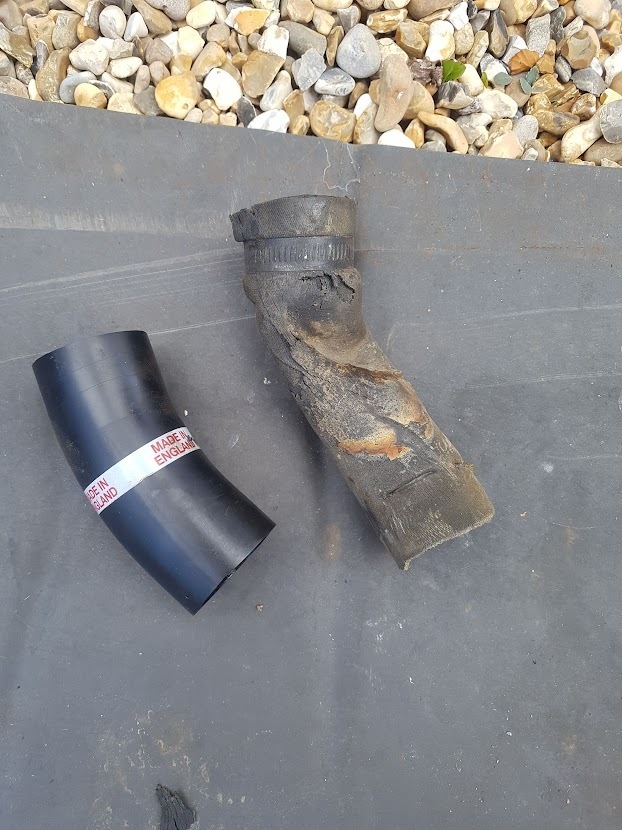 Obviously this wasn't simple - the fill neck had been repaired but left too short to reach the new hose so had to be extended. Thankfully I had some exhaust tube of the right diameter under the bench. Removing the tank disturbed the exhaust which I didn't even try to repair. It was noisy and on the way out, touching the body or chassis at every possible opportunity so I stumped up the cash for a new system. 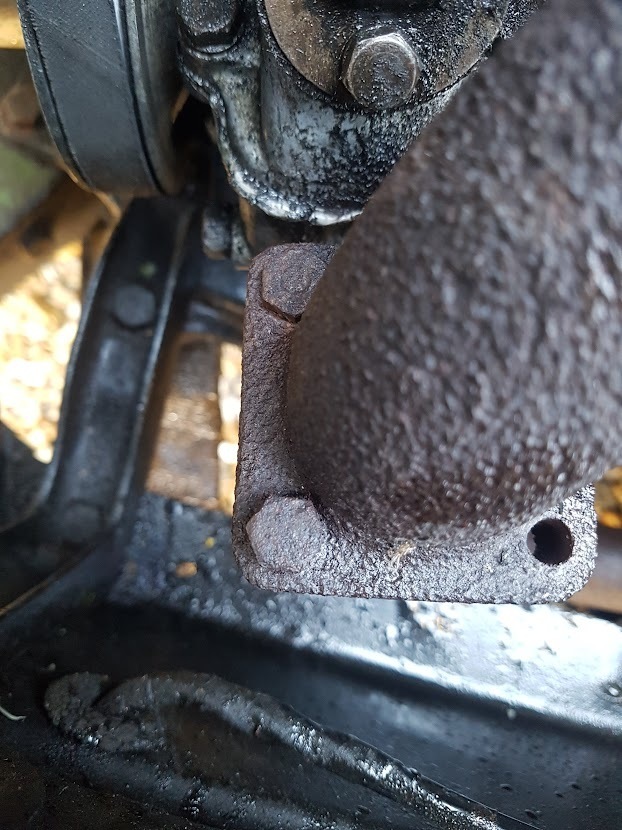 Removing the down pipe was fun... I ended up having to remove the manifold and cutting the bolts off in the vice. 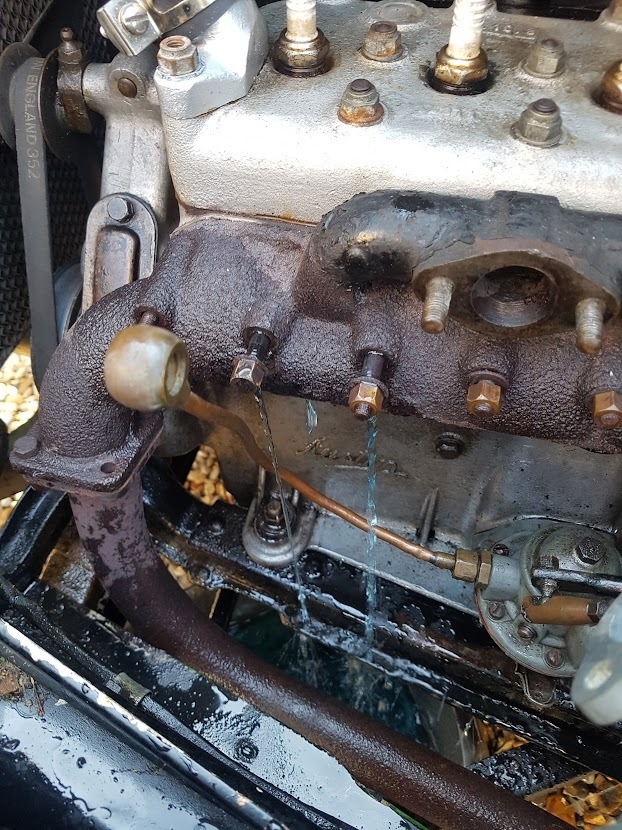 Removing the manifold led to an impromptu coolant flush... Studs go through to the water jacket which is great - water and heat! Thankfully none snapped and all could be recovered by running a die down the threads. I reassembled with liberal amounts of copper slip and a new gasket. Slightly annoyingly new tailpipes are out of stock everywhere for Ruby's and the one on the car was crusty and didn't fit the new system so I improvised and cut a section out of the old pipe... 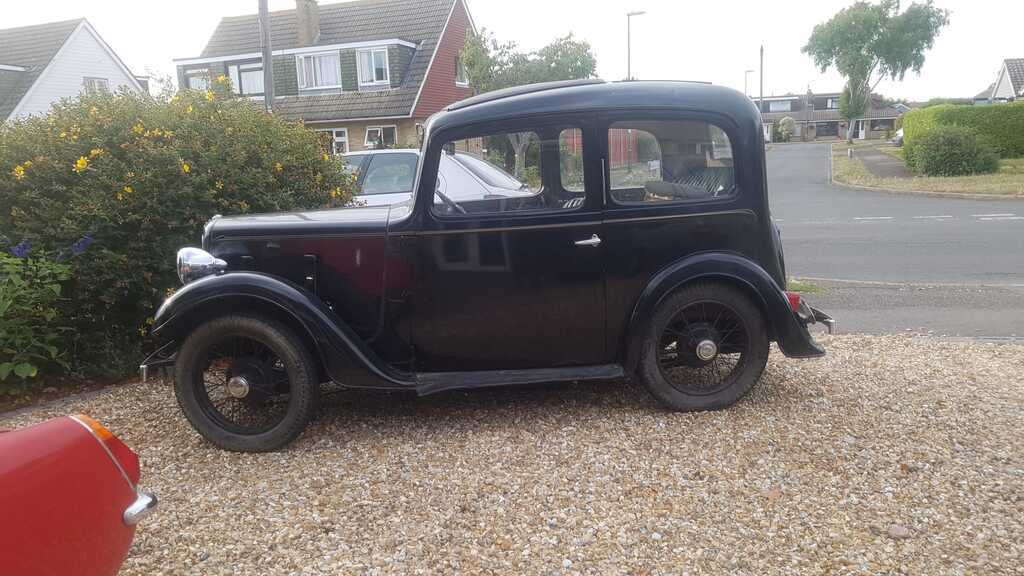 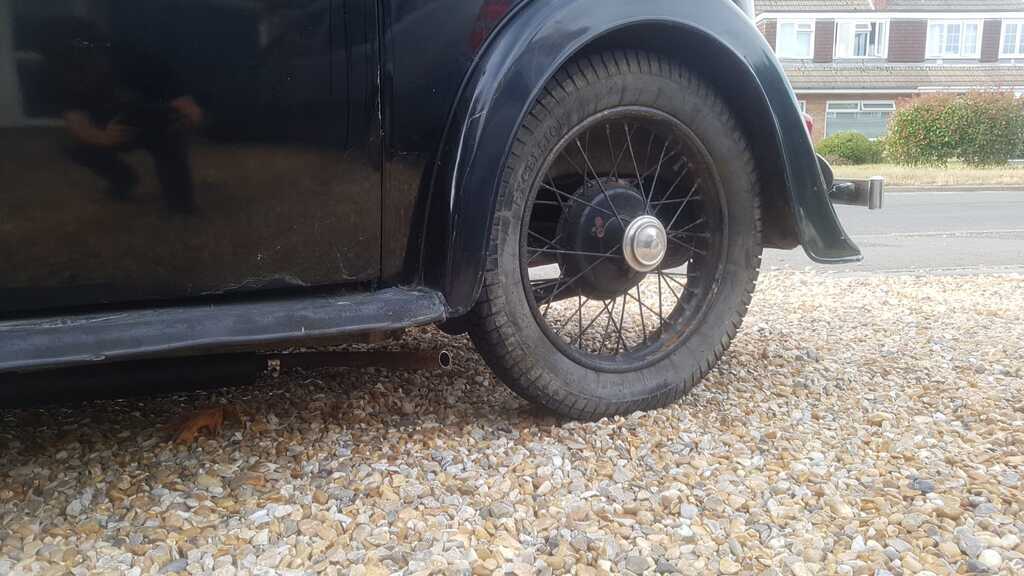 Side pipes just win so I'm happy. With the car now back together all that was left was a test run. The engine started quickly and easily despite having been sat for several months. An initial run around the block to start dialling in the timing went okay so I started to push further afield. Performance was definitely down with a slight incline requiring a drop to 3rd and the engine struggling to hold 20mph which was disconcerting. Before I could find somewhere suitable to pull over to investigate something cleared and the car came to life - I suspect a jet was partially blocked. An hour or so of cruising around the lanes had the timing set and the engine running well. The only issue I had now was the idle which needed to be kept higher than I would like. Return to idle was also poor and easily led to a stall. I slept on the issue and did some more reading up before having another shot this evening. The problem turned out to be user error; the idle mixture screw pitch is really quite course meaning that 1/4 of a turn out was enough to have it running overly lean. After this turning it in or out made no odds - it was full lean. I had set it to 1/2 a turn out as a starting point so had completely missed the useful range of adjustment. Resetting to 1/8 out got the idle sorted and the car running well. Performance is still feeling a bit lacking - I know this is not a rocket but the engine feels to be labouring more than it should so I think a decoke and valve lapping session is on the cards in the not too distant future. The gearbox is also getting very noisy which is a shame as the synchro's are good. I am pretty sure a bearing is very much on the way out so this will need swapping soon. I managed to pick up a 'rebuilt' gearbox at Beulieu last year (I actually bought 5; I bid low and the seller just threw more boxes into the deal for the original asking price!). It is clean but needs inspecting, hopefully as worst case it will suffice as a stop gap until the current box is rebuilt but I think that can wait for now. Charging system is working well, steering feels good and the brakes work so I'm getting there! Thanks for looking James |
| |
Last Edit: Jul 12, 2022 22:13:30 GMT by metroman
|
|
|
|
75swb
Beta Tester
Posts: 1,052
Club RR Member Number: 181
|
1937 Austin Seven Ruby75swb
@75swb
Club Retro Rides Member 181
|
Jul 13, 2022 22:34:41 GMT
|
|
Cracking problem solving James! Must be such a good feeling to finally having her running better?
|
| |
|
|
|
|
|
|
|
Thanks 75swb , it does feel great to finally be making progress. I decided to make use of my rekindled motivation and check the condition of the top end of the engine. 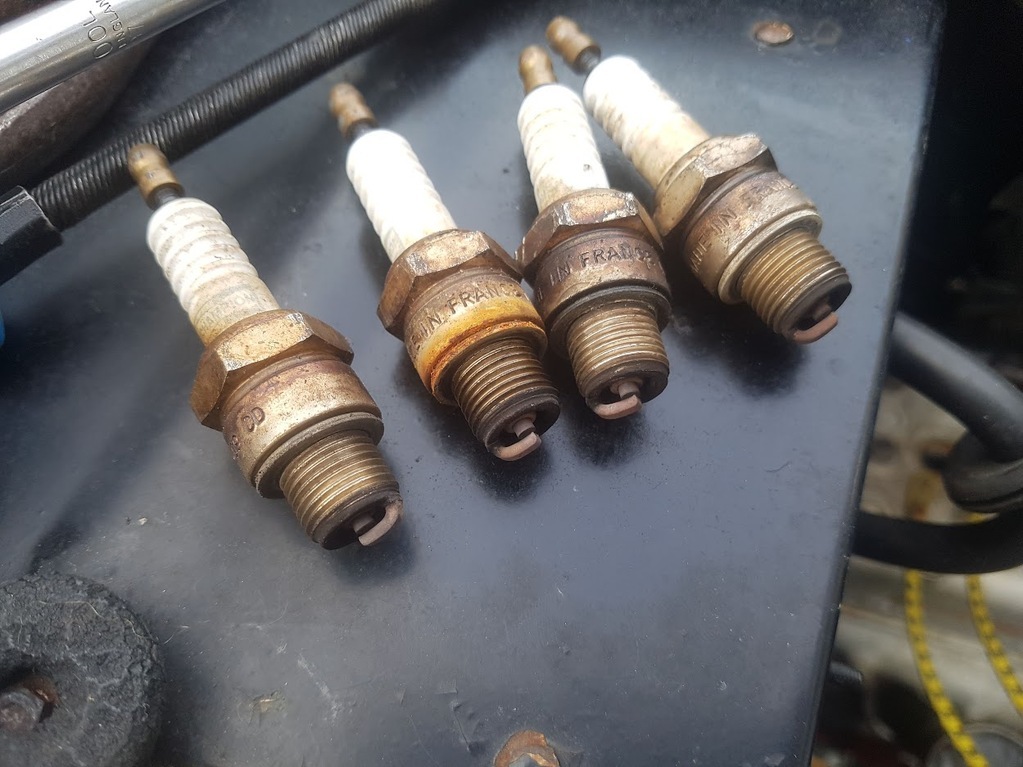 Plugs look good to me. These were new a year ago but went rusty before I replaced the leaking radiator top hose. 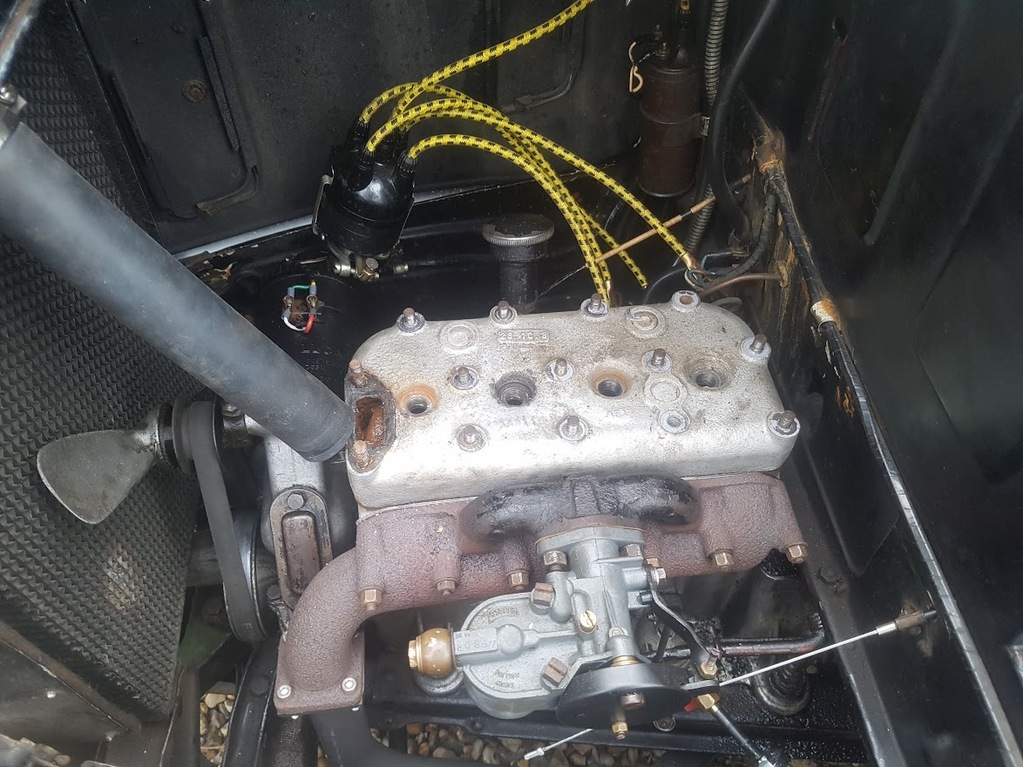 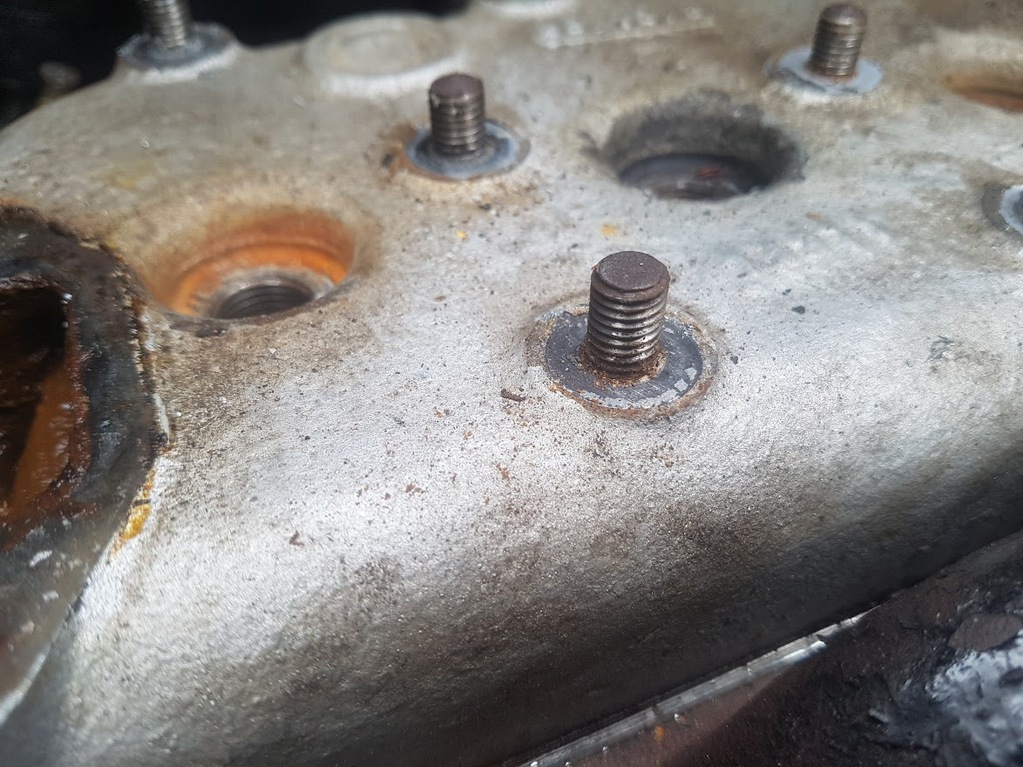 The head nuts all came off without a fight, although one brought a stud with it. Rather than try and pry the head off the block I made up a crude slide hammer by turned the swage off an old plug and tapping the ceramic core out. A length of 6mm studding and a big socket finished it off. 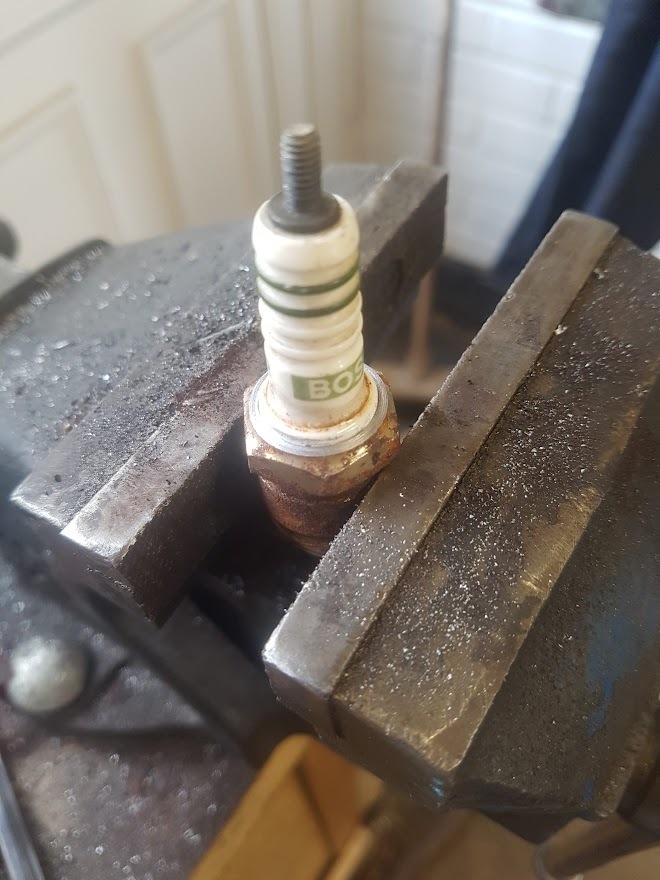 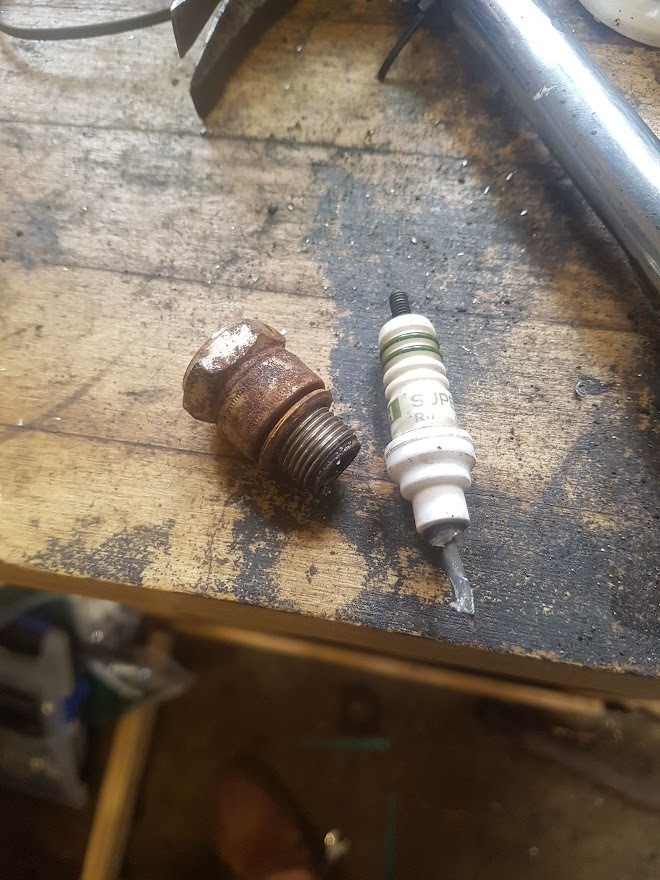 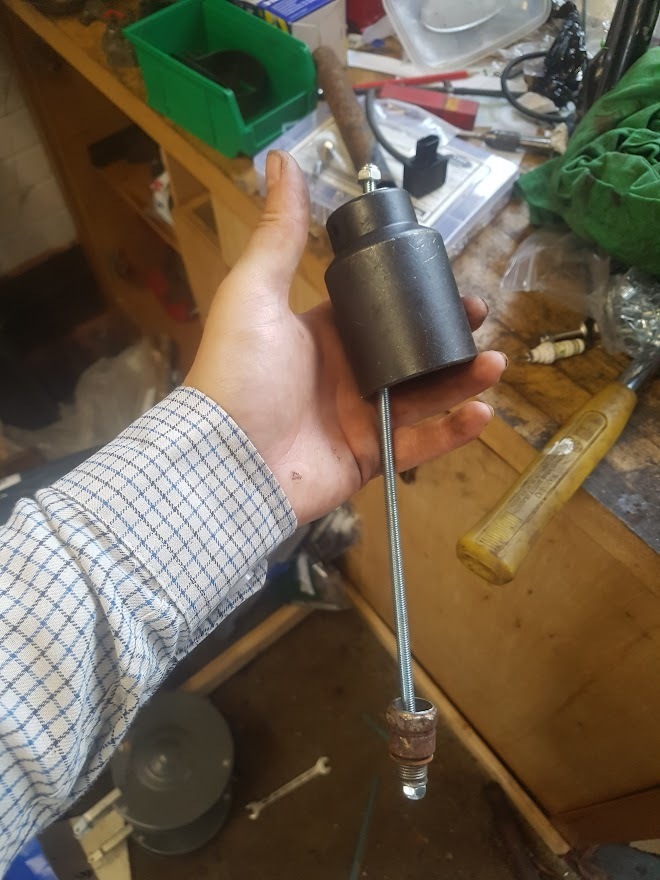 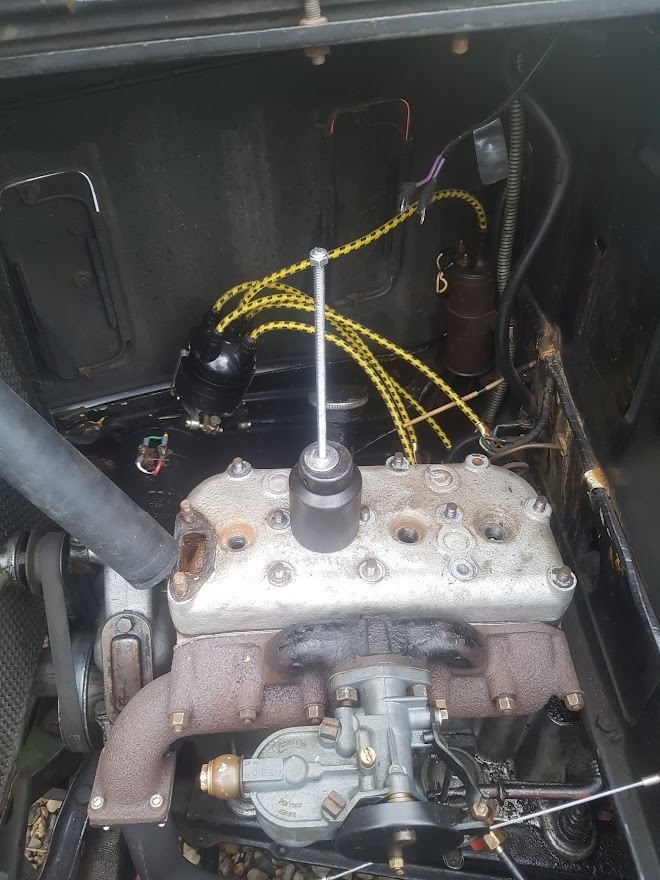 This made very easy work of pulling the head 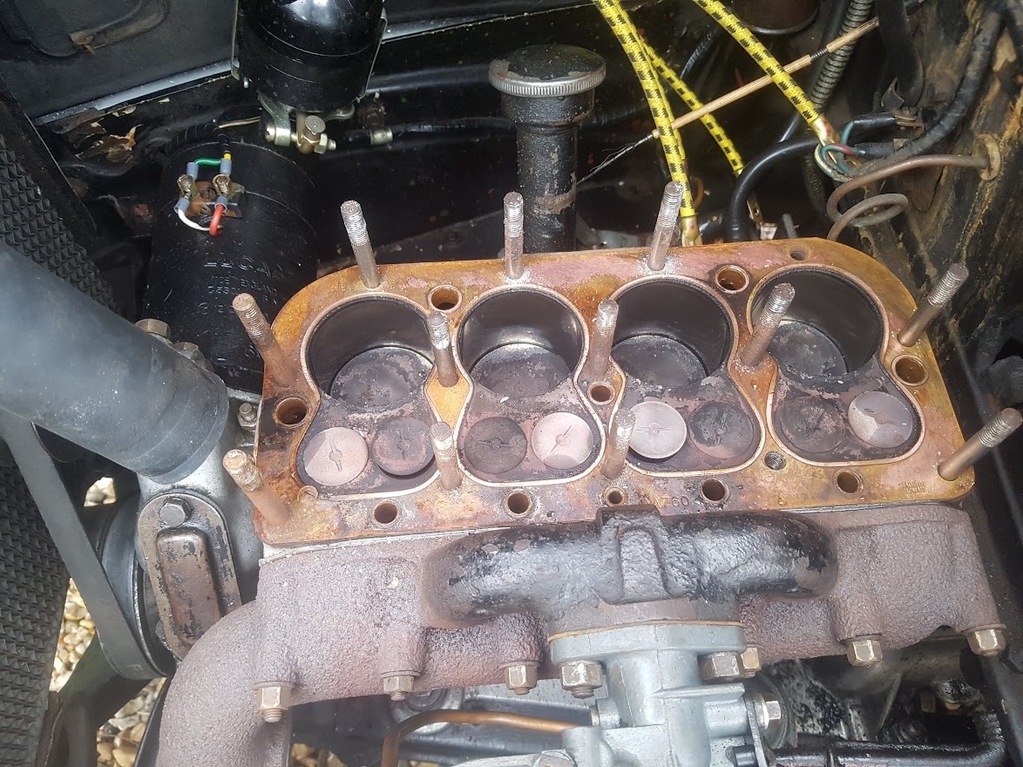 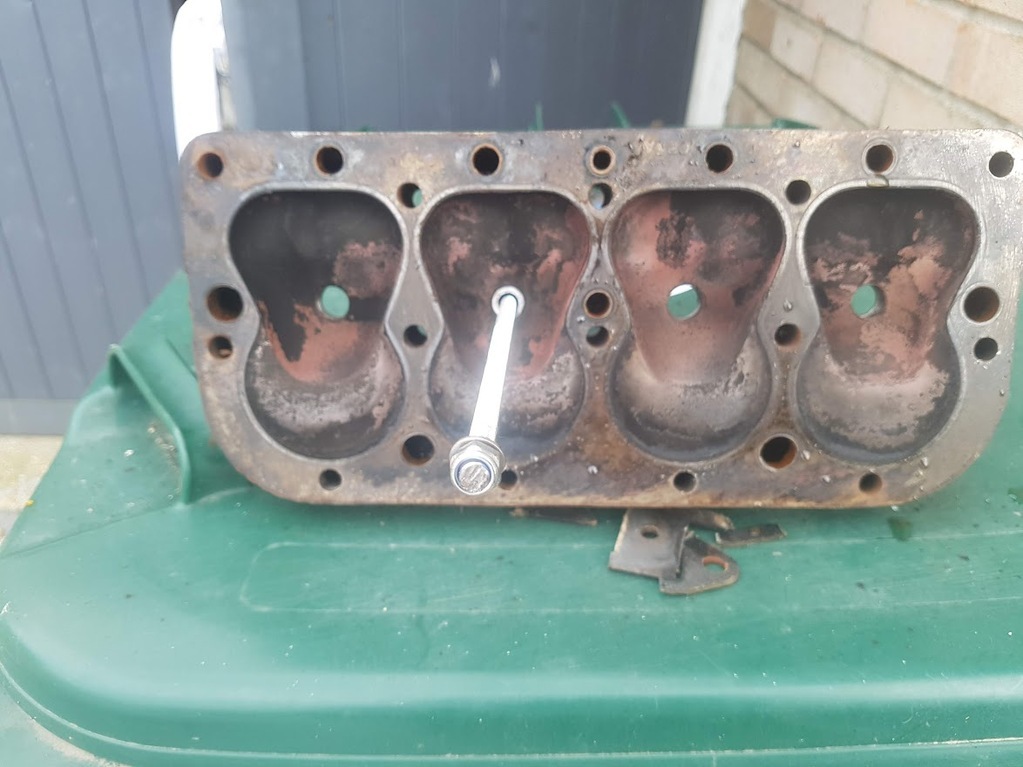 The engine was a lot less coked up than I expected which is good. The bores are certainly on the polished side but not stepped. Importantly I could see no sign of detonation damage to pistons or valves. 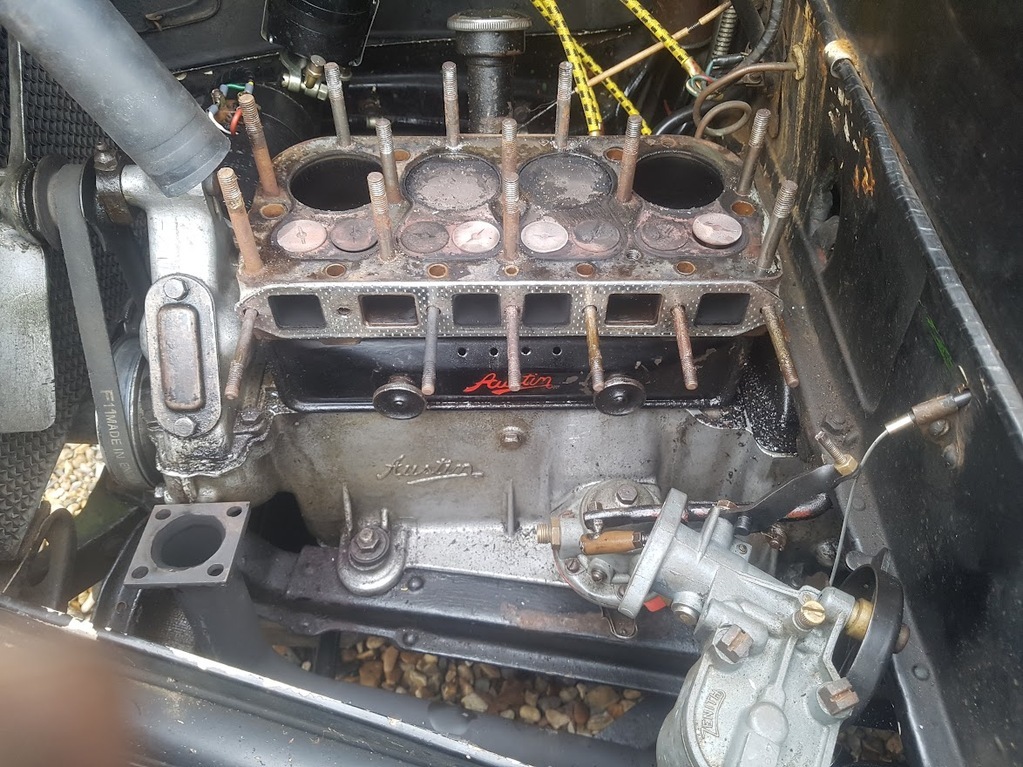 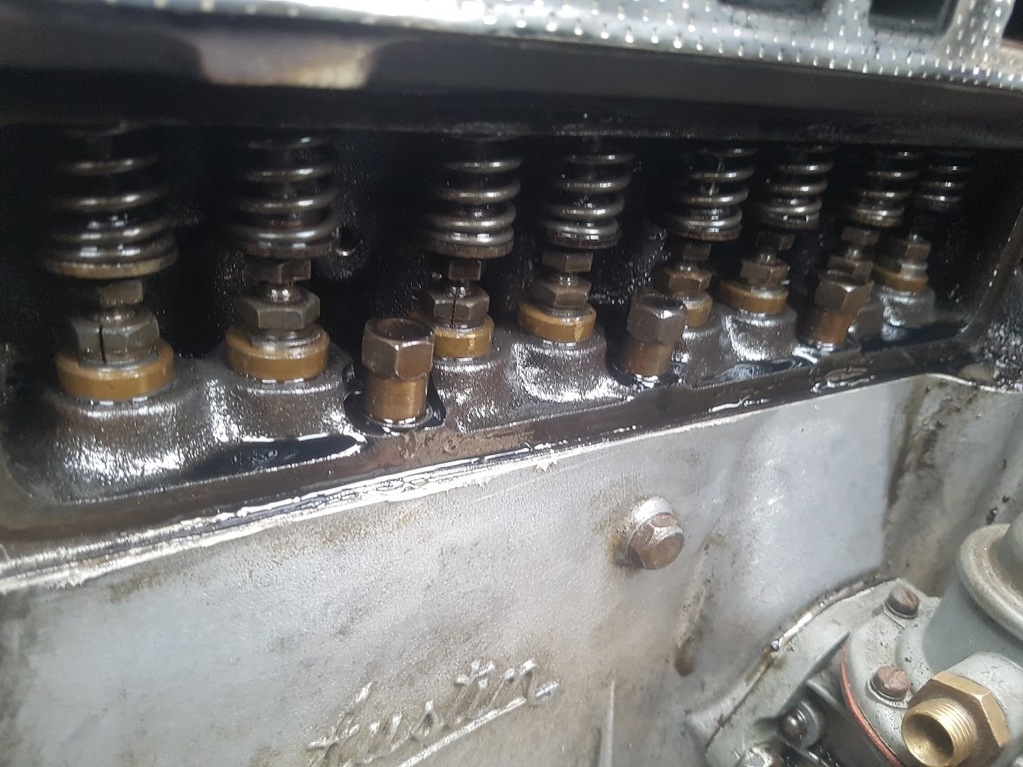 I then pulled the manifold to gain access to the tappets and found the first likely cause of the lack of power - inconsistent and extremely large tappet clearances, up to a 1mm on one valve! That will not have been helping performance at all. The valves were also all loose in the guides... On removing the valves it appears they are incorrect for the engine. From 1936 onwards (the engine in this car is a 37/38 3 bearing) the valves were drilled to accept a pin instead of a conventional collet arrangement, the valves fitted have collets. When I bought the car I was told the engine with new pistons. The stainless steel studs and modern pistons support this so I suppose whoever did the work decided to swap the valves as well. The next step is to inspect the valves and guides to see what is worn / out of spec. I have the original block for the car at the workshop and can pull the valves from that as a comparison / source of spares. Onwards and upwards! James |
| |
|
|
|
|
|
Jul 14, 2022 12:41:49 GMT
|
|
I had a quick measure up in my lunch break (perks of working from home) and found the valve stems to be seriously undersized compared to the published specs measuring at 6.96mm to 6.98mm whereas the guides seem to be in spec (9/32" / 7.14mm). The valves aren't worn, they are just plain wrong. A little disappointing but it could be far worse.
Fingers crossed the valves from the original engine are serviceable.
James
|
| |
Last Edit: Jul 14, 2022 12:54:11 GMT by metroman
|
|
|
|
|
Jul 14, 2022 13:22:45 GMT
|
|
That much valve lash will seriously impact engine performance.
Get it set up right and you'll notice the difference. You'll have to reset the timing and fuel once it's done though.
Herbert knew how to make an engine go, but he wasn't very good by today's standards of making them stay going. Don't forget, that engine would have been due its fourth overhaul by the time the body was falling to bits and worth nothing.
Pre-war metallurgical knowledge, particularly alloys was way behind what the development in the following decade brought along.
That's even shown in the cartoons of the day, you always see the pre-war cars dropping nuts and bolts, smoking, steaming and generally rattling and shaking about. If you weren't right up on top of fixing it when it broke, it would continue to shake itself to pieces.
Keep at it. It'll keep breaking and breaking but that's what they do. Keep fixing it and eventually the period between it breaking will extend out to allow you to get some enjoyment from driving.
Forget not, in '37 driving in a small car from say London to Brighton was a big undertaking with expectations of breaking down and a potential overnight stop somewhere. That was a lot of miles, and a journey of endurance.
Phil
|
| |
|
|
|
|
|
Jul 14, 2022 14:18:07 GMT
|
I think you are pretty right PhilA - the car is from a very different time, and by when my was new it was already frankly obsolete. T he biggest problem I am suffering from is previous owner(s) not having fully appreciated this and badly neglecting it. I am sure it was pretty good after the restoration but that was 50 years ago now, so it has well passed it's design life twice! I am trying to do as much preventative maintenance as possible, hence pulling the head now, to avoid breaking down. So far I have only failed to proceed once, which was all my fault - I ran out of fuel! That said the adventure that comes with what is nowadays a normal trip is what really appeals to me with this car and why I keep coming back to it. Generally I am also really enjoying the slow but steady improvements - I am sure I can make it a pretty useable little car. James |
| |
|
|
|
|
|
Jul 14, 2022 19:45:47 GMT
|
I am sure I can make it a pretty useable little car. James I reckon so, at least as reliable as it was when it was new! |
| |
|
|
thomfr
Part of things
  Trying to assemble the Duett again..
Posts: 694
|
|
Jul 14, 2022 20:56:05 GMT
|
|
Did you check the gearbox oil level? Could be the reason for the noise.
Thom
|
| |
73' Alfa Giulia Super
64' Volvo Duett
65' Volvo Duett
67' Volvo Amazon 123GT
09' Ford Focus 1.8
20' VW ID4
71' Benelli Motorella
65' Cyrus Speciaal
The difference between men and boys is the price of their toys
|
|
|
|
|
Jul 17, 2022 10:32:46 GMT
|
thomfrI did a gearbox oil change last year but will check the level - good idea I also pulled the valves from the original block. When the previous owner spun a bearing he opted to replace rather than rebuild the original but did keep it. Unfortunately it was kept outside in a plastic box full of water. 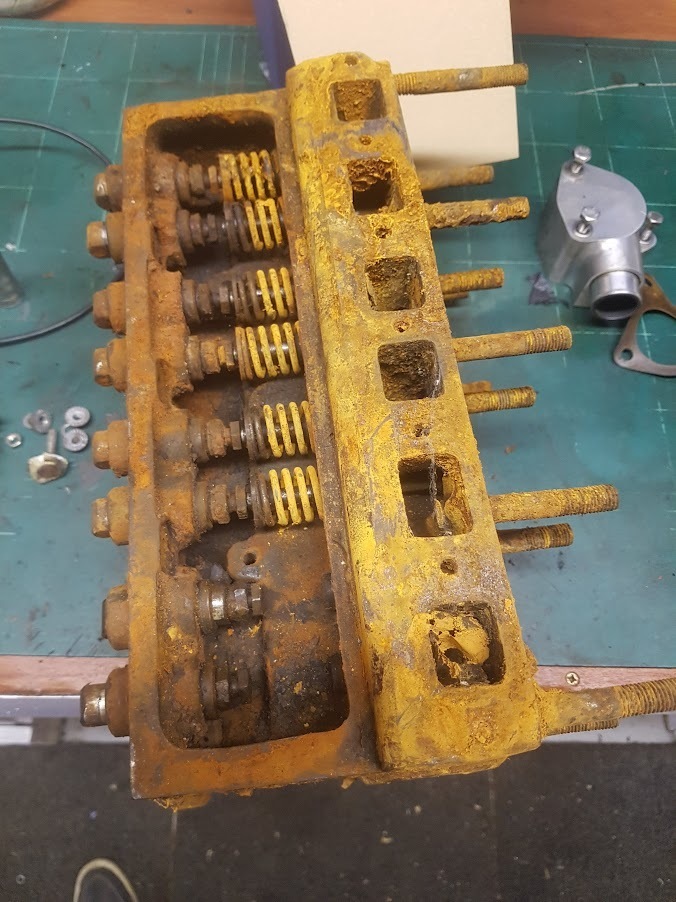 The combination of aluminium and iron meant that everything, ferrous or not, has a coating of oxide. It is clearly a different form of oxide to the stuff we normally encounter because it wipes off exposing good, unpitted metal... 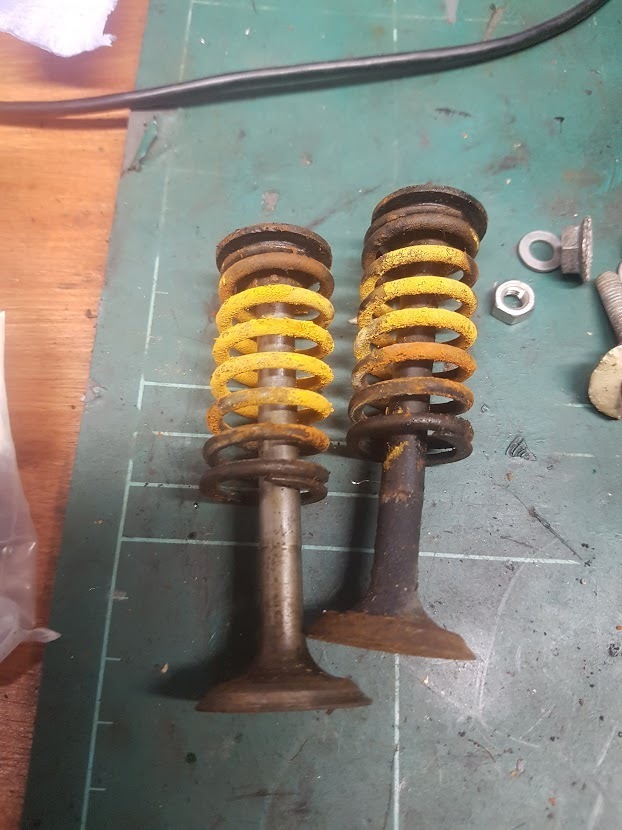 These valves measure up a bit bigger (7.06mm) and feel better in the guides. There is no measurable step on the stems so I don't think they are worn at all. The guides are probably a bit worn owing to the lack of lubrication - the valve chest is just lubricated by mist from the crankcase with no oil feed, and being sidevalve the guides sit in the ceiling of the chest so are run even drier. For these reasons I can't help but feel that more clearance is probably not the end of the world. So long as the valve seat and seal there should be no ill effects with high oil consumption etc. For now I am going to finish the decoke, swap the valves and lap them in, and see how she goes with properly adjusted clearances. James
|
| |
|
|
|
|
|
Jul 26, 2022 10:58:02 GMT
|
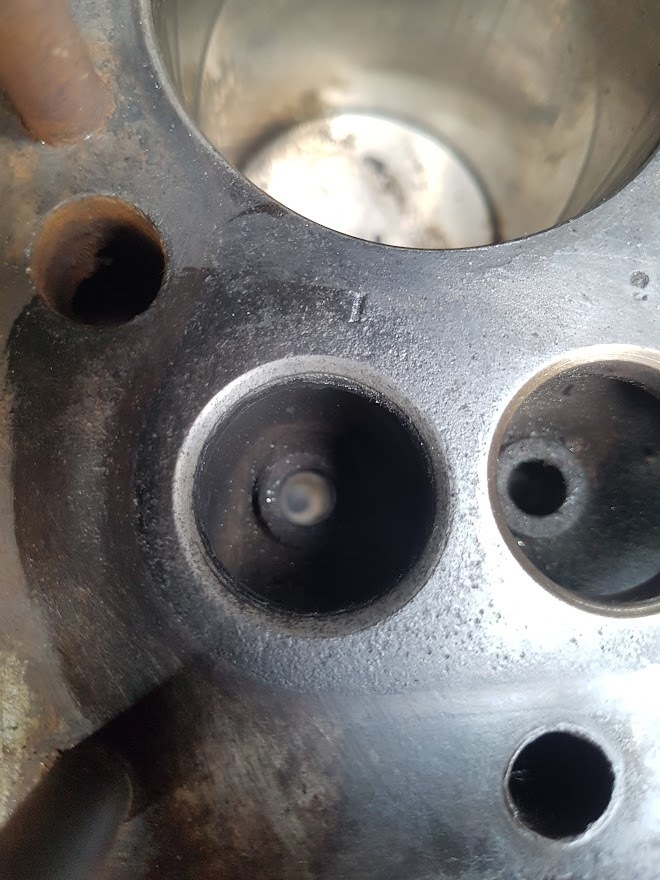 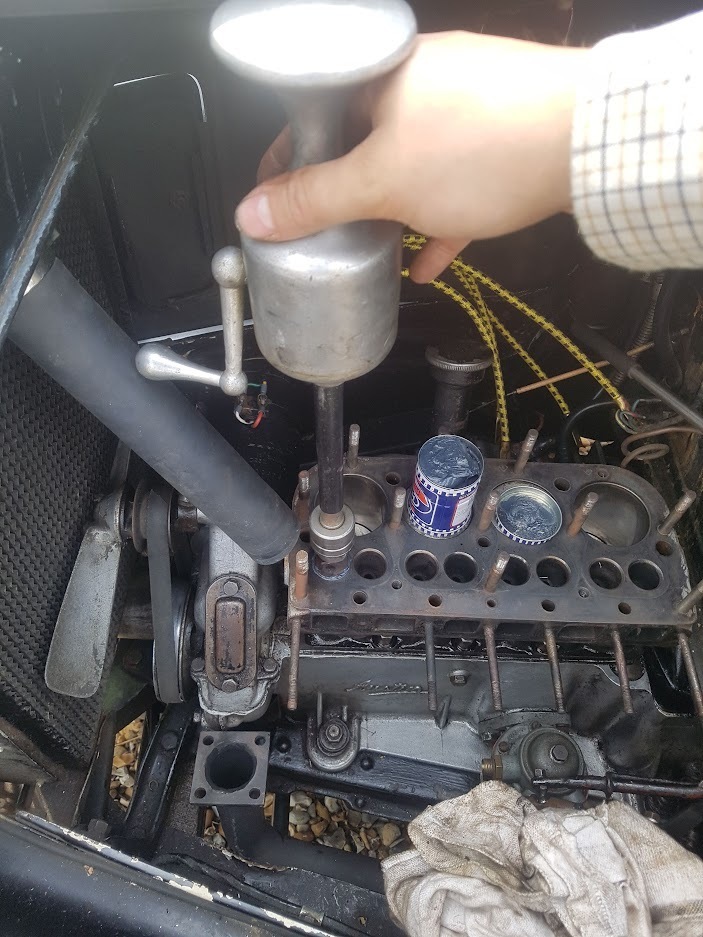 I have been busy lately so have been working on the Austin in free moments between other jobs. Valves were all lapped in with a lovely old Pickavant lapping tool. It's an odd thing that looks like a hand drill but randomises the direction of rotation and made the job a lot easier than trying to do it with a stick. The inlet seats were all pretty good but the exhausts had a fair amount of pitting which took a while to lap in. It will hopefully make a difference to compression and maybe even restore a horse or two. The front head studs were a little short so were replaced. The rest were removed and cleaned up before being reinstalled with copper slip. I also replaced a few of the manifold studs which were also on the short side and had corrosion damage where they run in the coolant jacket. 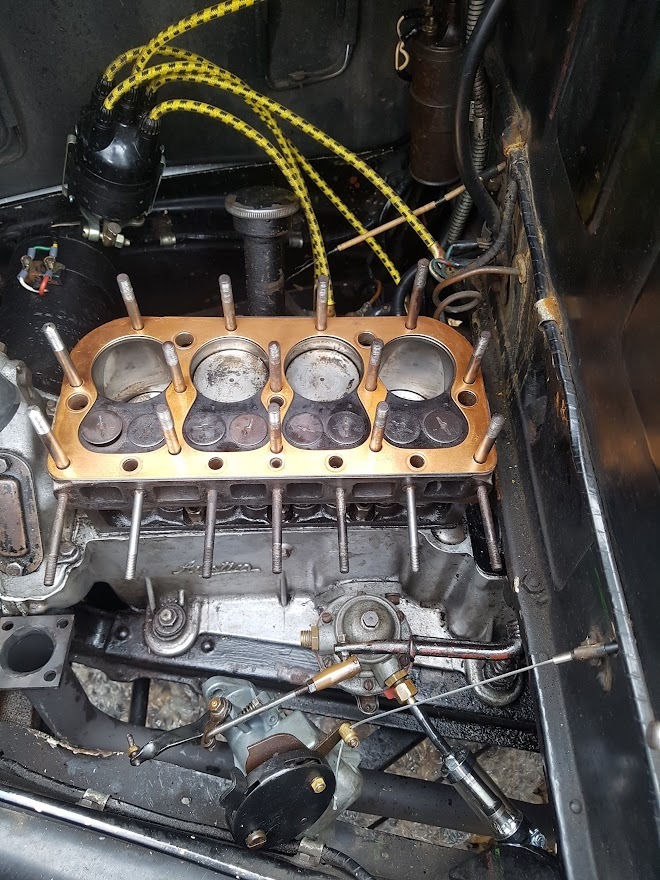 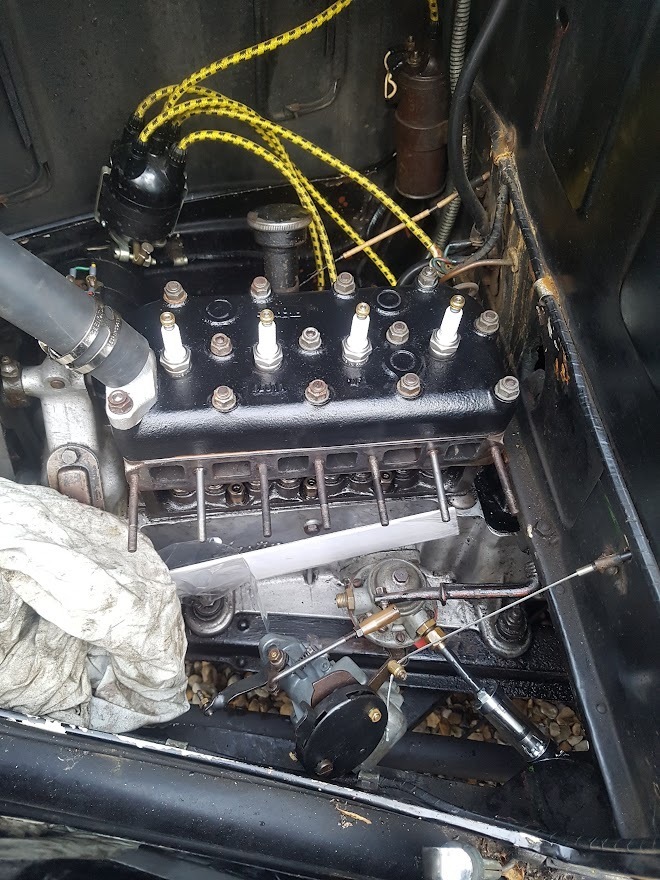 The block and head were de-coked and the head given a lick of black paint. Looks a bit smarter than the silver I think. I treated it to a new set of plugs with some nice turned and knurled brass caps. Nearly there! James |
| |
|
|
|
|
|
Jul 26, 2022 11:06:32 GMT
|
|
That ought to help it out.
Do any of the racers do wild porting jobs on these? Would a road car benefit?
|
| |
|
|
|
|


