|
|
|
|
|
Welcome to the club  Fantastic things to potter about in, especially in the lanes up here where you don't have to fight the delights of impatient 'modern' traffic Oddly we too have been having some fun sorting the starter and replacing all fluids on SWMBO's baby recently 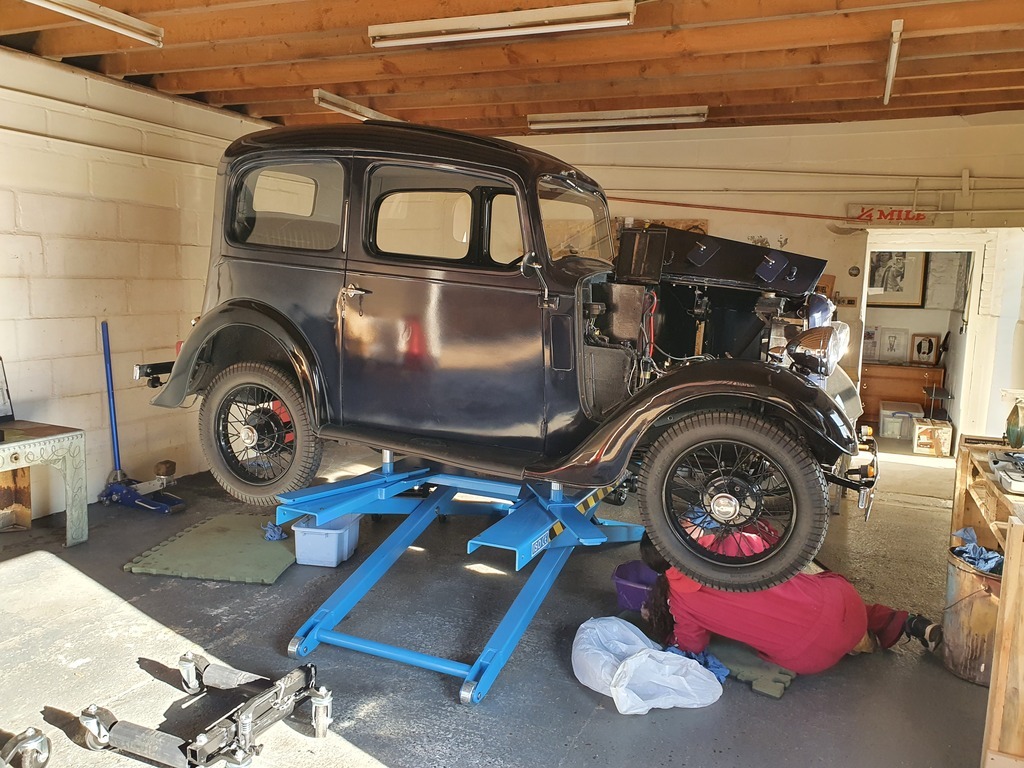 Drives so much better as a result though! 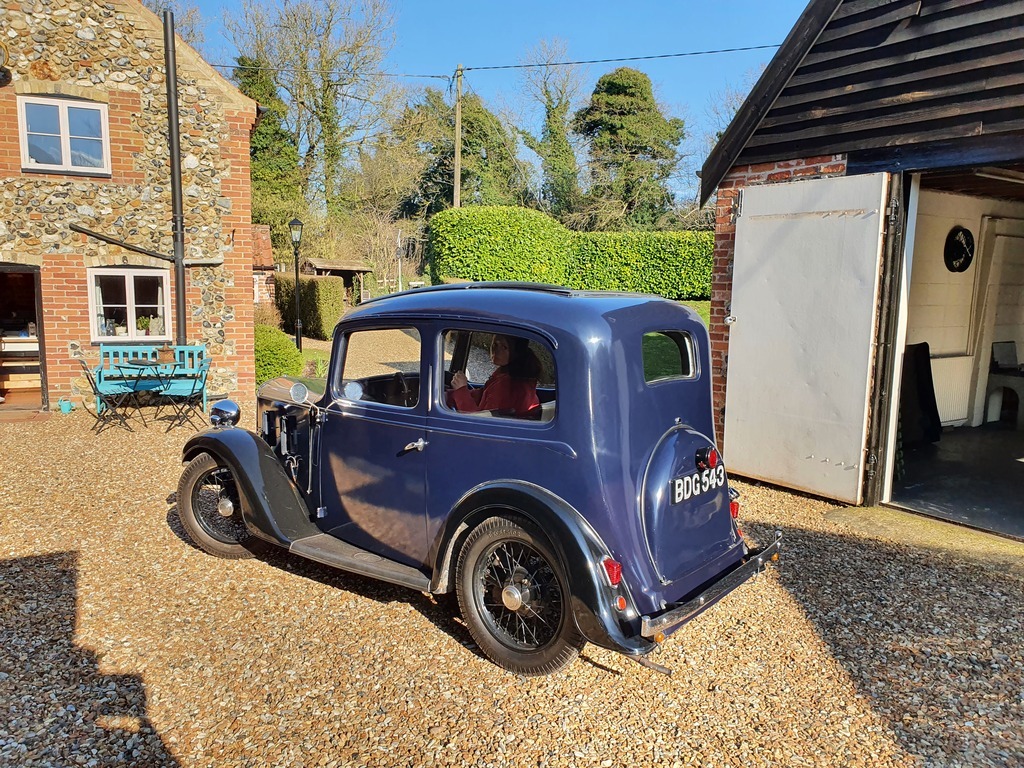 nice car lift what make is that? |
| |
|
|
|
|
|
|
|
Jul 24, 2021 10:33:46 GMT
|
For the headlights, I can recommend halogen pre-focus bulbs. The light is whiter and the output is higher with no significant additional current draw or modifications needed. It transforms the headlights. If you don’t already know this, do not be tempted to try to adapt in modern halogen bulbs. The reflectors and lenses are designed to work with a specific bulb. Modern shape bulbs like H4 etc have the filaments in a different place and it makes the light go everywhere except where you want it. www.autoelectricsupplies.co.uk/mobile/product/508/category/93 |
| |
Last Edit: Jul 24, 2021 10:35:20 GMT by Jonny69
|
|
glenanderson
Club Retro Rides Member
Posts: 4,356
Club RR Member Number: 64
|
1937 Austin Seven Rubyglenanderson
@glenanderson
Club Retro Rides Member 64
|
|
|
|
Nice. Bookmarked. I particularly like the fact that you chose to drive it home. Well done. 😀
I had a ‘37 Ford Y for a while, and really liked it. I’d love another pre-war car, but would try and find something similar, but a bit better made. A Series 2 Morris 8 would be high on my list.
Anyway, I’ll be following your adventures with interest. 👍👍
|
| |
My worst worry about dying is my wife selling my stuff for what I told her it cost...
|
|
|
|
|
|
|
|
Great stuff.
Wonder if the axle people could drop the axle a tad? :-)
|
| |
|
|
|
|
|
Jul 25, 2021 12:21:03 GMT
|
Jonny69 Thanks for the heads up, that explains why my girlfriends classic Mini has such appalling headlight beam patterns, it was fitted with some fancy new bulbs by the previous owner. There is a great deal of conflicting information about 7 headlights (amazing right!) so I am going to follow the same procedure as I am taking with the rest of the car and get them as good as they were new, or as close to anyway. This will mean stripping the lamps and polishing the lenses and reflectors, cleaning contacts etc and going from there. When I spoke to Classic Car LEDs they told me that they have been developing a 6v LED BA15 replacement for a few years which should be on sale soon. Given how good the other bulbs have been that will probably be my first step if an upgrade is needed. glenanderson I do like the pre-war Fords and did look at Morris 8s as they do appear better value for money than a 7, but the Austin won me over with the parts support and general usability. horrido An interesting thought... I am slowly building up a collection of spares. If I get enough I could build a proper car... 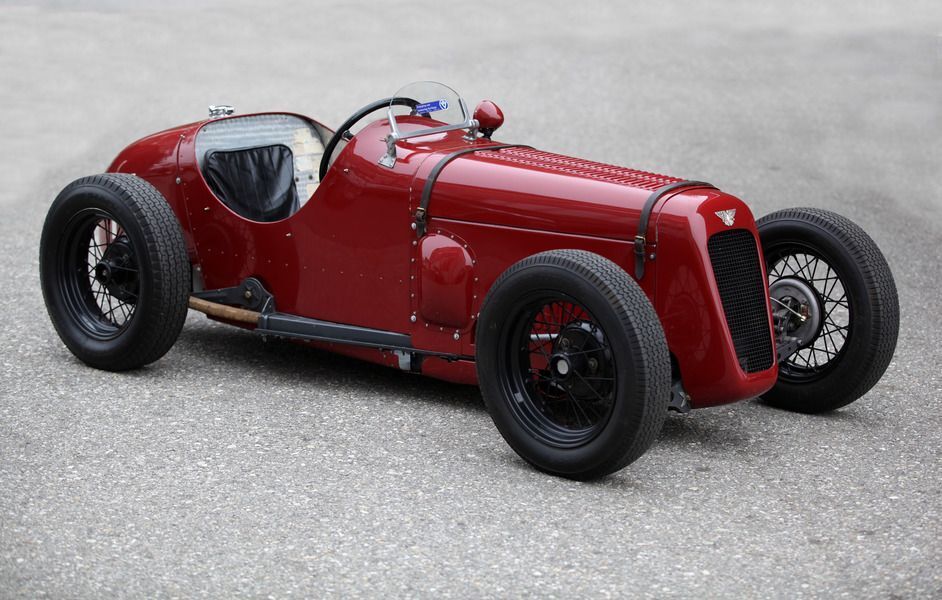 A little more progress has been made. 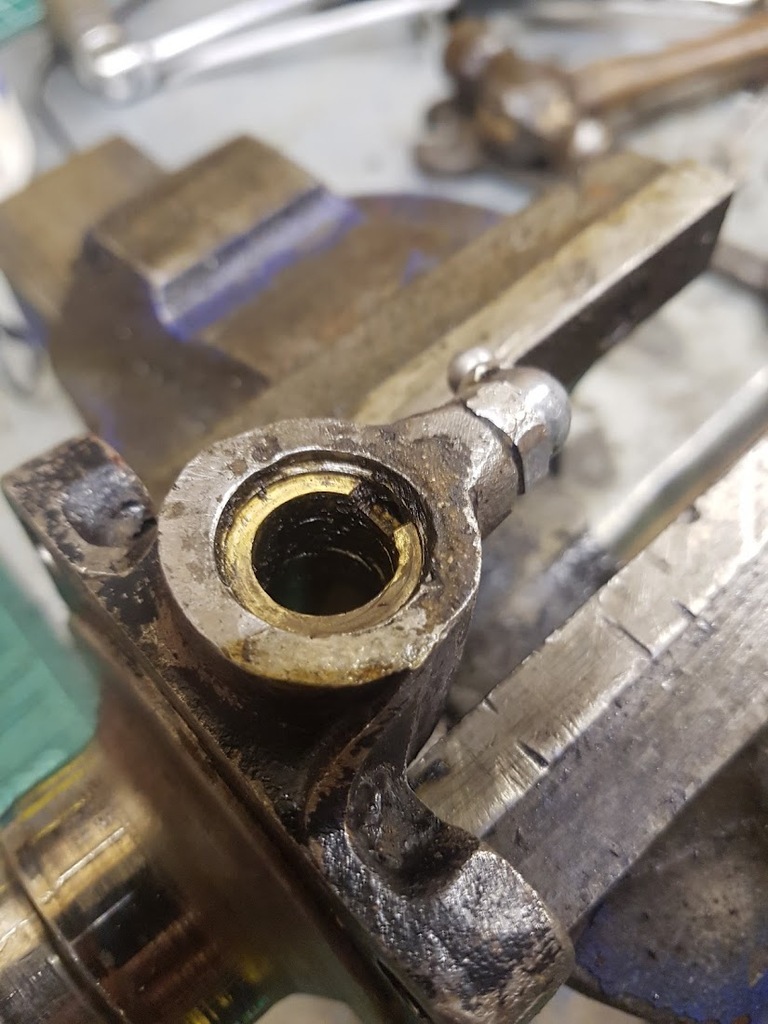 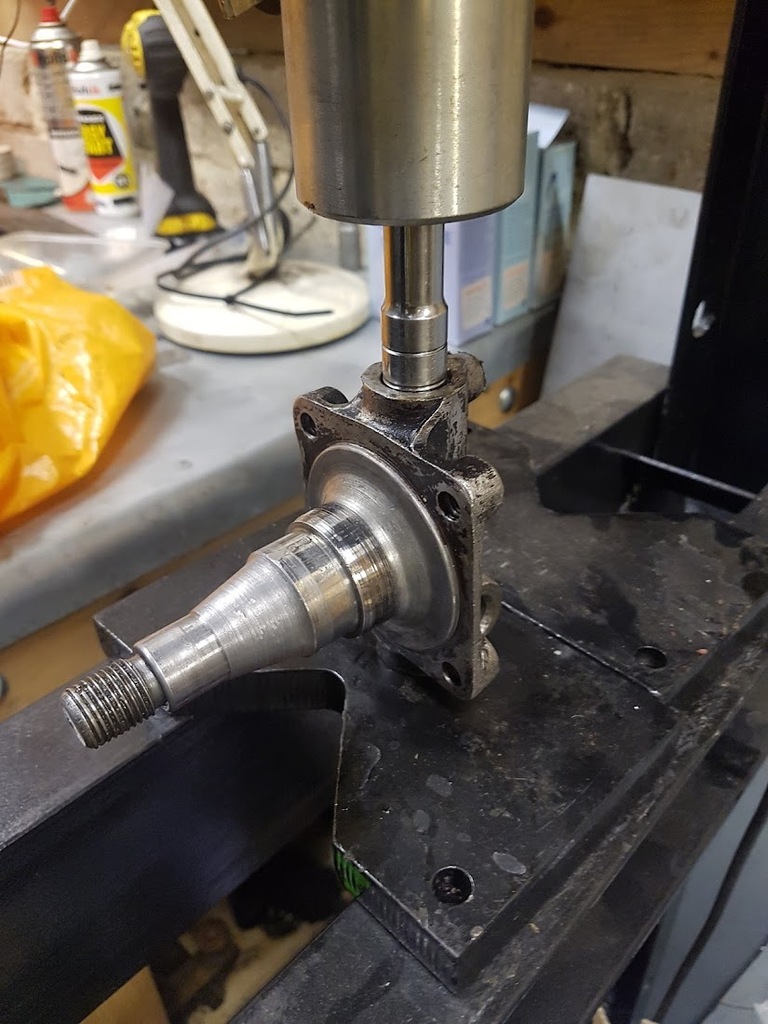 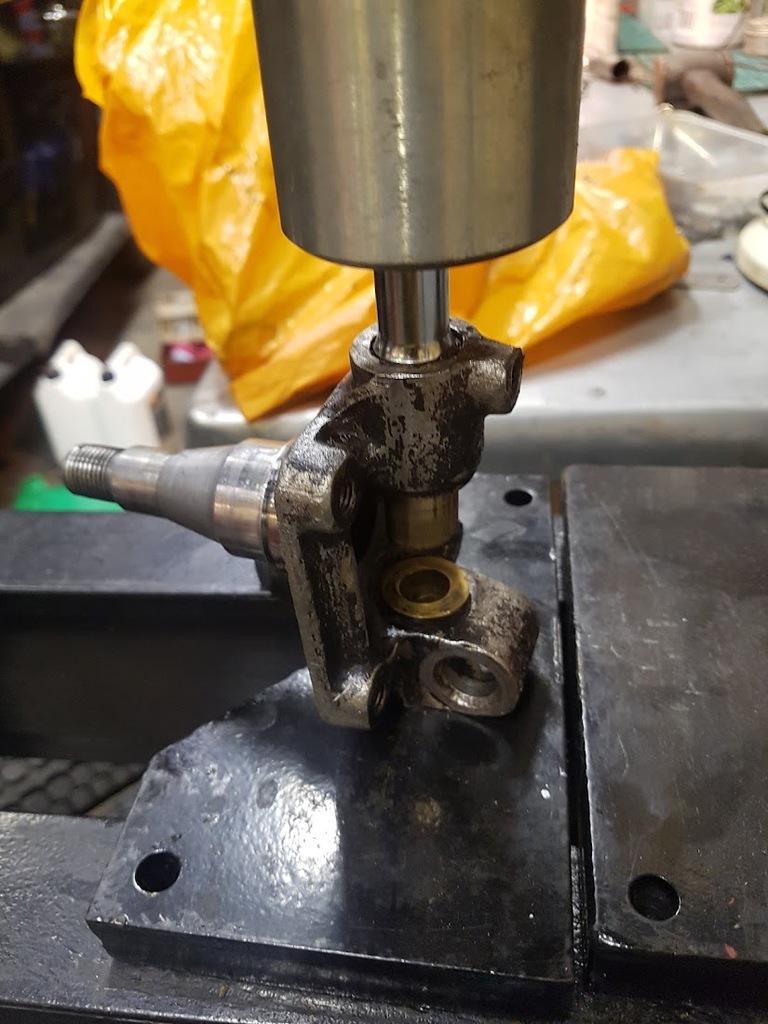 The old king pin bushes have been pressed out 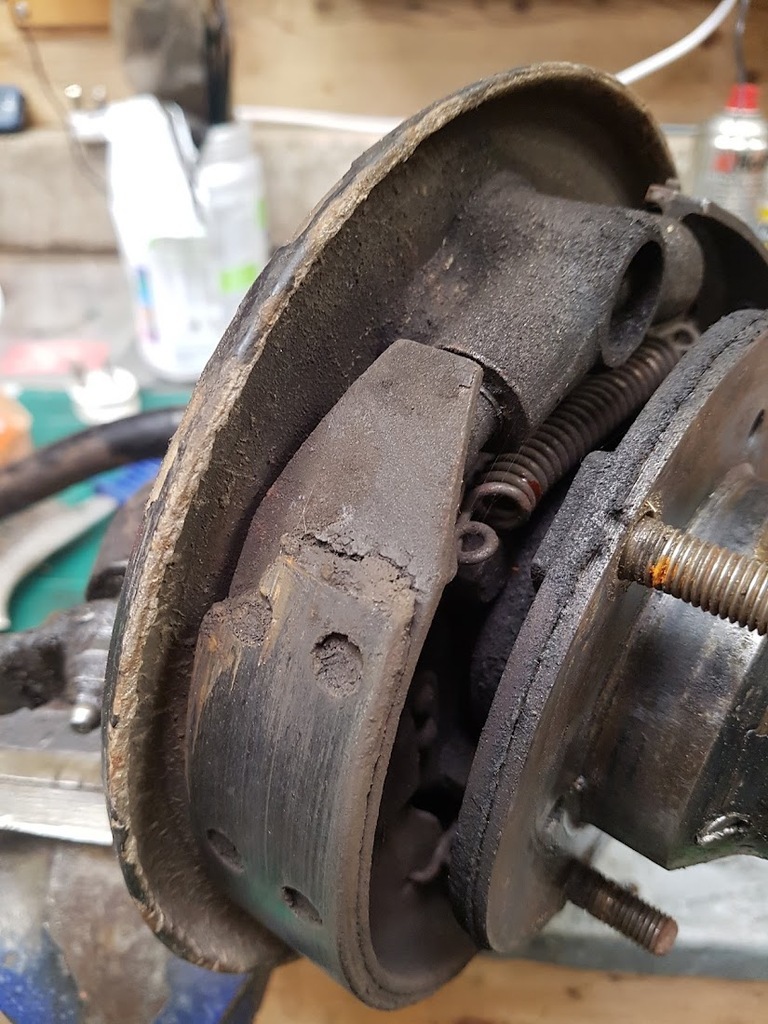 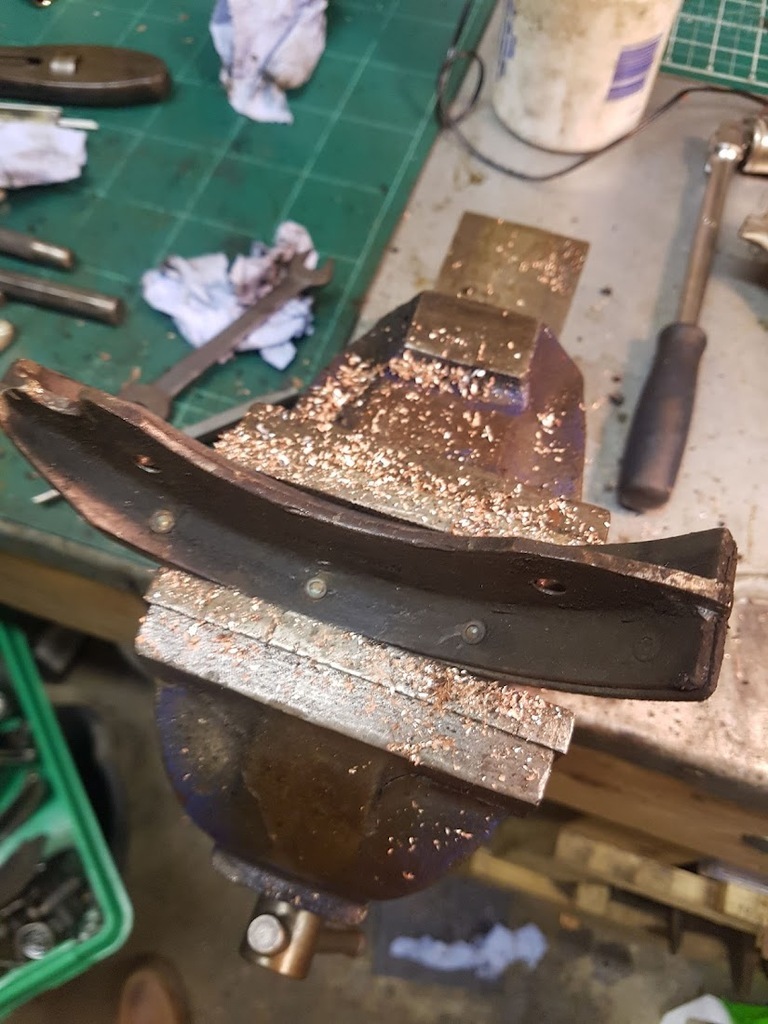 And the rivets drilled out ready for new brake shoe linings. Thanks for looking James
|
| |
|
|
glenanderson
Club Retro Rides Member
Posts: 4,356
Club RR Member Number: 64
|
1937 Austin Seven Rubyglenanderson
@glenanderson
Club Retro Rides Member 64
|
Jul 25, 2021 14:01:57 GMT
|
Paul Goff at www.norbsa02.freeuk.com/ has pretty much all the bases covered when it comes to upgrades for classic vehicle headlights. |
| |
My worst worry about dying is my wife selling my stuff for what I told her it cost...
|
|
|
|
|
Nov 24, 2021 12:33:21 GMT
|
Safe to say I have been rubbish at keeping this thread up to date, so sorry for that! I had all the major parts of the suspension blasted before sending the beam to Rory at Alba Austins who did a wonderful job of re-forging and machining my axle back to as new condition, I also sent him my hubs and kingpins so it could all be reamed to suit and returned ready to rebuild and fit. While I waited I further dismantled the front end, removing the radiator, damper and spring as a "while I'm here" job. 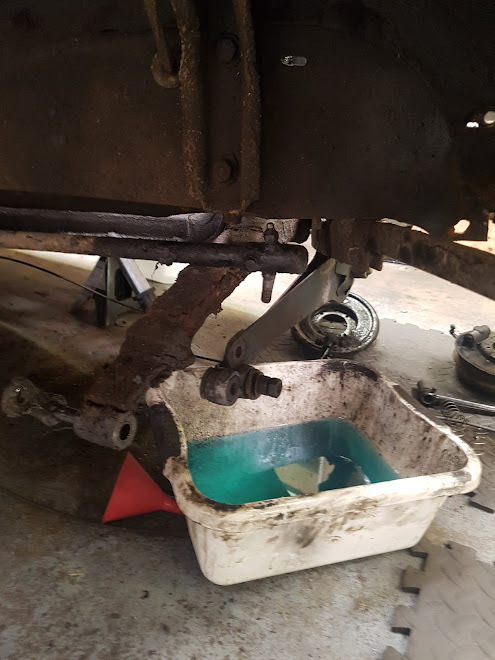 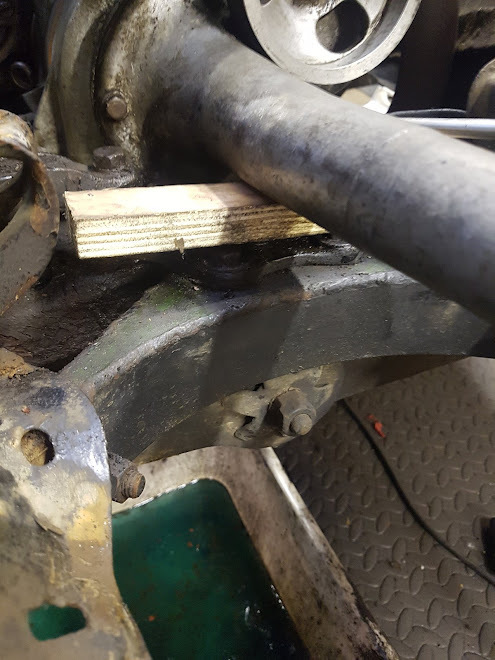 Access to fasteners on these cars is appalling! Designed to go together at the factory I am sure but with zero regard for servicing! To remove the damper and spring the engine had to be raised so I could get a spanner onto the nut and turn half a flat at a time. The spring was wrapped in very old Denso tape which was revolting to go near but had done a good job of keeping everything reasonably well lubricated for 50 years. I laid the spring on it's side and poured diesel, degreaser, engine oil etc over it every day or so for a month to clean out the old gunk and get it well lubricated for another half century. Before refitting I painted it in grease and wrapped it in fresh Denso tape. 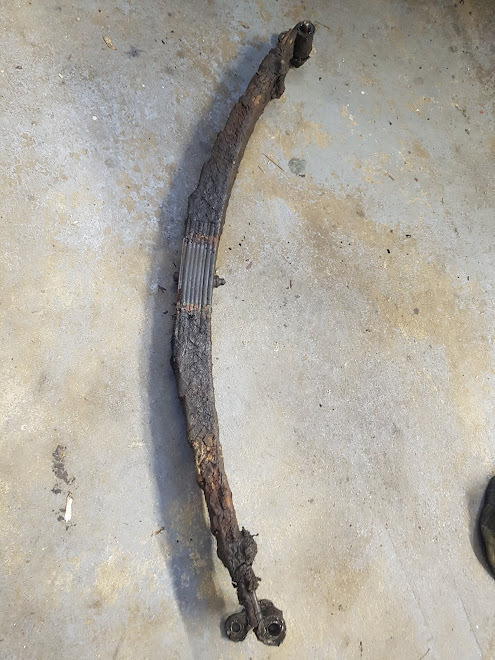 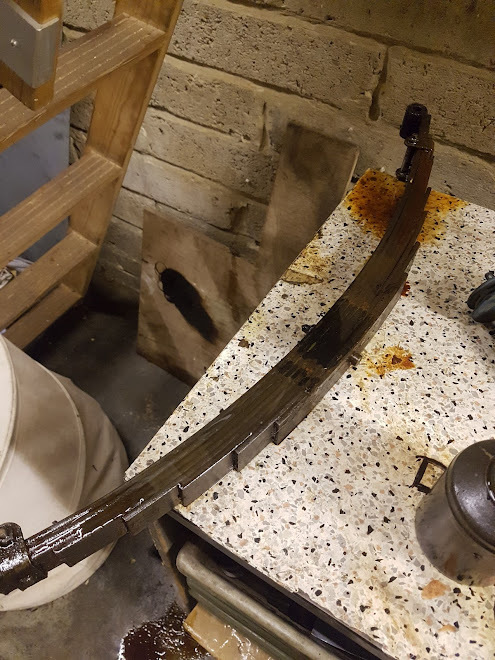 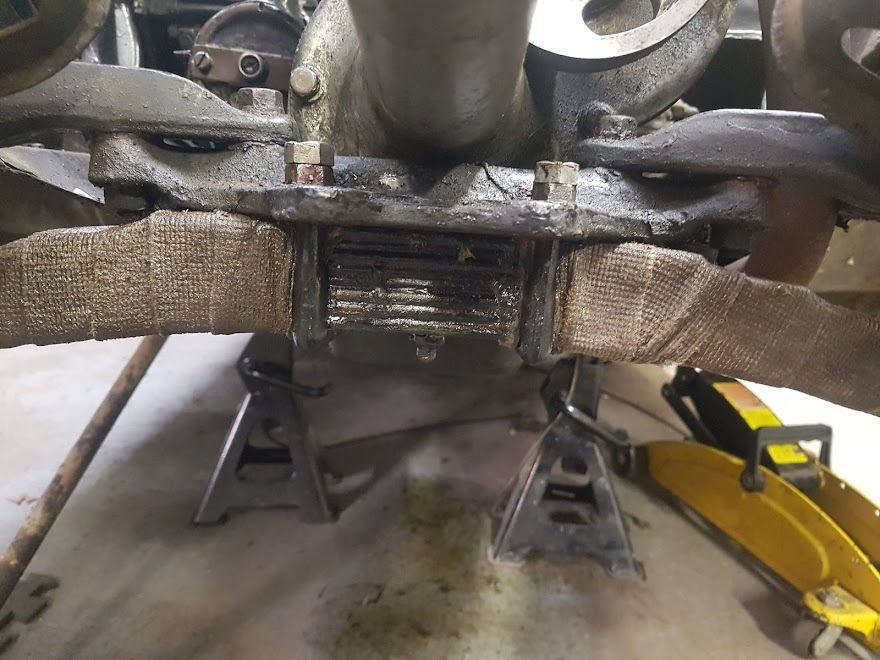 The friction damper was stripped, cleaned and painted. I reassembled with new friction discs for good measure. The rate of damping is set by the preload of the central bolt which I guessed. 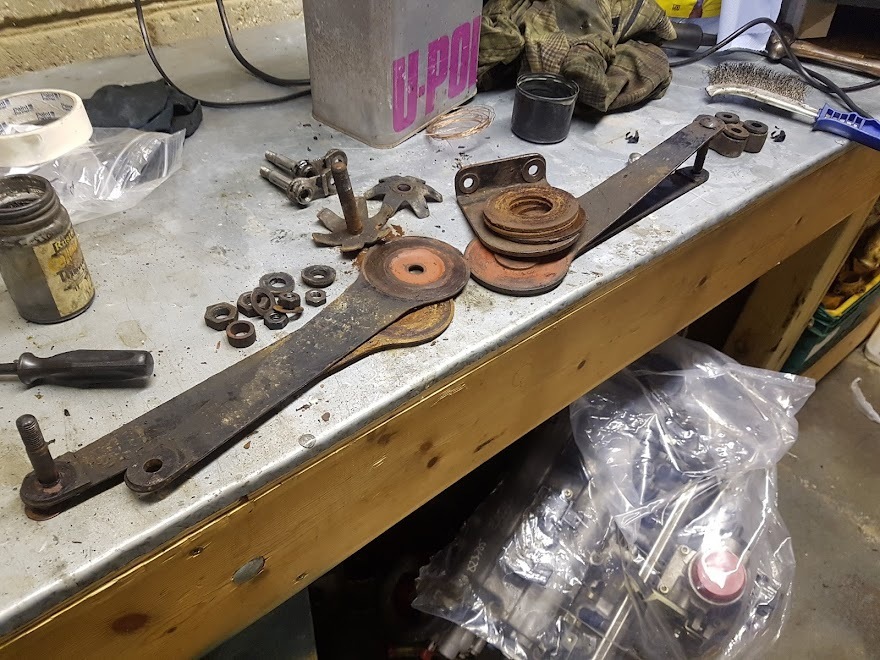 When the axle came back it was painted with Rustbuster Epoxy. It's a bit fiddly to mix but goes on really nicely and seems pretty durable. New cotter pins etc were fitted as required and all the threads chased to help everything go back together smoothly. 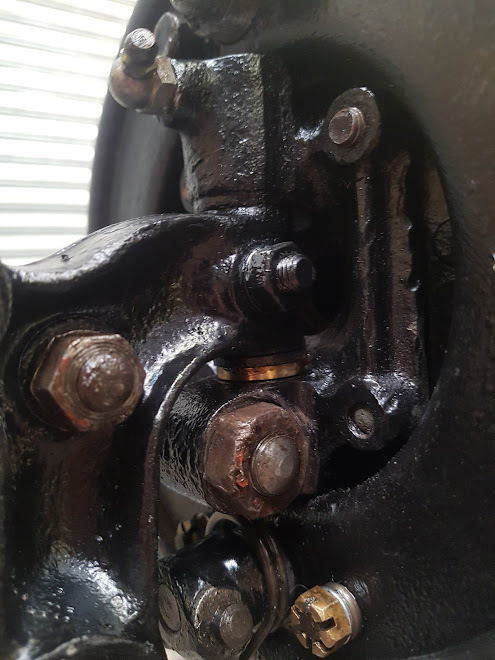 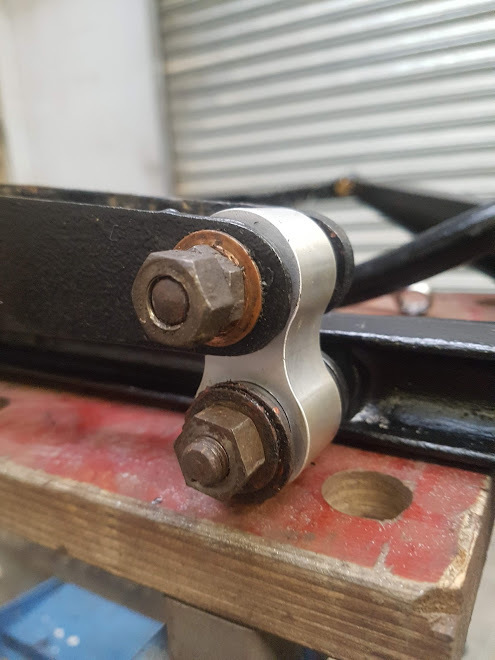 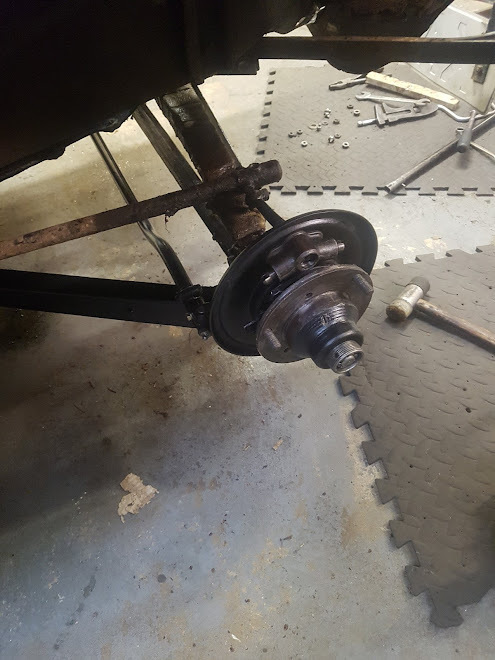 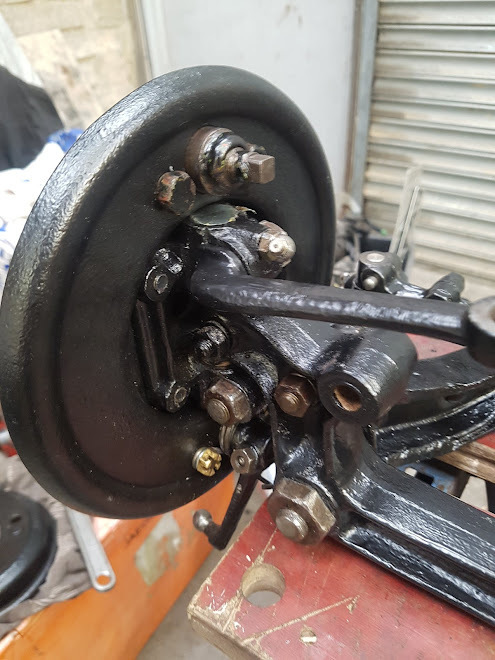 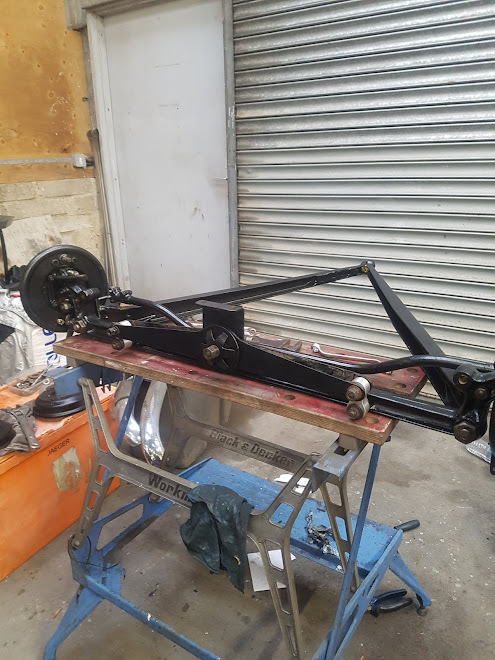 Overall a very satisfying little project! I was really pleased that I was able to do the entire job without damaging anything. I also only used tools at least 60 years old for an authentic experience, because why make things easy? Partly because I like to be obtuse but also it was nice to use the collection of Whitworth tools I inherited from my grandfather but have never really had opportunity to use before. I have learned that ratchets do save time... Getting the car started and running again was a bit of a challenge as no fuel was being pumped... Pulling the pump revealed the problem 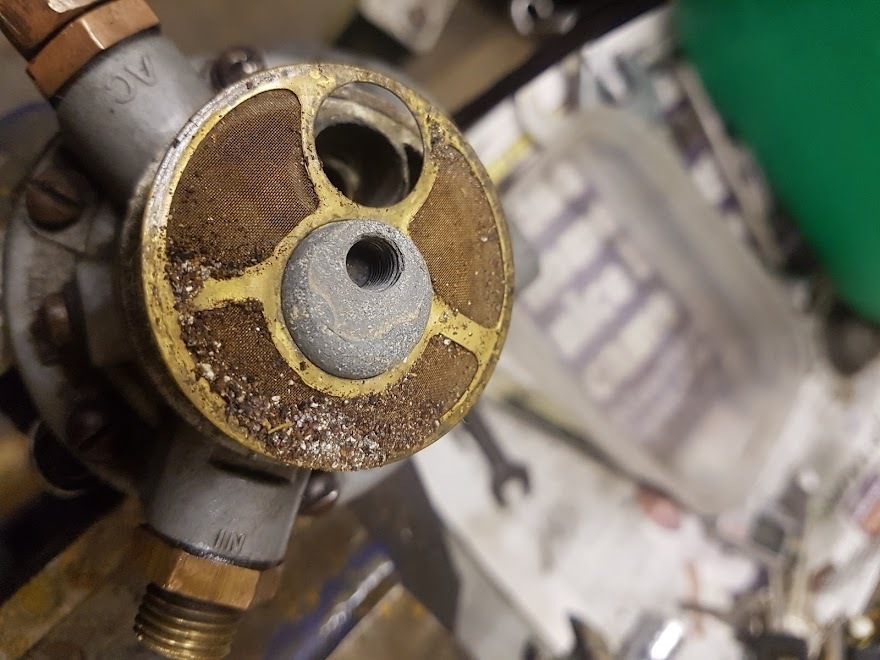 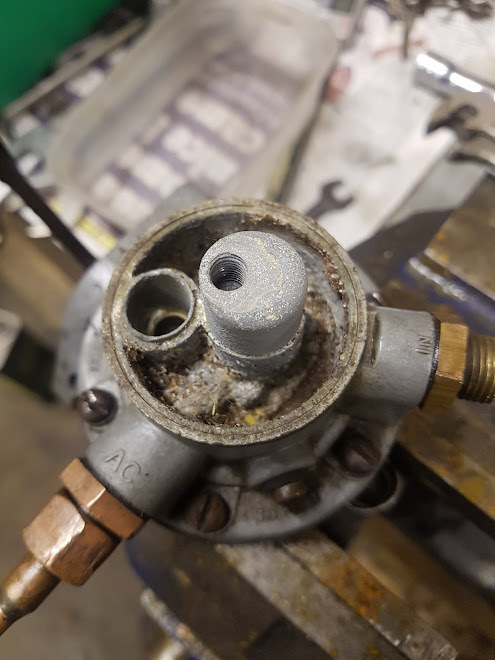 I cleaned it up and fitted a new diaphragm for good measure which seemed to sort things out and got me back on the road. More to follow Thanks for looking James |
| |
|
|
|
|
|
Nov 24, 2021 13:41:59 GMT
|
Handling and braking were both massively improved with the front end rebuild, steering is more direct and the tendency to wander reduced. The brakes still need some work setting up perfectly but work fine. A fuel filter was fitted to keep the pump clean but very little debris was picked up so I assume it is many years of grime that has accumulated rather than a bad tank. The sender is not working so the tank does need to be dropped at some point. What did become apparent was that the engine was not quite as happy as it was, cumulating in a rather fraught trip, three up at night, up to Micks Monster Burgers on Portsdown Hill. Setting off everything was fine but we started to loose power and idle quality dropped to the point that I was having to heel and toe constantly to keep the engine running. Cruise was fine but top and bottom end were gone, and there wasn't a lot to start with. Initial thoughts were bad or low fuel so I headed for the nearest fuel station, which was empty because panic buying (several weeks after the 'crisis'). We then limped on to the next station were I was able to fill up with super. It only took a few quid so the level was fine and the filter clear. A quick glance over the engine didn't reveal anything amiss so we carried on to my friends house a few minutes away to eat, let the engine cool off and take a better look. The plugs were clean, no sign of anything wrong under the dizzy cap and fuel was flowing so all I could assume was that the idle jet was blocked causing it to lean out. I had to use the starter motor to get her running ready for the run home, thankfully almost entirely downhill. The running got worse to the point that it was sounding like a shotgun backfiring and popping on overrun. The brake pedal had always been a loose fit at best on the pivot but this was now more of an issue as it made heel and toe much more tricky as I didn't know where it was. Despite this we got back and had a beer. The next day I found the issue - the nuts holding the carb on were both loose causing a huge air leak. I nipped these up and she ran like a charm.  Closer inspection of the carb did reveal quite a lot of wear to the spindle. Not wanting to take the car off the road I pulled the spare carb that had come with the car. The original engine had spun a bearing so was replaced a few years ago with one from a fire pump that had never been run. It looks like the original carb had been swapped over and the new carb stored with the original engine. Unfortunately the storage system was a plastic crate. At the bottom of the sea. 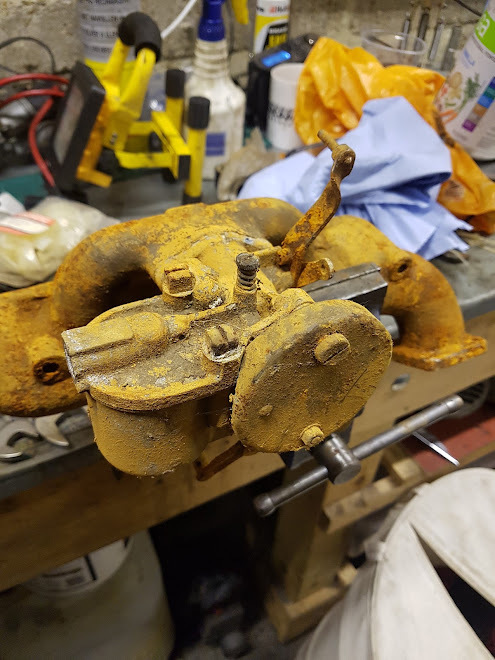 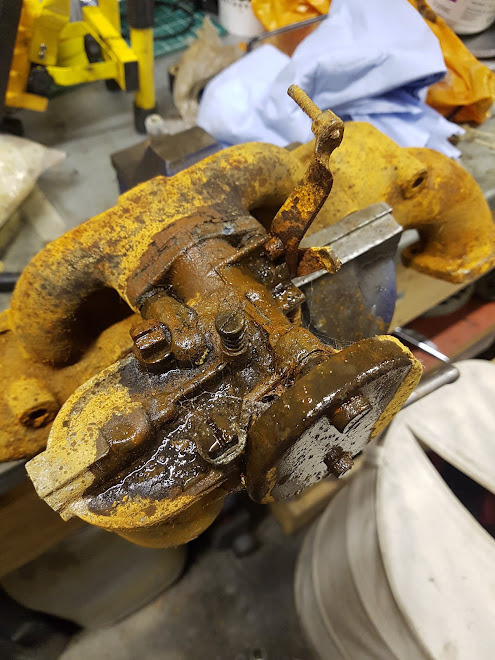 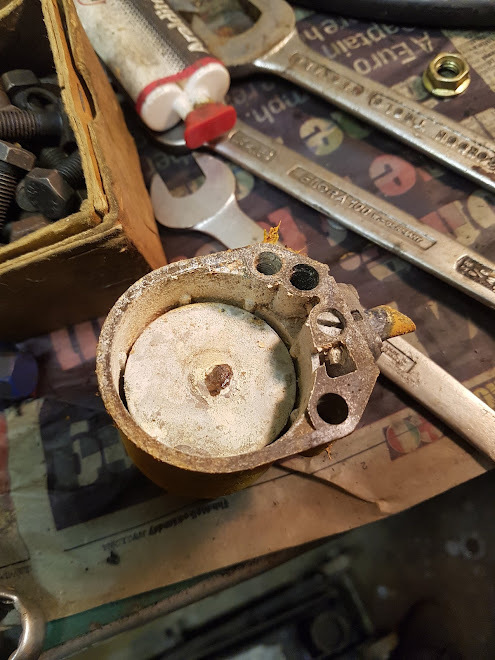 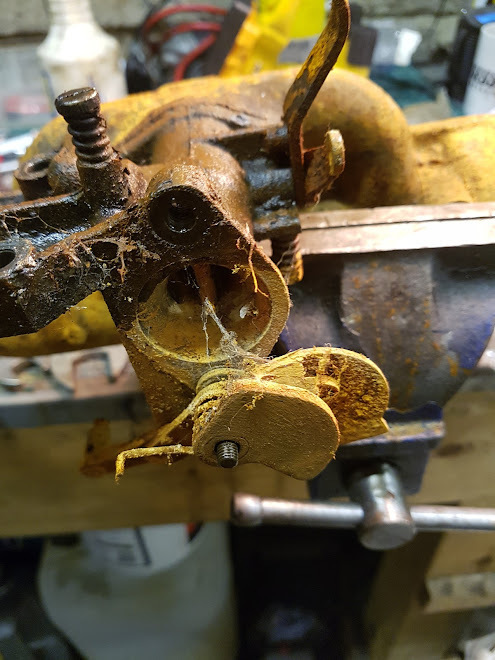 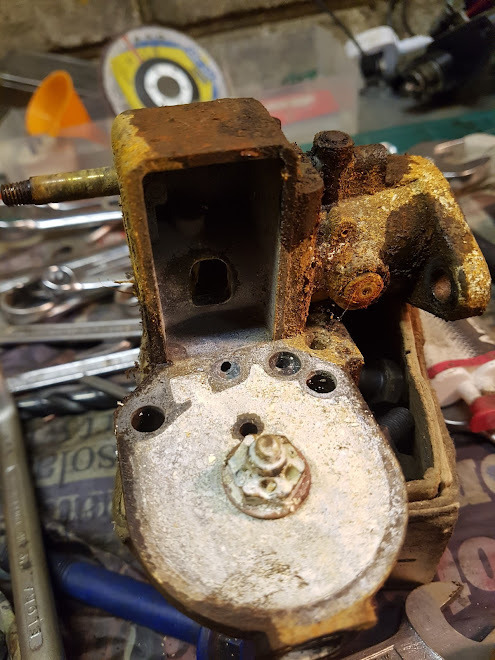 Sub optimal at best I'd say. Lots of WD40, a little bit of heat and an evening of very careful work did get it fully stripped down. Despite appearances there was no wear on anything. I invested in a cheap eBay ultrasonic cleaner and found that putting the parts in ziplock bags filled with 10:1 Screwfix Degreaser can work miracles. I used vinegar on rust parts and ran the cleaner in 5 minute cycles filled with tap water heated to 50C. 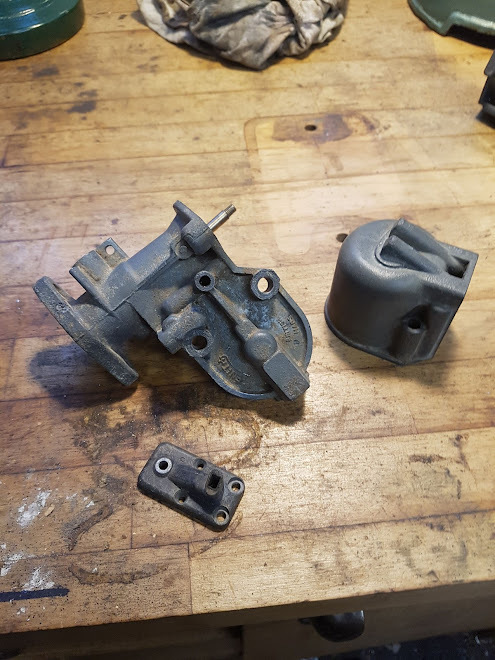 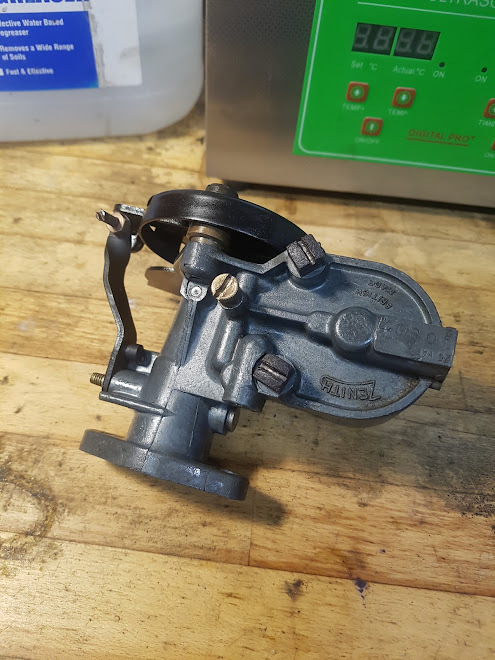 Success. I did swap the jets over as the 'new' carb had different sizes, I guess suited to constant load stationary work. The brake pedal was also given some attention. The shaft was badly worn and the bore in the pedal very out of round. The thread had also been damaged so I turned a new shaft, slightly undersized in EN24T. The pedal was reamed oversize and a phosphor bronze bush turned to suit. 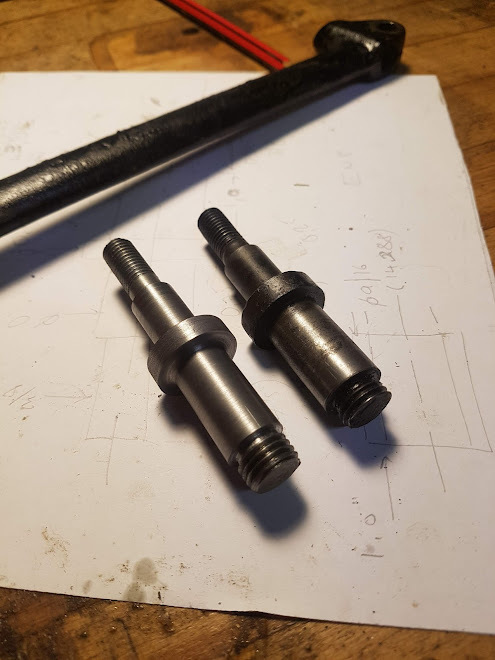 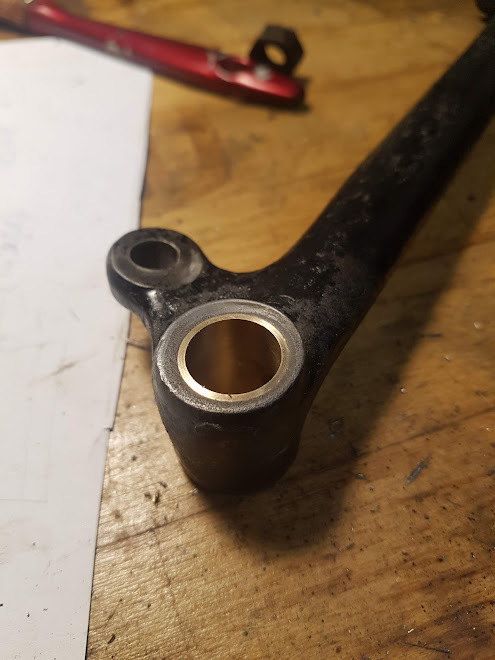 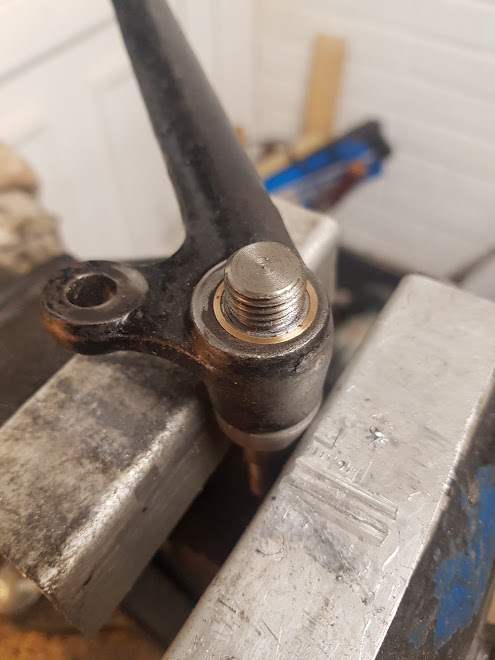 There is still a good amount of metal in the pedal and the bronze should last better than steel on steel, and hopefully will wear quicker than the steel so should it need servicing again it will just be a case of making a new bush. Back on the road again and better than before, onwards and upwards James |
| |
Last Edit: Nov 24, 2021 13:43:44 GMT by metroman
|
|
|
|
|
Nov 24, 2021 13:52:20 GMT
|
Jonny69 Thanks for the heads up, that explains why my girlfriends classic Mini has such appalling headlight beam patterns, it was fitted with some fancy new bulbs by the previous owner. There is a great deal of conflicting information about 7 headlights (amazing right!) so I am going to follow the same procedure as I am taking with the rest of the car and get them as good as they were new, or as close to anyway. This will mean stripping the lamps and polishing the lenses and reflectors, cleaning contacts etc and going from there. When I spoke to Classic Car LEDs they told me that they have been developing a 6v LED BA15 replacement for a few years which should be on sale soon. Given how good the other bulbs have been that will probably be my first step if an upgrade is needed. glenanderson I do like the pre-war Fords and did look at Morris 8s as they do appear better value for money than a 7, but the Austin won me over with the parts support and general usability. horrido An interesting thought... I am slowly building up a collection of spares. If I get enough I could build a proper car...  After many years messing with cars and bikes, there isn't much that makes me look twice, but wow! what is this and how do I find more like it? |
| |
|
|
|
|
|
Nov 24, 2021 13:59:36 GMT
|
It's a 750MC / VSCC 7 monoposto special, I think the Pigsty Racing Mk16 with a Roach body. The proportions are just spot on.  Another one of my favourites 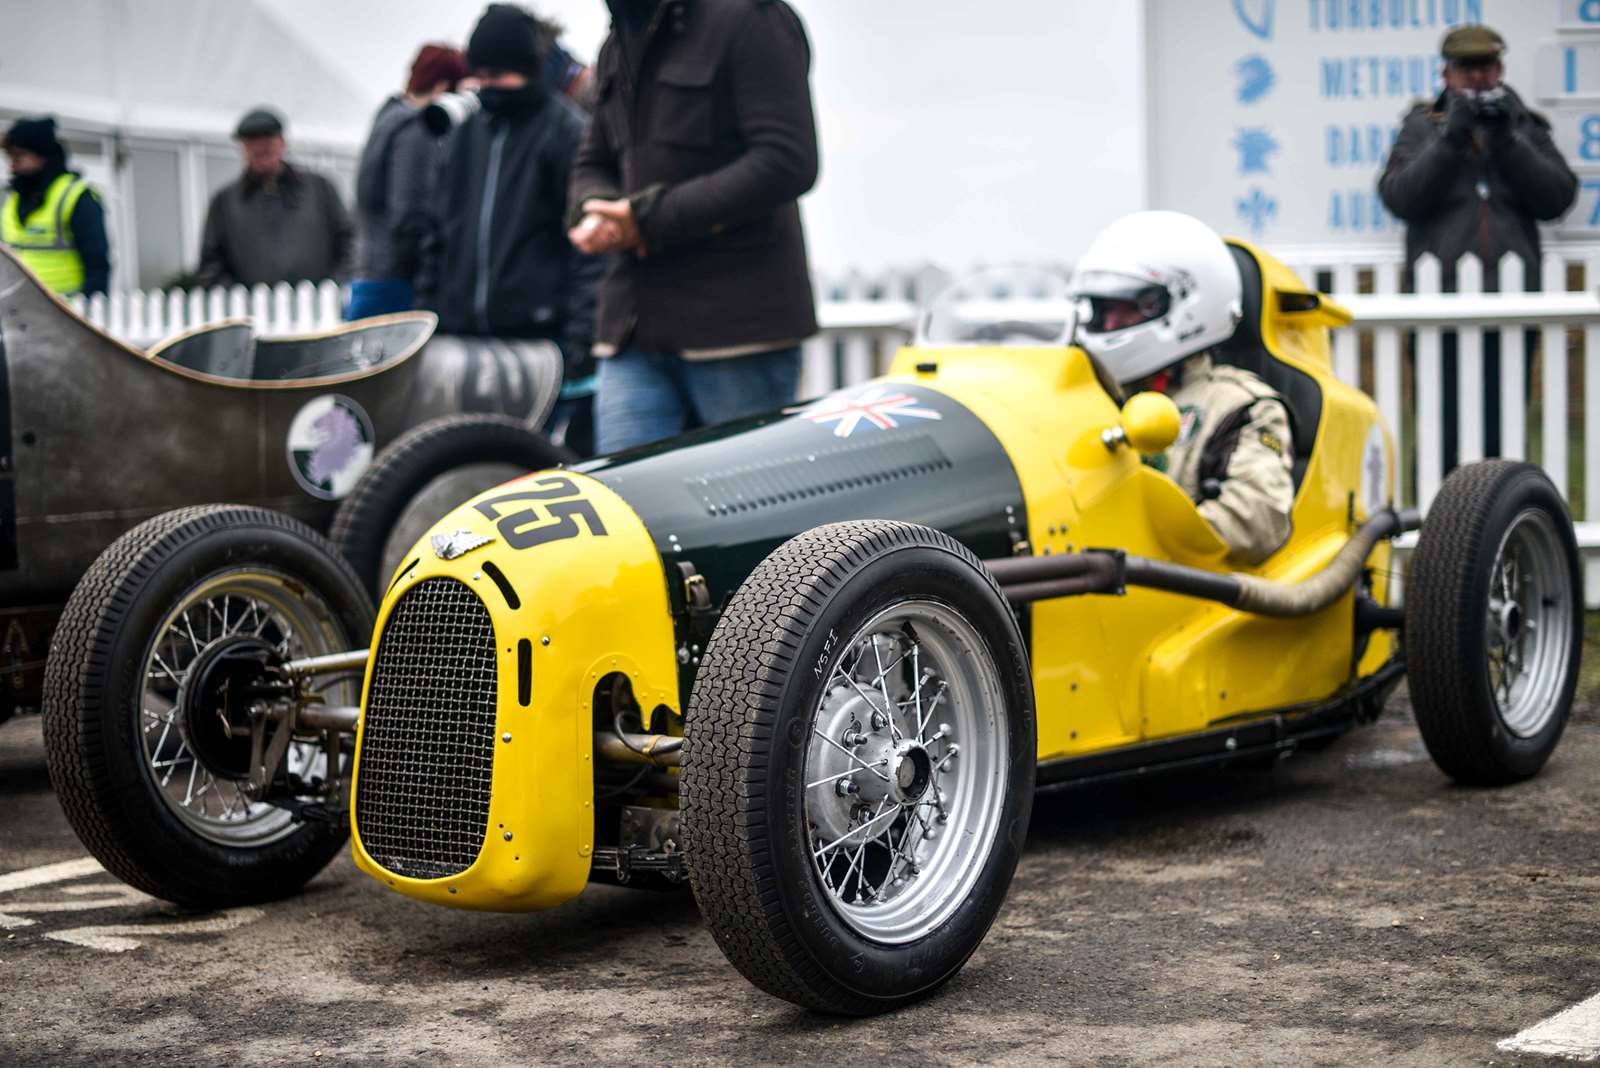 Miss Green, I really appreciate the subtle nod to the 8C Monza radiator surround. 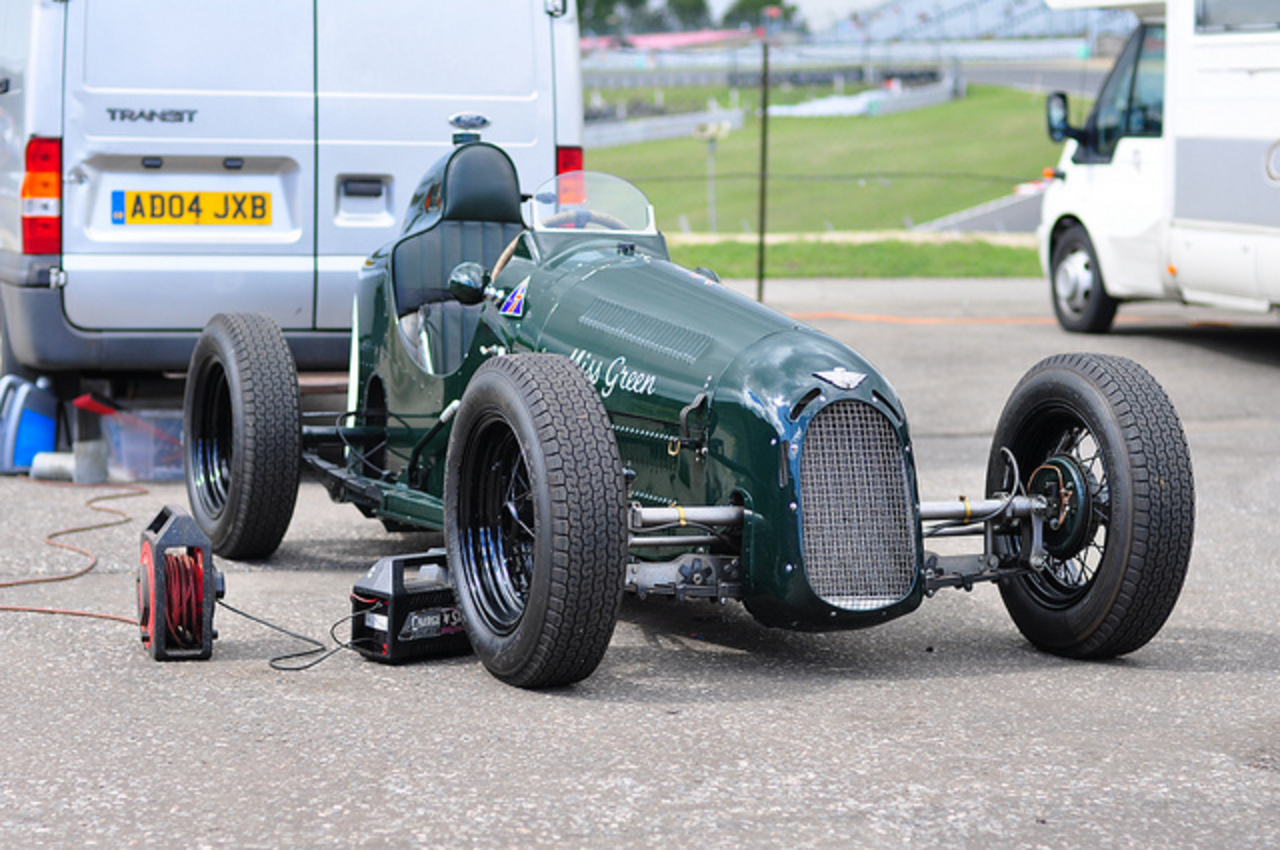 |
| |
Last Edit: Nov 24, 2021 14:03:32 GMT by metroman
|
|
|
|
|
|
|
Nov 24, 2021 14:08:43 GMT
|
|
that's the rest of my day ruined!
where did it all go wrong with cars, these are just beautiful
|
| |
|
|
|
|
|
Nov 24, 2021 14:20:18 GMT
|
|
I have to agree those top three are lovely, absolutely lovely looking cars.
Something to aspire to for sure.
Cheers
Col.
|
| |
|
|
|
|
|
|
|
It is starting to feel like this little car is fighting me a bit... 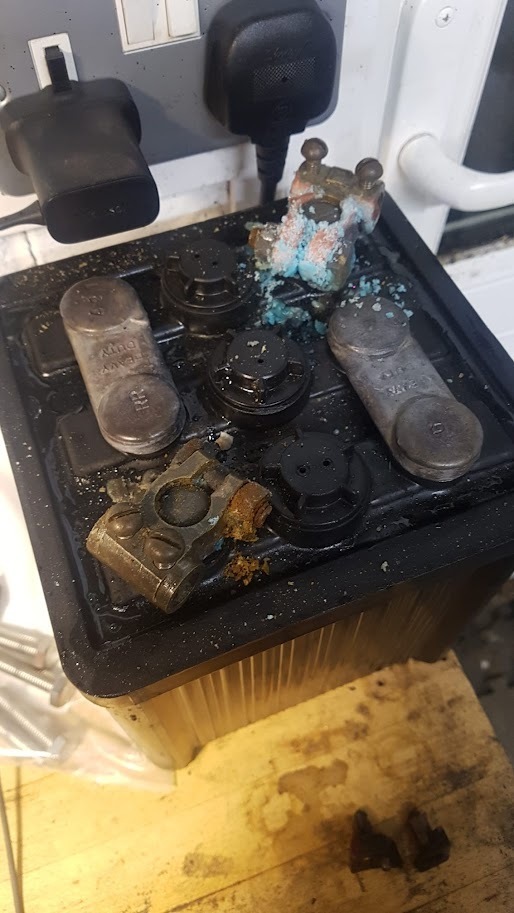 I was warned by the previous owner there were issues with the charging system but as it hasn't been causing me issues I have left it well alone. At least I did until it boiled the battery and stopped charging. The battery has needed topping up once or twice with fluid but has remained charged until now. 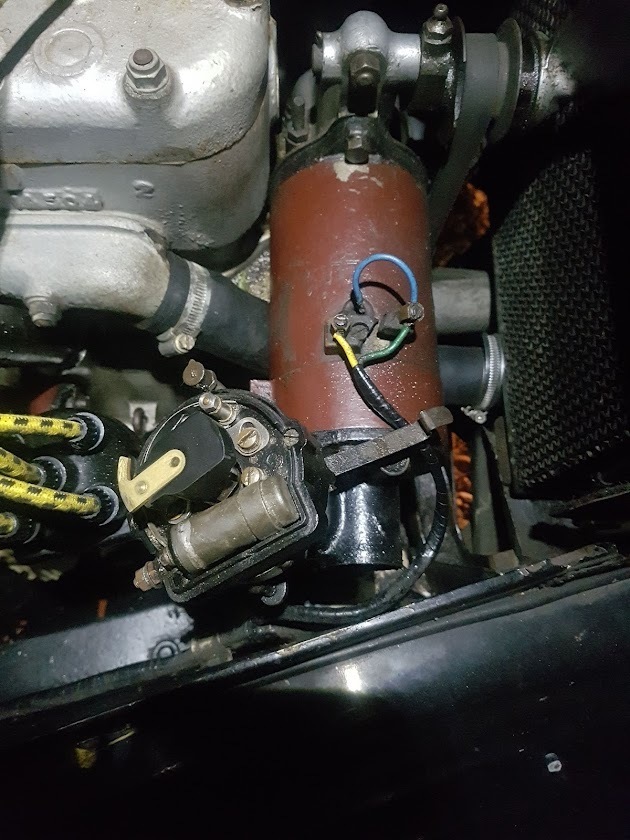 The dynamo didn't look too clever either with some very nasty connections, a broken connector block and chipped red paint. After a bit of a fight I got the dynamo off, more of the same dreadful access for fasteners! 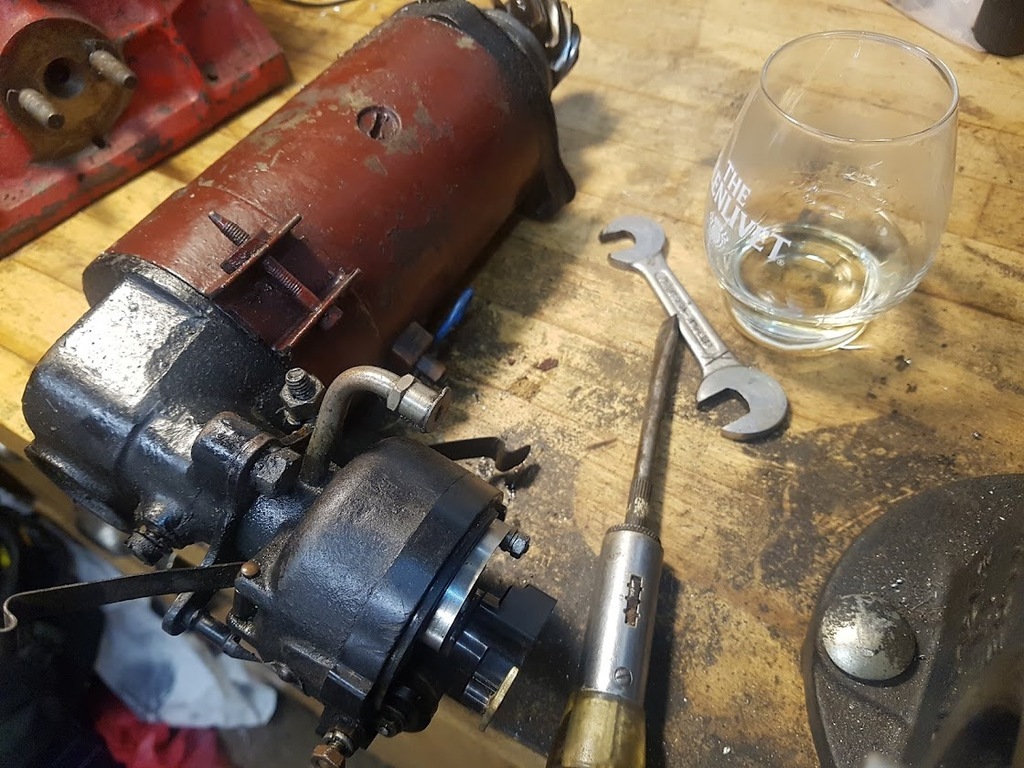 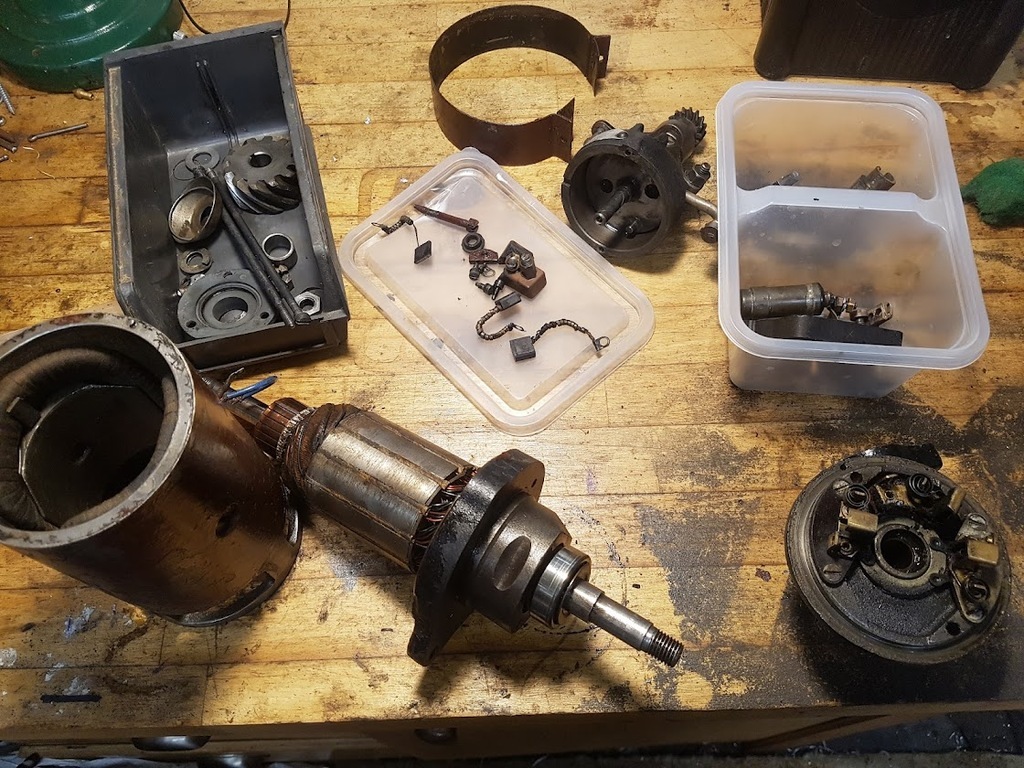 The original plan was to ship the dynamo and regulator to Classic Dynamo & Regulator Conversions to be rewound and converted to solid state / 2 brush regulation for better reliability but the lead time was 14 weeks... minimum! So plan B was initiated. Stripped and cleaned. I also fixed the broken connector block with some Q-Bond. This is a two part Cyanoacrylate/superglue based adhesive with a filler powder to fill gaps. I used tape to hold the parts together and hold the powder in roughly the right place before adding the glue which goes off in seconds. I was then able to shape it back with a file. Not perfect but totally functional again. 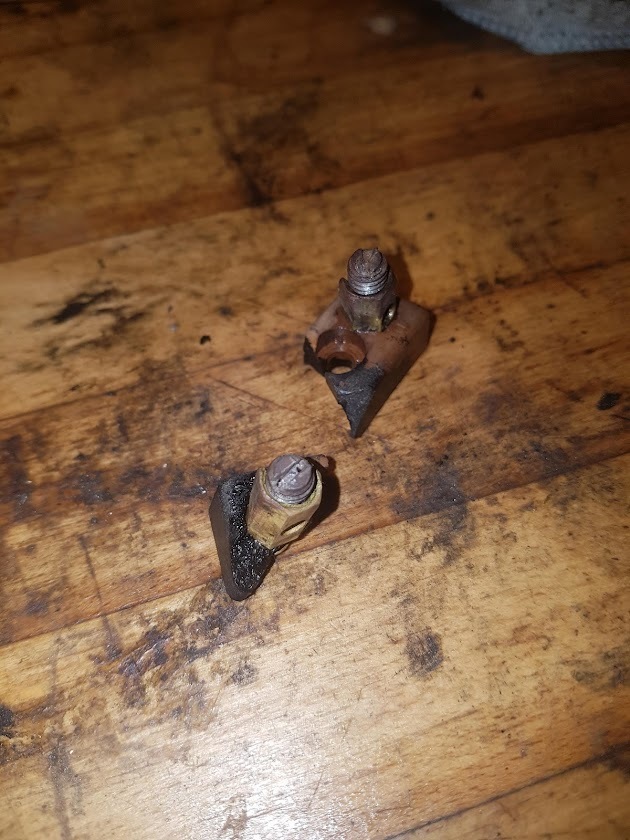 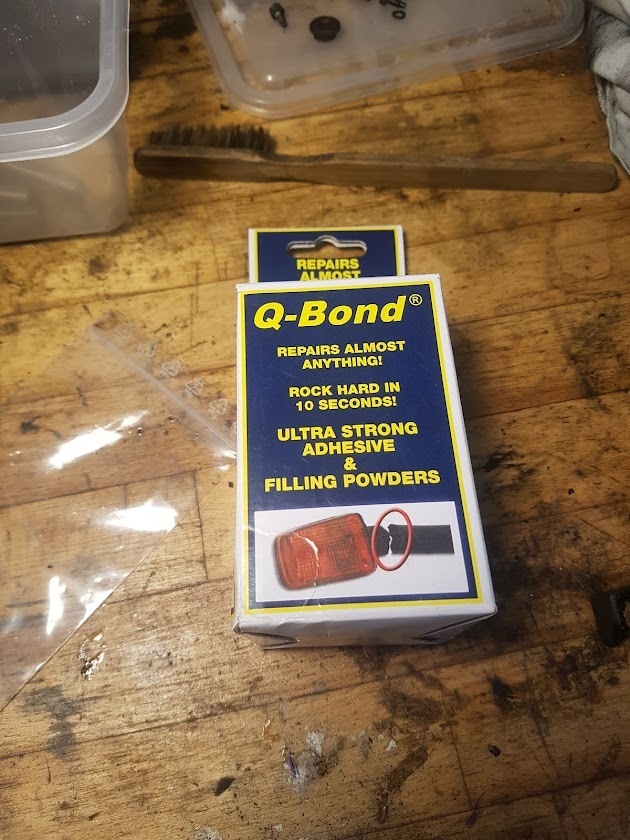 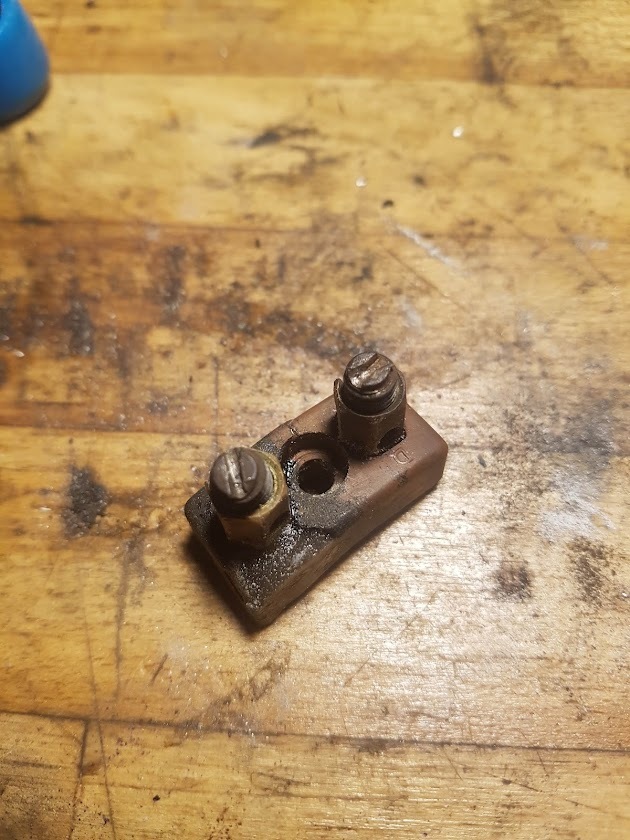 Everything looked to be in good condition so I gave everything a fresh coat of paint and reassembled. Converting to 2 brush was pretty simple, I followed this guide; ttypes.org/modifying-a-three-brush-dynamo-system-to-solid-state-regulation/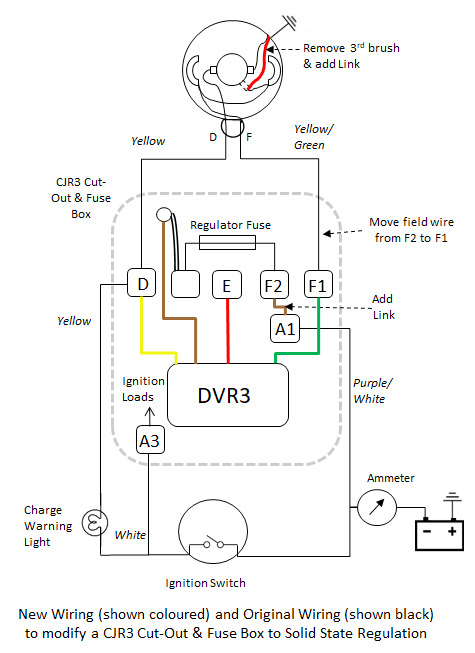 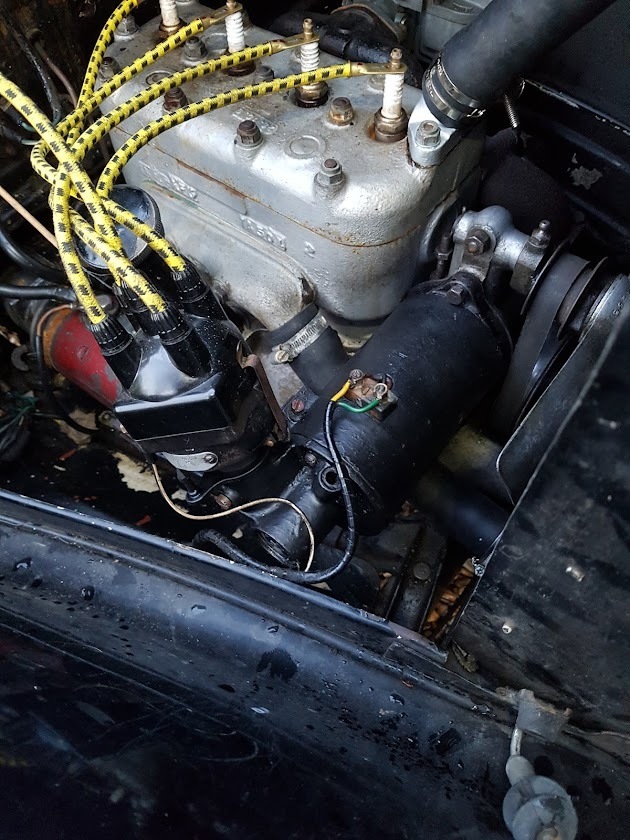 Certainly looks smarter in black. The final step was to fit a solid state regulator. I am running LED bulbs throughout so current draw is very low even with everything running so went for a small DVR2 unit. www.dynamoregulators.com/dvr2.php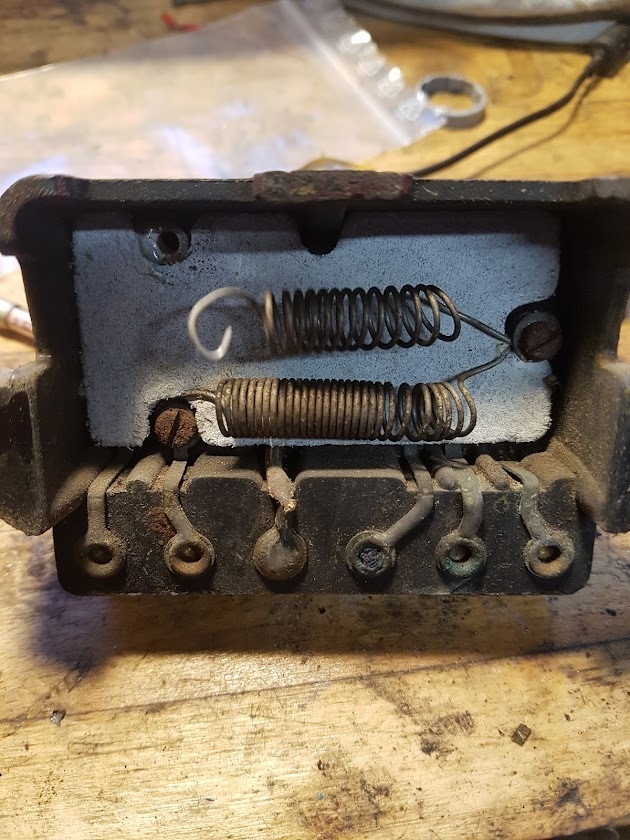 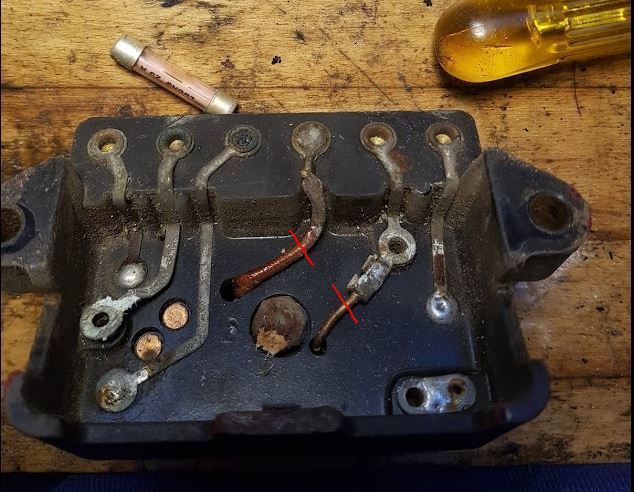 The resistors were removed and the two wires to the coil cut and insulated underneath the regulator box, this made space for the DVR2 which needed a small hole drilling in the case to fix it 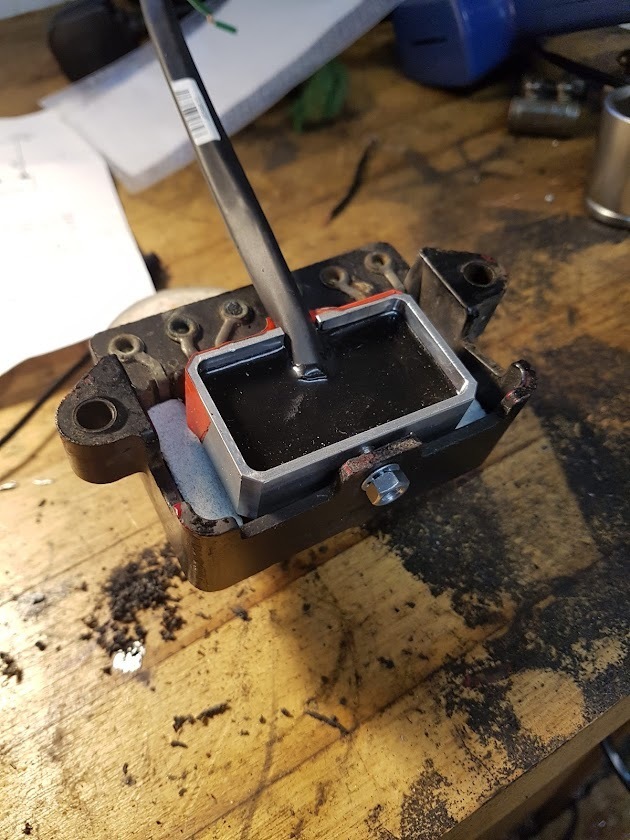 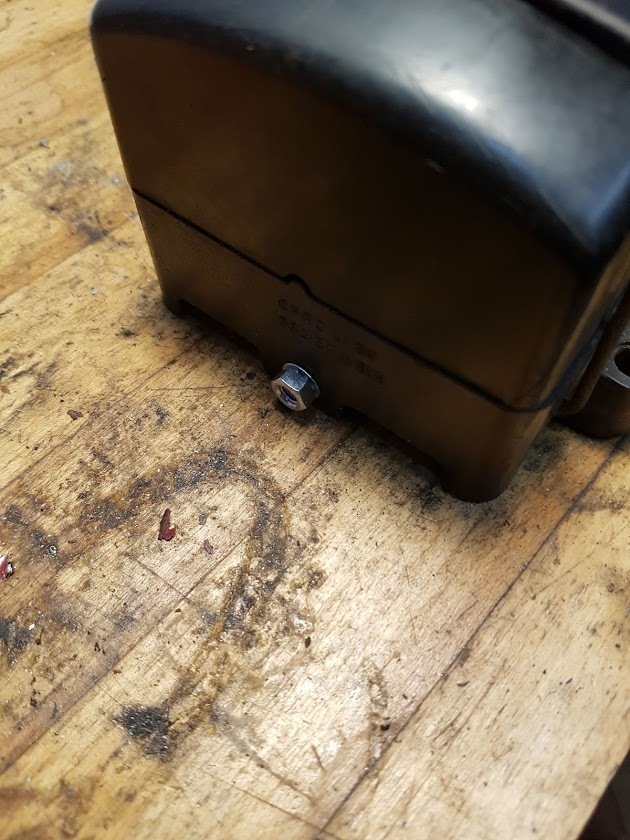 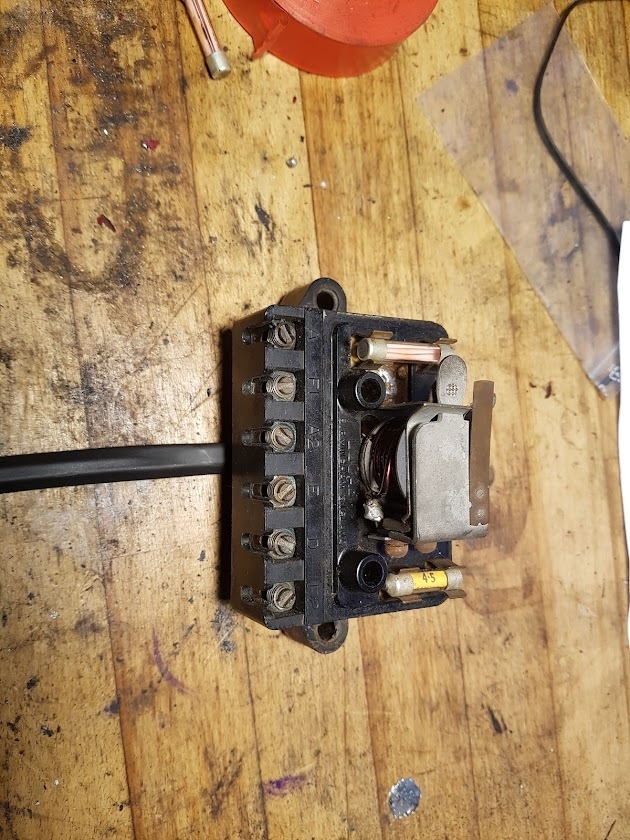 I was happy with this solution as the coil is still fitted so even with the cover removed the unit looks unmodified. It is now refitted and ready to go, except the fuel tank is now empty... One step up and two steps back. James |
| |
|
|
75swb
Beta Tester
Posts: 1,052
Club RR Member Number: 181
|
1937 Austin Seven Ruby75swb
@75swb
Club Retro Rides Member 181
|
|
|
|
I don't think I've caught up on this since your first couple of posts but it's a lovely thing, and your sympathetic restoration is a great approach.
|
| |
|
|
|
|
|
|
|
|
What an excellent thread, extremely educational and enjoyable.
Thanks for sharing you experiences.
John
|
| |
|
|
|
|
|
|
|
What an excellent thread, extremely educational and enjoyable. Thanks for sharing you experiences. John agreed and thank you |
| |
|
|
|
|
|
|
|
|
Excellent stuff.
I'd give Micks burgers a swerve though! Nice view at least....
|
| |
|
|
jimi
Club Retro Rides Member
Posts: 2,228 
|
|
|
|
Great stuff Denso tape 👍 I first used it as an apprentice in the late 60's when I was with the NCB and was still using it when I retired from offshore in 2020. A small tip, use your hand to smooth the tape (use a slight rotating movement in the direction of your wrap) this will blend the overlaps together and smooths out the texture of the tape, makes it even more weather resistant. Bit of a pain getting it off your hands most gloves won't work, tend to stick to the tape  |
| |
Last Edit: Dec 3, 2021 22:42:04 GMT by jimi
Black is not a colour ! .... Its the absence of colour
|
|
|
|
|
|
|
|
A drop of petrol on a rag, removes the grease off your hands, having handled Denso tape. Not HSE correct obviously, but there again many other practices aren't either. Put your fag out before trying it.
|
| |
|
|
|
|
|
Dec 15, 2021 17:45:55 GMT
|
norfolkshire - I just wore nitrile gloves when going near the stuff, it is not nice! jimi - good hint, I will give that a go, thank you The car is now really fighting, or at least the charge system is. With a fresh few gallons of fuel she fired up easily and with the timing set ran really nicely. The ammeter was showing charge at near idle for the first time ever and performance was really improved thanks to operational ignition advance. Disappointingly since that first test the charge lamp has failed to go out and there is no charge registering on the ammeter. Confusingly a voltmeter showed a healthy 7.2v when running over the battery which caused me no end of headache. Triple checking the installation and wiring of the regulator revealed nothing amiss. Grasping at straws a bit I did notice that the digital volt meter was picking up a little interference from the ignition system if held over the engine, which is probably no surprise so dug out a pre-war 8v Hunt analogue meter. 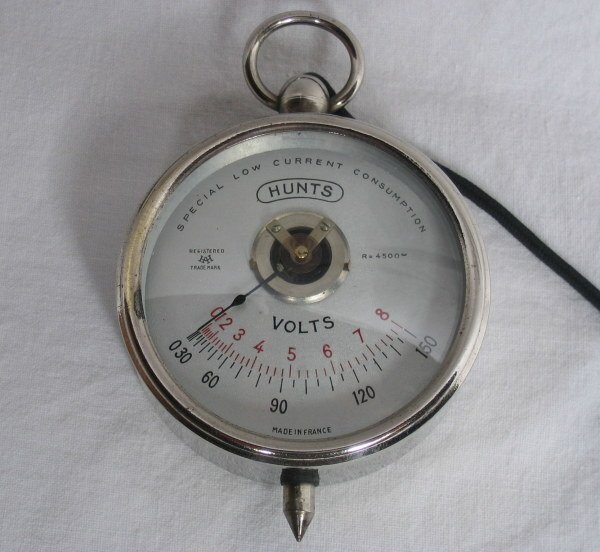 Photo of an identical unit stolen from google Photo of an identical unit stolen from googleThis told a more sobering tale, no change in battery voltage with the engine running, just a steady 6v. The output from the regulator was showing around 7v but only 3v from the armature which explains why the lamp is staying on. These are the instructions for the regulator dynamoregulators.com/documents/dvr2-data.pdf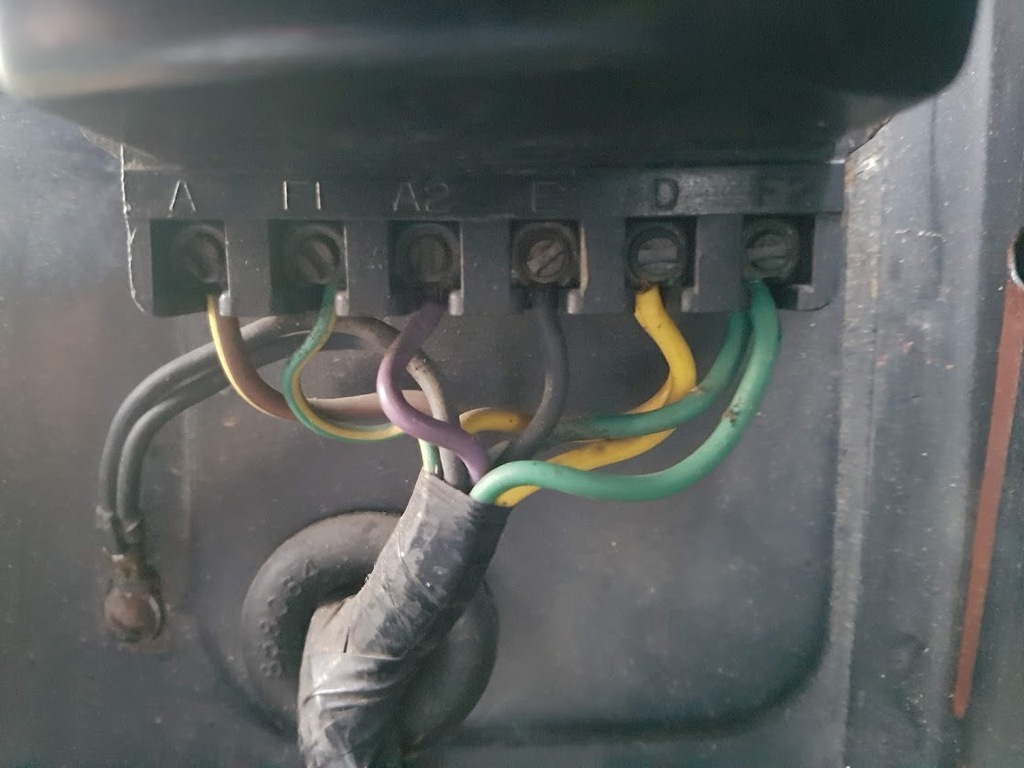 This was the original wiring to the old regulator. - A and A2 are now going to a shared connection with a fuse between them and the brown/white wire from the DVR2 - E is earth which is good, I ran a jumper directly to the negative terminal on the battery for good measure. (The car is negative earth but was positive when it left the factory.) - F1 and F2 go to the half / full charge switch which crudely regulated dynamo output when it was 3 brush. The wire to the field has been retained, the other two disconnected and insulated. The green F wire from the DVR2 is connected to this wire. - D is unchanged save for the addition of the yellow D wire from the DVR2 I have checked that there was no shorting between the terminals in the box and found none. I have ordered a second unit after contacting the manufacturer. All of the tests I have run seemed to confirm to them that the unit is working and I have a wiring problem but I cannot for the life of me work out what the problem is so have ordered a replacement anyway. If it works it proves the first one is bad. If it doesn't it proves I am missing something. I am really hoping it does fix the problem as the car has been sat for weeks now and is starting to feel a bit damp inside which is horrible. I try and use cars all year as the air flow and warmth from use keeps them much nicer inside, even if garaged which the little Austin currently isn't. If this fails I can see a 6v alternator being jury rigged to the engine as a temporary fix (never to be removed). These things are built for driving, not sitting and originality is good for nothing if it doesn't work! Thanks for looking James
|
| |
|
|
|
|


