|
|
|
Feb 23, 2022 10:18:58 GMT
|
|
That's a very nice looking car and the "sympathetic" restoration being done to it is excellent,
Not my type of car at all, (way, way too old lol,) but I can still appreciate quality work when I see it,
Now looking forward to seeing future updates on this thread,
Nigel
|
| |
BMW E39 525i Sport
BMW E46 320d Sport Touring (now sold on.)
BMW E30 325 Touring (now sold on.)
BMW E30 320 Cabriolet (Project car - currently for sale.)
|
|
|
|
|
|
|
Feb 23, 2022 16:53:20 GMT
|
|
Great thread. Is this an example of mission creep? Lovely car.
|
| |
Nuttier than squirrel sh...
|
|
roarz
Part of things
 
Posts: 60
|
|
Feb 24, 2022 10:36:26 GMT
|
Great car. Bookmarked and looking forward to updates. It looks like it's been badly treated in the past but in better hands now. Those death wheels on the grinders scare me a lot! Reading into its previous MOT history it didn't have one for 8 years, I highly doubt it was driven round for those 8 years, more likely parked in a bush or at the bottom of a lake, it is a typical old japanese car, RUSTY... I suspect the company i purchased it from bought it as a project (scrap) and just threw paint and fiberglass over it all to make it look respectable until muggins here bought it sight unseen of the interweb, it has fallen/still is falling to pieces in the year I've owned it. Keeps me busy/active fixing it I guess, just wish i was driving it more |
| |
|
|
roarz
Part of things
 
Posts: 60
|
|
Feb 24, 2022 10:40:36 GMT
|
Got to love those afterburner rear lights! That manifold is stunning, I'd happily put that on my coffee table and just stare at it all day long! Looks like your doing a cracking job on this. Is the colour AN0 or AR1? Hard to tell from the pics but either way it's a lovely colour. Wheels for me would have to be TE379's  If you only knew what those lights hid, and how I had to remove them!!!!!! the repairs are on going and updates shall be posted later on this evening (if the rain cuts me a break) |
| |
|
|
roarz
Part of things
 
Posts: 60
|
|
Feb 24, 2022 10:44:17 GMT
|
Great thread. Is this an example of mission creep? Lovely car. I'll be honest, I had to google that, and when i read the meaning I laughed quite hard and found myself saying f**king to right  |
| |
|
|
roarz
Part of things
 
Posts: 60
|
|
Feb 24, 2022 21:45:01 GMT
|
to furthermore update the build? is that what it is now? it was never meant to be, anyway, with the engine out and tarted up it would be a shame to throw it back in a rusty no good looking engine bay, I have given the engine bay a wire wheel back on any rusy/shady looking parts on paint and scuffed up the rest, applied a couple coats of Hammerite Krust and then a in a number of light coats added some raptor liner, i have been doing it in managable sections due to the recent wet weather so first off I got the near side sorted and then moved onto the front clip, therer was a large amount of rust situated under the drivers side head light, i cut the rot out for now but it will be replaced before the engine goes back in, again it is just finding the time between the weather and other jobs, its not a massive priority job so it can wait till the 11'th hour if it must, for now its all cut out and painted so it won't get any worse 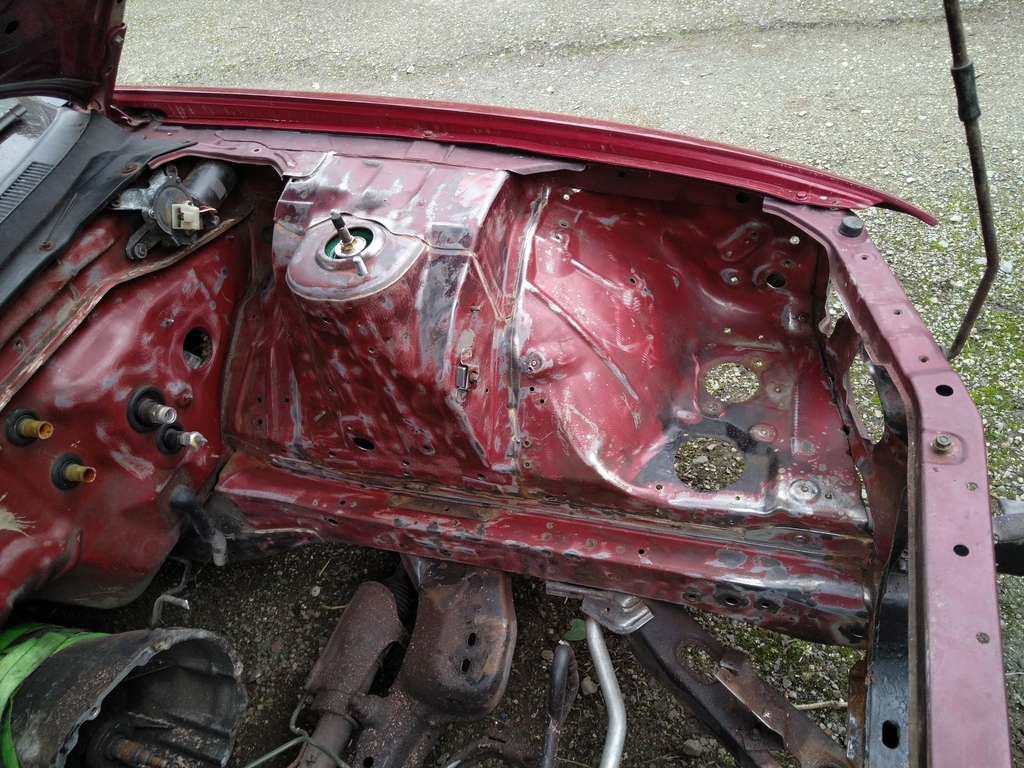 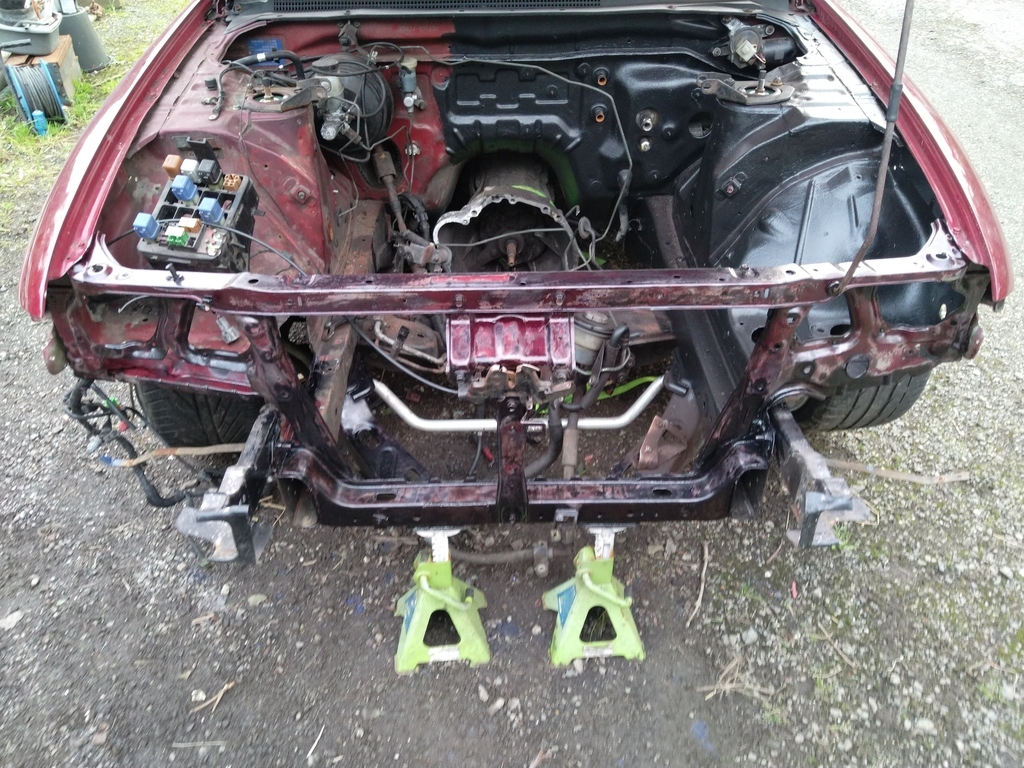 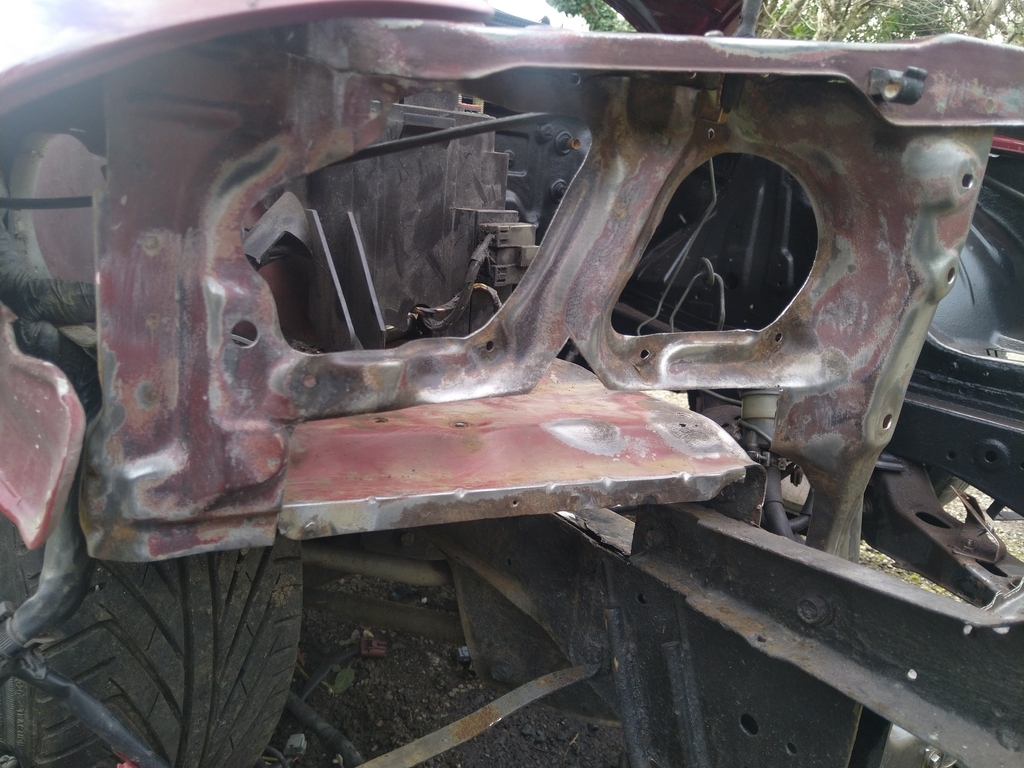 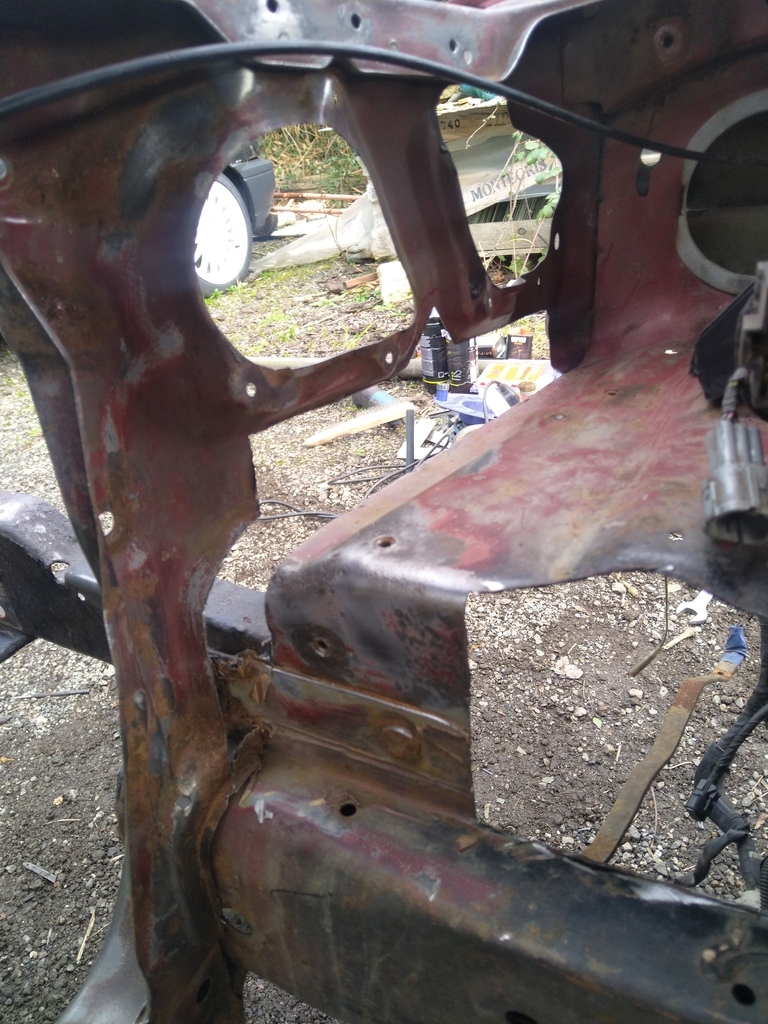 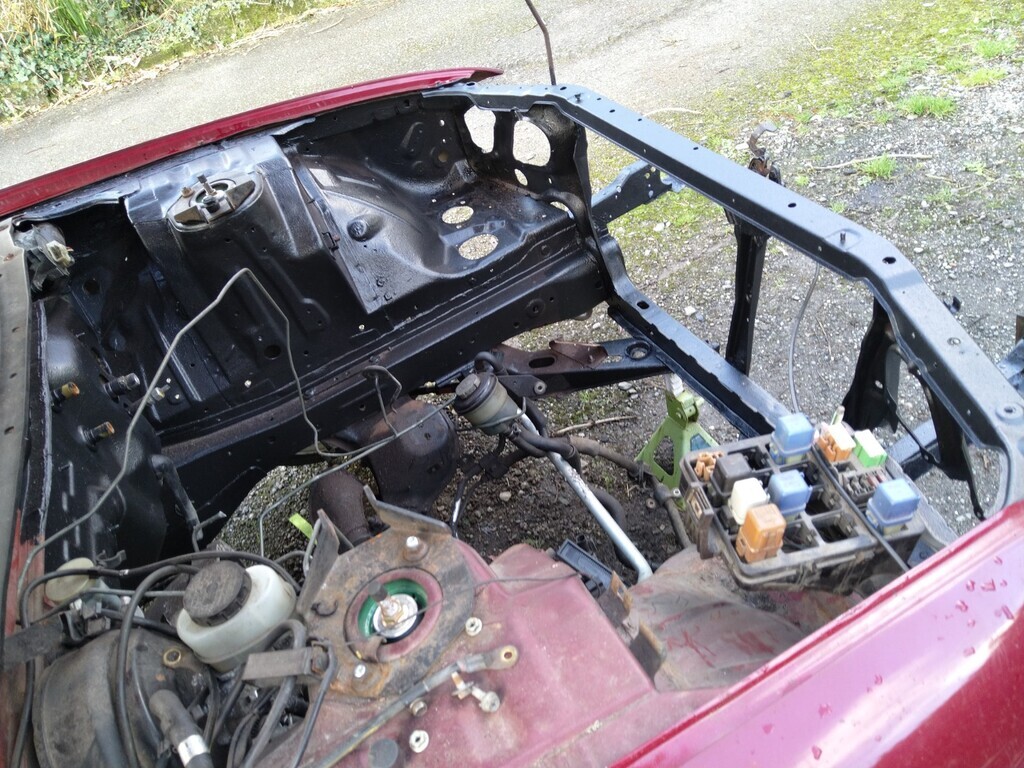 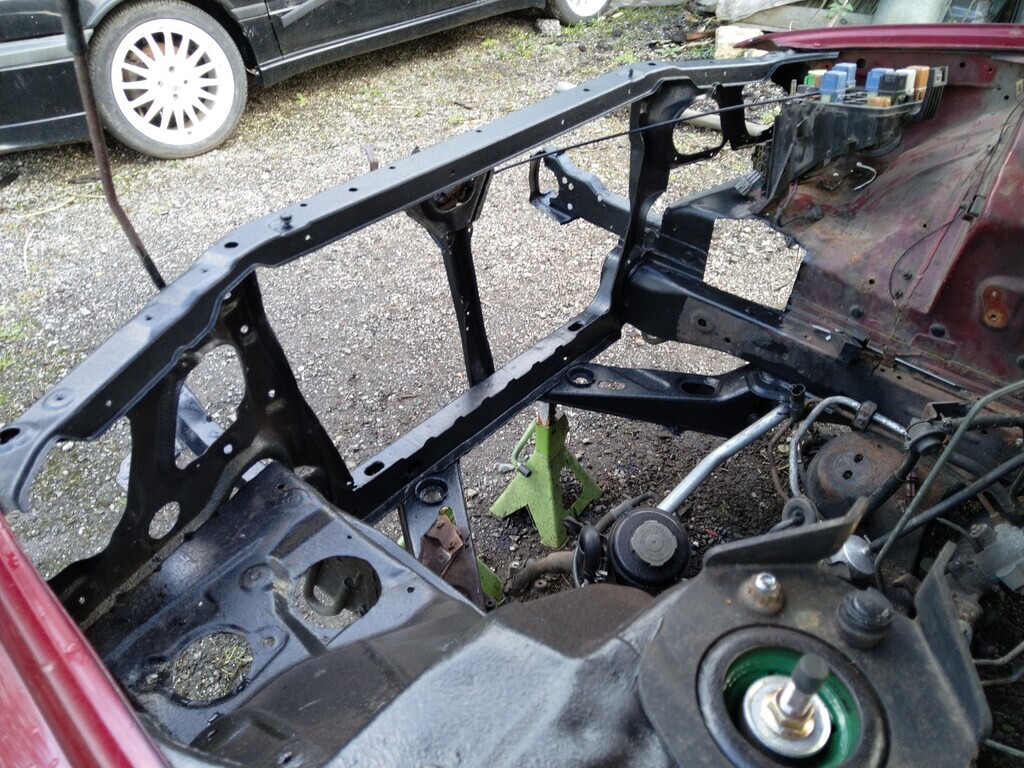 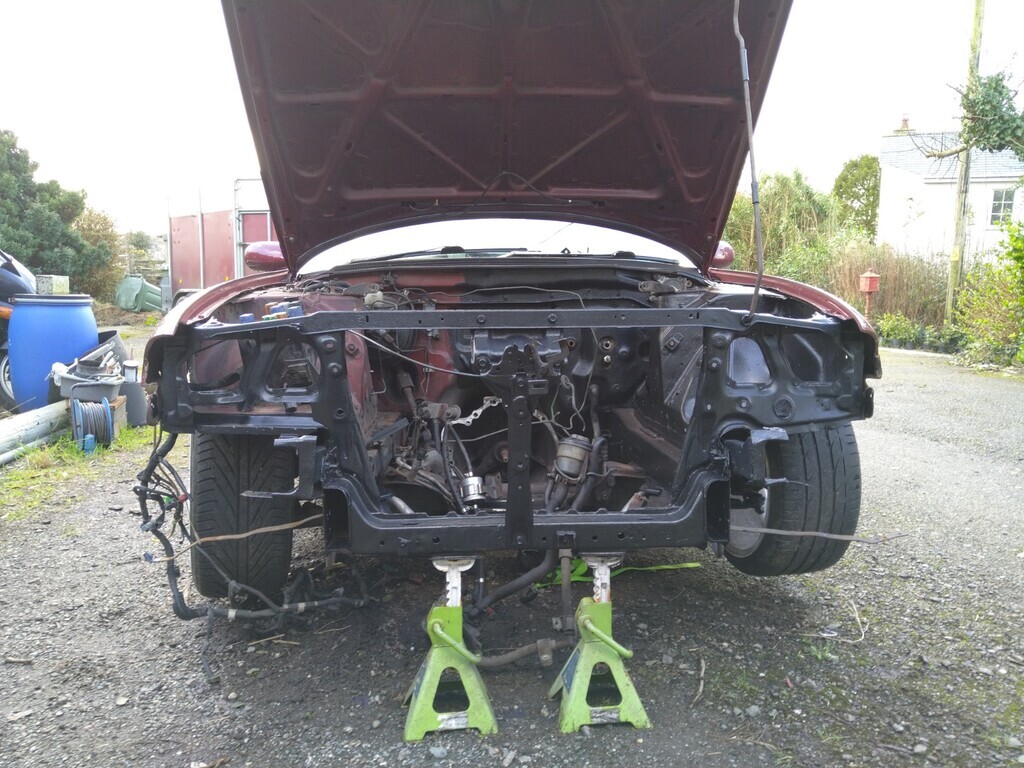 Still need to do the drivers side of the engine bay, wanna remove the clutch and brake master cylinders before i commit, as you can see, there are many small areas effected by corrosion. 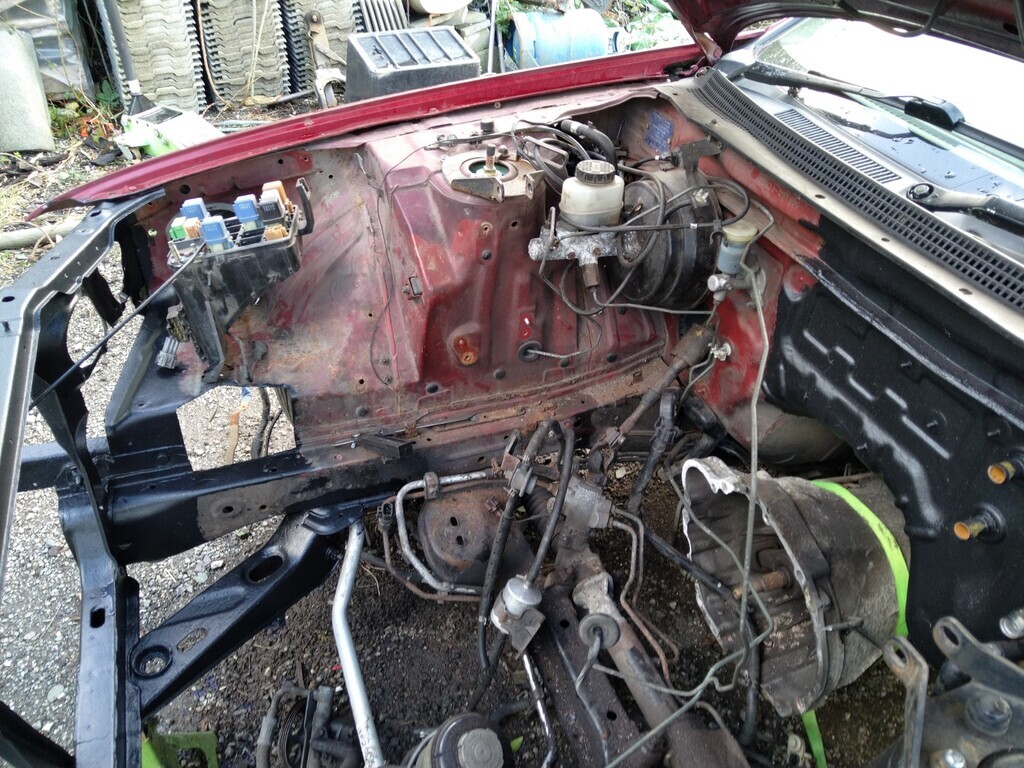 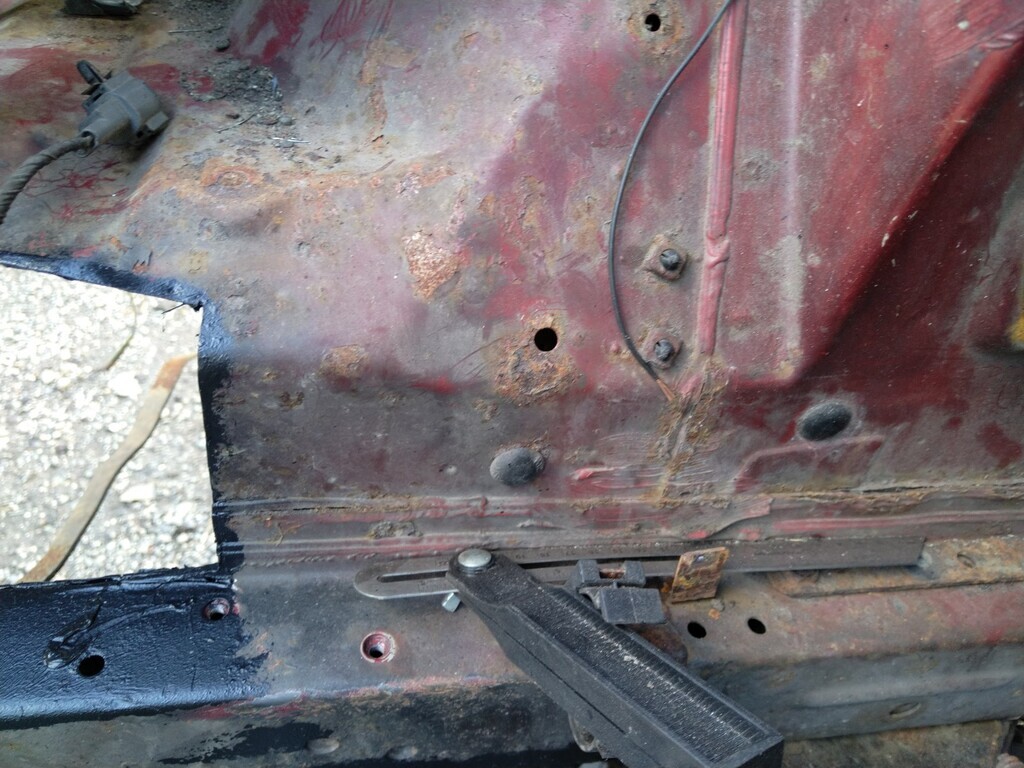 I had been noticing the boot was getting quite damp recently and the windows were becoming more and more prone to fogging up, after pulling the boot carpets it was quickly apparent that both the rear lights were a part of the problem, there had been a very very shoddy repair carried out. The top middle mounting bolt hole in the body had corroded away due to the run off from the boot, this is from what i can gather a common problem, the previuos attempt to fix it consisted of some fiberglass and a buct tonne of mastic to seal the light in, however, the very effected area they were trying to seal up didn't have enough sealant applied to it so it just turned it into a natural waterfall inside the boot everytime it rained. Last night I cleaned out the inside of the boot, applied a couple coats of Hammerite Krust and raptor liner, then, as I'm old (34) i lined the whole boot with sound deadening, I wan't comfort these days. Once the clouds broke this morning I set to work in sorting out the rear waterfall feature, now the mastic they had previously used was good stuff, i had to use a 2 foot pry bar just to lever the light out of the body work, when it did break loose it took some of the bodywork with it as you can see below. 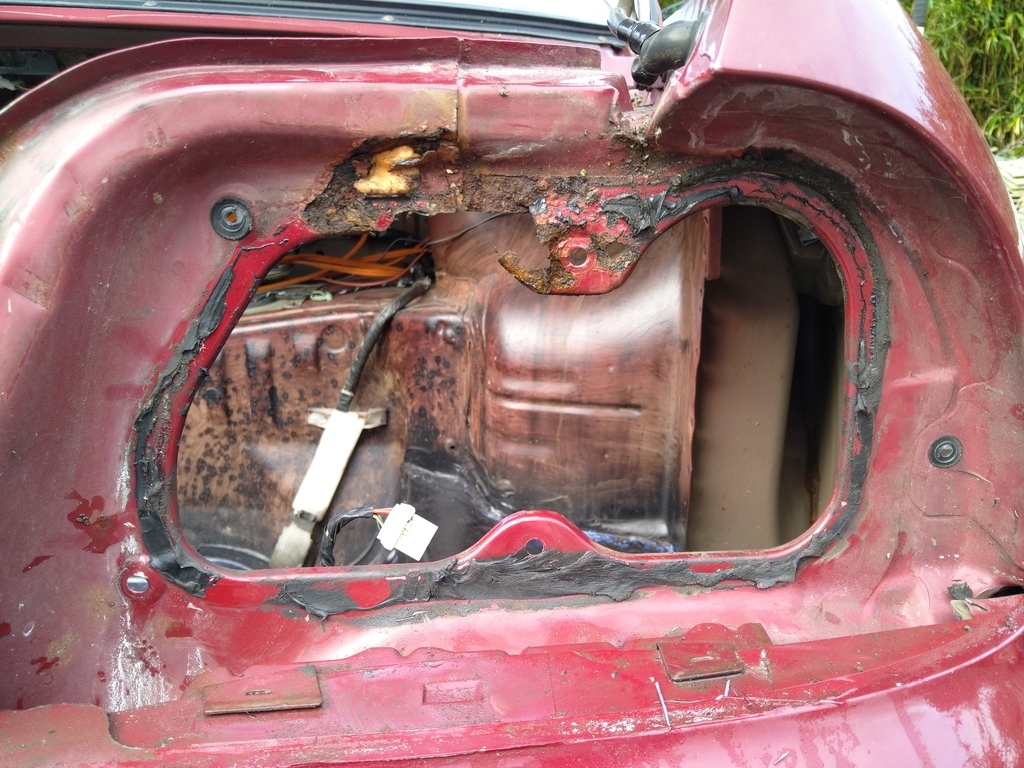 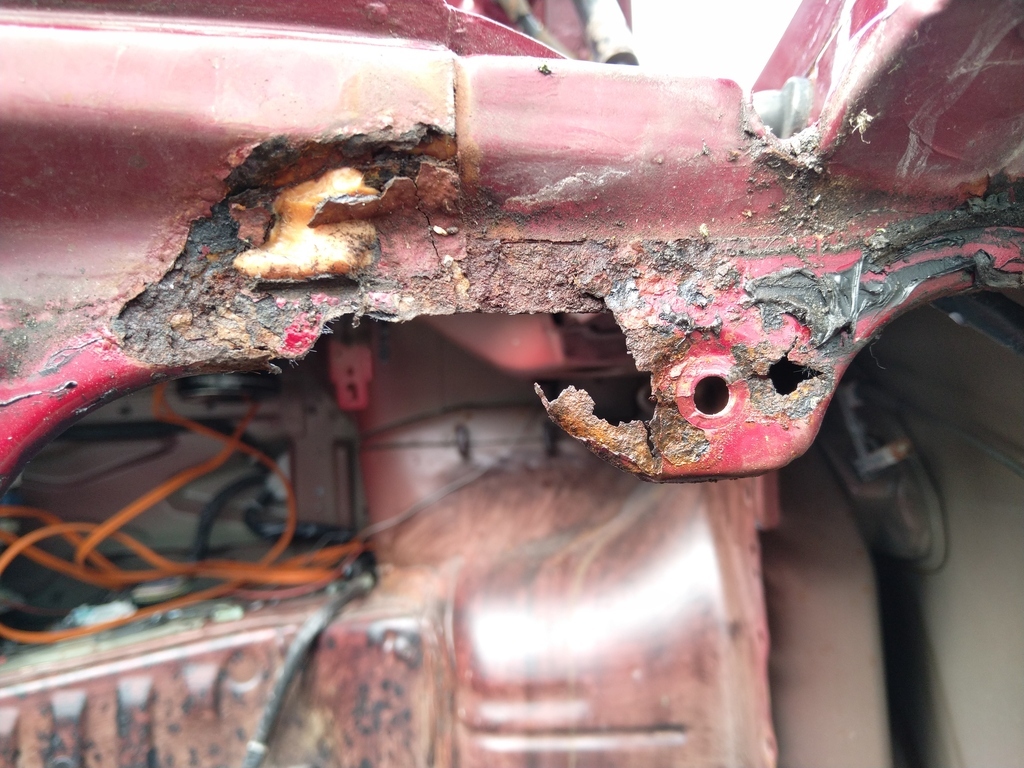 so armed with my angle grinder and some cardboard I made some Carboard aided designs and started to cut up the back end, I would like to mention (again) that I am not a professional welder (which is obvious) so please don't hate on any welds or repairs I make. I cut out one section, welded it in, cut out the next section etc etc. in all fairness, for my level of skill I was more than impressed with how it actually turned out. 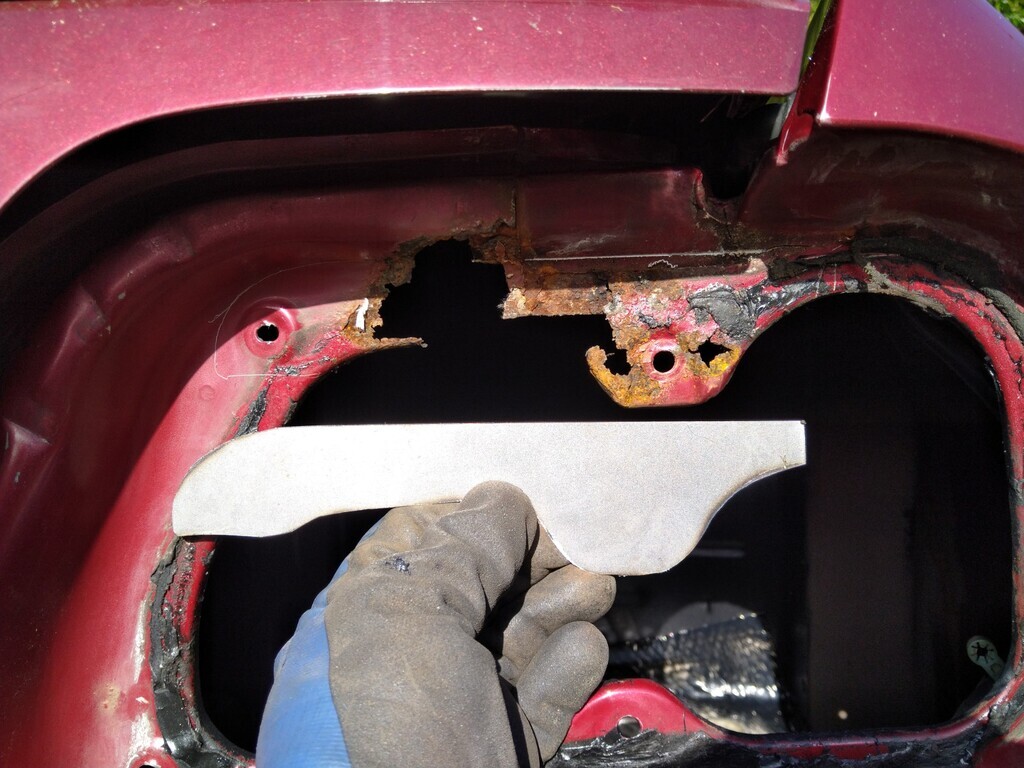 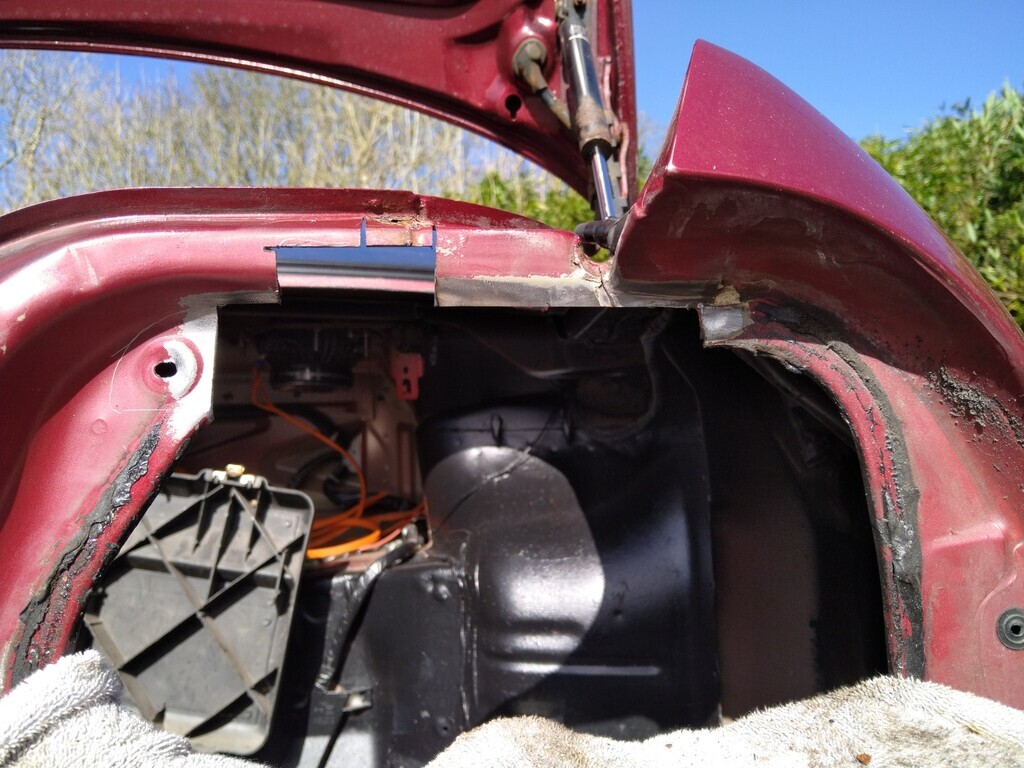 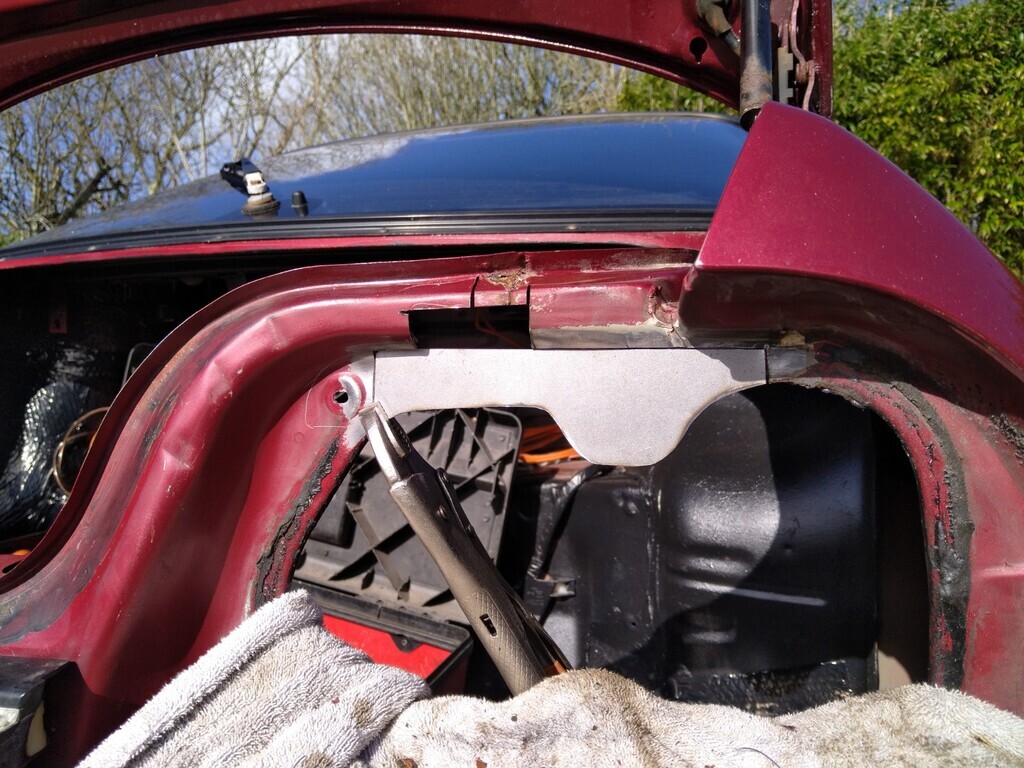 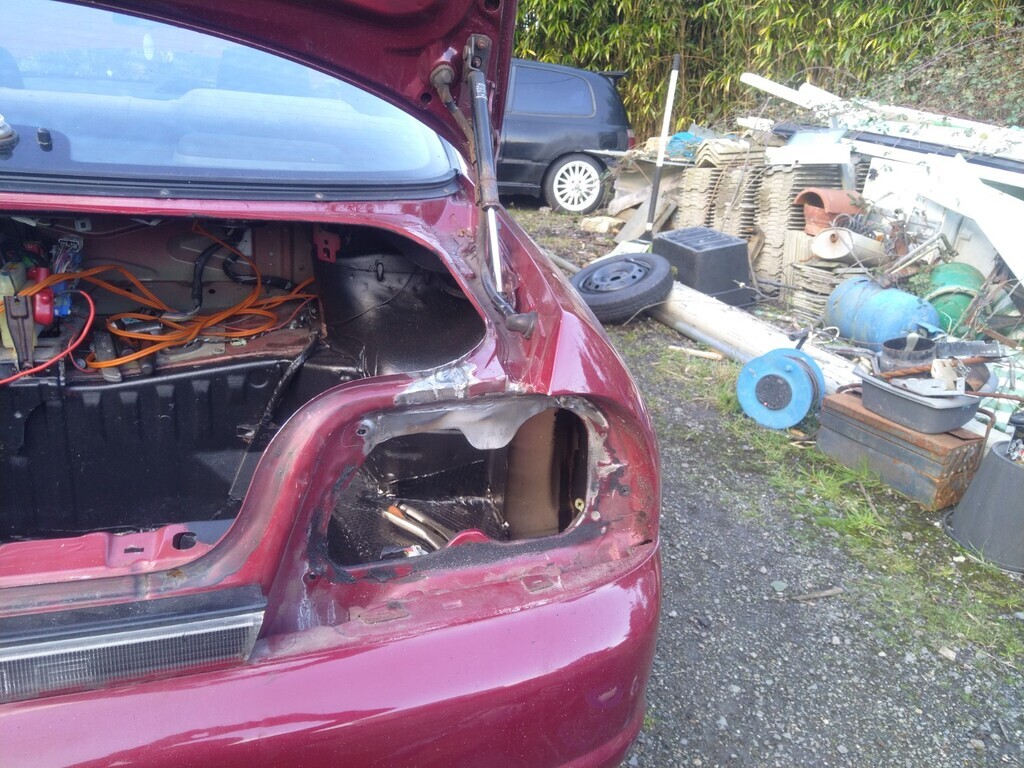 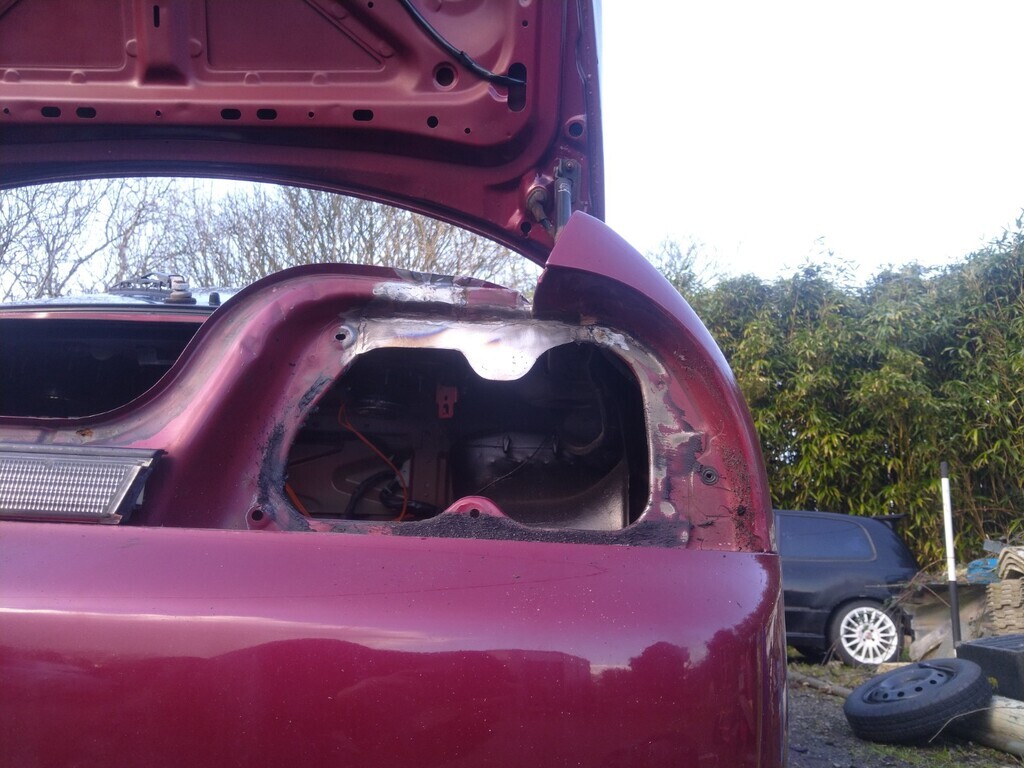 A quick masking up. 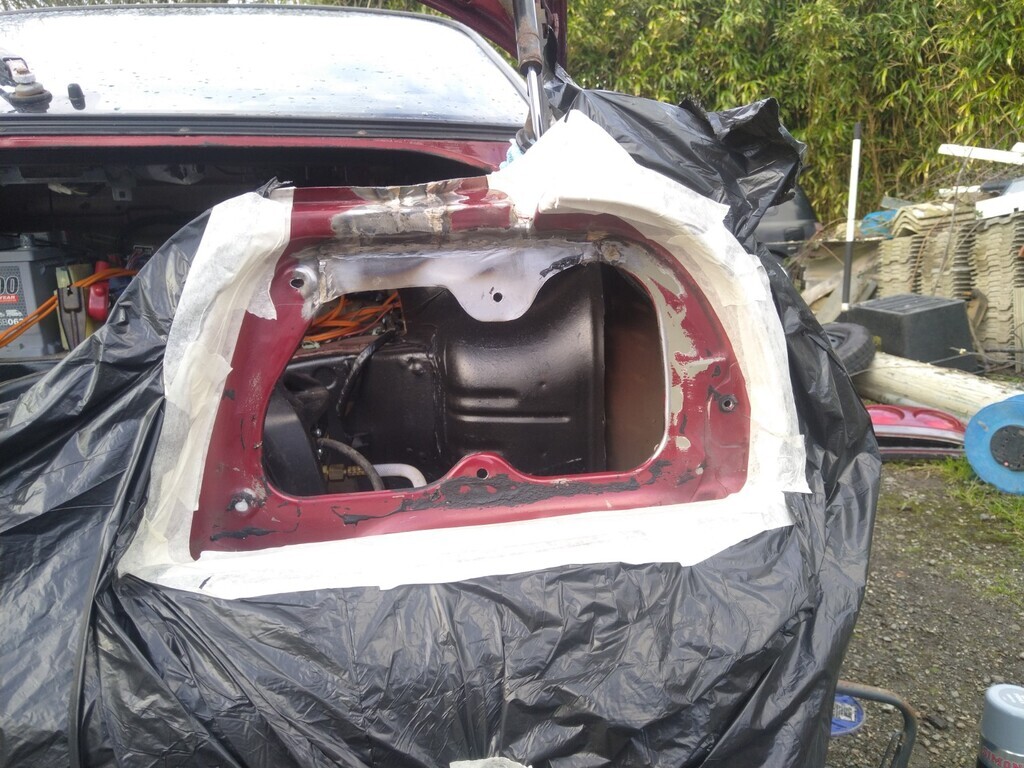 A slap of some etch primer and raptor liner and I can call that job done. 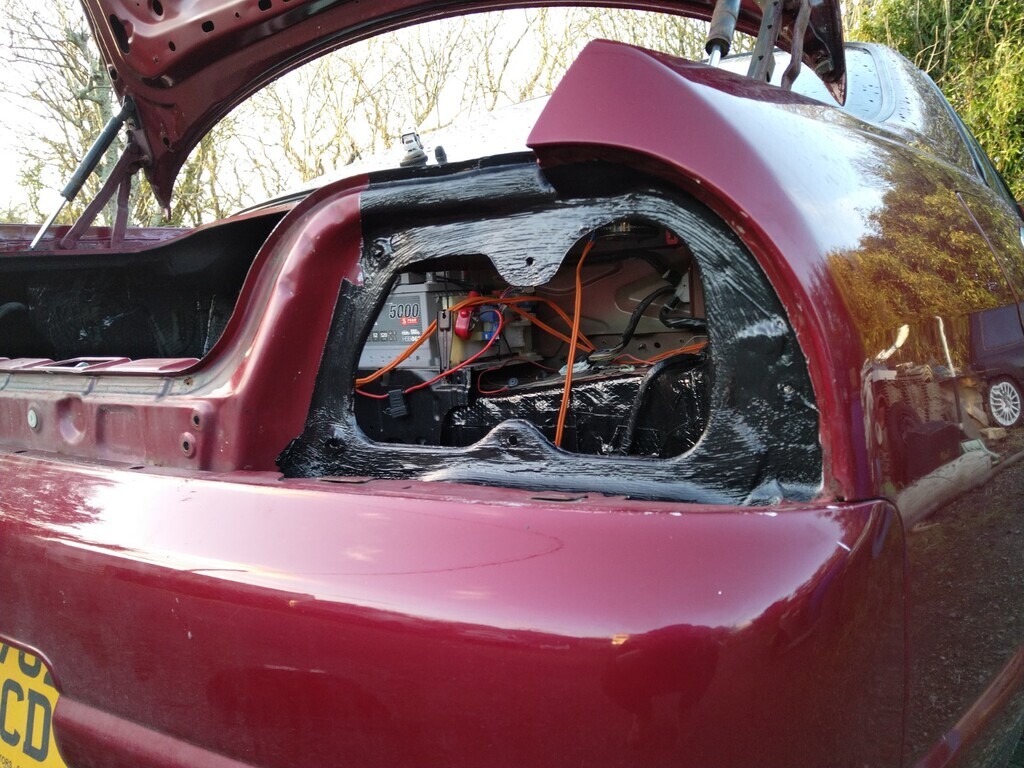 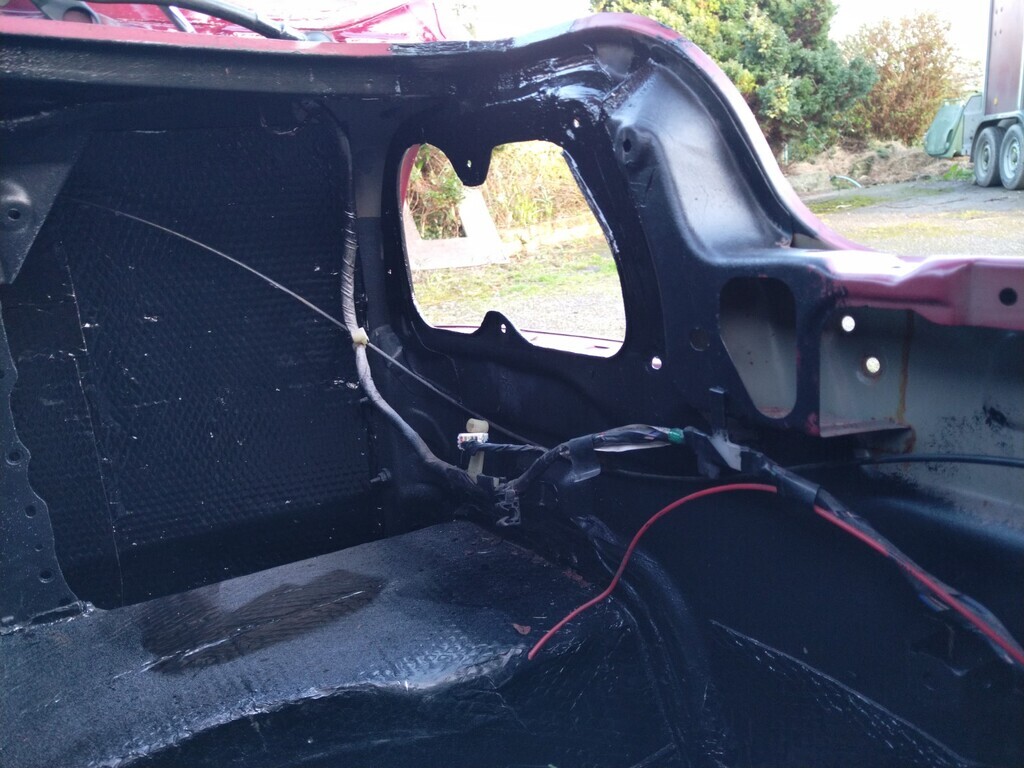 I had a stroke of genious upon fitting the lamp back in to position, apply some mastic, fit the lamp into position and see the level of impression in the mastic, now I thought i applied it generously enough but quite clearly that wasn't the case, good job I checked. 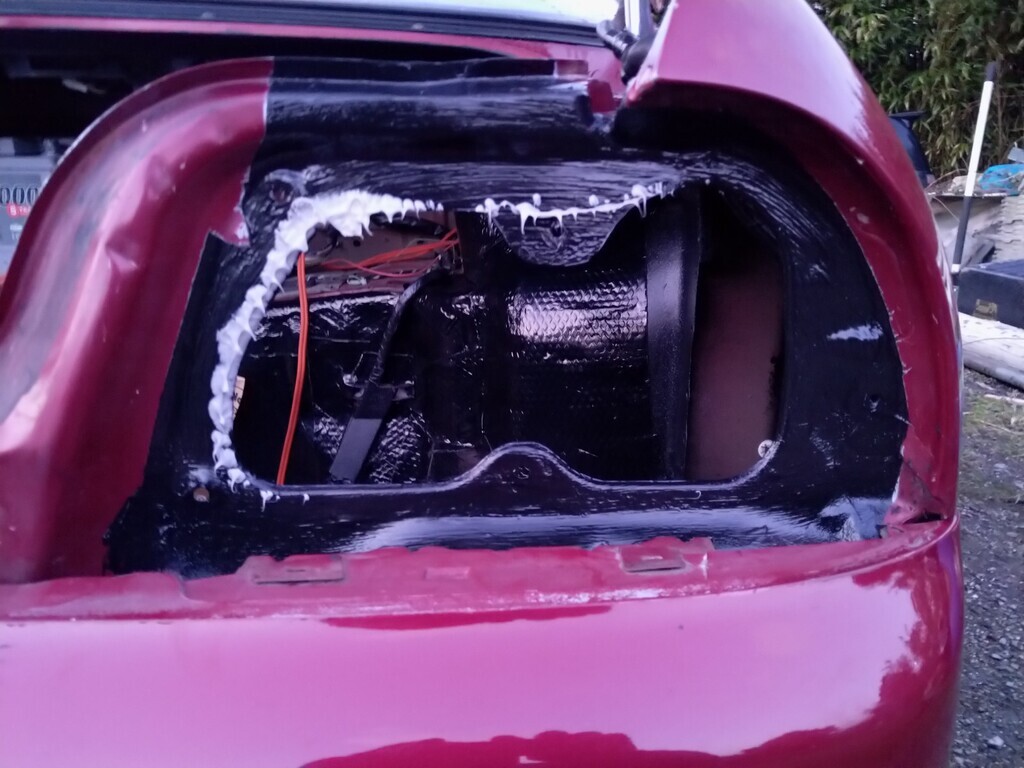 So much MUCH more was applied and after fitting there was a good helping of mastic being squished between the lamp and the bodywork on the inside so i knew the seal would be pucker. If the weather is kind enough I will try to get the other side sorted out tomorrow. As i have a stand alone ECU with new engine loom and digital dash display I pulled the loom out from the engine bay to the original ECU, it also tied into some of the body loom for the headlights and indicators and dash lights, after a couple glasses of wine and tracing out wires I got some snips and just went for it. 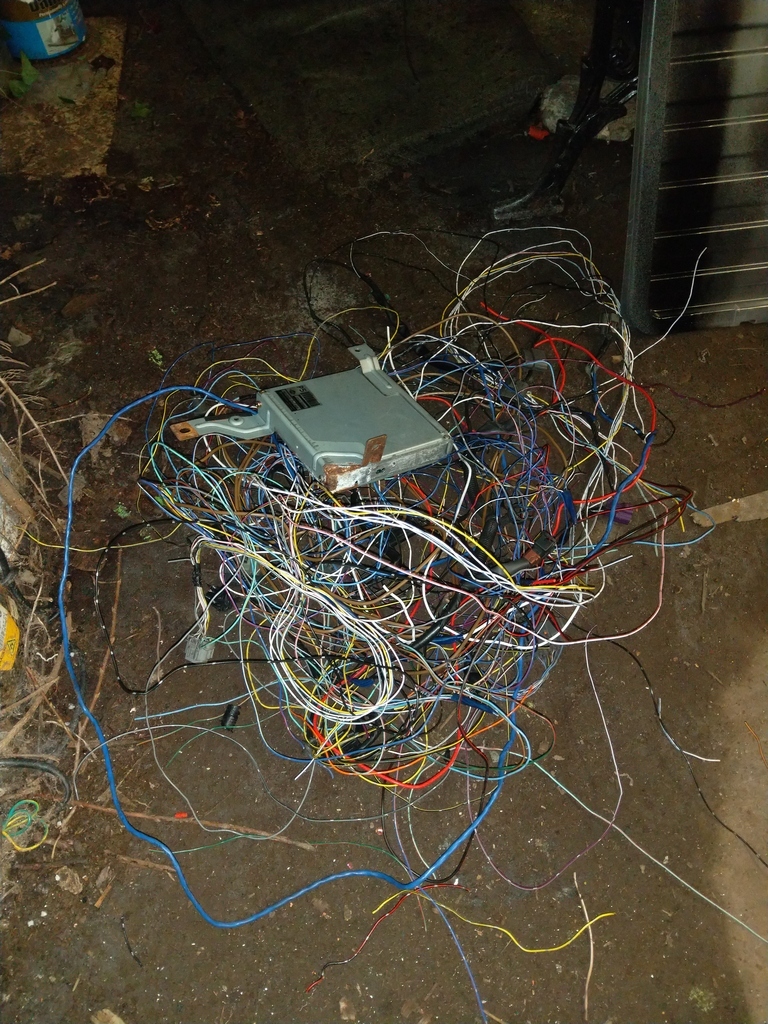 Hopefully the only wires i will need to put back are the wires to the right of the black and white plug, the Blue plug and associated wires can go by by. 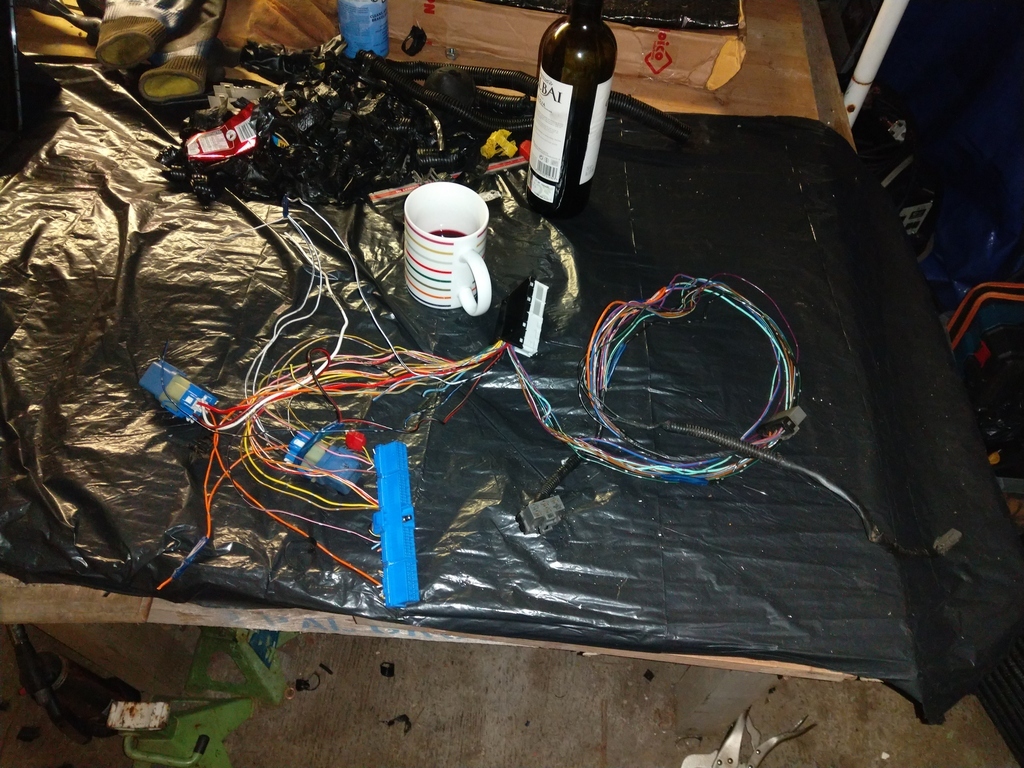 Few days back I got all the rear driftworks adjusable arms fitted, I got the lower contol arms on back order so will be waiting a while for those. 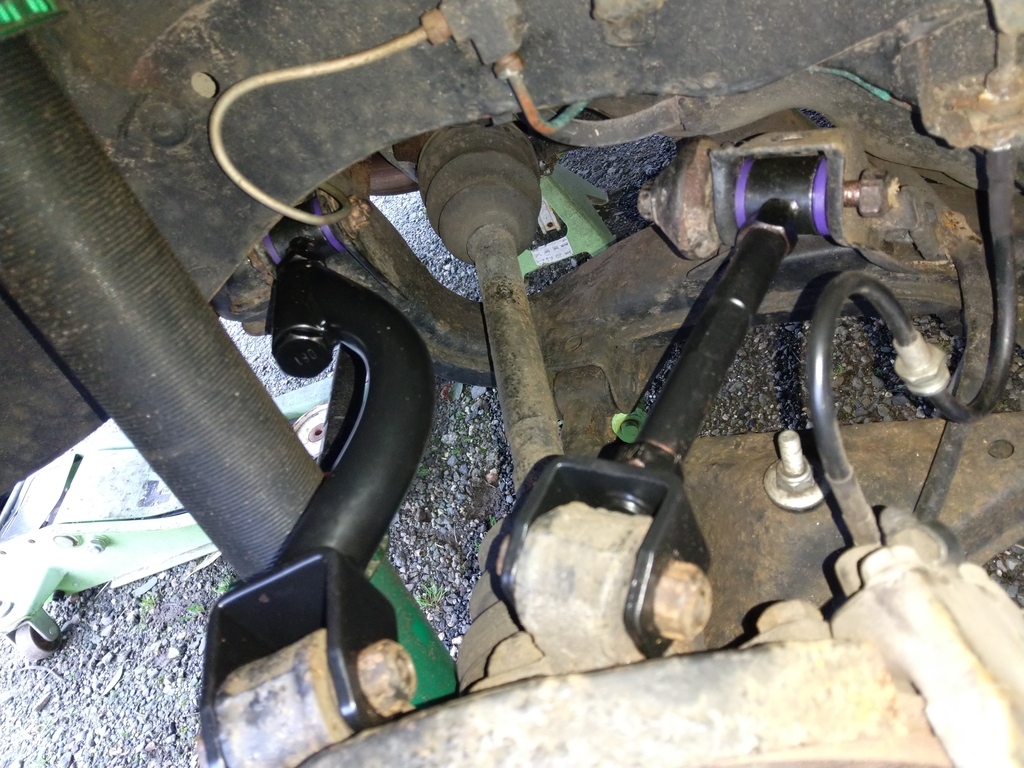 I got one side of the front fitted, just waiting to finish the other side of the engine bay before I fit them, just easier taking it all appart once rather than twice. heres what all the front looks like, everything in the suspension department will be nice and fresh, plus being tighter than before I can exit a corner where I'm pointing the wheels at rather than exiting a corner like a plate of jelly all over the place. Nice looking kit this driftworks stuff and well priced too. 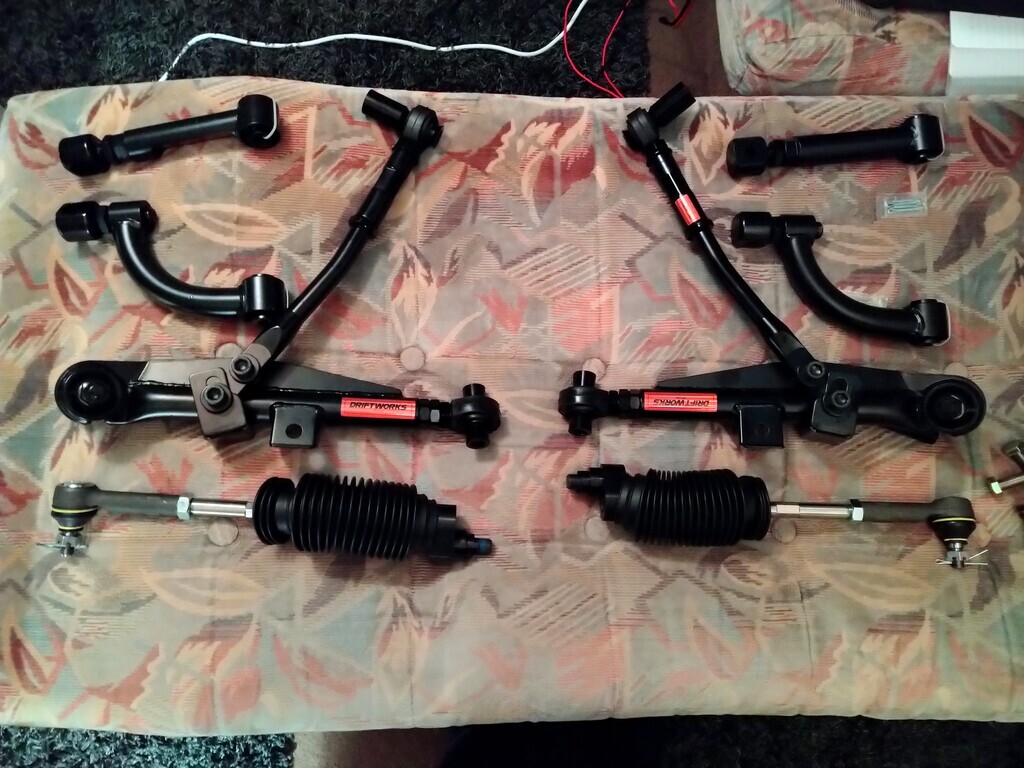 So with a good few days work and the boot coming returning baxck to something like it I went to chuck the spare wheel back in, then, I noticed something that would drastically alter the way in which I delt with a flat tyre, the spare was a 4x100, not 5x114.... W**kers. 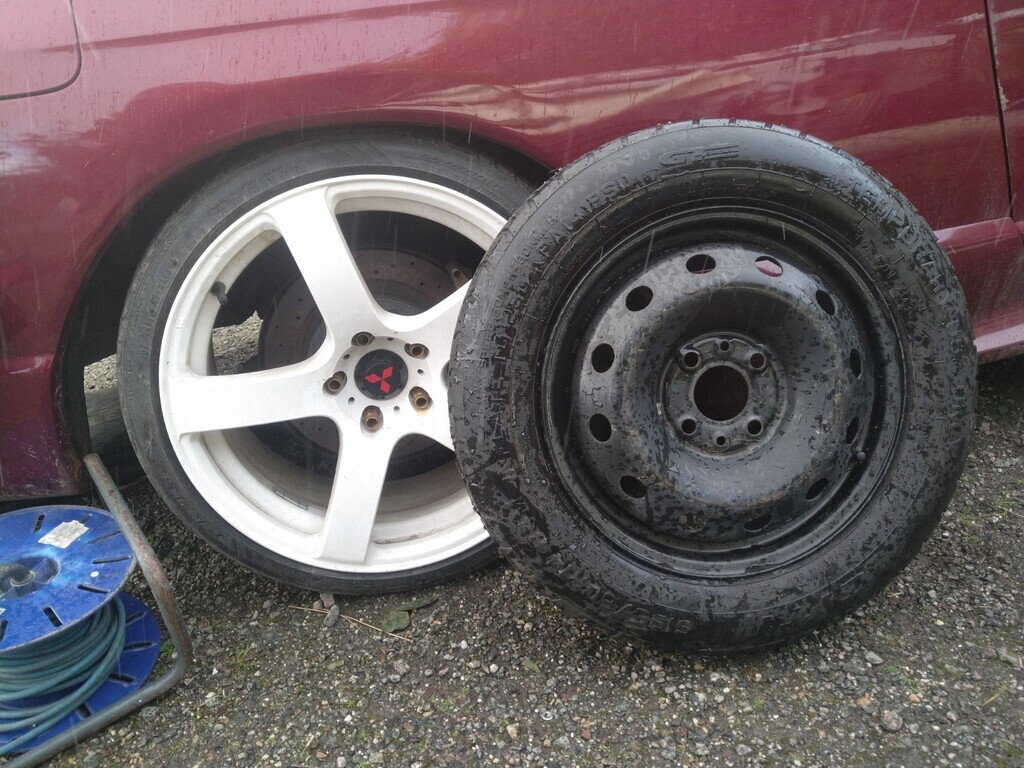 Lets see what the weather does tomorrow, I'll keep updates comign as they happen. Peace |
| |
|
|
roarz
Part of things
 
Posts: 60
|
|
Apr 26, 2022 22:43:21 GMT
|
Back from my travels again, so the passenger side rear lamp was just as bad as the drivers side, slight technical hitch with the phone situation so no photos to show on that repair, I have found another repair needing some attention, it was the last (out of 3) leaks in the boot, I had a thought it was coming from the plastic screw recepticle thing of the lower rear windscreen trim, turns out it was just beside it. 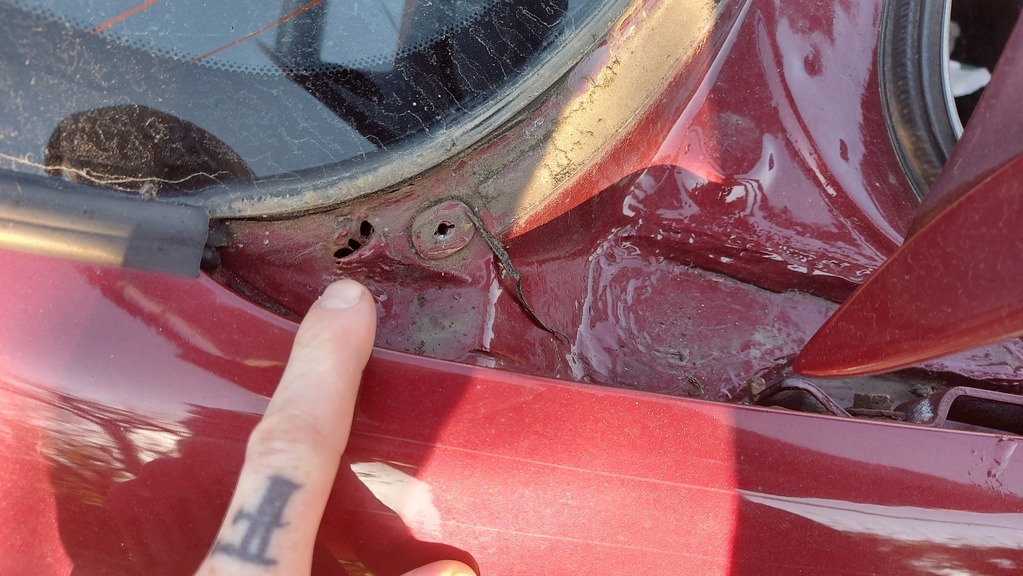 I repeatedly told myself not to poke it, don't poke it Cooper, DON'T POKE IT COOPER.... 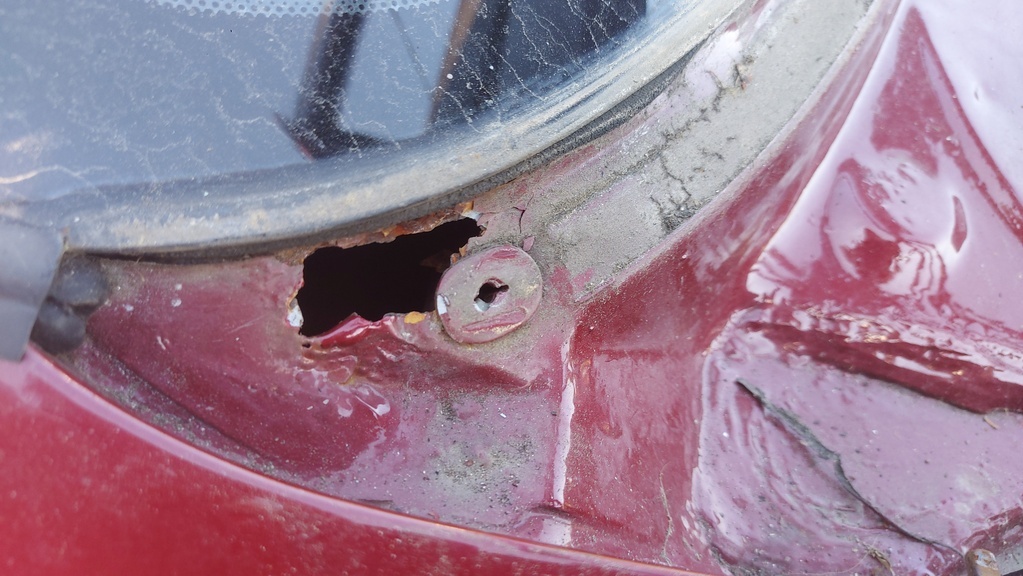 I poked it.... Now in order to fix this correctly the rear windscreen has to come out, I'm not ready to do this right not, that will need some proper mental preperation, I know exactly what i will find, RUST, same as everything else on this car.... Anyway, on some lighter news (and I don't mean lighter because its litterally sheadding weight through rust), you remember me pulling this sad sack of a rusty looking motor out? 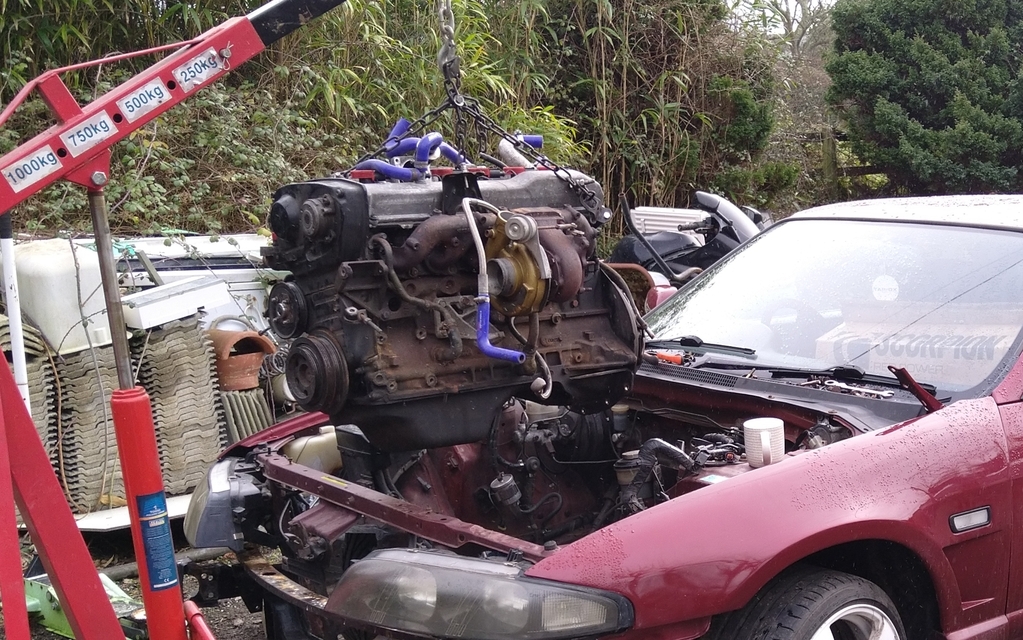 Well, now it looks completely different. 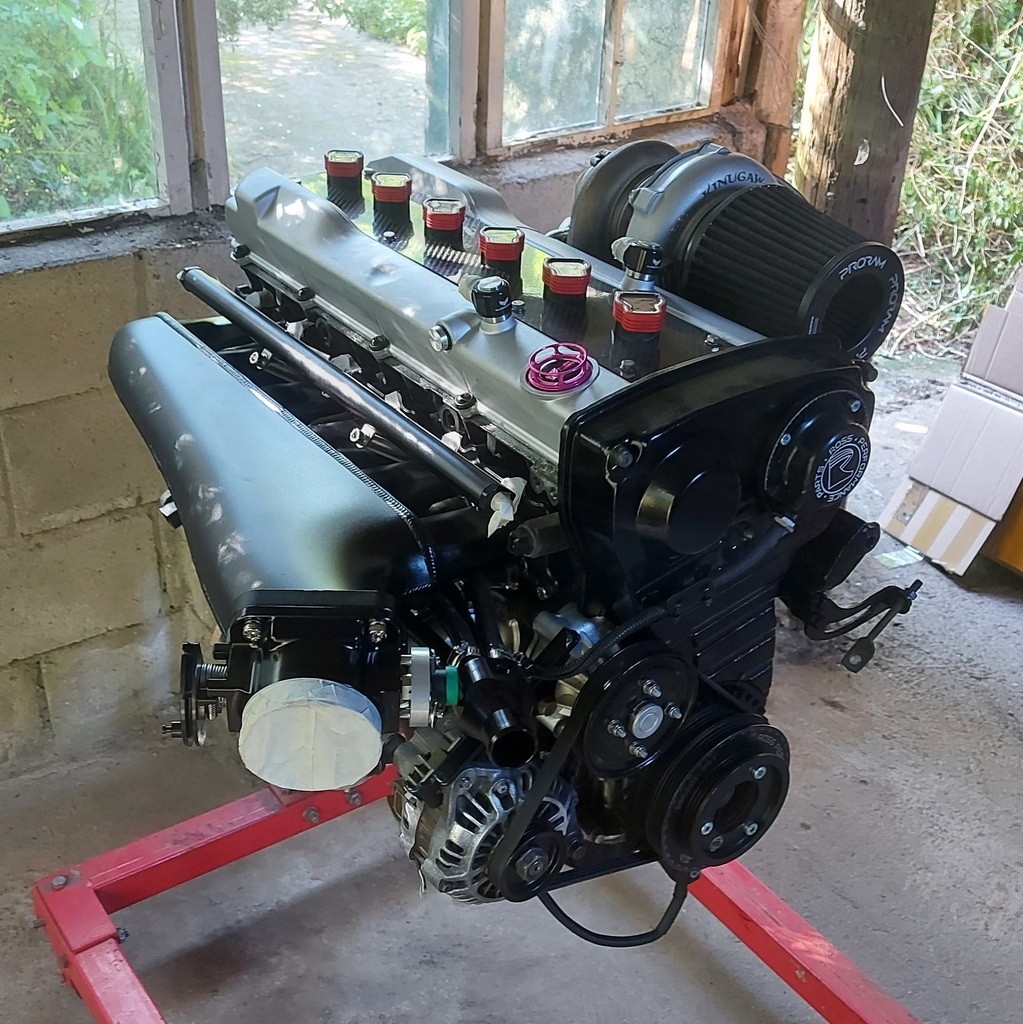 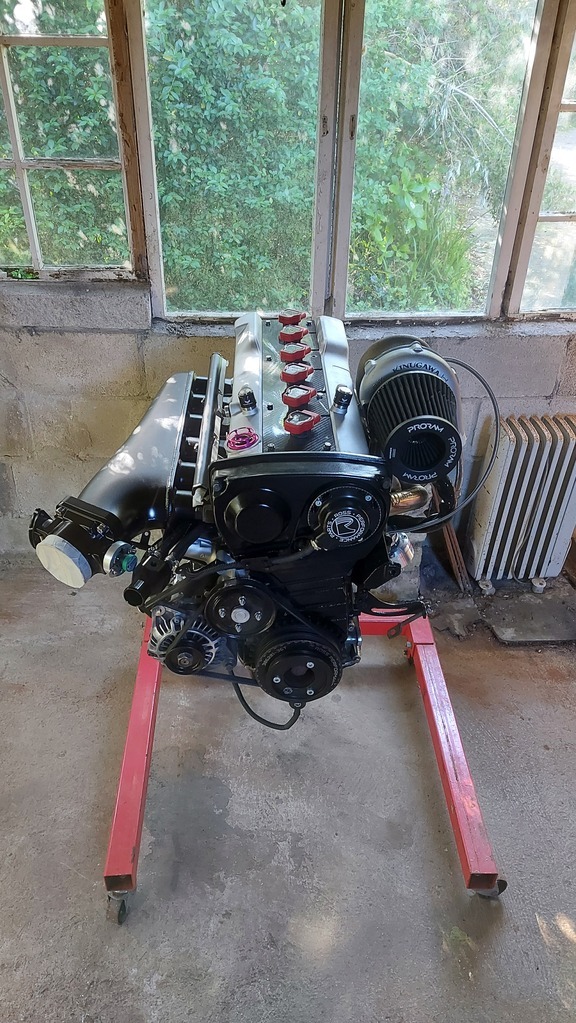 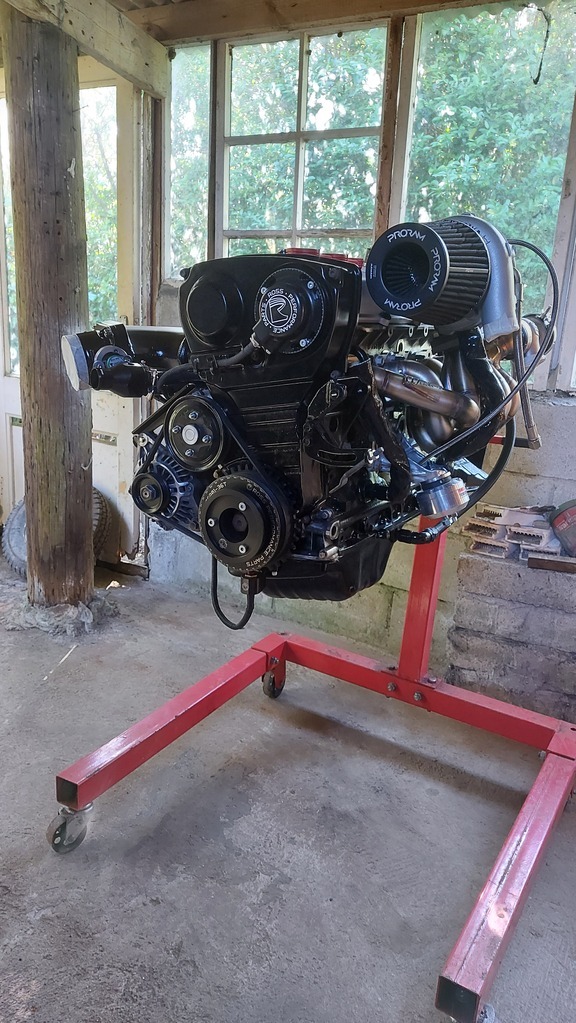 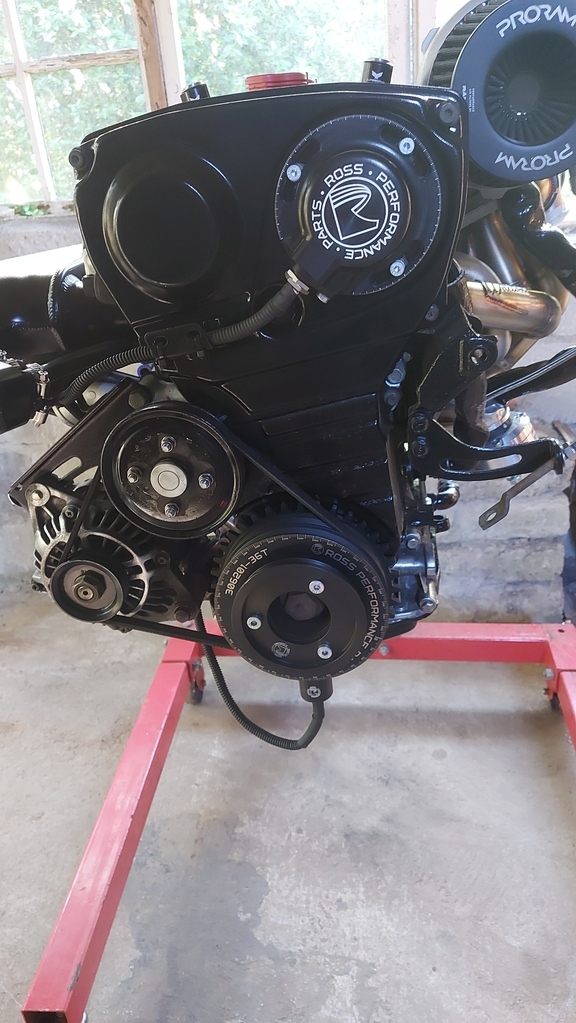 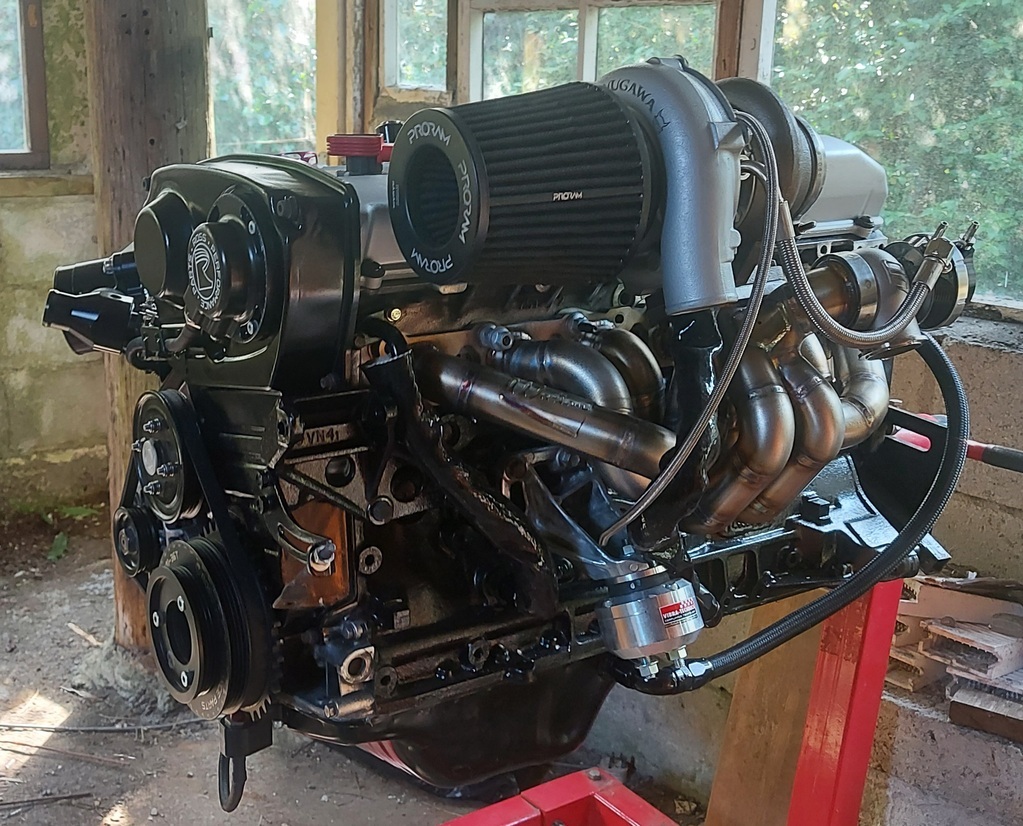 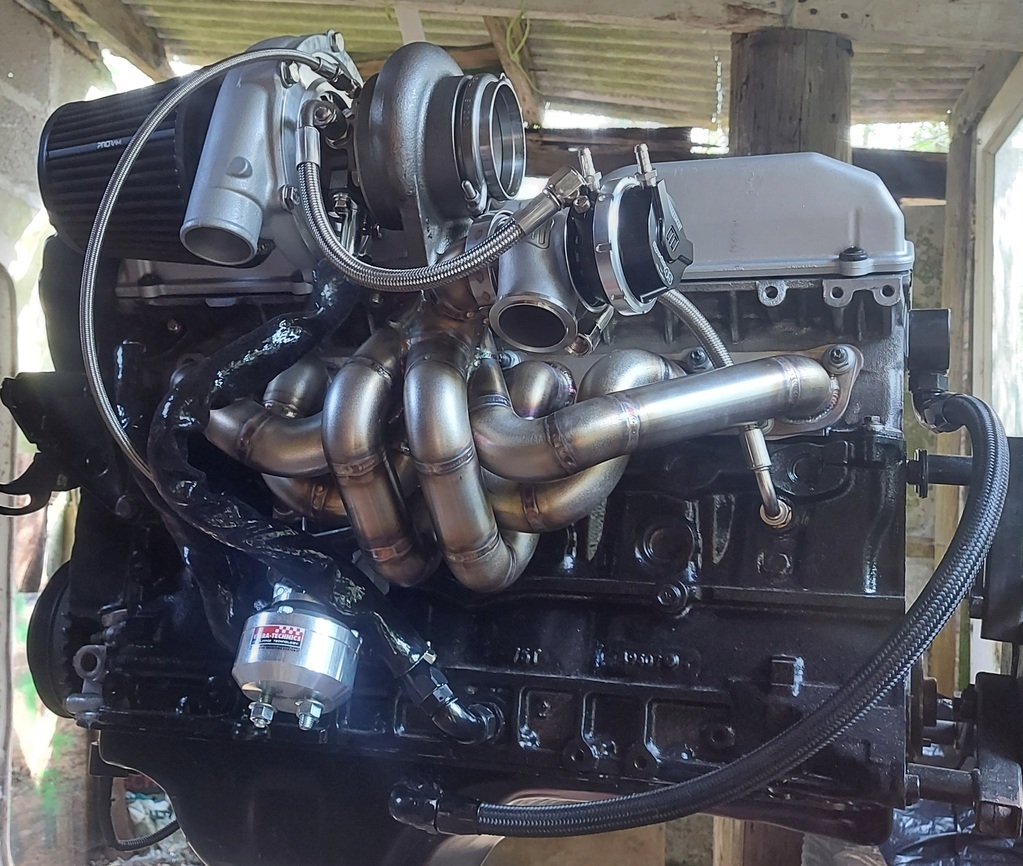 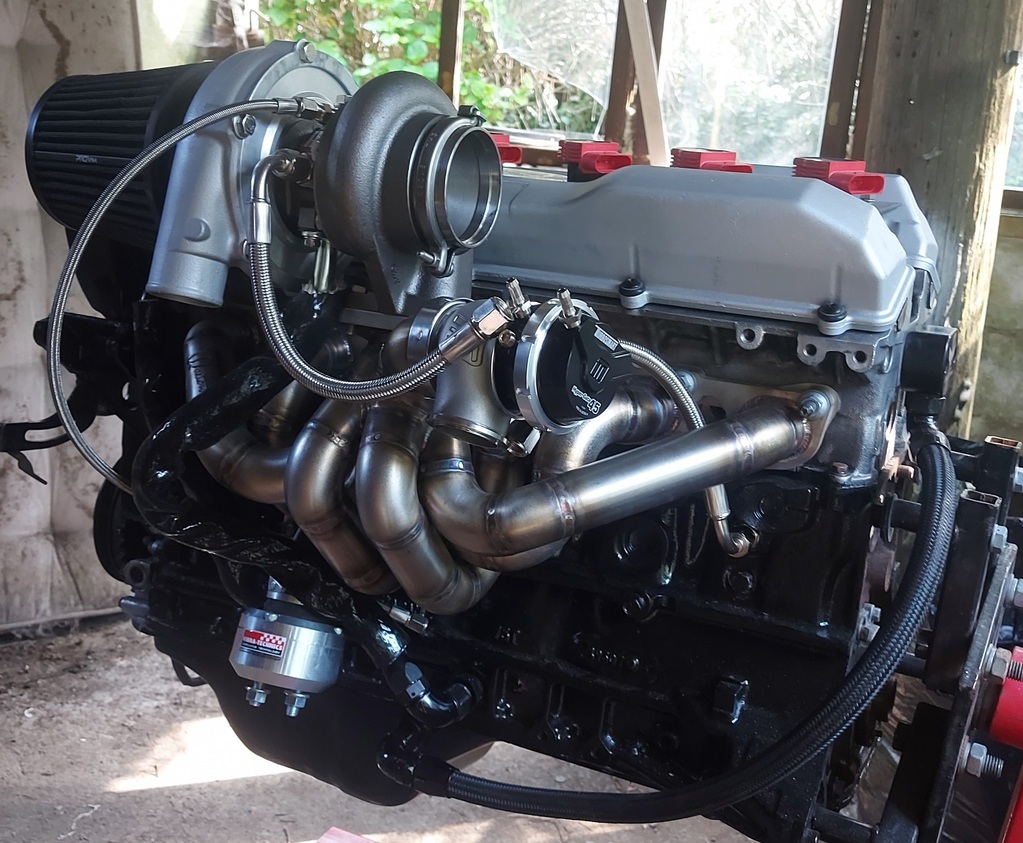 I don't mean to toot my own horn, but I think I did an alright job reviving it. |
| |
|
|
alx
Club Retro Rides Member
Posts: 367
Club RR Member Number: 21
|
1994 Nissan Skyline R33 GTSTalx
@alx
Club Retro Rides Member 21
|
Apr 27, 2022 11:31:48 GMT
|
Oooooof! Engine p0rn! Nicely done. AL. |
| |
|
|
|
|
|
Apr 27, 2022 11:57:54 GMT
|
|
|
| |
Last Edit: Apr 27, 2022 11:58:54 GMT by darrenh
|
|
roarz
Part of things
 
Posts: 60
|
|
|
|
***UPDATE*** The engine is finally back in... 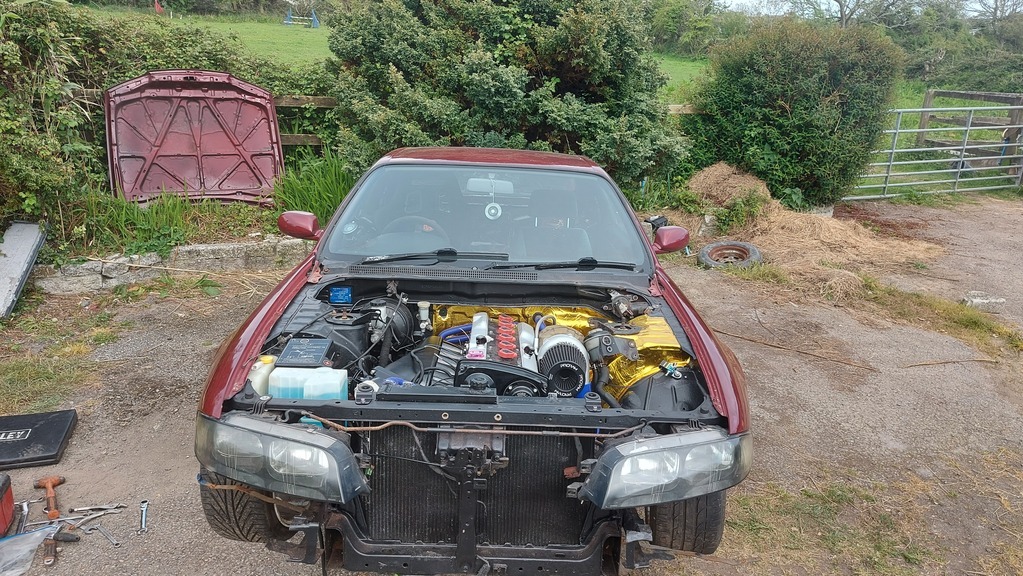 It didn't come witout it's own challenges, the ARP flywheel bolts turned out to be a tad to long for the lightened Nismo flywheel, nothing a vice, angle grinder and a thread file couldn't sort out 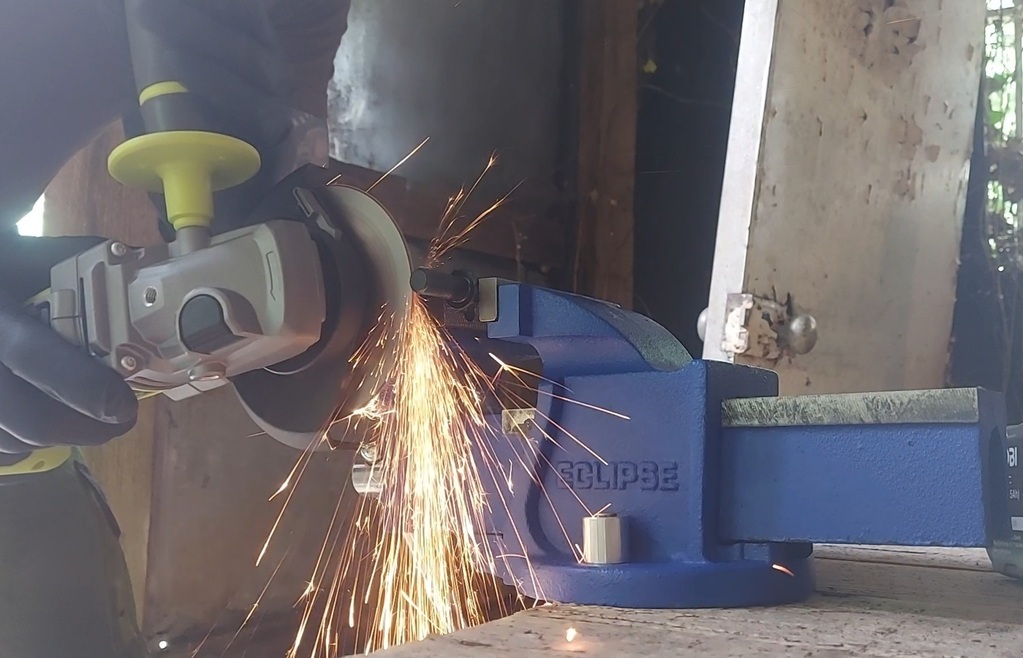 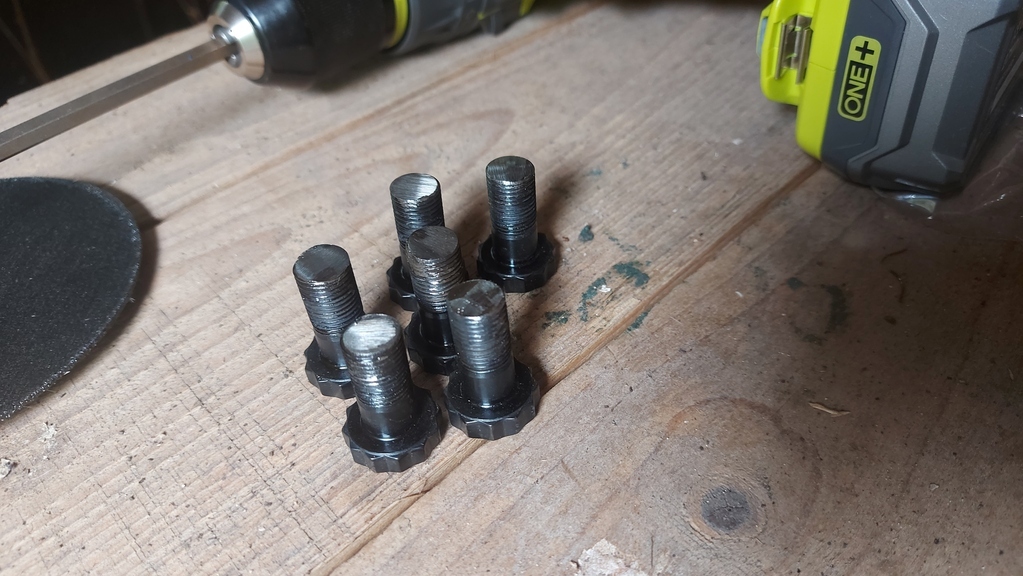 The next challenge was to get the engine from the shed, down past my landlords house, up and through the gate and across the gravel carpark. getting from the shed to the gate wasn't so hard, just involed a lot of brute force, lever bars and strategically manovering the engine crane in a way to not fall down draines etc, everything was slightly up hill and banked so it wasn't quite so straight forward as just pushing it. Getting it up and through the gate, well, I had to get creative, I was all by myself and didn't want to wait untill my landlord came home as I just wanted to get it in, so break out the tow strap and have a quick prayer just incase there is someone listening and send it. 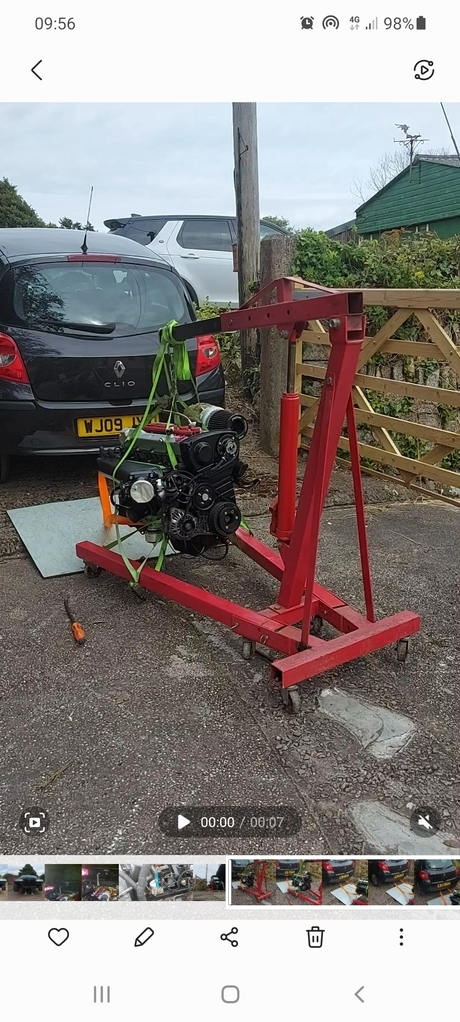 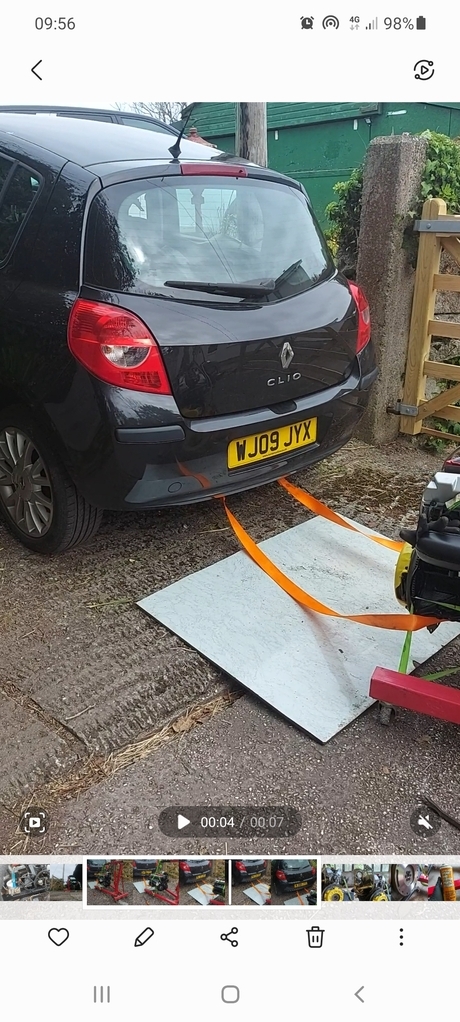 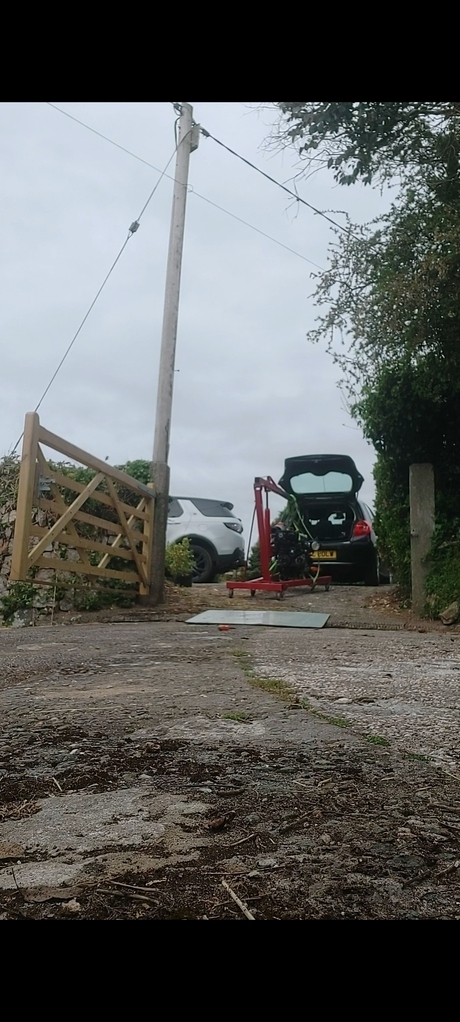 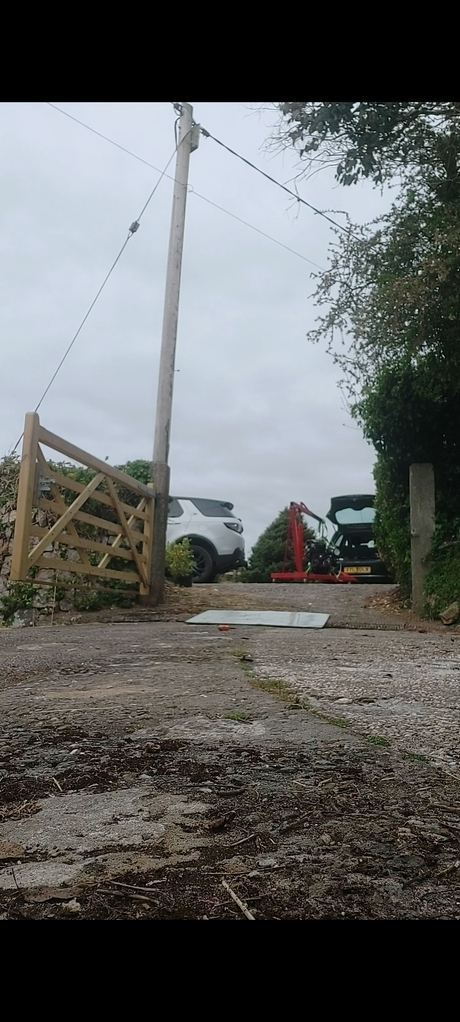 With the engine in I soon realised there was a few more issues to overcome, one being the power steering pump resivour doesn't fit anymore, this isn't too much of an issue, i was going to replace the lines to and from it as they're cracking and slightly weeping from the joines where the pipe has gone hard and brittle, I will make my own lines and relocate it behind the passenger headlamp. 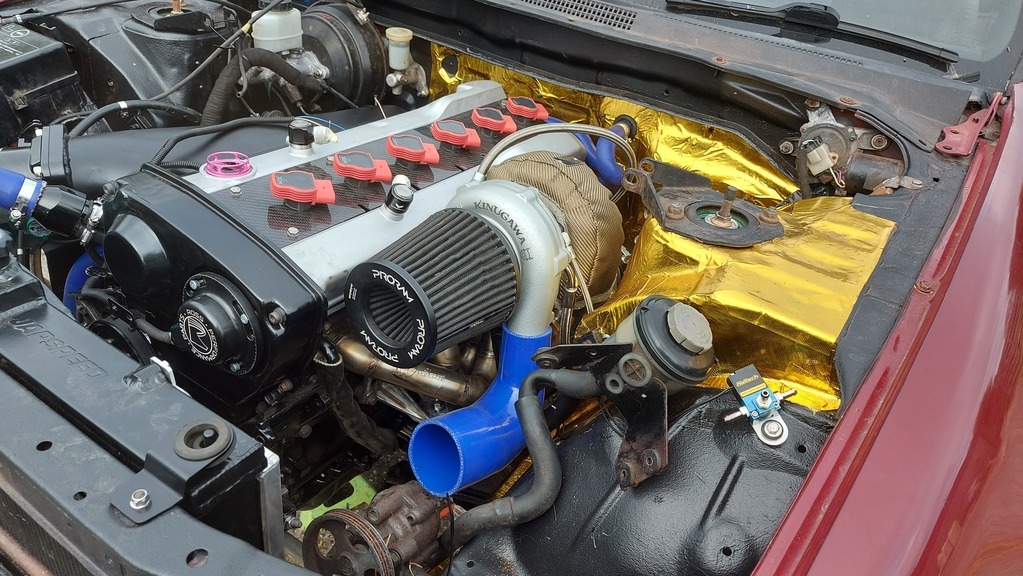 The next issue is the intake manifiold clashing with the windscreen washer bottle, I am probably going to have to try to cut this one up and see if I can make it water tight again or go down the route of chucking a pump into a small container/tank of some sorts, I'll figure that out later, unless any of you guys have an idea? 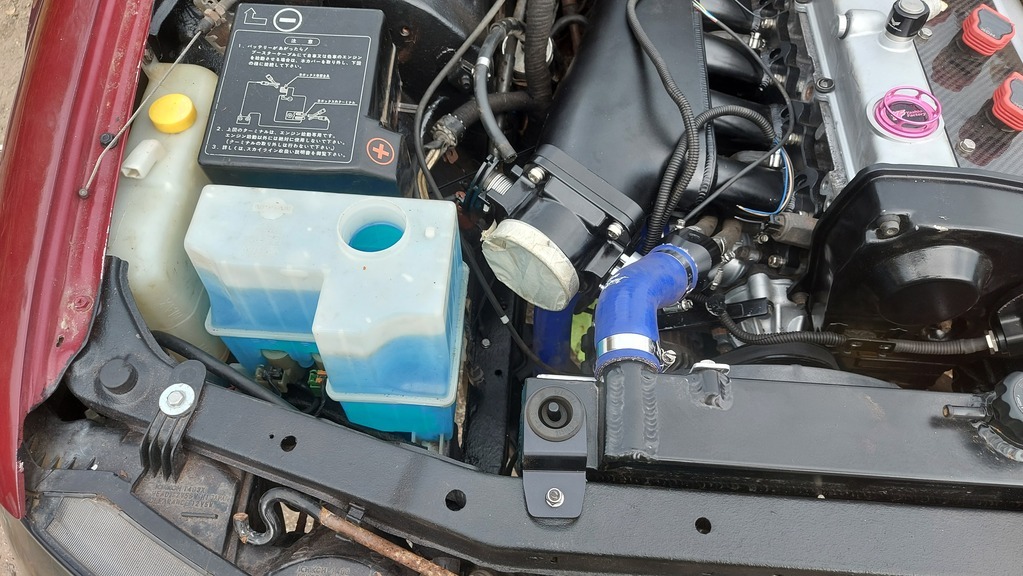 A few other things I have gotten done are, insalled my seat and rails 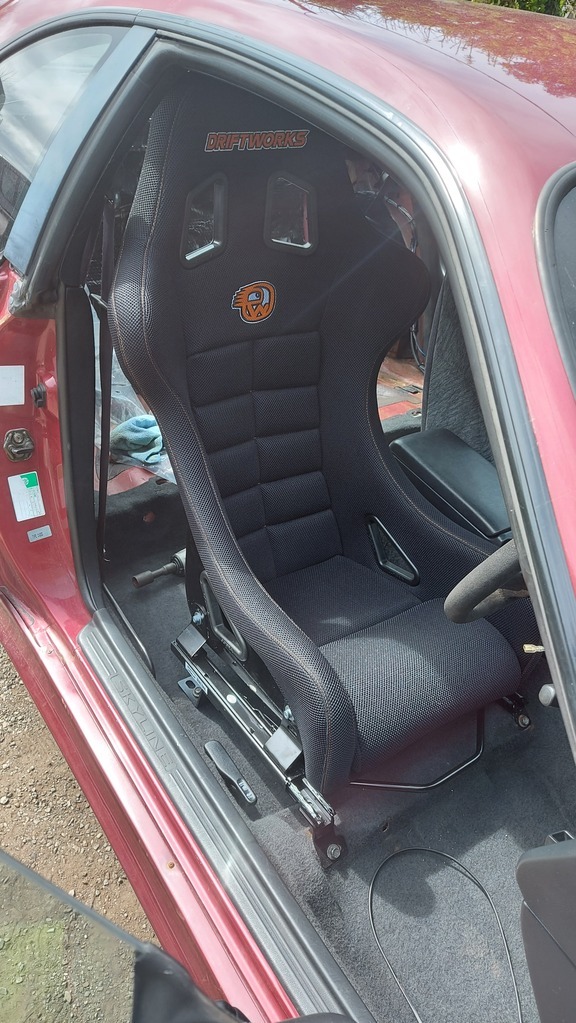 Got my haltech dash all wired in and got the turn signals, handbrake and main beam indications working on it. 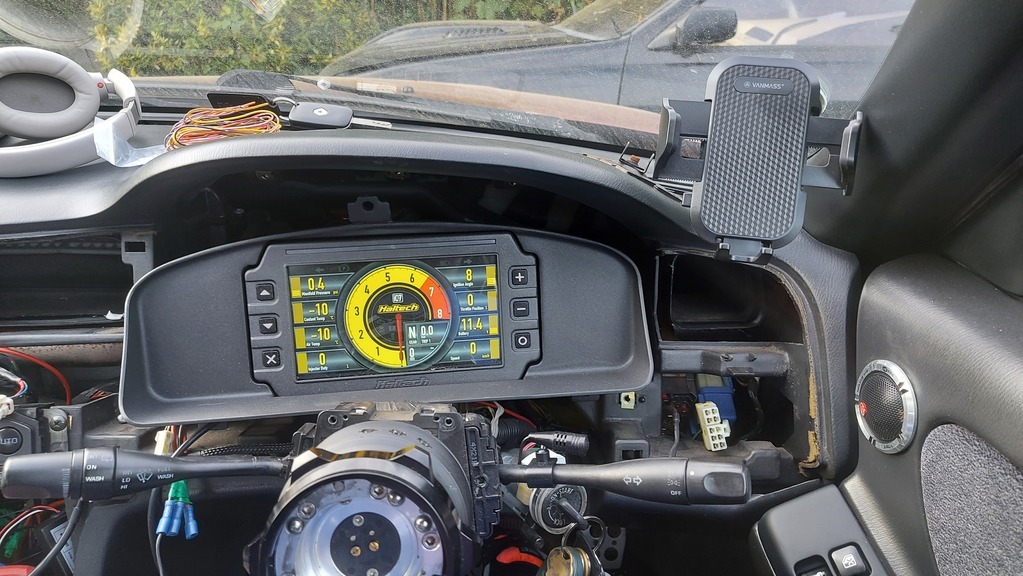 Fitted the Vibratech gearbox mount to acompany the same engine mounts. 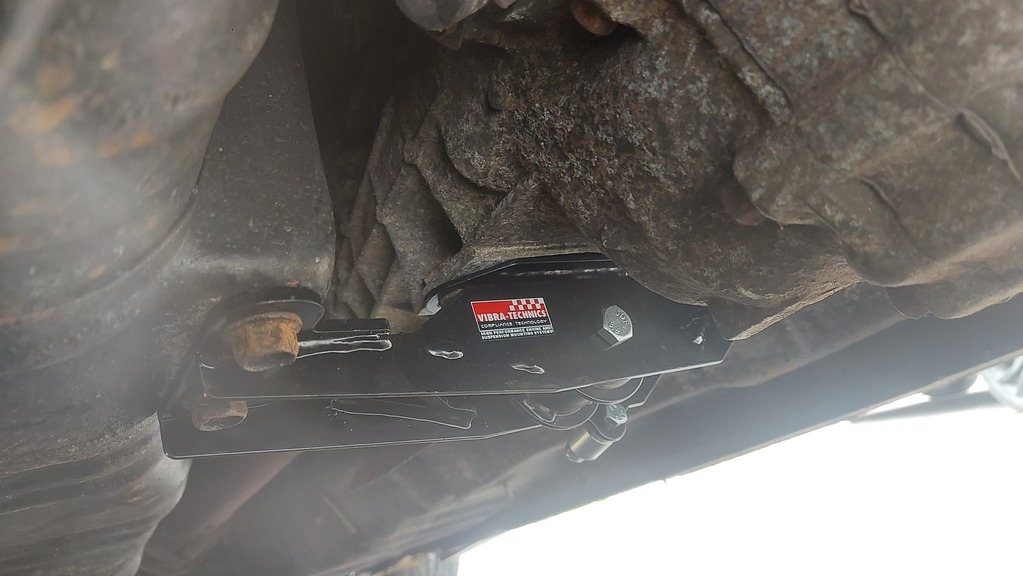 I had to chop out a lot of dodgy wiring and add my own in, added relays and fuses to what i needed as there was none before, not quite sure how it didnt set on fire. I will keep the post's comming as I go |
| |
|
|
|
|
roarz
Part of things
 
Posts: 60
|
|
May 28, 2022 19:27:51 GMT
|
|
Quick little update, I have been busy learning how to wire up a whole new wiring loom and sensors to the engine which apart from a plug to control the varible cam is all in and ready to be connected to a laptop to program what wire is going where and get a base map loaded on to it, problem is I don't have a laptop and the perosn who was meant to be lending me their laptop went and got covid so thats on hold right now. Today I remade the down pipe as the turbo is in a different position with the new manifold and also now on a V-band rather than a 5 bolt flange like the old one, somehow I managed to fluke that in there, I chucked a couple of pie cuts onto the turbo and onto the reminents of the old down pipe and a straight section just fitted straight in, don't ask me to do that again with so much success, just need to connect the waste gate dump pipe into it and that job can be called done, theres oil and water in the engine and I'm happy to report it didn't p*ss out of anywhere, I have cranked the engine over so at least that still spins over as it should. Maybe this time next week it will be running on all 6 cylinders, finger crossed. Still have to weld a few bits of fresh steel into the rear drivers side subframe mount area as that is crispy and after a few taps with a toffee hammer it now has a big hole in it. Also still have to make all new charge pipes but I plan to just tack that togehter and have it back purged and tig weled by a local company so I don't ruin my engine.
|
| |
|
|
roarz
Part of things
 
Posts: 60
|
|
|
|
I decided that i needed to put it up in the air to make my life easier to redo all the exhaust down pipe and also I knew there was a small patch of welding needing doing on the drivers side front mounting area of the rear subframe. 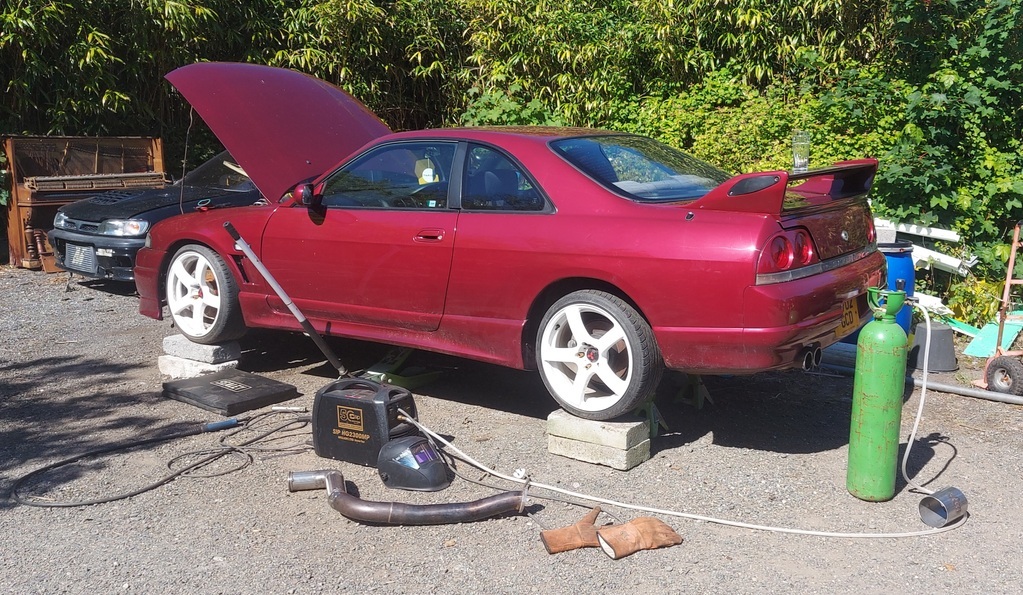 I had fully prepped for this and went and got a fresh bottle of gas and a 1/4 sheet of steel. 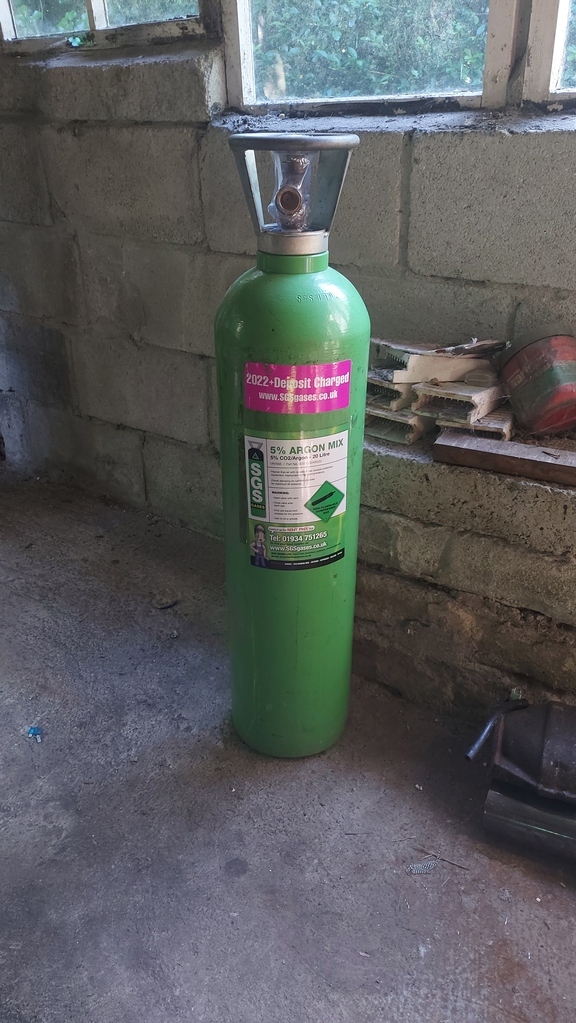 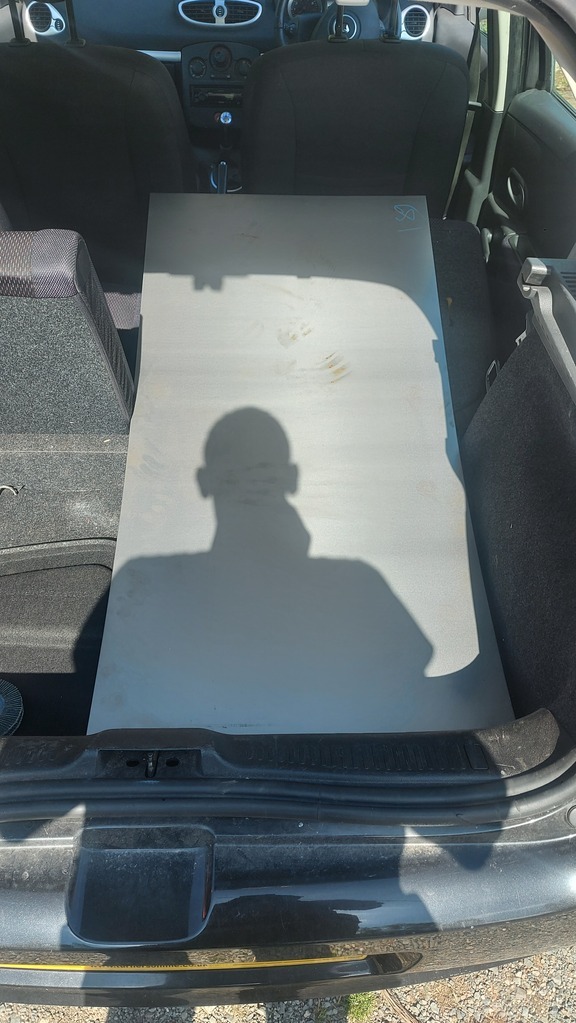 After gving it a little wire wheel off to get rid of all the underseal some more holes appeared, this was to be expected. 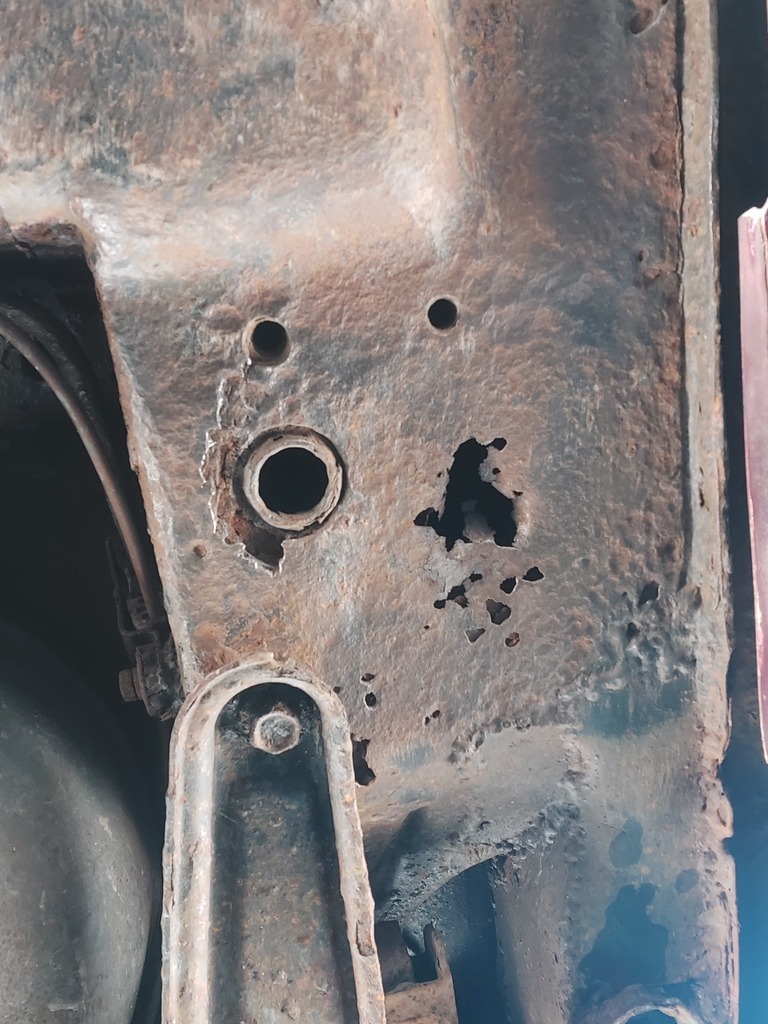 Then I got my body panel hammer out and started tapping around to see what was good and what was bad, it didn't go well. 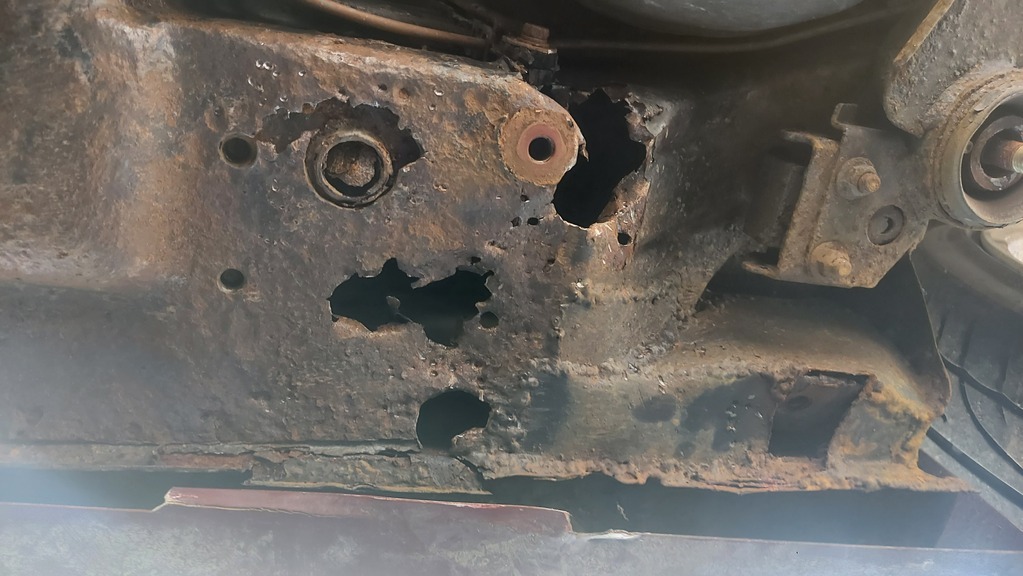 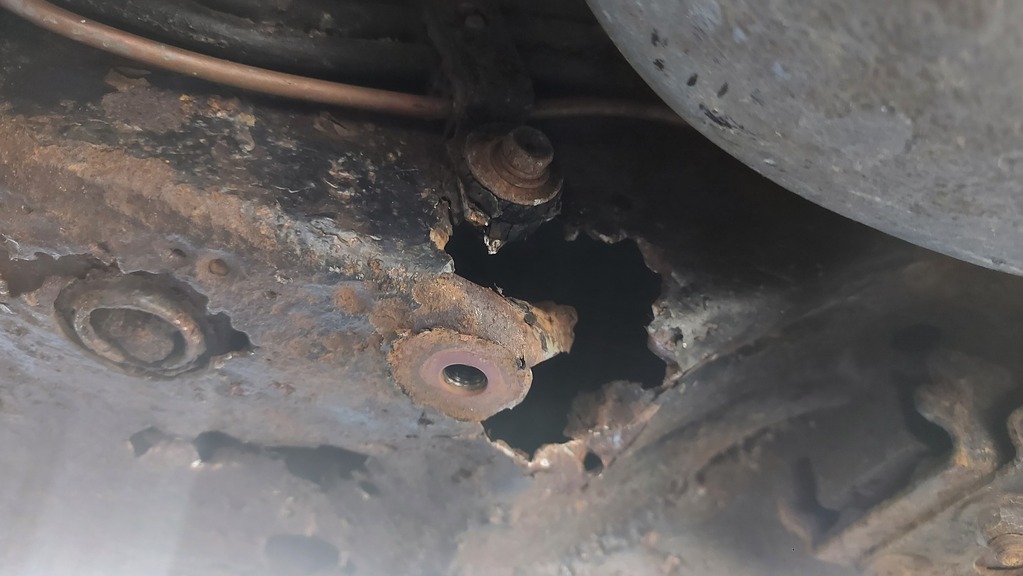 Now I'm no expert welder but i think the last person who did the welding "repairs" to this area was either blind or at very least partially sighted, they're shocking, theres gaps in the welds and burn holes all over the place, I'm going to have to drop the subframe and fuel tank to do this. As painful as it was to knock holes into it I was fully prepared for it as I knew it had to be done, I don't do half arsed jobs, I like to do thing correctly and to the best of my ability. I noticed an area of concern up the front on the drivers side so I gave that a little tappity tap too, one more hole to add to the list. 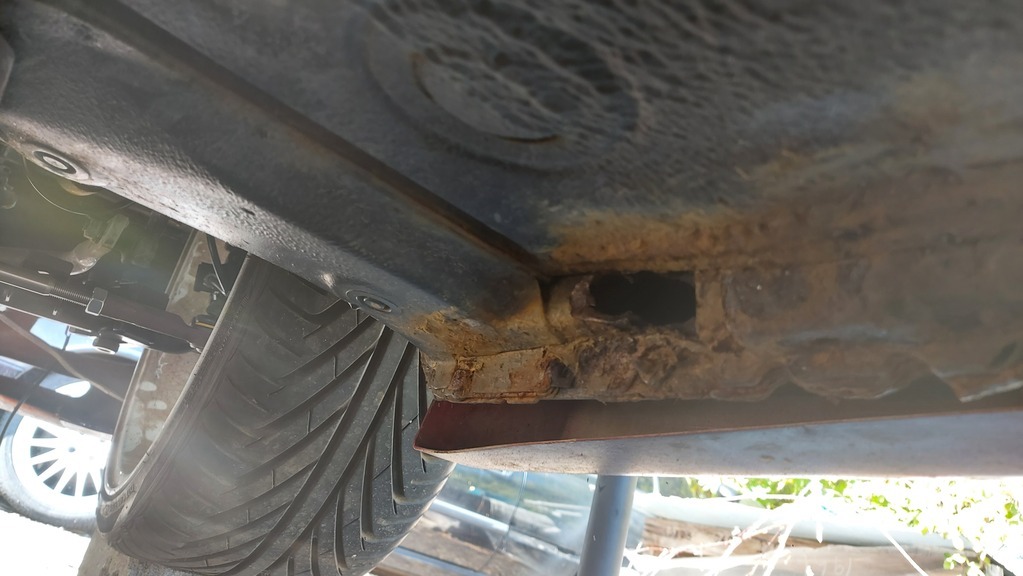 I then revisted the the rear and peared under the side skirt and it was clear that the sill had a small area needing attention too, what happened after this was just mayhem, utter carnage would probaly best describe it, so what happened was my hammer just kept chasing corroded steel and making holes, people with a weak stomach should look away now. Front of the drivers side sill. 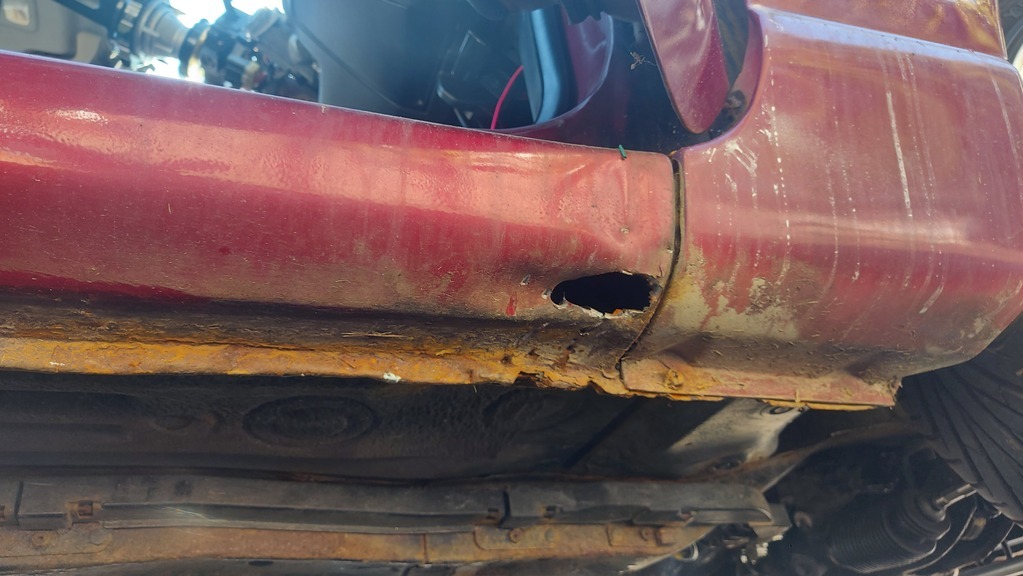 Rear of the drivers side sill. this was acutally disconnected/unwelded from the floor pan and it wasn't known until I started hitting it 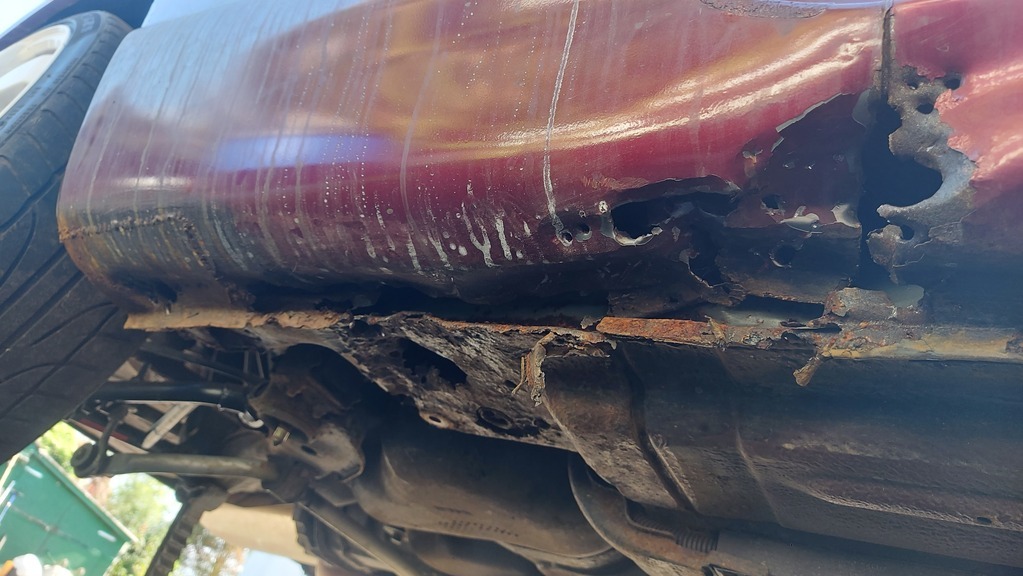 Rear drivers side arch. 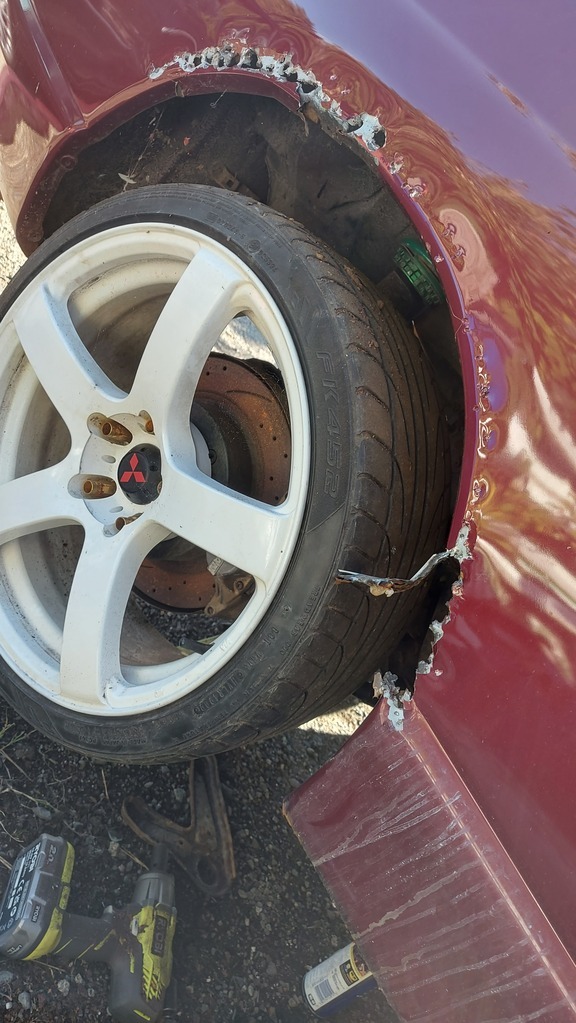 And again 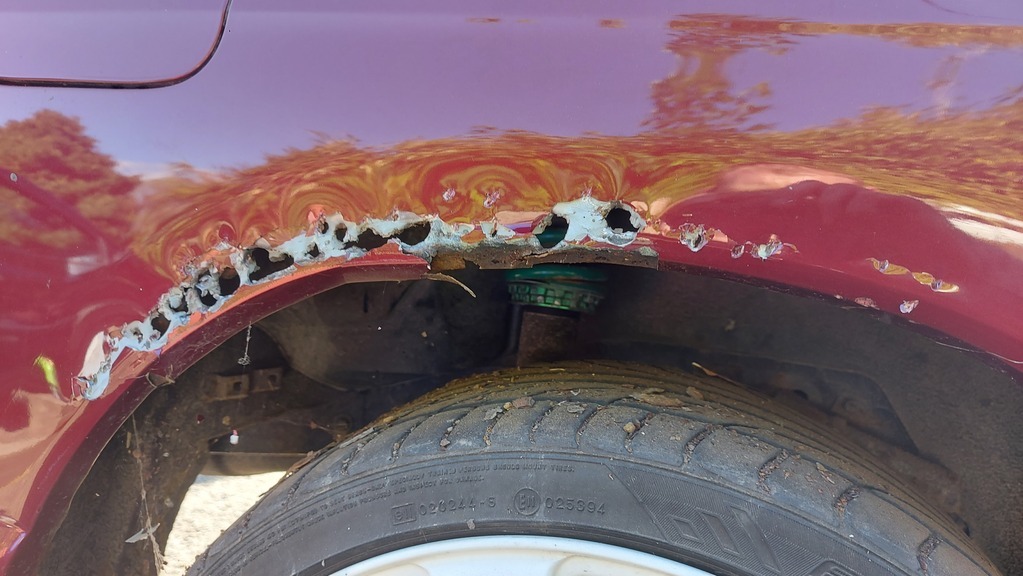 And again 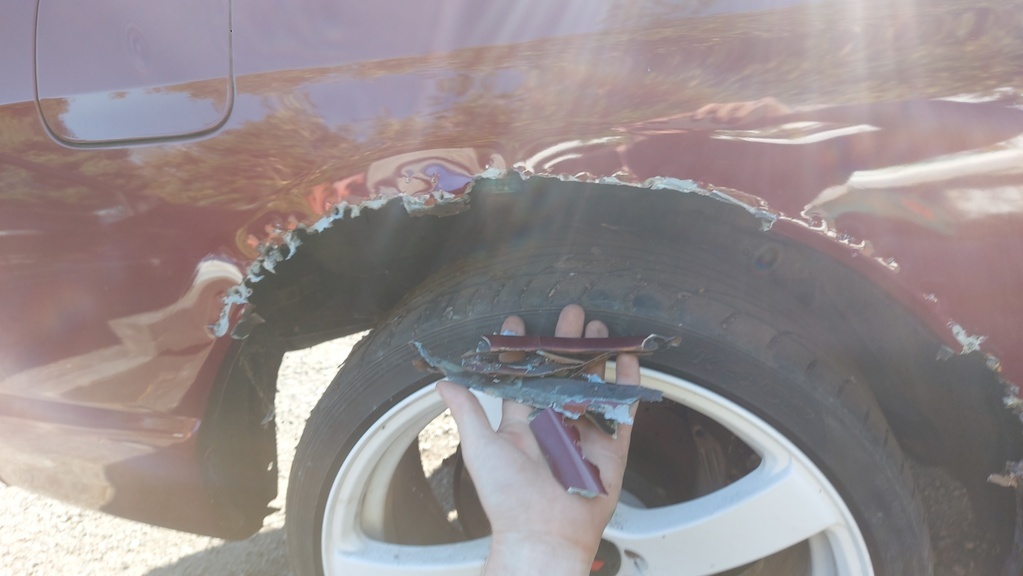 I then moved onto the other side, same story. 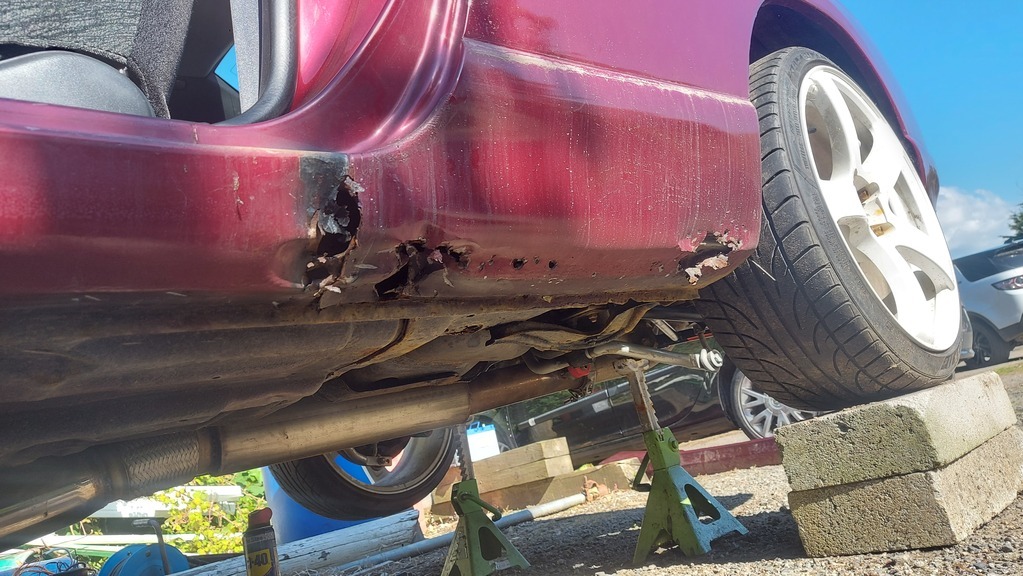 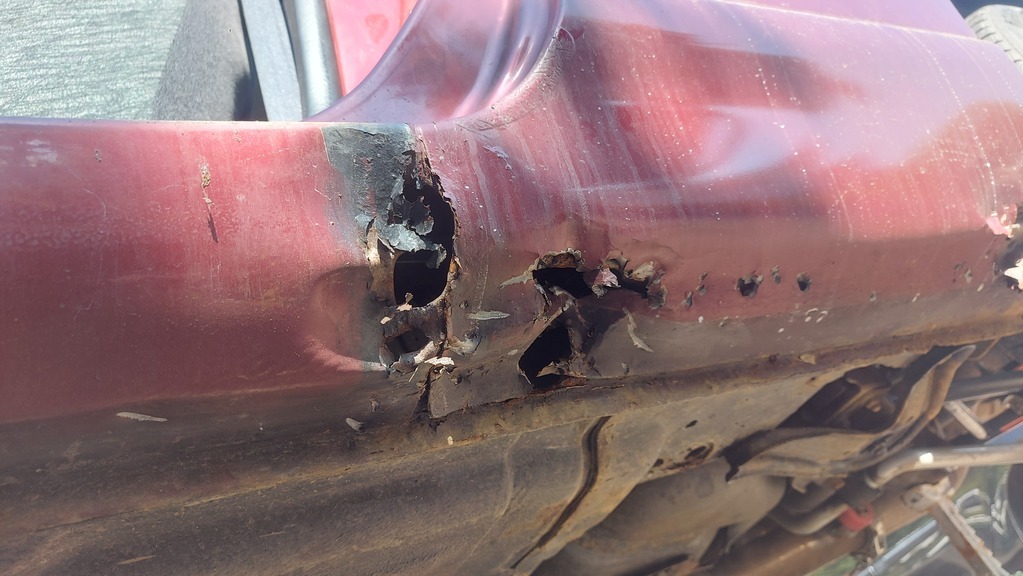 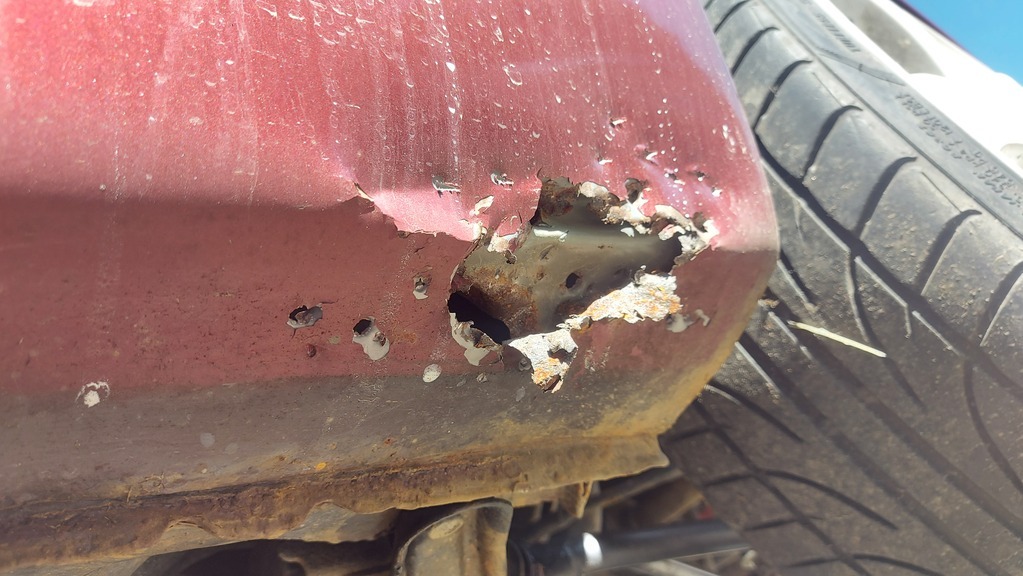 At this point I decided it would be a goot idea I stopped hitting it before I drank myself to death, it is very clear that I bought a lemon, there are some small bubbles of rust on the passenger arch so I knew this would be the same. Not to worry, I got straight on the interweb and ordered new sills, given the rediculous prices and rarety of new steel quarter panels I opted to go down the route of fiberglass over fenders, these are GTR type so they are 25mm wider, whilst I was there I ordered some new front wings as I HATE the current ones it has, the mould they used to make them was clearly in an accident as none of the body lines match up and they are like my chinese freind, Ug Lee... Hopefully the sills will turn up middle of the week and the panels some time soon after, I'm off to singapore for a month in a coulpe of weeks so I'm hoping I can get the majority of the work done before then, more annoyingly the whole car will need a respray, the paint from the last spray job is peeling off around most of the masking tape lines. Ughhhh I have my work cut out. People, take it from me don't buy a 25+ year old nissan, I have 2 of them so I have welded up a fair bit over the years. This was adverstised as "RUST FREE", or just that you can't see the rust as weve done a wibblepoo job of repairing it and covering it up. |
| |
Last Edit: Jun 2, 2022 11:18:47 GMT by roarz
|
|
ToolsnTrack
Posted a lot
   Homebrew Raconteur
Posts: 4,128
Club RR Member Number: 134
|
1994 Nissan Skyline R33 GTSTToolsnTrack
@overdrive
Club Retro Rides Member 134
|
|
|
|
Funny, we just started a very similar journey, although this one has far more issues than yours
Fully agree with you on the scene tax, the costs for any replacement on our 33 is eye watering. Looks like you are building a good strong unit though. The rust is a gutter and I'm sure ours will have the same issues hiding, but if nothing else the fixing it will reap benefits as far as investment goes.
Stick with it, it will be worth the effort!
|
| |
|
|
|
|
|
|
|
|
didnt have the audacity to like that last update. thoroughly depressing
|
| |
|
|
jmsheahan
Club Retro Rides Member
Posts: 689
Club RR Member Number: 121
|
1994 Nissan Skyline R33 GTSTjmsheahan
@jmsheahan
Club Retro Rides Member 121
|
|
|
|
Gah! Never nice doing the journey of rust discovery. As you've said, best to find it and do a proper job though which it sounds like you're bang on.
Hang in there and look forward to seeing the progress!
|
| |
|
|
ChrisT
Club Retro Rides Member
Posts: 1,670
Club RR Member Number: 225
|
1994 Nissan Skyline R33 GTSTChrisT
@christ
Club Retro Rides Member 225
|
|
|
|
That's shocking but not at all surprising, these Nissans do like to rust.
Good luck with the repairs, sounds like you've got the right idea.
|
| |
|
|
|
|
|
Jun 10, 2022 13:38:20 GMT
|
|
It's the best part of 30 years old, virtually every car of this age has rust issues, looks a bit frightening but I've seen much worse, It won't take that much time to sort the welding out once you get stuck in, the body prep will probably be a bigger job but you don't need to do that to enjoy it.
|
| |
|
|
|
|
|
Jun 10, 2022 21:01:54 GMT
|
|
Oof. That's all escalated rather quickly. Lucky car has found a good home though, and you'll get it sorted. Lovely machine, and fine standard of work so far!
|
| |
1968 Mini MkII, 1968 VW T1, 1967 VW T1, 1974 VW T1, 1974 VW T1 1303, 1975 Mini 1000 auto, 1979 Chevette, 1981 Cortina, 1978 Mini 1000 1981 Mini City, 1981 Mini van, 1974 Mini Clubman, 1982 Metro City, 1987 Escort, 1989 Lancia Y10, 1989 Cavalier, 1990 Sierra, 1990 Renault 19, 1993 Nova, 1990 Citroen BX, 1994 Ford Scorpio, 1990 Renault Clio, 2004 Citroen C3, 2006 Citroen C2, 2004 Citroen C4, 2013 Citroen DS5. 2017 DS3 130 Plenty of other scrappers!
|
|
roarz
Part of things
 
Posts: 60
|
|
|
|
So, been a day or two since i last gave an update, I had to go to Singapore for work for a couple weeks which was a waste of time as I caught that dasterdly Covid thing whilst I was there, anyway, back to cars. I started cutting up the drivers side and quickly found out it's pretty bad, inners sills rusted away and parted from the rest of the sill, most of the lip where the outer sill is welded to has rotted away, the subframe mount area and part of the chassis leg corroded away, arch is just foobard, i have a feeling I may have to cut out part of the floor where it meets the sill, I nearly cried. So with the drivers side feeling like a bad dream I jumped onto the passenger side hoping it was better, and it was. After cutting the sill panel off all the inner sill was in good shape, light surfce corrosion in places so I wire wheeled it off, added some rust converter, primed and painted it slapped some wax oil on for good measure. 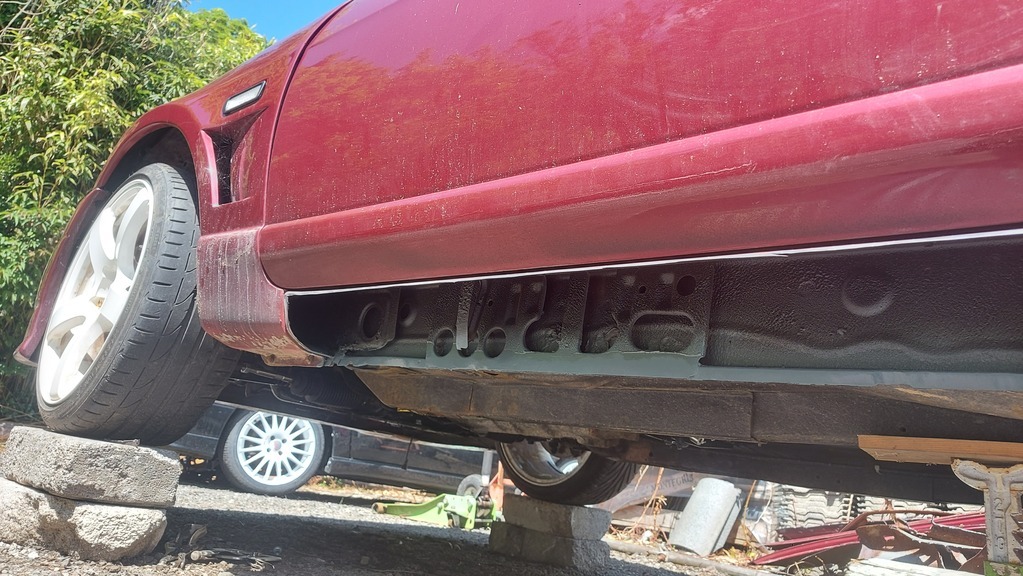 Then I zapped in the new sill panels (which inadverantly set some of the wax oil on fire in the process). 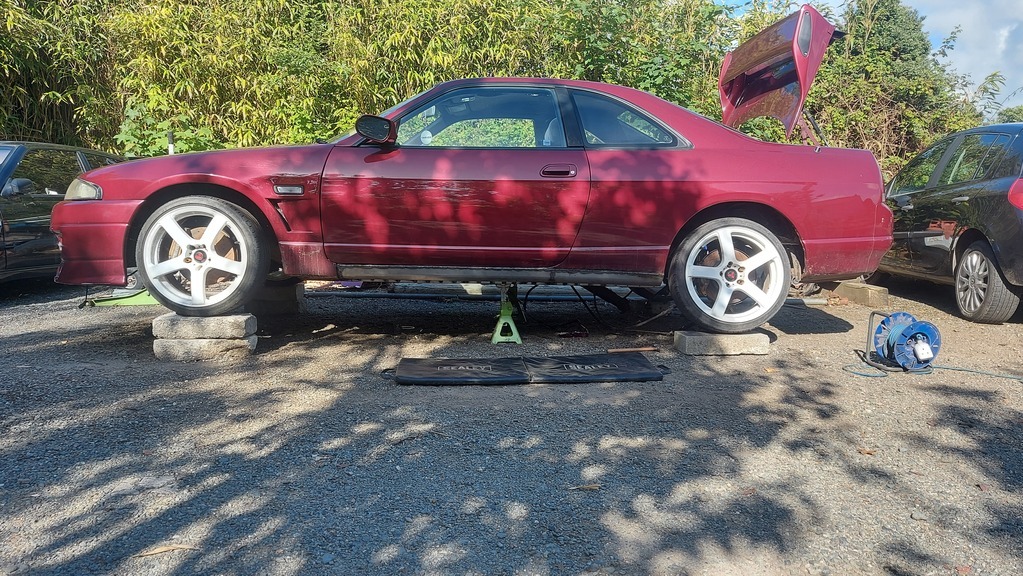 The front lower section of the rear arch also needed a little bit of work which also needed the mounting area of the subframe brace to be cut out and rebuilt from scratch. 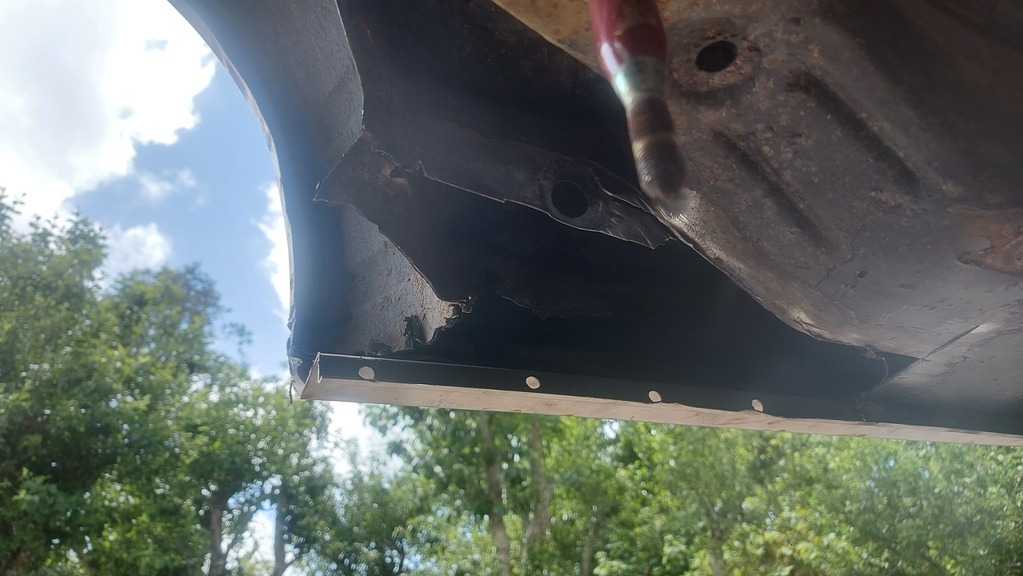 With that all sorted I started on the rear arch, this was just a simple cut the roten arch lip out and weld it shut as I was putting over fenders on. 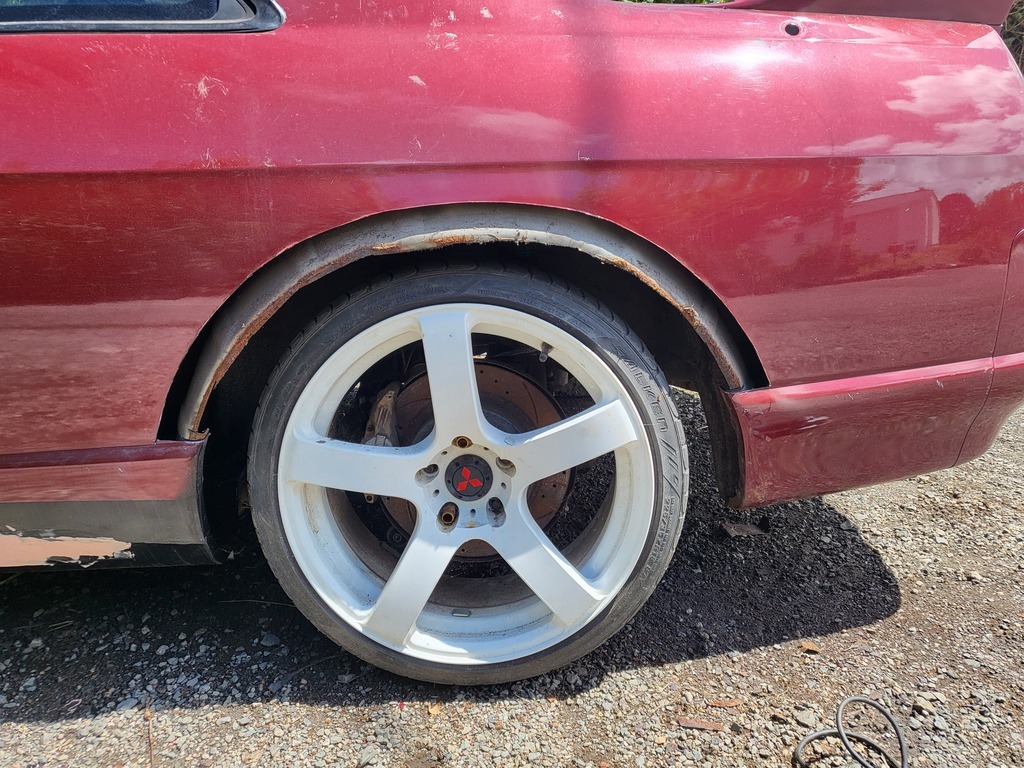 When I started to clean up the paint on the inner arch I soon found it was pretty rotten so I needed to cut a good 4 inch's out of it and weld in a new section. 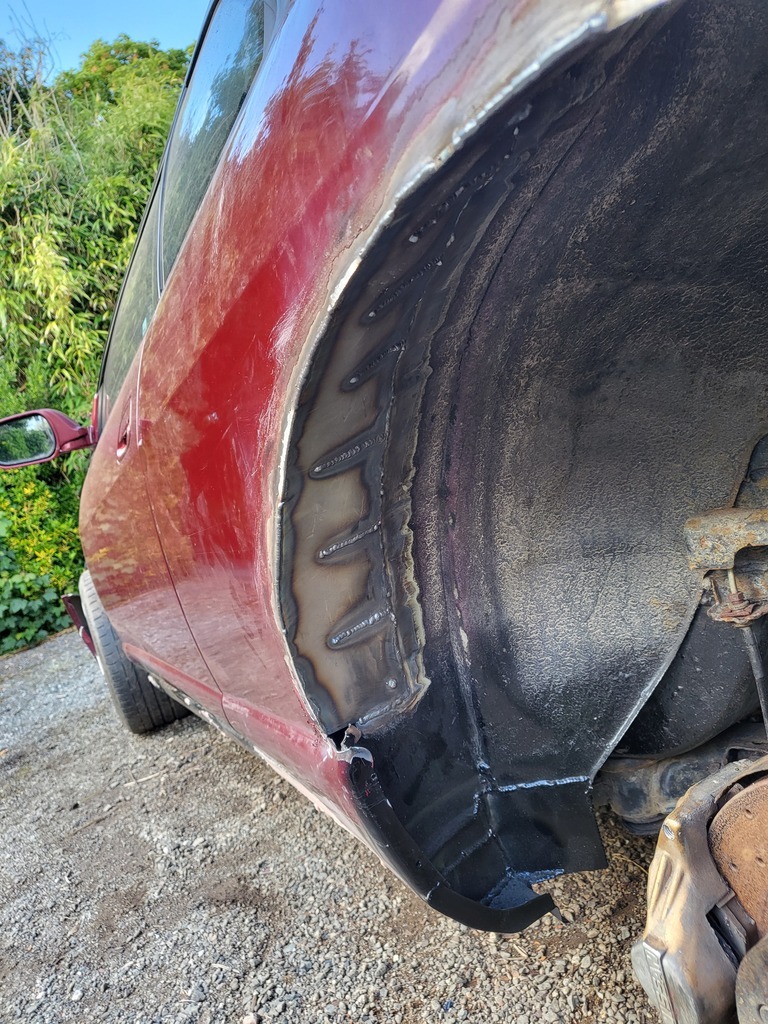 The spot welds on the two sections of steel making up the arch had parted, it was not possible to get in there and reweld it without cutting a massive hole in the quarter panel so I cleaned up the joining edges and gave it a few good spot welds, hopefully this holds. Bit hard to see in the photo but you could see they had split. 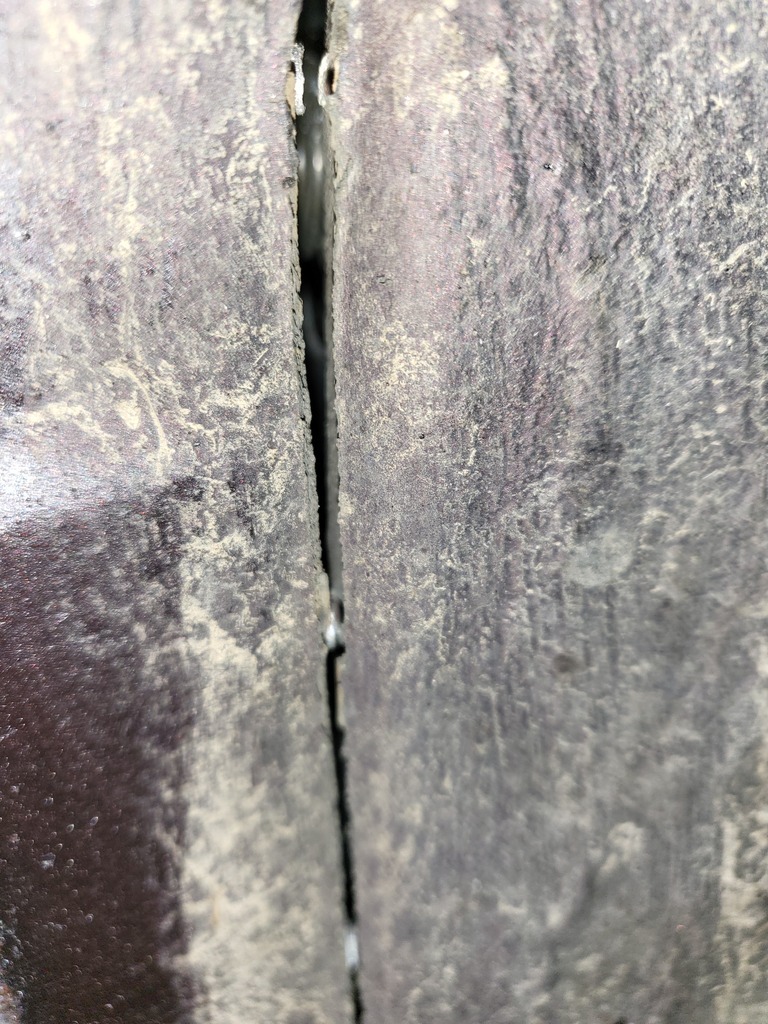 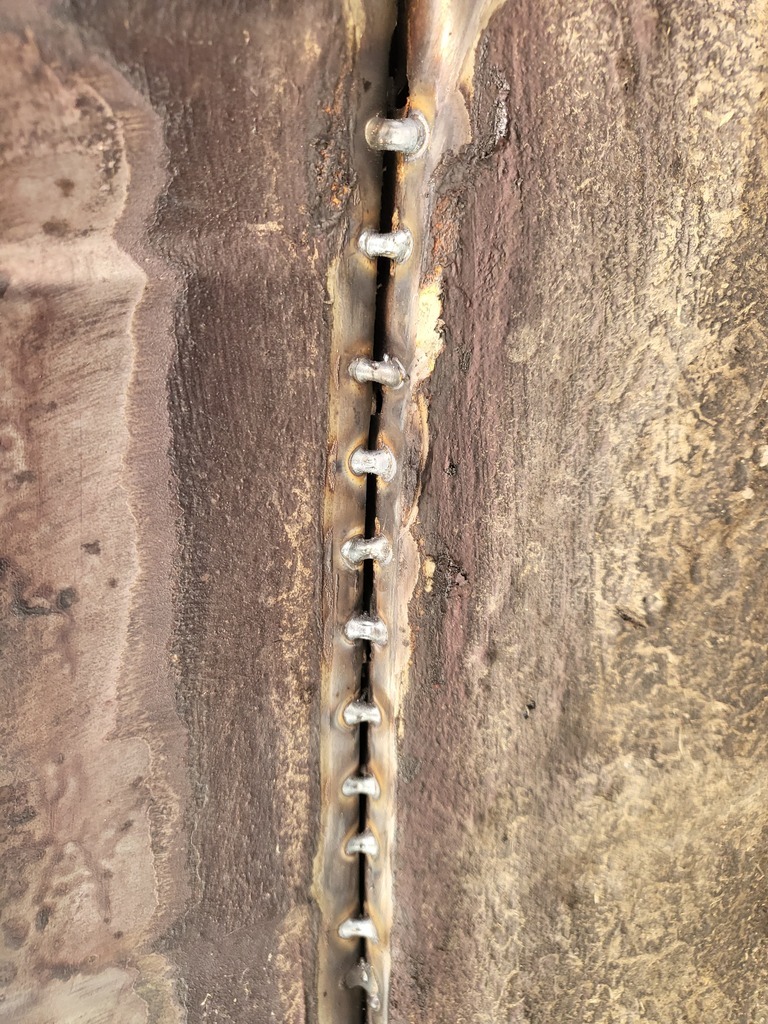 Moving to the top of the rear quarter panel we find some bubbles of rust, a quick poke with a screwdriver and wham, two holes in need of repair, so it was cut out, welded up, filled in, sanded and painted before the fender fitment, it didn't need to be perfect, it was going to be covered up once the over fender was install. 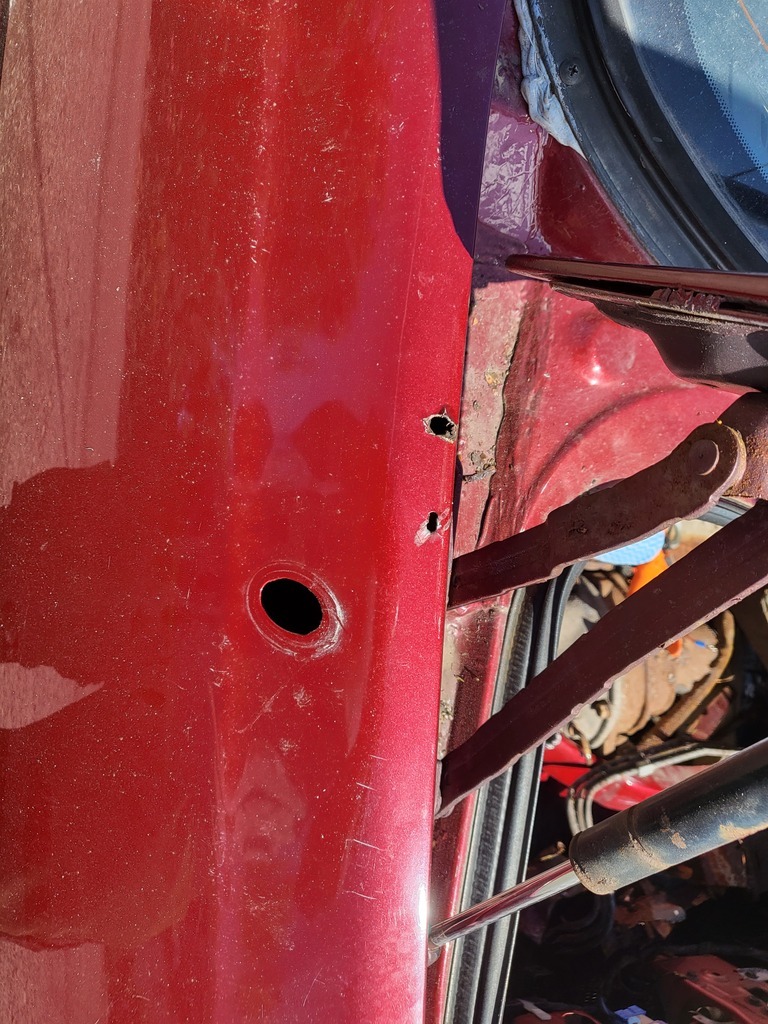 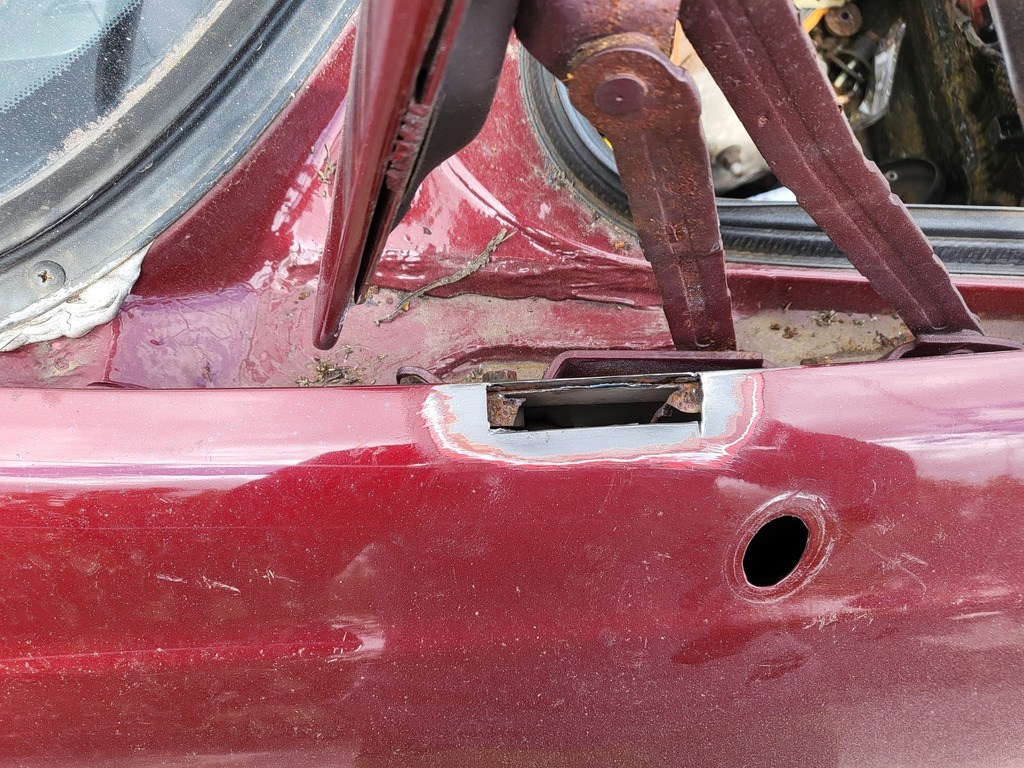 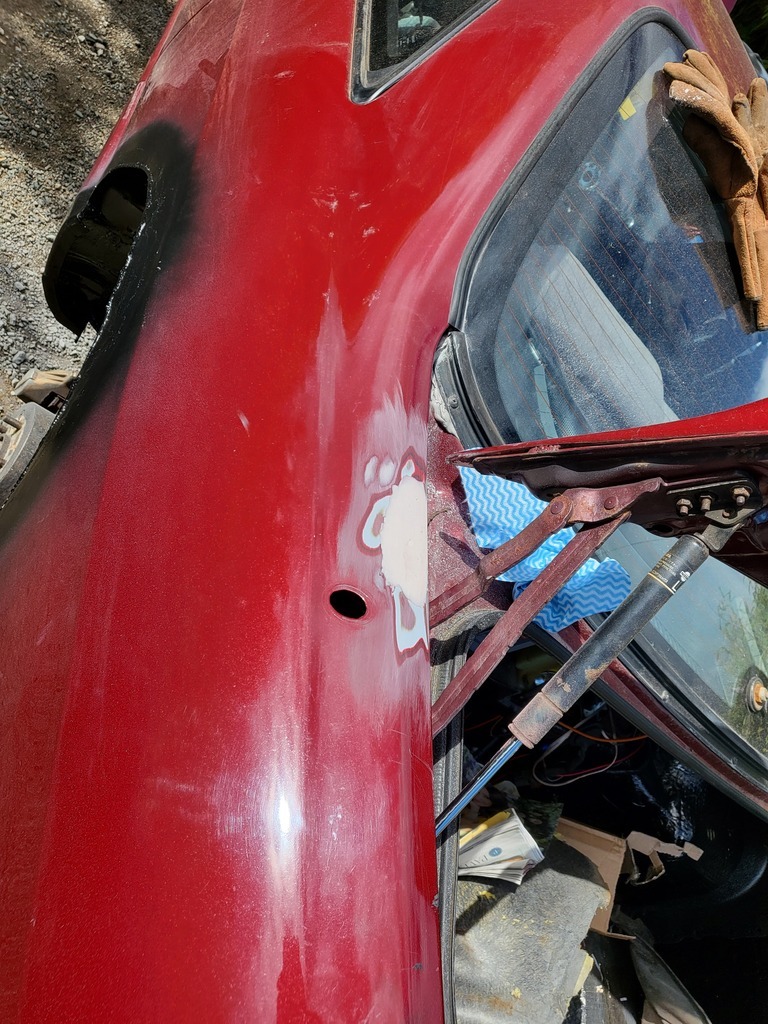 Now we move down to the front, with the wing removed we find lots of surface corrosion, fortunately it was just surface corrosion, so with it being wire wheeled off, rust treated, primed, painted and then a good coat of raptor liner added we can call that job sorted. 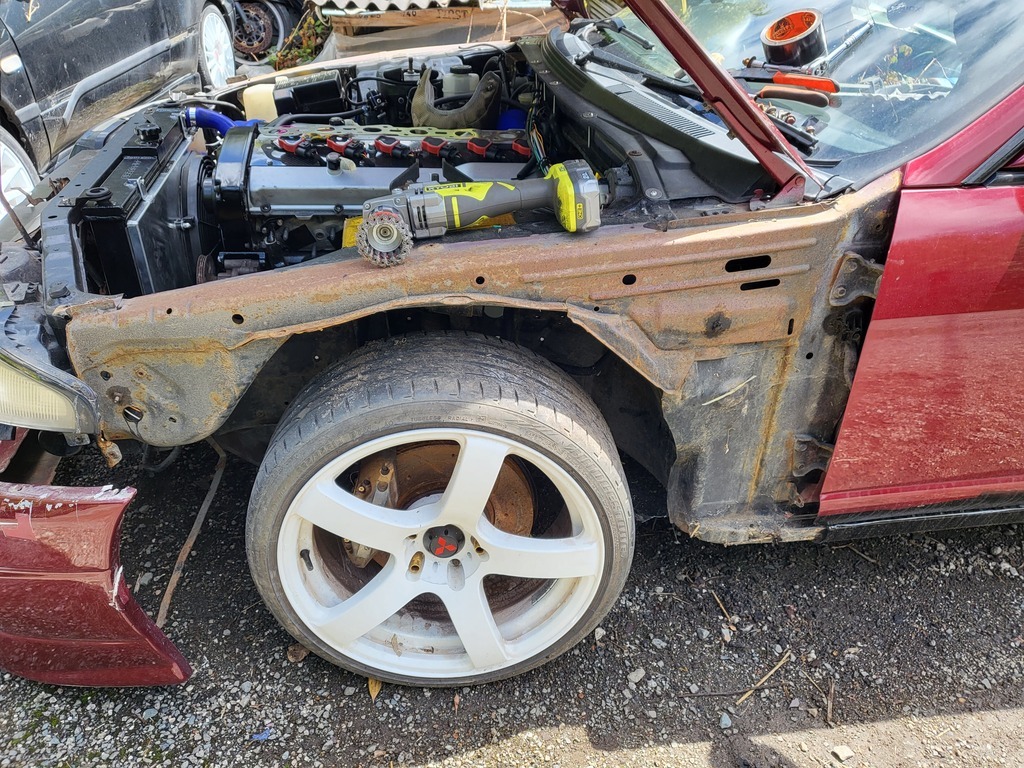 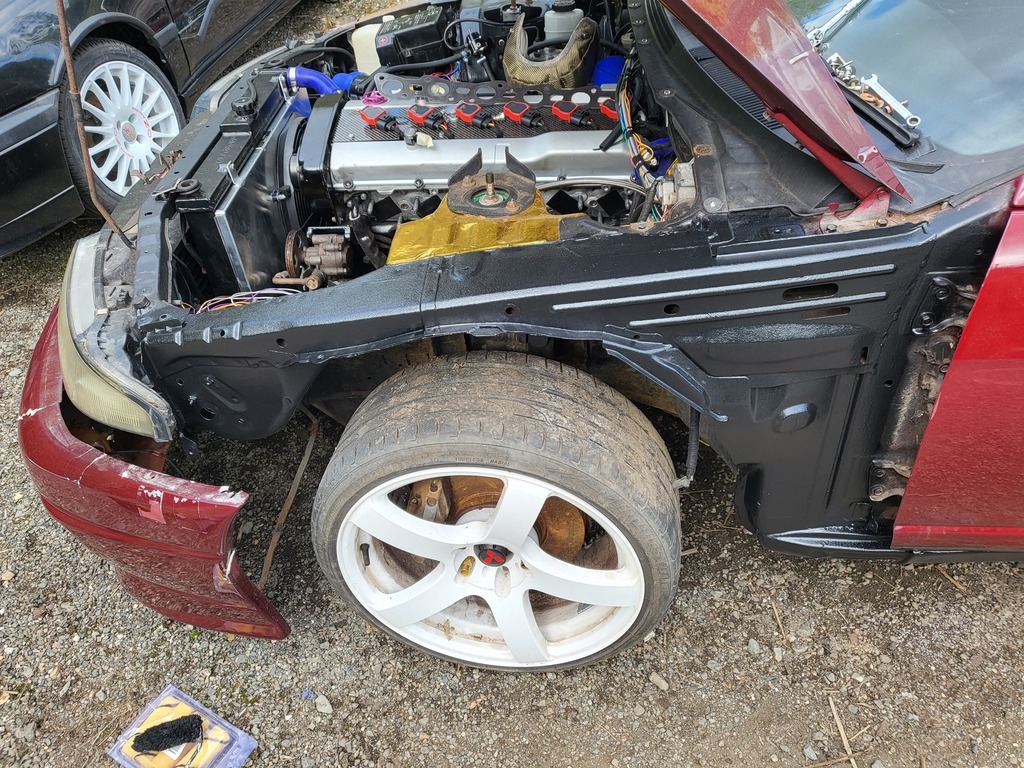 With the above treating and painting method I did the same to the new sills and steel fitted to the rear arch, the gap between the two sections of arch that had parted was too big to cover up with paint so a good dollop of seam sealer was added to close that up. The paint on the door was damaged during welding and angle grinder use so that explains the black paint added to the lwer section of the door. 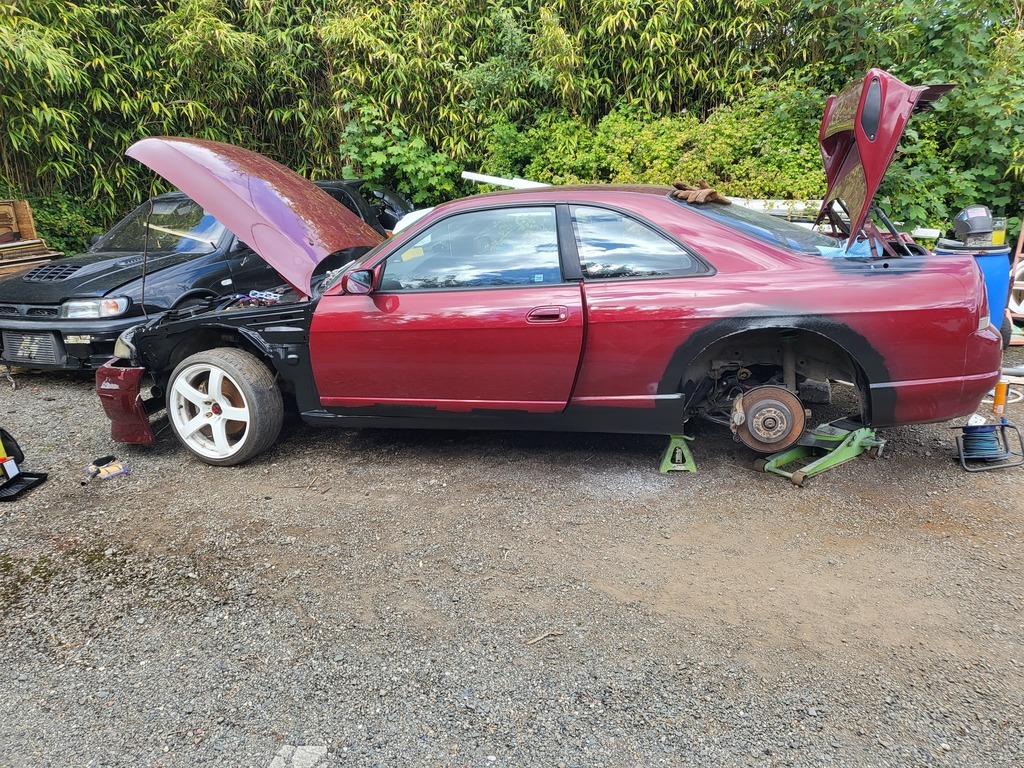 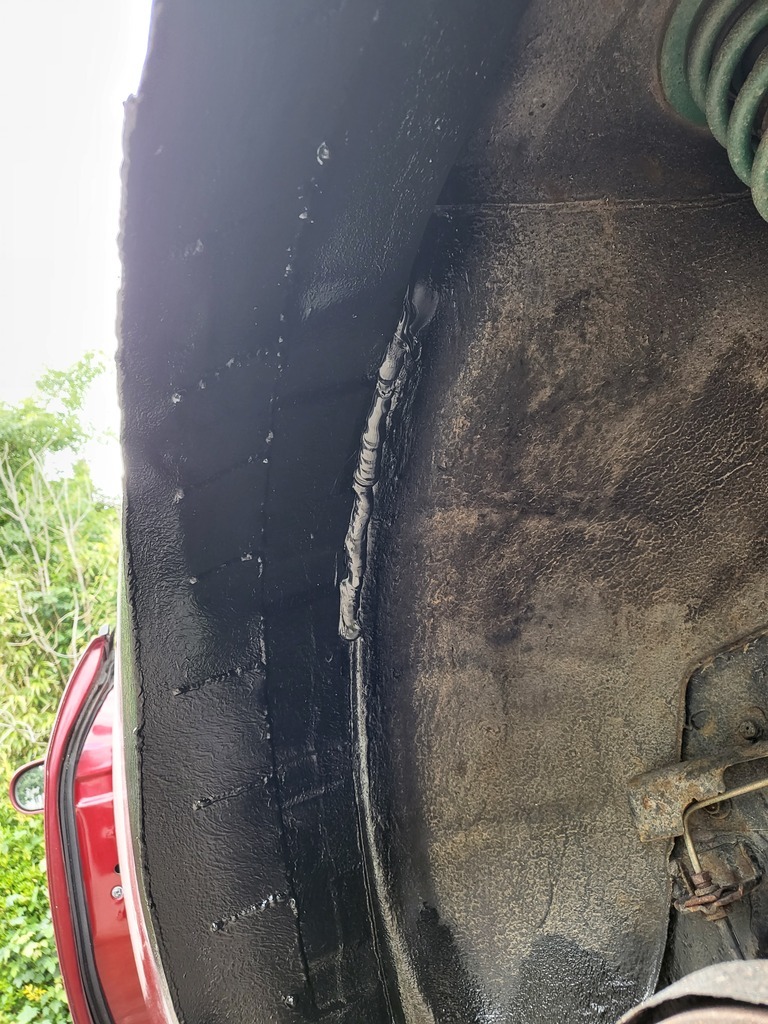 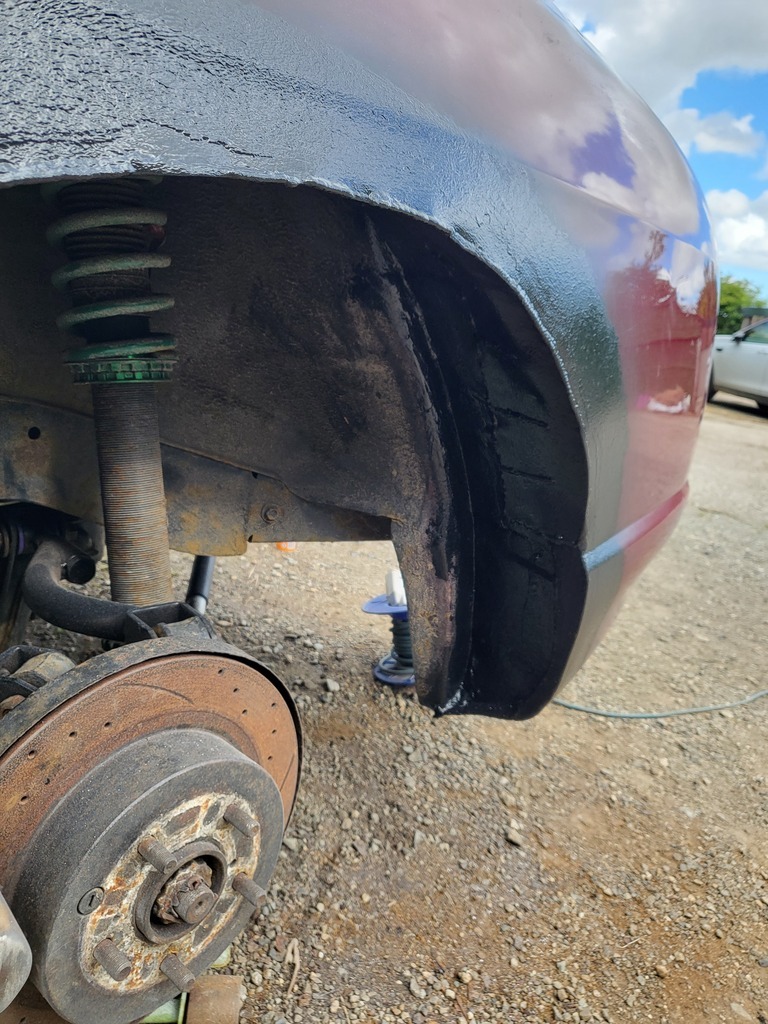 After some minor fettling with the new panels I soon had them fitted and it looking like a car again. 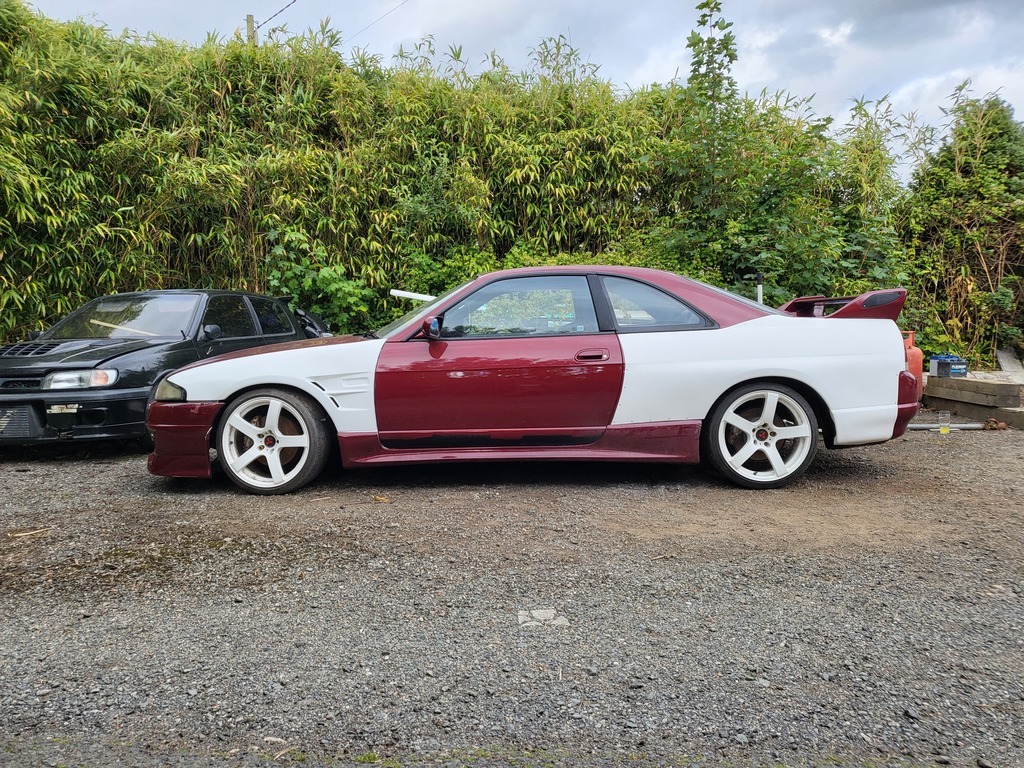 With the passenger side done I have to now sort out the complete mess of the drivers side, I may have to go buy another 1/4 sheet of steel as theres a lot to replace. Now, it didn't all go so smoothly, before I left for singapore I had to take it off the axle stands and blocks to move it out the way to make it look a little better/neater to my landlord in my absence, when I was doing the work on the subframe mounts I needed to take the subframe and fuel tank out from the car, I left the tank out but needed to put the subframe back in, after fitting it all I jacked it up and removed the axle stands from the rear of the car, what I had forgotten was that I had removed the clamp holding the hanbreake cables to the chassis in order to remove the subframe, so when the rear wheels landed on the deck it started rolling backwards, remember the front wheels are sat on blocks still, I managed to catch it before it rolled off the blocks but with the ground being made of gravel and the car park being on a slight incline I found myself soon sliding backwards on the gravel and CRUNCH, it rolled off the blocks and the two stacked blocks were way to high so the bumper ate it, I'm not a massive fan of the front bumper and do plan to find and fit an original bumper but still pi**ed off that it got smashed up, simple fix for the time being, ziptie drift stitch it back together. I think it would be a good idea to clean off the chassis legs and floor and give that all a good rust treatment and re-painting. |
| |
|
|
roarz
Part of things
 
Posts: 60
|
|
|
|
This was the mount for the subframe brace running in the chassis leg, this is the view from the inside of it!!! 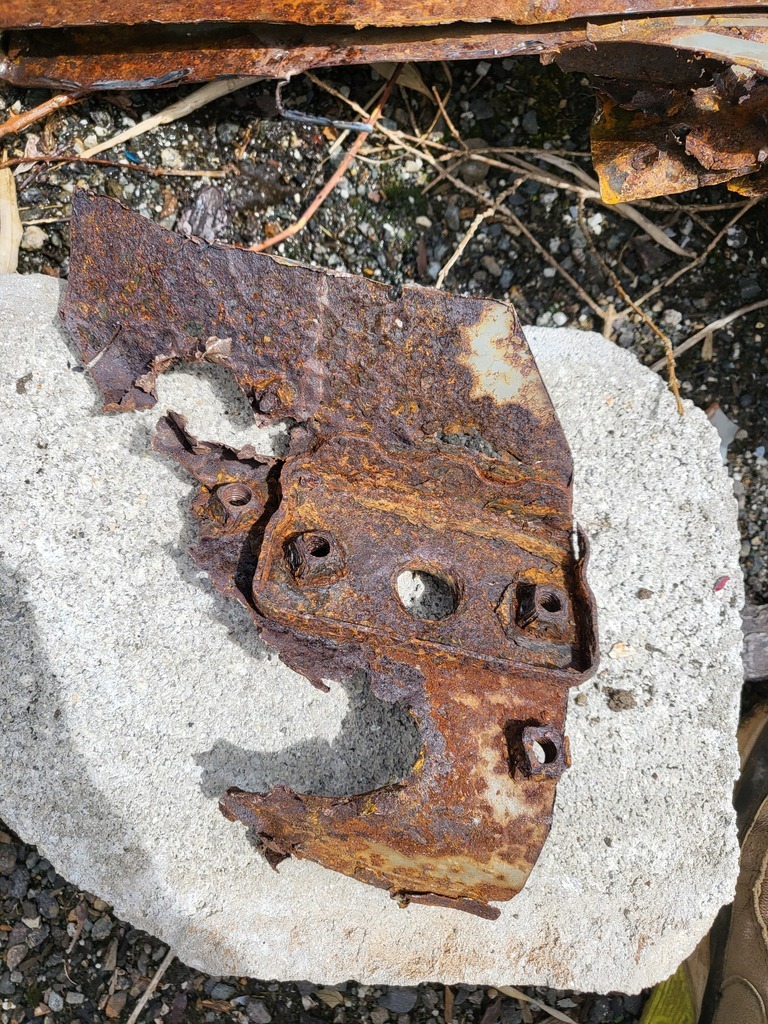 And the outside. 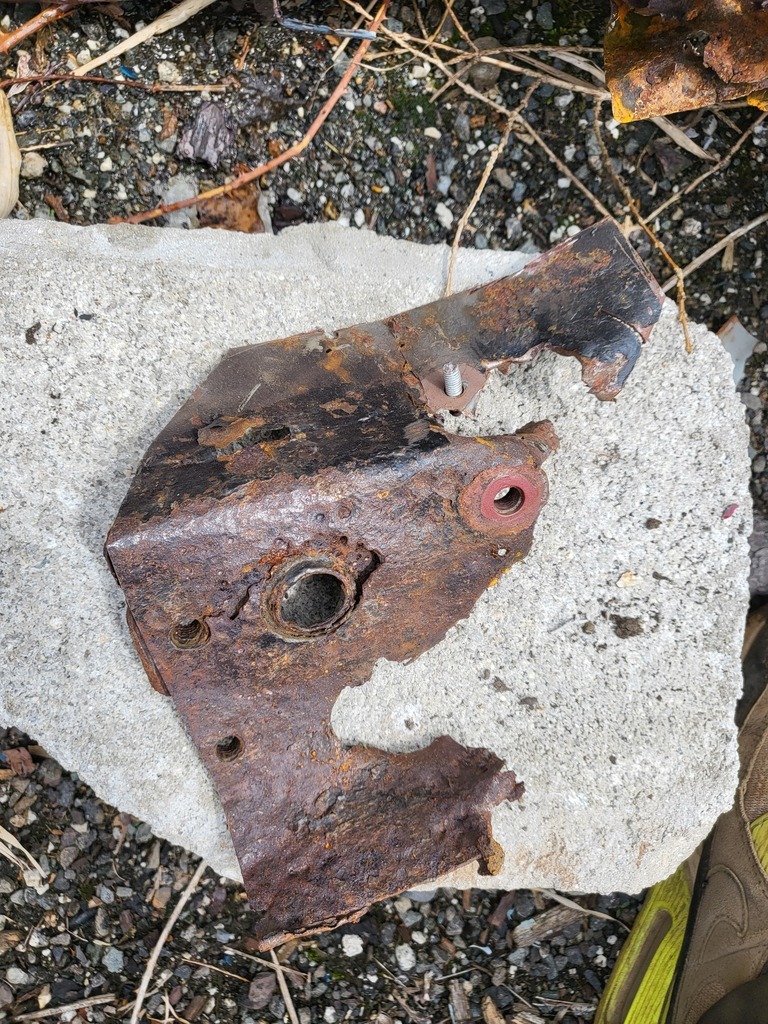 And where it came from. 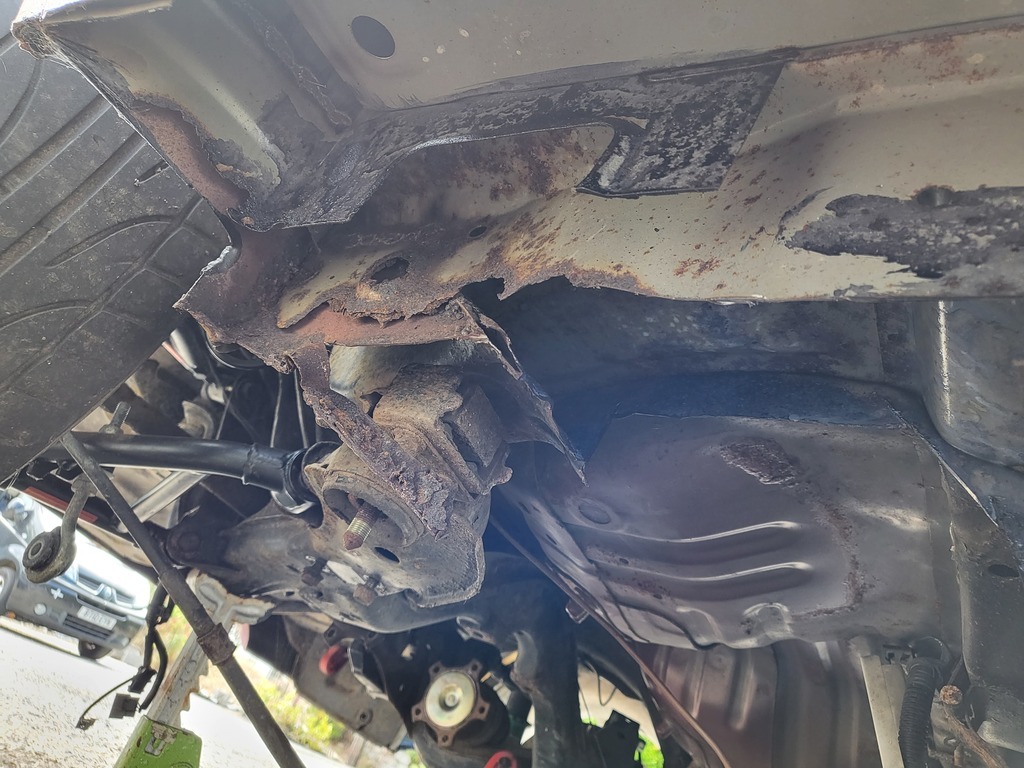 I have found the damage inside the sill to be a lot worse than I originally thought, progress will hault until Monday as I need to wait until my local steel supplier is open and get some thicker steel to replace the rust, probably gonna need a 9" grinder too, might struggle with my 4 1/2", might be worth getting another roll of welding wire #facepalm 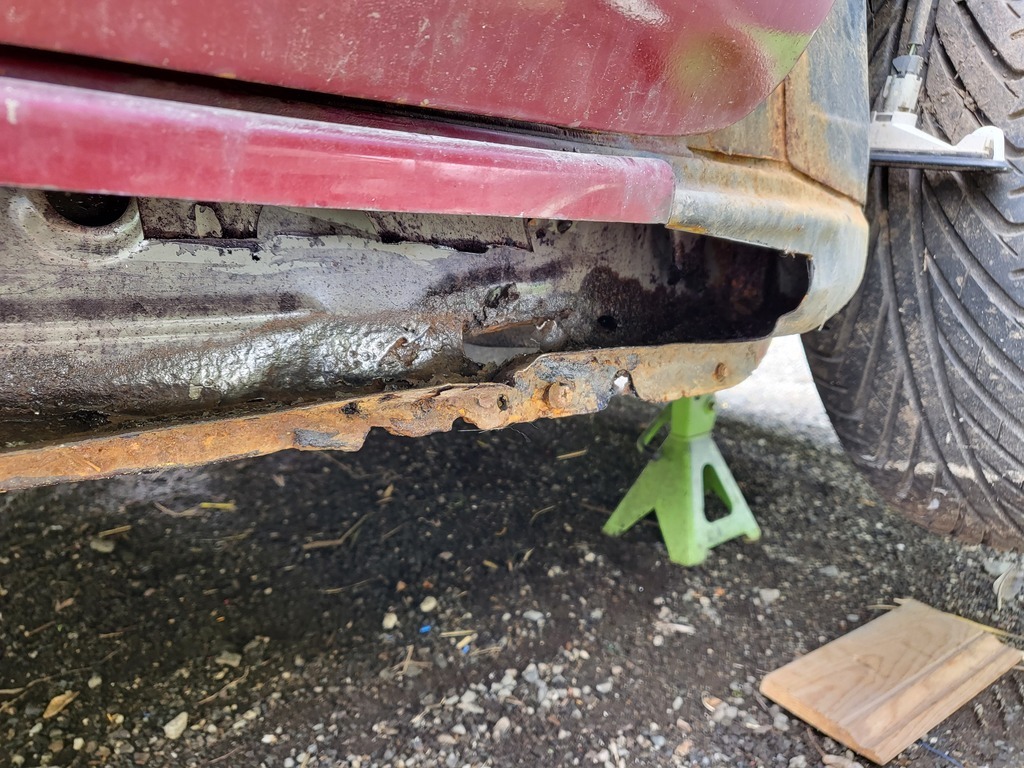 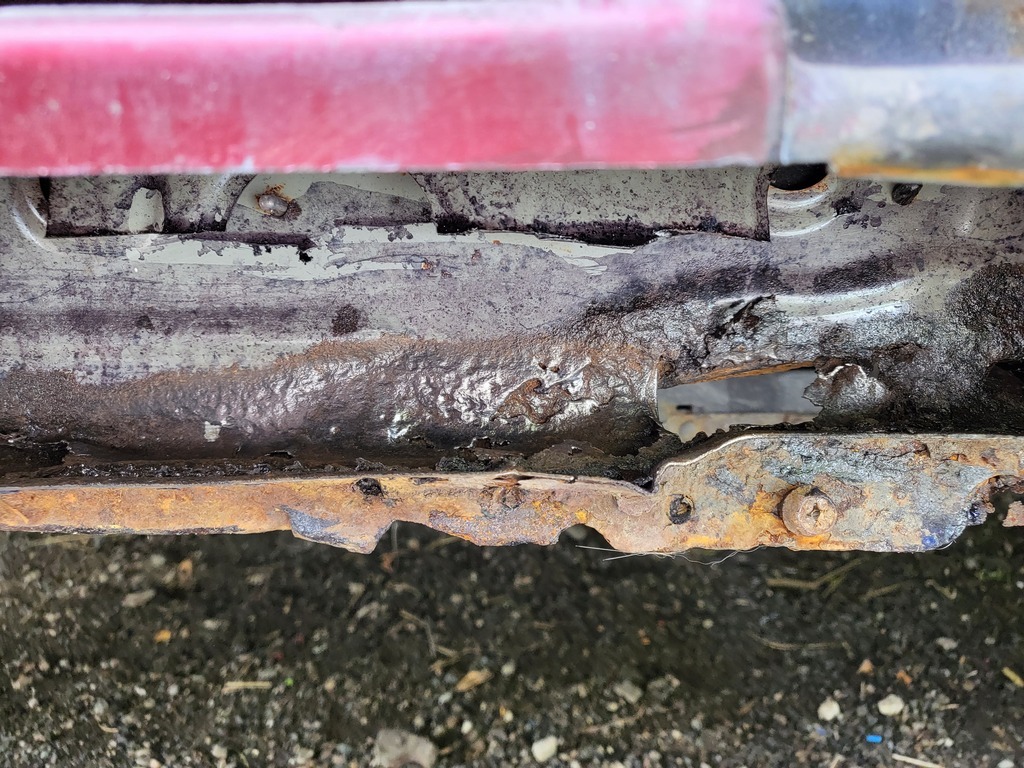 |
| |
|
|
|
|


