gazzam
Part of things
 
Posts: 741 
|
|
Feb 22, 2022 10:42:53 GMT
|
Thanks for the kind words lads. Phil, all the connections are like that just till I’m happy with the circuits. Peter, agree about the bullet connections. Can recommend doing your own plating. Very satisfying. Jimi, I’m afraid those coloured crimp connectors are a personal hate of mine and there will be none of them on any of my cars. Seriously though, I’d argue that a properly tinned wire would be just as good. I have been working on the wiring, honest. Been held up by the harness having a different number on one particular wire ( “ to stop confusion “ according to the supplier ) and all of the four wires for the horn relay being disguised by having the wrong connectors. Found these problems on Friday pm and wasn’t able to talk to the supplier till Tuesday, so I moved onto other tasks. The exhaust was one thing that could be pretty much finished, now that I had some mufflers. First one in place. 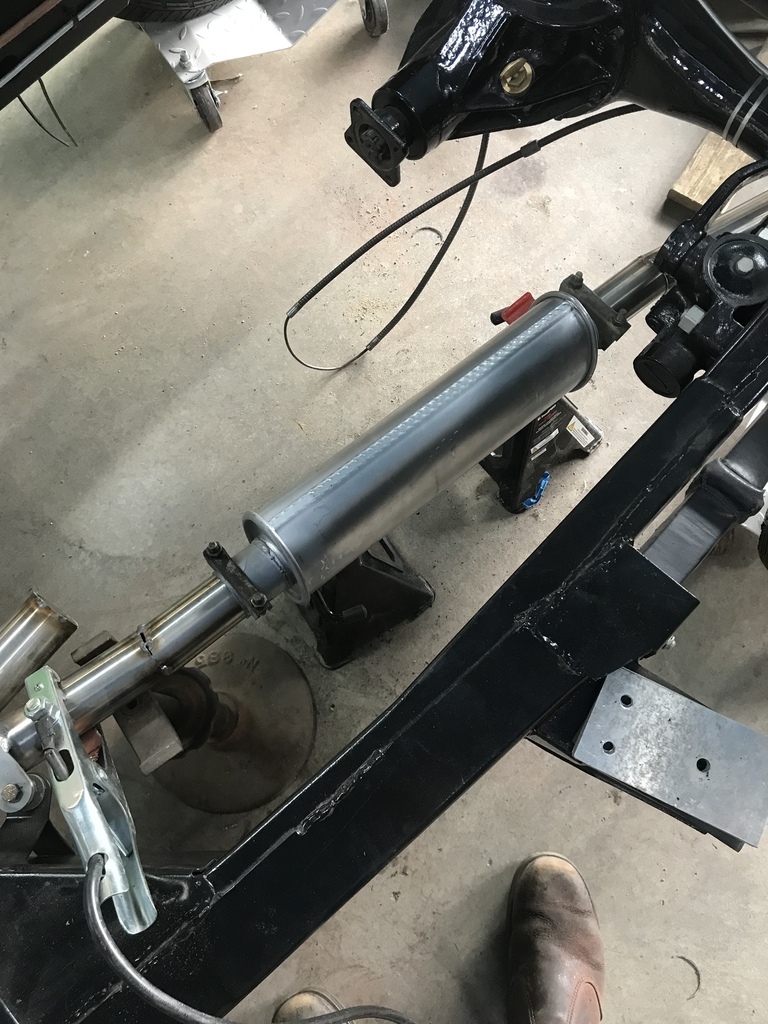 Then I basically set up the tailpipes and filled in the middle bit. 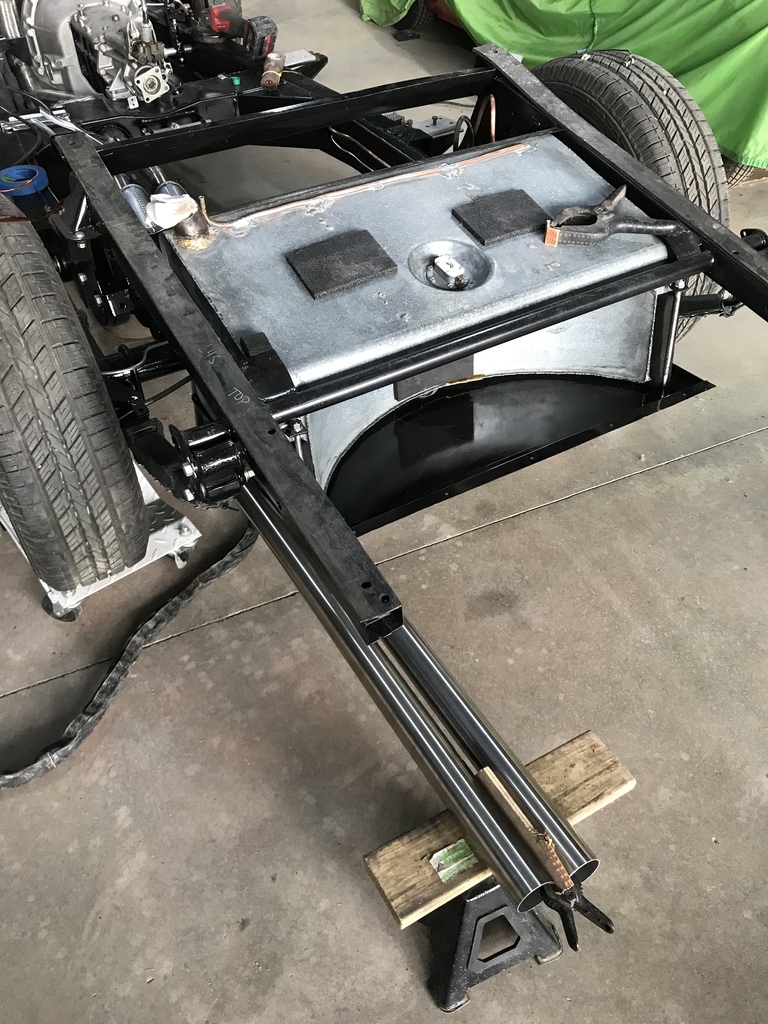 Much estimating of angles later ( but to be honest, it was easier than I was expecting ) and trimming and tacking, it had got to this. 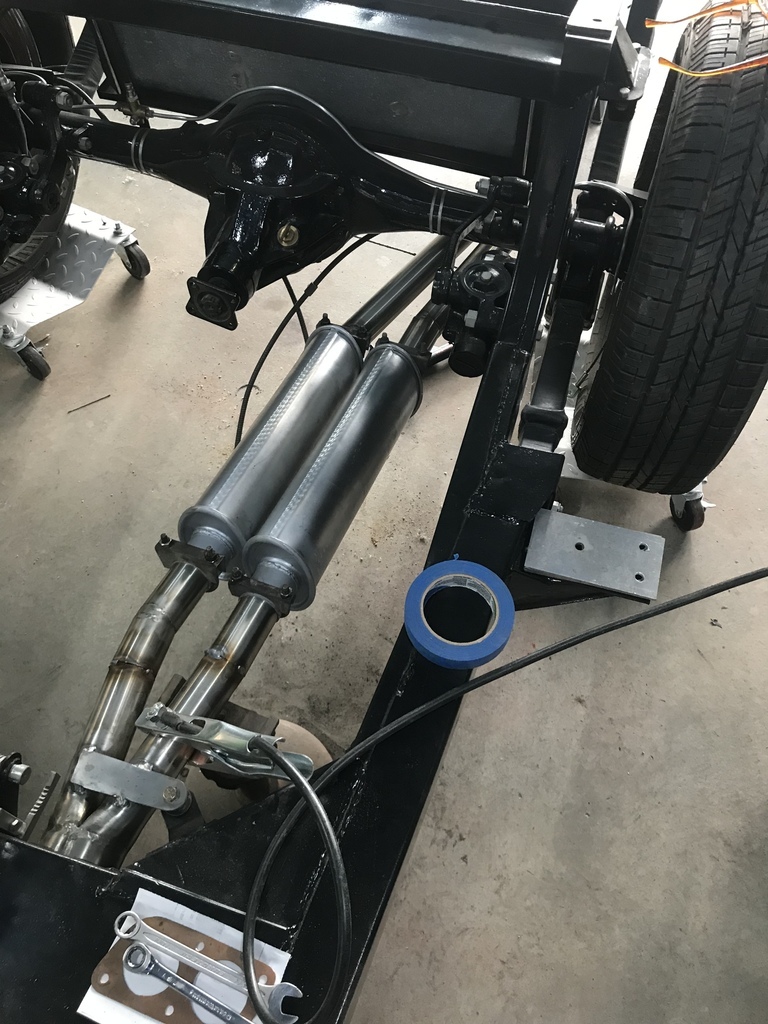 The clamps were from the old system, but of course there were only three the same because I needed four. So I had to make one of the folded bits. No big deal, then they were all zinc plated and voila. Hoping it’s not too loud, not a lot of room for any more mufflers. 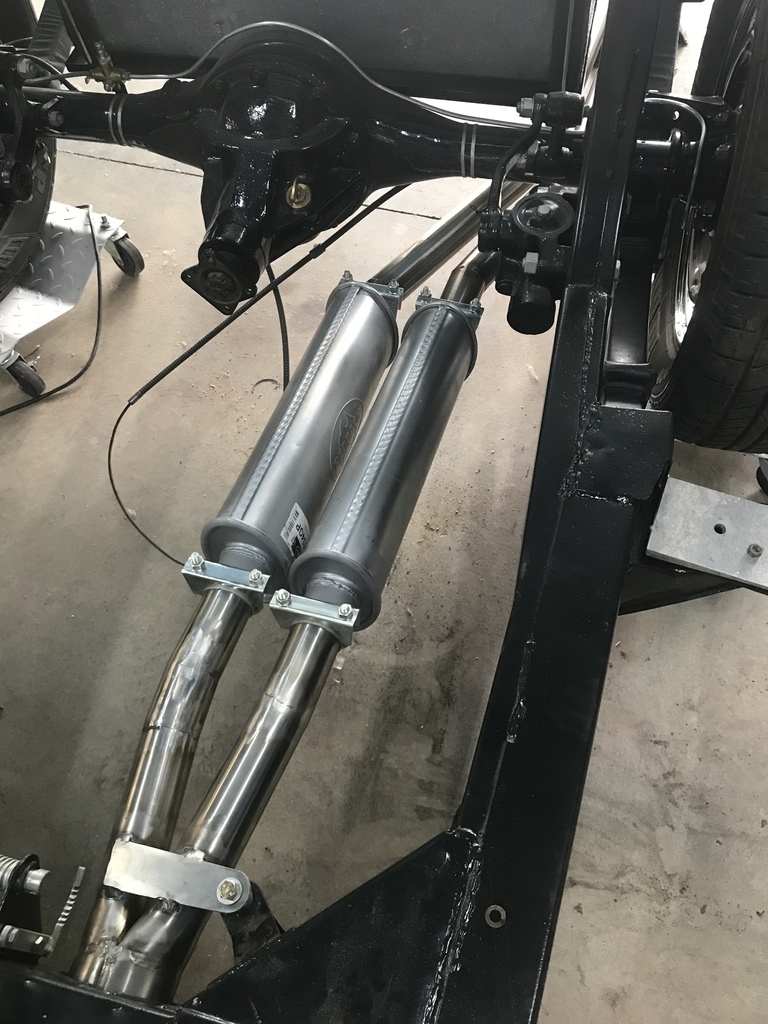 Also fitted a few of the smaller finished bits. For example the throttle pedal. 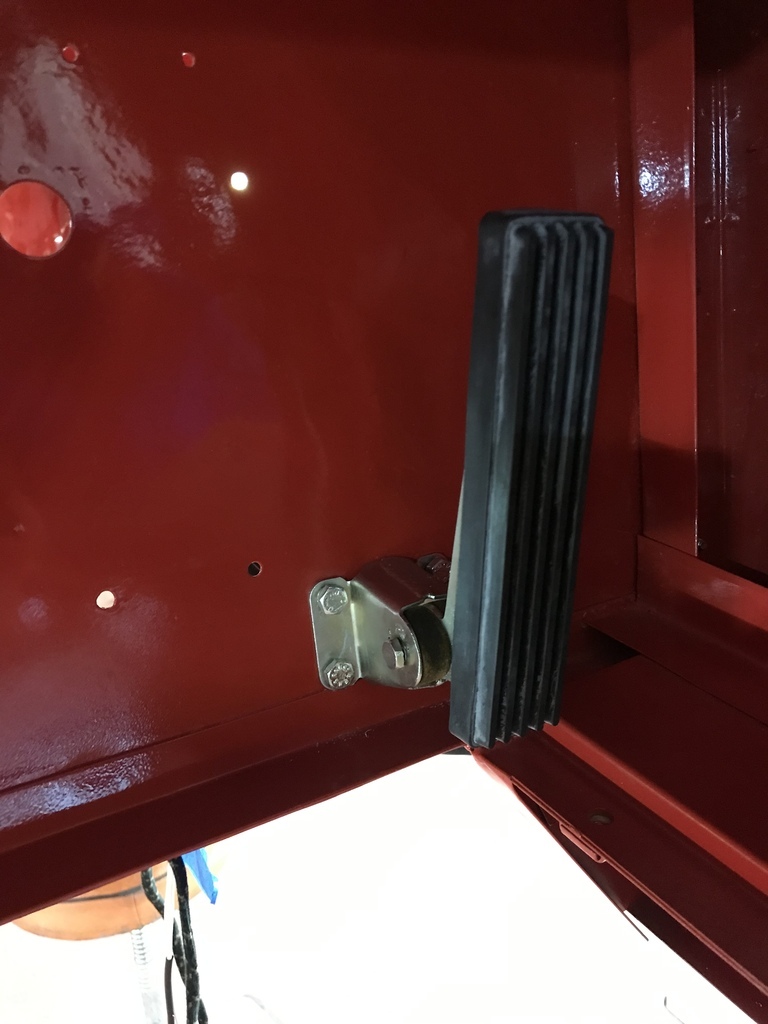 And put the rear brakes back together. 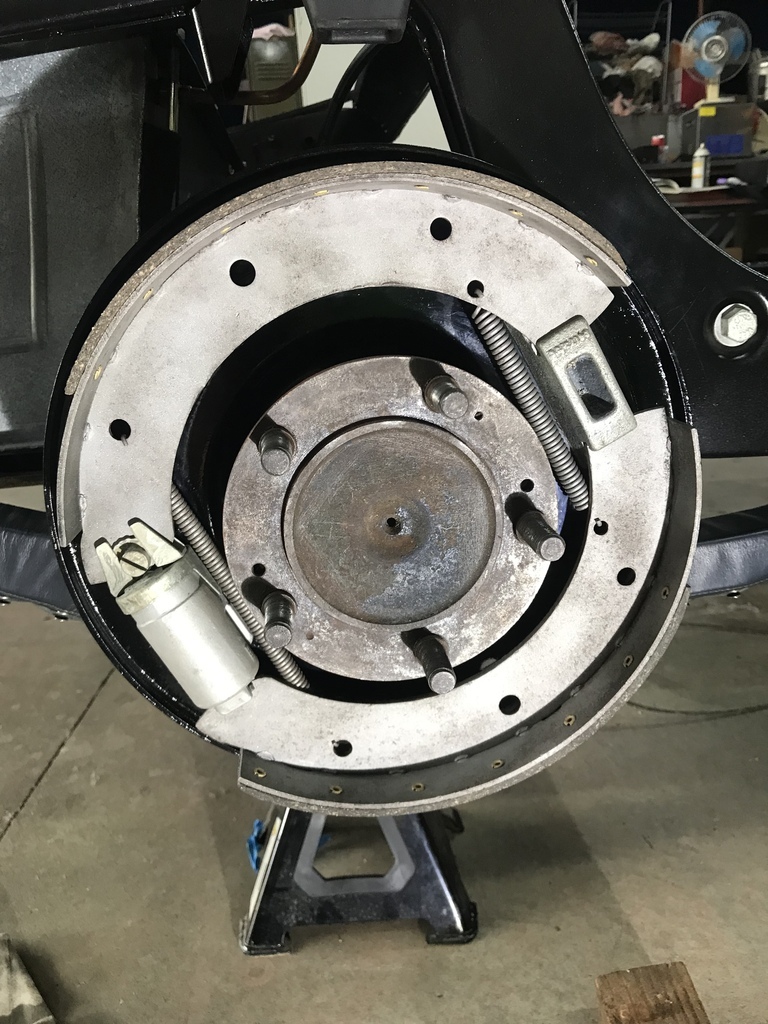 Getting very close to body-back-on time. That’s all for now. Comments etc etc. Thanks for looking. |
| |
|
|
|
|
|
|
|
Feb 22, 2022 13:07:31 GMT
|
|
Those pins that Jimi showed you work fine if you strip the plastic sleeves off, and then crimp with the square punch crimper. Heatshrink over the body and better than solder.
|
| |
|
|
glenanderson
Club Retro Rides Member
Posts: 4,357
Club RR Member Number: 64
|
1952 Jaguar XK120 restoration glenanderson
@glenanderson
Club Retro Rides Member 64
|
Feb 22, 2022 16:42:13 GMT
|
|
Whilst I agree totally with your contempt for the hateful red/blue/yellow crimps, solder is less than ideal in an automotive environment. The flux forms a powerful electrolyte when exposed to the damp, and the solder will wick up the strands of copper, away from the joint, and render what was a flexible multi-strand cable into a rigid single strand that’ll be prone to early failure from vibration. Far better to use either the plain screw terminal on the bare wires, the correct size bootlace ferrule, or a quality crimp.
|
| |
Last Edit: Feb 23, 2022 0:18:17 GMT by glenanderson: Grammar and idiocy.
My worst worry about dying is my wife selling my stuff for what I told her it cost...
|
|
|
|
|
Feb 22, 2022 19:06:01 GMT
|
|
I've always found both crimps and solder can fatigue if the outer covering is not supported, in both cases sleeving the joint with shrink tube and/or properly supporting the cables so they don't vibrate or pull has always been robust for me.
|
| |
|
|
gazzam
Part of things
 
Posts: 741 
|
|
Feb 25, 2022 10:27:26 GMT
|
OK OK OK, I won’t use solder. I’ll just follow what Jaguar (and pretty much everyone else ) did and just put bare wires into the regulator and fuse box. Thanks for saving me some time! As I said last time, it’s getting very close to body-back-on time. So I’ve been doing all the little things that need doing, but will be easier while there is good access. The brakes are all reassembled, master cylinder filled with fluid. Not bled, as the reservoir is attached to the body and is only part way though being sorted. Finally remembered to plate this oil return (or feed) pipe and it’s 3 banjo bolts. 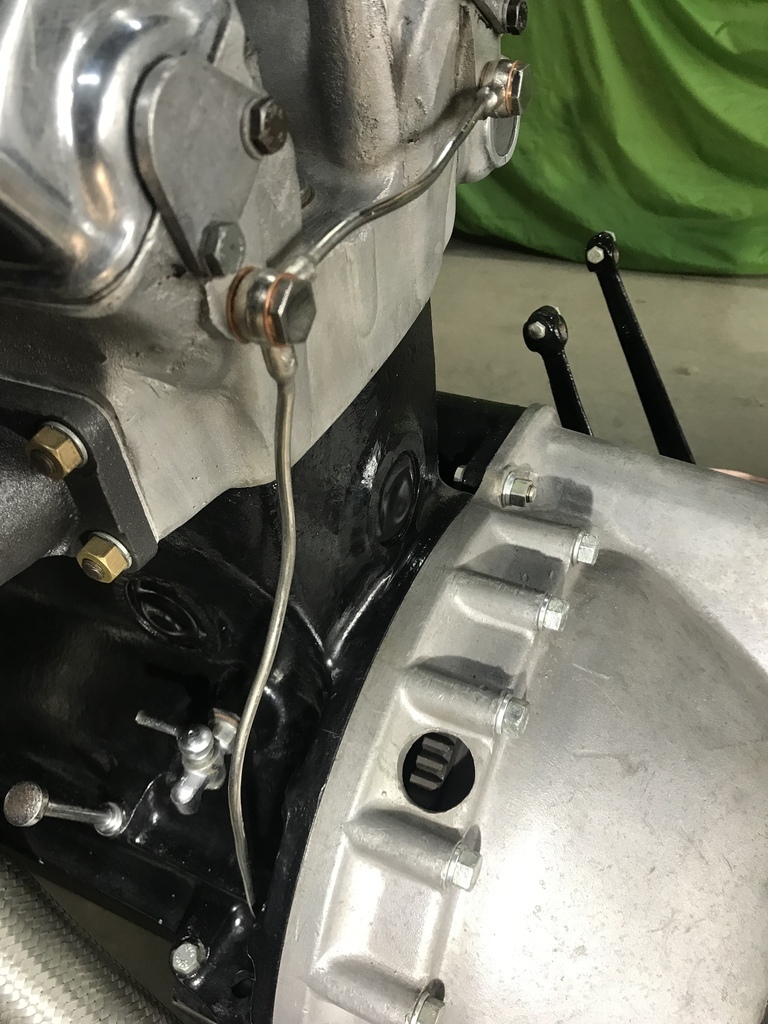 Made the plug leads, one end at least, and put them on. Waiting on the acorns (as I’m told they’re called) that screw into the distributor cap. 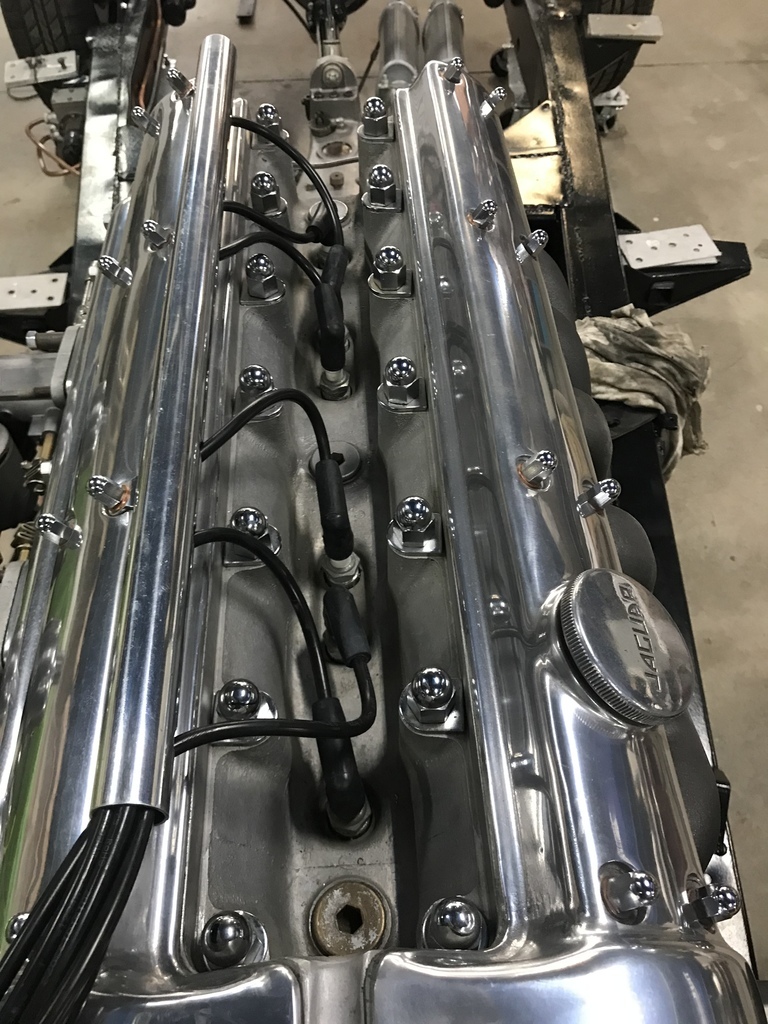 Mounted the carbs in place so I could finish the fuel line. Picture a bit of copper pipe, 3/8, as I don’t have a photo. I do have this photo of the vacuum line to the distributor. Was going to put a new piece of copper tube between the ends but it straightened out (and rebent) ok. This is before: 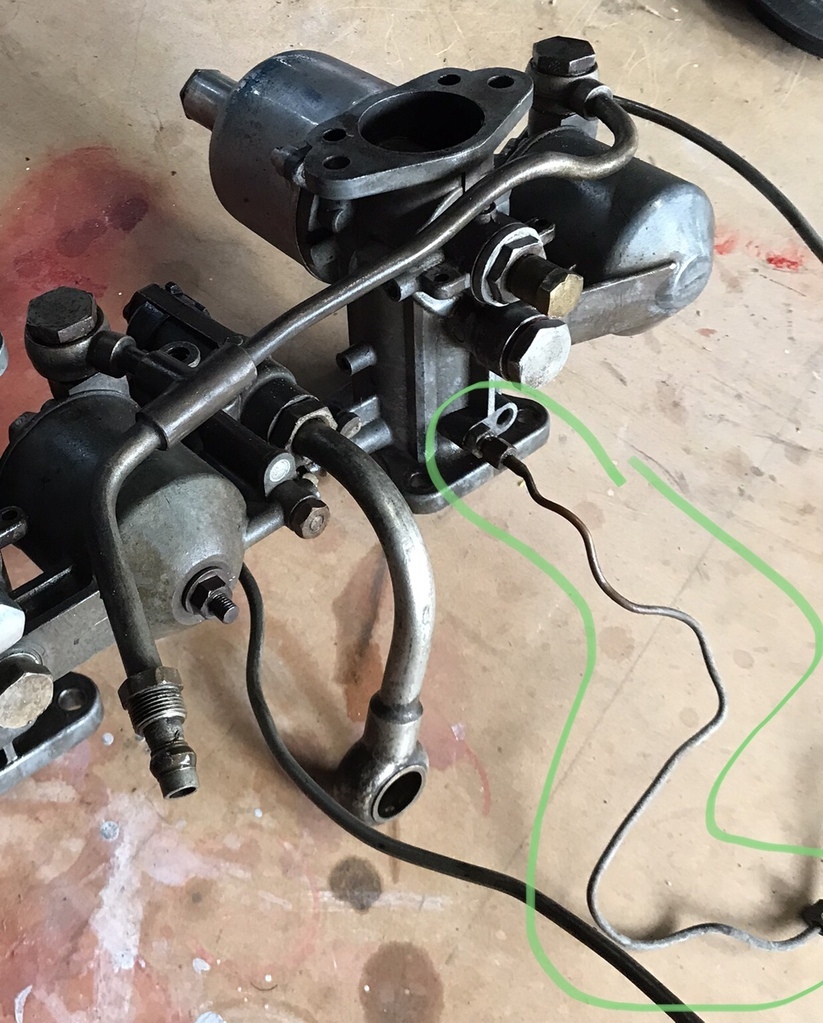 And now, after 10 minutes with a pair of pliers. Easier than putting the old ends onto new pipe. 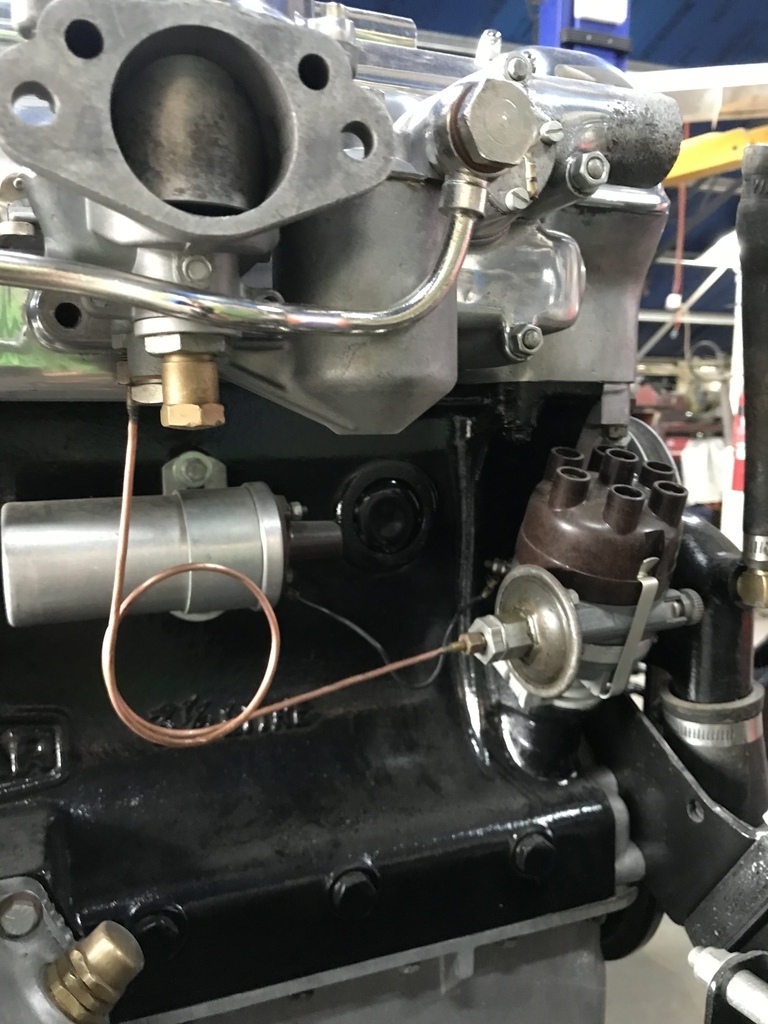 Have a mate coming tomorrow to put the body back on the chassis. Blimmen heck,scary, I hope I’ve thought of everything… Must try to take some photos, but I’ll probably be in too much of a faff. That’s all for now. Comments etc very welcome. |
| |
Last Edit: Feb 25, 2022 10:29:04 GMT by gazzam
|
|
|
|
|
Feb 25, 2022 10:33:47 GMT
|
|
Comments - well, I'd get a large container of my prefered beverage , a chair and sit down to soak up the view !
Fantastic project well done ...
|
| |
|
|
jamesd1972
Club Retro Rides Member
Posts: 2,921  Club RR Member Number: 40
|
1952 Jaguar XK120 restoration jamesd1972
@jamesd1972
Club Retro Rides Member 40
|
Feb 25, 2022 12:02:00 GMT
|
|
If you are really good you could set up a time lapse on your phone so we can see it happen..
Fantastic work, thank you for sharing.
James
|
| |
|
|
gazzam
Part of things
 
Posts: 741 
|
|
|
|
|
Thanks Westbay.
James, I took your suggestion, but have no idea how to upload it. It’s probably not really worth the trouble,
but seeing how it does exist…
|
| |
|
|
gazzam
Part of things
 
Posts: 741 
|
|
Feb 27, 2022 18:56:02 GMT
|
Body is reunited. It went very smoothly thanks to my mate Martin. I was as nervous as hell, worried that something had changed shape. I’d had the body on before but it was unpainted and I know that paint changes everything. There was one small glitch. The rear bumper brackets, well one of them at least, wouldn’t go back into it’s spot in the side of the boot. I’d had it in place when the body was on the rotisserie but part of the chassis was now in the way. Of course I discovered this after removing all the cabin bracing, so we called it a day and went and had a few beers. There was nothing for it but to bolt the braces back in place and lift the rear of the body a few inches. A couple of hours later the bracket was in and the body back down and bolted on. A few photos as I can’t get the time lapse to load. Thanks again, Martin. 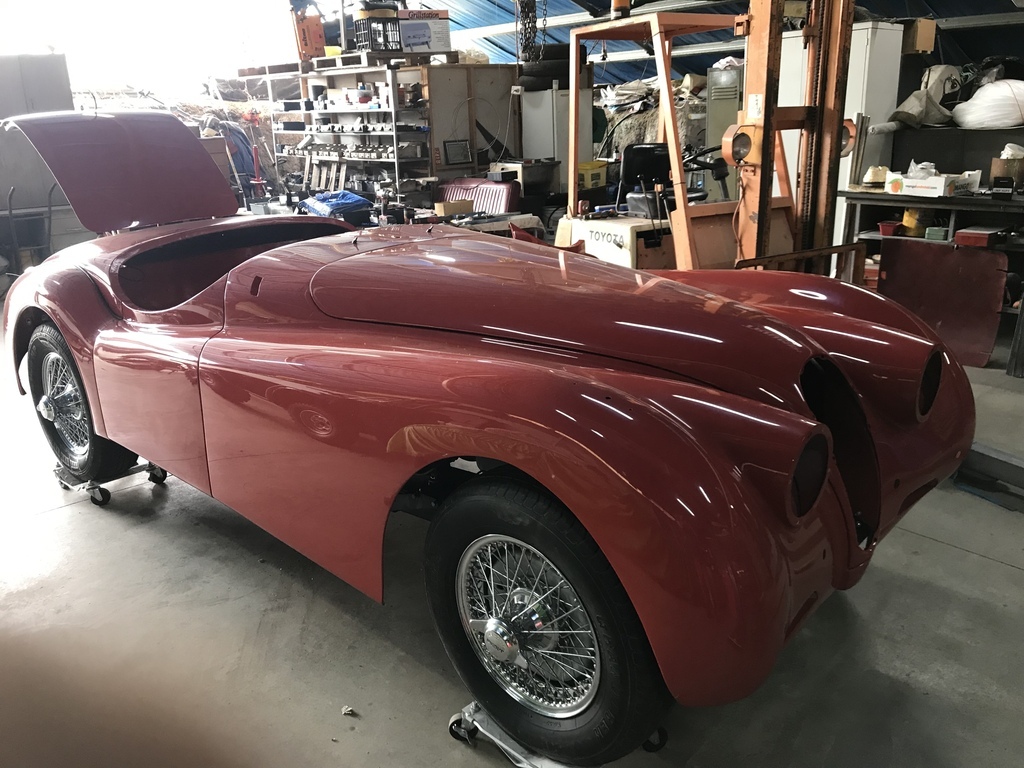 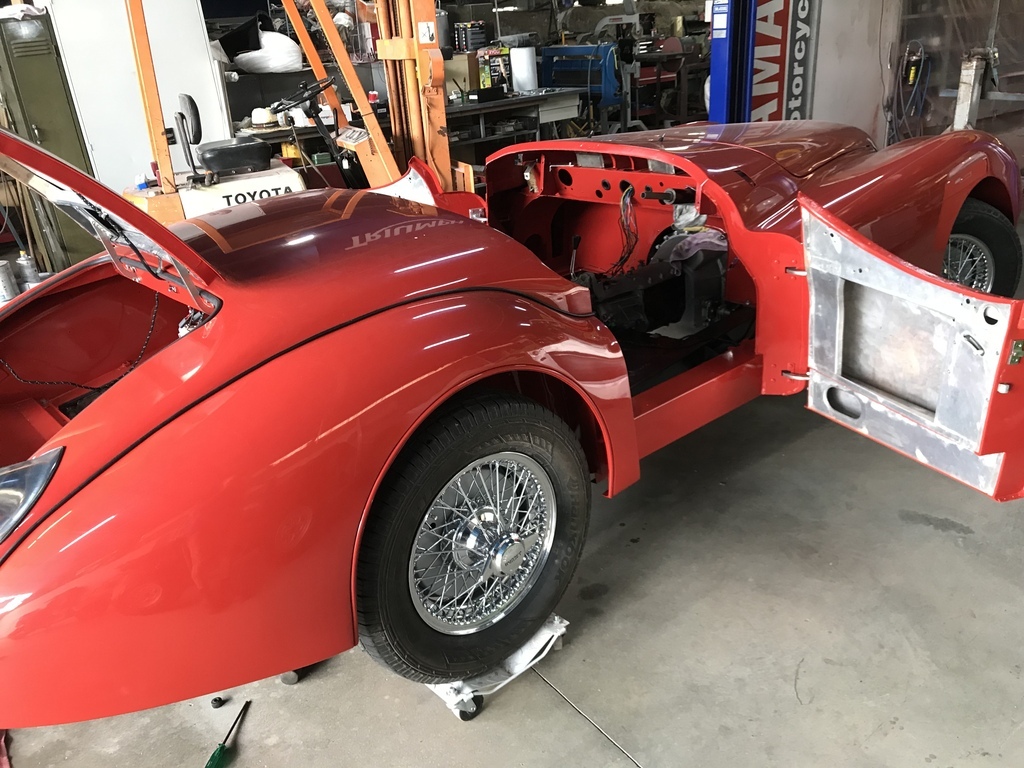 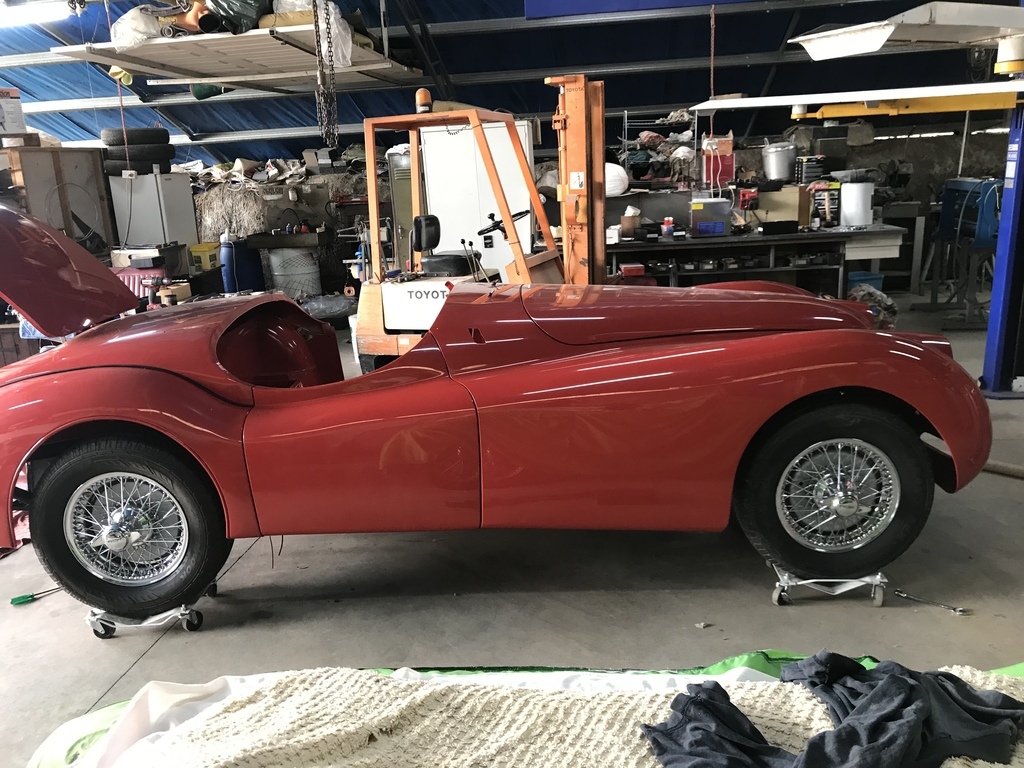 |
| |
|
|
|
|
|
Feb 27, 2022 21:14:36 GMT
|
Looks great, you must be very pleased. Nice straight reflections in the door & front wing/guard/fender  |
| |
|
|
|
|
jamesd1972
Club Retro Rides Member
Posts: 2,921  Club RR Member Number: 40
|
1952 Jaguar XK120 restoration jamesd1972
@jamesd1972
Club Retro Rides Member 40
|
|
|
|
Looks great back on its wheels. Might have to put the time lapse on something like YouTube and post a link? Somebody watching will be able to advise.
Exhaust noise levels cannot be too loud - it’s all behind you for people to enjoy…
James
|
| |
|
|
goldnrust
West Midlands
Minimalist
Posts: 1,887
|
|
|
|
|
Damn that's a gorgeous car. I had a model of one, a roaster in exactly that colour since that was one of my favourites as a child.
Fantastic attention to detail, it's going to be amazing when it's done.
|
| |
|
|
gazzam
Part of things
 
Posts: 741 
|
|
|
|
Thanks guys, appreciate it very much. James, I have no idea how to ( or interest in ) doing anything with YouTube. I’m surprised no one has chipped in with how to load it. Lots of small jobs over the last few days. Not much of it worthy of a photo. Finished the exhaust. Glad I only tacked the tailpipes because they needed some adjustment to get them to come straight out the back. Just a small extra cut to tighten the angle, then (after a check on the car) fully weld. Needed a bracket for the rear. Bent up a piece of 5mm stainless and welded a bolt to each pipe. 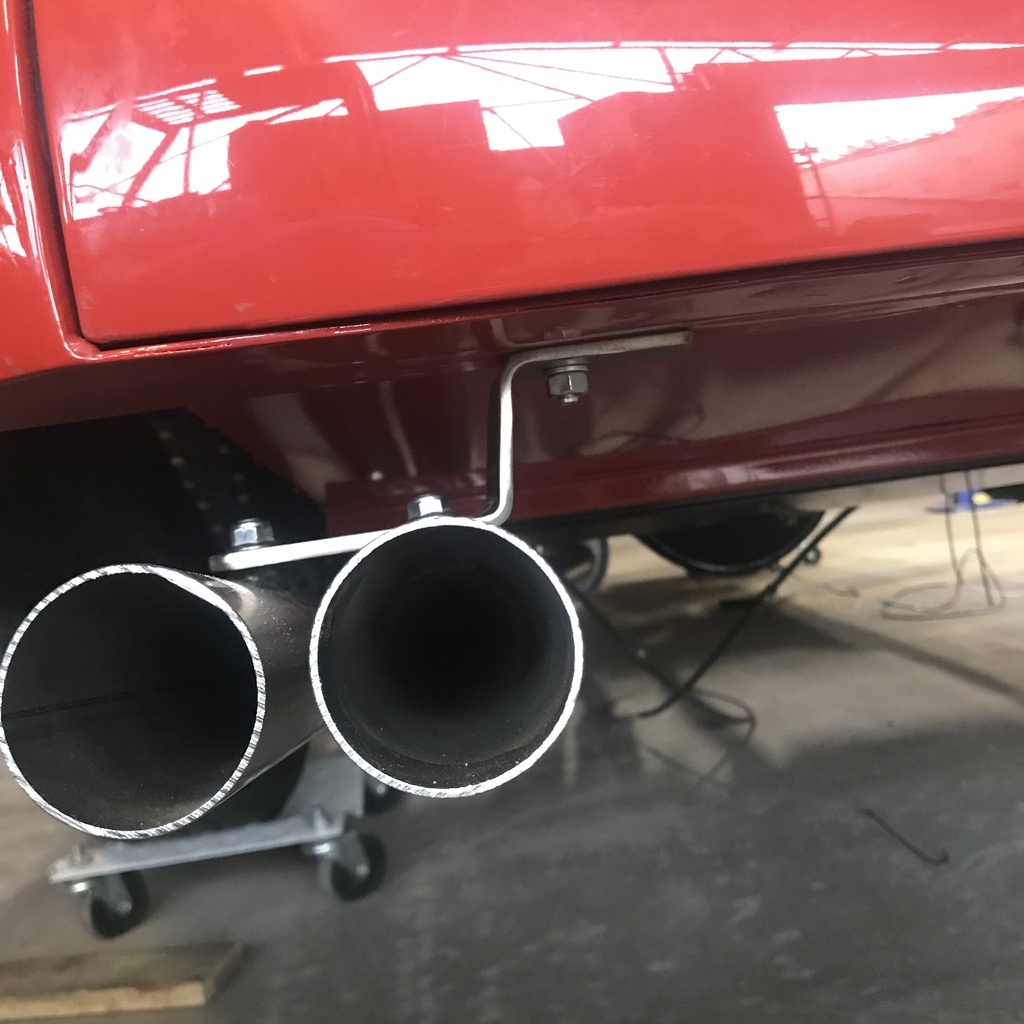 Number plate panel and beading mounted on boot lid. 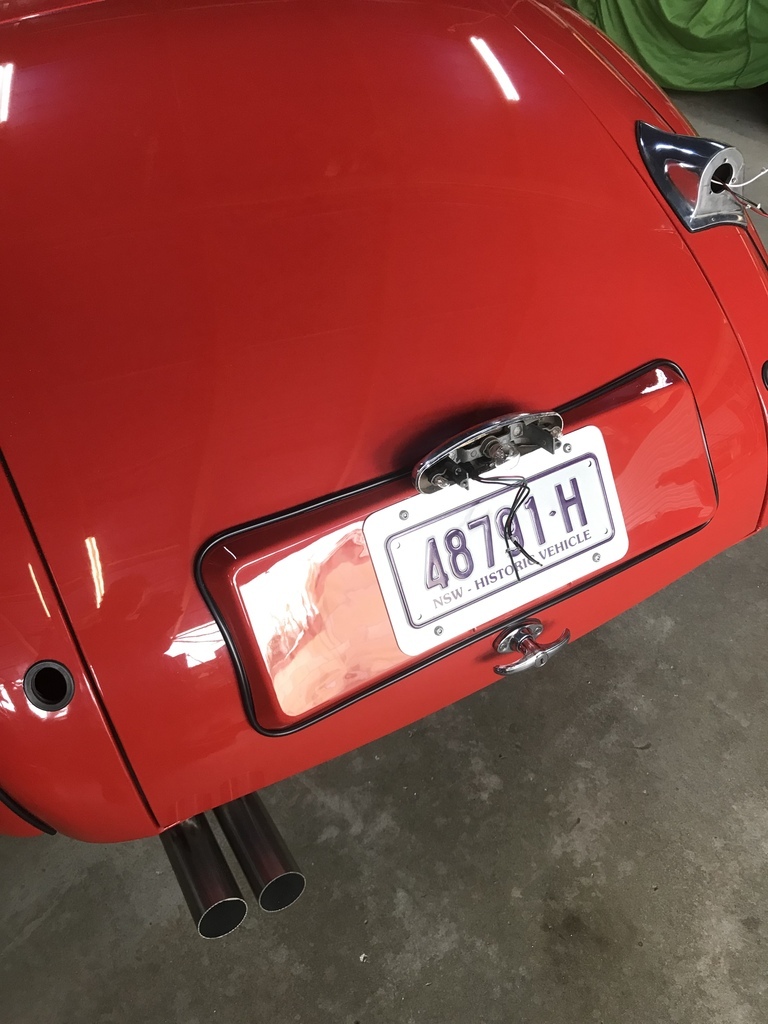 Carbs are in place. They had to be taken off so the steering column would clear as the body was lowered. 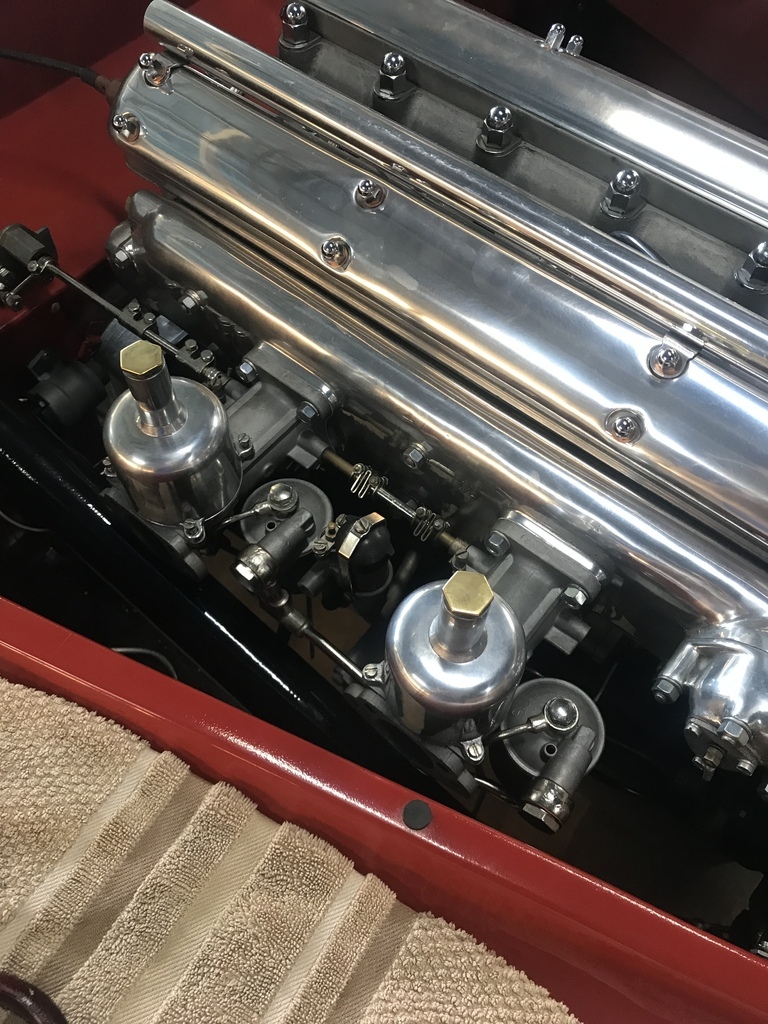 Just for the record, a before and after of the rhs of the engine looking from the wheel well. 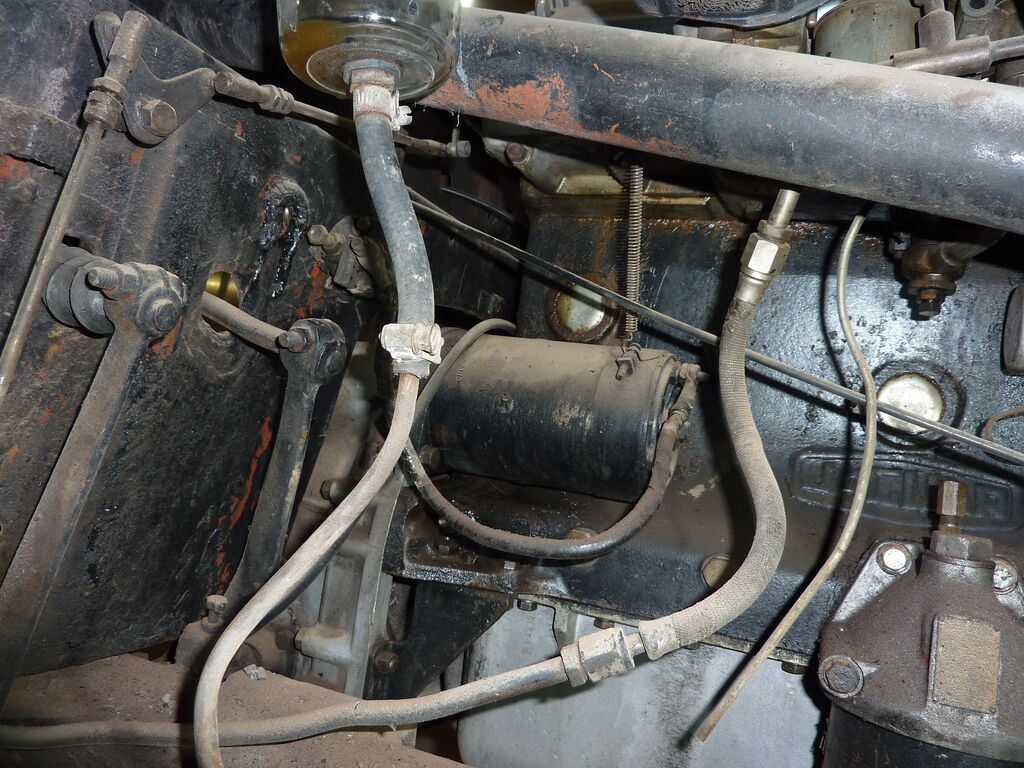 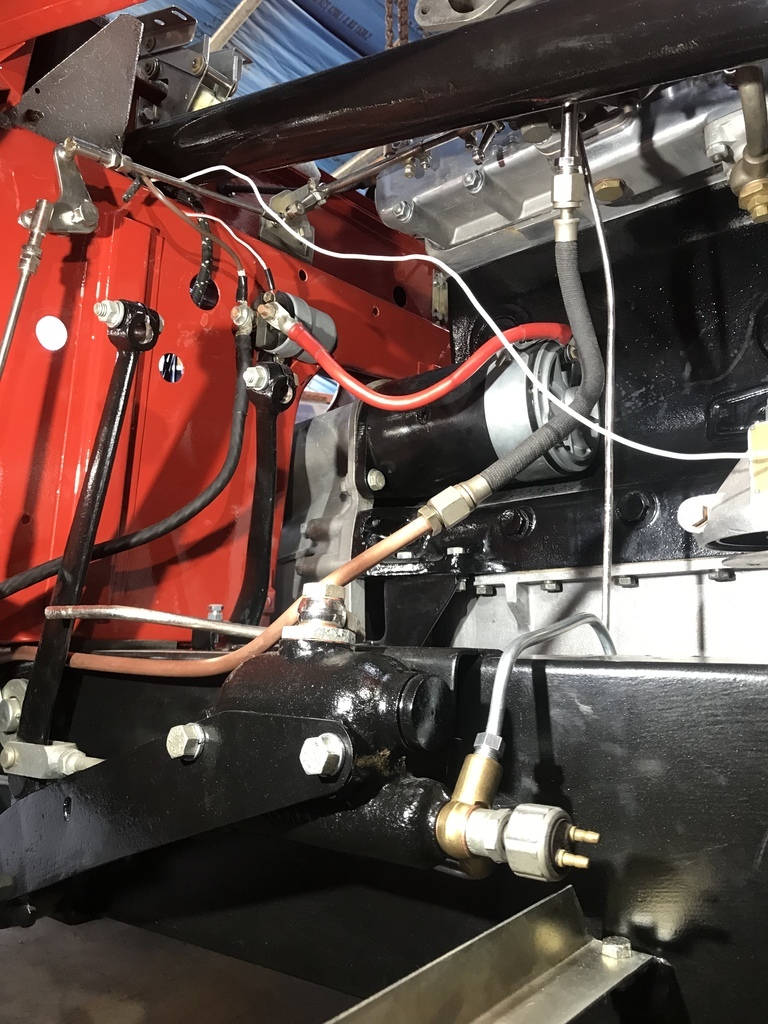 That’s all for now. Comments etc etc. |
| |
|
|
Davey
Posted a lot
   Resident Tyre Nerd.
Posts: 2,348
|
|
|
|
|
Looks great, baffles me the amount of attention to detail you've put into this. Will you need some sort of rubber for that exhaust mount? Might rattle itself loose.
|
| |
K11 Micra x3 - Mk3 astra - Seat Marbella - Mk6 Escort estate - B5 Passat - Alfa 156 estate - E36 compact
Mk2 MR2 T-bar - E46 328i - Skoda Superb - Fiat seicento - 6n2 Polo - 6n polo 1.6 - Mk1 GS300
EU8 civic type S - MG ZT cdti - R56 MINI Cooper S - Audi A3 8p - Jaguar XF (X250) - FN2 Civic Type R - Mk2 2.0i Ford Focus - Mercedes W212 E250
|
|
glenanderson
Club Retro Rides Member
Posts: 4,357
Club RR Member Number: 64
|
1952 Jaguar XK120 restoration glenanderson
@glenanderson
Club Retro Rides Member 64
|
|
|
Will you need some sort of rubber for that exhaust mount? Might rattle itself loose. I thought the same. Trying not to nitpick though, I’m astonished at the level of attention to detail you’ve managed. 😃👍 |
| |
My worst worry about dying is my wife selling my stuff for what I told her it cost...
|
|
|
|
|
|
|
^^^ and there was me thinking 'I hope he's going to file smooth the end of the exhausts'  Looks epic anyway  |
| |
|
|
75swb
Beta Tester
Posts: 1,052
Club RR Member Number: 181
|
1952 Jaguar XK120 restoration 75swb
@75swb
Club Retro Rides Member 181
|
|
|
I’m surprised no one has chipped in with how to load it. I believe (and I might be wrong here), that you can't put videos directly onto retrorides, and instead have to upload them somewhere else (like YouTube or vimeo, or saving it to Google drive and setting it to public) and share the link here. Can't wait to see this out in the sunshine and driving! |
| |
Last Edit: Mar 3, 2022 0:05:40 GMT by 75swb
|
|
gazzam
Part of things
 
Posts: 741 
|
|
|
|
I don’t anticipate any drama with the exhaust mounts. It’s not very long and has those very flexible woven things near the engine end. I will keep an eye on it, seeing you blokes think it might be a problem. You can relax Mark, the pipes are yet to be trimmed. 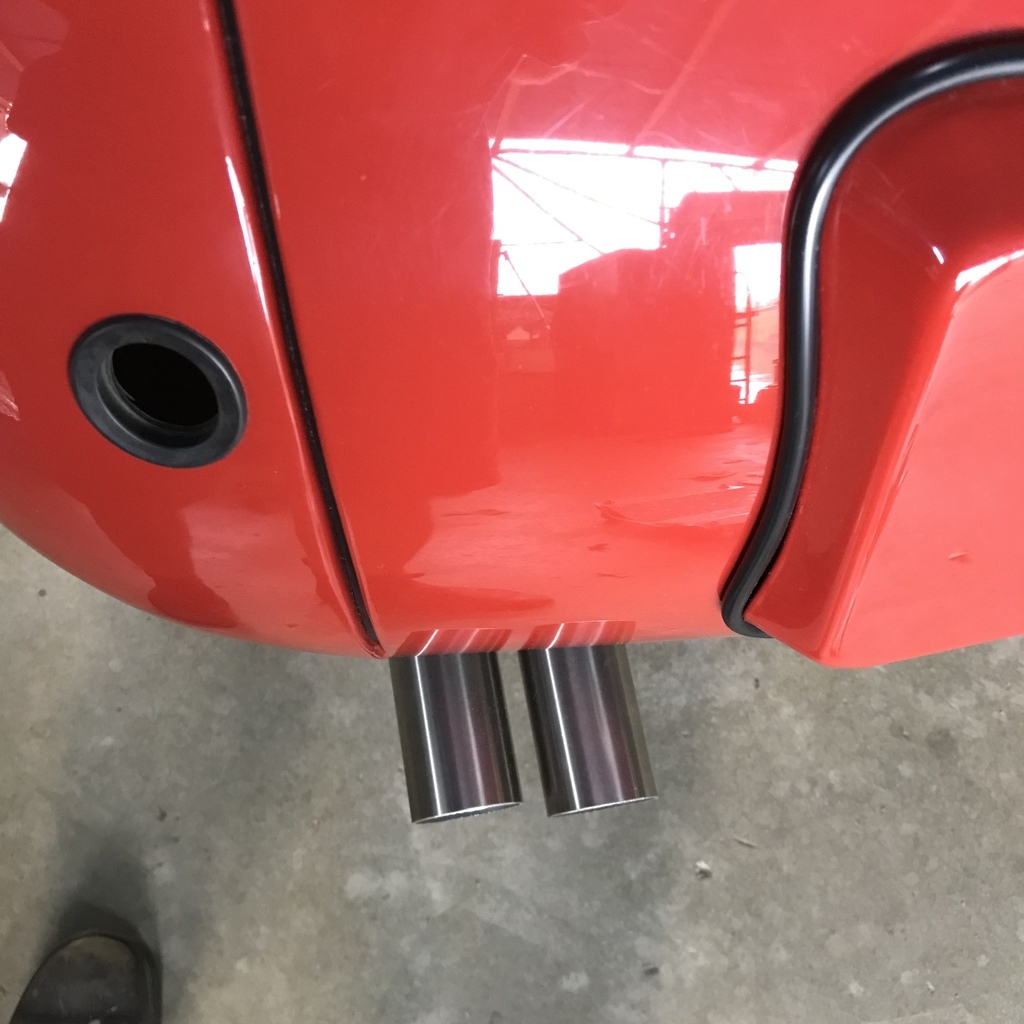 Masked up, ready to touch up the places where the body was mounted to the rotisserie. Most will be covered with trim, but if you’re gonna do something, do it proper… 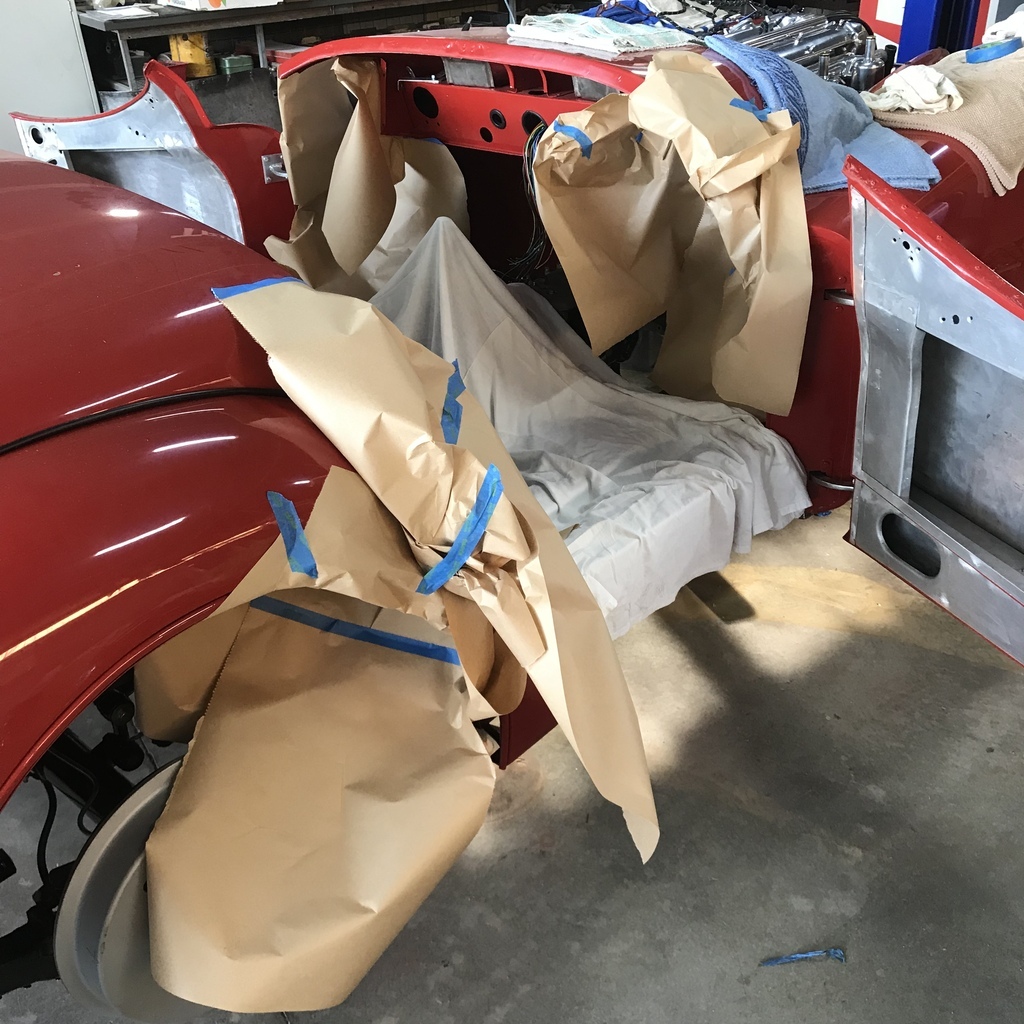 Wiring harness is now in situ, ready to start hooking things up. That’s all for now. Comments etc etc. Thanks for reading. |
| |
|
|
|
|
|
|
|
|
|
Looking good! I spot braided loom coming through the bulkhead without a grommet, though!  Perhaps a rubber washer of sorts where the exhaust mount meets the body, just to isolate it? |
| |
|
|
|
|


