|
|
|
|
|
The one in the link is from a Mini Austin 7 (the first few years were called Austin Sevens rather than Austin Mini, the XK120 would predate the mini by a fair few years, however, I would imagine that this part was used on a fair few cars over the years so choice should be plentiful for secondhand parts. |
| |
|
|
|
|
gazzam
Part of things
 
Posts: 742 
|
|
Oct 10, 2021 10:11:51 GMT
|
Thanks for all the suggestions etc. SNG have the union listed but have no stock, nor a date when they may have them. I’ll put a fair bit more effort in before I pay 225 quid for one! Other ones may look the same but are probably different. For eg here is a photo of mine and one from a 1952 Jag Mk 7. It doesn’t look it but the ends are 2mm smaller diameter and it takes 3/16 pipe rather than the 1/4 inch that mine has. 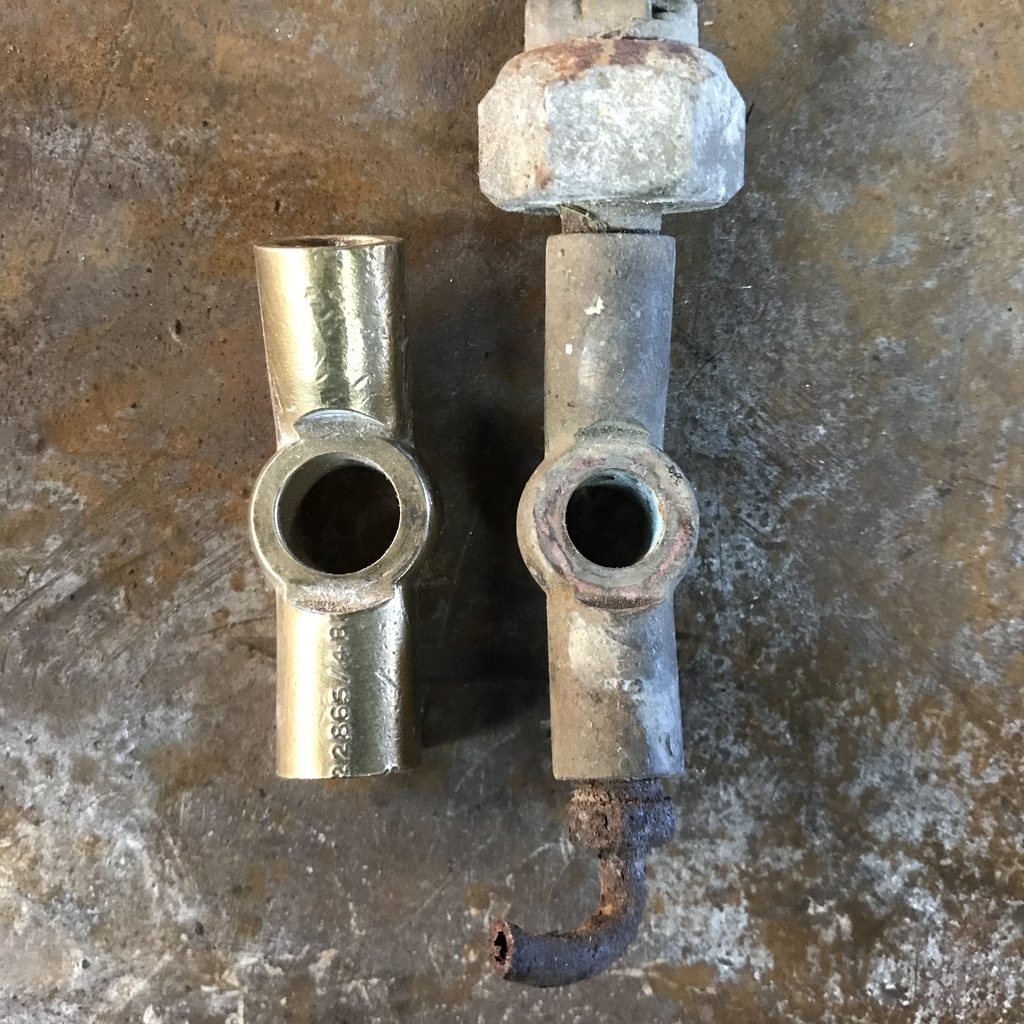 So I tried the version 2 mould but it didn’t work. My new furnace was a success however, so it’s not all bad news. The brass melted much quicker. I had been using this torch 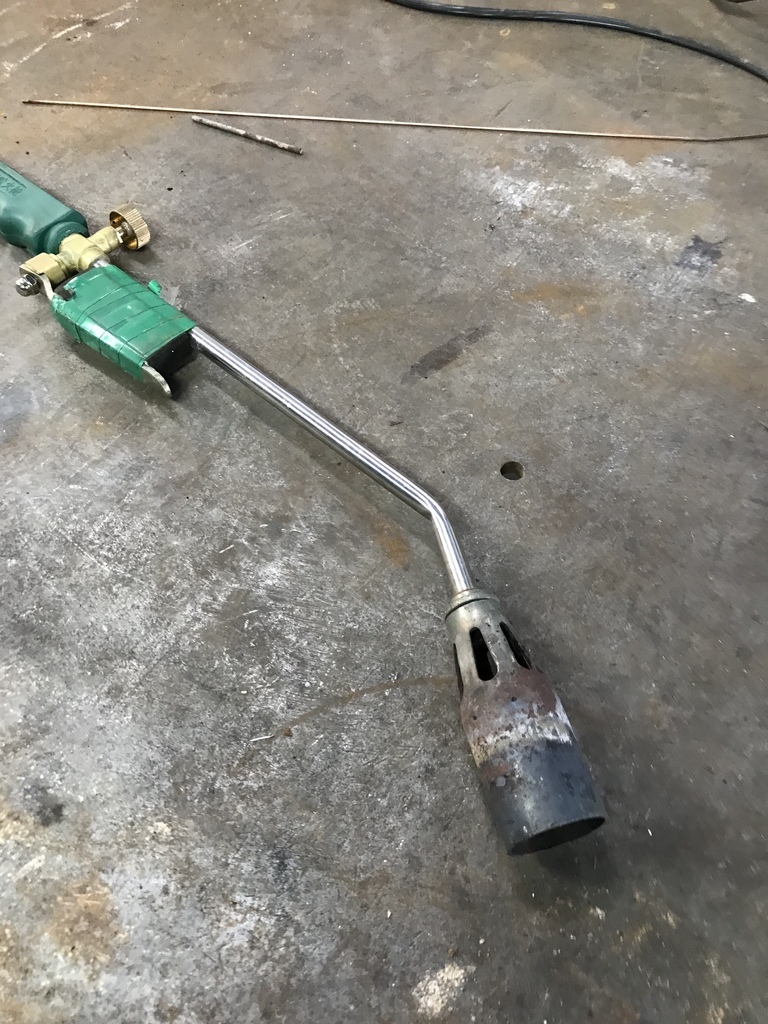 But it took ages to get the brass to melt, so I had a look on YouTube and made this. A piece of exhaust tube and an old plumbing reducer. 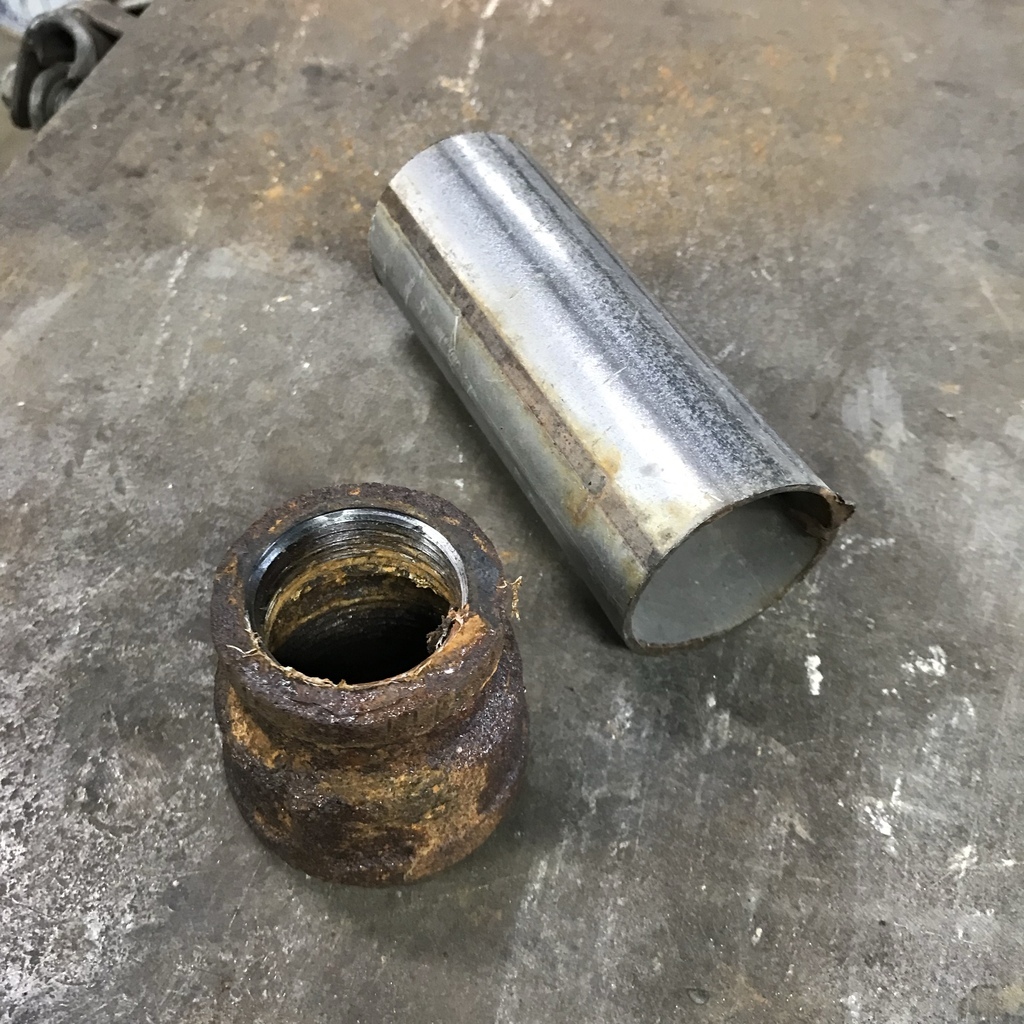 Turned into this 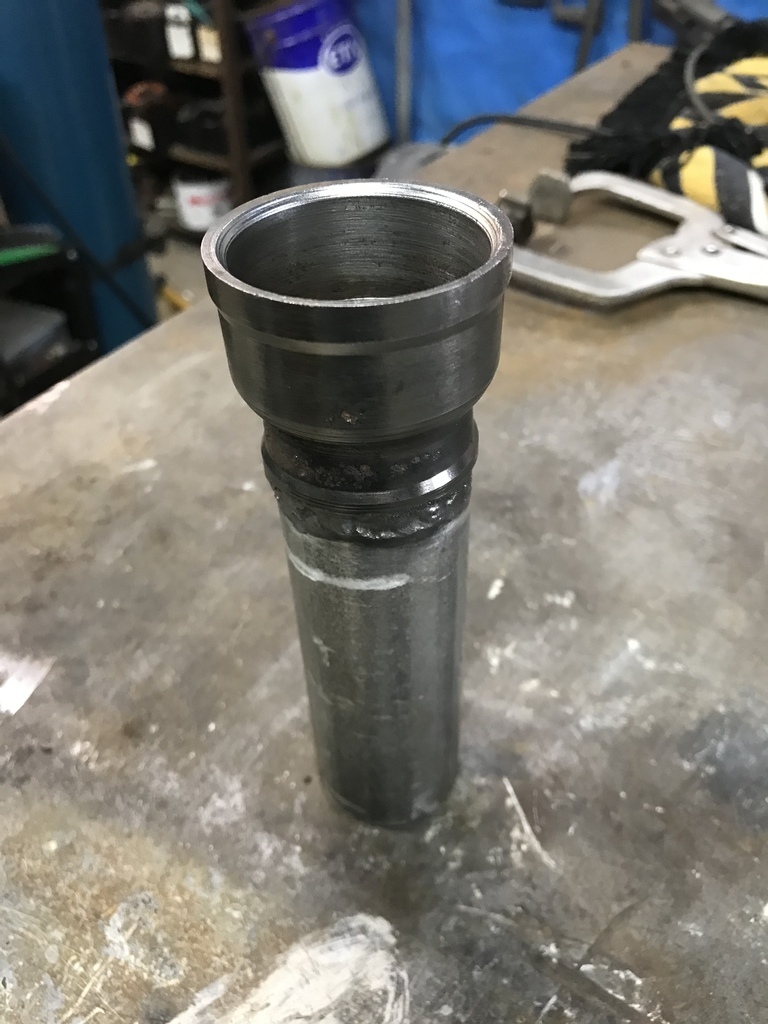 This holds the gas jet 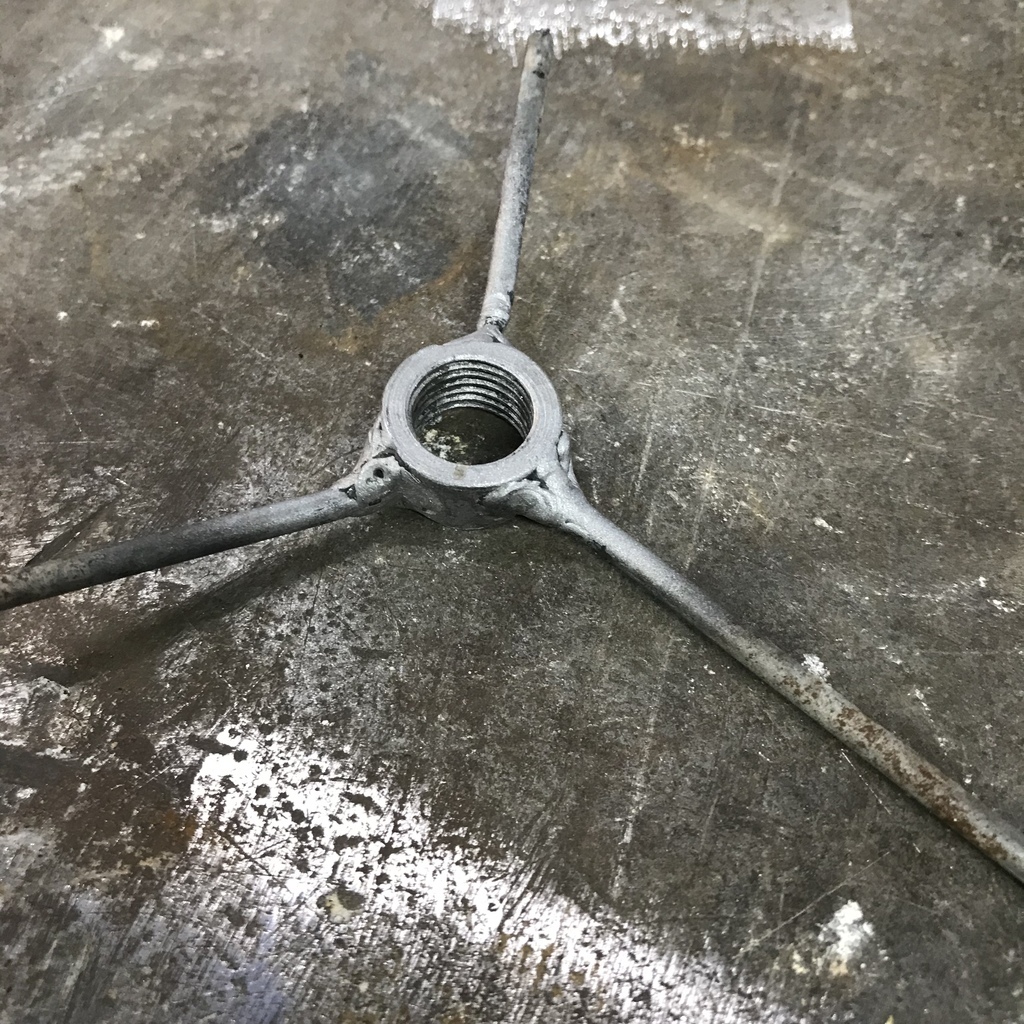 Once it’s welded in here 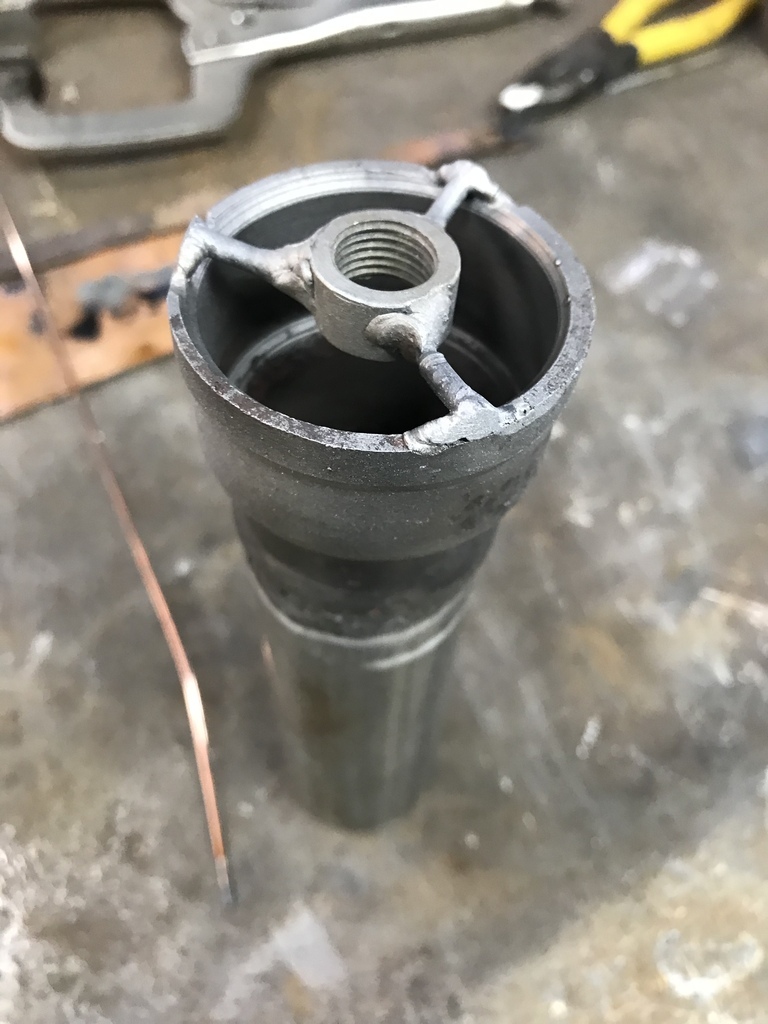 A few bits out of the stash 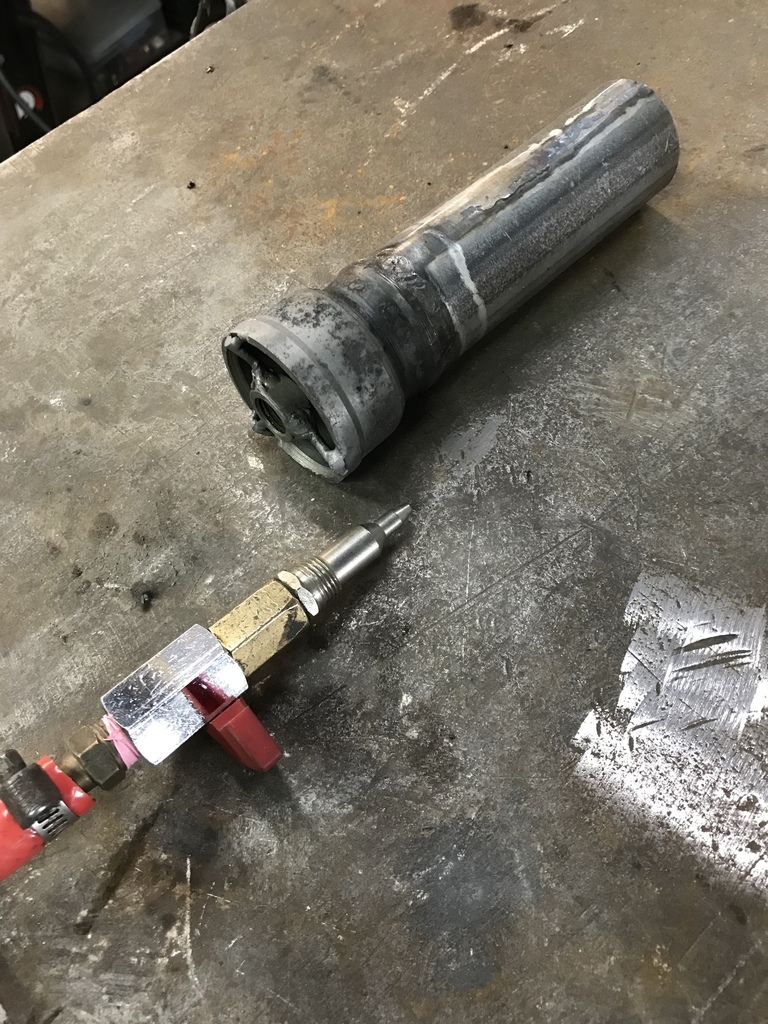 And it goes into the furnace thusly 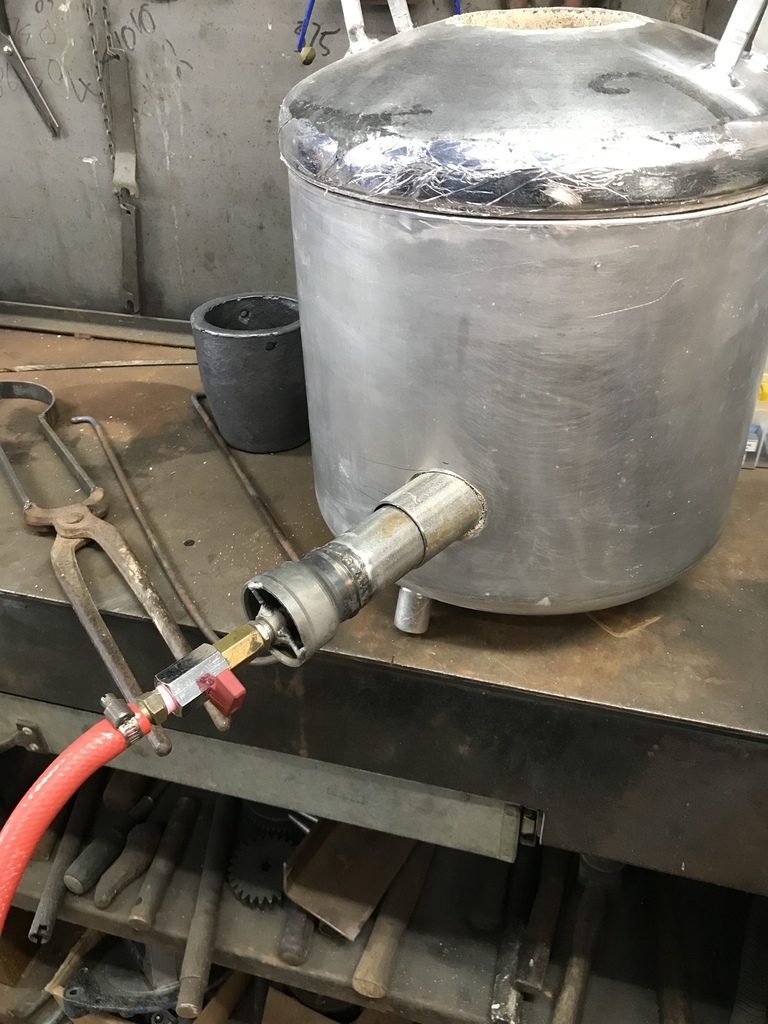 As I said version 2 didn’t work. I had cooked the mould several times when I was giving the furnace a trial burn. There were a few fine cracks in it ( the mould ) but it looked good enough to use. But the sprue might have been too small because the brass never made it to the mould. 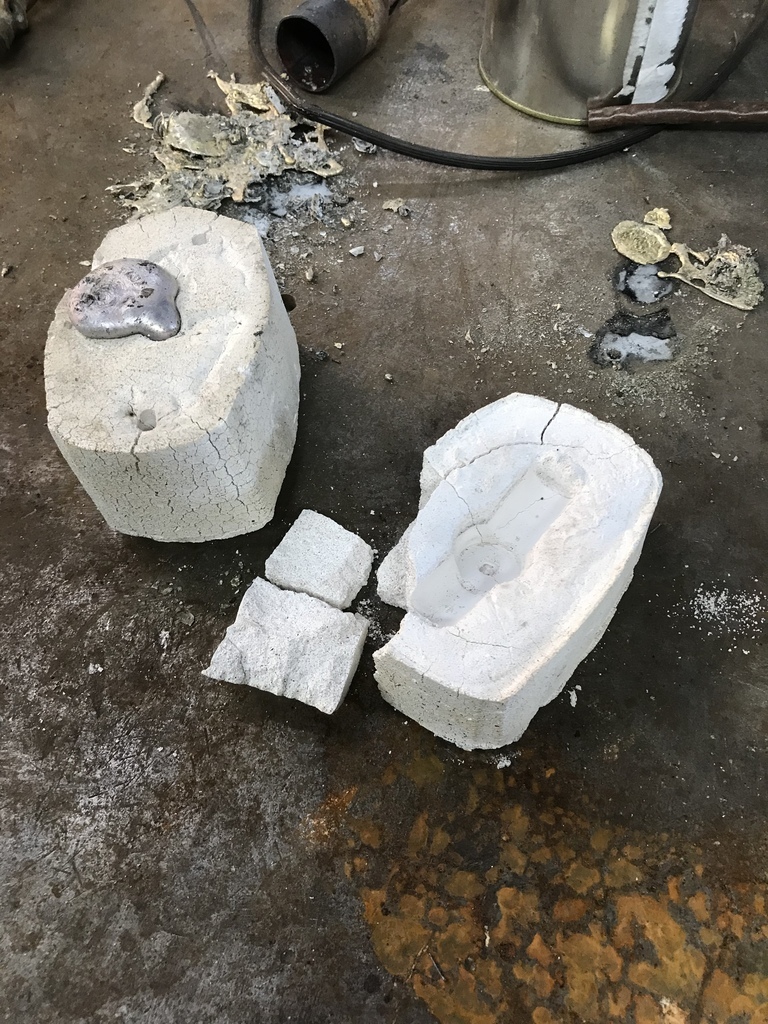 It hardened in the pouring basin and only went about a inch down into the mould, even though the mould was very hot. 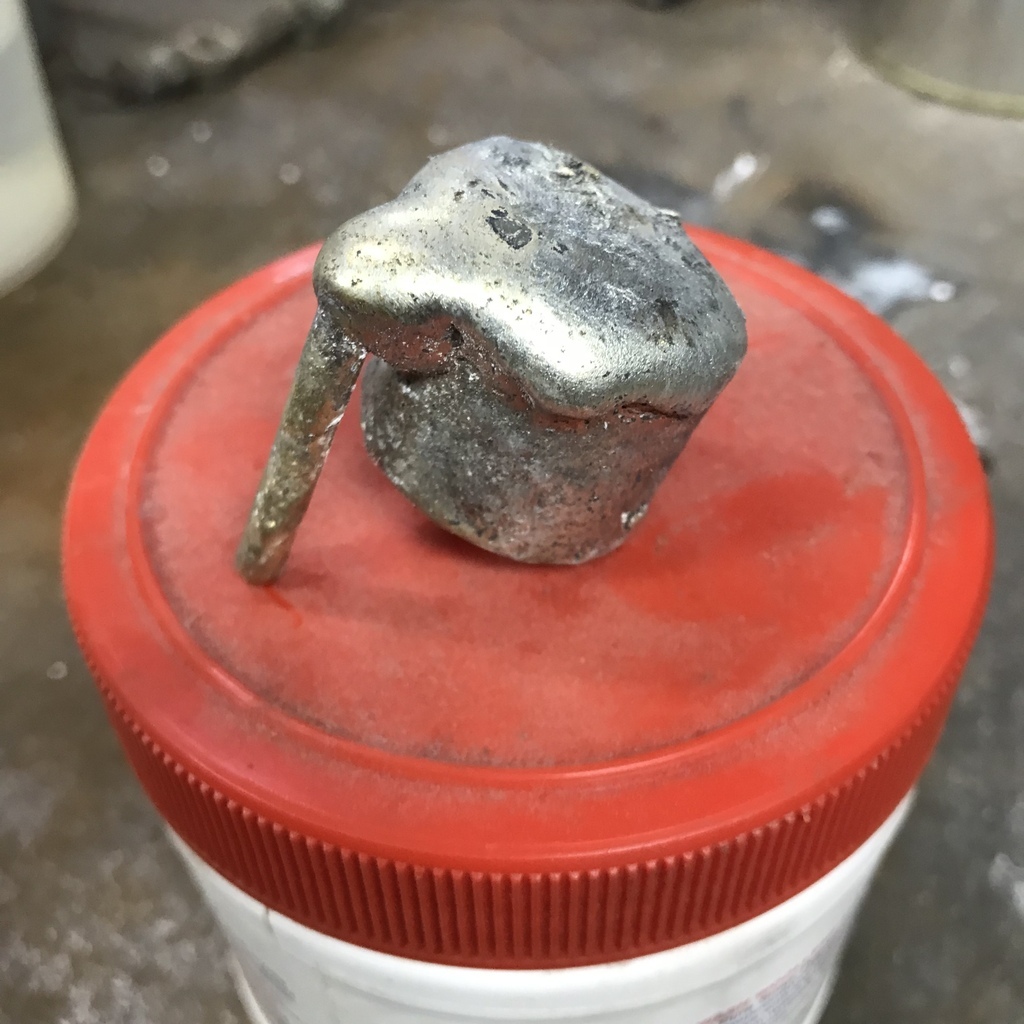 So version 3 is underway. Will report when it happens. In other news, I fitted the copper dress strips to the rear wheel arch - because I’m not having spats. I bought these years ago when I put the wire wheels on it. They’re really just a piece of copper tube flattened on one side. A fair bit of adjustment is needed to get them to conform to the guard curve. Clamped in place to mark where they must be trimmed to length. 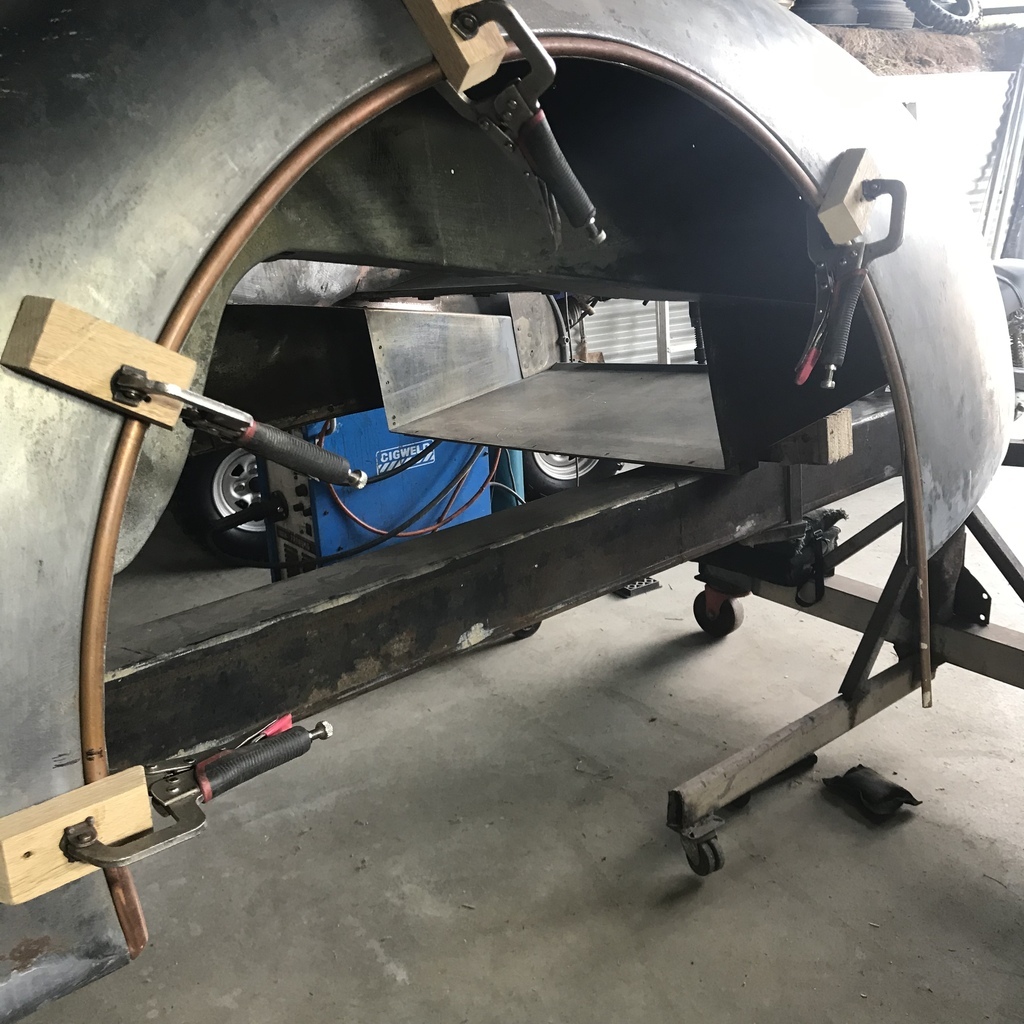 Cut and brazed the ends. 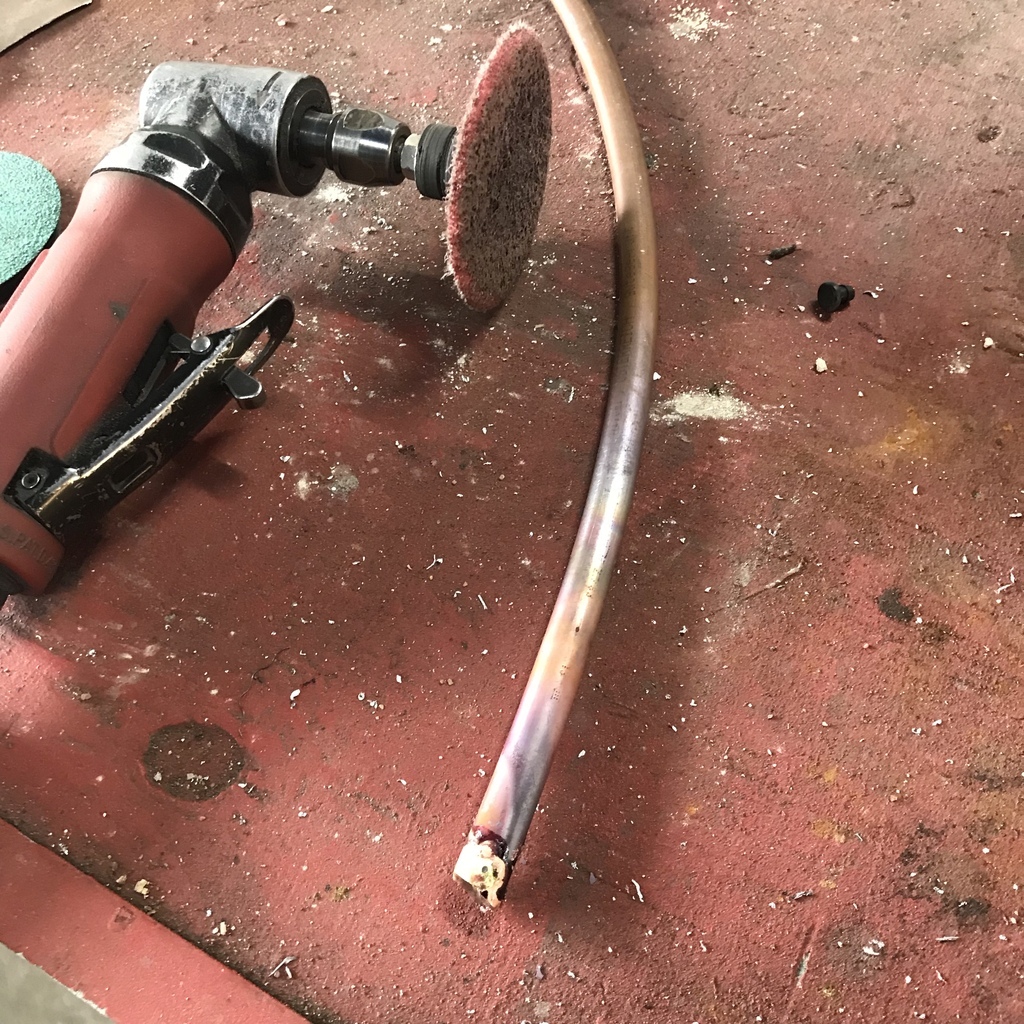 Self tappers hold them in place from the inside. 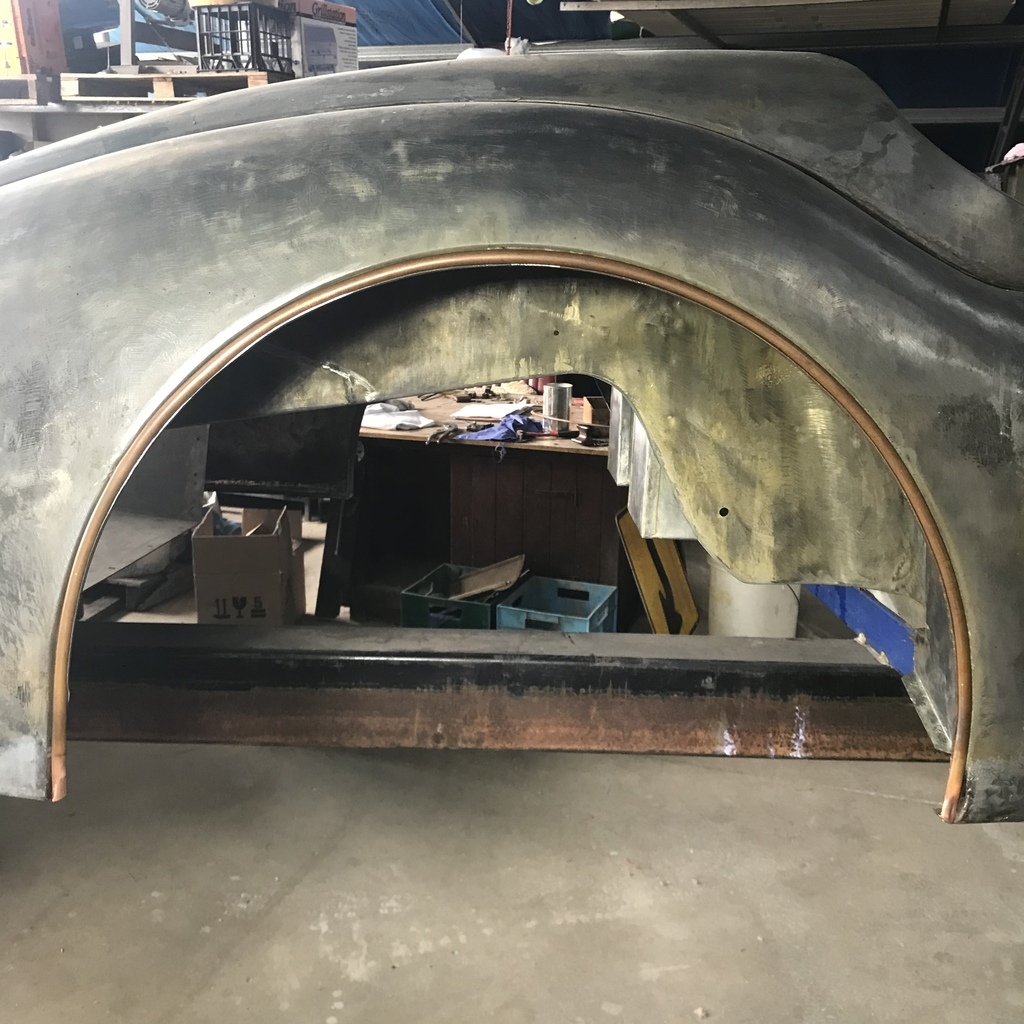 That’s all for now Thanks again Garry |
| |
|
|
|
|
|
Oct 10, 2021 12:35:01 GMT
|
|
That came out nice. Watching the casting trials with interest.
Surprised you have 1/4” brake pipes, I thought 3/16” was pretty universal? Or have I got the wrong end of the stick?
Nick
|
| |
1967 Triumph Vitesse convertible (old friend)
1996 Audi A6 2.5 TDI Avant (still durability testing)
1972 GT6 Mk3 (Restored after loong rest & getting the hang of being a car again)
|
|
|
|
|
Oct 10, 2021 18:57:24 GMT
|
|
I'm intrigued about the copper edgings, are they std or something you have added - and if so what do they replace?
|
| |
|
|
|
|
|
Oct 10, 2021 20:34:15 GMT
|
|
Watching your brass casting is very interesting.
I was hoping to set up to cast some brass soon myself.
I didn't expect it to be problematic, I am obviously wrong!
I haven't looked into it at all really yet so have no real clue what's involved.
I had planned on sand casting though. Didn't even know you could use plaster.
Now I'm seeing what your doing, I assume there is a good reason why your using plaster for a mould rather than sand?
Looks like I'm going to have to do alot more research before I look into setting up.
|
| |
|
|
nze12
Part of things
 
Posts: 193
|
|
Oct 10, 2021 20:49:54 GMT
|
Dredging my ancient memories of casting small components, I'm wondering if the metal is cooling too quickly due to restricted flow through the mould. I would opt for an arrangement like this to get a faster flow/fill through the plaster cavity. HTH Ken 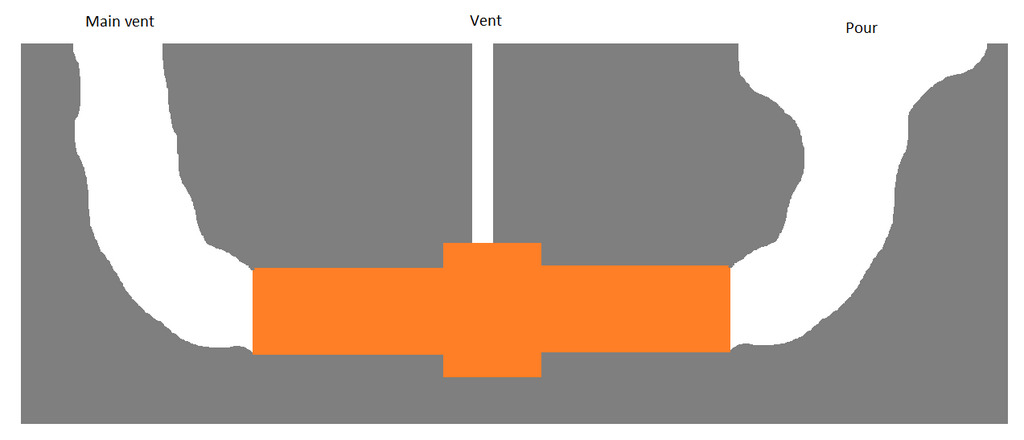 |
| |
1986 BMW E30 refreshed to original spec
1973 BMW E12 520 converting to Motorsport 530
1982 XJS V12 converting to 5 speed manual
Many landscaping projects overriding above!
Cogito cogito ergo cogito sum!
|
|
gazzam
Part of things
 
Posts: 742 
|
|
Oct 11, 2021 10:26:36 GMT
|
Thanks for all the suggestions etc. Nick, I can’t answer that. But this XK certainly has 1/4 inch. Mark, the copper fits in where the edge of the spats locate. This rebate : 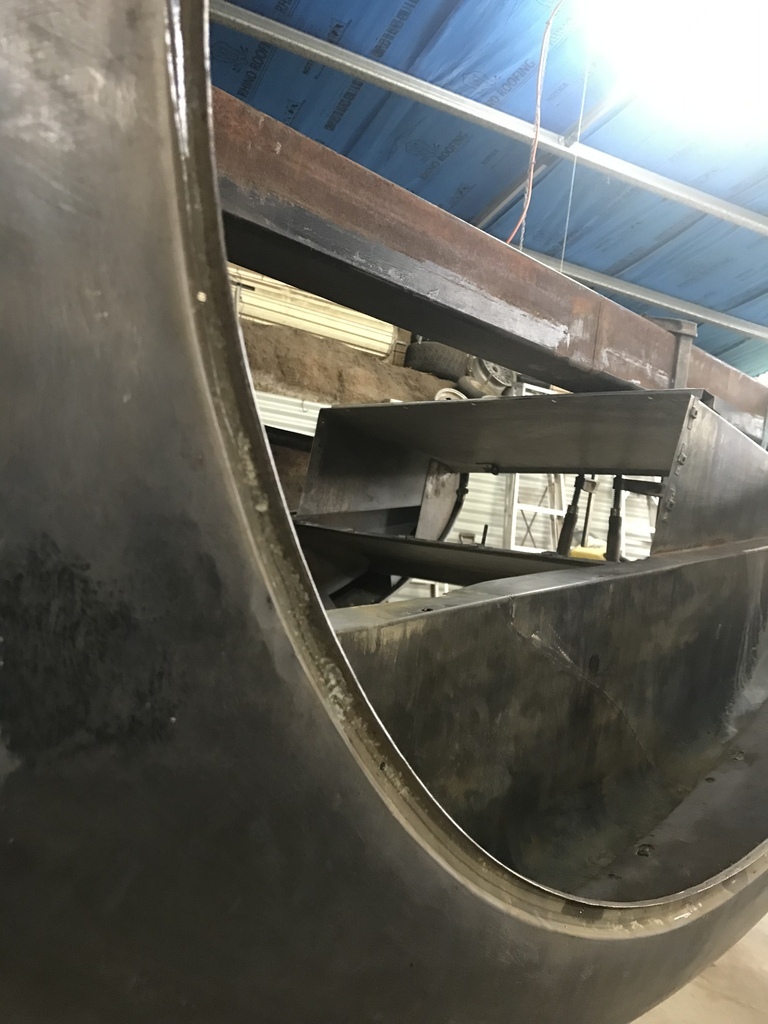 Any cars with wires have the finisher as spats won’t fit with wire wheels. VW, I used plaster because I thought it would give a better surface finish. And I already had it. Ken, yes I think the sprue ( as the YouTuber Olfoundryman calls it ) was too small. The layout you show would likely be better. But I had already tried version 3. So the mk3 version… Upped the diameter of the sprue, used a ballpoint to cast the hole a couple of mm bigger. The chopsticks at each end are to cast the vents. The red plastic thing is to make the pouring basin. 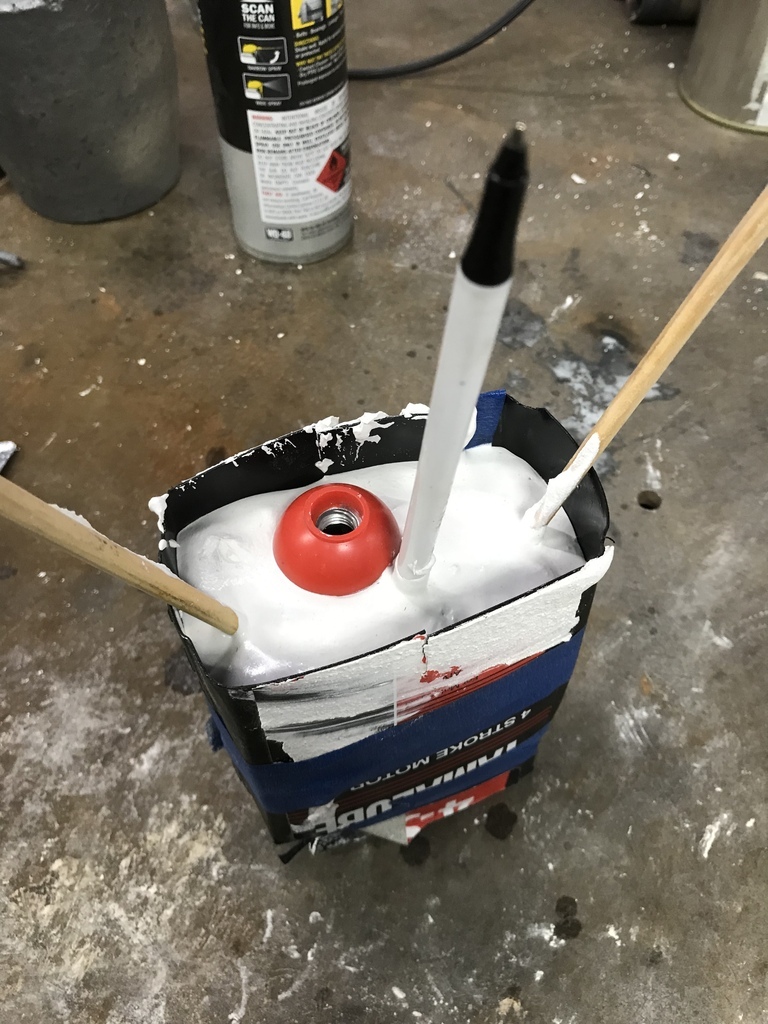 The mould had only plaster of Paris, no sand. I cooked it for an hour in the furnace and it was red hot when it came out. Lots of cracks but still in one piece, so I poured some brass. 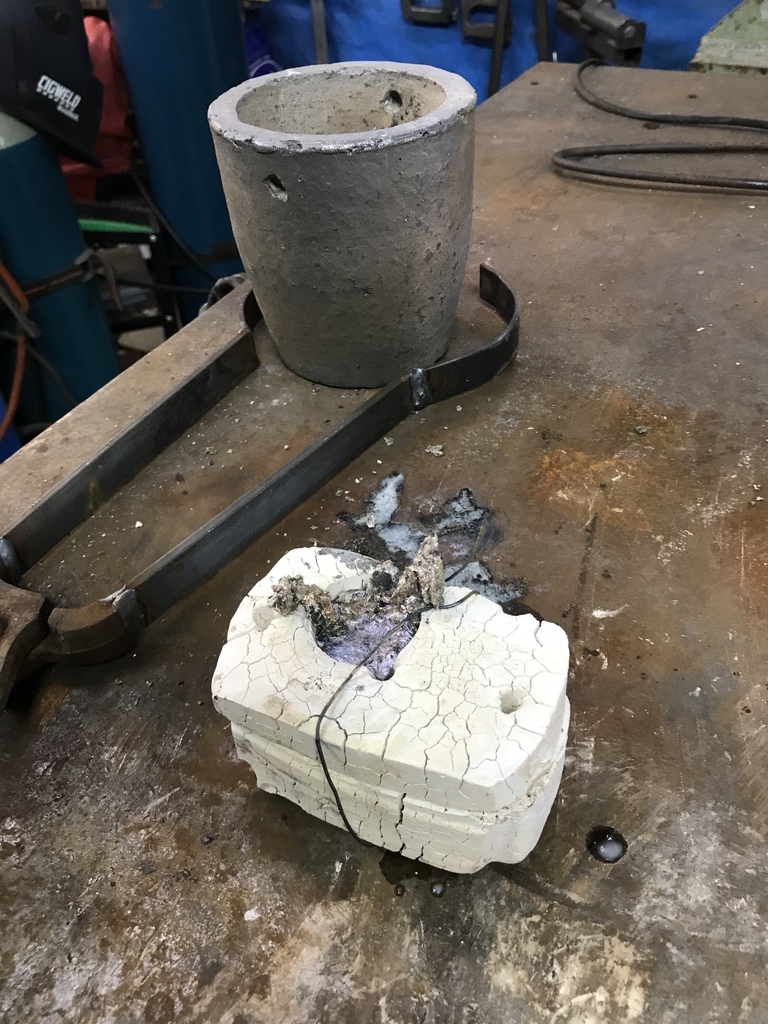 Sort of successful. 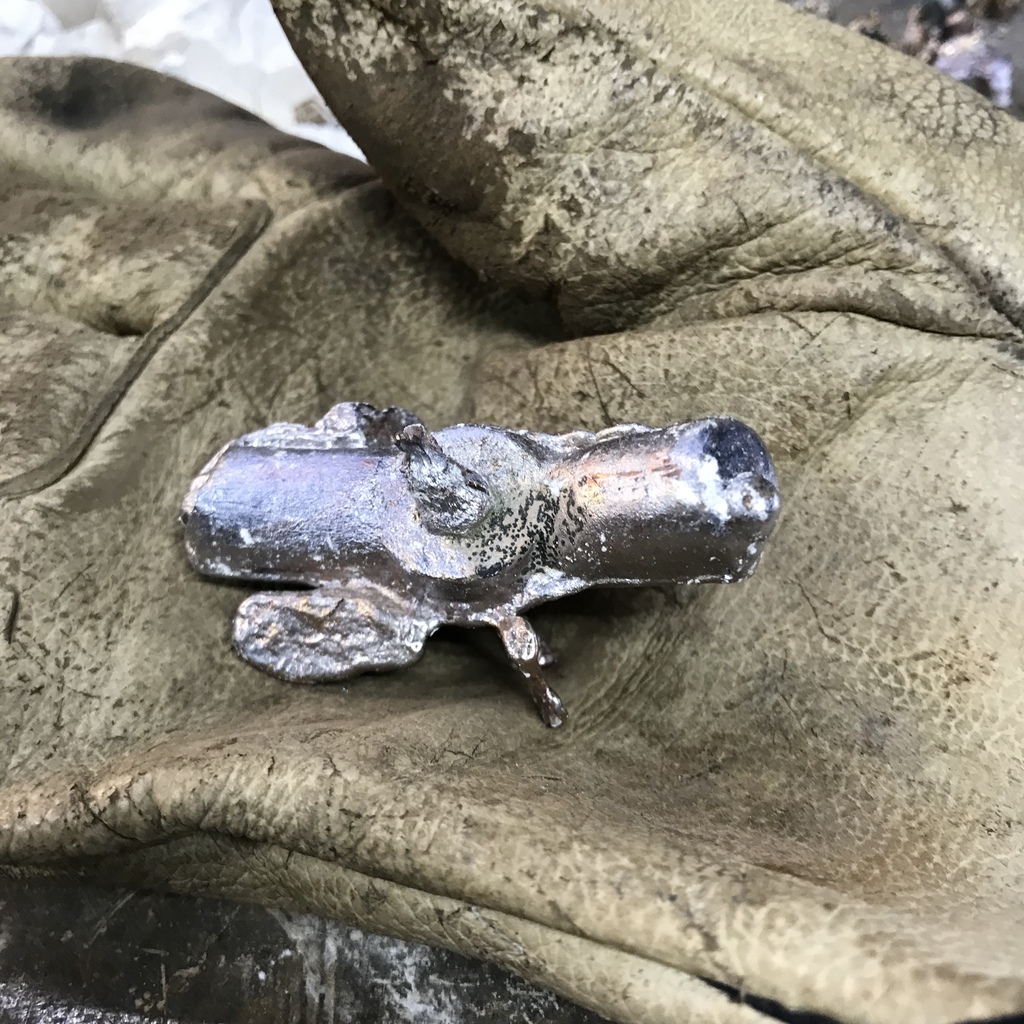 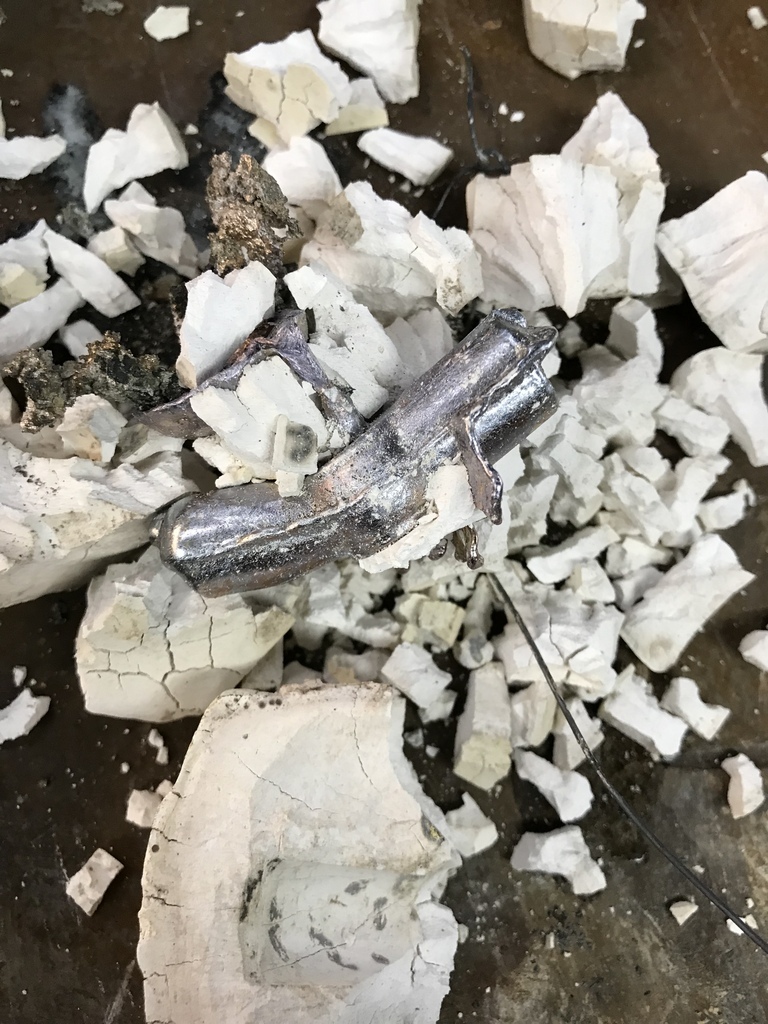 Those last 2 photos are in the wrong order as you may have realised, but it cannot be changed, no matter what I do… No vapour problem. Brass had flowed into the cracks ( not a problem ) but otherwise it all looked good. No part number though. The real problem was shrinkage. As Ken pointed out a few posts back. I’d estimate it lost maybe 5%. So I’m taking his advice and will dip the original in molten wax to build it up a size or two. All hopes of getting that part number have long since been dashed, so onwards and upwards! I’m also going to add sand to this mix as I think the v2 mould had less of a cracking problem. Will try 50% sand this time. During all this, had an unwelcome visitor to the shed. 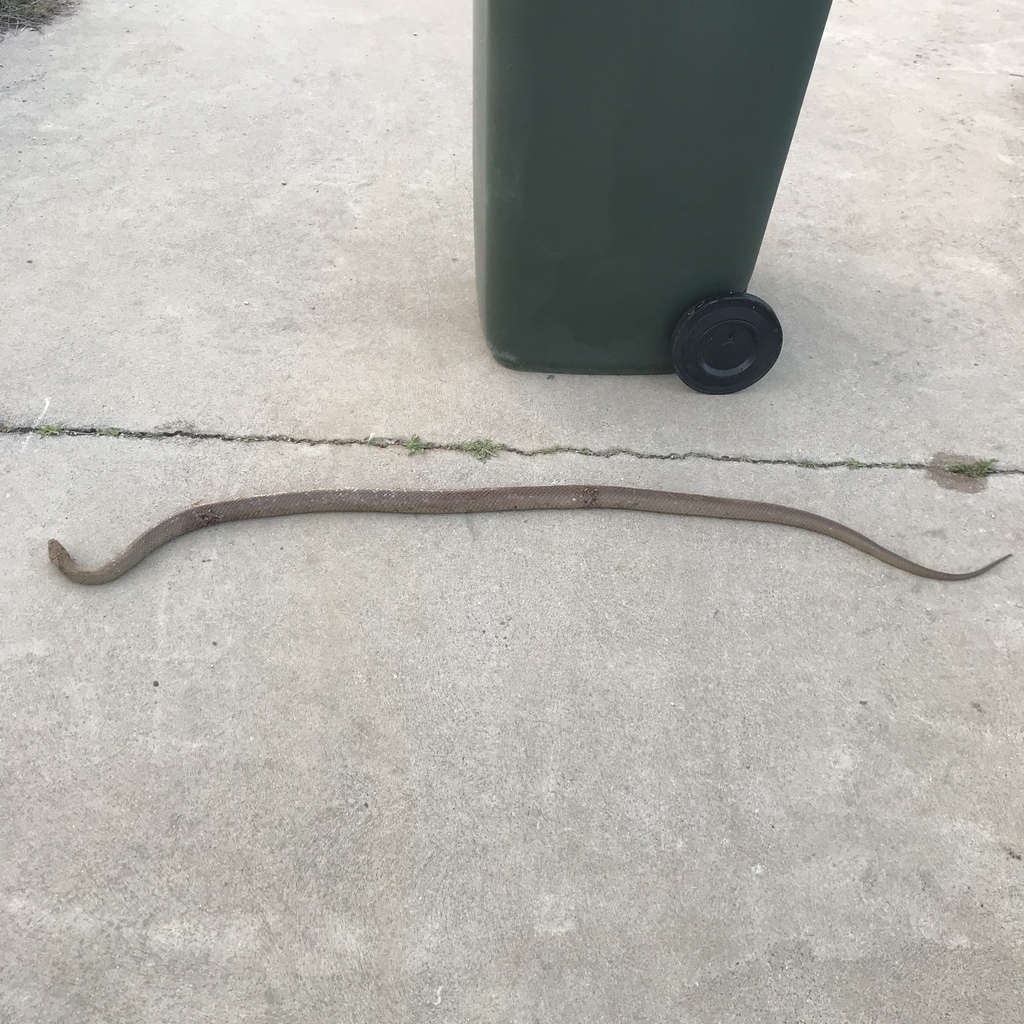 I wouldn’t normally kill a snake, they usually flee and that’s the last you see of them. And that’s good. But this one was almost under foot two days running, so he had to go. They are just too dangerous, both to me and my small dog. So I dipped the union in molten beeswax a couple of times and made a fresh mould. Here’s the mould with brass just poured. 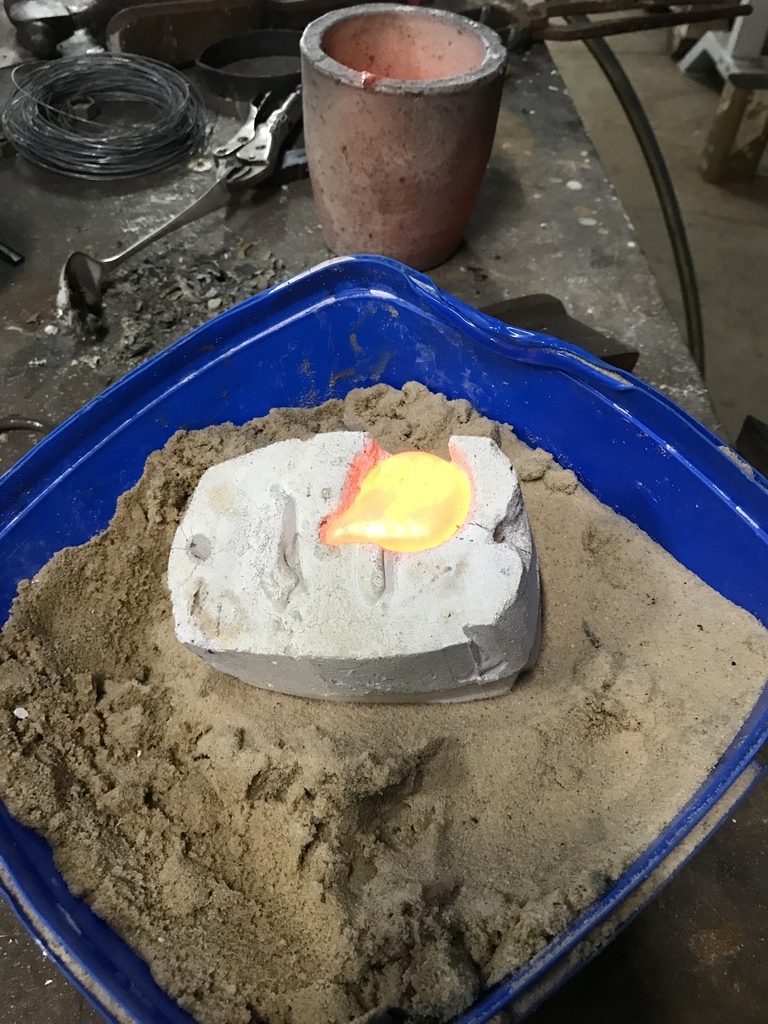 I didn’t think it had filled as I couldn’t see any brass in the vents. But when I opened it up, whoopee! 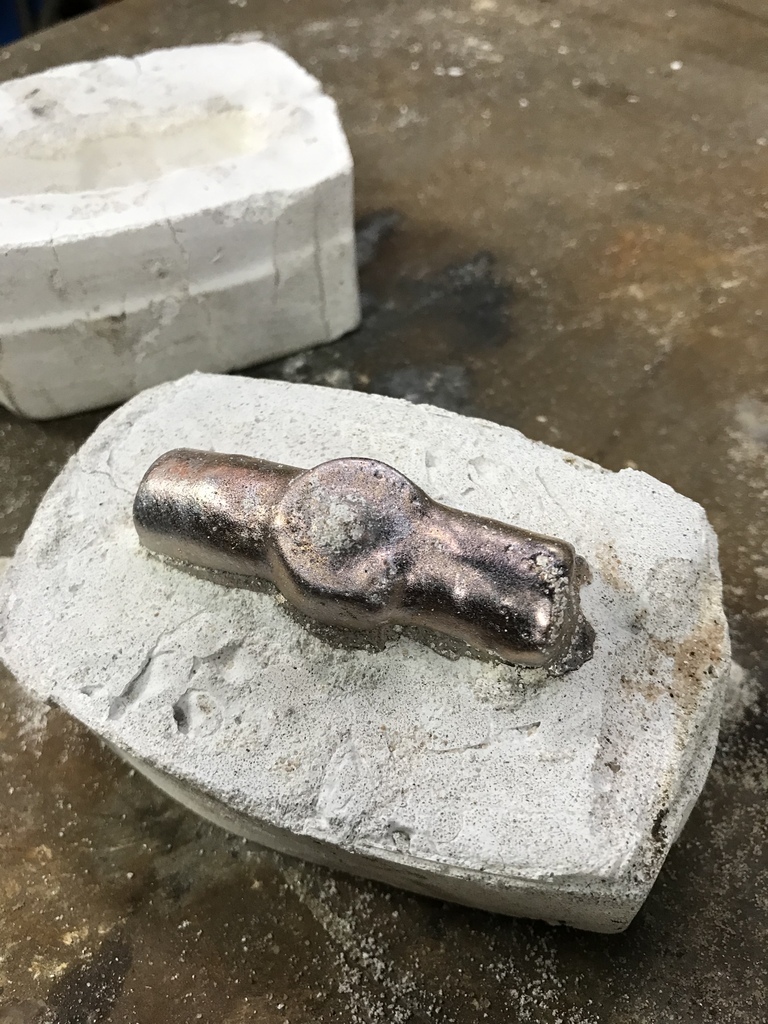 I think this may work. Just have to figure out how to machine it. Stay tuned… That’s all for now. Thanks Garry |
| |
|
|
|
|
|
Oct 11, 2021 10:34:25 GMT
|
|
Excellent 🙂
Nick
Can’t have venomous snakes underfoot…….
Eastern Brown?
|
| |
1967 Triumph Vitesse convertible (old friend)
1996 Audi A6 2.5 TDI Avant (still durability testing)
1972 GT6 Mk3 (Restored after loong rest & getting the hang of being a car again)
|
|
|
|
|
Oct 11, 2021 12:30:37 GMT
|
|
Ah, copper trim makes sense now as I could not see the wing had a recess in it.
Getting there with the casting!
|
| |
|
|
nze12
Part of things
 
Posts: 193
|
|
Oct 11, 2021 19:11:40 GMT
|
Fantastic! One way to retain the raised letters is to take a small plaster cast of them then place that small piece on top of your waxed original when pouring the main plaster mould. Hopefully that makes sense?  |
| |
Last Edit: Oct 11, 2021 19:24:56 GMT by nze12
1986 BMW E30 refreshed to original spec
1973 BMW E12 520 converting to Motorsport 530
1982 XJS V12 converting to 5 speed manual
Many landscaping projects overriding above!
Cogito cogito ergo cogito sum!
|
|
|
|
gazzam
Part of things
 
Posts: 742 
|
|
Oct 12, 2021 11:17:02 GMT
|
Thanks Ken, but given the size of the lettering that would be quite a challenge. Regardless I already had my casting when I saw your post. Machining the cast blank is the next task. I think the starting point will be to cut the flat area in the middle where the banjo bolt seats. The rotary table will be brought into play. I started with a small block of steel, drilled a central hole and one in each corner so it could be fixed to the rotary. 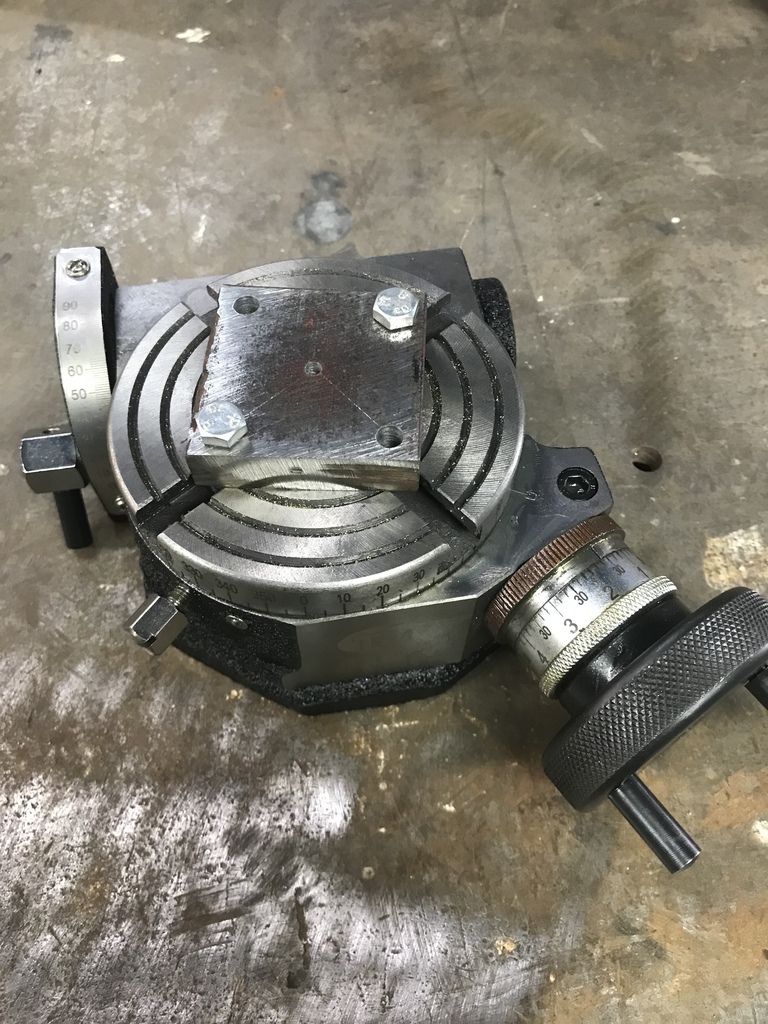 Then tapped a 6mm thread in the centre. 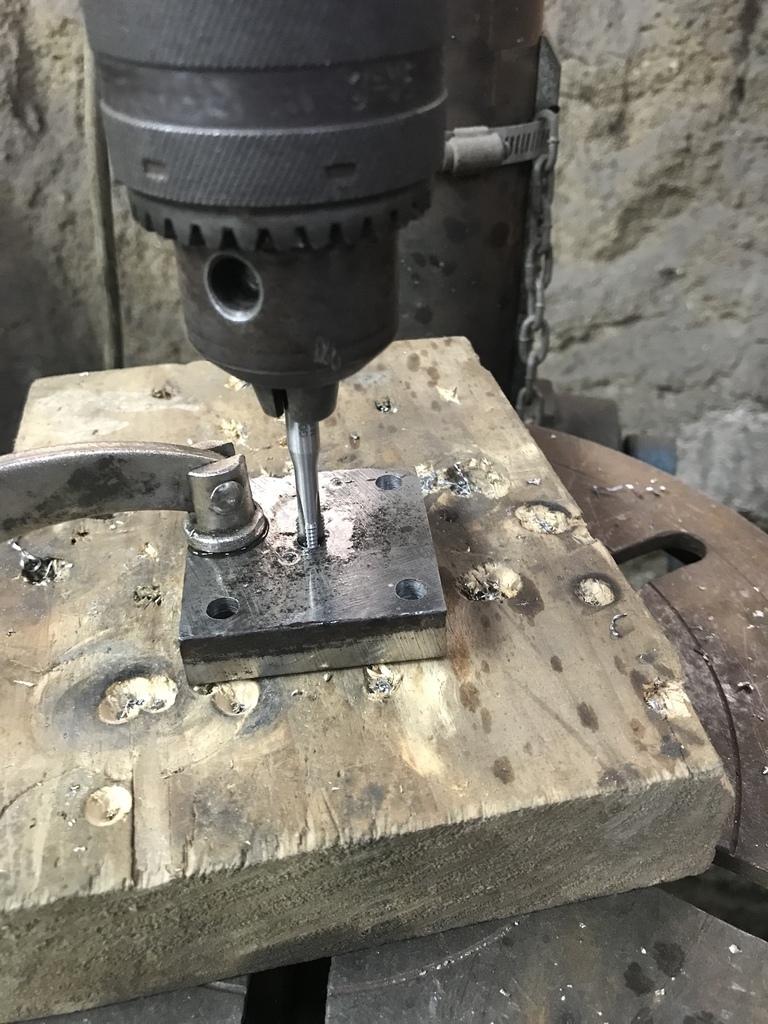 Put a setscrew in from the underside and bolted the combo to the table. 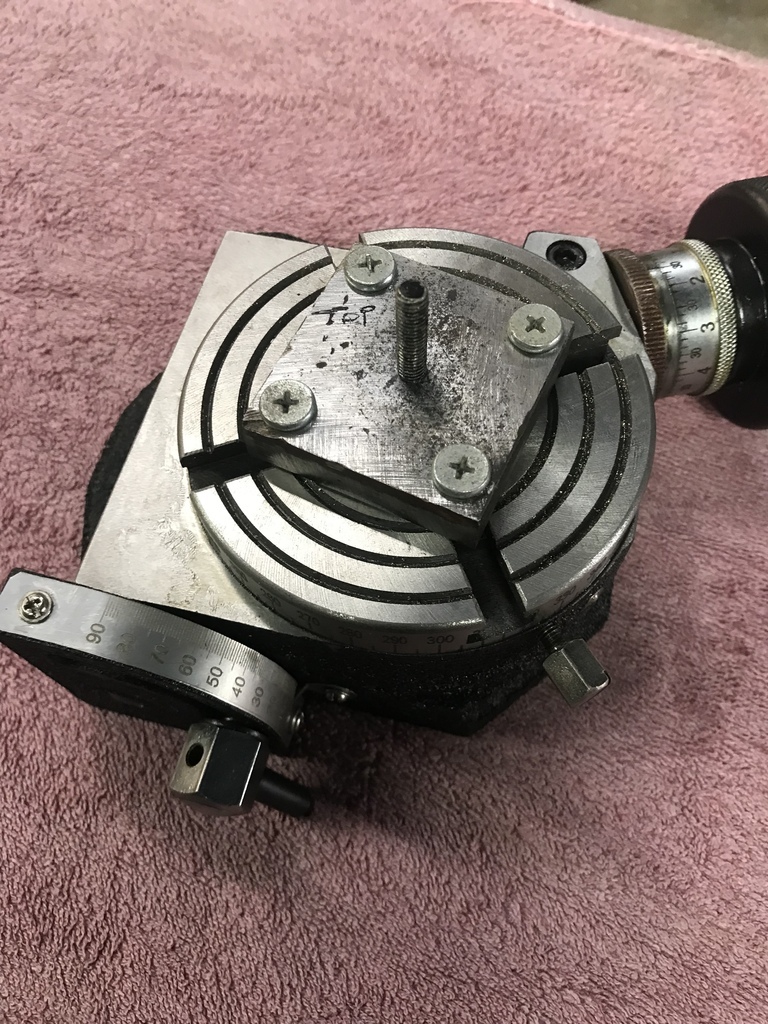 Drilled and tapped the blank so it could be anchored to the table. 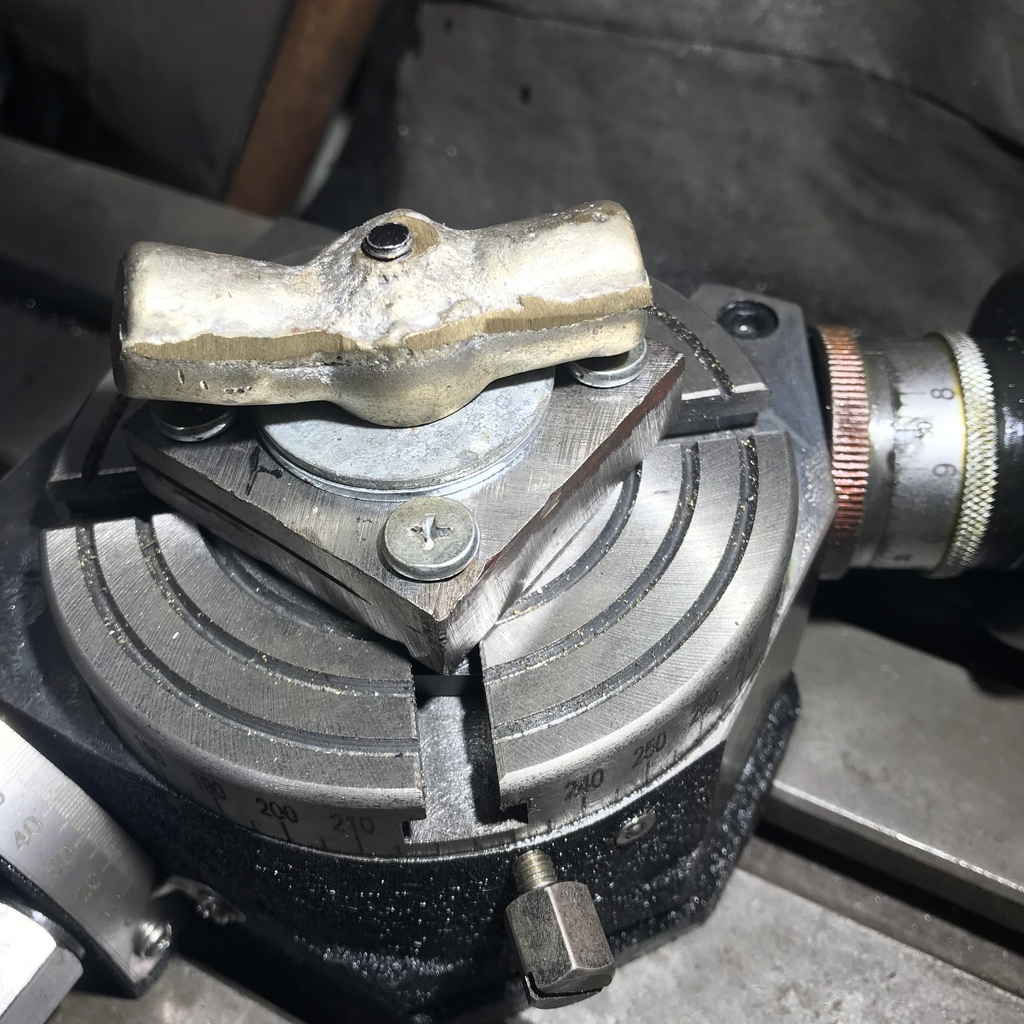 Then, once it was centred on the table and the table bolted to the mill, it was a simple matter to cut a flat on one side. 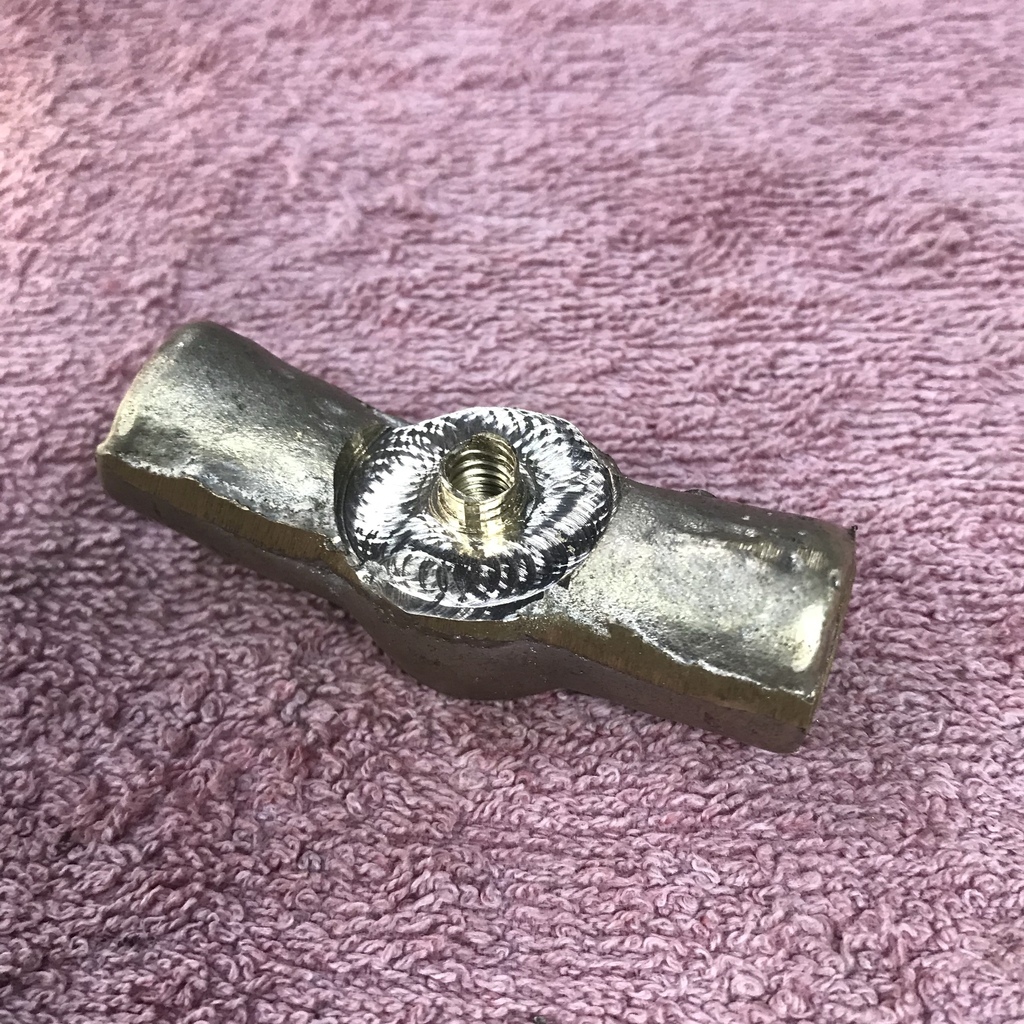 Then unscrew, turn over and cut the other side. Starting to get there… 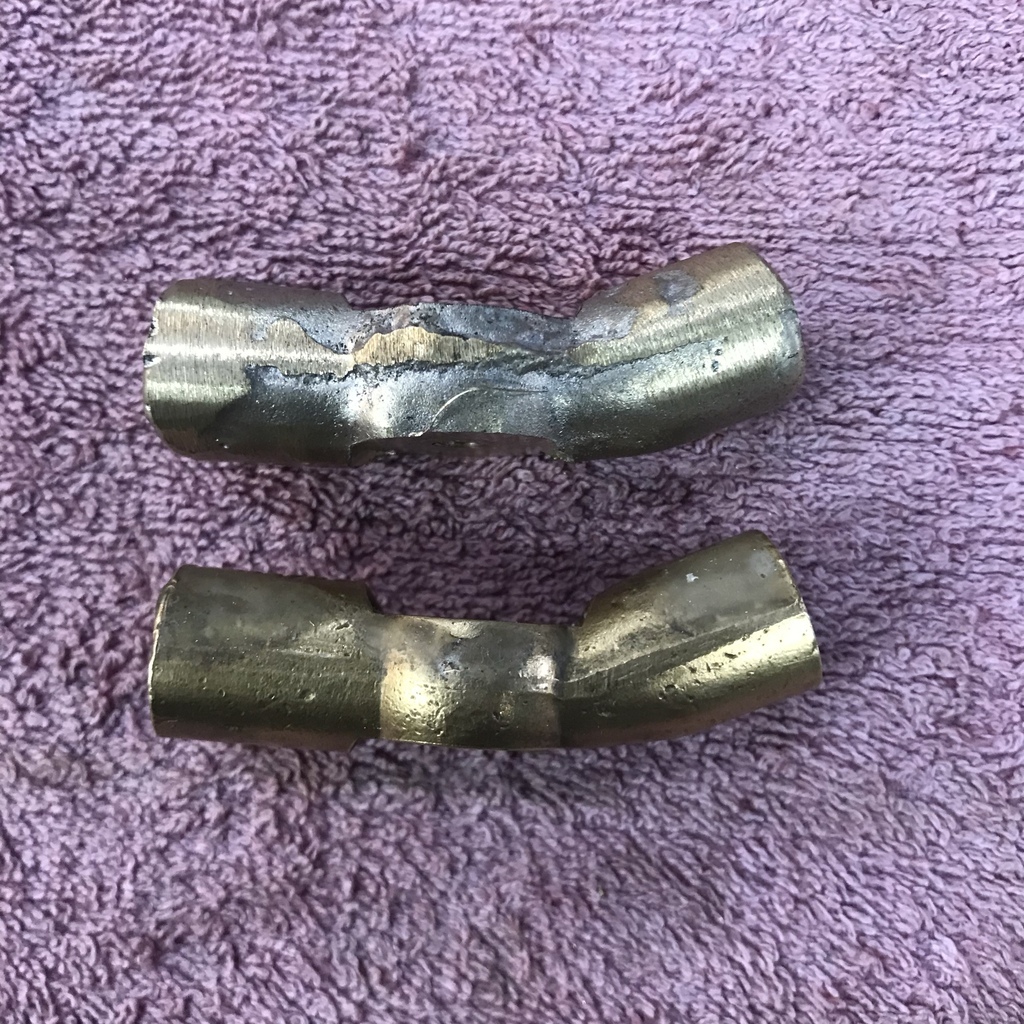 Carefully taking a bit off each side, I eventually got it to within a poofteenth of the correct thickness. The next step was to drill and tap the ends. Before attempting this I enlarged the holding bolt to 8mm. I thought it might be better with extra support. Then the table was raised to 90 degrees and a pilot hole drilled. 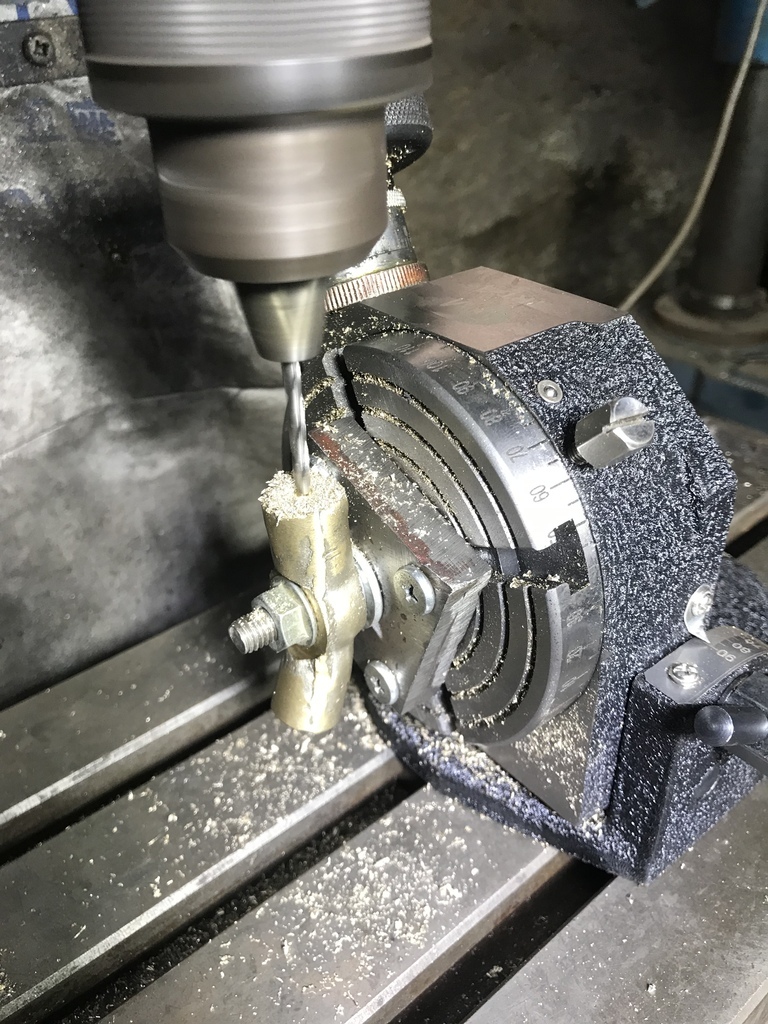 Open that hole out to 9.5mm 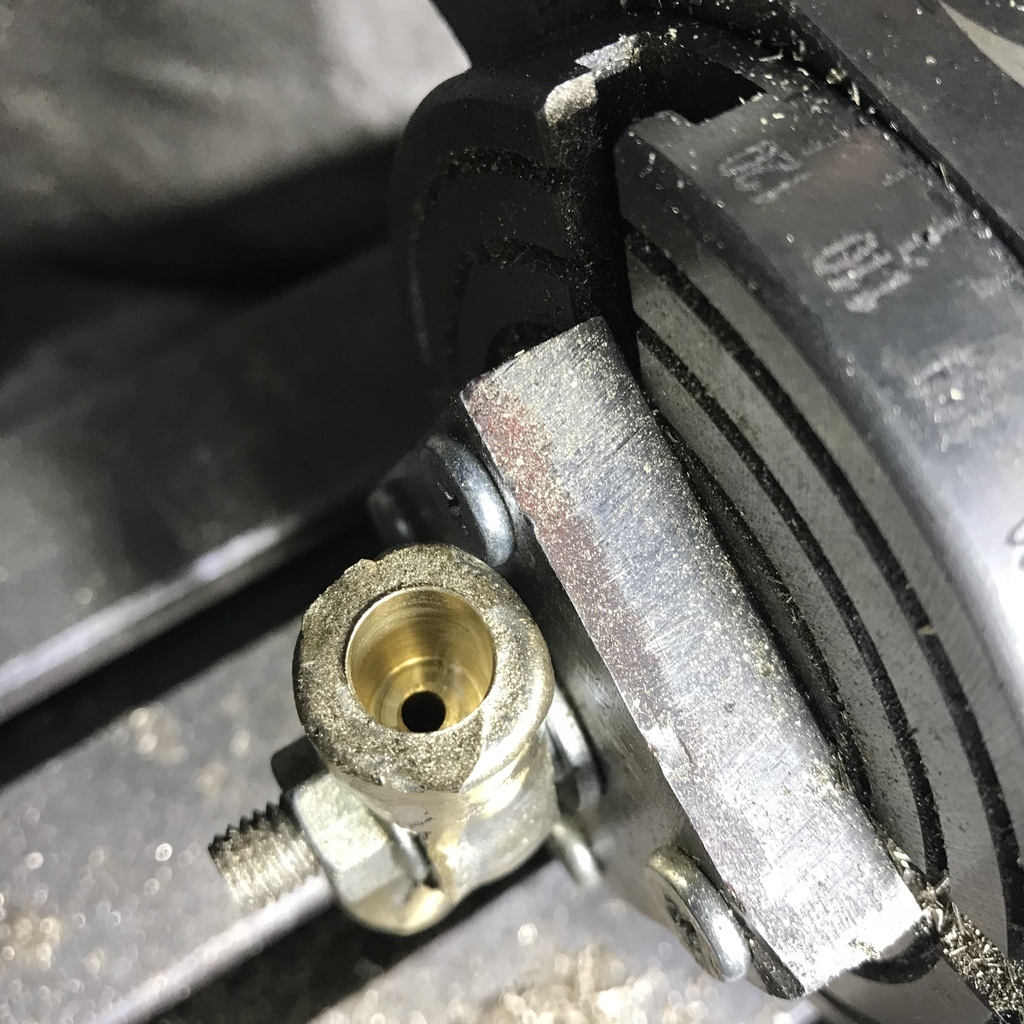 And tap it. 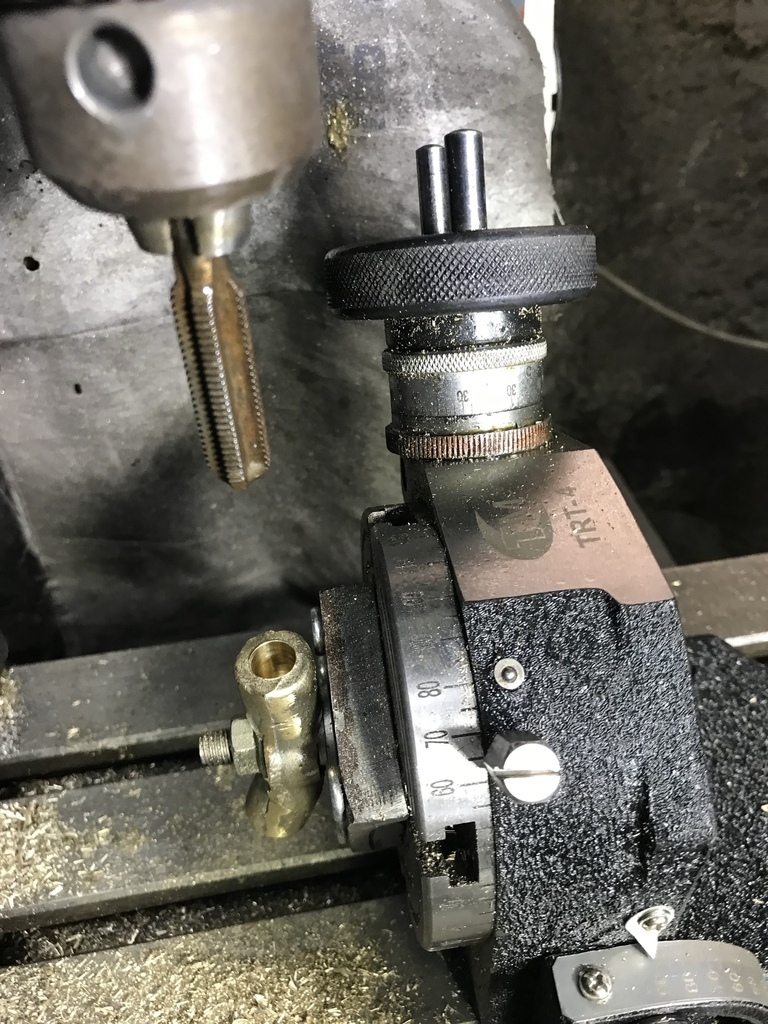 Needed to make the seat for the flare on the brake pipe. So I reshaped a drill to cut a slightly inverted flare. Just hope it seals. 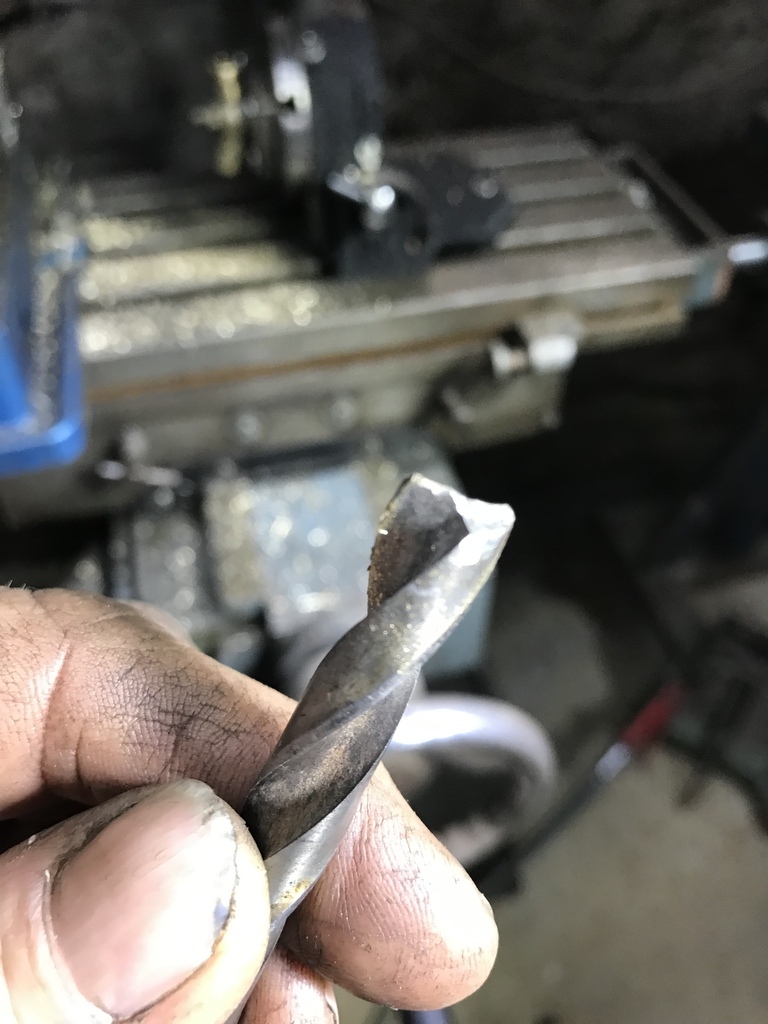 The other side was the same, just had to have the table at a different angle. And seeing it’s for the bleeder, didn’t need the special drill. It’s very close now. Might do a bit more finessing with the file. 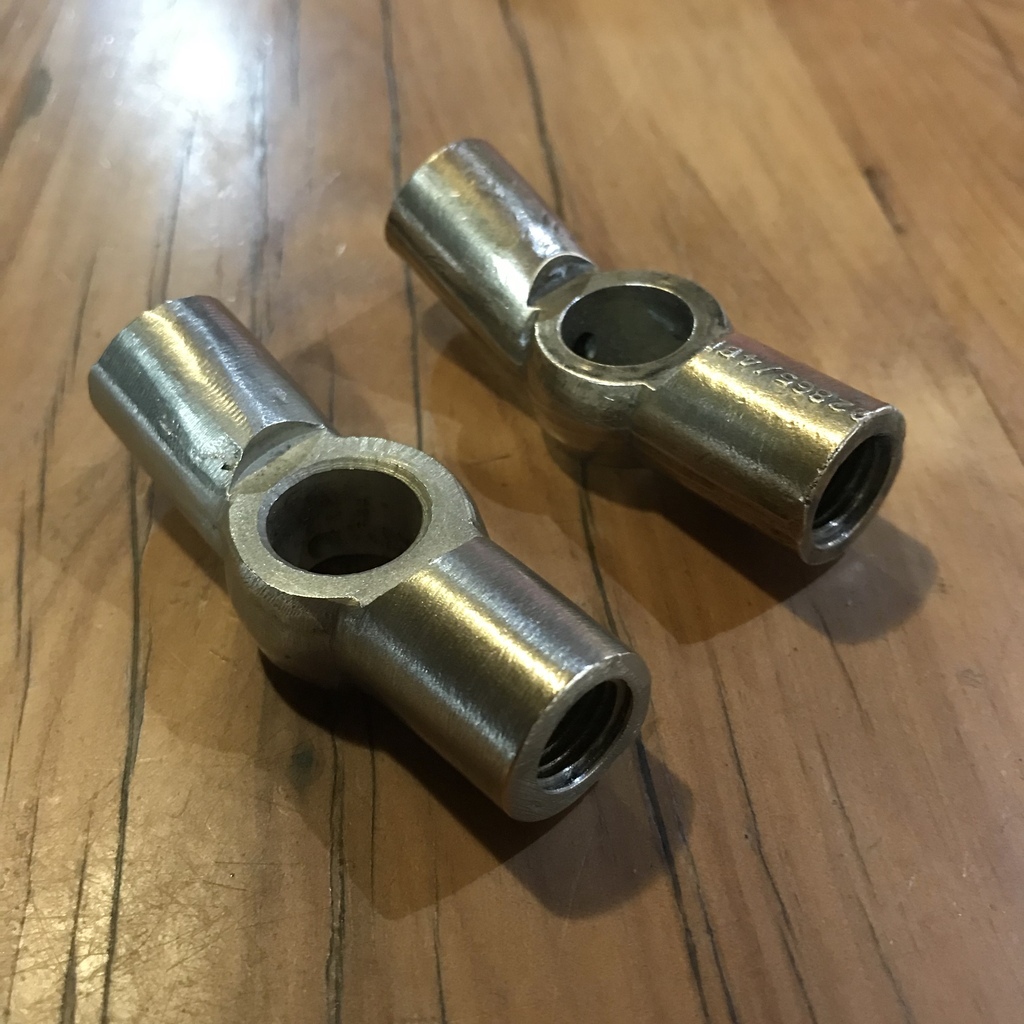 That’s all for now. Thanks for all the suggestions. Garry |
| |
|
|
|
|
|
Oct 12, 2021 11:35:39 GMT
|
|
That has to be rewarding to see it so close to the original. It's pretty amazing from way over here...
|
| |
|
|
jamesd1972
Club Retro Rides Member
Posts: 2,921  Club RR Member Number: 40
|
1952 Jaguar XK120 restoration jamesd1972
@jamesd1972
Club Retro Rides Member 40
|
Oct 12, 2021 12:16:12 GMT
|
|
Wow, that is just fantastic prototyping work. Have you worked out an easy way to pressure test it prior to installation ? Looks good and solid but wondered if there was a way to prove it ?
James
|
| |
|
|
|
|
|
Oct 12, 2021 12:22:52 GMT
|
|
Nice. Top points awarded for full use of the rotary table!
Nick
|
| |
1967 Triumph Vitesse convertible (old friend)
1996 Audi A6 2.5 TDI Avant (still durability testing)
1972 GT6 Mk3 (Restored after loong rest & getting the hang of being a car again)
|
|
|
|
|
Oct 12, 2021 18:30:45 GMT
|
|
I don't know, I turn my back for a few hours and you've finished it!
|
| |
|
|
nze12
Part of things
 
Posts: 193
|
|
Oct 12, 2021 18:33:25 GMT
|
Thanks Ken, but given the size of the lettering that would be quite a challenge. Regardless I already had my casting when I saw your post. Given the amount of talent and effort in this project I'm amazed that you can keep updating this forum as well! Oh - not forgetting your "St Patrick" duties too!  |
| |
1986 BMW E30 refreshed to original spec
1973 BMW E12 520 converting to Motorsport 530
1982 XJS V12 converting to 5 speed manual
Many landscaping projects overriding above!
Cogito cogito ergo cogito sum!
|
|
|
|
|
Oct 12, 2021 18:40:56 GMT
|
|
Terrific work and quite humbling for us mere mortals. The thread is a pleasure to read and your work rate is phenomenal.
|
| |
|
|
gazzam
Part of things
 
Posts: 742 
|
|
Oct 14, 2021 10:12:44 GMT
|
Thanks chaps, nice of you to say. James, I think I’ll pressure test it in situ. It’s easy to get at if there’s a problem. I’m fairly happy that there’s no porosity, and the sealing faces are pretty simple, so here’s hoping. Back on the metal. Started lead loading on the lhs front guard. I’d already done the joddled seam where it meets the cowl and the area where it meets the corner of the bonnet. The areas left to do on this guard are: The top of the guard needed building up to close the gap to the bonnet. The headlight pod/guard join. The chin/guard join. Much the same on the rhs. Here the top edge of guard has been done and the side of the pod has been tinned ready for lead. 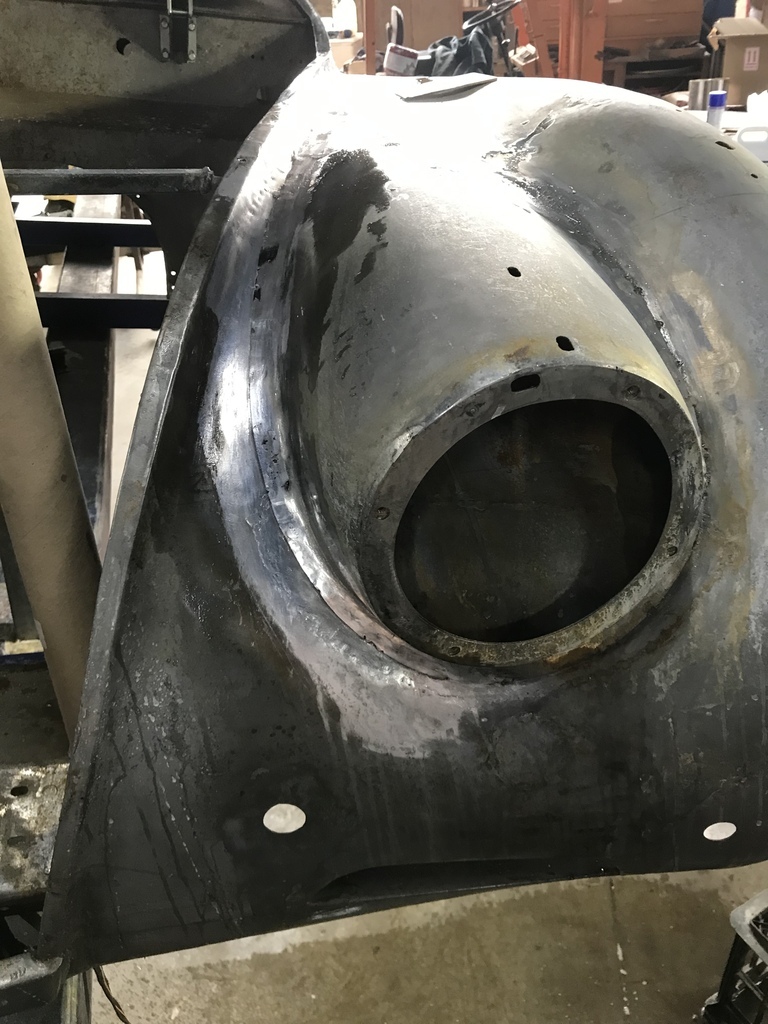 Lead wiped around pod. 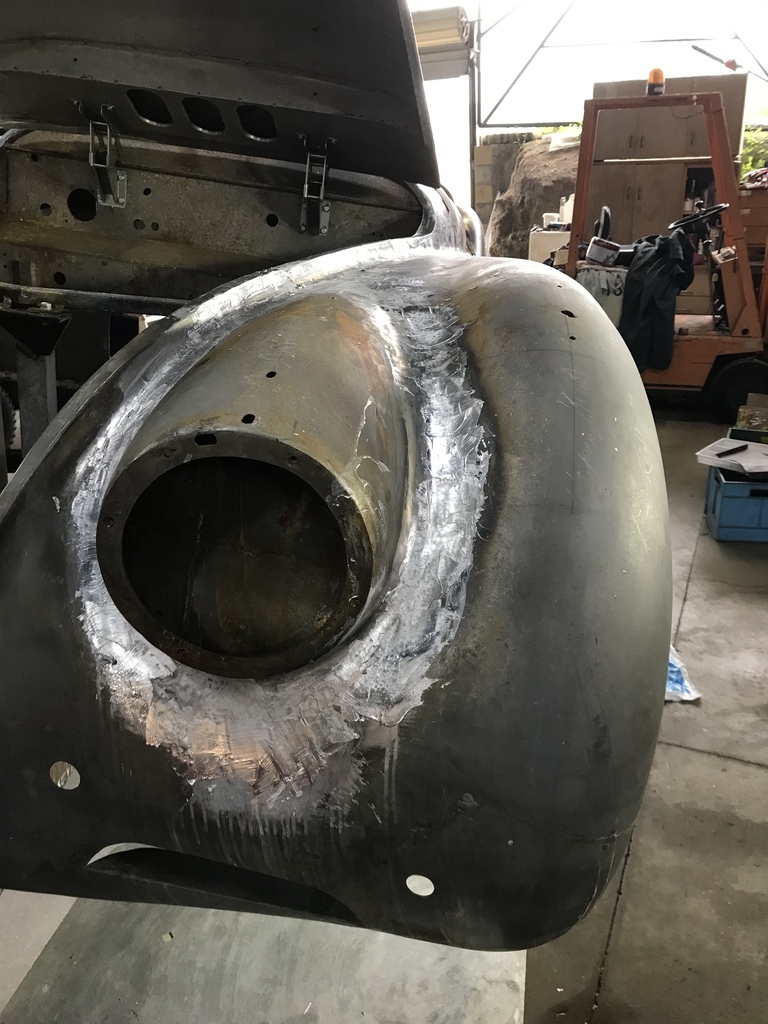 And some no small amount of filing later… 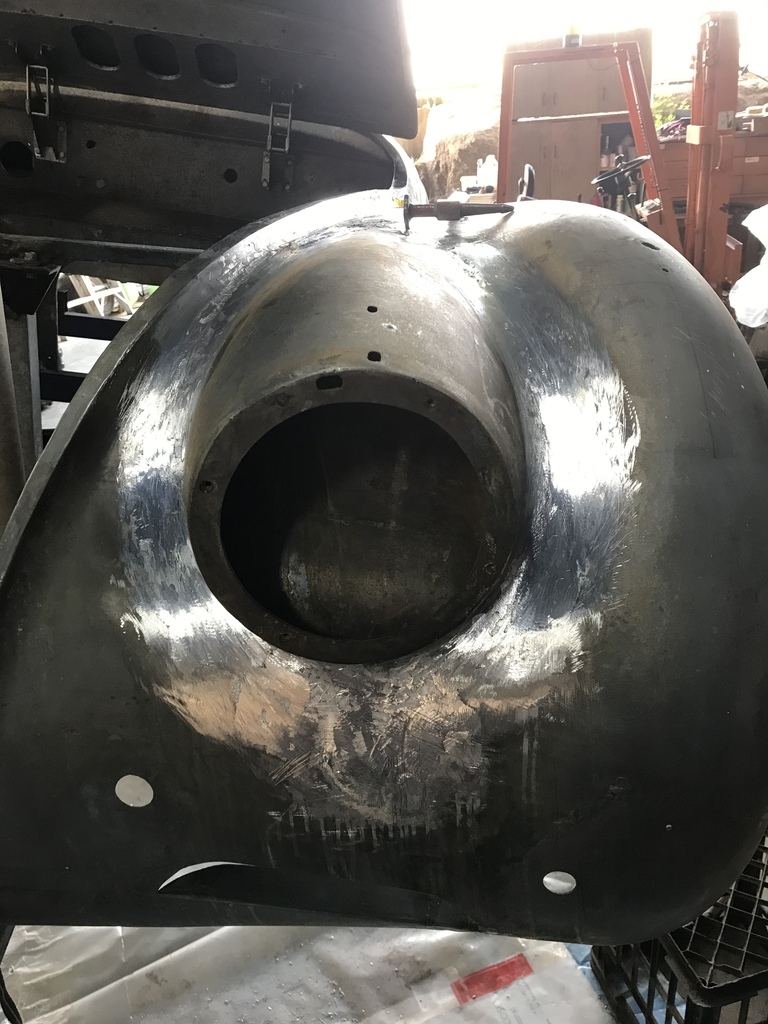 Next is the area where the grill part of the bonnet meets the guard. Here it is filled and getting close to finished. 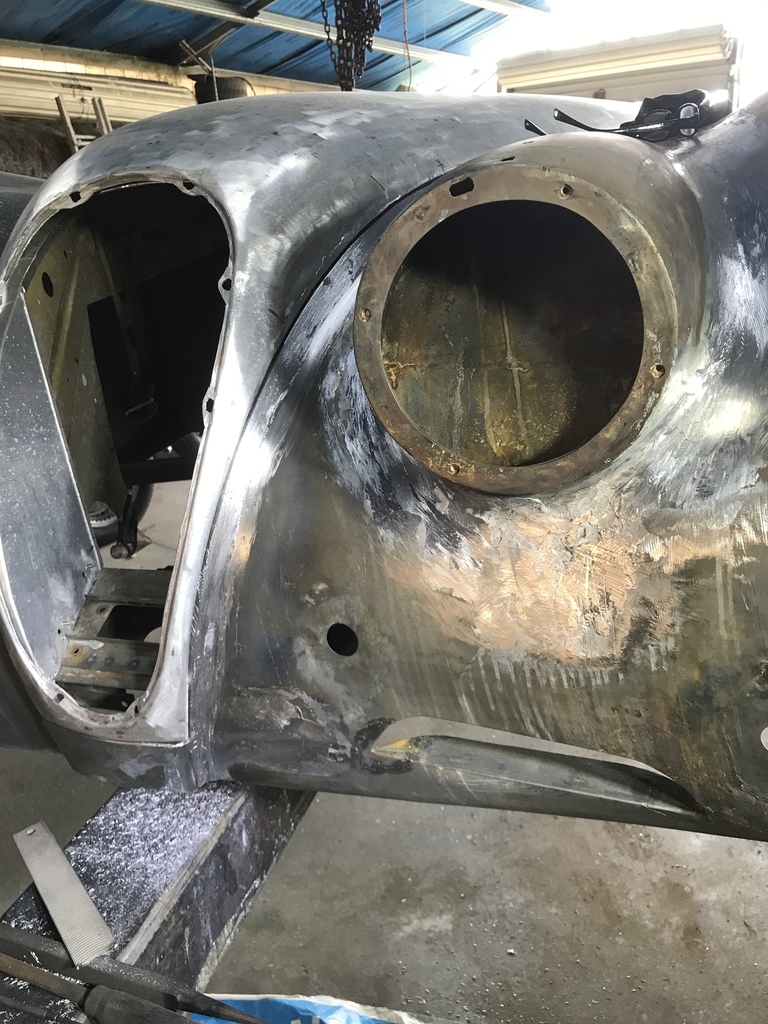 I realise it looks like a dog’s breakfast but you’ll have to take my word that it’s pretty much ready for epoxy primer. There will be body filler needed, I’m not precious about that. But it will be not much over a millimetre thick. The patch on the lower right will probably get wiped just because it’s fairly easy filing on a convex surface like that. This bit is similar and it took well under half an hour start to finish. There was a previous repair here that I had redone and the weld needed a wipe over. 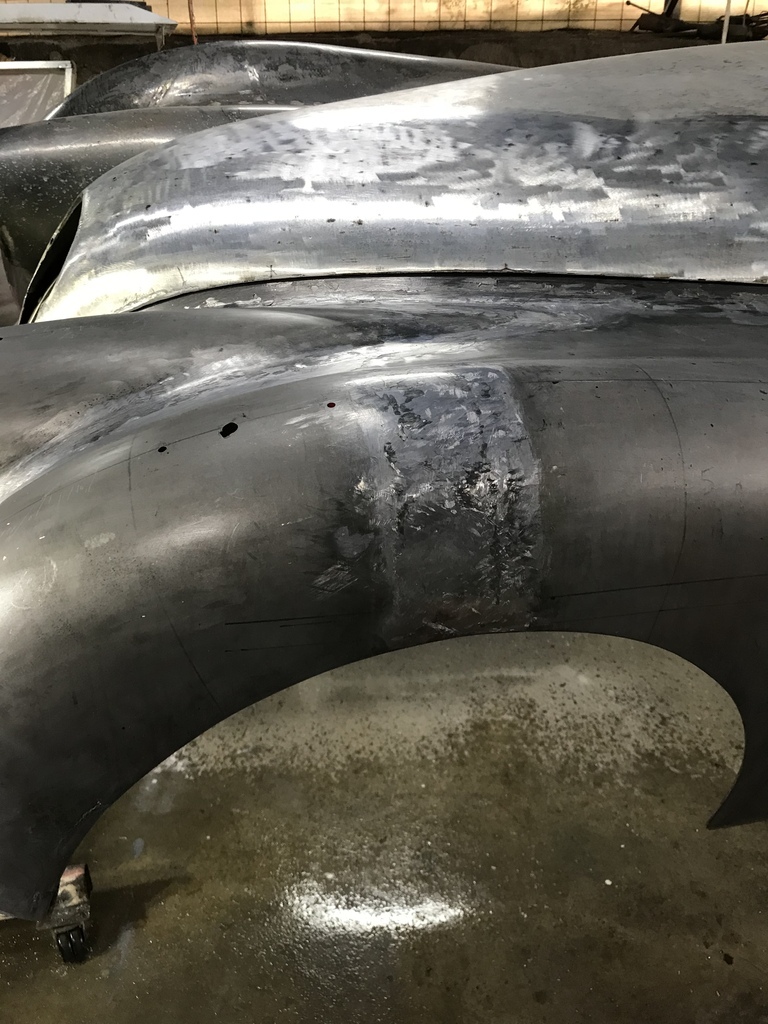 Front rh guard was next. When I say guard it’s really the part that meets the bonnet. And the headlight pod. Here’s the final ( I hope ) bit of leading in that area. 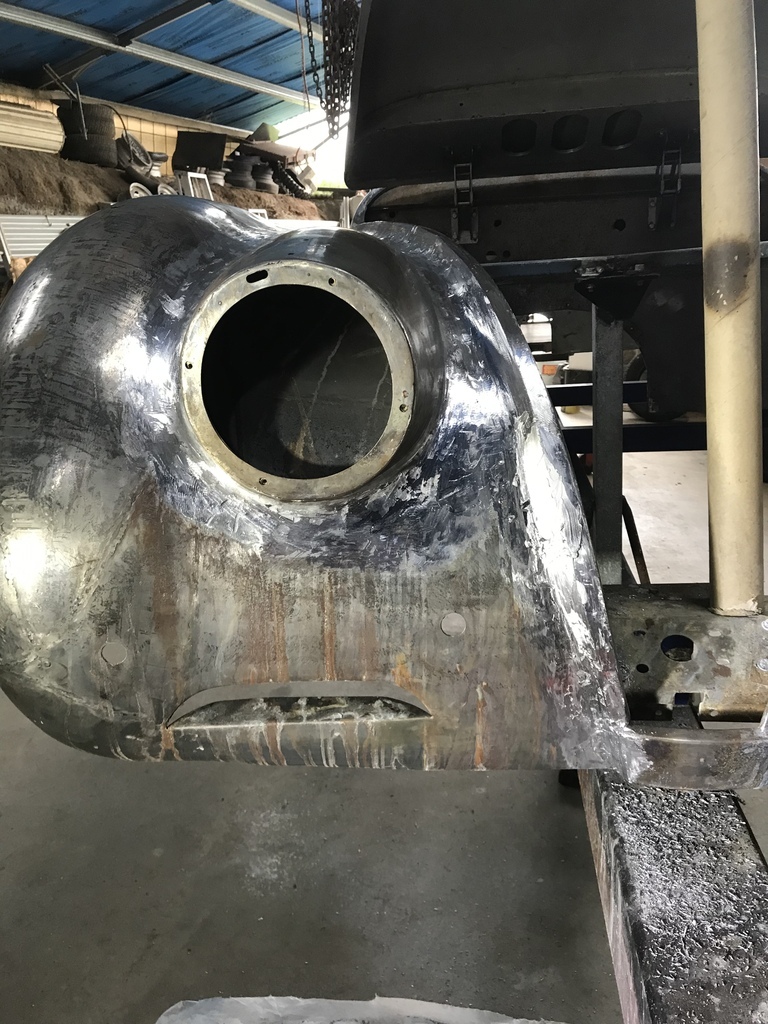 It’s hard to see in that photo, but the shiny section on the bonnet shut area is yet to be filed. It was a bit low and I had to build it up a little. Which is quite hard to do. The existing lead has to be heated enough for the new stuff to melt into it, but not enough that it will run away. The alternative is to just build up the area ( initially ) way over what you need. There are two problems with this. Lead is expensive. Filing it back is very hard work. This is the lead wiping dilemma, when one is no expert. But, like all things, with practise you will get better at it. Filing done, just work to do on bonnet gaps. Probably a fair bit of it… I didn’t take a photo as it still looks like the one above. That’s all for now, comments, suggestions and queries welcome. Garry |
| |
|
|
|
|
|
Oct 14, 2021 11:22:25 GMT
|
|
As always, a pleasure - and education! to read your posts....many thanks.
|
| |
|
|
gazzam
Part of things
 
Posts: 742 
|
|
Oct 19, 2021 10:42:13 GMT
|
The bodywork is done. The lead work is as good as I’ll ever get without starting again and just over filling it, in order that when it’s filed back, it will be perfect. I might not live long enough! Though I would love it to be perfect, it’s just not possible given my skill as a wiper. So there will be body filler, but no more than 1.5 mm. I can live with that. So I washed the whole body with De Ox It. It’s a phosphoric rust remover, but given the size of the shell and the complexity, it’s impossible to get it dried off completely, quickly enough . This means it dries with a powdery deposit in the corners and crevices. Paint won’t stick to powder so I tried using Eastwood Metal Ready after the DeOx, but had the same problem. It looked like it had been dragged from a swamp. 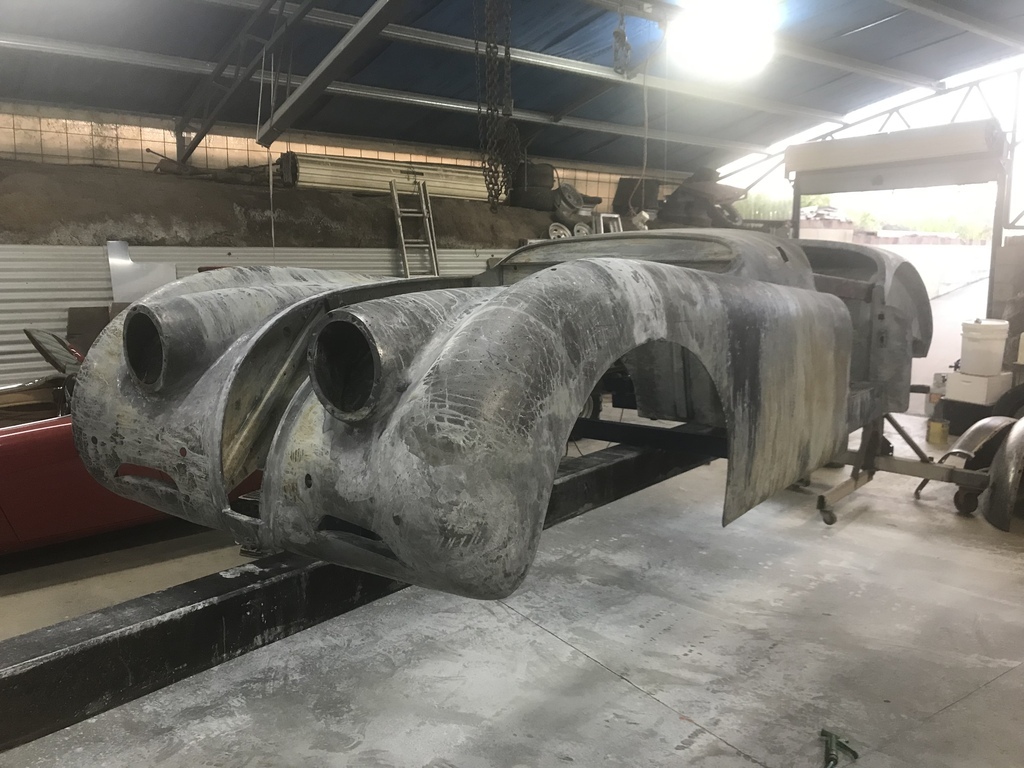 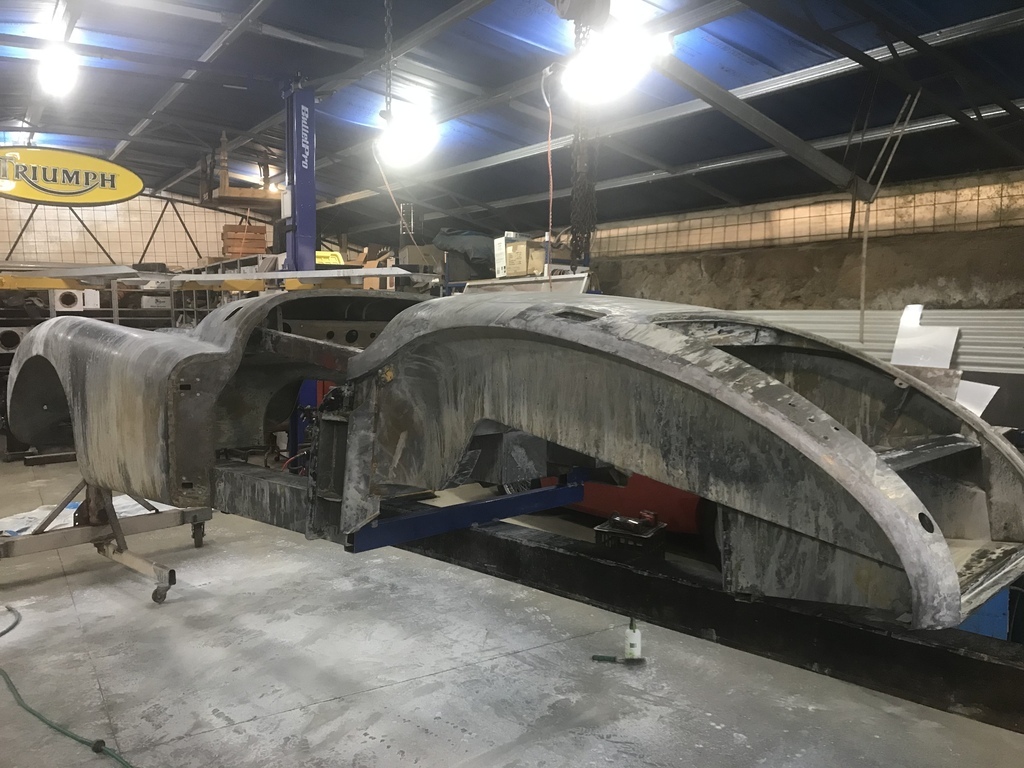 No alternative but to blast it again. It didn’t take much, low air pressure with the small spot blasting gun was adequate. Only took a few hours to get all the difficult spots cleaned up. Then I washed the large areas with wax and grease remover before giving them a quick touchup with some 40 grit on the DA. This was the result. 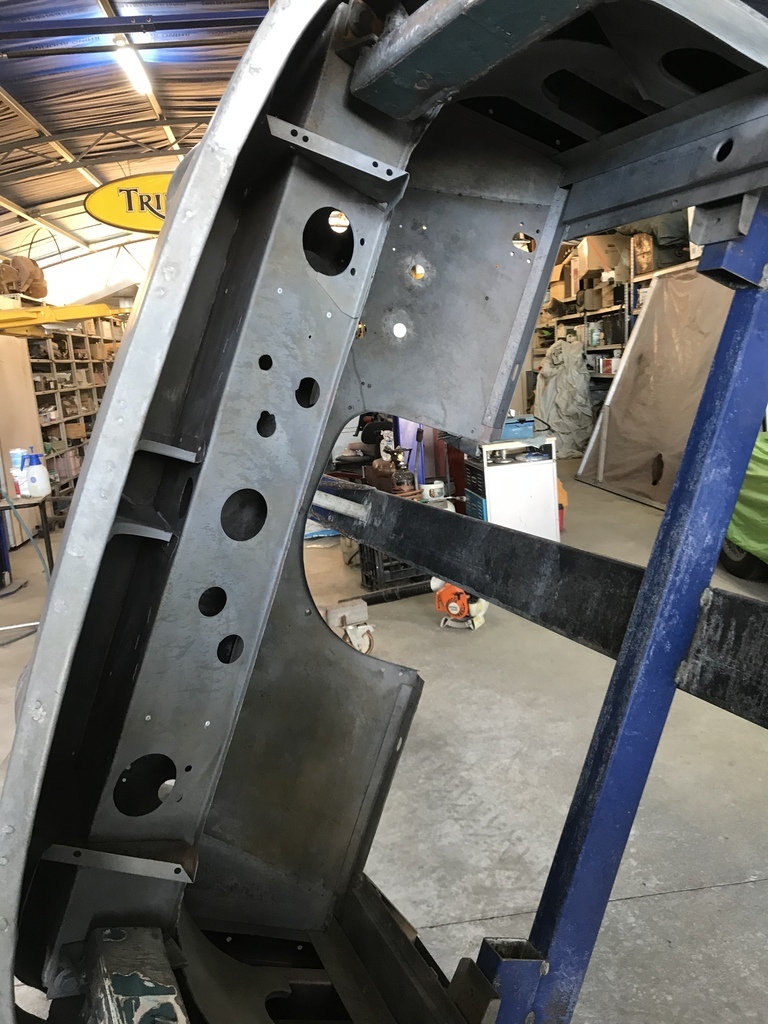 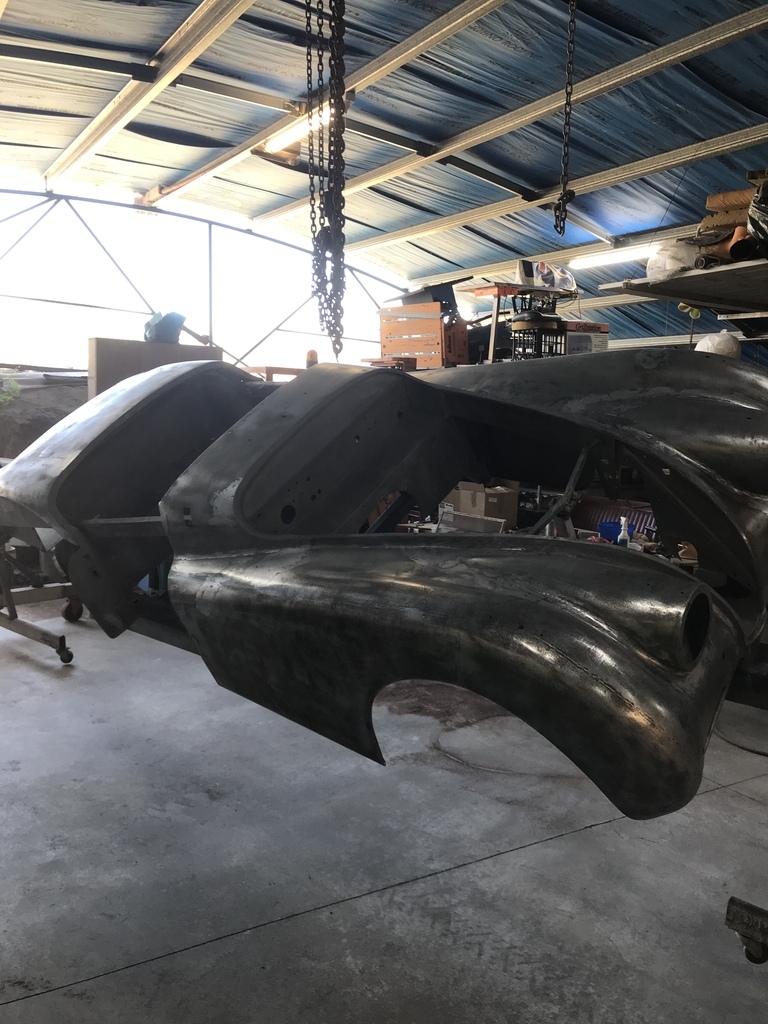 So I got stuck in and hung some new plastic on the shelves that form my spray booth. There were also a few little areas that needed attention - some grinding, welding etc and then it was time to get the epoxy primer out. We’re expecting a few wettish days, so I was keen to get all this fresh bare metal covered. Et voila, it now is one colour! A bl00dy milestone! As opposed to a millstone. 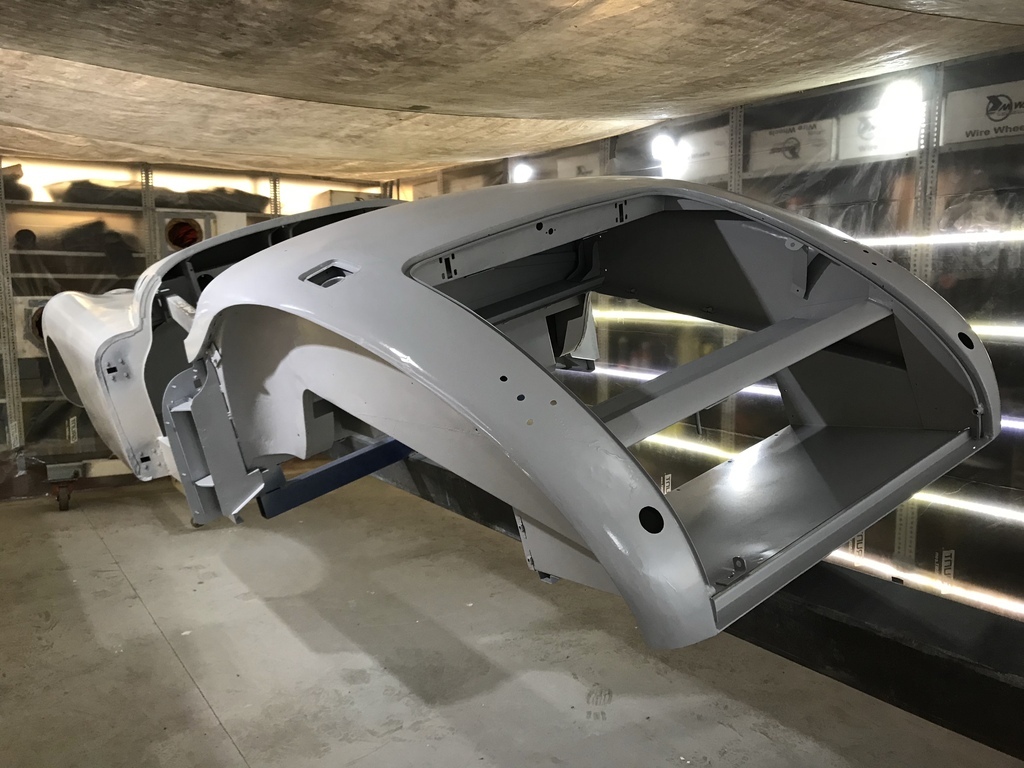 Now for the filling and sanding. That’s all for now. Thanks for looking. Comments welcomed. Garry |
| |
|
|
|
|


