|
|
|
|
|
Any further developments   ?? Sort of! I've spent the past month or so unsuccessfully testing out various bits and pieces (as well as welding up copious holes in a Pug 106 and my MGF). There was a delay with picking up the replacement roof panel as well (caused by me!). In the meantime I've been experimenting with zinc plating the caliper spacer brackets which has been a trying esperience  quite a learning curve to get everything working ok, coupled with the new non-carcinogenic yellow passivate not being much good (it rubs off quite easily). Going to try with some olive drag passivate which is apparently a bit less finicky than the trivalent yellow and is also more long-lasting (just less pretty). As for updates, I've collected the roof panel:  I spent an hour or two drilling spot welds from above before deciding that would take far too long (made it about 10" in an hour and a half). Decided to cut the lip halfway in the rain channel to take the majority of the spot welds off, and then drill out the remaining ones from the underside.  That done I now have a non-sunroof roof skin free of the supporting frame   The roof skin itself is in really good nick, but there are a few little rust spots jsut starting to break through so they were wire wheeled and phosphoric acided before a coat of epoxy primer went on.  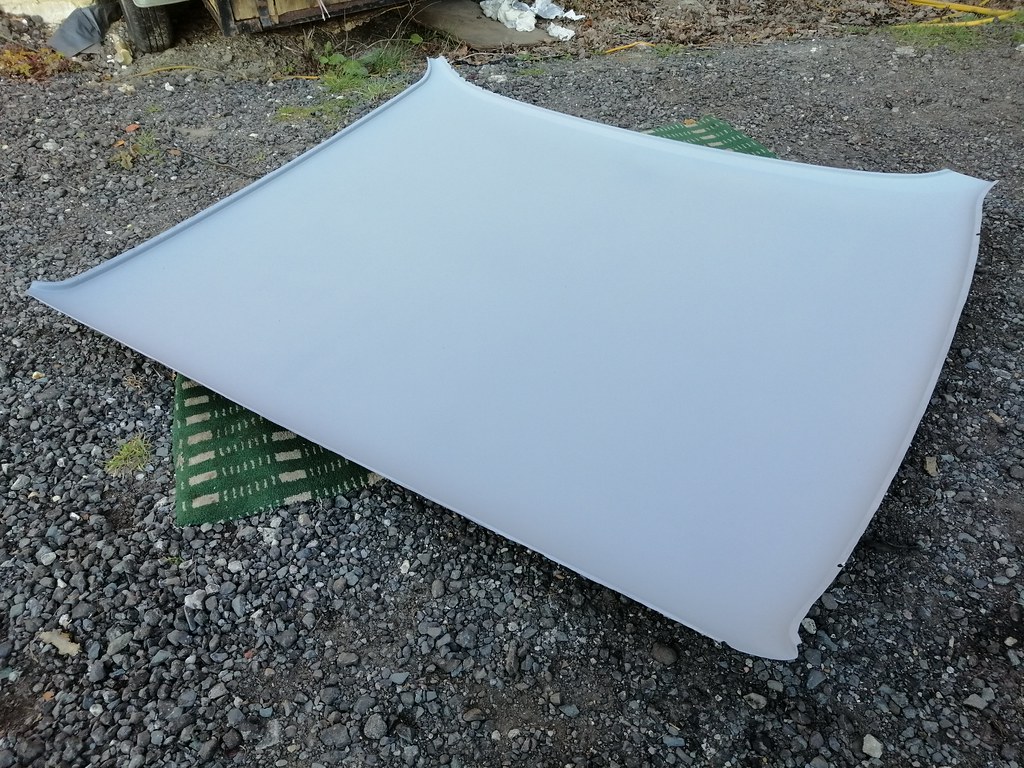 It's a bit gritty from the outside painting, but it's sealed which is the main thing. Next step is to get the roof panel off the car itself! :S |
| |
|
|
|
|
|
|
|
|
|
|
Thanks for the update, keep up the good work!
|
| |
|
|
|
|
|
Apr 12, 2021 11:46:52 GMT
|
Thanks for the update, keep up the good work! Thanks man  will do! Another little update. No going back now... 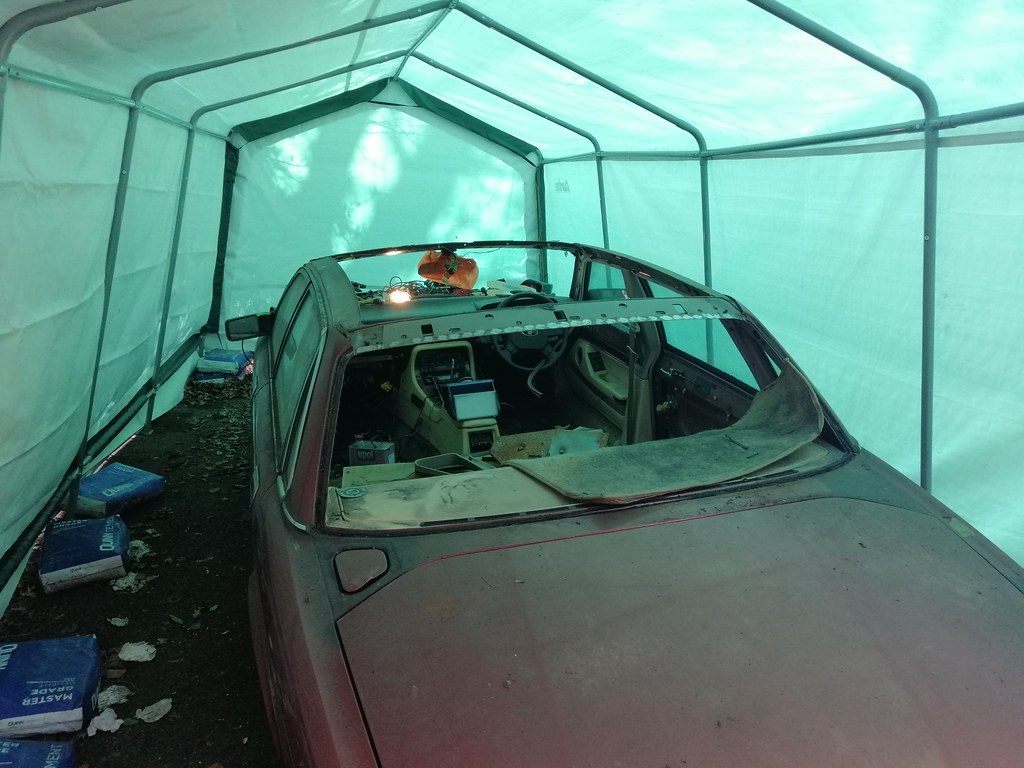 It's at this point my mate has mentioned a convertible would be a neat idea  suppose that's a last resort  |
| |
|
|
Paul Y
Posted a lot
  
Posts: 1,951
|
|
Apr 12, 2021 12:04:27 GMT
|
Or a Pope Mobile... Yeah.... P.  |
| |
|
|
|
|
|
Apr 12, 2021 12:53:03 GMT
|
Or a Pope Mobile... Yeah.... P.  Haha now there's an idea  I've seen a few pickup conversions on these too... They're long enough you could probably do a crew cab and still have a reasonable bed... |
| |
|
|
|
|
|
Apr 12, 2021 21:30:04 GMT
|
|
You are going to need a big Webasto for that.....
Nick
|
| |
1967 Triumph Vitesse convertible (old friend)
1996 Audi A6 2.5 TDI Avant (still durability testing)
1972 GT6 Mk3 (Restored after loong rest & getting the hang of being a car again)
|
|
mk2cossie
Club Retro Rides Member
Posts: 3,060  Club RR Member Number: 77
|
|
Apr 12, 2021 21:52:55 GMT
|
You are going to need a big Webasto for that..... Nick Now that would be awesome!  |
| |
|
|
|
|
|
Apr 19, 2021 10:25:18 GMT
|
And we have a roof again!  Used the old roof panel as a template to get the shape roughly right, then cut it about 10mm oversize to make sure I didn't cut it too small.  Popped it in place and then gradually, carefully trimmed each corner until it fit really quite snugly! Approaching it with the angle grinder for the first time I had one of those ' I'm about to make a £90 mistake aren't I' moments, but it passed quickly enough  was rather chuffed with the result if I do say so myself      There was the tiniest bit more fettling done after that before the first few tacks were done to hold it in place   After that I clamped it to oblivion and stuck some tiger seal along the inner edges of the front and rear, and as far as I could get it into the corners, like it had as standard. I waiting til this had cured to act as a clamp on the inside edge, before slowly and steadily spot welding around the edges (one spot at a time, with a clamp being moved along just beside it). Seemed to work quite well   Lastly, I very slowly (over the course of a couple of days, inbetween other jobs) filled in the pillars with successive tacks. Letting it cool completely between each spot weld (and with all the other edges being nicely secured) helped keep warping to a real minimum   So we've now got a non-sunroof Jag! Next step will be cleaning up along the spot welded seams, painting and then seam sealing ready for the final coat when the whole thing gets sprayed  Big relief to finally have this bit done!  |
| |
Last Edit: Apr 19, 2021 10:25:58 GMT by biturbo228
|
|
|
|
|
Apr 19, 2021 13:14:59 GMT
|
Superb work and a great response to a seemingly insoluble problem  |
| |
|
|
|
|
|
Apr 19, 2021 14:26:34 GMT
|
Superb work and a great response to a seemingly insoluble problem  Thanks man  and yeah, I'm lucky that there's a chap in the midlands who breaks these and can get stuff like roof skins relatively easily. That's one of the reasons I was happy to have a go welding a patch in as I knew that it wouldn't be impossible to get a replacement roof if it all went wrong! Glad I didn't try it on the Alfa 75 first. That would have been much more of a pickle! |
| |
|
|
|
|
|
|
|
Apr 19, 2021 18:31:18 GMT
|
|
Brave as always (balls of tungsten) and looks to have paid off handsomely.
Are we watching in real time now or is there still some catching up to do?
Nick
|
| |
1967 Triumph Vitesse convertible (old friend)
1996 Audi A6 2.5 TDI Avant (still durability testing)
1972 GT6 Mk3 (Restored after loong rest & getting the hang of being a car again)
|
|
|
|
|
Apr 19, 2021 21:03:09 GMT
|
Brave as always (balls of tungsten) and looks to have paid off handsomely. Are we watching in real time now or is there still some catching up to do? Nick Haha thanks man  was touch and go for a bit with the weld-in panel, but all came together in the end! Yeah we're real-time now  last tacks on the roof were late Sunday! |
| |
|
|
|
|
|
May 24, 2021 10:37:53 GMT
|
So it's been a while since I got some decent progress on the Jag. Fuel pipes are in progress, but held up by needing to order more brass unions to sort them, so I finally turned my eye to the burnt loom in the boot. So way back on page 1 I mentioned I had tried to drain some water from the fuel tank out of the level sender hole, which turned out not to be water and went up when I tried to drill a drain hole with a cordless drill  not my smartest moment... A mate and I managed to put it out quickly enough, but it had quite thoroughly melted the RH loom in the boot. Fused into one charred lump! I bought a new section of loom from the ever-helpful Naki, but TBH this was putting me off:  64 wires! Oh, and they were cut off just ever so slightly too short (my fault for explaining the point to cut wrong!). I'd spent ages trying to find something like a suitable bulkhead plug which would let me put in a little extension loom, but ended up buying another rear loom that was cut a little longer and a box of solder sleeves  So yeah, this is where I've spent the past 3 days!  It started off with straight-forward matching of colours. So far so good, if a little slow going. About midway through though I realised that there were some wires that were duplicate colours! Oh, and another issue that soon became apparent was that the new loom I'd bought, despite being from the same model year, had a few differences (mainly that the new loom had fewer wires than the car loom!). I got it down to about 15 wires that weren't obvious, so most of the 3-day job time was spent trying to fathom out where those went! First off I checked that all the plugs had the right colours on them by comparing the short loom (which matched the car-side loom) with the long one which luckily checked out. Worked out that the black and pinks were all straight earths, so the 3 on the car side can be connected to the single on the new loom (which must then split again somewhere in the loom).   Some more testing found that 2 more wires were directly connected somewhere else in the car-side loom so it didn't matter which one they connected to on the new loom. Luckily I managed to find a PDF copy of the XJ40 workshop manual (1985 pages!) which has partial wiring diagrams scattered all through it, including for the big multi-pin ABS module plug where 6 more of the mystery wires were hiding. Oh, and the Haynes manual led me to one more wire which connected to 'fuse 3' in the central fuse box (why the aerial up relay was connected to a fuse that says' cruise control' on it I didn't question...)  With those sorted, the rest fell into place as if they didn't connect to these they must connect to the other duplicate wire of the same colour. The only final issue was that some of the wires remaining were weird shielded wires for ABS and speedo hall effect sensors. These have got one regular wire running down the middle, with a little woven sheath around that, and then a final layer of insulation. Not fun to splice! The plan I came up with was this: Cut the wire, carefully strip the outermost insulation without snagging the copper weave too much. Roll that back and strip the inner wire. It's a good idea to thread a big solder sleeve per side (for the sheath) and any heatshrink on now as it doesn't like going over the when it's all bunched up. 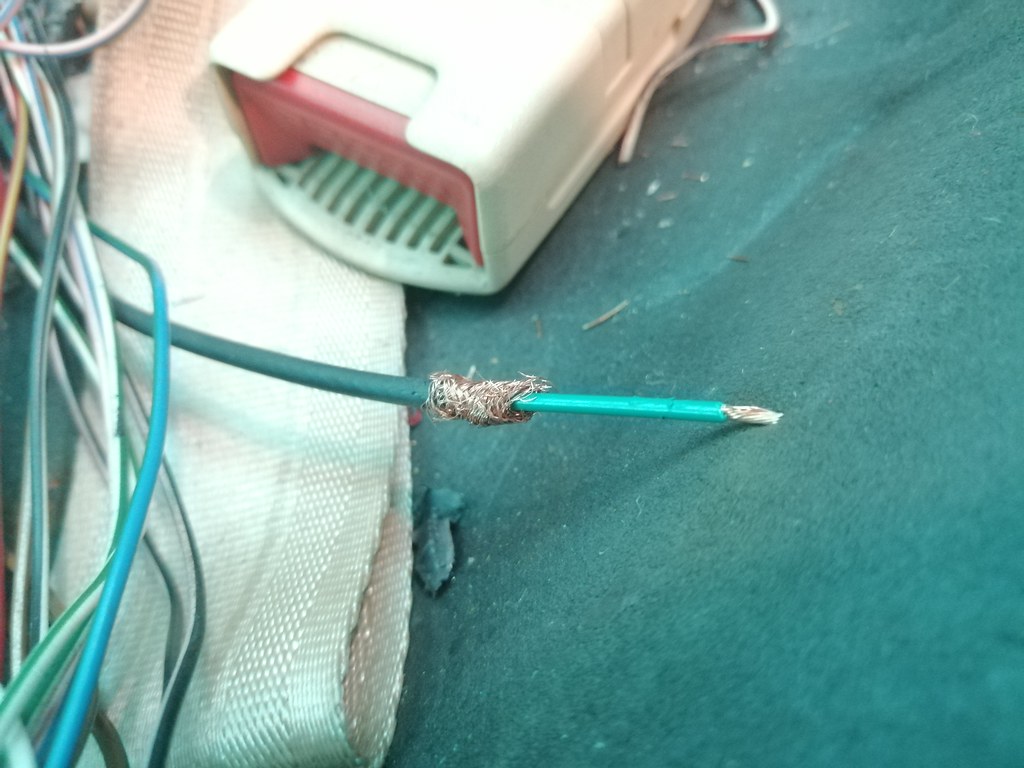 Luckily, I had a spare section of sheathed wire from the speedo sensor which had 2 wires in so it's a bit thicker, meaning I could half-inch a section of sheathing that fits over the solder sleeves.   That gets threaded over the inner wire too (easier before you strip the inner wire as the copper snags).  Join the inner with with as small a solder sleeve as you can, then thread the bigger sleeve over it.   Then use one of the big solder sleeves to connect one side of the outer sheath, the second to connect the other.   And finally heat-shrink it all up!  The speedo cable needed a different tactic as I didn't have a copper sheath big enough to fit over the two wires underneath, so I just made a little bridging section out of some flattened weave and solder-sleeved that on which seemed to work. But with all that done, and 3 days later, I now have a complete loom again!  All wrapped up and ready to be threaded back into the boot   No idea if it all works, but that's one big job off the list  |
| |
|
|
|
|
|
|
|
Another week, another shuffle closer to it being sorted  fuel lines run from the back (this pic was after the first one, but I've done feed and return now).  ...and up to the front.  Ended up buying some expensive cohline fuel hose from Merlin Motorsport as my mate with the E36 V8 has been bitten by stuff that had all the proper letters stamped on the outside but definitely wasn't fuel hose (it must have sweated fuel through the hose as it smelt the whole time). At least with this you know what you're getting (or you know who to complain at if you don't!). Those connect to an adjustable FPR (bathed in the pallid green glow of the new tent)...  The BMW high pressure pump apparently likes to have 4 bar feeding it, but on the BMW there's a module that regulates the pressure by adjusting voltage to the pump. No good for the Jag and its walbro I think (although I do still have it just in case). I looked around for 4 bar diesel regulators as I hear fixed ones are a bit more reliable than adjustable ones. The main one I could find is from a TD5, but when you type 'TD5 fuel regulator' into google it autocompletes it as 'TD5 fuel regulator leaking', which I gather is a common problem. Will see how the malpassi does! |
| |
|
|
|
|
|
|
|
Next thing off the list  Last of the sills repaired (although there's a bit of crust on the passenger's front that needs proper investigation, and some rusty bits right at the front). Starting to run out of rust to fix which is exciting  Here's the sill:  Chopped out:  Ended up forming most of the panel in situ as, but turned out ok  had to take the door off to get to the front section, but that's not too tricky.  Remade the door seal retaining channel using my patented tent peg technique     Modified the technique slightly so I could form a full 180 degree curve. Ground a piece of flat bar to shape with a bit of a longer section below so you can clamp it higher.  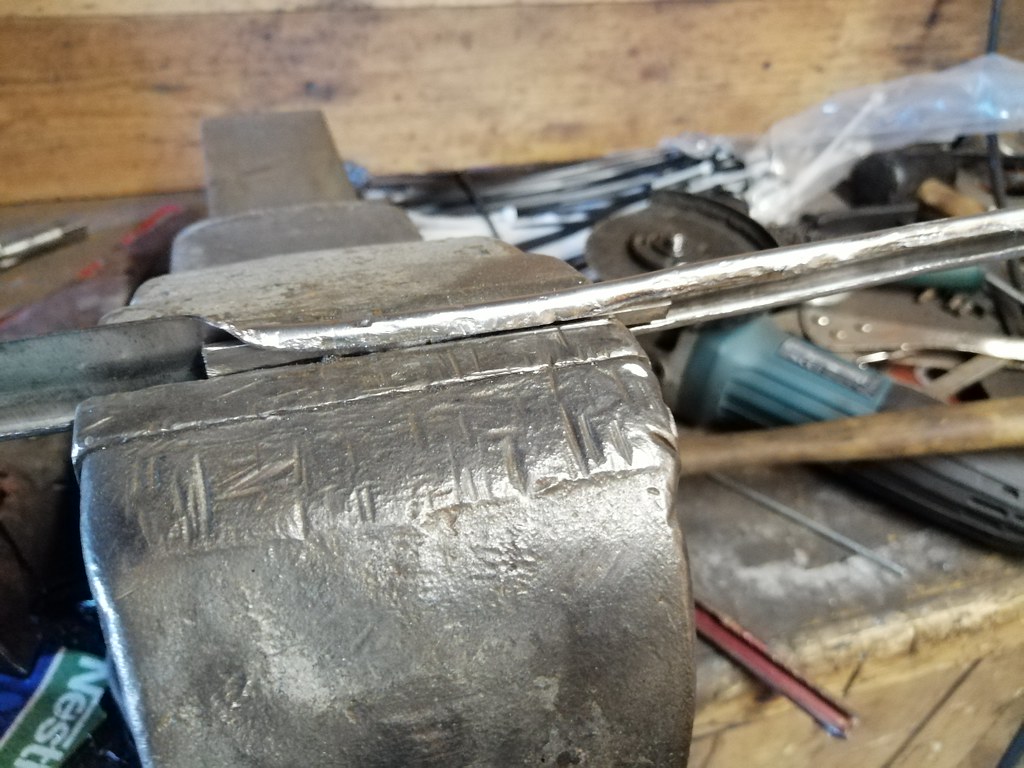 One channel complete! Managed to recover a curved section of the channel at the front which I didn't fancy making at all!   And a spot of paint  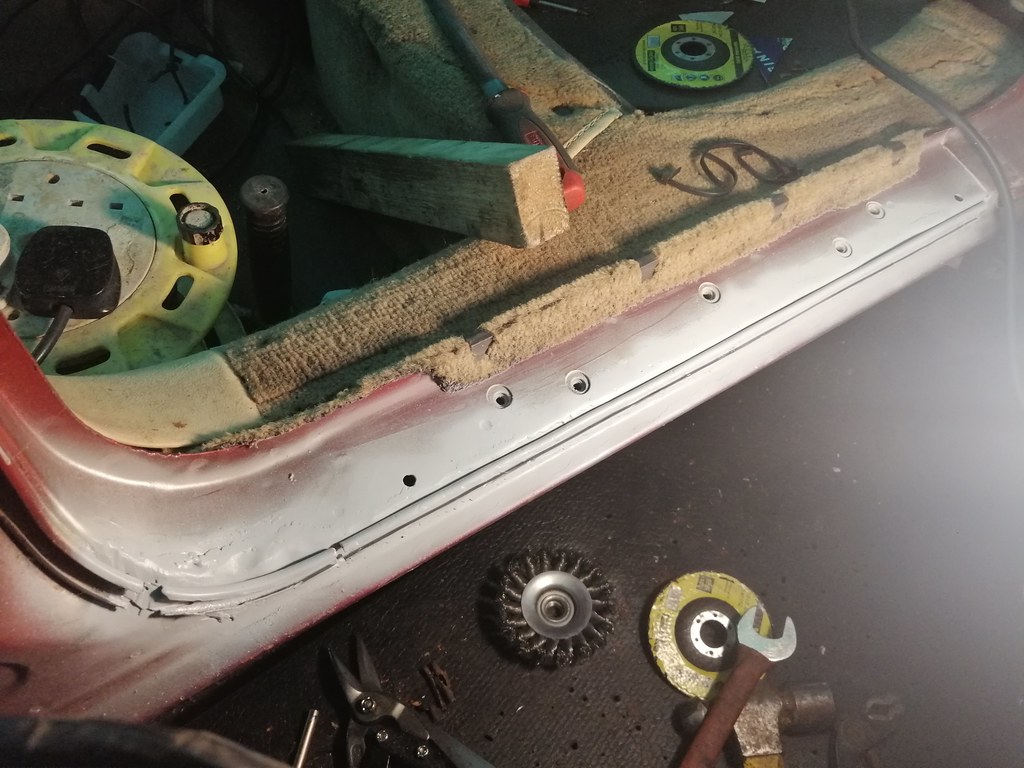 I've also stripped and repainted all of the bits where the roof's welded on. I'd done it in etch primer but run out of hardener midway through so just finished blowing it over to protect it slightly but planned to redo it in epoxy anyway. The pickle is that I've done the scuttle panel and the underside of the roof in etch which I didn't realise isn't waterproof! Need to come up with a clever plan for injecting some epoxy into the box sections and the like as it's going to be a royal pain to correct. I'm thinking something like a waxoyl gun filled with paint If it works ok it might be useful to paint the inside of chassis rails and boxes and the like. Will report back how it goes! |
| |
|
|
|
|
|
|
|
Oh, also, it's a doubly exciting weekend. For a bit of context, I have a catastrophic memory (or is it too many things to remember...) so I put together these little to-do lists. They tend to have mainly a handful of things that need doing in a given week, and then a whole host of longer term things so if I the weekly things are quick I'm not stuck thinking 'well, what do I do now'. I've started a whole dedicated page for the Jag:  What's exciting about this weekend is that the on the next list, the Jag section will be off the bottom of the page! There's still a lot of work left in it, but it's nice to see light at the end of the tunnel (even if it's a speck in the distance...)  |
| |
|
|
|
|
|
|
|
|
Excellent work on the roof, that's a job many would shy away from.
|
| |
1988 Mercedes w124 superturbo diesel 508hp
1996 Mercedes s124 e300 diesel wagon
1990 BMW E30 V8 M60 powered!
1999 BMW E46 323ci project car
|
|
|
|
|
|
|
Excellent work on the roof, that's a job many would shy away from. Thanks man  must admit it was quite nerve wracking as I was cutting into it! But my thorough dislike of sunrooves was spurring me on  Turned out to not be all that tricky in the end, once I'd got to the point of swapping the whole roof skin. Definitely not a beginner job, but not the most complicated thing I've done by a long shot. The knack seems to be in making sure you cut a decent oversize on the roof panel and then diligently fettling it to shape with lots of trial fits. Get the fitment close enough and the welding goes easily  |
| |
|
|
|
|
|
Jun 15, 2021 23:26:18 GMT
|
Next few steps on the Jag  First off was masking up all the interior and giving the roof a blow over with epoxy primer, after discovering that the etch primer I used isn't properly waterproof...  That cured I could pop some dynamat on the roof. It adds in a bit of the weight I've just cut out with the sunroof, but it really does stop the panel ringing. I also tested out using a cavity wax injection gun to blow some paint into the sections of roof I can't reach. Seems to work rather nicely, although understandably it chews through paint!  I've still got a few bits to paint so can't unmask everything and get on with the last bit of pillar welding, so while the paint turns up I turned my hand to the exhaust  Shortened an inexpensive 3" E90 downpipe and fitted a v-band on the end.  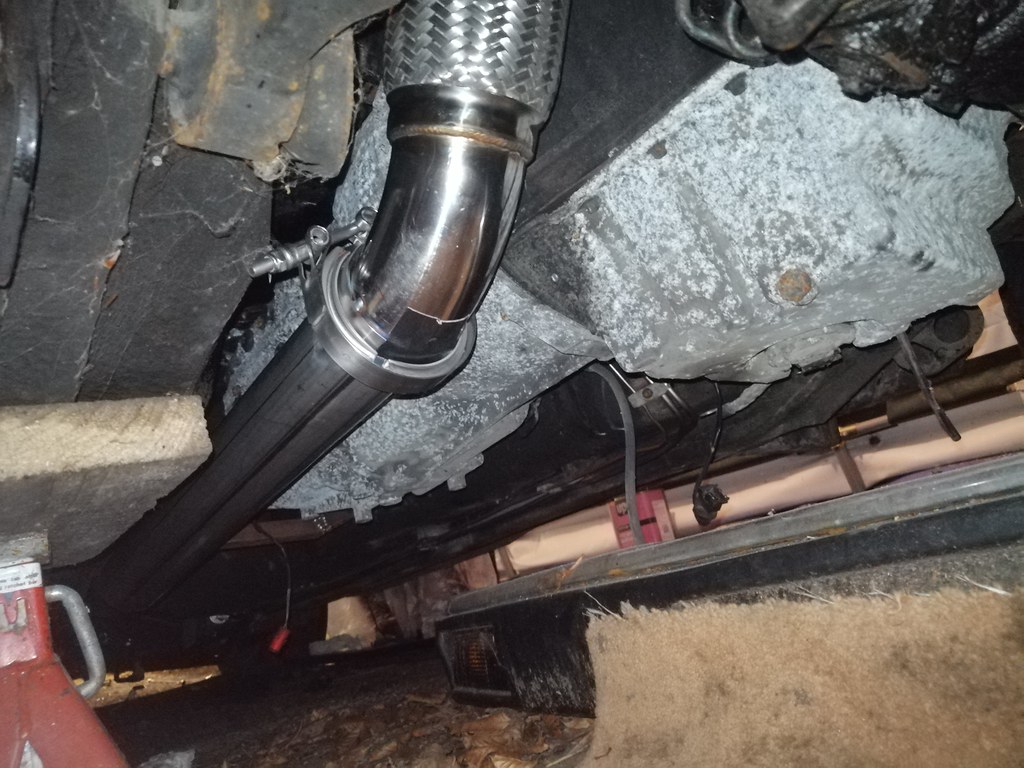 Clearance past the gearbox mount is tight, but I can cut some of the edges of that away to make a bit more space.  Little dogleg section to get it away from the handbrake mechanism...  ...and a patented carbon fibre mid-section   That's a mockup for the splitter section to get it over the axles. Figured the design at this stage is a lot less critical than a merge collector upstream, and it'll be much easier to weld. Plus, the bigger distance between the 2x 2.25" pipes puts them closer to where they need to be. Just waiting on a couple more v-bands so I can tweak the shape of individual bits of the system once it's in the car and that'll be the centre section done! Then onto the hard bit :S |
| |
|
|
|
|
|
Jun 21, 2021 21:00:39 GMT
|
More exhausting sorted  sorted the first midpipe...  ...and got the second midpipe together. Not the prettiest splitter, but it puts the v-bands in a beter place for the over-axle pipes and was much easier to fabricate!   Checking prop clearance. Oodles of space!  Got a mount sorted and everything hung up in place, then spent about an hour lying under the car trying to decide whether I'd done a good enough job  where the exhaust drops under the gearbox mount, and where the middle v-band is, it sits about 10mm below the level of the chassis rails. I could probably remake various bits and pieces to tuck it up just above the chassis rails, but decided it was too much of a pain and risked it touching the bodywork :S 10mm below really isn't too bad either  So on with the convoluted over-axle pipes! Took a while to get things sized right, but a combination of silicone hose offcuts to set clearances, cable ties, and resigning myself to taking the rear suspension back out again to clearance the box section above it and I think I'm there  Starts from the back like so:  Pops up and over the axle:  And down the other side:  Clearance is tight, but it stands a chance of working. There's around an inch above the inner UJ, and maybe 2 and a bit where it drops down next to the wishbone. Hopefully that's enough! I also relocated the rear v-band to get it a little higher and improve ground clearance, resulting in this pitchfork-alike thing    I've since removed the mount as it's in the wrong place, and still need to sort the tailpipe, but that's one axle pipe done   Now just have to do it all again for the other side  |
| |
Last Edit: Jun 21, 2021 21:01:07 GMT by biturbo228
|
|
|
|
 quite a learning curve to get everything working ok, coupled with the new non-carcinogenic yellow passivate not being much good (it rubs off quite easily).


 not my smartest moment...


