|
|
|
May 19, 2020 21:14:17 GMT
|
|
|
| |
Still learning...still spending...still breaking things!
|
|
|
|
|
|
|
May 20, 2020 23:45:04 GMT
|
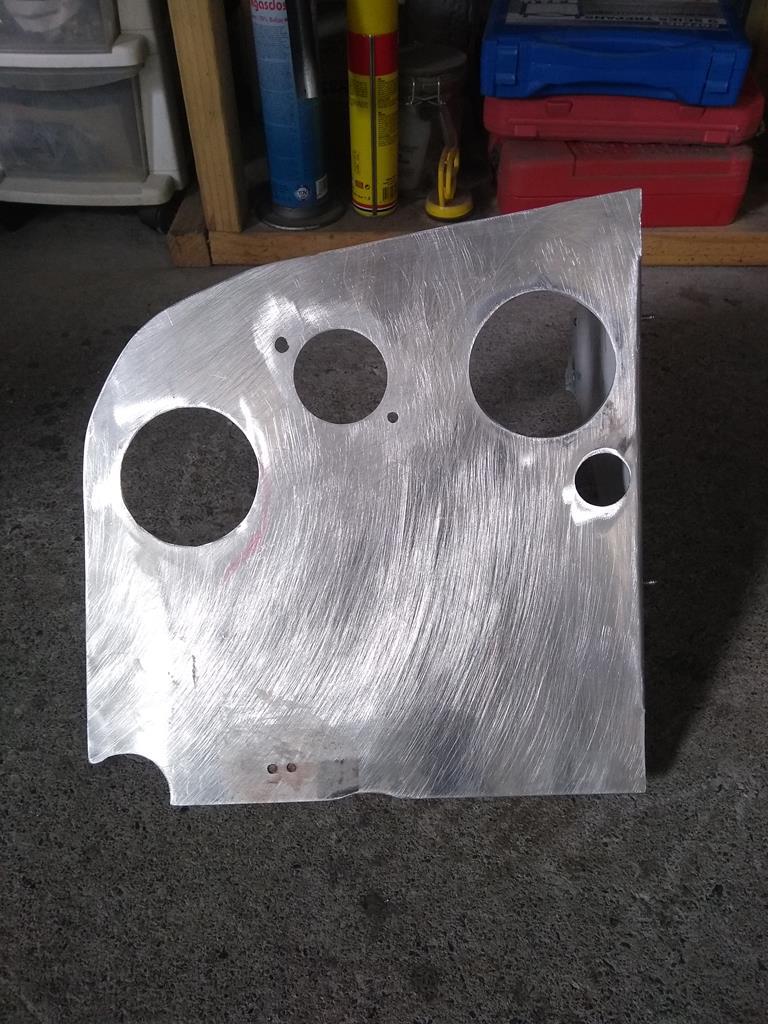
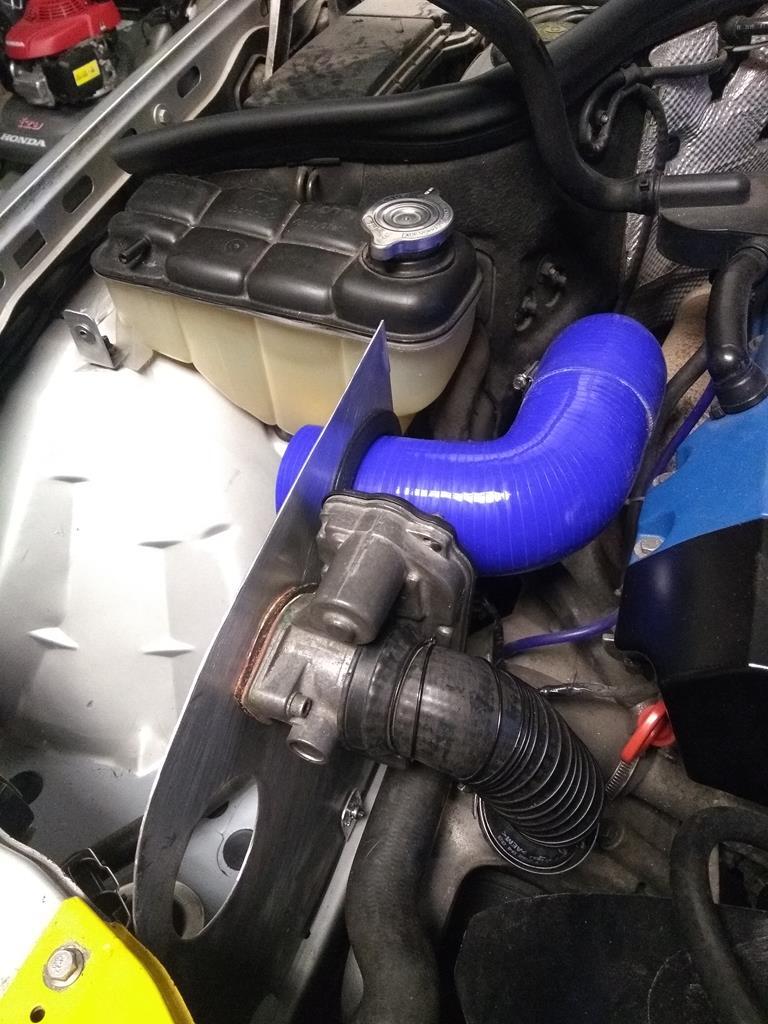
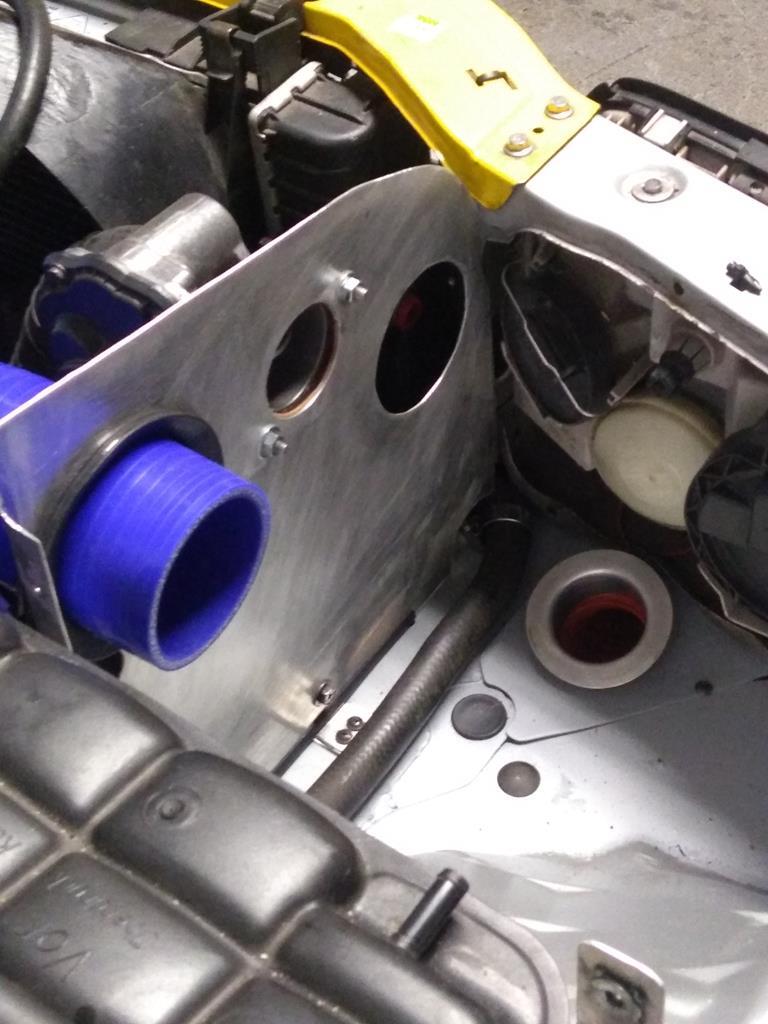
It's taking shape now. I'm finished with mocking up, at last! Just waiting on a 90 degree 70 & 57 mm hoses, a self sealing hose take off for the engine oil breather and all I'll have to do is order a cone filter. Once I'm happy all is fitting well (need to cut out a new rear panel, as one I was using has been butchered a bit) I'm pull the CAI apart and give the panels a lick of paint and add some insulation on the outside. 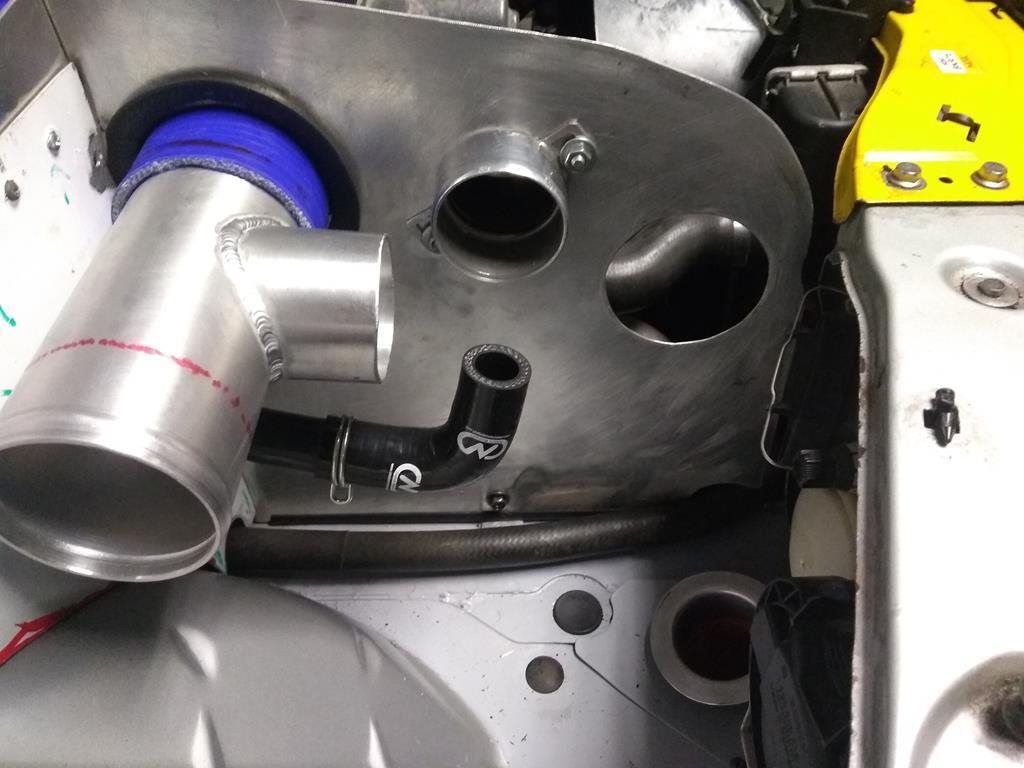 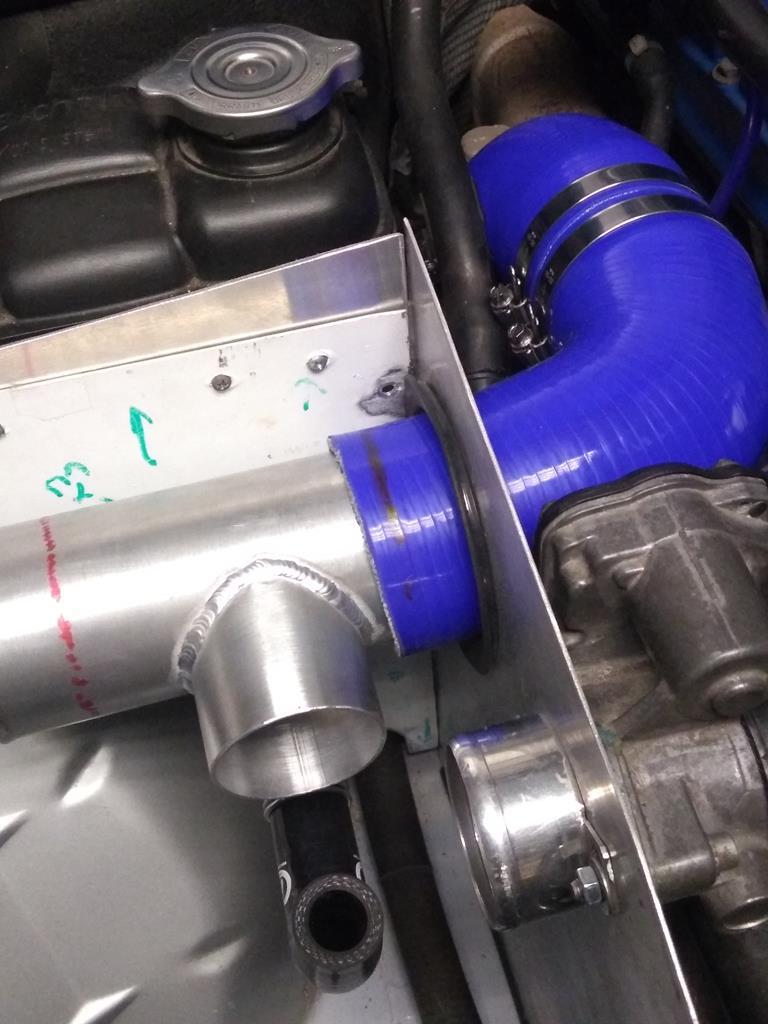 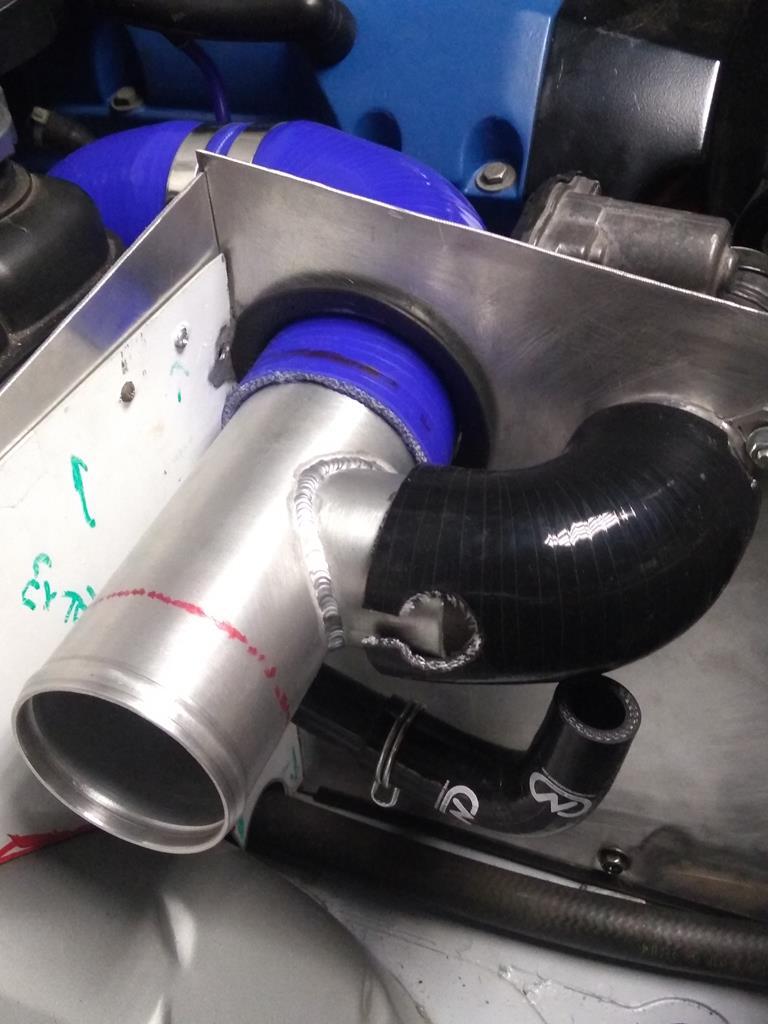 |
| |
Last Edit: May 21, 2020 0:00:10 GMT by Woofwoof
Still learning...still spending...still breaking things!
|
|
|
|
|
May 23, 2020 18:30:33 GMT
|
I've now made and fitted a new back panel and the 57 mm 90 degree hose arrived. I etched primed and top coated (some shade of wheel silver) both panels along with fitting lower rubber trim seal all the way round. I'll get around to fitting insulation on the outside later. I'm still waiting on a 70 mm 90 degree hose, a hose take off and top rubber seal. I ordered a cone filter at last, couldn't decide on which brand to buy. Looked at K&N, Green, Ramair, AEM and ITG to name a few. Mind boggling really. I was leaning towards an AEM as it's dry filter and they're simple to wash out but couldn't get enough info on the size I'd need and really didn't want one that was unnecessarily too big as space is limited. In the end I went with an ITG after contacting them for some guidance, they couldn't have been more helpful. Making up a CAI system for this car has become a bit of a saga but I'm getting there.  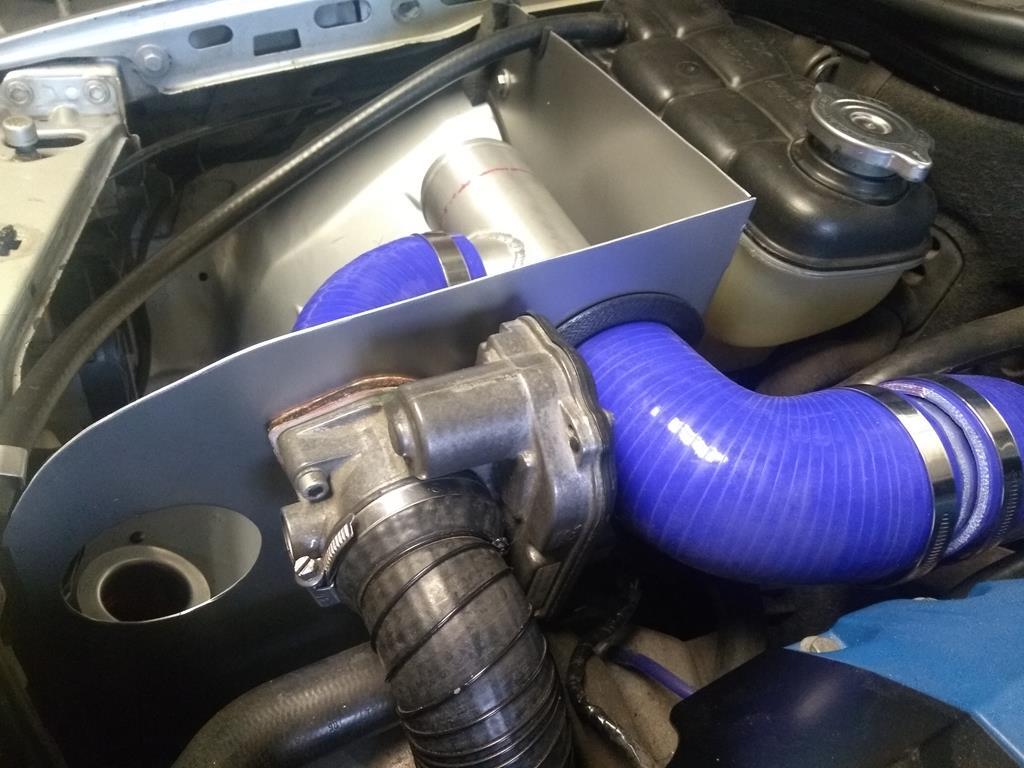 |
| |
Last Edit: May 23, 2020 18:49:52 GMT by Woofwoof
Still learning...still spending...still breaking things!
|
|
|
|
|
May 26, 2020 21:15:13 GMT
|
On a home run now. Just waiting on a hose for the filter and the filter itself. It seems the postal service and courier companies are still flat out thanks to the virus, so everything is taking far longer than usual to arrive which is a little frustrating. Complete except for the two parts mentioned, when I'm happy all is good I'll apply insulation to the outside of the panels. 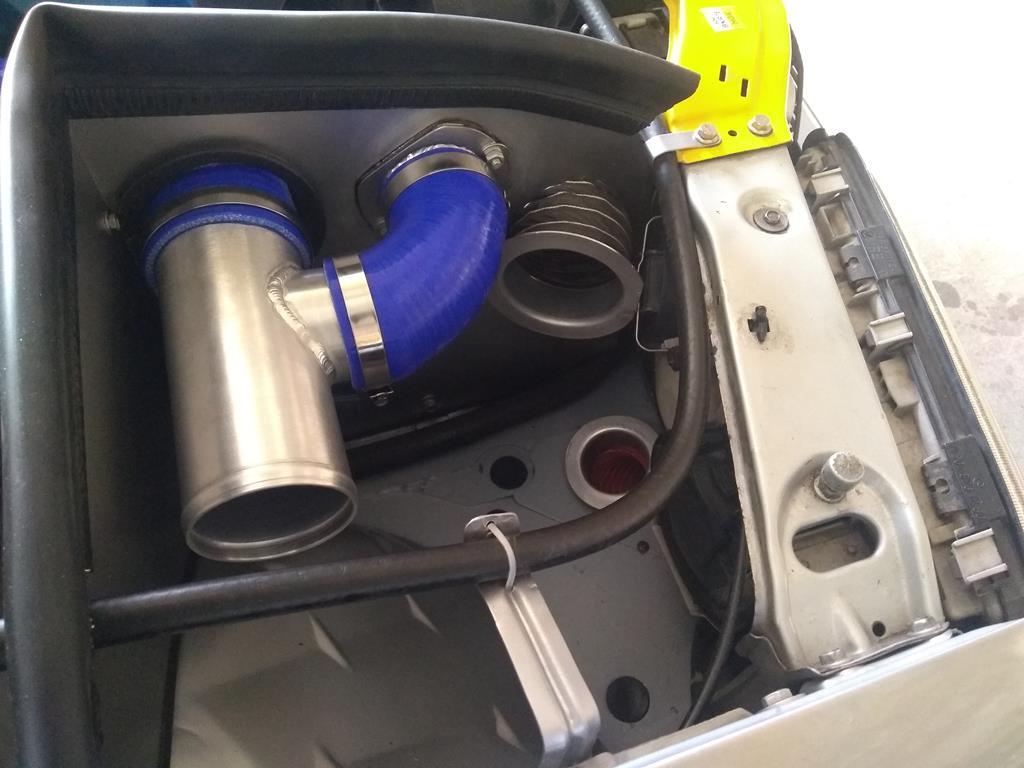 |
| |
Still learning...still spending...still breaking things!
|
|
|
|
|
|
|
Done at last! A bit of a saga really. Waiting on parts didn't help and being honest I was losing interest too, wondering if it will be worth the effort. Anyway, I'm happy enough with the end result especially since I haven't built a CAI system in many years. 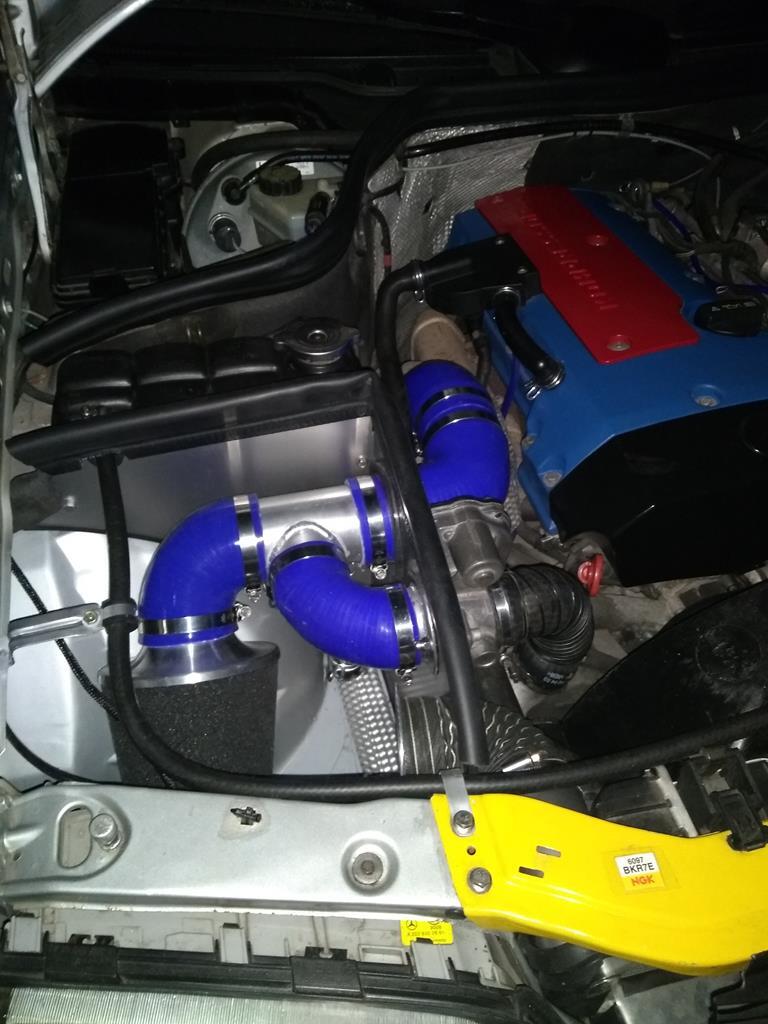 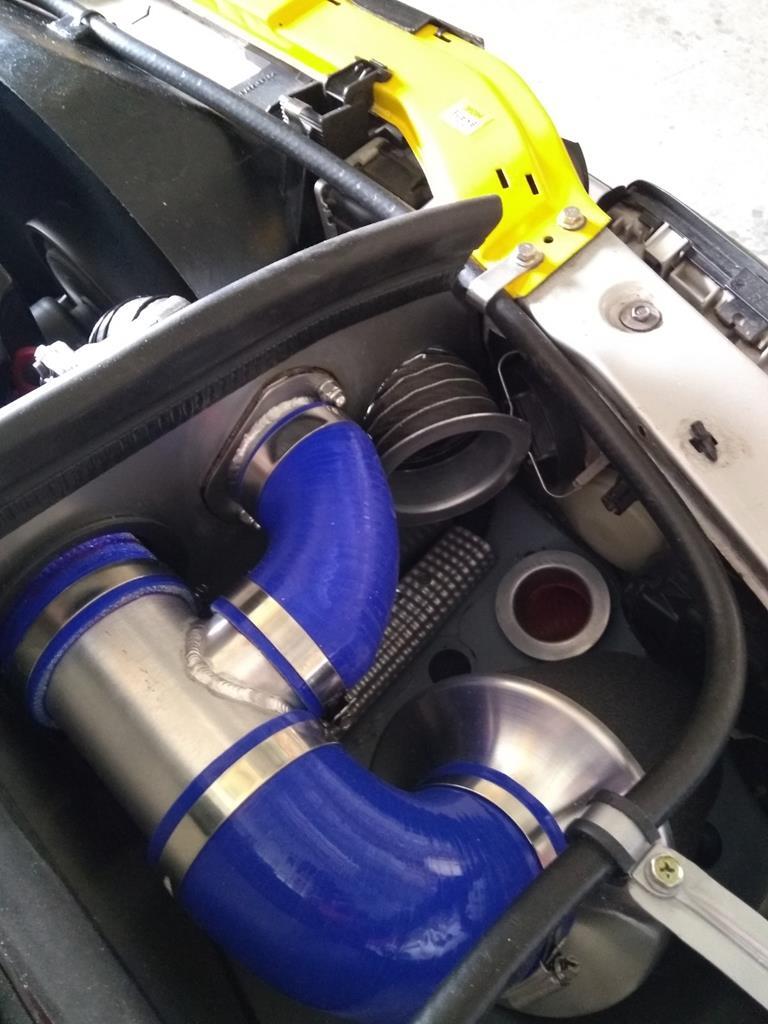 |
| |
Last Edit: Jun 2, 2020 23:24:33 GMT by Woofwoof
Still learning...still spending...still breaking things!
|
|
|
|
|
Jul 17, 2020 21:24:24 GMT
|
A little running report after covering a 1000 miles over the last month. No photos just waffle!!! The car is pulling like a train with 7 psi boost at only 2500 rpm, just over 10 psi @ max rev's. Fuel trims are good, ST staying around 0% and LT at -5.5%. Inlet air temps are o.k., usually 8C/45F above ambient off boost and anywhere between 15-25C/59-74F above ambient on boost. The new I.C.and the CAI are no doubt helping but the 100% larger I.C. that I had previously installed produced better IAT's (at a loss of some boost pressure). I still reckon a 50% larger I.C. than stock would be ideal. Handling, is better than ever, the larger A/R/B's have made a bigger difference than I first realized. There's less intervention from the ASR, less flashing of yellow lights on the dash which is nice. Still, I've noticed the Yoko Advan Sport's are wearing fairly quickly on the rear, they'll need to be replaced in the next couple of thousand miles. The ride height is still slightly higher prior to replacing the rear suspension bushes, and the shocks set one click softer. I'll revisit adjusting height but it will do for the next few months, probably go to 2 nib front and 3 nib rear spring insulators rather than the 3 front & 4 rear currently fitted. There's now 2 degrees front camber with 1.5 rear. No doubt the suspension setup could be improved upon but it would need somebody that knows what they're doing unlike me! So, I'll live with the way things are now - ignorance can be bliss!  In the other news while checking for any noises from the front of the engine - like a little timing chain wear (not urgent as its very minor at this stage) but that will end up being a major job for me. S/C out, head off, manifolds off ,front cover off and loads of other stuff. I'll overhaul the S/C at the same time and get the head cleaned up too along with fitting a new water pump etc. Deffo going to be a winter project. Anyway, I checked the belt tensioners, idler, water pump, alternator, fan clutch and PAS pump. All were good, no worn bearings except for the alternator, it had seen better days. Time to change it, I had look around for an off the shelf replacement which became bewildering with massive differences in prices. Luckily, my local repair guy offered to fully recon it at a reasonable cost. Other than all the waffle above the car is running good, all engine parameters are within spec, the induction noise from the new CAI is slightly louder but only marginally, happy with that. The overall handling is great even if it's slightly less comfortable on poorer/bumpy road surfaces, a trade off I'm more than happy to make. There's a better steering feel too, it's more alive. The bad news is, I hit some road debris at high speed, don't know what it was but it sure made a loud bang under the car, on inspection it damaged one of the cats (twin cats side by side) which causes a rattle on cold start up - really annoying. So, I'll need to sort that out. The easiest/best route at the moment seems to be, get the damaged cat cut out and have a Magnaflow universal cat welded in. The again, this could be an opportunity to have a de-cat pipe made up, loose a little weight (down pipe & cats weigh in at 10.5kg) while possibly gaining a little power. We'll see.. |
| |
Last Edit: Jul 17, 2020 21:27:58 GMT by Woofwoof
Still learning...still spending...still breaking things!
|
|
|
|
|
Sept 12, 2020 21:00:45 GMT
|
A little update covering the last two months, nothing exciting really but the majority of items needed to be done. I replaced the alternator, the original one did well so no complaints and I don't miss the bearing noise at idle. The O/S/R toe arm bush failed and actually became very bad over the previous 100 miles, you'd think the rear sub frame was cracked when driving. Should have done both of these arms long ago and I've no excuses as I've had the parts for several months! Anyway the car is driving great now after a four wheel alignment, it's handling and grip are a far cry from when I bought it. The bush almost fell out.  IMG_20200908_124527163 IMG_20200908_124527163 by Johnny Slow, on Flickr I ditched the bonnet vents. Got a bonnet in the same colour from the scrapyard, it's not perfect but better than the original was with no major or many stone chips and no acid stains from bird droppings. Vents will be missed when idling or in slow moving traffic but the simple fact was they made no difference to engine bay heat when driving, so they were of no real use. Uncovered vents.  InkedI.C. Grill InkedI.C. Grill by Johnny Slow, on Flickr Covered  InkedIMG_20200416_174820433_HDR_LI (2) InkedIMG_20200416_174820433_HDR_LI (2) by Johnny Slow, on Flickr 'New' bonnet  IMG_20200821_172756900 IMG_20200821_172756900 by Johnny Slow, on Flickr I also changed the air intakes for the CAI. I moved the 2nd smaller intake from the bumper to lower down where a spot lamp could be located. Both intakes in the CAI itself been modified with main intake getting baffle plates which are easily removable by a simple wing nut. The smaller intake has a cover with a seal attached. It can be uncovered again by a wing nut with no need to remove the cover itself. So, in theory I've now the best of both worlds - less induction roar and better air flow when I'm going for a blast. Also, there's no chance of the 2nd intake allowing rain in. In the bumper  49065510533_8a0c0aaa01_w 49065510533_8a0c0aaa01_w by Johnny Slow, on Flickr In the sport lamp location  IMG_20200813_124238354 IMG_20200813_124238354 by Johnny Slow, on Flickr CAI intake outlets with baffle plate and cover  IMG_20200817_224449252 IMG_20200817_224449252 by Johnny Slow, on Flickr Main intake with baffle plate removed  IMG_20200817_224621595 IMG_20200817_224621595 by Johnny Slow, on Flickr 2nd intake open position  IMG_20200817_224519977 IMG_20200817_224519977 by Johnny Slow, on Flickr |
| |
Last Edit: Sept 12, 2020 21:55:49 GMT by Woofwoof
Still learning...still spending...still breaking things!
|
|
|
|
|
Sept 12, 2020 21:10:32 GMT
|
I also adjusted the ride height. Was never too happy with the way it stood but wanted to get a few miles on the refurbished rear suspension etc to let it settle before changing out spring pads again. I'd left it with No3's on the front and 4''s on the rear. Now there's 3's all round, happy enough with that. With 3's and Eibach springs it's about 45 mm lower that a stock C-Class. (Sorry about the curse word photo.)  IMG_20200911_213056861 (2) IMG_20200911_213056861 (2) by Johnny Slow, on Flickr |
| |
Last Edit: Sept 13, 2020 23:16:42 GMT by Woofwoof
Still learning...still spending...still breaking things!
|
|
|
|
|
Sept 12, 2020 21:41:52 GMT
|
I mentioned previously I hit something on the road and it damaged one of the cats, causing a rattle. Tried the trick of inserting a few long self tappers into the rattling cat but it only did the job for a few days, the rattle came back with a vengeance, worst than ever. What to do? Well, Merc want over grand for the cats so that's not happening. The offerings from aftermarket suppliers is very limited with only two suppliers at either 500 quid or 67 quid! Now, I always intended to get a de-cat set up while having the cats for the NCT (MOT). I ordered the cheap downpipe with a single cat which is for pre '97 cars. The plan is to chop out that cat and fit it in place of the damaged cat on the original downpipe and that should allow the car to pass it's emissions test. Currently the original d/pipe and new cat are with the local welding guy. This will leave me a downpipe for a de-cat set up. Original  IMG_20200805_130534965 IMG_20200805_130534965 by Johnny Slow, on Flickr New  IMG_20200806_213616906 IMG_20200806_213616906 by Johnny Slow, on Flickr Next up was the new downpipe with missing cat. I ordered a straight resonator and pipe reducer along with a few U bolts to make a de-cat pipe. That lot will have to be welded soon. It did the job in reducing back pressure but it's too loud between 2500-3500 rpm, I couldn't live with it. The plan now is to fit another resonator further back where the original resonator use to live (I stupidly had that resonator removed some time back, don't ask!  ) Cat out, resonator in.  IMG_20200817_153252724 IMG_20200817_153252724 by Johnny Slow, on Flickr Temporarily fitted, joints need welding.  IMG_20200817_184745478 IMG_20200817_184745478 by Johnny Slow, on Flickr |
| |
Last Edit: Sept 12, 2020 22:29:37 GMT by Woofwoof
Still learning...still spending...still breaking things!
|
|
|
|
|
Sept 12, 2020 22:09:34 GMT
|
|
Next up over the winter.
1. Get both cat & de-cat pipes welded. Fit 2nd resonator.
2. Fit cat pipe, Fit rear seats, Clean & adjust handbrake & book N.C.T. (M.O.T.)
3. Replace clutch kit + DMF + both cylinders.
4. Replace both rear tyres.
|
| |
Still learning...still spending...still breaking things!
|
|
|
|
|
|
|
Sept 22, 2020 12:36:02 GMT
|
|
Good news! Actually it's great news, the car has been transformed since doing the de-cat.
First off, it boosts quicker and there's no hesitation in getting to max boost (10.5 psi) just before the rev limiter. The cam change over point is more pronounced, there's even some pops and bangs from the engine on overrun too. The throttle response seems sharper and the Long term fuel trims have moved from -5% to as low as -1.2% when driving hard, they never went that low before. I'm presuming the engine is demanding more fuel to make more power thanks to the improved breathing. If it's making a few more BHP great but I couldn't really say in all honesty. my butt dyno says it is. More importantly it's driving much better as in it feels more eager especially up the rev range.
Now, I'm coming to the conclusion that all this new found life in the engine is not just from a de-cat and an ECU reset but it's very possible that the damaged cat (one of two) might have been causing a blockage? Regardless of any blockage the engine never preformed as well prior to the cat damage.
If there was a dyno near to me I'd book the car in just for the hell of it even if I know full well max BHP is not the be all or end all, still it would be nice to know the figures.
The only regret I have is I didn't do a de cat sooner. Anyway, happy days.
|
| |
Last Edit: Sept 22, 2020 23:52:12 GMT by Woofwoof
Still learning...still spending...still breaking things!
|
|
|
|
|
Jan 10, 2021 23:07:57 GMT
|
|
Wow, didn't realise it's a few months since I updated this thread.
So, I made a list at end of September. If I haven't mentioned it I'm good a making lists but not always good at getting everything done.
1. Replace dipstick seal.
2. Sort fuel smell when tank is filled to max.
3. Adjust handbrake mechanism (under rear seat), it's over adjusted.
4. Carry out Diff, G/box and engine oil changes.
5. Replace wiper blade.
6. Fit larger calipers & discs etc, etc to the front.
7. Fit new front wheel bearings.
8. Fit exhaust downpipe with new cat.
I had a new clutch and rear tyres on the to do list but I'm holding off for now.
Some photos and text to follow in due course.
|
| |
Last Edit: Jan 10, 2021 23:33:01 GMT by Woofwoof
Still learning...still spending...still breaking things!
|
|
|
|
|
Jan 12, 2021 22:00:56 GMT
|
Old and new dipstick seal, you can clearly see the difference as the old one has expanded. 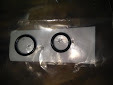 New cat fitted to original downpipe, not pretty but will do for one day a year for NCT (Mot) test. 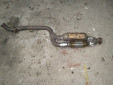 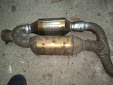 Fuel smell issue. One perished, cracked & split fuel hose located behind the o/s/r wheel arch liner.  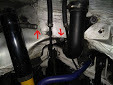 Front brake upgrade. I needed to overhaul the stock calipers as one was starting to stick. So, I looked into better brakes while retaining the standard 16'' wheels for practical reasons. I wanted a direct bolt on jobbie. After several hours of 'research' I opted for E-Class 320 calipers. This worked out great as used calipers were €50 delivered and the total for everything was €280/£250 including 2 x wheel bearing kits. Overhauled the calipers and got a bunch of new parts. The stock disc 288/25, E-Class 300/28 with 9-10% greater pad area. Both systems use a 57mm piston. Hoping this new setup will give me the brake feel I want. 'New' calipers, 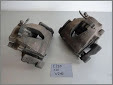 In citric acid/water mix. Plenty of bubbles, bubbles are good! 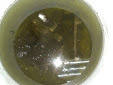 After 24 hrs. 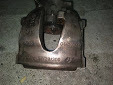 After 48 hrs & a quick wire brushing. 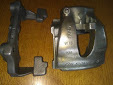 New seals etc and fresh paint. 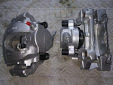 New parts. Brembo discs & pads, back plates etc. 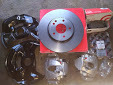 P.s. sorry , I don't know why the photos are so small. |
| |
Last Edit: Jan 19, 2021 15:20:51 GMT by Woofwoof
Still learning...still spending...still breaking things!
|
|
|
|
|
Jan 12, 2021 22:05:53 GMT
|
All fitted with new wheel bearings as well. I got lucky with the bearings, both sides were on their last legs. No noise or any indication that there almost fcuked but I'm sure it wouldn't have been long to hear that infamous sound of a failed bearing. One was actually starting to score the stub axle. The only downside I can say, is the extra weight. The E-Class caliper is 0.5kg heavier and the 300mm disc 2kg. So, a reasonable amount of extra unsprung weight and rotation mass. But I reckon the trade off will be worth it. Hope so! I'll know very soon as I'll give the car a good road test over the next few days. 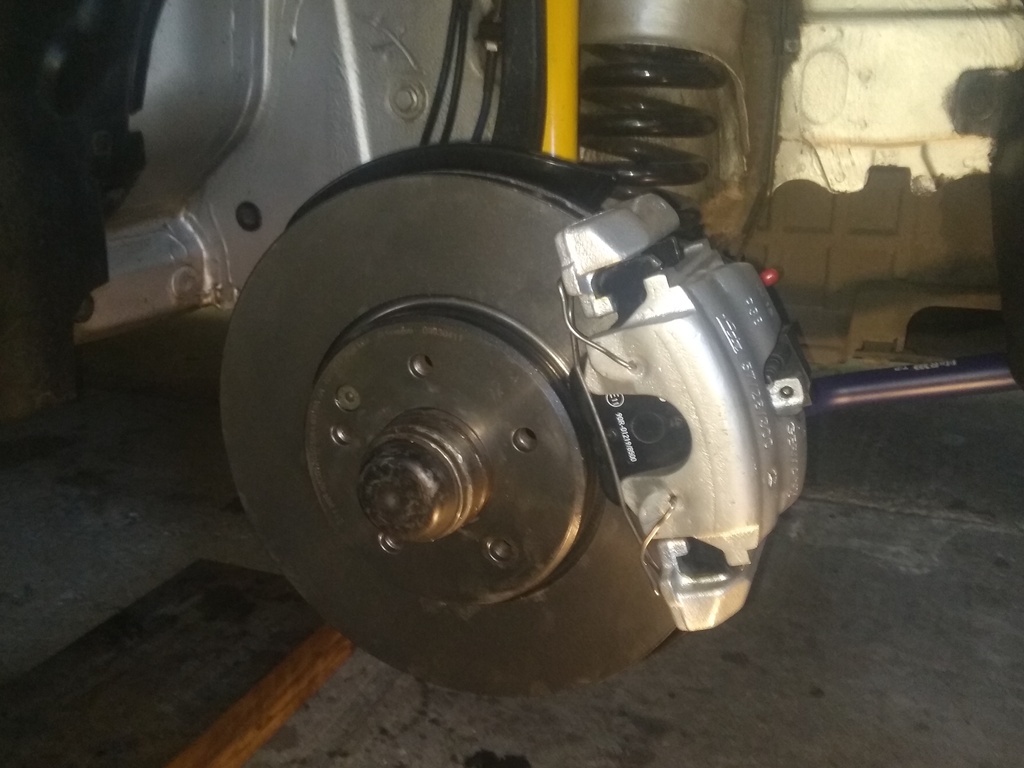 |
| |
Last Edit: Jan 12, 2021 22:37:43 GMT by Woofwoof
Still learning...still spending...still breaking things!
|
|
|
|
|
Jan 18, 2021 15:06:03 GMT
|
The new brakes: There's less free travel giving more progression which I was hoping for. What really stands out is the greater braking force for the same pedal pressure compared to stock. Very happy overall and it was worth doing, definitely inspiring more confidence when driving hard. I will at some point fit performance pads, probably Ferodo DS or EBC Yellow with the expectation of even better braking performance. I got my finger out and cleaned/waxed the wheels in honour of the new brakes!  |
| |
Last Edit: Jan 19, 2021 15:23:33 GMT by Woofwoof
Still learning...still spending...still breaking things!
|
|
|
|
|
|
|
|
Time flys! I didn't realize it's four months since I last updated.
I have done a few other bits. Adjusted the steering box, had the ECU flashed, the decat exhaust system is all welded up, no more nasty U bolts and I'm in the process of rebuilding the supercharger. Checked boost pressure (again) and I'm also messing around trying out different MAF's.
I'll add photos and info soon.
|
| |
Last Edit: May 9, 2021 22:28:59 GMT by Woofwoof
Still learning...still spending...still breaking things!
|
|
|
|
|
May 10, 2021 22:42:50 GMT
|
Front brakes update. Larger W210 E320 test results: 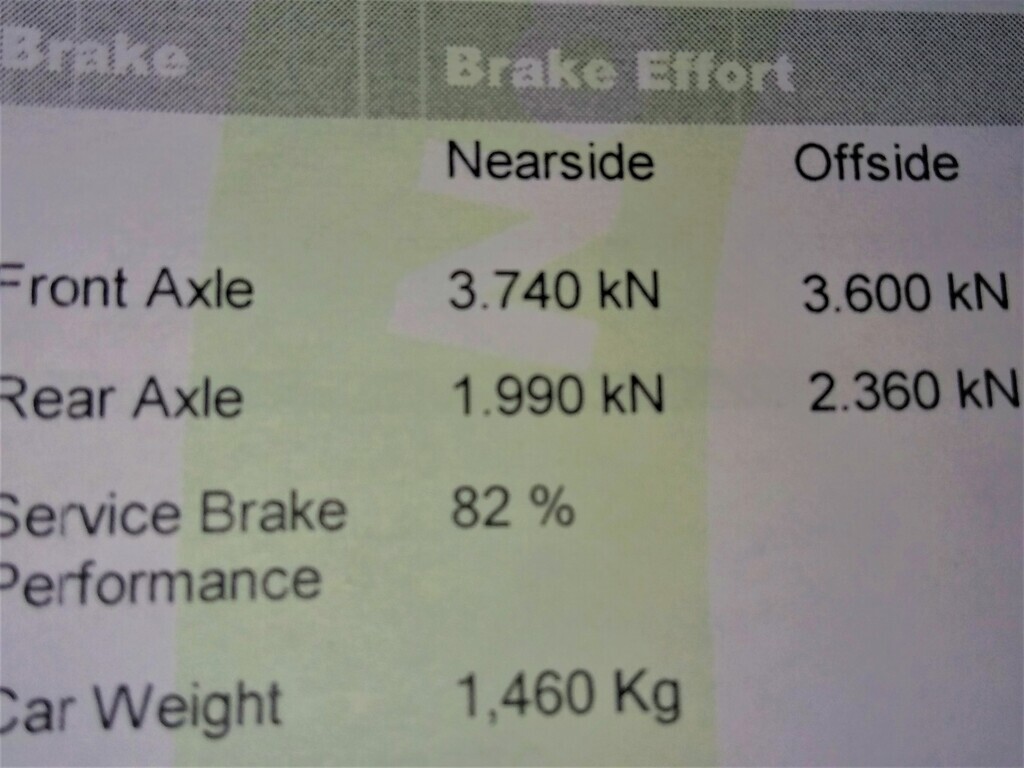 Stock brake test result: 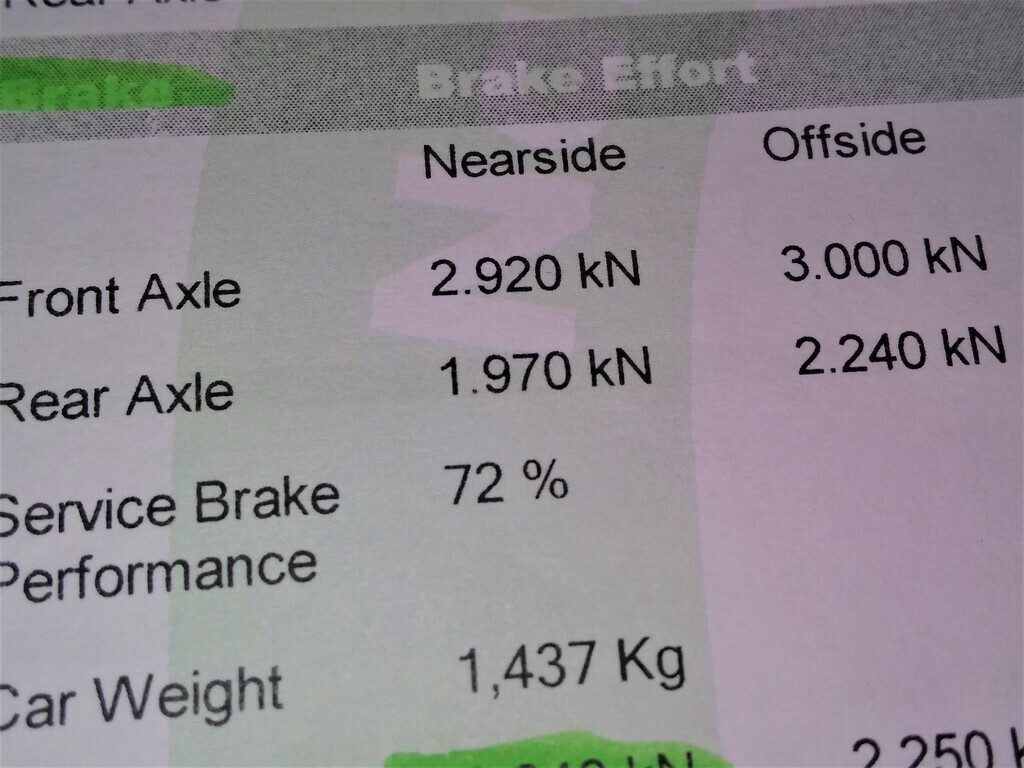 That's a 20% improvement and the new brakes were not even fully bedded in, also I managed to get a little air out of the O/S/F after the test. Pleased with the results overall. Exhaust all welded up, it may not be very fancy welding but it's robust and strong. Also, new bolts fitted and slightly better located o2 sensor. It's still a little too loud between 2000-3000 rpm, a small centre resonator should solve that. 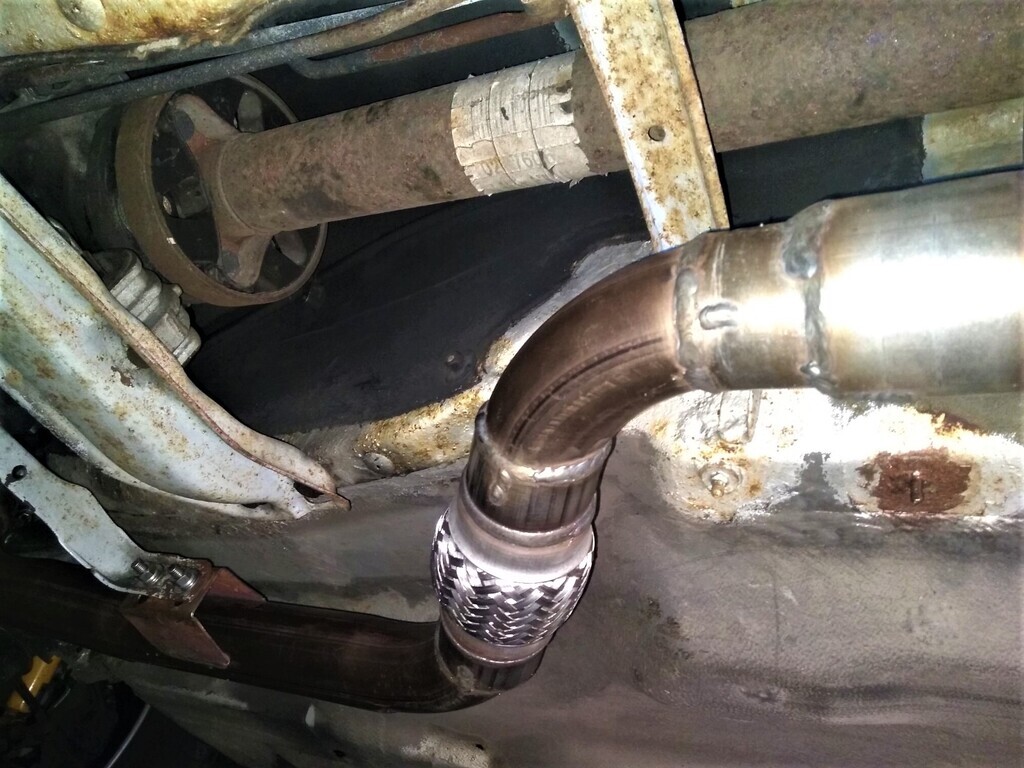 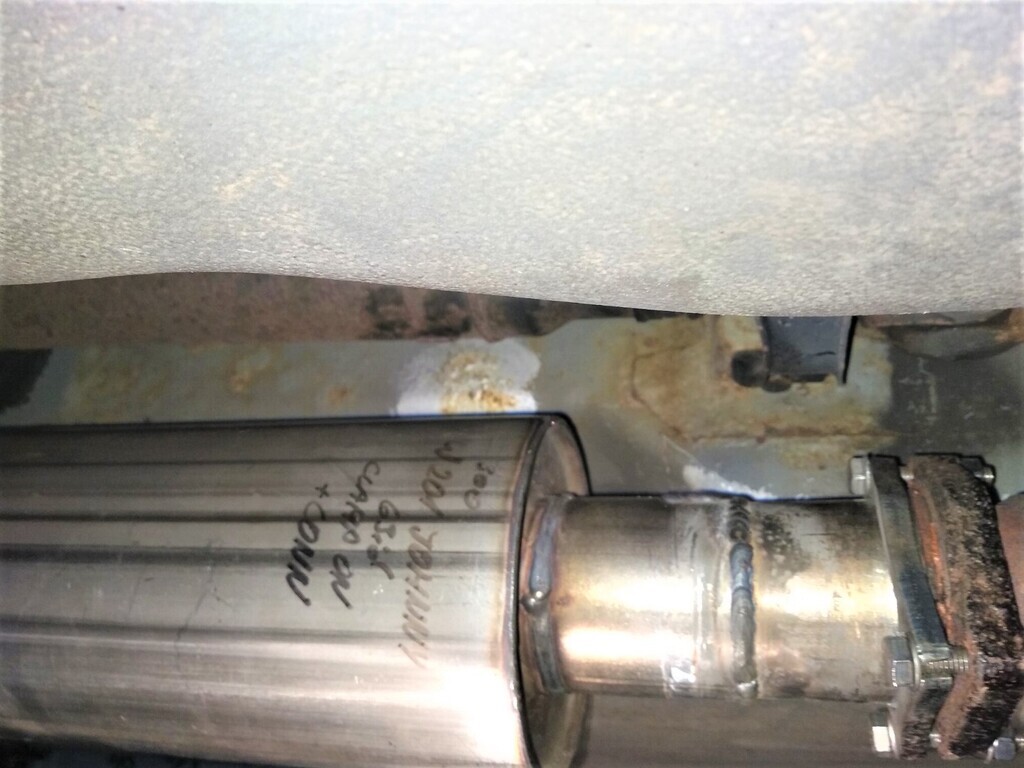 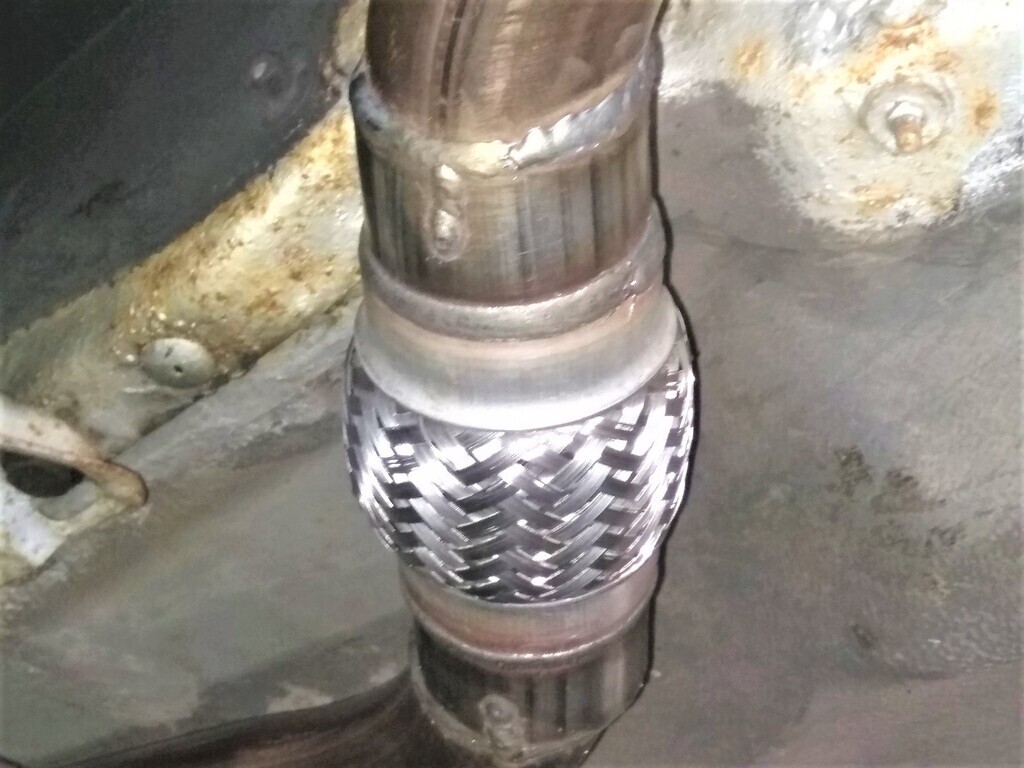 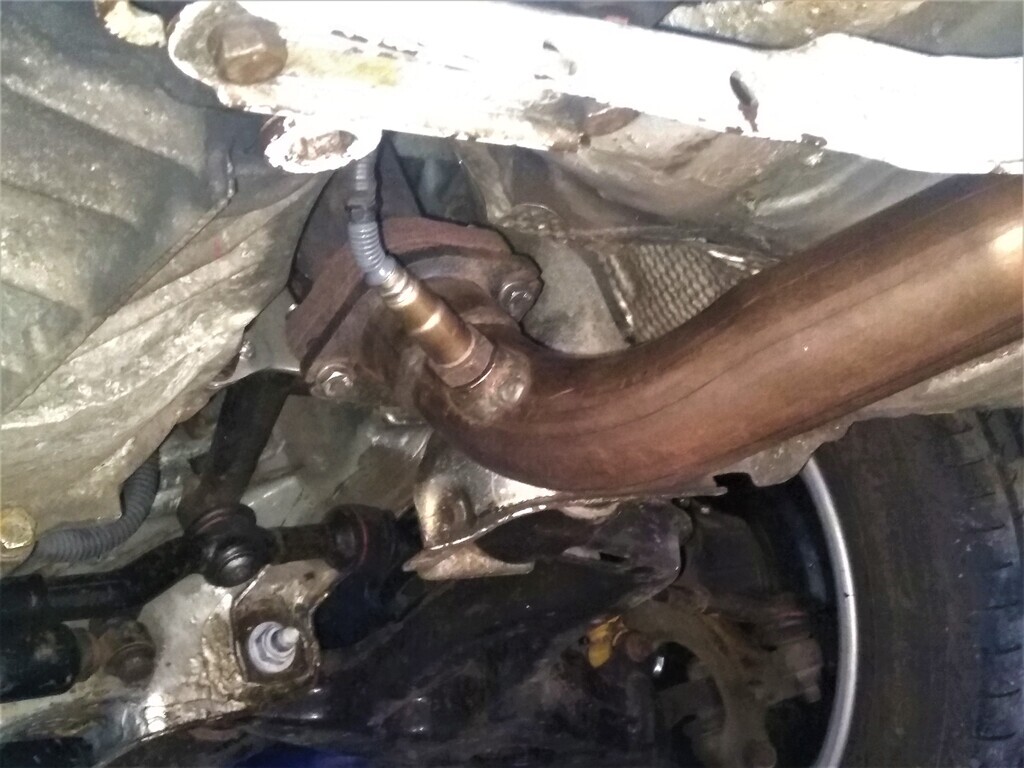 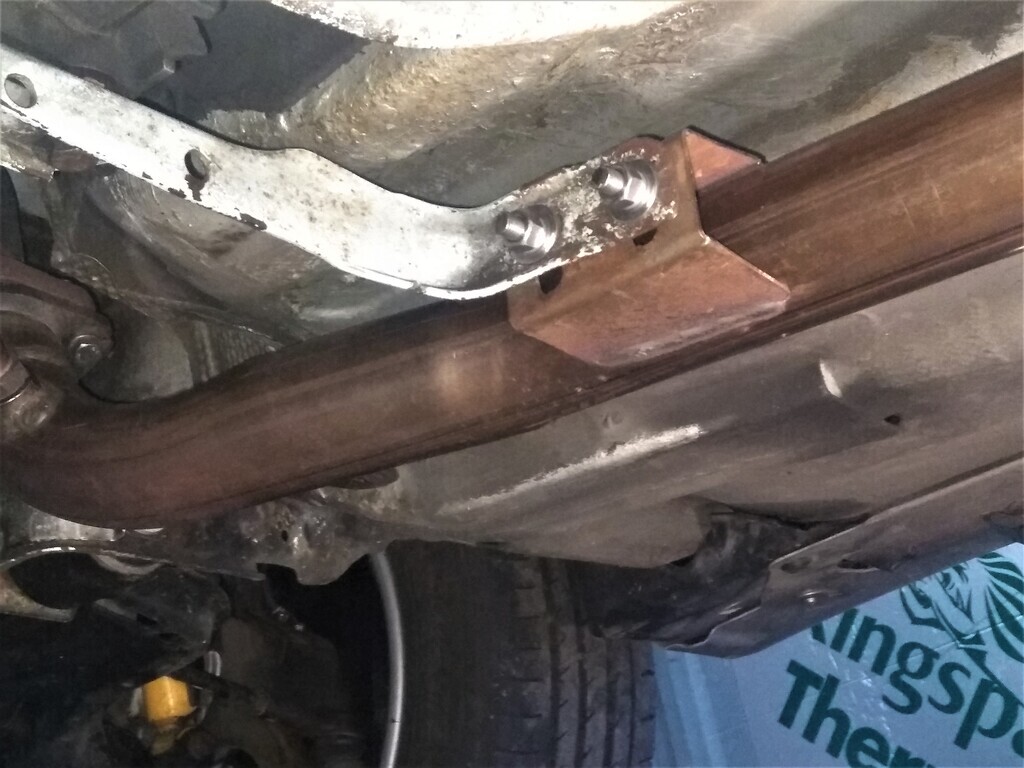 |
| |
Last Edit: May 10, 2021 23:24:56 GMT by Woofwoof
Still learning...still spending...still breaking things!
|
|
|
|
|
May 10, 2021 23:20:00 GMT
|
Checked the AFR at idle, the idle is rock steady. Then went on to check the boost gauge readings. More to come on that... 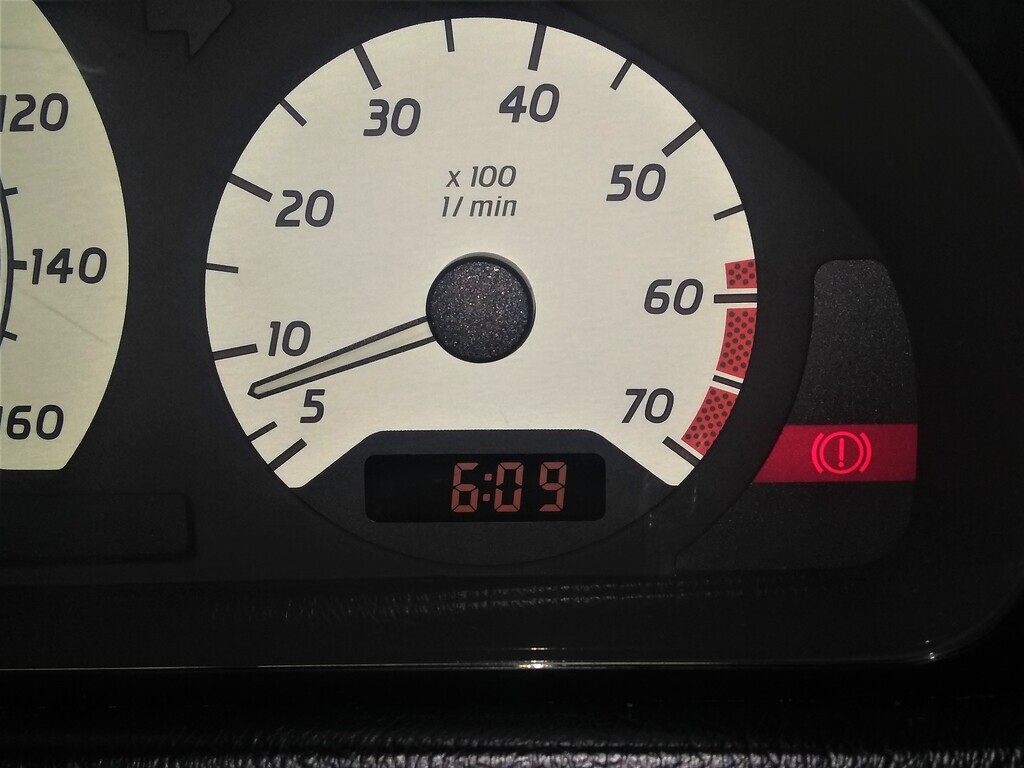 |
| |
Last Edit: May 10, 2021 23:21:37 GMT by Woofwoof
Still learning...still spending...still breaking things!
|
|
|
|
|
May 11, 2021 20:32:47 GMT
|
I've never been happy with any of the boost pressure gauges (all mechanical) I've had in the car. First one was a cheapo Bosch made in China. It did the job initially but I didn't have full faith in it and lacked a vacuum gauge. Still a good looking gauge, easy to read and good value too. Decided I'd get a top notch one, I chose Stack. They have a good reputation within the motorsport world and it showed vacuum too. Well, that lasted about six months thanks to a sticking pointer. Sent it back and waited on the results of an inspection, Stack found it was defective. I got another one which was modified with a pin that's inserted into the back locking the gauge while being shipped. Obviously Stack have had problems with other boost gauges not just mine. Second Stack and third gauge I'm still not happy. I noticed this latest gauge is sitting at 1 in.-Hg instead of zero prior to starting the engine and the vacuum reading seems excessive at just under 22 in. -Hg, after all we're not talking about a factory fresh engine. I would expect something in the region of 18-20 in. This was confirmed when I hooked up my old vacuum/fuel pressure gauge and got a reading of 20 in. The goods news is, this means the boost gauge is under reading (as the gauge pointer is below zero boost at rest) which was confirmed when I hooked up a friends electronic boost gauge where it showed 10.4-10.5 psi max. while my Stack only shows 10 psi. And hands up, the inner child in me just hates the boost gauge under reading  So, if anybody really wants to know the exact boost & vacuum pressures don't trust mechanical gauges, they are literally only a gauge. I'll be adding a electronic gauge (stepper motor type) to the shopping list at some stage, with a recall function. I'm just sorry I didn't do that in the first place. At idle 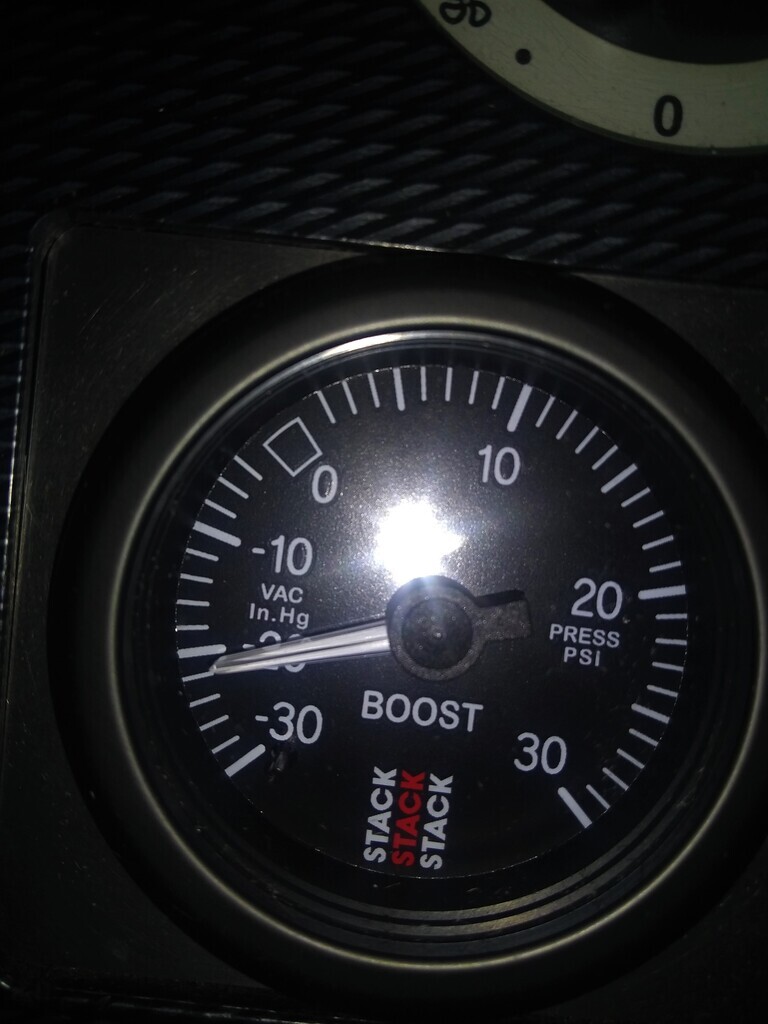 Engine off. 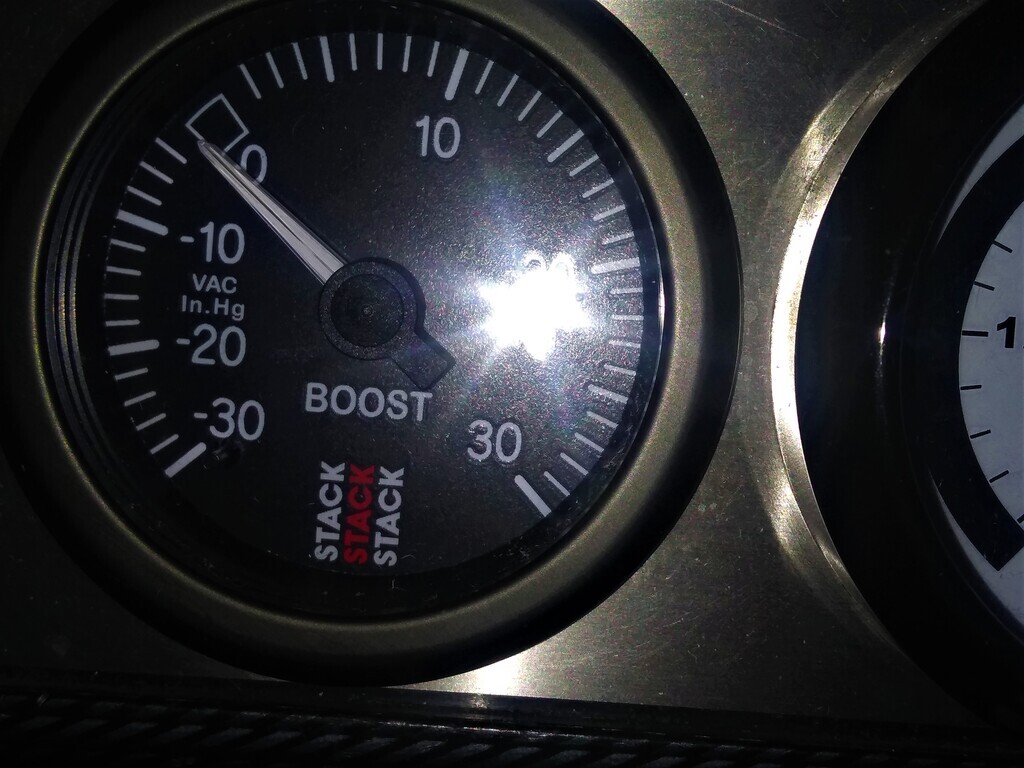 Engine off and gauge showing exactly zero unlike the boost gauge. 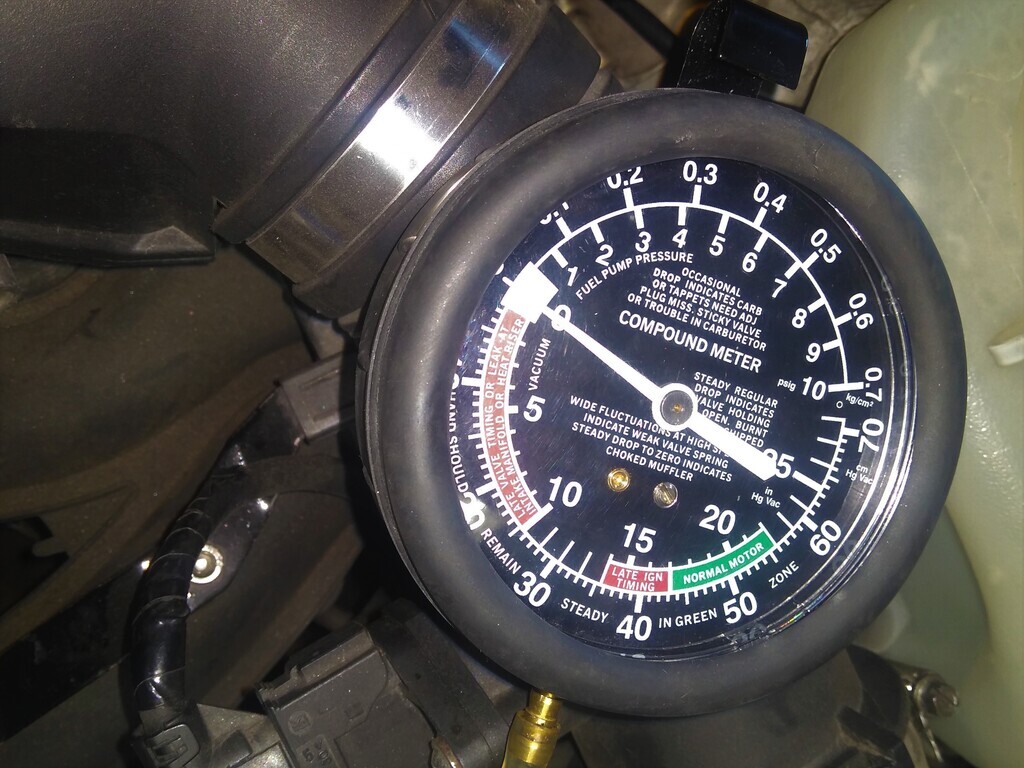 Engine at idle. showing a more realistic 20 rather than almost 22 on the boost gauge. |
| |
Last Edit: May 11, 2021 20:41:01 GMT by Woofwoof
Still learning...still spending...still breaking things!
|
|
|
|
|
May 11, 2021 20:52:07 GMT
|
Sent the ECU off to a very clever guy (well far, far smarter than me) in Sweden The S/C boost limiter has been removed, I may not need this currently as I've no issues with the 10.5 psi boost pressure the engine has but I'm near the threshold (c.10.8 psi) where the ECU won't like the MAF signal and would disengage the S/C clutch and or open the Bypass valve unless a zener is added to the MAF wiring but I may have a slight increase in boost pressure with the new increased rev limit which is now set at 6250 rpm. I didn't want to go too high as the engine has plenty of miles on it. It's an extra 250 rpm as the Merc limiter came in at 6000, not at 5800 as per the rev counter markings. A few degrees have been added to the timing, I haven't got any details on this yet. The fuelling was adjusted also, again no specifications at the moment. The car has now done a total 520 miles since the ECU was remapped of which 340 miles covered rural, urban and open country roads with varying speed limits of 80-120 km/h (50-75 mph). A few private roads were also used to carry out this very unscientific test  So, that's more than enough miles for the ECU to do a total relearn, actually it only needs about 250 miles. It's running great, it's forte is 60-120 mph. I've no factual data for 0-60 mph but guessing it's sub 7 sec? Then again, I've no real interest 0-60's as they are hard on a car especially an old one and if I want to make rapid progress, I need to be above 60 mph, 75 really. The remap has made a few notable differences, all good. First off, as already previously mentioned the raised rev limited to 6250 makes life easier, giving a little more time to snatch the next gear without any fall off in boost pressure and 3rd allows c.95 mph which is great for overtaking. The throttle response has improved too, at first I wasn't too sure - placebo effect and all that but it has, it's even noticeable just rev'ing the engine at standstill. The remap tweaks to the timing and fuel are responsible for that. The minor flat spot @ 3000 rpm has disappeared totally, it wasn't anything of real significance but it was there. Nice to have it gone all the same. Having said that it was nothing like the flat spot that occurs when boost pressure is upped before moving the MAF closed to the T/B. All in all very happy and if I want to run a smaller S/C pulley (taking the current boost from the current 10.5 to 14/15psi) I now can do as the ECU has the boost limiter deleted. That's it, don't think I can add to what I've already said. Here's some data: LTFT's Max/Min. 0.0/-3.1 STFT's Max/Min. -0.2/-2.4 Timing Advance Max -17.5 degrees Boost Pressure Max 10.4-10.5 psi I.A.T. off boost Max/Min. 21/17C (ambient 11/9.5C) I.A.T. on boost Max 34C (short what durations) A.F.R. Max/Min 11.9- 14.5 (max boost pressure - cruising) Eng Temp 85C Oil Temp 80C (sump/oil pan) Hopefully I'll have an update on my results trying different spec MAF's (non Merc) soon. |
| |
Last Edit: May 11, 2021 22:35:12 GMT by Woofwoof
Still learning...still spending...still breaking things!
|
|
|
|


 )
)
