|
|
|
Sept 15, 2021 12:11:51 GMT
|
|
I'm quite pleased with it yes, my aim now before the weather breaks is to get the ramp in a useable condition i.e. backfilled with hardcore and tidied up around the exterior.
I can then pick away at the floor etc in my leisure over the winter.
I do have another little build project on the cards though, which will take a bit of time up until spring.
|
| |
|
|
|
|
|
|
|
Sept 19, 2021 19:57:18 GMT
|
|
Cladding looks great, lead on cills looks good too. With gutters on should be ready for the winter.
|
| |
|
|
|
|
|
Sept 20, 2021 12:05:41 GMT
|
Cladding looks great, lead on cills looks good too. With gutters on should be ready for the winter. Thanks buddy, the cills are actually 0.5mm galv tin. Agreed, some guttering is required now to get the water away from the roof. |
| |
|
|
|
|
|
|
|
|
Small update, managed to buy a job lot of used guttering and down pipes for the wallet bustign fee of £20.
Was more than enough to do the entire shed, all fitted up now.
Happy days
|
| |
|
|
|
|
|
Nov 23, 2021 13:23:35 GMT
|
Not much progress to report really, I have been busy with a planning application for a future project. Thats now away under the consideration of my friendly planning officials, so time to try and achieve a little with the lockup, especially as it will be required for the next build if planning is a goer. Started out with some lighting as its dark 60% of the time now and the 40% of daylight I am doing the dayjob. I bought some 4' lights from a bloke on facebook, then rewired them for LED use. I them bought some LED tubes from another block on facebook. Cobbled them together and installed and fairly pleased with the output. I had planned to install 6 twin luminaires but 4 was more than enough. May install another 4 at low level to help out if I ever get to work on a car in there at all. 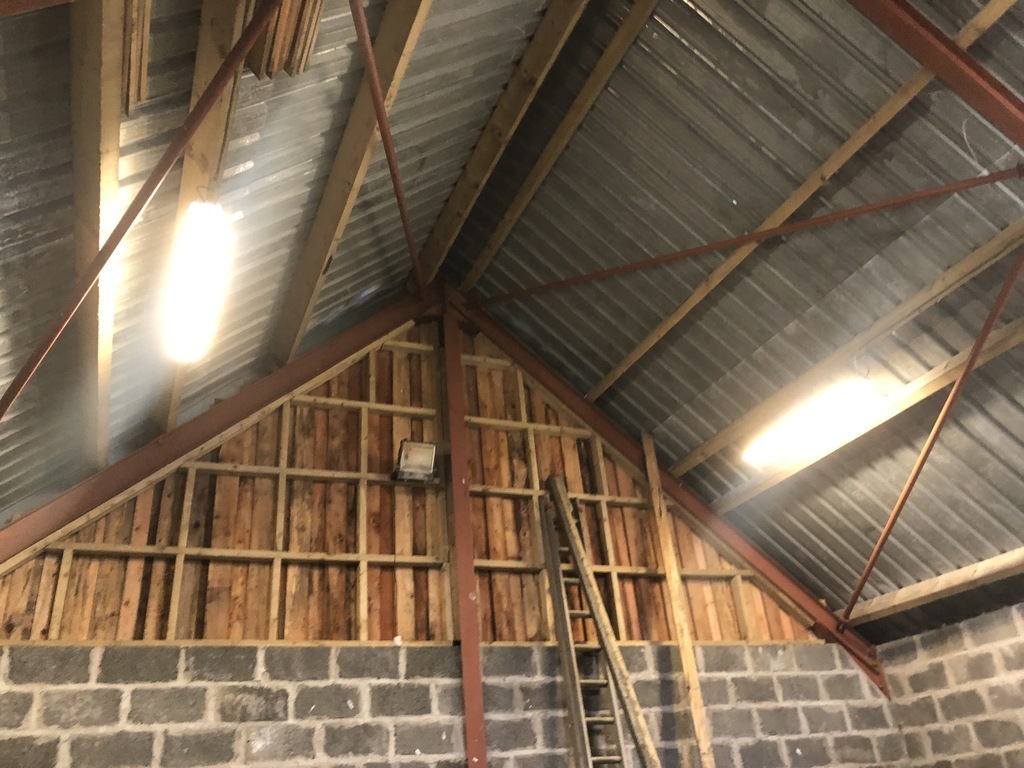 |
| |
|
|
|
|
|
Nov 23, 2021 13:34:56 GMT
|
This one will no doubt be controversial but anyways it is what it is. Its now time to do a floor The sensible option would be to hire a wagon of concrete , pour it and we are done, wouldn't it? But I have a block payed drive that I don't want a massive lorry on, and don't want to pay for a concrete pup as I am also a skinflint. So the trusty old Belle minimix was brought out.a pile of ballast and cement picked up and good to go. I have broken the floor down into bite sized chunks, or 8ths really, each one 4m x 2m. The section to be done was shuttered off and commenced work on Saturday morning, almost 4 hrs later, the first section was complete. I did debate installing rebar, but this wont have anything much heavier than a car or small tractor in it so decided against it. 4" thick at its shallowest and a tad thicker elsewhere. 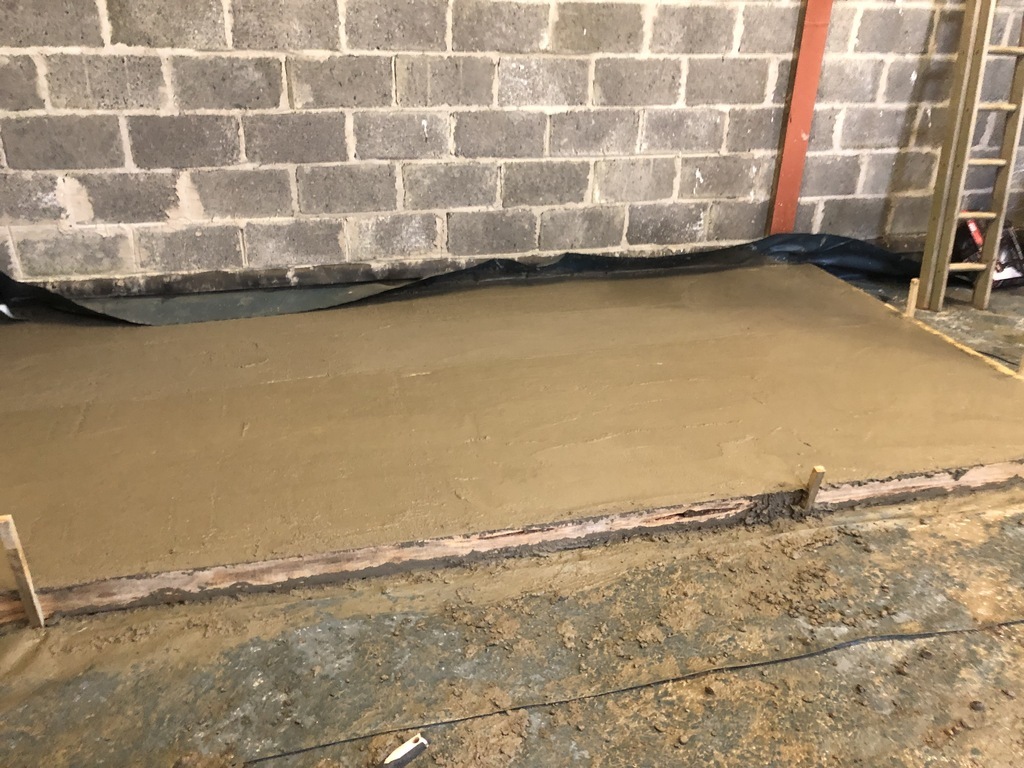 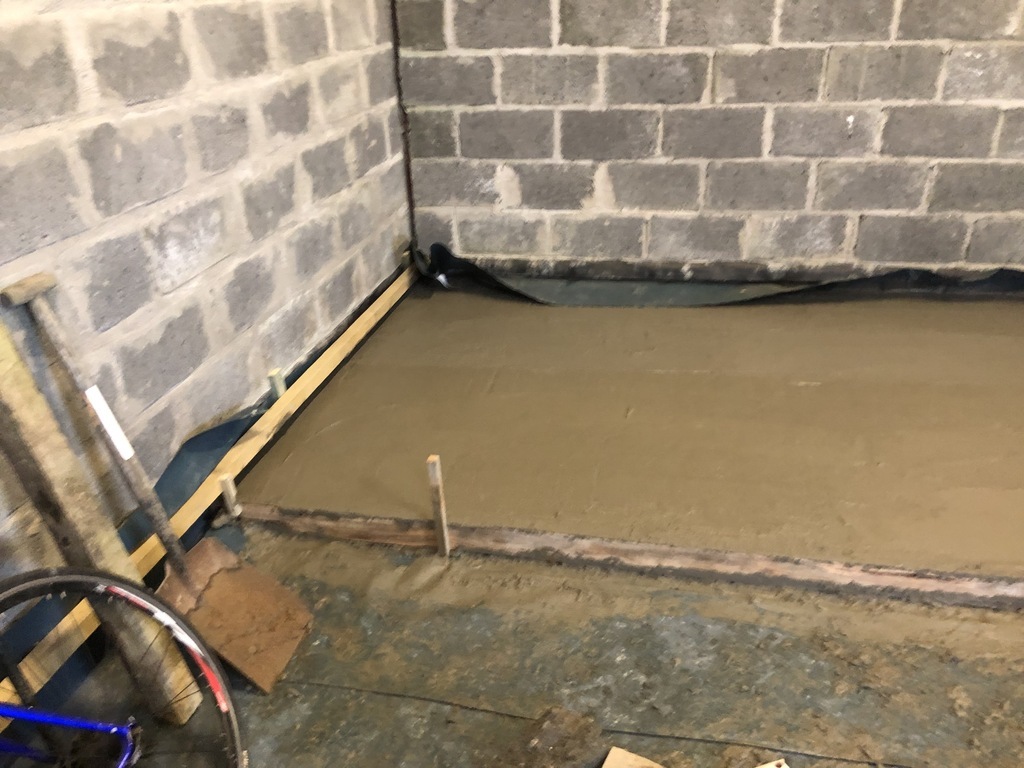 Now I wont pretend that I am chuffed with the finish of the floor, I'm not. Probably solo tamping across 4m span is a little too wide. But I have young kids and neither of them have a penis so are not really interested in helping. I may hire in a concrete grinder machine when complete to smooth it out a bit, or I may not we will see. |
| |
|
|
glenanderson
Club Retro Rides Member
Posts: 4,352
Club RR Member Number: 64
|
The Lockdown Lockupglenanderson
@glenanderson
Club Retro Rides Member 64
|
Nov 23, 2021 14:58:24 GMT
|
|
It’s perfectly acceptable in my book. In many ways, doing it in chunks is much easier.
You could always tamp it across the short side…
|
| |
My worst worry about dying is my wife selling my stuff for what I told her it cost...
|
|
|
|
|
Nov 23, 2021 15:40:46 GMT
|
It’s perfectly acceptable in my book. In many ways, doing it in chunks is much easier. You could always tamp it across the short side… I could, and I think i possibly will next time, i have taken a halfer tomorrow to get the next piece done and allow a few days curing time before Sat, do you reckon thats long enough cured to tamp against or will the tamping stick wear into the slab that was poured on Sat last week? I also bought some fibreglass reinforcing fibers for the slab, but havent used them thus far as I read it can make the surface hairy and difficult to paint of epoxy later on, anyone got any experience with this stuff? |
| |
|
|
glenanderson
Club Retro Rides Member
Posts: 4,352
Club RR Member Number: 64
|
The Lockdown Lockupglenanderson
@glenanderson
Club Retro Rides Member 64
|
Nov 23, 2021 15:53:14 GMT
|
|
Personally, I’d leave it a week. You can do alternate bays and work your way around.
Are you going to put expansion joints in between the slabs, or just but them together?
No experience at all of the fibres.
|
| |
My worst worry about dying is my wife selling my stuff for what I told her it cost...
|
|
|
|
|
Nov 23, 2021 16:33:37 GMT
|
|
I think I will just butt them up, i guess i could butt them and then run the stihlsaw down the join to make an expansion joint, i dunno if its really necessary though
|
| |
|
|
|
|
glenanderson
Club Retro Rides Member
Posts: 4,352
Club RR Member Number: 64
|
The Lockdown Lockupglenanderson
@glenanderson
Club Retro Rides Member 64
|
Nov 23, 2021 16:35:19 GMT
|
|
When I did mine I used a fibre strip between bays. Seems ok.
|
| |
My worst worry about dying is my wife selling my stuff for what I told her it cost...
|
|
|
|
|
Nov 23, 2021 18:23:41 GMT
|
|
Lights are nice & bright for only 4 foot.
Mix looks a bit brown? what mix are you using?
You could always do the bays 12" fron the wall edge and fill the outer strip in last, that way you can walk round it and tamp across the 2 metres.
I tend to run a plastering trowel over the floor after tamping, gives a nice smooth finish for little effort.
|
| |
|
|
|
|
|
Nov 23, 2021 18:58:45 GMT
|
|
Mix is 4 part ballast to 1 part cement and dilute to taste
It does look muddy in that pic but it’s more grey in the flesh
|
| |
Last Edit: Nov 23, 2021 19:19:30 GMT by henspeed
|
|
|
|
|
Nov 23, 2021 19:21:19 GMT
|
a closer shot, but it still looks brownish to me must be those curse word 4' LEDs   |
| |
|
|
|
|
|
Nov 23, 2021 19:40:51 GMT
|
Looks better there  |
| |
|
|
|
|
|
Nov 23, 2021 21:51:11 GMT
|
|
Wow looking back at this thread, I’m not a kick in the backside off 2 years at this build.
Time flies eh.
|
| |
|
|
|
|
|
Nov 24, 2021 15:48:07 GMT
|
Updates are coming thick and fast, took a halfer this morning from work and went at it. 2nd 8th section complete, floor 1/4 way there now. Next piece will probably be Sat morning to allow this one to cure a bit. 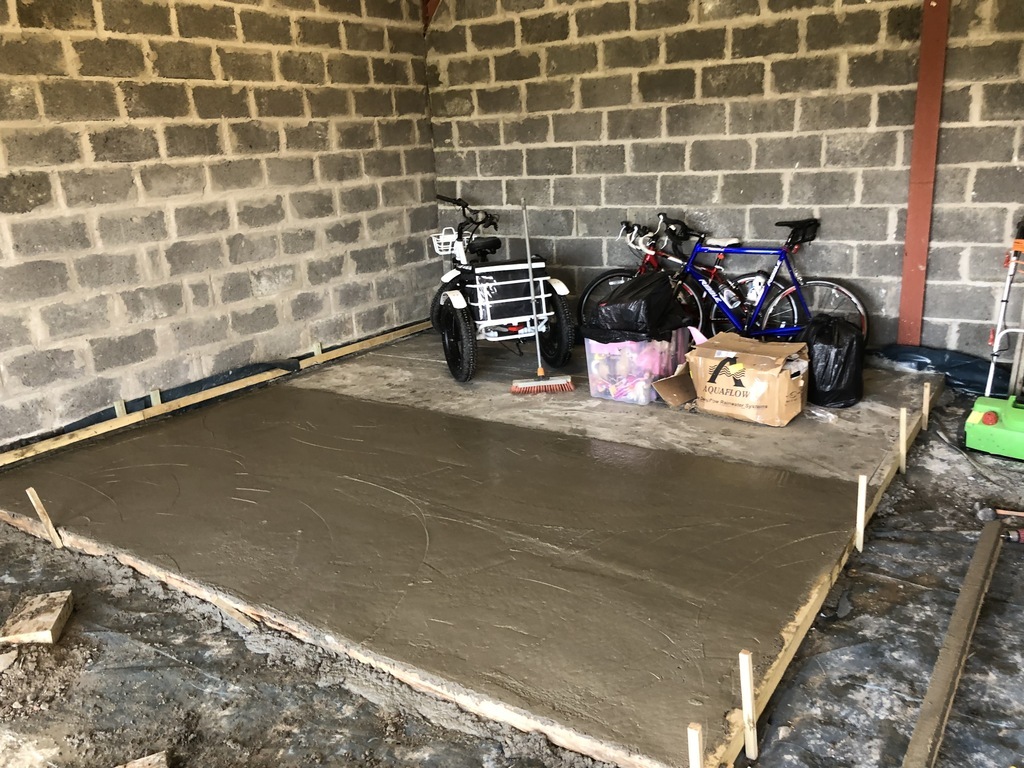 Look at the curse word bleeding into the lockup already, the trike is the father in laws, his mobility is poor now so he bought that to keep moving, cant knock him for that. |
| |
|
|
|
|
|
Nov 24, 2021 15:49:00 GMT
|
|
I'm leaving the floor to cure for a few hours, then will try the plastering trowel again when a little more firm.
|
| |
|
|
|
|
|
Nov 24, 2021 21:24:51 GMT
|
|
Well I must say that was a lot easier to smooth out after a few hours curing.
|
| |
Last Edit: Nov 24, 2021 21:25:20 GMT by henspeed
|
|
|
|
|
Nov 24, 2021 22:20:47 GMT
|
|
When I did my garage base at my old house I had a concrete mix truck where they mix it on-site and then wheelbarrow it to the job (they do the barrowing), they did it two pours (three sections) and I leveled it with a neighbour and it took around an hour and half each time.
The cost of this was far less than I could buy the materials for so it might be worth looking into that as it would save a load of mixing and the wagon could park on the road.
My garage base was around 25-30m from the wagon and it was fine (total size was 8m x 8m.
|
| |
|
|
|
|


