LowStandards
Club Retro Rides Member
Club Retro Rides Member 231
Posts: 2,716
Member is Online
|
|
Aug 20, 2019 10:58:27 GMT
|
|
My future plans are to fix the cooling system issues and blat around in her till the mot is up.
Then i'll look at a CG13DE conversion
During that time I will most definatly be removing the 12" wheels and huge* tyres the PO put on for off roading and fitting a set of 10s
This should help with the awful ride height, but i'll also chuck on a set of hi-los whilst i'm at it.
Dash needs a re-fettle, strapped in the harness I cant reach the switches and the steering wheel covers the gauges. I have a bank of Lucas Marine gauges i kept from my old Jago that should see there way into her.
Other than that, it's pretty much enjoy her
|
| |
|
|
|
|
MiataMark
Club Retro Rides Member
Posts: 2,971
Club RR Member Number: 29
|
1982 Mini ScampMiataMark
@garra
Club Retro Rides Member 29
|
Aug 20, 2019 11:54:44 GMT
|
|
Are the headlights LED units?
|
| |
1990 Mazda MX-52012 BMW 118i (170bhp) - white appliance 2011 Land Rover Freelander 2 TD4 2003 Land Rover Discovery II TD52007 Alfa Romeo 159 Sportwagon JTDm
|
|
LowStandards
Club Retro Rides Member
Club Retro Rides Member 231
Posts: 2,716
Member is Online
|
|
Aug 20, 2019 12:02:53 GMT
|
Are the headlights LED units? Yeah, cheap eBay units Seem to do the job, no idea on beam pattern or legalities |
| |
|
|
|
|
|
Aug 20, 2019 16:13:24 GMT
|
LOVE this. My mate had a Scamp - we were going to use it as a track car down at the Mini World Action Day at Castle Combe but some local scrotes stole it and burnt it out. Bar Stewards. Would've been hilarious fun as it was an early 1275 engine with high lift cam and twin carbs. Shame it was beyond repair  I will have to see if I can find a picture. |
| |
Last Edit: Aug 20, 2019 16:14:02 GMT by mrbounce
|
|
LowStandards
Club Retro Rides Member
Club Retro Rides Member 231
Posts: 2,716
Member is Online
|
|
Sept 9, 2019 10:30:45 GMT
|
I got a spare half hour so thought i'd take a look at the overheating issue I pulled the plugs (they were new before RRG) and found them in reasonable condition, tad lean maybe and some fouling on cyl 3 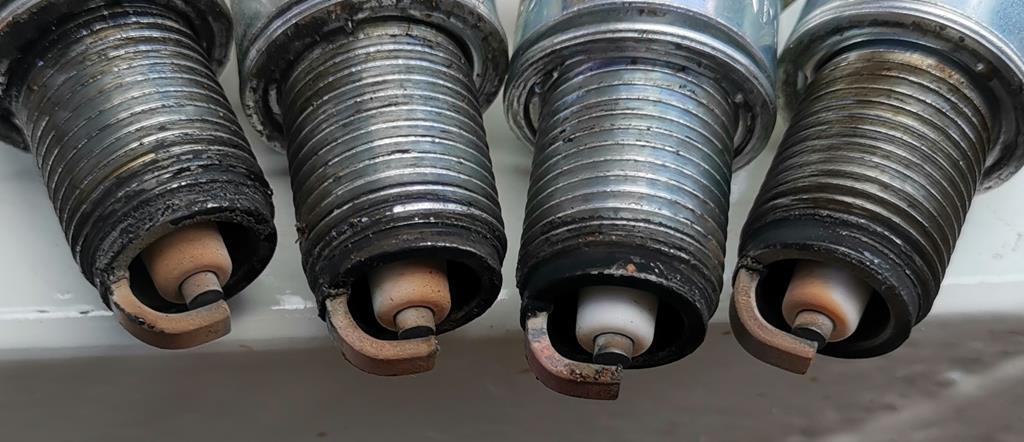 Next I did a compression test 1 - 132psi 2 - 137psi 3 - 142psi 4 - 148psi Bit of variation and according to the internets they should be circa 180psi so something is amiss Pull the rocker cover off. Yup, that'll be it then, I should sell it to Hellmans! 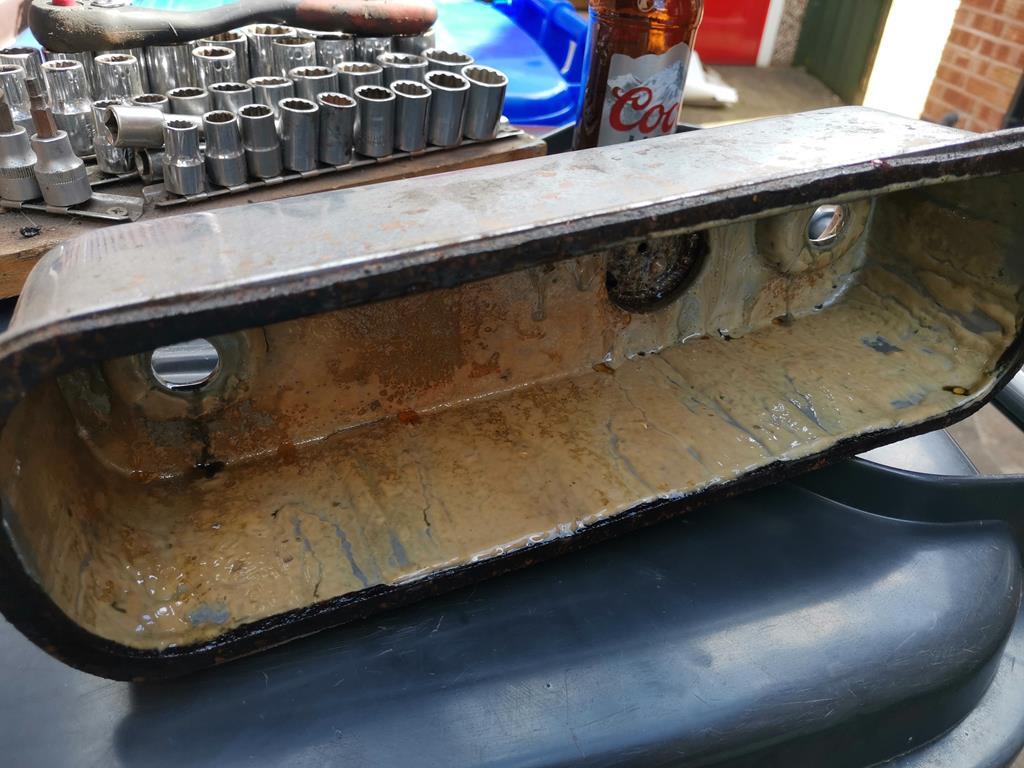 Go online, spend some pennies on a HG set, water pump, thermostat and bypass hose. I've got to wait for them to arrive, so in the meantime i've found all the marine spec guages from my old Jago 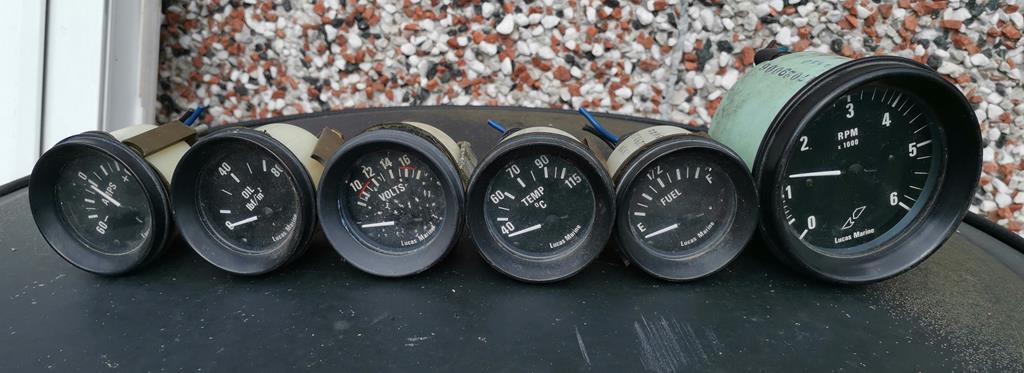 These should give me a little more indication on what's going on in the engine bay... |
| |
|
|
|
|
|
Sept 9, 2019 20:06:20 GMT
|
|
Blimey! I don't think I have ever seen THAT much mayo inside a rocker cover before! Yup, a new HG is probably a good plan...
|
| |
|
|
LowStandards
Club Retro Rides Member
Club Retro Rides Member 231
Posts: 2,716
Member is Online
|
|
|
|
Finally managed to get some free time to take a look at this here head gasket. I'm working outside as my garage is full of Rover P4, it's cold. Start by getting all this 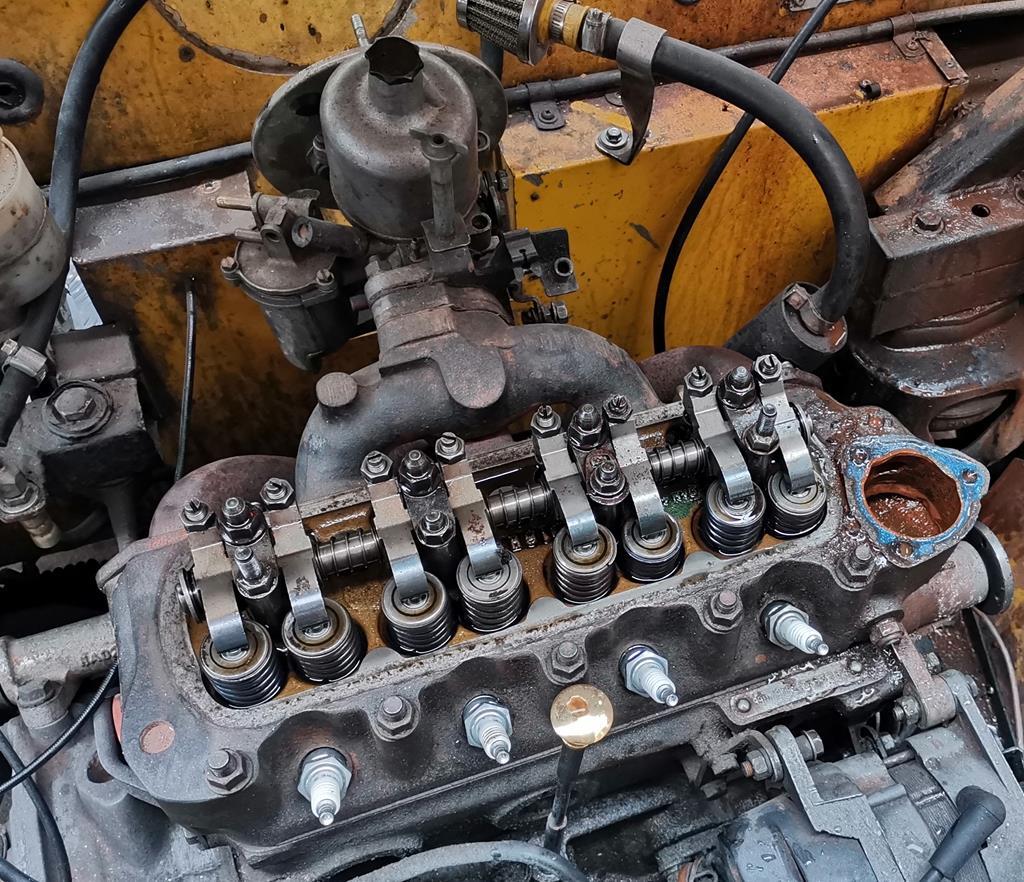 Into my go to pink princess car parts storage system 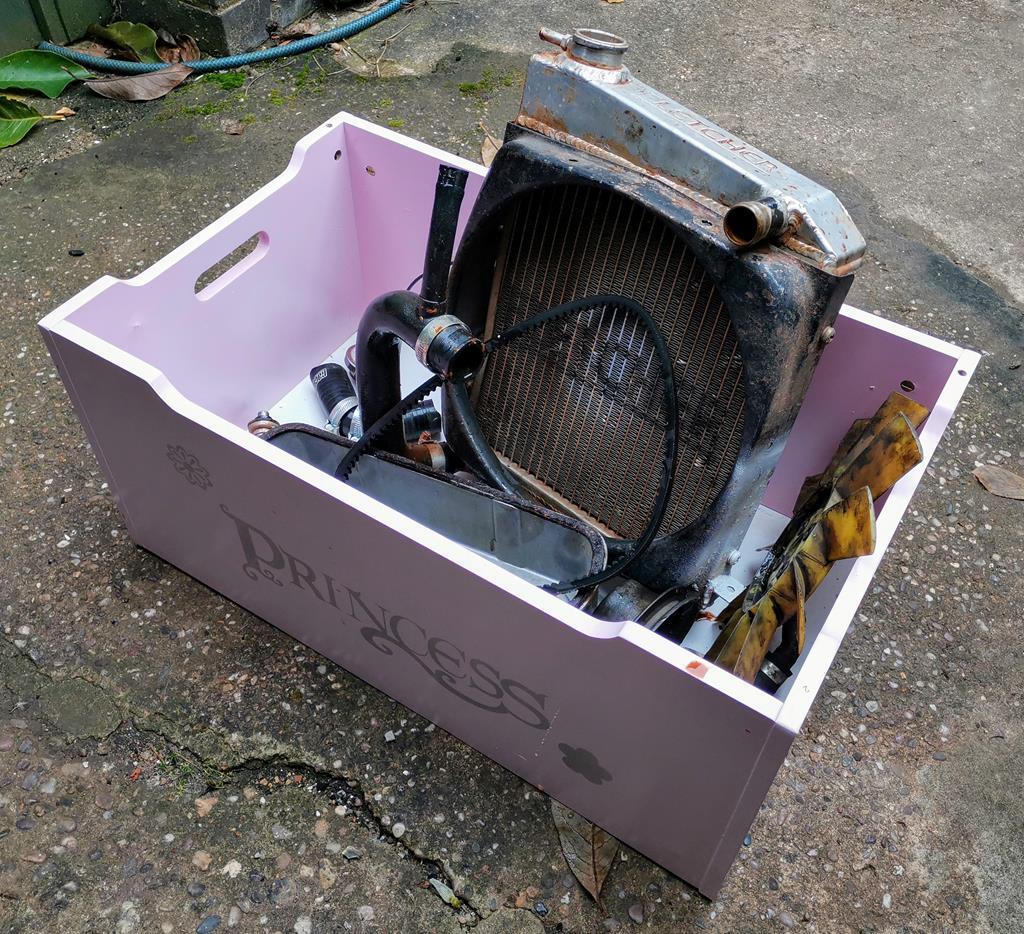 Head off, looks like it's been tracking between cylinder 1 and the water jacket, also cylinders 2 and 3 appear to be joined slightly. 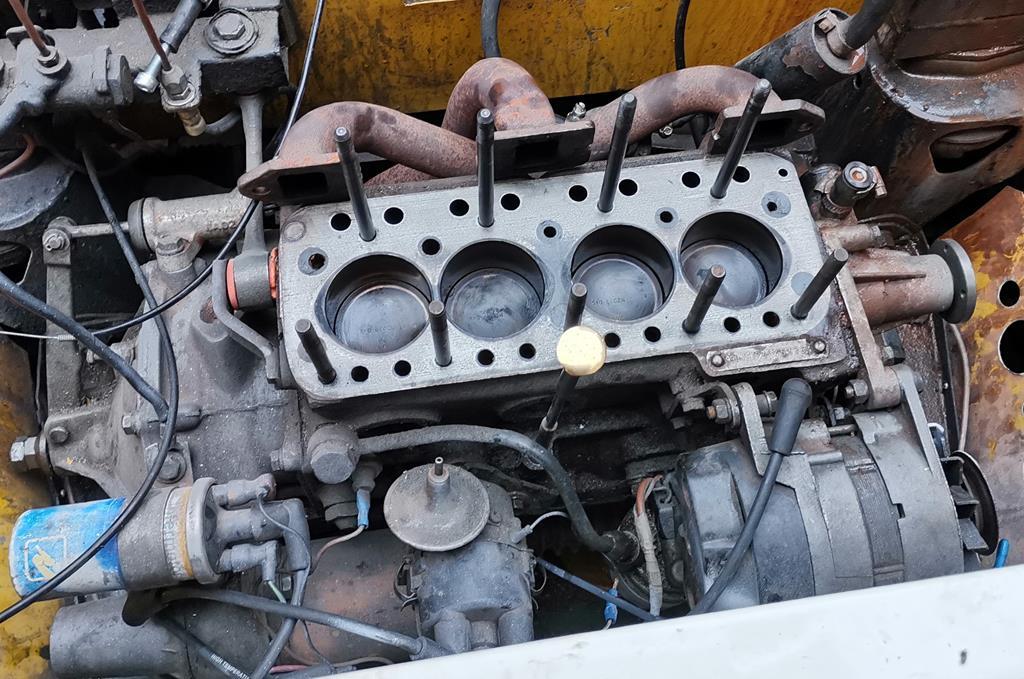 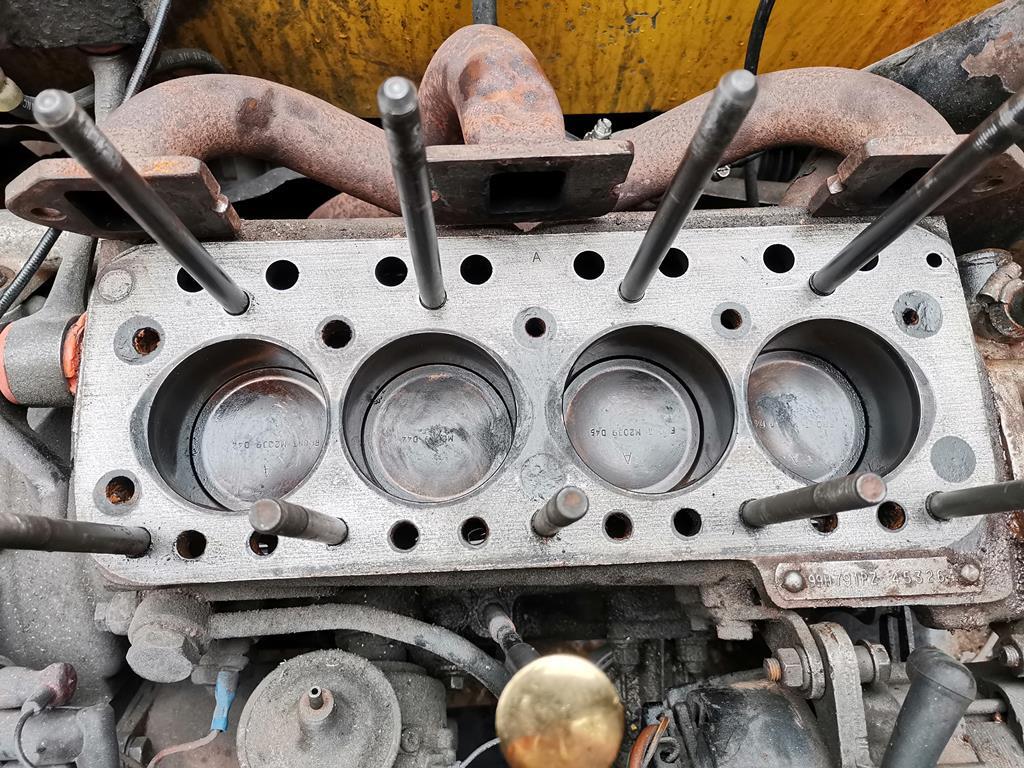 I fitted a new waterpump whilst I was at it. They're cheap, so might as well. Note she's fitted with an A+ engine and i'd ordered an earlier pump. No difference bar the bypass hose is blanked as part of the casting on the A+ so I had to employ the old hose and bolt system. 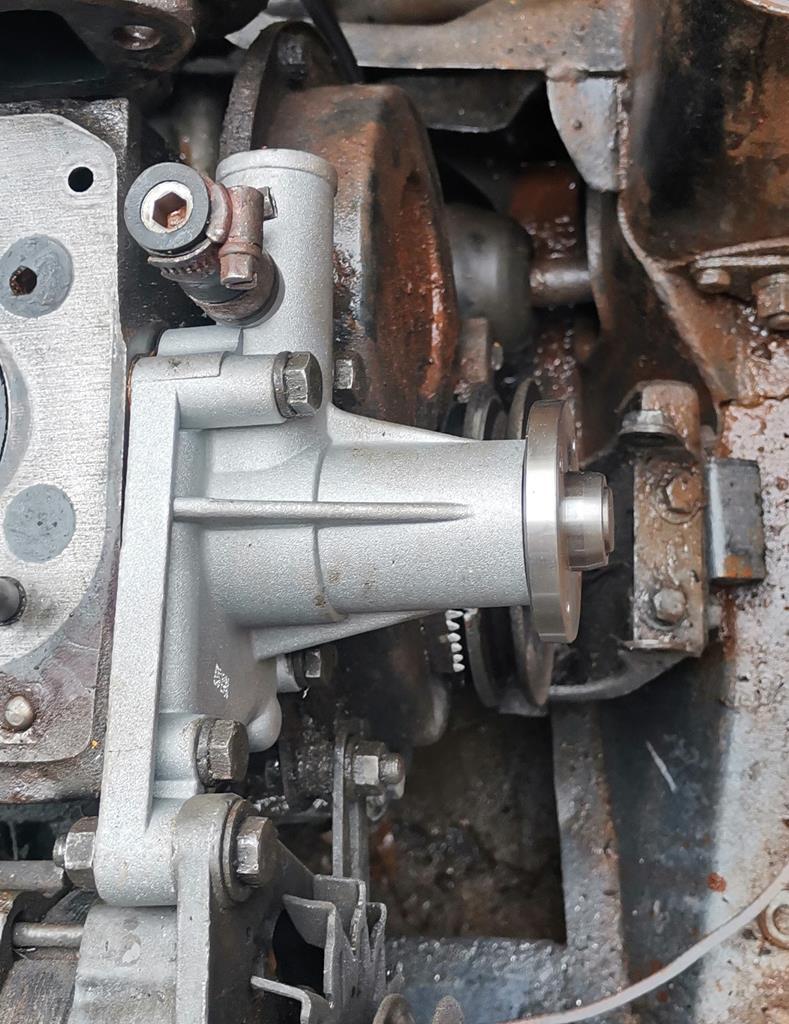 The head was in good condition, in fact the valves were perfect, needed the slightest tickle with the fine lapping paste and a touch of carbon cleaning from the faces. The valve guides were pretty shot on all valves. Most were missing the little springs and a few were cracked. 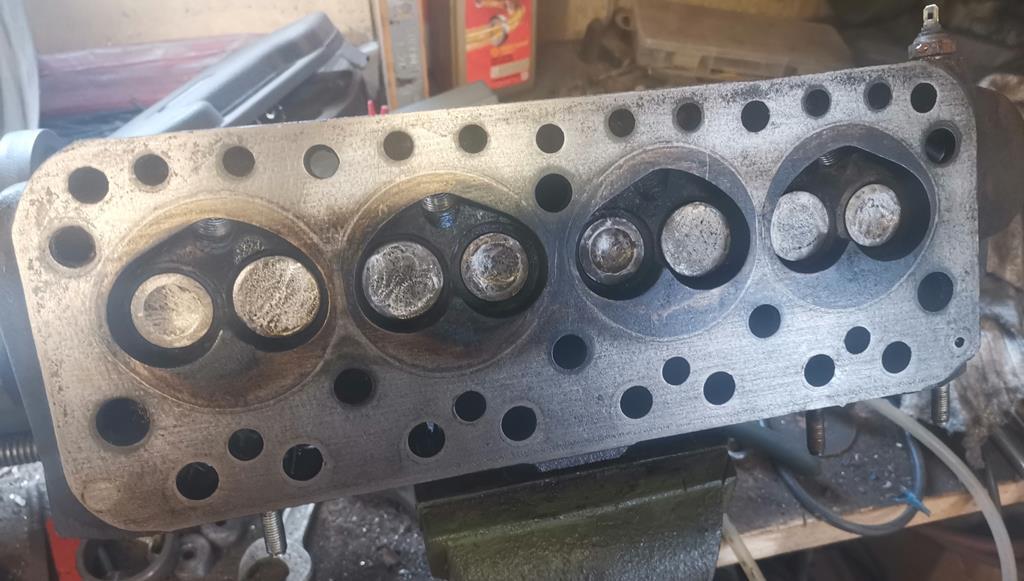 New composite head gasket fitted. I chose not to use the copper one as the surfaces need to be pristine (turns out they were anyways) 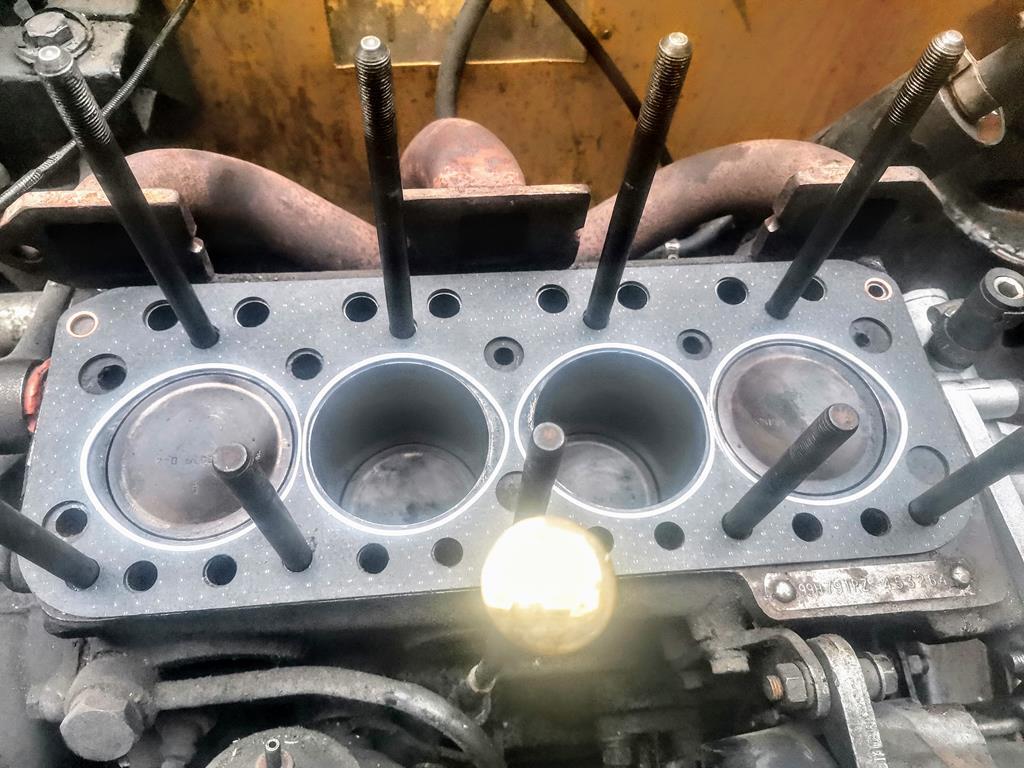 I've chucked the head on and everything is back in it's place. I still have the valve clearances to do before I can fire her up, but it started to absolutely chuck it down 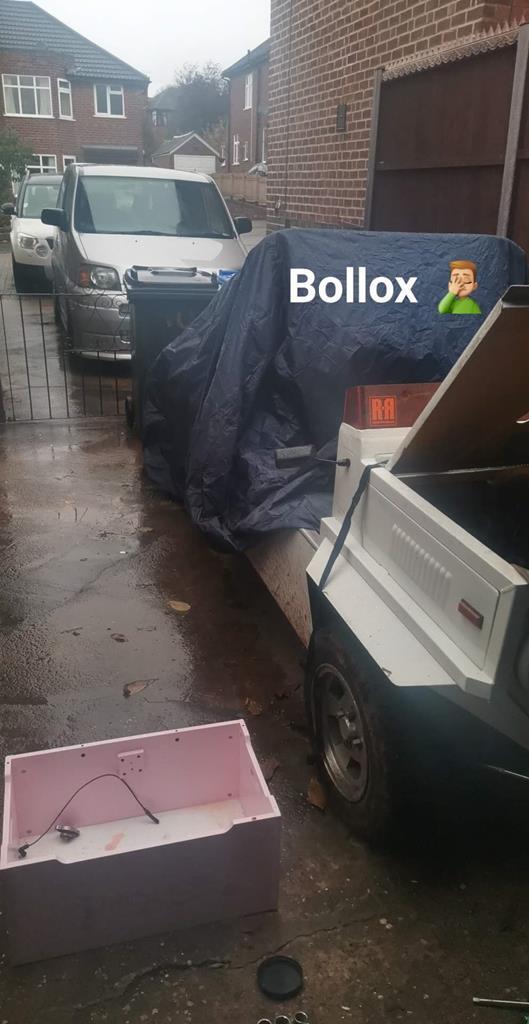 When I next get half and hour, i'll get them done and hopefully she'll no longer run all the way up the gauge and spit hot water through the bulkhead at me! Oh, I bought a new steering wheel as well. The current one is a 13 inch affair and the new one is 11 inches, I think it will look and feel better 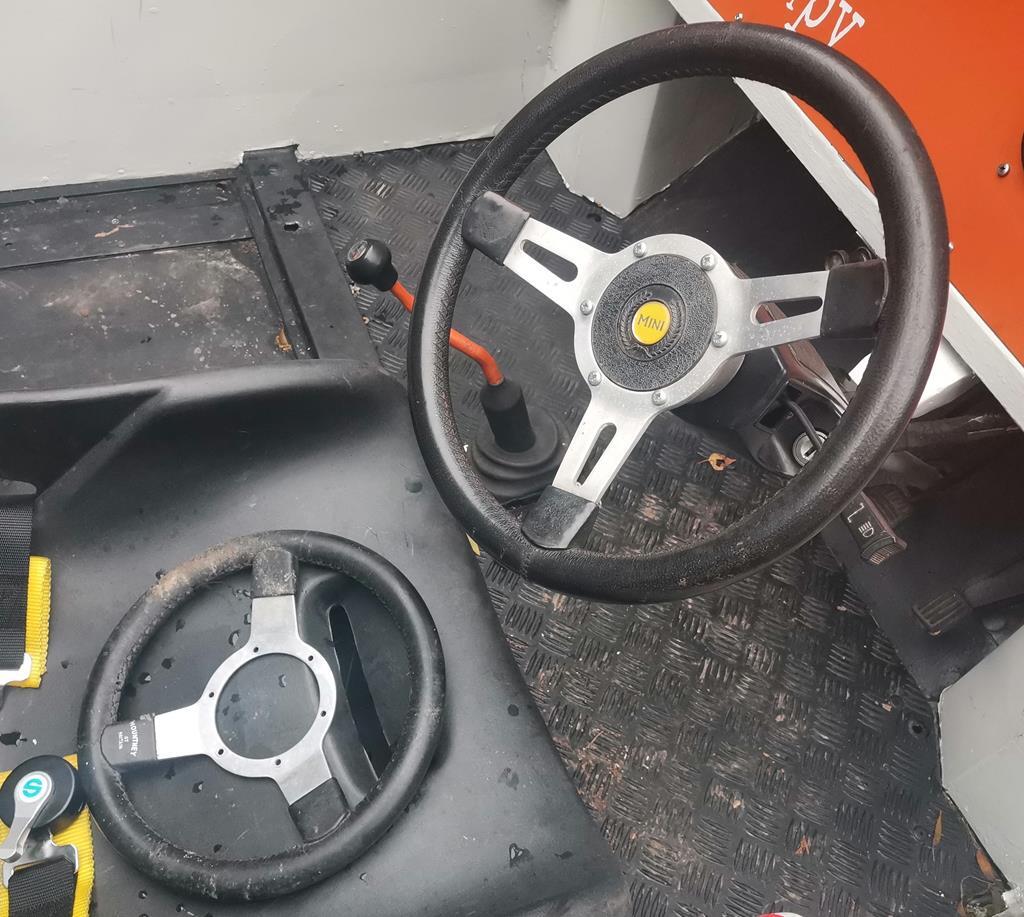 |
| |
|
|
|
|
|
Nov 11, 2019 21:23:46 GMT
|
|
I don't mind doing an HG swap on an A-series or A+. My friend and I once did one in 52 minutes from bonnet opening to start up. Easy when you know how!
|
| |
|
|
LowStandards
Club Retro Rides Member
Club Retro Rides Member 231
Posts: 2,716
Member is Online
|
|
|
|
The P4 has finally gone so I have a nice space inside the garage once more. Now the engine works I figure I best crack on with fixing the issues that are gonna happen when you build a car in a couple of weeks. I took this picture with the camera in front of my eyes with me sat in the seat Can anyone see the issue? 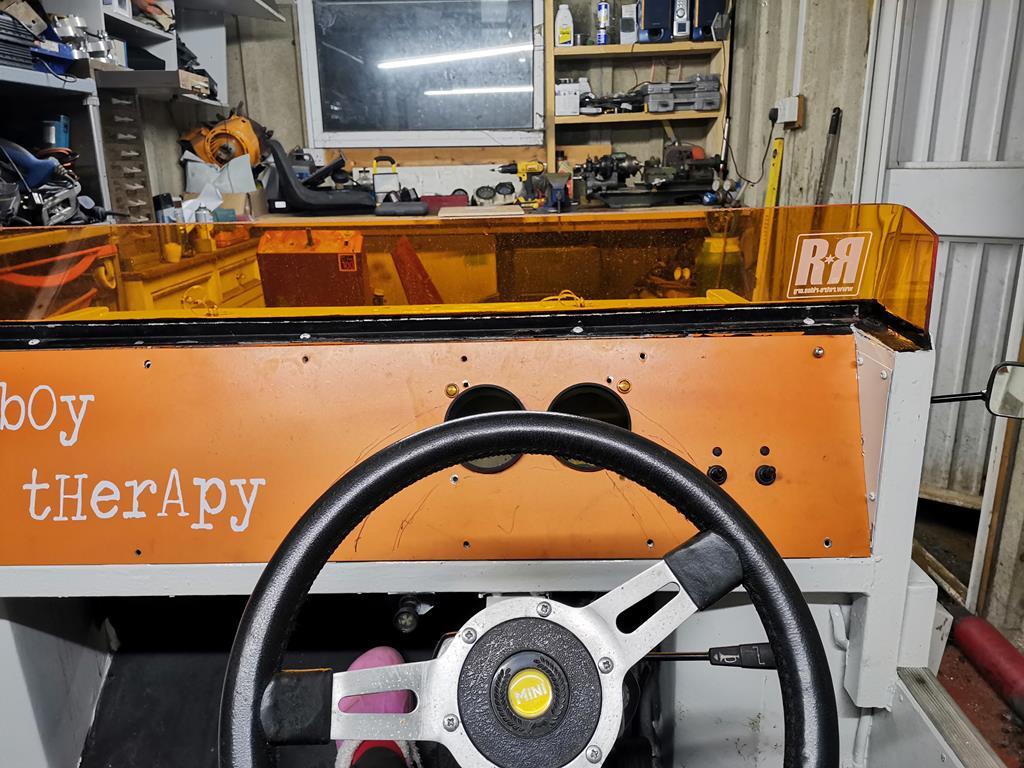 Whilst sat there, I got the sharpie out and marked up where I can and cant see 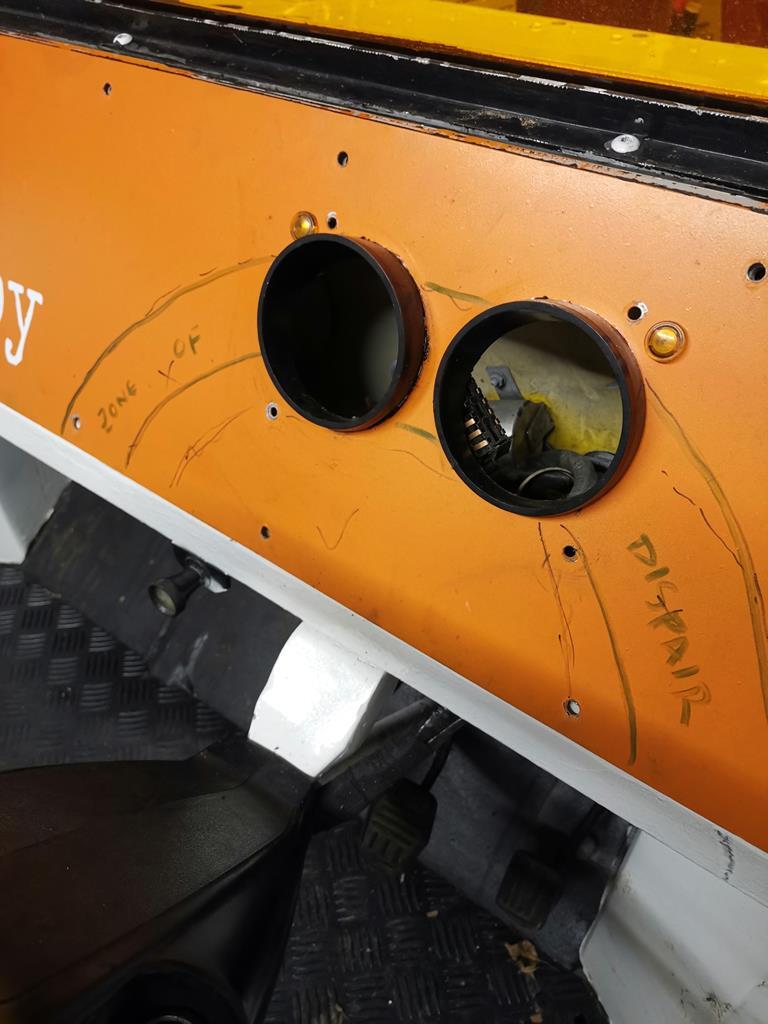 Then I spent what felt like hours mocking up positions of gauges so that I could see them and also the dash still looked good. Turns out, no matter what I did I really liked the fact the dash had nothing on it, so I sat down again and did some thinking. Then I went on eBay and chucked £100 at random sellers. I'll not reveal my idea as it may be awful, but in the mean time I figured as most of the wiring will be altered for new gauges and the fact that the Scamp has exactly zero of the original comforts I may as well rip out the Mini loom and start again. 20 mins later: 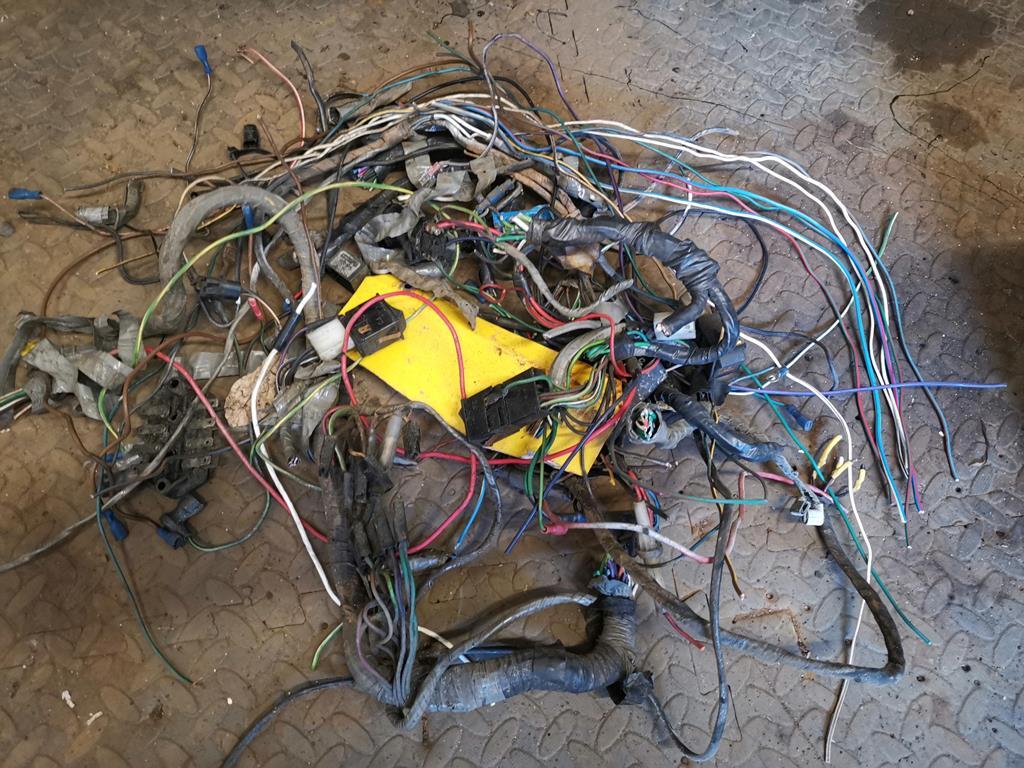 That's where I got to this weekend. I'm now at the mercy of the eBay sellers posting things out to me, though I fear even though I clicked 'UK Only' a few of the items might just be wandering over on a boat! |
| |
|
|
|
|
|
|
|
|
Be interesting to see what you do here. Will be bookmarking
|
| |
Current Fleet:
2004 Audi A4 1.9tdi Sport Avant
2014 Ford Fiesta 1.25 (wifes car, curse word box)
1987 Volkswagen Polo CL
|
|
|
|
LowStandards
Club Retro Rides Member
Club Retro Rides Member 231
Posts: 2,716
Member is Online
|
|
|
|
A few of my ordered items have started drip feeding through The gauges have come, along with the new fuse box and some adaptors for the senders to fit the engine. 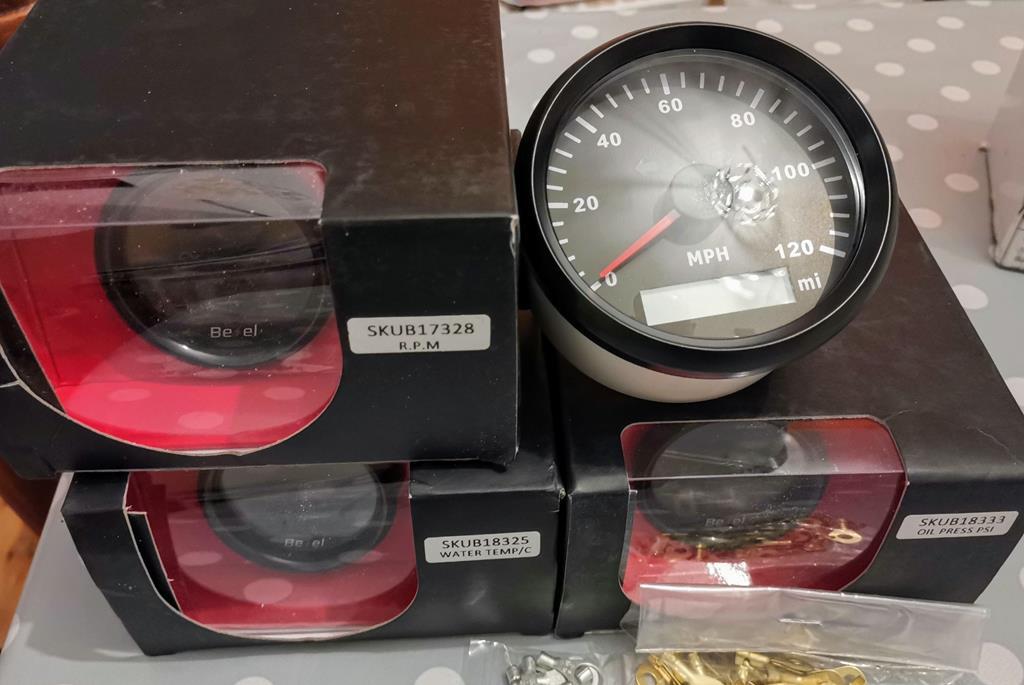 I'll tell you my idea, then we can throw suggestions or tell me i'm an idiot etc. I've ordered a chunk of black tinted perspex. When there is no light shining through (the panels behind the dash will be painted matt black) the perspex is not see through. When you shine a light through it, you can see through it exceptionally well. The speedo is the only thing that will be mounted onto the dash. I'm thinking in the space below the 2 original gauges on the current dash. This is a fancy GPS affair as there will be an engine swop in the future, so I figure i'll do it correctly now. The 4 led, digital, colour changing, opening ceremony giving, peak value saving, mega chinese dials, will be mounted directly behind the dash. When the car is switched off, you wont see them, at all. When they are on they should shine though perfectly (hopefully) Same goes for the warning lights, all hidden behind the perspex. The 2 light switches currently on the dash will be relocated to the side of the drivers seat. I can't switch them on anyways where they are as the harness wont let me reach them! Have a badly thought out video of my concept |
| |
|
|
LowStandards
Club Retro Rides Member
Club Retro Rides Member 231
Posts: 2,716
Member is Online
|
|
|
|
Quite a fair bit done this weekend, but as it's wiring, it's slow going so I wont bore you with a hundred pics of yellow thin wall. You can see I don't follow the mindset of purchasing 1m of yellow with a blue stripe and .75m of it with a green stripe etc. What I do is use a single colour per circuit, then I print a label for each end of the wire and clear shrink tube is on. I figure unless you somehow manage to cut through the whole loom randomly in the middle of it, this is fine (saves looking up the wiring diagram when you can see at a glance) The fuse box is in and the relay to power it all. 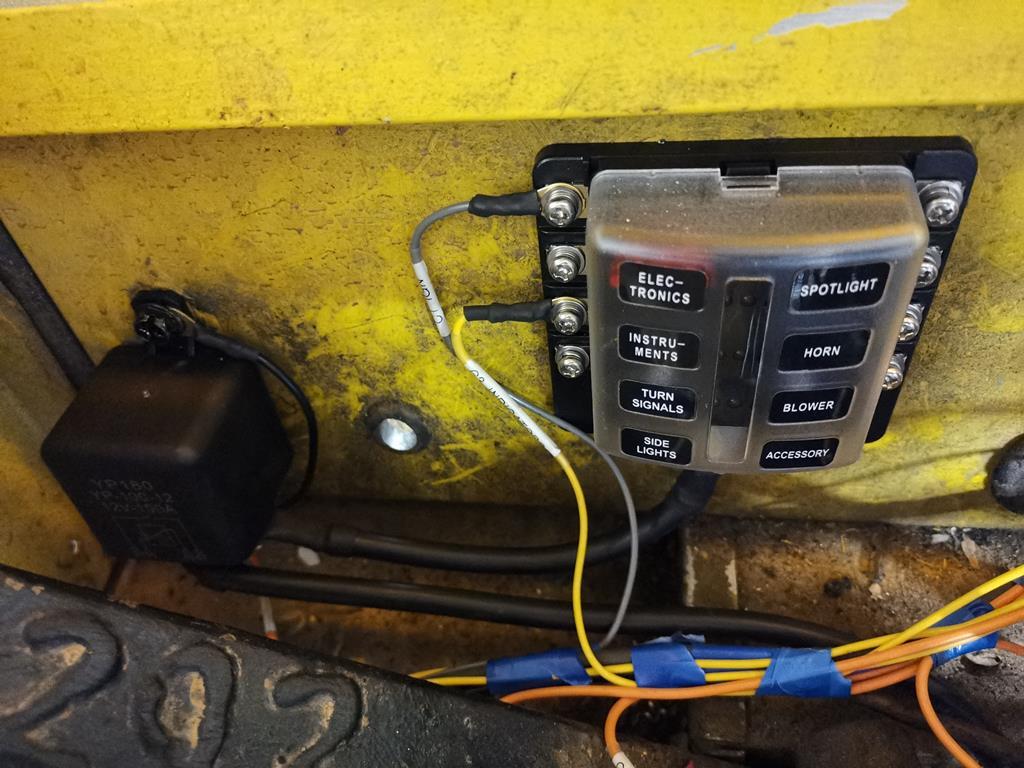 What I do (and i'm in no way saying this is the correct way) is to only have the ignition key on a direct to battery circuit. When the key is turned it energises the big 100Amp relay you can see on the left, which then powers up the fuse board. This means there is only a single wire with any sort of power running though it when the car is off. Also, I got the gauges working |
| |
|
|
LowStandards
Club Retro Rides Member
Club Retro Rides Member 231
Posts: 2,716
Member is Online
|
|
Dec 16, 2019 10:30:50 GMT
|
Even with half the amount of ancillaries there's still a fair amount of wiring going on. 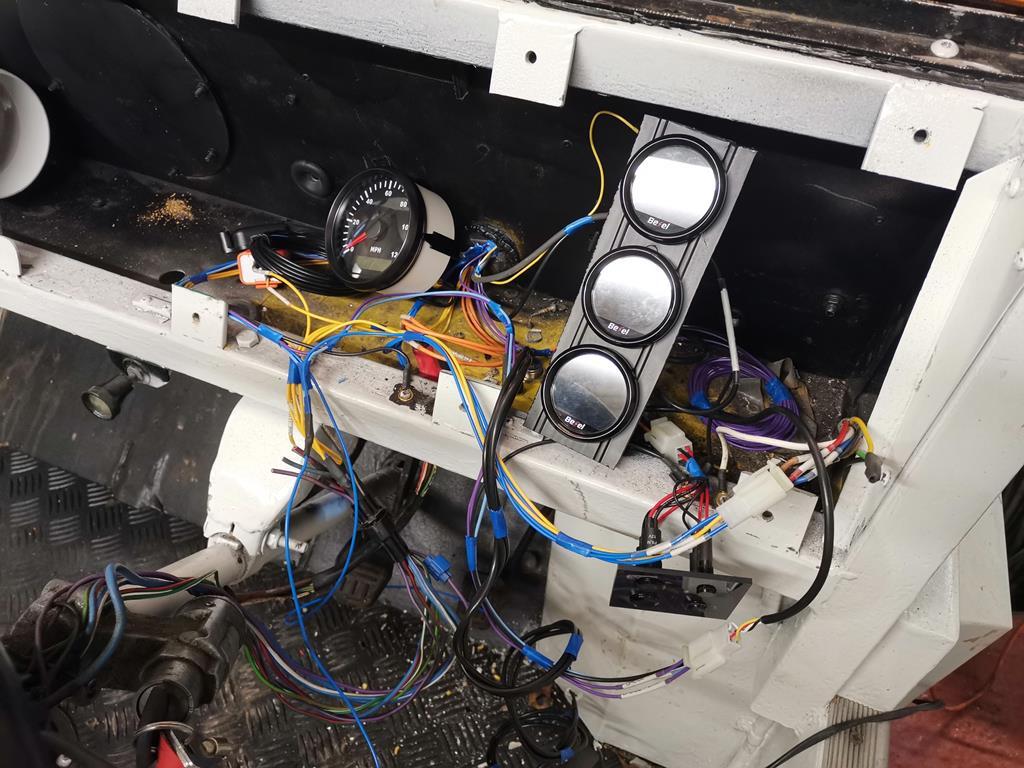 She's getting there now though. All the gauges work now, inc. the GPS speedo. The lights are wired bar the main switch as I still have no idea where would be best to place it. I can't actually reach the dash when i'm harnessed in and the steering column doesnt have a lot of room to install a switch. I'm thinking possibly fitting it into the side panel next to the seat? I also looked at heat. Now an open topped car is never going to be warm; but the trip back from the Gathering told me some sort of heat wouldn't go amiss. Again, I want everything to be hidden, so behind the dash it has to be. First problem, finding a fan compact enough, but also powerful enough to blow warm air from under the steering wheel at my crotch. Ended up with the 4 inch bilge fan, she chucks out 270CFM at full pelt. 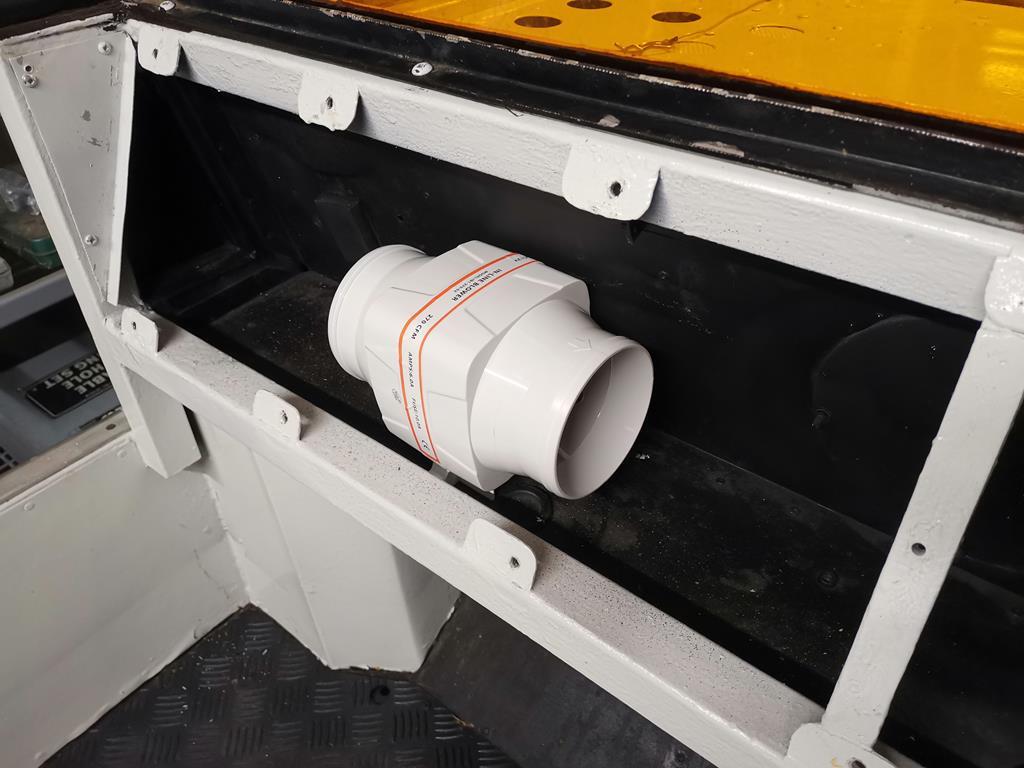 Being 4 inches means I can use normal extractor fan fittings. I've gone for a 90 degree bend into rectangle section for the inlet, which draws air in from below the dash, so it should be clean and water free. 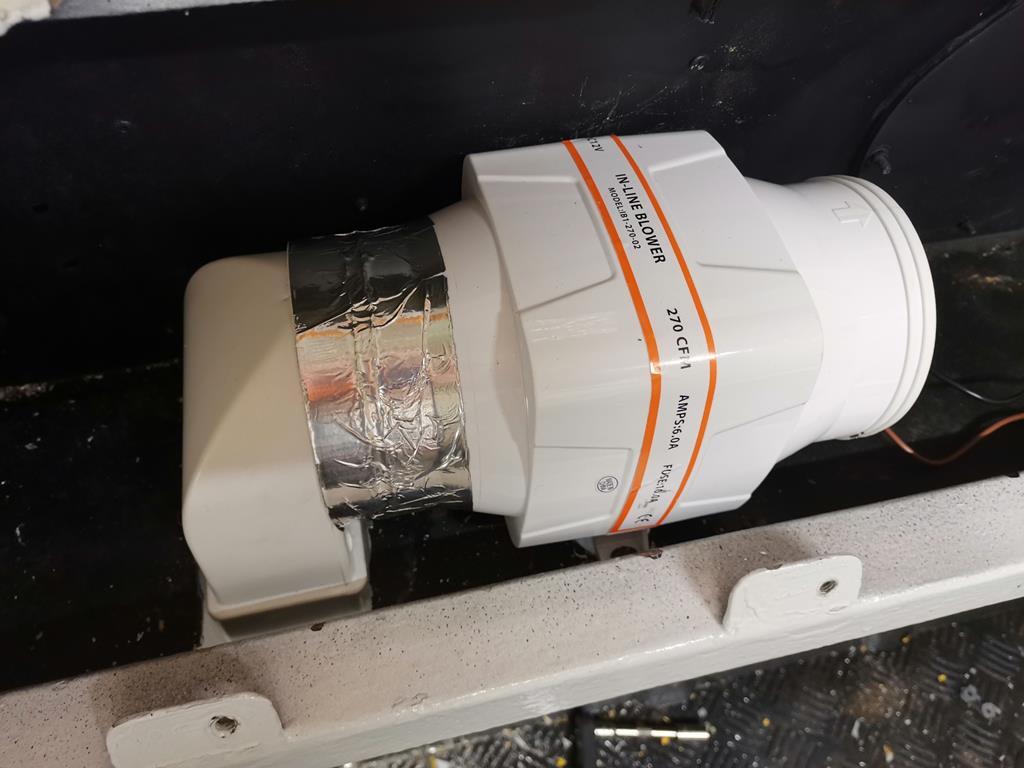 Finally a pic of the behind the dash showing locations. 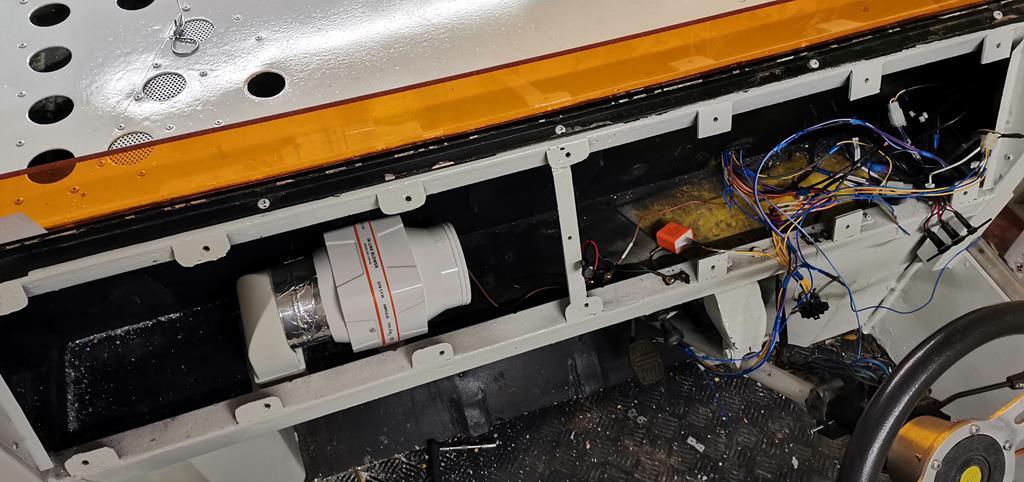 I'm now struggling with finding a heater matrix small enough to actually fit in the small space (about 150mm square and 25cm long) I'm tempted to make my own out of microbore copper pipe by coiling it up inside a piece of 4 inch tube. Anyone reckon this will give me enough heat output? |
| |
|
|
79cord
Posted a lot
  
Posts: 2,617
|
|
Dec 16, 2019 11:22:42 GMT
|
|
Electric Heater? No idea what's even available.
Copper piping sounds interesting.
|
| |
|
|
LowStandards
Club Retro Rides Member
Club Retro Rides Member 231
Posts: 2,716
Member is Online
|
|
Dec 16, 2019 11:27:32 GMT
|
|
I think anything electric will cost a fair few quid to not be chinese tat.
I've just ordered some 50mm copper flat bar, so I can test the theory.
Be nice if I can get it all inside a bit of tube
|
| |
|
|
|
|
|
Dec 16, 2019 13:34:39 GMT
|
|
What about a heated seat kit? Then the blower can keep your feet warm...
|
| |
|
|
LowStandards
Club Retro Rides Member
Club Retro Rides Member 231
Posts: 2,716
Member is Online
|
|
Dec 16, 2019 13:41:20 GMT
|
|
The seat is very much a plastic affair.
Anything rested on it would no doubt go walkies when parked up
|
| |
|
|
|
|
|
Dec 16, 2019 19:38:30 GMT
|
|
|
| |
|
|
|
|
|
Dec 16, 2019 20:02:23 GMT
|
|
|
| |
1994 BMW 525i touring
2004 BMW Z4 sorn and broken
1977 Ford Escort
1982 Ford Capri getting restored
1999 Mazda B2500 daily driver.
|
|
|
|
|
Dec 16, 2019 20:12:05 GMT
|
|
fantastic thread, i love it when you just completely wing things and hope for the best. always alot more fun!
|
| |
|
|
|
|


 I will have to see if I can find a picture.


