|
|
|
Oct 15, 2019 20:18:00 GMT
|
If you need any parts the Jaguar Spares day is next weekend at Stoneleigh Park near Coventry. I have always found some bargains there, I'm currently doing a 1967 2.4 MK2 needing lots of panels. Thanks for the heads up, I'm already planning to go with quite a list! There's quite a few brake parts I need to source, along with a replacement rear window some missing chrome and a whole list of other things I can't remember off the top of my head just now. It's good to hear that there are bargains to be found. You never know till you've been if it's going to be just the same prices as if you buy off eBay, just with the hassle of driving there! I have always found it to be really good and have saved a fortune on body panels, some people do want silly money for things but there are bargains to be had. I bought a non heated rear screen last time for £35 as mine was broken when I bought my MK2.
I see your in Bromsgrove, i'm only down the road in Redditch.
If you do get stuck with brakes I had my original dunlop master cylinder resleeved by these guys in Stourport on Seven and they were really good: www.classiccar-brakes.co.uk/ |
| |
|
|
|
|
goldnrust
West Midlands
Minimalist
Posts: 1,886
Member is Online
|
|
Oct 19, 2019 20:51:53 GMT
|
That's good to know, thanks. As it happens the master cylinder is about the only thing that's not totally knackered on my brakes.   I've been pushing on with the doors, spurned on by the thought of once again 'finishing the welding'. At the end of the last update I'd just discovered what a mess my rear drivers side door was... 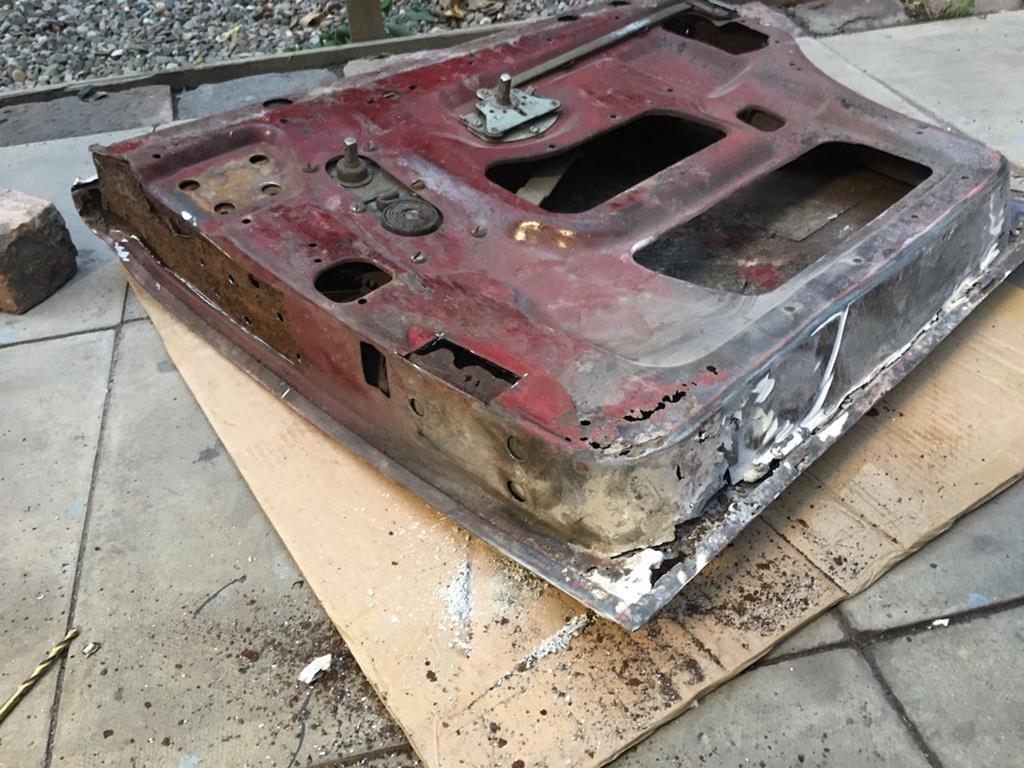 Plenty of grinding, welding and hammering later and we're all fixed up  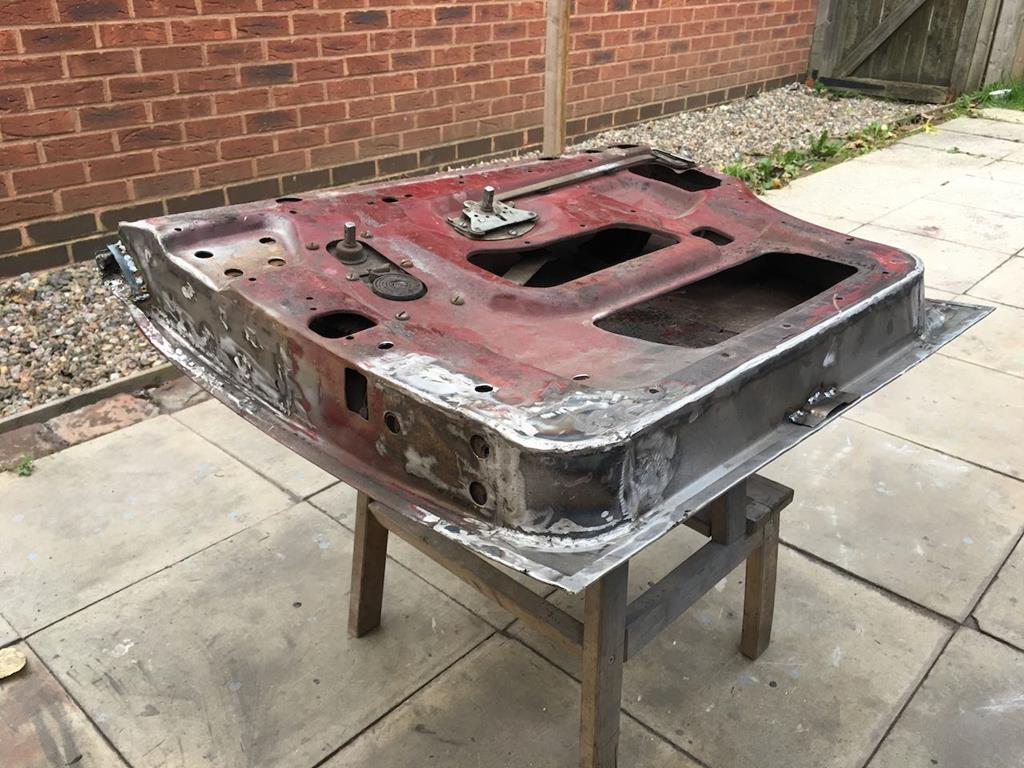 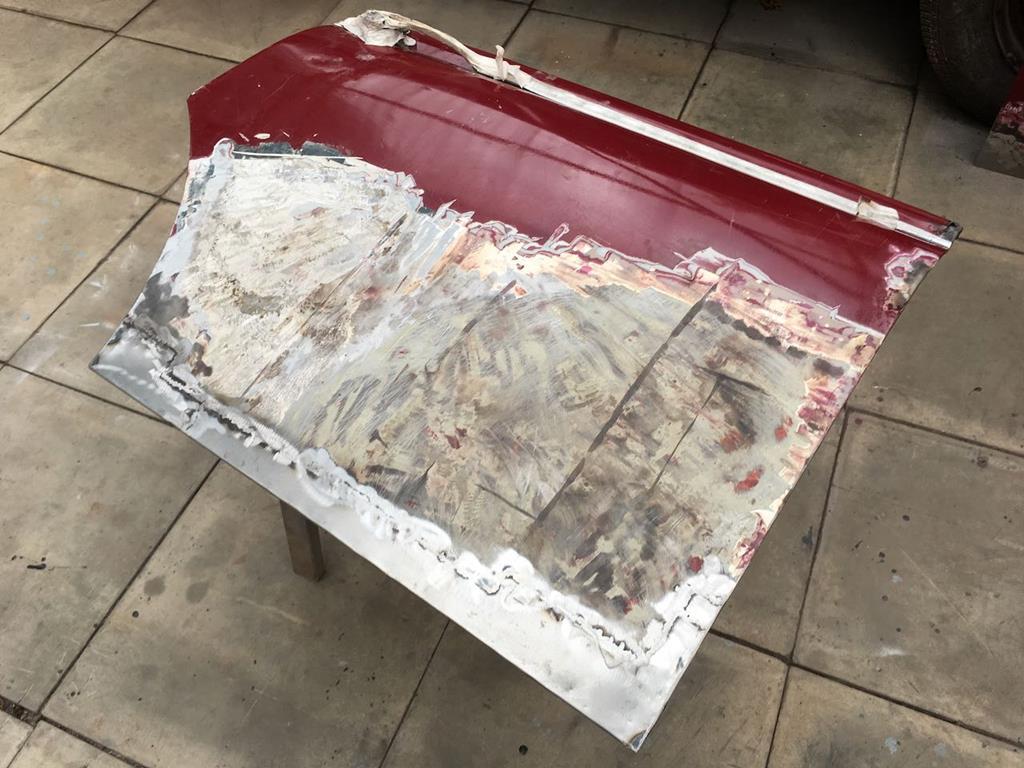 A key addition to that door is the drain channel. I wasn't actually aware that the drain holes in the doors needed that little channel adding to them till I got my replacement front passengers door. My original doors were so covered in filler I couldn't see any drain holes and the replacement drivers door was missing the little channels. It makes total sense that they are required as, now the door seals are in, it's easy to see you need this little extra piece to make sure any water in the door drips outside the car and not into the door shut. Anyway, I've gone round and added them to all the doors. And with that, the welding is once again done, which is marvellous news  The next task is to get the doors ready for paint, so I've spent a very exciting day today with a tub of filler and lots of sandpaper. 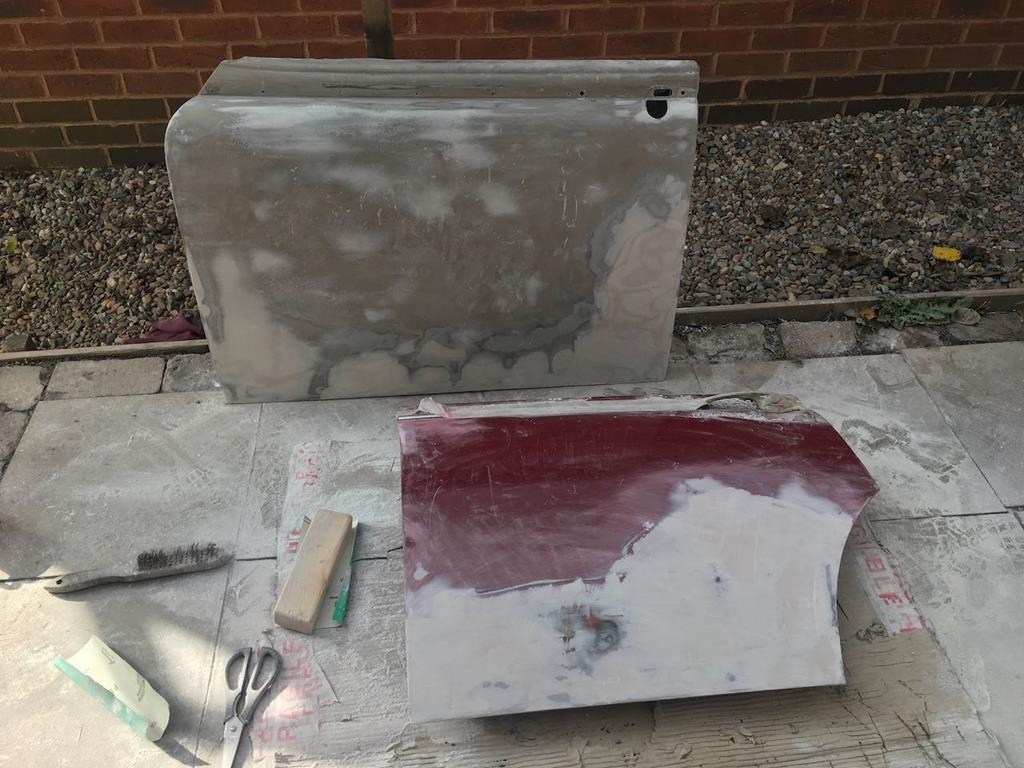 I made pretty good progress. The passengers front door is mostly rough shaped, the rear doors have got a fairly long way to go. Whilst waiting for the various rounds of filler to go off, I finally got round to giving the fuel tank a coat of paint on the outside, it looks much better for it. 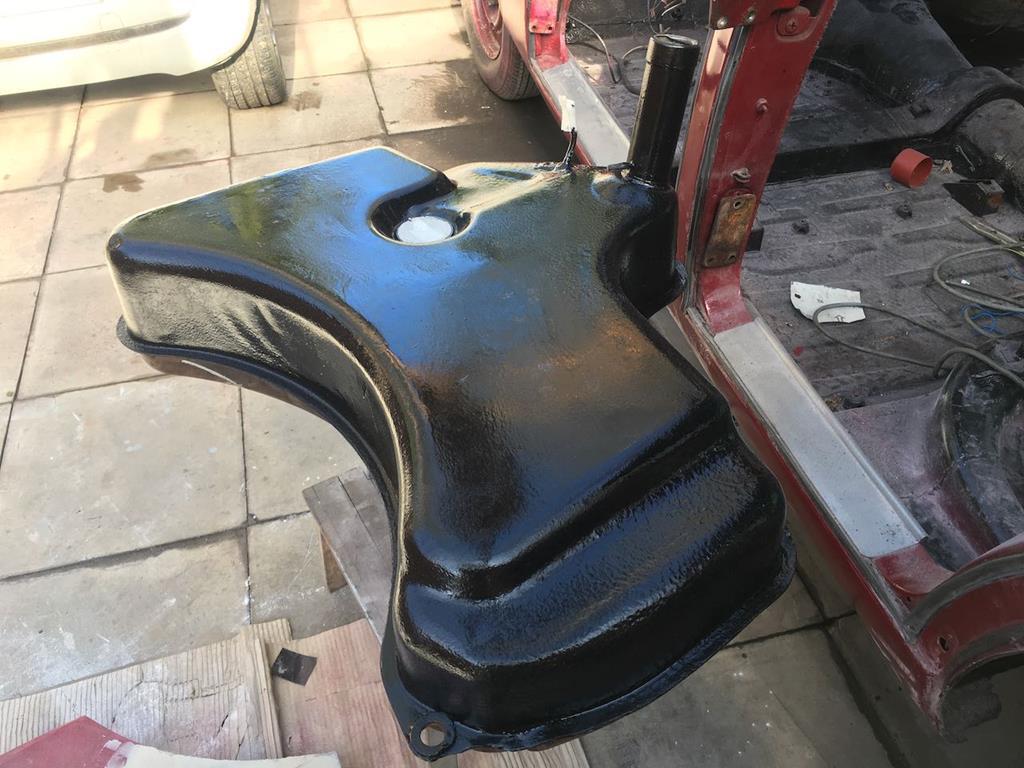 It feels like progress again to be back onto the paint prep. It'll be great to actually get these doors on the car at some stage and be back to where I was several weeks ago, haha. |
| |
|
|
|
|
|
Oct 19, 2019 21:13:15 GMT
|
|
The doors are look excellent, how did you make the bottom section as this is a gentle curve rather than straight to follow the sill?
When I did the last set I repaired the flat bit and then spot welded on an angle with slots cut in it so I could bend to follow the curve, it wasn't entirely successful though.
The company in Stourport can also sleeve the wheel cylinders if you get stuck although I didn't use them to do this as I bought a cheap set of new old stock ones in the end.
|
| |
|
|
vader
Part of things
 
Posts: 425  Club RR Member Number: 93
|
|
|
|
The doors are look excellent, how did you make the bottom section as this is a gentle curve rather than straight to follow the sill? When I did the last set I repaired the flat bit and then spot welded on an angle with slots cut in it so I could bend to follow the curve, it wasn't entirely successful though. The company in Stourport can also sleeve the wheel cylinders if you get stuck although I didn't use them to do this as I bought a cheap set of new old stock ones in the end. Yay, fame at last for Stourport, If it’s the company i’m Thinking of in Sandy Lane I used them some time ago for a brake master cylinder and servo. |
| |
Last Edit: Oct 20, 2019 8:43:37 GMT by vader
Triumph Stag
Ducati Supersport
Shanks’s Pony
|
|
goldnrust
West Midlands
Minimalist
Posts: 1,886
Member is Online
|
|
Oct 20, 2019 19:09:55 GMT
|
homersimpson When I checked against the car I found that while the front doors had a reasonable curve to them, the curve in the rear doors was very very subtle. So I made the door frame repair as a straight section folded in my metal bender, then once I'd got it and the skin repair tacked up I fitted the door back to the car and used a hammer to tweak the curve till it was right. I'm sure its not the official approved procedure, but it seemed to work ok! haha I spent this morning wandering round the, very fancily named, Jaguar International Spares Day. In reality, it was piles of old car bits in a big shed  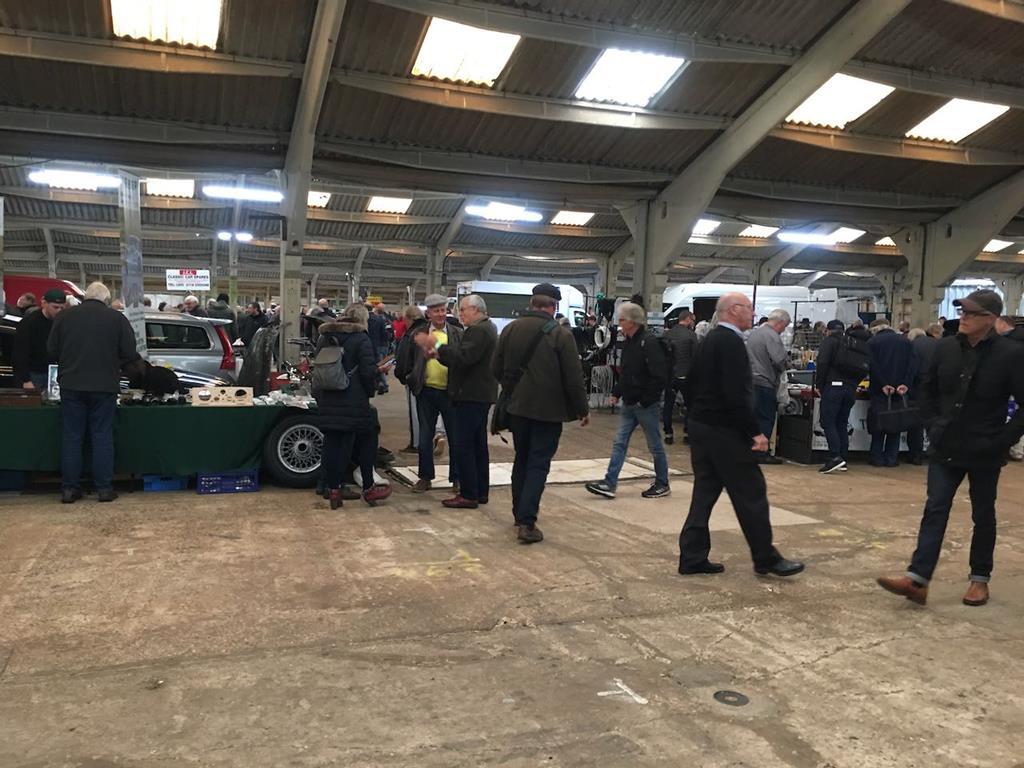 I wasn't sure what to expect, having never been to an auto jumble before. It's a lot harder to find what you want than on the internet, we are very much spoilt by the search function! Dustbins full of assorted chrome trim, for example, means as a buyer you've really gotta know the part you're looking for. There were a lot of prices with more zeros on the end that seemed appropriate for rusty parts piled on the floor, but I guess when they are parts for cars potentially worth 6 figures it's to be expected. Equally there were some really good bargains to be had. I had to be brave to not get distracted by shiny wheels and to stick to my list! My main aim was to get a replacement rear window, and sadly on that front I failed. I didn't see any rear windows, I saw very little glass generally. There's 3-4 rear windows on eBay right now, so they are out there. Maybe glass just doesn't normally sell well at these events. Despite this, the day was definitely a success. This was my haul: 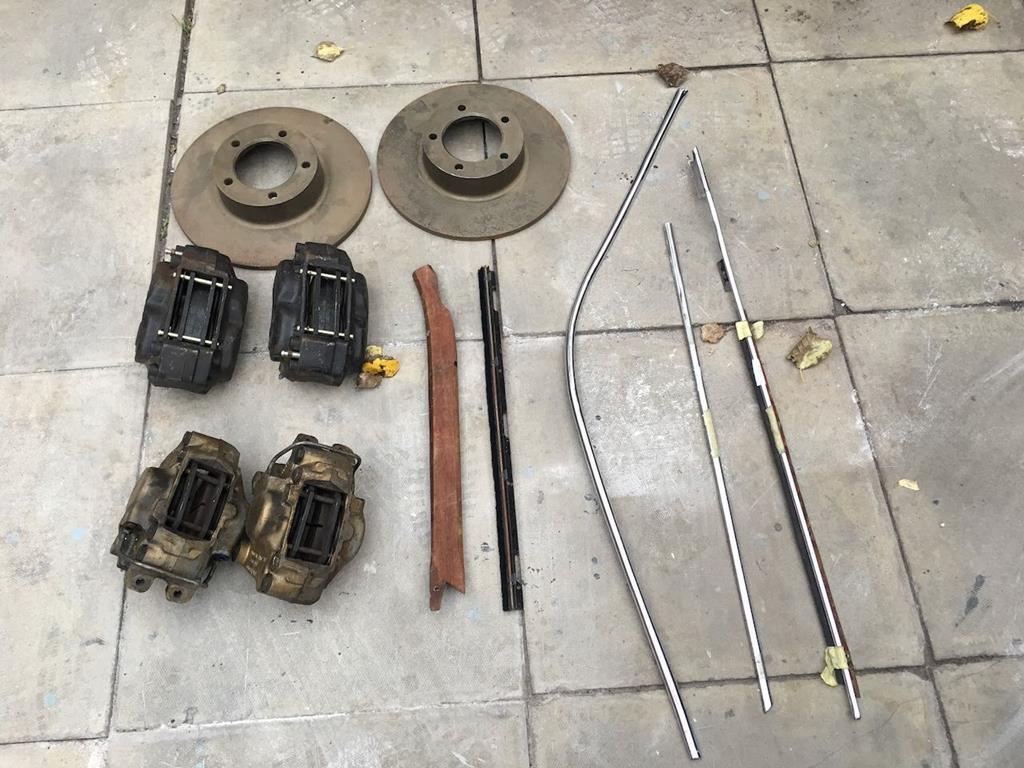 I was missing the chrome trim for the drivers door and front drivers drip rail chrome, I got these 3 sections, and the window inner felt trim, for next to nothing as they're not in great nick. As it happens they're about as knackered as the rest of my chrome trim, so will fit in with the car just nicely. Much better than spending over £100 to buy these pieces new, only to have them stick out like a sore thumb and make the rest of the chrome look bad! Likewise I got a replacement piece of A pillar wood trim for a few quid, it will need re-veneering, but so does the rest of mine and my original passengers A pillar trim is rotten at the bottom. The best score of the day though was the brakes. I managed to pick up a pair of aftermarket 4 pot front brake callipers (and discs) and a pair of E-type S2 rear callipers for considerably less than the cost of repairing/replacing my original brakes. The 4 pot fronts should offer much better stopping power than the standard design and being a modern seal design should be much easier to service if necessary. Likewise the E-type rear callipers should (if the internet has given me the right info) be a bolt on upgrade that gives me much improved stopping power, maintaining a reasonable brake balance with the uprated fronts, and also have the modern seal design. According to the seller the front's are un-used, purchased but never fitted, externally they look like this could be true though they are a bit dirty, I will pop the pistons out and check them before installing them. The rears are definitely used, but still look pretty good, again I'll give them a once over before fitting them. Anyway, shouldn't get too excited, got a lot of sanding to do first!
|
| |
|
|
|
|
|
Oct 24, 2019 19:03:13 GMT
|
|
I will have to give that a try, I went to Stoneleigh last weekend and bought a job lot of panels, I've put the ones I don't need on eBay to get some cash back as I'm doing a rebuild on a very tight budget.
There is always a good turn out at Stoneleigh and this time was especially good, I could have spent my money 3 times over if my wife would have let me :-)
|
| |
|
|
goldnrust
West Midlands
Minimalist
Posts: 1,886
Member is Online
|
|
Oct 26, 2019 20:50:03 GMT
|
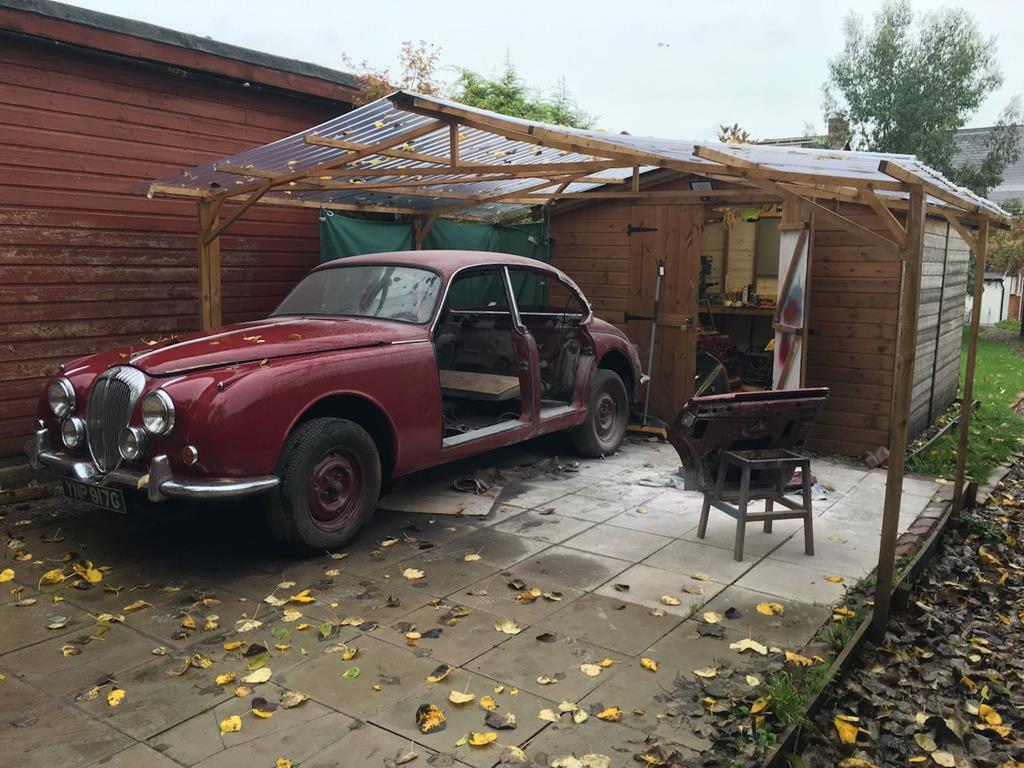 It was very autumnal out there today. Thankfully the carport kept the worst of the weather off me and meant I could still carry on with my door prep. The passengers front and rear doors are now shaped up and I've given them a quick blast of high build primer. 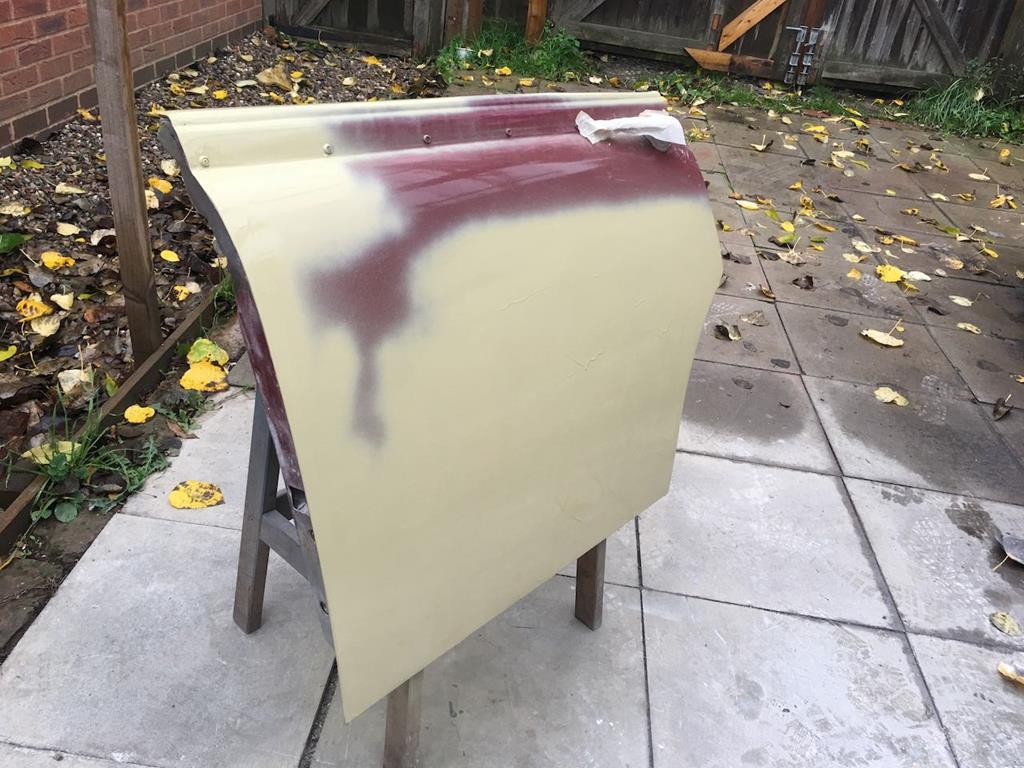 And the drivers rear door is pretty close to shaped up right, I think one more round of sanding should do it. 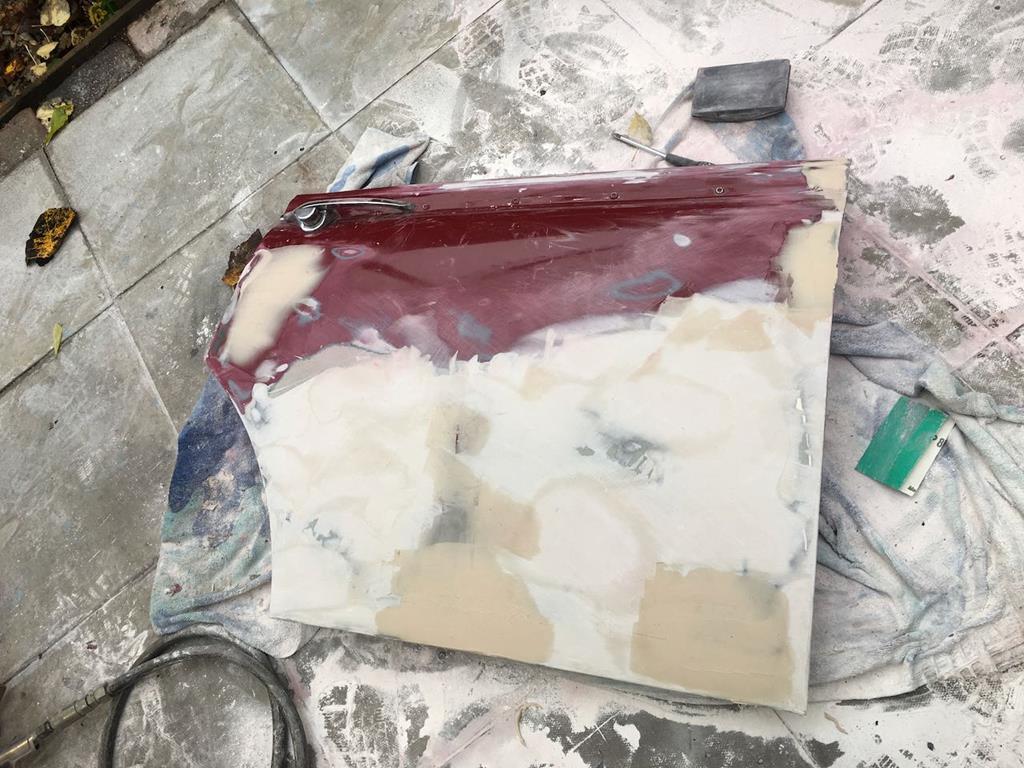 So no wildly exciting progress this week, but it's still progress  |
| |
|
|
goldnrust
West Midlands
Minimalist
Posts: 1,886
Member is Online
|
|
|
|
Good progress this week, picking up where I left off last time, I finished off rough sanding that last door pretty quickly. After that it got a quick coat of high build primer, just to fill in the scratches from the coarse sand paper, before I went over all the doors, and the roof, with fine sand paper and gave them a light coat of red primer in preparation for paint. 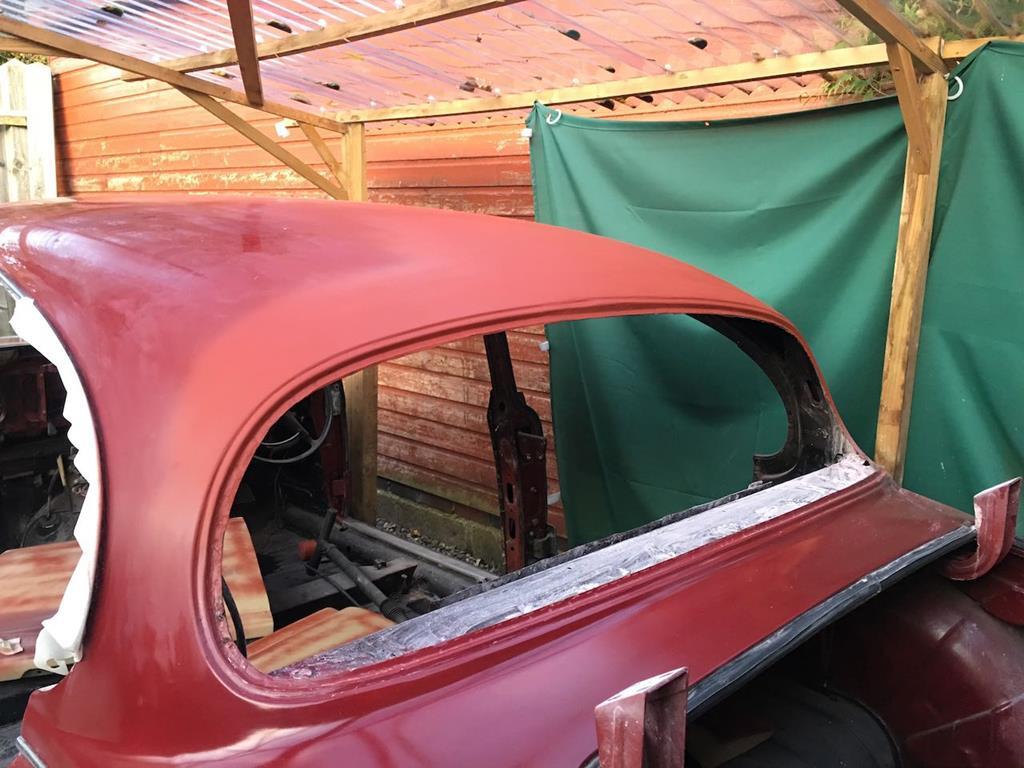 So I was ready to paint, just as the weather has turned colder. Not really the situation I wanted, but needs must. I picked the brightest warmest afternoon I could, and made a start. 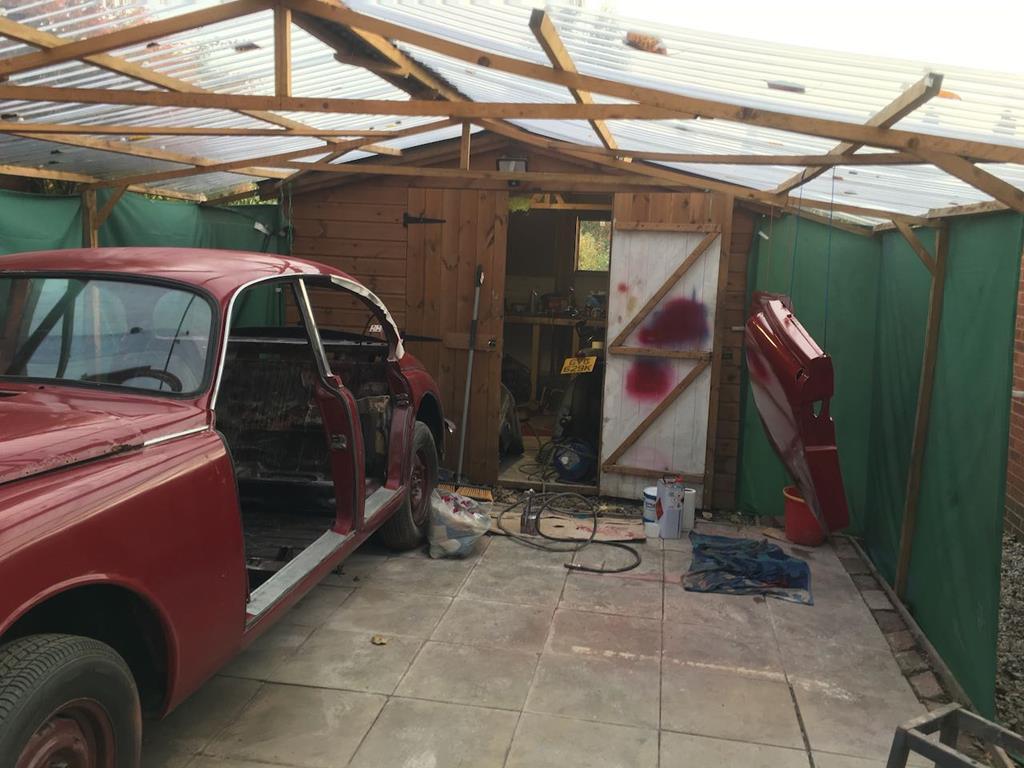 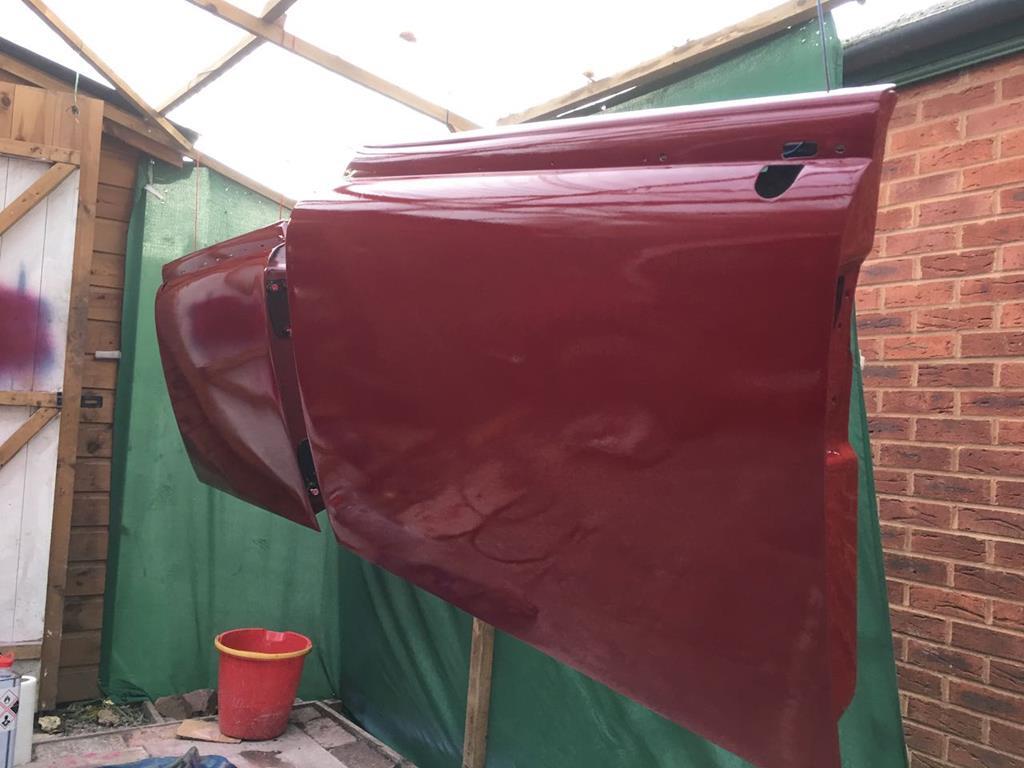 It was looking fairly promising, but as I got to putting the last coat of clear on I was loosing the light. 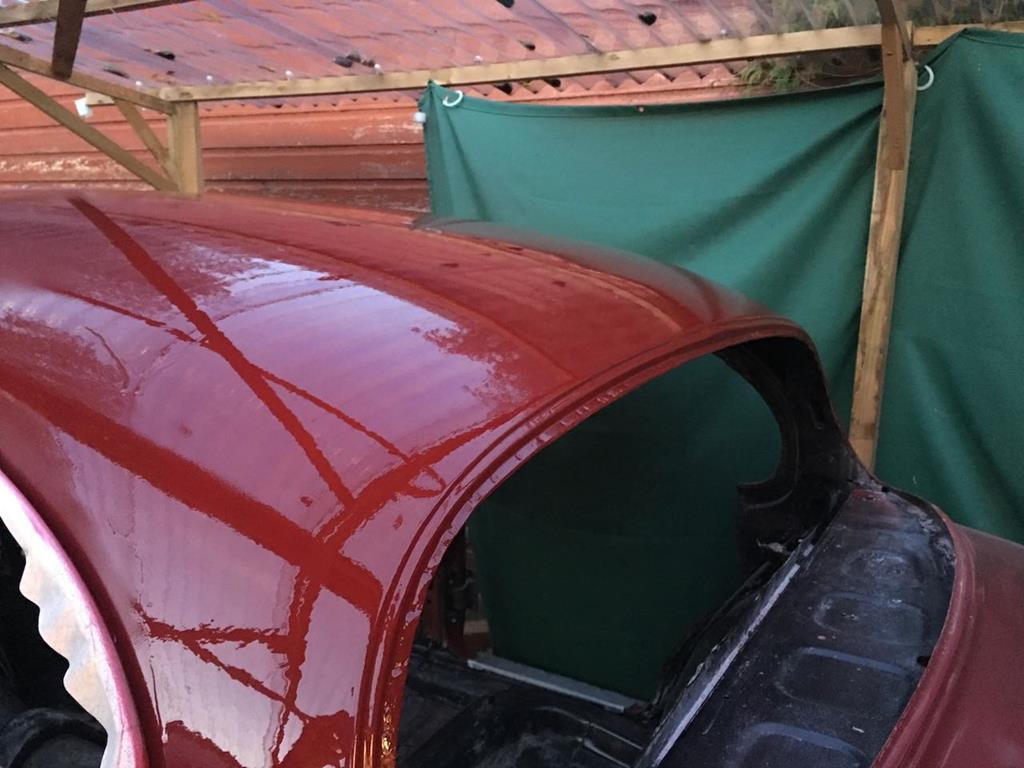 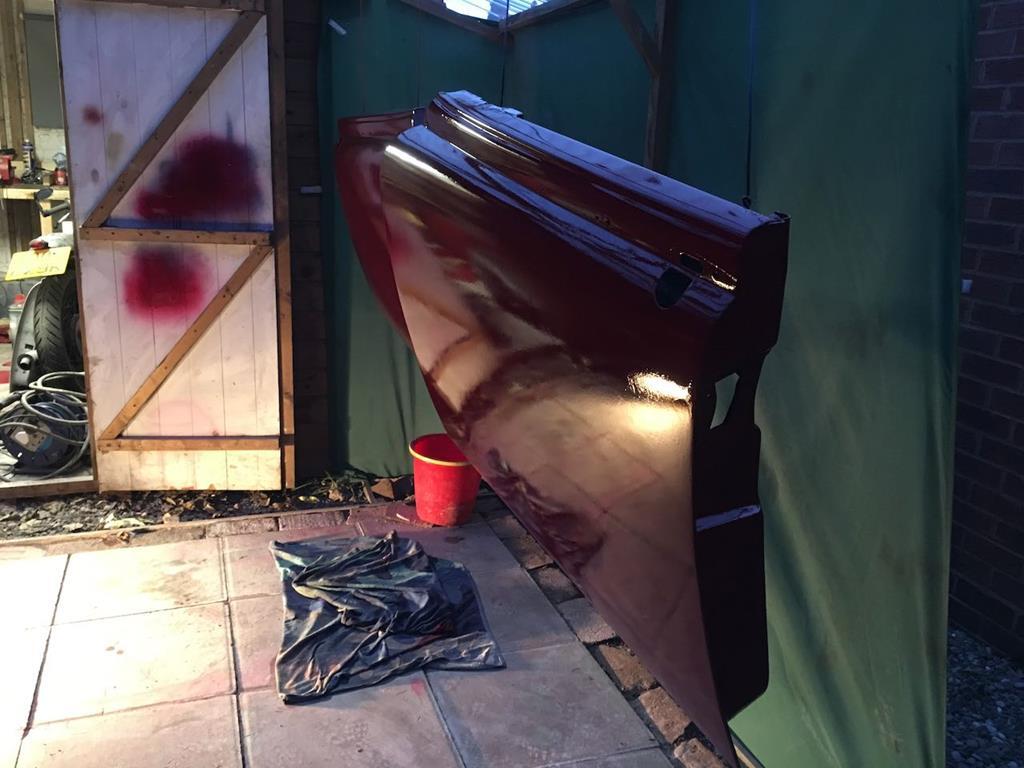 The end result isn't the greatest finish I've ever done... There's also a couple of runs on the roof which I'm annoyed with myself about. To compound matters when I came back out to look the following morning, the clear coat had dried with a bit of a hazy finish, which is a sign that it was too cold to be painting really. Oh well, DIY painting is always a bit hit and miss in my experience. The saving grace is that all of these issues can be remedied by wet sanding and polishing, which was always part of the plan. A couple of days laterI got the rear doors painted up. 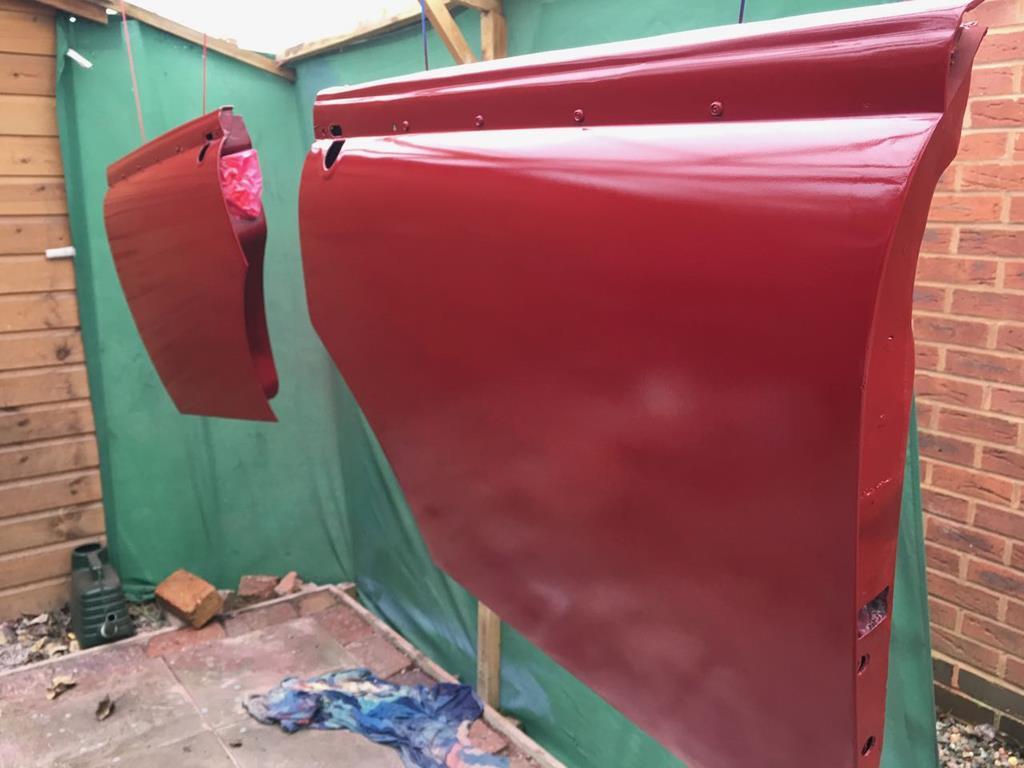 Which went a bit better (I made sure to start earlier in the day!) but still suffered a bit of hazing as they dried, again easily remedied. So yesterday was the big day, I could finally have another go at bolting the doors up. 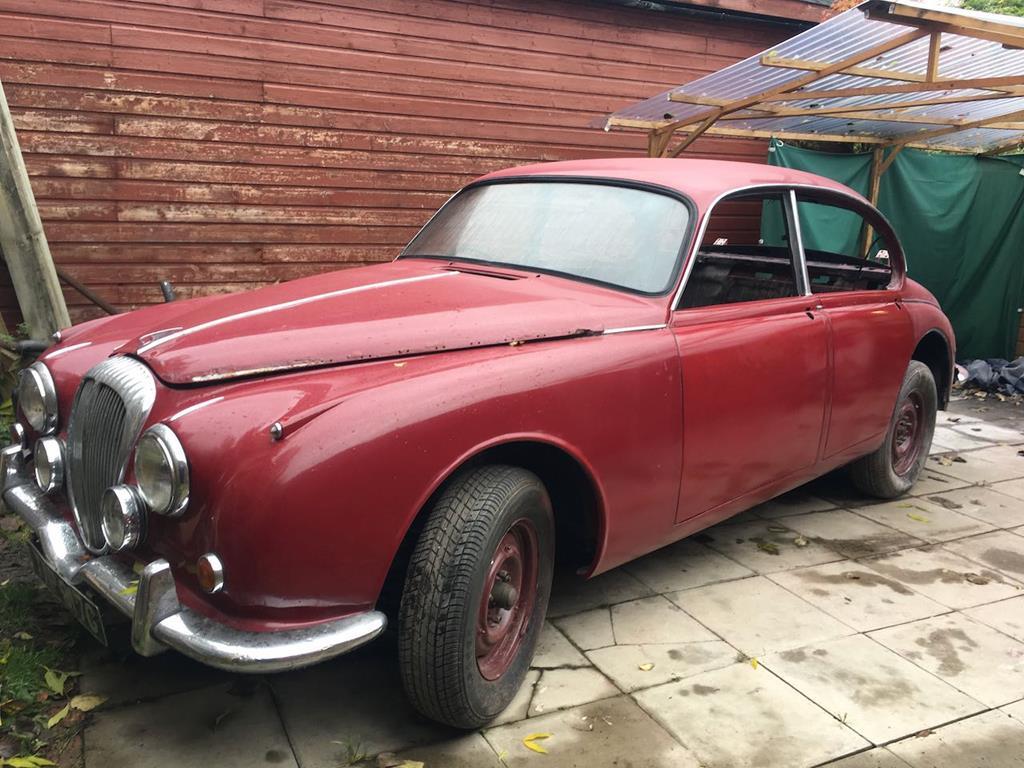 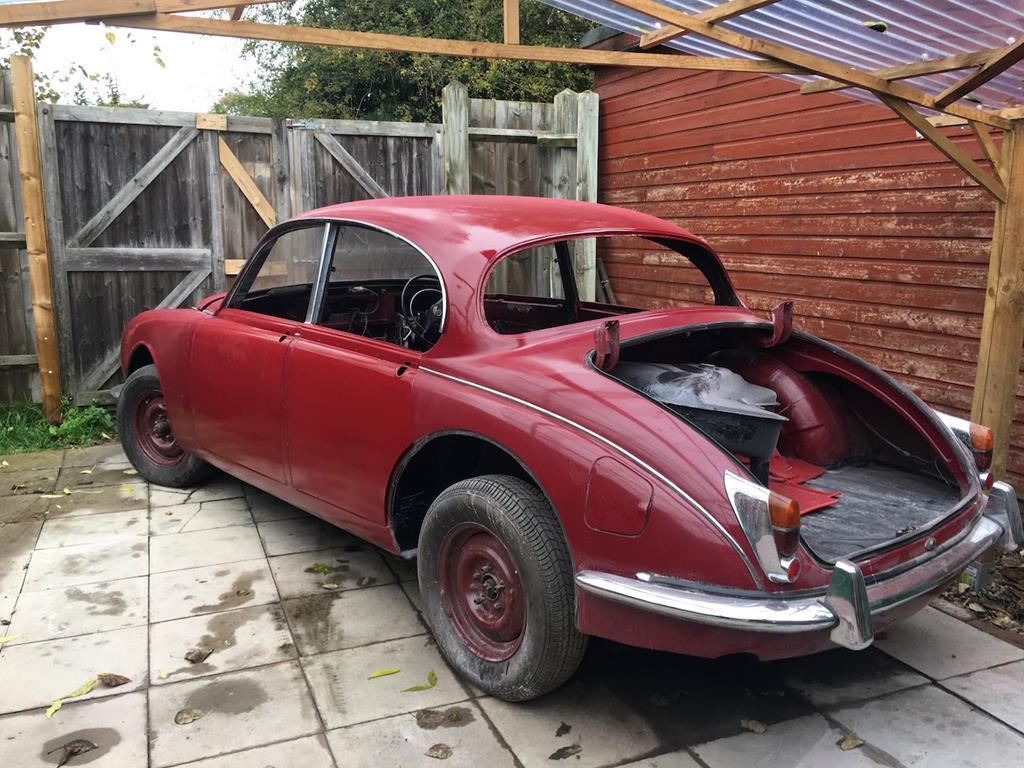 It took several hours adjusting hinges and catches, but I'm pretty happy with the fitment. The shut lines are a million times better than there were. I'm sure concourse judges would have a lot to say about them, but they are more than adequate to me. I'm a little concerned that the colour isn't a great match. I bought an initial litre of paint, which did my first attempt at the drivers door, the sills and engine bay, but I had to go get a new batch mixed up for this round of painting. I'm hoping that it will settle down as the paint fully cures, time will tell. If not I might have to look at blending the colour into the front and rear wings. A job for the spring either way... I also picked up a replacement rear window this week, from a nice chap towards Dudley who had a lovely collection of old cars. After a minor repair to the heated screen wiring, I popped the window in yesterday (very carefully!!). 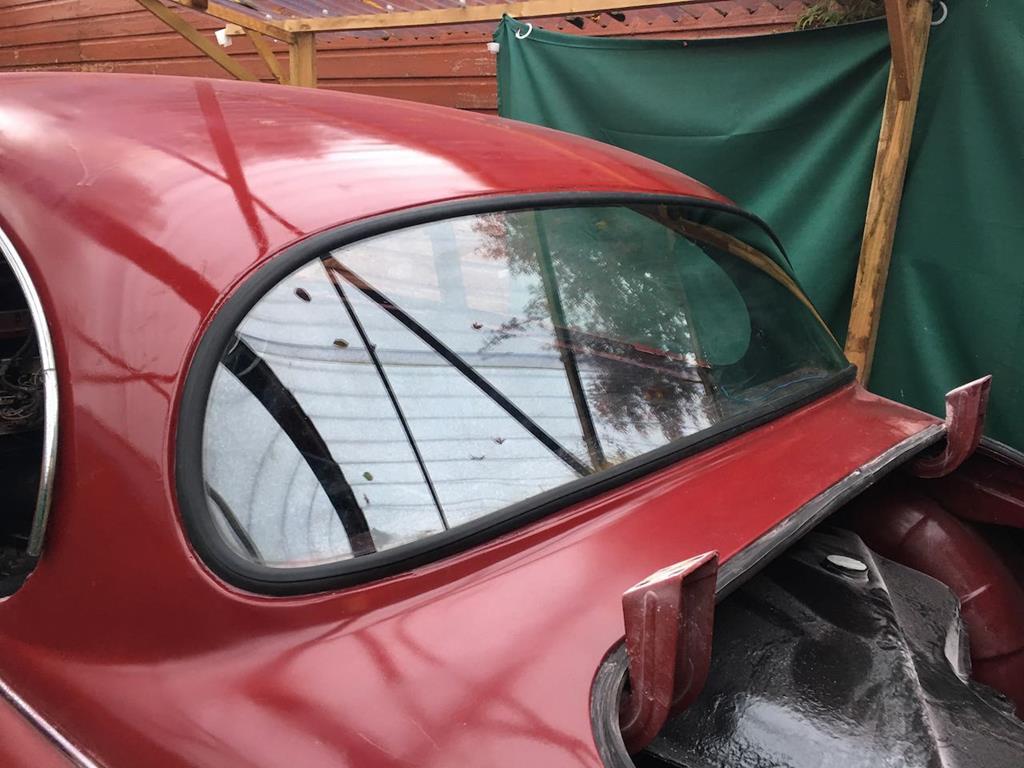 Roof line is much better, and once I've applied sealant under the seal and fitted the chrome trim, it should look nice and tidy. Thinking of trim, as a little morale boost, my last job yesterday was to pop the first piece of chrome that I picked up from the auto jumble on to the car. Nice simple job, but it looks much better for having the drip rail complete rather than having a raw metal edge. 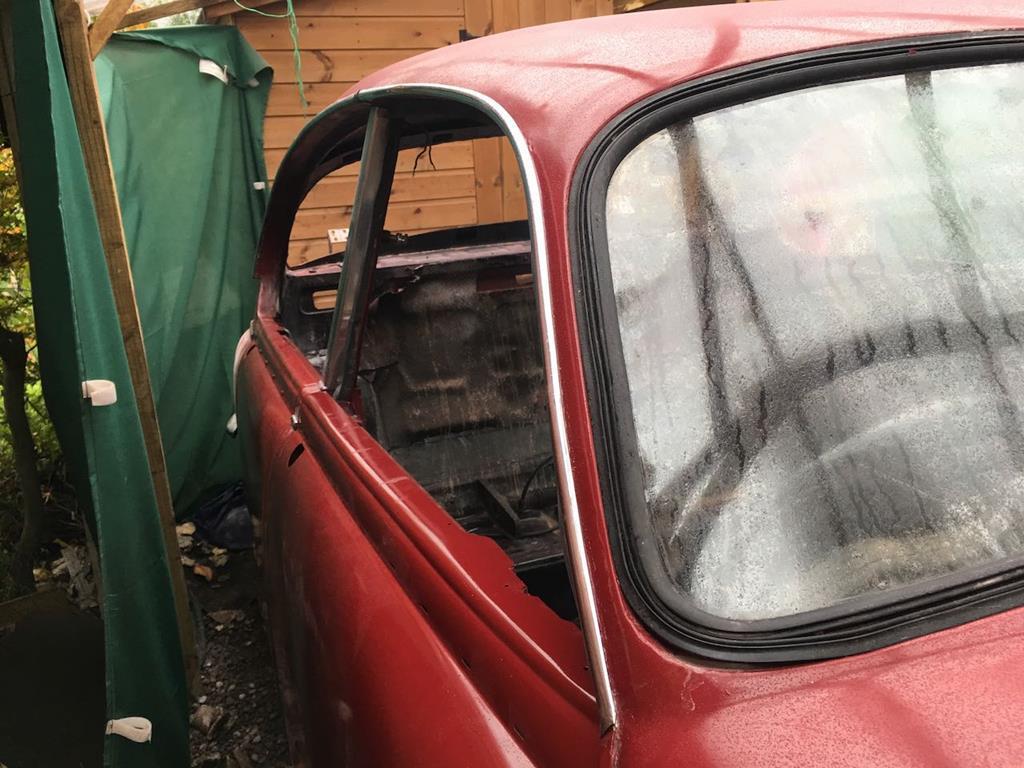 It's a big relief to have the doors on the car. Not only does it mean I can start to feel like I'm moving 'forward' again with the project, but it frees up a lot of room in my shed making it much easier to work in there  |
| |
|
|
|
|
|
|
|
|
Why don't you paint in the shed? If painting outside a fan heater pointed at the doors for 20 minutes as soon as you finish spraying would help immensely. Also warm the panel before paint to avoid moisture being sealed under the paint.
|
| |
|
|
|
|
|
|
|
Why don't you paint in the shed? If painting outside a fan heater pointed at the doors for 20 minutes as soon as you finish spraying would help immensely. Also warm the panel before paint to avoid moisture being sealed under the paint. Hi Marc, Are you not blowing a lot of dust into the freshly painted panel with the fan heater?
Peter
|
| |
|
|
|
|
|
|
|
|
Tons of great work going on here. The work to the doors was a complete restoration in and of itself. Rear window looks great and I'm sure you are very happy with the results and your decision to cut into the roof, ect.
very well done!..very DIY but on a high level!
inspirational.....
JP
|
| |
I know its spelled Norman Luxury Yacht, but its pronounced Throat Wobbler Mangrove!
|
|
|
|
|
|
|
Why don't you paint in the shed? If painting outside a fan heater pointed at the doors for 20 minutes as soon as you finish spraying would help immensely. Also warm the panel before paint to avoid moisture being sealed under the paint. Hi Marc, Are you not blowing a lot of dust into the freshly painted panel with the fan heater? Peter
Not really Peter, maybe an odd bit but dust will flat out in the polishing stages whereas moisture in the paint will normally require sanding back and re spraying. |
| |
|
|
goldnrust
West Midlands
Minimalist
Posts: 1,886
Member is Online
|
|
|
|
blackpopracing Sadly painting the shed isn't really an option, I agree it would have been better. It's pretty cramped in there at the moment with all the bits of Daimler and my motorbike. Under my carport it's fairly still, and away from any dew settling, so better than just 'outside'. I have tried the fan heater trick a few years ago but, like petervdv suggested might happen, I found it resulted in a lot of dust stuck to the finish and I wrote it off as a bad idea. To an extent whether I've gotta flat and polish off a bit of orange peel and light hazing, or wether I've gotta flat and polish dust off makes no difference, I've still gotta spend hours flatting and polishing it   Thankfully I don't think moisture will be a problem. Over the years I've painting outside at various times of the year and not had any micro blistering or other signs of moisture before  The panels were warmed and dry before painting, the paint was warm and I've got an inline filler/moisture trap on the air supply. As ever, half the problem with DIY stuff like this is that it's been months since I picked up the spray gun, and months before that time also. I'm probably just getting my self together and getting a feel for it but the time I'm done. And once again I probably wont paint anything again for 6 months and will have forgotten everything again. I always find it's the same with welding too. Thanks 07lilredwagon  I really was hoping to stick my head in the sand and ignore the door issues for a while yet. But now I've been forced to deal with them, it's nice to know they wont need attention in the future. I fully intend to keep my head in the sand over the bottom edge of the boot lid and the clearly knackered bonnet though 
|
| |
Last Edit: Nov 3, 2019 16:09:11 GMT by goldnrust
|
|
|
|
|
|
|
|
Lots of that interior wont go back in again, and the parts that do, will be refurbished first. As you can see from the pile of manky old carpet (and boy was some of it grim!) I have identified that the original interior colour was beige. So another question I'm considering is what colour should I trim the car in when it does go back together. Sticking with grey is easiest for the seats, but equally I read good things about leather re-colouring kits, and going back to beige/cream would be elegant. Equally, if I'm going down a lightly modded route, and this is not a car with providence or history so I'm not going to worry any purists, is there another option that would look nice. Black is an option that's been suggested by some of my friends. [/quote]
When I did my interior on my last MK2 I used a product called Vinylkote which I bought from a company called technispray in Birmingham. I sent them a vinyl sample and they colour matched it, it was quite expensive but a lot less than new trim and you need to use the right prep stuff for it. I used it on the leather seats as well and it seems reasonably durable.
With some new hardboard and a repaint the old door cards looked like new.
|
| |
|
|
|
|
|
|
|
|
You can still get vinylkote formula 40 and it does work very well, as you say not cheap though.
How about 2 tone, black carpets, a black lower 4 or 5 inches to the door trims (possibly in matching carpet) and keep the grey seats and upper door trims.
|
| |
|
|
goldnrust
West Midlands
Minimalist
Posts: 1,886
Member is Online
|
|
|
|
I've been looking into the leather recolouring kits from www.furnitureclinic.co.uk , they seem to be a name that crops up from time to time and the guides they have of how to use the products and what's included looks good. I'm pretty settled on my colour scheme now, I'll be fitting a light grey head lining with dark grey carpets and then the seats, door cards and other vinyl trimmed parts of the car will be black. I'm hoping the dark grey carpet will help break up the black, along with the various pieces of wood trim. I've seen a couple of pictures online of similar schemes which I think work. I liked my black interior against a very similar exterior colour in my Lancia too  |
| |
|
|
|
|
|
|
|
|
I did the interiors of both my Rover P5 s with the products of the furniture clinic. One of the Rovers i use daily and its 4 years ago now and it still looks good, Their leather filler works good. I was not convinced that leather filler would work but it does. One of my Rovers is living outside and that also looks good.
Peter
|
| |
|
|
|
|
|
|
|
|
Good work, look forward to updates. Unfortunately the photos have gone from your Lancia Fulvia thread, hope that you still have the originals.
|
| |
|
|
goldnrust
West Midlands
Minimalist
Posts: 1,886
Member is Online
|
|
|
|
That's good to know petervdv  daddyshortlegs daddyshortlegs yes sadly when photobucket first went stupid, I took the rash decision to delete my account in protest. I was pretty grumpy as I was already paying them for their extra hosting capacity when they cut their service and held everyone to ransom. I've got all my photos safely here, for the Lancia, Rx7, Mx5 and other threads from several different forums, but all in it was several thousand photos and would be a mammoth task to put them back. Anyway, it's Saturday night and this is seemingly becoming a traditional time for me to update this thread  I've got plenty done across a few days this week. First job, I put the door handles back on and followed that by putting the chrome side trims on. 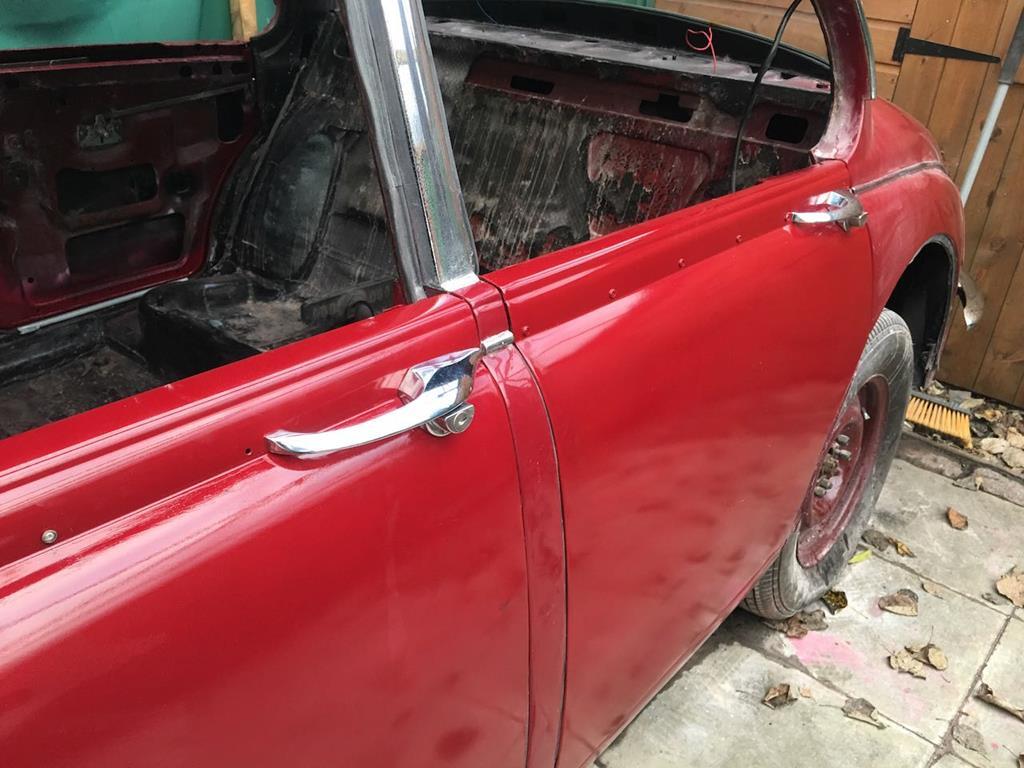 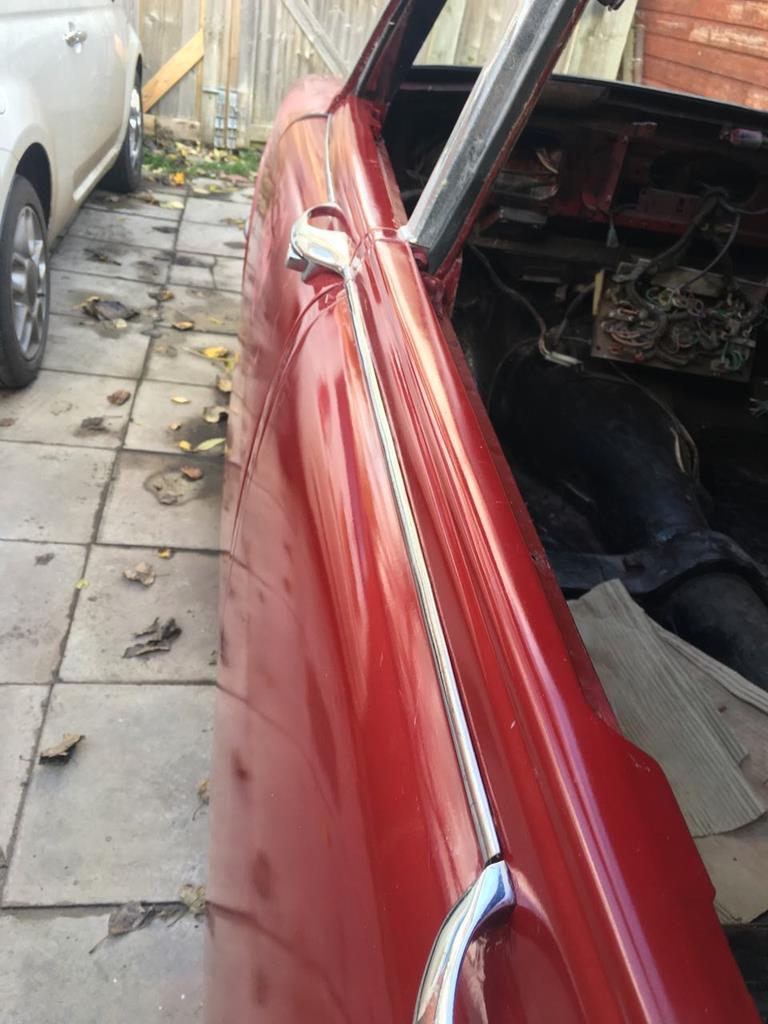 They don't look too bad on there, but up close none of my chrome work is in great condition really. Regardless, it all looks better for a proper clean up and a bit of a polish, here is a before and after of a section of the windscreen trim. This section was especially pitted, probably one of the worst affected areas. 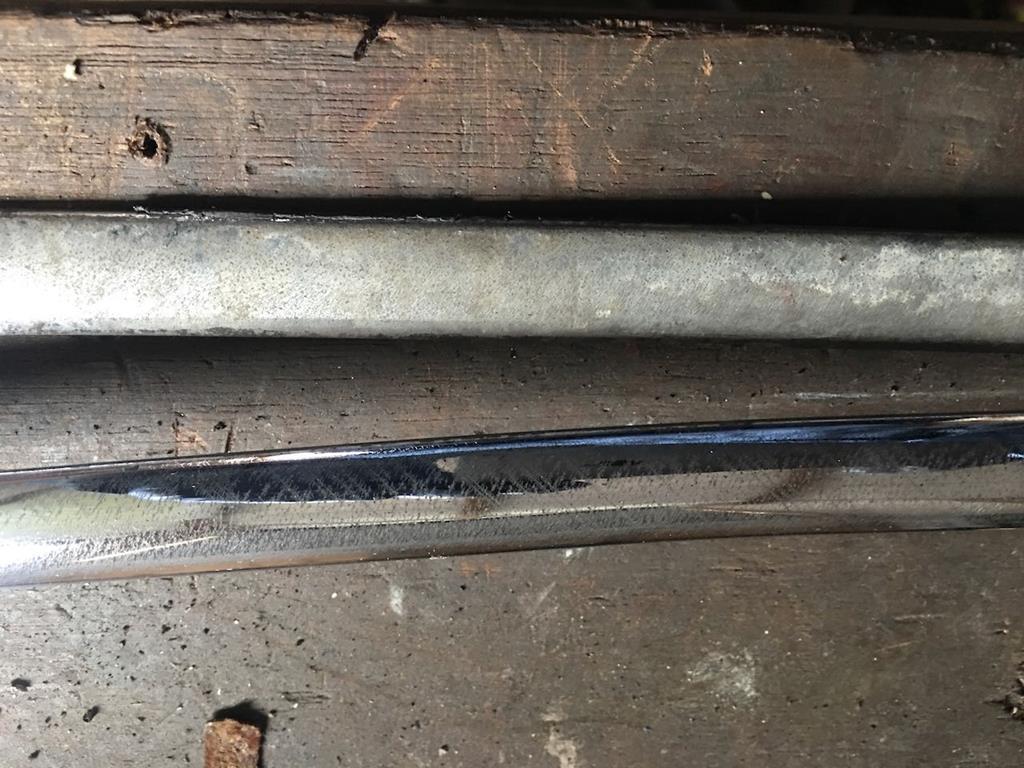 So having cleaned up the windscreen trim, it made sense to fit that next. Previously I'd put the new rubber into the frame and the glass into the rubber, but this week I finished the job. That meant putting non-setting sealant between the glass and rubber and then between the rubber and frame, before fitting a locking strip into the rubber and then finally getting the chrome trim on 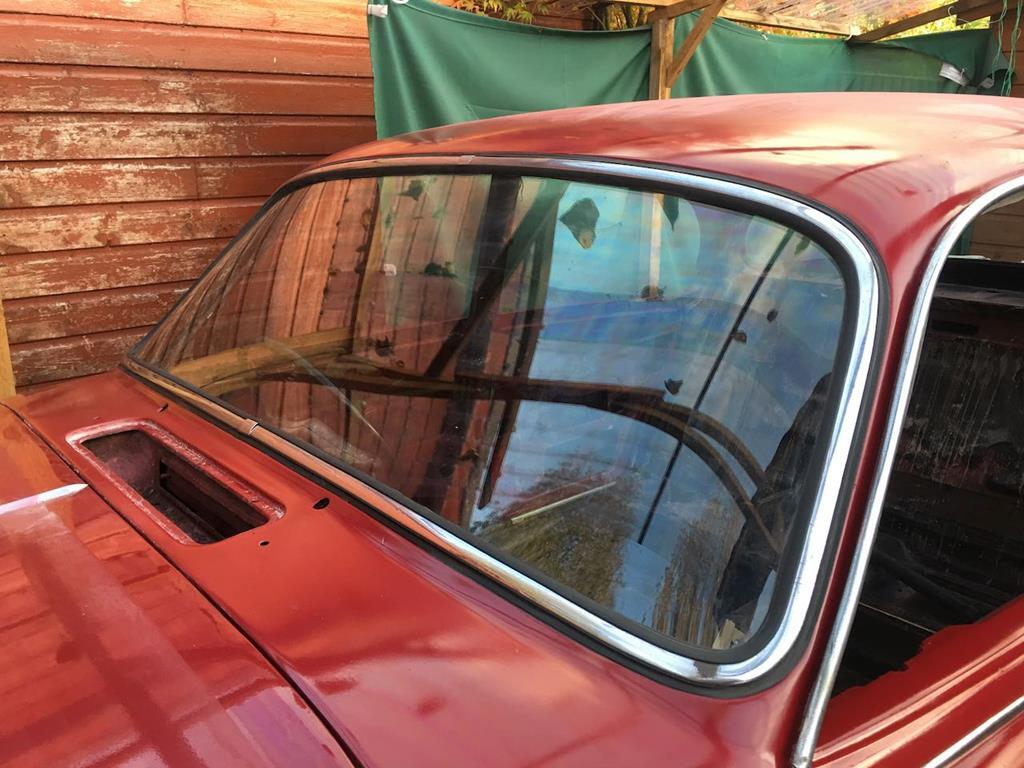 It's not the easiest task I have to say! It took me a good couple of hours and made a huge mess. As I'm a glutton for punishment, I did the rear screen trim next. This is a slightly simpler system, without the locking strip, but Because the trim only sits under the rubber on one side it has to be glued in place. The tape in this picture is there to stop the trim moving while the adhesive dries. 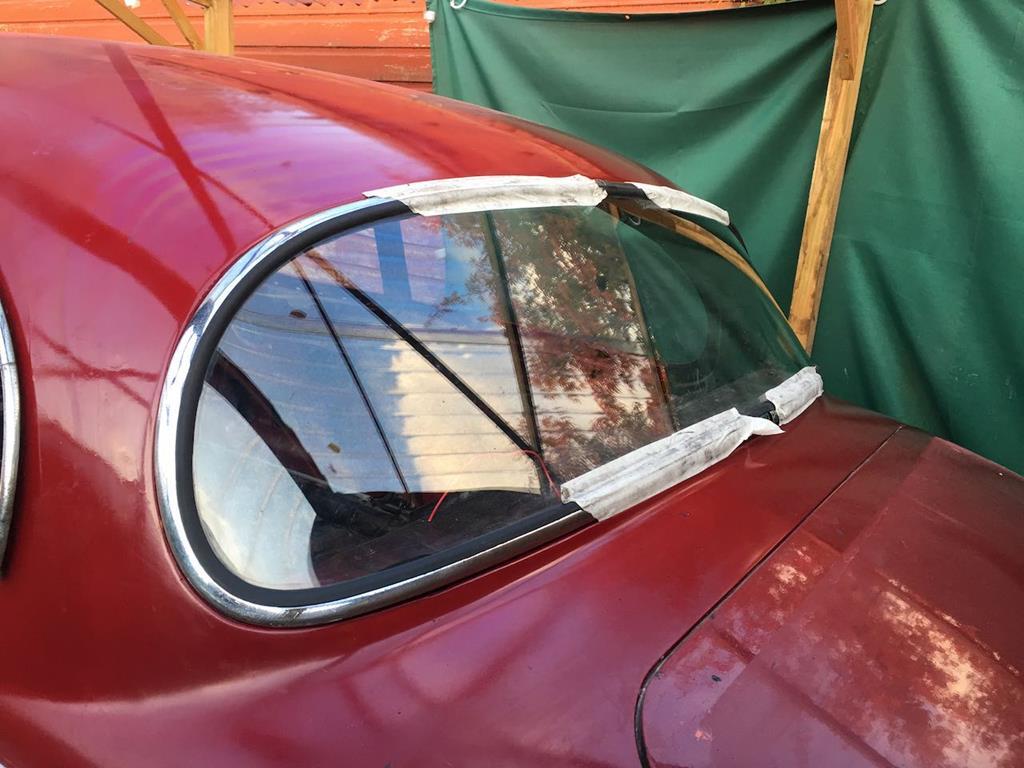 2 bits of glass fitted, 4 to go! So on to the door tops. In theory fairly simple, just slide them back into the door shells, bolt it up and off you go... In practice, there was a lot of mucking about with shims and trying to get them lined up right. I also had to break out the welder to repair a couple of the mounting tabs on the bottom part of the frame. Oh and they're all chrome, so time to break out the chrome polish and elbow grease again. I did the front's first. 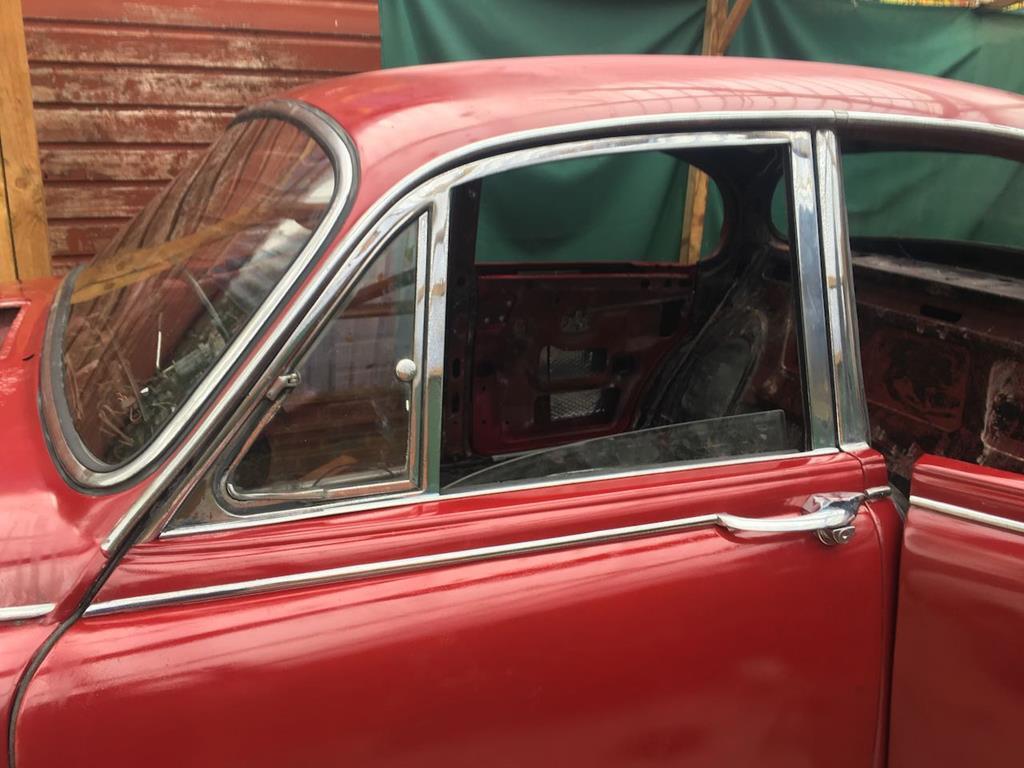 And then the rear. 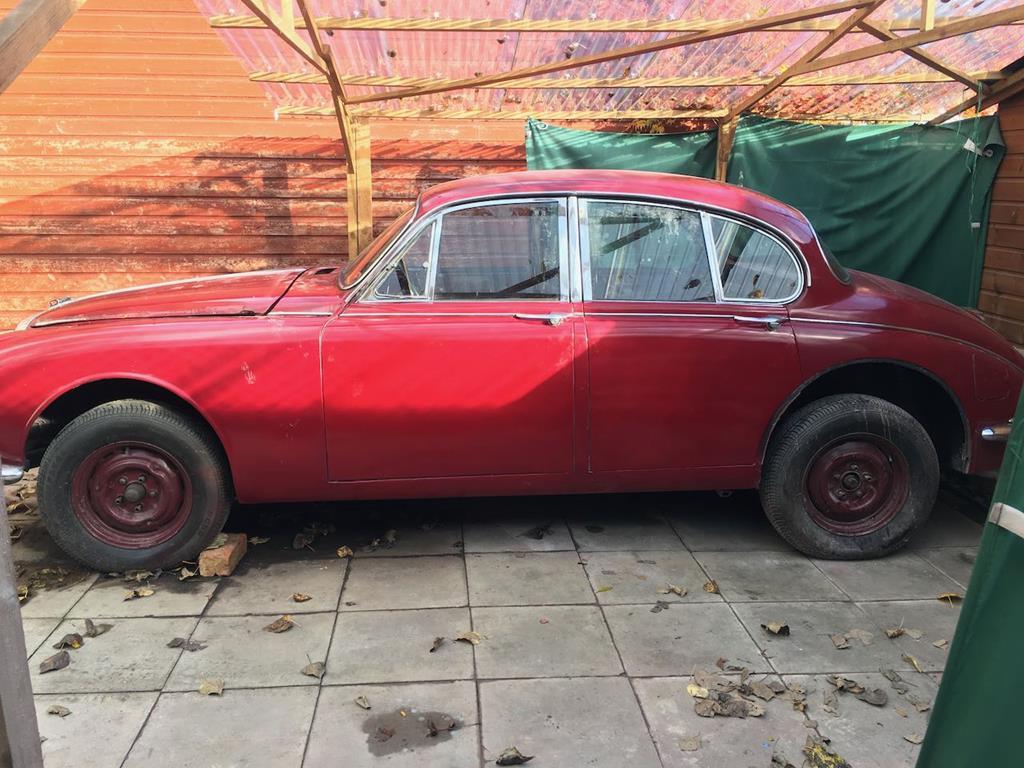 At which point I've very nearly got a weatherproof car. To complete the weather proofing, I needed to fit the replacement wiper boxes I'd bought, my originals were seized and rotten, and to sort the vent on the scuttle that allows fresh air into the car. The vent is a common challenge on these cars. It's a surprisingly complex little arrangement of linkages, most of which are inside the vent cavity on the scuttle and therefore exposed to the elements when the vent is open. Thankfully the hardest work was already done months ago when I fought with the the seized shut vent and eventually managed to get it open enough to get a spanner in and shear the heads off the rusted bolts and remove most of the assembly. One flap is on a piano hinge that's welded the shell, so that one I'd been feeding penetrating oil into for weeks while trying to work it back and forth, it did eventually move and now moves fairly freely. This week to finish the job I cleaned and painted the various parts, drilled and tapped out the sheared off bolts and then I was ready to re-assemble. Vent is shut... 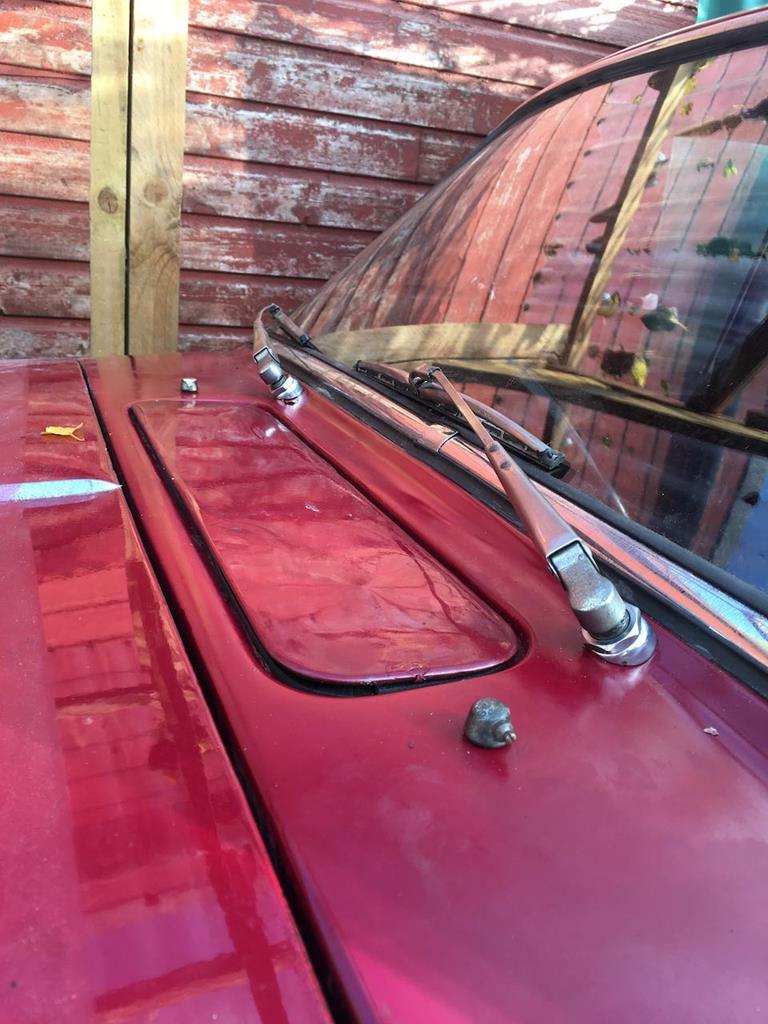 .. push the lever in the car and it pops open, being held in either the fully open or fully closed position by the neat little sprung linkage. 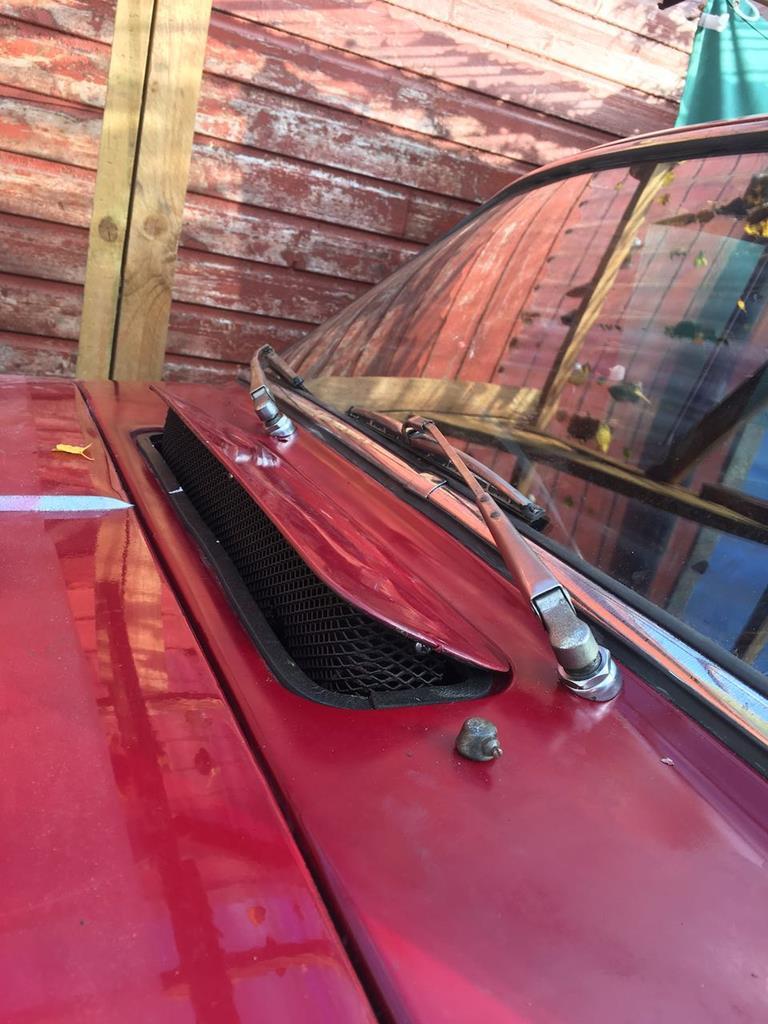 Marvellous. While on the topic of heating and ventilation, sorting the heater box has been on my to do list for a while. It's quite big, so getting it out of the way would be good, but also once it's bolted back to the car it will allow me to complete the cooling system, and get one step closer to having the engine run again. 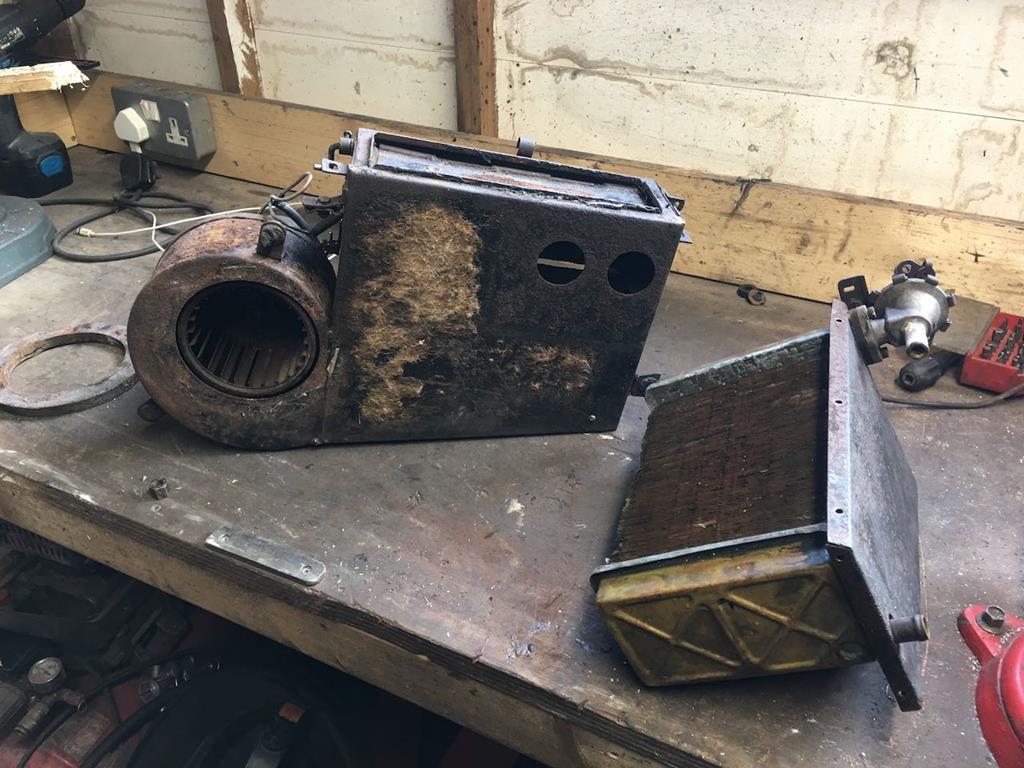 One sorry old heater. Like the vent flap, the hinges in these as welded to the unit and were seized solid. And like the vent, I've been feeding oil into them for weeks now and got them all freed off. I stripped it down, wire brushed all the old flakey paint and rust off, flushed through the matrix, stripped and cleaned the motor and then gave everything a lick of paint and reassembled it with fresh foam seals. 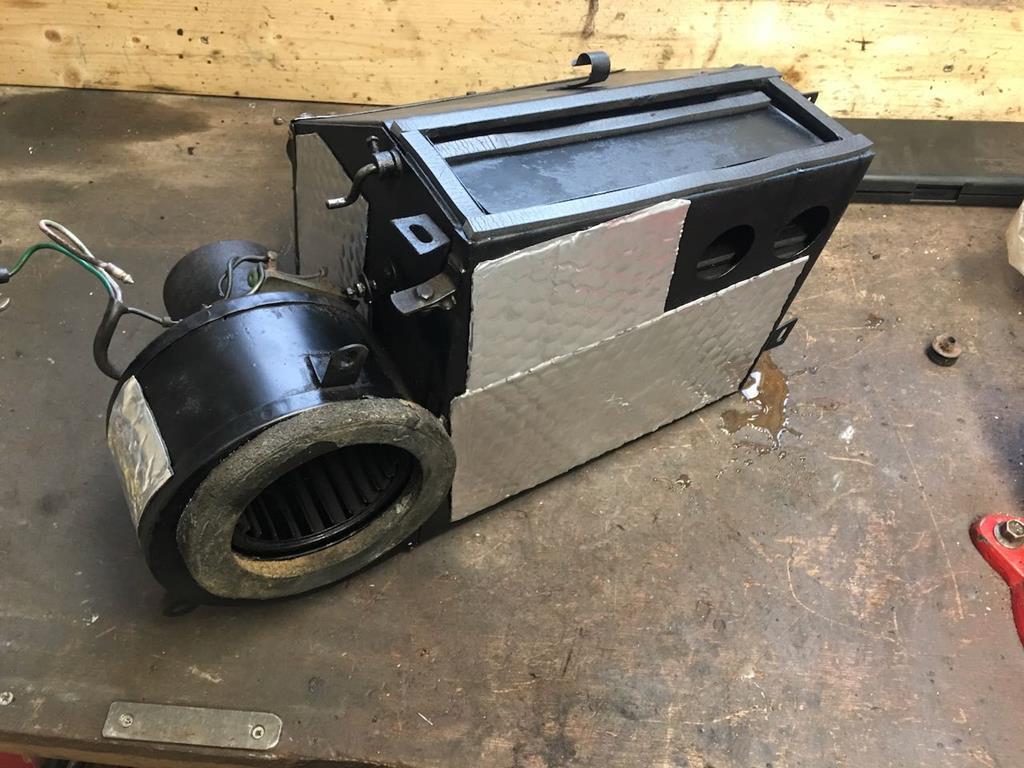 Much better. As you can see I also stuck some sound deadening on the outside of the heater. Daimler did originally cover the heater in a layer of the horse hair type insulation. Not sure if it was about sound proofing or keeping the heat in/out. Once I know how the clearances will work with it mounted, I'll probably put a layer of foam over the top of my current deadening, to add the heat insulation and finish the sound proofing. It will also do a nice job of hiding the unsightly silver! Lastly, while feeling enthused about the idea of getting the engine running again, I made a start on rebuilding the carbs this afternoon. 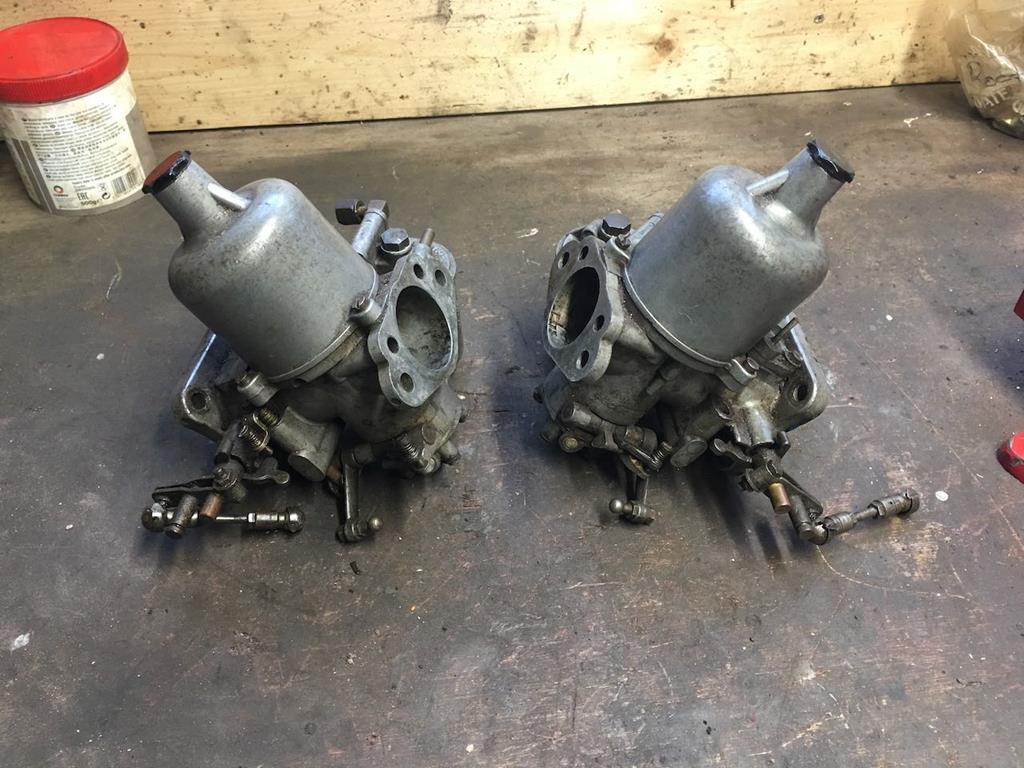 First carb stripped down and it doesn't look as bad as I expected. I started cleaning some of it up, but then ran out of carb cleaner, so decided it was a sign that it was time to escape the shed and get warm in the house. 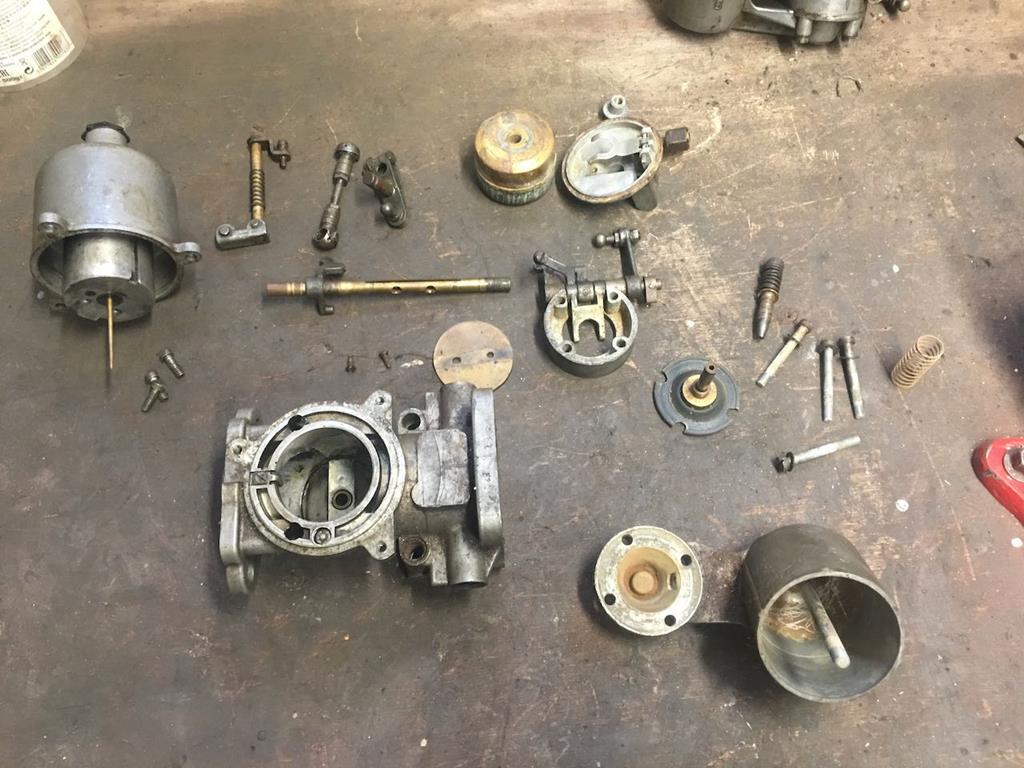 There's some gunk in there, but nothing drastic, and I think the jet must have been changed recently as the rubber diaphram looks to be in surprisingly good condition. There's some wear on the spindle, again nothing drastic but it may be enough to start causing an air leak soon. Anyway, I paid good money for a full rebuild kit for both carbs, so I shall replace everything I can and hopefully have a pair of carbs that do a half decent job of mixing the right amounts of fuel and air by the end of it! |
| |
|
|
|
|
|
Nov 10, 2019 14:53:10 GMT
|
|
excellent progress. hats off to you for having the patience to get all that chrome back on the car!
JP
|
| |
I know its spelled Norman Luxury Yacht, but its pronounced Throat Wobbler Mangrove!
|
|


