goldnrust
West Midlands
Minimalist
Posts: 1,887
|
|
Aug 20, 2021 20:20:26 GMT
|
Sadly, homersimpson, its not looking quite so stunning in real life. I've got some paint issues that the heat this summer has shown up. Micro-blistering from when I was painting last autumn I think. I think I'd just left it too late in the year. She looks good from 10ft away but up close it isn't good. Photos can hide a lot of sins! Thanks sideoilerv8  Both gearboxes are BW35s, just with different valve bodies to give you the different shift patterns. As you say, at '68 yours should have the D1/D2 box. You can obviously see what the car came with by looking at the shift position indicator on the steering column, but within the gearbox I don't know how the tell the difference. The only way I knew mine had the PRND21 pattern was from test driving. Mine is actually PRND22 at the moment  ... and I don't know why, but I'm not in the mood for opening the gearbox up again to find out! 1st works fine in D, so I'm fine for now!  The warning light circuit is not the most elegant, but 1000 miles later or so it seems to be working still! This is the basic concept I started with: 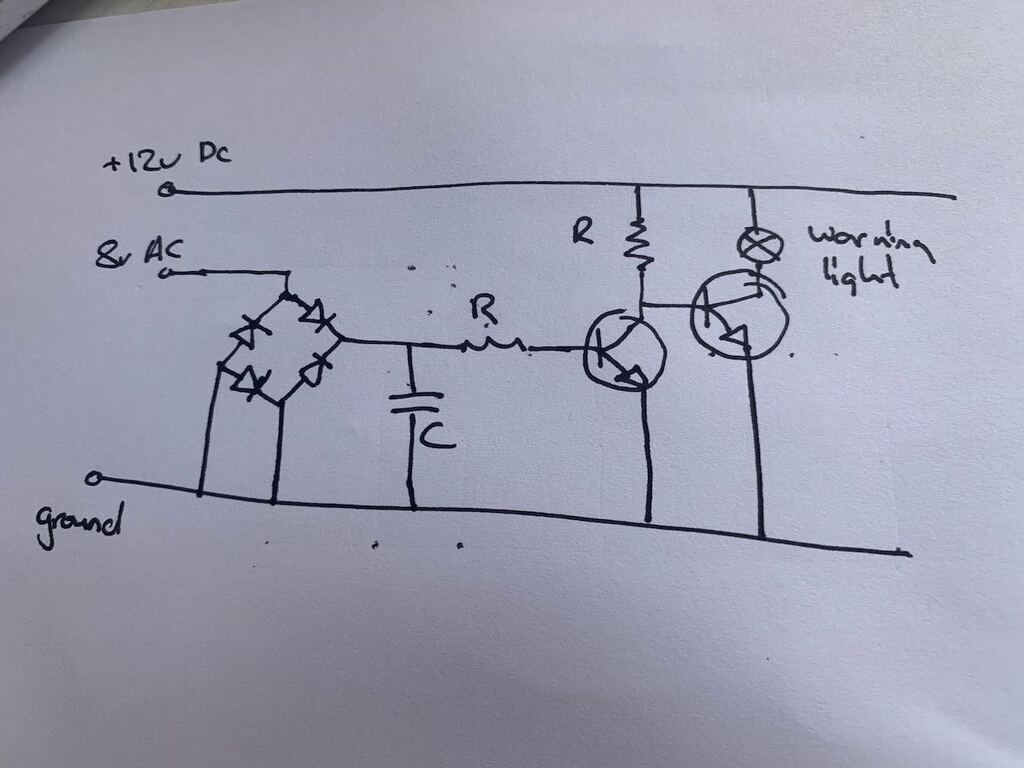 The alternator puts out 8v AC when running and the bulb needs a signal of open circuit/off when the alternator is running and a connection to earth/0v when the alternator is stopped. Working from left to right across the diagram, the first step was to rectify that AC signal to a DC voltage. In that diagram I'd planned a full bridge rectifier (the diamond of 4 diodes on the left edge of the diagram) but I realised that because the ground for the AC circuit is shared with the ground for the DC circuit, that wouldn't work, and the lower 3 diodes are defunct, so I just went with a basic half bridge rectifier using the single diode, then used a capacitor (well actually I used 3 because I had 3 smaller ones to hand) to smooth this lumpy signal out into a steady DC voltage. A resistor is added to limit any current drawn from the warning light circuit in the alternator. So at this point I have a circuit where when the alternator is not running there's 0v and when it is running I have 4-5v DC. The two transistors amplify this signal to a point where it can drive the 12v bulb and also invert the signal, as I need the light on when the alternator is off, and light off when the alternator is running. The first transistor and the pull up resistor function to invert the signal. If we take our signal from the join between the transistor emitter and the end of the resistor, then when the alternator is off then the transistor is off and the pull up resistor means we see 12v. When the alternator switches on then the transistor switches on and we will see 0v at that point in the circuit. Now we have a signal thats on/12v when the alternator is off, and off/0v when the alternator is running. Finally the last transistor turns this into the open circuit/off signal we need to power the dashboard bulb. So when the alternator is off we are feeding a 12v signal to the base of this final transistor which turns it on, connecting the bulb to ground/0v, turning the bulb on. When the alternator is on, and we feed 0v to the base of this transistor it switches off and the bulb goes out. That's a very long explanation of a relatively simple circuit! It's a good job I don't fancy being a teacher!  Regarding the modifications to the alternator, that's not one I've heard of. I will be asking more of my alternator if my plans come together, so if you find out more please let me know! I hope your engine is better than mine was! These engines are a little smokey as standard due to the lack of valve guide oil seals as standard, but obviously if its big smoke there may be other issues... Depending on any other work you're taking on, it might be worth just pulling the heads off first rather than pulling the whole engine. Worn valve guides are common and definitely make it smoke. When my engine came apart it was clearly heavy pitting in one of the bores that was allowing oil past the control rings and causing my smoke. |
| |
Last Edit: Aug 20, 2021 20:51:19 GMT by goldnrust
|
|
|
|
goldnrust
West Midlands
Minimalist
Posts: 1,887
|
|
Aug 20, 2021 20:46:38 GMT
|
What have I been up to this week you may ask? It's been a bit of a scatter gun approach but I've made various little bits of progress. Firstly I've made a start on soldering together my Speeduino ECU. It's only a start and there's quite a way to go, but I've had it for several months now and only just got the enthusiasm to start! 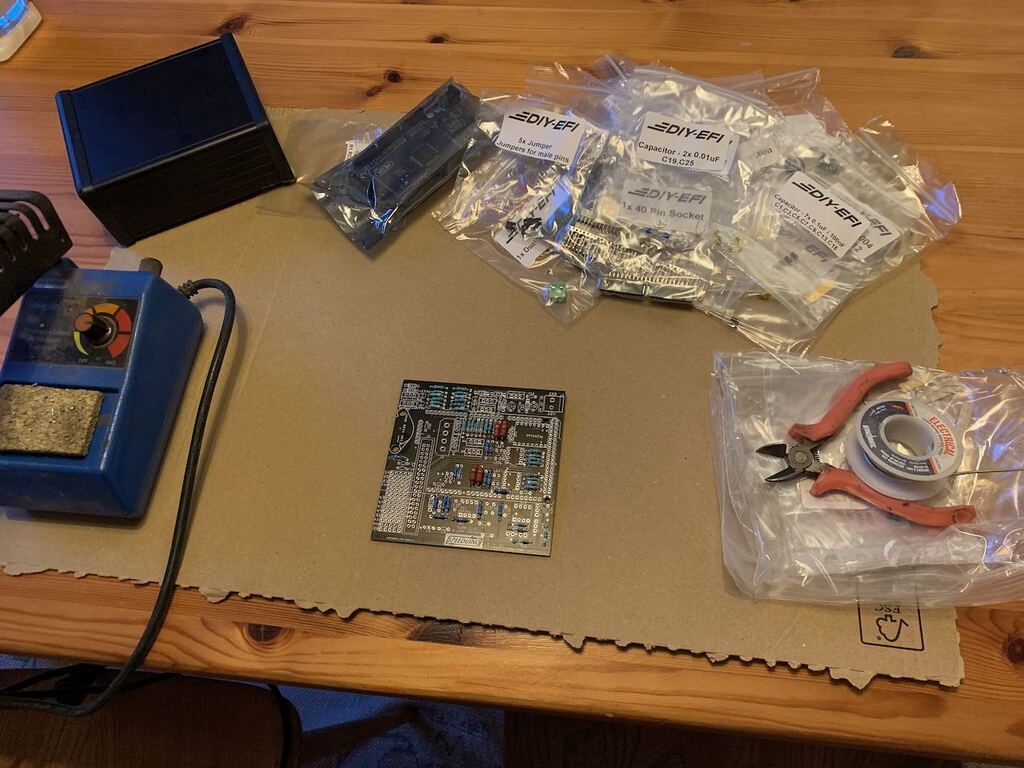 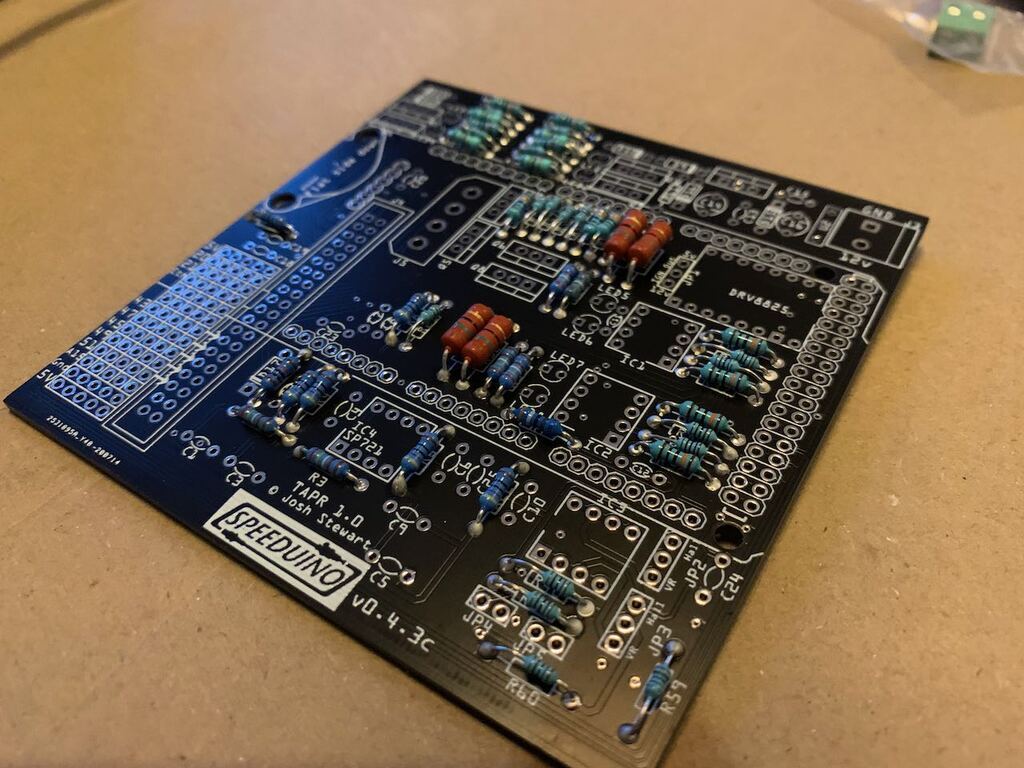 Knowing that I will have this ECU installed,I decided it was time for an overhaul of some of my cabin electronics, which meant time for some woodwork! 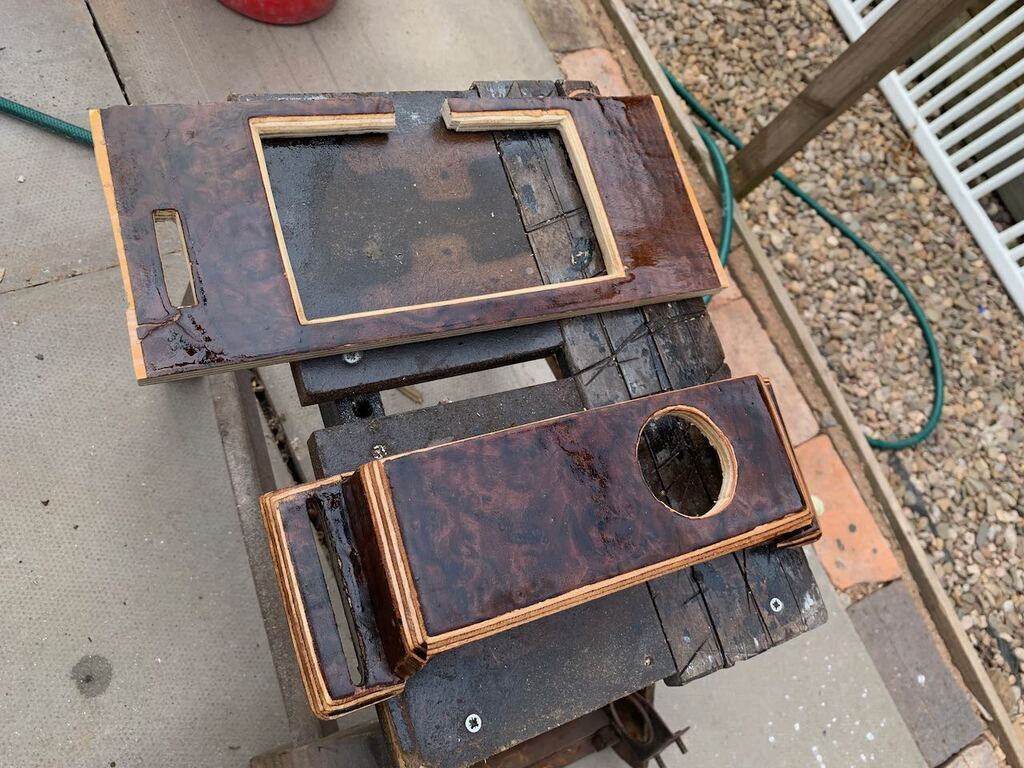 The old head unit was not only ugly, but was of limited use as most of my music is on Spotify. A friend kindly offered me an android head unit he had going spare (going full race car and removing his stereo all together). This would be great as it would bluetooth to my phone for music and also would link up to the Speeduino ECU giving me data logging and tuning options built into the car. As it would be even more out of place than the old head unit, and more importantly wouldn't fit in the single DIN slot, I decided to mount it in the glove box. My glove box was already missing as it was rotten when I bought the car, so I didn't loose any storage space. 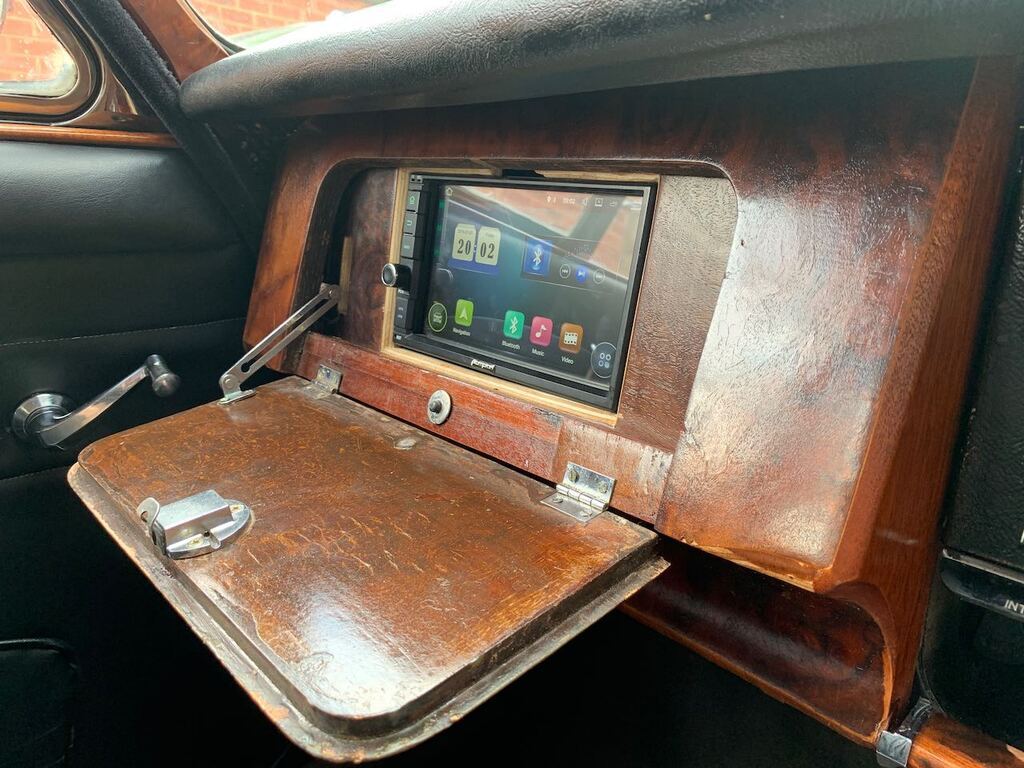 So that works nicely and tucks neatly out of sight with the lid closed. This left me with a gap where the old radio went. Thinking ahead, while I don't want to go wild with extra gauges, I will want a space for a couple of extra gauges to keep an eye on things while supercharged. This old radio location seemed an idea space, thats not too distracting but still easily visible. As you can see from the first picture, I filled in the old hole cut for the radio and re-veneered the section with walnut and then cut a hole for the first gauge. 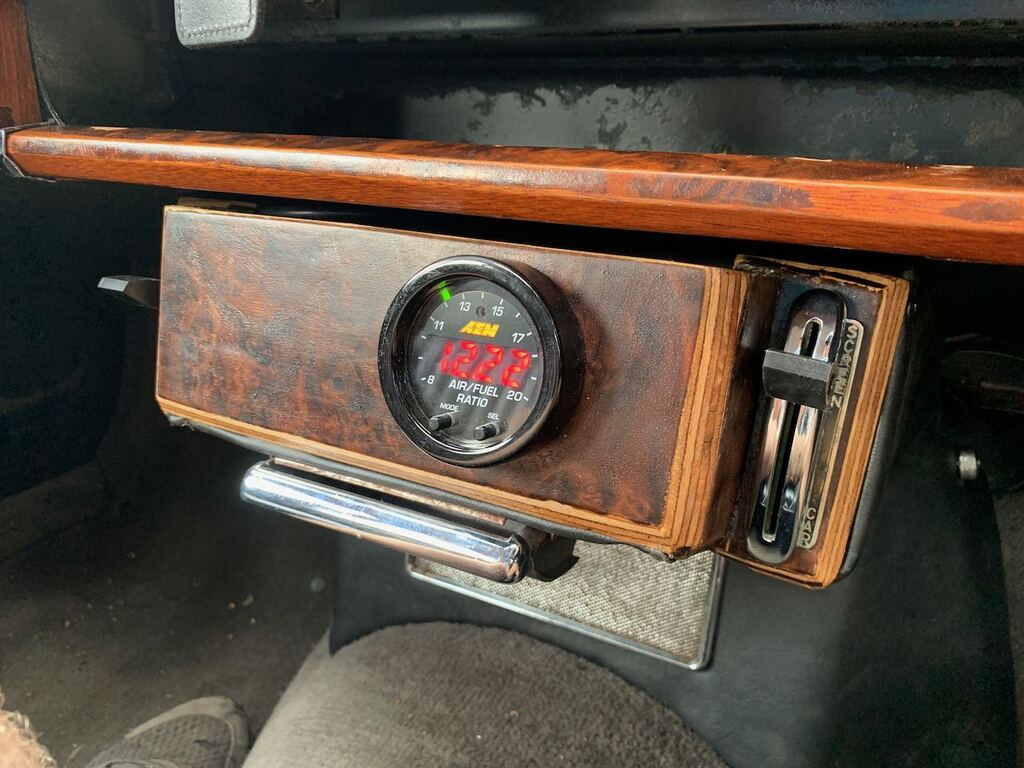 I already had the Wideband air fuel gauge and sensor on the shelf I the garage, so I thought I'd get on and drop that in now, I can keep an eye on my carb tuning if nothing else! It's not the most subtle/retro gauge, but it's what I had so it will do for now. Finally this week I did some very rough mocking up to work out where the supercharger might fit. Using the inlet manifold sonus kindly sent me as a starting point, and taking measurements from under the bonnet, I think this sort of position is going to work best. 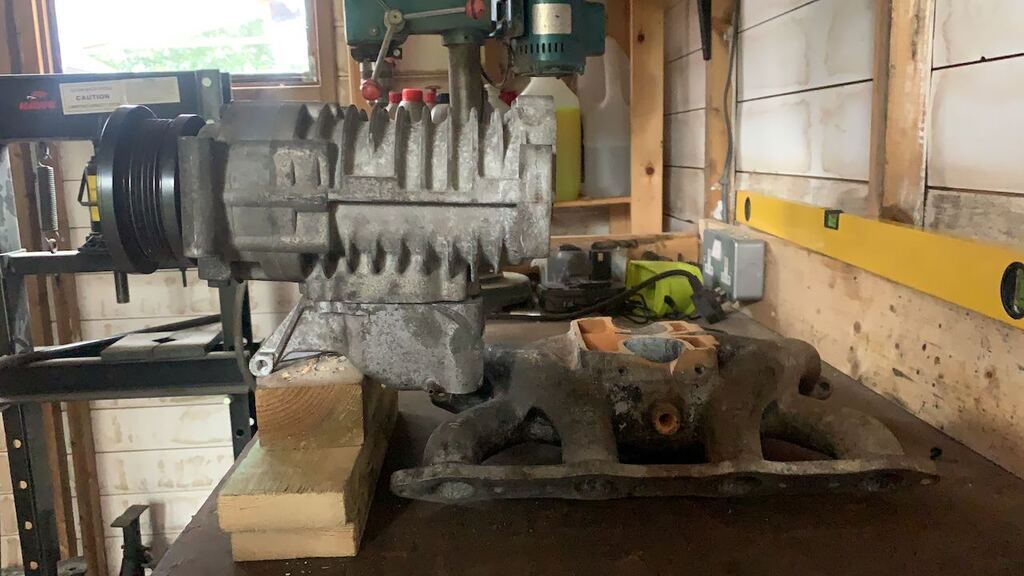 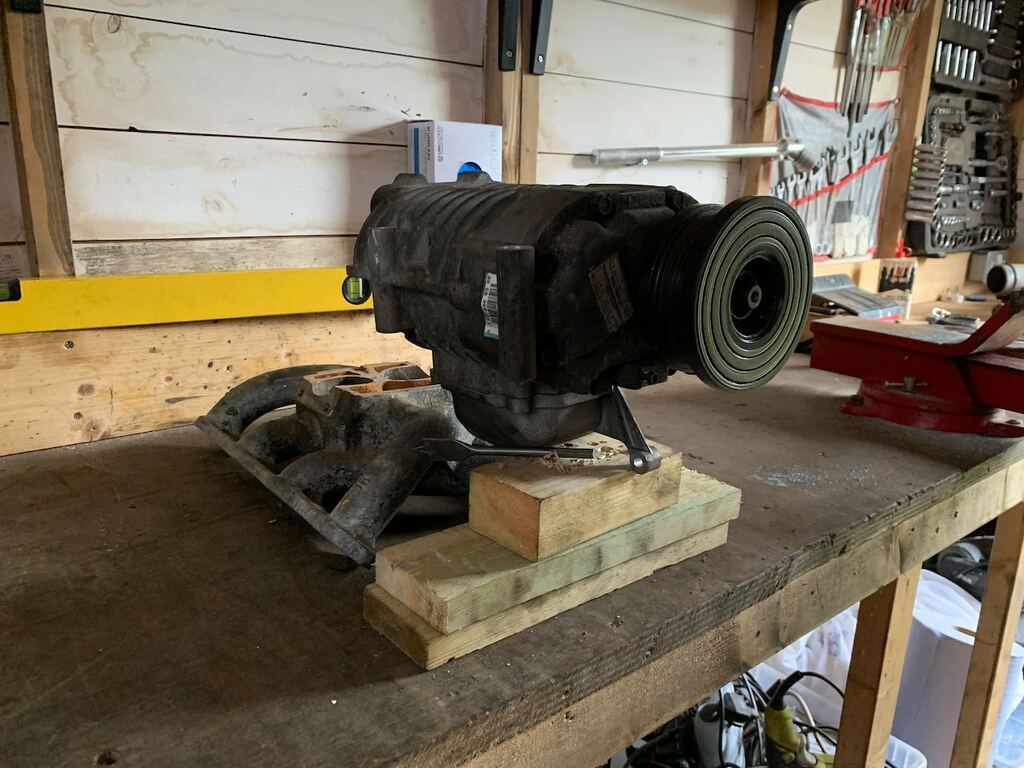 It should fit under the bonnet, and clear the thermostat housing in that location, the route for the compressed air out from under the supercharger and into the intake is going to be tight, but possible. The supercharger sits off centre, to allow the alternator to hopefully sit next to it. If possible I'd like to see about incorporating a charge cooler, but I'm not sure how possible that's going to be. Some friends with better aluminium fabricating experience have said they'll help, and we may even just start again with a new intake manifold. I'm not sure on this though, as I'm keen to not let this project get too complex! Overall I'm just pleased that it looks like it will be possible to fit everything in and under the bonnet, even if the packaging makes for some less than perfect air flow paths  Edit: I meant to add that I'll be bringing it to the gathering on Sunday (just in retro parking not on a stand), so if you see me say hello! |
| |
Last Edit: Aug 20, 2021 20:54:03 GMT by goldnrust
|
|
|
|
|
|
|
excellent , i dare to suggest cutting of the stubs an inch from each head and going sheet ally box  (theres a gathering ! damn i keep missing stuff ) |
| |
|
|
jehu
Part of things
 
Posts: 96 
|
|
|
|
Hi Goldenrust, It seems you are still being discovered, I'm in the same situation as sideoilerv8 only a bit further along with my rebuild. I found your blog when I was looking for a Daimler same colour as mine and snap, here we are: 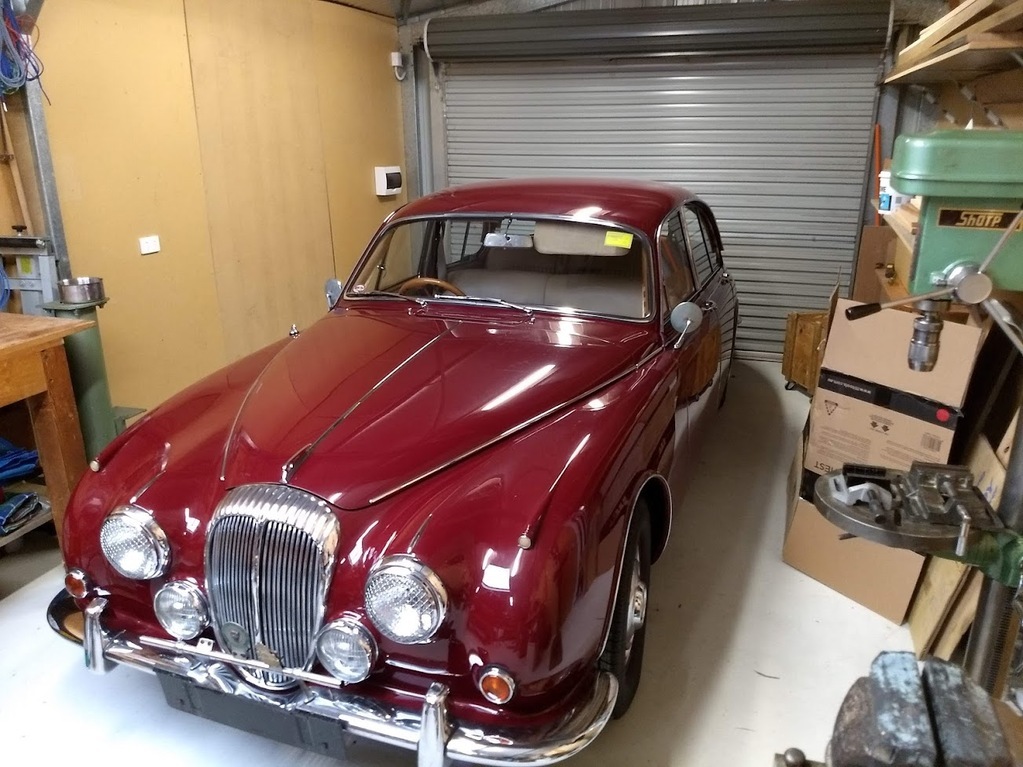 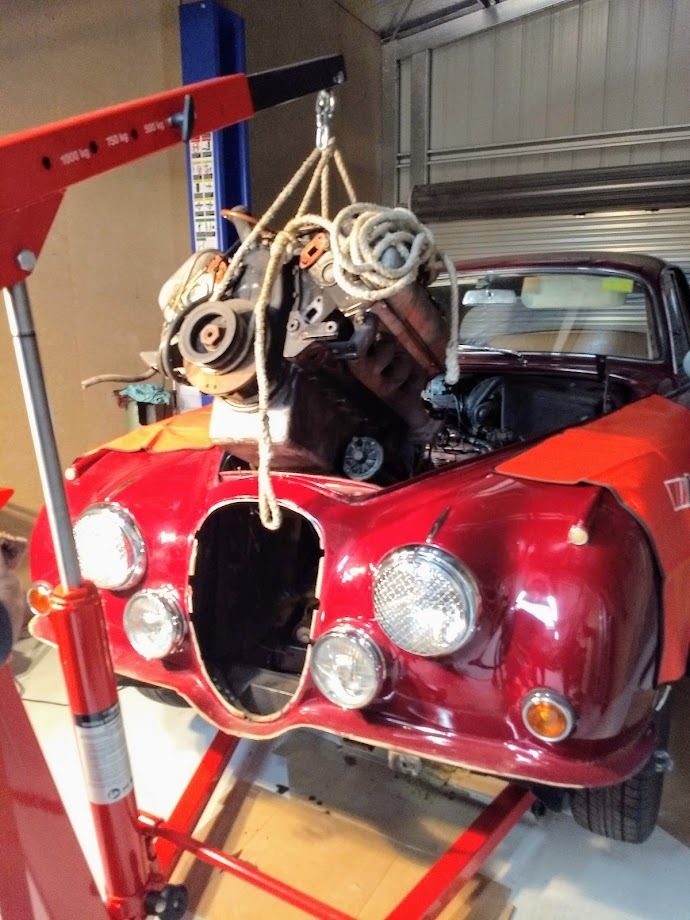 I too have spent quite a few hours reading this blog with great interest, and wow, I cant imagine starting with a body in the condition of yours. The body of mine is excellent but other bits not so good although my engine is repairable. I'm waiting on +.020 pistons from DMG, meanwhile replacing suspension parts, brake piston assemblies, brake pipes etc. I'm really looking forward to the supercharger development. |
| |
2016 Audi Q3
1976 MGB
1968 Daimler 250 V8
|
|
CaptainSlog
Part of things
 
Posts: 510
Club RR Member Number: 180
|
|
Aug 24, 2021 12:42:54 GMT
|
Hi Goldenrust, It seems you are still being discovered, I'm in the same situation as sideoilerv8 only a bit further along with my rebuild. I found your blog when I was looking for a Daimler same colour as mine and snap, here we are: I too have spent quite a few hours reading this blog with great interest, and wow, I cant imagine starting with a body in the condition of yours. The body of mine is excellent but other bits not so good although my engine is repairable. I'm waiting on +.020 pistons from DMG, meanwhile replacing suspension parts, brake piston assemblies, brake pipes etc. I'm really looking forward to the supercharger development. Please start a thread jehu! |
| |
|
|
goldnrust
West Midlands
Minimalist
Posts: 1,887
|
|
Nov 14, 2021 17:31:49 GMT
|
Well doesn't time fly... Life has got a bit busy and I've spent very little time on any forums over the past few months, I apologise I didn't even see the posts in this thread till now. sideoilerv8, I'm sure it's far too late anyway, but I never made note of what components I used. Just some bits I had kicking about in the shed left over from Megasquirt projects. It was probably some 1k resistors, whatever the biggest capacitor I had to hand was (still only uF though), generic 1n4001 diodes and whatever transistors Megasquirt uses to drive relays. Thank you for the alternator information! I hope you got to the bottom of your engine issues, I can understand not wanting ot go down the full rebuild route, as you say it soon gets expensive, especially when you have to do each task 8 times! Maybe I should get a car with fewer cylinders next! (...) jehu I'm glad you've enjoyed the read. The car looks lovely, the paint and chrome condition certainly puts mine to shame! I hope the engine rebuild is going smoothly. I've several thousand miles on my DMG pistons and have no reason to complain. 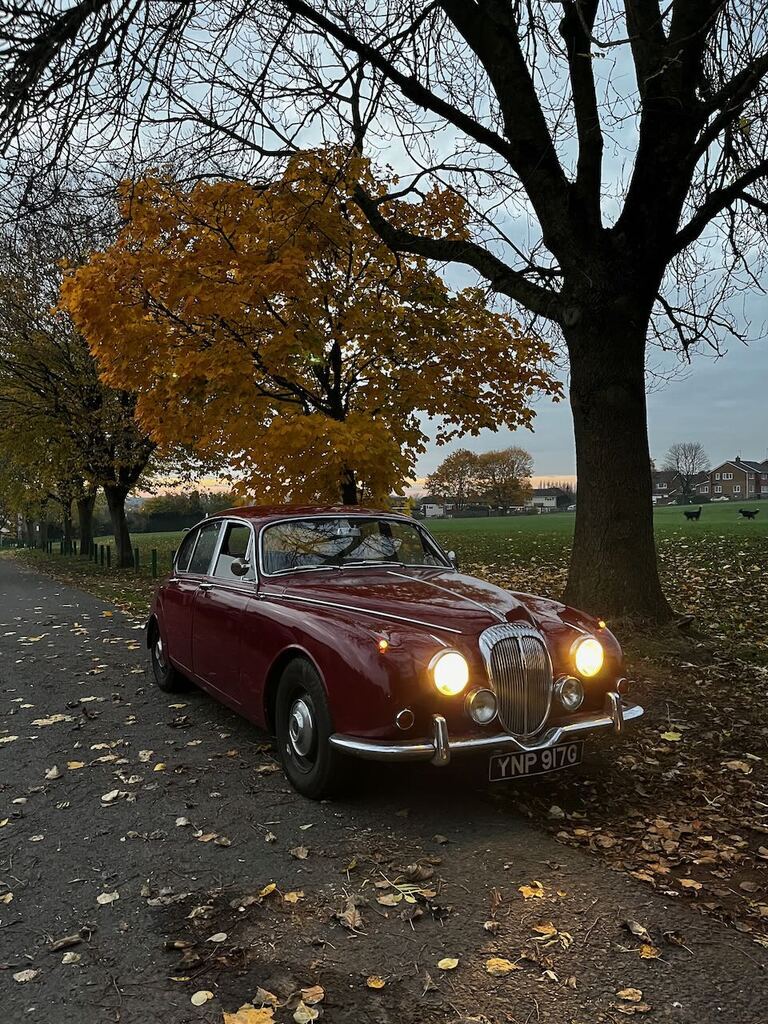 As you can see, the Daimler is still happily out there enjoying autumnal drives. It's been humming along nicely these past few months, and I've just been out enjoying driving it and doing the usual light maintenance. The most recent bit being a change to 80w90 gear oil in the dashpots. The AFR gauge, I fitted back in the summer in preparation for the supercharger, has been showing me that I didn't have enough acceleration enrichment. After experimenting with a few different oils it wasn't till I got to something as thick as gear oil that I finally didn't have a lean tip in. Presuming there's not some wear or damage causing weird issues with my carbs, how people drive round with things like 3in1 oil in their dashpots and claim their cars drive better I have no idea! haha. Speaking of supercharger, that has taken a step back for now, it's still very much on the to do list, but it's further down the list. I've been enjoying driving the Daimler whenever possible, so I'm loathed to take it apart while it's running well. On top of this I had a bit of a vehicle shuffle, I sold my mx5 to a friend and picked up a new project, which will take priority for now. Once the new project is on the road then the supercharger conversion goes back to the top of the list. The new project is quite a bit smaller than the Daimler, so hopefully won't take as long  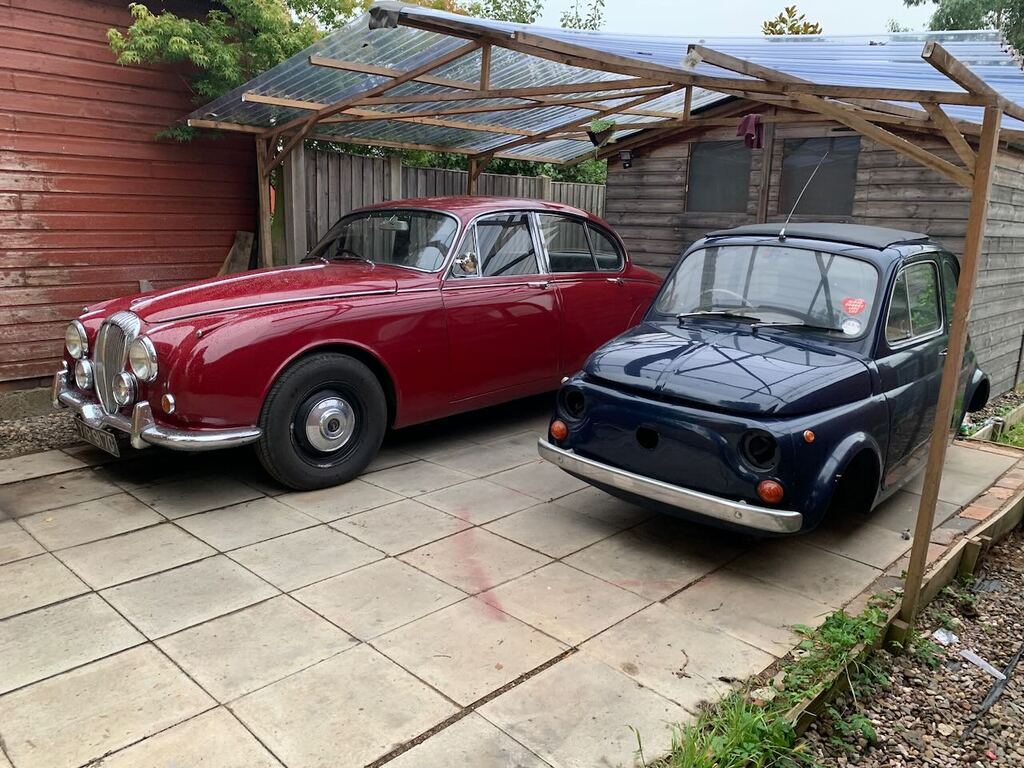 |
| |
|
|
|
|
|
Nov 14, 2021 20:22:34 GMT
|
|
New project, new thread?
|
| |
|
|
goldnrust
West Midlands
Minimalist
Posts: 1,887
|
|
Nov 15, 2021 23:06:23 GMT
|
|
|
| |
|
|
|
|
|
|
|
I have read the first few pages, and the most recent ten. Well done that man. Lovely things these Daimlers; the supercharger should sort out the performance nicely.
Recalling them as relatively new cars, they didn't suffer much in the way of wind noise even flat out. The problem most likely lies in the assembly of the upper and lower parts of the doors, or the NDVs (quarterlights to anyone outside Jaguar).
|
| |
|
|
|
|
|
|
|
|
|
|
Natural Driving Ventilator??
|
| |
|
|
|
|
jehu
Part of things
 
Posts: 96 
|
|
|
|
Hi All yes it has been some time now well i pulled the engine out to see what was going on with my smoking issue as said i never in all the years on working on engine for a hobby never seen a car smoke so much as this Daimler compression was around 100 to 130 on the cylinders the car has had another set of heads fitted before i brought the car i have the old heads and are in a bad way with corrosion and burnt valves engine striped down and found more sludge i seen in all my life loads of it the bores look to have some water marking and one bore had a score mark in the cylinder wall was not sure if it was a score or a crack the funny thing was this cylinder had the beast compression of all 8 cylinders ? crank looked ok so i sent the heads off the J and E to have new valve guides fitted to take valve oil seals and just need to get them collected in the new year the block i took to F j paynes in oxford what a great bunch of guys old school be going for around 100 years to the cylinders hone and the crank polish and hot dip the engine / remove the crank sludge plugs as i have read they was a pain to remove so i let them have the fun and this turned out to be correct one of the plugs they had to weld a rod to it to get it out i really did not wont to go down the re bore and crank regrind route due to the expense so i am now short of one sludge plug and need a original plug to match the other plugs but cant get one [ if any one has one of the original plugs that was fitted please let me know as i need it before i can start to re build the engine ] All the cylinder came up really well the bore that had the score mark is still their but not so noticeable and as said had the best compression of all 8 i was expected to find a broken piston ring but no so the only thing i can think of is when the second set of heads was fitted a bit of swarf got in to the cylinder and caused to scoring i now got all new standard rings and bearing and will start the final cleaning of the block in the next few days ready for re assembly not sure what to do about the cam to use the one i have or go for an exchange one  ? any advice Goldnrust what AFR meter did you use ? and would it be possible for you to give me your e mail as if i get a problem re building the engine you may know the solution as you been their before me Happy new year to you all 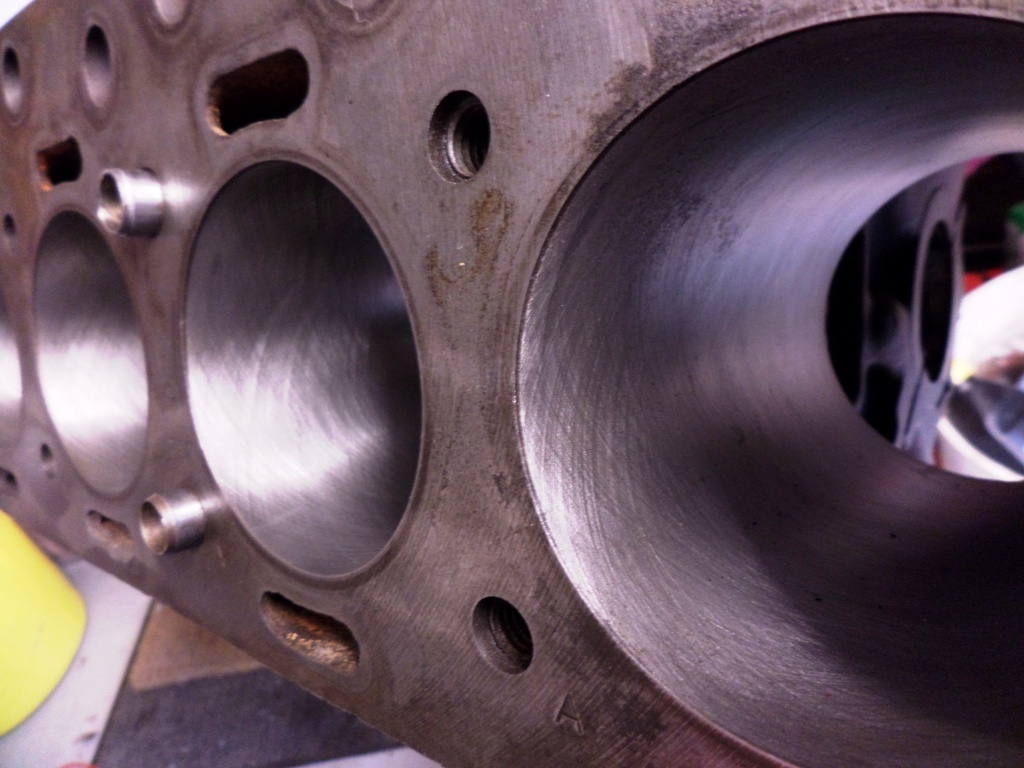 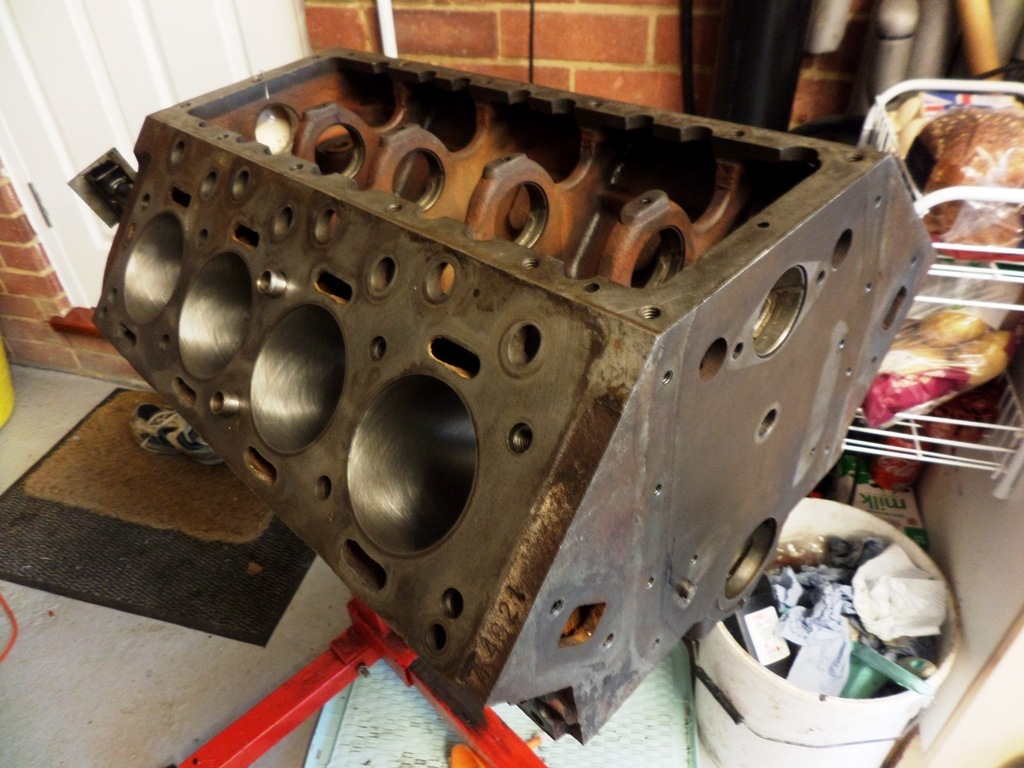 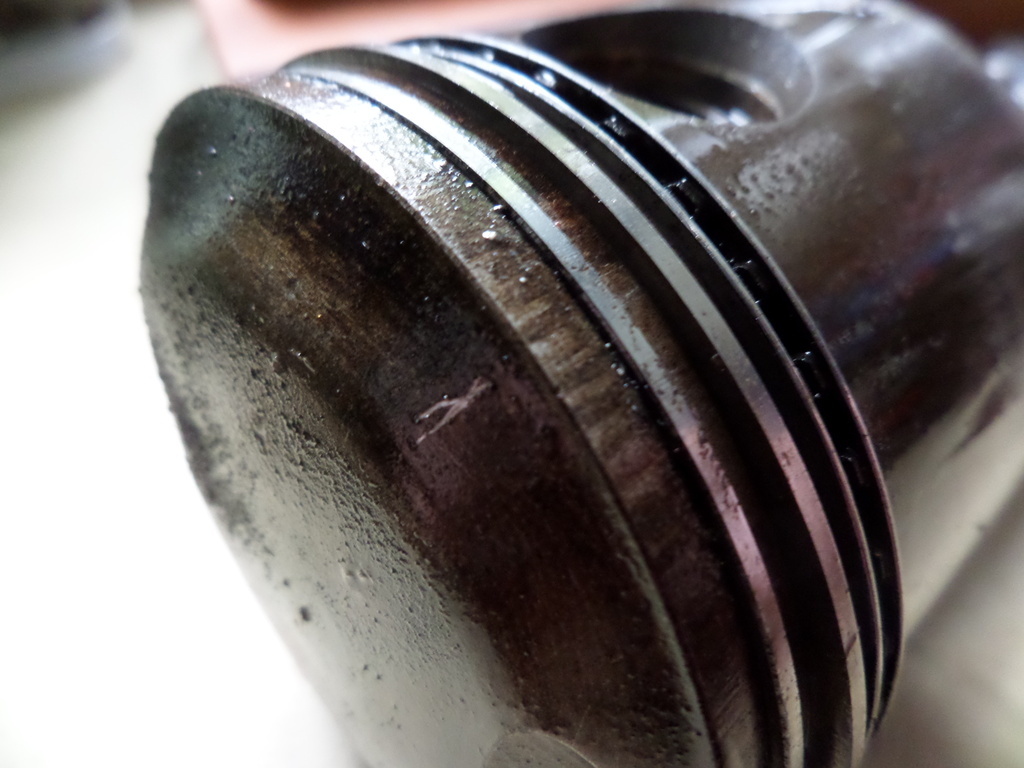 |
| |
2016 Audi Q3
1976 MGB
1968 Daimler 250 V8
|
|
jehu
Part of things
 
Posts: 96 
|
|
|
|
Initially I honed my bore hoping to get away without major expense. They cleaned up reasonably well but still with some water marks and slight ridge (see pic). However when I found that the standard aftermarket rings required the pistons to be machined I sent the rings back ordered 30+ pistons and had it bored - which I should have done in the first place. I hope your works out better. 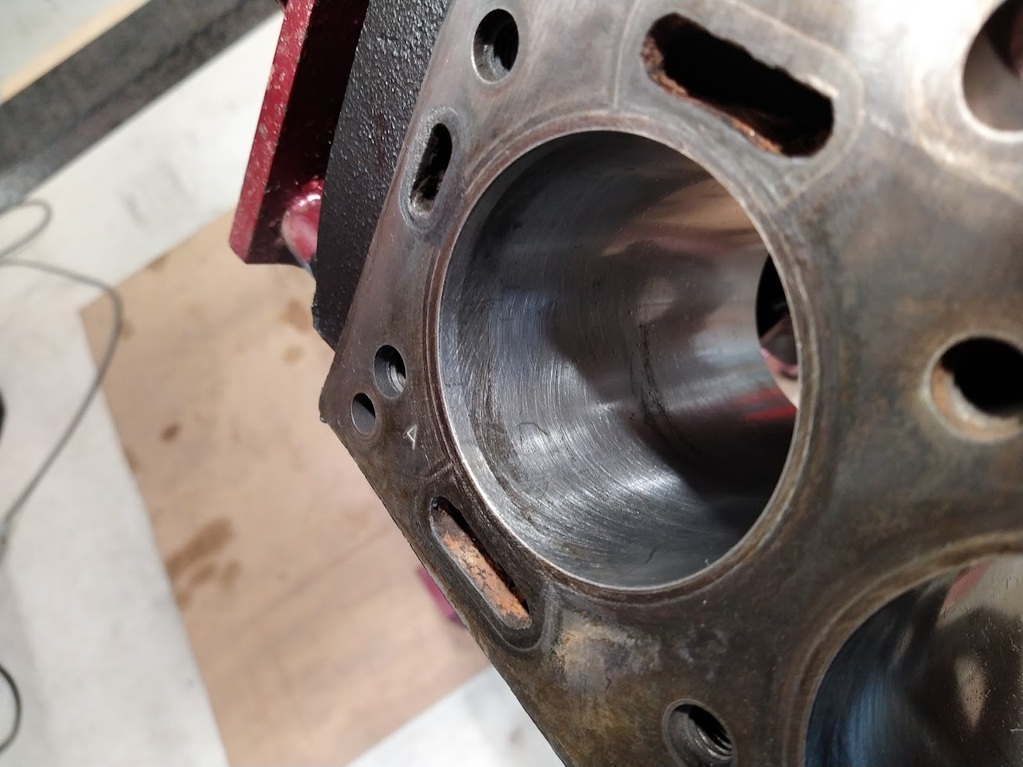 |
| |
2016 Audi Q3
1976 MGB
1968 Daimler 250 V8
|
|
jehu
Part of things
 
Posts: 96 
|
|
|
|
|
|
| |
Last Edit: Jan 2, 2022 4:23:52 GMT by jehu
2016 Audi Q3
1976 MGB
1968 Daimler 250 V8
|
|
|
|
|
|
|
No draught ventilators.
Edit:- beaten to it I see.
|
| |
Last Edit: Jan 2, 2022 8:30:47 GMT by etypephil
|
|
|
|
|
|
|
|
Jehuminhag
quote I found that the standard aftermarket rings required the pistons to be machined
why dint you just get the right standard rings for the pistons fitted in the block ?
|
| |
|
|
goldnrust
West Midlands
Minimalist
Posts: 1,887
|
|
|
|
Well everyday is a school day! I was just calling them quarterlights! I think, @etyphil, now I’m much more used to the car it’s fair to say the wind noise is very well managed… for a 60s car. It’s just that I was essentially comparing it to the decade younger, or newer, vehicles that I’d had before this. Feel free to keep posting sideoilerv8 and jehu, engine stuff is always interesting. The car is running well, and I’m taking it out whenever I can (which is now going pretty limited for a while as there are two new additions to the Goldnrust household) come rain or shine. The biggest run out recently was a gentle Sunday adventure with Mrs Goldnrust consisting of a 90 mile round trip with coffee and wandering round a Christmas market back at the start of December. We left in the sunshine, but found ourselves returning in heavy snow at night! 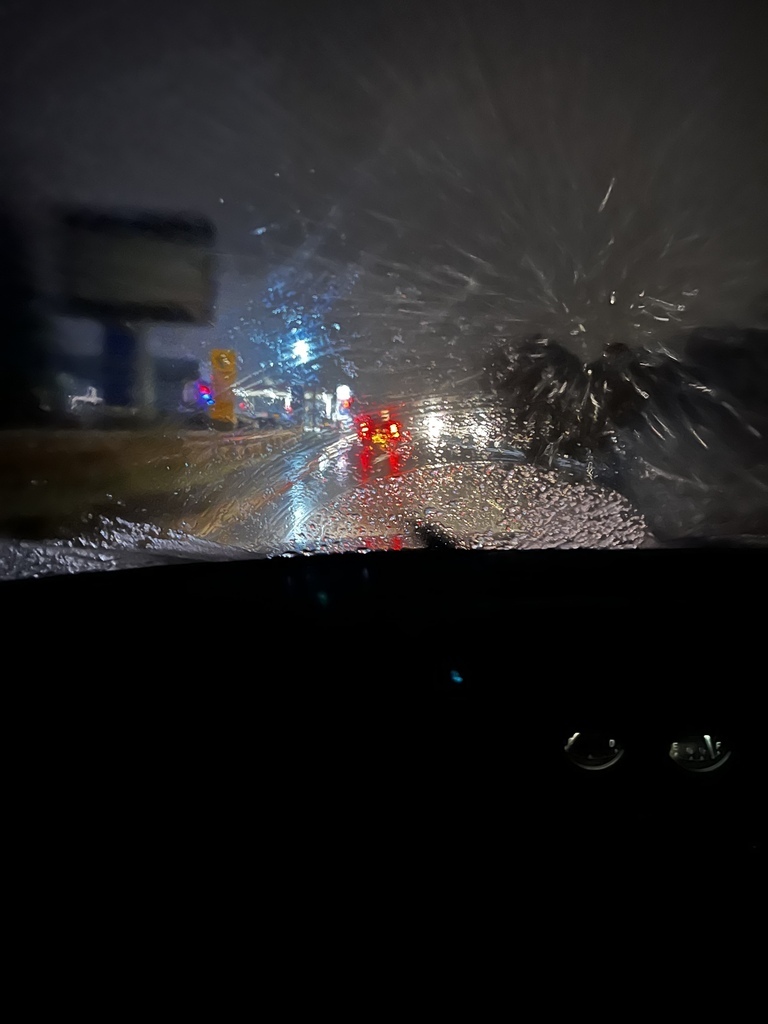 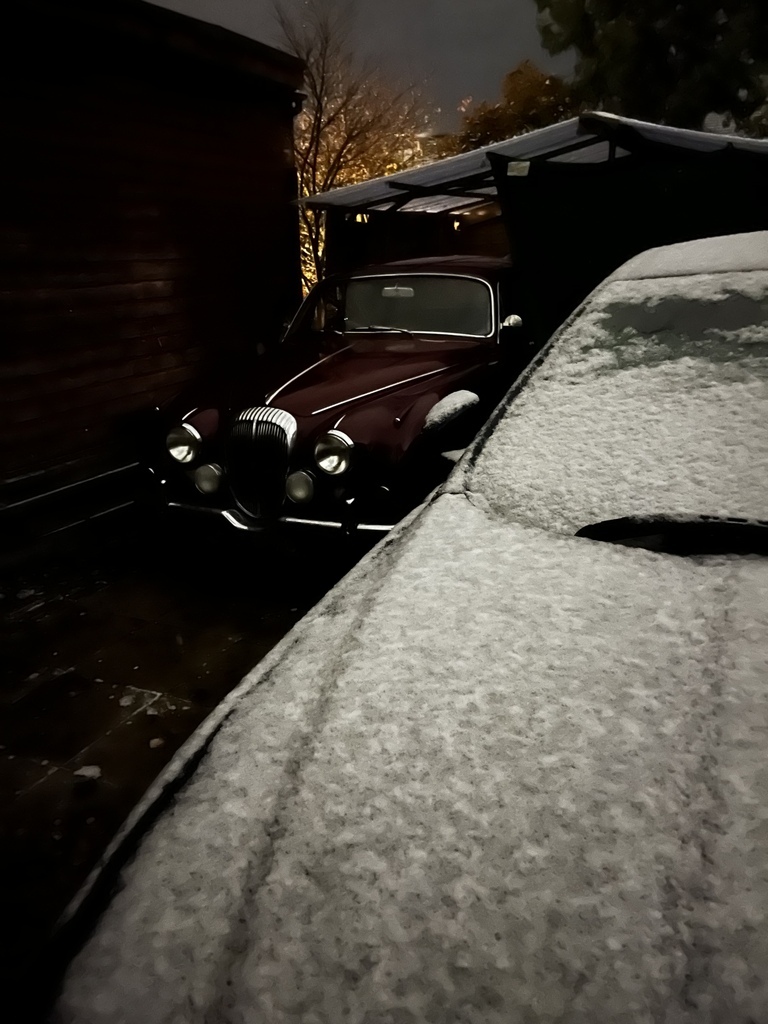 I doubt there were many other V8 250s on the road that night! Still the old girl took it all in her stride. The only issue was keeping the windscreen clear, which took the heater on max+ a bit of NDV(!) opening. I have a feeling the hoses that distribute the heat are a bit knackered, so maybe something to explore at some stage. |
| |
|
|
|
|
|
|
|
I have used this as a replacement for the hoses: www.ebay.co.uk/itm/190673685793Sadly the main issue with the heater seems to be that the fan is fairly weedy, on econojag i'm upgrading the heater with a Mondeo Mk4 Fan and a Mondeo Mk3 heater matrix, its still a work in progress but inital testing shows a vast improvement in fan power. |
| |
|
|
|
|
|
|
|
|
I had a Rover P5B as a dailey and it was parked outside and there were periods i used it every day and had no problems with condensation on the windows but there were also periods, i did not use it much and it was difficult to keep the windows clear. Then moisture was inside the car due to condesation
Peter
|
| |
|
|
 Both gearboxes are BW35s, just with different valve bodies to give you the different shift patterns. As you say, at '68 yours should have the D1/D2 box. You can obviously see what the car came with by looking at the shift position indicator on the steering column, but within the gearbox I don't know how the tell the difference. The only way I knew mine had the PRND21 pattern was from test driving.
  ... and I don't know why, but I'm not in the mood for opening the gearbox up again to find out! 1st works fine in D, so I'm fine for now!


 Both gearboxes are BW35s, just with different valve bodies to give you the different shift patterns. As you say, at '68 yours should have the D1/D2 box. You can obviously see what the car came with by looking at the shift position indicator on the steering column, but within the gearbox I don't know how the tell the difference. The only way I knew mine had the PRND21 pattern was from test driving.
  ... and I don't know why, but I'm not in the mood for opening the gearbox up again to find out! 1st works fine in D, so I'm fine for now!


 ? any advice


