Tamber
Part of things
  Shattered. Held together by spite and tape.
Posts: 338
Member is Online
|
|
|
|
Jeez. You're determined. Might have been quicker to winch the workshop over the truck though. It probably would've been! ...but I would still have had to winch it with the farm-jack!  Amazing what one can get done in two days, with the motivation of "You put it in the foxing workshop, or you take it away and find a new workshop." 's made it very difficult to get anything done in there, now, though. |
| |
-< Welder. Allegedly a mechanic. Bodger of Things >-
* 1958? Bedford RL - Progress: Glacial.
* 1994 Skoda Favorit - It's baaaaaaaack!
* 2018 Herald Classic - Gone!
|
|
|
|
Tamber
Part of things
  Shattered. Held together by spite and tape.
Posts: 338
Member is Online
|
|
|
|
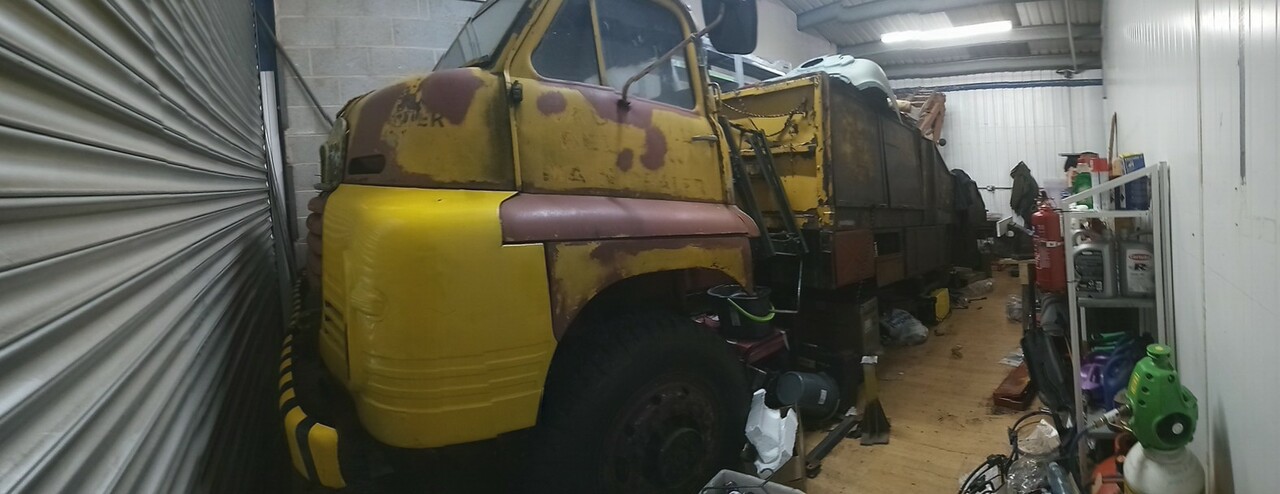 Bit cramped in there.  First time back in since the giftmas holidays, now that the weather's beginning to be ... well, less frigid, at least. Still blowing a gale and raining sideways. Didn't plan to do much, just dropping off some little bits n pieces (Ali brazing rod & flux. I have plans), and making sure the truck's still there. So I unpacked the head-gaskets I got months ago and never opened... 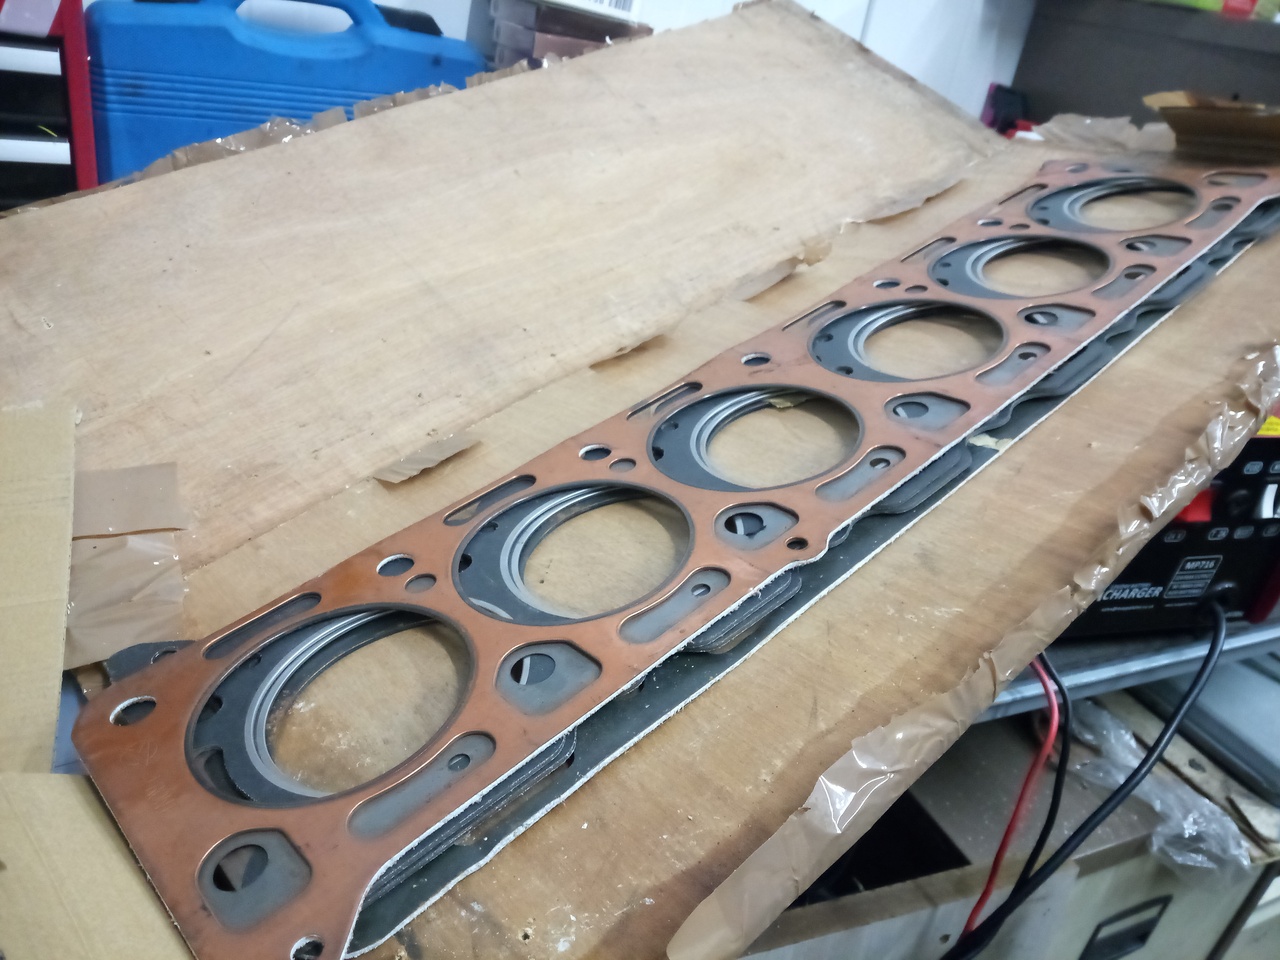 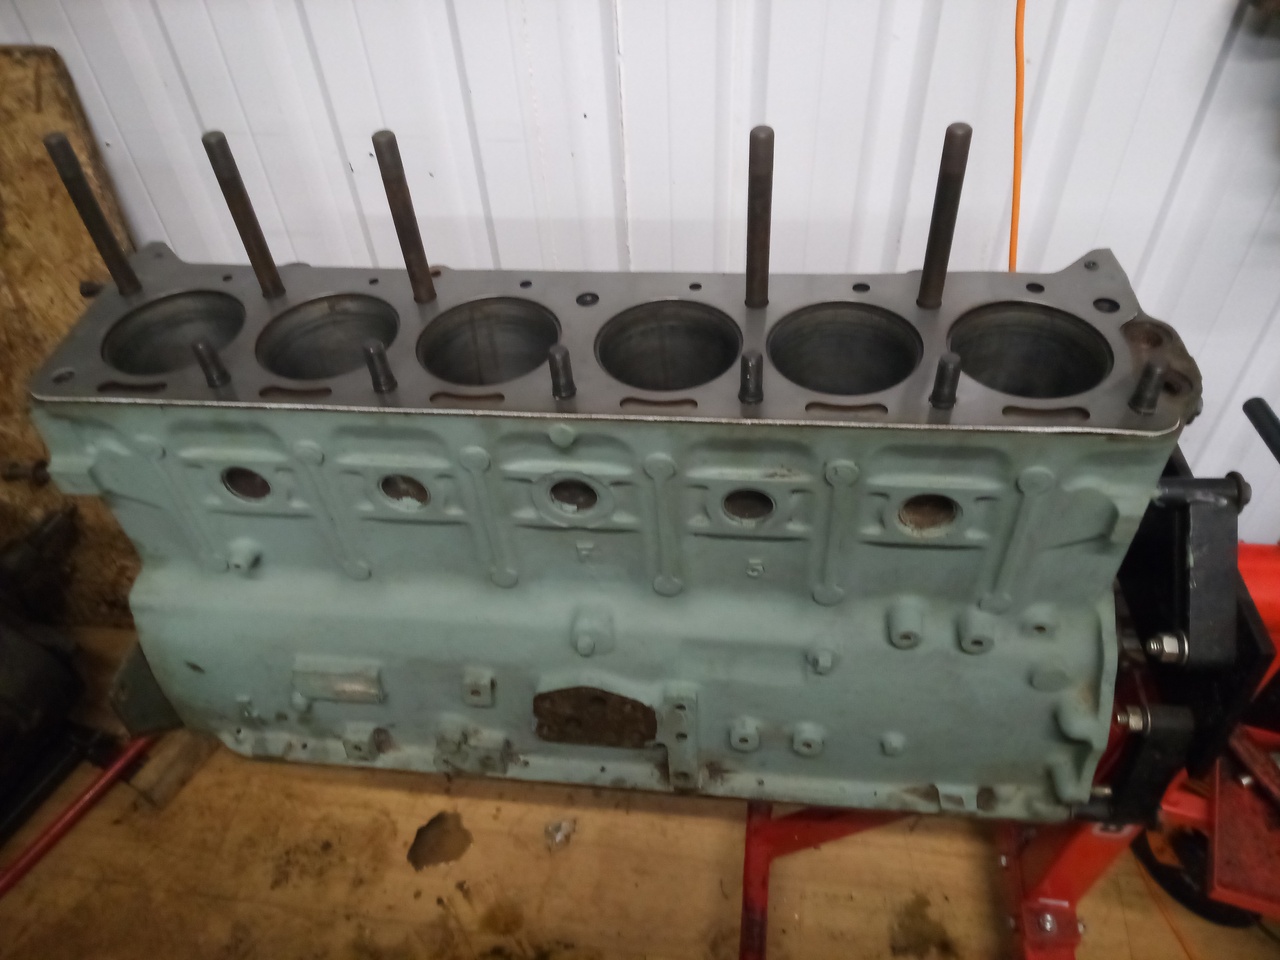 And they're the right ones. So that's nice. (Might measure one up to have a dimensioned drawing, while I have spares, just in case.) Was also going to put a grounding lug in near the battery, fastened to the new chunky steelwork I've put in, rather than the old grounding point that's in the thin sheet metal of the passenger's seat base. But I couldn't find my bag of bolts, so I went home instead. Storage boxes have been ordered, so that I can organise bolts, because it's getting ridiculous now. |
| |
-< Welder. Allegedly a mechanic. Bodger of Things >-
* 1958? Bedford RL - Progress: Glacial.
* 1994 Skoda Favorit - It's baaaaaaaack!
* 2018 Herald Classic - Gone!
|
|
|
|
|
|
|
|
Would it be worth doing a tracing or rubbing off that gasket as well as the drawing (as long as you can keep it somewhere safe) then all anywhere has to do is scan it in to get exact dimensions
|
| |
|
|
Tamber
Part of things
  Shattered. Held together by spite and tape.
Posts: 338
Member is Online
|
|
Jan 12, 2021 18:58:52 GMT
|
Would it be worth doing a tracing or rubbing off that gasket as well as the drawing (as long as you can keep it somewhere safe) then all anywhere has to do is scan it in to get exact dimensions That'd be a good plan, too. Maybe trace it out & scan it to begin with. |
| |
-< Welder. Allegedly a mechanic. Bodger of Things >-
* 1958? Bedford RL - Progress: Glacial.
* 1994 Skoda Favorit - It's baaaaaaaack!
* 2018 Herald Classic - Gone!
|
|
Tamber
Part of things
  Shattered. Held together by spite and tape.
Posts: 338
Member is Online
|
|
Jan 23, 2021 13:25:25 GMT
|
I've decided to set myself a goal, so I at least have something I can point myself towards; and that is: Have the engine running by the end of 2021. Yes, it doesn't seem like a massive target, and there's still 11 months, but! - Engine is still pretty much a bare block at the moment.
- I have to build up the fuel-injection kit, too.
- Going to have to build at least one manifold from scratch.
- Going to have to build a new sump (and pickup) from scratch
- ...there's going to be all sorts of other roadblocks I can't see yet.
Anything else I get done will be a bonus.  And, to that end, I'm going to brave the snow and head out to the unit. |
| |
Last Edit: Jan 23, 2021 13:25:42 GMT by Tamber
-< Welder. Allegedly a mechanic. Bodger of Things >-
* 1958? Bedford RL - Progress: Glacial.
* 1994 Skoda Favorit - It's baaaaaaaack!
* 2018 Herald Classic - Gone!
|
|
Tamber
Part of things
  Shattered. Held together by spite and tape.
Posts: 338
Member is Online
|
|
Jan 23, 2021 23:46:40 GMT
|
Okay! As I was leaving to head off to the unit, I spied that my length of aluminium tube (for the inlet manifold) had arrived. Marvellous! That means I can combine it with these bits I made a start on earlier: 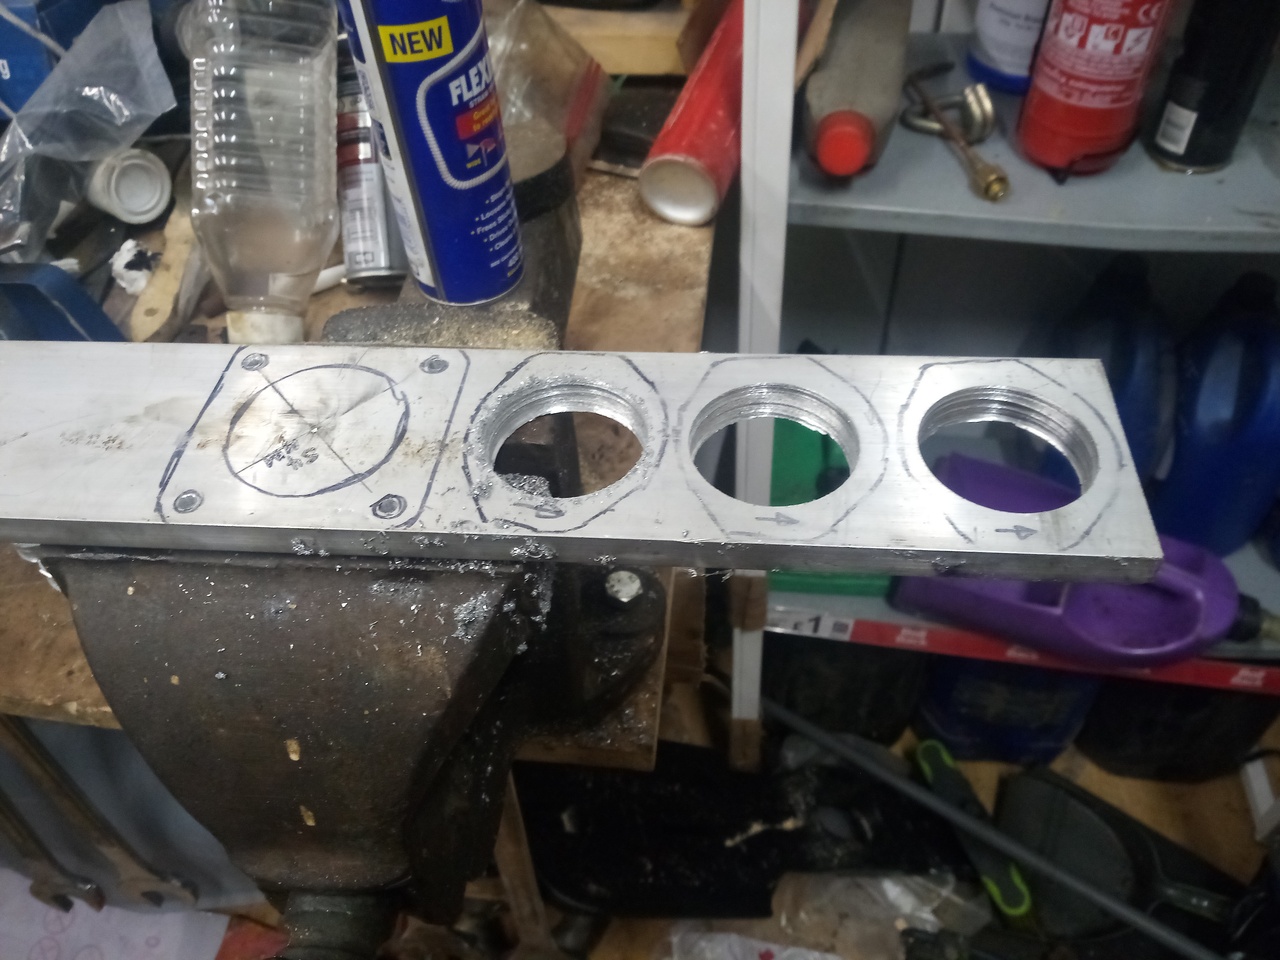 And thus, with a bit of grinder-y action, my Mad Science goggles... 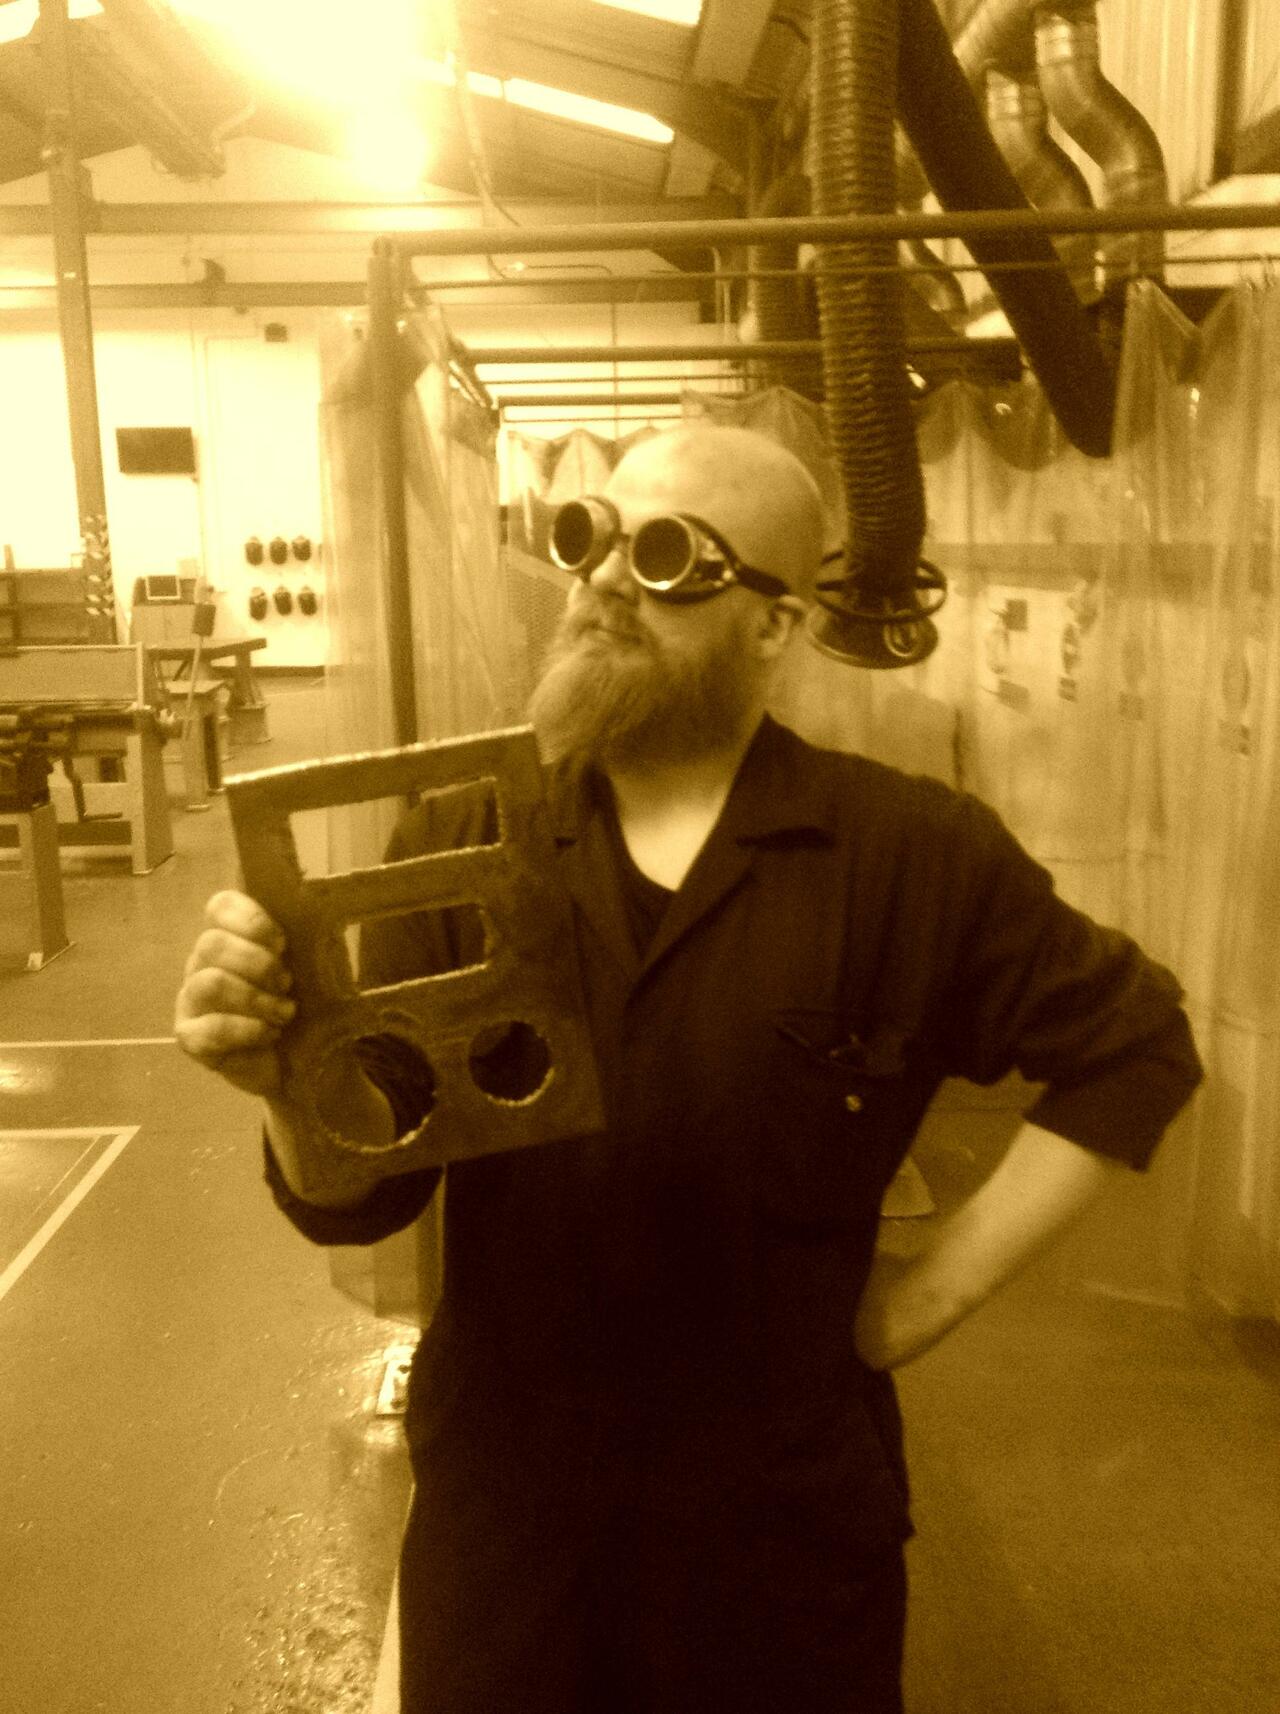 ...some careful experimentation with the aluminium brazing rod + flux I picked up the other day, we get: 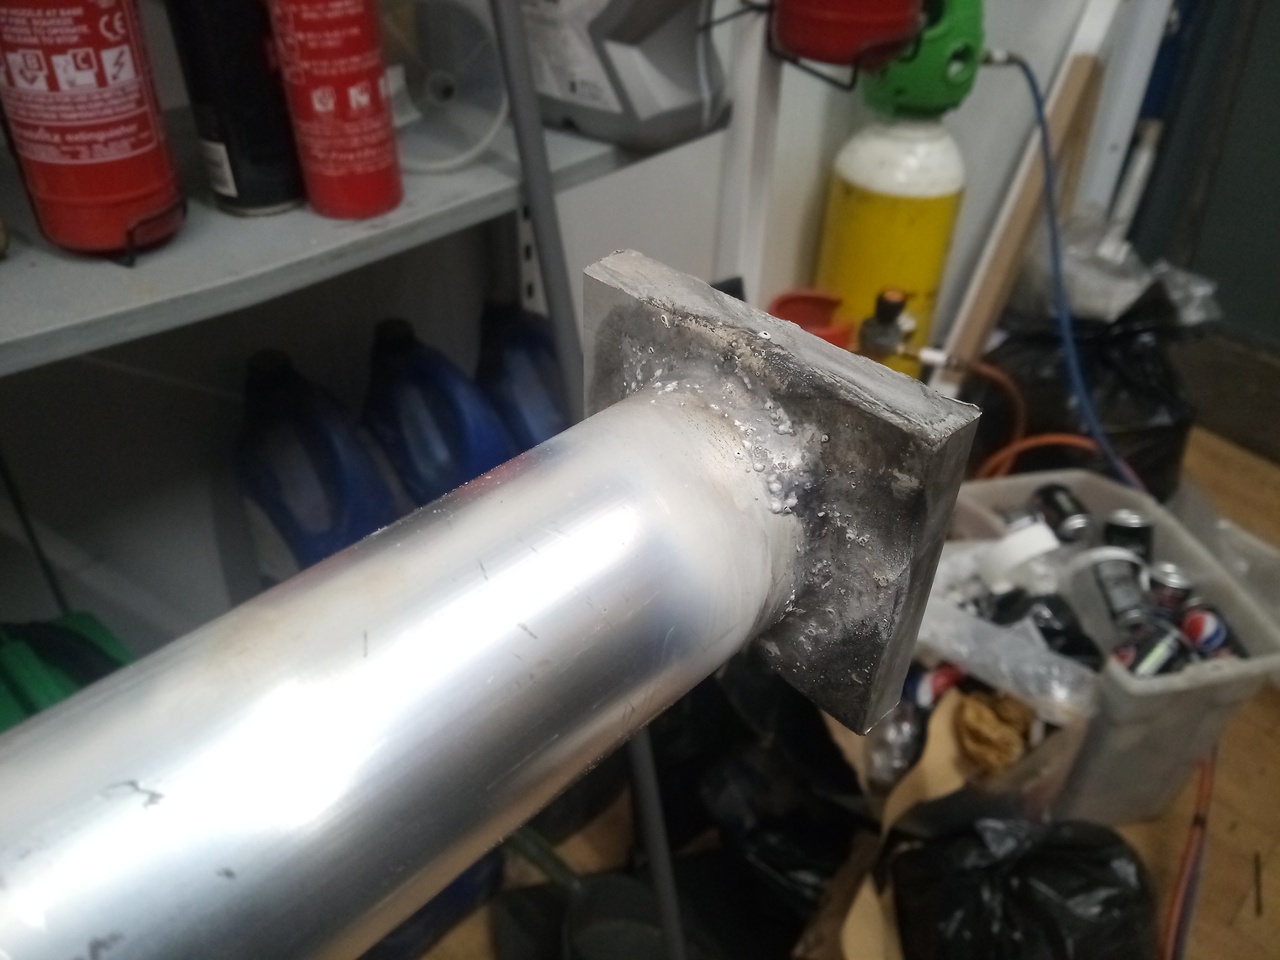 Not the prettiest, but good enough for a first go, and it cleaned up nicely; so out with the hacksaw and some chopping action, and the result is: 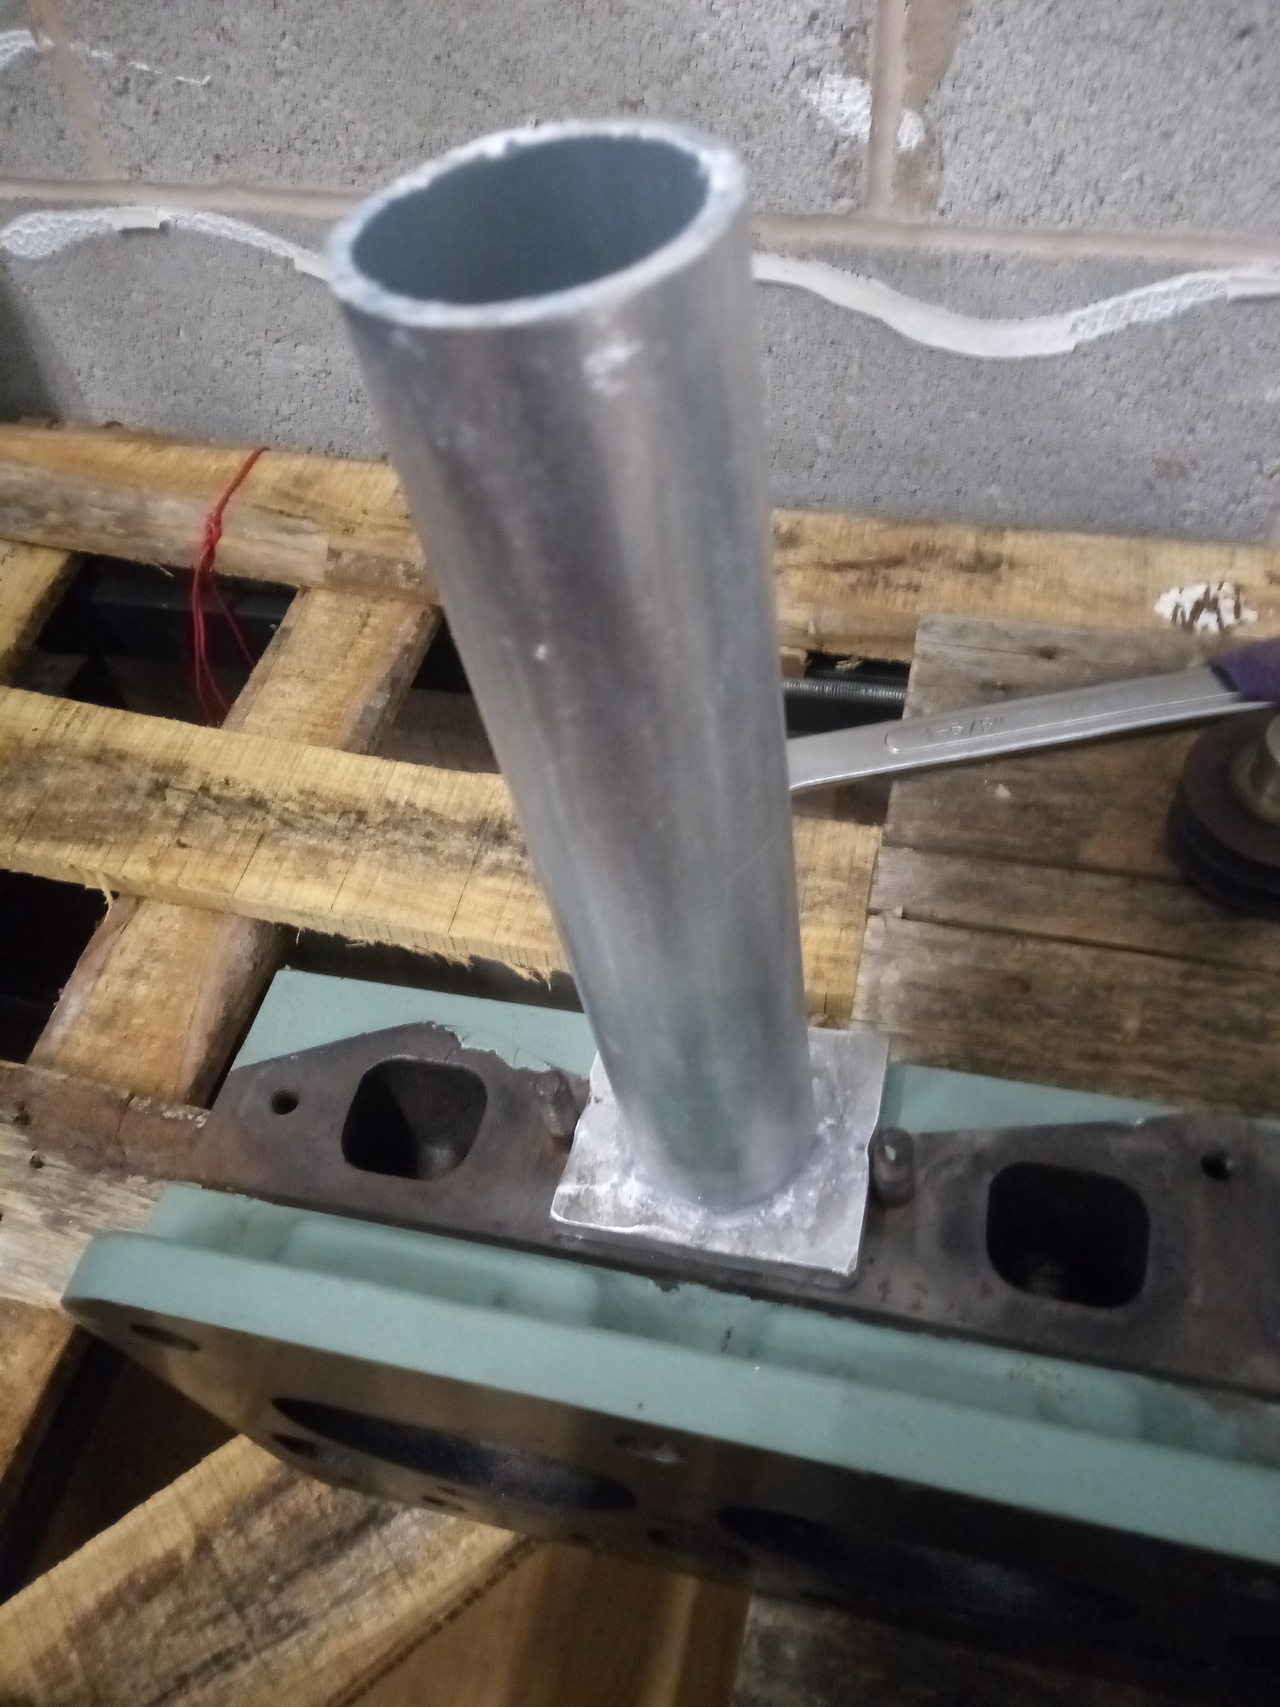 Then it's merely a case of repeating twice more. (Also, some beautification work making those flanges look somewhat like the original ones. Ideally, I'd like to fit them straight into the original ones and trace it, but I think the original manifold is in a locker on the offside of the truck. Which is right up against the wall. Same as my extension leads, and a bunch of other stuff. *sigh*) I've gotten injector bosses ordered, and there'll be some serious thinking before I go and attack them with the torch to braze them in, since they all need to line up at the same angle across all 3 inlet runners; which pretty much means I need to have the manifold in its final form by that point so I can use a jig to hold them all in place at the right angle respective to each-other. Which, of course, means I need to have gotten to the point of, y'know, having the manifold designed and near enough finished before I can do that. So I probably need to figure out what direction I want to go with the manifold. Other than that, I've started lapping valves in. Should probably have had the seats very lightly cut just a little bit while it was at the machine-shop, but oh well; the coarse paste has done a pretty good job. |
| |
-< Welder. Allegedly a mechanic. Bodger of Things >-
* 1958? Bedford RL - Progress: Glacial.
* 1994 Skoda Favorit - It's baaaaaaaack!
* 2018 Herald Classic - Gone!
|
|
Tamber
Part of things
  Shattered. Held together by spite and tape.
Posts: 338
Member is Online
|
|
|
|
Pistons on rods, and rings on pistons, on Saturday. Heater on full blast, both to warm the pistons up to make the gudgeon pins a nice easy slip-fit, and to stop me from freezing. Heater was coughing and spluttering a little bit by the time I was onto the last piston, so I'll need to get some more diesel. (Annoyingly, there's still at least a gallon in the tank of the heater; but because it's a wide, low tank, the level is low enough that the pickup ... can't. So it flames out, and fills the workshop full of smoke. Oh, the joys.) Anyway, I did sorta video me doing those last two pistons (phone propped up on toolbox; I have stumped up for a new camera & tripod for videoing this stuff, simply because otherwise I'll never do it, since the current setup is such a pain in the  .), so that'll be part of the engine rebuild vid, I guess, when I get around to that.  In the meantime, I've started on putting together the bits of engine-work video I *do* have, because if I save it all up until the engine rebuild is completed, the rest of the truck will be done before I ever get that video stitched together. |
| |
-< Welder. Allegedly a mechanic. Bodger of Things >-
* 1958? Bedford RL - Progress: Glacial.
* 1994 Skoda Favorit - It's baaaaaaaack!
* 2018 Herald Classic - Gone!
|
|
|
|
|
|
|
Hope the medication worked  |
| |
|
|
Tamber
Part of things
  Shattered. Held together by spite and tape.
Posts: 338
Member is Online
|
|
|
|
Hope the medication worked  Amply. It might've still hurt, but I didn't care any more.  |
| |
-< Welder. Allegedly a mechanic. Bodger of Things >-
* 1958? Bedford RL - Progress: Glacial.
* 1994 Skoda Favorit - It's baaaaaaaack!
* 2018 Herald Classic - Gone!
|
|
Tamber
Part of things
  Shattered. Held together by spite and tape.
Posts: 338
Member is Online
|
|
Feb 20, 2021 20:26:29 GMT
|
|
Also, in case anyone needs to know, the timing cover oil seal is a GACO 6350016, which apparently cross-references to a Payen NA512 C939 as (apparently) used in other Vauxhall products of the same time period.
Timing cover has been cleaned up, given a coating of etch primer, and is now hanging around waiting for me to make a gasket for it, paint it in its finished colour, fit the seal, and all that. (Should probably add some sort of mounting point for crank position sensor before painting it, too.)
I also have all six pistons in the block, and the rod caps loosely attached; need to roll the block over in order to torque the caps, next. It's gotten significantly more difficult to rotate the crank now, with the drag of 24 rings adding to the stiff rear-main seal, and no good way to bar it over! (having no flywheel, or crank pulley, yet.)
|
| |
-< Welder. Allegedly a mechanic. Bodger of Things >-
* 1958? Bedford RL - Progress: Glacial.
* 1994 Skoda Favorit - It's baaaaaaaack!
* 2018 Herald Classic - Gone!
|
|
|
|
Tamber
Part of things
  Shattered. Held together by spite and tape.
Posts: 338
Member is Online
|
|
|
|
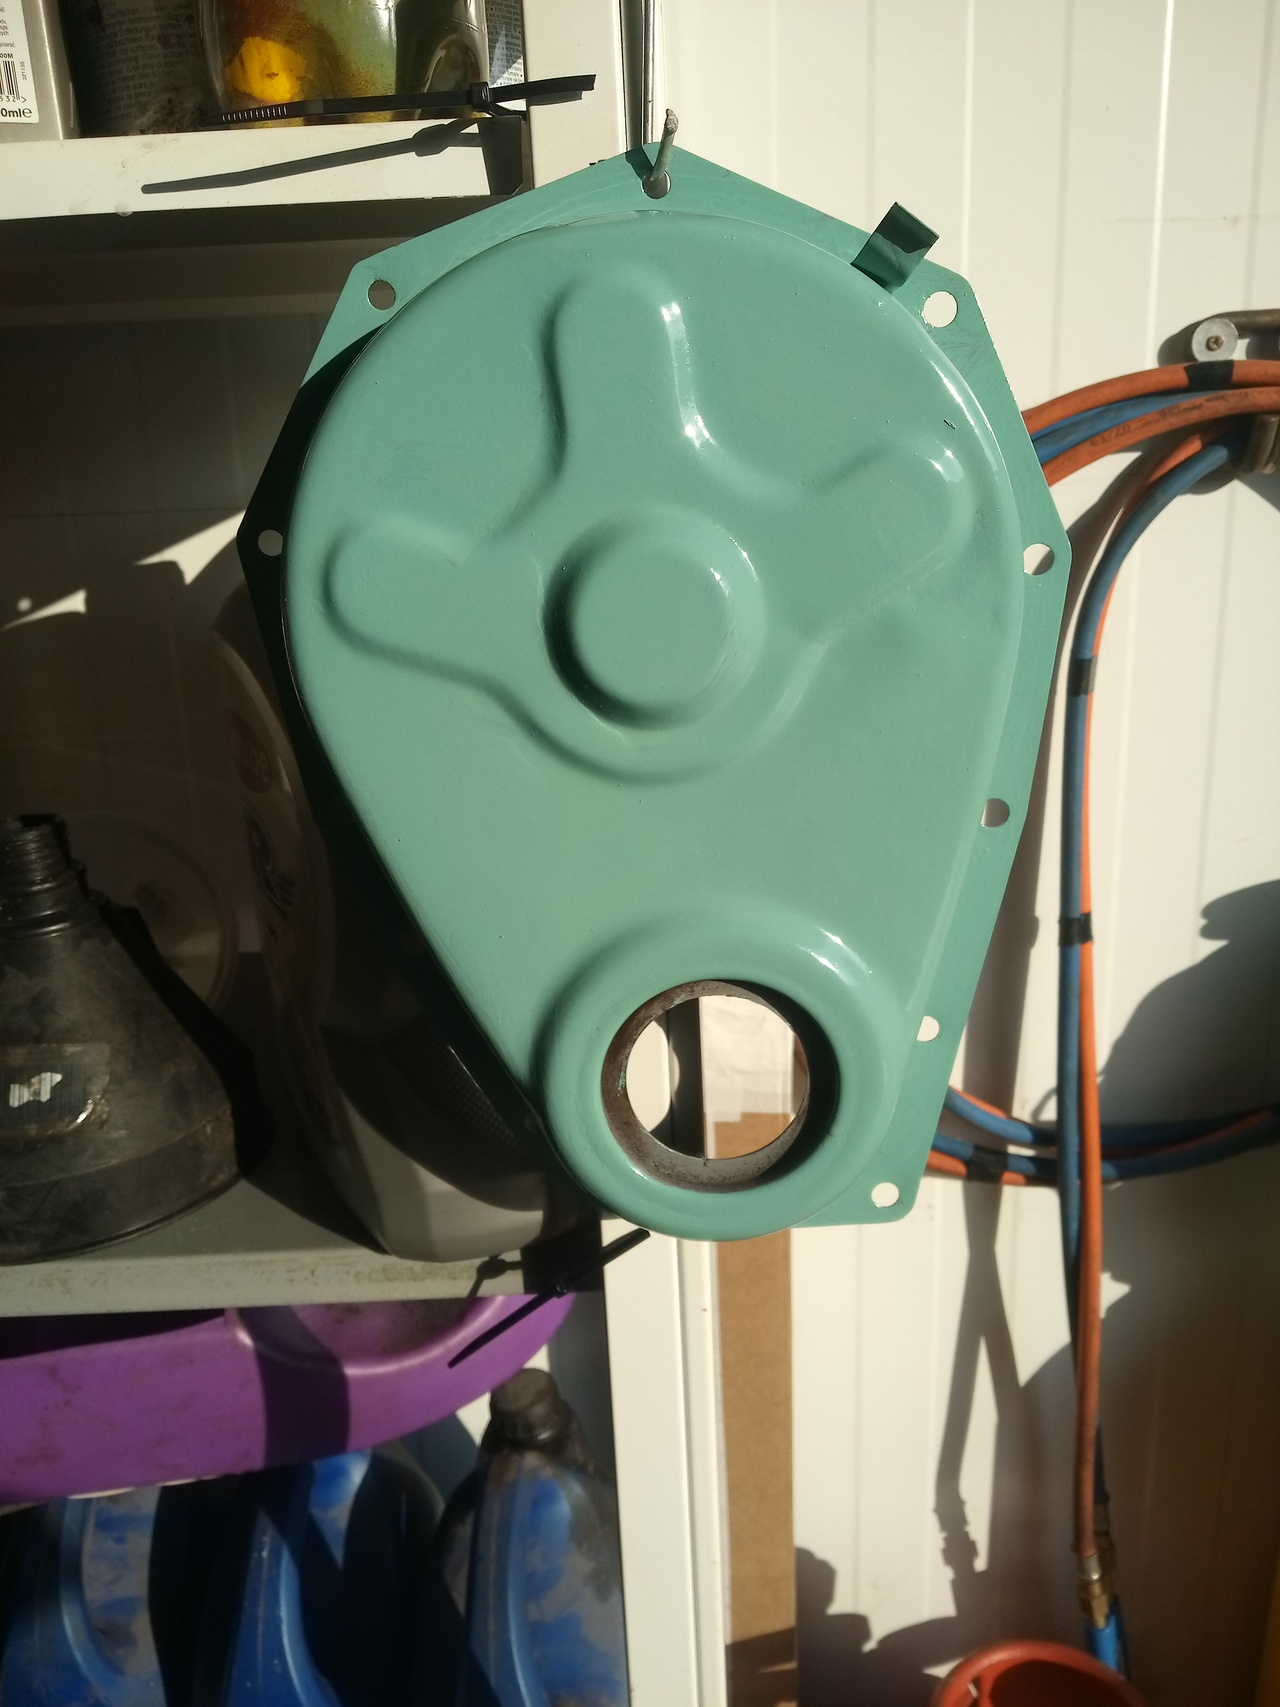 Seems a little dark, compared to the remnants of what was already on the engine, but I'm going to keep on with it. Additionally, I have made some progress on re-wiring the back lights, now with an additional 4 or so years of experience since I did it the first time and with things having changed slightly! The original design had the wiring to each rear light cluster pass down its respective side of the truck. That was fine, but if I were to do it now, it'd all pass down one side then split at the rear cross-member. But, no, I'm going to just have to put up with it doing a bit of a loop around both sides of the truck, to all come together at an adaptible box only to fan back out again. Cables all fed in... 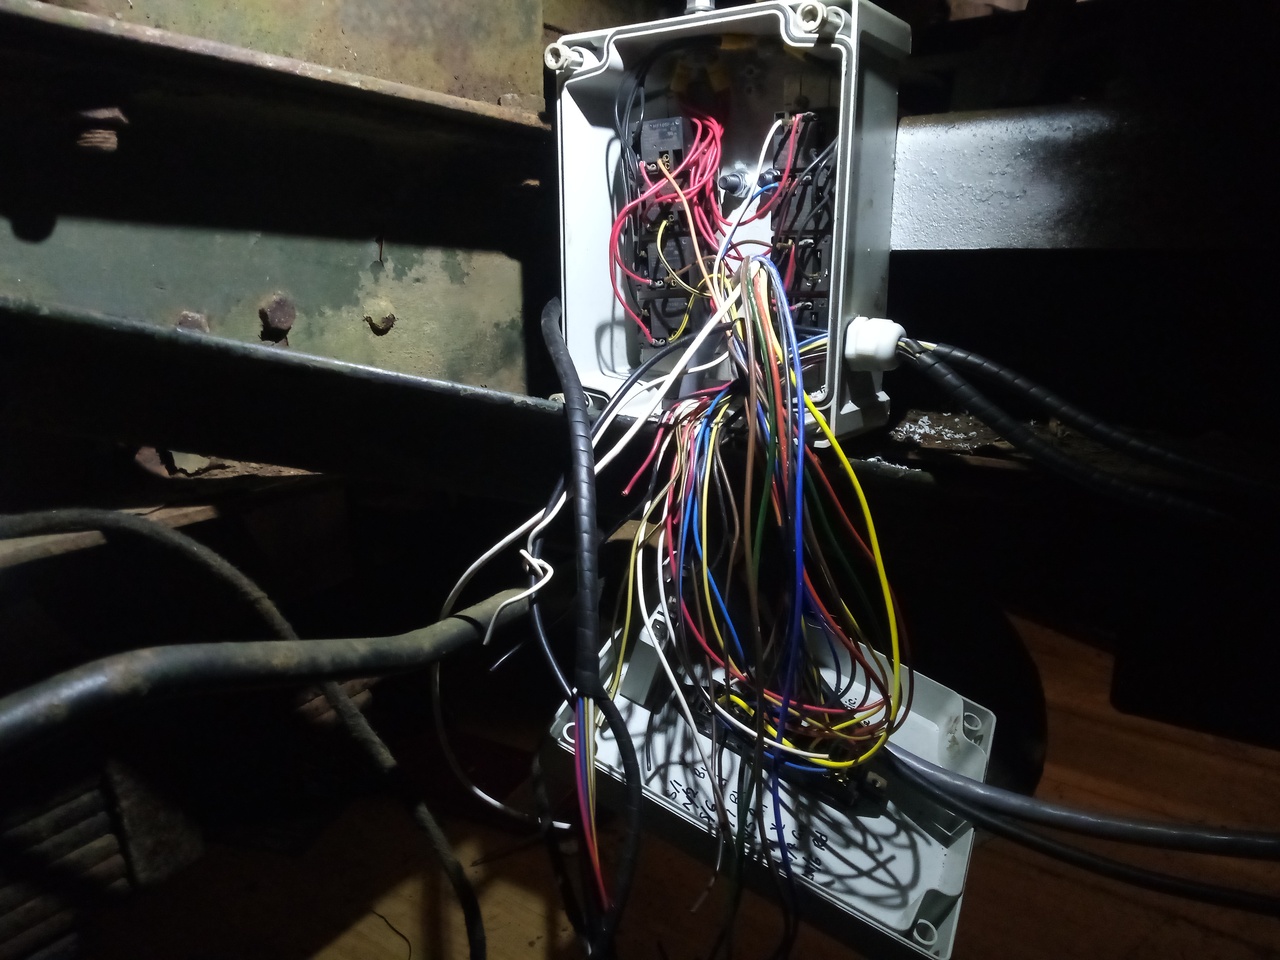 And wired up to the various relays and fuse-holders. (Aside from the switched ignition feed for triggering the relay, and a battery feed power wire out to the circuit-breaker. And a big length of battery cable to bring power down to the box from all the way up at the front! Oh, and a couple of nice ground cables to the chassis, one here and one up near the battery, because it turns out that my new rubber cab mounts do a real good job of insulating the cab from the chassis electrically!) 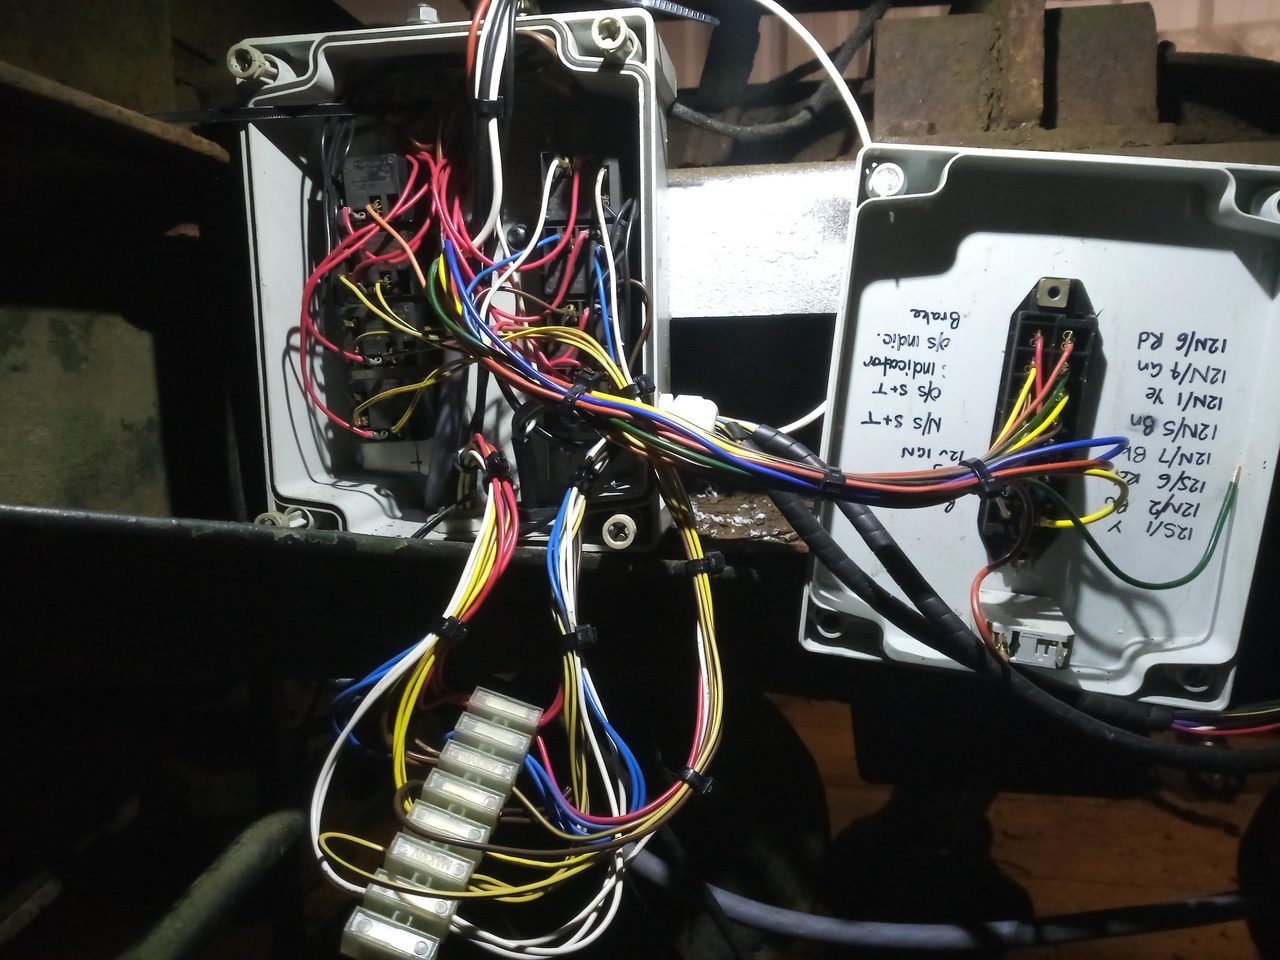 Looks a little over the top, but I don't think it is.  It's doing the same job as any other one of those "smart relay" jobbies, but also providing a place for me to connect all of the back lights, too. |
| |
-< Welder. Allegedly a mechanic. Bodger of Things >-
* 1958? Bedford RL - Progress: Glacial.
* 1994 Skoda Favorit - It's baaaaaaaack!
* 2018 Herald Classic - Gone!
|
|
|
|
|
|
|
|
As long as you keep a good diagram for fault finding I don't think you can overdo updating wiring with relays and fuses, most of the original switches in the 60's were barely up to the job in the first place let alone with some modern accesories like lights and a heater that actually works, I vividly remember hotwiring the lights on my anglia on the side of a german autobahn in the late 80's after the switch melted!
One thing though, if you are using a relay to control the ignition load you will need a diode in the ign warning light circuit, the current back feeding through the warning light can be enough to keep the relay in even with the ignition off. (I found out the hard way, yours might to be as easy to stall deliberatley as a morris minor!)
|
| |
|
|
|
|
|
|
|
Not to long ago I decided to convert all of the various external lights on my Land Rover Defender to LED versions. Having trawled through the Internet, I came across a brand trading as RUBBOLITE. It transpired that this brand is an American outlet, who manufacture lights, etc... for their military. My local vehicle, electrical set-up, supplies a local haulage company with their requirements, and this haulier's lorries/trailers are fitted with RUBBOLITE produts. So if it's good enough for this haulier, I'll give it a go. I decided to fit a RUBBOLITE cluster to each rear corner; these are supplied with water-proof connectors. Extension leads are also available as well. So I decided to annoy the purists, yet again, and had stainless-steel mounting brackets fabricated to accommodate the new light clusters; these were duly fitted by someone far more competent than myself. The extended cables from the two separate light clusters, plus one surface mounted number-plate light, were then fed up into the rear corner of the load area, where a waterproof, rubber junction box was mounted. The 13pin electrical, towing socket was also fed into this same waterproof box. All of the various wires were now connected together, and the vehicle loom extended to marry up. Works superbly. My Land Rover is currently in the process of being rebuilt onto a new chassis, and as part of this process the vehicle loom, which is in four sections, is again being modified. The 4th. section is the rear lights; the 3rd. section runs from the front bulkhead, through the chassis and feeds section 4. This 3rd. section has been replaced with 13 core cable, wrapped in convoluted tubing for extra protection as used on HGV's, and fed directly to the rear-mounted waterproof junction box. All nice and simple; meets modern day standards; done and dusted. So the good old Bedford is following a trend. 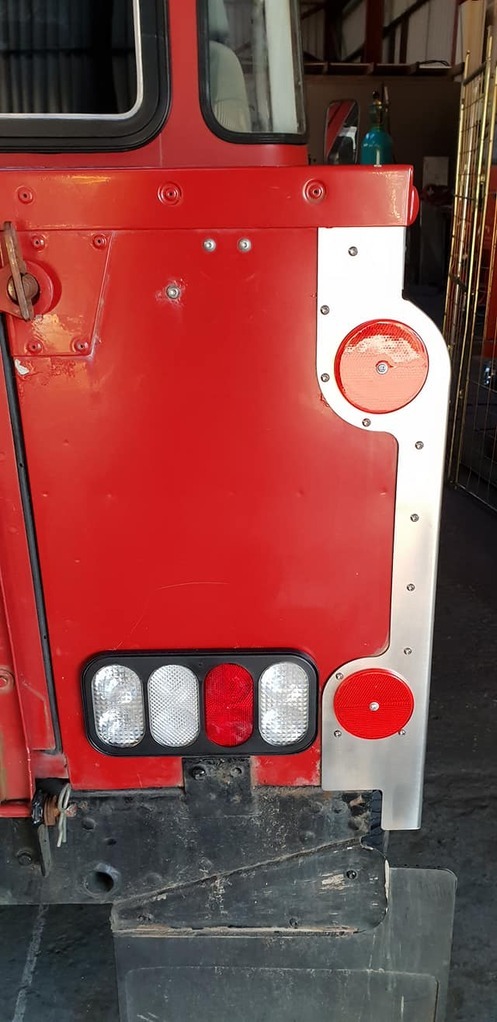 |
| |
|
|
Tamber
Part of things
  Shattered. Held together by spite and tape.
Posts: 338
Member is Online
|
|
|
|
As long as you keep a good diagram for fault finding I don't think you can overdo updating wiring with relays and fuses, most of the original switches in the 60's were barely up to the job in the first place let alone with some modern accesories like lights and a heater that actually works, I vividly remember hotwiring the lights on my anglia on the side of a german autobahn in the late 80's after the switch melted! Definitely; I've got a pile of notes and diagrams that I'm going to finalise into a few proper diagrams (laminated!) that can be stored in the truck for when the inevitable happens.  And the original wiring was about what was to be expected from the era, with full load current going through every switch and a grand total of 4 fuses. The replacement fuse & relay board is rather more comprehensive -- though, as it's been about 3 years since I first built it, there are some changes and rework I would like to do because I'm not entirely happy with how I did it first time, now. At least it's easy to take it out and make those changes, because it's on two plugs and two flying battery leads.  I do have some slight concern now and again over how a single fuse -- the one supplying the switches -- blowing basically switches off the whole truck, but it's realistically no worse than losing the wire off the back of the ignition switch, or a battery terminal coming lose, or whathaveyou. Guaranteed to happen at the worst possible time, though.  One thing though, if you are using a relay to control the ignition load you will need a diode in the ign warning light circuit, the current back feeding through the warning light can be enough to keep the relay in even with the ignition off. (I found out the hard way, yours might to be as easy to stall deliberatley as a morris minor!) That's something worth thinking about, but we'll have to see. Though even if it *does* hold the relay on, the worst that happens is that the 'fridge' supply pin on the trailer socket stays live for a bit. There should be enough other things on the ignition side of the main ignition relay that will mop that stray current up, though. As for deliberately stalling it, I suspect it won't be much more difficult, but probably not good for anything.  |
| |
-< Welder. Allegedly a mechanic. Bodger of Things >-
* 1958? Bedford RL - Progress: Glacial.
* 1994 Skoda Favorit - It's baaaaaaaack!
* 2018 Herald Classic - Gone!
|
|
Tamber
Part of things
  Shattered. Held together by spite and tape.
Posts: 338
Member is Online
|
|
|
|
Not to long ago I decided to convert all of the various external lights on my Land Rover Defender to LED versions. Having trawled through the Internet, I came across a brand trading as RUBBOLITE. It transpired that this brand is an American outlet, who manufacture lights, etc... for their military. Yeah, I've used Rubbolite/Trucklite stuff fairly often at work, but didn't really want to go fully LED on this because things like the modern equivalent of the Rubbolite Model 50 are very in-your-face about being LED and it just doesn't suit the look I'm after, in my not so humble opinion. If they were diffused to an even glow all over the face of the lamp, rather than a single sharp point, that would be much nicer. I know it can be done, work's big wrecker has a set of WAS W158 combination side-marker and indicator lamps down each side, with what they describe as "neon effect"... 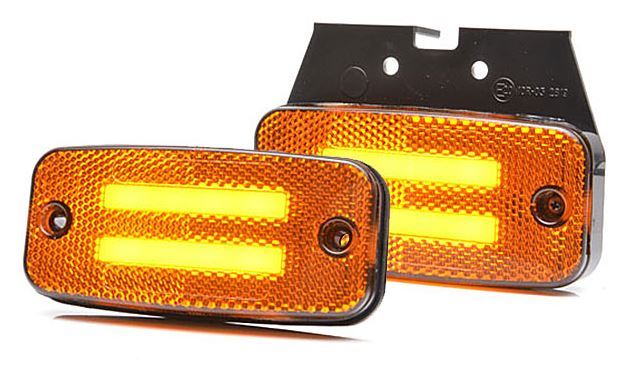 ...but I haven't yet found a product that does exactly what I'm after. For now, I'm hoarding old Model 50s when I remove them at work to fit other lamps.  I might well still change some of the bulbs to some of the classic-car-LEDs stuff where they match the colour of the old incandescent bulbs, down the line, though. This 3rd. section has been replaced with 13 core cable, wrapped in convoluted tubing for extra protection as used on HGV's, and fed directly to the rear-mounted waterproof junction box. All nice and simple; meets modern day standards; done and dusted. So the good old Bedford is following a trend. Yeah, vehicle electrics and electrical products have come on a long way since these things were first built. Which is a good thing, as far as I'm concerned! Long gone are the days of every switch needing to be rated to 30A, and running headlights through a cable that needs to dive in through the dashboard and a hard-worked switch before heading out to the lamp itself...  I've got upgraded headlights -- though they're still halogen -- in the Bedford, using 70W H4 bulbs in retrofit 7" headlight units, replacing the old sealed beams; shouldn't be much worse than a modern halogen truck headlight, and still looks pretty original. The rear lights are pretty standard multi-functions that are definitely a bit newer looking, but have been fitted onto damn near everything since ... well, I don't know when, but they feel like they've been around forever, and since they're still so popular and parts are so common for them, I feel it's a good option that doesn't look too out of place. A side note on convoluted tubing/kopex/whatever you want to call it, if you're running loose wires inside it anywhere: over time, if there's lots of vibration (say, it's fitted on a motor vehicle  ), the convolutions can abrade the insulation on the wires inside to the point that you can get random mystery shorts. Takes the best part of a decade of daily hard use to reach that point with side marker wiring along the chassis, though. (Oh, and the edges of the split, if you're using split-loom, give no quarter on insulation. Or fingers.) |
| |
-< Welder. Allegedly a mechanic. Bodger of Things >-
* 1958? Bedford RL - Progress: Glacial.
* 1994 Skoda Favorit - It's baaaaaaaack!
* 2018 Herald Classic - Gone!
|
|
|
|
|
|
|
A side note on convoluted tubing/kopex/whatever you want to call it, if you're running loose wires inside it anywhere: over time, if there's lots of vibration (say, it's fitted on a motor vehicle  ), the convolutions can abrade the insulation on the wires inside to the point that you can get random mystery shorts. Takes the best part of a decade of daily hard use to reach that point with side marker wiring along the chassis, though. (Oh, and the edges of the split, if you're using split-loom, give no quarter on insulation. Or fingers.) Thank you for the information. In my own case the 3rd section being 13 core cable, contained in its own outer insulation, the convoluted tubing was purely to avoid the galvanised finish on the inside of the chassis-leg chaffing the 13 core outer covering. Hopefully I shall not be plagued by too many problems. I also understand your wish to keep any lighting conversions looking period. In my own case I merely wanted to update my LR lights, and I'm afraid I am not too bothered about modern updates, within reason that is. Keep up the good work with your project; I look forward to your progress reports, which I read with great interest. |
| |
|
|
Tamber
Part of things
  Shattered. Held together by spite and tape.
Posts: 338
Member is Online
|
|
Apr 11, 2021 23:33:35 GMT
|
I might just have to built it all up with the old-school incandescent light housings, and put in some decent LED bulbs. Always an option, if I get sick of chasing burnt out bulbs.  In the meantime, I tore apart a perfectly working fuse-box because I was sick of how p!iss poor it looked with the bus-bars on the front and instead built it using some much nicer relay-holders that I only found pretty recently! 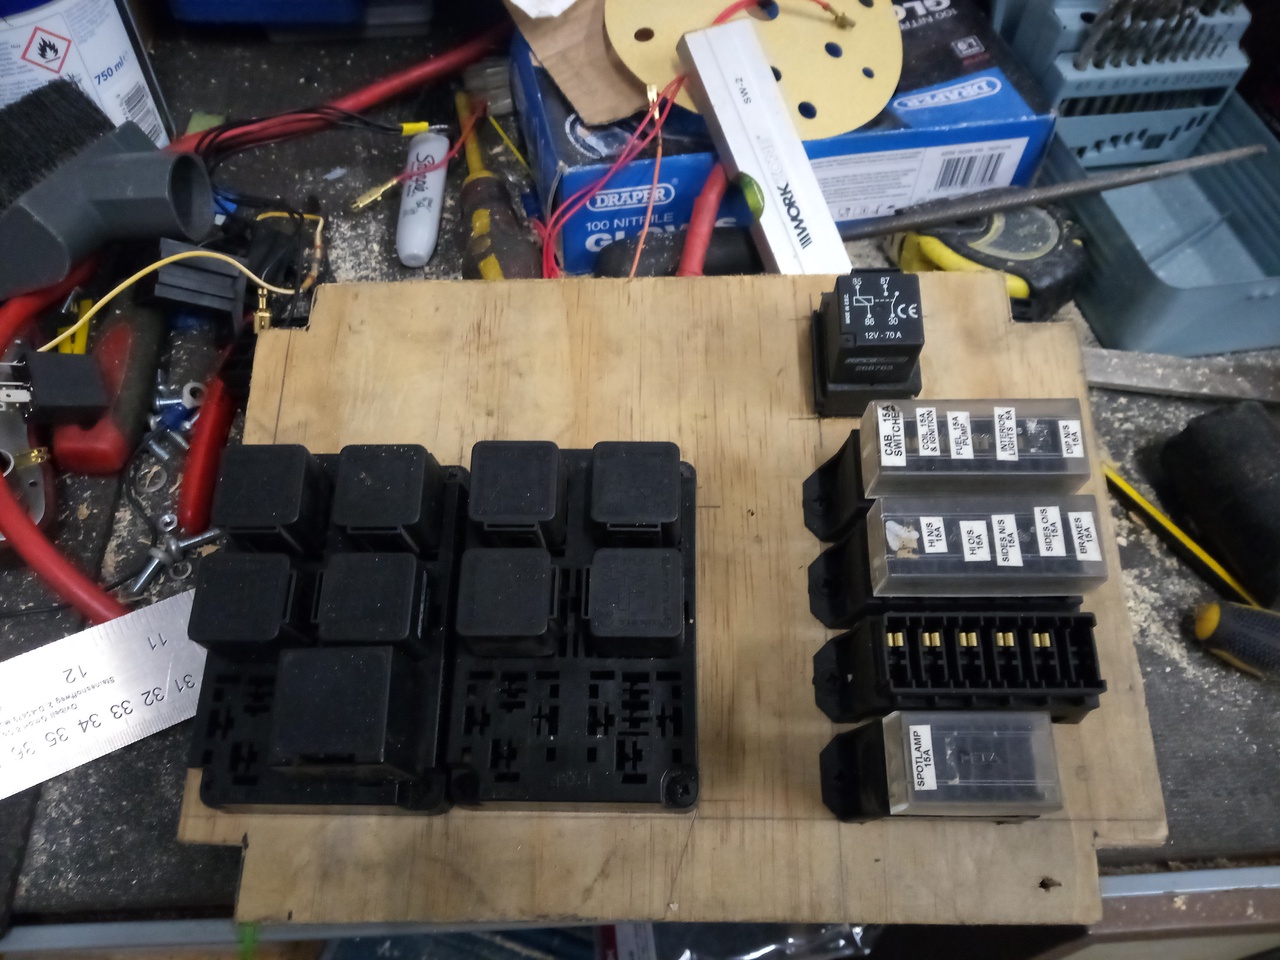 I did have to rearrange the relays slightly (swapped & renamed two) because it has a "flasher" relay position that only has 4 terminals (Corresponding to where Tmls 30, 85, 86, and 87 would be on a standard automotive mini-relay. But my flasher relay has them in the positions that would be 85, 86, 87, and 87a. Of course.) but that's no big deal while I'm pulling the whole thing apart anyway. I think I am going to fit in the two "afterthought" micro-relay holders too, even though I technically have enough slots in the relay holder blocks to have everything on them, because I want to leave room for an additional relay or two if needed. Expansion room is always important. And it's all going to fit into the same Gewiss box as I had before. (If it doesn't, then I'll come up with something else, I guess?) Also, added some O-rings to the valve stems because it was positively oozing down them before; and while some oil on the valve stems is important for lubrication, there was quite a bit more than I'd like. Didn't want to go to the extent of umbrella seals, though, because I don't want to starve them of lubrication. 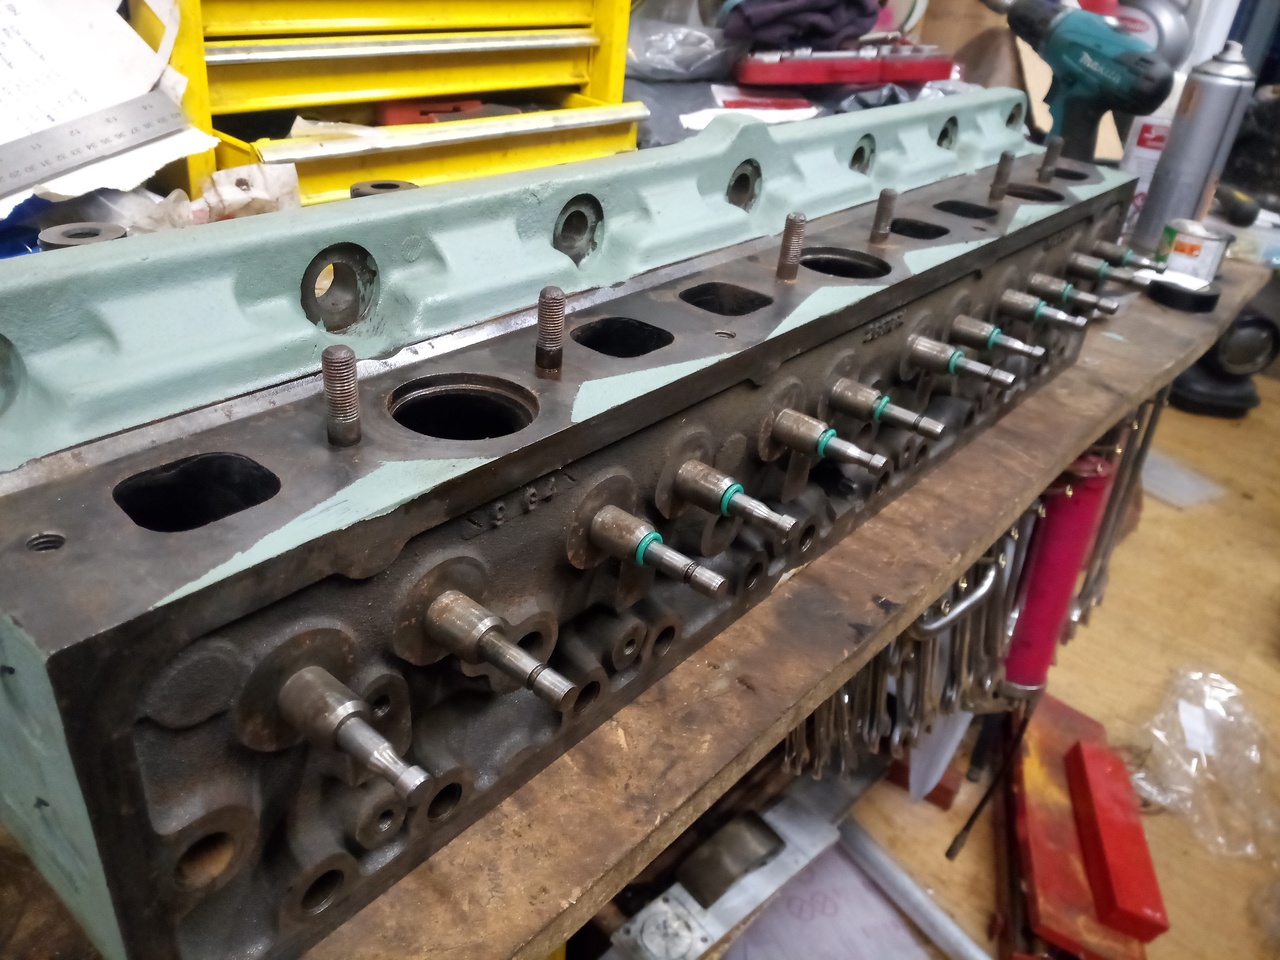 Shown here with two valves sans o-ring, because I had a moment of genius and only bought a 10pk of the o-rings. I only realised I'd screwed up when I got to those last two valves, then I had to wait a week for another pack. 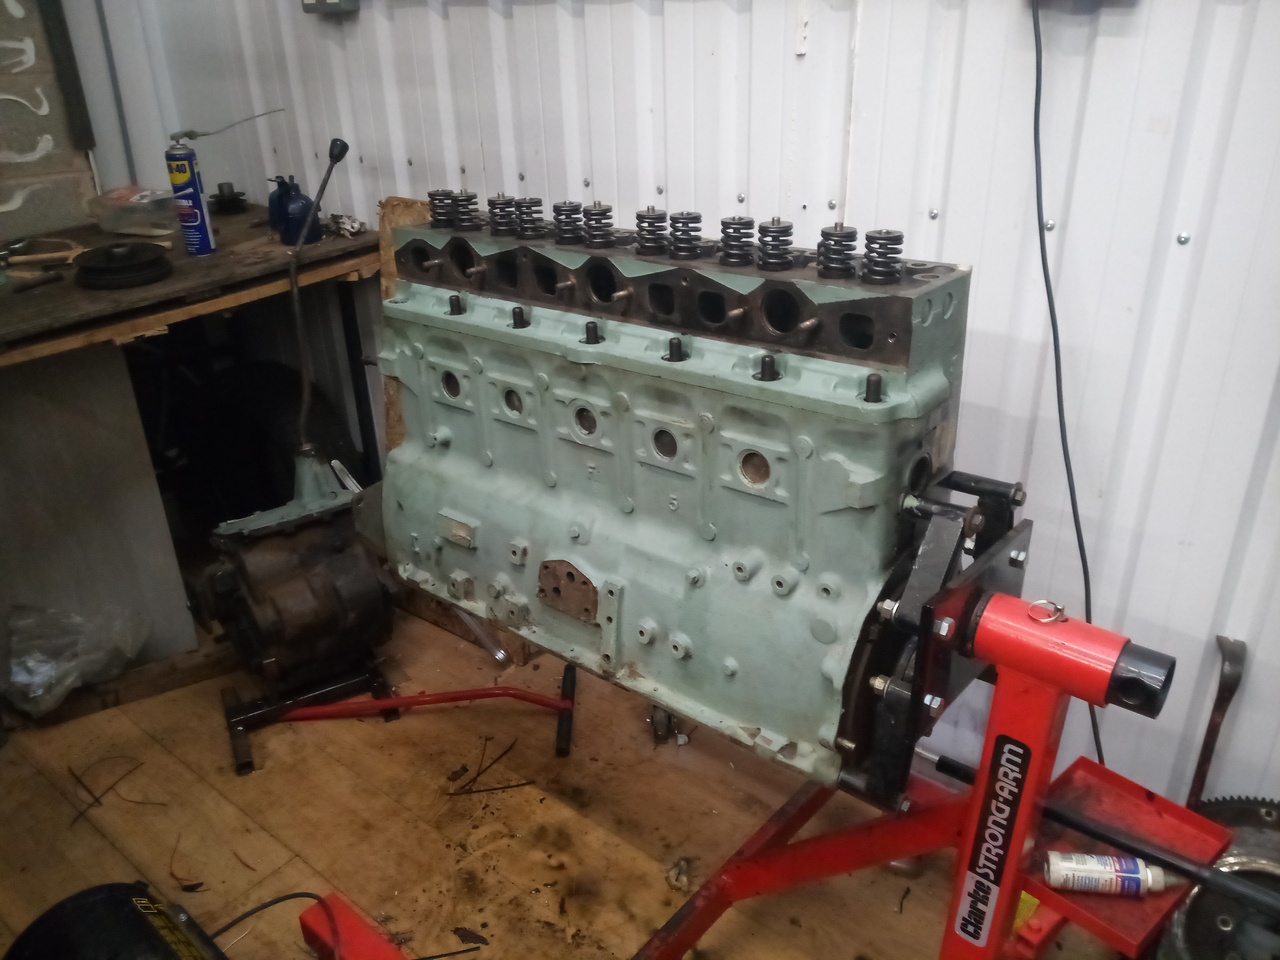 Valve springs all fitted, head just plopped onto the block so I can get some of my workbench space back. Waiting on O-rings for the coolant ports at the back of the block, and other bits and pieces I've ordered while wasting my one decent weekend due to a blinding headache that started Saturday afternoon and ran through til 4pm Sunday. Ah well. |
| |
-< Welder. Allegedly a mechanic. Bodger of Things >-
* 1958? Bedford RL - Progress: Glacial.
* 1994 Skoda Favorit - It's baaaaaaaack!
* 2018 Herald Classic - Gone!
|
|
|
|
|
Apr 12, 2021 13:08:40 GMT
|
|
Surprised that engine stand hasn't sagged yet with that big lump on it!
Steps forward and all that.
|
| |
|
|
Tamber
Part of things
  Shattered. Held together by spite and tape.
Posts: 338
Member is Online
|
|
Apr 12, 2021 19:03:56 GMT
|
Surprised that engine stand hasn't sagged yet with that big lump on it! It did! That's why it's got the extra reinforcing brace!  I never did find out how much it'd sag, because it followed the jack all the way down, and that was entirely far enough for me. Steps forward and all that. All I can do! Might not be as fast as I'd like, but as long as I keep going forwards, I'll get somewhere. Current distraction is trying to get my car to the point it can pass an MOT in May. (Few rust-holes to repair, and figure out why it's got a misfire at part throttle. Just barely off-idle is fine, and absolutely flat out is fine. At least, beyond the speeding tickets I'd get in anything more than 1st gear. Ah well.) |
| |
-< Welder. Allegedly a mechanic. Bodger of Things >-
* 1958? Bedford RL - Progress: Glacial.
* 1994 Skoda Favorit - It's baaaaaaaack!
* 2018 Herald Classic - Gone!
|
|
Tamber
Part of things
  Shattered. Held together by spite and tape.
Posts: 338
Member is Online
|
|
Apr 13, 2021 22:09:32 GMT
|
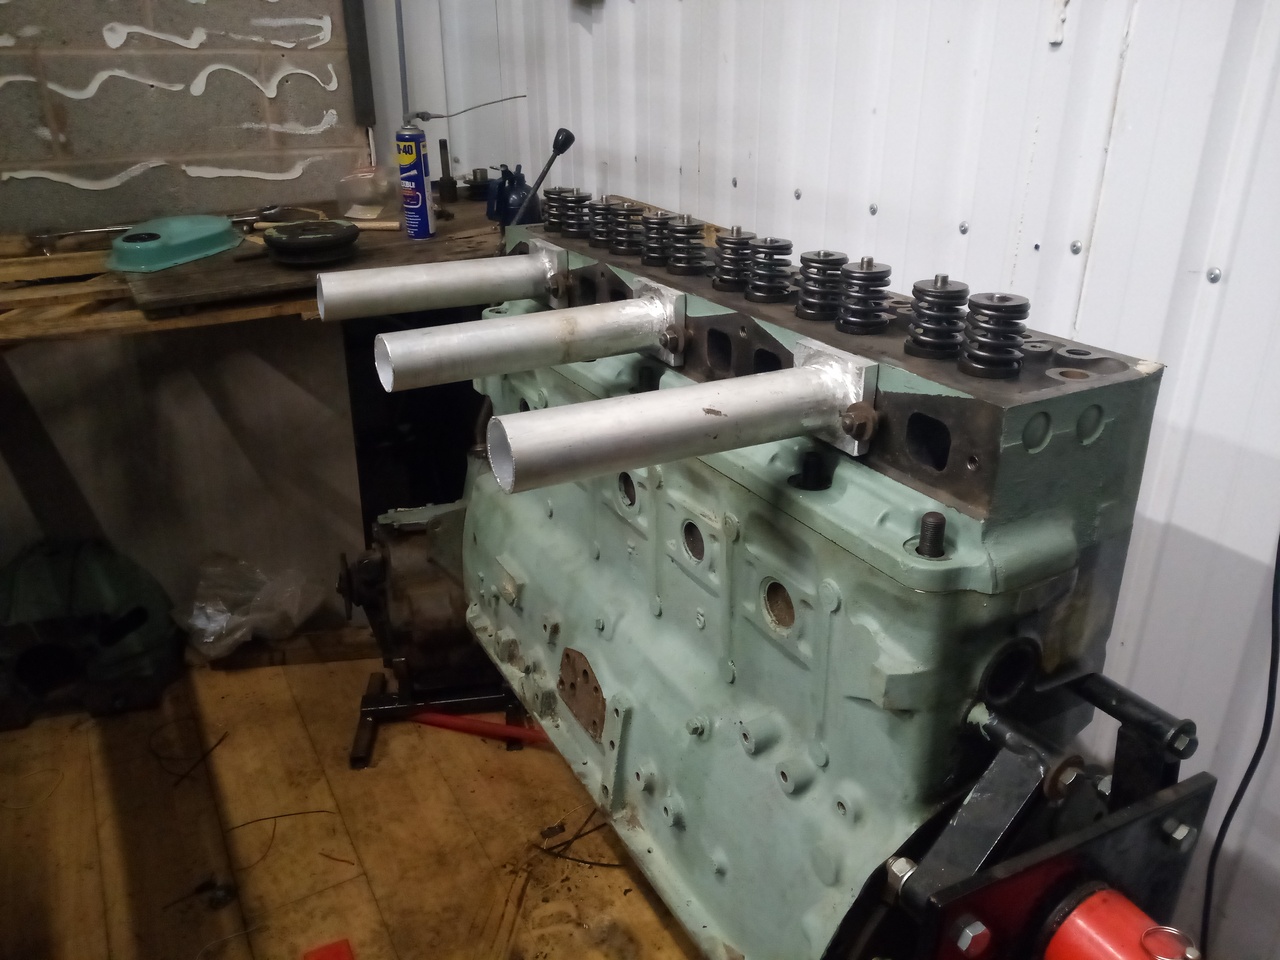 Phase one (Runners) of the new inlet complete. Not yet sure how I want to proceed from there. Noodling will continue until I come up with something I like. Runner length hasn't yet been determined beyond "cut the length of tube I had into 3 equal lengths with a little extra left over, just in case" |
| |
-< Welder. Allegedly a mechanic. Bodger of Things >-
* 1958? Bedford RL - Progress: Glacial.
* 1994 Skoda Favorit - It's baaaaaaaack!
* 2018 Herald Classic - Gone!
|
|
|
|


 .), so that'll be part of the engine rebuild vid, I guess, when I get around to that.


 I never did find out how much it'd sag, because it followed the jack all the way down, and that was entirely far enough for me.