Tamber
Part of things
  Shattered. Held together by spite and tape.
Posts: 337
Member is Online
|
|
Apr 28, 2020 23:17:53 GMT
|
I wouldn't exactly say "slaving away"... there's a reason it's taken as long as it has, to get to the point I am!  Anyway, in the meantime: I've finished painting the (front of the) bumper. 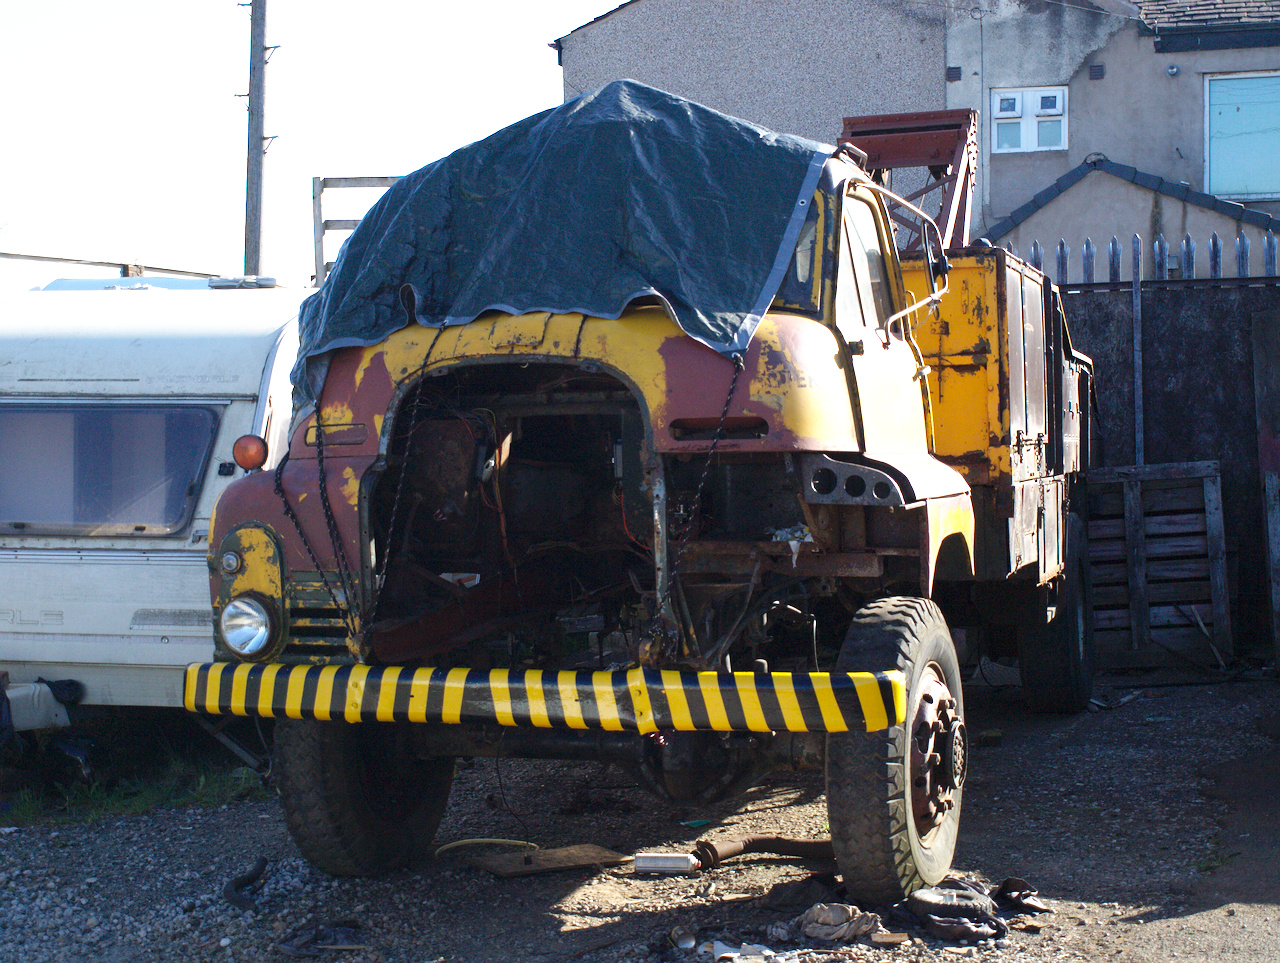 Not perfect, but ...realistic? (There's a few small spots where flakes came off when I removed the masking, and there's a couple of little bits where primer bled under the masking. Either way, it's plenty good enough.) And then removed the other wing, so clean-up and painting can continue. Lots of scraping and scrubbing going on, and annoyingly I didn't make a big enough push to get it cleaned up and in primer before the rain arrived. Oh well. 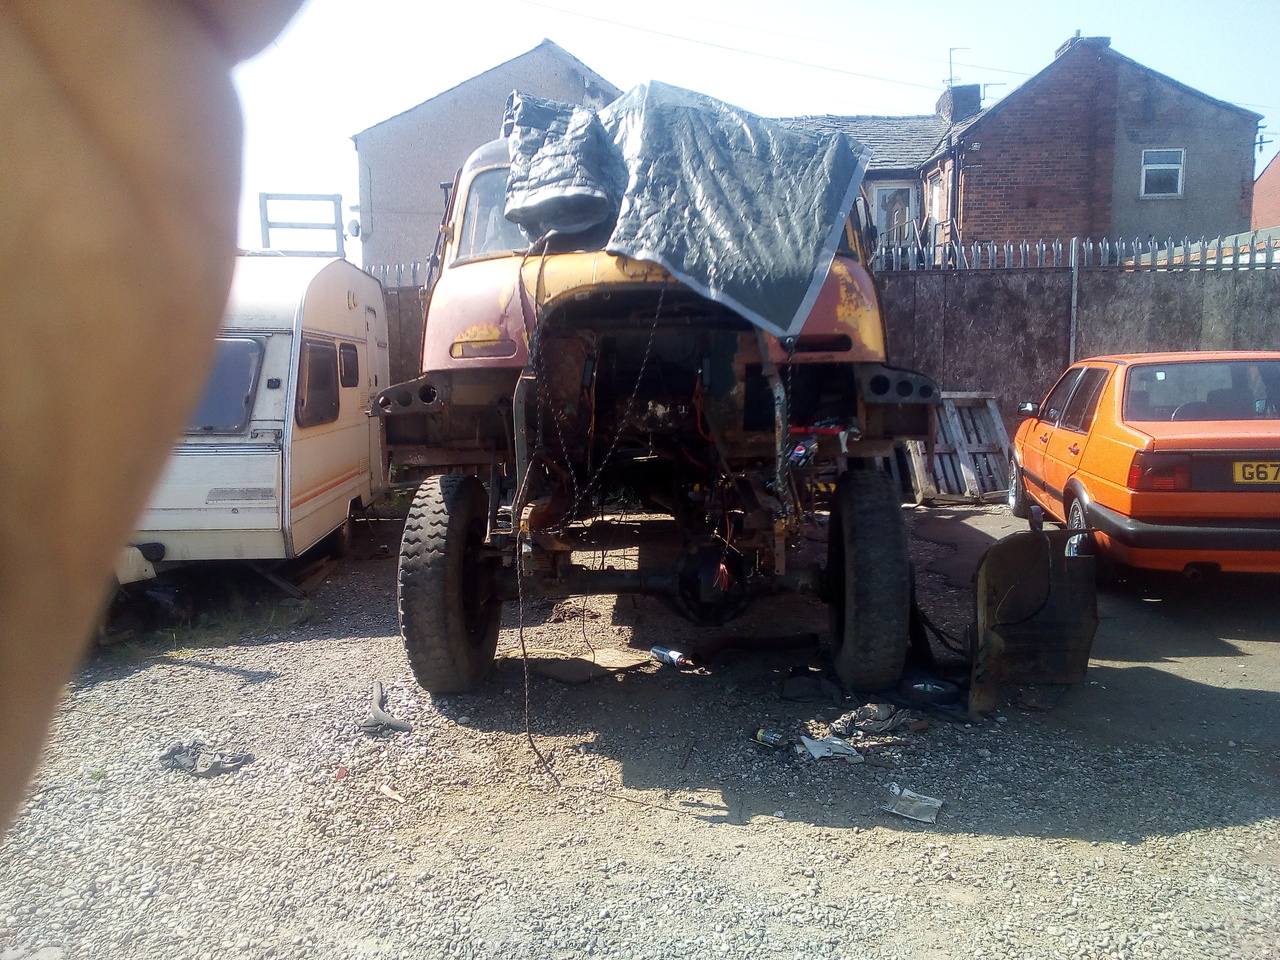 I can at least get on with cleaning & painting the back-side of the panels I've removed, in the unit. I've also got a little fabrication to do on the bracket that holds the hazard switch/RPM gauge; partially because I was a little enthusiastic removing metal for the cutouts, so I need to re-add some just to improve the fit, but mostly because I need to add a place for the indicator switch to go without it looking like a complete afterthought. I have an idea for how I want to do it, and it involves turning that bracket into a 'pod' by enclosing the sides rather than it just being a flat plate with some holes in. It remains to be seen how well it will work out, but I'm sure I can come up with something. Could've started on that today, but wasn't really in the mood to set up the welder and get all fab. So I reconnected the intermittent wipe on the car, and went home. (...I may have even stopped off and given the car its annual wash on the way.) |
| |
-< Welder. Allegedly a mechanic. Bodger of Things >-
* 1958? Bedford RL - Progress: Glacial.
* 1994 Skoda Favorit - It's baaaaaaaack!
* 2018 Herald Classic - Gone!
|
|
|
|
|
|
|
|
|
Apr 29, 2020 21:27:41 GMT
|
|
I remember reading an old Warlord/Commando or similiar magazine in which a gentleman avoids all sorts of scoundrels, ne'er do wells and others of a similiar ilk while test driving a truck just like yours.
The truck drove through everything with aplomb. Hedges, walls and more.
I was very impressed.
Enjoying your thread sir and keep it up.
|
| |
|
|
Tamber
Part of things
  Shattered. Held together by spite and tape.
Posts: 337
Member is Online
|
|
|
|
Not mine. Belongs to a friend of my brother; and it's really quite nice. My comedy conveyance is a different VAG product: a tatty L-reg Skoda Favorit in (mostly) 'green'.  Anyway, continuing the... uh... whatever it was I was doing with the truck. I've cleaned and painted (red oxide) a few little more bits of chassis. But in slightly bigger items... (Not my bike in the background.  ) 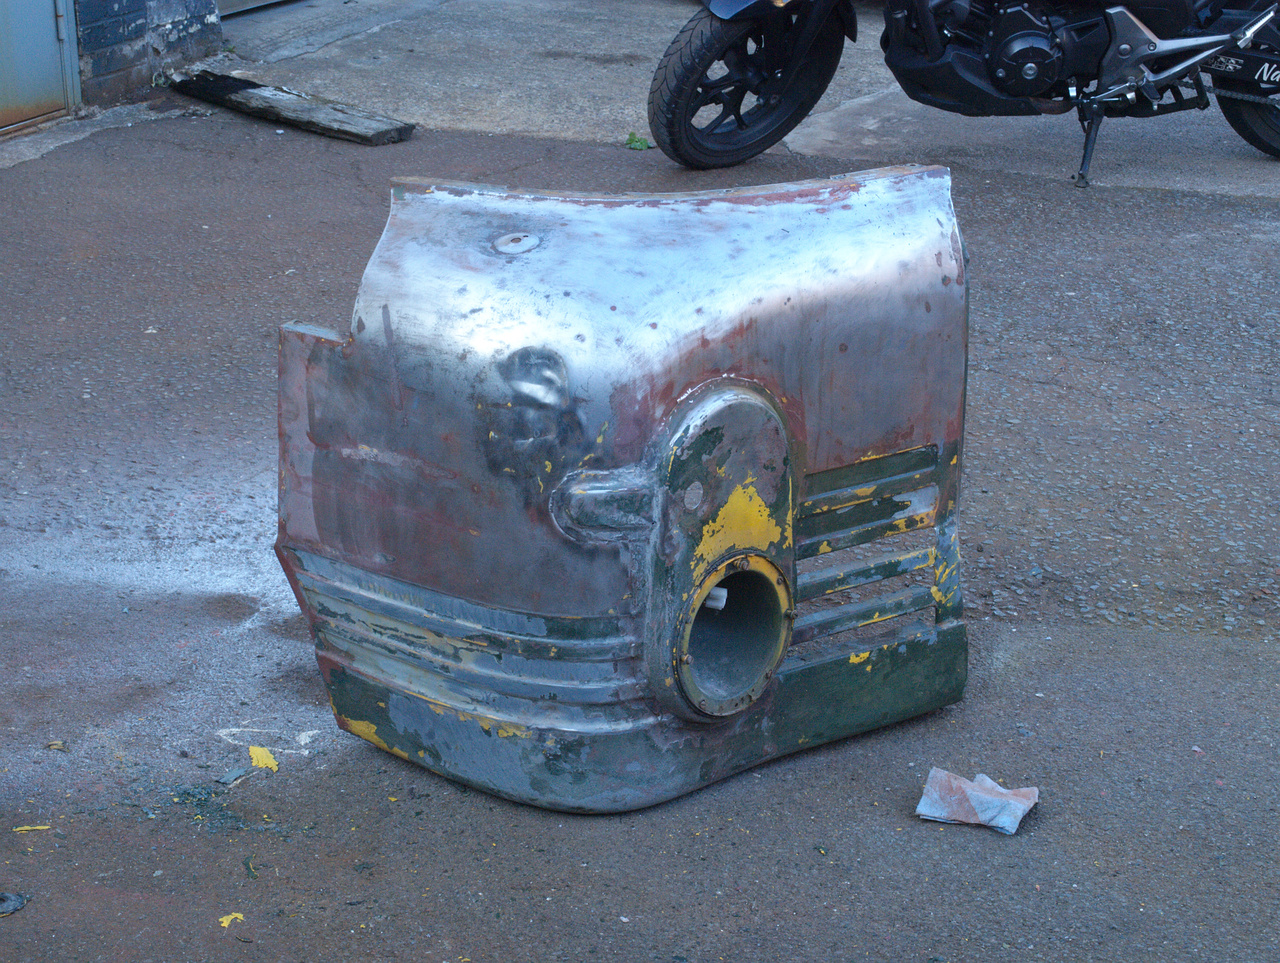 Quite impressed with just how solid all that metal is. I was a little worried when I found the body-filler patches, but they turned out to only be filling dents rather than rot-holes. I like the dents. They give me something to ponder over... What did they hit? Who done it? That sort of thing. 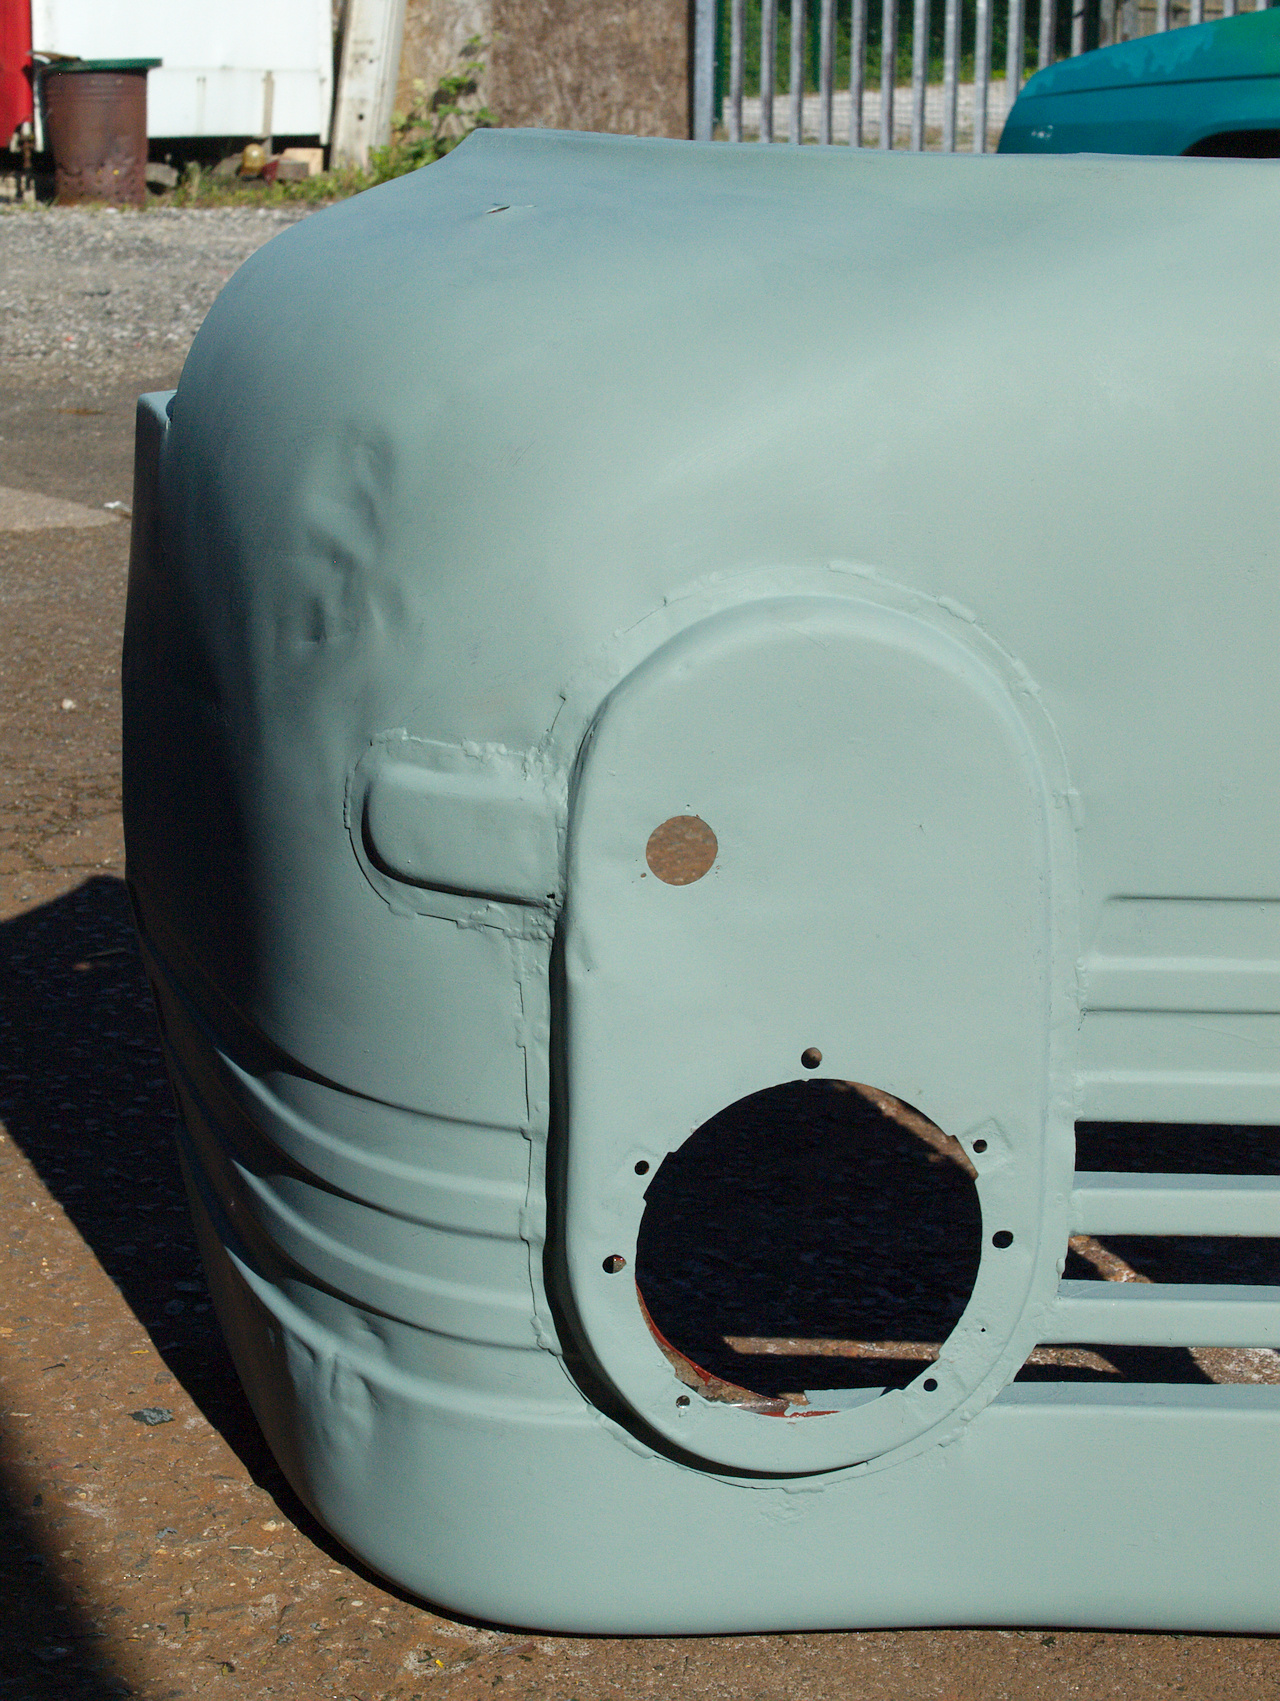 That nice etch-primer really brings out all the dents and historic welding, doesn't it? Yes, I've just spotted that bit on the inside of the headlight ring that I've missed.  And, as a comparison to the other side: 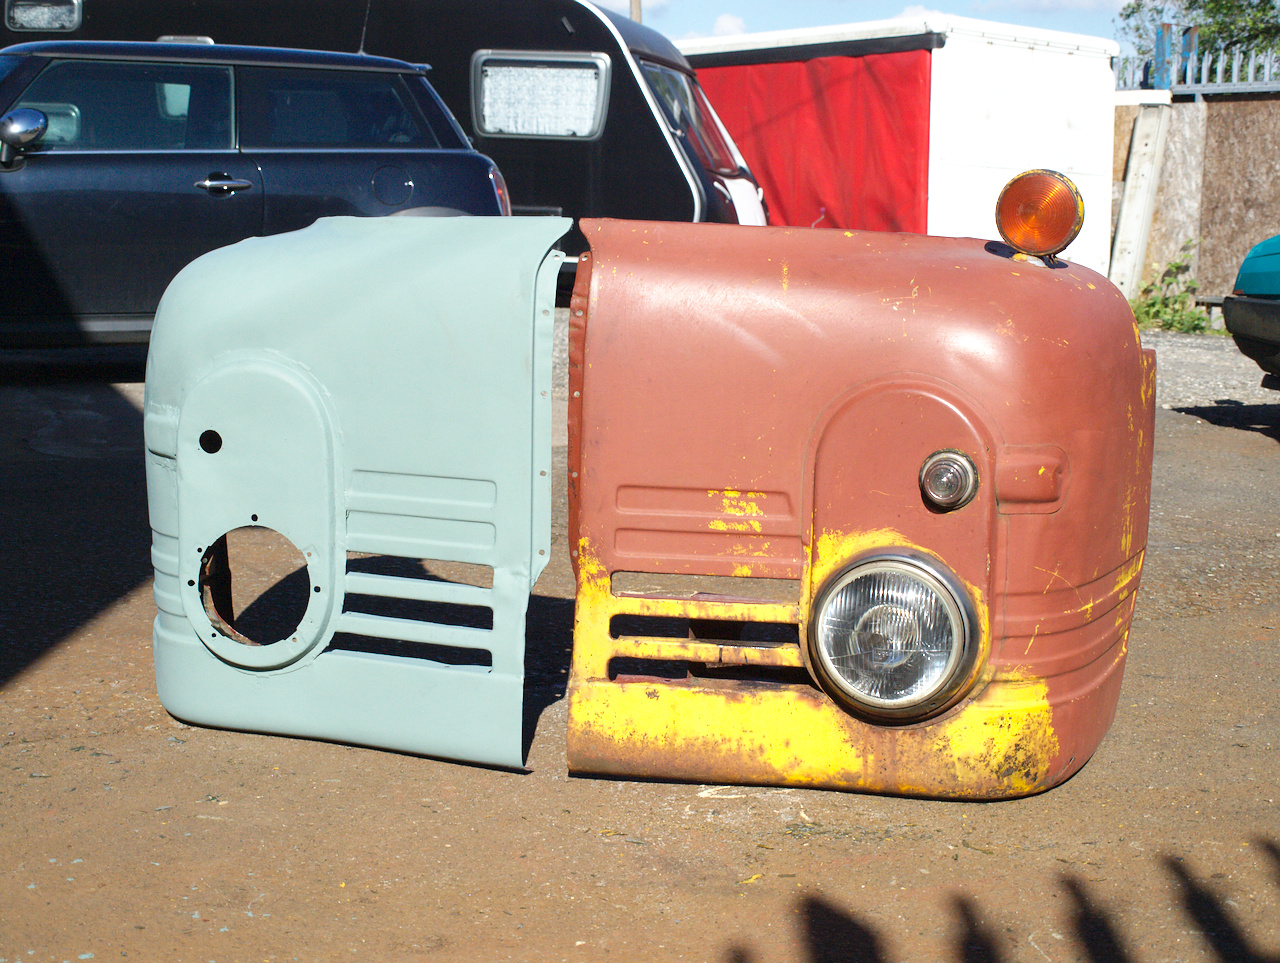 Long way to go before they can be refitted, though, but today I felt like doing that so I did it. (The weather was just right for it. And it's looking like tomorrow is going to be another good one, so I'll try get the nearside wing stripped, prepped & in primer too.) |
| |
-< Welder. Allegedly a mechanic. Bodger of Things >-
* 1958? Bedford RL - Progress: Glacial.
* 1994 Skoda Favorit - It's baaaaaaaack!
* 2018 Herald Classic - Gone!
|
|
|
|
|
|
|
|
I really like the way they left the stitch welds alone on the headlight surround. dressed back and painted!...its rugged.
JP
|
| |
I know its spelled Norman Luxury Yacht, but its pronounced Throat Wobbler Mangrove!
|
|
|
|
|
|
|
|
That looks dangerously like progress. Well done!
It also looks really good. Gives you a boost for the rest of the project doesn't it.
|
| |
|
|
Tamber
Part of things
  Shattered. Held together by spite and tape.
Posts: 337
Member is Online
|
|
|
|
It really does. Surprising how getting things to be all one colour makes it feel like something has been achieved. So, following on from that, and while the weather's still nice...  *melts* 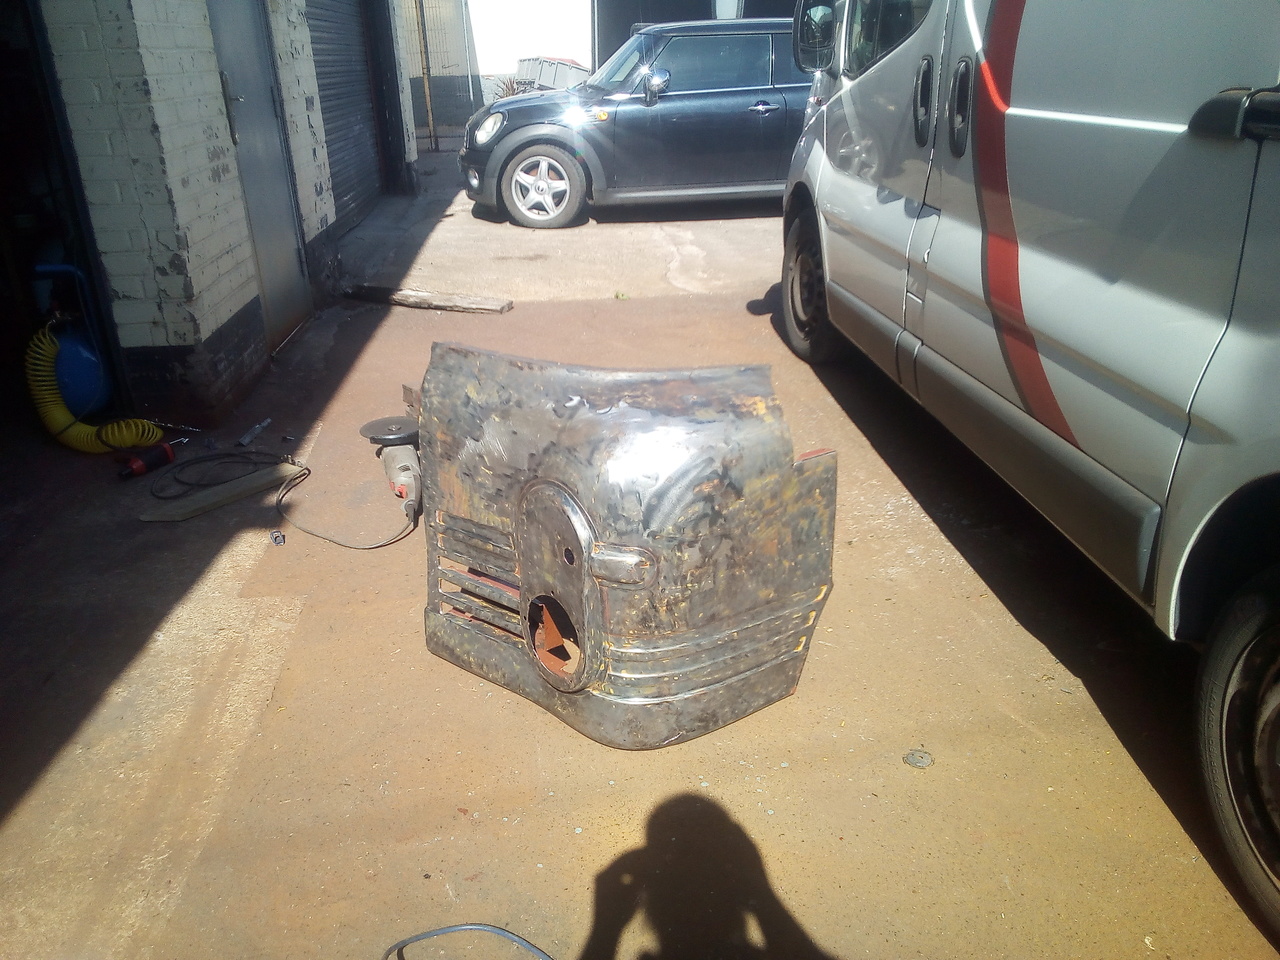 This panel took a lot longer to strip than I anticipated. It looks to be a replacement panel from the truck's commercial era, since it's not got the 4 layers of flaking Deep Bronze Green under the yellow; it's just a layer of black, and then the yellow, which has adhered really quite well. The only slight issue was a couple of pin-holes around the headlight, where the inside wasn't painted: 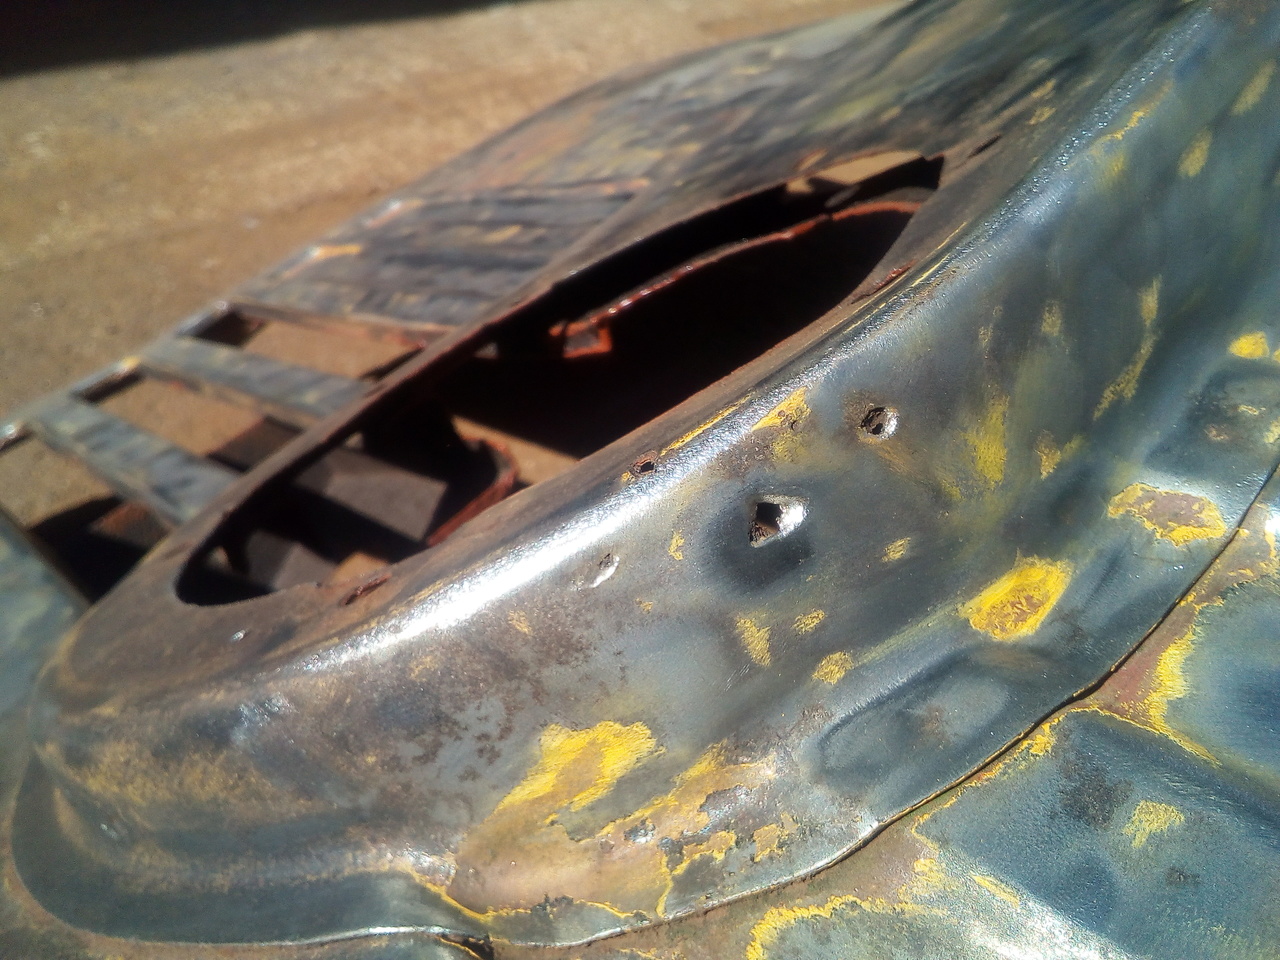 Easily-enough fixed, though; and then on with the funny 'grey' etch primer. Probably could've blended that weld in a little more, and made it disappear completely. But I didn't. 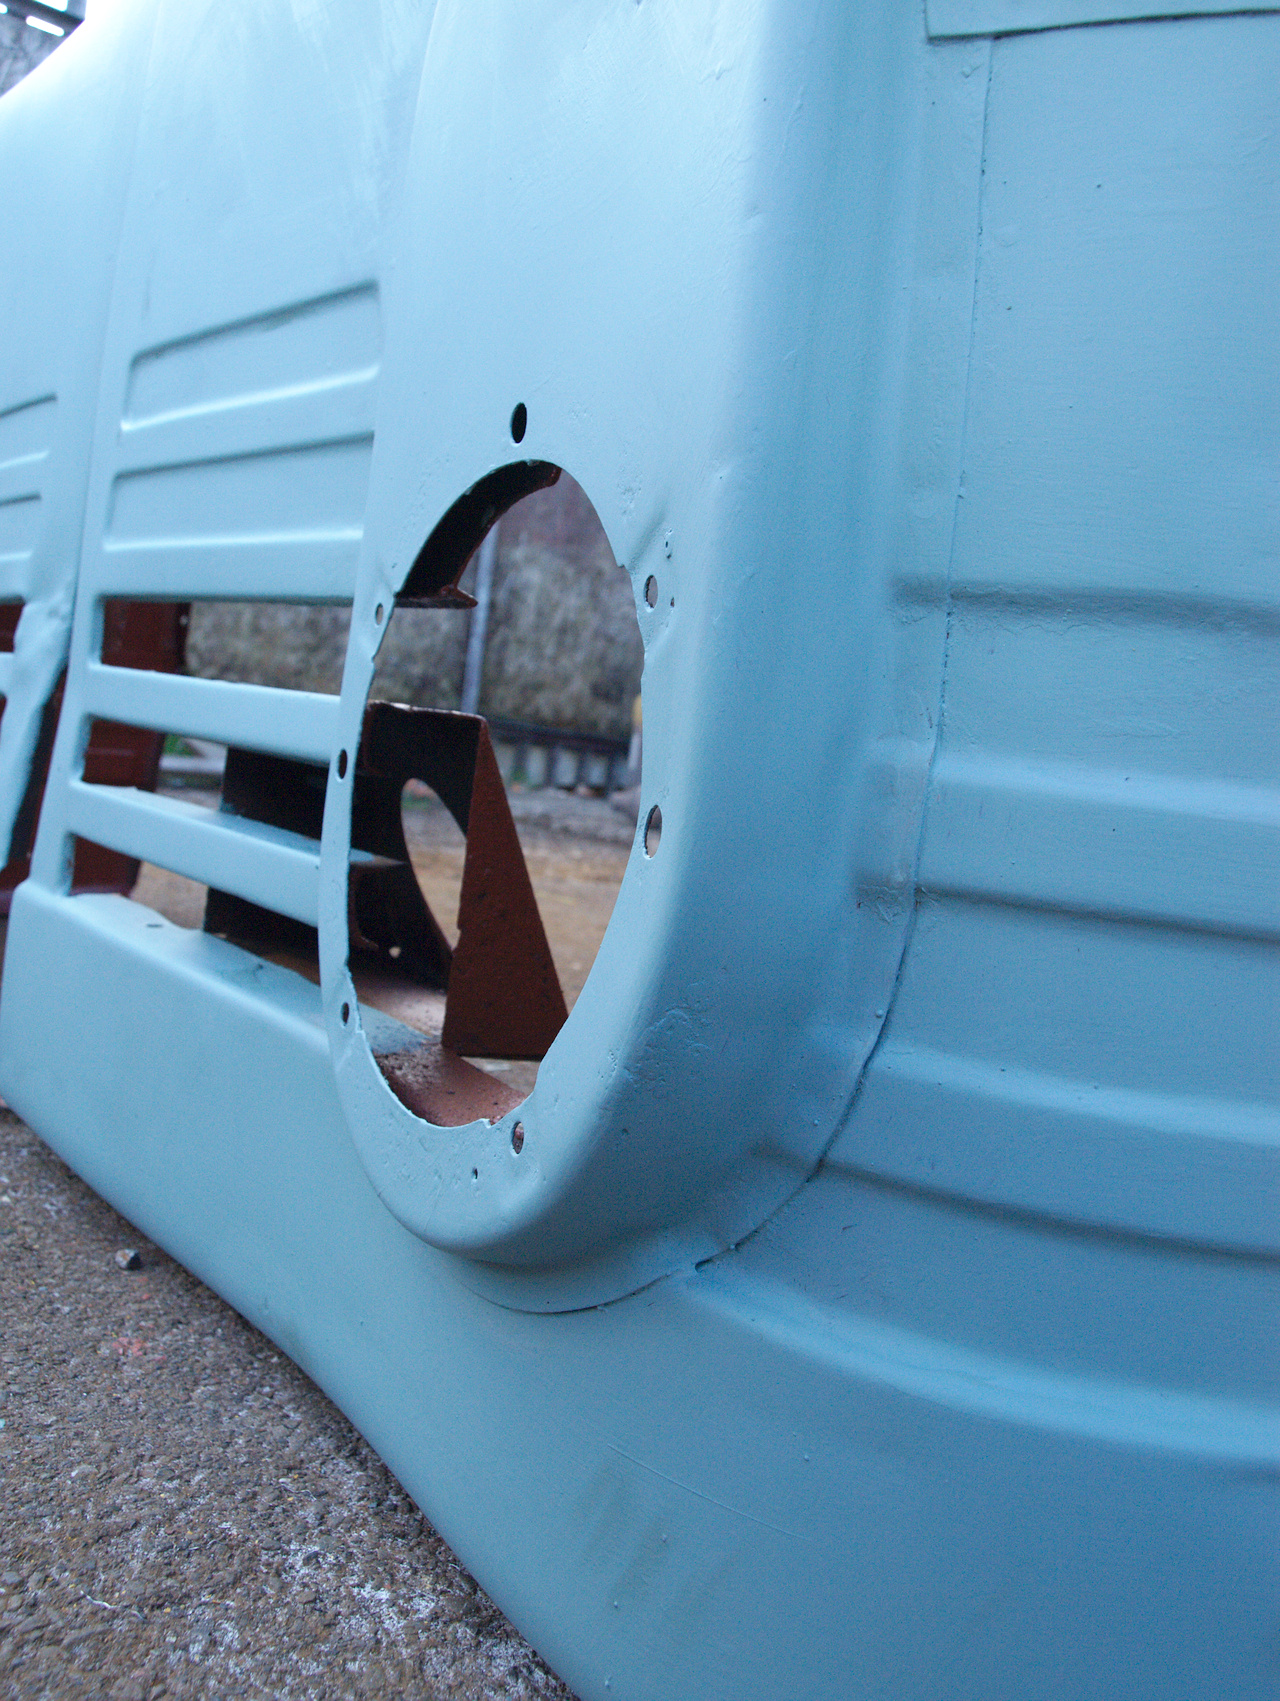 Matched set! One with that additional panel spot-welded on, as expected for a factory part, the other with it welded on by a workshop. Presumably it had a bit of an oopsie...  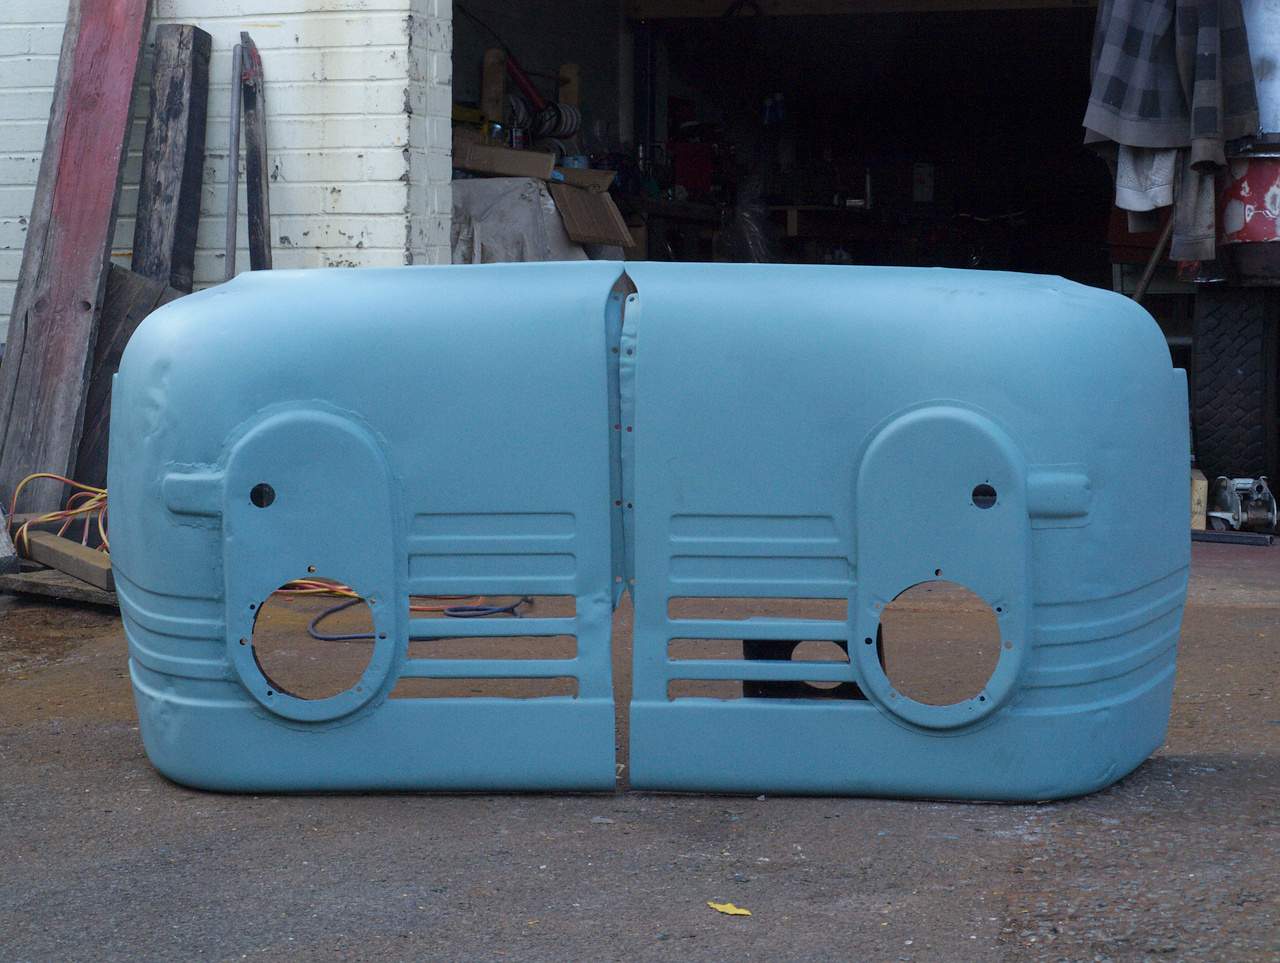 |
| |
-< Welder. Allegedly a mechanic. Bodger of Things >-
* 1958? Bedford RL - Progress: Glacial.
* 1994 Skoda Favorit - It's baaaaaaaack!
* 2018 Herald Classic - Gone!
|
|
|
|
|
|
|
|
So, er, silly question but...
Did they bother to blend the the seam between the light pod and the wing? Or did they just not bother because it's a whopping great big truck?
|
| |
|
|
Tamber
Part of things
  Shattered. Held together by spite and tape.
Posts: 337
Member is Online
|
|
|
|
I'm guessing it was a function over form repair; no need for it to look pretty, just stop the lights falling off.  Can't remember whether it was under green or yellow paint; if the former, then it'd be a military workshop that did it and I suspect they wouldn't be too worried about it looking pretty as long as they could just slap some green paint over it and call it good. |
| |
-< Welder. Allegedly a mechanic. Bodger of Things >-
* 1958? Bedford RL - Progress: Glacial.
* 1994 Skoda Favorit - It's baaaaaaaack!
* 2018 Herald Classic - Gone!
|
|
Tamber
Part of things
  Shattered. Held together by spite and tape.
Posts: 337
Member is Online
|
|
|
|
Anyway, speaking about not pretty, I'm back again. Since the last post, I have: Finished up the tacho/hazard/indicator pod.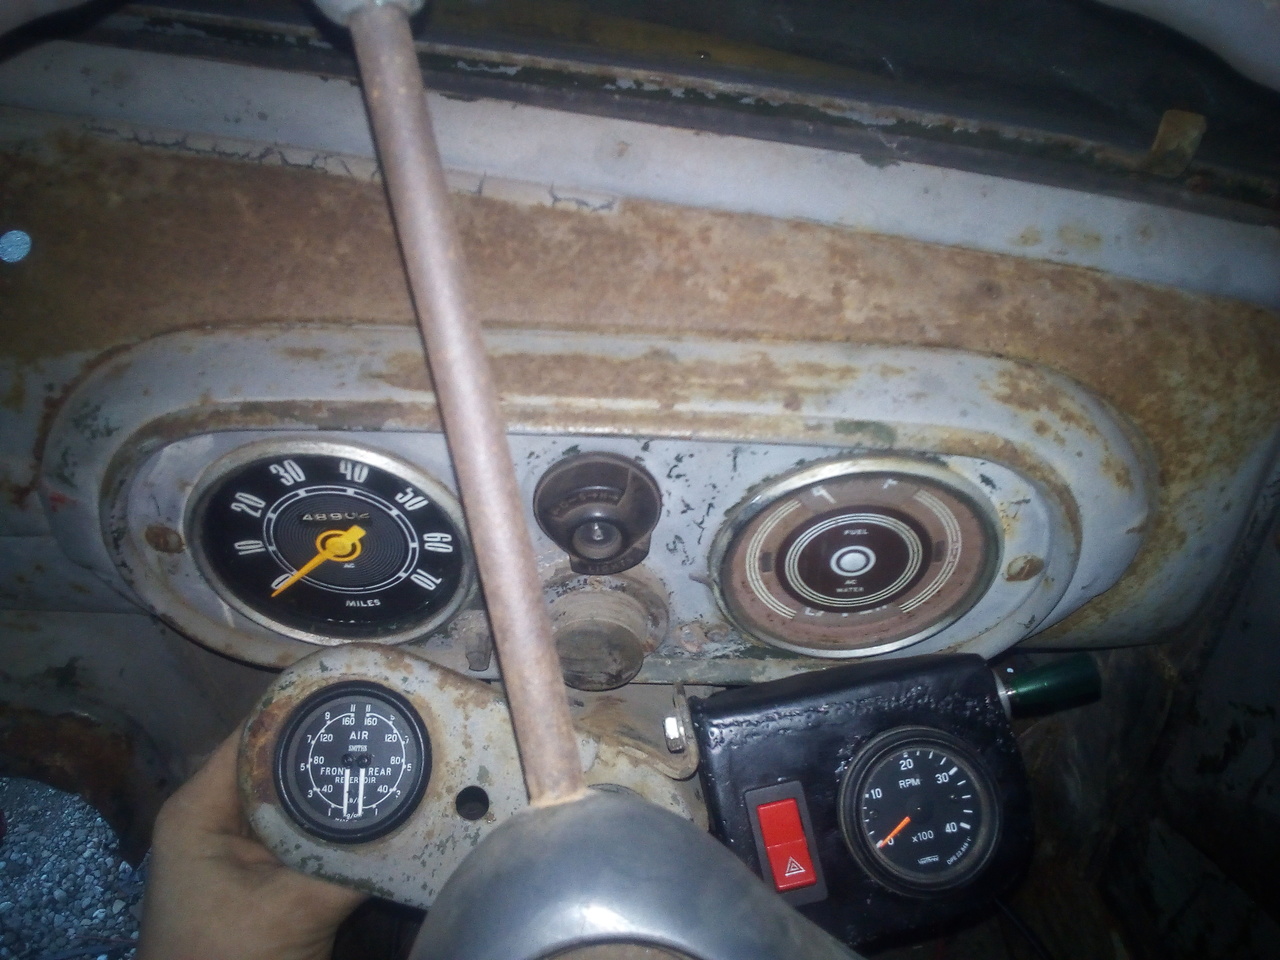 It's not perfect, but perfectly functional and I can live with that for now. I do need to make an adapter for the original air-gauge mount, to take it from the oddball size down to 52mm for that nice twin-circuit air gauge. Also need to add in a little warning lamp for the hazards somewhere but that shouldn't be too much of a problem. (The switch isn't illuminated, and the indicator switch doesn't -- and can't -- flash with the hazards.) Started some paint/rust stripping, and priming inside the cab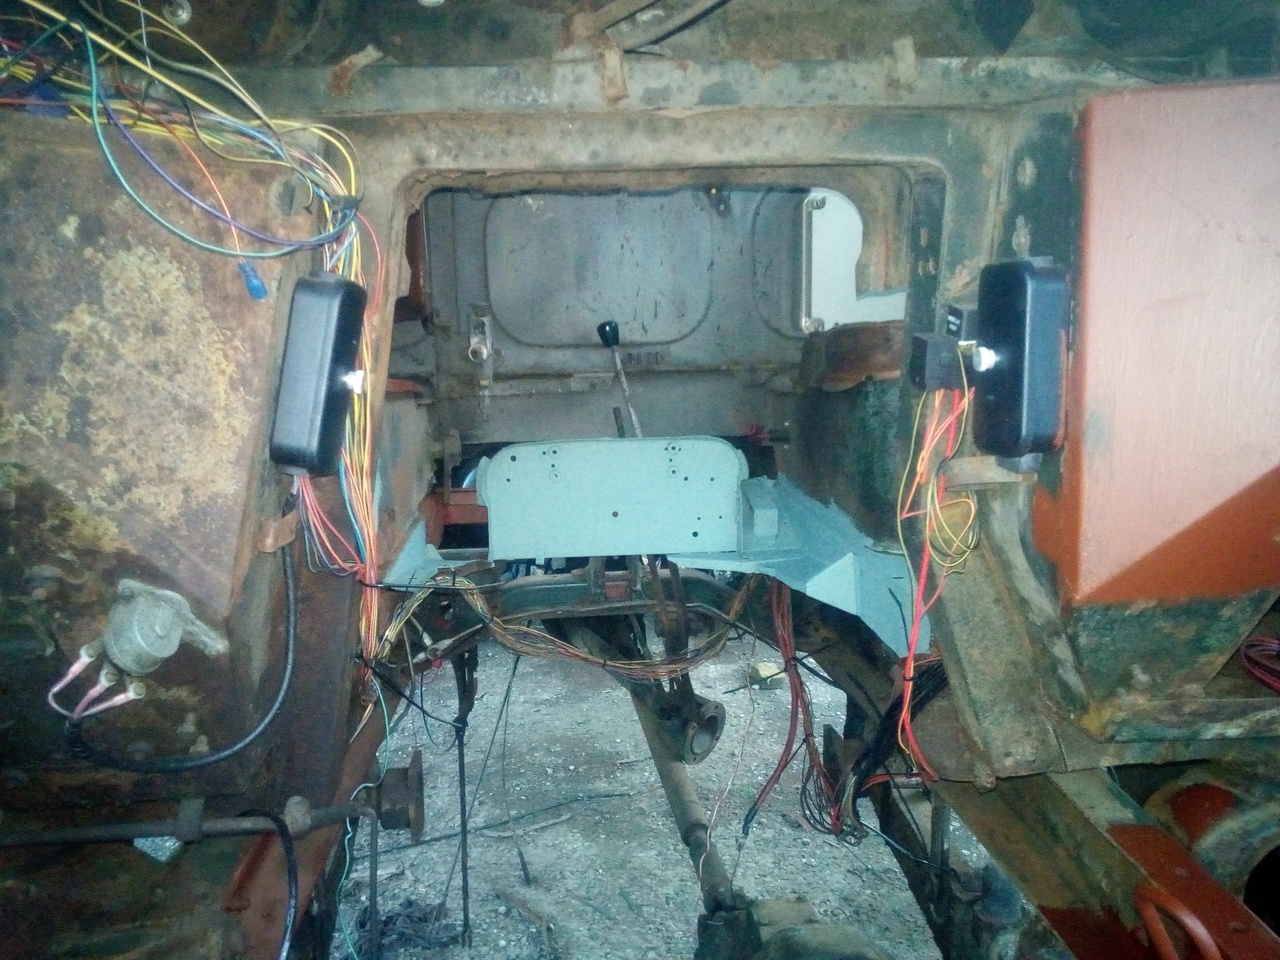 I was going to just use the grey primer I have, but I had some of the etch primer already out and left over from giving the front wings another coat. The floors have since got a little red-oxide because, again, I had some of that out from painting other things. The grey primer would be more ideal, since I plan on the inside of the cab being a grey colour anyway, but hey. It's got paint on it, that should slow the rust a touch. Got the first piece of new floor in!...okay, it's only the bit immediately behind the battery-box, but it counts. Made in two parts so that I could make a neat(ish) job of putting a hole in for the wiring to pass through. Welds on the side of the battery box still need dressing back; the picture makes them look worse than they are. And they don't look all that pretty anyway; having to do chain-of-tacks doesn't really give the flux-core time to warm up and do its job, so they look porous as all hell. 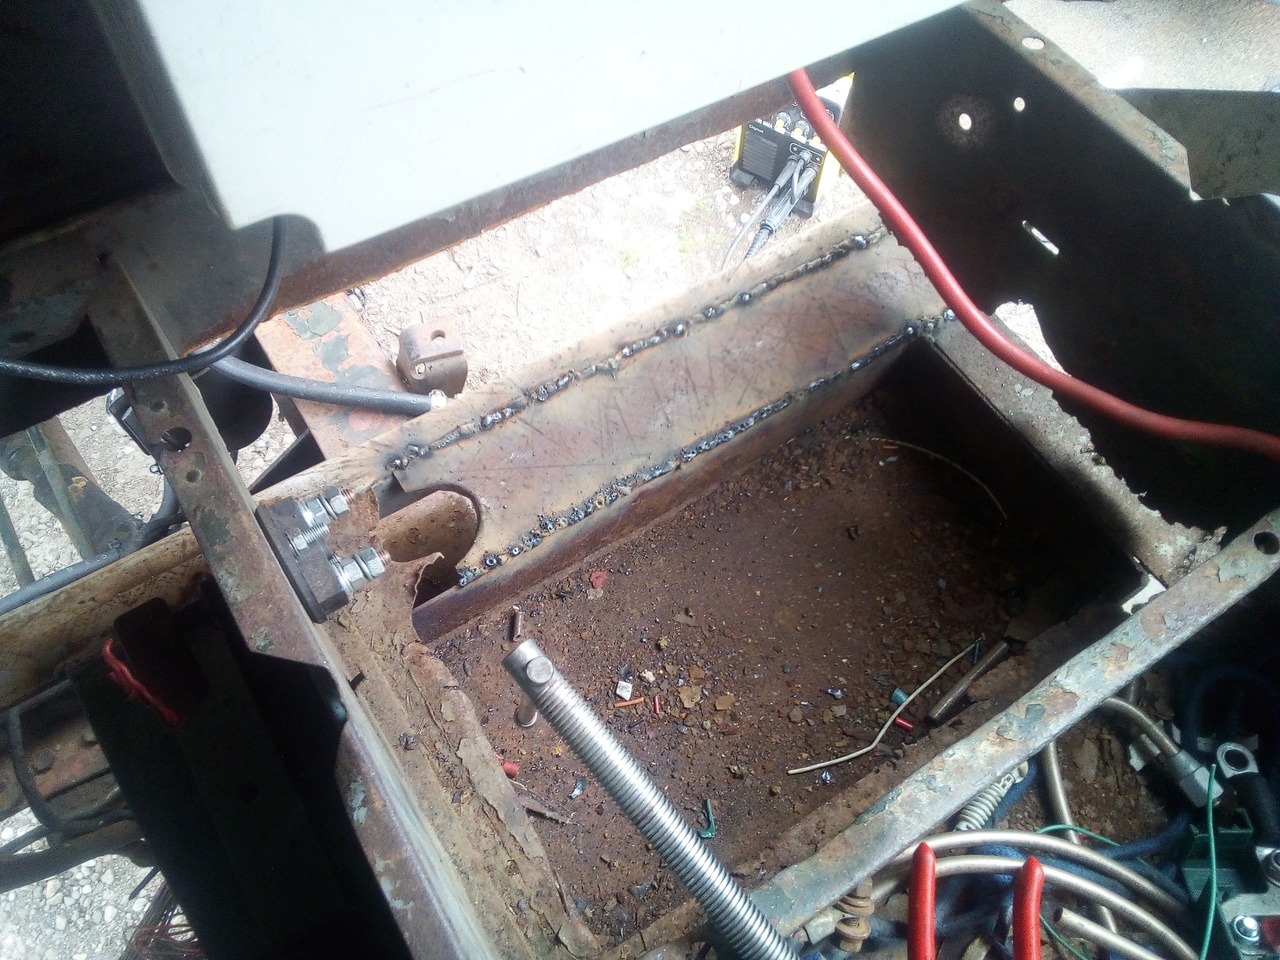 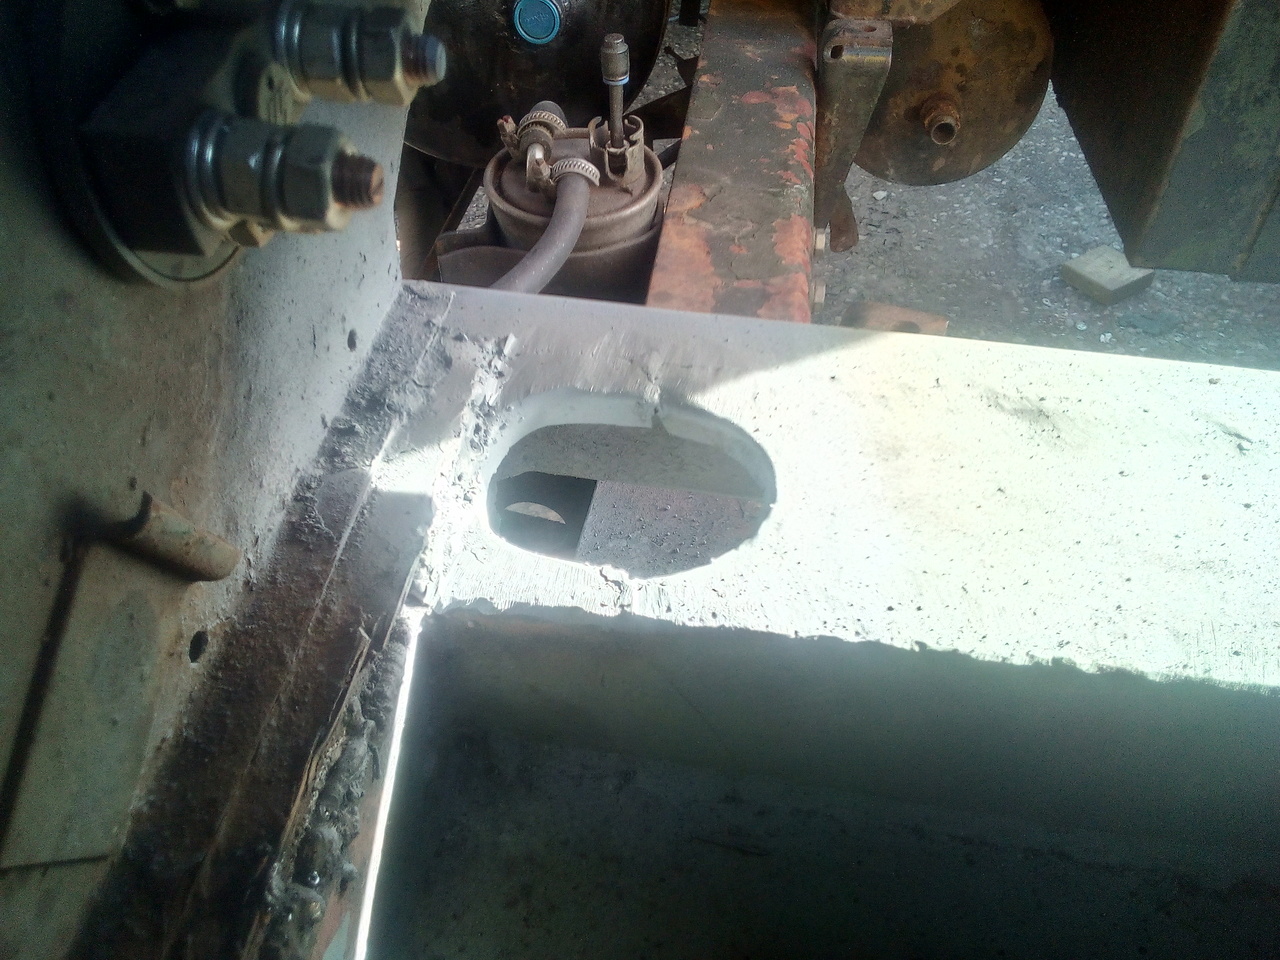 Bracketry! Bracketry!Quite stout bracketry at that. This ties the outer edges of the cab frame to the rear crossmember quite rigidly. Once I'd done this, the passenger door stopped being quite so stubborn to open, as the cab would sag and bind things up once I started to open it before. 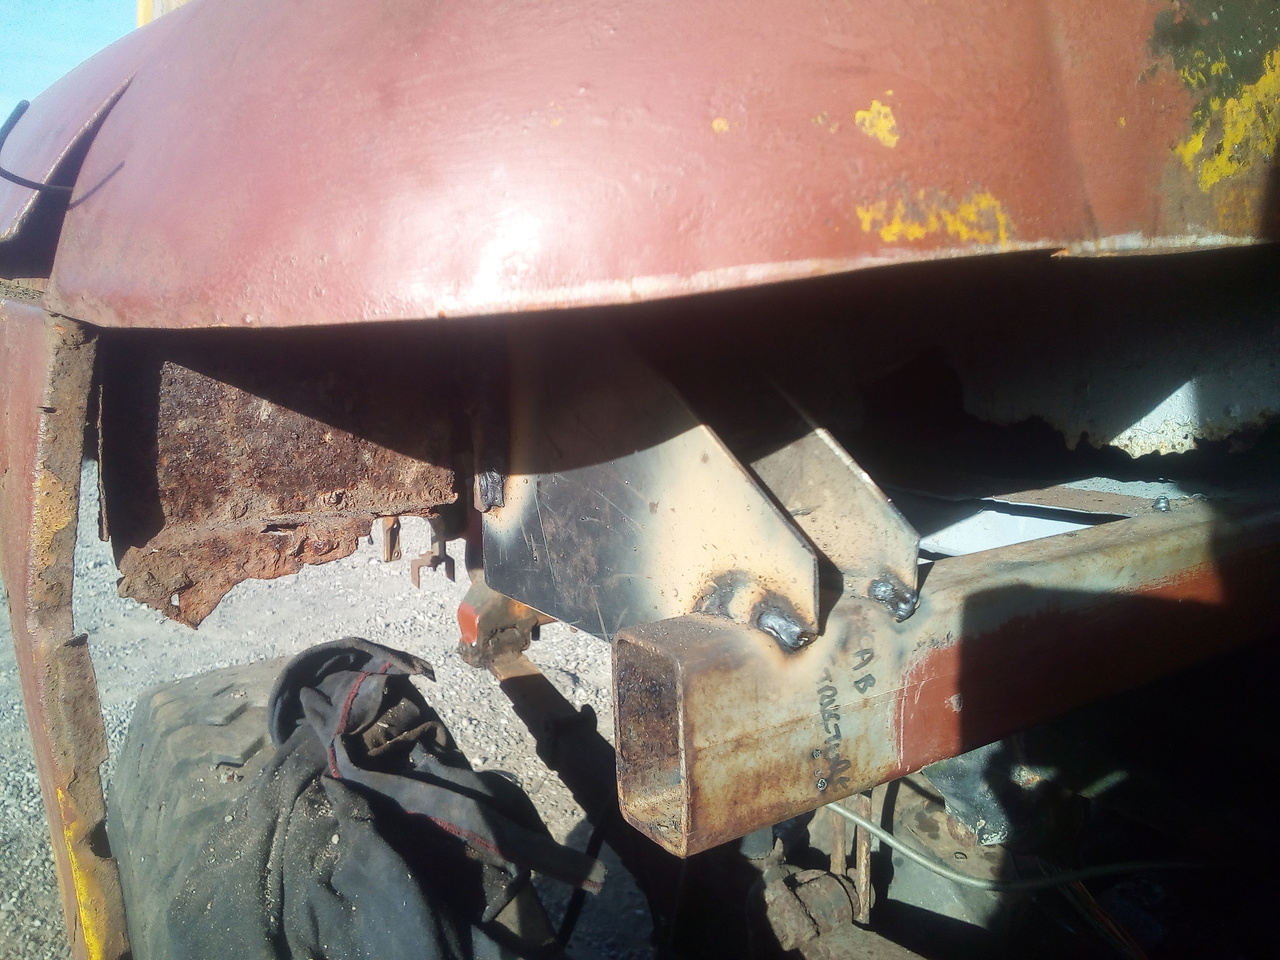 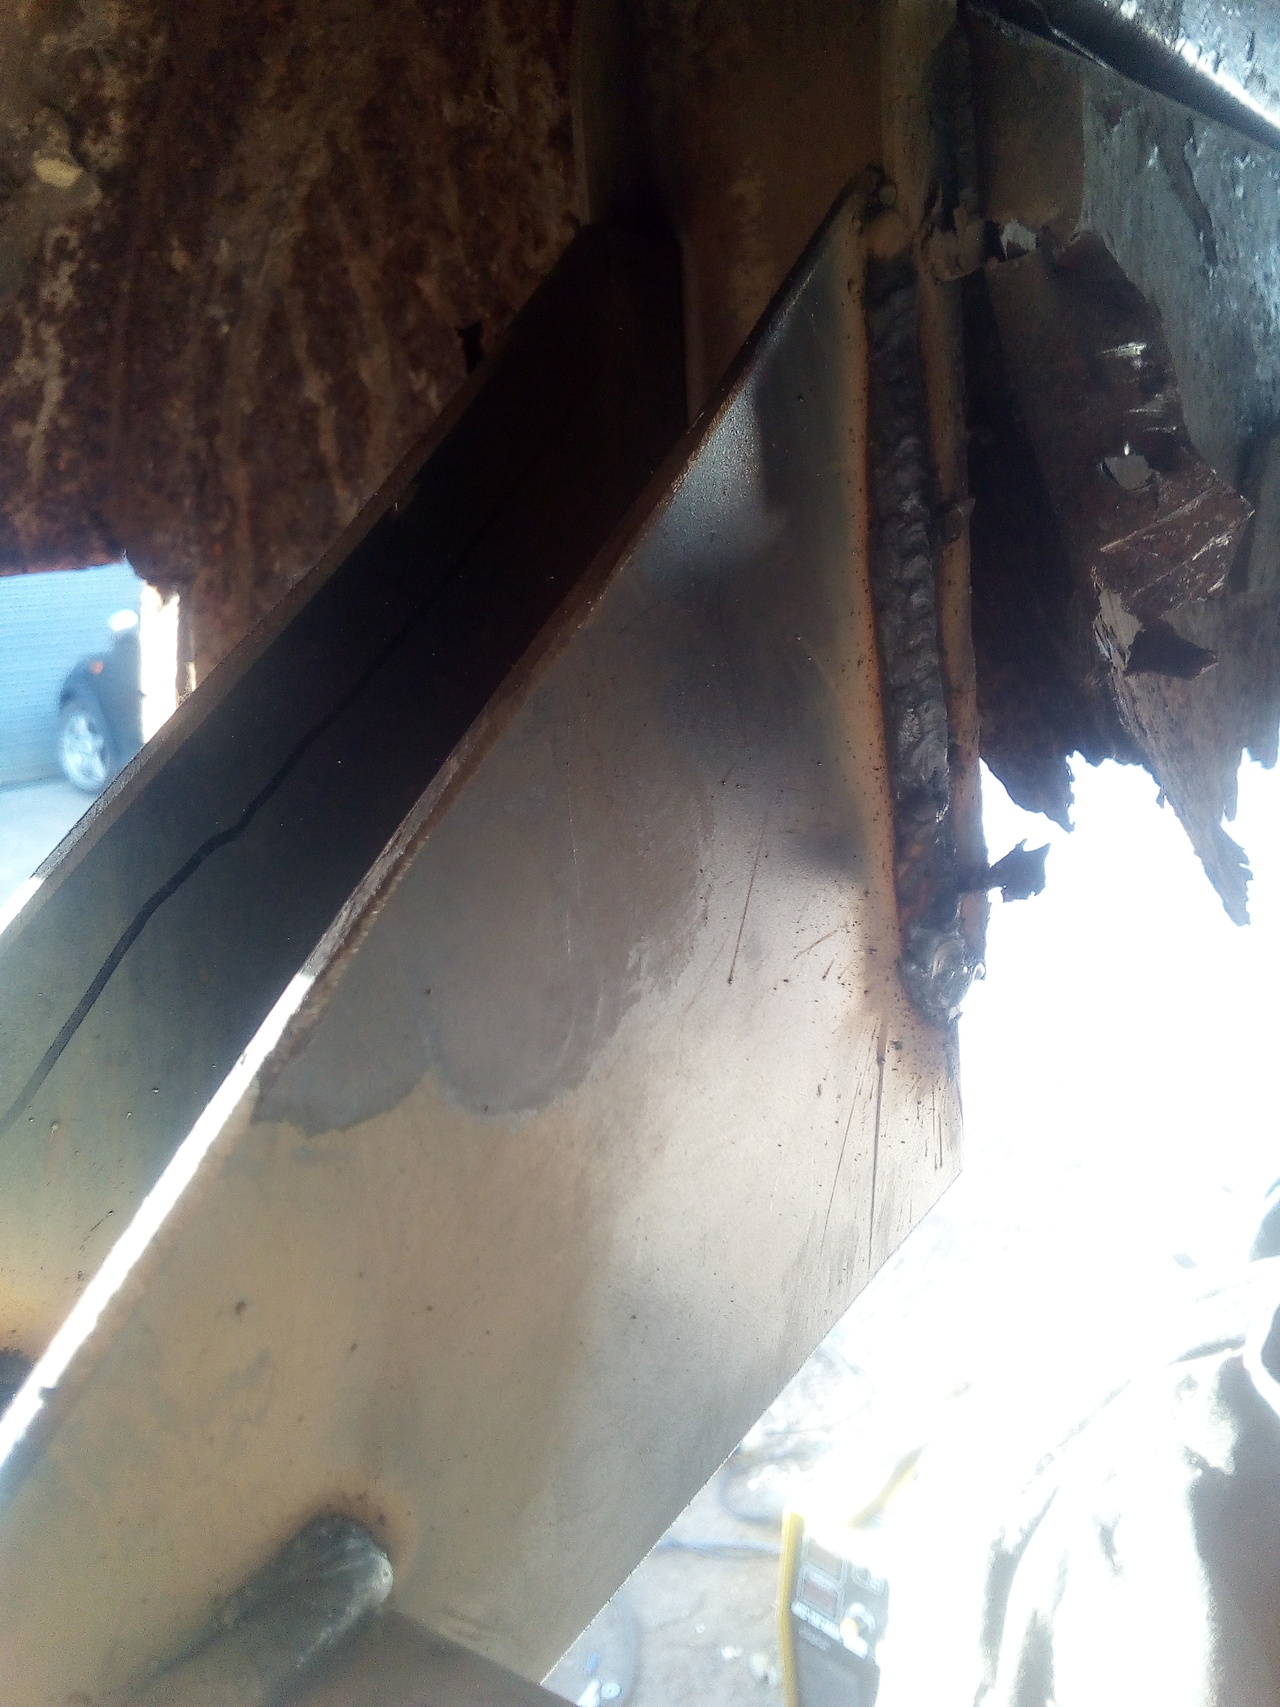 I also did the other side, too. So that's progress. (And then I spent the rest of the evening laying under the truck, pondering.) Pondering!"Hmm... I wonder if I could drop that prop out for a pump and hydraulic motor? Make the winch a bit more usable, and would give me the option to run other stuff too..." And I reckon I could, too. I would have to build another bracket, though...  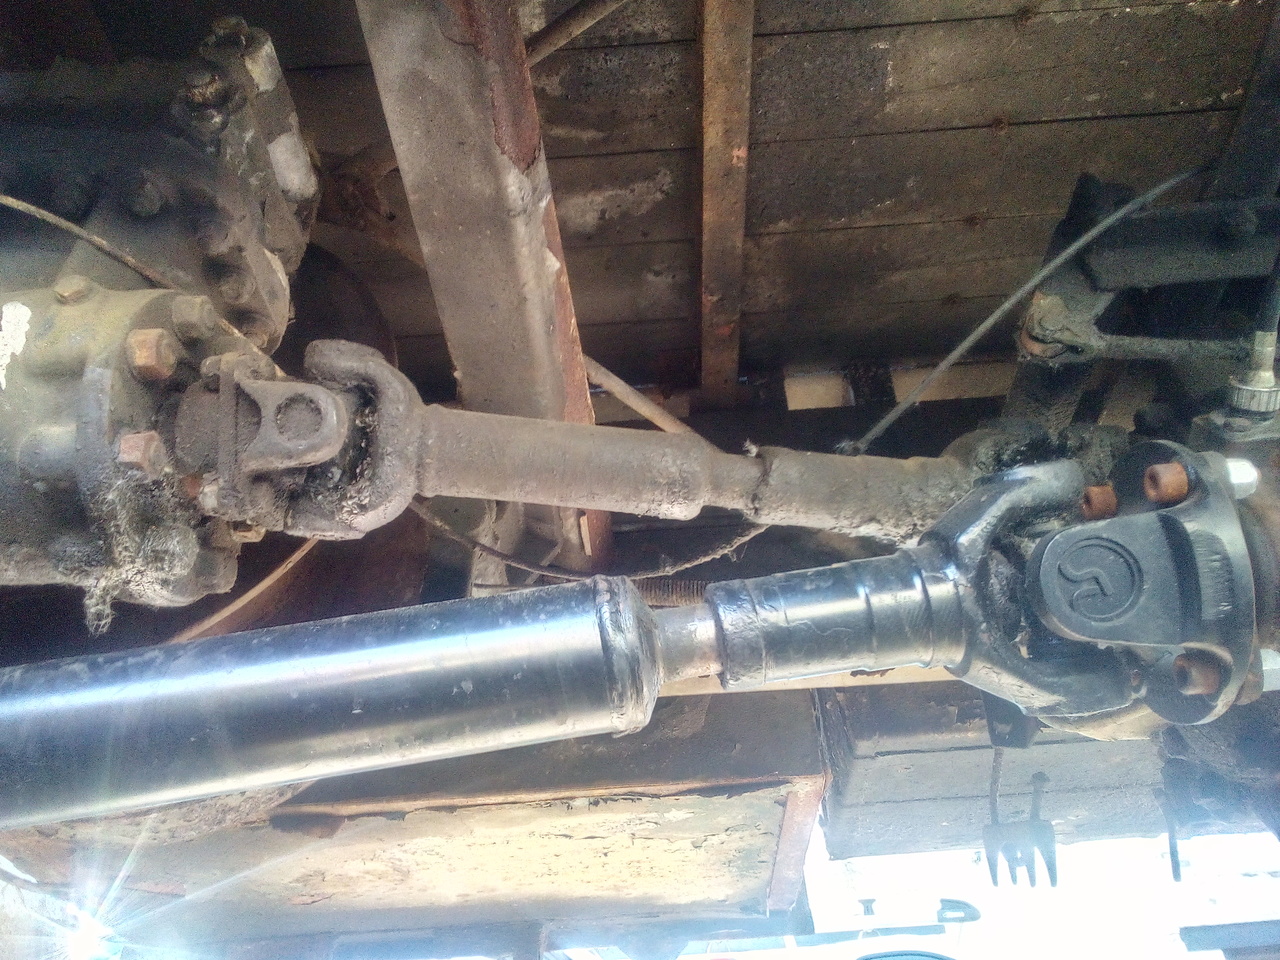 The winch definitely needs some attention, though. Just about everywhere it's possible for it to leak oil, it is doing. 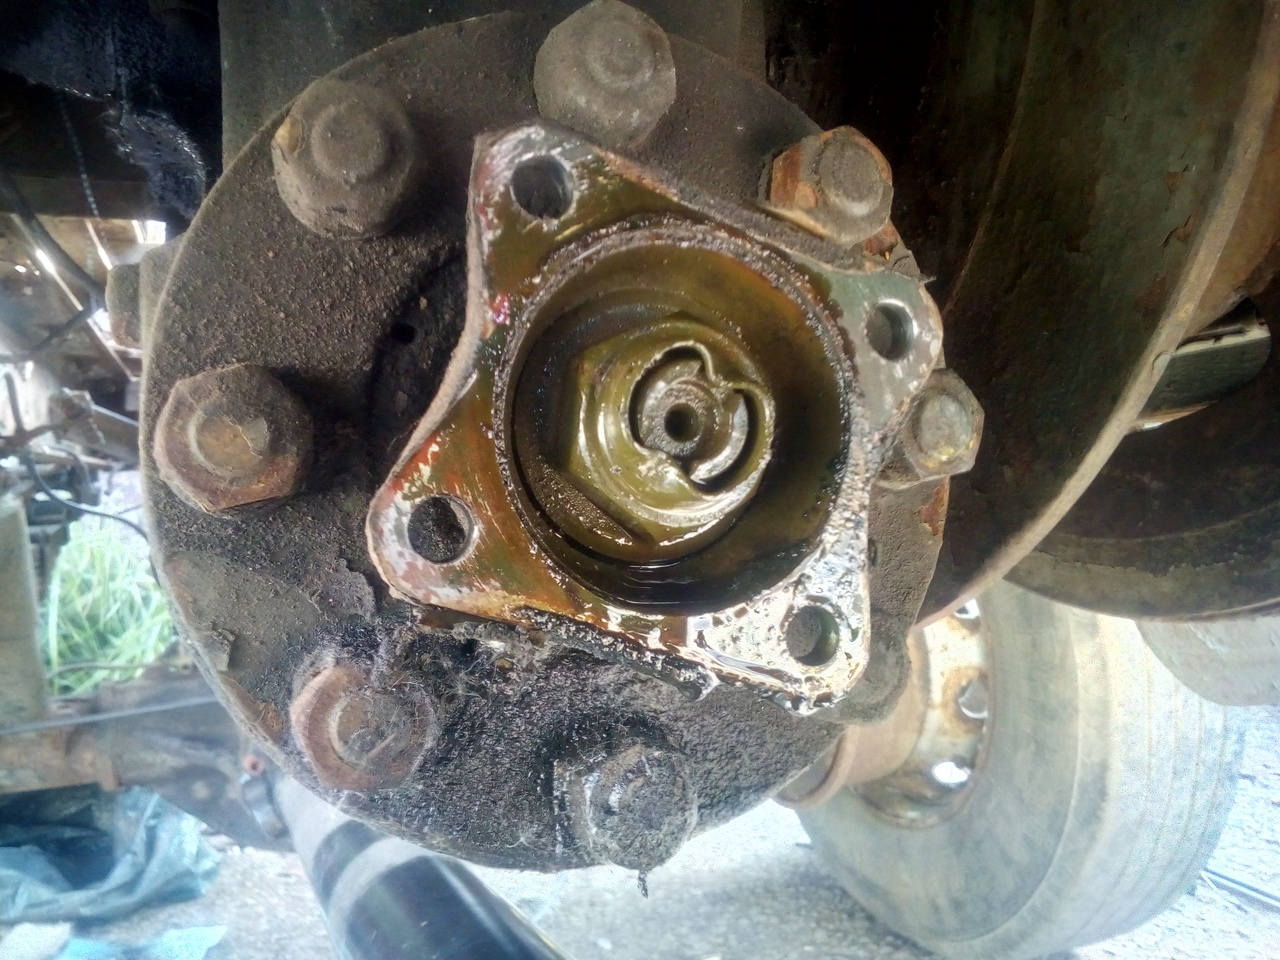 (That'd be down the splines for the flange, then.  ) Oh, and some other bits fell out of the engine, too.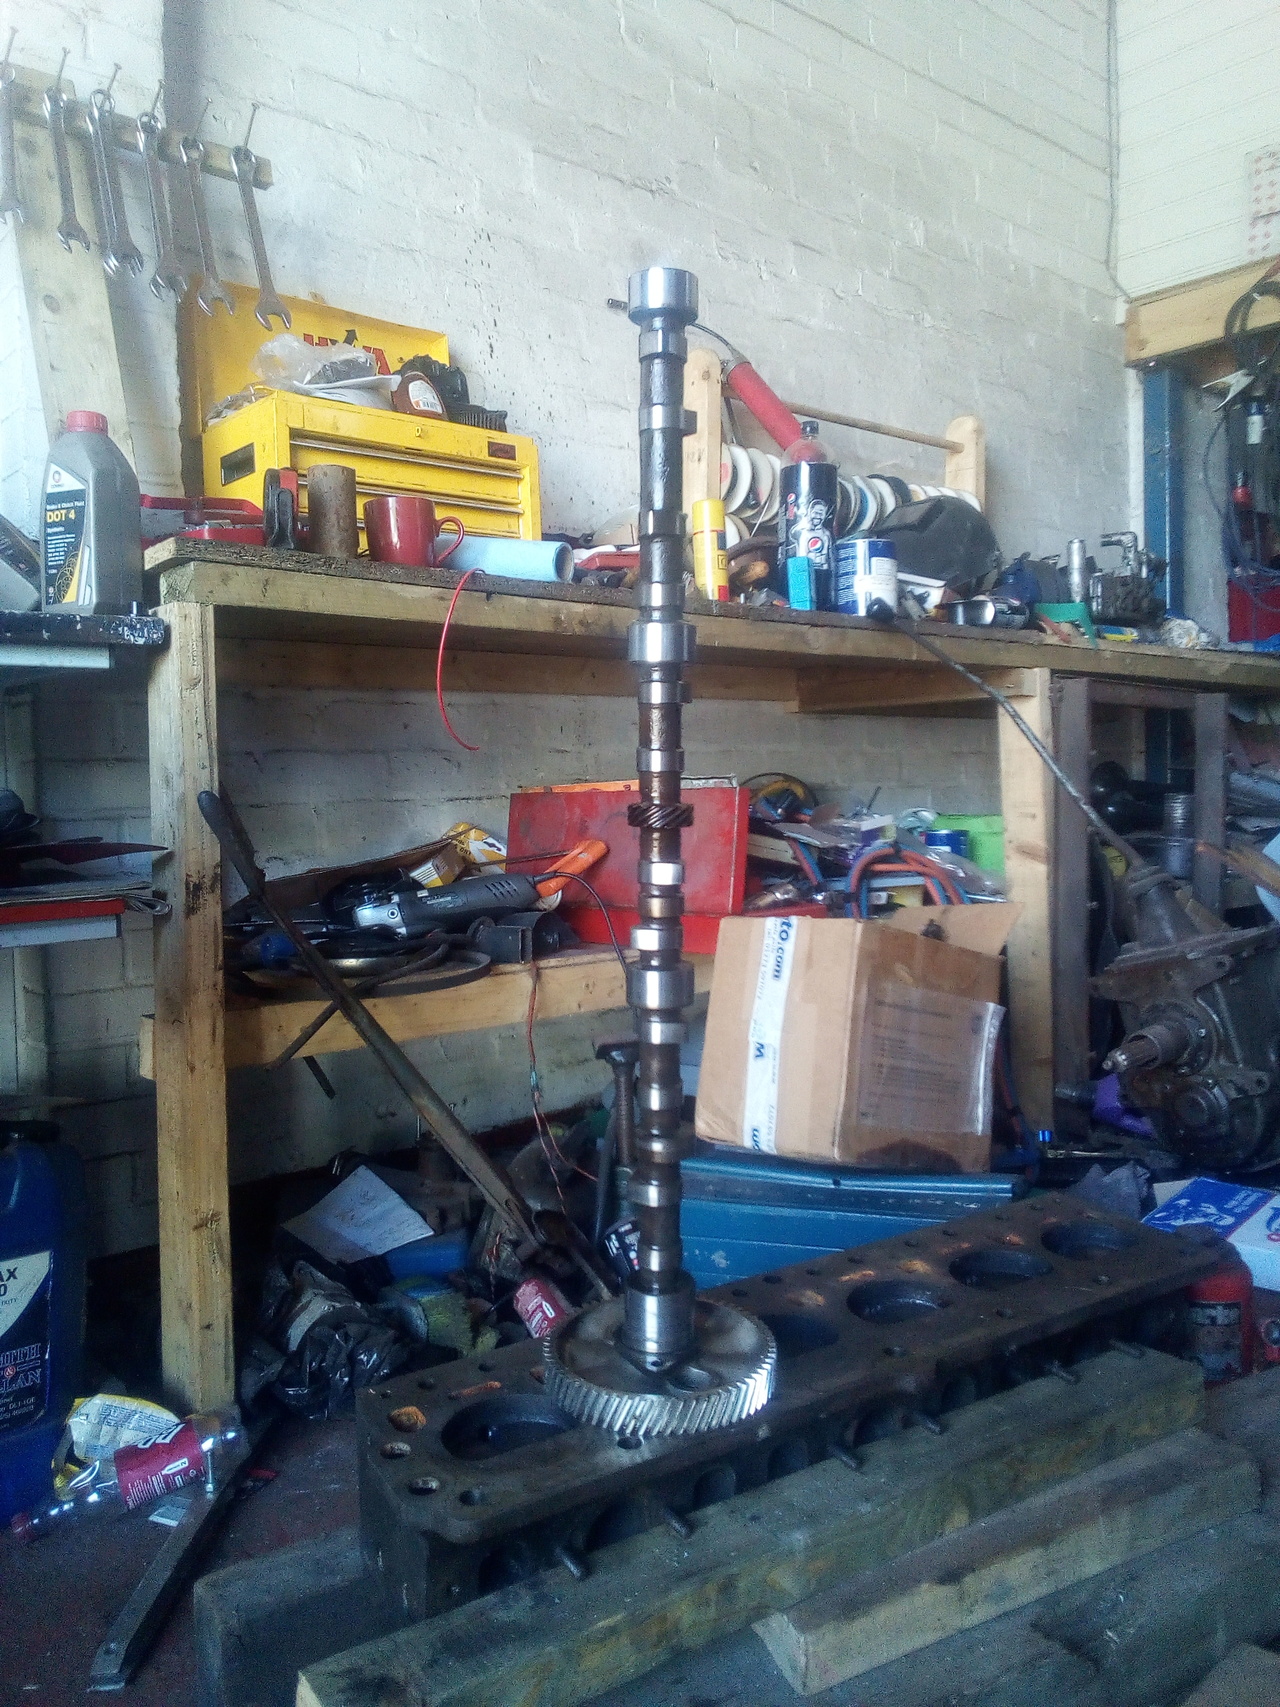 Oh no. 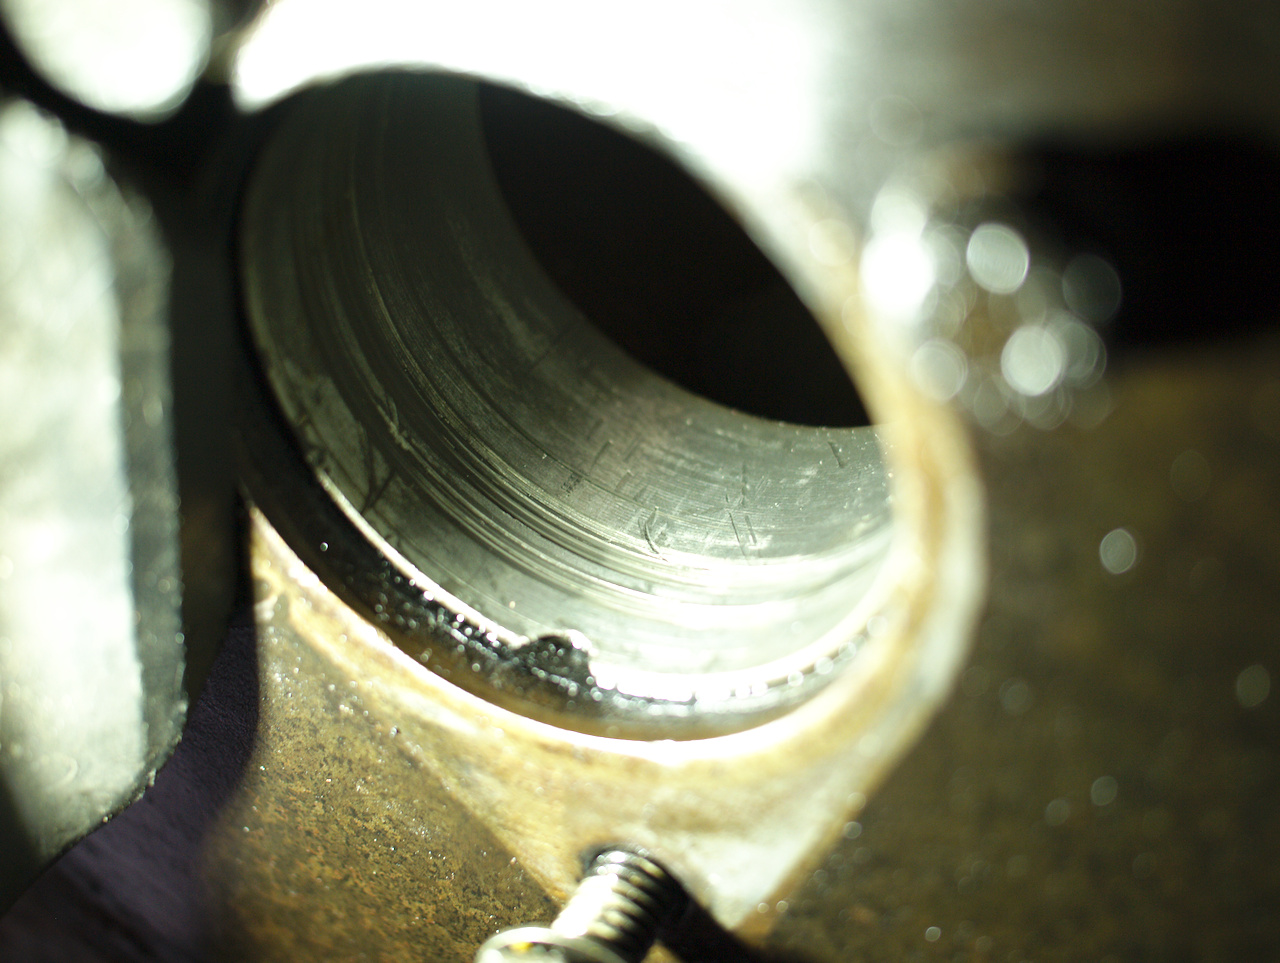 Anyway, here's Vandervell... *strums guitar*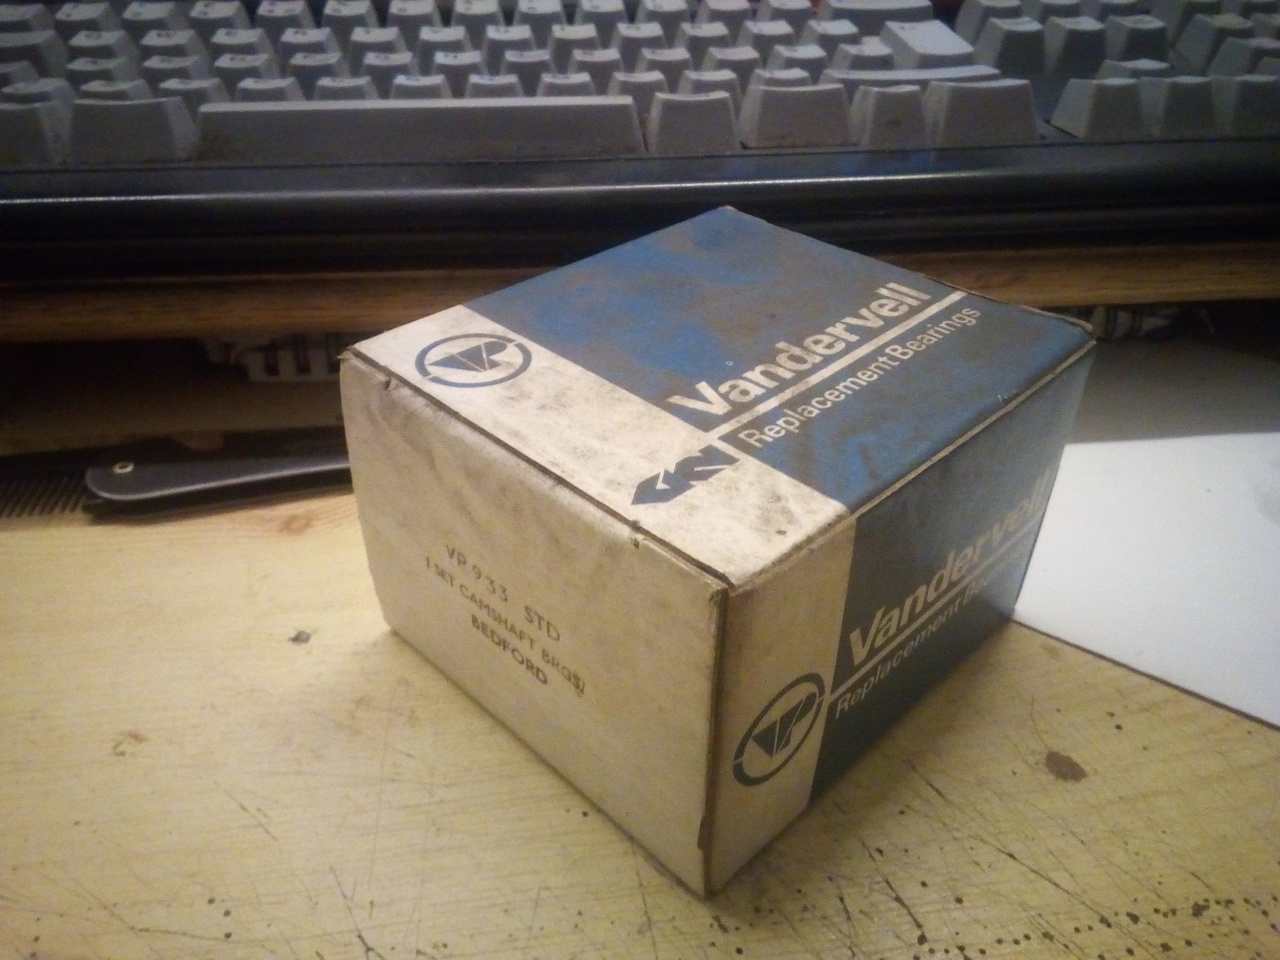 (Bradford Grinders has them in stock, and I was pleasantly surprised at the price.) For those of you who want more video of me making a fool of myself, I have gotten a few bits and pieces over the course of several months (when the camera cooperates, when I remember to bring it with me, and when I'm doing something that's worth videoing.) but need to edit something together. I will, however, continue making a fool of myself regardless. And that brings you up to date! |
| |
-< Welder. Allegedly a mechanic. Bodger of Things >-
* 1958? Bedford RL - Progress: Glacial.
* 1994 Skoda Favorit - It's baaaaaaaack!
* 2018 Herald Classic - Gone!
|
|
|
|
|
|
|
|
|
|
Your cab must have been one step from crumbling off the truck. Well saved that man!
Don't you have access to a MIG welder? Actually I just looked at the photo again, it's a gasses MIG isn't it?
Anyway, keep it up. You are making me hanker after the bottom of a bus again!
|
| |
|
|
Tamber
Part of things
  Shattered. Held together by spite and tape.
Posts: 337
Member is Online
|
|
May 30, 2020 10:49:08 GMT
|
Your cab must have been one step from crumbling off the truck. Well saved that man! The more rot I uncover, the more nervous I am about having thrashed it around that industrial estate... Don't you have access to a MIG welder? Actually I just looked at the photo again, it's a gasses MIG isn't it? Yup! That's the one. It's pretty decent when the welds are long enough that the wire can start to heat up and the flux does its thing. But since that's not particularly easy to do on sheet metal, they'll just be a bit claggy on the surface. More awkward to clean up, but still plenty strong enough. Anyway, keep it up. You are making me hanker after the bottom of a bus again! Well, rust never sleeps... |
| |
-< Welder. Allegedly a mechanic. Bodger of Things >-
* 1958? Bedford RL - Progress: Glacial.
* 1994 Skoda Favorit - It's baaaaaaaack!
* 2018 Herald Classic - Gone!
|
|
Tamber
Part of things
  Shattered. Held together by spite and tape.
Posts: 337
Member is Online
|
|
May 30, 2020 14:19:32 GMT
|
Oh, and on the note of engine parts... 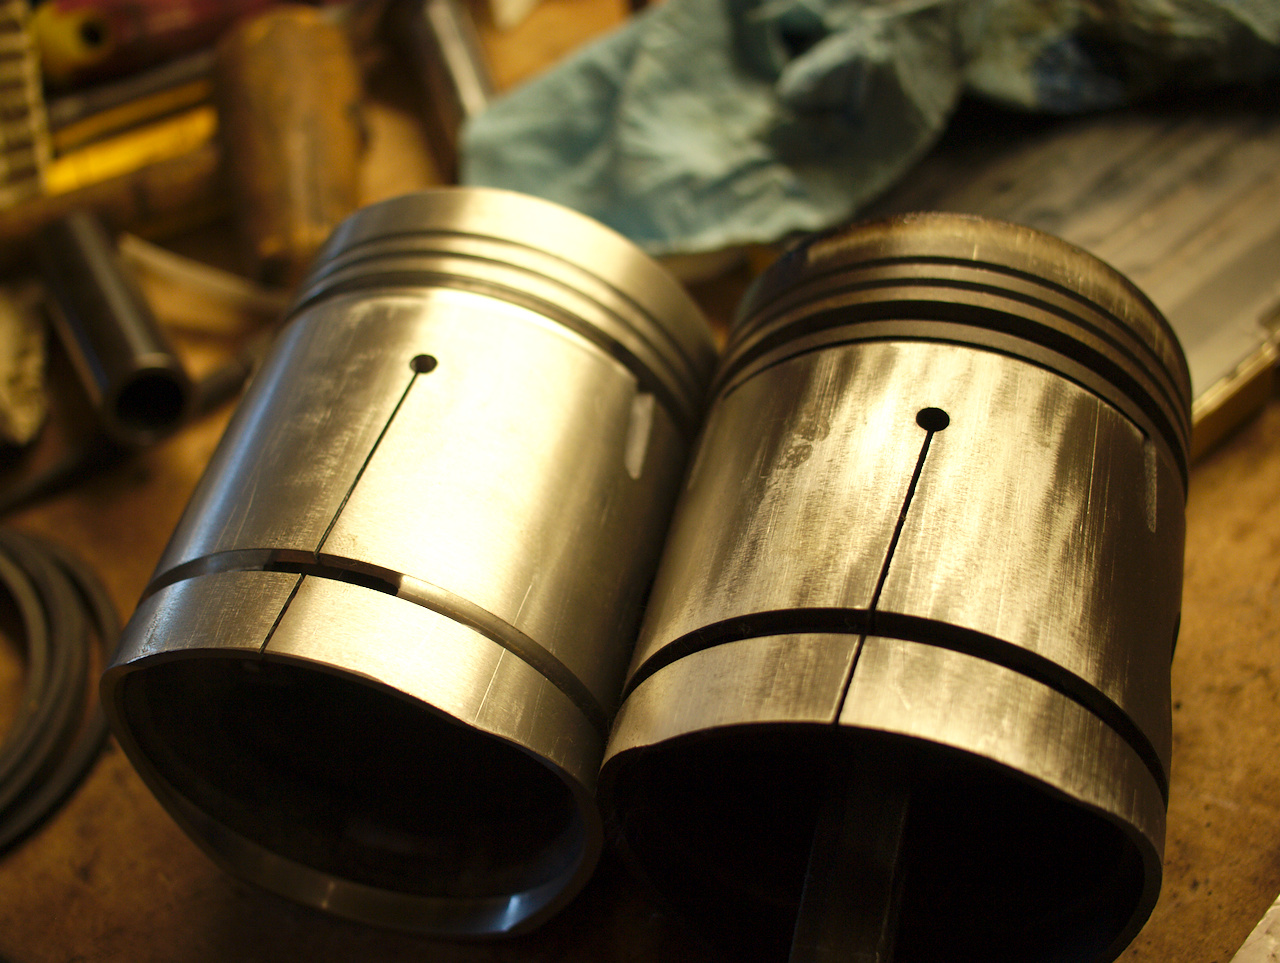 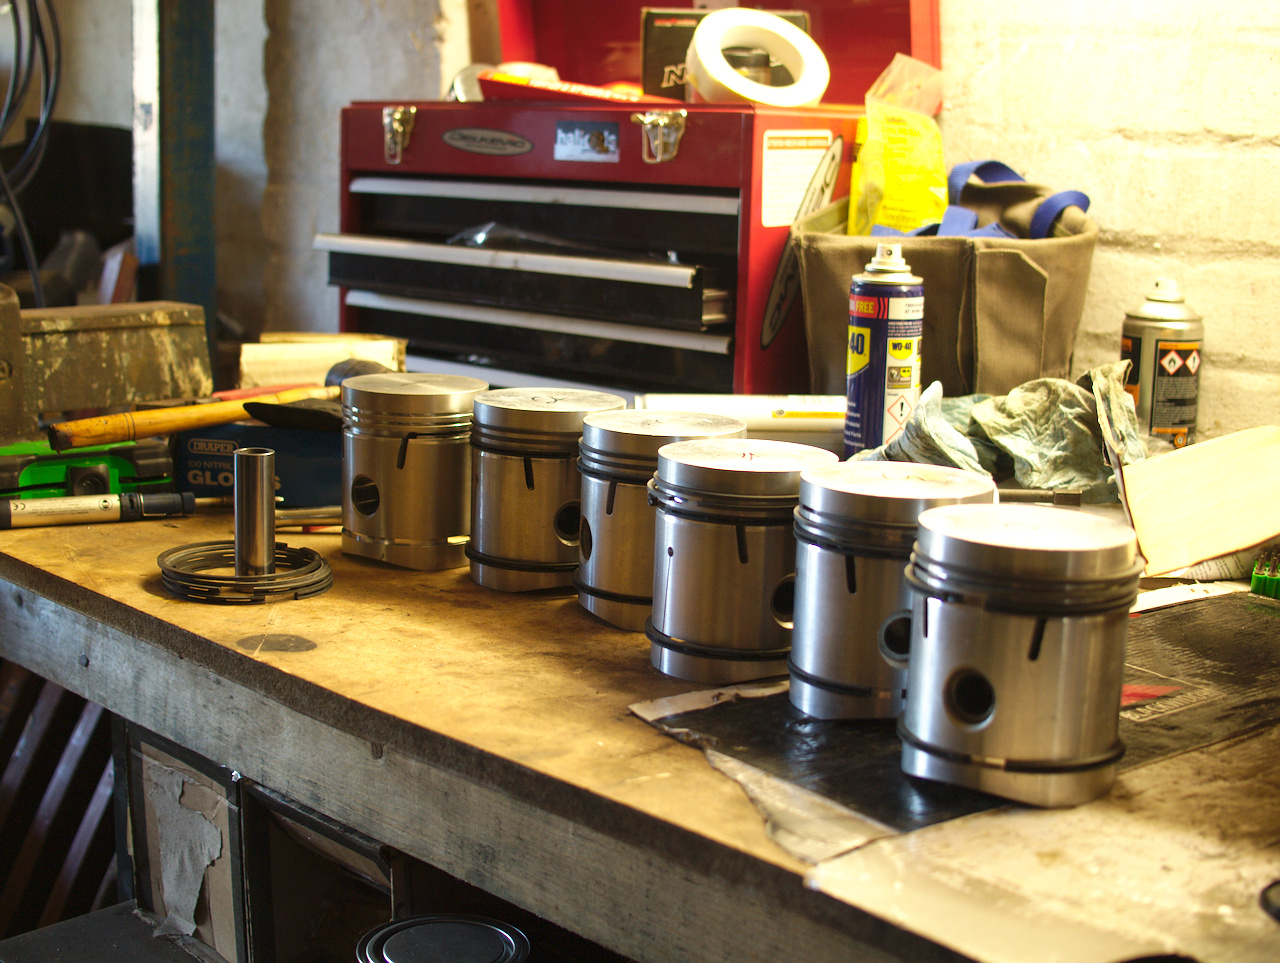 One ... well, six more pieces of the puzzle. All but one of the bores have cleaned up with a honing; but they're right on the outer end of the spec, and №4 has scoring that still catches the thumbnail even after honing. If not for the scoring, I would probably build it up like that and run it anyway; but as it is, I'd rather not. Going to be at this forever, at this rate! In hindsight, I probably should've ordered the +.020 pistons and just accepted I was going to need to run the block to the machine-shop to have it bored out. Ah well. |
| |
-< Welder. Allegedly a mechanic. Bodger of Things >-
* 1958? Bedford RL - Progress: Glacial.
* 1994 Skoda Favorit - It's baaaaaaaack!
* 2018 Herald Classic - Gone!
|
|
Tamber
Part of things
  Shattered. Held together by spite and tape.
Posts: 337
Member is Online
|
|
Jul 20, 2020 23:07:10 GMT
|
(This is going to be a bit of a text-heavy ramble. I have other pictures, just can't be bothered fishing them out when it's just gone past midnight...)  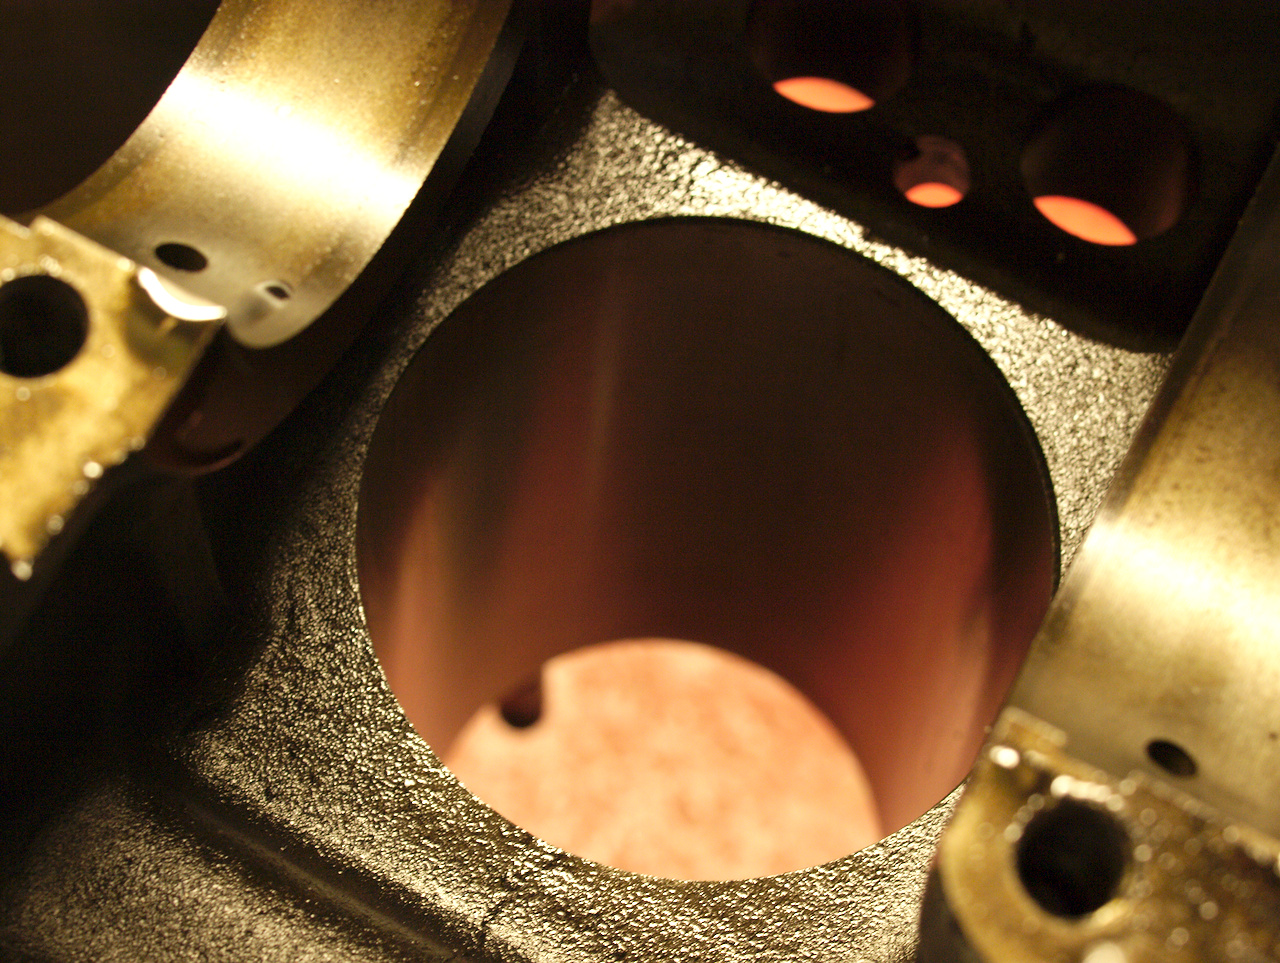 ...Doesn't look like there's any liners there, to me. Right, continuing on with the previous plan, then: Going to see how much of that scoring I can hone out without taking it so far I can't just use these standard-bore pistons & rings, rebuild the engine as I currently have it, get a set of +20 pistons for future stock once I've got the money spare and then when the time comes for the next rebuild I'll have the block punched out to +20. I've got a new rope seal on order (...I am considering, when that future rebuild comes and the block ends up at the machine-shop, having it also machined to take a two-part modern-style rear-main seal, if I can find anything that fits the right dimensions.), which I am not looking forward to fitting. Too many horror stories about building up an engine with a rope main-seal, and having it leak afterwards.  (To be fair, that's not uncommon even with modern seals. Cue muttered imprecations in the general direction of a Cummins in an Iveco, that has had 3 rear main-seals in two weeks...  Seal is 2 parts, one that's a press-fit on the crank, which runs *in* the other part of the seal that is press-fit into the timing case. And you have to drive them both in at the same time, which is very easy to screw up.) I've torn the oil pump down, and it looks to be all good inside; there's a little wear, but nothing out of the ordinary and the clearances seem entirely reasonable. The pickup separates from the pump body with only a little swearing, and I think I have a plan for changing the pickup to use a front-sump pan instead; I also have a rough drawing for a front-sump pan, that I should be able to make up & tack together, then take to someone I trust to weld it all up oil-tight. Also, a good pile of stuff has built up now... Material marked out for manifold flanges, set of cam bearings, the pistons and whatnot, various bits n pieces for the fuel-injection setup (Coil-pack, throttle-body, idle air valve, various plugs, and that sort of stuff.) Haven't fully decided on what direction I'm going to go with the manifolds, yet, but as long as I have the flanges then I'm at least making progress on that front. I foresee a lot of drilling, grinding, and filing in the future. (Particularly of the stainless for the exhaust flanges! Ouch!) While I've been a bit down on enthusiasm, I've started a touch of painting. Getting one of the front wings in yellow, and it's going okay. Started off painting it with a brush (because people keep telling me I can't do it with a brush!  ) and determined to finish it that way, but it's slow going. Looks good as the coats build up, though. |
| |
-< Welder. Allegedly a mechanic. Bodger of Things >-
* 1958? Bedford RL - Progress: Glacial.
* 1994 Skoda Favorit - It's baaaaaaaack!
* 2018 Herald Classic - Gone!
|
|
|
|
|
|
|
Jeez, I'm knackered now! Just read the lot. What a great, and well told, story.  Bookmarked to keep up to date. |
| |
|
|
|
|
|
|
|
Good to see progress! With the rear crank oil seal we use this one in one of the other Vauxhall/Bedford engines, if you want to measure up the crank diameter I can check see how it compares 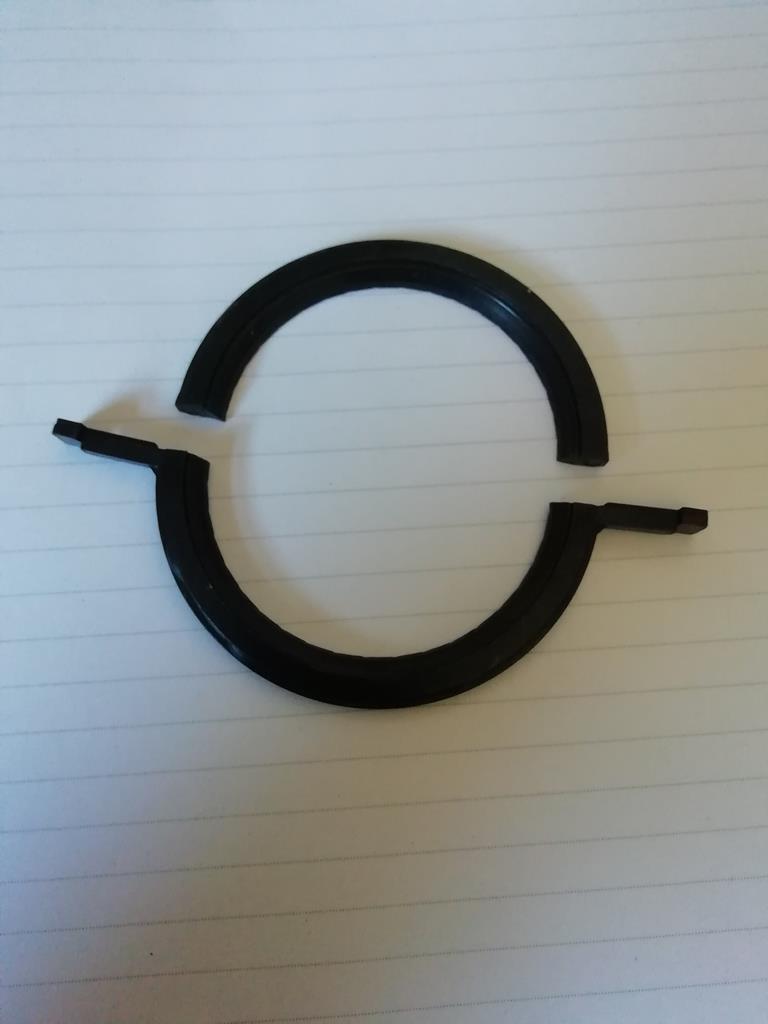 With the little wings you can either have the bearing cap machined or just trim them off |
| |
Last Edit: Jul 21, 2020 7:53:34 GMT by gtviva
|
|
|
|
|
|
|
|
Do they work?
Series Landrovers have a similar split seal and they rarely seem oiltight.
|
| |
|
|
|
|
|
Jul 21, 2020 12:09:58 GMT
|
Do they work? Series Landrovers have a similar split seal and they rarely seem oiltight. They sure do, a million times better than the rope seal, might even be 2 million times better!
The rope oil seals are ok when the engines used regular, weve found when they sit for long periods they dry out and when you start up it seems to wear the rope seal much quicker
|
| |
|
|
Tamber
Part of things
  Shattered. Held together by spite and tape.
Posts: 337
Member is Online
|
|
Jul 21, 2020 17:00:54 GMT
|
Progress? Progress?! Mm, I guess it could be called that!  With the rear crank oil seal we use this one in one of the other Vauxhall/Bedford engines, if you want to measure up the crank diameter I can check see how it compares Handily, I have the measurement written down already! (For once...  ) The journal that it seals on is 75.90mm outside where the existing seal has ridden, and 75.87 where the rope seal has worn it over the years. With the little wings you can either have the bearing cap machined or just trim them off Probably easier just to trim them off, I'd think, but we'll see! |
| |
-< Welder. Allegedly a mechanic. Bodger of Things >-
* 1958? Bedford RL - Progress: Glacial.
* 1994 Skoda Favorit - It's baaaaaaaack!
* 2018 Herald Classic - Gone!
|
|
|
|
|
Jul 23, 2020 11:27:49 GMT
|
Progress? Progress?! Mm, I guess it could be called that!  With the rear crank oil seal we use this one in one of the other Vauxhall/Bedford engines, if you want to measure up the crank diameter I can check see how it compares Handily, I have the measurement written down already! (For once...  ) The journal that it seals on is 75.90mm outside where the existing seal has ridden, and 75.87 where the rope seal has worn it over the years. With the little wings you can either have the bearing cap machined or just trim them off Probably easier just to trim them off, I'd think, but we'll see! Just ran the tape over the seal and its about 64mm shaft diameter so its miles off unfortunately |
| |
|
|
|
|


 )
)


 )
)


