|
|
|
May 12, 2021 21:05:56 GMT
|
Since the last update there has been a fair amount of work but until this week almost nothing worth posting about. Progress was slowed greatly by the propshaft which turned into a bit of a nightmare life lesson. Until recently I didn't know a huge amount about conventional propshafts, my background is with pre-war grand prix cars and more recently marine outboards, both of which tend to use small diameter solid shafts rather than welded hollow tubes. Wanting the easy life I simply gave a recommended supplier a length, UJ detail and details of the application. After a not insignificant delay and a price that went up half way through the job I did receive a propshaft, along with a hand written scribble stating "shaft speed 2500rpm". So that would be a maximum speed of about 45mph. Given that this is hopefully a prototype for some production parts I decided to get a second opinion from another supplier, and very glad I am that I did. They confirmed that the shaft was completely unfit for purpose - made with a 1.25" diameter tube it was very much incapable of spinning safely over around 3000rpm. Queue another not insignificant wait and finally I had a prop, this time 2" diameter, as per the original MG. While waiting for the prop I finally got around to weighing the engine and gearbox with some pleasing results Midget ribcase gearbox: 20kg Jimny R7ME: 25kg CG13 (bare engine with adaptor plate and engine mounts): 57kg CG13 (with clutch assy): 70kg CG13 (with starter and alternator): 77kg I need to confirm for myself the weight of the A-Series but the figure that keeps coming up is 100kg for a bare 1275 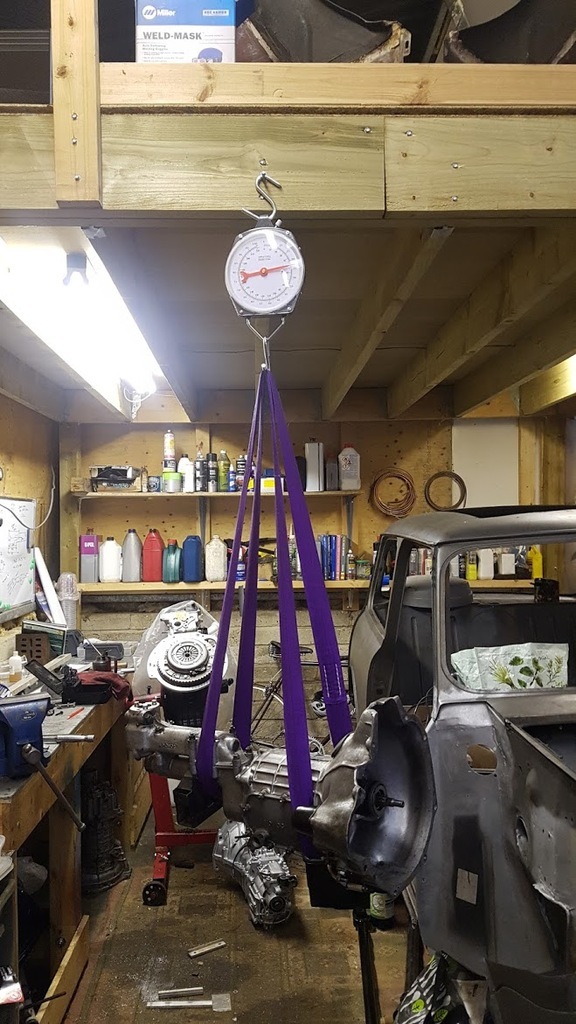 I also picked up a some donor engines to supply with kits (CG13 and CG3A) after seeing some people were having trouble getting hold of them. Happily the kits are now starting to sell. 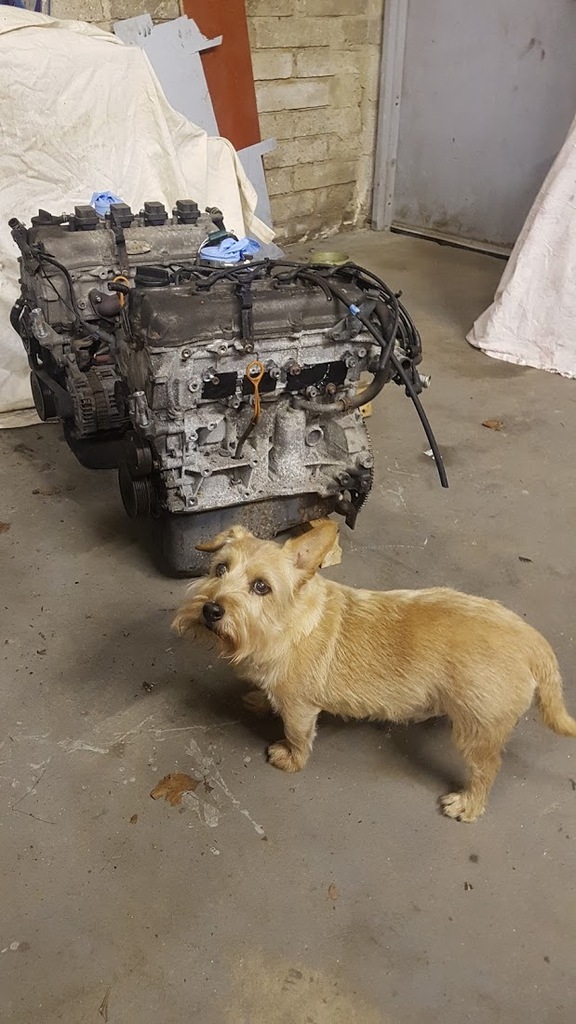 Ted the workshop dog thinks I have a problem. He's probably right. Another area of progress has been the wiring loom. I haven't been happy with the engine loom for a while but went to pot when I had to change from the NODIZ to the DTA. I was also unhappy with the inline fuses and relays cluttering the engine bay so decided to try and find a neater solution. In keeping with the rest of the build the last thing I wanted to do was cut any holes in the chassis so was very happy when I found that the blanking plates for LHD pedal boxes are being reproduced. I bought one and cut some holes to allow for a Littelfuse power distribution module to be fitted. This is basically a fancy relay fuse box that can be customised to suit the application. 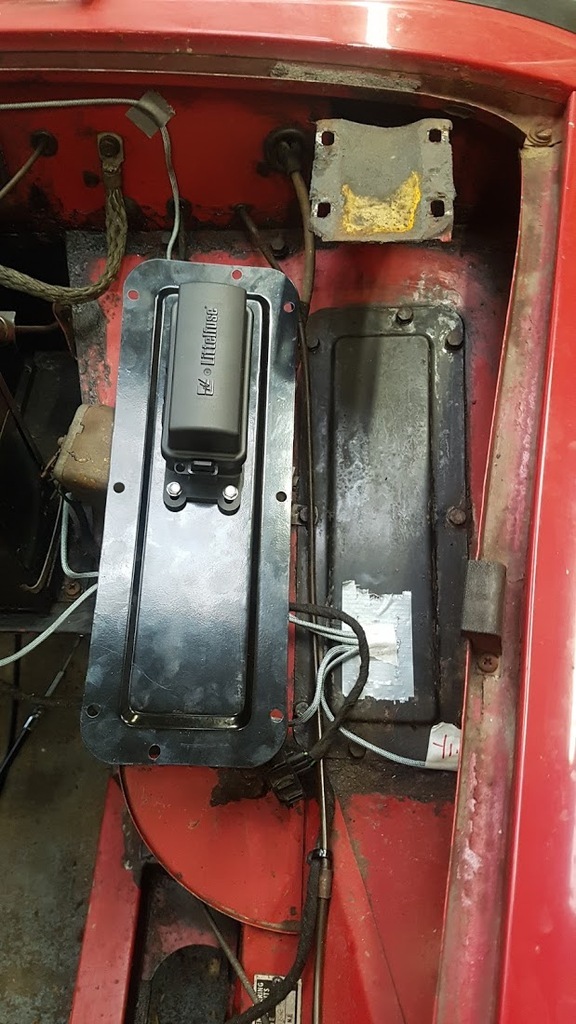 A lot of planning, research and detective work to identify the various plugs and connectors followed and a wiring diagram drawn up in TinyCAD which is a nice (and free) bit of software. 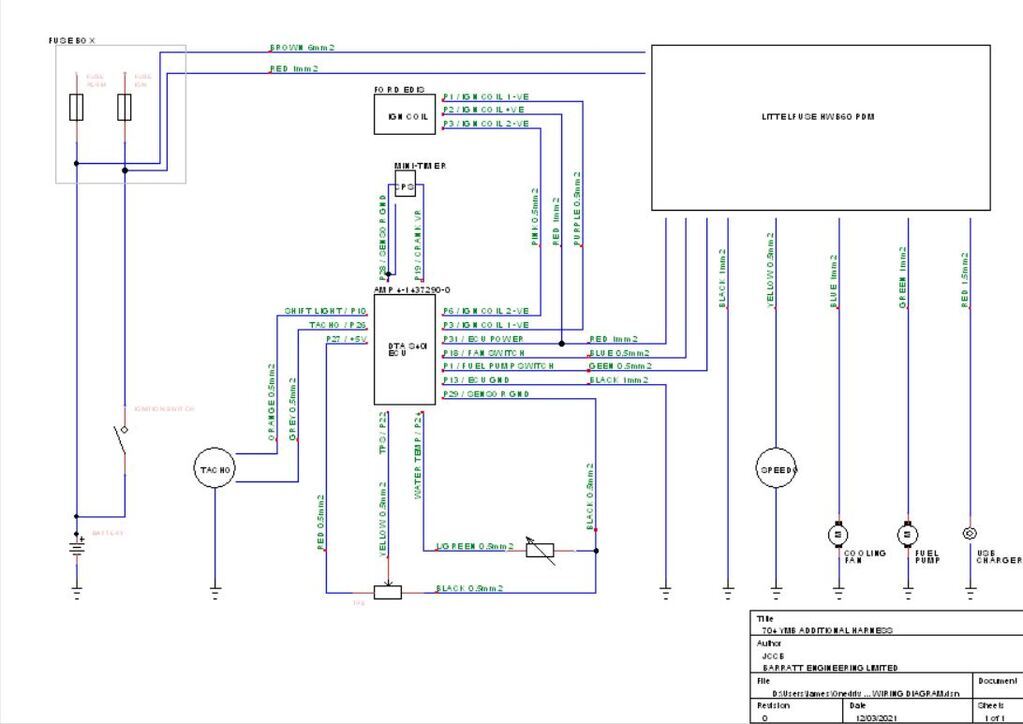 The routing was mapped out using some paracord to get all the lengths and junctions correct before committing anything to wire. With that done and the parts ordered I got to work. 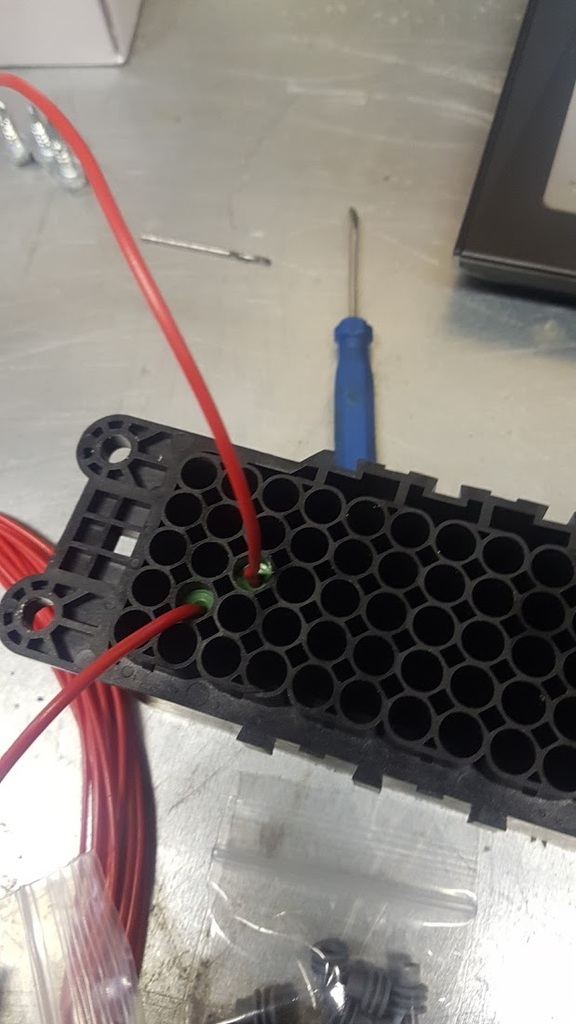 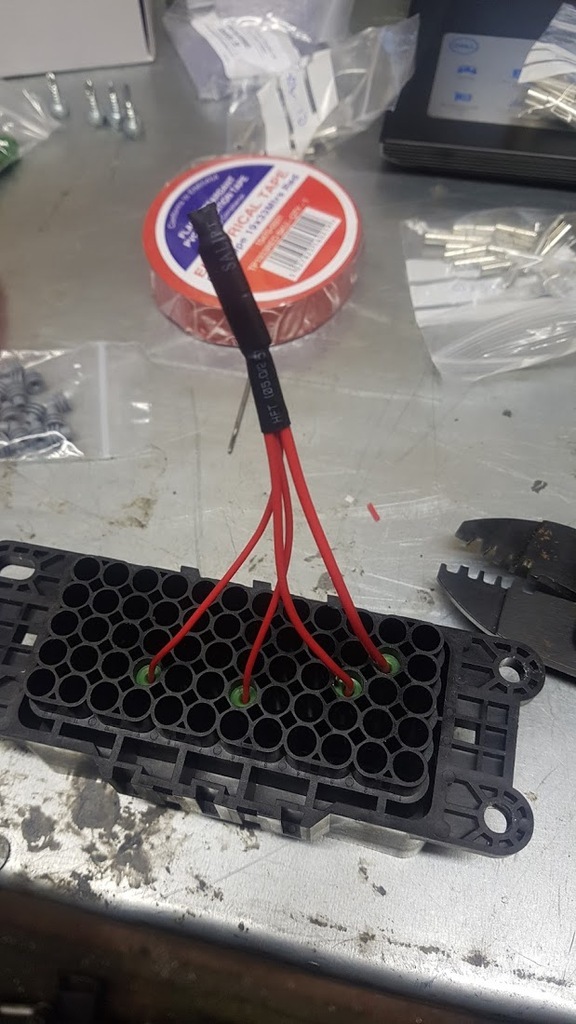 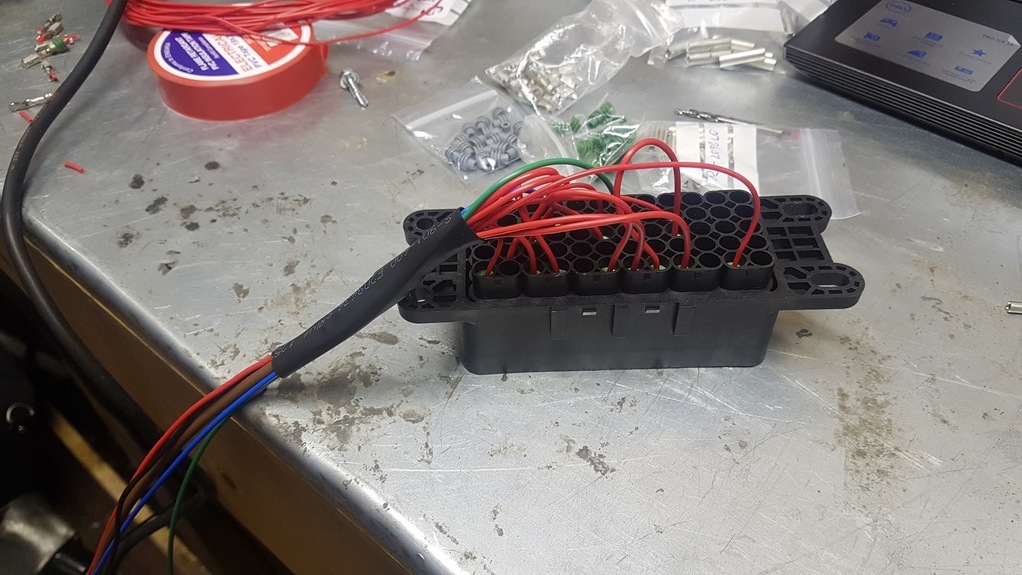 I started with the PDM and ended up with a full loom over a few evenings. I completely got lost in the work and forgot to take any photographs of the finished loom, I will rectify that very soon. I then came to fit the engine, and got this far... 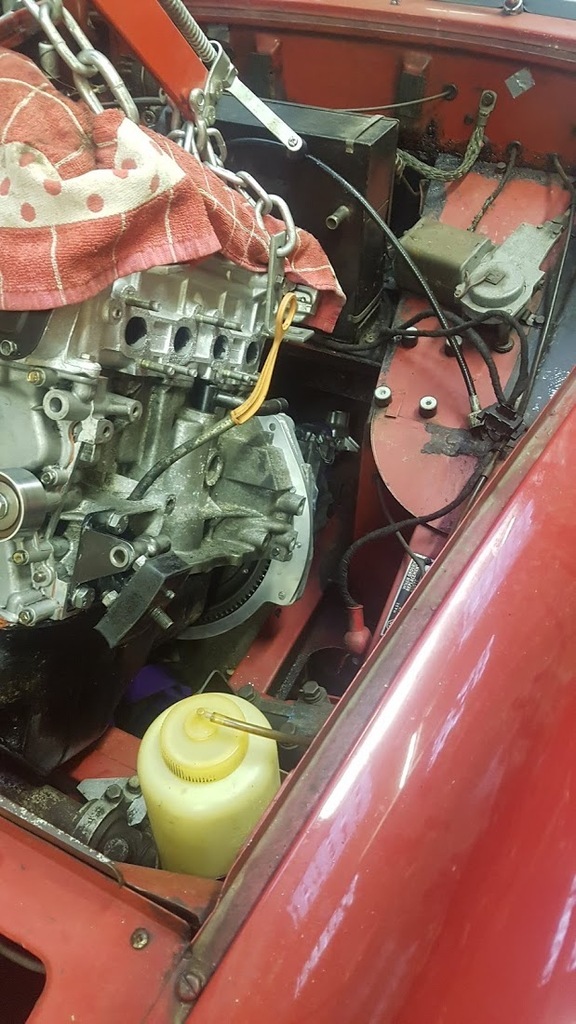 While the gearbox and block have been in the car before this was the first time I had attempted to fit the entire assembly as one, and I hit a problem. The Suzuki gearbox is taller than the MG box with very long fasteners which stand proud of the top of the casing. These were clashing with the bulkhead making it impossible to fit! I pulled the assembly and measured up the engine, chassis and gearbox to put into CAD, which confirmed that the powertrain was not going to fit. By 3mm. Awesome. 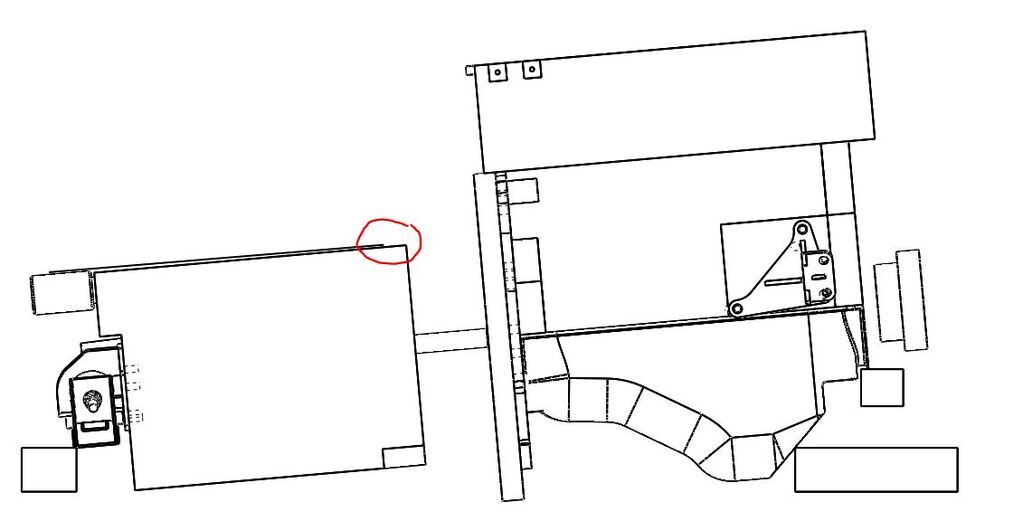 The solution was reasonably simple 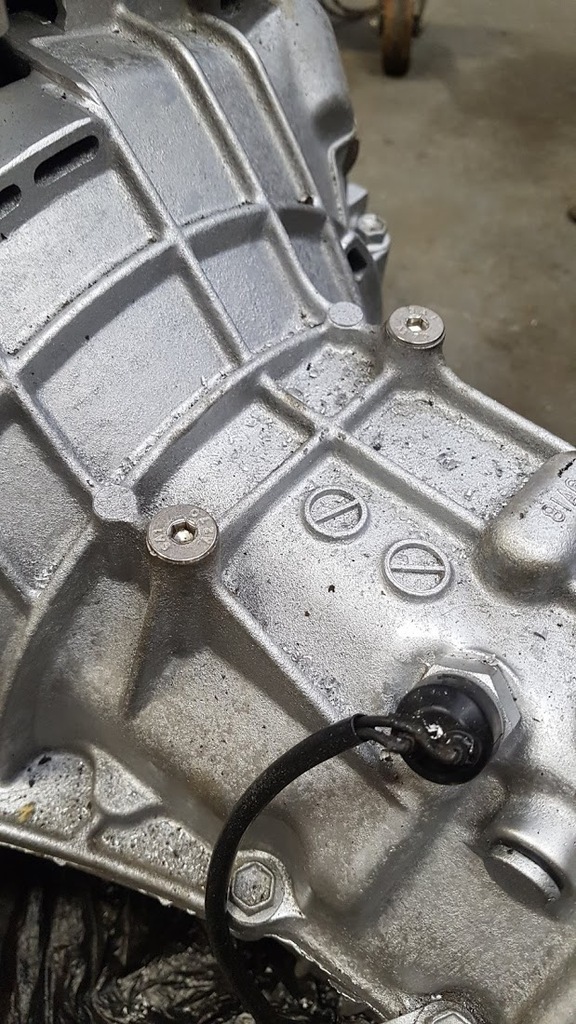 The holes were countersunk and the bolts replaced. Moving forward the sump could have the front face moved back enough to give the necessary clearance without interfering with the oil pickup. 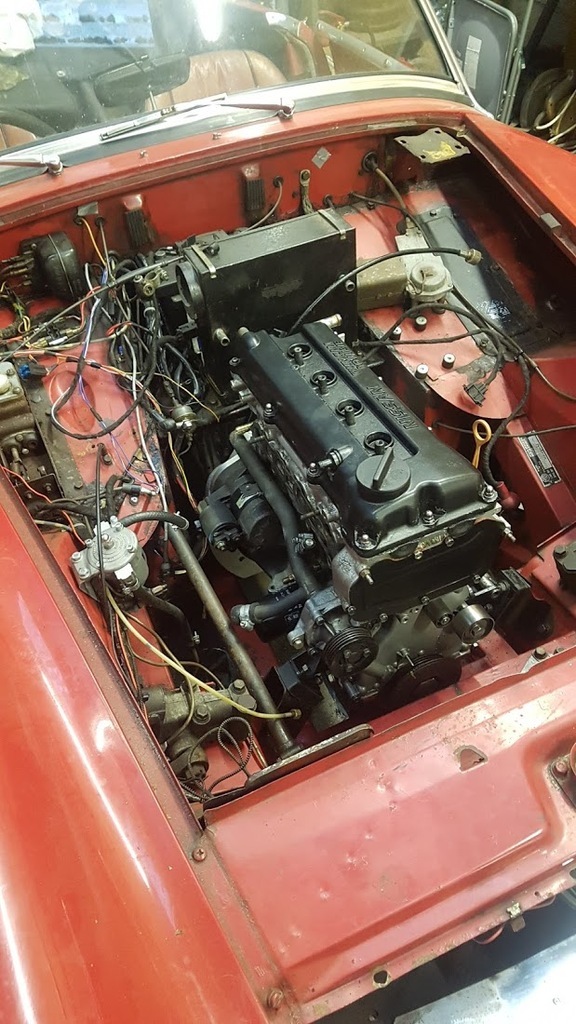 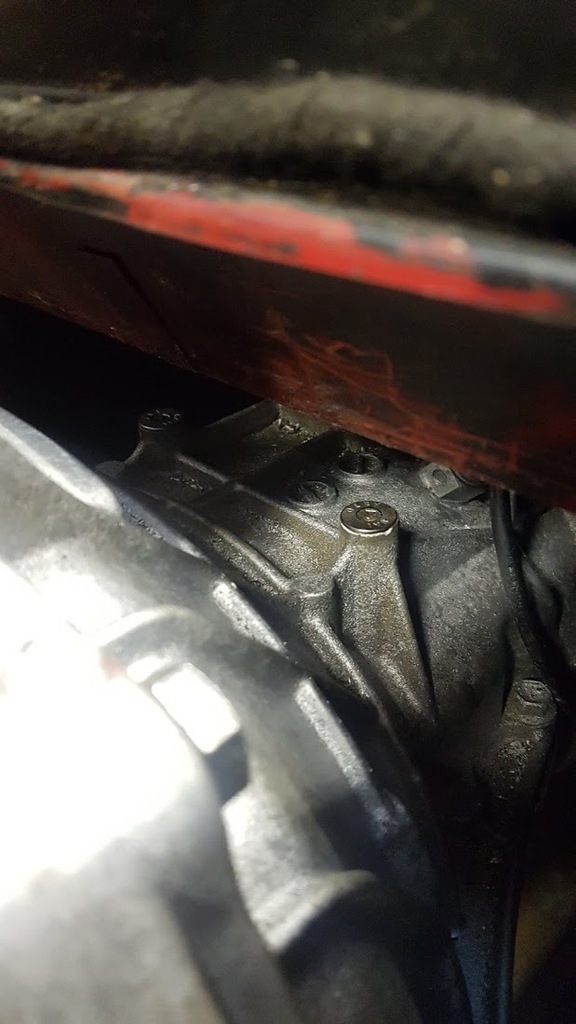 And fitted! Once in the bolts are miles away from the car. 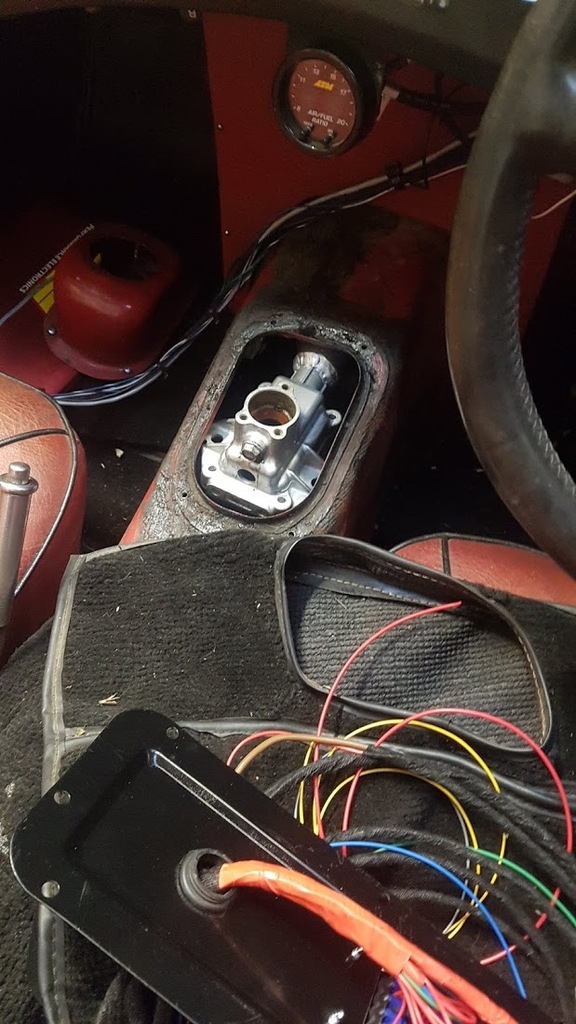 Gear stick is in the right place 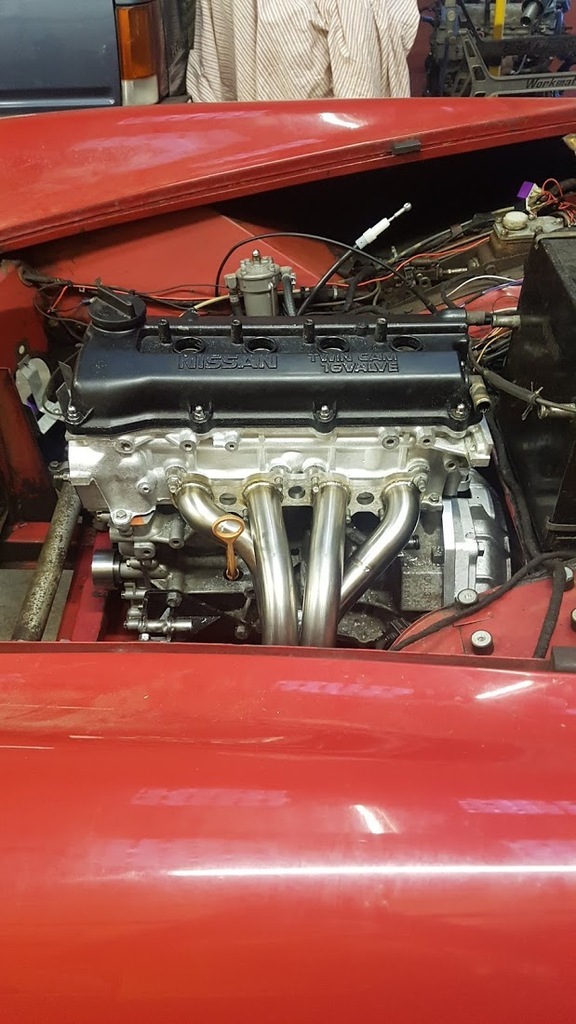 And I couldn't resist trying on the stainless manifold again. Here's hoping I'll be back on the road soon. Thanks for looking James |
| |
|
|
|
|
|
|
|
May 13, 2021 17:29:18 GMT
|
|
Absolutely love this. Perfect mix of modern and classic.
|
| |
|
|
|
|
|
May 13, 2021 18:50:18 GMT
|
|
Have you thought about offering the rib case conversion for the minor, if it fits in everything should be the same except the exhaust.
|
| |
|
|
|
|
|
May 13, 2021 21:07:21 GMT
|
generallee - thank you, most kind kevins - I am looking into it. I have had a Morris chassis measured and it looks like it will go in just fine but I am hesitant to advertise something I haven't been able to fully prove out. That said, if someone was to step forward as a willing 'guinea pig' and be happy to assist in developing a Morris version of the kit I would be very keen to work something out with them. The same is true for an A35 / A40.
|
| |
|
|
|
|
|
|
|
Bolting a car back together again isn't terribly interesting, hence the lack of updates. That process is now over... The last bit of engineering required on the gearbox conversion was the clutch actuation. On Type 9 conversions this is hotly debated with strong arguments for both hydraulic and cable operation. Cable won over for me for cost and simplicity. Previously I had been concerned that bench testing the clutch suggested the pivot travel of the standard pedal would be insufficient to disengage the clutch but altering this would mean bracketry and a modified pedal. With the box in the car I decided to cobble together a mechanism with an M5 bolt and mole grip to just confirm that the work was required, and very glad I am that I did! It turned out that with the cable adjusted the pedal travel was perfect, and lighter than the old setup to boot. I then proceeded to break my golden rule and modify the car. Only slightly and very reversibly - a slot was cut into the pedal box assembly to allow the cable to pass thru' and latch on to a turned adaptor. Great care was taken to ensure the cable end was not exposed to any bending loads or rubbing on anything that could result in premature failure. 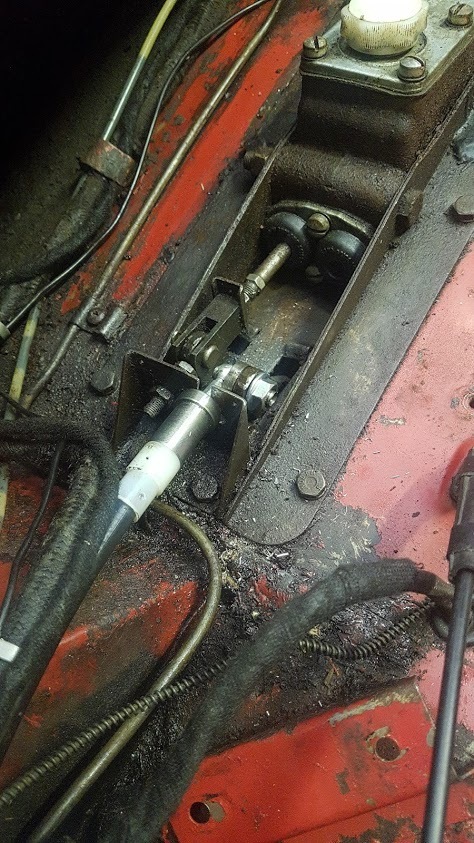 I will make up a spreader plate to better distribute the load. Finally a hole had to be drilled in the transmission tunnel to fill the gearbox. Frustratingly the fill plug is on the opposite side to the BMC box and the box cannot be filled prior to installation because of the angles required. This could be easily welded up, or just left with a grommet. To my amazement the engine fired up first time and after checking and double checking everything I could think of, I went for a drive, and then another drive, and another... 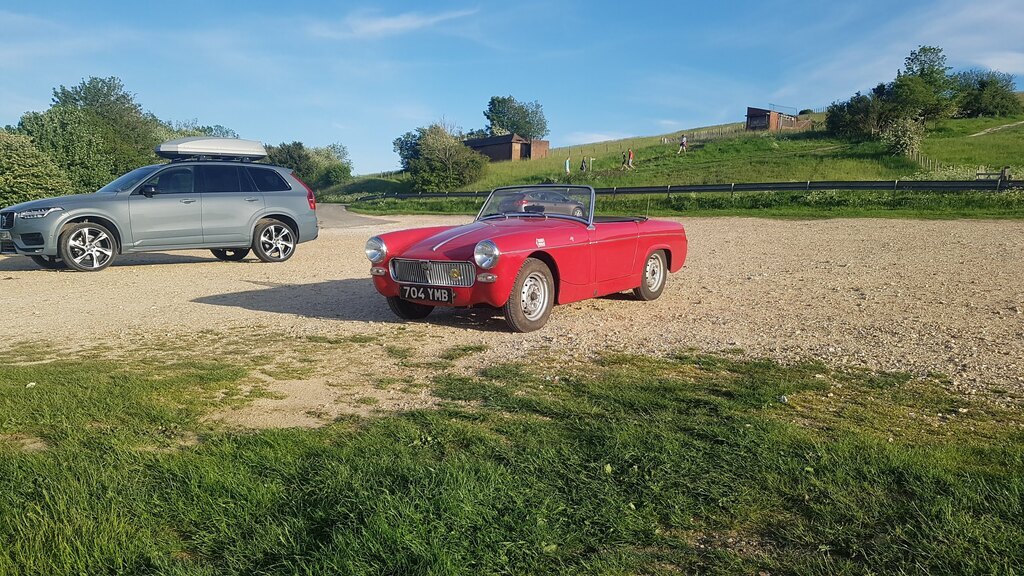 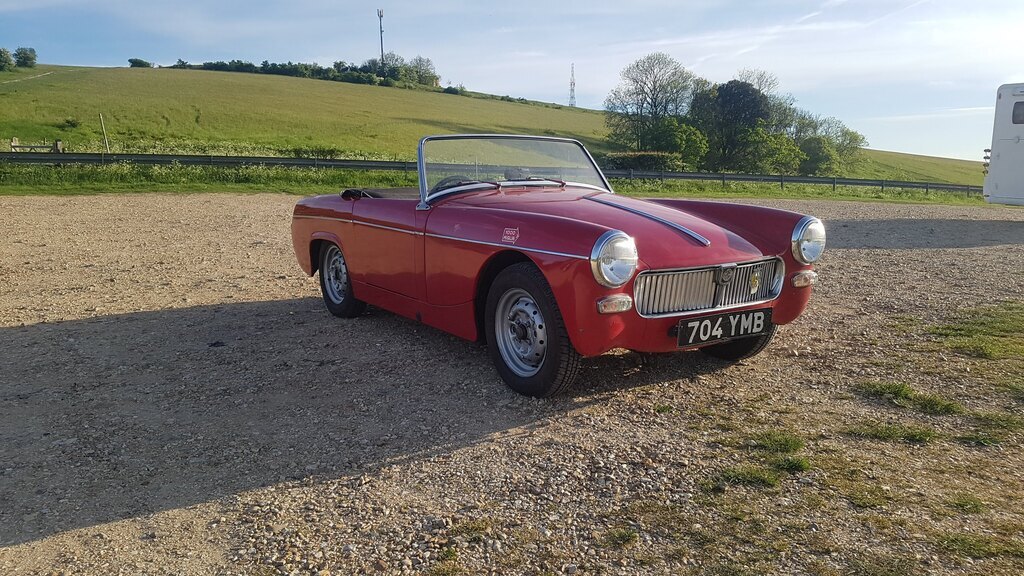 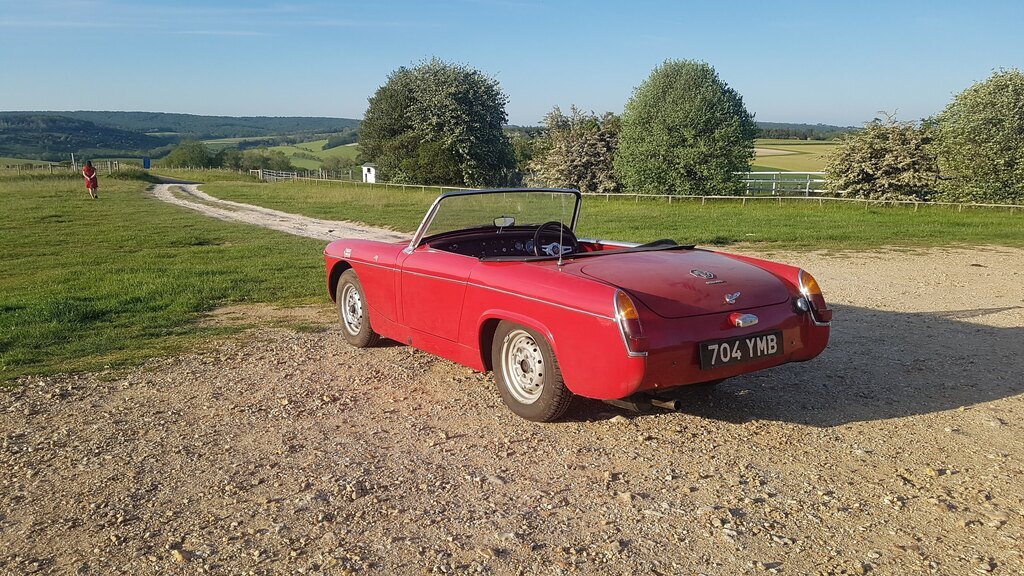 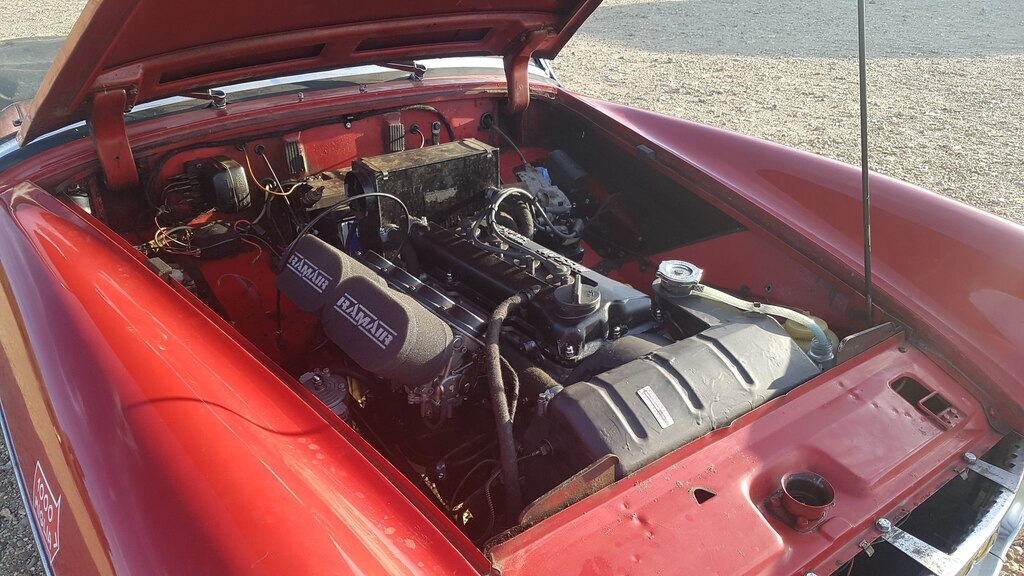 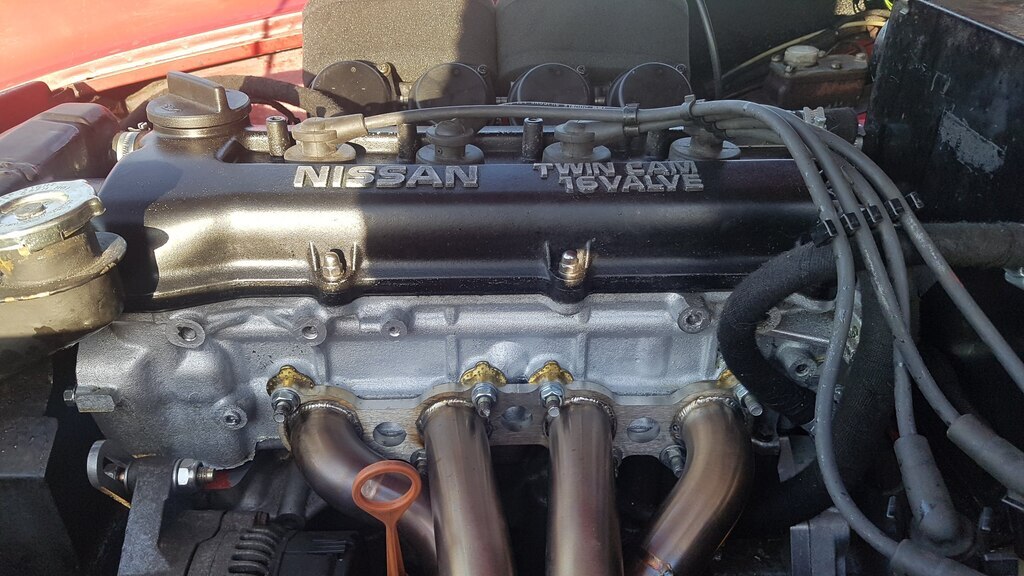 Today I even remembered to get some photographs. It feels like an age since I was last out in the car and I cannot believe the difference the gearbox has made. The feel of the car is very different, more so than changing the engine. It is quite, smooth, changes gear perfectly and has a nice short throw, comparable to an MX5 gearbox but with a longer stick, so the gear-knob is in the standard place. The engine is as willing as ever but brilliantly docile when not being pushed and the overdrive top has made things far less frantic when moving at speed. It has further highlighted the need to refurbish the front dampers and start developing the chassis as it just cannot keep up, but that can wait for now while I get some proper mileage on the car. It has been a lot of work but I think well worth it! Thanks for looking James |
| |
|
|
|
|
|
Jun 17, 2021 10:14:43 GMT
|
With the car finally on the road there is only one thing for it - use the thing! Well over 1000 miles covered since the last update with some servicing and upgrades made along the way. Immediately clear was the performance, or lack of, from the front suspension so I finally got around to servicing the lever arm dampers. 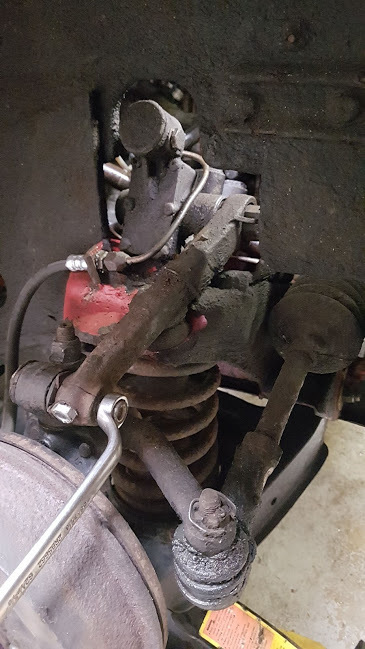 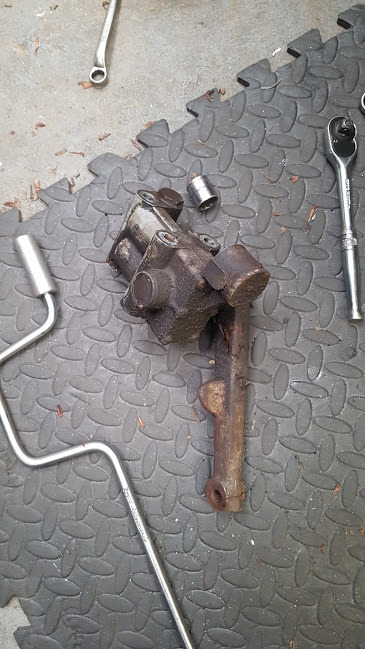 They come off pretty easily 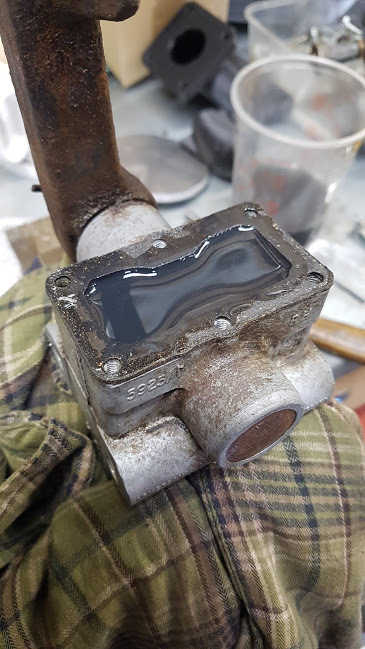 Unlike the rears they were still full of oil which is promising, the seals are clearly intact. The oil however had a viscosity closer to water than 20W 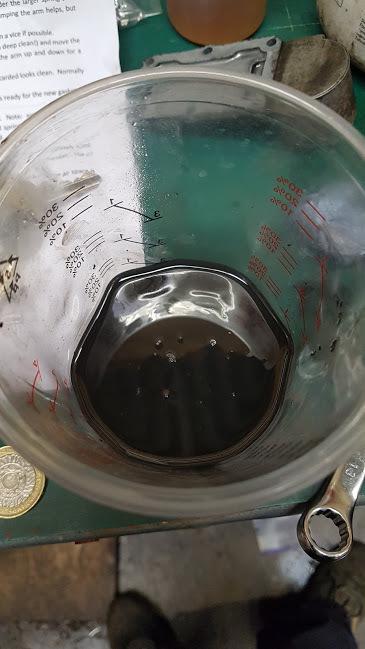 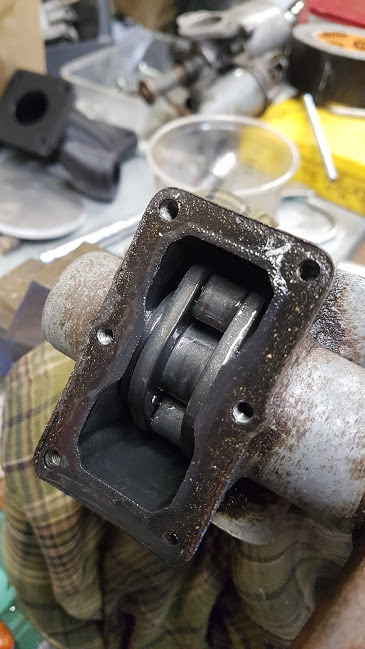 The old oil was drained and the units flushed through until clean 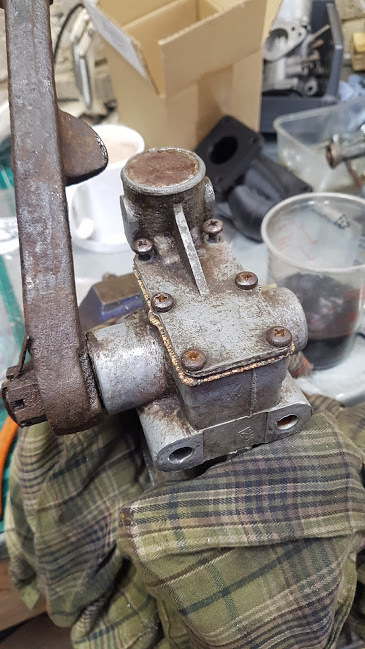 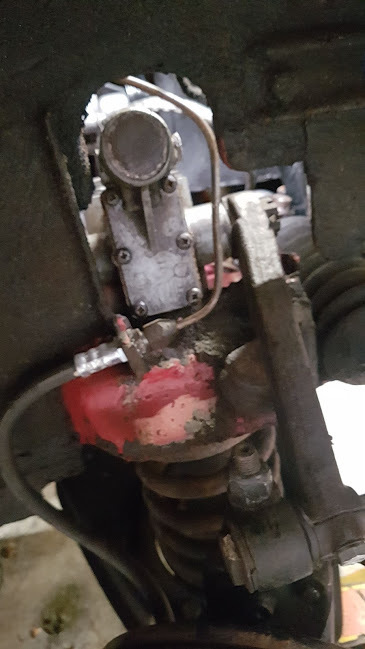 The difference was night and day - the car is a lot more stable and corners a lot flatter, despite not having a front anti-roll bar (not fitted as standard to very early cars). More work is needed here but it's a step in the right direction. As noted a few pages back the Jimny gearbox is not equipped with a speedometer drive or sensor - this is taken care of in the separate 4WD transfer box on the Suzuki - so an electric speedometer was needed. Luckily I am not the first to have had this issue and Vitesse Global Ltd offer a very close replica of the original Smiths speedo with their 5 speed MGB kits. 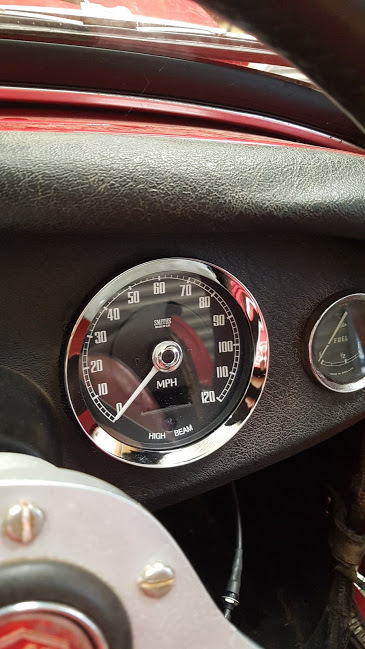 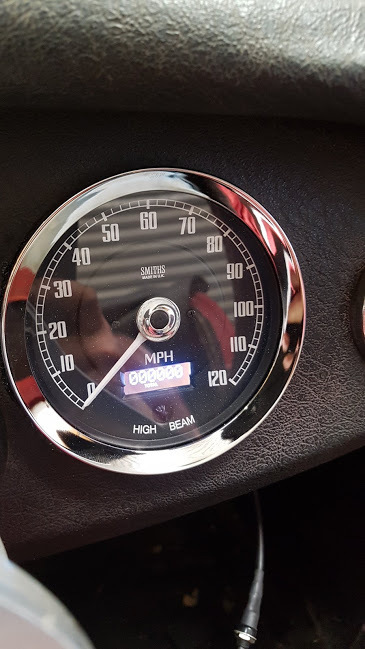 The backlight is a touch bright but I'm pleased with the result. I just need to finish the sensor mount on the diff case now. With that done I took the car on a blast across Sussex with some friends to the BRHC at the old Bentley Motor Museum. Despite being the oldest and least powerful car by some way, (and certainly most under braked and tyred!) it held it's own with a pair of MX5s and a very well sorted 4AGE swapped Midget. This all led up to yesterdays long anticipated and heavily postponed trip to Stanton Motorsports in Hungerford for a rolling road session... 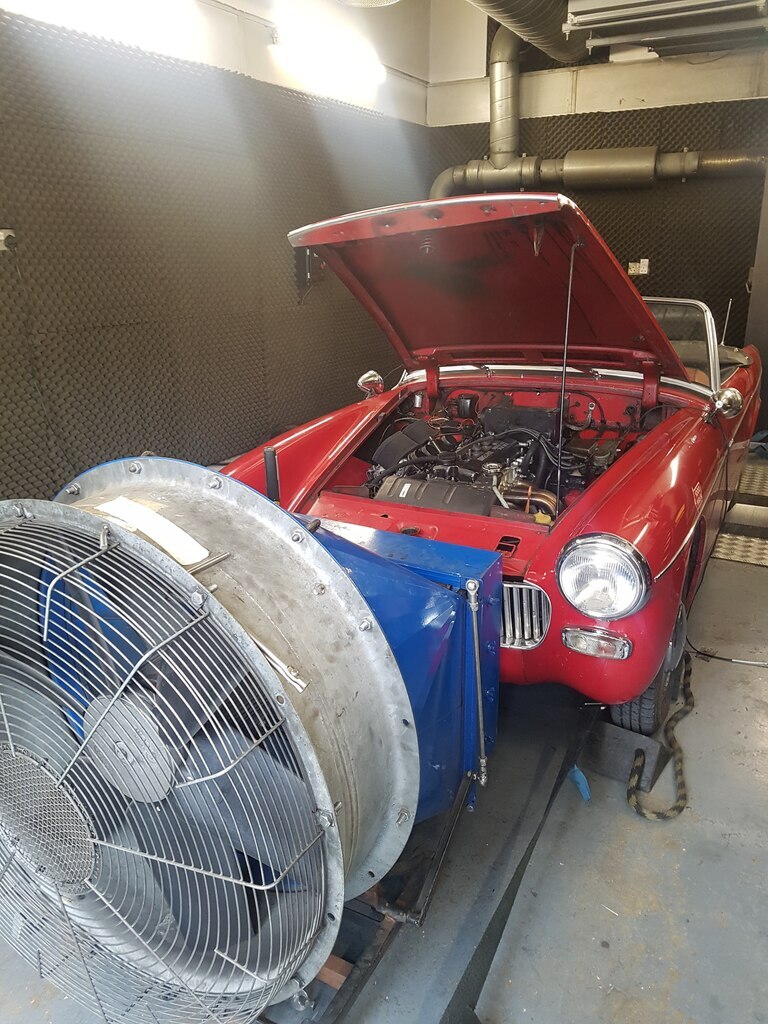 After being strapped down, the timing checked and an exhaust clamp tightened we got underway... I was delighted that the fuelling was good across the entire range with nothing needing touching on the carbs, proof that with enough time spent and a wideband installed it is possible to get decent results from a road tune. Timing wise we ended up at just 26* all in for maximum power, clearly a very efficient combustion chamber in the little CG. Final power was a healthy 73.4hp at the rear wheels, surprisingly at 5500rpm so 2000rpm below the factory redline, so plenty of scope for further development there. The torque curve is lovely and flat though making it extremely driveable. The performance increase over standard is further amplified by the 40kg+ weight saving. 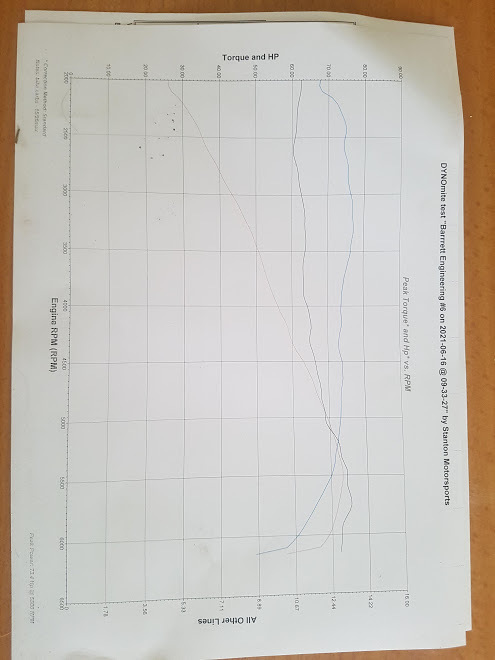 The engine is a completely standard 1995 CG13 / 1275cc bottom end with over 100k miles on it. The head is a standard CG10 / 998cc from a 2001 car which is identical as far as ports and valves are concerned. Fuelling is a set of Mikuni 36mm carbs from a GSXR600 on a second hand homebrew manifold with non-existent port matching Ignition is a DTA S40i wasted spark which allows me to keep the heater and battery in the standard location. This could be swapped for a Lucas dizzy. Exhaust is my own 4-1 stainless manifold with 2" exit stepped down to a 1 5/8" single box Maniflow system. I suspect that a combination of the poor inlet manifold and small bore exhaust are limiting the top end but without some improvements to the suspension, brakes and squashy bit behind the wheel more power is the last thing I need... Thanks for looking James |
| |
Last Edit: Jun 17, 2021 10:16:01 GMT by metroman
|
|
|
|
|
|
|
|
Such a fan of this build, looks amazing! Might be fun to get it on megasquirt or speeduino down the line!
|
| |
|
|
|
|
|
Jun 19, 2021 15:02:01 GMT
|
shalmaneser - Thank you, I'm glad you're enjoying it. I am really keen to give Speeduino a go in the future for sure, it is really looking like the future for hobby EFI. For now I'm happy enough with the carbs and the DTA is proving reliable for now, and can apparently be upgraded with injector drivers if I go down that route in the future. If I was to change the carbs it would more likely to be for a set of SU's as they are a bit more in keeping with the car. James
|
| |
|
|
|
|
|
|
|
|
Congrats!
73.4Bhp@rear wheel is massive improvement from Old A-series engine.
It will cost you at least £5k. 1380 half block with cross flow head...
So you can buy MOT failed Micra for £300 and sell everything you don't need and your engine could be for less than £150? There is no brainer!
Mikuni bike carbs are one of best you can have.
They are better than DCOE weber as they and primary and secondary system. SU will look nice but you will lose power, economy, and efficiency. Keep it as it is.
|
| |
Building roof chopped, screen raked '68 Mini with G13B 1.3 16v Gti engine with LSD, Yamaha R1 carbs. As well as mk1 Suzuki Swift Gti AWD with a turbo.
Drives PHEV Outlander but wishing my mk1 Swift Gti or mk2 CRX Vt were still with me!
|
|
merryck
Club Retro Rides Member
Posts: 480
Club RR Member Number: 9
|
|
|
|
So you can buy MOT failed Micra for £300 and sell everything you don't need and your engine could be for less than £150? There is no brainer! Not for long, prices are going up! |
| |
|
|
|
|
|
|
|
Jun 20, 2021 13:55:43 GMT
|
So you can buy MOT failed Micra for £300 and sell everything you don't need and your engine could be for less than £150? There is no brainer! Not for long, prices are going up! The bottom end of the used car market seems to have completely broken over the last year and the amount of used spares is definitely still well down across the board. That said, I'm having no trouble getting hold of 1.3 and 1.4 engines for under £300, and people are still literally giving away 998s. The shells rot out well before the engine is close to being tired. I am still planning a properly 'hot' engine and considering building it with a 1.0 bottom end Apparently 145bhp... James |
| |
Last Edit: Jun 20, 2021 13:56:44 GMT by metroman
|
|
|
|
|
Jun 20, 2021 16:19:39 GMT
|
|
Read the whole thread (so far!)and really like your approach and solutions.
Loving the work and look forward to more.
|
| |
Needs a bigger hammer mate.......
|
|
|
|
|
Jun 28, 2021 13:35:21 GMT
|
With the engine running really well and the gearbox performing faultlessly it was pretty apparent that the handling was still pretty sub-optimal despite the improvements made by the dampers. I was finding the car quite skittish with a tendency to wonder, and the steering was very light. The not insignificant weight reduction over the front axle meant that the car was sitting very high at the front which was putting the front wheels into positive camber, and I believe also pushing the alignment towards toe-out. Because the car is much lighter than standard I wasn't keen on fitting lowering springs from the usual sources because the rates are also increased, which I don't think I need, so ended up with a pair of Frontline springs. They were extremely helpful over the phone and in person when I collected them. The standard springs are 271lb and the Frontline 1" lowering springs 340lb. Excellent... 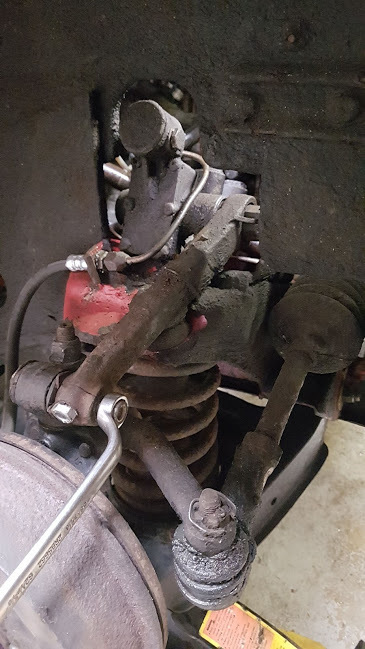 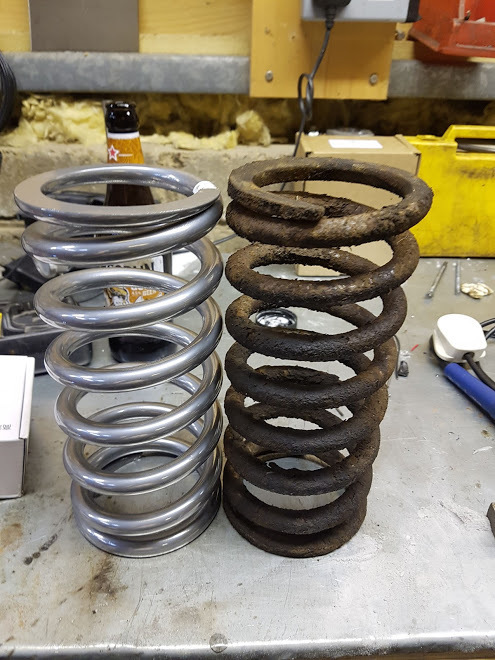 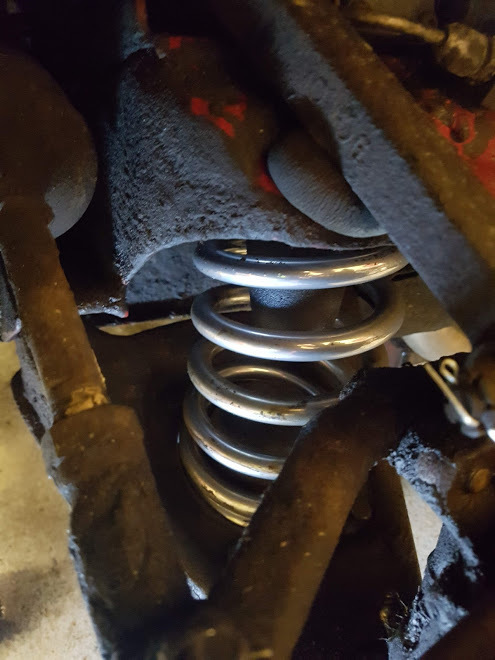 Or perhaps not... So it turns out the early cars like mine have a shorter spring as standard, 9.4" compared to the 9.1" Frontline. The later 1275 cars have a 10" spring which I suspect the Frontline part is meant to replace. The end result was the lowering spring made the car sit even higher! After a bit of head scratching I decided to space down the spring pan with some 20mm ally spacers and longer bolts. The ratio of spacer length to ride height change seems to be about 2:1 so a 40mm drop. There is some debate on Midget forums about whether the spacers are a good idea or not, I concluded that if the diameter is larger enough, the drop isn't too great and suitable materials are used the only danger is an increase in travel before the pan hits the bump stop. Given the increased spring rate and reduced mass over the axle I was happy to accept this. 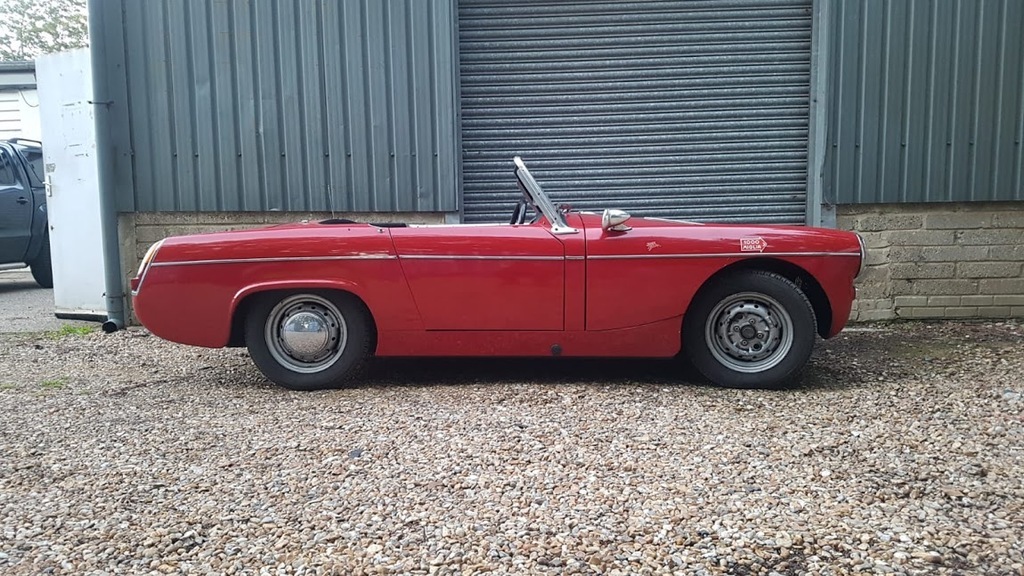 Aesthetically; much better, handling; night and day. The car is completely transformed, for the better. I need to get the string out to confirm wheel alignment but it is now really confidence inspiring. Neutral tending towards understeer so pretty ideal for me. James |
| |
Last Edit: Jun 28, 2021 13:36:28 GMT by metroman
|
|
|
|
|
Jun 28, 2021 15:01:13 GMT
|
|
Nice work! Re the suspension upgrades, I've put 20/50 oil in my, very old, front shock absorbers and that seemed to work well!
|
| |
|
|
|
|
|
Jul 14, 2021 11:46:02 GMT
|
With the springs and ride height sorted I finally coughed up for a set of new tyres to replace the aging Firestones. As normal I went around in circles reading conflicting opinions online, made some phone calls and went with a set of Blockleys. www.blockleytyre.com/product/145r13I have had very mixed experience with 'modern' tyres on classic cars, especially with lighter cars that really don't suit a very hard side wall. I am also not a fan of modern treads and sidewalls aesthetically. Pirelli Cinturato and Michelin XAS were the other options but I was sold on the Blockleys by the offer of my money back after 1000 miles if I wasn't 100% satisfied... I was very glad to have changed the tyres when the fitting centre found all the wheels had been fitted with inner tubes. There was some minor corrosion to the inside of the rims but nothing a wire wheel and sealant couldn't sort out. Whilst there the alignment was also sorted. Next up was the steering wheel. I'd been hunting for a genuine GAN1 wheel since my dad bought the car but they are all either badly damaged or astronomically expensive. The original had been swapped out at some point for an aftermarket wheel which looked nice but felt horrible and I am pretty sure it has cracked inside the rim (ooo err). 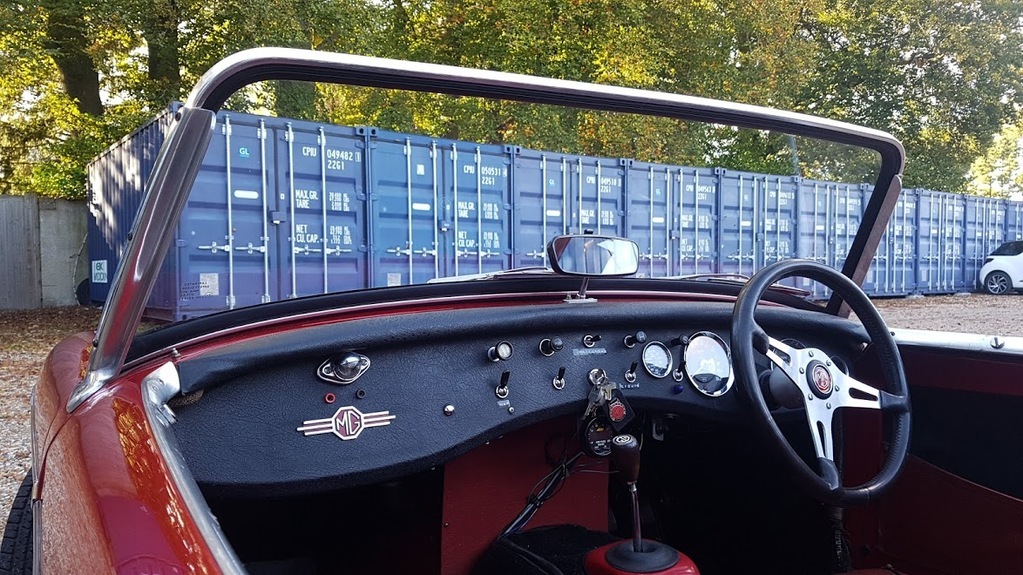 Before 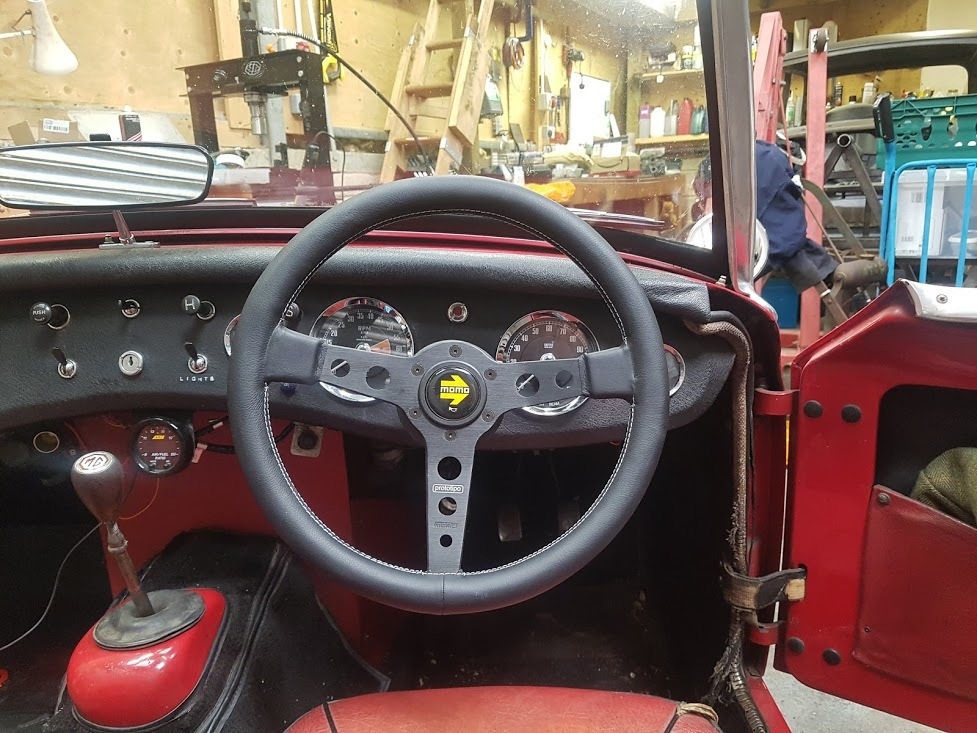 After No, it isn't massively in keeping with the car but I just love the Prototipo. With that all done the fluids were checked and the car was packed with spares and camping gear ready for a very long overdue road trip. |
| |
Last Edit: Jul 15, 2021 10:32:55 GMT by metroman
|
|
|
|
|
Jul 16, 2021 10:50:47 GMT
|
Road Trip! This one has been a very long time coming, we started planning it back in January to keep the locked down winter blues at bay and give a deadline for the project. First leg was a cross-country jaunt following a Mk1 MX5 from the south coast up to Bibury to meet with friends from nearer Oxford. Immediately noticeable was the improvement in stability over 60, and reduced tyre noise.  MG, Caterham SV, Mighty 405 After a good pub lunch at the Catherine Wheel pub, we set off in convoy to the Herefordshire Raceway kart circuit. This turned out to be a great circuit with a nice layout and very well-prepared karts. I didn't come last which was a bonus. We then headed south again into the Wye valley to camp at Broadstone Park outside Monmouth. This was my first taste of Welsh roads and the little Midget did not disappoint, keeping up with the Mazda and Caterham pretty well. I was pretty ecstatic when I was told that the occasional popping from the exhaust on long engine braked declines was accompanied by some decent flames - race car! (or out of sync carbs)   A pretty idyllic spot to spend the night Local cider of indeterminate alcohol content ensured a good night’s sleep was had, but did mean a cooked breakfast was necessary before we could pack up and get on the road again. Boris the randy campsite turkey made packing very entertaining...  My tent now… Back on the road, we took the A40 skirting along the north of the Brecon Beacons, then headed south down the A470 which led to the epic A4059. Some miles to let the brakes cool down and then back north over the Breacon’s again, this time on the A4063 Mountain Road. I think it may have been marginally better to do the route in reverse as the series of hairpins were attacked downhill but it was still brilliant fun.  At the peak of the A4063  We then made our way to Carreg Cennen Castle for a late lunch and walk before pushing on to Pendine Sands. By lucky coincidence our stay was coinciding with the VHRA speed trails so we saw (and heard!) some seriously cool 30s American metal on the roads as we got closer.   The castle was well worth visiting. The views were spectacular.  One of several speed trial cars we passed on the way. This leg was uneventful right until we hit the track leading to the campsite which was a touch bumpy for the MG’s low hanging exhaust. No amount of weaving was stopping the banging and scraping so I tried increasing speed a touch. This improved matters so much that, in my best Clarkson impersonation told my passenger “I think speed is my frien…” but was cut short but the entire exhaust falling off! Perfect!  Emergency repairs! However, luck was on our side – the owner of Big Barn Campsite had owned a (much missed) AH Sprite and lost his exhaust in the same manner, so was sympathetic to my plight. He was even kind enough to not only recover the lost exhaust for me but give access to a barn in which to carry out the repairs on a flat, level concrete floor. I had been sensible enough to invite a friend who is both a great engineer and also an experienced race mechanic so the exhaust was not only refitted but the mounts all rejigged to get some vital extra clearance. A result in my book. We started early on Saturday to get down to Pendine beach to see the VHRA speed trails. There was a great turn out of cars both competing and spectating with a nice atmosphere. Certainly an event worth travelling for.    Next on the itinerary was a cross-country drive up to Snowdonia taking in as many sites and roads as possible along the way, including the epic Devil’s Staircase and Mach Loop, ending with a 30 minute stretch of single track forest and hill roads leading to a wonderfully isolated cottage.        Sunday was a day off long drives, spent wandering around the very strange Portmeiron, compulsory I think because we had a Caterham with us! A most odd place indeed but enjoyable all the same. All that was left now was the 300 mile drive home. The little MG performed faultlessly with only the seat causing me a bit of discomfort towards the end. We had been extremely lucky with weather for the trip with only occasional showers, good enough to drive the entire way with the roof stowed away, until I got to within 5 miles of home and the heavens opened. And I mean, really opened. For about 10 minutes there were several inches of water on the road and virtually zero visibility; the perfect end to a road trip in an old British sports car really!  To sum it up I am over the moon at how the car held up and performed. The engine and gearbox swap caused no issues and gave over 35mpg average despite being trashed for a good amount of the driving. The suspension mods and refurb combined with the tyres have worked brilliantly to get the chassis up to speed with the powertrain and meant the MG was able to give the MX5 a run for its money in the corners and leave it well behind on the straights. Another surprise was just how well the 7” drum brakes held up. They have a reputation for being diabolical but I had no real issue with them, it was just something that had to be kept in mind on long declines where I relied more on engine braking. I suspect the not insignificant reduction in mass also helped them along as I only started to get fade once after an especially prolonged stretch of hairpins taken at speed. Spending this amount of time in the car has meant I have long list of things to change, repair or upgrade but that’s half the fun. Thanks for reading James |
| |
|
|
|
|
|
Jul 16, 2021 20:31:25 GMT
|
|
Thanks for such a good read!...and great pictures. Well done on such an excellent upgrade on your Midget and very glad that you can use it in such a spirited manner.
|
| |
|
|
madmog
Club Retro Rides Member
Posts: 1,160
Club RR Member Number: 46
|
|
Oct 25, 2021 16:30:20 GMT
|
Do like this build, alot! My 106 Rallye had CBR600 ITB's and it had 3D printed intake manifold made out of heat resistant PLA plastic, been in use for 2 years and are still going strong. Just so that if you'r wondering, there is 3D option aswel. ITB's them selfs were some where or region or 60€.  Can you tell me more about heat resistant PLA? What temp can it handle? I’m thinking of the catch 22 where you are limited by the max temp of the printer. I’ve thought of making things in PETg but have been reluctant to risk even that in an engine bay let alone touching a cylinder head. Also Metroman James, please put a link to your website. You are being too modest leaving it out. |
| |
|
|
|
|
|
Oct 26, 2021 10:17:29 GMT
|
I have a 1962 MK2 Sprite and it still has the drum brakes (although its still 948cc), they have always been ok but as you mention they tend to fade on long down hill sections where engine braking is your friend.
The only issue I did have was decending the old wyche road in Malvern which is aroudn 1 in 5 I think and I was decending in first and half way down the original gearbox stripped all the teeth off first gear, it was pretty hairy!
I would suggest though upgrading to discs would be a sensible addition as its a simple bolt on upgrade and they are much better, I had a set on , my 1958 frogeye and coupled with a 1098cc engine it was much easier to drive in modern traffic.
Here is my MK2 Sprite about 20 years ago when I first rebuilt it.
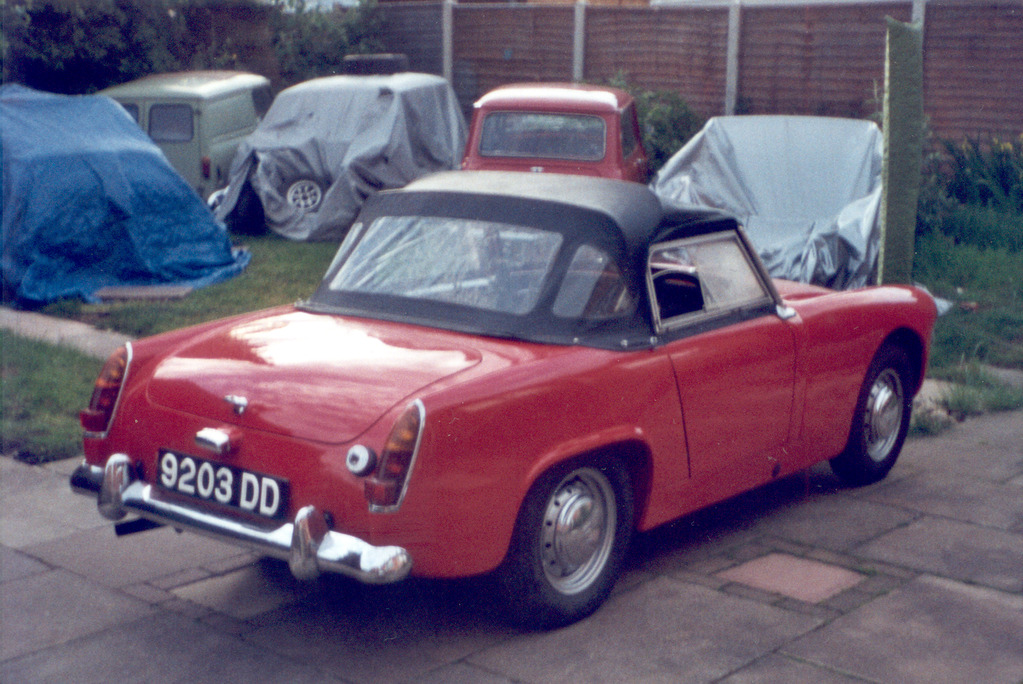 |
| |
|
|
|
|
|
Nov 23, 2021 15:12:07 GMT
|
That Sprite looks lovely homersimpson . I only experienced fade once with the 7" drums and that was also on a long downhill stretch. Loosing the gear teeth sounds terrifying! MG wise the car has been in pretty constant use since the trip and needed very little doing. A front wheel bearing wore out which I replaced and upgraded the brakes at the same time. There are quality issues with most new ball bearings for Midgets which either fall apart, do not have a large enough corner radius to seat correctly against the upright, are not ground correctly to give the proper pre-load, or all of the above! Because of this I opted to go with a taper rolling set from Moss, which have a higher load capacity so should las t a bit longer. The bearings are the same as those fitted to an MGB but with a larger radius. There is some great information about Midget front wheel bearings here www.mgexp.com/article/mg-midget-and-sprite-front-wheel-bearings.271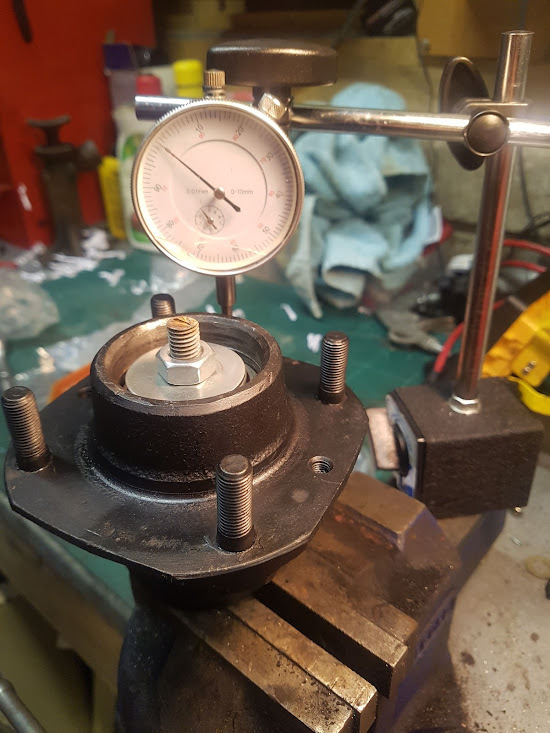 The kit did come with a ground shim but when checked on the bench the bearings were binding so I had to fit some shims. The MGB GHK1005 kit fitted fine. I set the bearings to the MGB spec of 2-4 thou end float on the bench and doubled checked after fitting to the car. With the hubs in bits I also took the opportunity to upgrade the drums to 8" from a Morris Minor. This was pretty simple to do. If anyone is interested the parts list I used was as follows; 2x drums FBK125 1x brake shoe set FBK121 4x springs FBK121 2x 8" Morris Minor backplates 8x longer bolts to mount the backplates, I forgot to note the sizes I had to make a pair of 6mm spacer rings, I made these from pre-cut discs from eBay www.ebay.co.uk/itm/293562006032?var=592372280441&hash=item4459a8ba10:g:besAAOSw7z5epvGmBoth the discs and backplates need to be drilled with the same bolt pattern as the Midget backplates and bored to the same ID to clear the hub. This could probably be done with a hole saw but as I have a lathe I trepanned them. 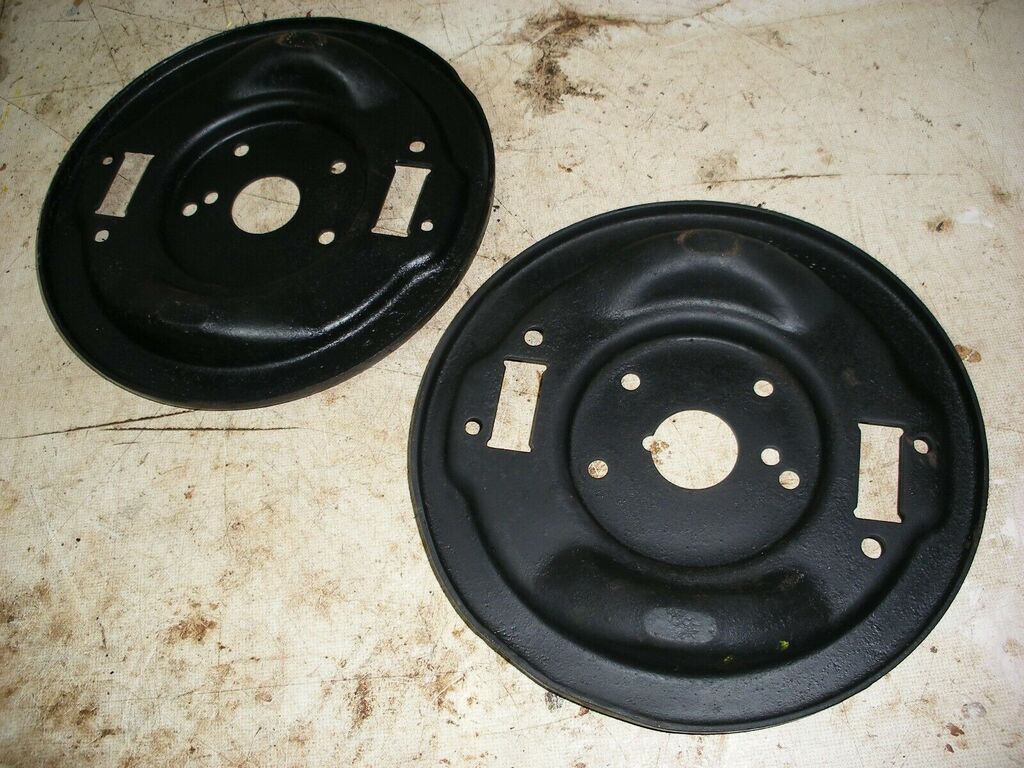 Unmodified Morris backplates 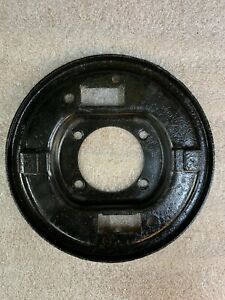 Midget backplate 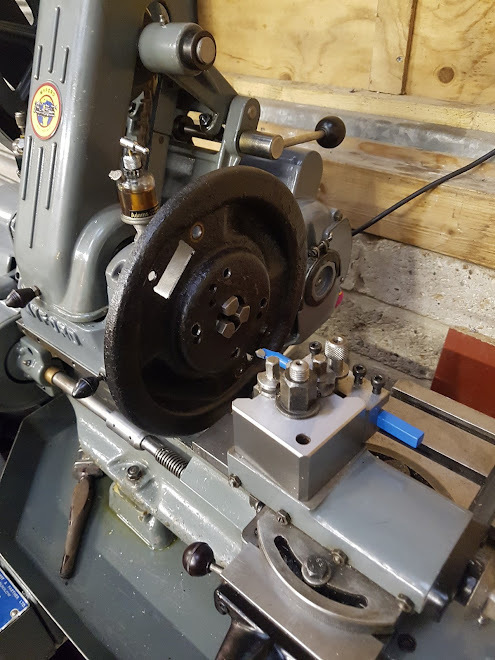 Setting up on the Myford, it just about fits I didn't do very well with remembering to take photographs, as and when it comes apart again I will take photos and draw the spacers so anyone can copy if needed. More information about the conversion can be found here: austinmotorvehicleclubqld.org/blog/2019/1/23/replacing-sprite-7-front-brake-drums-with-morris-8-brake-drumsforum.austina30a35ownersclub.co.uk/viewtopic.php?f=7&t=4240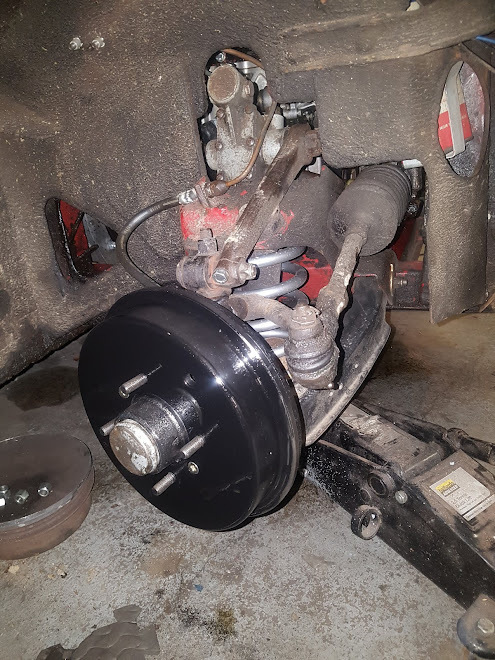 I am really pleased with the results, it was only a few hours work and far cheaper than discs. I also didn't need to worry about rebuilding the master cylinder to remove the valve fitted to drum braked cars, or deal with too many new parts of questionable quality. Now bedded in the brakes are more positive and really inspire confidence. Certainly worth doing. A nice surprise through the post was this months TKC magazine with a 4 page feature on the car and company. I am very grateful to Steve Hole for getting in touch and for the writeup. It's a good mag and well worth picking up a copy 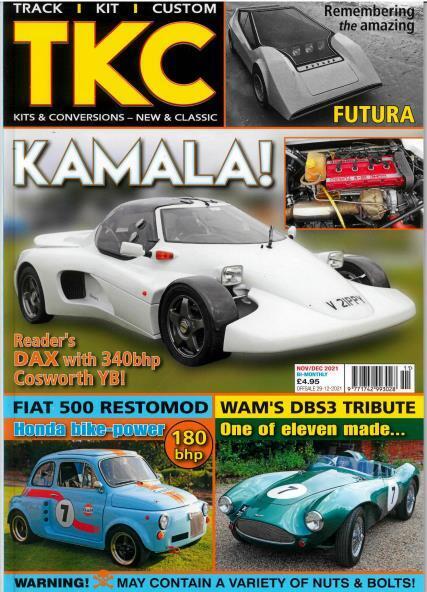 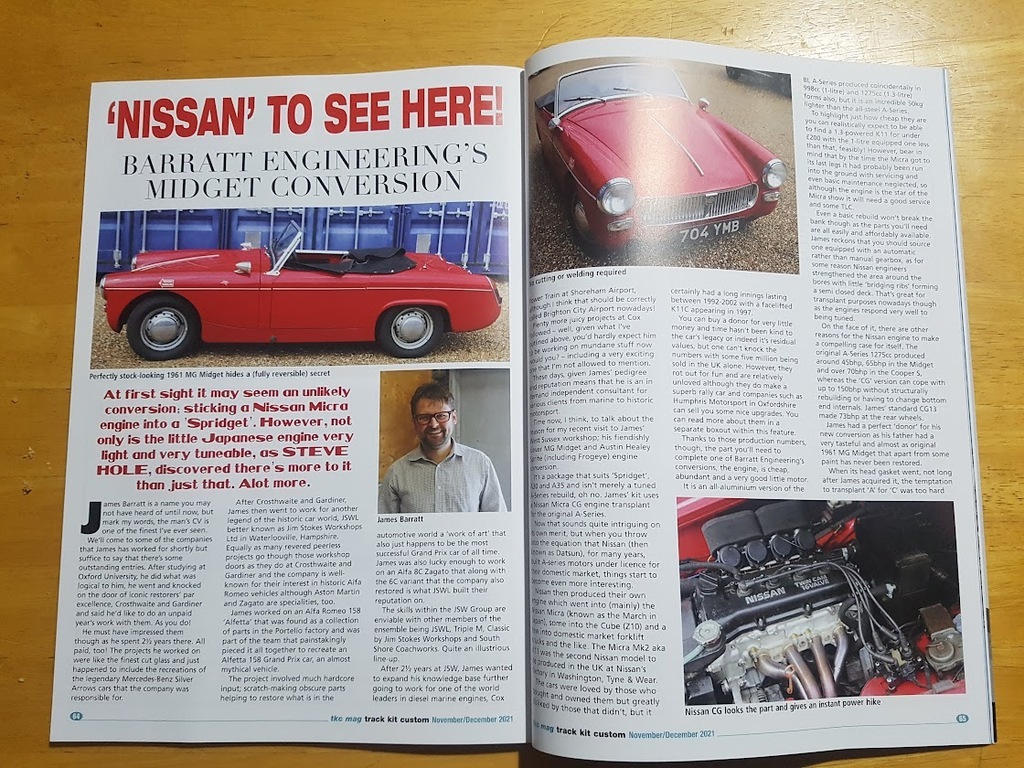 My girlfriend has made a quick video of the car which was good fun and, I think came out pretty well, especially given it was entirely shot on a phone. A gimbal and decent mic should make for some good footage. Next steps are going to be on the rear suspension and axle location. Both rear dampers and leaking and lateral location is lacking so there is definitely scope for improvement. I'm not a fan of the panhard rod kits as I have never found rose joints have a long service life on a road car, even with boots, and bolting to the sheet metal of the boot floor isn't ideal either so am investigating alternatives. A-frames seem very popular with A30/A35 racers and look to be a decent compromise between simplicity and performance compared to a Watts or Mumford link. Where possible I will be carrying on the same ethos as the rest of the build and making sure it is bolt on with minimal (ideally zero) drilling, cutting or welding. 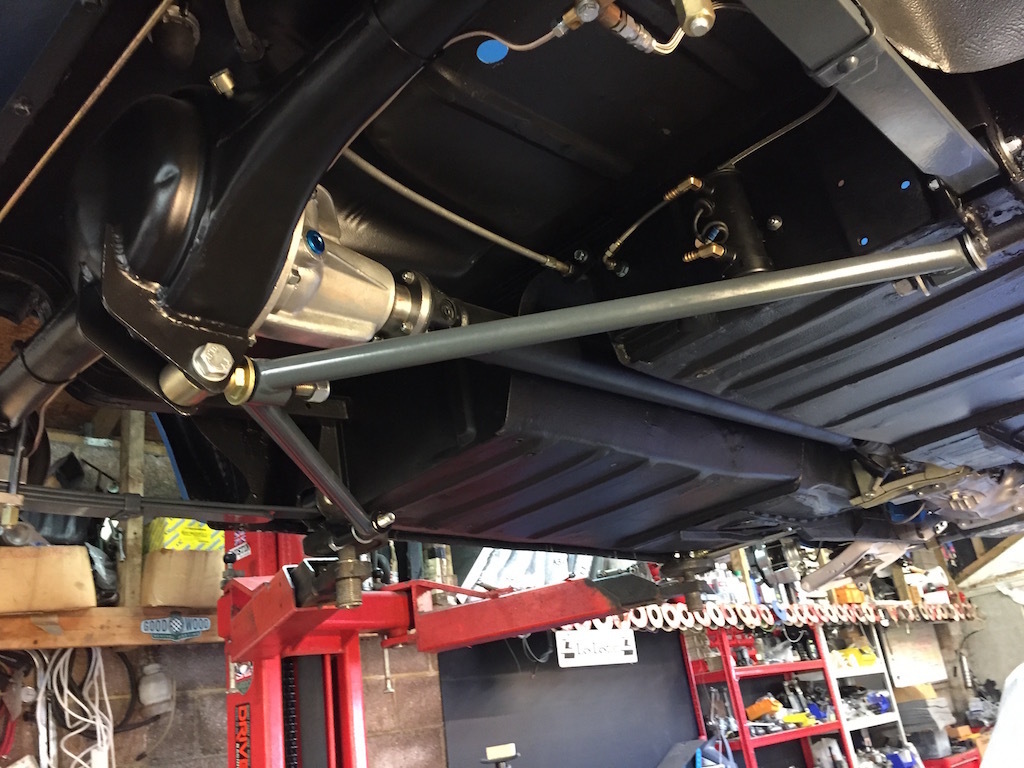 Thanks for looking James |
| |
|
|
|
|


