|
|
|
Nov 23, 2021 15:14:00 GMT
|
|
|
| |
Last Edit: Nov 24, 2021 13:45:59 GMT by metroman
|
|
|
|
hagus
Part of things
 
Posts: 35
|
|
Nov 23, 2021 22:44:48 GMT
|
|
Superb!
|
| |
|
|
|
|
|
|
|
|
Just sat and read the whole thing. Awesome project. Amazing work!! Now just need to do a 1500 triumph engine kit!!😜 id love to get rid of the old boat anchor!
|
| |
|
|
|
|
|
Jan 28, 2022 14:31:18 GMT
|
|
Although I’ve just realised, if changing the engine and gearbox it doesn’t really matter what the old engine was!! 🤦🏼♂️
|
| |
|
|
|
|
|
Jan 29, 2022 18:42:34 GMT
|
|
Glad you enjoyed it, that's quite a commitment to read the whole saga. For a 1500 you'll just need some A-Series engine and gearbox mounts and the CG engine and Suzuki box will bolt right it - I don't think you'll regret it for a second!
James
|
| |
|
|
|
|
|
Jan 30, 2022 20:23:52 GMT
|
|
I’ve just read through this thread from the start too. A really interesting and entertaining read. An excellent, well thought out, and well engineered engine swap. I loved the little drive by video. It looks, and sounds, like such fun. It made me want to rush out and buy one immediately! Good luck with the business 👍🏻
|
| |
|
|
|
|
|
Apr 29, 2022 10:28:56 GMT
|
I've got a few small updates on this thread since I last checked in, so here goes: Back in January I took both Midgets to the local rolling road for a little shoot-out type thing as a bit of a marketing exercise, and also out of personal curiosity to see how the Micra engine compared to a half decent A-Series. Neither car embarrassed itself, the results were pretty surprising and my better half made a great little video of the escapade. 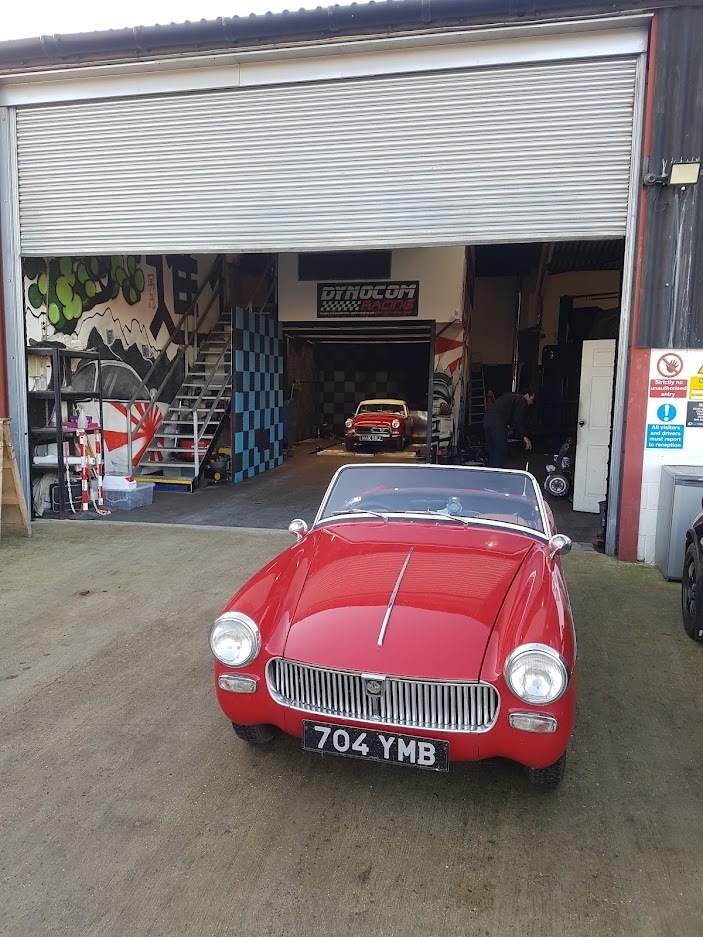 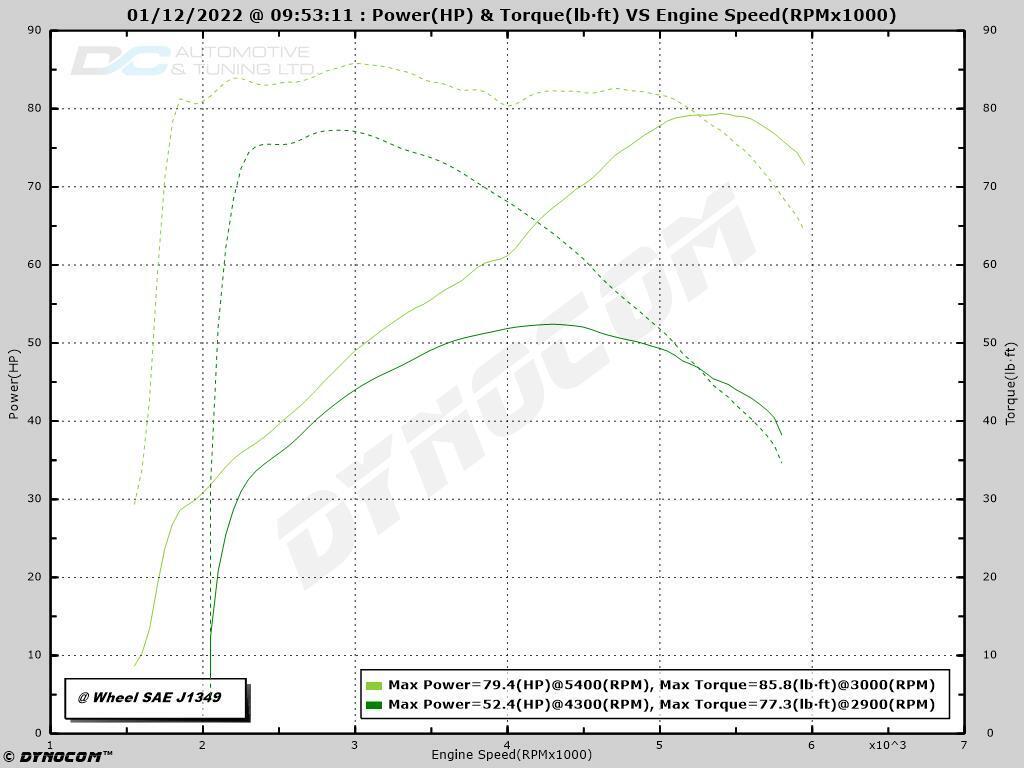 Light green - CG13 Dark green - 1275 A-Series The downside was when the car was being strapped down the diligent operator noted a small fluid weep from the back axle, which turned out to be a fractured rear brake line. Not ideal at the best of times, and very unfunny with single circuit brakes! While totally possible to replace the line on the car I decided to take the opportunity to remove it all together and give it a freshen up. There were no signs of any of the suspension having been touched since the car rolled out of Abingdon in 1962 and everything looked well used! That said I only had a get the grinder out for two fasteners so not too bad. Both pipes were remade in Kunifer. I cut some short sections of fuel hose and slide it over the pipe before flaring, to protect the pipe where it is tied to the axle. 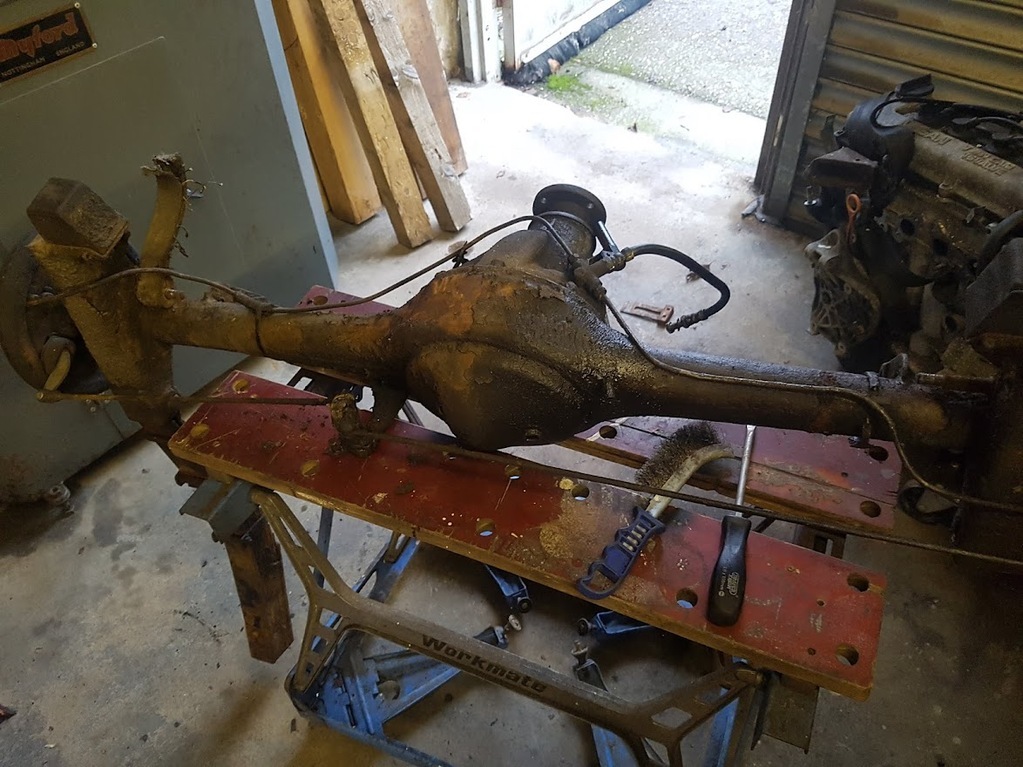 I removed the springs and completely stripped them. Half the clamps had failed through age and corrosion which will not have been helping axle location at all, and the bushes were completely wallered out. Each leaf was cleaned up on both sides with a 120 grit flap wheel, cleaned, oiled and reassembled with Denso tape. The ride was very harsh before - this work was done to try to reduce the stiction in the spring 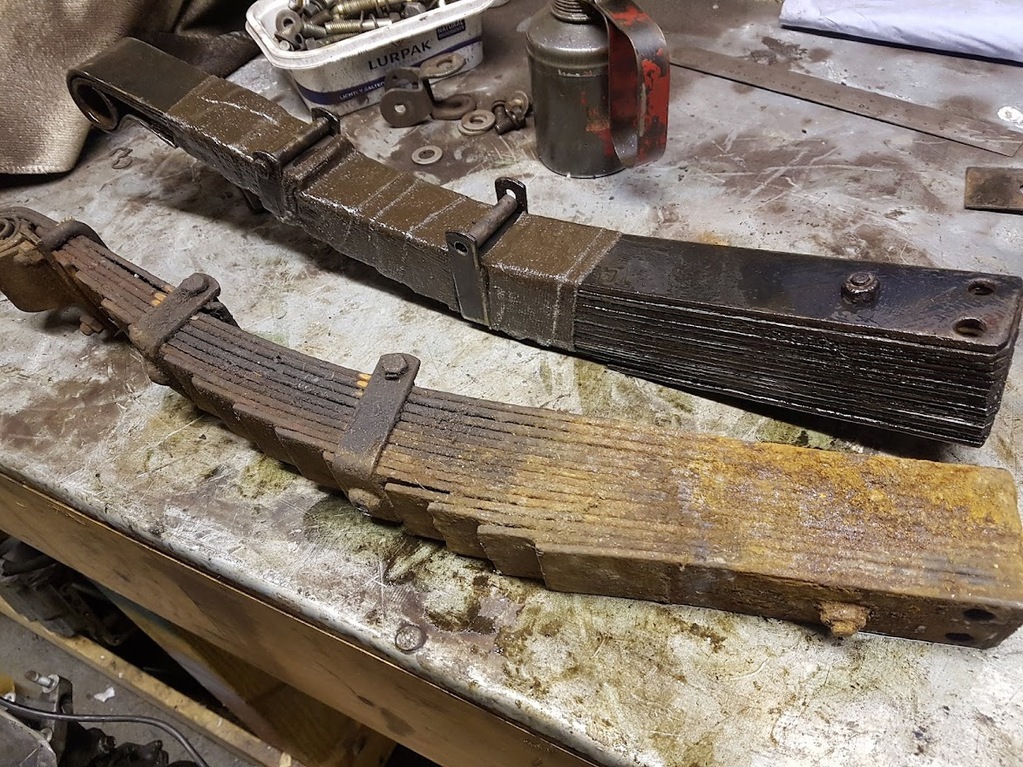 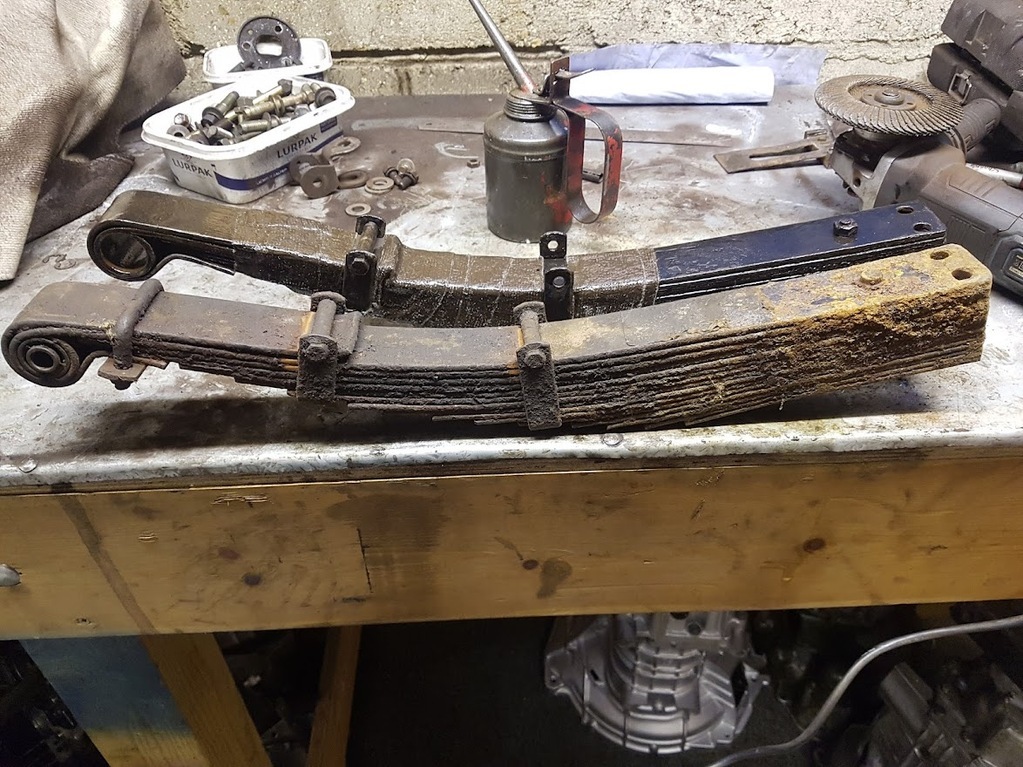 The trailing arms were next. The bushings needed replacing but the thin stamped steel had got very thin. There are some nice adjustable replacements with a rose joint at each end which keep the axle vertical when the car is lowered but I'm yet to be convinced of their long term durability in a road car. The ride height is staying standard as ground clearance for the exhaust is poor as it is. There are also new ones being made but I managed to score a pair of NOS arms from eBay for sensible money. These were cleaned, painted and the original bushes burned / pressed out. I polybushed the entire rear of the car when reassembling with an Autobush kit from Motobuild. It all fitted perfectly which was a nice surprise. On inspection the rear lever dampers, which received an oil change and clean last year, were almost empty with very slack shafts. As a quick fix a pair of used eBay dampers went on. These had oil and no play so should be fine for now. 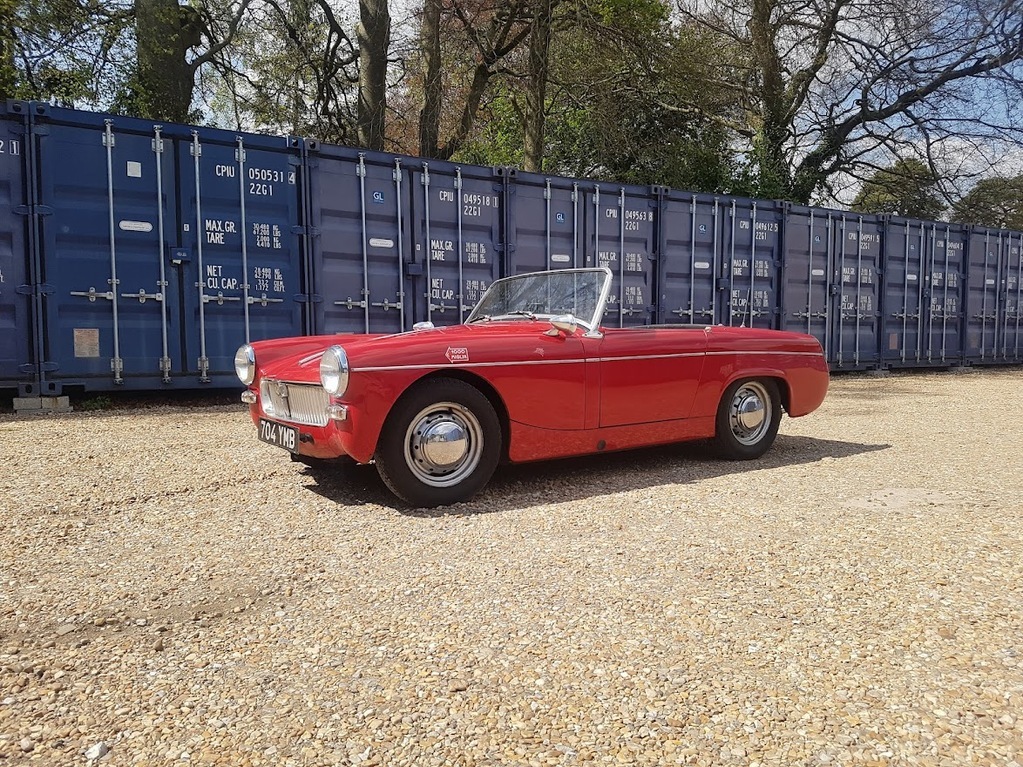 With all that done I put it all back together and took it out for a drive. Gamechanger. The car is so much more sure of itself now the axle is better located (who'd have thunk it) and much better to drive. It wasn't bad before but was nervous, especially on interrupted surfaces and cats eyes could really upset it. I am now far less convinced there is any need for additional lateral location from an A-frame or panhard rod which is great. The downsides are that the car has gone from neutral / understeer to mild oversteer when pushed and brake fade is now a thing. I think oversteer can be fixed with a front anti roll bar, standard fitment on newer Midgets for this reason. The braking issue is new and I think entirely because corning speeds are higher due to the car being more confidence inspiring. Actual stopping power from the larger 8" drums is at least as good, if not better than the discs on the 1970 car, the problem is heat. Some thought is required here so in the mean time I went to the pub (and made a car friend). More to follow soon.  Thanks for reading James |
| |
|
|
|
|
|
Apr 29, 2022 13:42:20 GMT
|
|
Well done.
I know people have been a little critical in the past regarding the potential benefit of the conversion in terms of the power v the existing A series. With those sort of figures it hopefully puts it to bed.
Would be really interesting to put this up against the more common K-series conversion as with those WHP figures I don't think there would be much in it at all (given the obvious advantage of not needing to modify the shell).
|
| |
Last Edit: Apr 29, 2022 13:44:07 GMT by shandylegs
|
|
|
|
|
Apr 29, 2022 16:02:37 GMT
|
Way back in the thread I posted about attempting to 3D print an inlet manifold. Well here's an update on how that went. To recap this is what I was starting with for an inlet manifold: 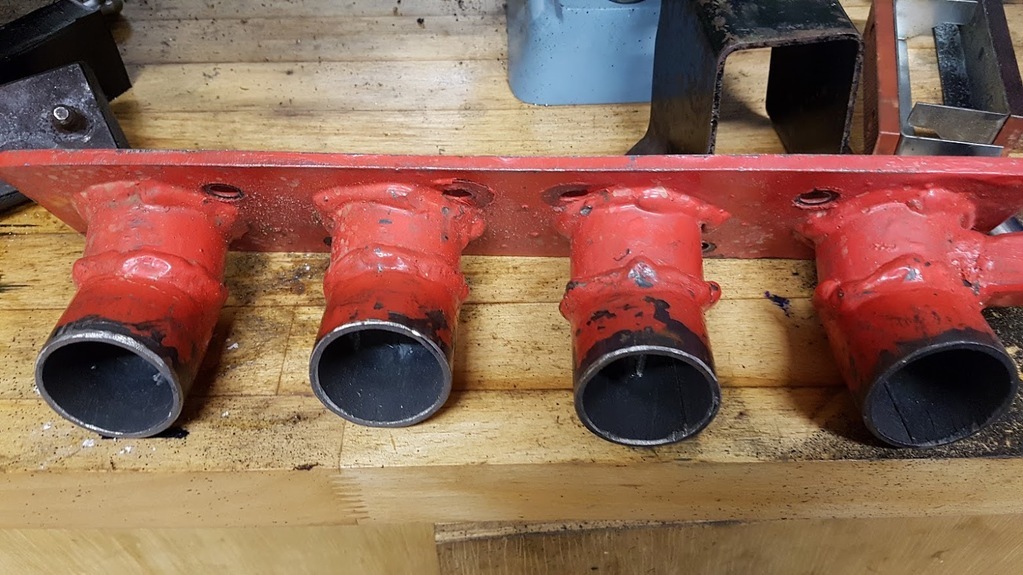 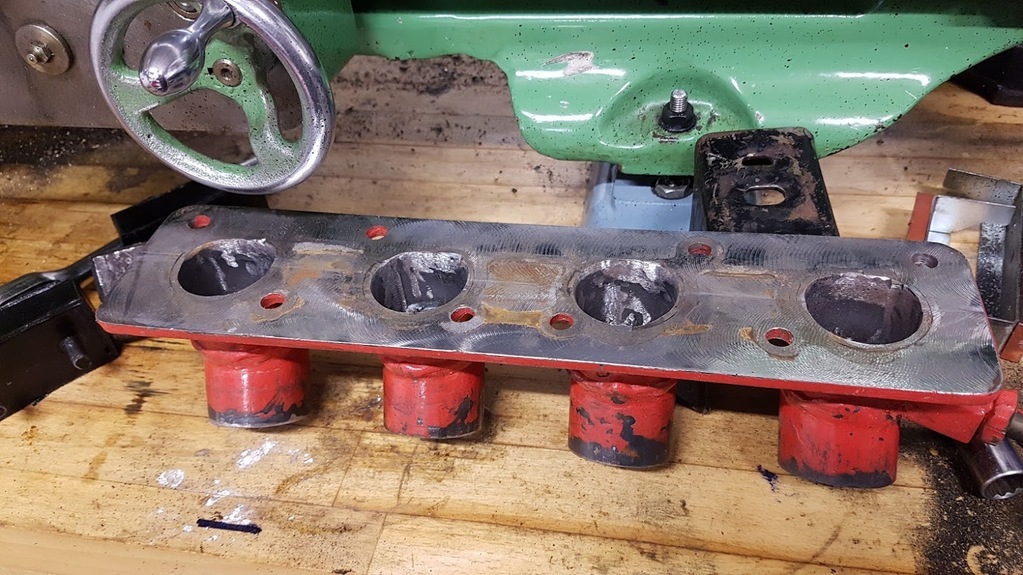 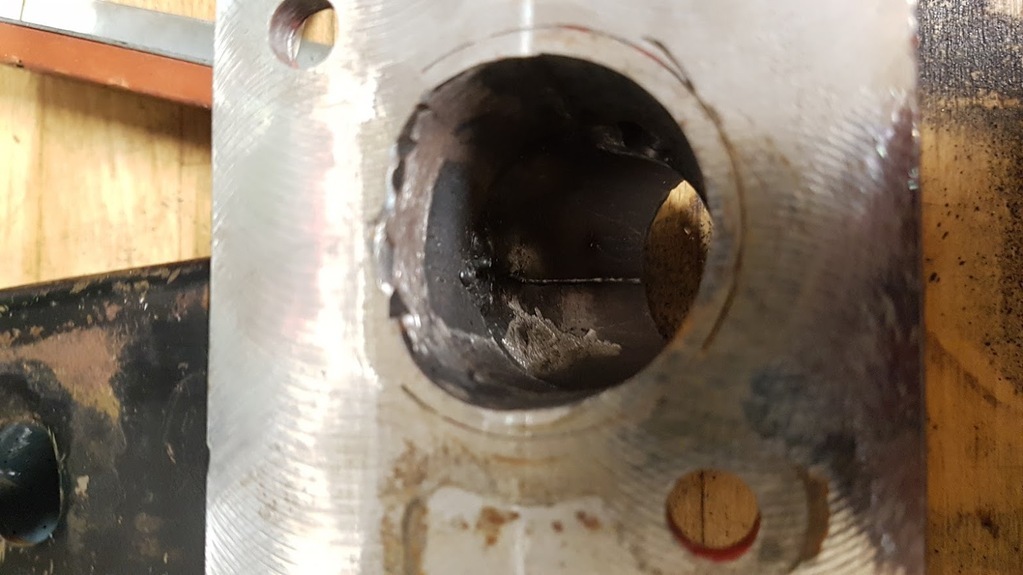 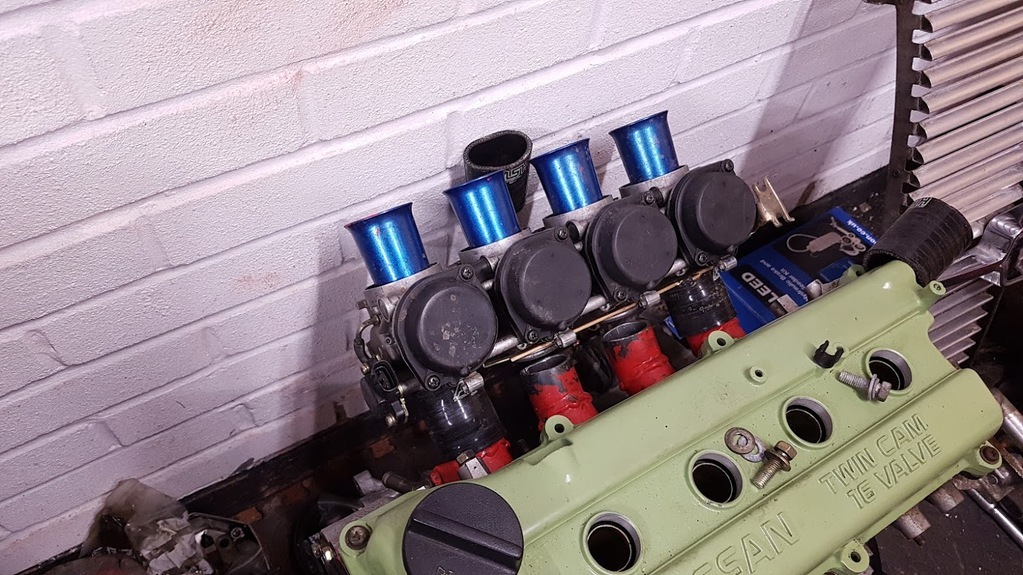 Far from optimal but at under £100 with the carbs I wasn't going to complain too much! However the porting was dreadful for performance so it was always going to need improving on. I hatched the plan to have a go at 3D printing one based on the "how hard can it be" motto. So I bought an Ender 3 v2, a cheap generic Chinese made machine with a reputation for sort of working and having an excellent community with lots of upgrades, mods and support available. I'd been sceptical about whether printing was really at a level where it is viable at home so didn't want to blow a lot of cash to find out I was never going to use the thing. Anyway, here is the machine as purchased, set up in my office 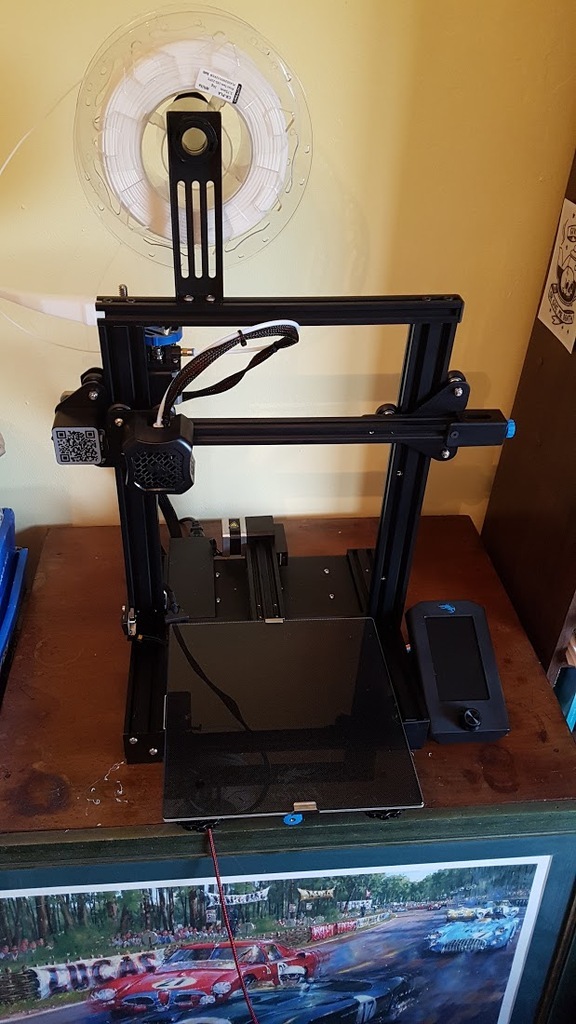 To the machines credit it worked extremely well out of the box and printed some lovely prototype manifolds in PLA. This stuff is great for quick prints but has limited mechanical properties making it unsuitable for the task in hand. 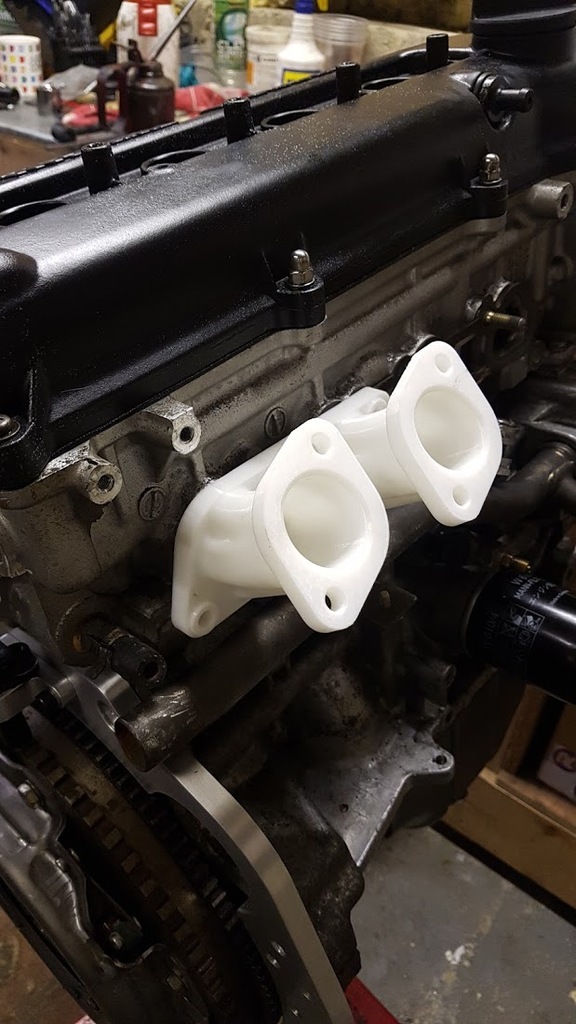 Following some really good videos on YouTube, in particular Making For Motorsport (worth a look) I decided that I needed to move over to polyamide Nylon filament for the task. This is used by a lot of OEMs for manifolds, typically with glass fibres to reinforce the plastic. For printing the glass tends to be substituted for carbon fibre strands, around 30um long. I think because it flows better through the nozzle than glass would. Moving to this material wasn't completely straight forward. Nylon needs to be heated to a higher temperature than the PLA the printer is designed for so a new heater / hotend was needed. The carbon also makes the filament abrasive so the nozzle also had to be replaced. They are brass normally, I ended up with a hardened tool steel nozzle. Then the material itself is a bit of a faff. Nylon absorbs water from the atmosphere at quite a rate which causes real problems when printing. The plastic is heated to ~260C to get it to melt and flow through the nozzle so any moisture boils and ruins the print quality and strength. So I bought a food dehydrator to process the nylon before printing - this is starting to feel like hard work! Some more prototypes where printed in the cheap and easy PLA 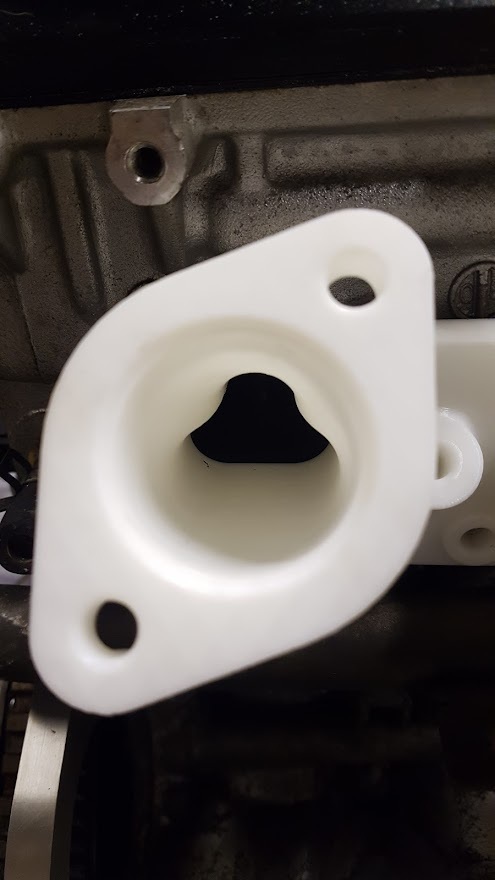 Not easy to see in the photograph but the port matching is perfect After not a small amount of calibration and messing about I was ready to go for it. 40 hours(!) later I had this 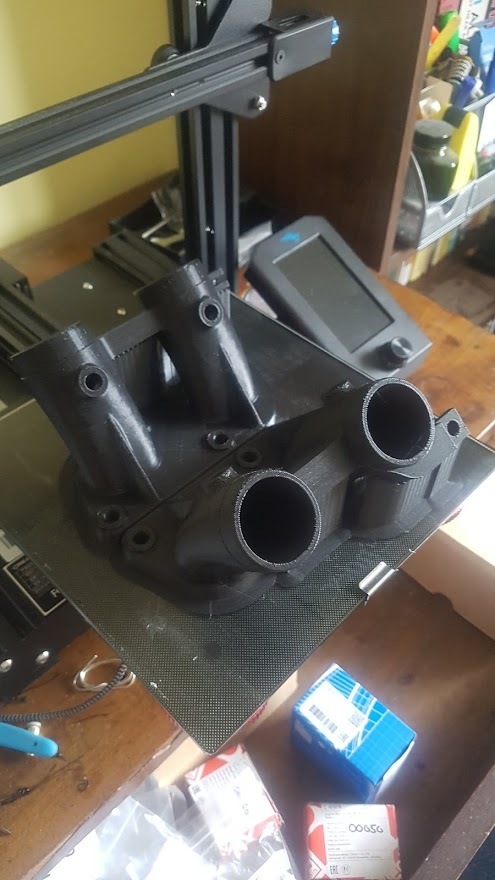 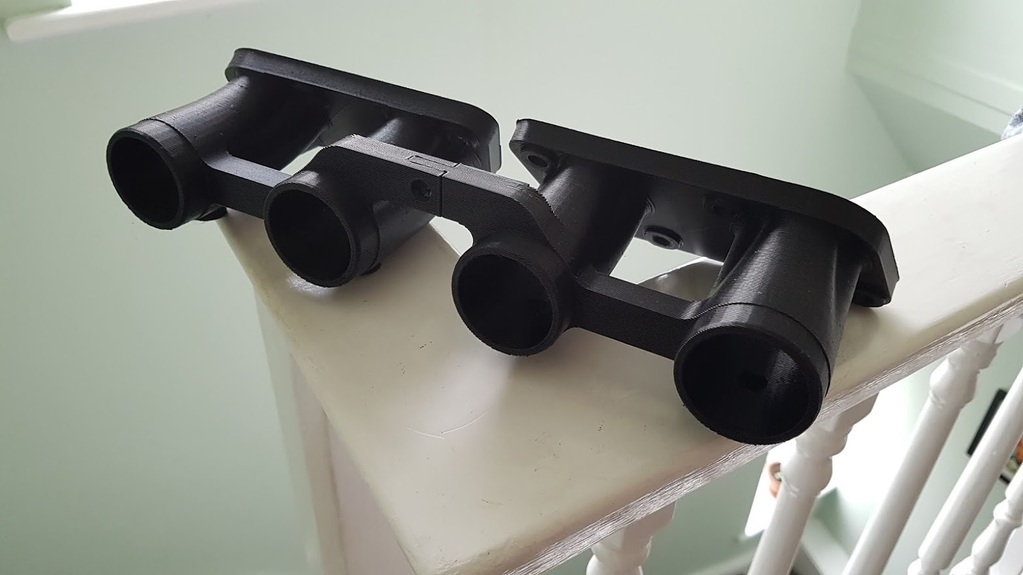 Which bolted to the engine with the carbs looked like this 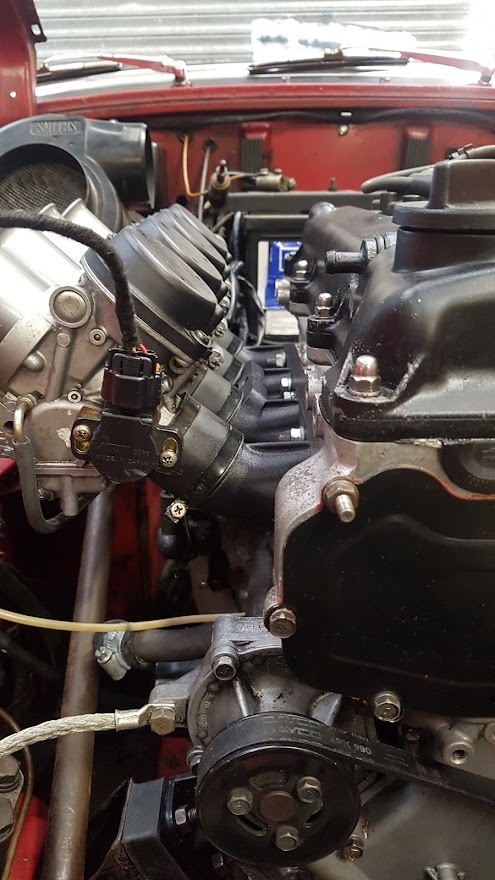 That's more like it! The print wasn't perfect and had warped slightly but it all sealed up nicely with some O-rings. The engine fired up and ran great! After an hour it didn't. Idle speed was increasing and mixture was out - the manifolds had warped and also started to delaminate. Then I took them off I was able to pull them apart by hand to the point I could almost unravel the filament. More work needed... The manifold of shame went back on and the printer went back to PLA prototypes for the summer. All that time the hateful ports were hurting me inside. I couldn't let this go on so I went back to the project to try again with more time and a little more understanding. The first change I made was to put the printer in an enclosure. This would do several things - make it look better and be tidier in the room - keep the prints at a more constant temperature - keep the printer clean and freer from dust - protect the prints from drafts which can cause all sorts of issues with warping - allow me to explore heating the environment to a higher temperature to allow the plastic to cool slower and potentially adhere better between layers IKEA to the rescue and I now had this 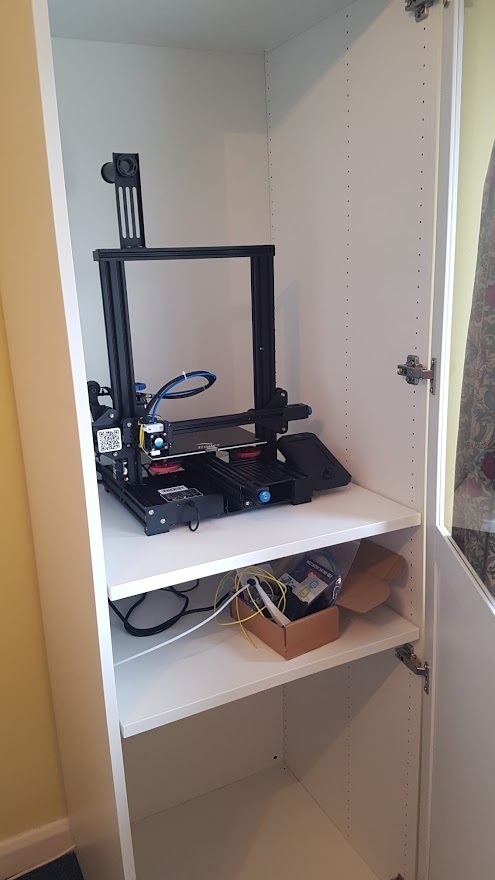 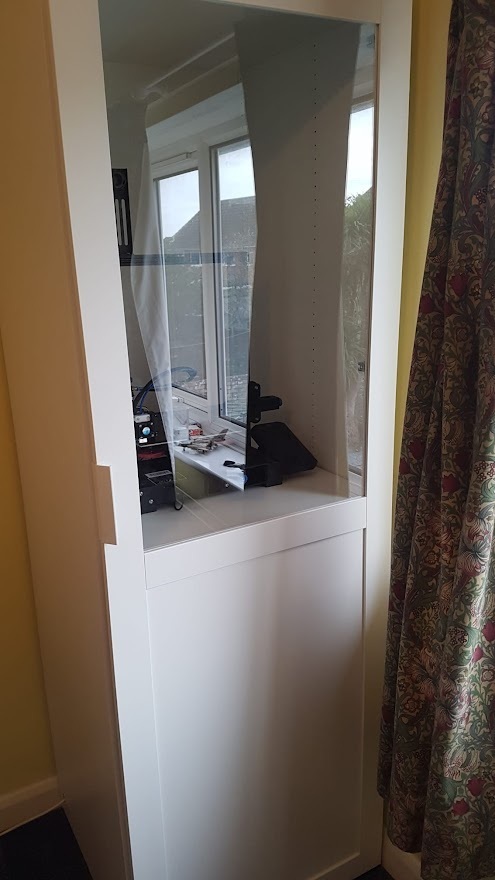 Excellent - ready to go... Or not! Many hours and not a small amount of frustration followed 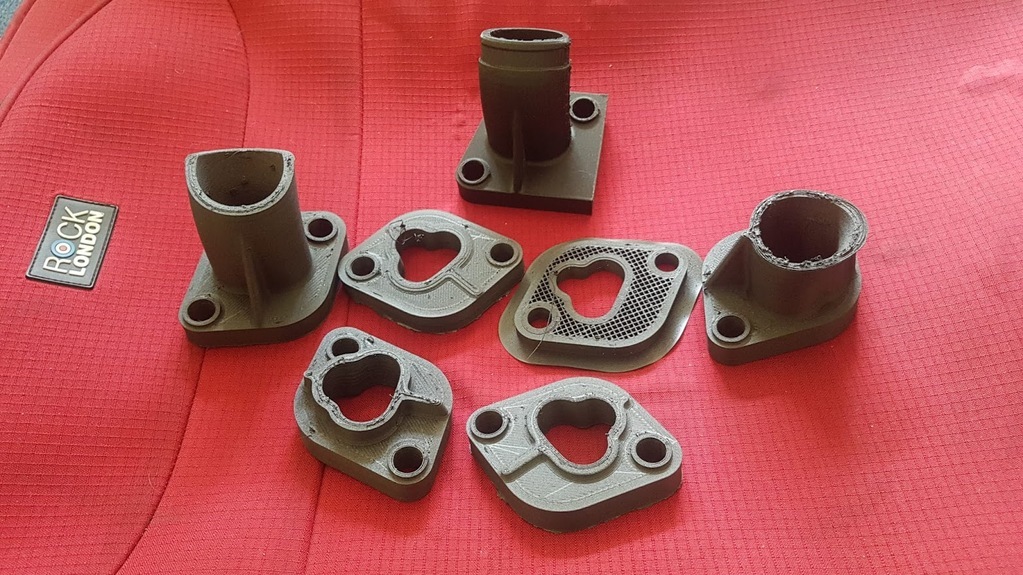 The prints themselves were now extremely strong and consistent but the printer was struggling. I was getting good print quality for a few hours but not long enough to reliably print the runners. I believe the issue was down to heat soak - the plastic has to be melted in a small area behind the nozzle but kept solid above to prevent it clogging up. For cooling the machine has a finned aluminium heatsink with a fan constantly pushing air over it, which worked great. Until someone decided to stick it all in a hot box. I appreciate this means nothing to most of you and I am sorry - here is a diagram to try to explain what I'm rambling on about. 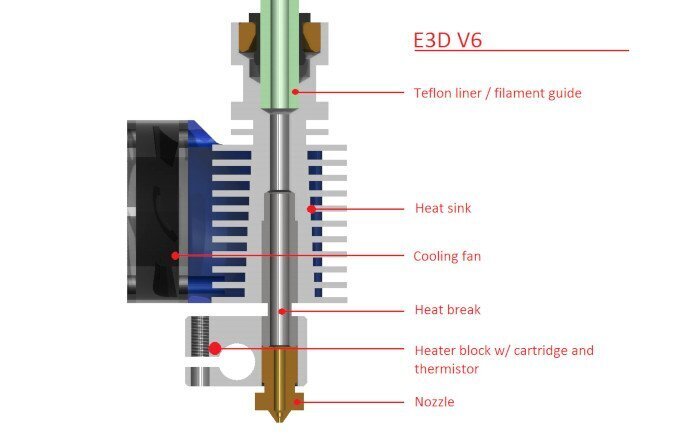 Anyway... this seemed to be tricky to solve. Cold thing hot = bad. I thought of drawing cold air in but figured it defeat the object of printing in a hot enclosure by cooling it, and introduce drafts again. Instead I went for the complicated option. I bought a new heat sink for about £5 - parts for these printers are really cheap 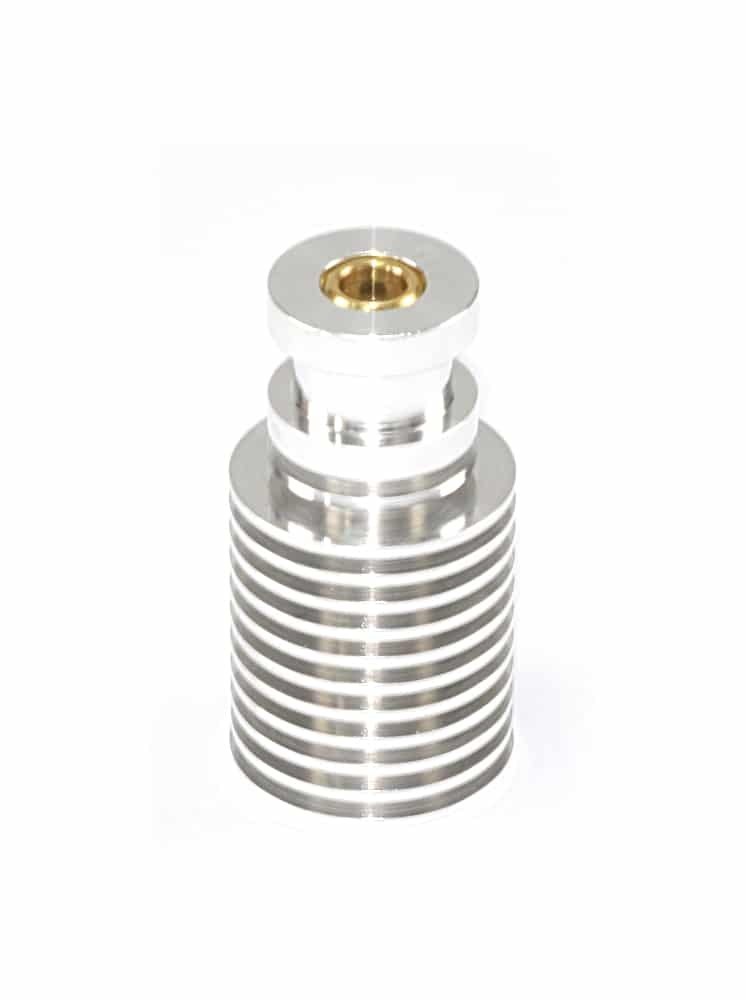 And introduced it to the lathe 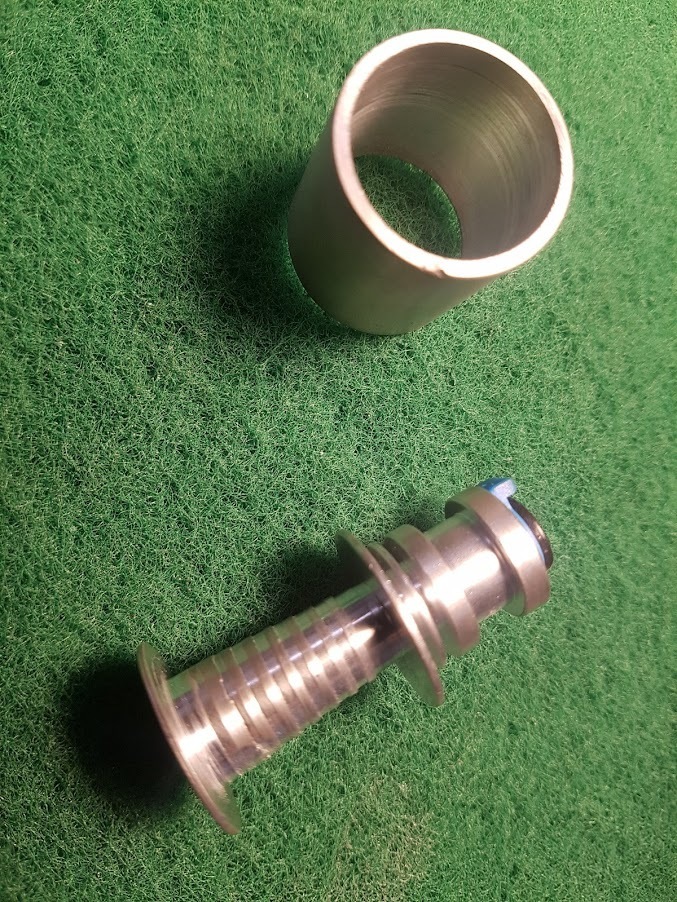 I then turned up a sleeve and got some pneumatic fitting, and pushed it all together with some loctite 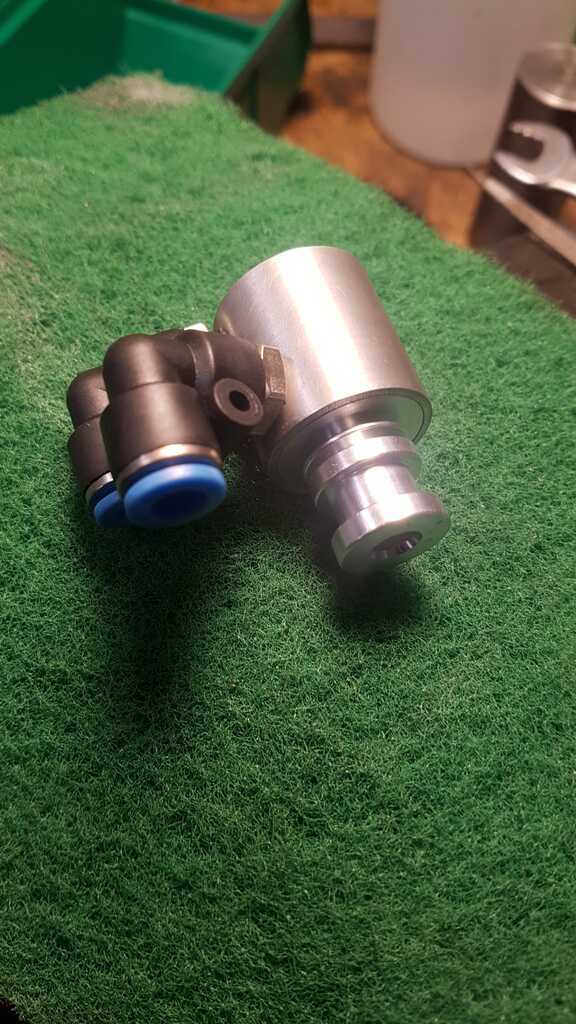 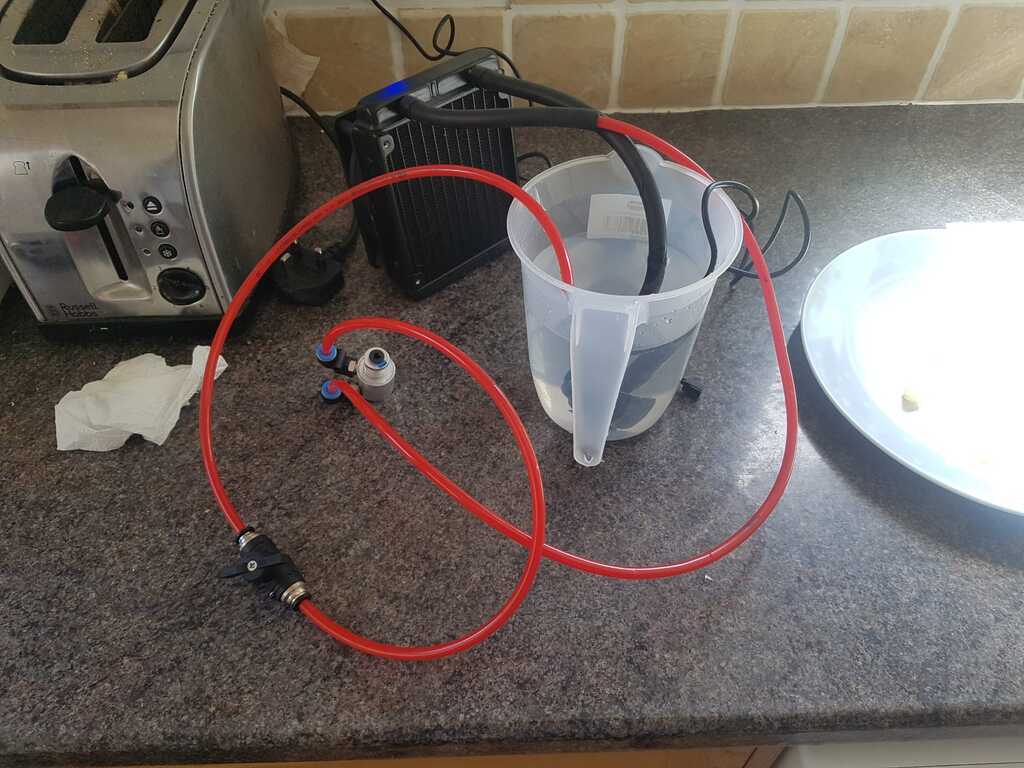 Combined with an Amazon special USB fish tank pump I now had a water cooled 3D printer. Complexity FTW! 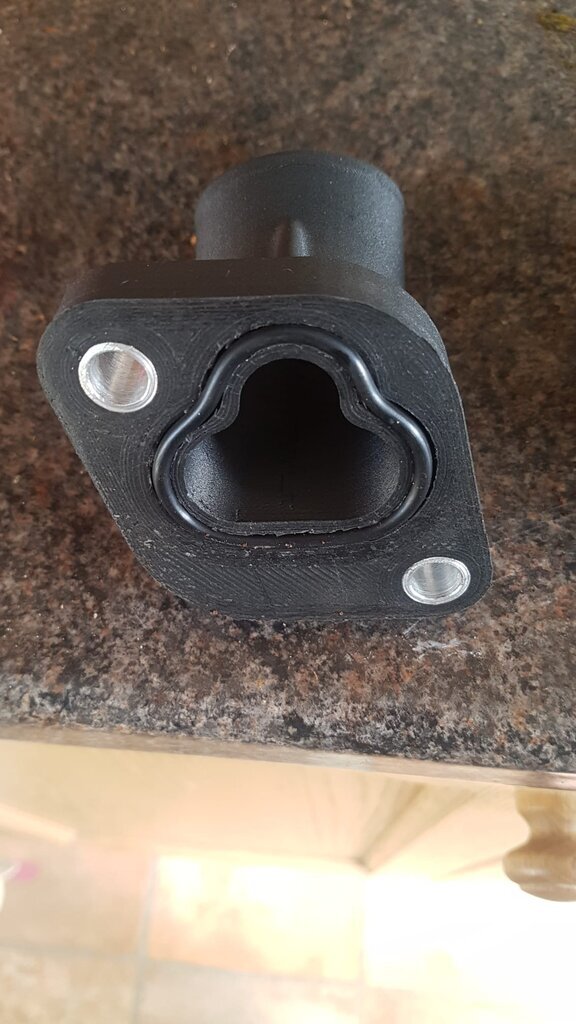 The design was changed based on what I have learned over the last year including the addition of compression limiters and printing as four runners rather than two to reduce warping. A larger section O-ring was also used this time. 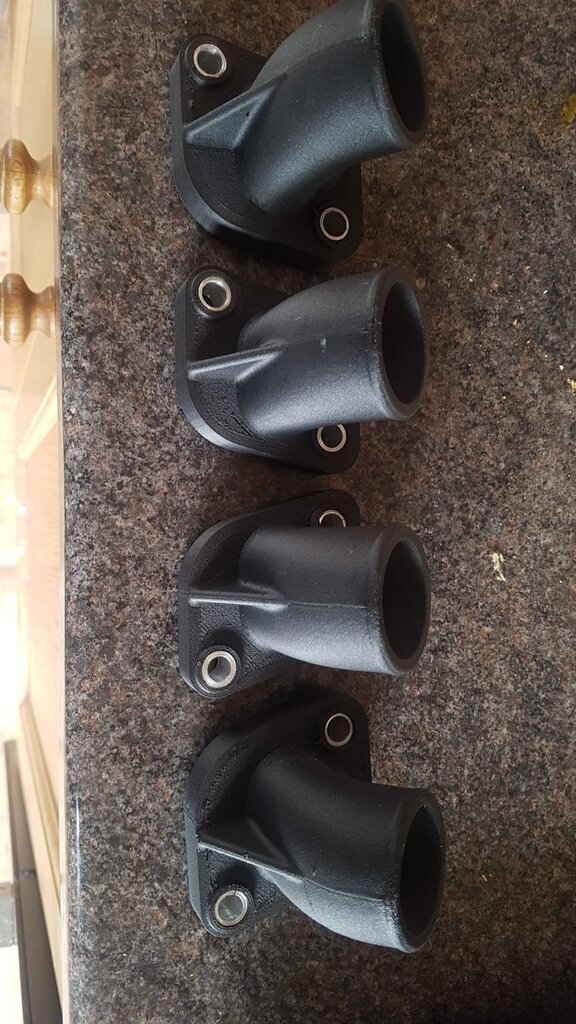 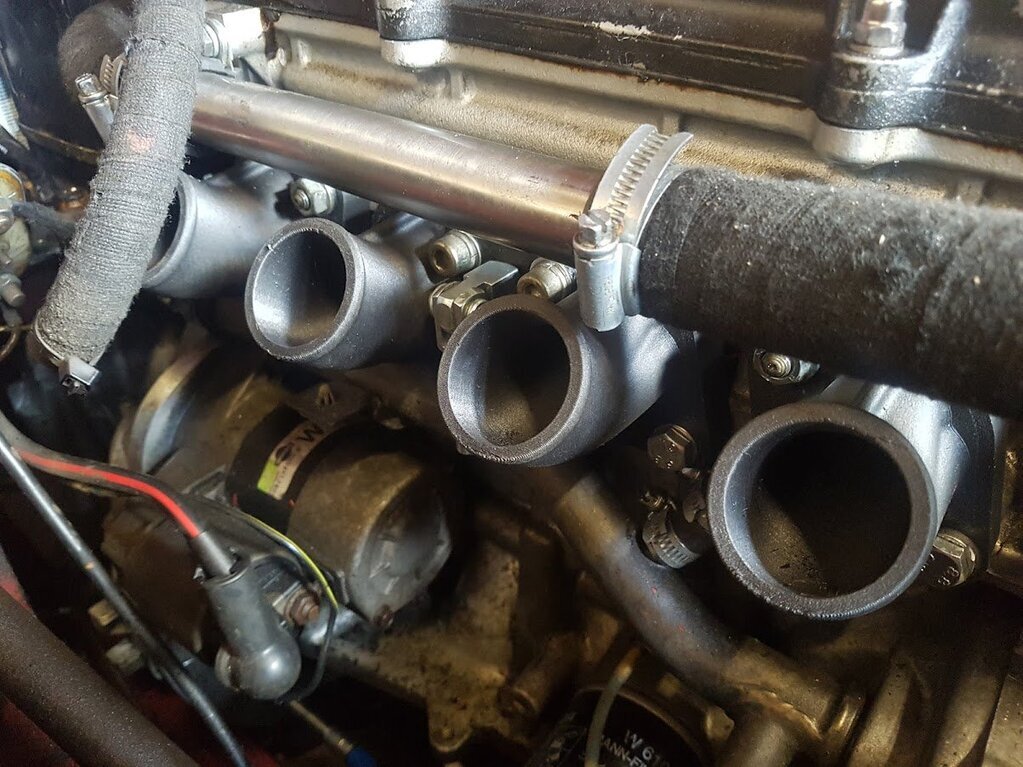 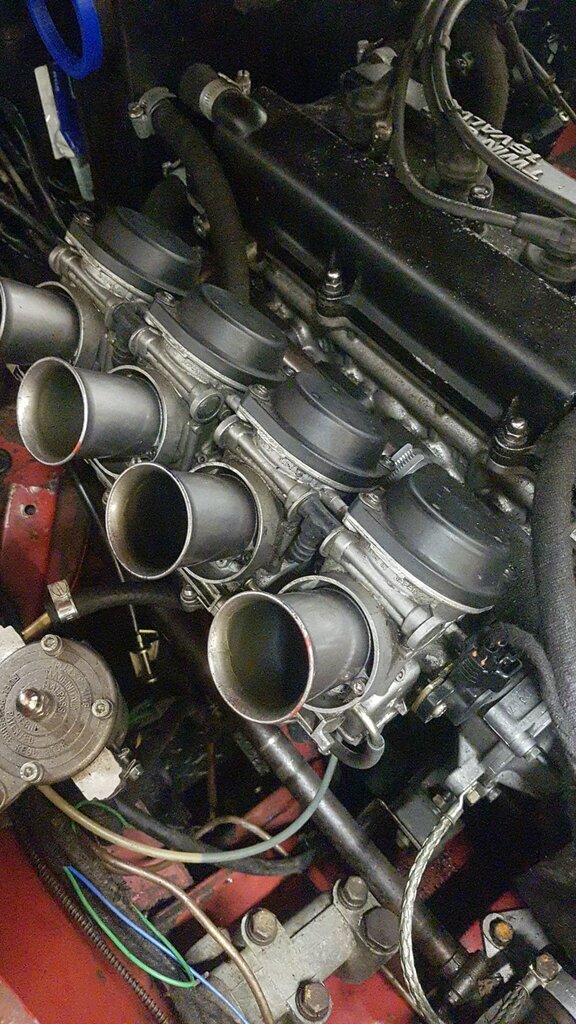 They have been on the car for nearly a month now without (touch wood) issues. I like to think that the car feels better at higher rpm but without going back on the rollers it's hard to say. It can't be worse though, that's for sure! Durability is still unknown and they are being closely monitored for signs of creep or delamination, but so far so good. Thanks for looking James |
| |
|
|
|
|
|
Apr 29, 2022 16:15:34 GMT
|
Well done. I know people have been a little critical in the past regarding the potential benefit of the conversion in terms of the power v the existing A series. With those sort of figures it hopefully puts it to bed. Would be really interesting to put this up against the more common K-series conversion as with those WHP figures I don't think there would be much in it at all (given the obvious advantage of not needing to modify the shell). It would be a good test for sure. Any more power would do little for actual enjoyment without really developing the chassis to keep up anyway. In the end the rolling road results seemed to cause even more anger - I accused of deliberately buying a bad car to test against! Incredible what can be diagnosed over the internet. I think the A-Series car drives really well and sits at 80 70 very happily. At the end of the day anyone seriously considering buying a kit is more than welcome to come for a test drive and decide for themselves, it's the only way to really judge something like this. Thanks for looking James |
| |
|
|
|
|
|
|
|
Apr 29, 2022 17:00:11 GMT
|
|
Can you remember wht the Ikea doo-dad was called? I really need something for my printers!!
|
| |
Koos
|
|
|
|
|
Apr 29, 2022 17:22:44 GMT
|
mdh - I used a PLASTA, I think this one www.ikea.com/gb/en/p/platsa-frame-white-50330951/It isn't very solid or easy to assemble so needed some reinforcement, but for the money is fine. It fits an Ender 3 perfectly. EDIT: found the order: PLATSA Description:Frame Article Number:503.309.51 Qty: 1 VÄRD Description:Panel/Glass Door Article Number:603.813.89 Qty: 1 HJÄLPA Description:Shelf Article Number:903.311.66 Qty: 2 LÄTTHET Description:Leg, Adjustable Article Number:203.311.98 Qty: 1 HJÄLPA Description:Standard Hinges Article Number:603.312.00 Qty: 4 LÄTTHET Description:Handle Article Number:203.317.11 Qty: 1
|
| |
Last Edit: Apr 29, 2022 17:33:39 GMT by metroman
|
|
|
|
|
Apr 29, 2022 22:40:28 GMT
|
But wait - there's more! The brakes. While the brakes cooking could be resolved for normal driving by a) not driving like a tit and b) better cooling and some improved linings I have entered the car into a 12 hour alpine rally in June... So good brakes are a bit of a must-have all of a sudden! I suspect that finned aluminium drums would be sufficient but I can't find any for the life of me so I figured I go for the easy option and buy a complete, all new disc brake conversion with new stub axles, king pins, calipers, the works. All for a sensible price from one of the big MG suppliers. Combined with some braided hoses and good pads this was surely the way to go! 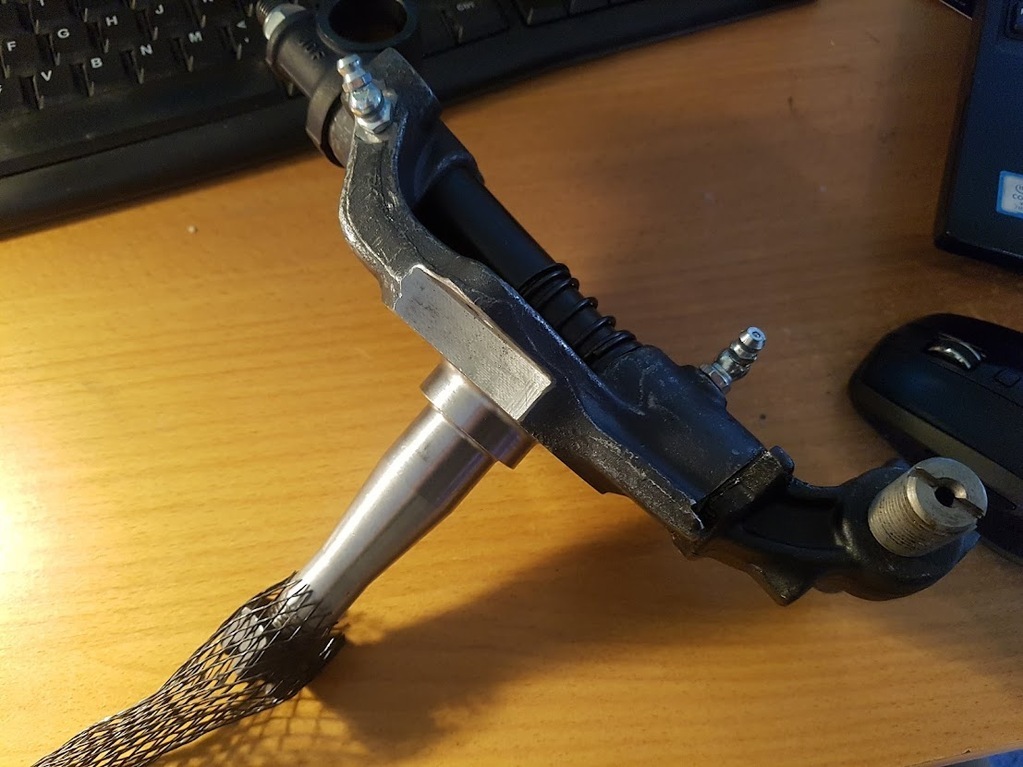 Out of the box a shiny new stub axle and king pin assembly ready to go! Let's look at the lower fulcrum. Well that's no good. The pin is located with a cotter pin but needs to be a very close fit in the kingpin or it will just come loose within minutes. Dangerous. I tried the other pin, and tried in the other stub axle assembly but it was the same story. Out to the workshop then. Running a mic over the parts showed the kingpin bore had been bored / reamed to pretty much bang on 9/16 but the pins were .002" - .003" under. Still, maybe just a bad batch, let's look at the rest of it to be sure. I started with the wheel bearings as these are a known problem for Midgets, A35s etc. The bearings are pretty standard angular contacts but with a large radius to clear the corner radius where the axle meets the stub-axle body. 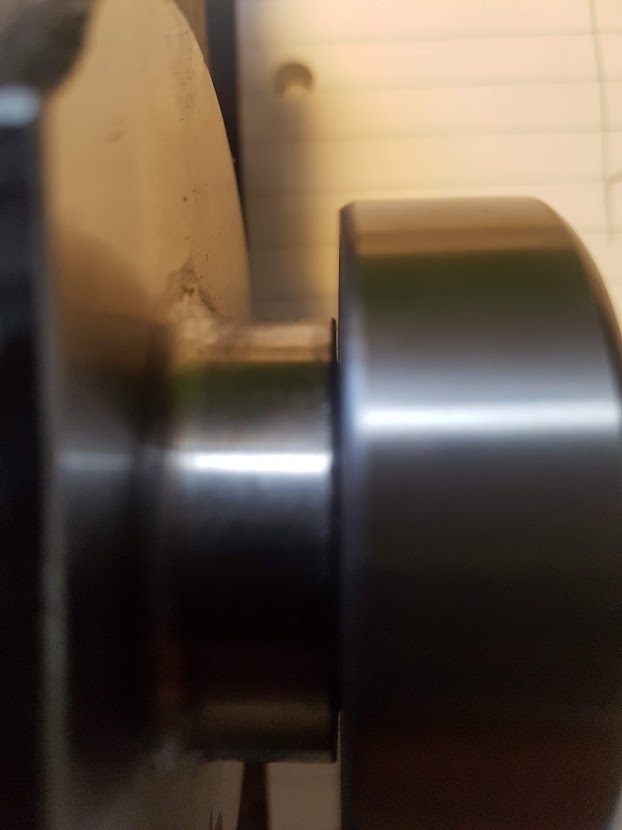 Nope. That's a miss as well. Driving like this is outright dangerous. The stub axle is no longer in tension and is not properly supported, instead it is placed in bending at the point of highest stress. Failure means the wheel comes off. Oh, and the bearings were sloppy as anything on the shaft, Bavarian pork based product and hallway. The bearings themselves are non-branded unmarked and very cheap. Take from that what you will. Let's have a look at the second stub axle assy. King pin is a bit stiff. Hmm... popped it in the soft jaws... What a joke. Maybe it's just shimmed wrong, that's an easy fix at least. Loosen off the nut and... Well that's going to work great - original parts are a close slide fit. Half a mill of play in that. This part locates the king pin to the upper arm. And the stub axle still won't swivel With some difficulty I got the king pin out of the stub axle and found a right horror show. 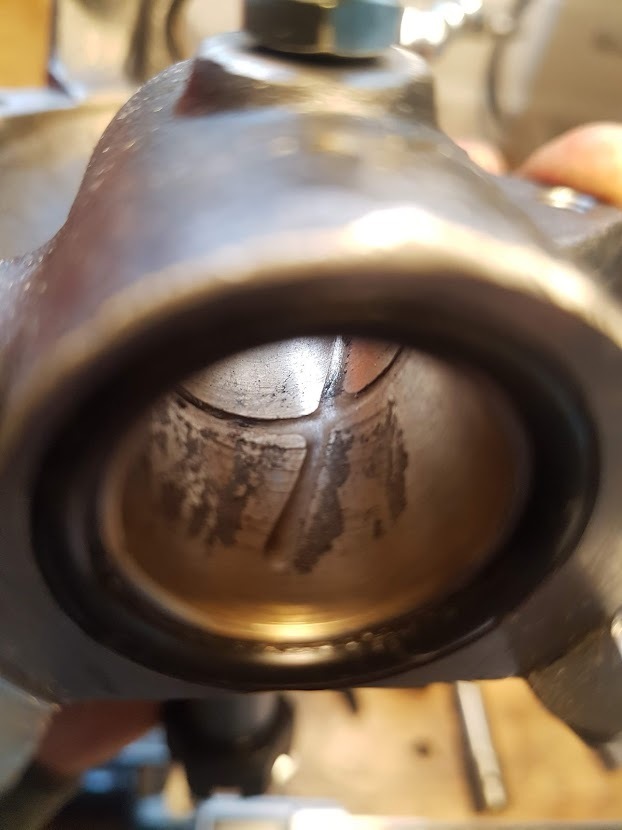 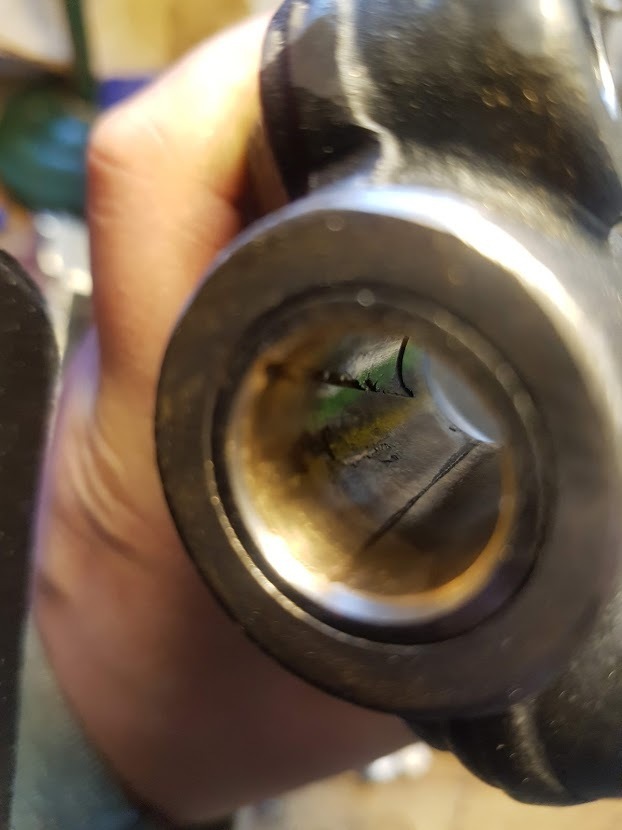 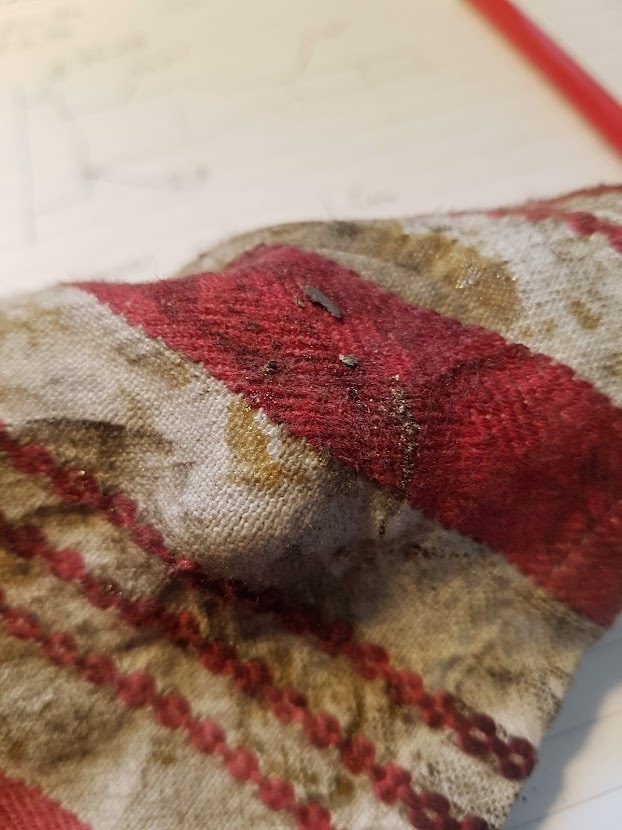 At this point I really had seen enough. Nothing supplied I inspected useable and a lot was outright dangerous. I called it a day and had a beer. The next day I emailed the supplier with the images and photographs above and explained I would be returning the kit for a refund. I got nothing back so called them up, this was probably the most disappointing part of the entire experience. In 35 years they have never had a single problem with any of these parts. One problem they could believe but as there were so many it was "not believable". I explained that I was happy to help go through the issues and help if possible to resolve them as I wanted the kit still. Not interested. The parts were returned by recorded delivery on Monday. I have emailed to chase up the refund but had nothing back. While there are a lot of suppliers but they all seem to sell the same parts made in the same places so it is pretty unhelpful. From what I can tell the only real difference is with some places you pay a bit more for a marginally better website. So what to do? I still need better brakes. I have decided to start by benchmarking some original parts and see where that leads to. 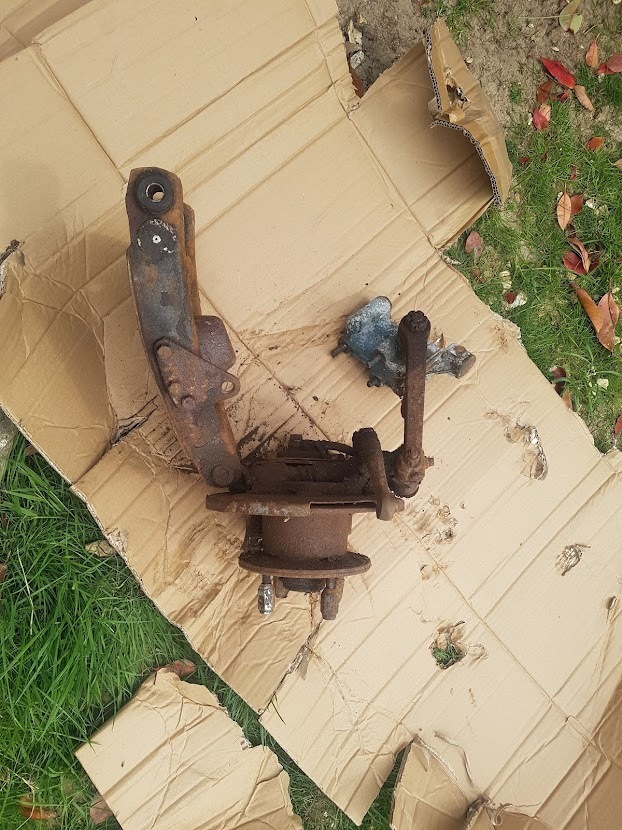 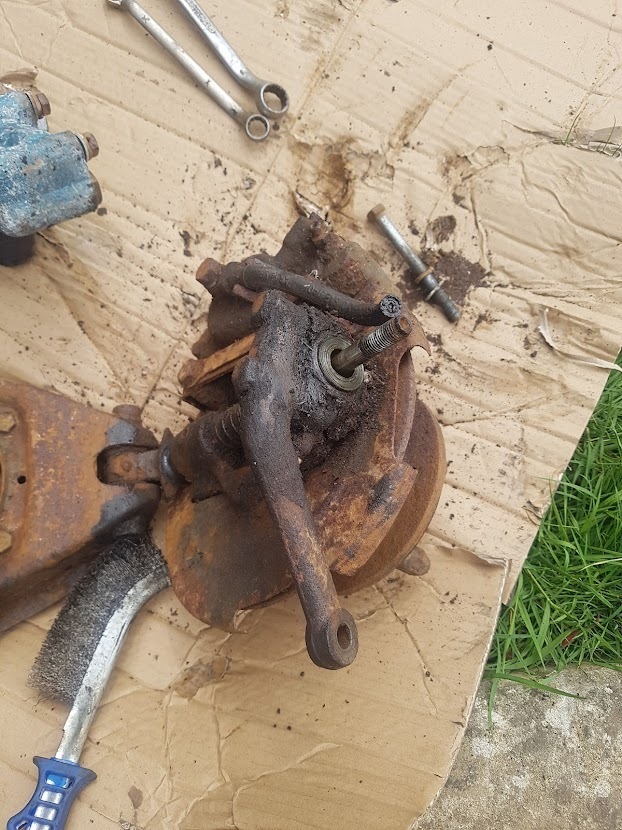 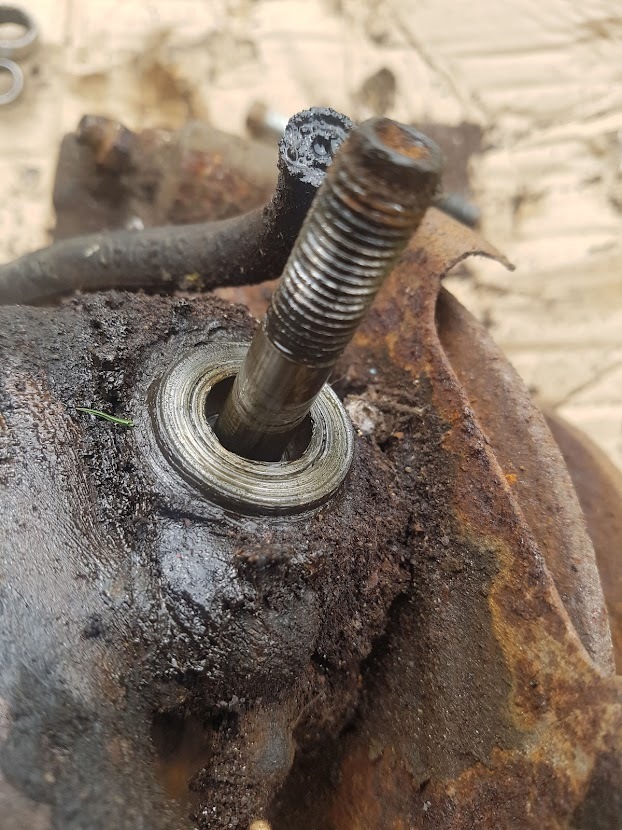 This looks like a cruddy mess from the bottom of the sea but well, it is. However, it is still useful. Nothing has seized other than the lower fulcrum in the kingpin so there is hope for it all yet. The fulcrum arrangement with it's sliding threads really feels the weakest link in the entire setup and really dates the car. The Sprite was launched in 1958, a year later the Mini was on the roads with proper ball joints -this is a bit of a throw back even for a late 50s car, so that would be nice to address. Otherwise it's all pretty good. Kingpins aren't ideal but with a bit of grease seem to last pretty well. I think I have a plan coming together. As for bearings I've tracked down original British made stock, with plenty more where they came from. These have the proper large radius to allow them to seat properly. The manufacturer was also confident enough that they aren't an embarrassing liability best sold cheap and forgotten that they engraved their name as well as the part number into them. Fancy that! 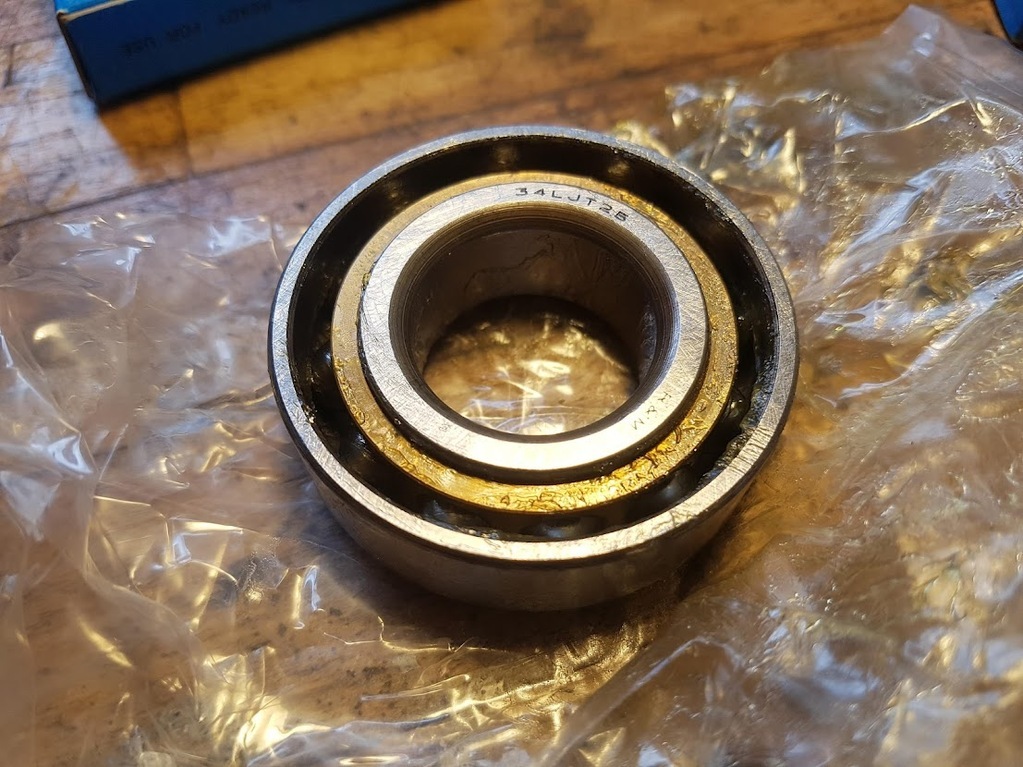 I can only assume that the vast majority of customers are happy with the quality of the parts being supplied but I find it hard to believe that I am the only one frustrated with this race to the bottom where only price matters, especially with safety critical components, so plan to try to address the major failings on my own car and see where that leads. Thanks for reading, and sorry if this one was a bit negative. James |
| |
|
|
jimi
Club Retro Rides Member
Posts: 2,224 
|
|
|
|
|
That kingpin bush is junk, I've seen better scrap ones, more to the point the complete assemblies are junk.
They should be embarrassed to put there name to them, I hope (probably in vain) that you get a full refund + shipping and an apology, very unprofessional.
|
| |
Black is not a colour ! .... Its the absence of colour
|
|
|
|
|
|
|
|
Canley classics do a truionless kit for the spitfire/ Gt6, I've thought about it for my elan, might be worth takinh a look at how they do it. (Quite a simple neat solution)
|
| |
|
|
stealthstylz
Club Retro Rides Member
Posts: 14,960
Club RR Member Number: 174
|
|
Apr 30, 2022 10:16:24 GMT
|
|
I find this sort of issue fairly commonly on aftermarket "performance" parts and it's always the same "we sell loads of them and haven't had any bad feedback". Well yeah, that's because most people haven't got a clue what they're looking at. If the part is bolt on they bolt it on and don't know any different.
|
| |
|
|
stealthstylz
Club Retro Rides Member
Posts: 14,960
Club RR Member Number: 174
|
|
Apr 30, 2022 10:18:14 GMT
|
|
The 3D printed manifold is superb BTW, that sort of thing could be a game changer for what we do as aftermarket intake manifolds are usually either expensive or rubbish.
|
| |
|
|
|
|
|
Apr 30, 2022 14:36:09 GMT
|
jimiI agree - I will be getting my money back one way or another, even if it ends up with small claims. I hope it doesn't have to go that far. kevinsI have been looking at those kits - they are very nice. The Triumph suspension is just better all round even with trunnions... stealthstylzNail on head. With cheap entry level classics you have inexperienced have-a-go-Henry's not wanting to spend money, no knowing what is right and now, to make things worse, not having to MOT the cars. In my experience a lot of garages, including those claiming to be specialists, are just as bad. I've got reasonably high hopes for the manifolds, and even if this system ultimately doesn't work 3D printing is opening up a lot of possibilities. Lost PLA casting in particular looks like it has a huge amount of scope. Even paying to have parts printed commercially is quite inexpensive, if you can produce the CAD. James
|
| |
|
|
merryck
Club Retro Rides Member
Posts: 480
Club RR Member Number: 9
|
|
Apr 30, 2022 19:54:51 GMT
|
|
I'm also interested to see how the manifold lasts. Hoping to put a CG13 into a Mini at some point so will be after one. If you're interested in casting your own, myfordboy on Youtube has a load of videos of that kind of thing.
|
| |
|
|
madmog
Club Retro Rides Member
Posts: 1,160
Club RR Member Number: 46
|
|
Apr 30, 2022 22:39:21 GMT
|
RE: 3d printing nylon, something I came across which may be of use although I have only seen it used for PLA and PETg which would require lower temperatures. It's called something like re-casting. In essence you grind a load of salt to a very fine powder, put your 3d item into an ovenproof container surrounded by the salt, ram the salt down really hard then stick the whole lot in the oven. The 3d item melts but can't go anywhere then re-solidifies without the weaknesses inherent in filament joins. In essence it has been cast in its own shape. The salt being soluble washes out of intricate shapes. Only downside I can see for nylon is domestic ovens might not get hot enough to remelt. Also you have to have 100% infill parts for obvious reasons. hackaday.com/2020/09/23/reforming-3d-prints-with-salt-and-heat/ |
| |
|
|
|
|


