bstardchild
Club Retro Rides Member
Posts: 14,975
Club RR Member Number: 71
Member is Online
|
|
Apr 27, 2020 20:24:03 GMT
|
Hi Chris, Great work as usual. Can I ask a quick question please. What’s the best technique for doing spot welds using the mig welder. I find that I get it ok 8 or 9 times out of 10, occasionally it hasn’t gripped. Maybe I didn’t have the panels tight enough together, any advice welcome. Norman Norman - Ensuring that the panels are snug fit and close fitting - both surfaces should be shiny bright steel and you need to up power on the MIG well beyond what you would set it at for a normal tack / seam weld - (For example I was seam welding @80 Amps but plug / spot welding @110 Amps - this will vary dependant upon your MIG set up) you also need to ensure that you have a decent size hole for the plug weld - I normally drill 6 - 7mm holes I did some plug welds years ago and despite the metal being clean and shiney and they were about as much good as blue tack So I went looking on the internet and found the mig welding forum They have a whole bunch of help pages one of them was on plug welding (or spot welding with a mig) www.mig-welding.co.uk/plug-weld.htmAnyway what I learnt was starting at the edge of the hole was clearly a rubbish technique and what I should have done is start at the centre and then go out Also my holes in the top were way to small All of the advice stated by @grumpynorthener only 10 years ago he wasn't about to ask  |
| |
|
|
|
|
Norman
Part of things
 
Posts: 449 
|
|
Apr 27, 2020 20:28:47 GMT
|
|
Hi, Thanks for the link, I have seen that before. That is the technique I use starting in the middle and working in circles. I think my failure is because I don’t increase the power. Norman
|
| |
|
|
nze12
Part of things
 
Posts: 193
|
|
|
|
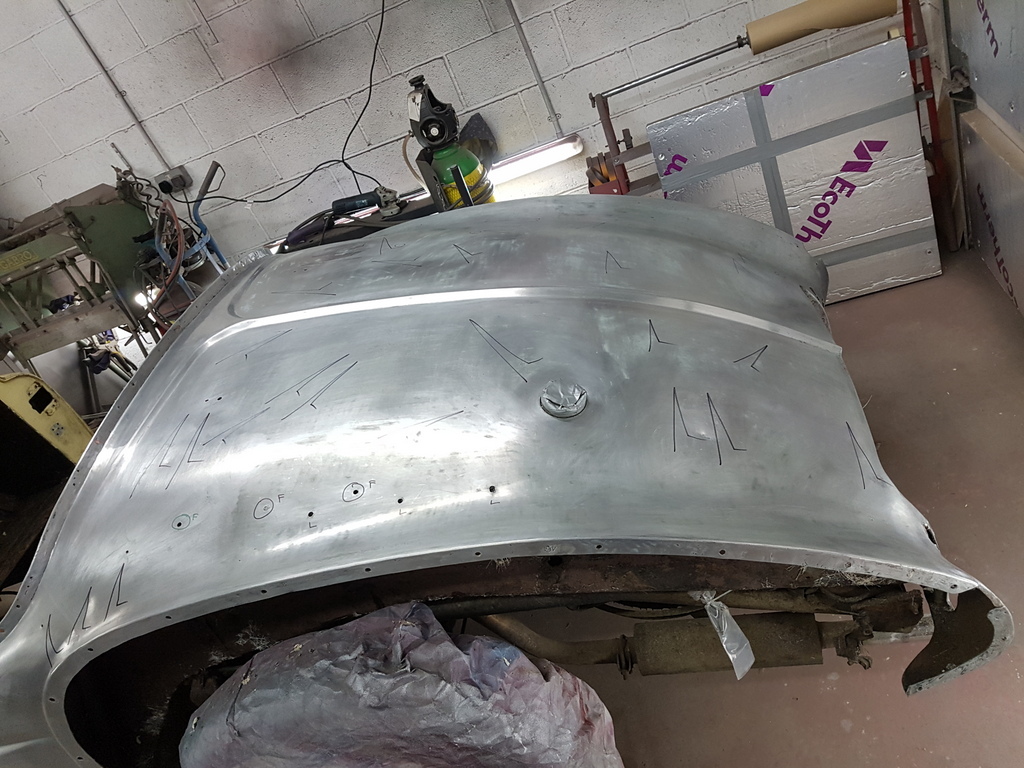
Graffiti attack by Batman? |
| |
1986 BMW E30 refreshed to original spec
1973 BMW E12 520 converting to Motorsport 530
1982 XJS V12 converting to 5 speed manual
Many landscaping projects overriding above!
Cogito cogito ergo cogito sum!
|
|
|
|
|
|
|
Graffiti attack by Batman? Afraid not - Just an indication of the distorted profile on the panel  |
| |
|
|
gess
Part of things
 
Posts: 220 
|
|
|
|
|
This is a good looking car, but as a family man I must ask. Is there no boot on this car? No way to bring along a bit of luggage for the weekends in the countryside? I would have thougt that there was a bit of luggage space in the rear, but I cannot see a hatch.
Interresting thread by the way. I was surprised to see all the patchwork this car has seen and how much work is needed to put it right again.
|
| |
|
|
|
|
|
|
|
This is a good looking car, but as a family man I must ask. Is there no boot on this car? No way to bring along a bit of luggage for the weekends in the countryside? I would have thougt that there was a bit of luggage space in the rear, but I cannot see a hatch. Interresting thread by the way. I was surprised to see all the patchwork this car has seen and how much work is needed to put it right again. This Jupiter is a SA model - luggage storage was within a compartment housed between the chassis & the rear shroud panel - accessed behind the seat - does not look that large but its perfectly capable of swallowing 2 slimline medium size suitcases 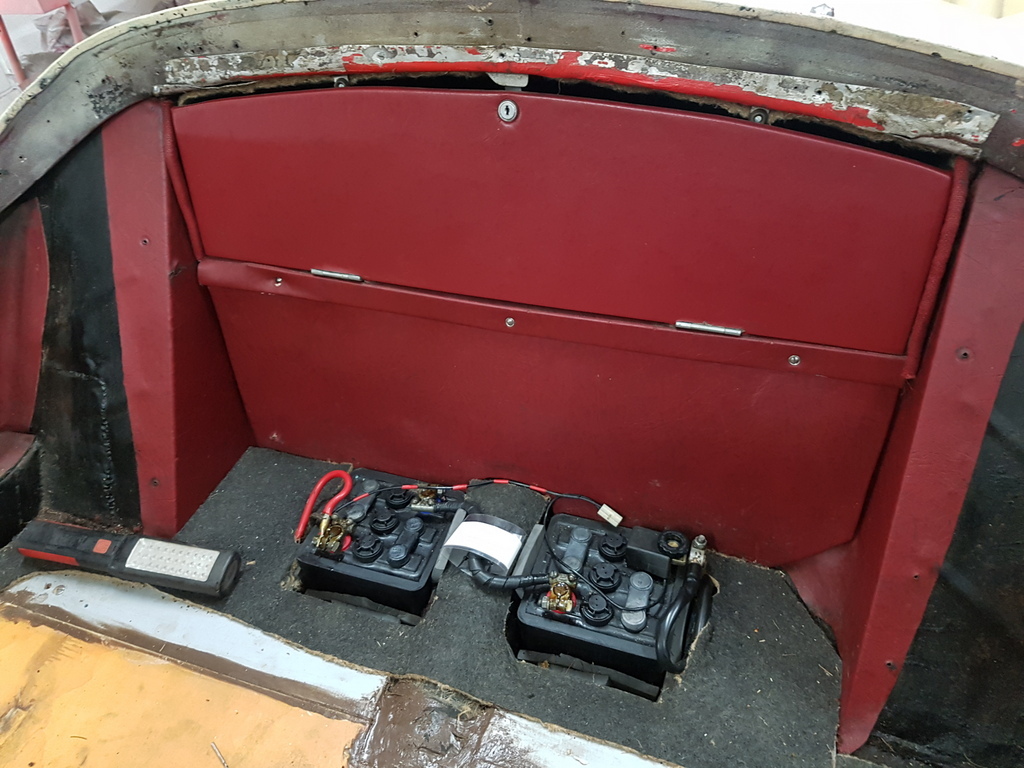 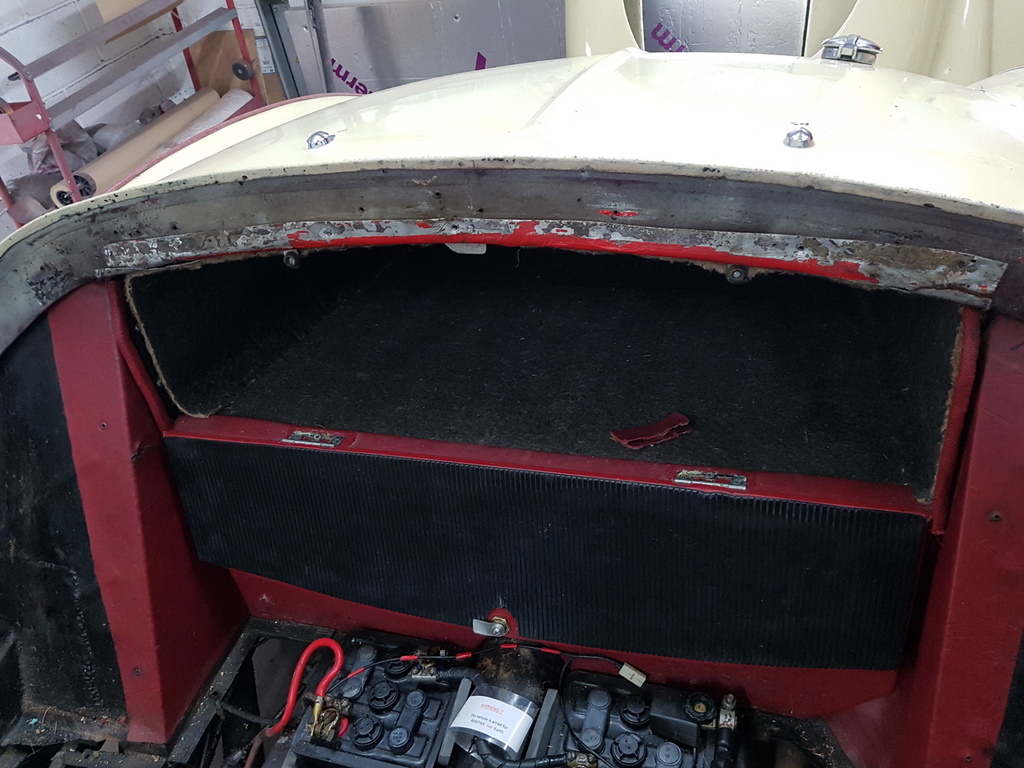 Towards the latter end of production Jowett produced a revised SC model - with a boot space 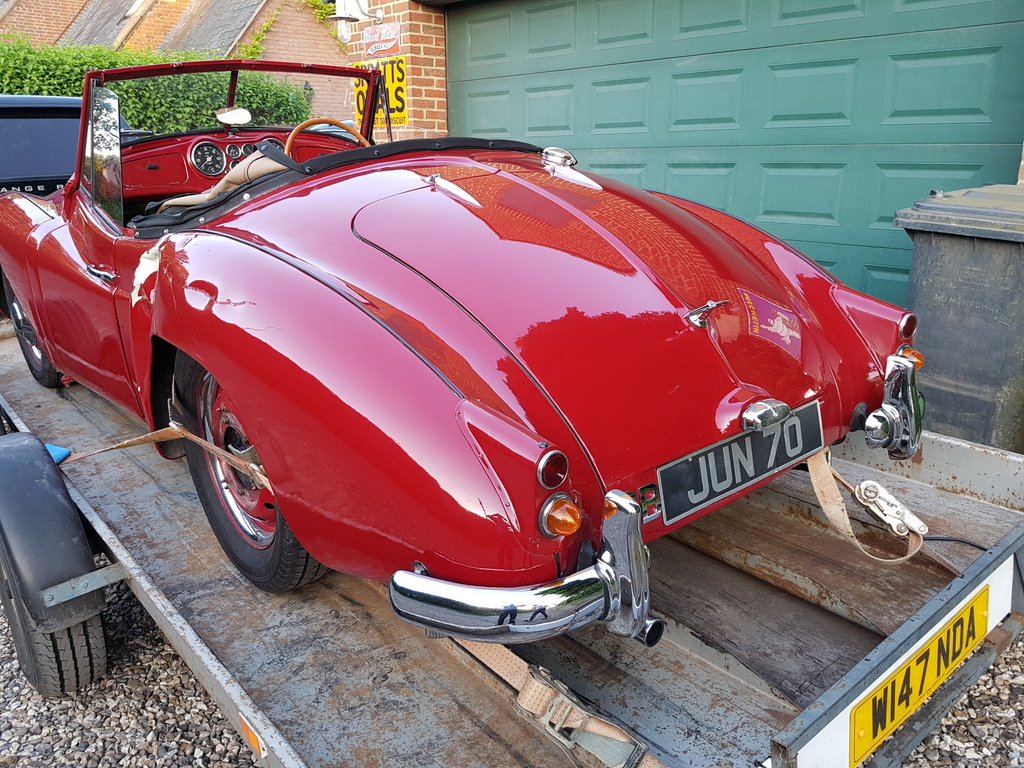 However they only produced around 80 of this model before the factory ceased production hence out of the 900 cars built these are the much rarer / more sought after cars |
| |
|
|
gess
Part of things
 
Posts: 220 
|
|
|
|
|
Thank you for the response, I thought I had seen a model with a boot space and a hatch.
|
| |
|
|
|
|
|
Apr 28, 2020 19:24:16 GMT
|
More creative single handed handling of heavy / bulky parts 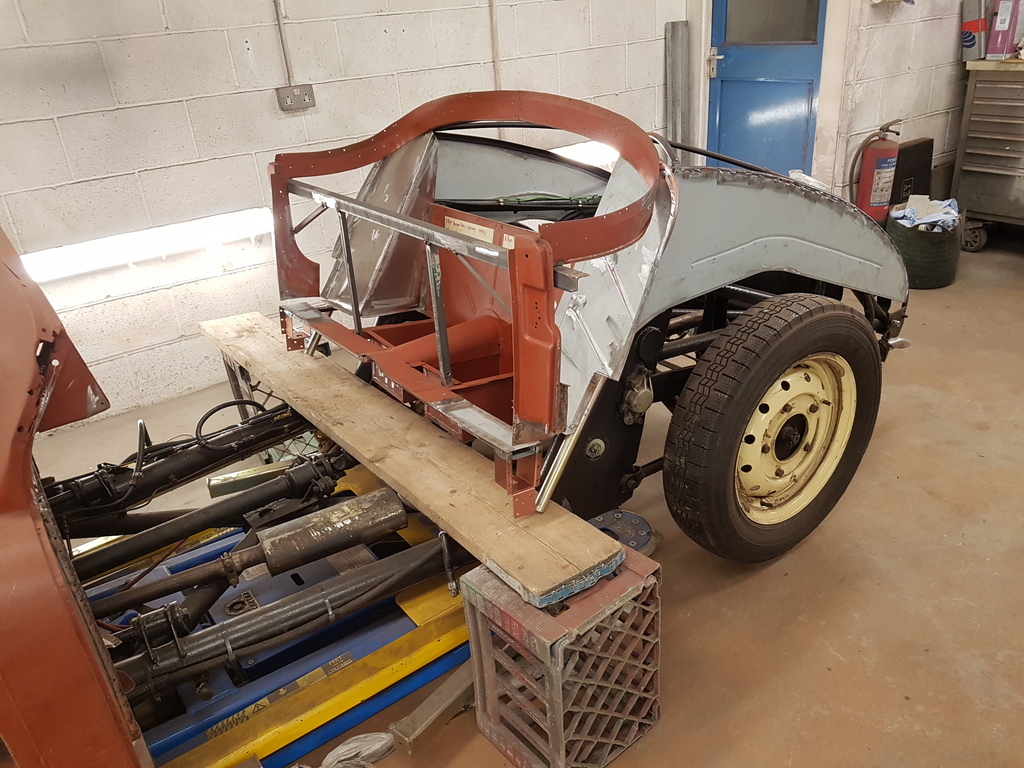 After much door aperture measuring I could drill the rear body mounts insitu 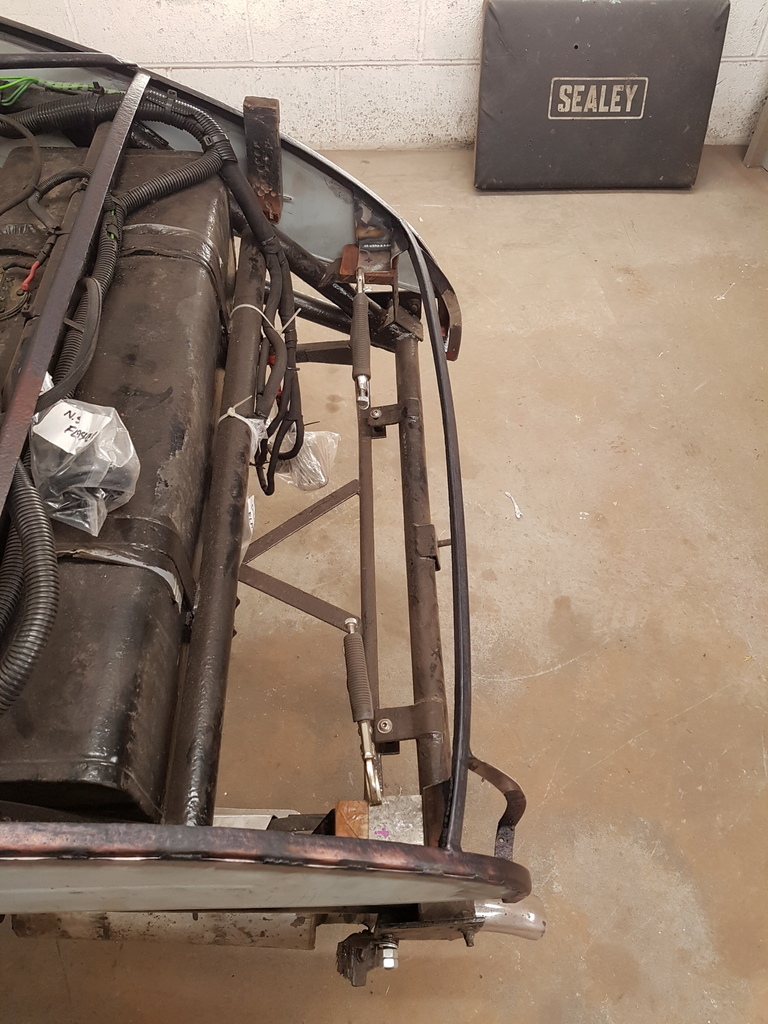 Then bolt the rear mounts up 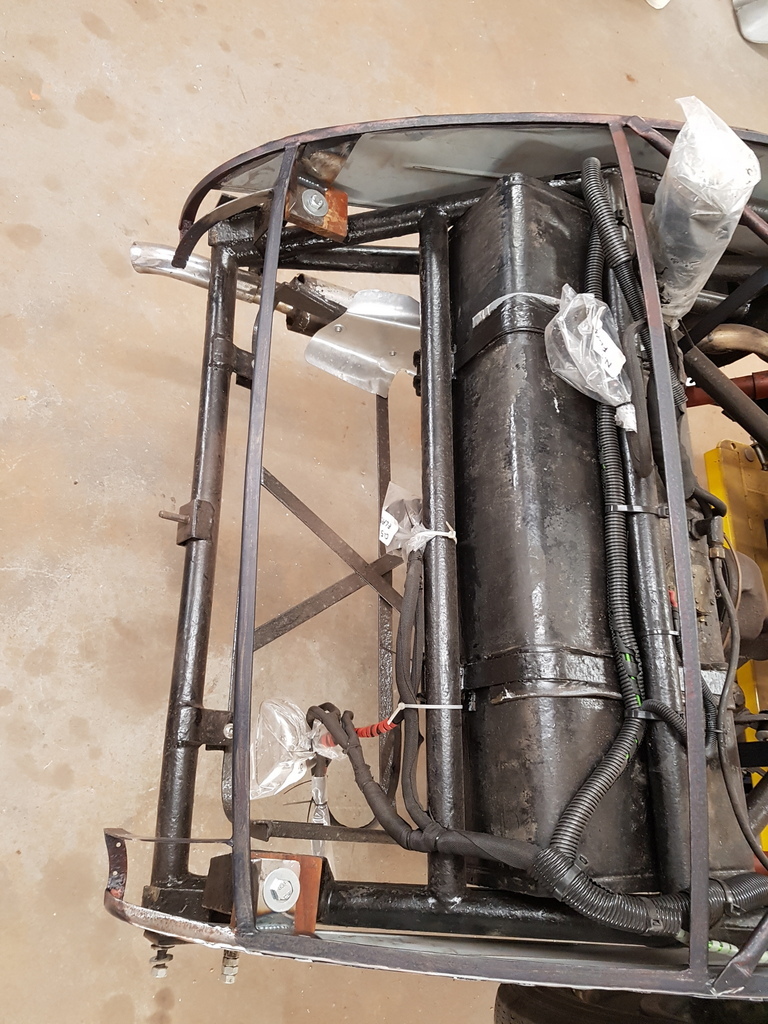 Along with the mid body mounts 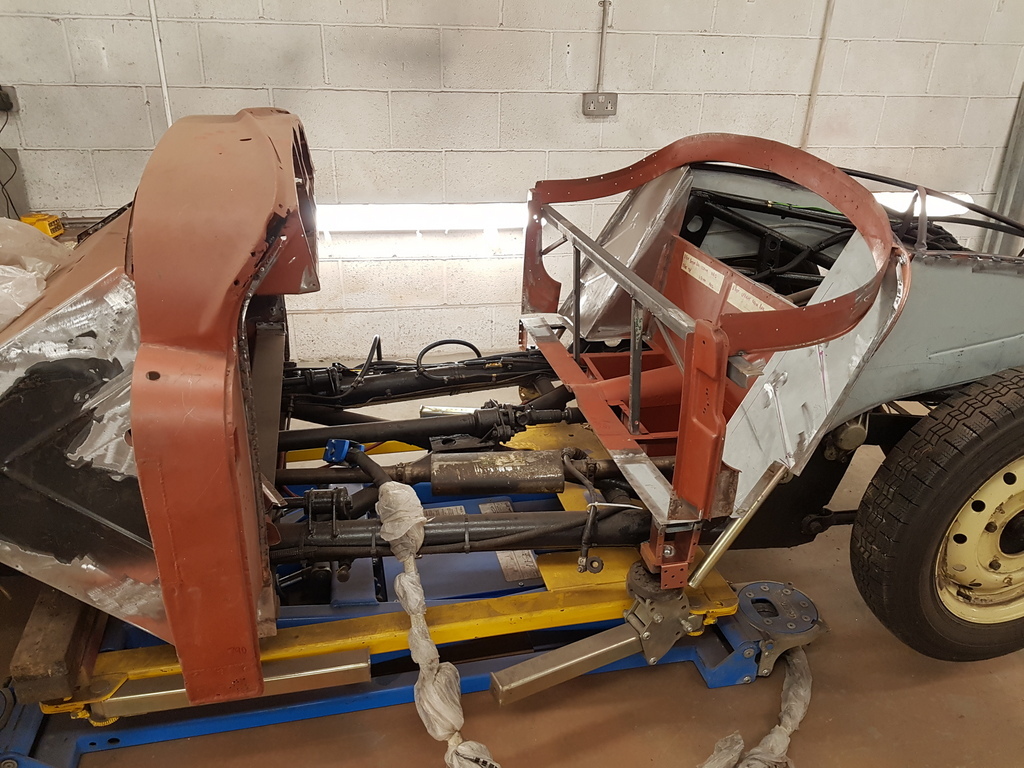 Having undertaken several Jupiter restorations I retain a set of aperture & cockpit braces that I fabricated some time ago 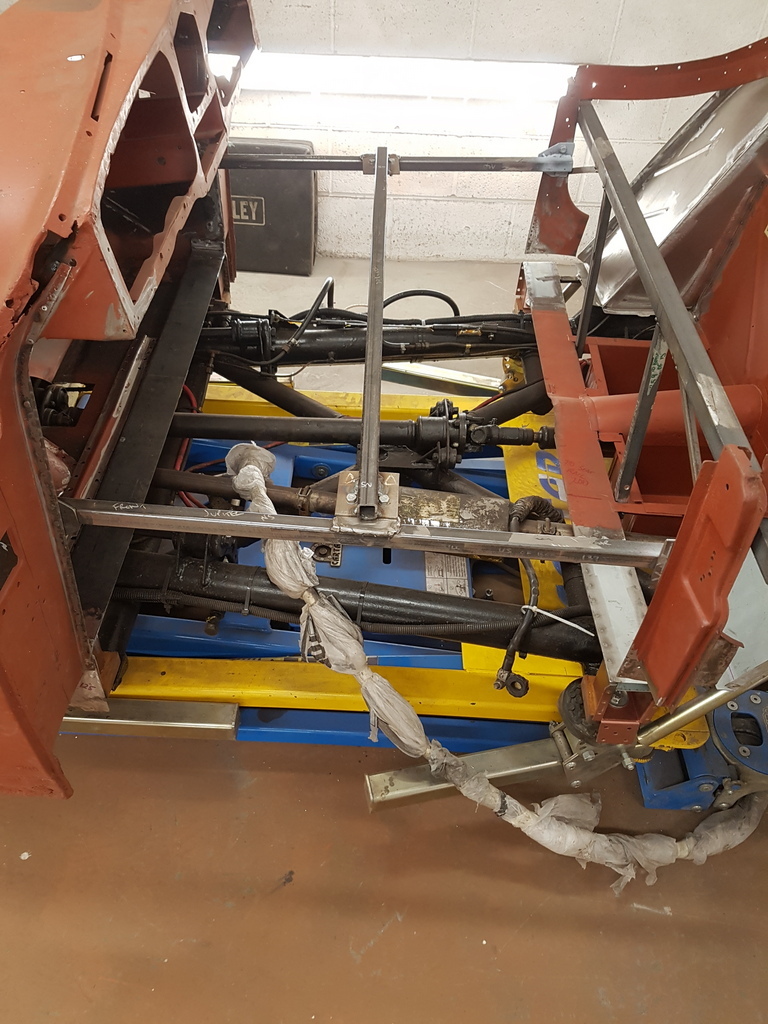 Drilled the A & B posts and bolted these in - again cross checking the door aperture widths 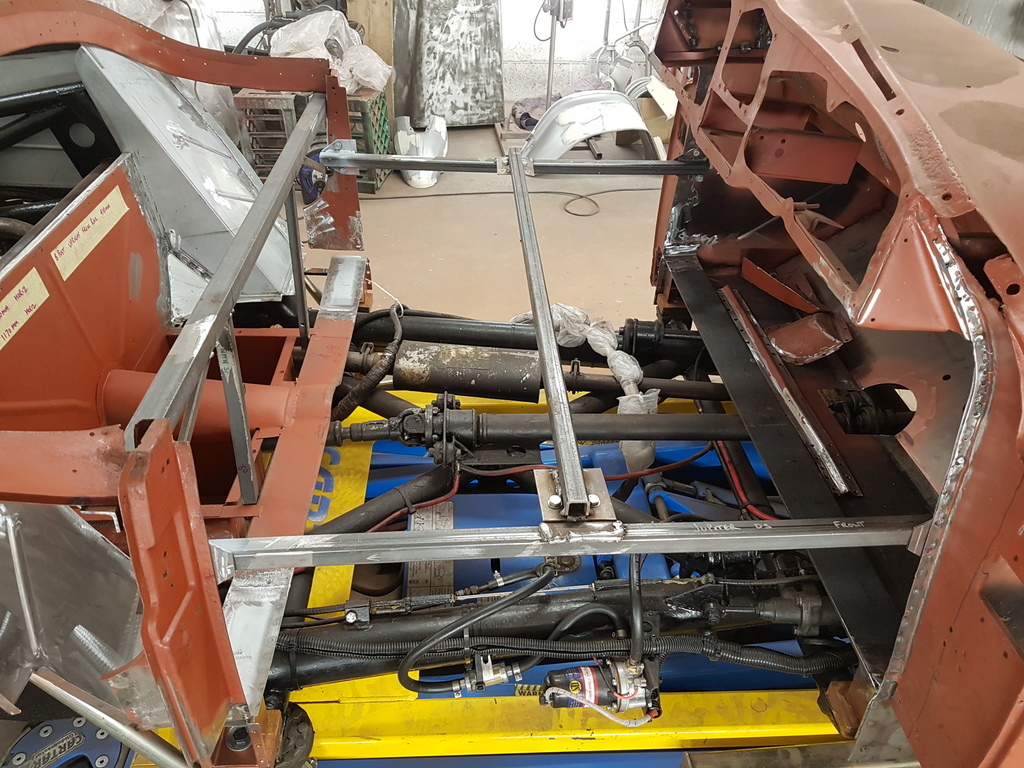 Trial fitting the sills is next on the list 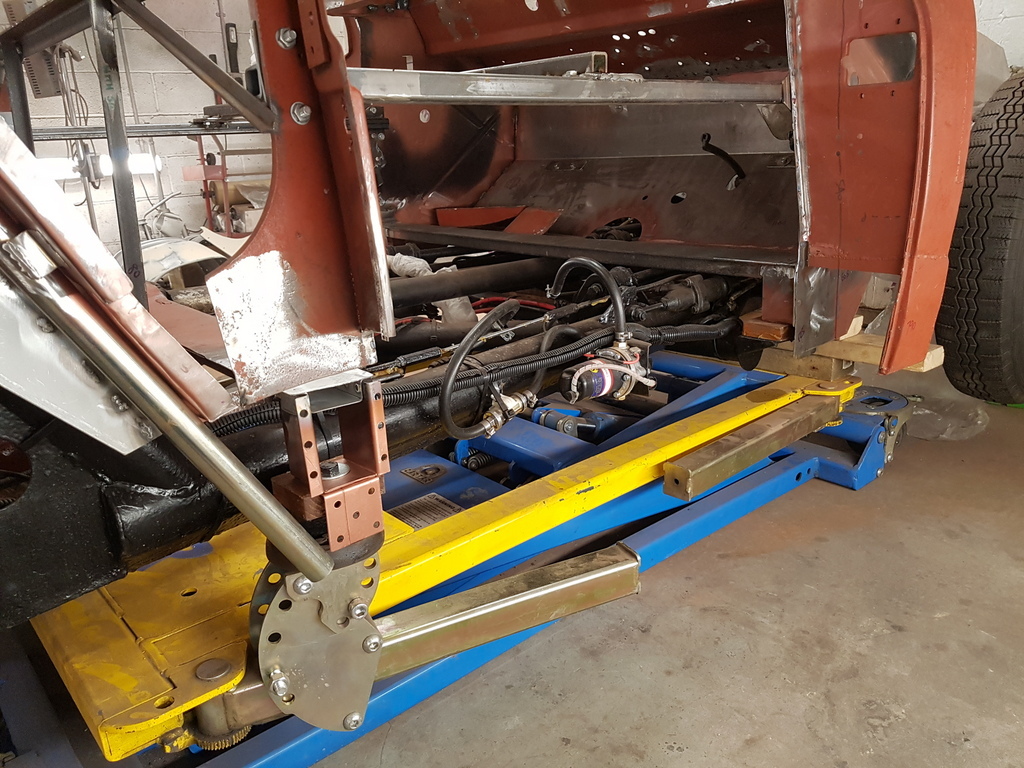 Sills form a box section of inner & outer and are covered by the lower section of the doors - the sills are produced to the original factory profile with exception of the cuts outs & rear taper which to be honest with each car being hand built is better undertaken insitu to suit each car 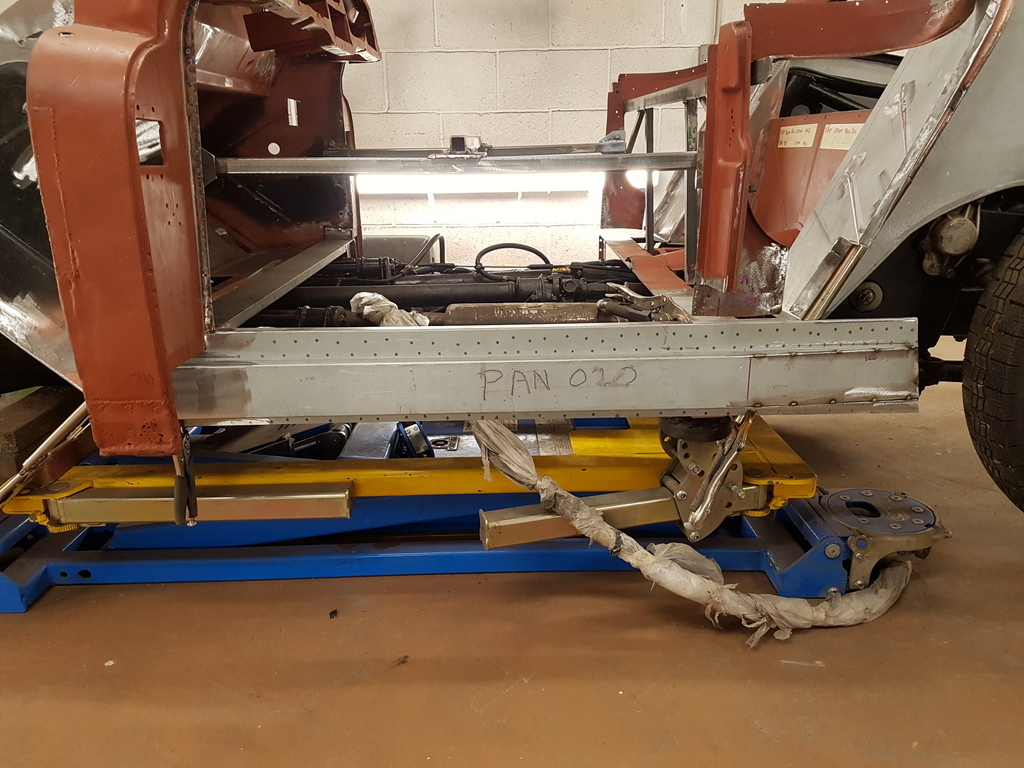 Initial fitting of the nearside 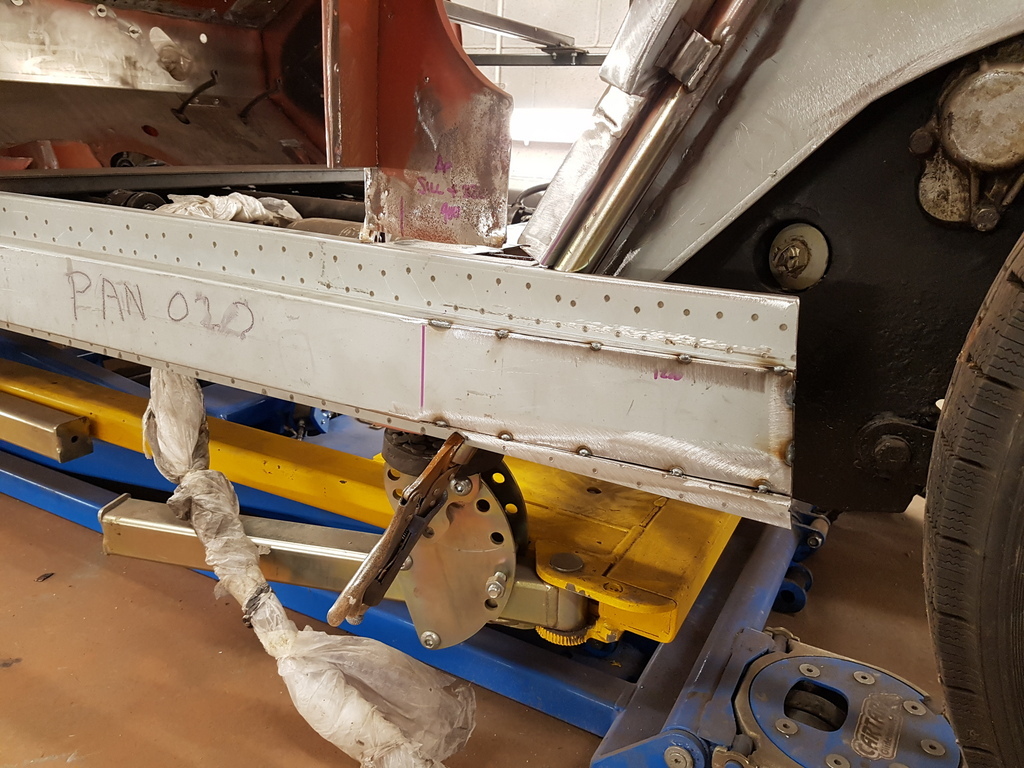 The rearward section has to be tapered in in order for the outer panel to clear the box section has this is also a tapered fit 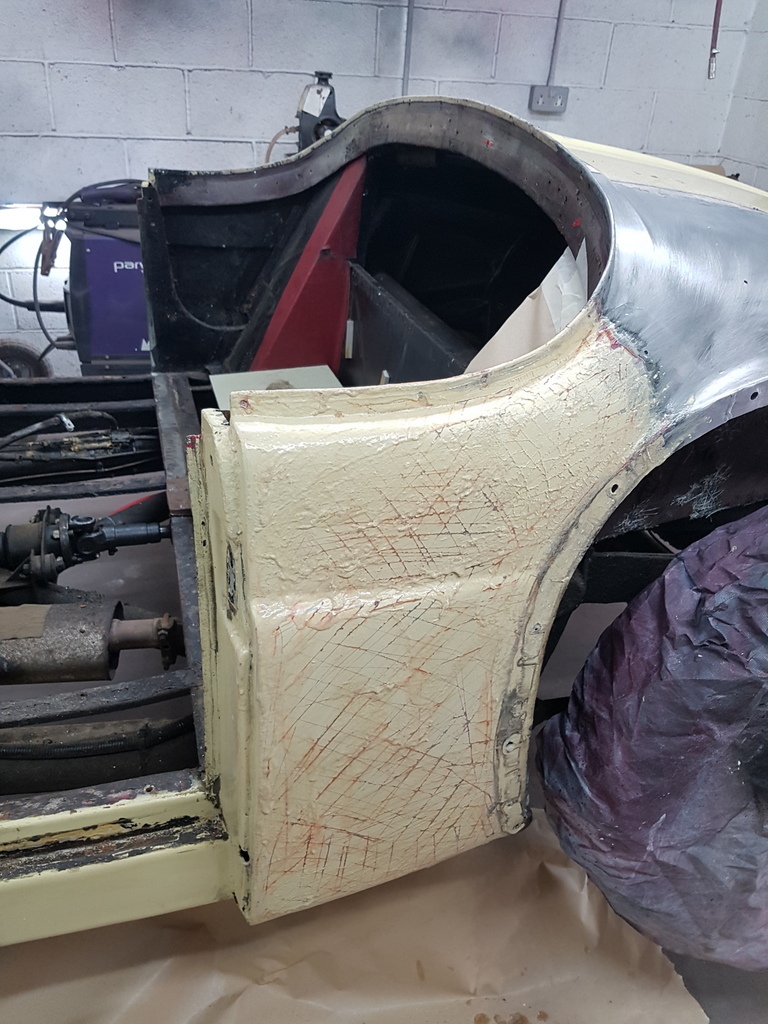 The front of the sill terminates within the A post box section 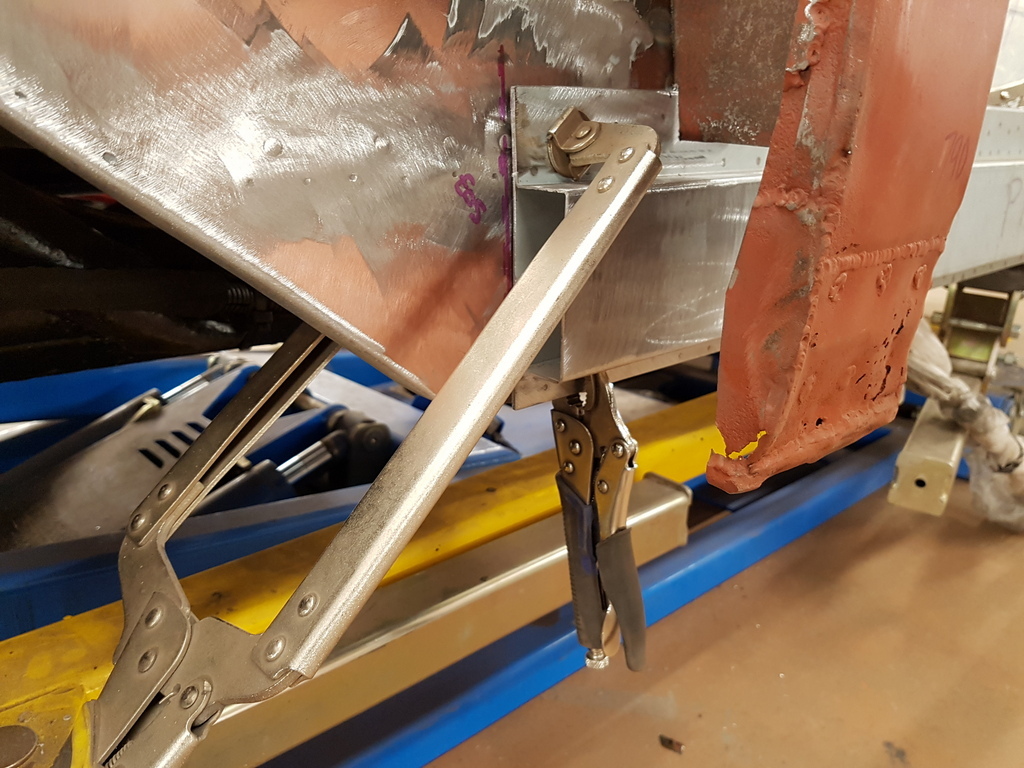 With the sill traveling directly through the base of the B post 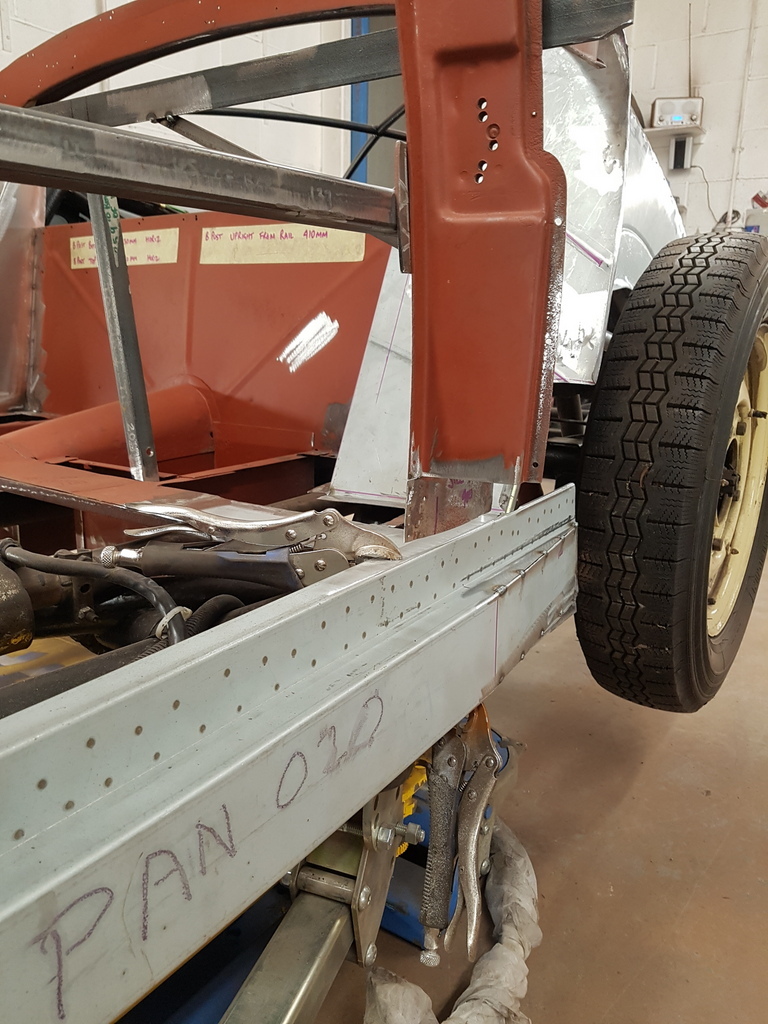 The inner sill face connecting to the side return of the bulkhead & the front body mounting 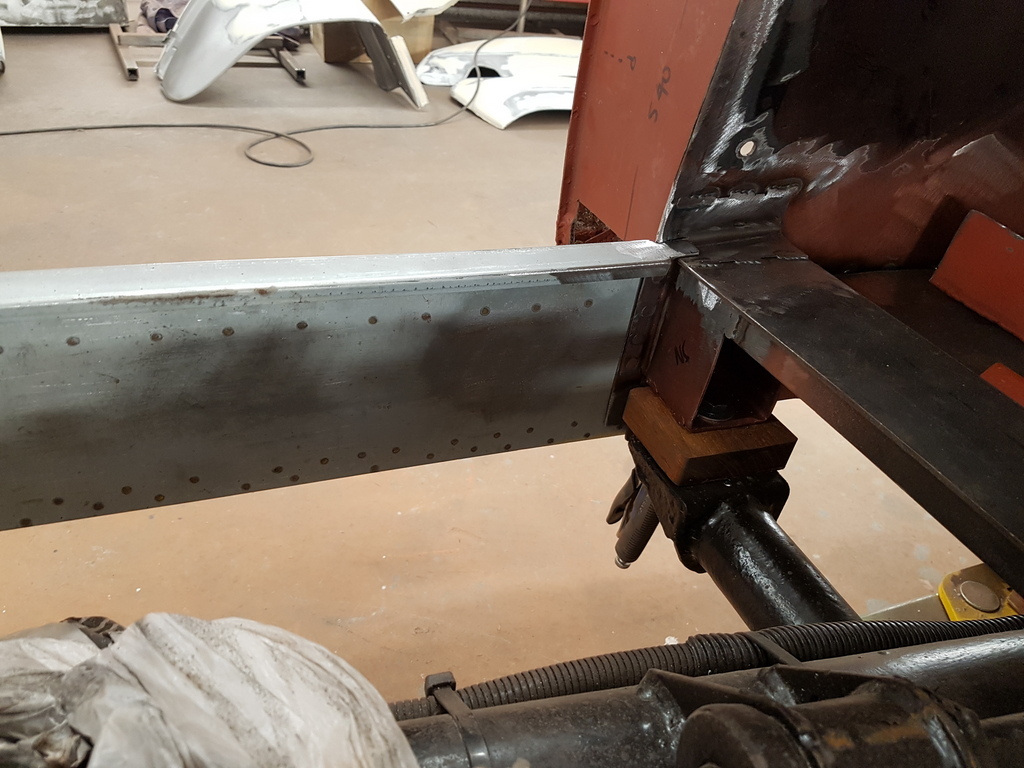 Along with the mid body mounting 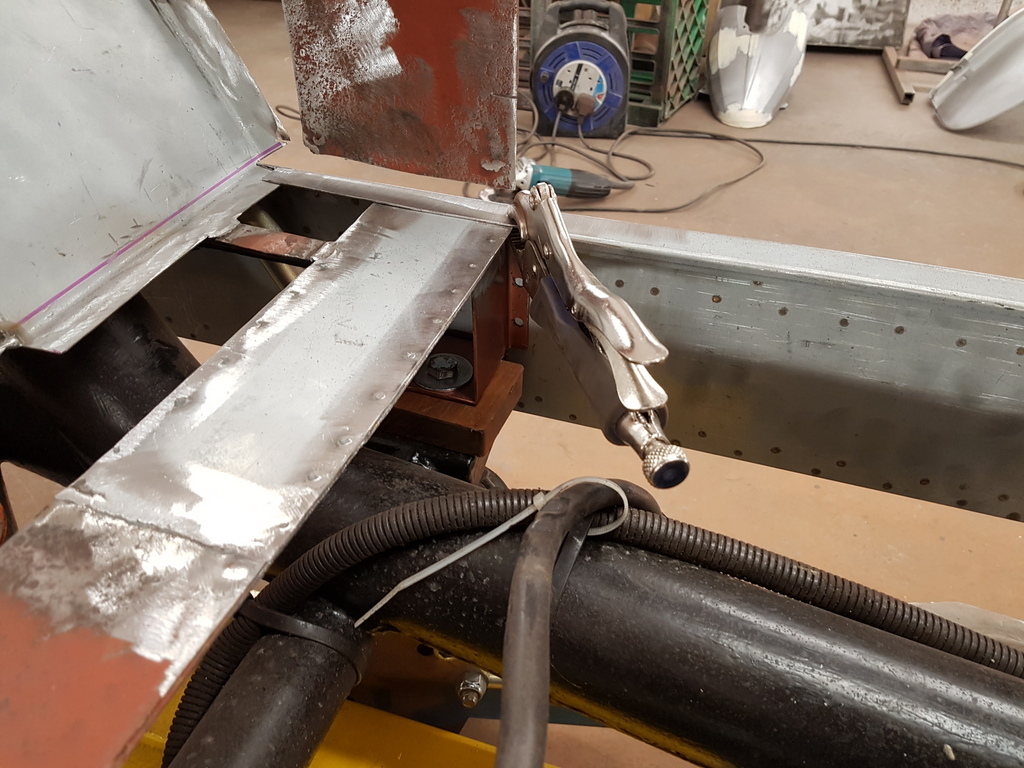 And the base rear support hoop (just visible in the pic) 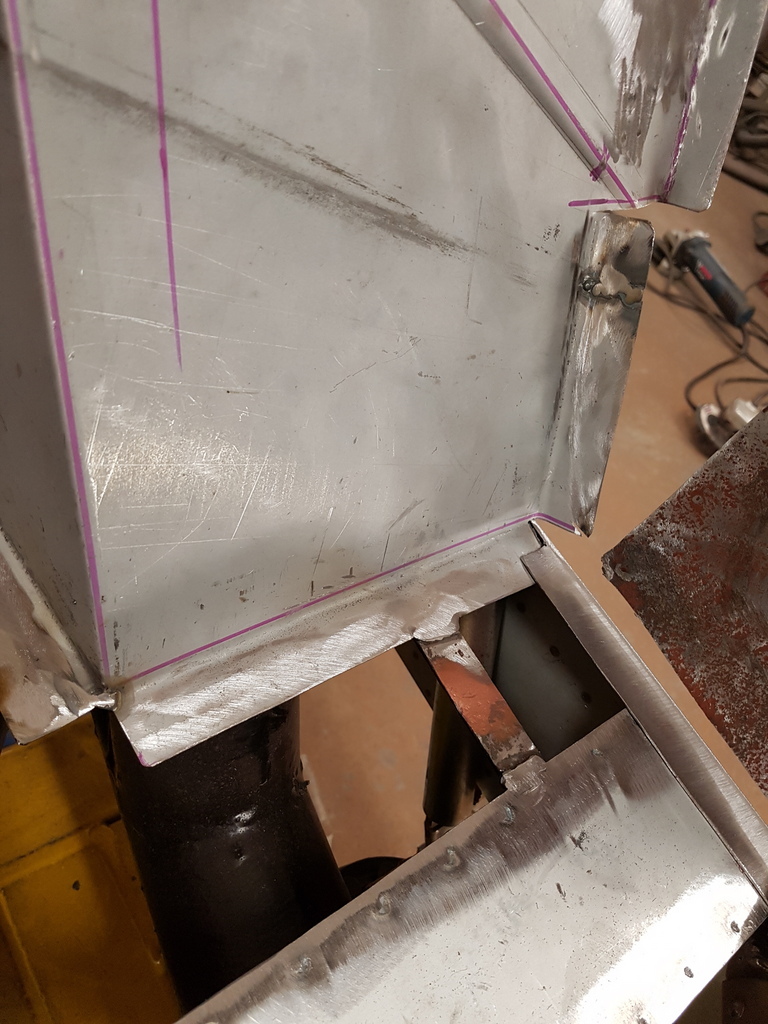 General arrangement has seen from the inner sill face 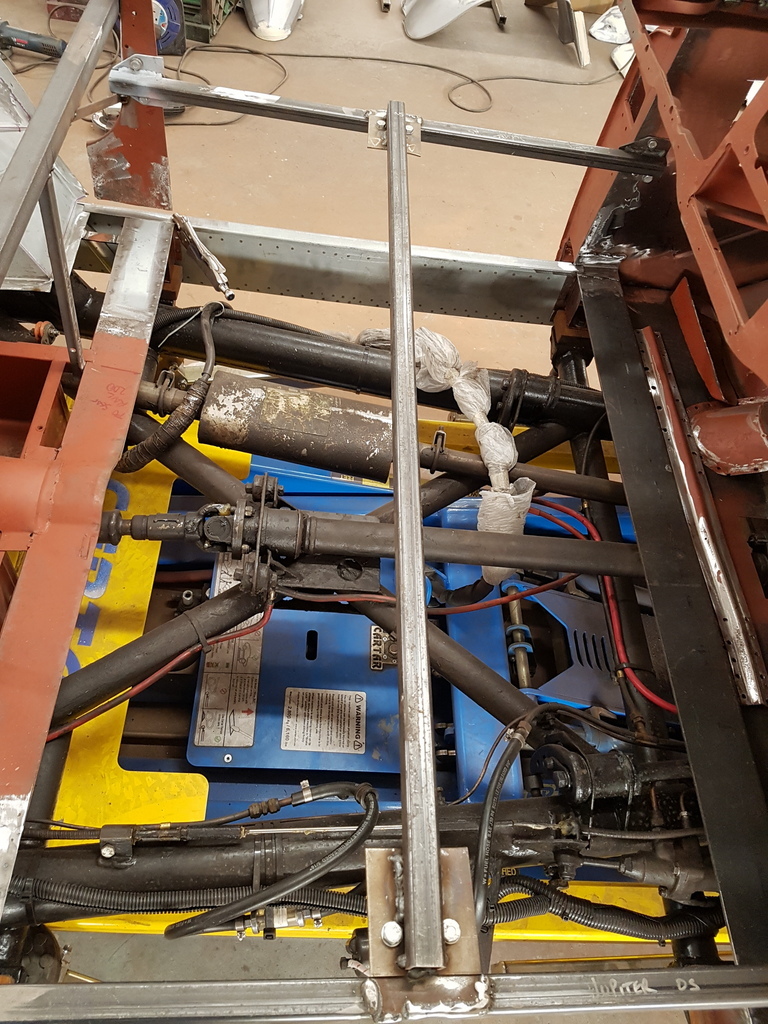 Sill now has to be removed and the rear taper welded & dressed back 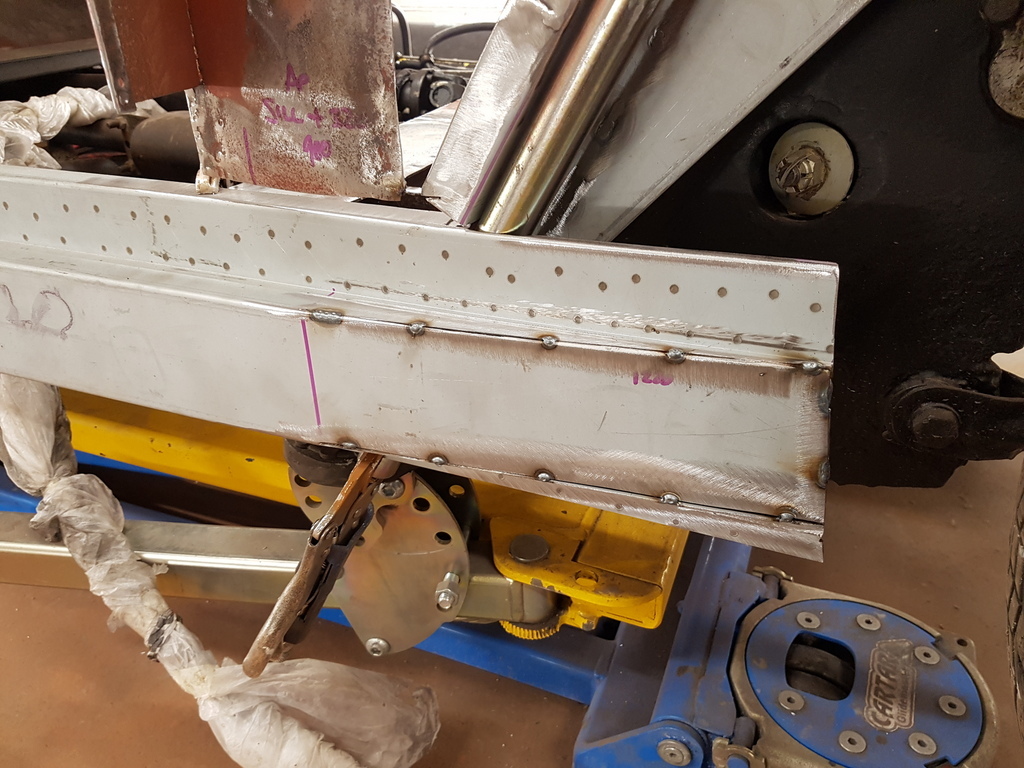 Then the sill can be refitted & fully aligned 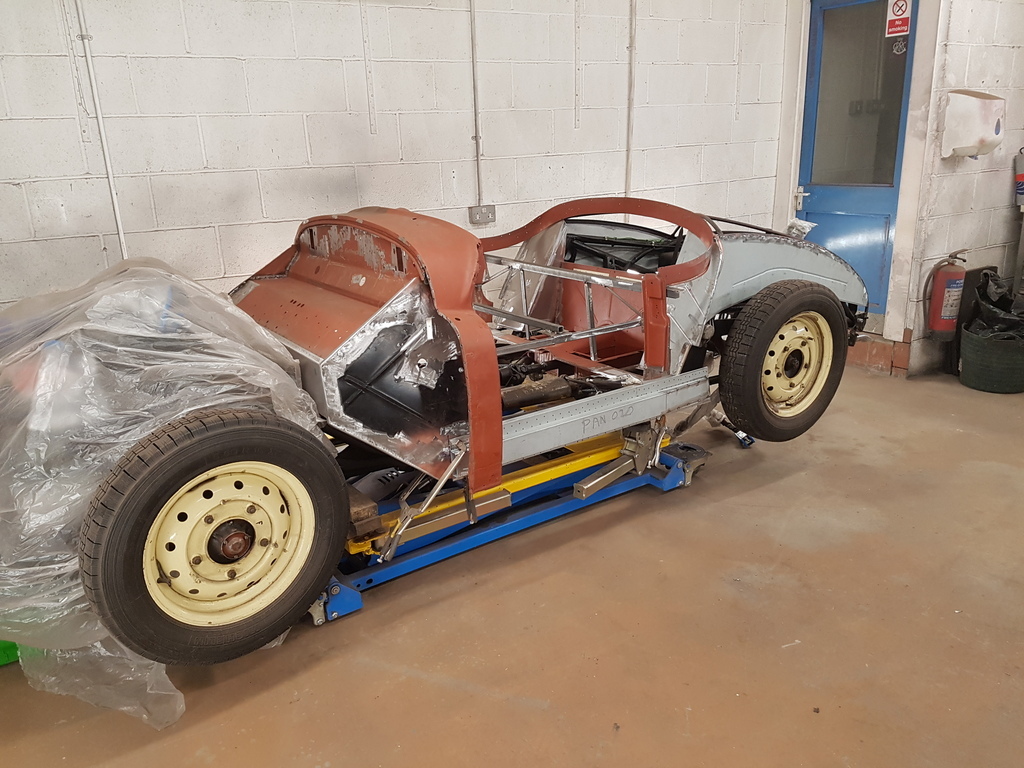 It will only be secured by temporary fastenings at this stage though 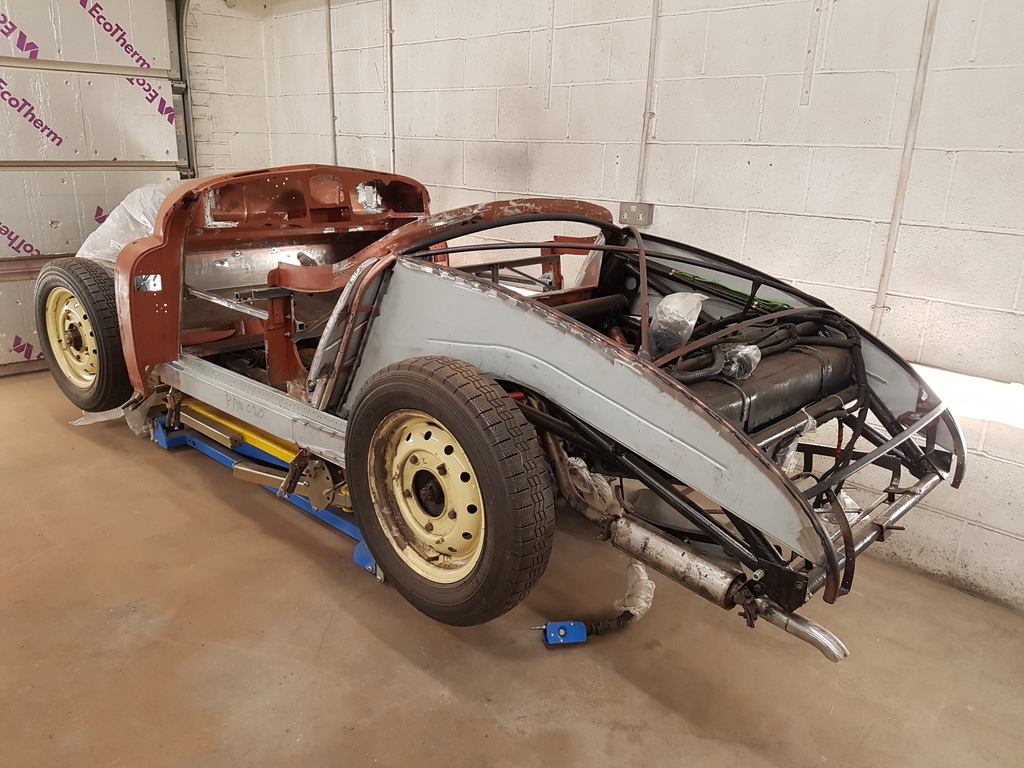 Only once the doors are refitted (which requires the repair section of the A post fitting has the bottom door hinge fastens to the base of the A post) Still pretty decent progress for today - more tomorrow |
| |
Last Edit: Apr 28, 2020 19:29:04 GMT by Deleted
|
|
Norman
Part of things
 
Posts: 449 
|
|
Apr 28, 2020 19:34:19 GMT
|
|
Jees that’s quality work, it must be a nightmare measuring and measuring again before welding anything. It will help the fact you have cockpit braces etc. You are working at pace here, I seem to spend most of the day with little to show. Keep up the great work and all the apprentices here are awaiting the next instalment. All the best, Norman
|
| |
|
|
|
|
|
|
|
Jees that’s quality work, it must be a nightmare measuring and measuring again before welding anything. It will help the fact you have cockpit braces etc. You are working at pace here, I seem to spend most of the day with little to show. Keep up the great work and all the apprentices here are awaiting the next instalment. All the best, Norman The cockpit jig has to be adjusted / altered to suit each individual Jupiter - I have yet to come across one car that carries the same measurements has the last -they all have a measurement difference / tolerance range heading for + / - 25mm - the door gapping in particular was very poor on all cars even from new 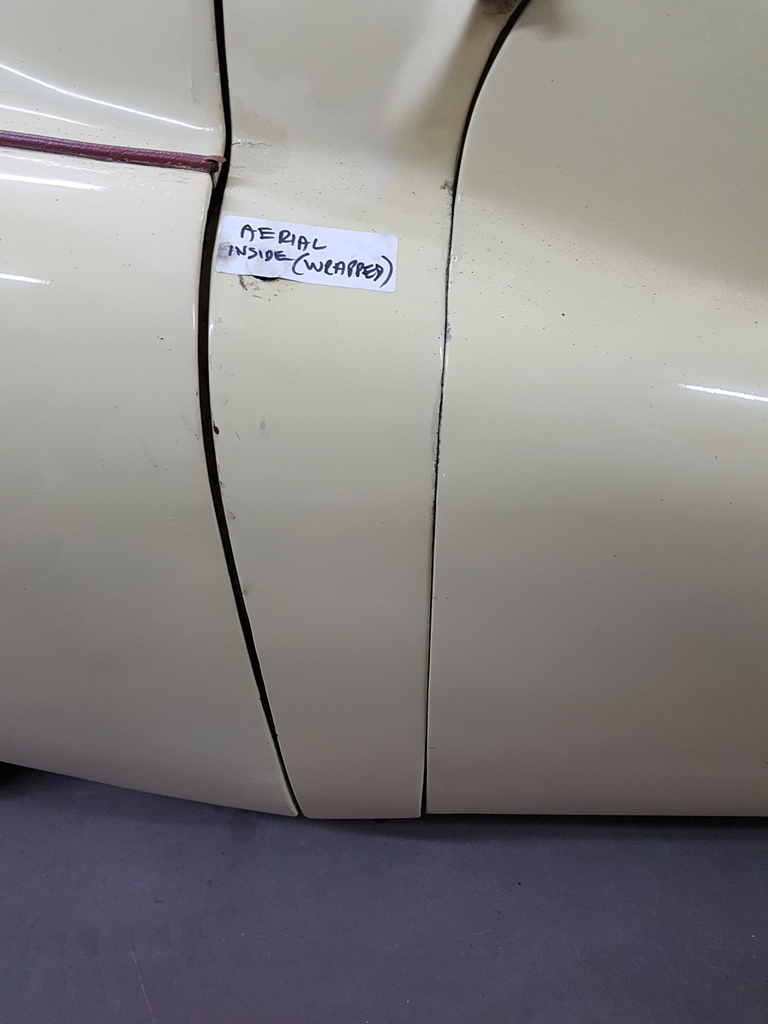 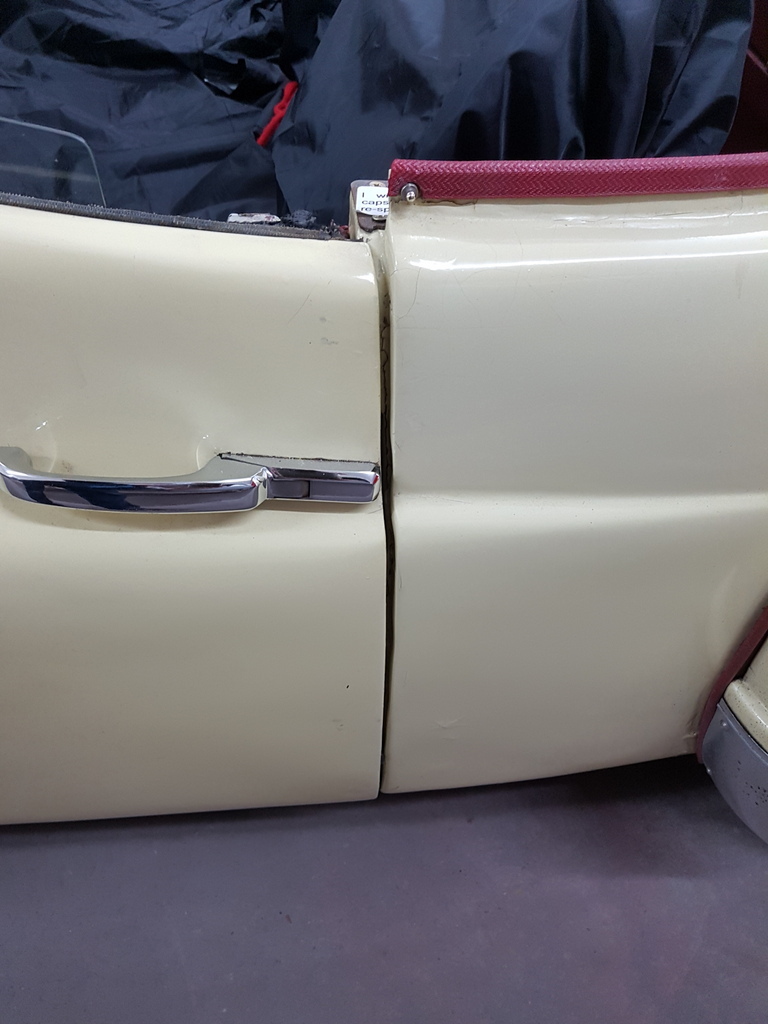 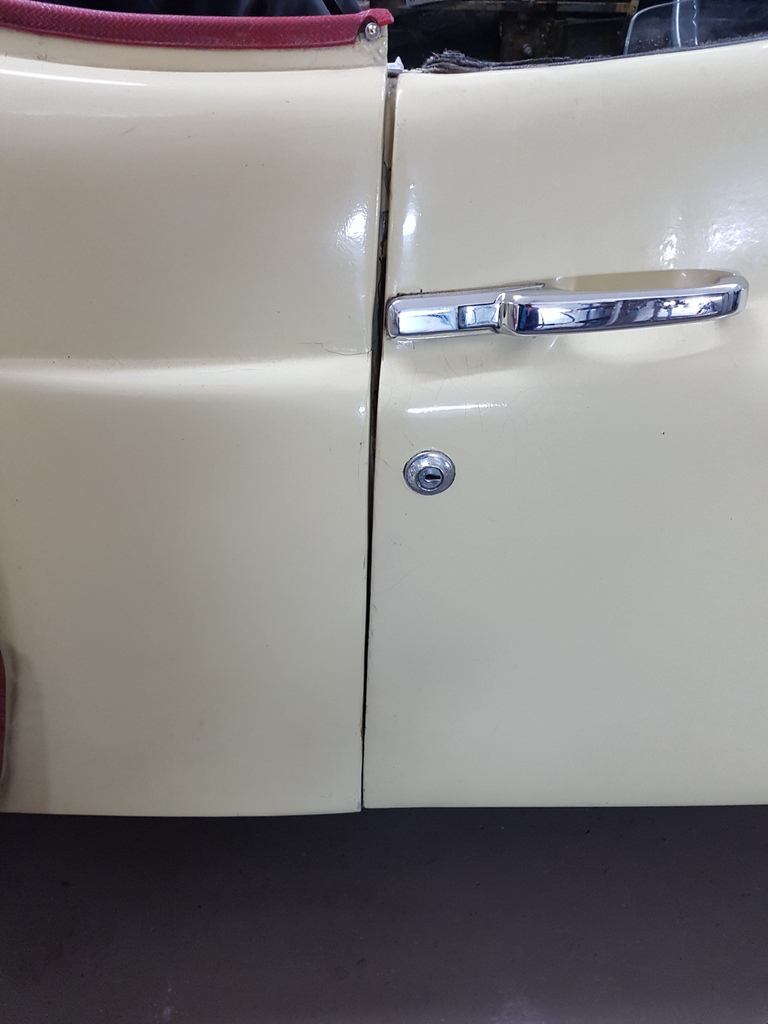 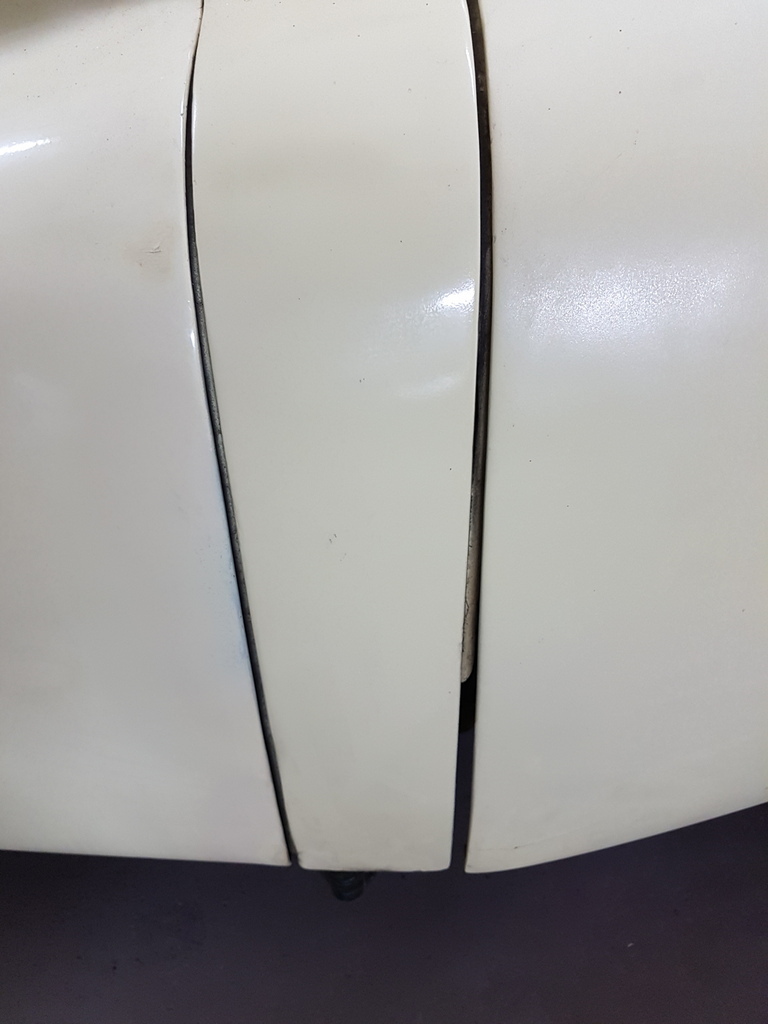 |
| |
Last Edit: Apr 29, 2020 7:34:42 GMT by Deleted
|
|
|
|
|
|
|
|
|
You are working at pace here, I seem to spend most of the day with little to show. Same here - I spent an afternoon (albeit a short one) on mine yesterday, and all I achieved was to remove a short (5") piece of double-skinned inner sill and make a replacement piece for one of the skins. And this is the second side I'm working on now, so in theory I'm not figuring stuff out this time around. |
| |
|
|
eurogranada
Europe
To tinker or not to tinker, that is the question...
Posts: 2,556
|
|
Apr 29, 2020 10:28:33 GMT
|
|
Hard to imagine buyers even back then accepted this level of fit...
|
| |
|
|
|
|
|
Apr 29, 2020 10:46:03 GMT
|
Graffiti attack by Batman? Afraid not - Just an indication of the distorted profile on the panel  I am intrigued by your markings on the Jupiter's rear panel, I can see some of the damage from the pictures, could you please tell us more about your technique. Diolch (Thank you) |
| |
|
|
|
|
|
Apr 29, 2020 10:48:50 GMT
|
Hard to imagine buyers even back then accepted this level of fit... Alex - This car like all the rest has seen a life - its body structure has seen an element of bodge and the body mountings have become weak over time allowing the body to sag and the aperture gapping's on the car have suffered has a direct result - none the less the body apertures on most vehicles that were built in the 40's & 50's were poor regardless of manufacture |
| |
|
|
|
|
|
Apr 29, 2020 10:57:49 GMT
|
Afraid not - Just an indication of the distorted profile on the panel  I am intrigued by your markings on the Jupiter's rear panel, I can see some of the damage from the pictures, could you please tell us more about your technique. Diolch (Thank you) Whilst I use sight I more rely upon touch and carefully go over the panel by hand whilst wearing a thin cotton type glove to identify panel undulations - its critical with a panel of this size at this stage whilst it is still affixed to the car and I can mark it up - with the panel removed from the car I can address the panel profiles carefully with a hammer & dolly - once the panel is refitted to the car its very difficult / impossible in some areas to access the underside of the panel with the dolly or hammer - hence the reason for marking the panel up & addressing the damage with the panel off the car |
| |
Last Edit: Apr 29, 2020 10:59:50 GMT by Deleted
|
|
|
|
|
Apr 29, 2020 11:02:50 GMT
|
|
Another fascinating thread....I am embarrassed by my efforts when I read of the knowledge and skills of GN and other posters on here!
|
| |
|
|
eurogranada
Europe
To tinker or not to tinker, that is the question...
Posts: 2,556
|
|
Apr 29, 2020 14:43:37 GMT
|
Hard to imagine buyers even back then accepted this level of fit... Alex - This car like all the rest has seen a life - its body structure has seen an element of bodge and the body mountings have become weak over time allowing the body to sag and the aperture gapping's on the car have suffered has a direct result - none the less the body apertures on most vehicles that were built in the 40's & 50's were poor regardless of manufacture Off course, the way your sentence regarding panel gaps directly preceded these pictures in my mind I'd associated them with an example of factory gaps. My bad. I guess they would have been nicer after leaving the factory, even though not as perfect as today. But as you've said. Handbuilt versus machine built... It's to be expected to an extent. |
| |
|
|
|
|
|
Apr 29, 2020 15:35:38 GMT
|
|
Mass produced hand built individual vehicles.
|
| |
|
|
|
|
|
Apr 29, 2020 16:28:57 GMT
|
|
I have a sneaky suspicion that gaps will be a touch nicer for its next life!
|
| |
'80 s1 924 turbo..hibernating
'80 golf gli cabriolet...doing impression of a skip
'97 pug 106 commuter...continuing cheapness making me smile!
firm believer in the k.i.s.s and f.i.s.h principles.
|
|
|
|
|
Apr 29, 2020 19:00:47 GMT
|
You are working at pace here, I seem to spend most of the day with little to show. Same here - I spent an afternoon (albeit a short one) on mine yesterday, and all I achieved was to remove a short (5") piece of double-skinned inner sill and make a replacement piece for one of the skins. And this is the second side I'm working on now, so in theory I'm not figuring stuff out this time around. You see some days you can just push on and make a lot happen because you have previously diligently spent a great deal of time preparing something and ensuring that's its correct - and then it just bolts into place in next to no time and makes it look like you have completed a weeks work in the space of day - especially when its large bulky part / section - like yesterdays fitting of the rear superstructure - then other days you can spend all day attempting to hang a door and not be much further on than what you were at the start of the day 'Like Today'  |
| |
|
|
|
|


