pptom
Part of things
 
Posts: 475 
|
|
May 29, 2020 15:12:41 GMT
|
Done for the day. Firstly got the inner sill mocked up which shows how far out the A post and rear quarter are 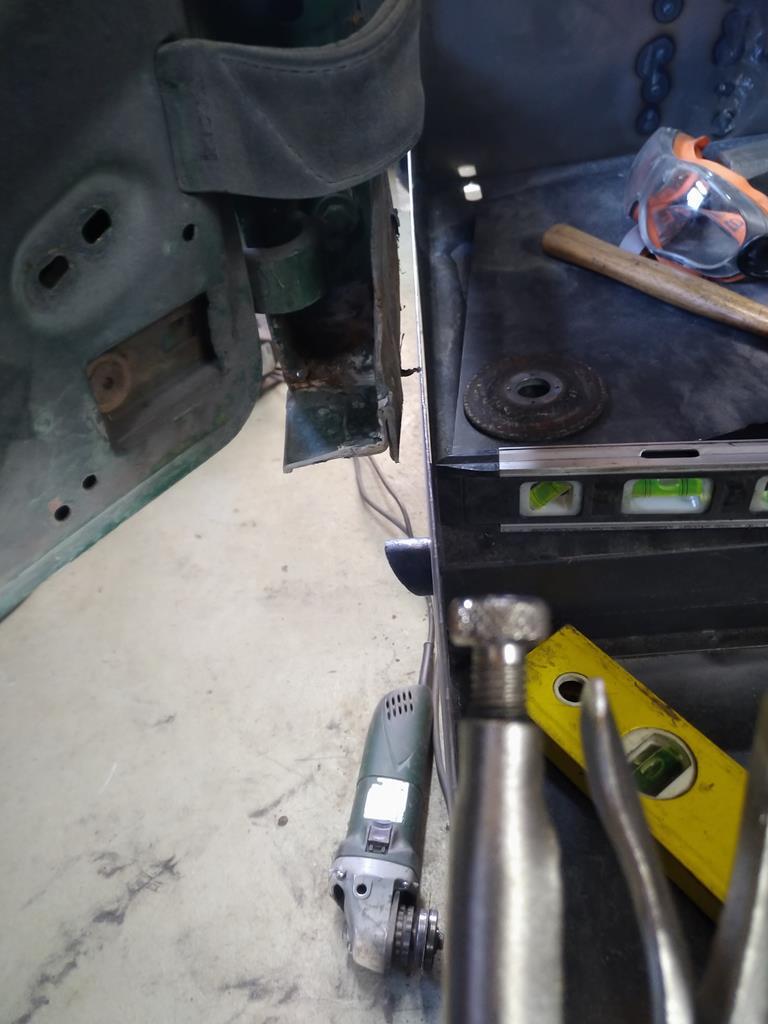 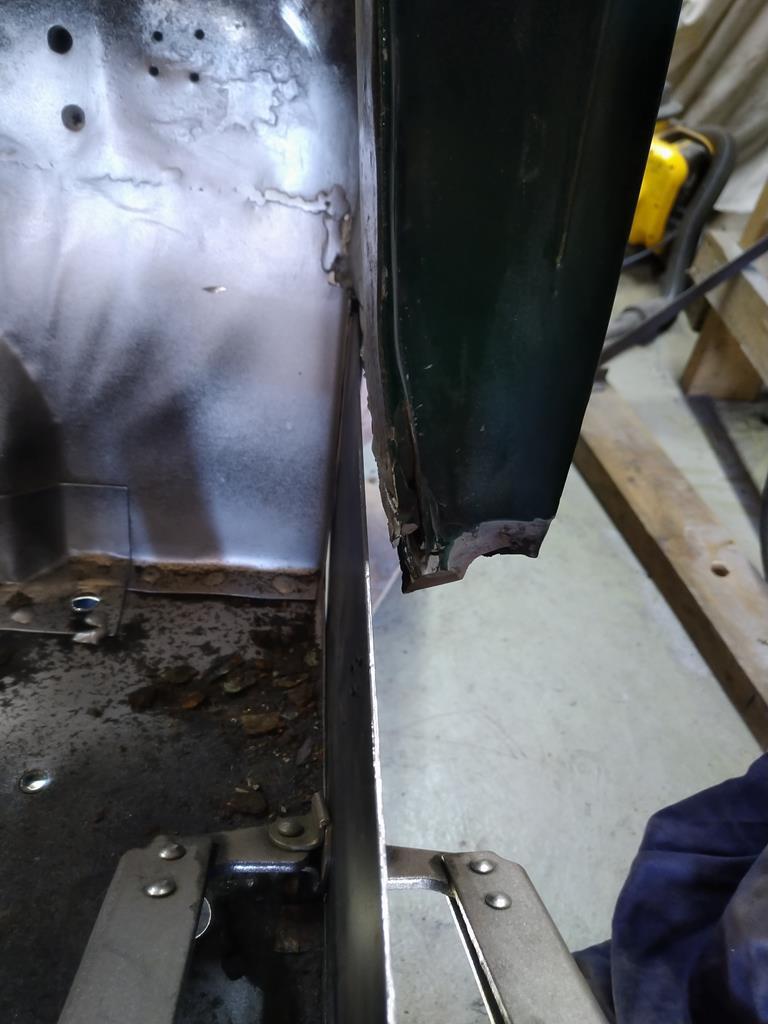 This also shows the inner and outer rear arches, fist pic is how they sit, second is how they should be 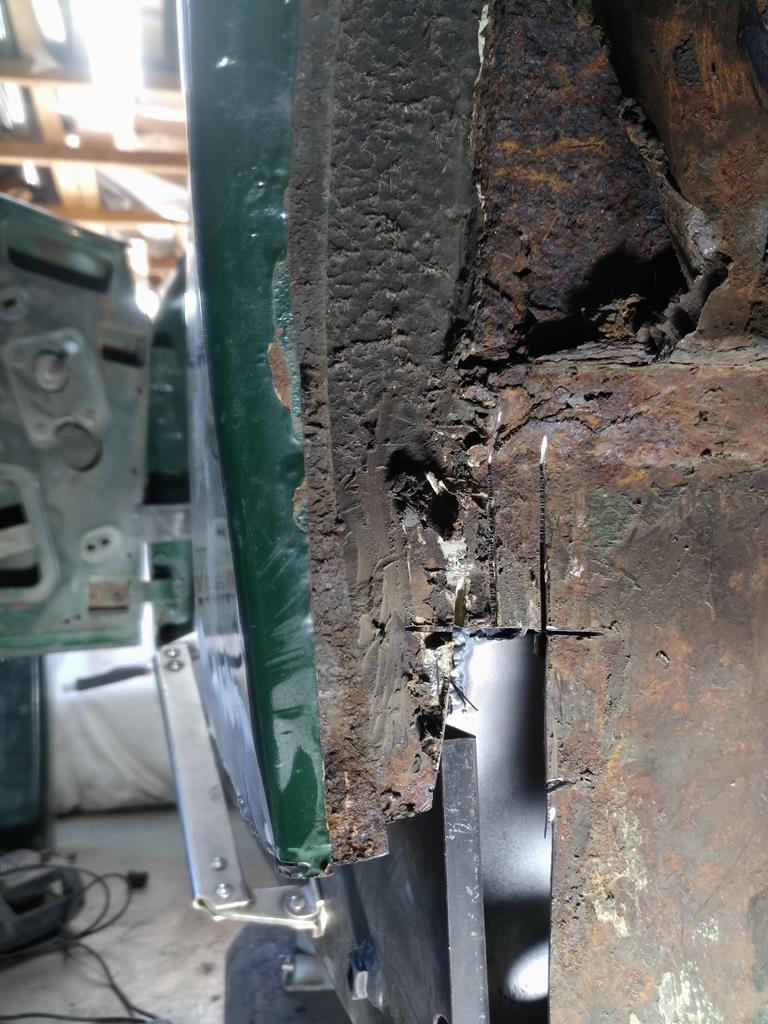 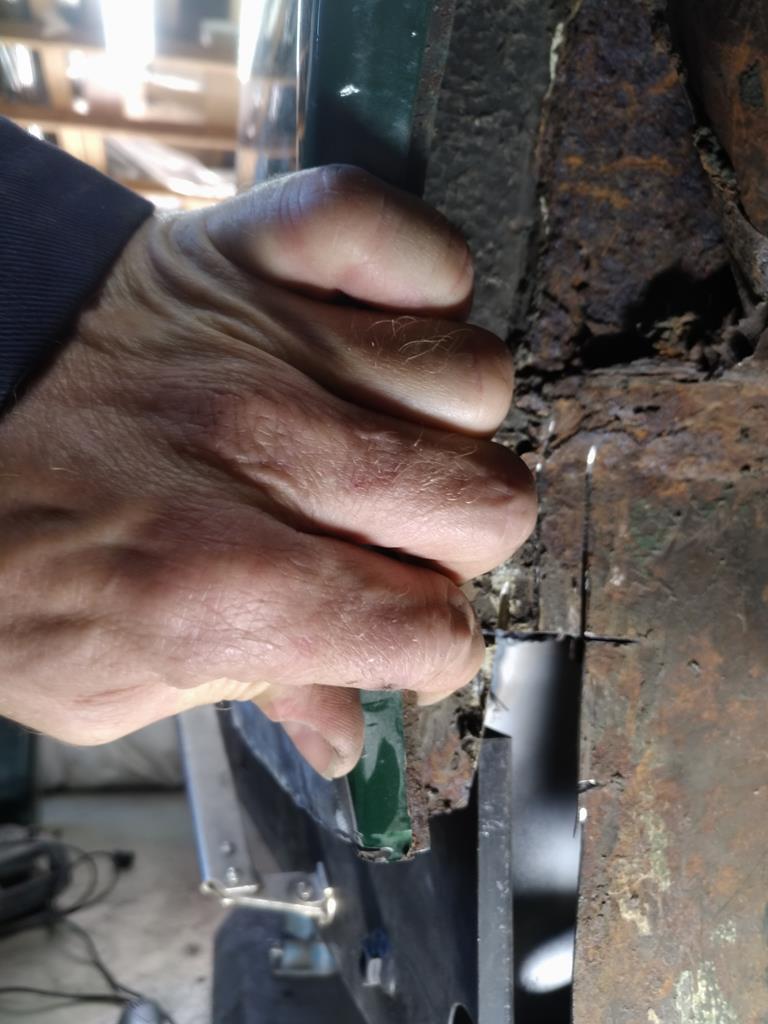 |
| |
|
|
|
|
pptom
Part of things
 
Posts: 475 
|
|
May 29, 2020 15:25:27 GMT
|
So, out with the ratchet strap to pull the A post in. I went around the bracing on the opposite side of the car, struggled pulling it in until I remembered a had a brace across the car!🙄 Cut the brace and pulled in flush with the sill. You can see the brace at the top of the picture and how much it's moved. 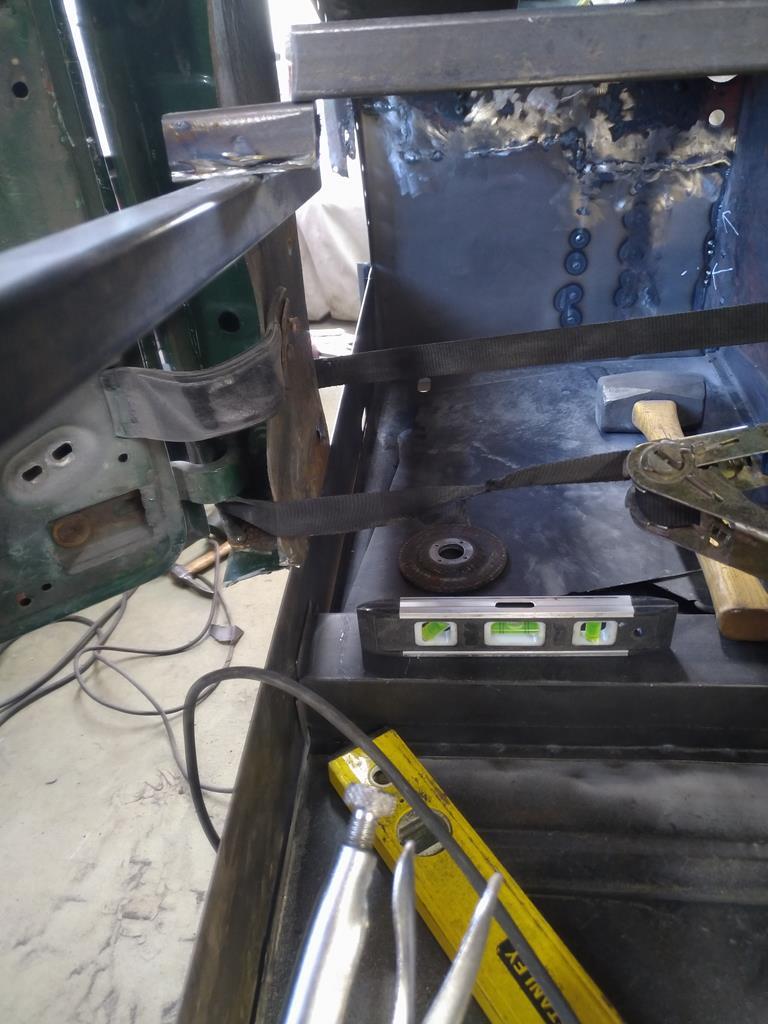 After that I got the sill prepped for welding and punched the spot weld holes in the floorpan side lip. Also lopped off the bottom of the A post and rear quarter and test fitted the outer sill. All went much quicker than the drivers side, that's the benefit of jumping through all of the hoops before and knowing how to deal with them. Finally welded in, happy with that. 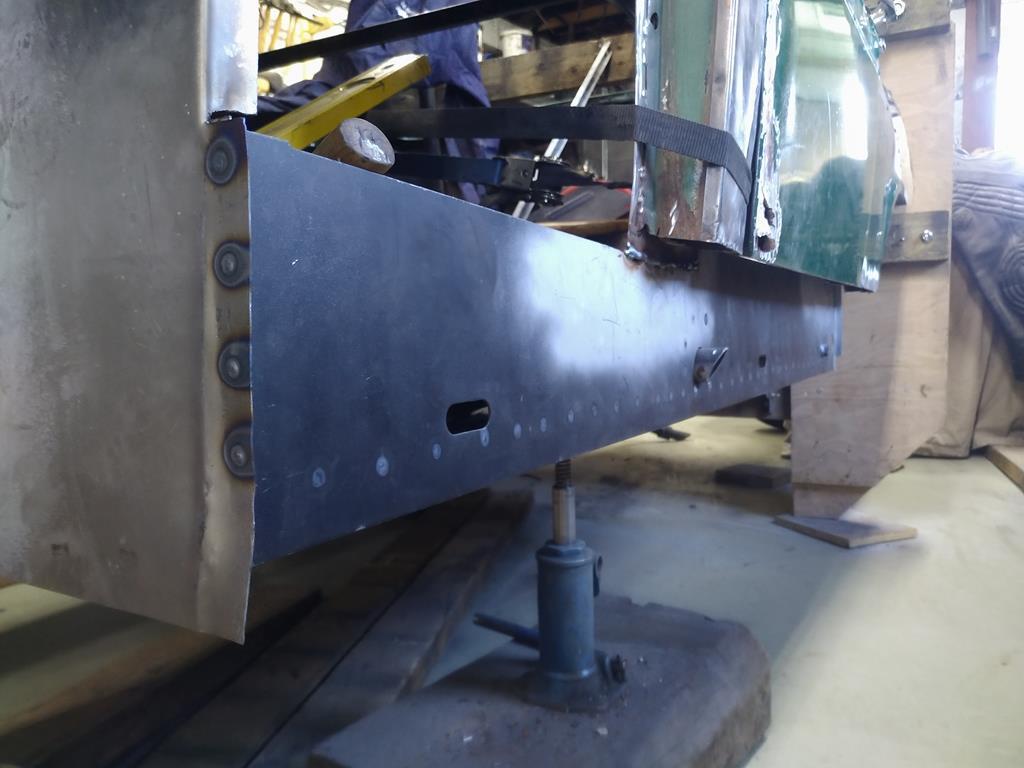 And since I did all of the spot welding from inside the car this time I won't have to spend time grinding down all of the spot welds before fitting the outer sill. Just some minimal prep around the butt welded seam under the A post and the outer sill can go straight on. |
| |
|
|
pptom
Part of things
 
Posts: 475 
|
|
May 31, 2020 14:24:11 GMT
|
Made some new bottoms for the A post and rear quarter. A post bottom was Migged in place, rear quarter Tigged. Although MIG is easier, up until 2 weeks ago I've only had TIG, so although self taught, I've got very used to it. Tig is much slower and hotter, but I found it great for these little sections, the main advantage being grinding down the weld. I reckon there is 80% less grinding and what is there is easier to remove, I've read that mig creates very hard metal. 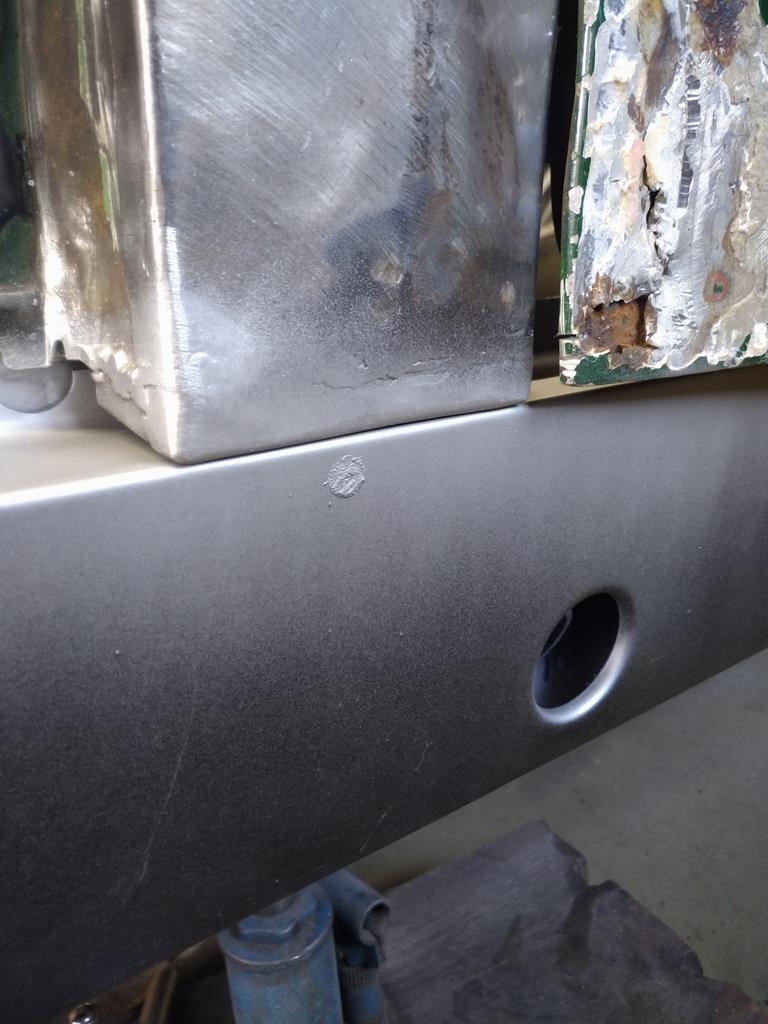 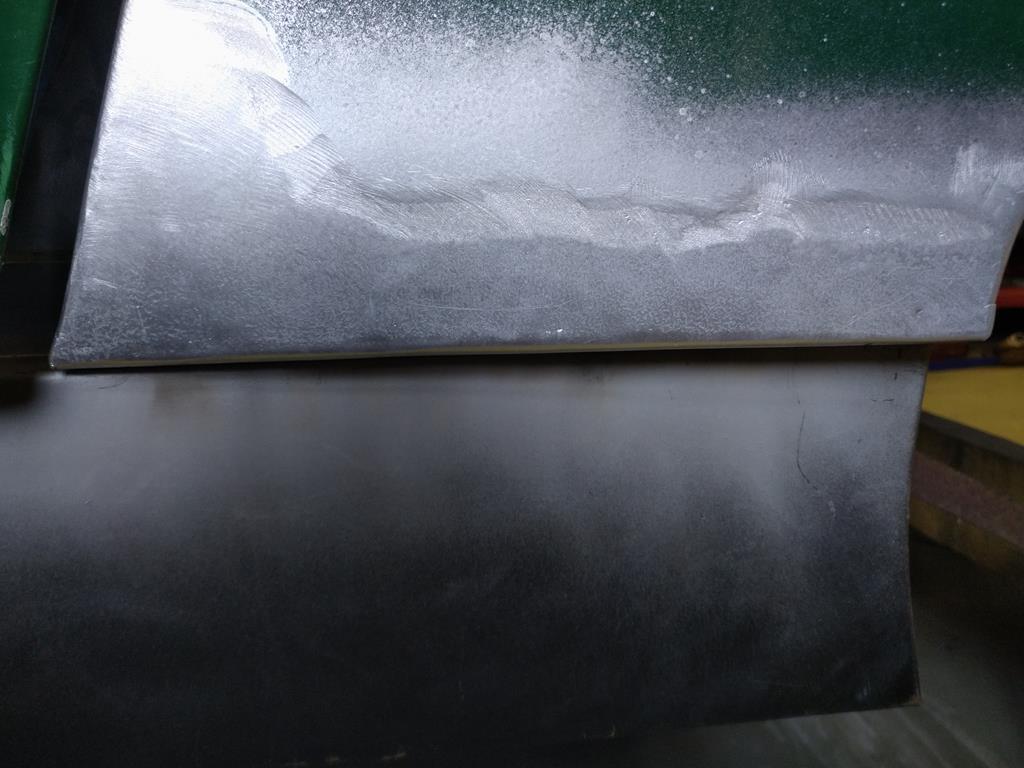 The weld is invisible, the bit you can see is the filler / metal interface, it's all had some Galv spray. With that done and various other bits of tinkering the outer sill went on 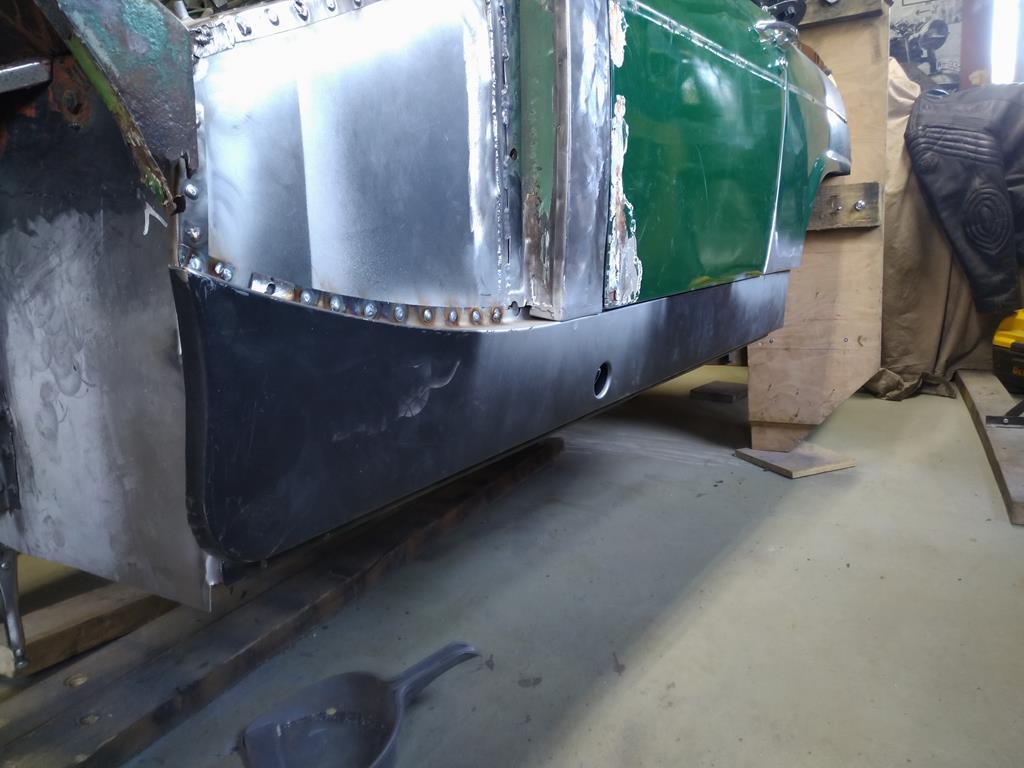 Finally flipped the car onto each side to finish all of the welding, wire wheeled the spot welds and gave it all some Hydrate 80. |
| |
Last Edit: May 31, 2020 14:27:04 GMT by pptom
|
|
teaboy
Posted a lot
   Make tea, not war.
Posts: 2,125
|
|
May 31, 2020 19:55:08 GMT
|
|
You’re doing a really nice job.
Putting the ‘professionals’ to shame.
|
| |
|
|
pptom
Part of things
 
Posts: 475 
|
|
|
|
Thanks Teaboy, I'll have to dig out who did the work and see if they are still trading. The last couple of days have been on the boot floor. Quite a bit of time disassembling the heritage assembly without destroying it, but it went ok. Its gone from this 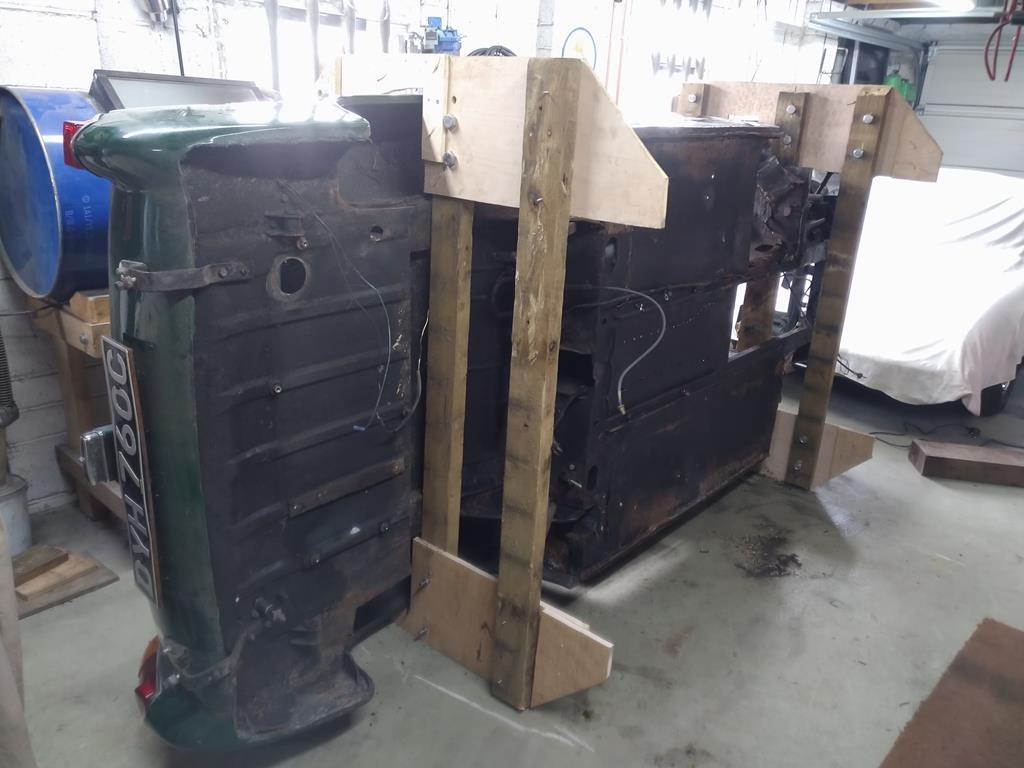 To this 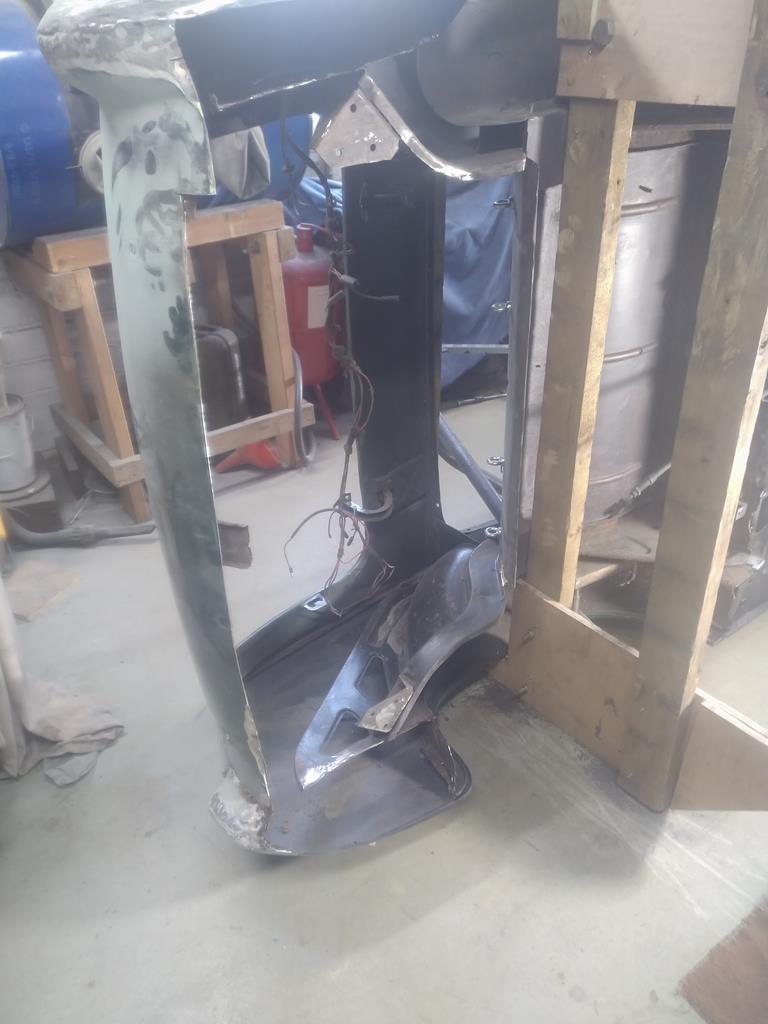 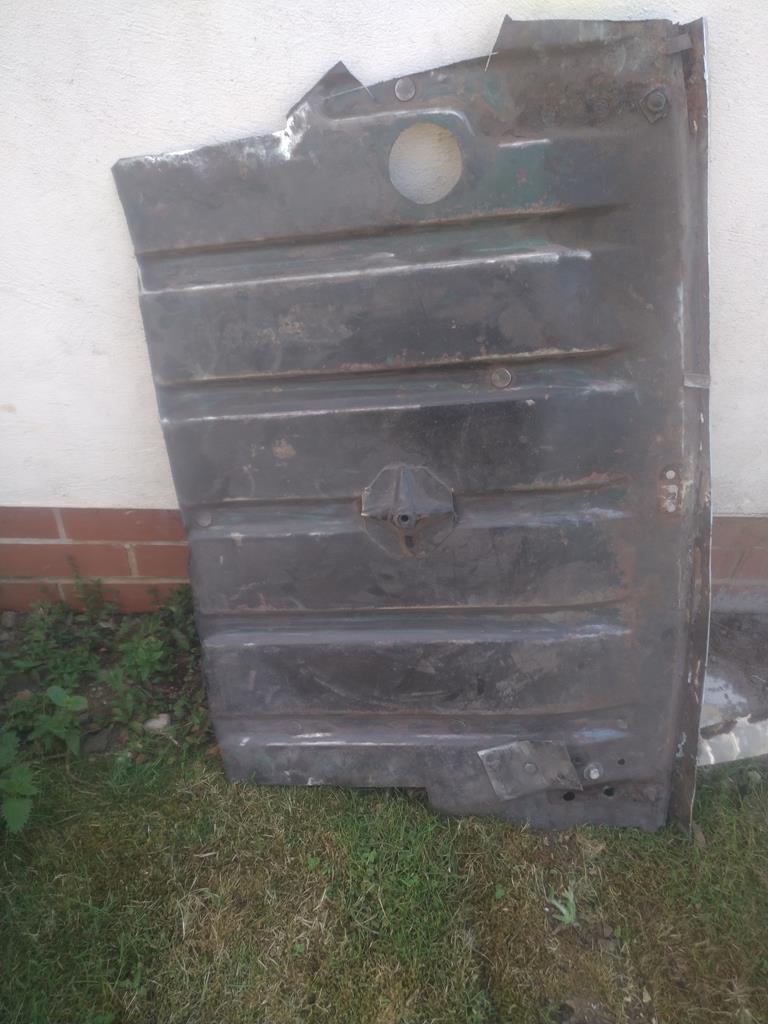 Not too much drilling out of spot welds as most of them were rusted out. Also, I didn't bother with the spot welds where the rear lip attached to the rear panel / valance, as that is getting replaced too, so I just buzzed it off with a cutting disc revealing, as is par for this car, 2 layers of metal and a load of filler 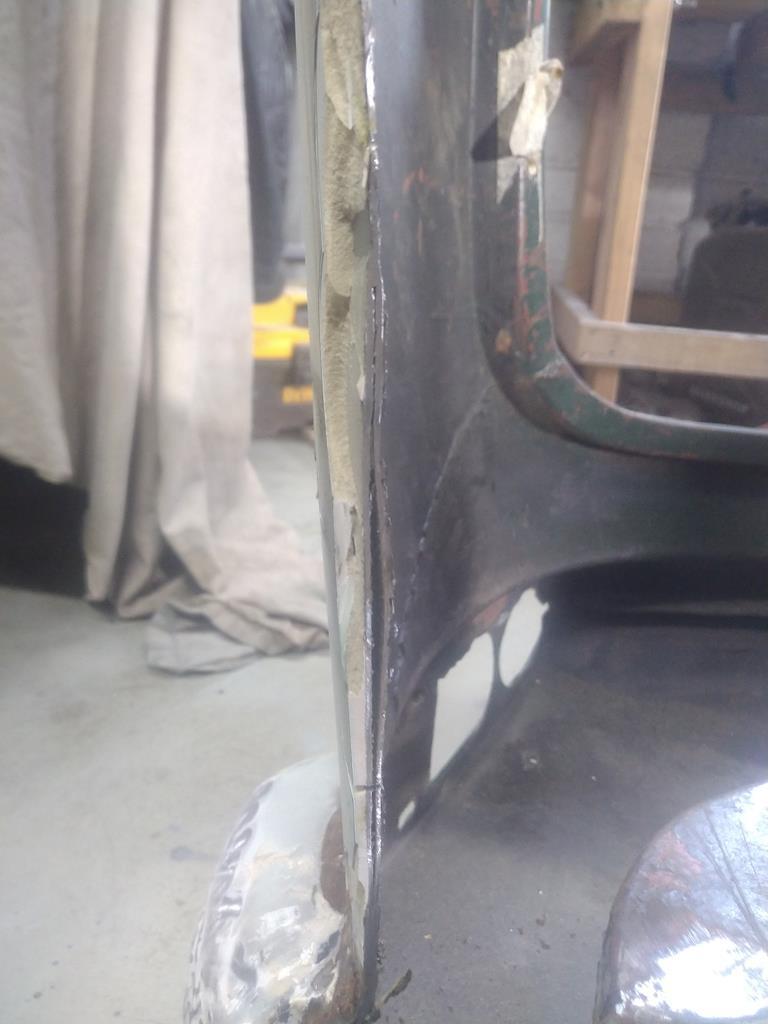 Eventually, after making some various bits and bobs and some careful cutting this was the result. Some of the spot welds aren't the smallest as I had some tears when dismantling the panel and I'm only grinding down the ugly ones as it's all underneath the car and I don't want to weaken the surrounding metal. Wire brushed the welds and applied Hydrate 80 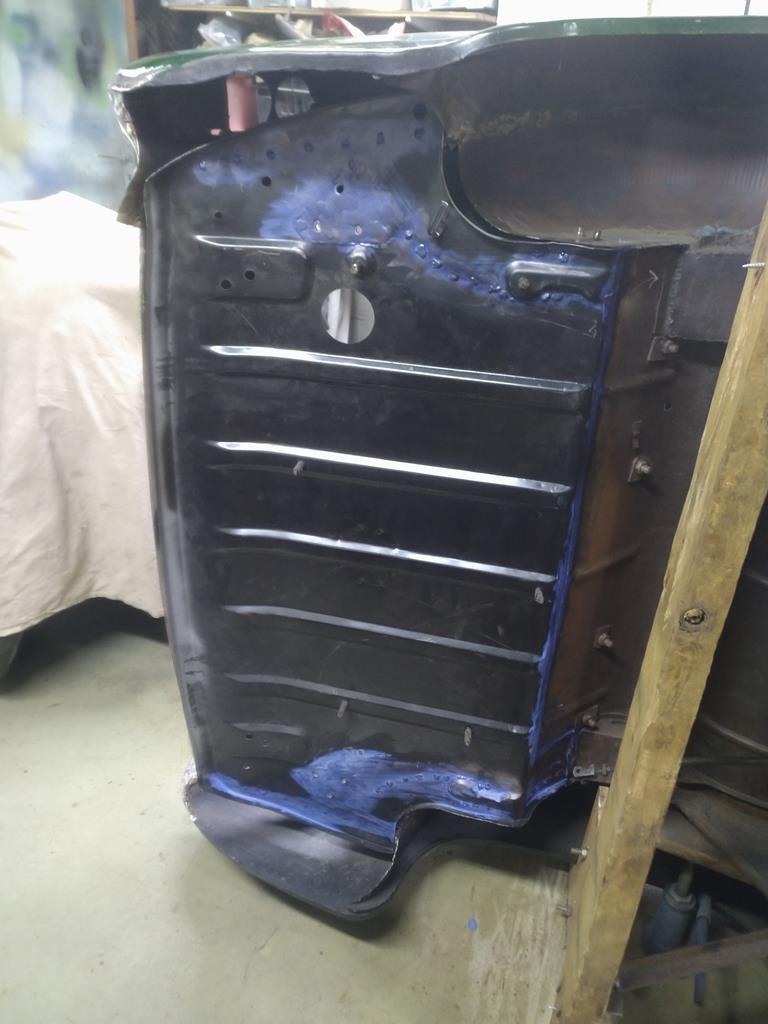 |
| |
|
|
pptom
Part of things
 
Posts: 475 
|
|
Jun 12, 2020 15:16:15 GMT
|
Next job was the rear bulkhead / inner wheel arch / spring hanger box area. Started on the drivers side by cutting an MOT patch out 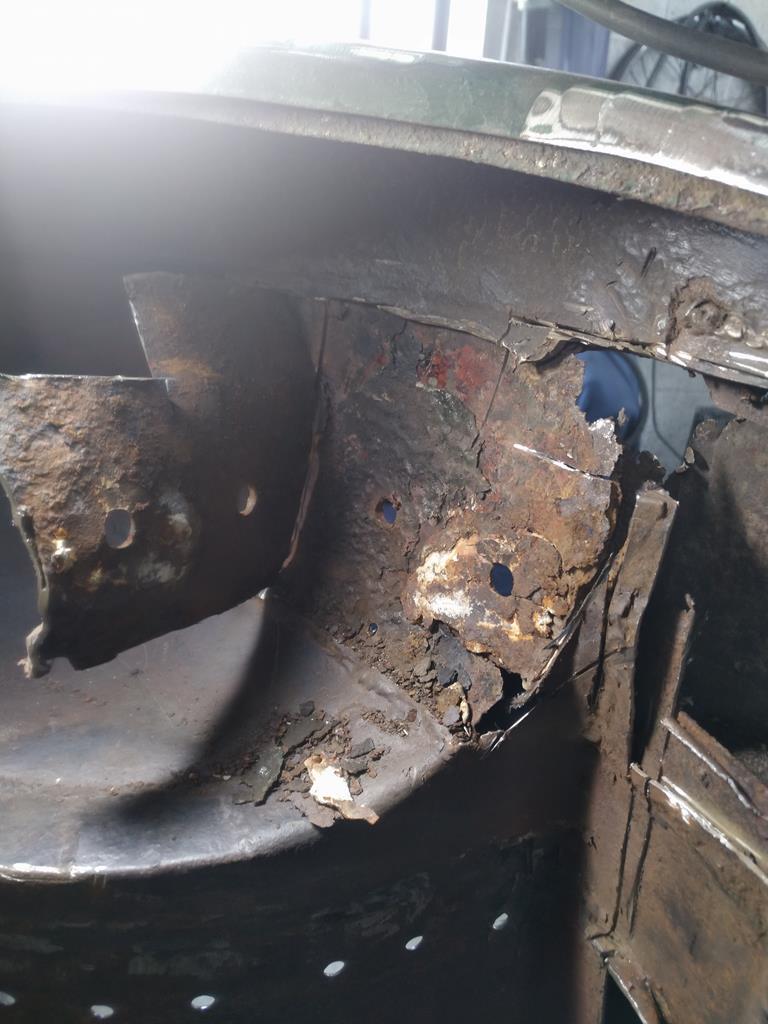 Quality, this is one of the mounting locations for the roll hoop, not much photos of this side, but it took me about 3 days of cutting out and butt welding repair sections including a new spring hanger box as the old one had multiple repairs and was on its last legs about 30 years ago 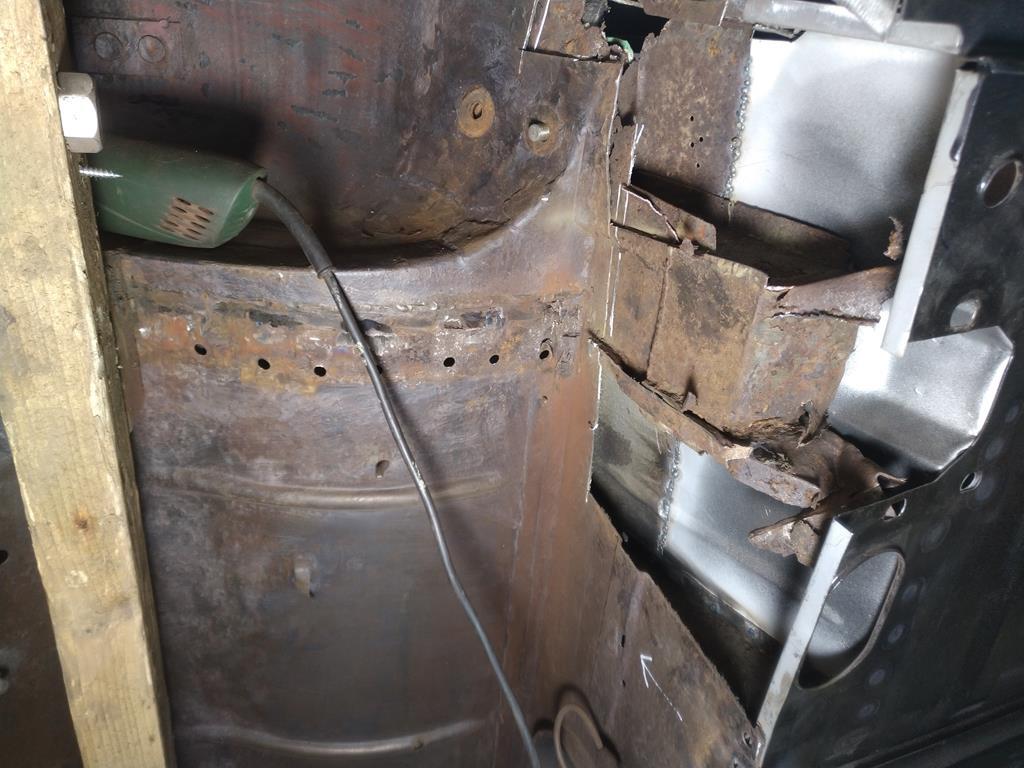 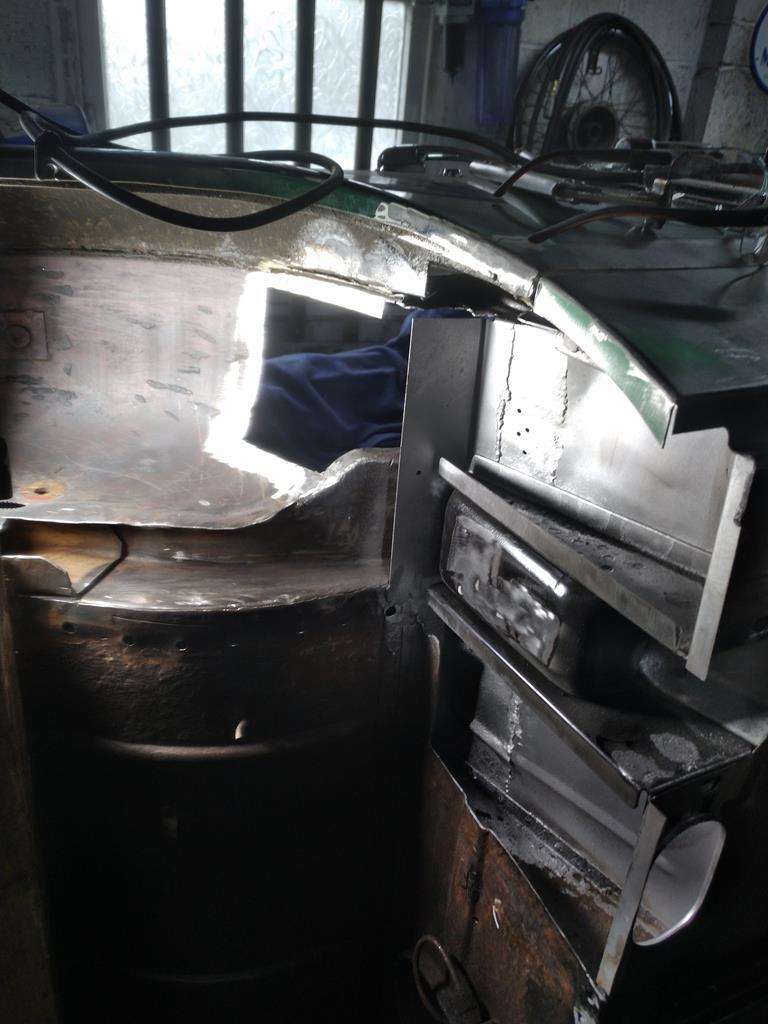 Finally dressed up and slathered with hydrate 80 to try and get into all the crevices 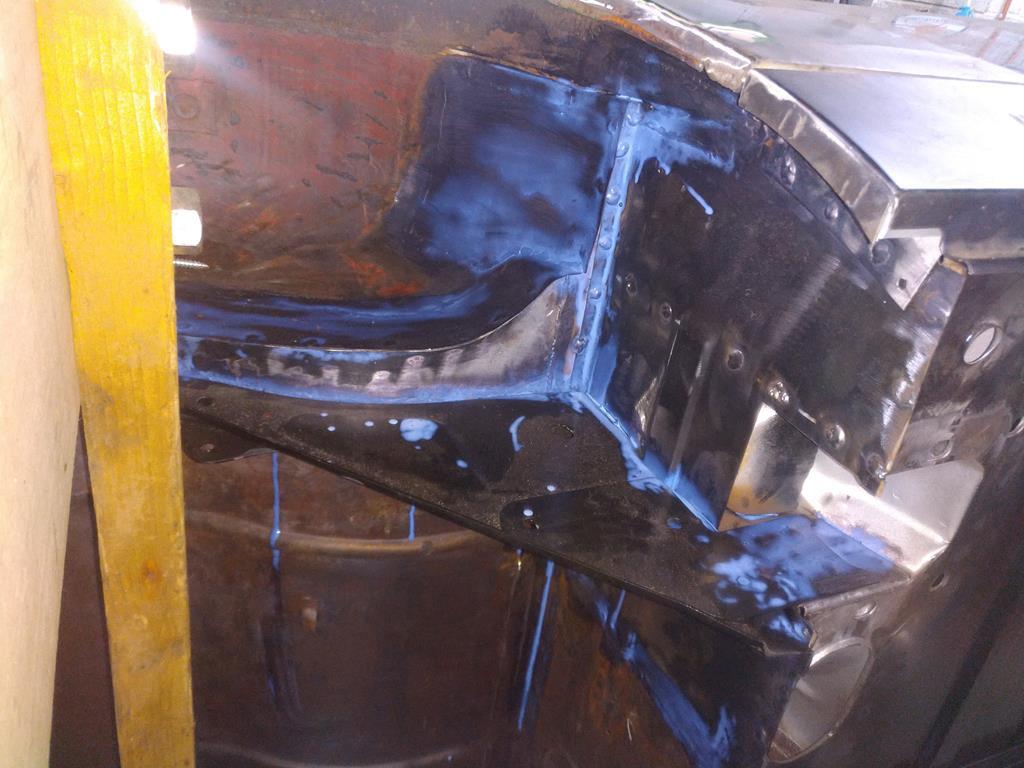 |
| |
|
|
pptom
Part of things
 
Posts: 475 
|
|
Jun 12, 2020 15:23:48 GMT
|
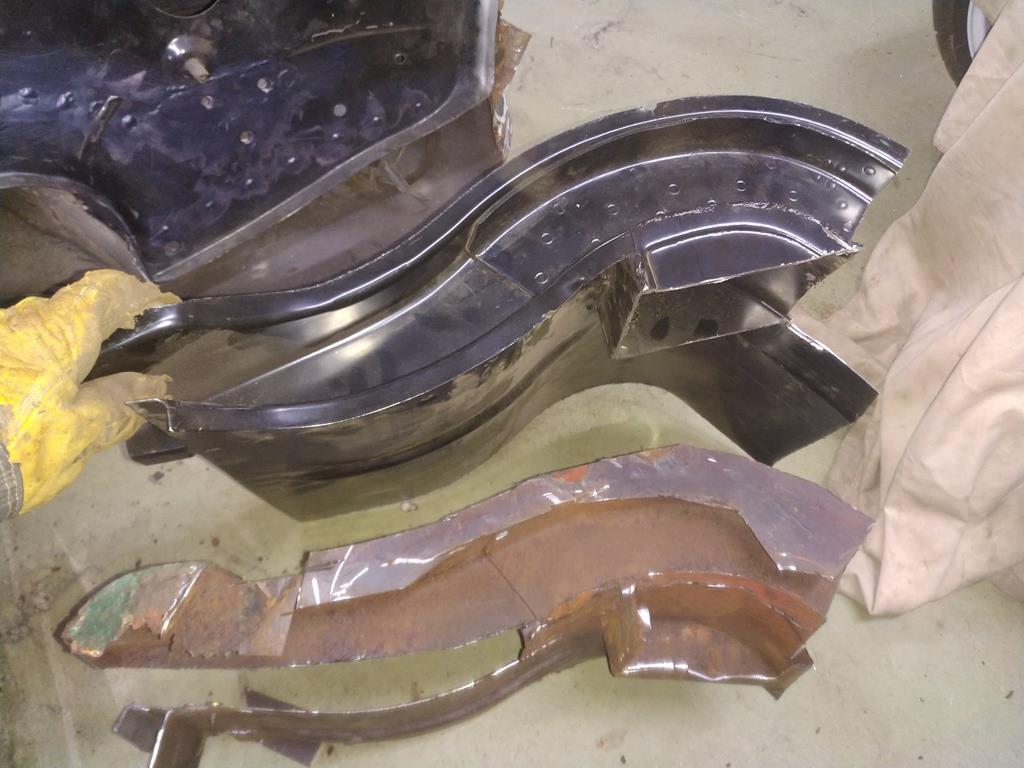
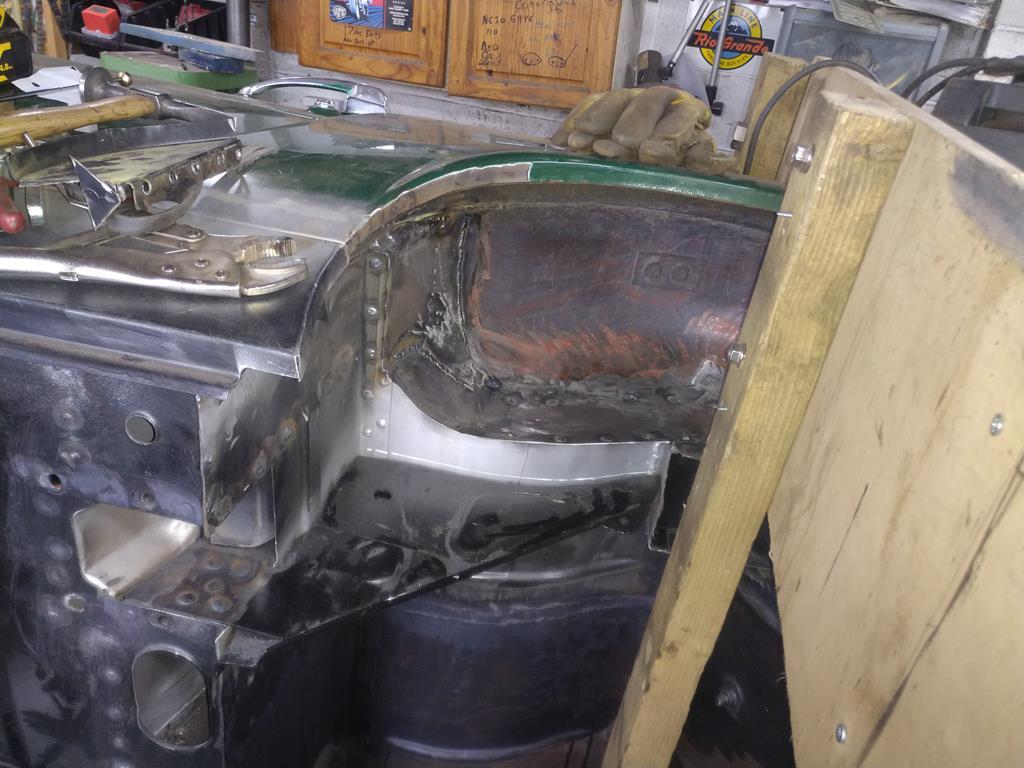
That was the easy side, passenger side had a big hole and I suspected the chassis rail was toast. 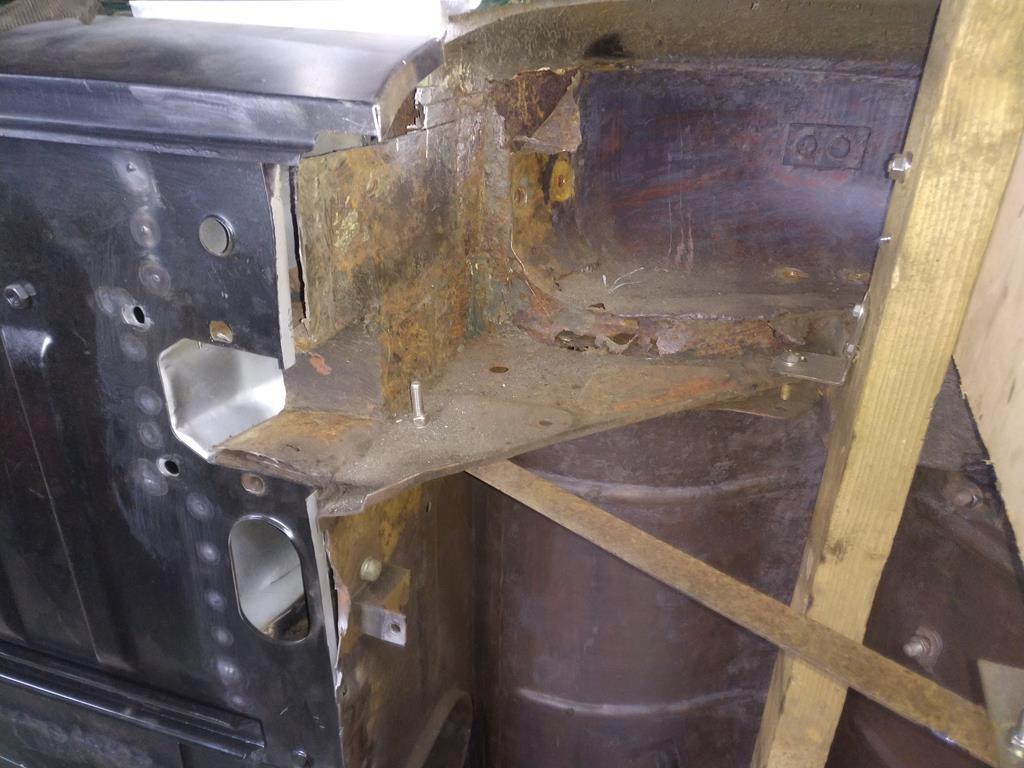 Slowly picked bits back and realised, as I've now finally learnt, it's always way worse than it looked. There was nothing for it but to put some more bracing in the car, take a brave pill and chop the chassis rail out. 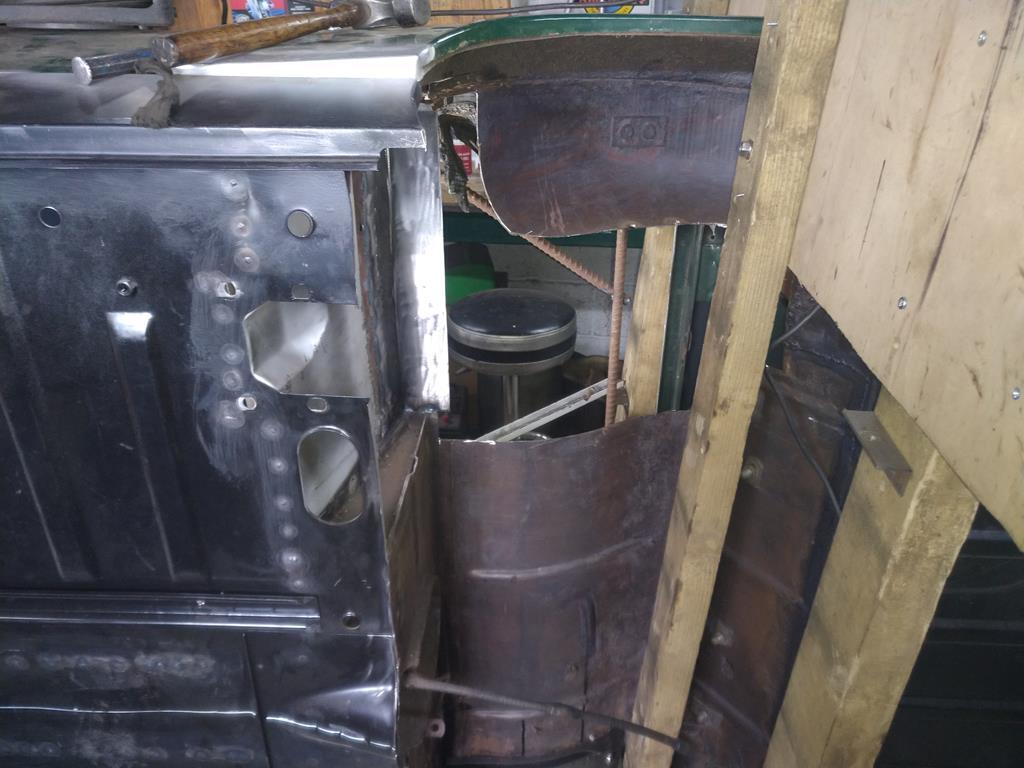 This is where buying that big boot floor assembly really paid off |
| |
|
|
|
|
|
|
|
Jun 12, 2020 17:16:51 GMT
|
|
You’ve done a mammoth task in a really short time and to a fantastic standard. Very nice.
|
| |
|
|
Darkspeed
Club Retro Rides Member
Posts: 4,882
Club RR Member Number: 39
|
Lotus Elan +2 + mk2 Swidget Darkspeed
@darkspeed
Club Retro Rides Member 39
|
Jun 12, 2020 17:39:45 GMT
|
You’ve done a mammoth task in a really short time and to a fantastic standard. Very nice. Second that - Always a pleasure to follow a build that exceeds even the best professional standards by a good margin. |
| |
|
|
|
|
pptom
Part of things
 
Posts: 475 
|
|
Jun 12, 2020 18:47:19 GMT
|
|
You both flatter me, thanks for the encouragement. Fortunately its just mostly cutting out and welding in replacement panels.
I'd make a right pigs ear if I had to actually make any panels.
|
| |
|
|
pptom
Part of things
 
Posts: 475 
|
|
Jun 21, 2020 20:04:41 GMT
|
A fair milestone today, after fitting a new rear panel last week (sorry, no pics) structural welding was completed. I got the car flipped, supported and removed the rollover jig. 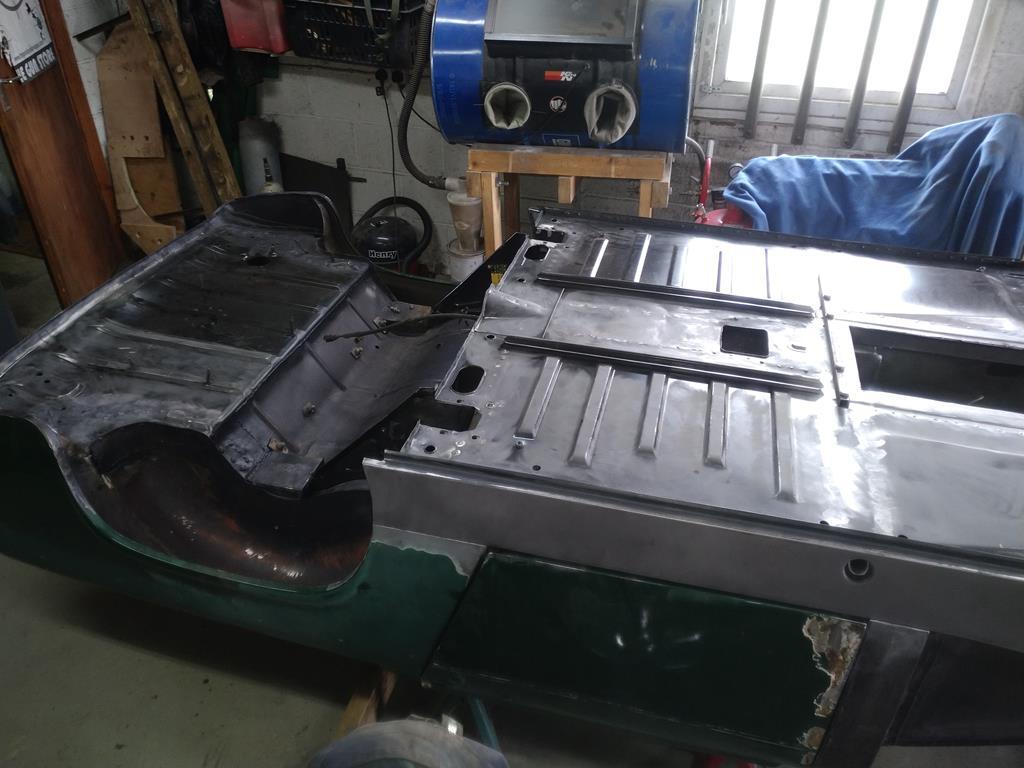 Then rubbed down, ready for painting. The Heritage panels seem to have a good coating from new, it seems like 2k to me with an undercoat, so these just got keyed. The aftermarket panels have a rubbish coating in comparison which sands off easily. Then on with its first coat of Epoxy mastic. Brushed / rollered for many reasons rather than sprayed 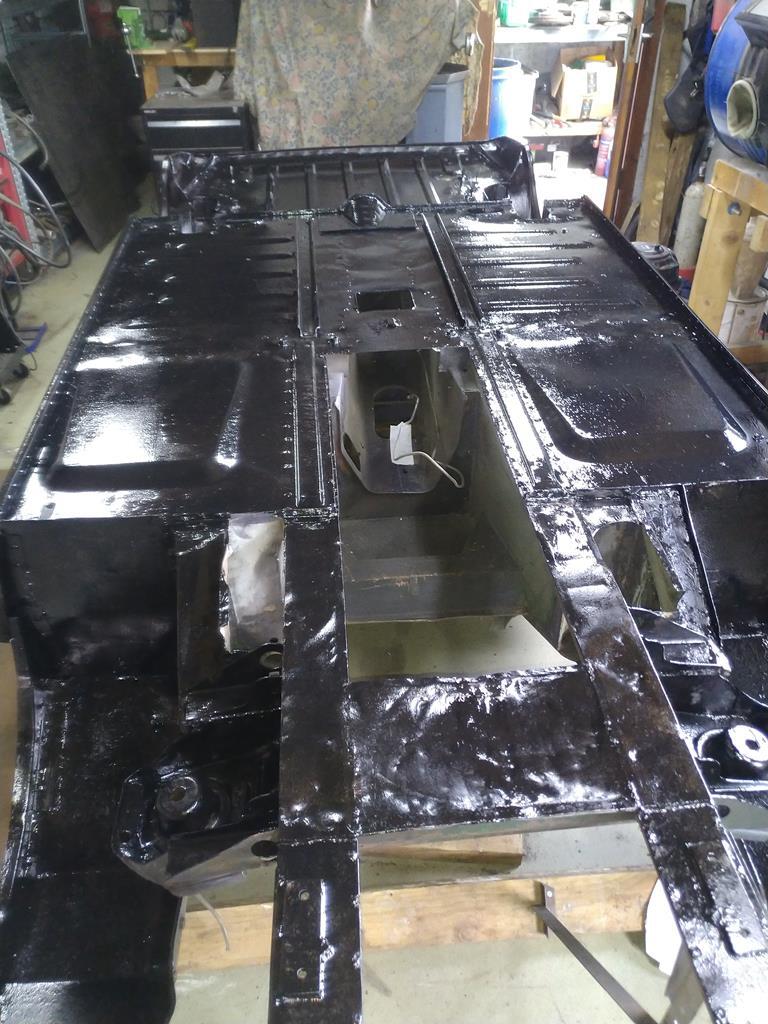 Then, while that was curing I moved onto the dash, which is quite a nice metal pressing. The last few days have been rust removal / hydrate 80 and spraying the back of it with enamel. Today I sprayed the front with some wrinkle black. Had good results with this before, not so good this time. The drivers side has come out nice, but passenger side wrinkled up very inconsistently, so much so that I scraped it off after an hour. There is a panel join between the 2 halves so it will be easy to re prep the passenger side and paint it again, with my fingers crossed. Only trouble is that I ran out of paint. £15 a can, but I'd had 1/2 a can sat on the shelf for 2 years so it was very nearly a free job. Its currently in my paint curing area (greenhouse) 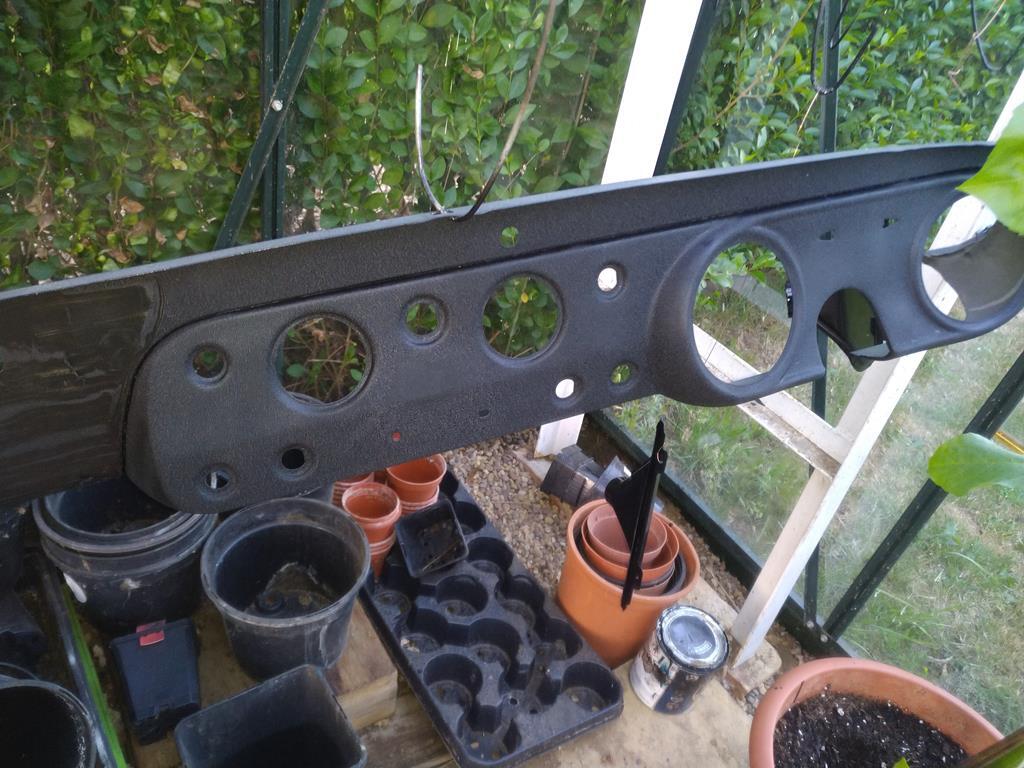 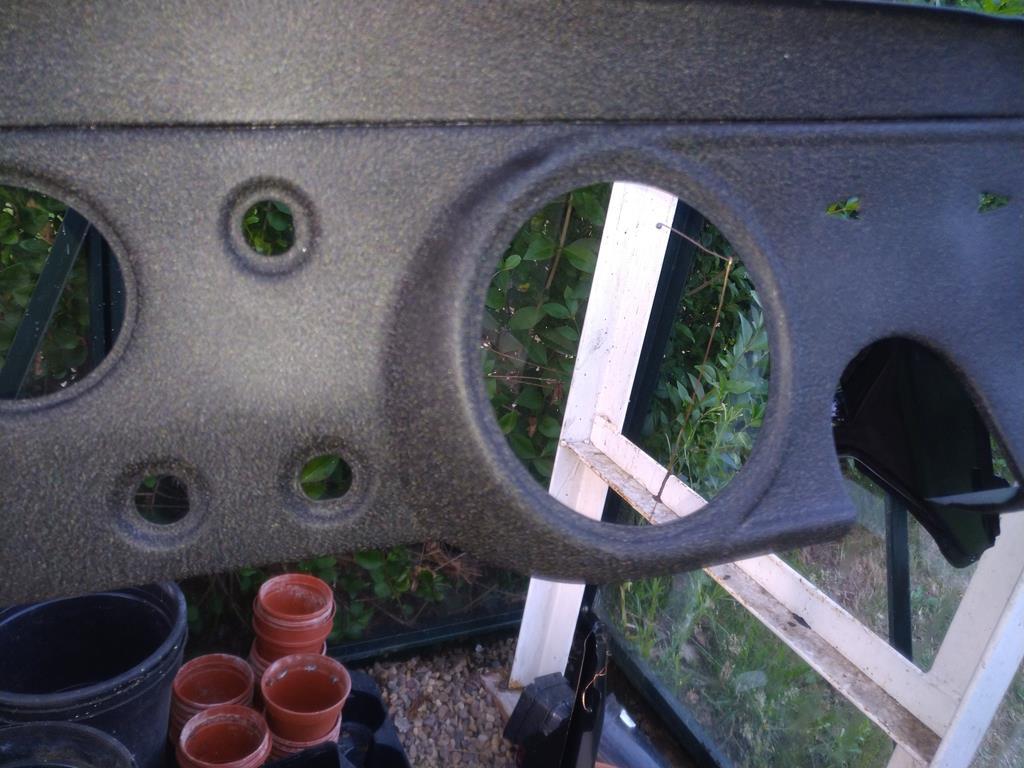 Also sold the 1275 engine and gearbox, hence being able to fund the project going forward, including the rear panel, pass door skin, paint and supplies, including seam sealant and some dinitrol underseal which should see out this coming week. |
| |
|
|
|
|
|
|
|
|
Just fantastic work!
I do worry a little that if anyone decides to chop up the roof of my Spitfire they'll find quite thick filler to get the warped curse word flat. Could definitely have done a better job on that!
|
| |
|
|
pptom
Part of things
 
Posts: 475 
|
|
Jul 11, 2020 10:49:45 GMT
|
|
There's definately a place for it and I'm not saying it's a bad thing, it would be some build on a 40 / 50 year old car that had no filler, I'm having to use over 1/4" of it to build up the edges of the scuttle panel to match the wing profile where the A posts were badly matched up. But in my cars case it's been used to disguise very poor panel fit. Think they were all genuine Panels too. I can't help thinking that if all that time spent filling and sanding was spent on panel fit instead then next to no filler would have been needed.
|
| |
|
|
pptom
Part of things
 
Posts: 475 
|
|
Jul 11, 2020 11:12:24 GMT
|
In other news, the Elan finally got it's date on the rolling road having originally been booked in 3 days after lockdown started. 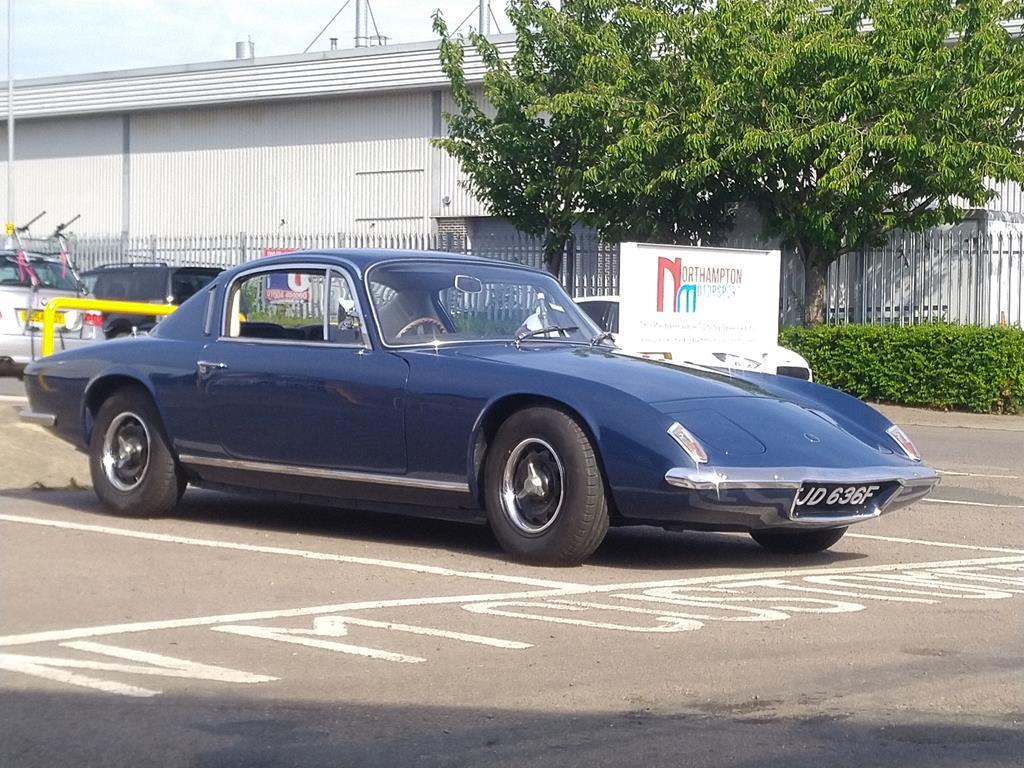 After running the engine in under perfect conditions in the rollers the oil was changed and on to some power runs. With the block re-sleeved, some forged pistons and higher lift cams I was hoping for 140bhp. First run made 125, but the session ended at 126. With inconsistent fuelling and basically rich at low rpm, leaner at mid and fine at high. I was a bit disappointed to be honest. The next day I discovered that the airbox had been fitted badly and the sealing rubber was dangling in front of the carb trumpets, the rolling road place to be fair apologised and offered to give me some free runs to check the fuelling. I also had a think and decided to change the cam timing which was pretty straightforward as I'd also fitted adjustable sprockets during the rebuild. Back on the RR with the airbox fitted properly the inconsistent fuelling was sorted. Peak power was up to 130bhp with a small gain in torque too. There is still a massive compromise between low / mid / high reves in terms of the fuelling and we've left it at a happy medium which doesn't create any lean spots anywhere, I suppose that's carbs for you. On the road it drives much better, makes a lovely noise and is pretty fun. The engine re-build had picked up 12bhp and about 10lbf torque, but more importantly it now doesn't leak or burn oil. The graph shows how much difference just changing the cam timing had made. 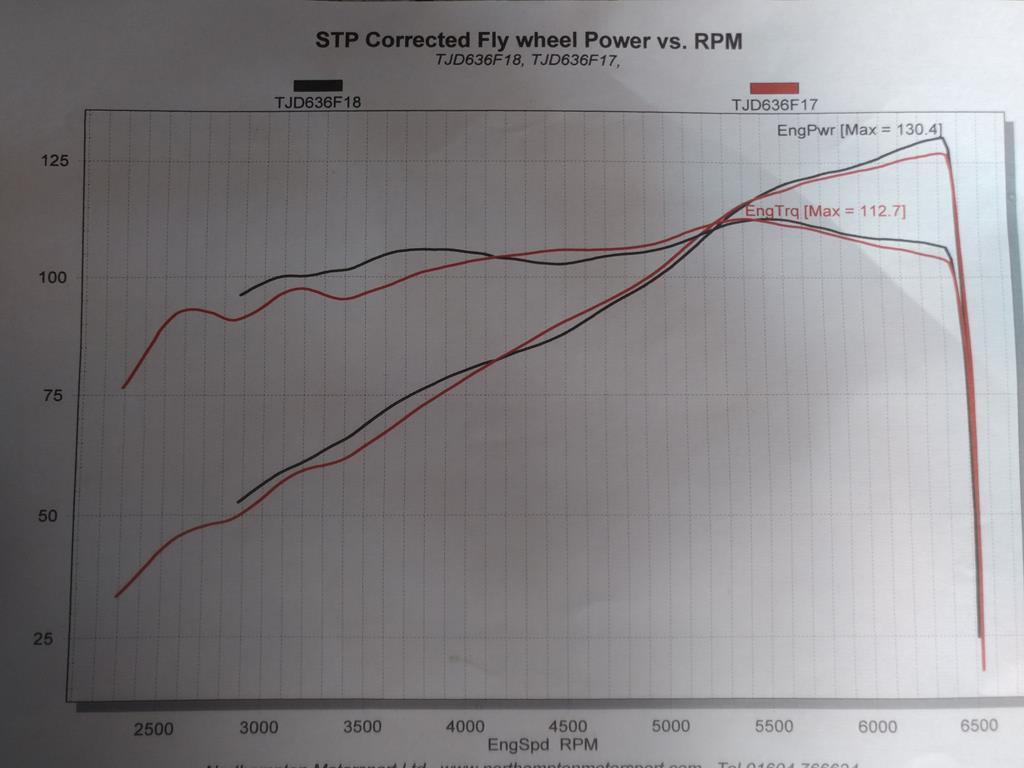 |
| |
|
|
pptom
Part of things
 
Posts: 475 
|
|
Jul 23, 2020 17:32:26 GMT
|
Back on the midget! Body is now filled and lined, wings, boot lid, front valance are filled and also painted on the inside with jotamastic 90 and I have some lechler green TI primer for them when the weather and wind direction is kinder to me. 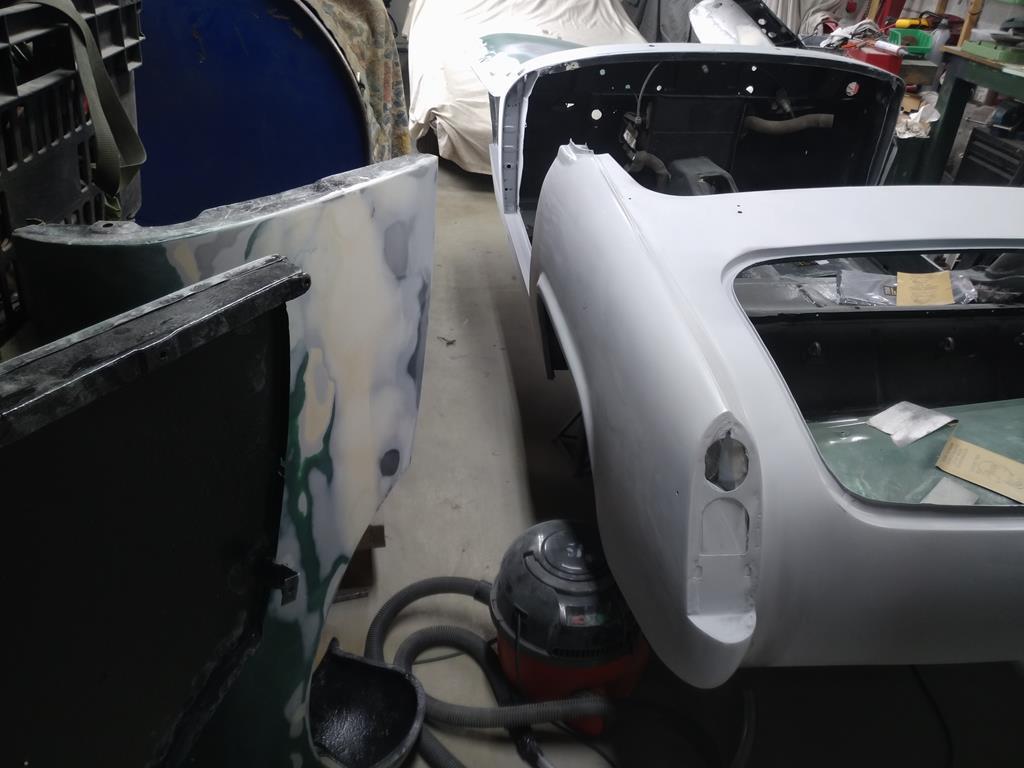 Today I decided to clean the diff and ready it for a rebuild. I removed it from the axle some time ago, as per the below photo, one of the diff cage bearing ears had sheared off in the past, I did notice a clunk on the short drive around to my garage and this must have been the source. Anyone seen this before? The opposite side bearing had also seen better days due to the extra load and fell apart when I removed it. 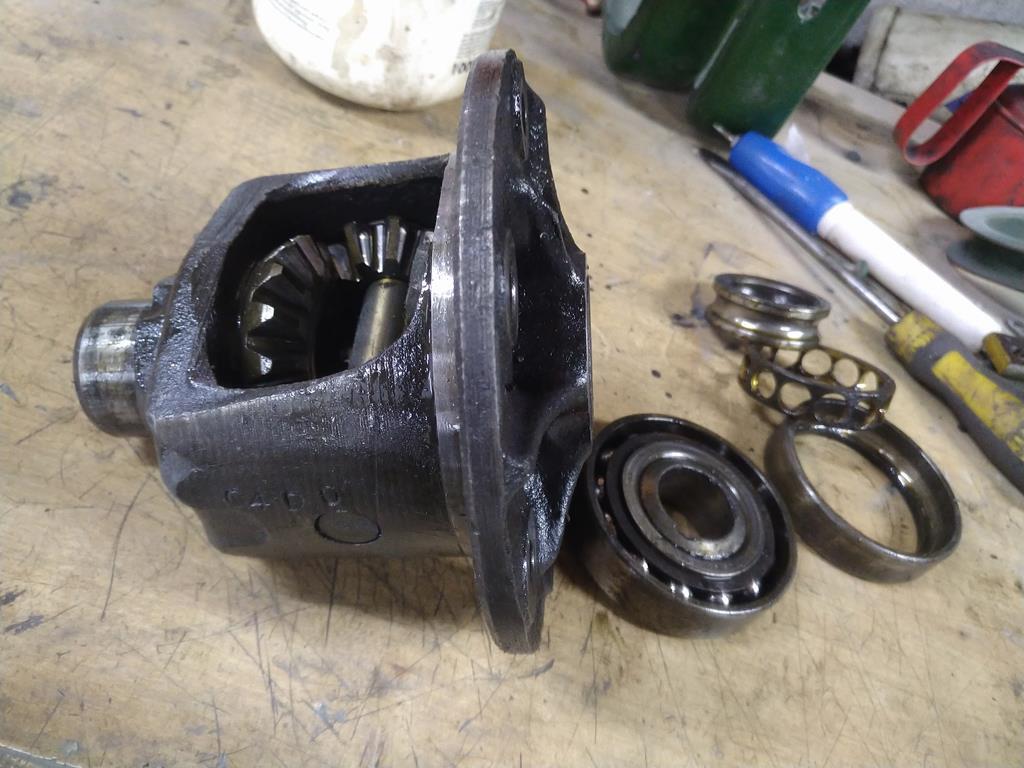 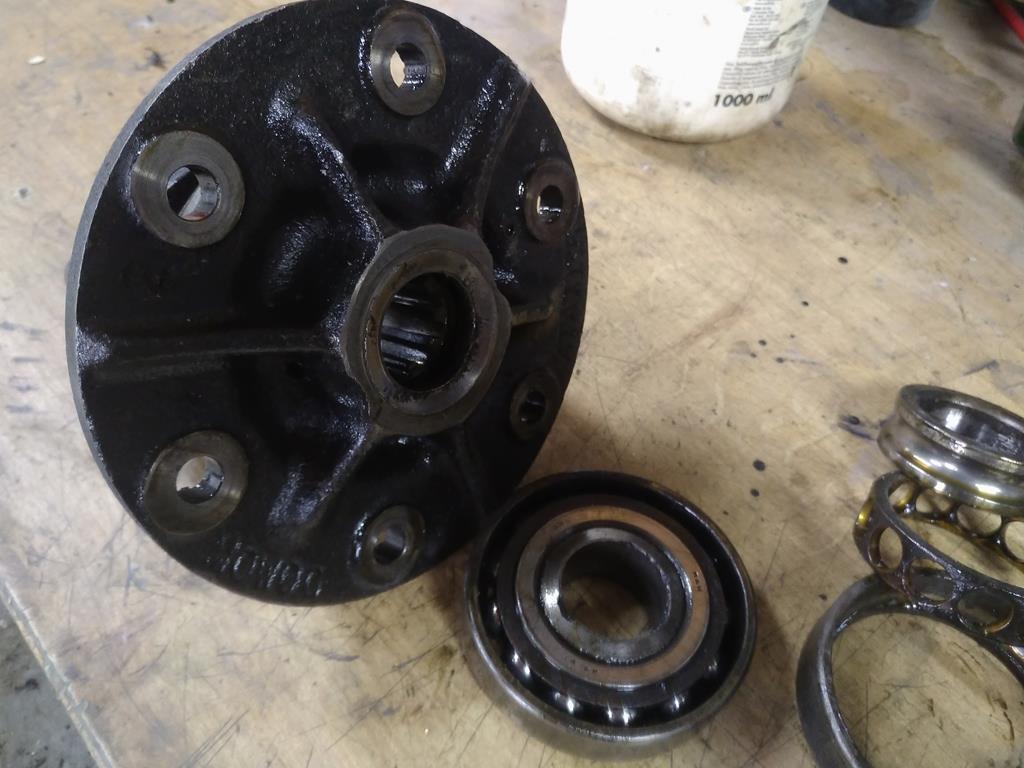 This actually worked out really well for the application of man maths. It meant I needed a new diff, which, when combined with a 10% off offer on eBay and selling a few bits meant that this was irresistible 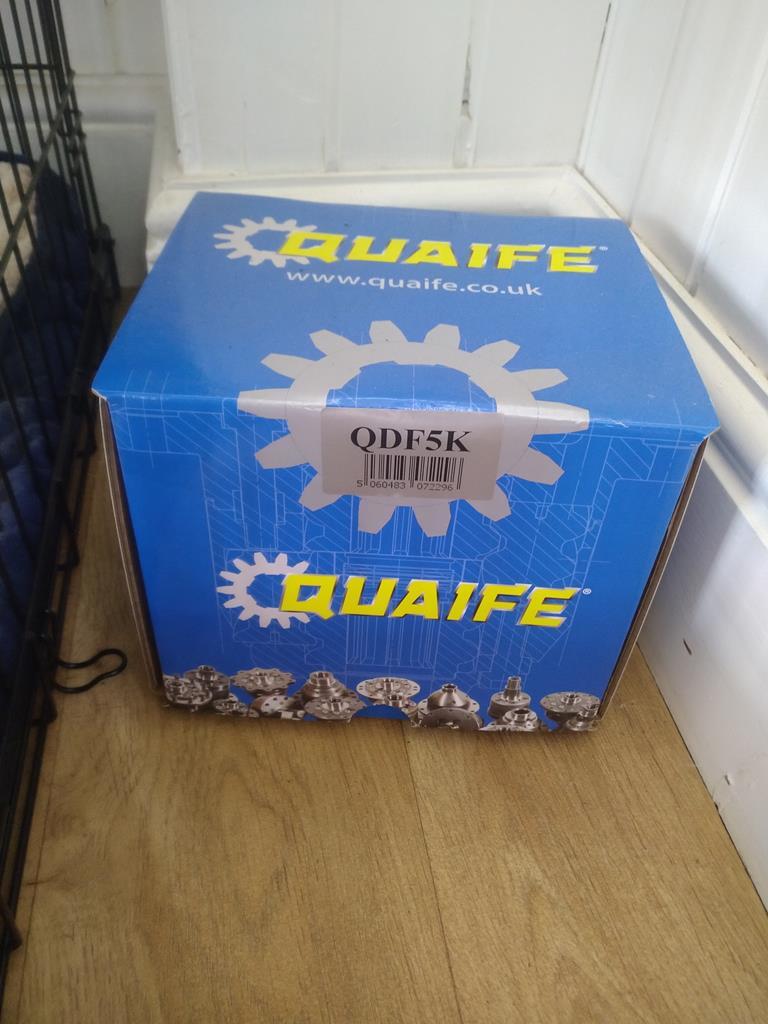 Got some new bearings and nose seal and it's ready to go back together tomorrow if I'm not painting 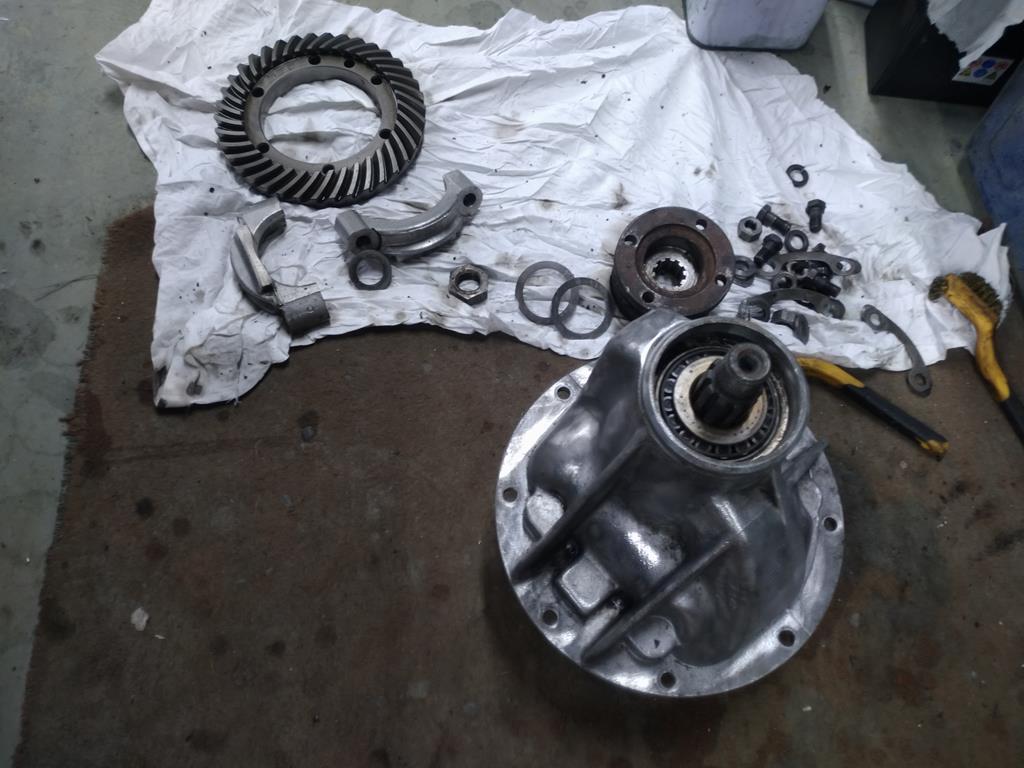 |
| |
|
|
pptom
Part of things
 
Posts: 475 
|
|
Jul 23, 2020 17:36:29 GMT
|
Also, I wasn't happy with the dash, so I stripped the wrinkle paint off, gave it a coat of Epoxy primer while I was painting the body and wrinkle painted it again, much better result than going straight over bare metal as before. Happy with that. 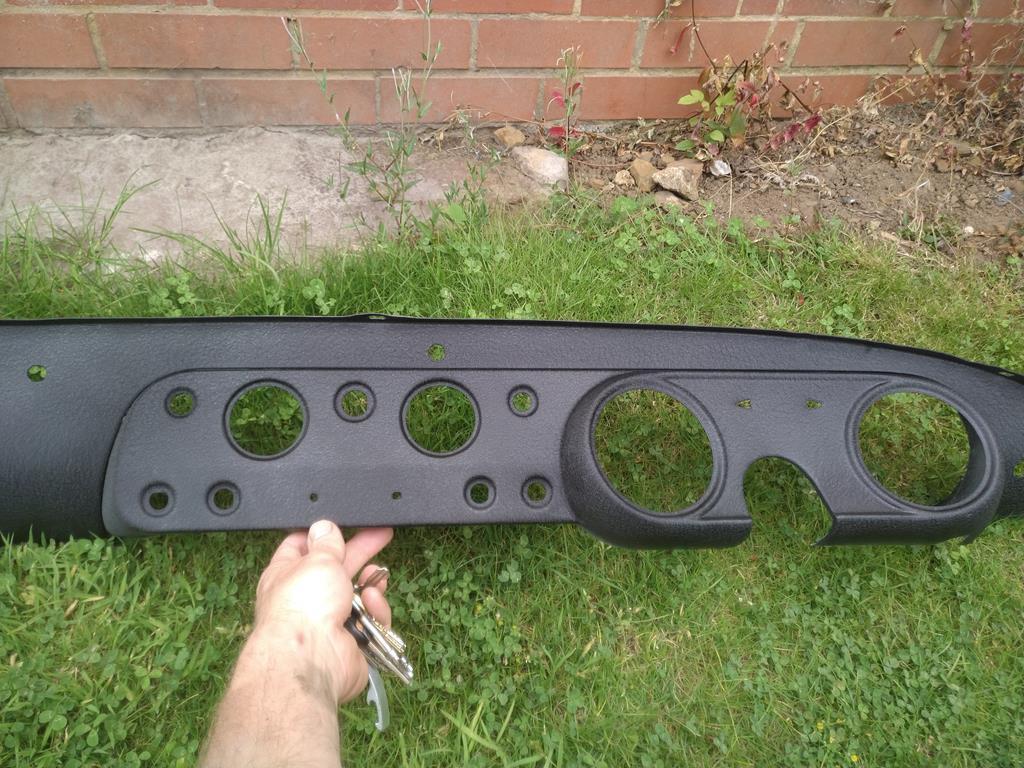 |
| |
|
|
|
|
|
Jul 23, 2020 21:29:21 GMT
|
|
Sorry I missed it but what engine will you be installing?
My first car ever was a 62 Midget; it was 1981 and we'd just moved from Blighty to Southern California; I was 15 and had been saving my pennies to buy my first car as a project to "do up" before turning 16 - legal driving age there. Saw the one that was become mine in the LA Times small ads, drove halfway to Palm Springs to get it ... it didn't look far on the map! Here's the funny part: Practical Classics had recently done a full Spridget Buyer's Guide, so I took the list of all the places to look for rot, ready to pike and prod. BUT ... while there were dents, a mismatching pattern front wing, totally shot interior and a bad #3 exhaust valve, there was also absolutely no rust.
As we all say, "I wish I had it now", although being six foot and bit lardy I'd look utterly ridiculous.
Keep,up the great work,
john
|
| |
|
|
|
|
|
|
|
|
Very nice job. I have this to do on a mk4 Sprite in my future...
You should beat the dents out of the filler panel under the front of the engine. I think they all got jacked up on it... They collect water and oil and pebbles otherwise.
Phil
|
| |
|
|
pptom
Part of things
 
Posts: 475 
|
|
|
|
|
John, it's a Suzuki g13b, 1.3, 16v injection mated to a Suzuki samurai 5sp gearbox eventually.
Phil, I did seriously consider replacing the panel you mention, didn't in the end though, got to keep something original!, the new engine should sit further back for better access.
Looks like the weather this weekend isn't going to be too good, so planning on making some seat mounts. The buckets which came with the car were bolted directly to the floor, planning on a fixed frame which tilts them back a bit, so putting me a bit further away from the steering wheel. Not much space in these little cars and the wheel still feels too close, even with the seats against the rear bulkhead.
|
| |
|
|
|
|


