pptom
Part of things
 
Posts: 475 
|
|
|
|
|
Thanks, thing is, I looked at some right rotters before finding this one.
I'm fairly comfortable with it now though, will keep me busy for a while (messing about in my garage is my main hobby), learn some new skills - always been a bit afraid of metal and rust and I know it will be all good for the future.
I just wish it was a bit cheaper as I'm out of funds until my motorbikes sell, which won't be any time soon.
Have grit for the blaster and some black rustoleum, also all the parts to finish the engine and box so with this and cutting out I can keep myself busy.
|
| |
|
|
|
|
pptom
Part of things
 
Posts: 475 
|
|
|
|
Nightmare cutting the floor out but it's finally done 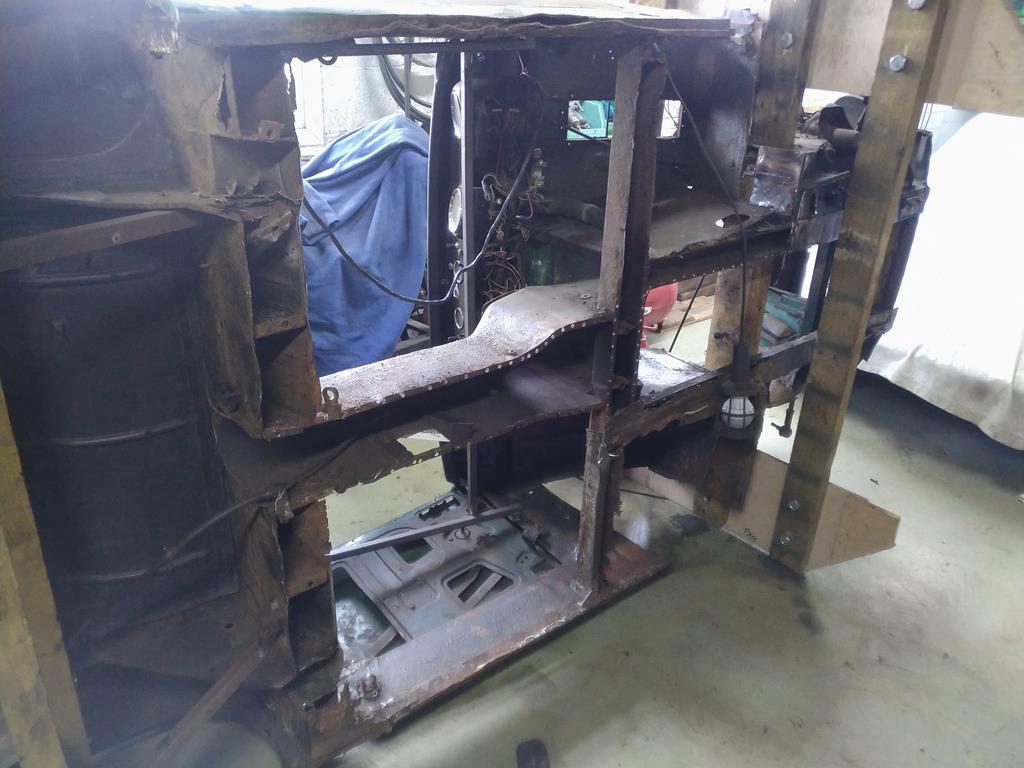 Double skinned in places, lots of overlapping panels stitch welded where it should originally have been spot welded. I reckon only 20% of the spot welds were left, the rest had to be cut / ground out. Now for the tidying. Plan is to get a heritage floor in and use that as a datum for the bulkheads and sills which are currently out of alignment and due to be replaced anyway. 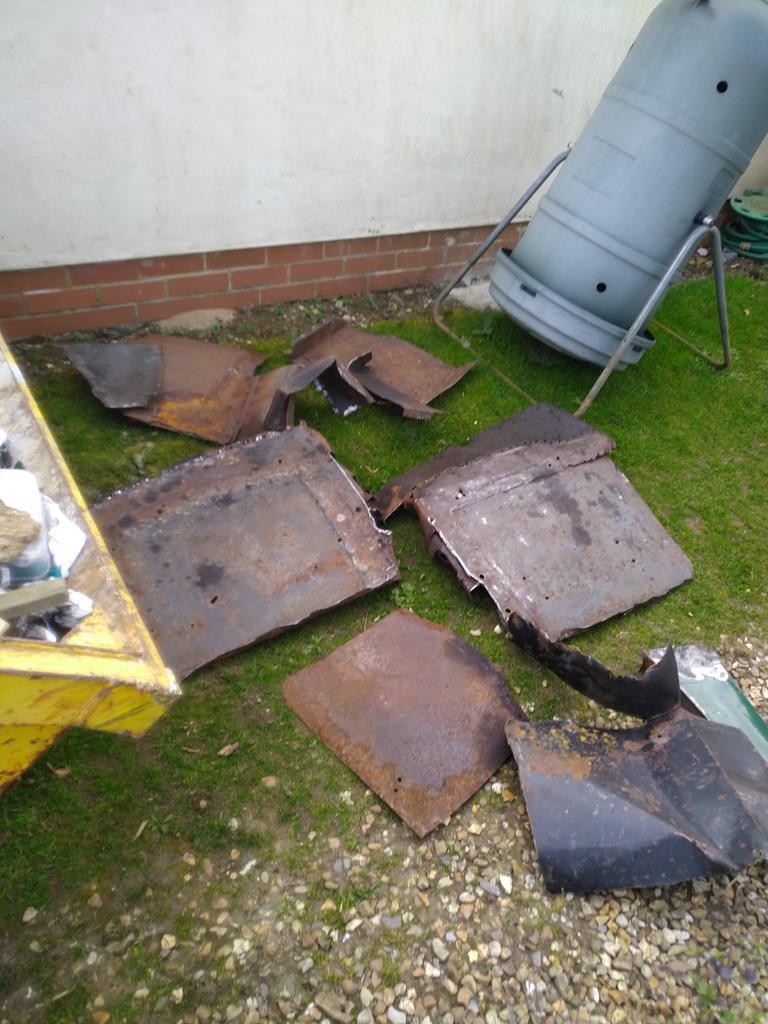 |
| |
|
|
Darkspeed
Club Retro Rides Member
Posts: 4,882
Club RR Member Number: 39
|
Lotus Elan +2 + mk2 Swidget Darkspeed
@darkspeed
Club Retro Rides Member 39
|
|
|
|
This is now one of those Schadenfreude threads - It just got so much better because something is whole lot worse - all very conflicting.
|
| |
|
|
pptom
Part of things
 
Posts: 475 
|
|
|
|
|
By the way, the skip in that picture wasn't ordered specifically for this car, but it's coming in handy.
I concur, looks worse but it actually is so much better, the floor was a big obstacle, I'm relieved its out if the way.
|
| |
|
|
pptom
Part of things
 
Posts: 475 
|
|
May 25, 2020 11:59:29 GMT
|
It's time for an update. The last few weeks have been a bit demoralising, just rust bashing really, but I've got most of it out now, including the front end and boot. It's been dressed back / cut out and I've given it some hydrate 80. The other week I was at a loose end so thought I'd take the wire wheel to the inside of the boot, just to tidy it up as it looked ok. There were a couple of external MOT patches but all was going well until I got some filler (in the boot!) This was the result 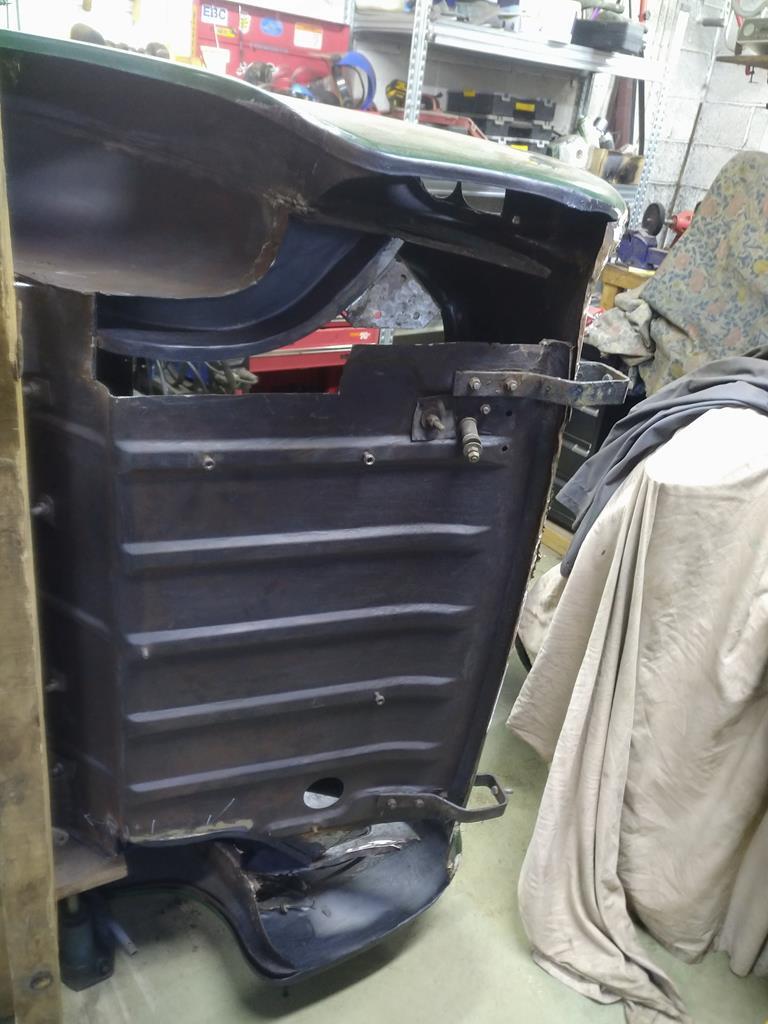 Cutting that rubbish out led to removing a tubes worth of seam sealer from the boot floor / rear valance interface which revealed that I need a new rear valance. Repaired the boot chassis rails with the TIG and had a bought about the boot floor. I could make some patch panels, but decided the right way to do it was a new boot floorpan. Managed to get a heritage rear assembly which are normally £400+ for £150 which will not only good be me the boot, but also some other repair panels which I would have had to make. It needs disassembling 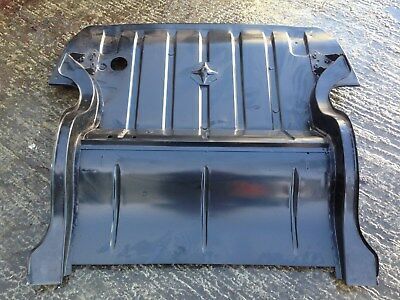 |
| |
|
|
pptom
Part of things
 
Posts: 475 
|
|
May 25, 2020 12:20:42 GMT
|
With the lockdown finally easing I managed to collect my MIG. First job was the floorpan, this was a heritage panel which is serving as something as a datum because it became apparent that the car had been through many trials and tribulations over the last 54 years and there wasn't a lot that was straight and true. 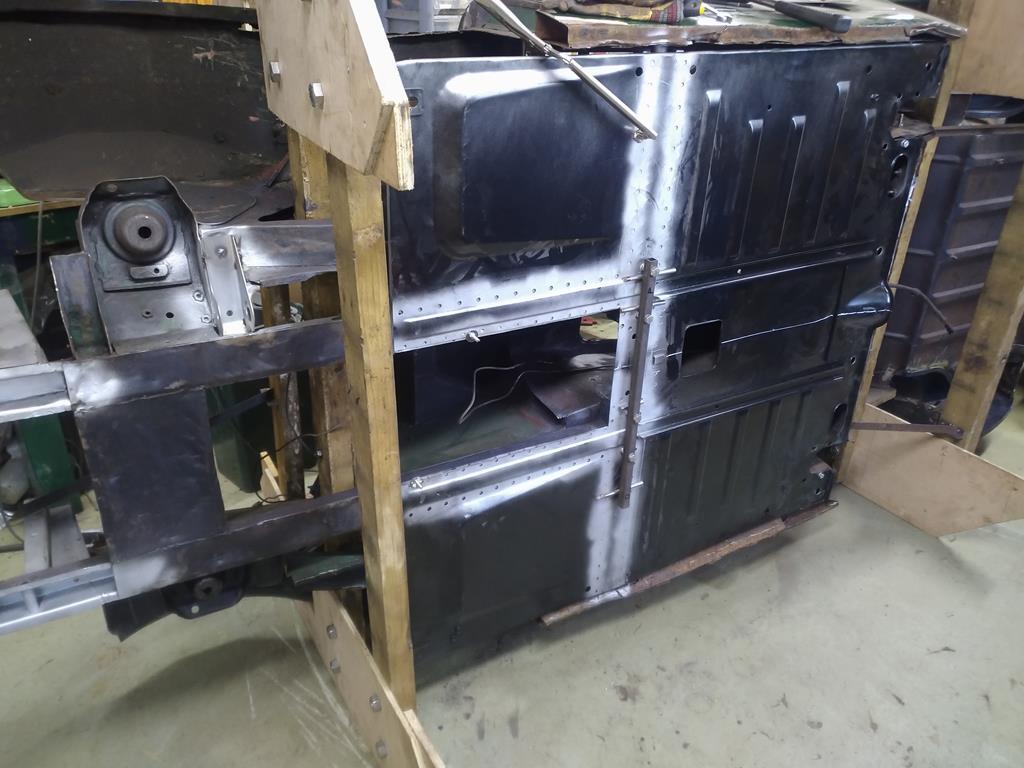 The brace across the middle is temporary. There is a full with crossmember inside the car which gets in the way of an alternative gearbox. The accepted resolution is to cut out the section inside the gearbox tunnel and add a bracing bar across the gap. Having the floor off gave me a bit more opportunity to do something really strong, so I've internally braced the crossmember and added threaded bungs etc so it retains rigidity. The temporary bar will be replaced with some sort of plate which will also pick up the gearbox mount |
| |
|
|
Darkspeed
Club Retro Rides Member
Posts: 4,882
Club RR Member Number: 39
|
Lotus Elan +2 + mk2 Swidget Darkspeed
@darkspeed
Club Retro Rides Member 39
|
May 25, 2020 12:25:36 GMT
|
|
That boot floor section was a good buy.
Does make you wonder about just how many of those shiny looking classics out there are just tarted up rot boxes with a Polyester to Steel ratio not much different to my projects.
|
| |
|
|
pptom
Part of things
 
Posts: 475 
|
|
May 25, 2020 12:30:47 GMT
|
When that was in I used repair sections on the rear bulkhead which pick up the rear leaf spring mounts. The actual mounts were completely rotted out and wouldn't have lasted long. Then onto the footwells / front bulkhead. Many, many repair sections here. 4 layers thick in places, so all of that junk got cut out. Called my local steel stockholders for a price of some 1mm sheet (2m X 1m) and nearly fell off my stool when they said £50 collected! I know it's been a few years since I brought some, but felt that was a bit rich. Managed to get the same product online delivered for £30, madness. Not the neatest, but alot better. Also made the gusset section on the right following a guide on here for swaging the edges 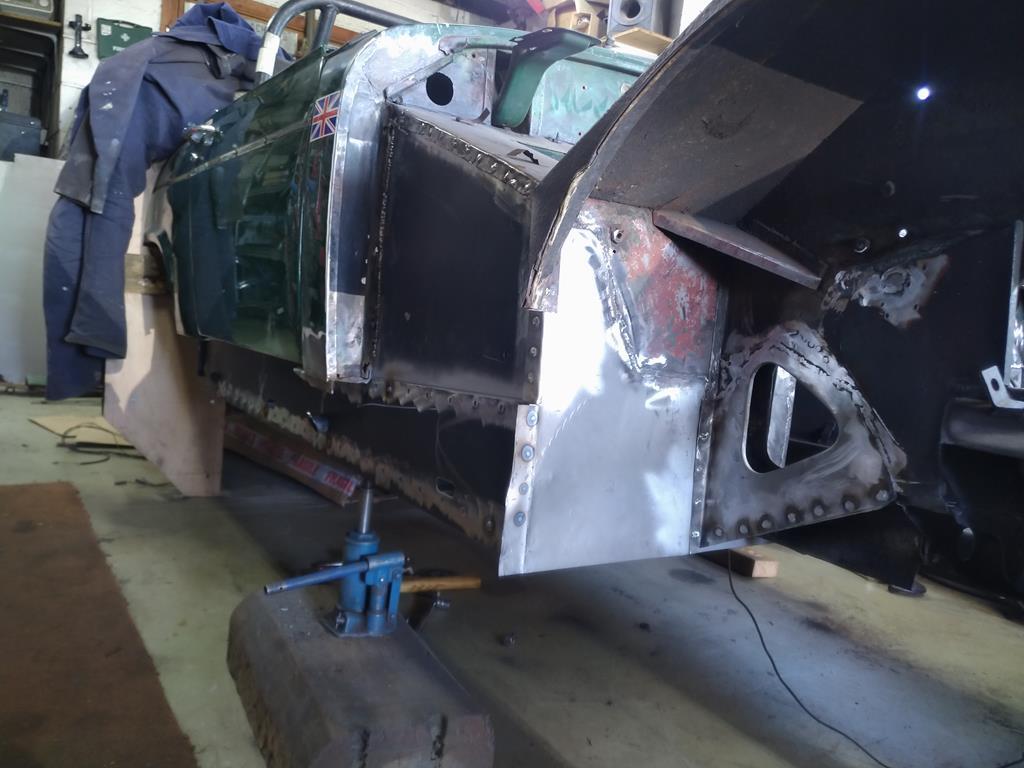 |
| |
|
|
pptom
Part of things
 
Posts: 475 
|
|
May 25, 2020 12:42:45 GMT
|
You're right, this was perfectly legal to drive, but it would have folded in half by itself with a bit of spirited driving. I have the receipt from the 90's for £3.5k of bodywork, looks like it was done by the apprentice with flux core, no supervision and an obsession with seam sealer and filler. Finally today I cut the sills off one side and got a new inner mocked up. First time it's had straight sills for a while I think. Really pleased with the fit eventually, I spent quite a few hours getting everything straight. Got 6 spot welds in and ran out of gas. I knew when being covered in rust, showered with sparks, picking out dirty bogeys etc that one day it would get better and to percevere, but it does get you down. Today feels like a corner has been turned. 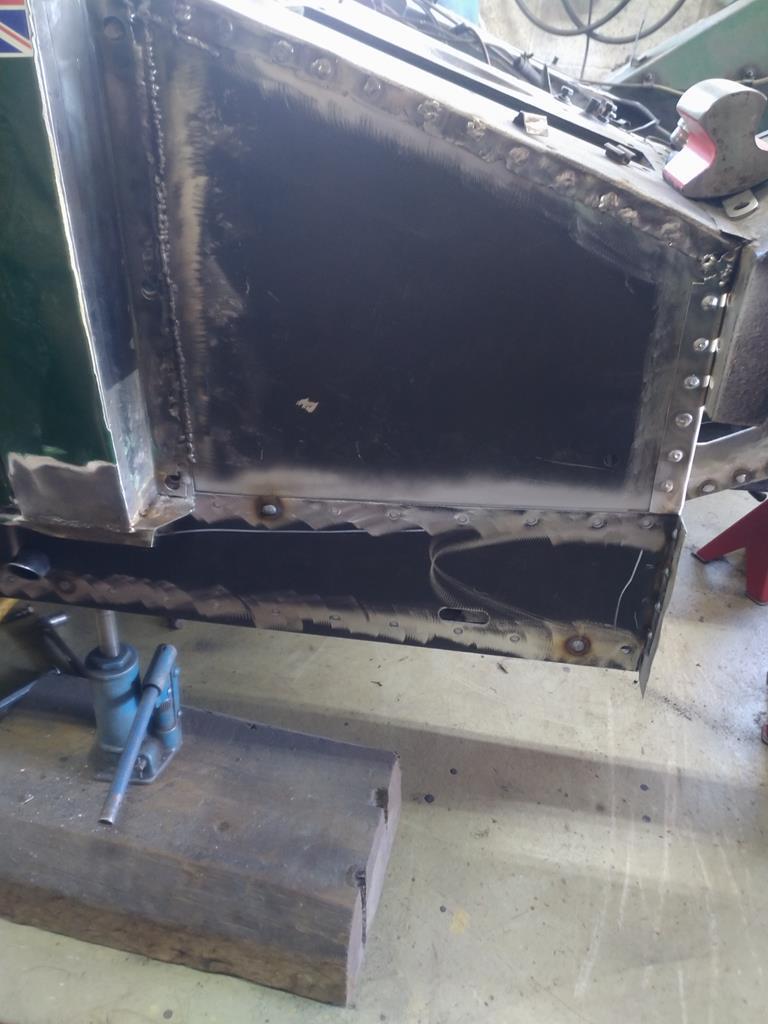 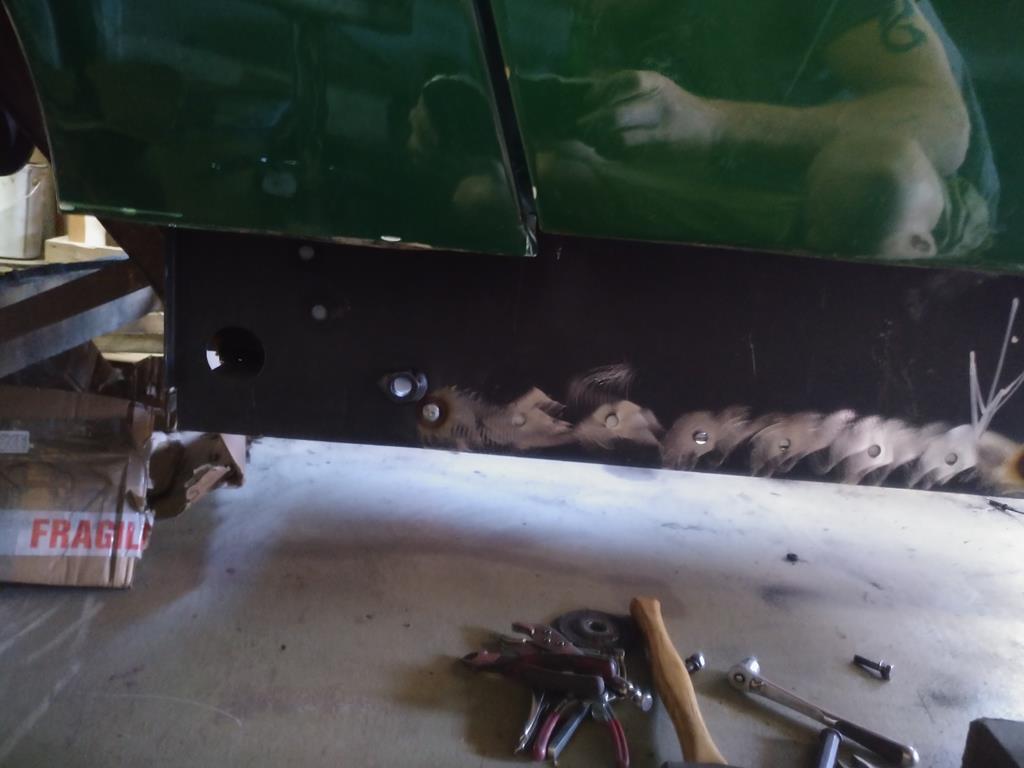 |
| |
Last Edit: May 25, 2020 12:44:26 GMT by pptom
|
|
pptom
Part of things
 
Posts: 475 
|
|
May 28, 2020 17:01:23 GMT
|
Rhs inner and outer sills finally welded in place, you may notice the rear quarter sicks out, this is because its been badly fitted during the 'professional bodywork renovation' it will be cured when I move onto the rear of the car as it's welded to the inner arches and rear bulkhead which both need work. 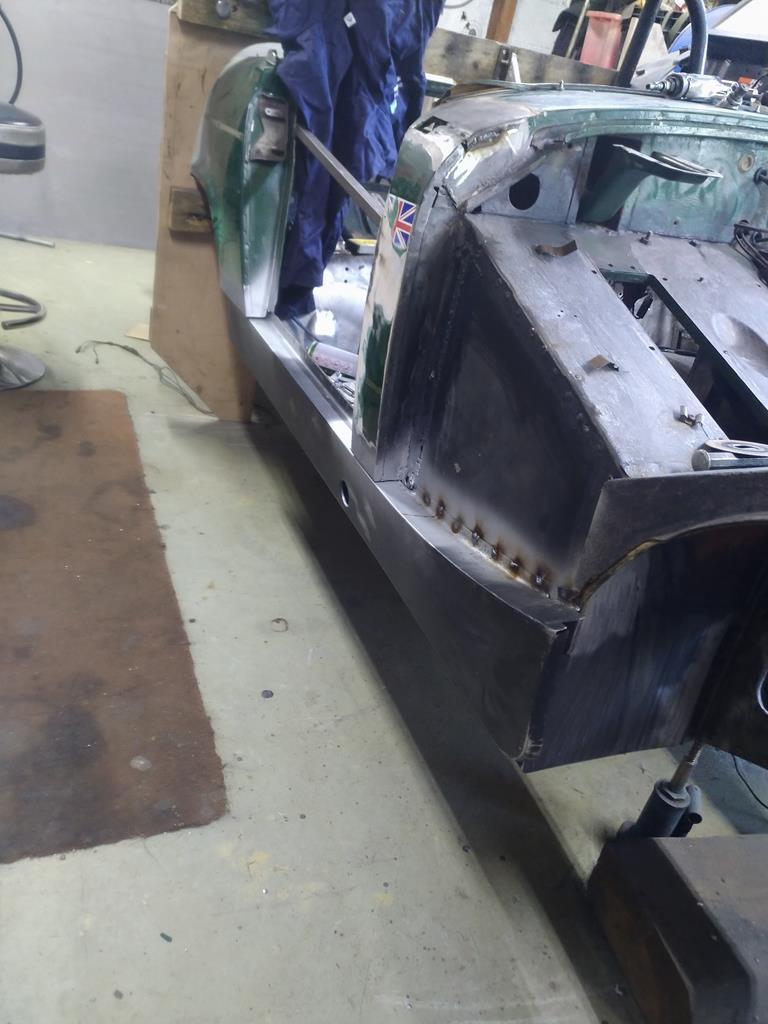 I've had quite a few days entertainment out of this, but am happy with the result. I thought it was rude keeping it all to myself so I've decided to take a photo diary of the passenger side |
| |
|
|
|
|
pptom
Part of things
 
Posts: 475 
|
|
May 28, 2020 17:04:23 GMT
|
First up, cutting out the old. I'd already removed the front section and ground back some of the filler below the A post. Finger for depth. 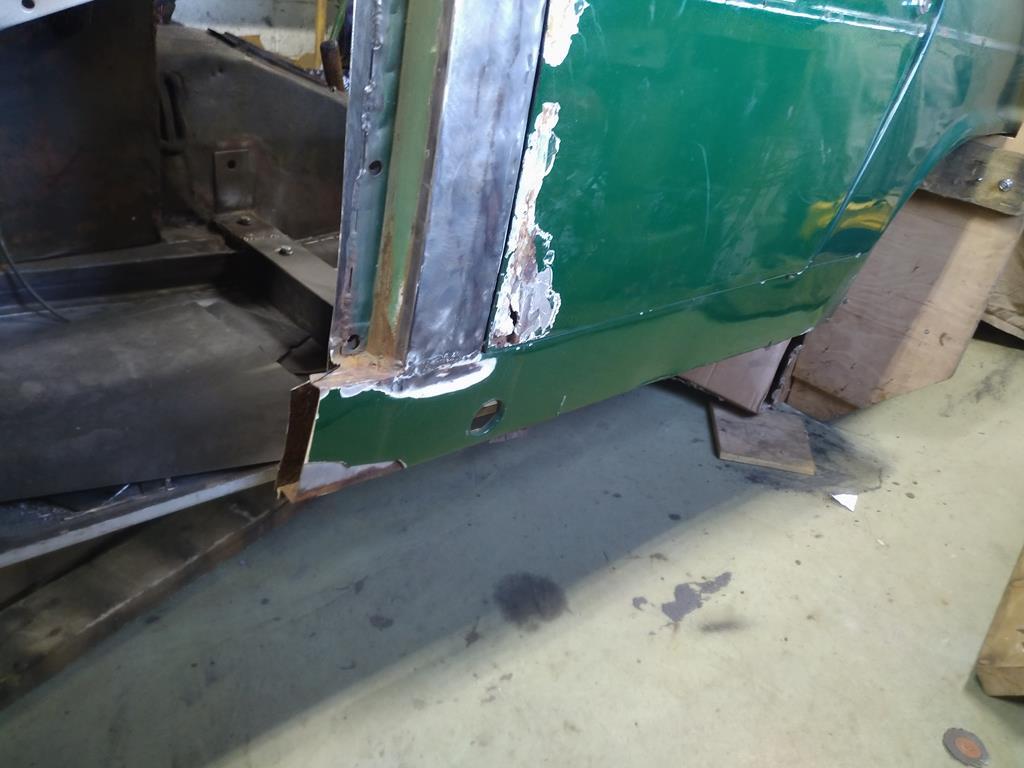 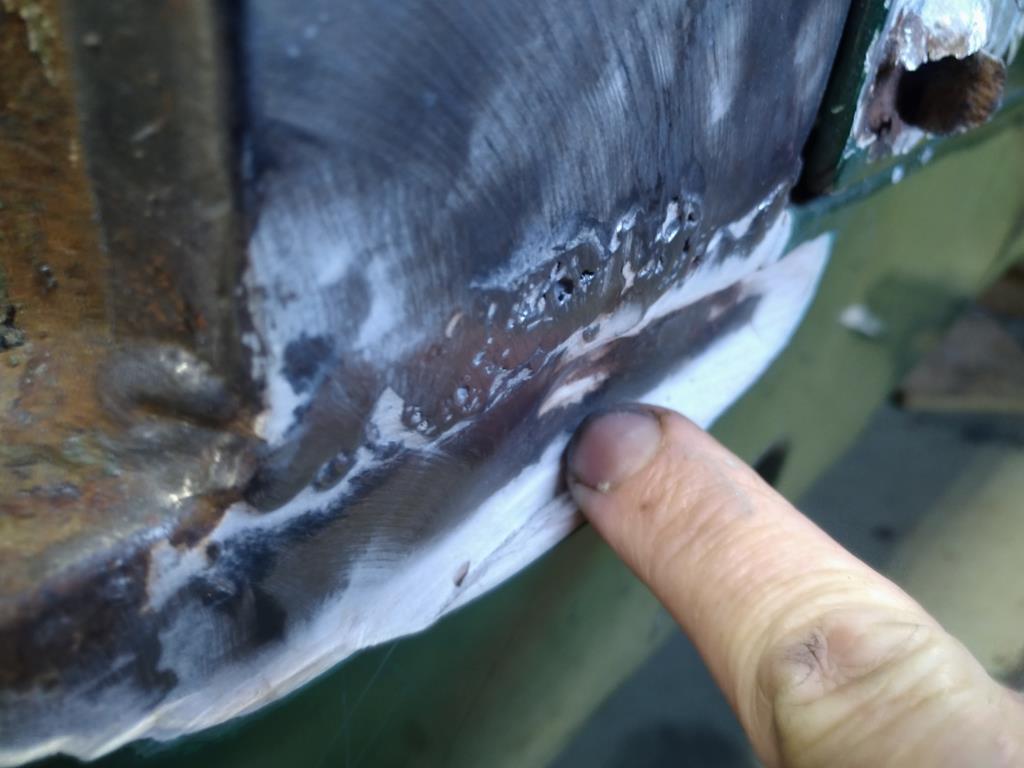 |
| |
Last Edit: May 28, 2020 17:06:07 GMT by pptom
|
|
pptom
Part of things
 
Posts: 475 
|
|
May 28, 2020 17:28:37 GMT
|
Sill to rear quarter, ground back the fake filler panel join to find a really straight panel join behind 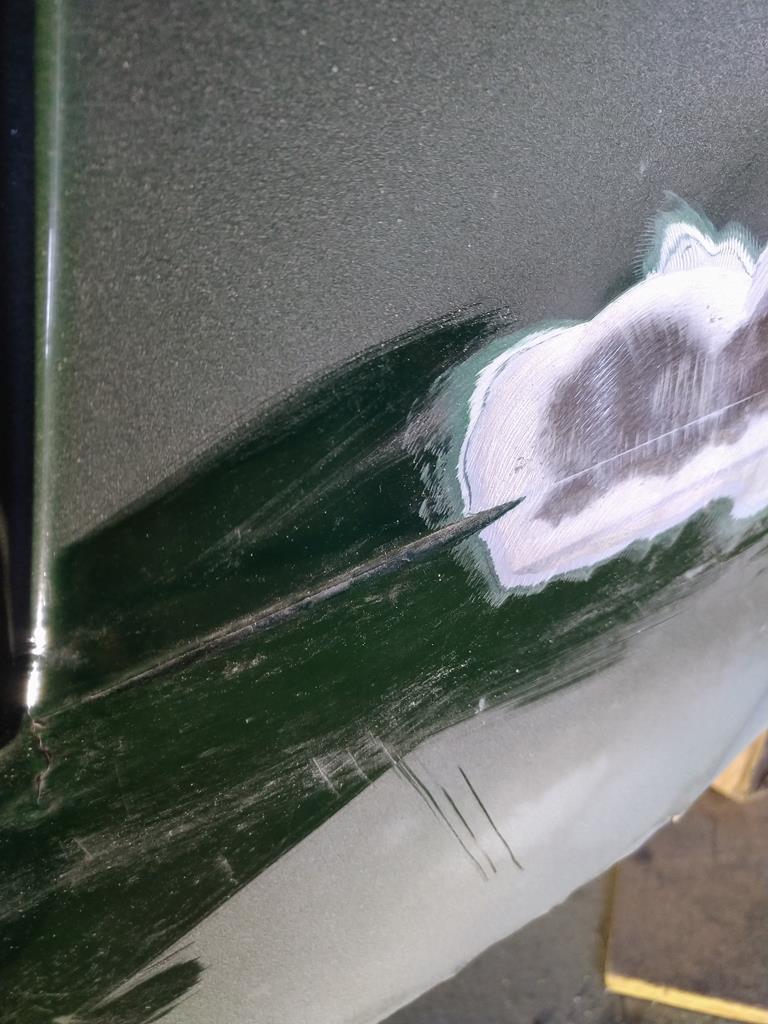 Hmm, something isn't right, I'll chase the filler down 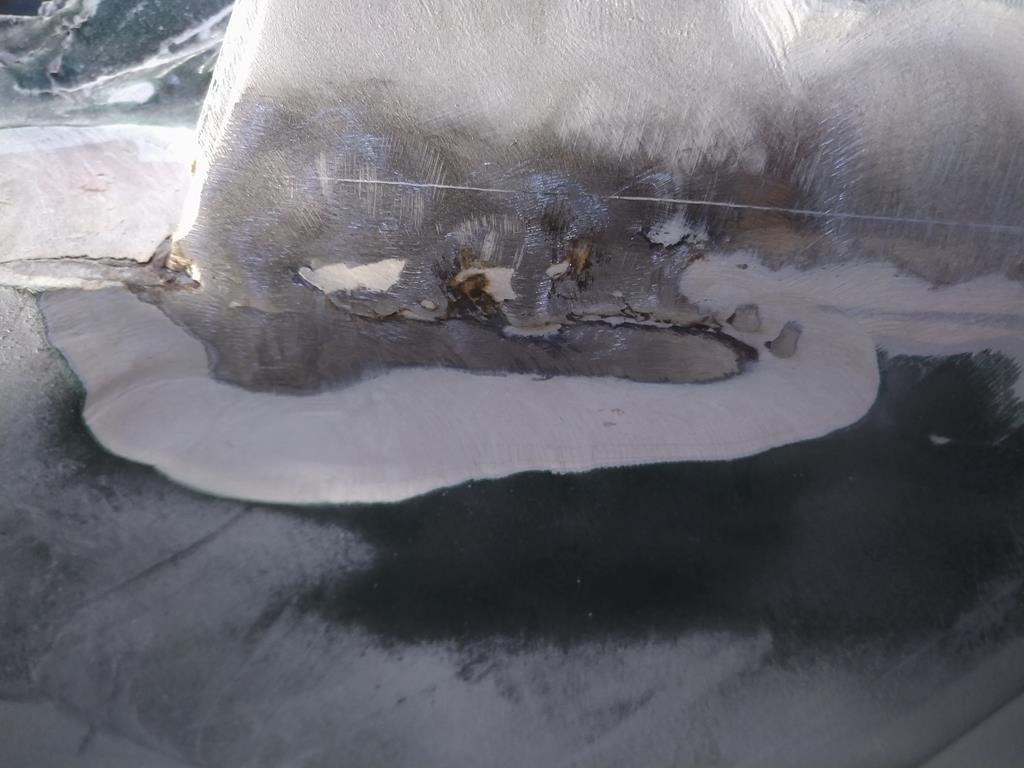 Ah, there it is, there should be a small gap between the sill and rear quarter, and A post for that matter, but there were just butt welded across the gap. Also it looks about 15mm too low, as was the RHS |
| |
|
|
pptom
Part of things
 
Posts: 475 
|
|
May 28, 2020 17:32:17 GMT
|
Then I thought I'd take the filler down on the sill to rear quarter upper, the horizontal face which sits under the door. 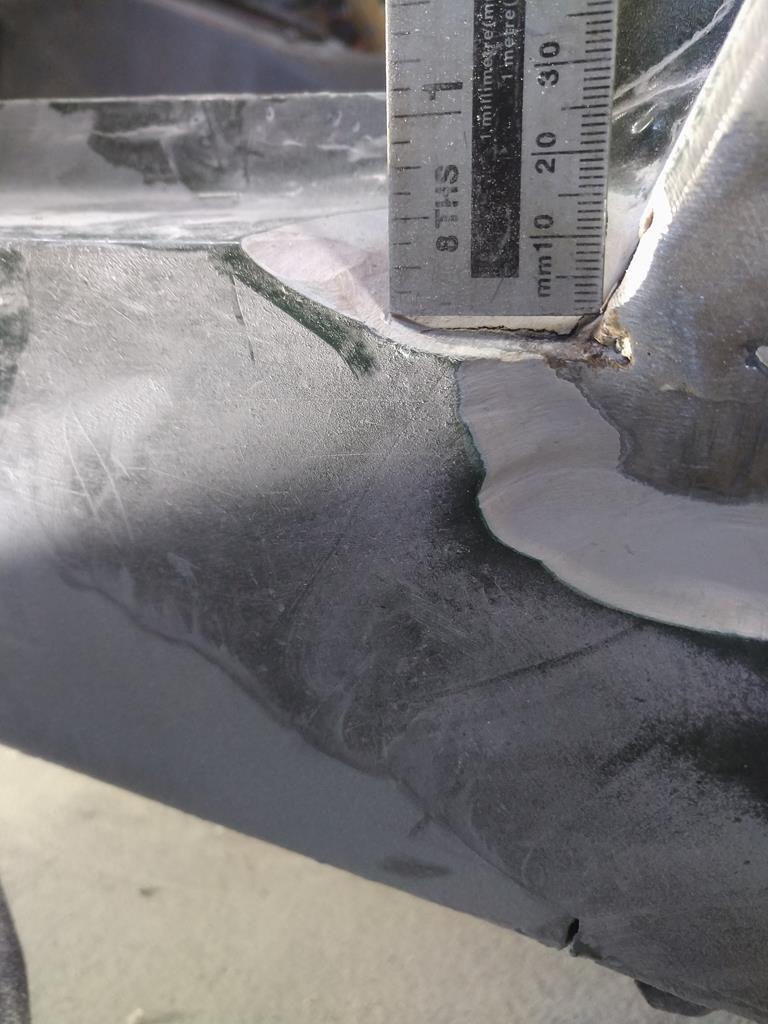 Yep, it's been built up by 15mm of filler. Finally I cut straight through both sills to remove, here is a cross section 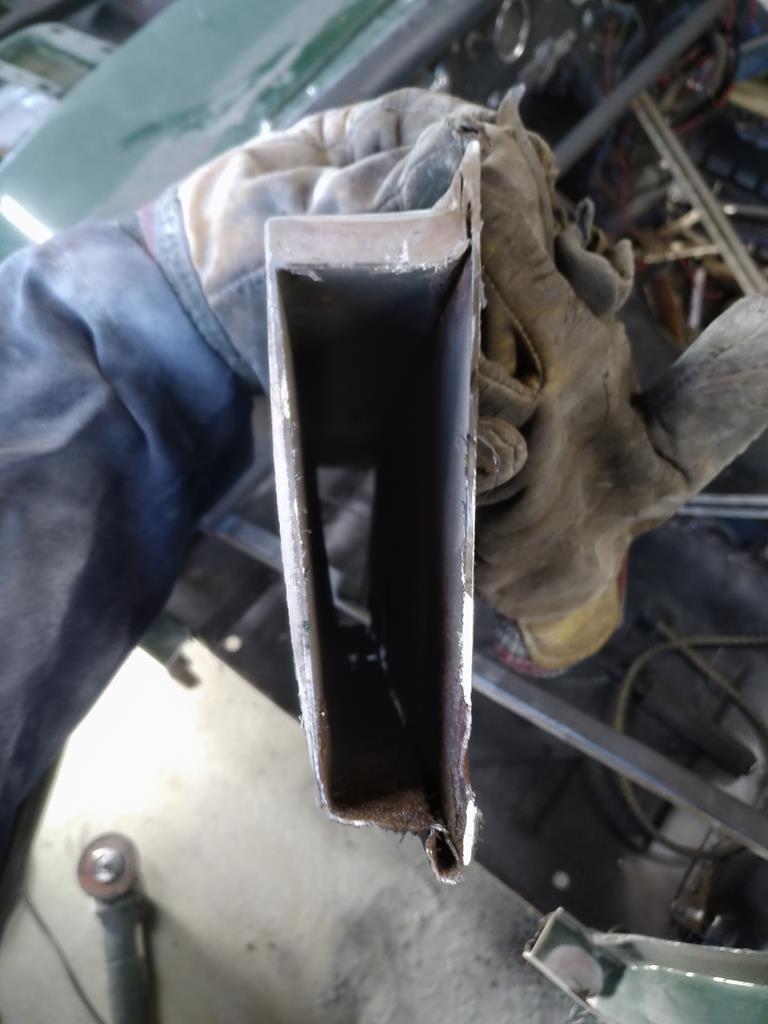 |
| |
Last Edit: May 28, 2020 17:33:48 GMT by pptom
|
|
pptom
Part of things
 
Posts: 475 
|
|
May 28, 2020 17:38:55 GMT
|
Fortunately I would have been fine in a crash as the 4 point belt eyes were really well welded in 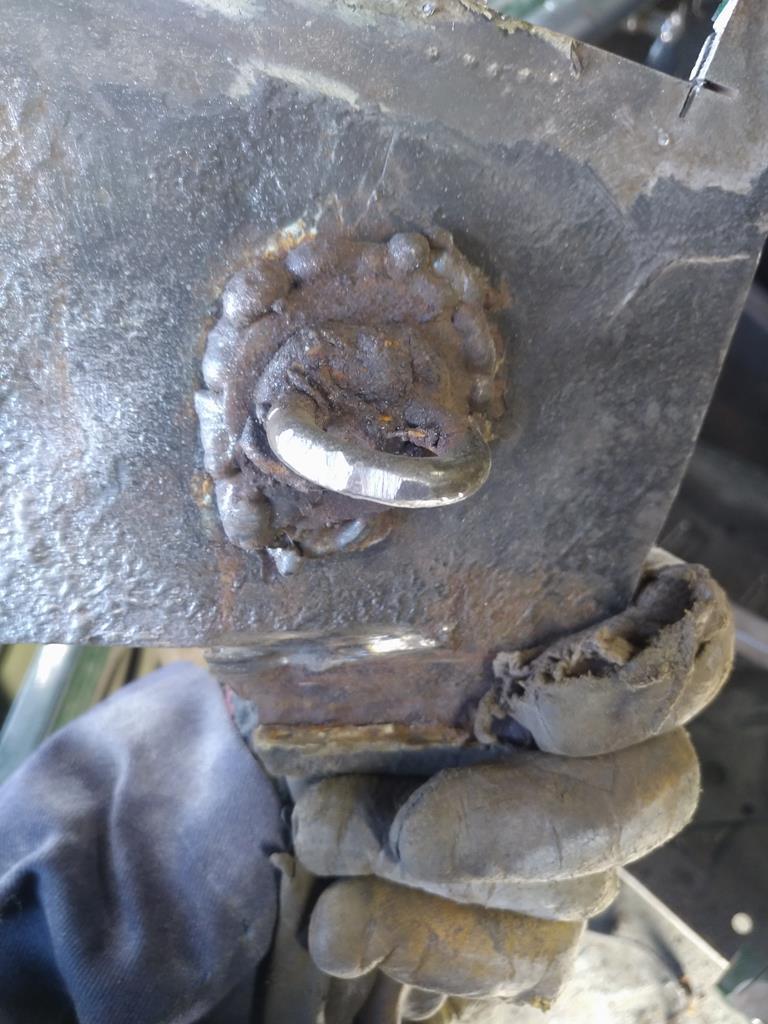 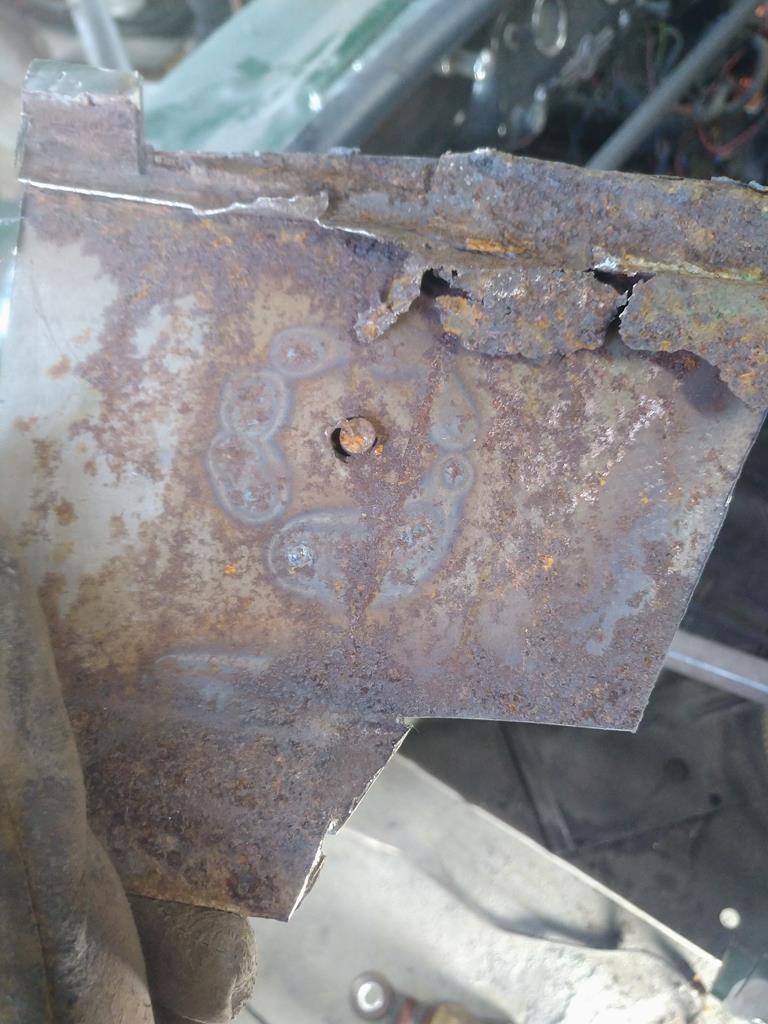 The drivers side and I think this one weren't even a proper threaded fitting. They were self tapping / wood screw type threads |
| |
|
|
pptom
Part of things
 
Posts: 475 
|
|
May 28, 2020 17:42:11 GMT
|
And the final picture for today is of the door alignment, fine at the front, a bit saggy at the back. Needs re-skinning too. I suspect the A post is tilted at an angle 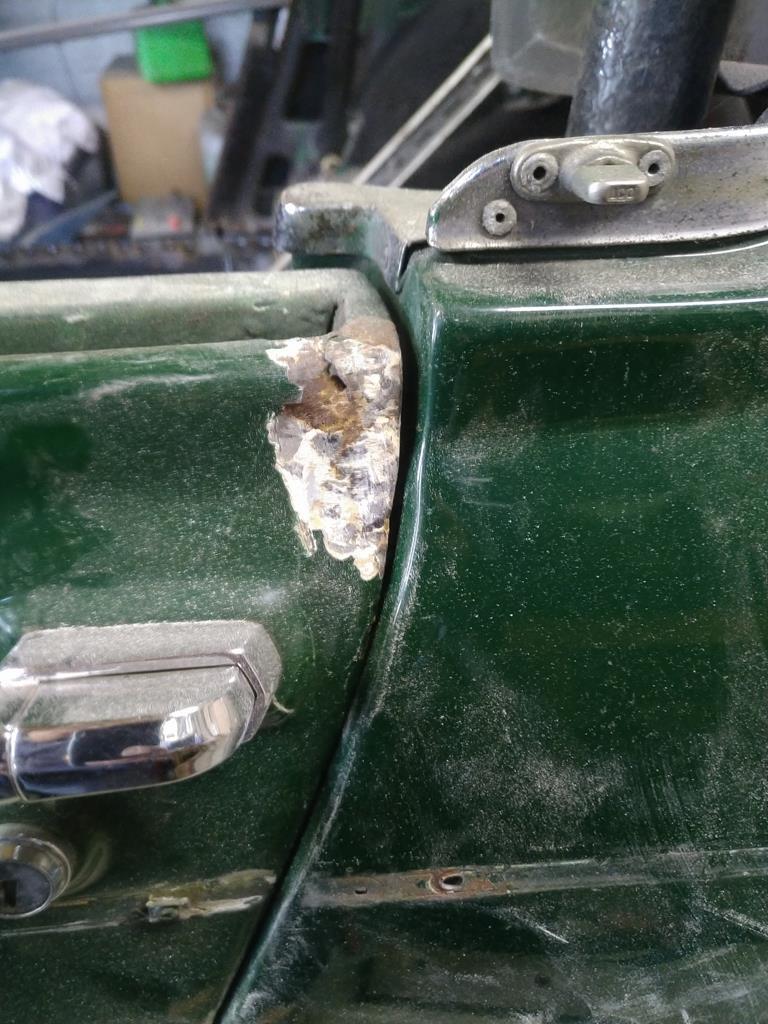 |
| |
|
|
|
|
|
May 28, 2020 19:33:47 GMT
|
|
Some fine bodges, but your rattling through this at a great pace. Far quicker than I would be able too. Brilliant work.
|
| |
|
|
pptom
Part of things
 
Posts: 475 
|
|
May 28, 2020 20:36:26 GMT
|
Some fine bodges, but your rattling through this at a great pace. Far quicker than I would be able too. Brilliant work. The perks of having no kids, an understanding wife and being a bit obsessive, I find it hard to rest and if I haven't got a project I'm totally lost. Focussing on something keeps me sane. |
| |
|
|
|
|
|
May 28, 2020 22:02:41 GMT
|
|
I think I have the same problem, but with the kids.
|
| |
|
|
OGDB
Part of things
 
Posts: 544 
|
|
May 29, 2020 14:35:34 GMT
|
|
This is an insane amount of filler. I often wonder what people think when they pile this much slop into bodywork. I had it in my mini, both scuttle corners were packed full of filler. Its nice to see that home restos like this have such a decent standard of workmanship in them. Sure its better than what some people are paying "Professionals" for.
|
| |
|
|
pptom
Part of things
 
Posts: 475 
|
|
May 29, 2020 15:04:32 GMT
|
|
I'm lucky I have the time and the space and really, it's only thanks to sites like this and the MIG welding forum and all of the helpful people in them sharing their skills that I've been able to have the confidence to try stuff like this.
|
| |
|
|
|
|


