|
|
|
Feb 21, 2019 22:13:24 GMT
|
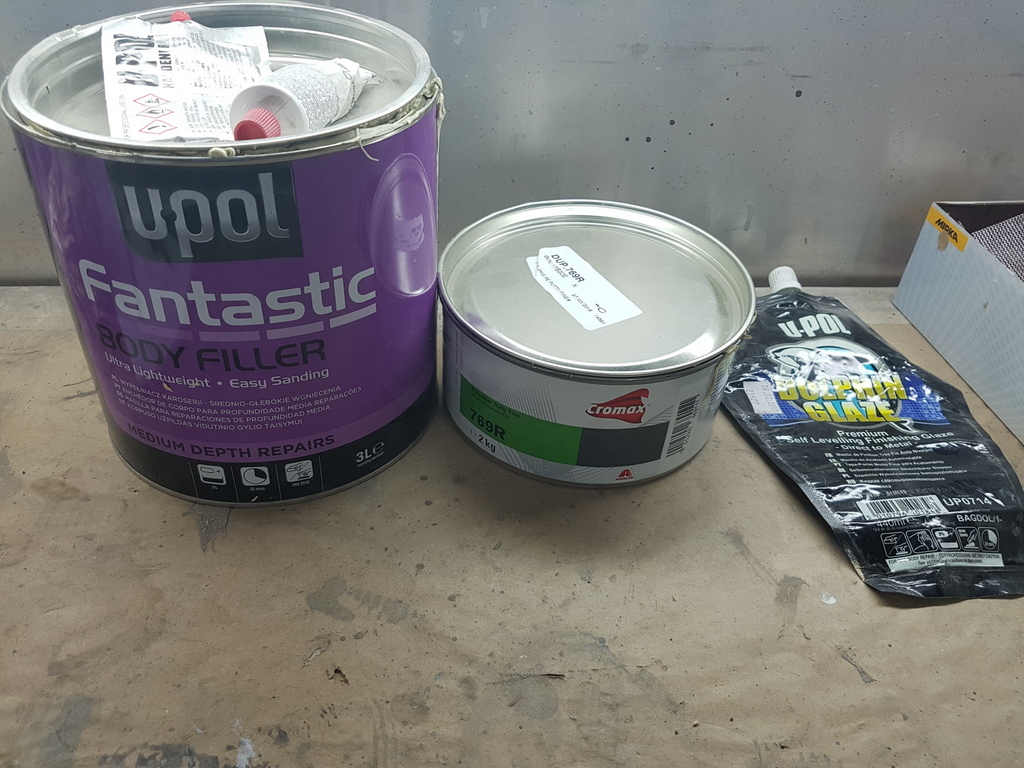 So in answer to the questions raised I use 3 different fillers - The Fantastic is good base filler that I use on panel deviation of 5mm > 2 mm The Cromax is a excellent fine detail filler that use on panel deviations of 2mm > 0mm and is the beige coloured filler that you see on the front wing in the thread - this is a great fine filler goes on / spreads has easily has margarine The Dolphin Glaze is a fine glaze - semi liquid and self levelling - great for taking out any minor undulation / deviations when final profiling and is a light mint green in appearance - can be sanded / blocked back to a virtually transparent thickness |
| |
Last Edit: Feb 21, 2019 22:14:53 GMT by Deleted
|
|
|
|
|
|
|
Feb 21, 2019 22:33:58 GMT
|
On to the nearside rear wing 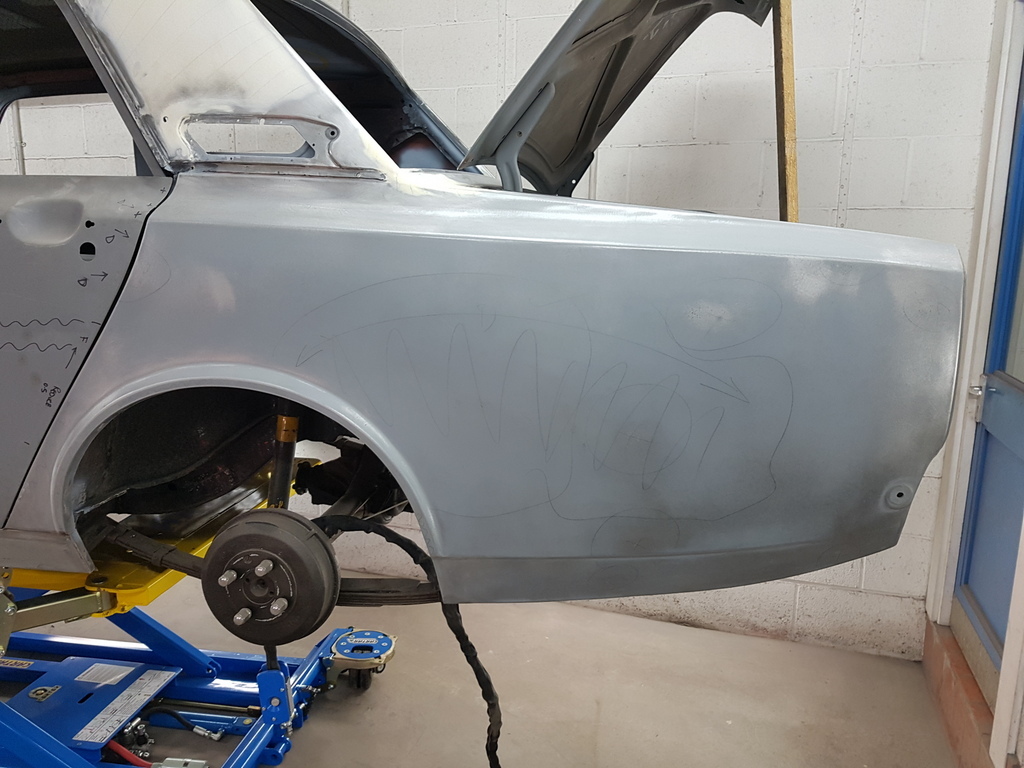 Which although was a new old stock rear wing it was new old stock rear wing that had seen a life - had been moved around several times and maybe had fallen onto its outer face at some point 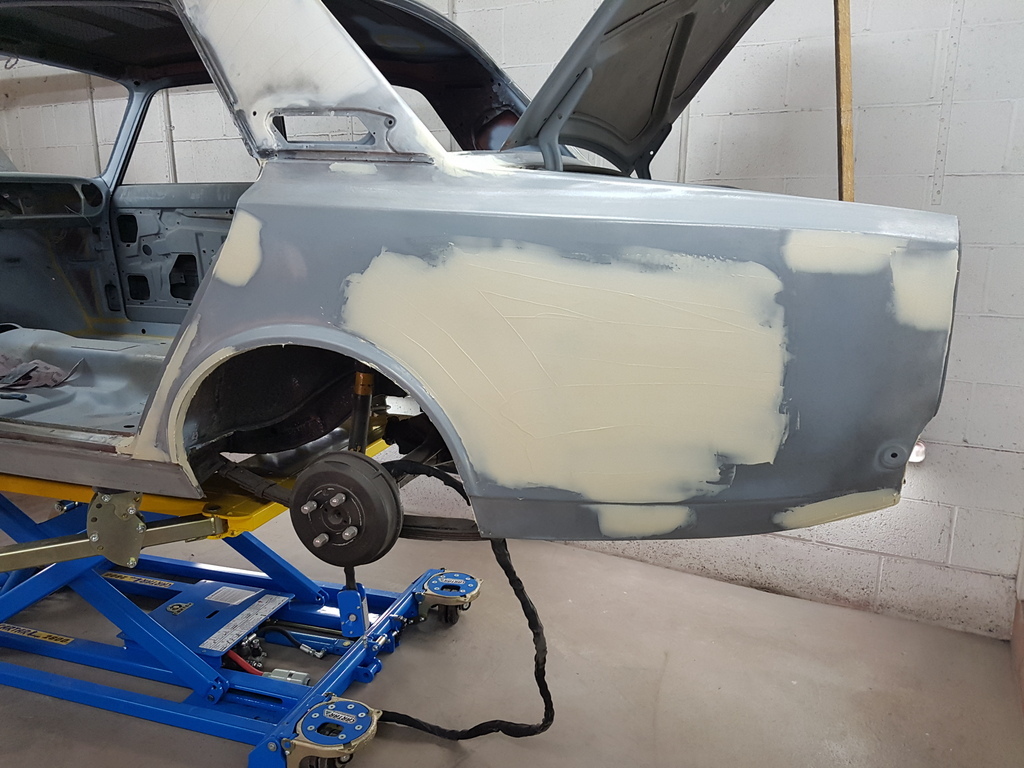 Hence there was some deviation to the panel 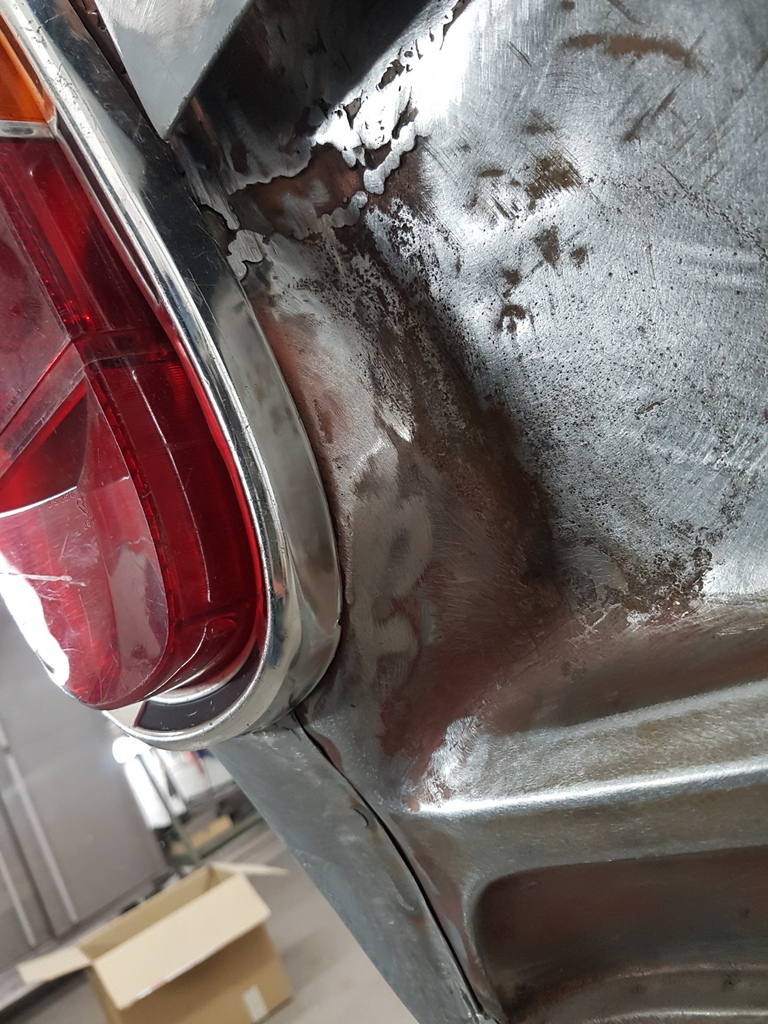 The rear panel had taken a beating at some stage 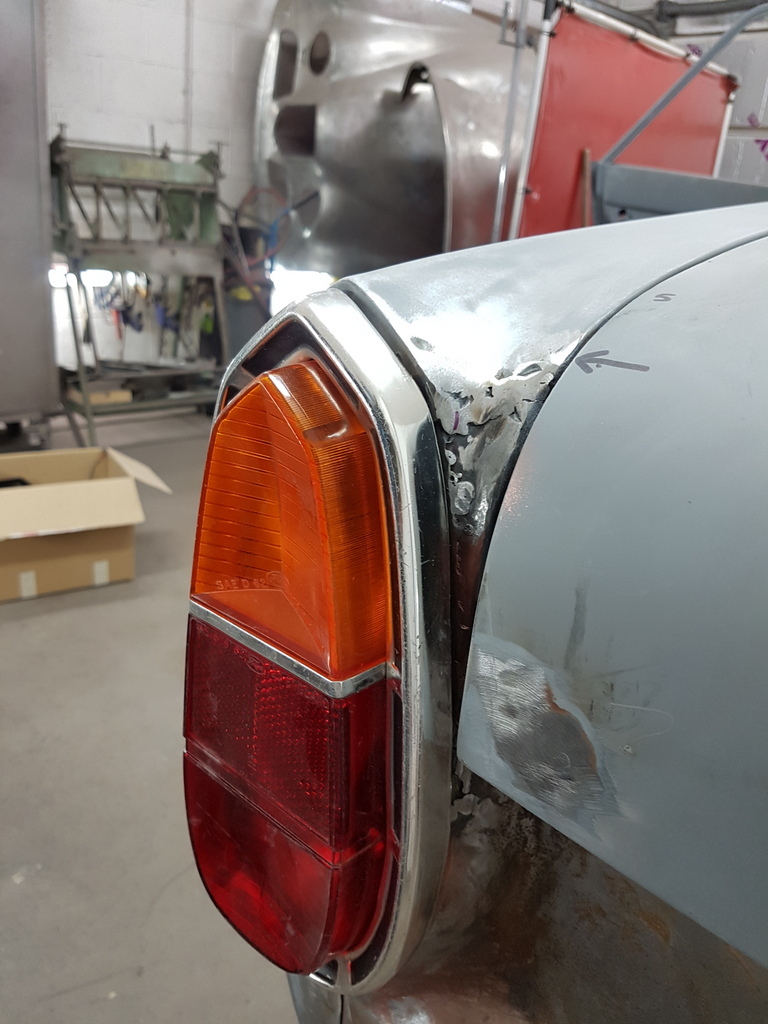 And the profiles to the rear lamp aperture were awful 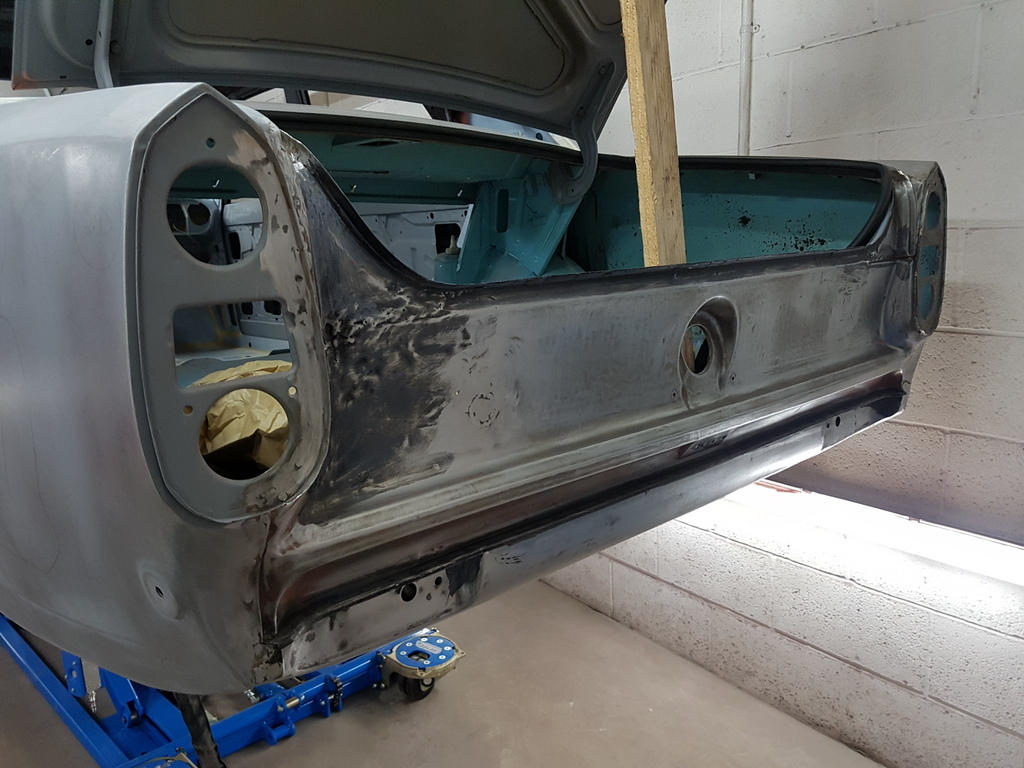 Lots of work here to get this right on multiple compound curvature faces 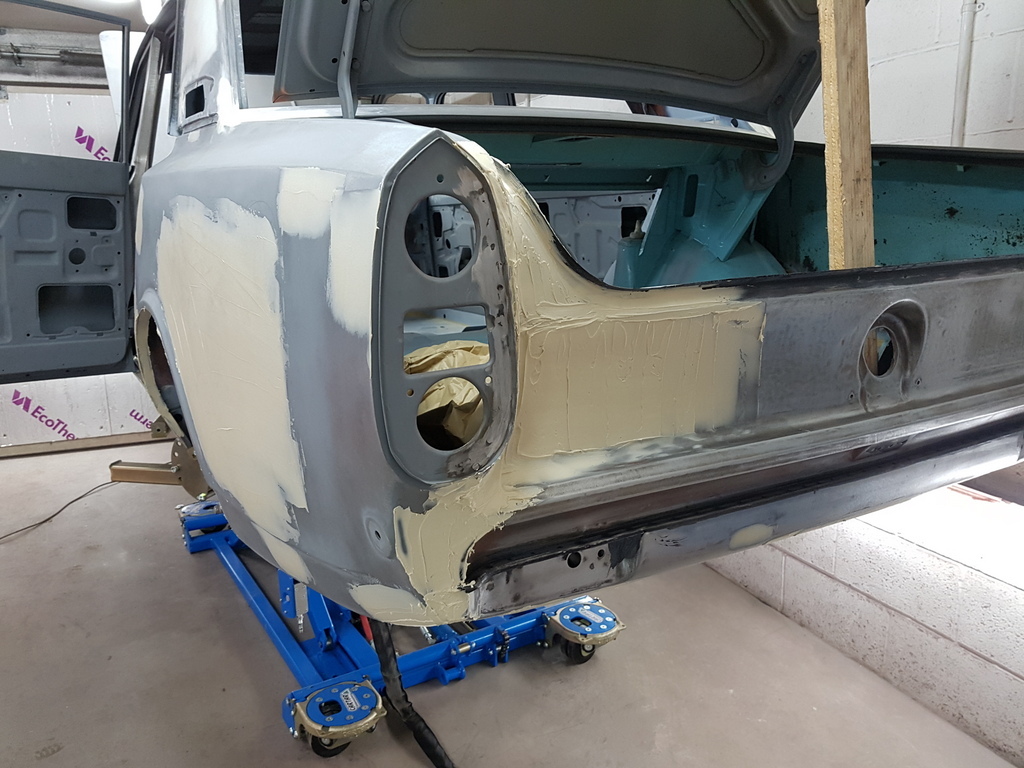 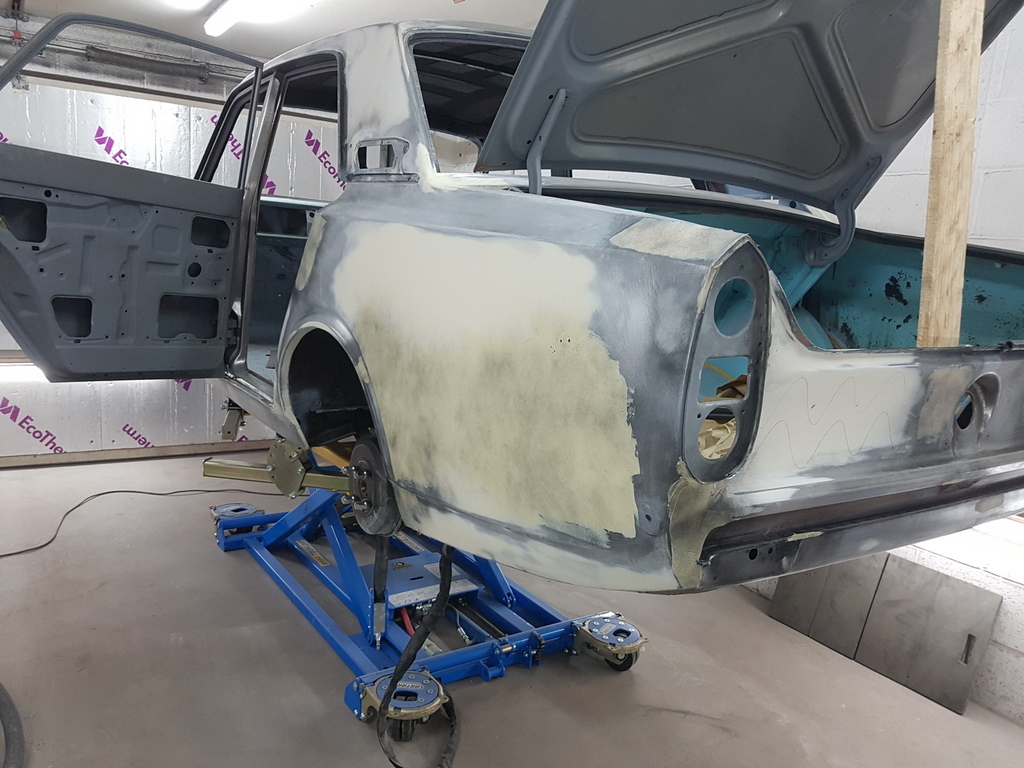 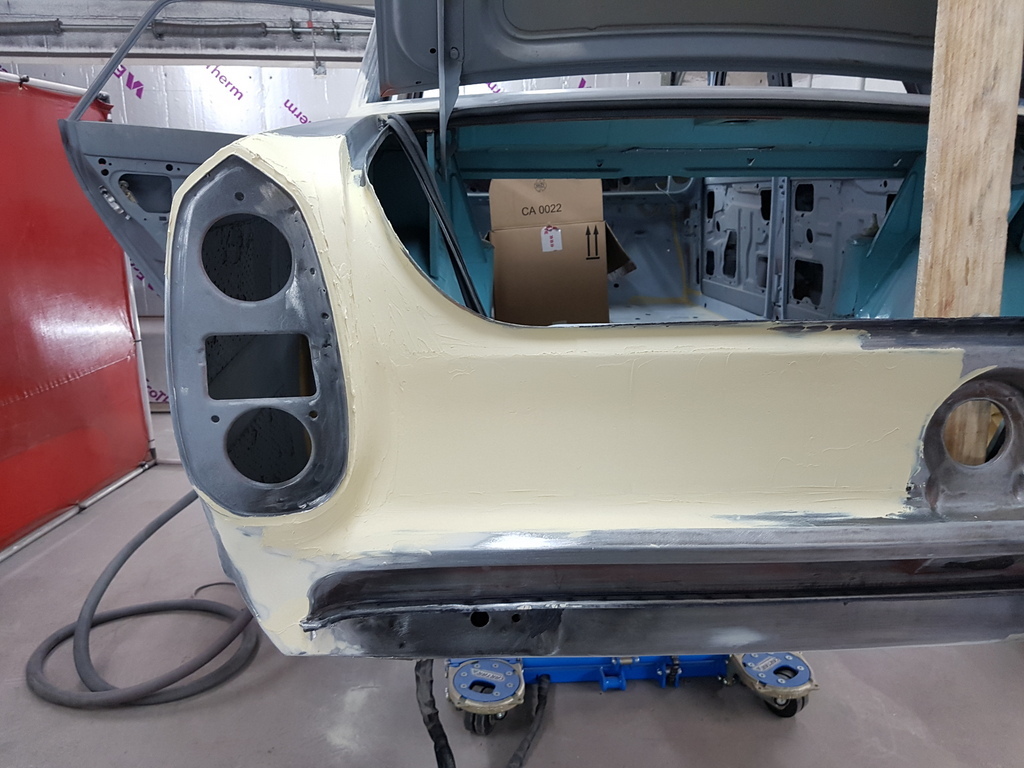 Slowly it takes shape 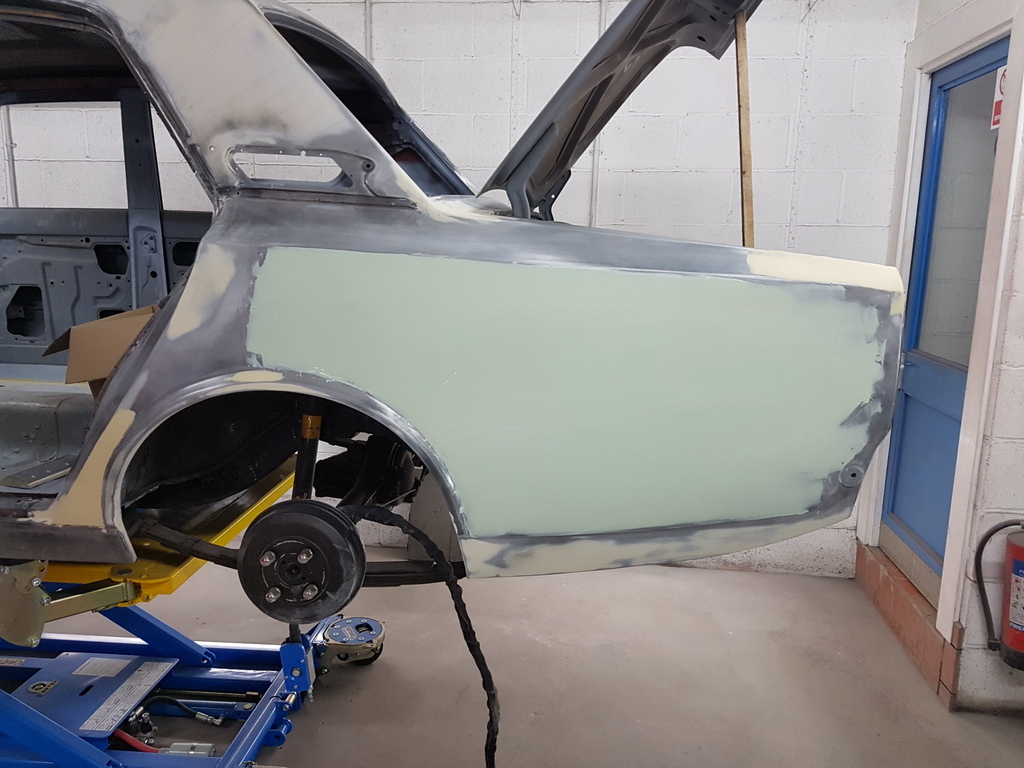 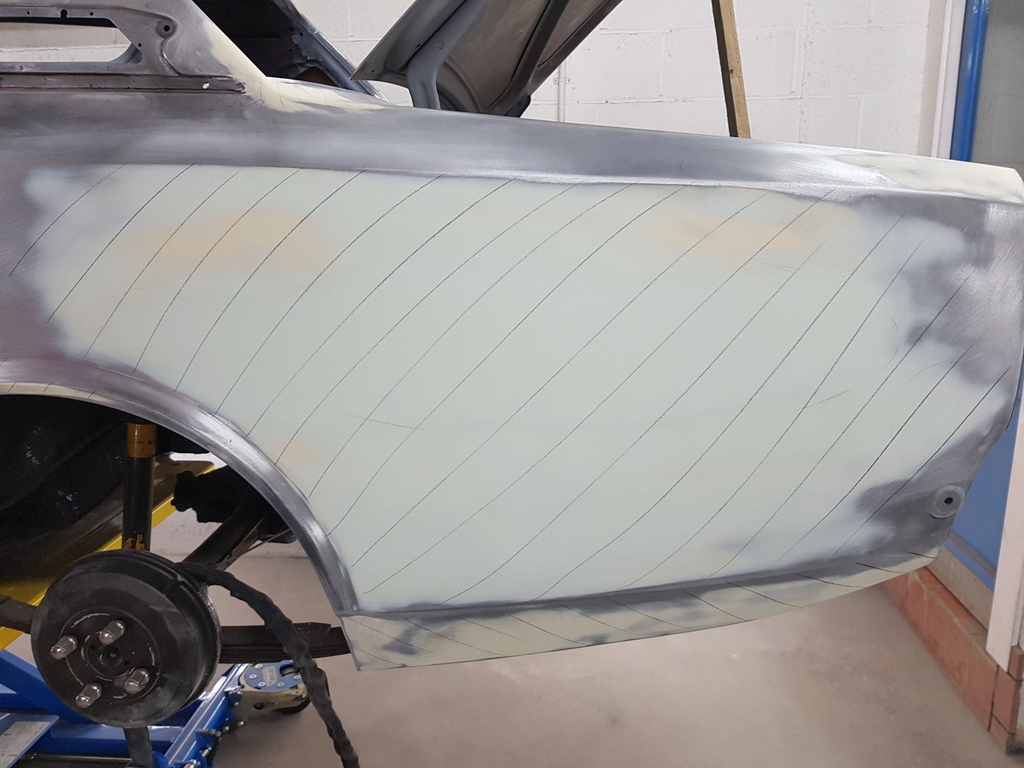 But just about there with a quick rub over of the glaze 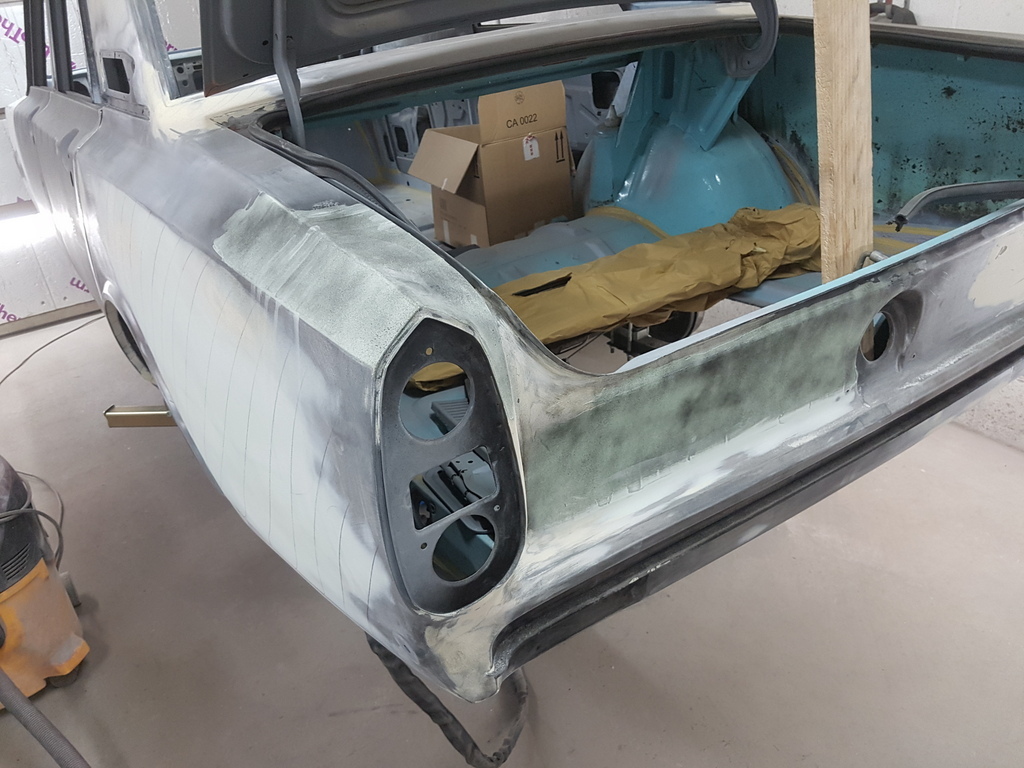 More tomorrow |
| |
Last Edit: Feb 21, 2019 22:35:22 GMT by Deleted
|
|
keyring
Part of things
 
Posts: 913
Club RR Member Number: 47
|
|
Feb 21, 2019 22:46:01 GMT
|
|
Looks like it’s coming on well! Although it looks extremely awkward to to get and sand back the filler round the boot water strip...
What grit of sand paper/sheets are you using when sanding back the filler?
Does the first layer require a more abrasive paper to allow the glaze a ‘key’ or is it all done the same?
|
| |
|
|
|
|
|
Feb 21, 2019 23:26:11 GMT
|
|
Chris, how much was the scissor lift? (if you don't mind me asking)
|
| |
|
|
|
|
|
|
|
|
Nice job as ever Chris. It a pleasure following your work.
With mentioning the fillers, you mention a range of 2 to 5mm for one type. I do not think on any of your projects, there is 5mm filler as that is a pretty thick layer. For me 2 to 3mm is the max and if 5mm would be required its bodywork or lead time.
The NOS wing is not too bad. I found some NOS front Wings for my Rover and it soon became clear why these were never fitted to a car. The fit was so poor, i repaired the old ones. I was very pleased with finding these kind of holy grails but one has to be carefull especially now that prices for NOS Rover panels have gone sky high. I also found a NOS rear door which fitted without problems
Peter
|
| |
Last Edit: Feb 22, 2019 7:22:08 GMT by petervdv
|
|
|
|
|
|
|
Looks like it’s coming on well! Although it looks extremely awkward to to get and sand back the filler round the boot water strip... What grit of sand paper/sheets are you using when sanding back the filler? Does the first layer require a more abrasive paper to allow the glaze a ‘key’ or is it all done the same? I mainly use P80's all the way through the process - has I then use a polyester spraying filler that I block back over the entire car I really don't have to go much finer than 80's - I also use a specialist abrasive and not just any make that comes off the shelf - I will take some images and post up on the next progress post of the thread |
| |
Last Edit: Feb 22, 2019 11:41:36 GMT by Deleted
|
|
|
|
|
|
|
Chris, how much was the scissor lift? (if you don't mind me asking) Mark - With the Vat a little over £3k - I saved £1k off the list price - you can get a standard scissor lift for much less than this - in fact sub £1500 - and they will get the vehicle to the same height has mine does - however it's the flexibility of being able to move a complete vehicle whilst on the lift by raising the castors - it's increased the flexibility of my small workshop no end and that is why I have paid a premium over the price of standard lift - I have to say though regardless of which model you have the ability to work at sensible height and adjust that in seconds has made so much difference it's unreal  |
| |
Last Edit: Feb 22, 2019 7:48:37 GMT by Deleted
|
|
|
|
|
|
|
Nice job as ever Chris. It a pleasure following your work. With mentioning the fillers, you mention a range of 2 to 5mm for one type. I do not think on any of your projects, there is 5mm filler as that is a pretty thick layer. For me 2 to 3mm is the max and if 5mm would be required its bodywork or lead time. The NOS wing is not too bad. I found some NOS front Wings for my Rover and it soon became clear why these were never fitted to a car. The fit was so poor, i repaired the old ones. I was very pleased with finding these kind of holy grails but one has to be carefull especially now that prices for NOS Rover panels have gone sky high. I also found a NOS rear door which fitted without problems Peter Peter - You are quite right - 5mm would be an exception and I like to work to a panel tolerance of > 3mm - there is the odd exception though for instance around the rear light cluster on that nearside rear wing - it would have been quite difficult to achieve the profiles in anything else other than filler - maybe a little leadwork but I don't think that you would have improved it much - I have no inversion to polyester fillers and the quality of them has improved hugely over the last 10 years - providing they are used & applied correctly - certain users of fillers and I include the general car trade & some restorers in this term have a poor understanding of the use of fillers - how / where / what types along with lazy attitudes to obtaining the very best panel profile possible prior to the use of the said fillers let alone the time & care to achieve the correct profile of the filler once they have applied it. You can also throw into the mix the outright bodging brigade whom would rather use the quick fix of bridging fillers / polyester fillers in structural areas along with the use of fillers for hiding damage / rust for the short period of time it takes to move the vehicle into non suspecting hands / new ownership - it's these users that give the use of filler a poor name and a bad reputation 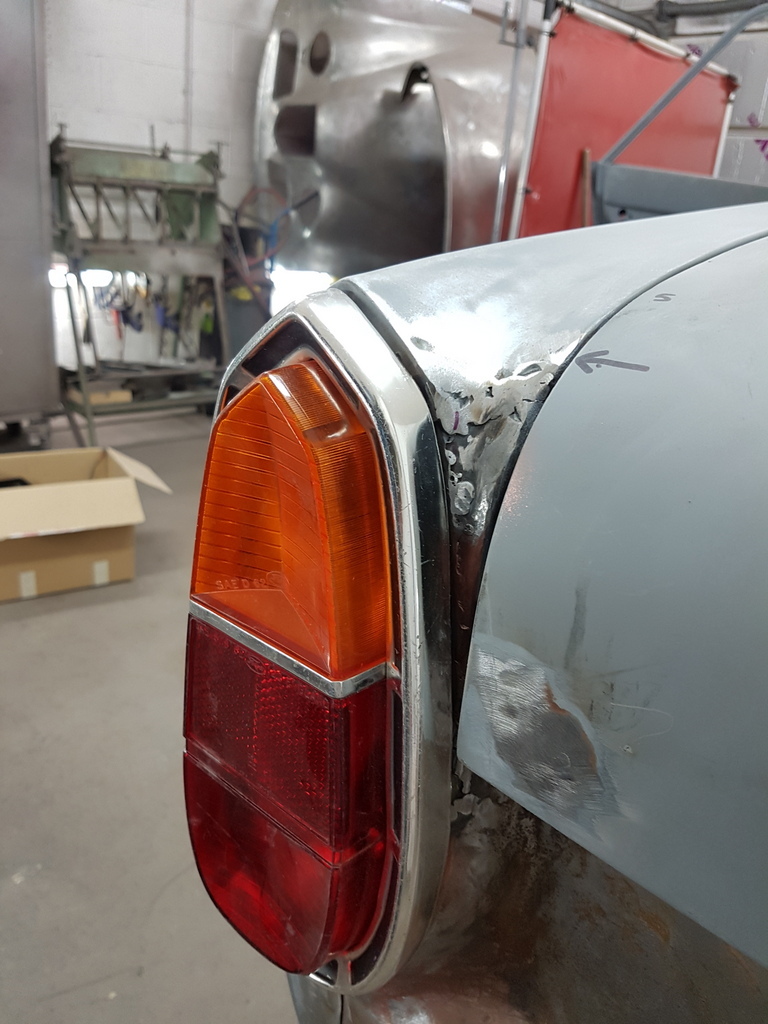 But when used correctly you can turn this sorry mess of rear light cluster / boot aperture in to this 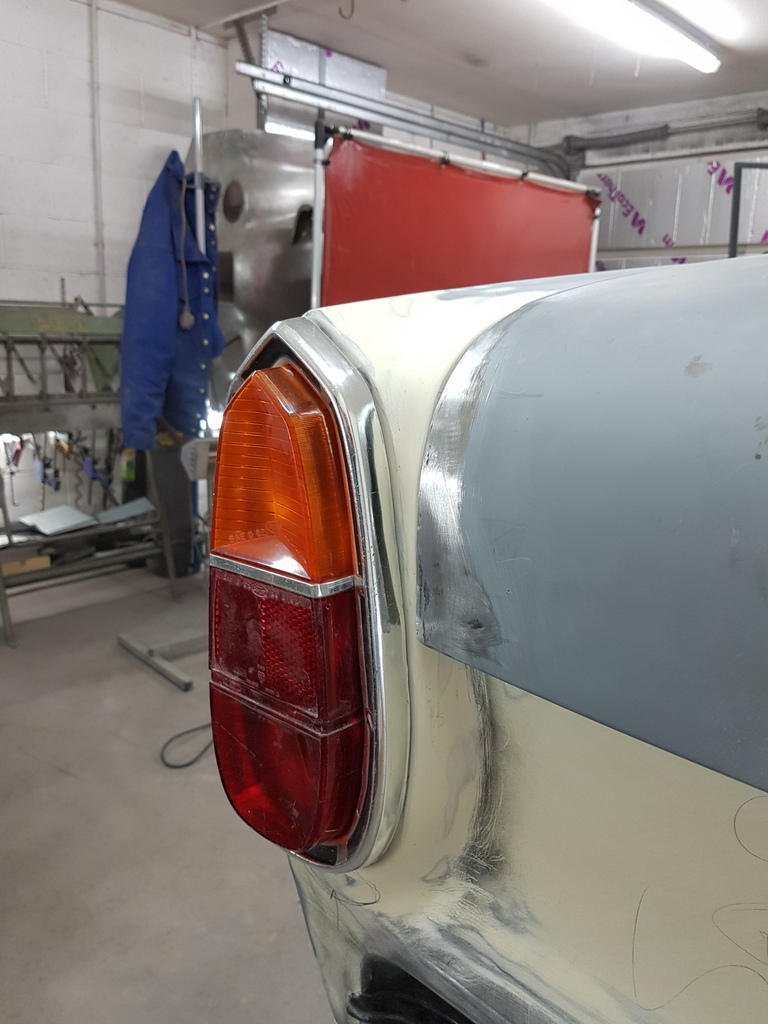 |
| |
|
|
|
|
|
Feb 22, 2019 11:39:37 GMT
|
Chris, how much was the scissor lift? (if you don't mind me asking) Mark - With the Vat a little over £3k - I saved £1k off the list price - you can get a standard scissor lift for much less than this - in fact sub £1500 - and they will get the vehicle to the same height has mine does - however it's the flexibility of being able to move a complete vehicle whilst on the lift by raising the castors - it's increased the flexibility of my small workshop no end and that is why I have paid a premium over the price of standard lift - I have to say though regardless of which model you have the ability to work at sensible height and adjust that in seconds has made so much difference it's unreal  Yeah, something for the wish list I think as it's difficult to get a jack under the pop due to ground clearance. |
| |
|
|
|
|
|
Feb 22, 2019 11:43:13 GMT
|
|
Great work as usual, I guess what is not coming across here is the time involved, I have done a little body work over the years and I would far rather be welding up rust metal than the time it takes to do this sort of work!
I agree on the use of filler, 24 years and 100,000 miles of all year use ago I replaced 3 of the 4 wheel arches on my TR7 and finished with a skim of filler, still no problems today, In my experience the key thing is to keep the moisture out of the back of the filler, I usually seam weld the repairs but I try to paint and seal behind as well, in inaccessible areas regular doses of wax seems to work
|
| |
|
|
|
|
|
Feb 22, 2019 12:05:04 GMT
|
Great work as usual, I guess what is not coming across here is the time involved, I have done a little body work over the years and I would far rather be welding up rust metal than the time it takes to do this sort of work! I agree on the use of filler, 24 years and 100,000 miles of all year use ago I replaced 3 of the 4 wheel arches on my TR7 and finished with a skim of filler, still no problems today, In my experience the key thing is to keep the moisture out of the back of the filler, I usually seam weld the repairs but I try to paint and seal behind as well, in inaccessible areas regular doses of wax seems to work Kevin - You are not wrong about the 'Time Involved' it's a subject I was going to cover in one of my posts and whilst it's nice to see the progress - each of the posts represents several days work has a minimum |
| |
Last Edit: Feb 22, 2019 13:44:40 GMT by Deleted
|
|
keyring
Part of things
 
Posts: 913
Club RR Member Number: 47
|
|
Feb 22, 2019 12:59:50 GMT
|
Looks like it’s coming on well! Although it looks extremely awkward to to get and sand back the filler round the boot water strip... What grit of sand paper/sheets are you using when sanding back the filler? Does the first layer require a more abrasive paper to allow the glaze a ‘key’ or is it all done the same? I mainly use P80's all the way through the process - has I then use a polyester spraying filler that I block back over the entire car I really don't have to go much finer than 80's - I also use a specialist abrasive and not just any make that comes off the shelf - I will take some images and post up on the next progress post of the thread That makes sense! Is polyester spray filler available in single pack? Or is this also a 2-pack product? I’ll look forward to the next update, again, it gives me a good idea of the product I should be buying, sure I also seen you use the sanding blocks that are linked to the vacuum, but obviously the price involved with that set up, it’s not something I’ll be using! |
| |
|
|
|
|
|
Feb 22, 2019 19:37:21 GMT
|
I mainly use P80's all the way through the process - has I then use a polyester spraying filler that I block back over the entire car I really don't have to go much finer than 80's - I also use a specialist abrasive and not just any make that comes off the shelf - I will take some images and post up on the next progress post of the thread That makes sense! Is polyester spray filler available in single pack? Or is this also a 2-pack product? I’ll look forward to the next update, again, it gives me a good idea of the product I should be buying, sure I also seen you use the sanding blocks that are linked to the vacuum, but obviously the price involved with that set up, it’s not something I’ll be using! Single pack polyester used to be available but unsure if you can obtain now - all of what I use is 2 pack - once you have found a decent automotive paint factors / suppliers advise them what you are doing and see what they recommend / stock - you don't have to purchase it there & then - get the product details and let me know what they advise - I can then review it for you and see if it will do the job Over the weekend I will add to the Corasir posts on what abrasives I use and the advantages - there is no reason why you cant build yourself a dustless sanding kit - a little ingenuity with the use of a old cylinder vac / Henry and you will be sorted and the benefits of dustless are superior over any other method but I will explain when I do the post |
| |
|
|
keyring
Part of things
 
Posts: 913
Club RR Member Number: 47
|
|
Feb 22, 2019 19:58:07 GMT
|
That makes sense! Is polyester spray filler available in single pack? Or is this also a 2-pack product? I’ll look forward to the next update, again, it gives me a good idea of the product I should be buying, sure I also seen you use the sanding blocks that are linked to the vacuum, but obviously the price involved with that set up, it’s not something I’ll be using! Single pack polyester used to be available but unsure if you can obtain now - all of what I use is 2 pack - once you have found a decent automotive paint factors / suppliers advise them what you are doing and see what they recommend / stock - you don't have to purchase it there & then - get the product details and let me know what they advise - I can then review it for you and see if it will do the job Over the weekend I will add to the Corasir posts on what abrasives I use and the advantages - there is no reason why you cant build yourself a dustless sanding kit - a little ingenuity with the use of a old cylinder vac / Henry and you will be sorted and the benefits of dustless are superior over any other method but I will explain when I do the post That’s my first port of call as soon as I’m back on land so I can get the ball rolling and seeing what I need to get buying to get the project off to the start it needs.... That sounds perfect nd just what I need! I did think it would be possible to make something up with an old/cheap vac Thanks again  |
| |
Last Edit: Feb 22, 2019 19:59:06 GMT by keyring
|
|
|
|
|
Feb 22, 2019 20:07:15 GMT
|
|
make sure the filtration is up to spec or you will just end distributing the finest dust back into the atmosphere.
|
| |
'80 s1 924 turbo..hibernating
'80 golf gli cabriolet...doing impression of a skip
'97 pug 106 commuter...continuing cheapness making me smile!
firm believer in the k.i.s.s and f.i.s.h principles.
|
|
|
|
|
Feb 22, 2019 20:27:38 GMT
|
Nearside of the rear panel / wing / lamp cluster now complete with the profiles along with the holes drilled for the 'Delux' badge 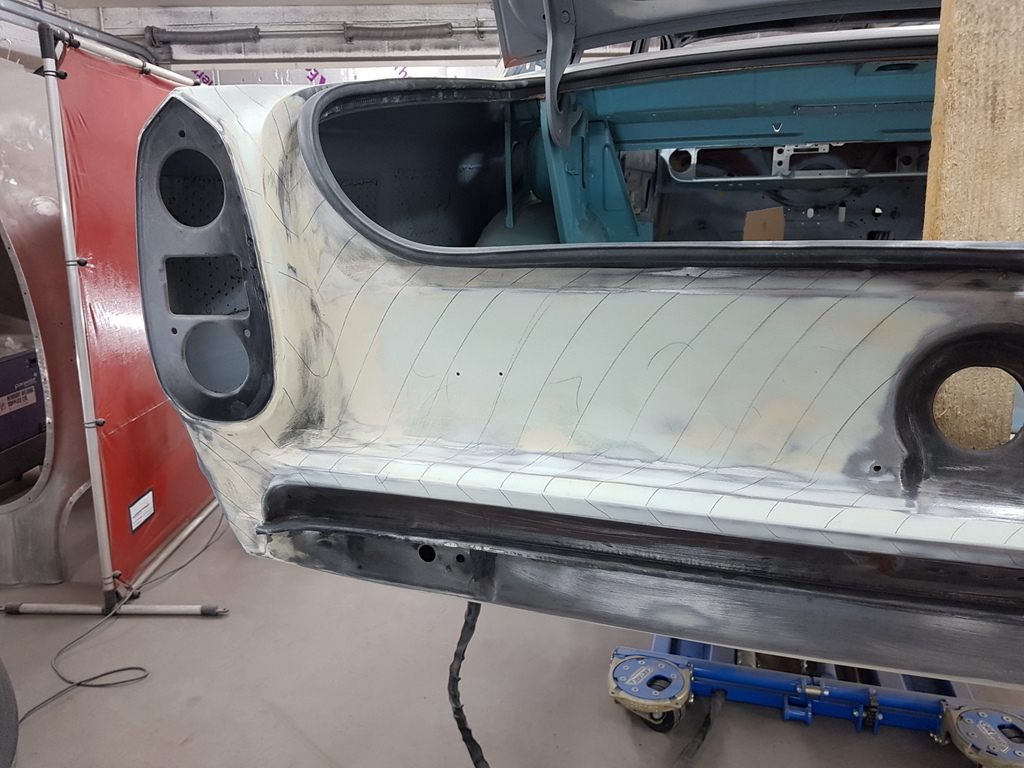 There is a fine line here - in what deviation to remove and what to leave - When the car left the factory deviation & minor panel ripples were distinct in certain areas - like behind the rear bumper where the rear panel & lower valance meet on the seam edge - the spot welds adding minor deviation - same with some of the joints in the door apertures - whilst these could be addressed / filled & hidden it would to anyone in the know make the car appear somewhat false - whilst Peter's Corsair is not being returned to the road has a 100% factory car it wont be that far away from it either - hence some common sense needs applying to the profiling methods Whilst the door apertures on the nearside are not too bad on the verticals and the door profiles largely align with the front & rear wings 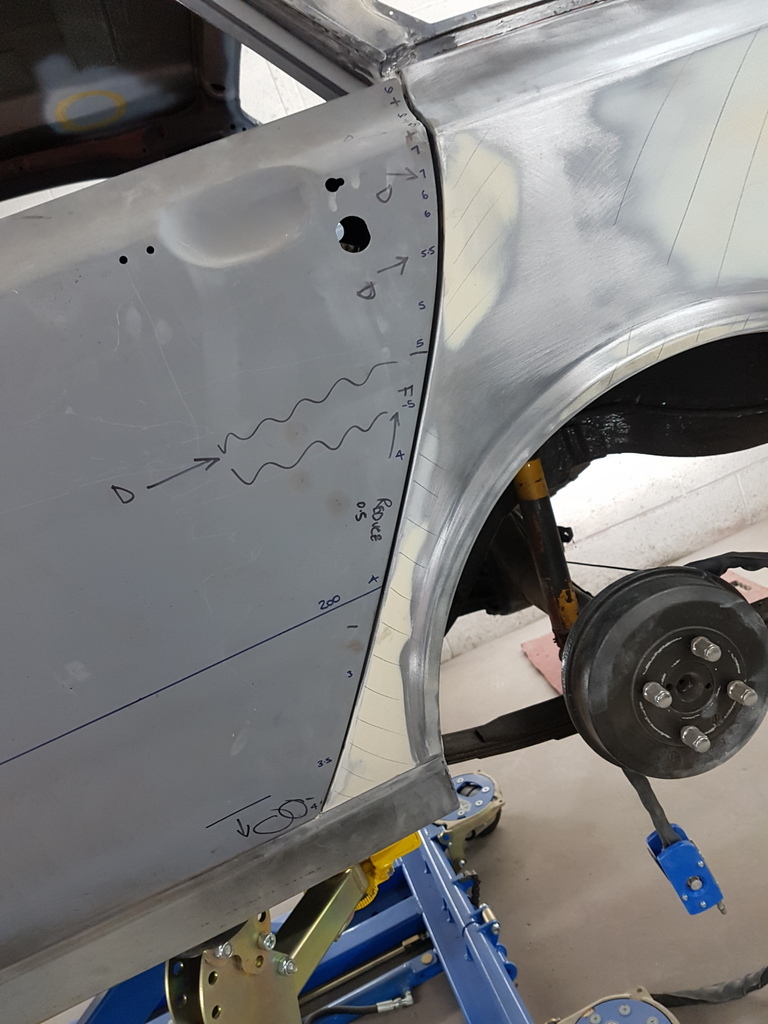 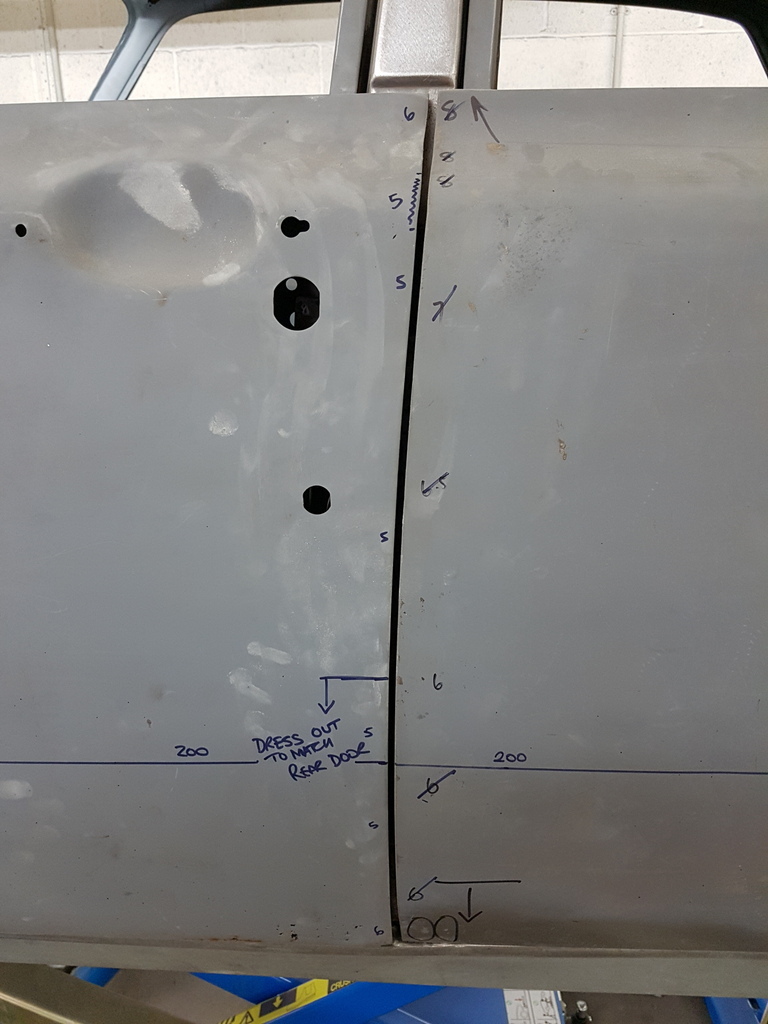 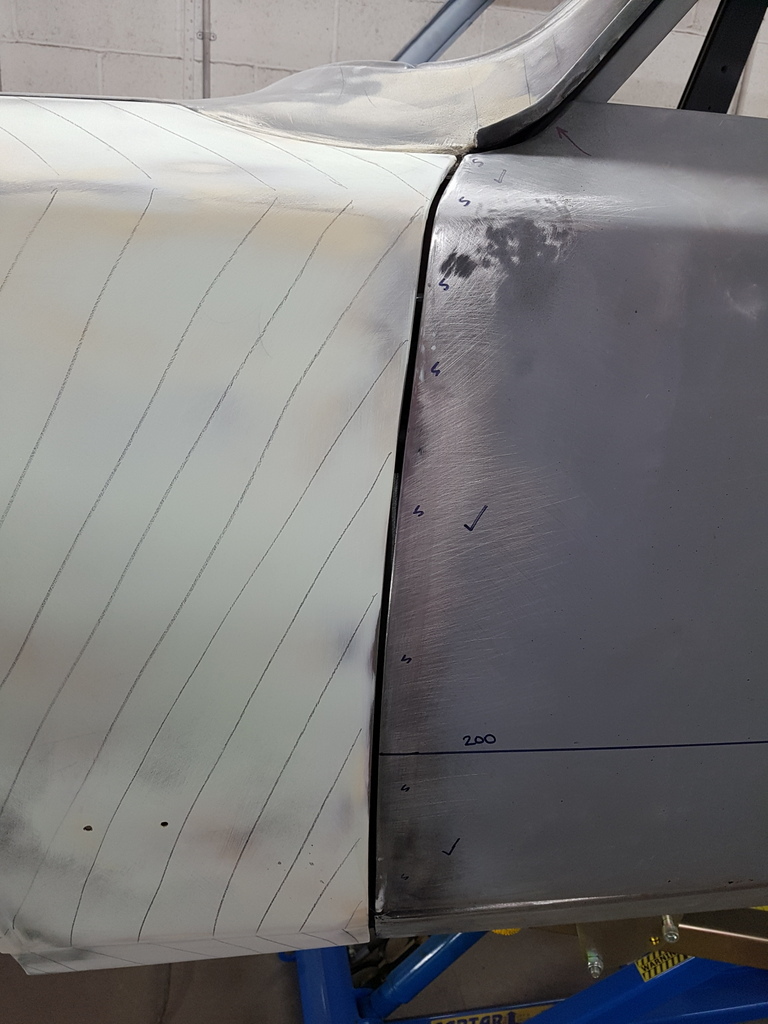 However the horizontal apertures with the sills are poor along with the fact that are rust perforations along the bottom edges of both doors 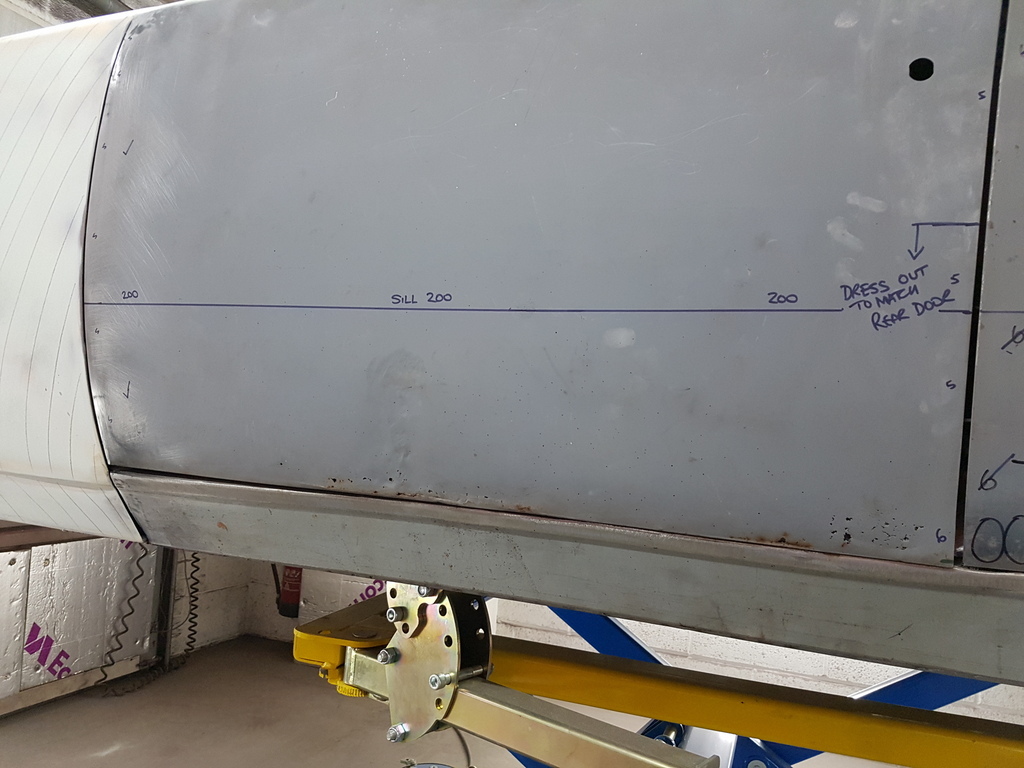 Note the datum lines drawn to both doors 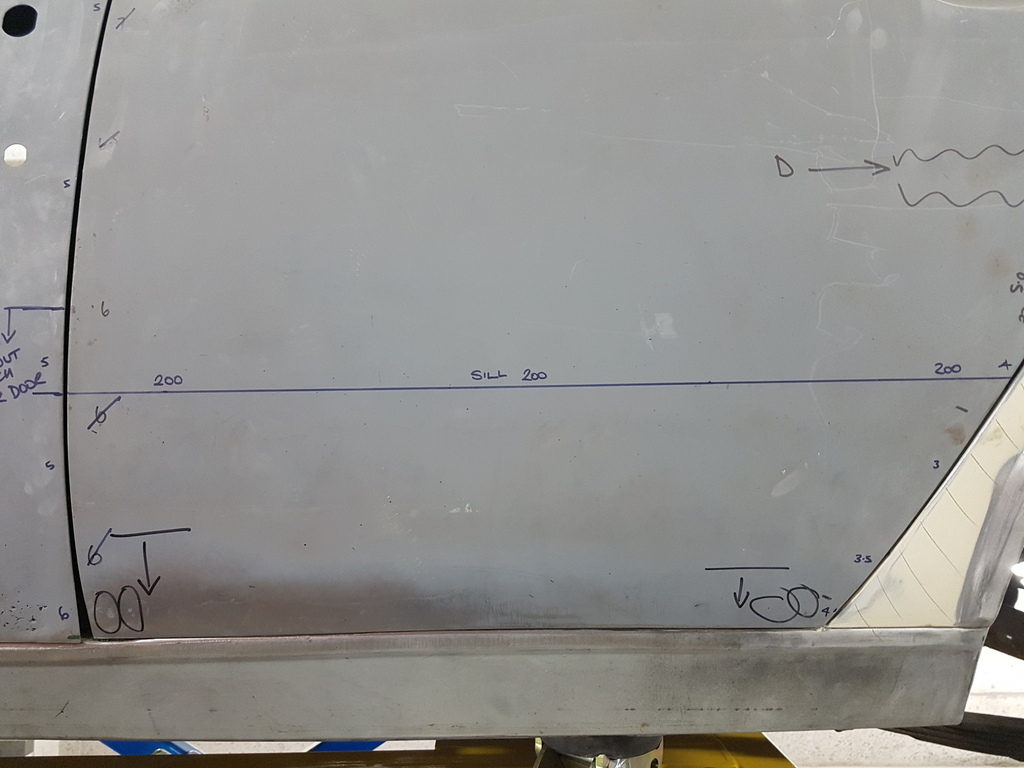 Front door first - now realigning doors to exactly where you had them previously can be a painful headbanging exercise 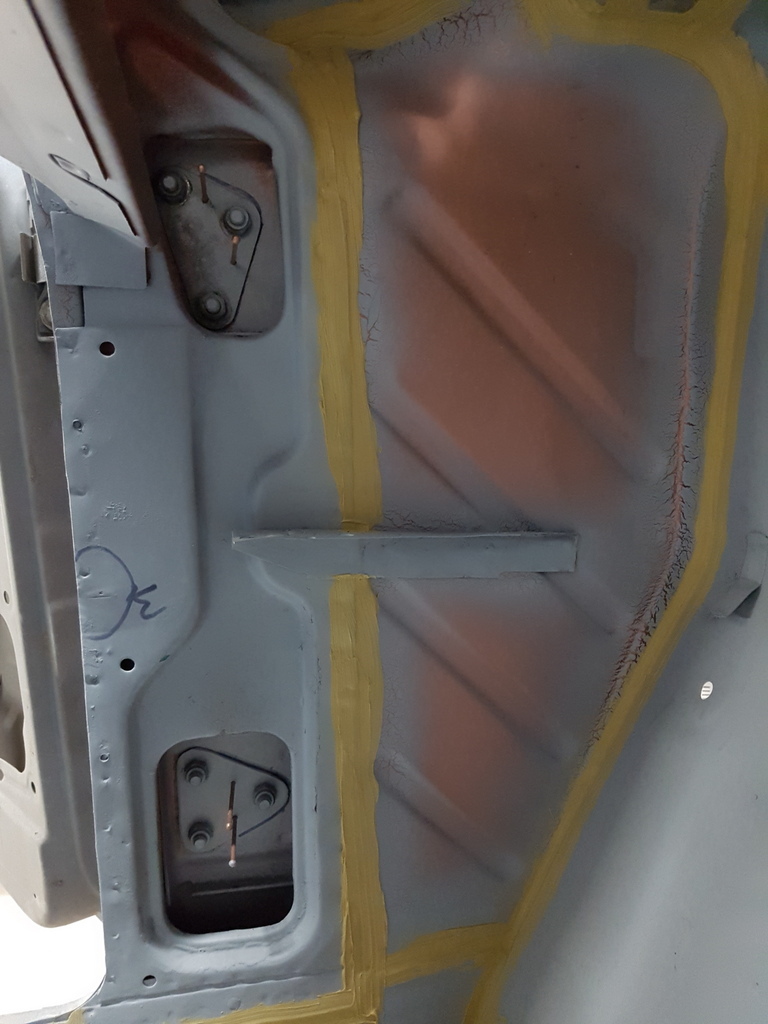 But there are no rules about how easy you can make it for yourself - two 2 mm drilled holes into the back of the hinge block and two pins inserted on each hinge gives you an easy hinge location system 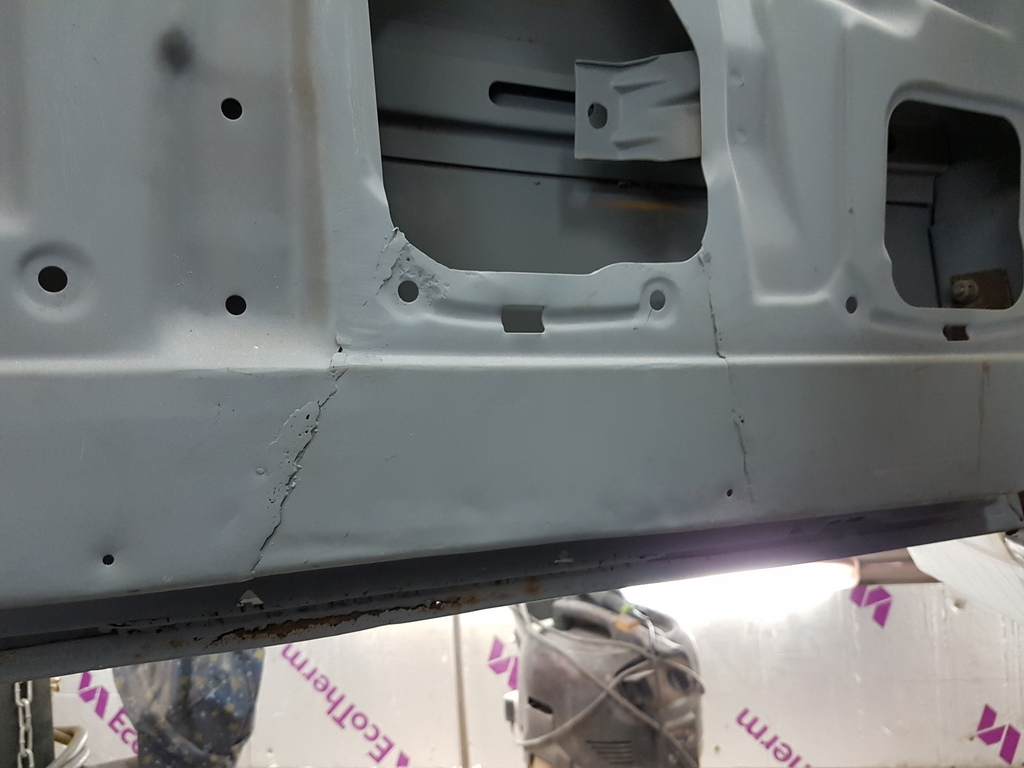 The inner door shell has clearly been messed about with - cut out & rewelded 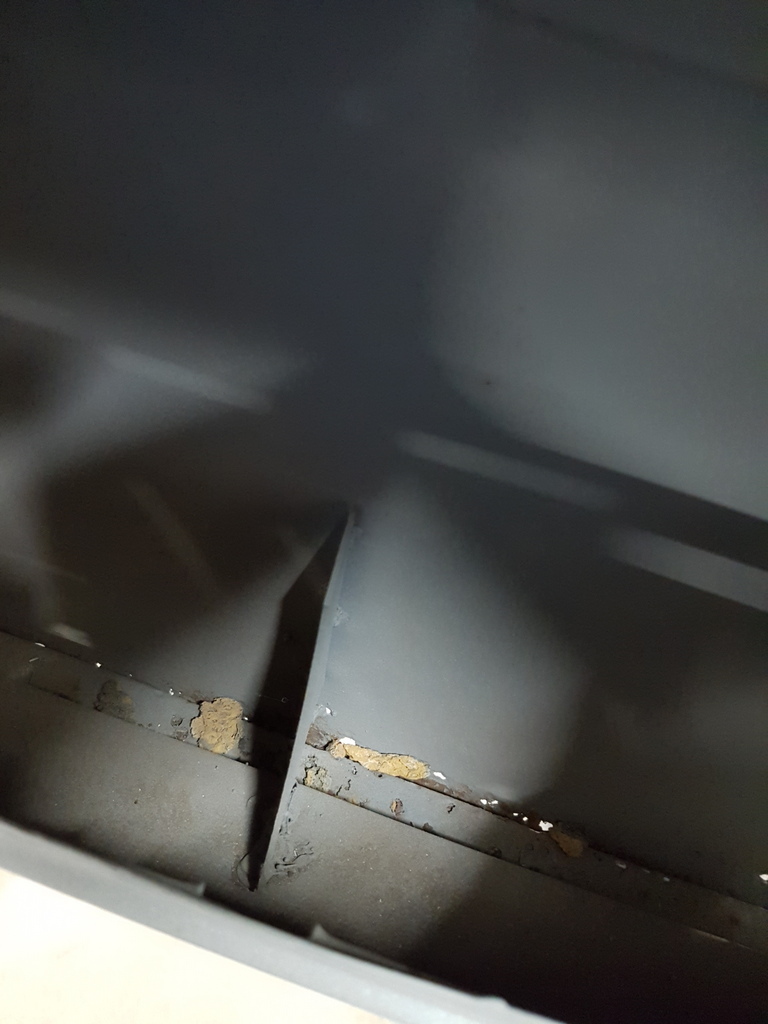 Then this odd unorthodox bracket welded between the door skin and the frame 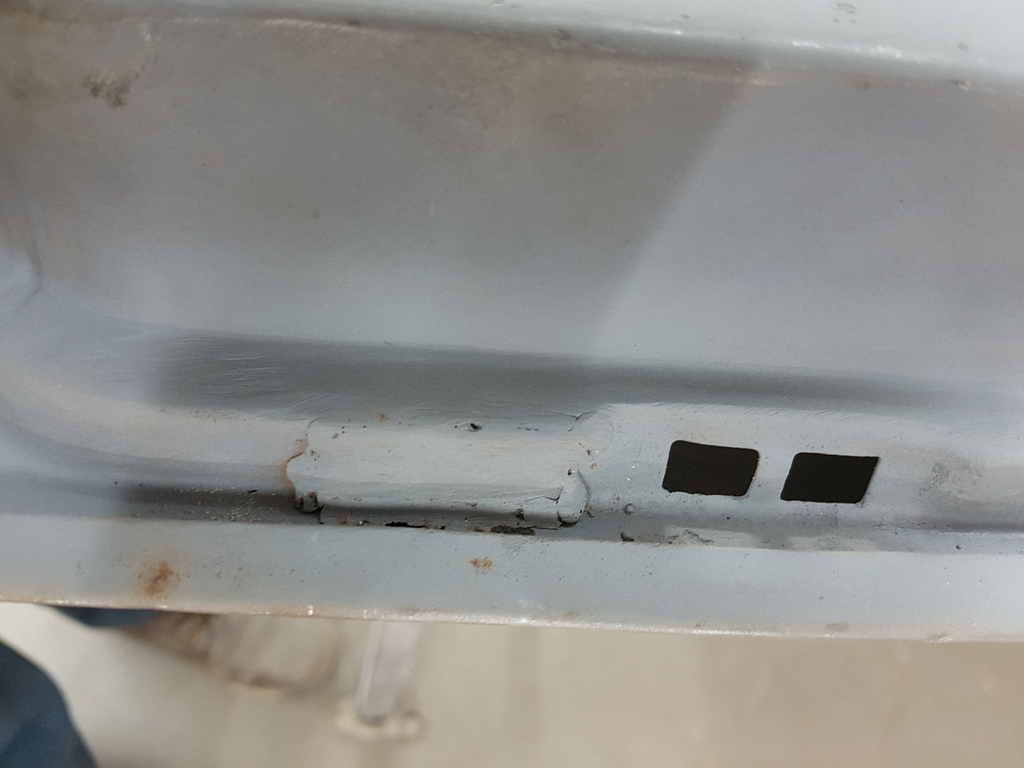 Along with some fairly ugly patches welded into the bottom of the door frame 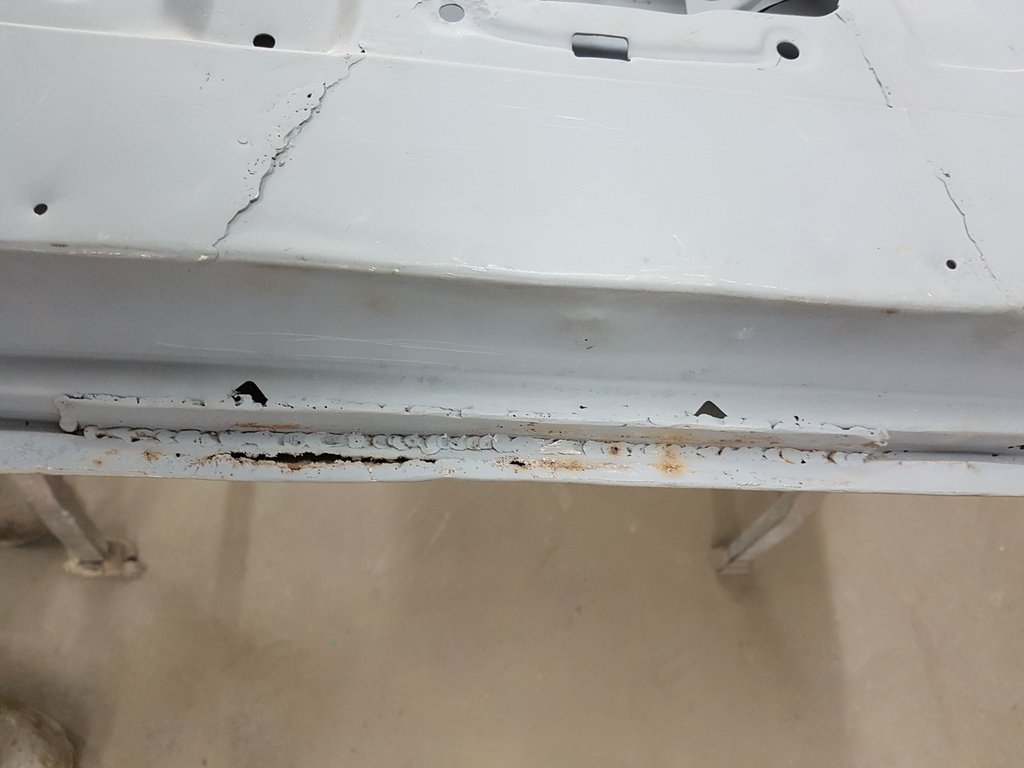 The small pointed upstands are for retaining the door seal that travels all the way around the door 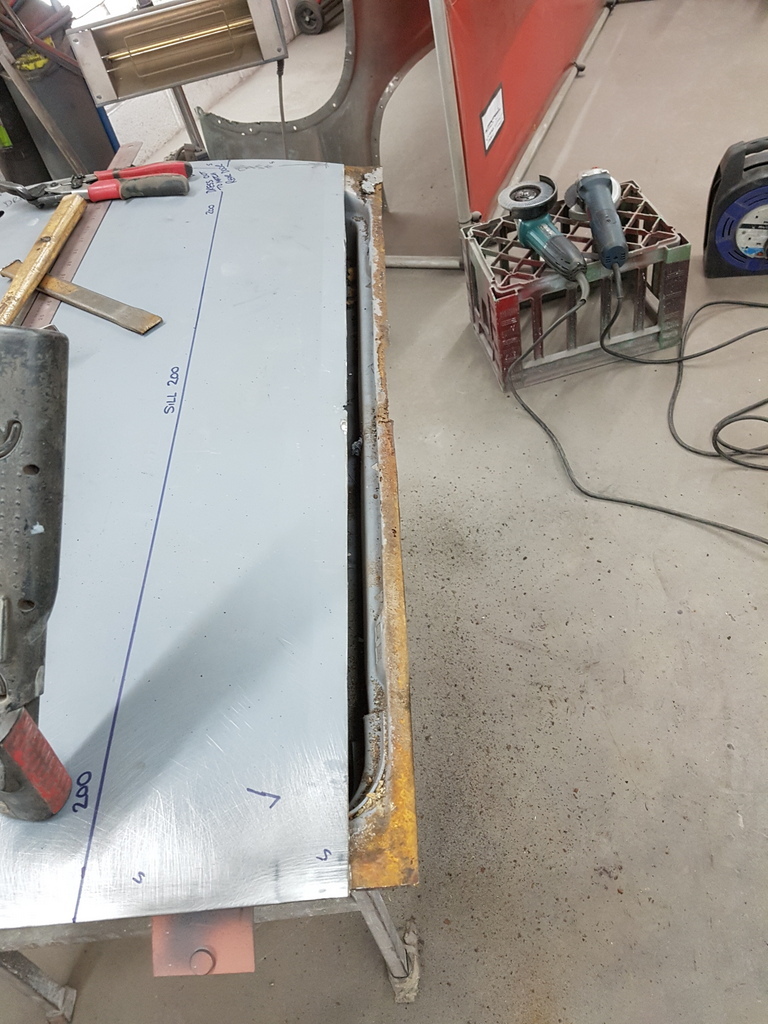 Loose the bottom of the outer skin first 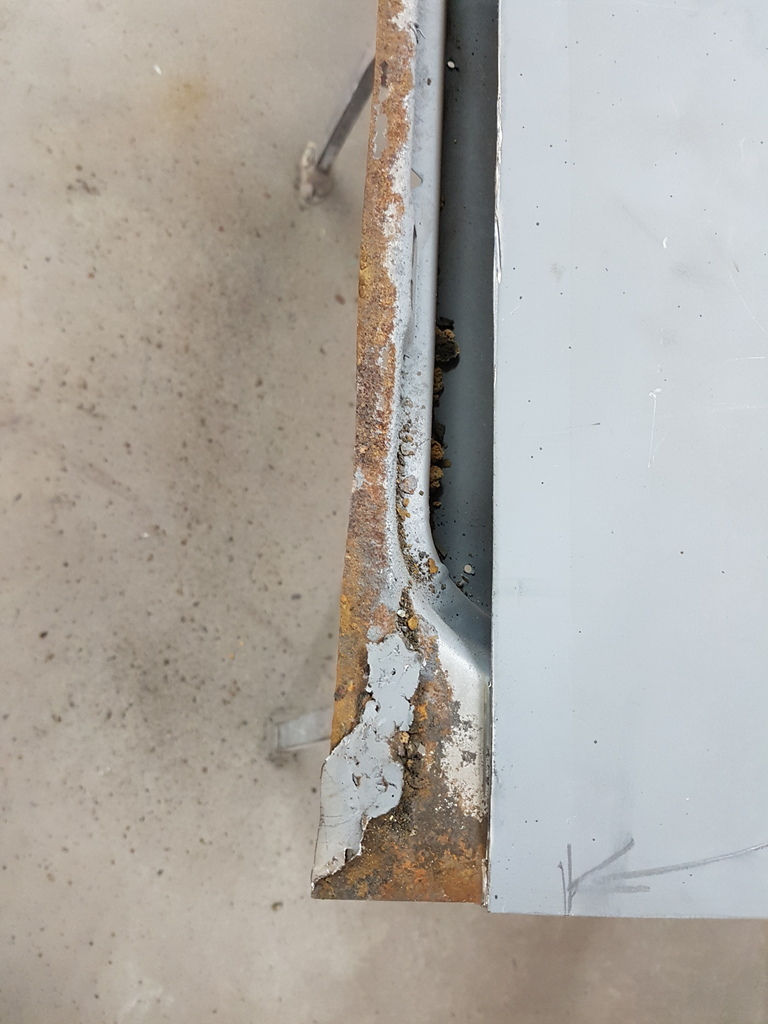 Chop out some weak mess 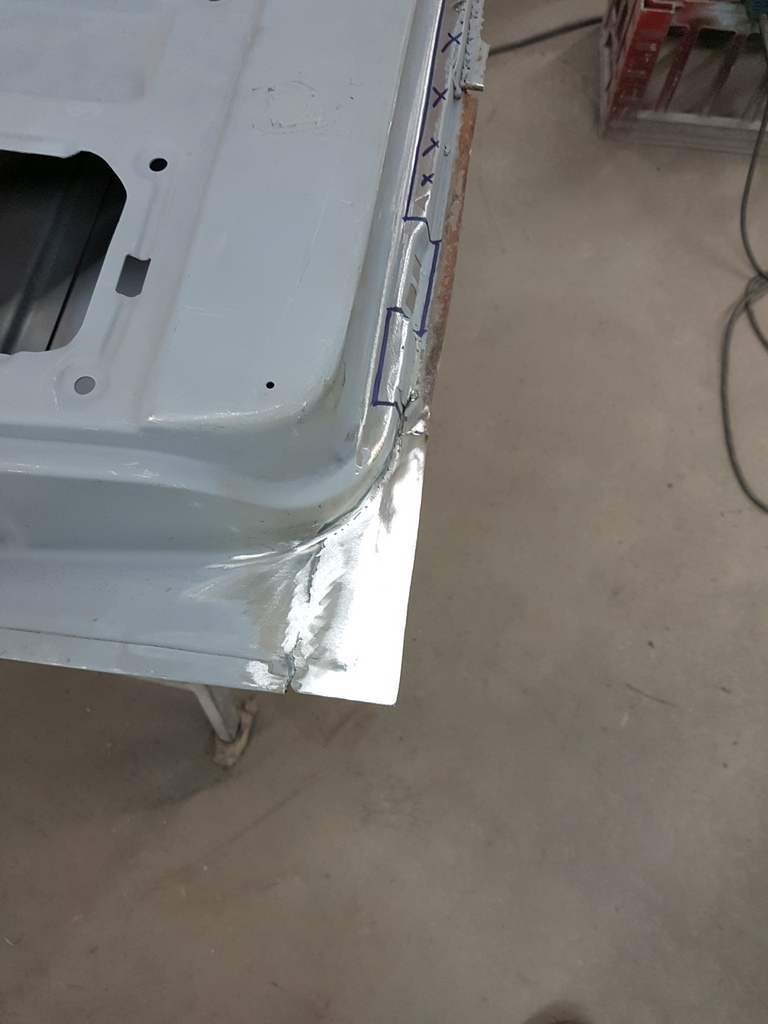 Let a new section in 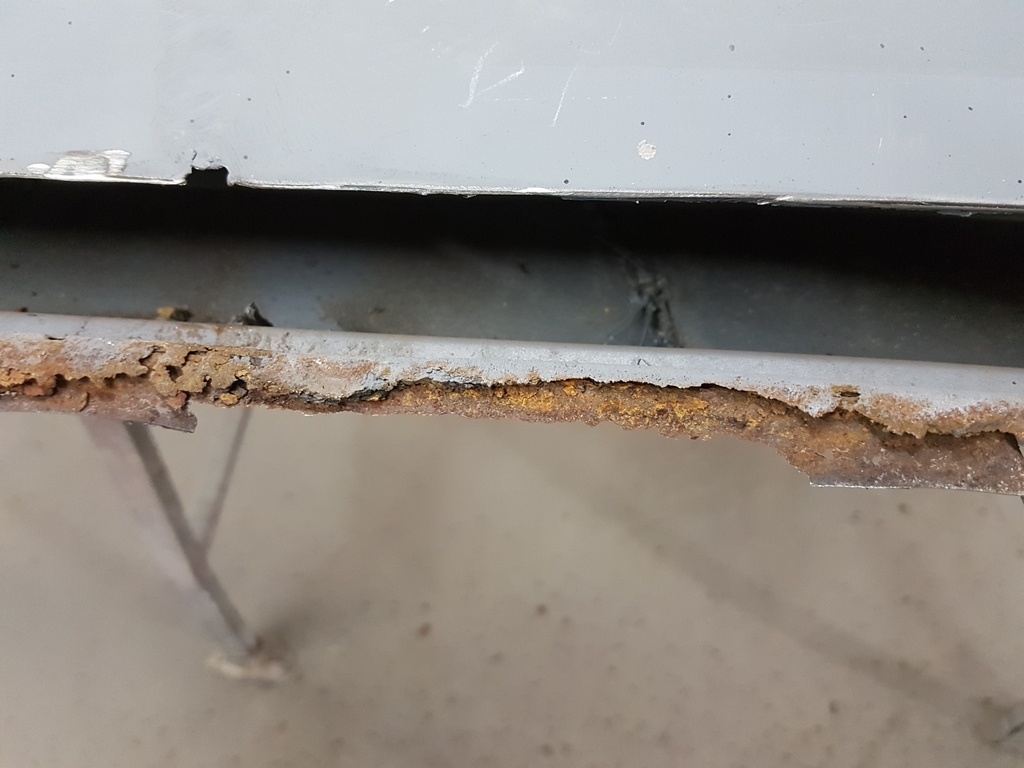 Remove the odd bracket and chop some more of the frame out 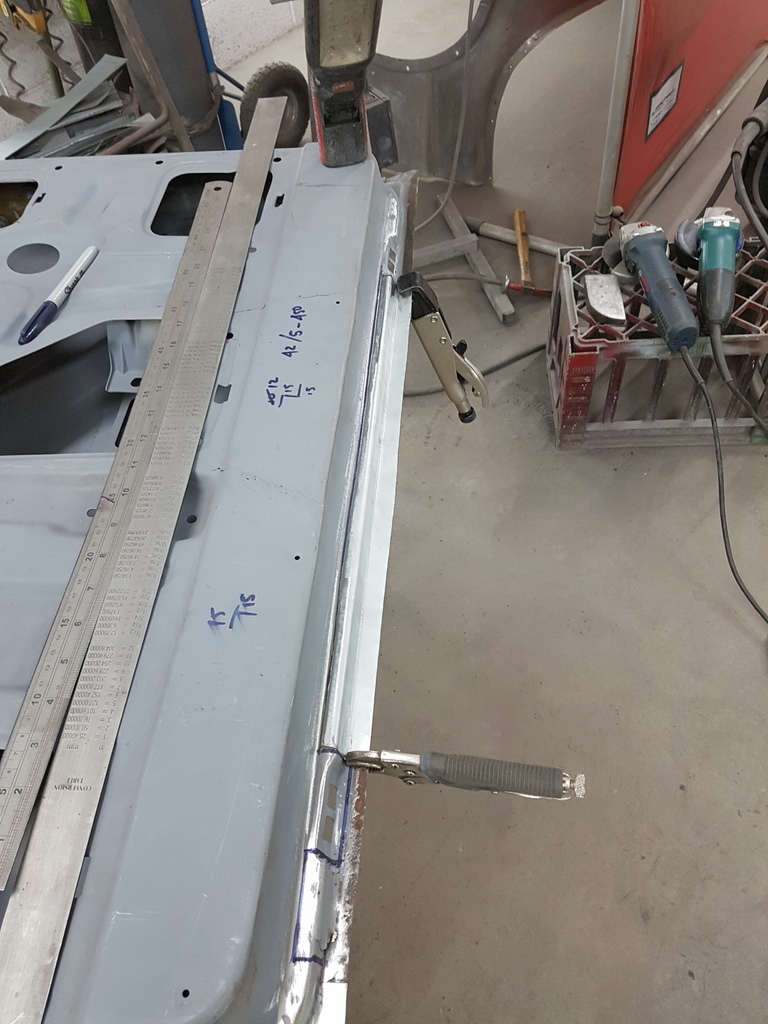 Fresh steel going back in 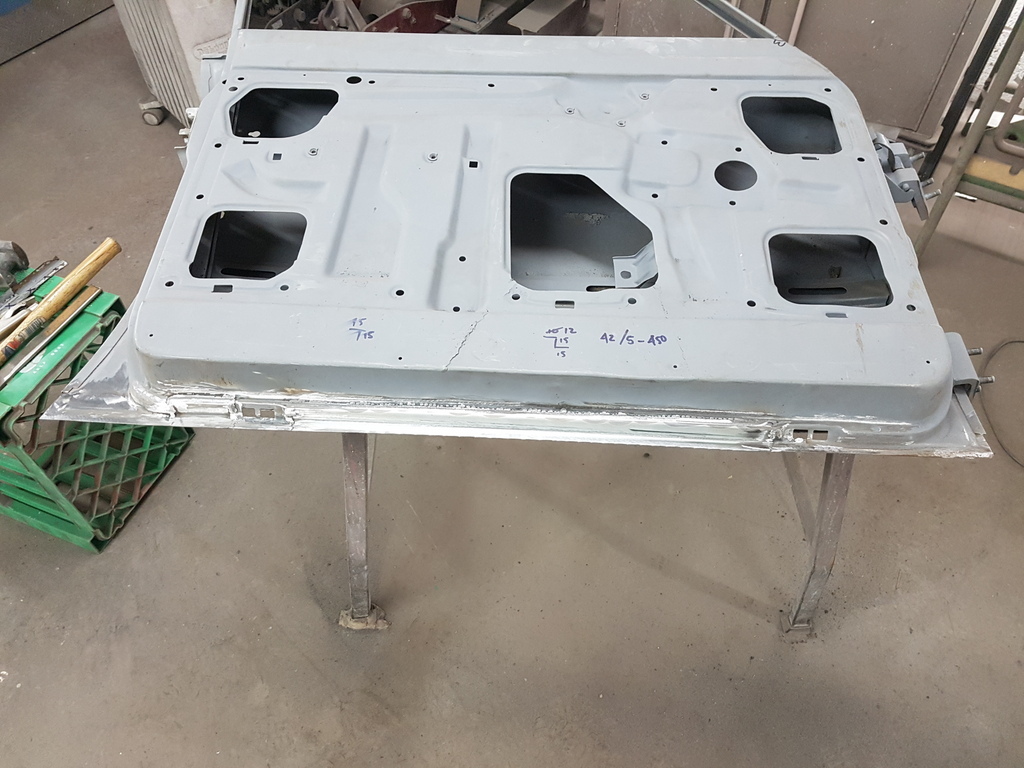 Clean & dress it - then flip the door over 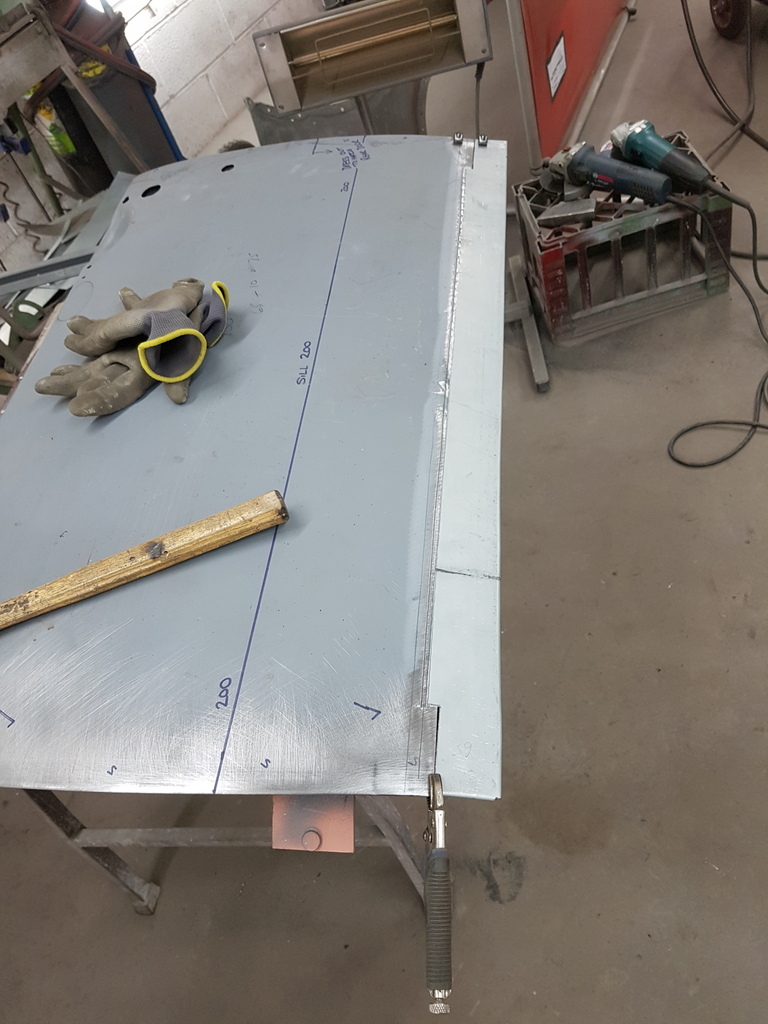 Repair skin checked for fit 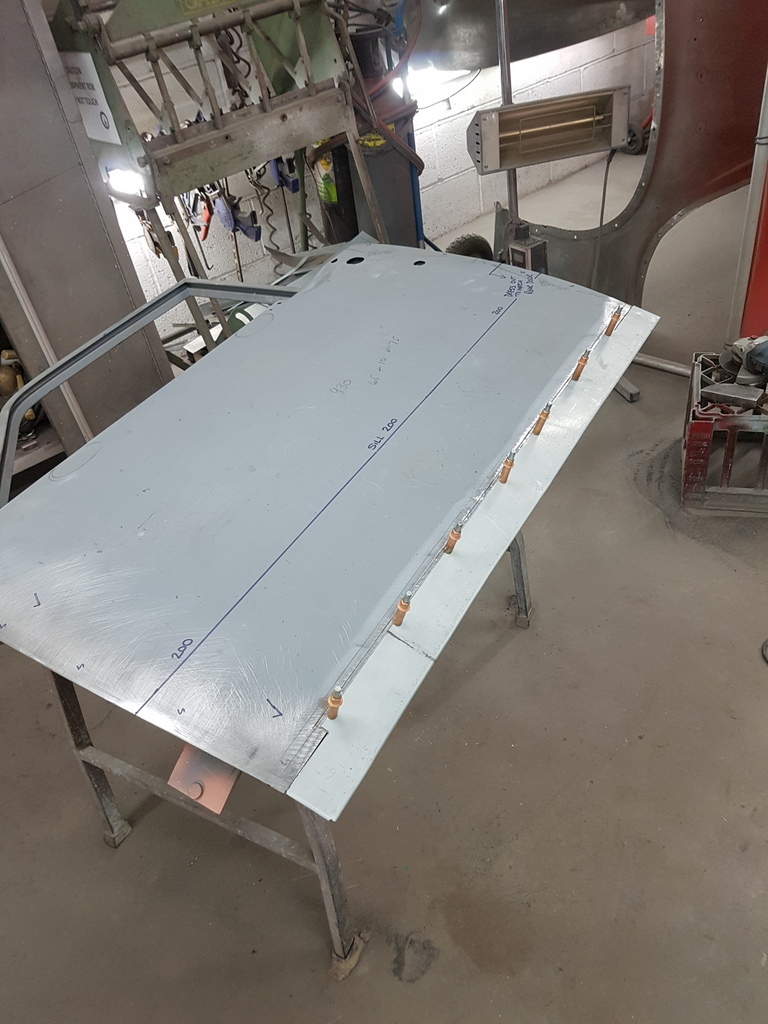 Pinned up 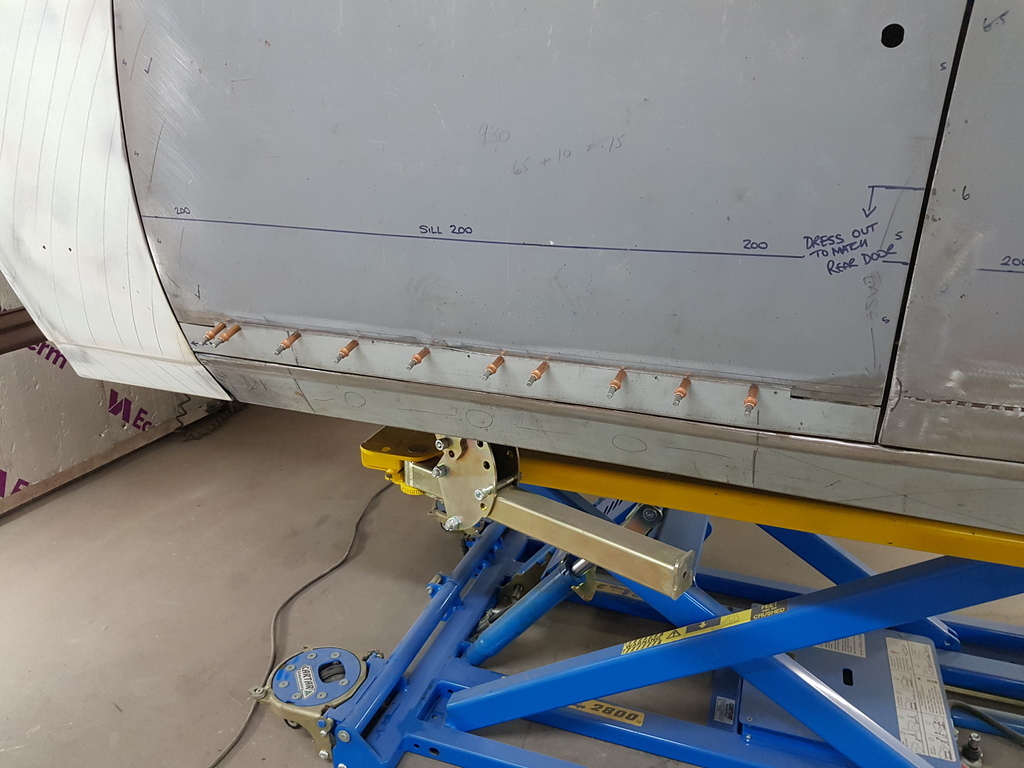 Door rehung - checked for fit / adjustments made 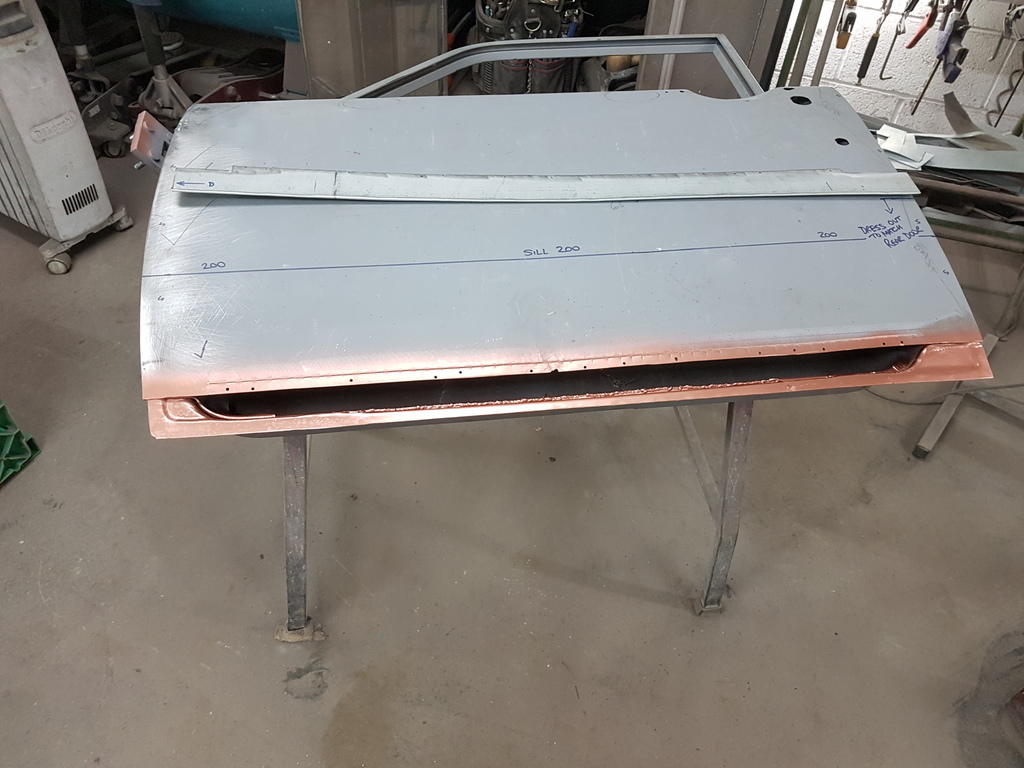 Door back off - skin joggled & weld through primer applied 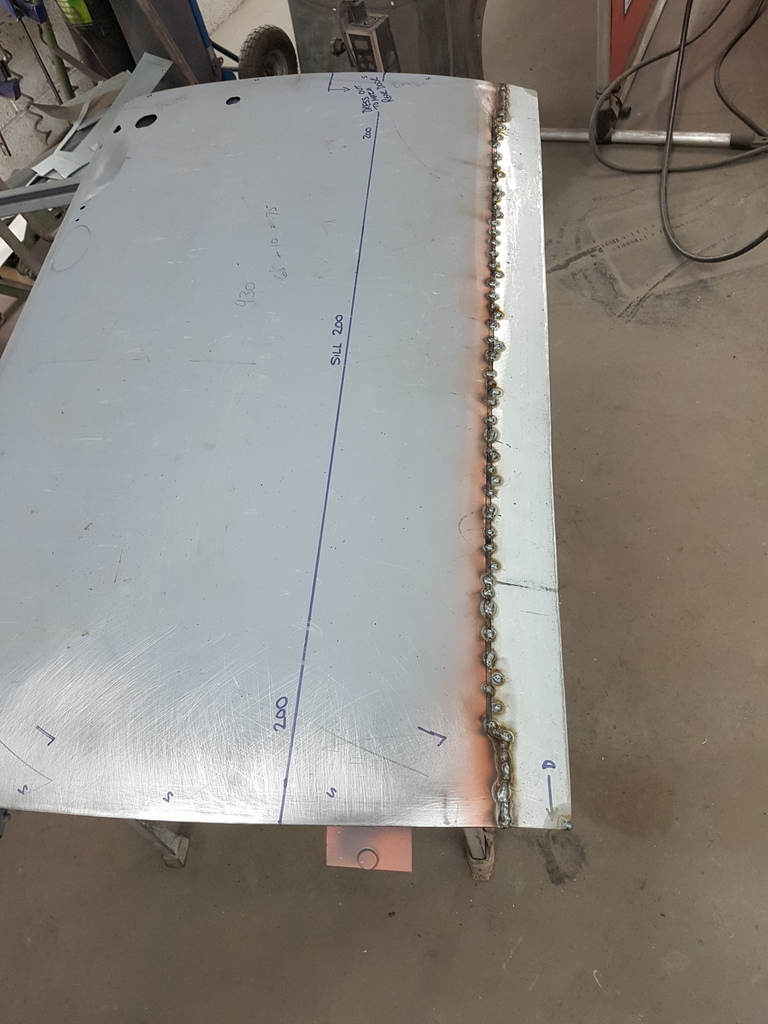 Repair section carefully tacked to the skin 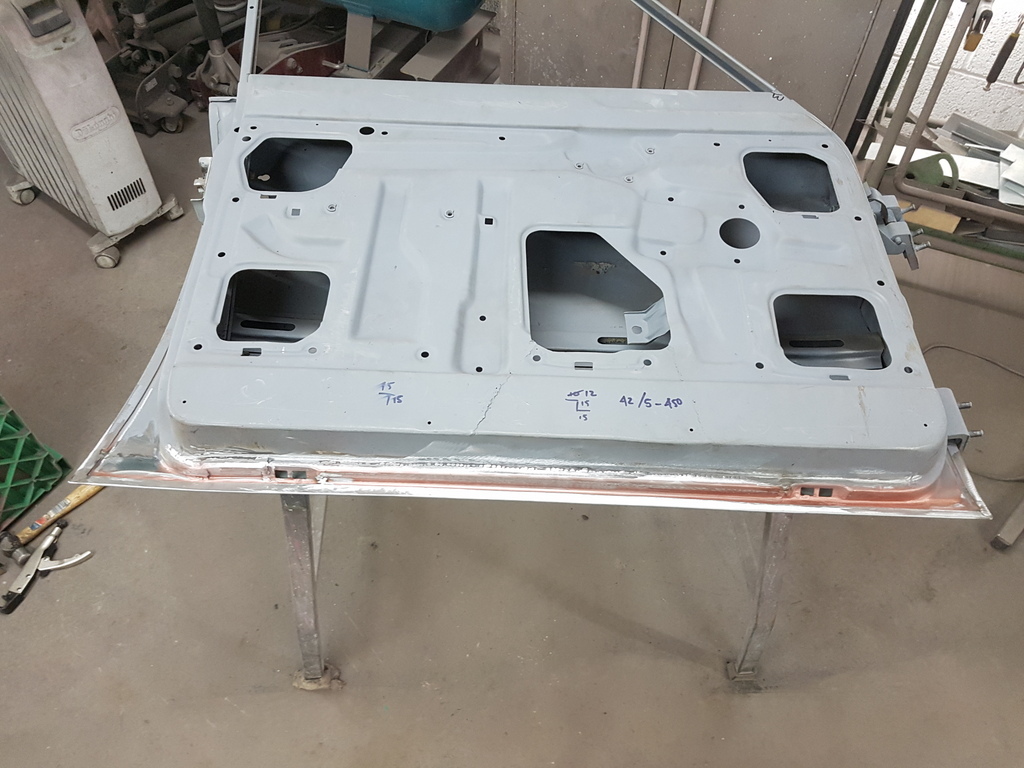 Door turned over again and the flange edges dressed over with the panel hammer & dolly 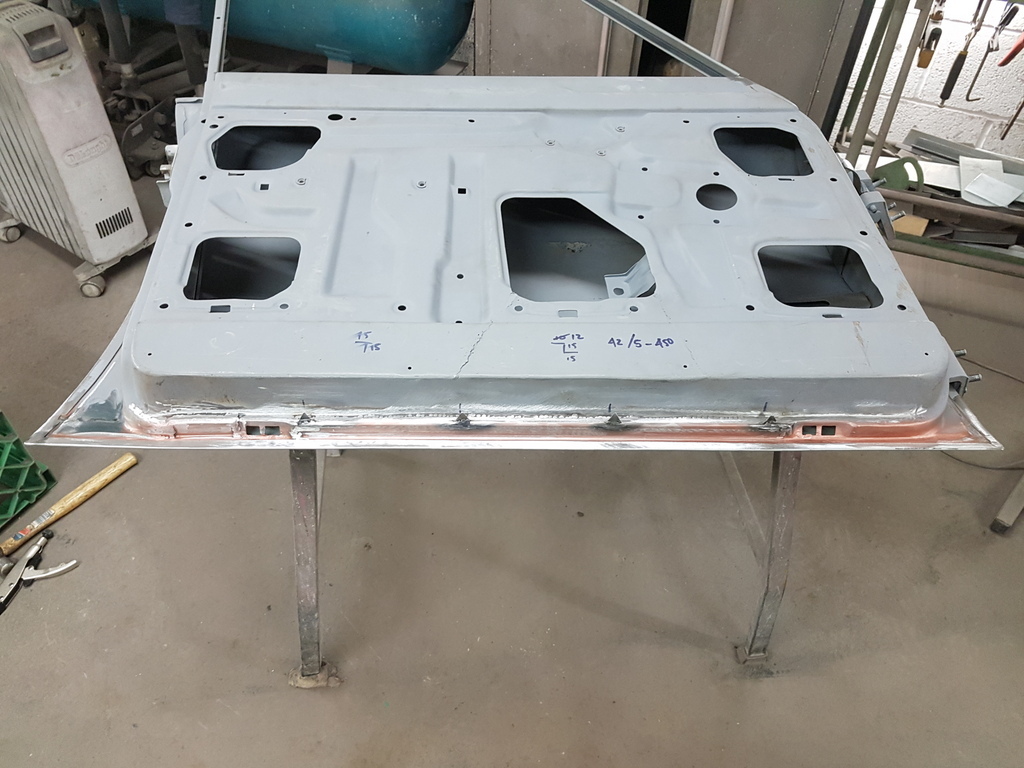 Door seal retaining tabs added 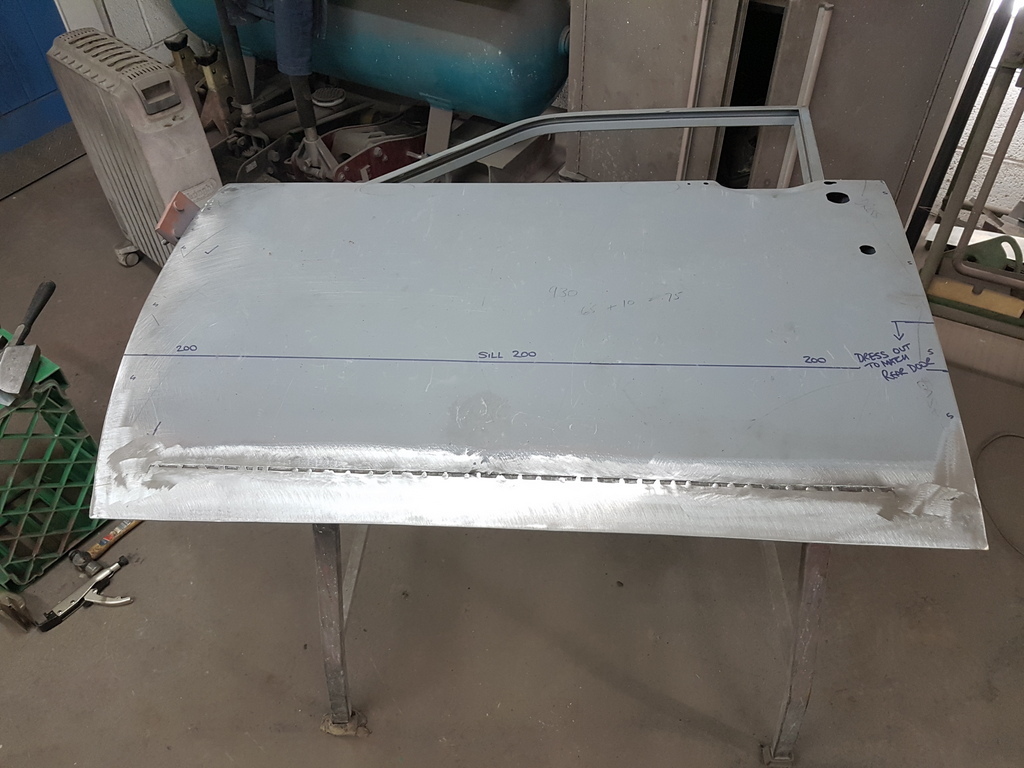 Door face side up - dressed back - job done & ready for rehanging to the car |
| |
Last Edit: Feb 23, 2019 20:23:03 GMT by Deleted
|
|
|
|
|
Feb 22, 2019 20:32:50 GMT
|
|
hinge alignment pins...classic joined up thinking!
|
| |
'80 s1 924 turbo..hibernating
'80 golf gli cabriolet...doing impression of a skip
'97 pug 106 commuter...continuing cheapness making me smile!
firm believer in the k.i.s.s and f.i.s.h principles.
|
|
|
|
|
Feb 23, 2019 19:19:39 GMT
|
Pete forwarded me the images of the car from the first day of his ownership 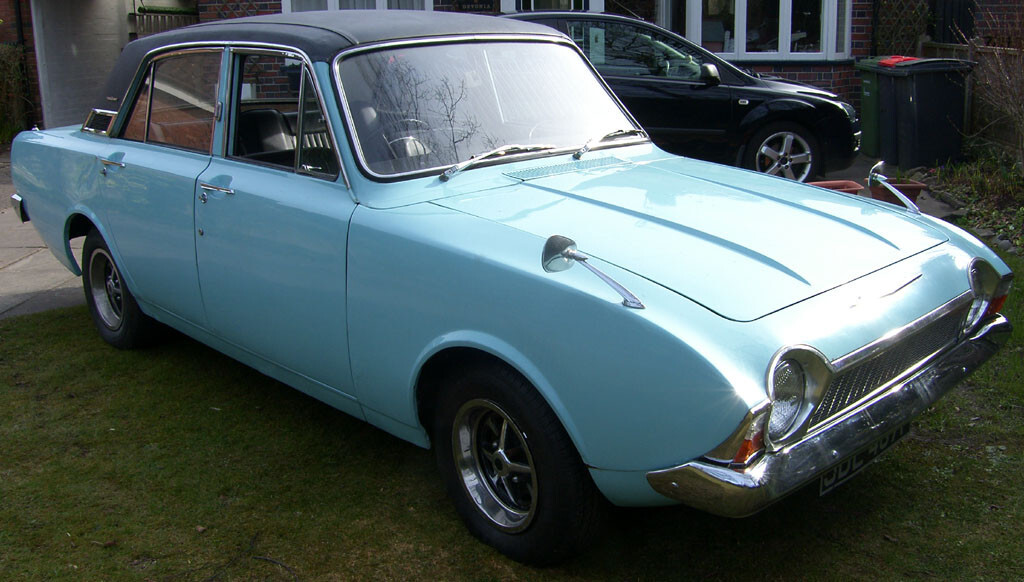 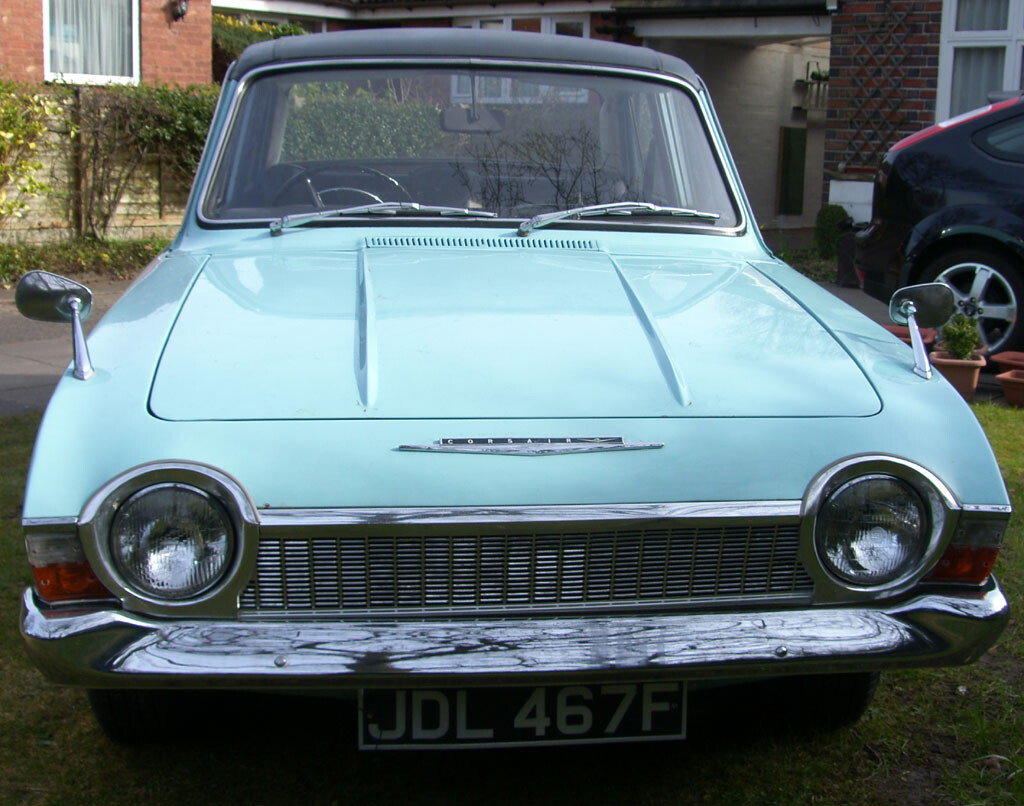 On the upside it's all there and the trim is in reasonably good condition 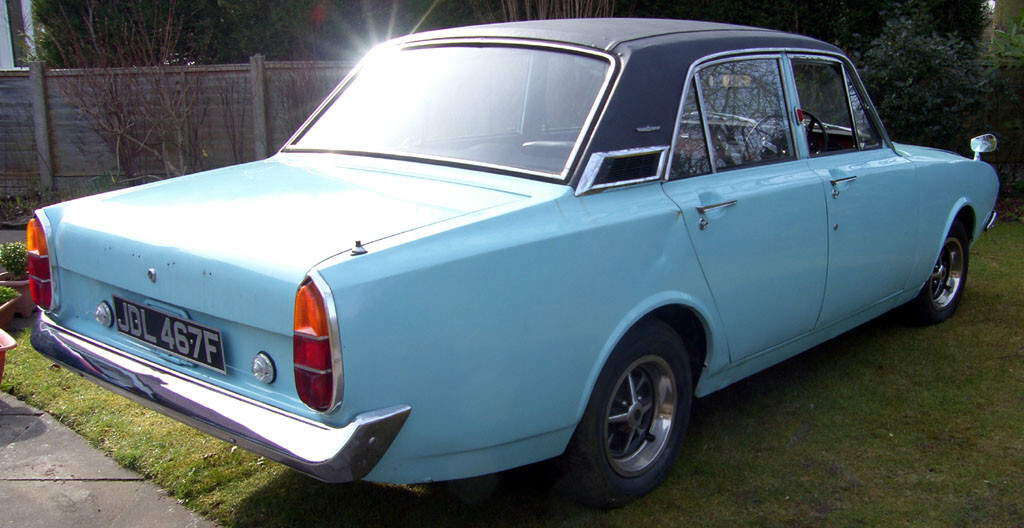 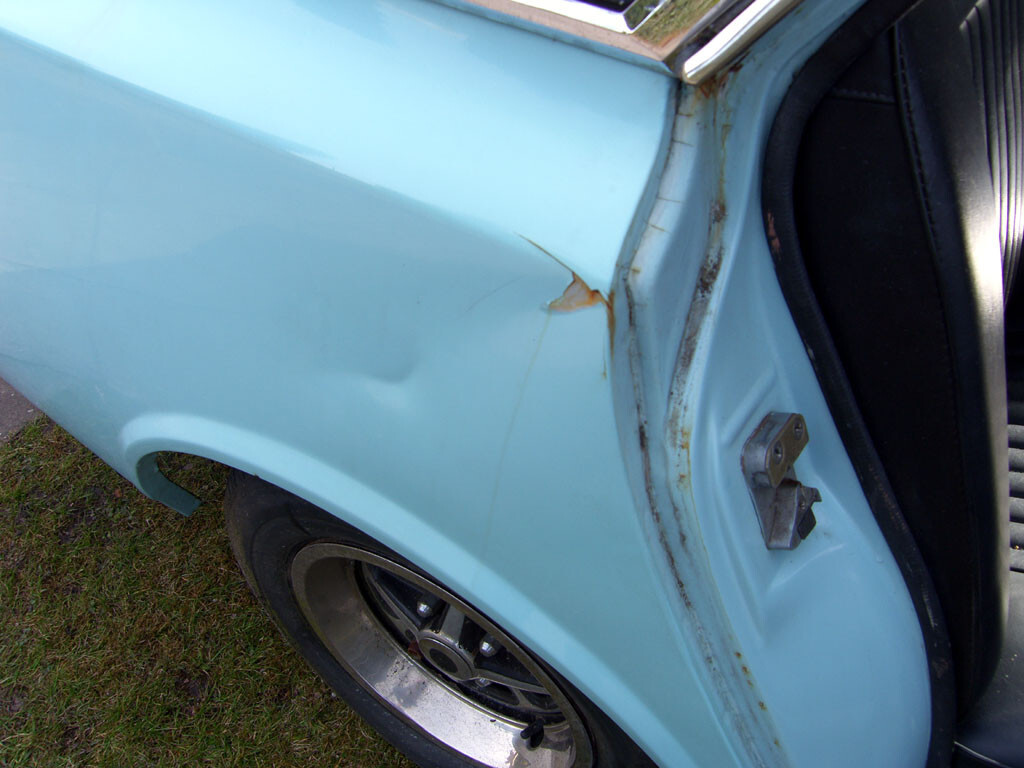 But the body is showing signs of fraying around the edges 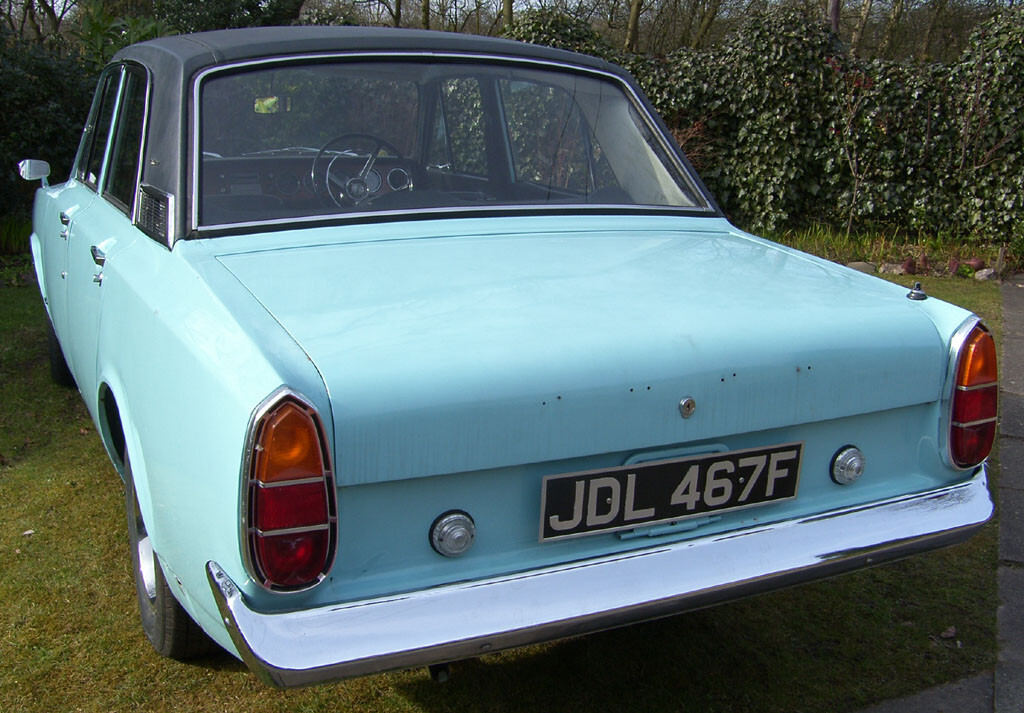 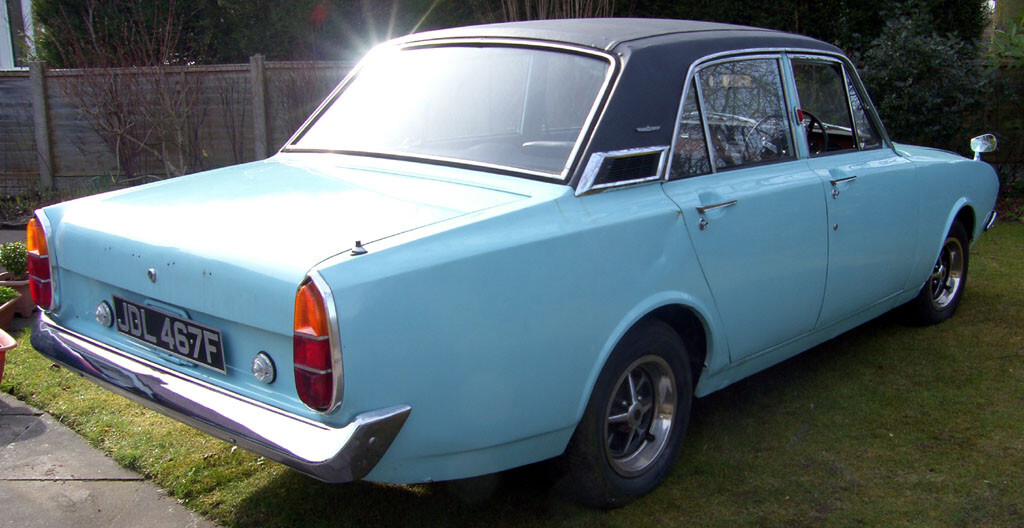 It's come a long way since |
| |
Last Edit: Feb 23, 2019 20:24:19 GMT by Deleted
|
|
|
|
|
Feb 23, 2019 19:48:28 GMT
|
So I said I would cover the abrasives that I use - 'Mirka' is the brand and by no means cheap but then again it is has it's performance and lifespan outweighs that of any other abrasive in the market 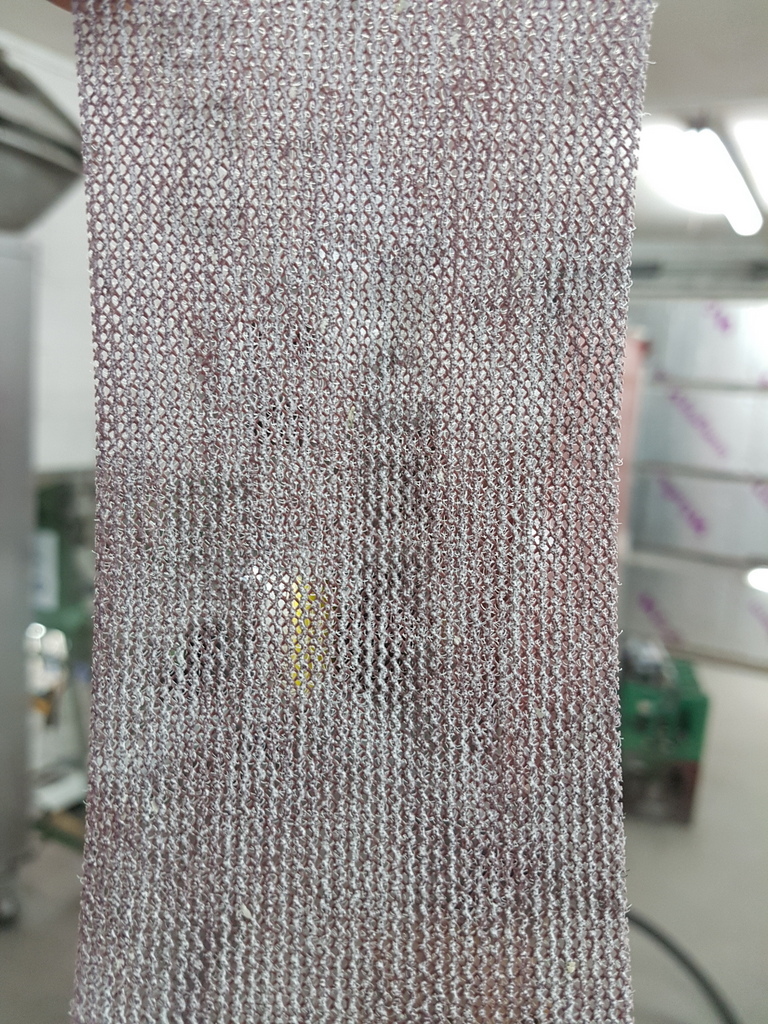 The abrasive is attached to a net type strip 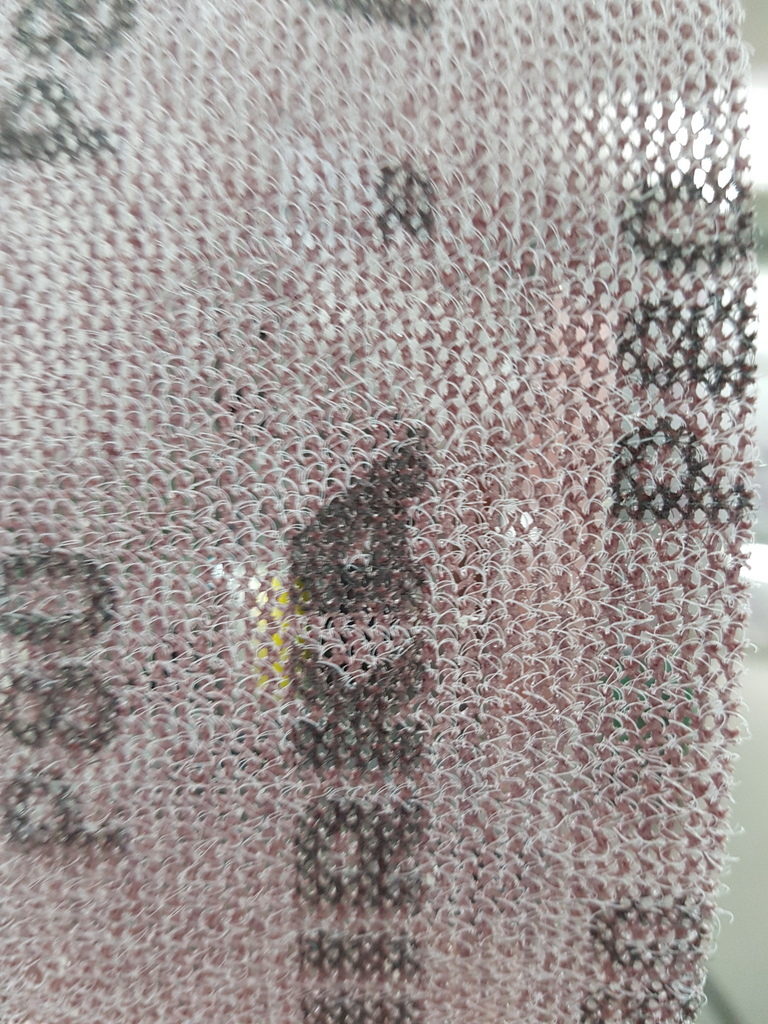 With a velcro type backing 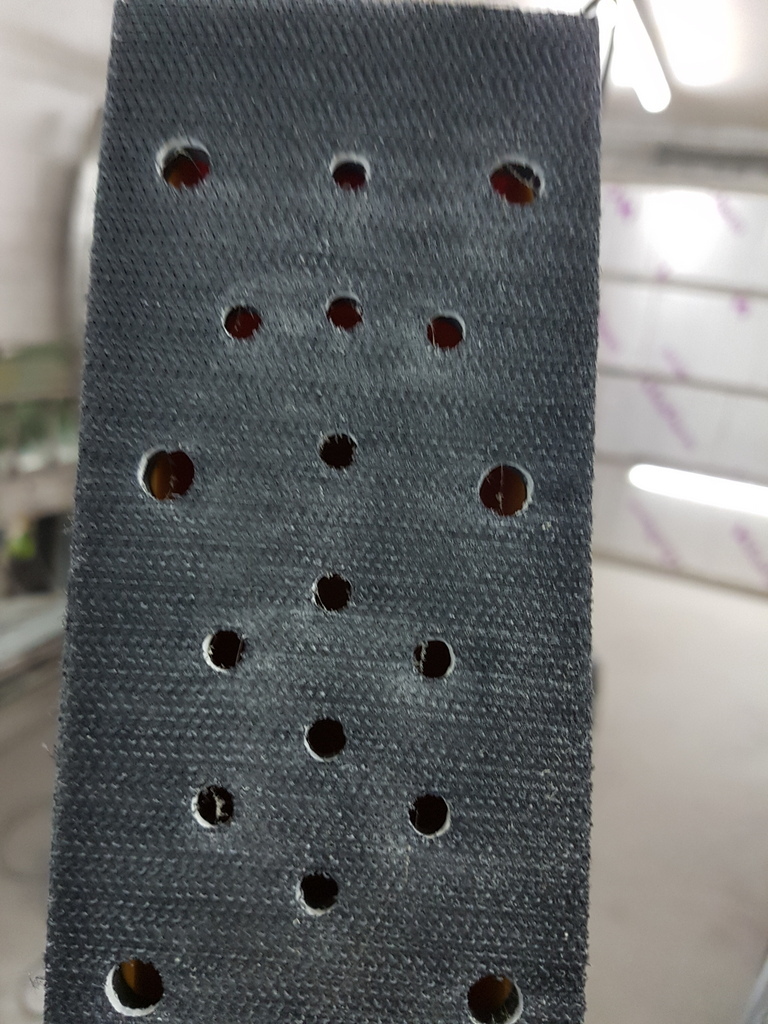 That fastens to whichever size block & abrasive you are using 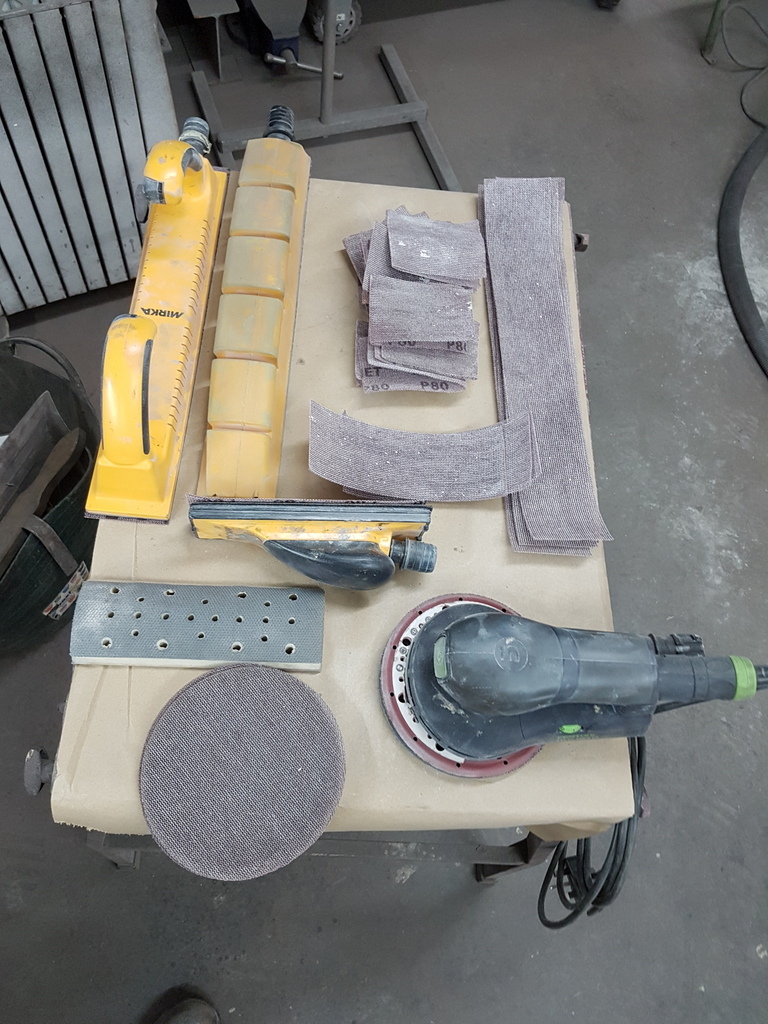 There is a whole range of 70mm wide strips along with the blocks that they fit to - along with DA discs based on the same net format 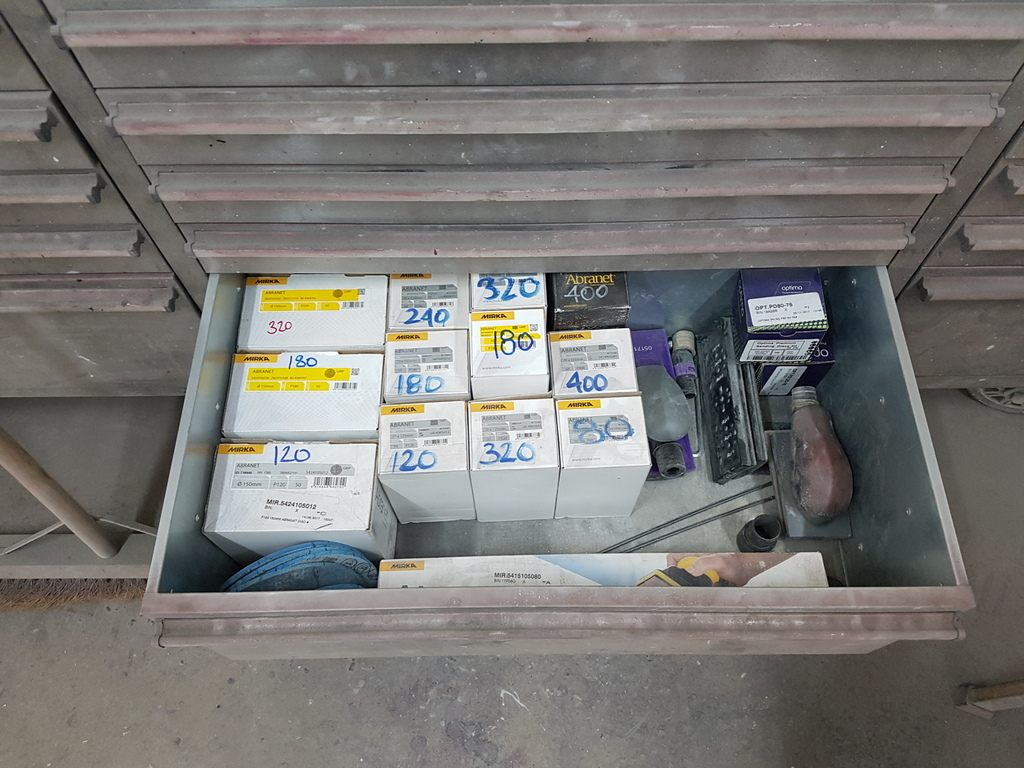 This is working stock then I keep other unopened stock upstairs in the stores 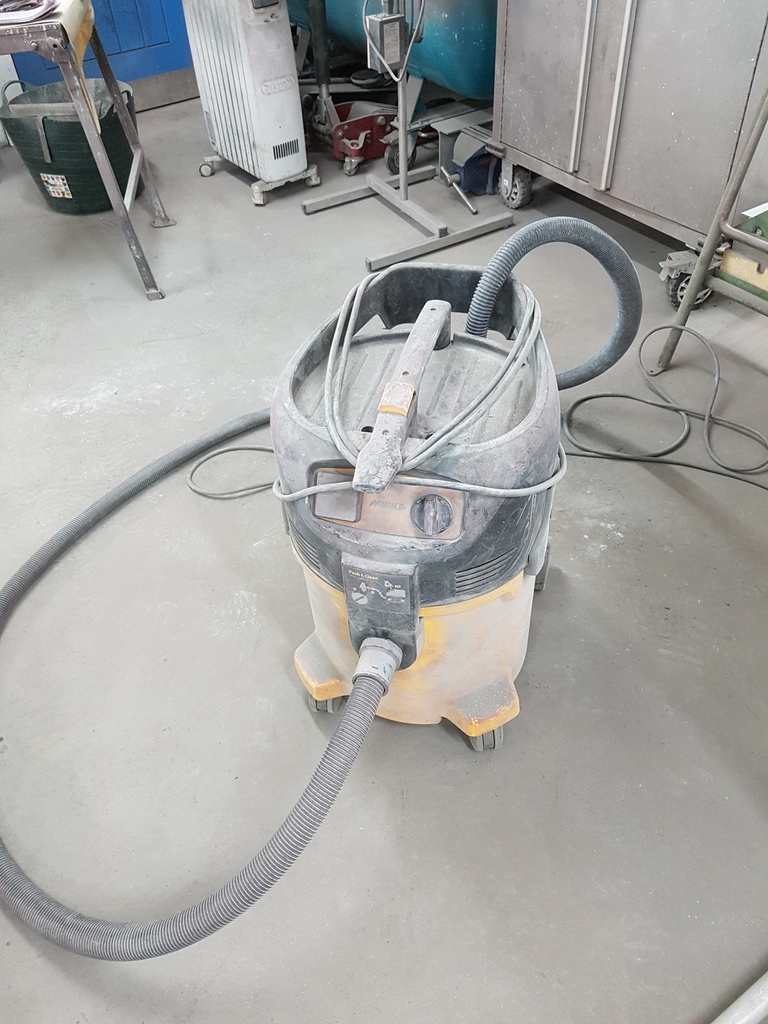 All filler / paint / rust debris from sanding gets sucked through the net of the abrasive and into the hoover which is power sensing so that if I use any of the electrical powered sanders / DA via the hover it automatically starts / stops the vac 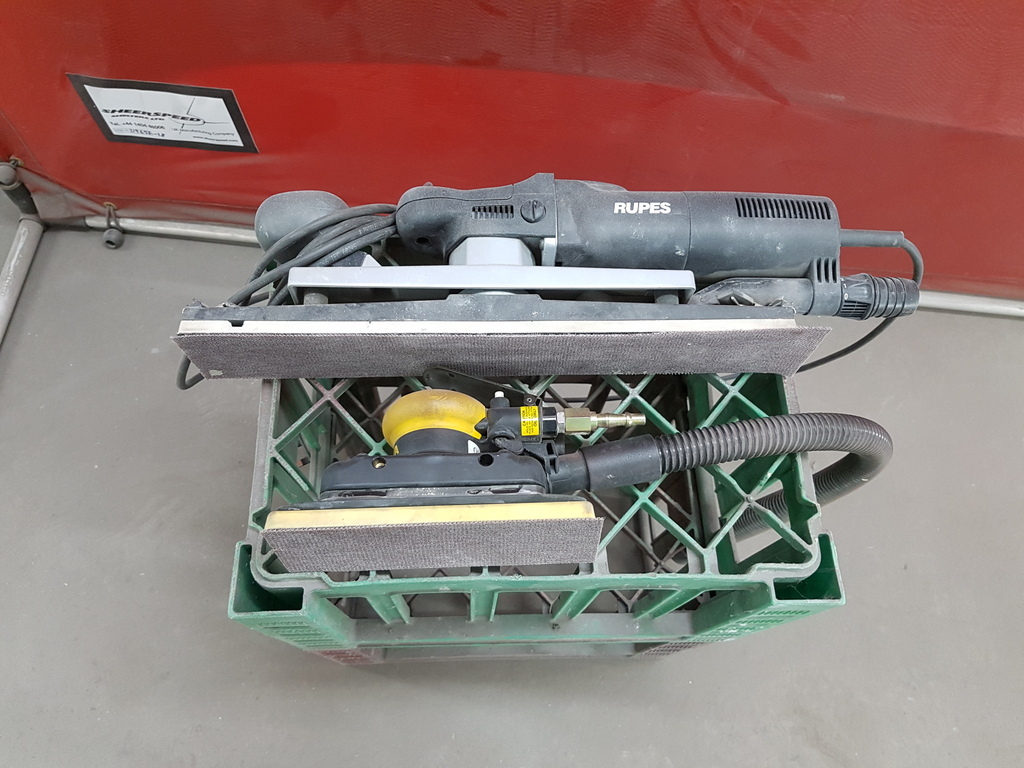 I also have this pair - the smaller one being air powered and takes 70mm x 198mm strips and the larger beast which is electric takes 70mm x 420mm - this one alone is fantastic on wide / long panels like doors & wings but it shoves out a hell of static kick - generated by the osculation pad - gets me every time 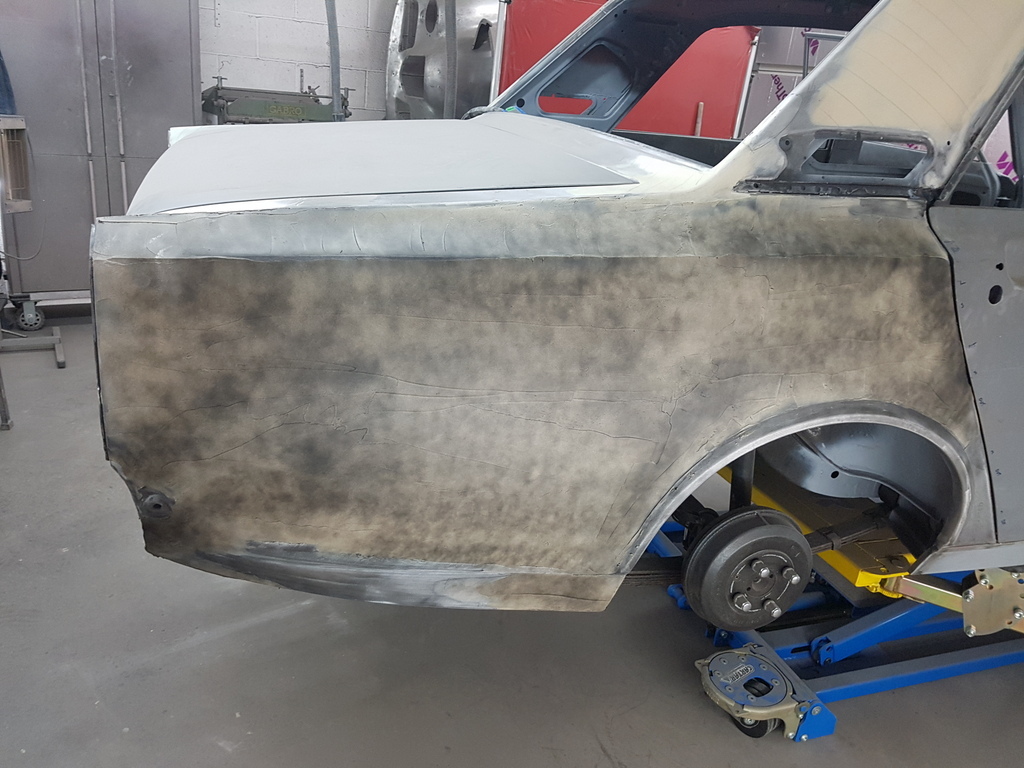 You can work virtually dust free with this kit - it makes a huge difference 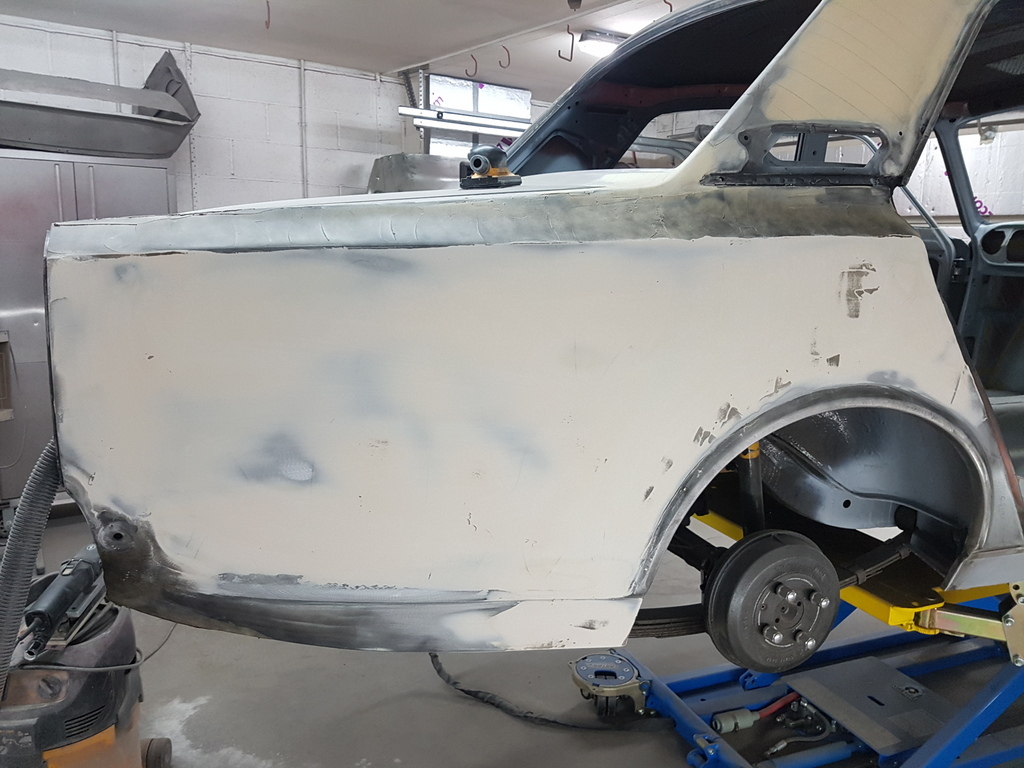 So I was shaping this rear wing with the large flatbed sander for about 20 minutes 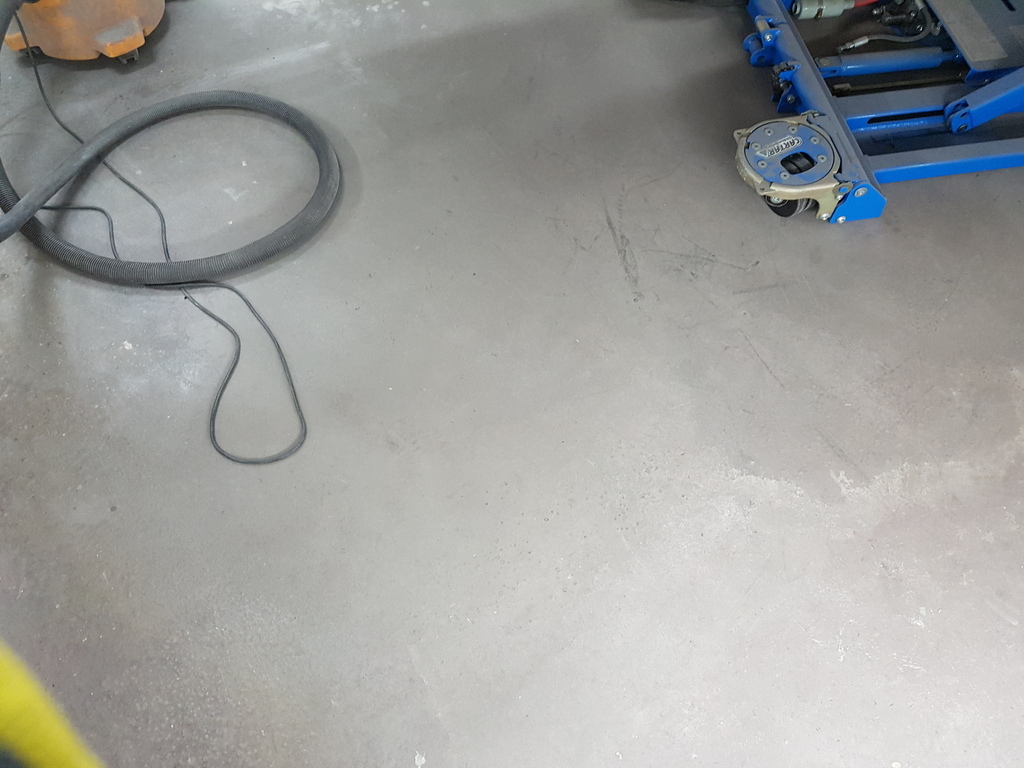 With virtually no dust on the floor - nor on me nor anywhere else other than into the hoover bag - this has another added advantage though - all abrasives work with friction - so has the air gets drawn through the net type abrasive by the hoover it keeps the abrasive cool which in turn prevents clogging hence a longer lifespan of the abrasive - worth every penny in my book - I save the strips that I take off the sanding pads has they wear and use them for any areas that I have to access by hand - it's the only time that I have to wear a dust mask with this abrasive |
| |
Last Edit: Feb 23, 2019 19:52:38 GMT by Deleted
|
|
|
|
|
Feb 23, 2019 20:12:18 GMT
|
|
This is going to be the worlds finest Corsair surely?
|
| |
Fraud owners club member
2003 W211 Mercedes E class
1989 Sierra sapphire
1998 ex bt fiesta van
|
|


