|
|
|
|
|
|
1200 and 1300 have the same ratios, but yes, they are a little more sprightly of the line. You just trade it for high speed cruising, although motorway speeds are do-able.
My gearbox is a '72-ish 1300 box with '66 short axles and tubes and a Superdiff (4 spider gears instead of two) that's been modified for better oil flow. It's managed 93mph at the end of the drag strip, but that engine will turn 7500rpm!
|
| |
1968 Cal Look Beetle - 2007cc motor - 14.45@93mph in full street trim
1970-ish Karmann Beetle cabriolet - project soon to be re-started.
1986 Scirocco - big plans, one day!
|
|
|
|
luckyseven
Posted a lot
   Owning sneering dismissive pedantry since 1970
Posts: 3,839
Club RR Member Number: 45
|
|
Oct 24, 2018 15:51:50 GMT
|
Hmmm. *whispers* but if I were to sell my RX-7 I could have an epic engine of utter epicness from the proceeds...  *thought bubble* Anyhooo, so we come to the inaugural meeting of the MWVW Club. Or Milford, Worthing and Wormley to give it it's full title. And yes, I know that's not enough "W"s, but it was getting silly. It sounds a lot grander than it is, anyway. Basically it's three mates who happened to all end up with Beetles at the same time. Lewis ( dex66 of this parish) has had his Dexter for a long time. Lewis is a man of few words, but has a perfunctory Dex thread here forum.retro-rides.org/thread/203749/1966-vw-beetle-cal. You met him before in this other thread, amongst others forum.retro-rides.org/thread/203522/volksworld-show-pics when we went up to the season-opener Volksworld show. While we were there, Ada fell a bit for a stockish and unassuming '67 (one-year only crossover model straddling the best bits of old and new(ish) Beetles). By the time we went to the Dubs In The Park show (linked to in a previous post of this 'ere thread), he'd bought it. And christened it "Lenny" for no reason that's easily understood. We called it "poppodom beige". Lenny has a thread here if you'd like to know more forum.retro-rides.org/thread/206134/lenny-poppadom-beige-vw-beetleRight, so given that we all had Beetles and Ada's was the slowest and worst at hills, despite having 100 very real more CCs than my Dolly (I only mention it because it's funny), it was time for a meetup. Lenny was also depressingly stock and needed stuff doing to amend this. And what's the first thing we do to make our cars less stock and abject, boys and girls? Yep, wheels and lows. Innit 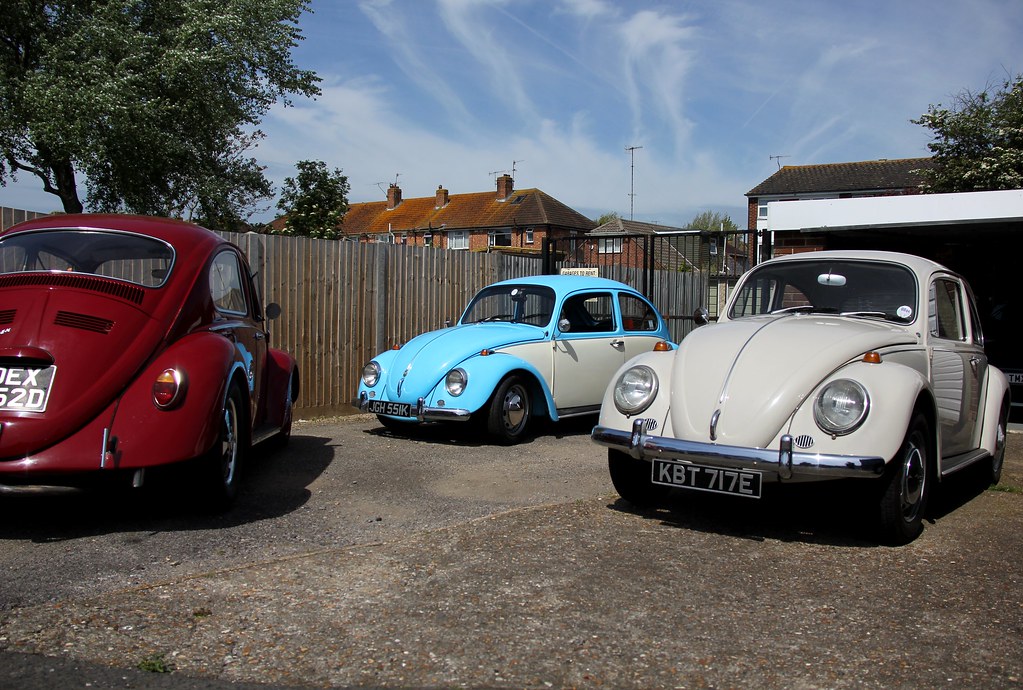 Trio Trio by Nick Liassides, on Flickr If ever a photo demonstrated the insane and unforgiveable standard ride height of a Beetle... Anyway, th'Boy Ada had ordered in a load of stuff to amend Lenny with, but some was wrong and some more bits were needed so the first order of the day was... 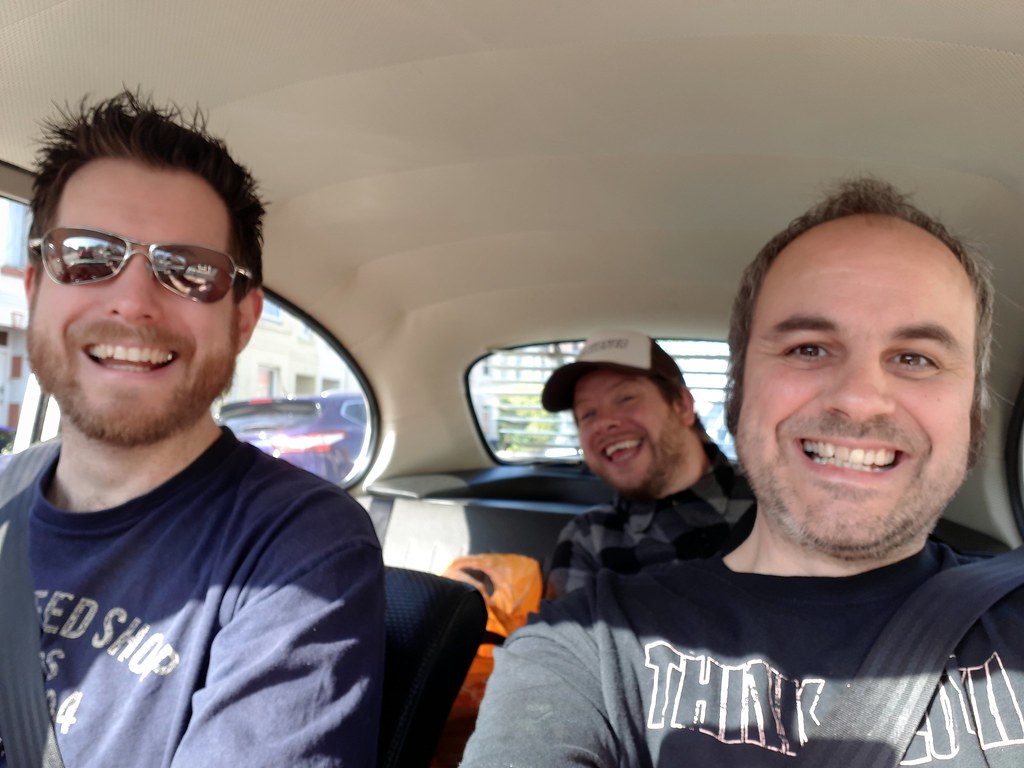 riding selfie riding selfie by Nick Liassides, on Flickr ROAD TRIP!  *ahem*. I think that's actually only the second ever selfie I've taken  You can see why. It wasn't the most epic of road trips, but at least it involved soss an hegg McMuffins and ended up at *choral paean* the Mecca of all things VW 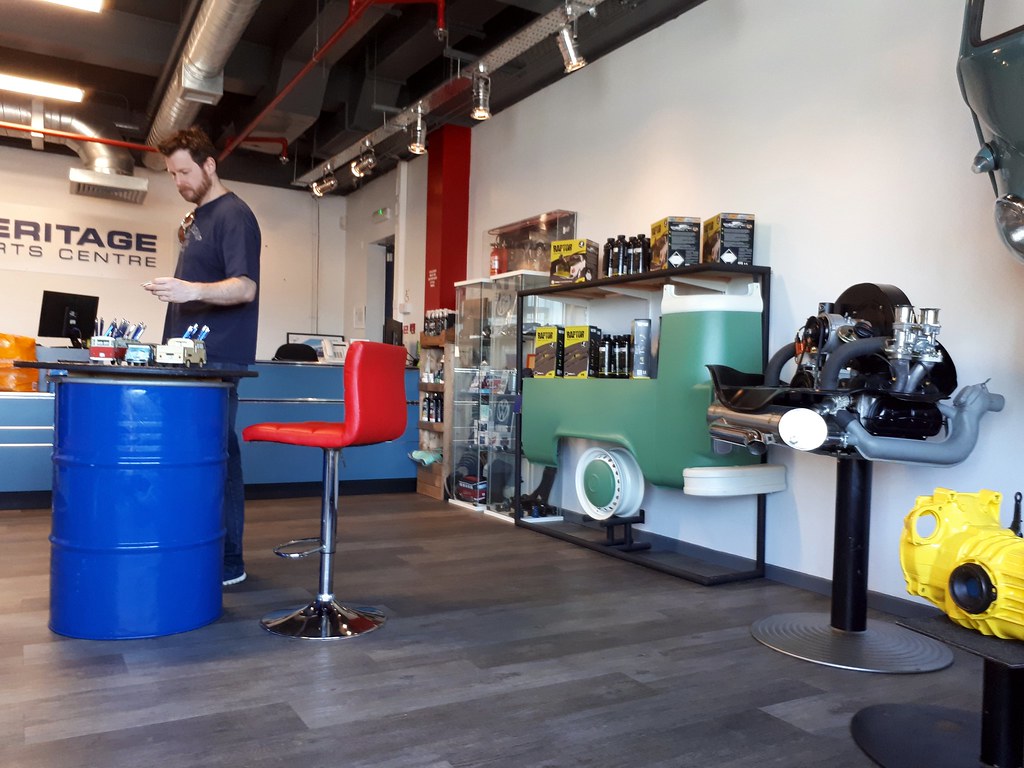 messages after the beep messages after the beep by Nick Liassides, on Flickr I still can't get used to calling it Heritage Parts Centre. Especially not when the website still redirects from "VW Heritage". We sat about while Adam tried to remember what he'd come for, and Lewis pondered the Wall of Wheels 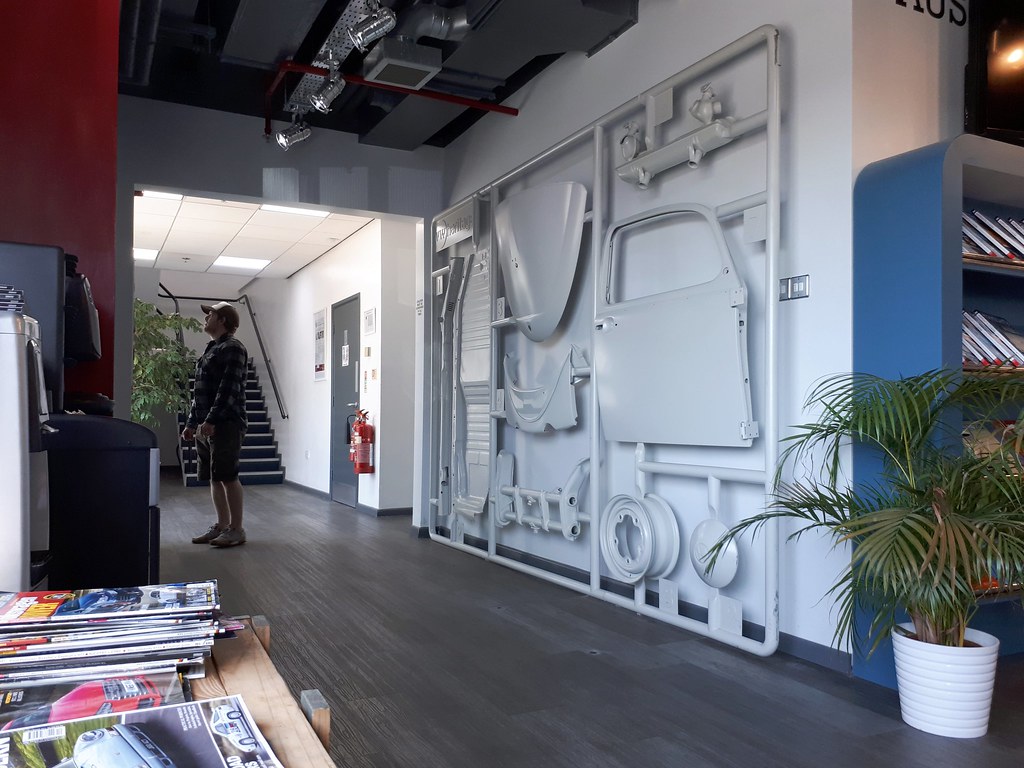 Heritage worship Heritage worship by Nick Liassides, on Flickr Dunno why, Dex already wore what's generally taken to be the acme of Beetle wheels in the shape of detailed Fuchs. With genuine Porky centre caps, no less  Stuttgart original Stuttgart original by Nick Liassides, on Flickr Maybe the fact he's since changed to gas burners might explain it  Sorted for parts and shiz, we returned to our little garage community to get stuck in. Well, Adam and Lewis got stuck in, I mostly mooched around being useless and taking random "art" photos of pointless things 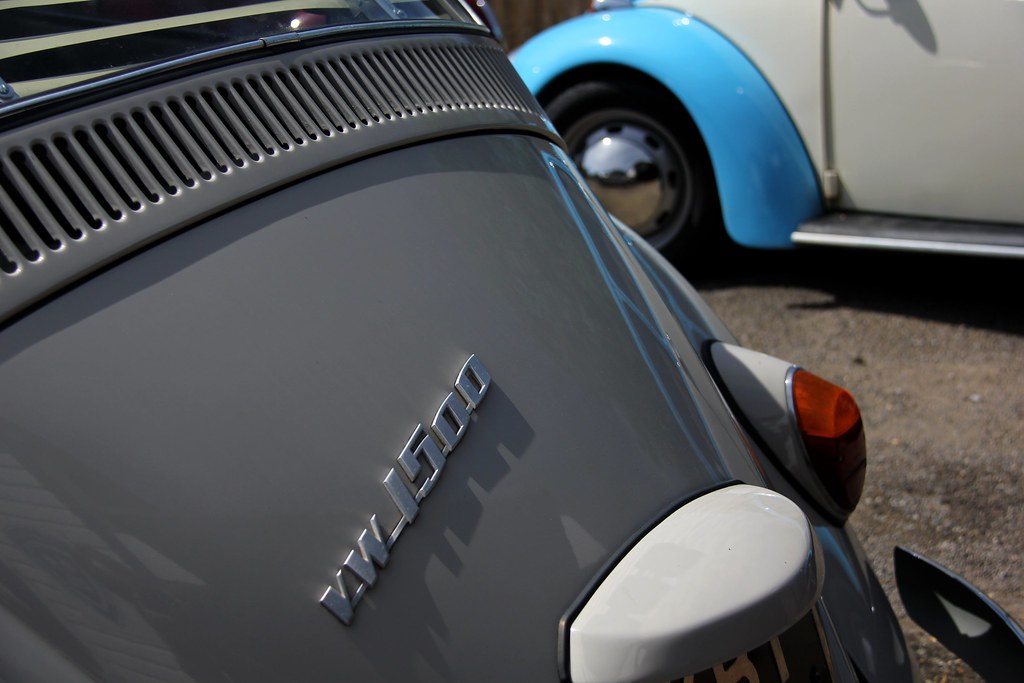 1500 reasons for fun 1500 reasons for fun by Nick Liassides, on Flickr Usually cherished as one of the most desirable combinations of car and engine, the '67 1500 Beetle rejuvenated VWs flagging appeal like no other. The engine was great, the car addressed many of the flaws long-time owners of older cars complained about. Sadly, Lenny no longer has his original 1500 lump, having a replacement 1300 that's been "thrown in" there (not my words). Lovely dash though 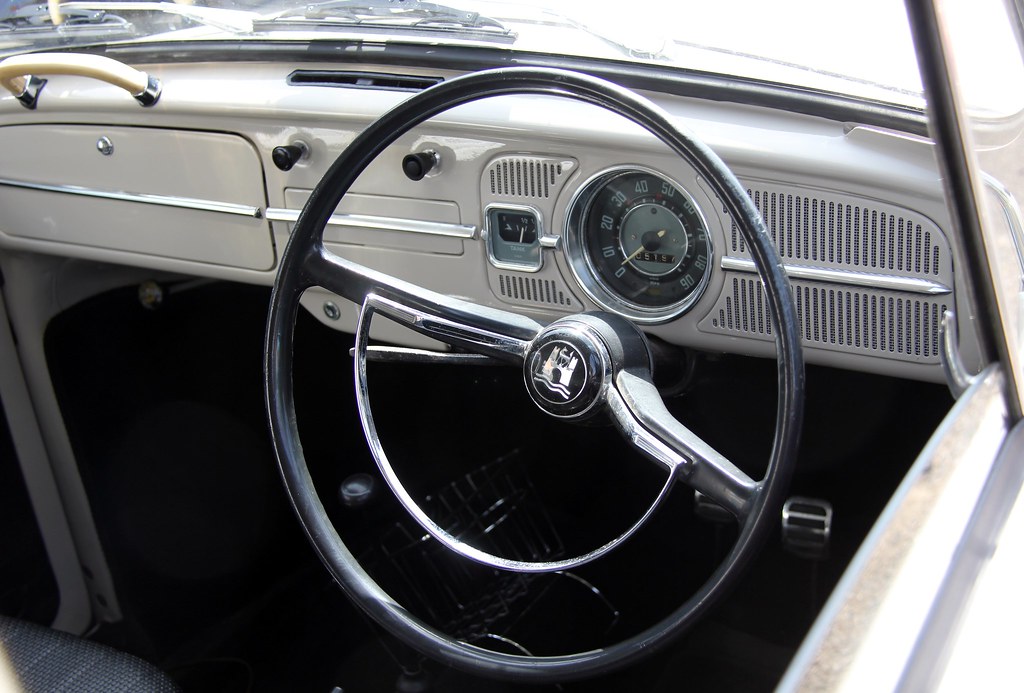 Lenny dash Lenny dash by Nick Liassides, on Flickr 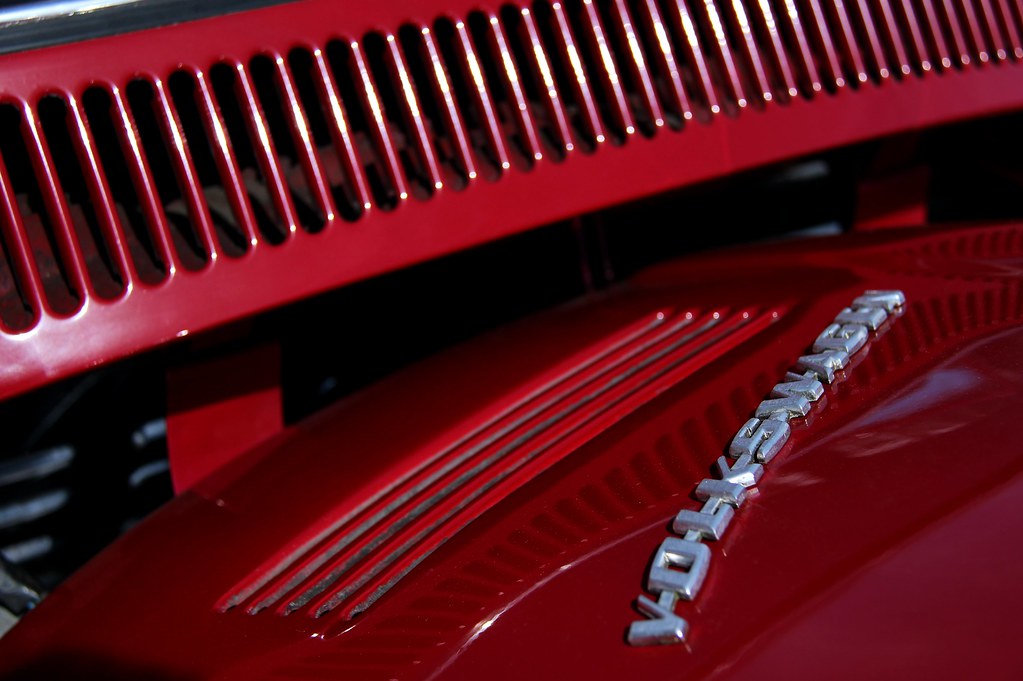 Dex louvres Dex louvres by Nick Liassides, on Flickr Dex has a lot more fun in his rear end than the other two put together. 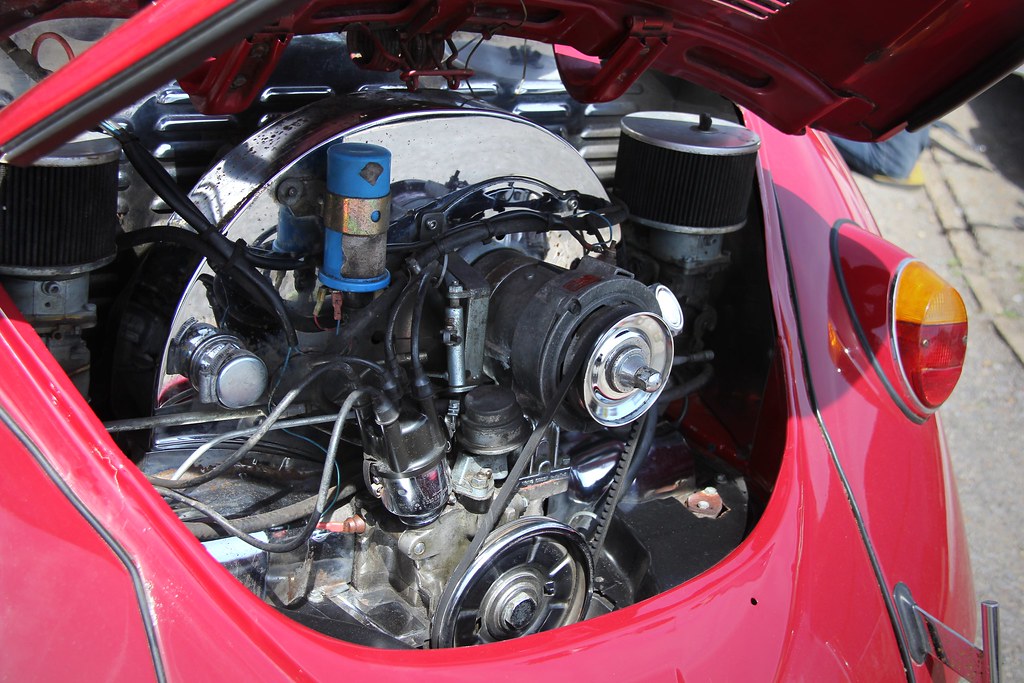 Dex bay Dex bay by Nick Liassides, on Flickr On this particular day, Lewis was mainly about keeping an eye on all that extra twin-carbed 1700 grunt by fitting a tach he'd picked up. And a replacement steering wheel, dunno why. Not much wrong with the old one. 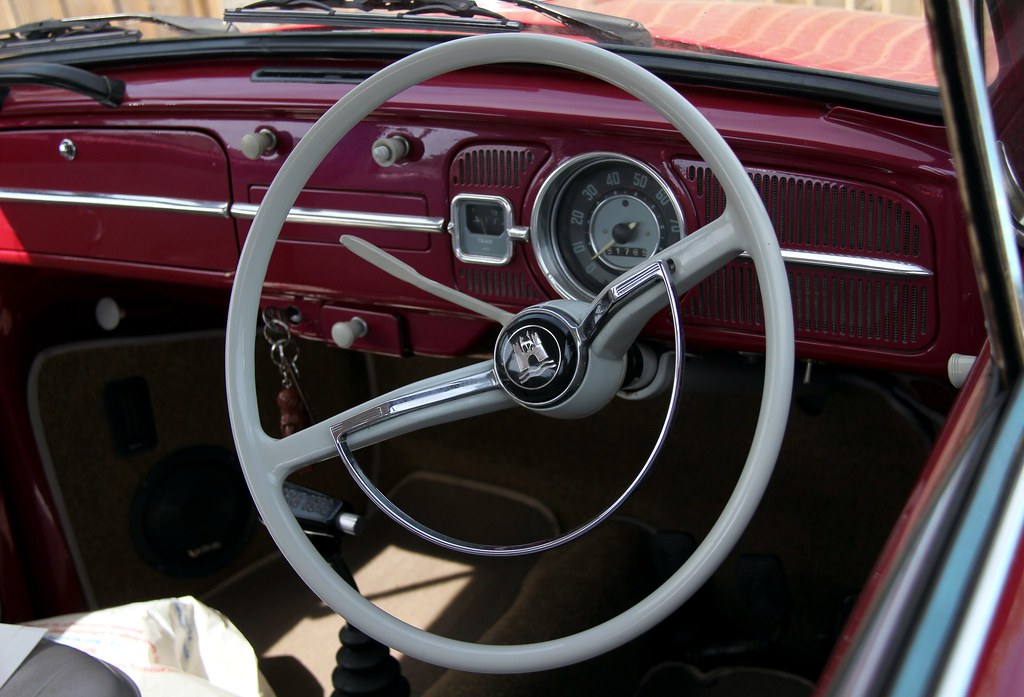 Dexters OG wheel Dexters OG wheel by Nick Liassides, on Flickr so while he got on with pretending to work really hard on wiring and stuff (which he does for a living, basically, so was fooling nobody)... 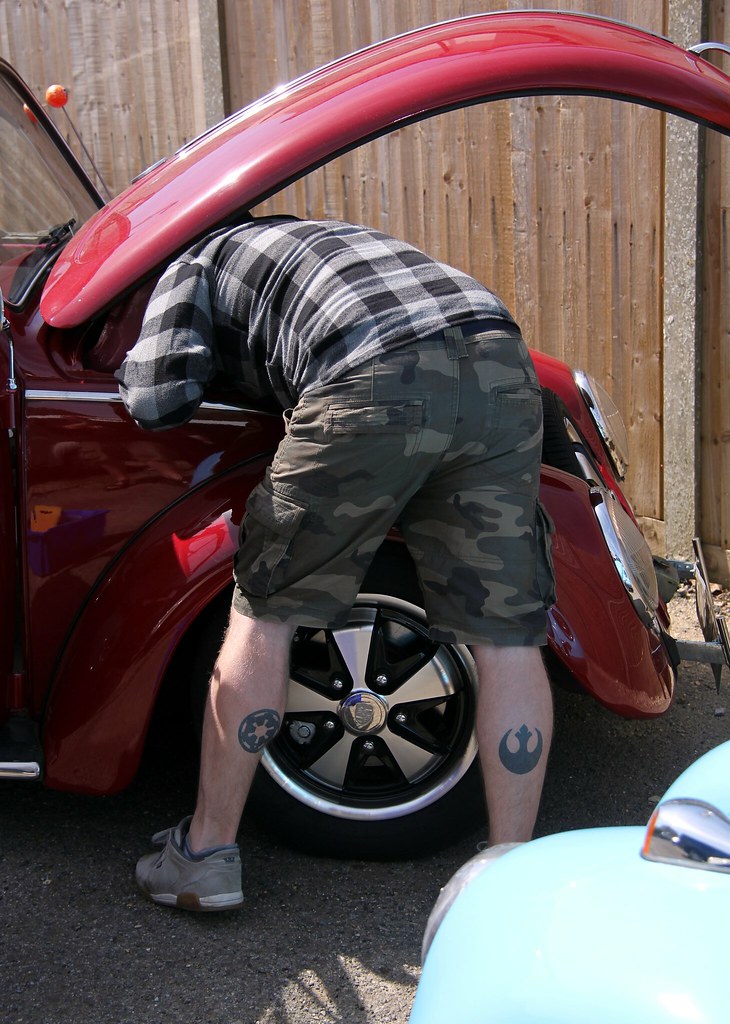 Pornstar pose Pornstar pose by Nick Liassides, on Flickr ....me and Ada got on with jacking up Lenny. Well, I say "me and Ada", clearly what I mean was "Ada and I". And to be truthful, I didn't actually do very much  You can see why these needed changing! Personally I've never been too much of a fan of late-style dog dish Beetle hubcaps. 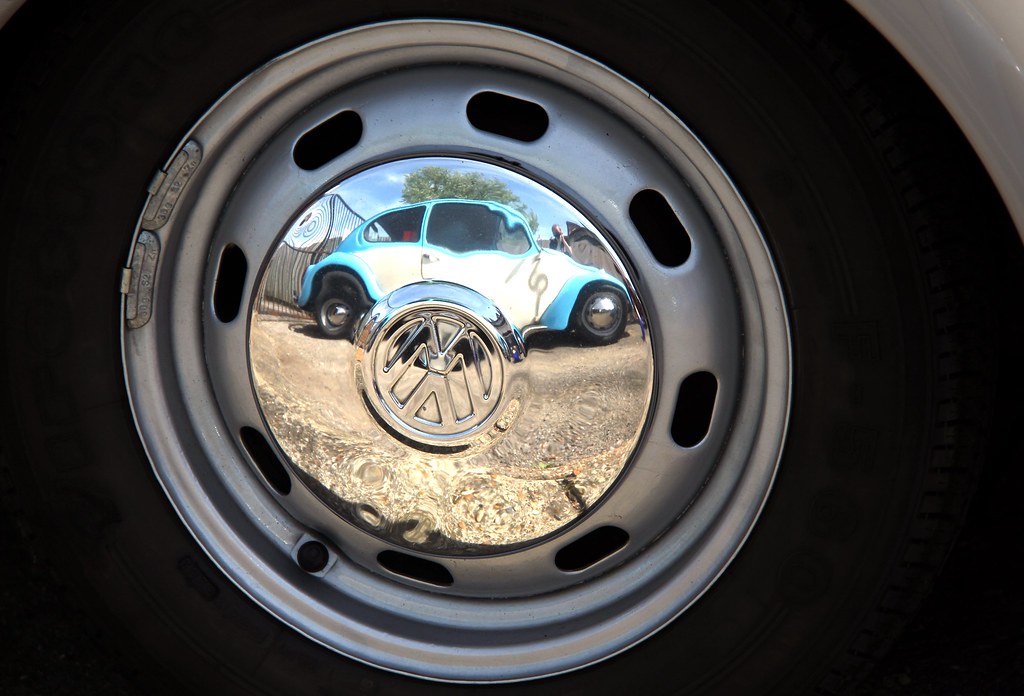 Dolly reflection Dolly reflection by Nick Liassides, on Flickr It didn't look too hopeful under there, it has to be said. The track rods and balljoints looked like they'd been salvaged from a scrapheap and glued together with monkey turds. We left them soaking in penetrating oil in the misguided and hopelessly optimistic faith that might help 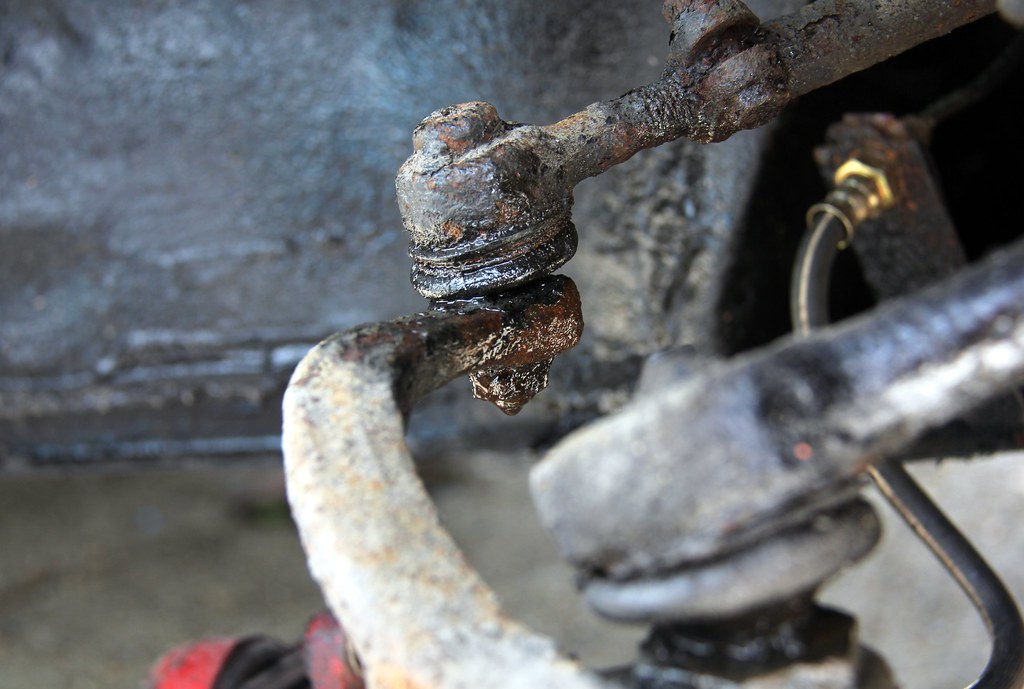 Gnarly track rod Gnarly track rod by Nick Liassides, on Flickr "And why did you need to break all this stuff apart, L7?" I hear you ask? "Didn't a '67 Beetle come with disc brakes as standard?" Well, yes they did, I'm glad you asked. And top Beetle trivial knowledge there too, give yourself a house point. But, y'see, Ada had bought a set of wheels (Fuchs, natch, because apparently it's The Law nowadays that every third Beetle has to have Fuchs) that required a five-bolt stud pattern. And the '67 was the first year of the new Beetle 4x130 stud pattern. So we had to change everything to aftermarket early-style discs. And besides, there was the small matter of lows. Drop spindles were required! About this time we got a mojo boost by the arrival of Eeyore, who was kindly dropping off his Auxiliary Big Hubnut Removal Tool (it's a scaffold pole). But it did at least give us a chance to wonder once again at the rarity and beige enormity of his amusing Hornet. Now with front buckets instead of the weird tartan split bench thing 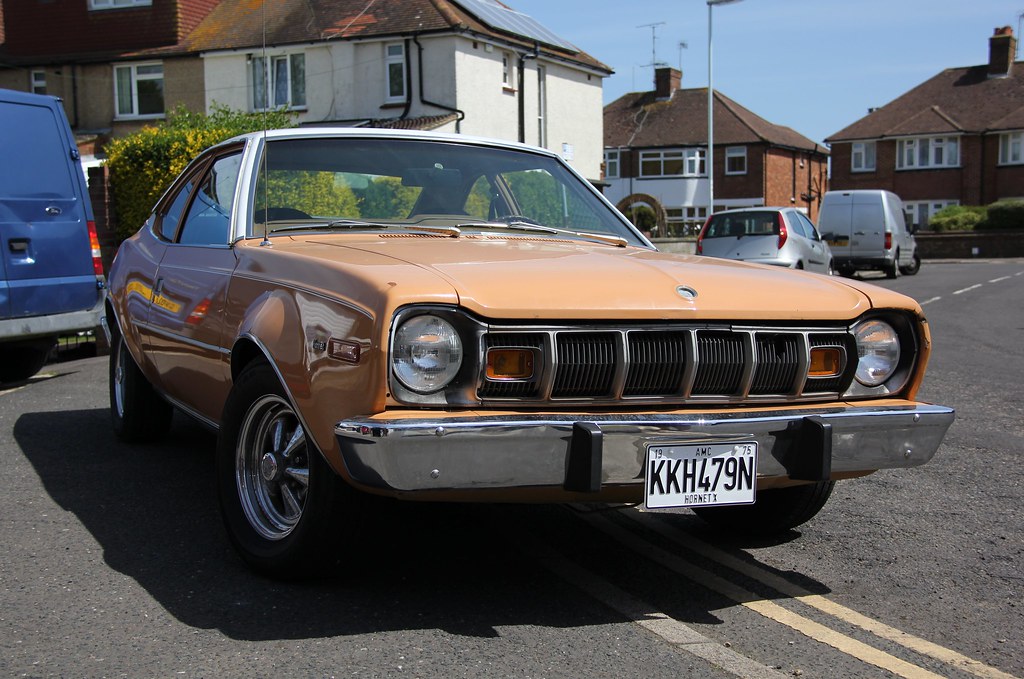 Hornet Hornet by Nick Liassides, on Flickr ("work" is happening in the background, please note) 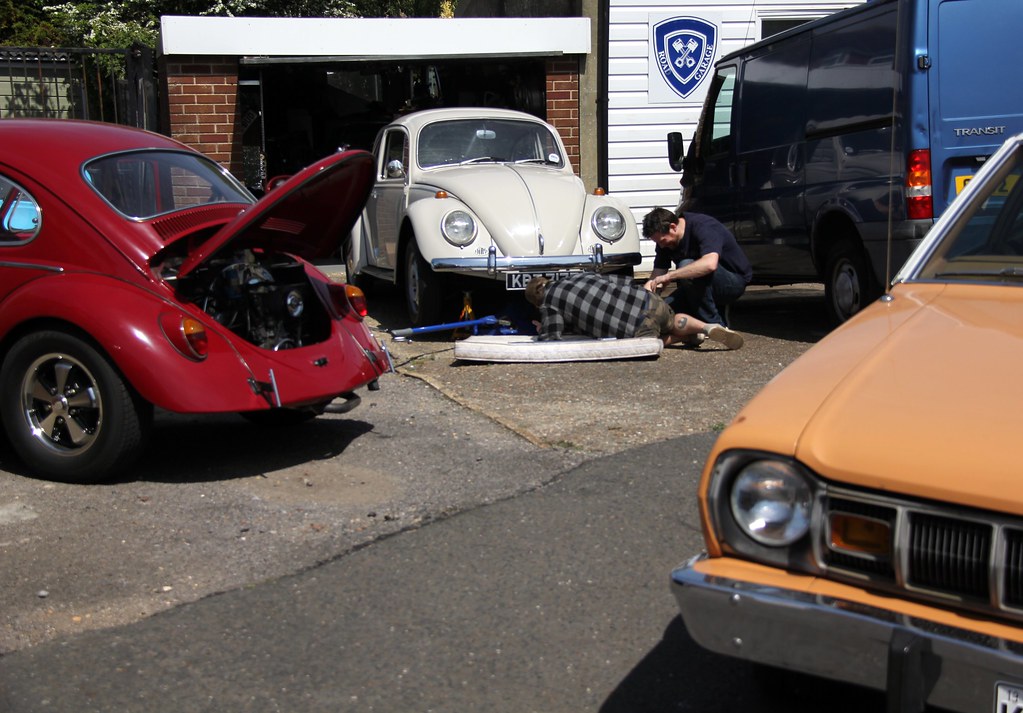 Jacking Jacking by Nick Liassides, on Flickr As I said before, I love any car that has a "Desert" setting on the heater controls 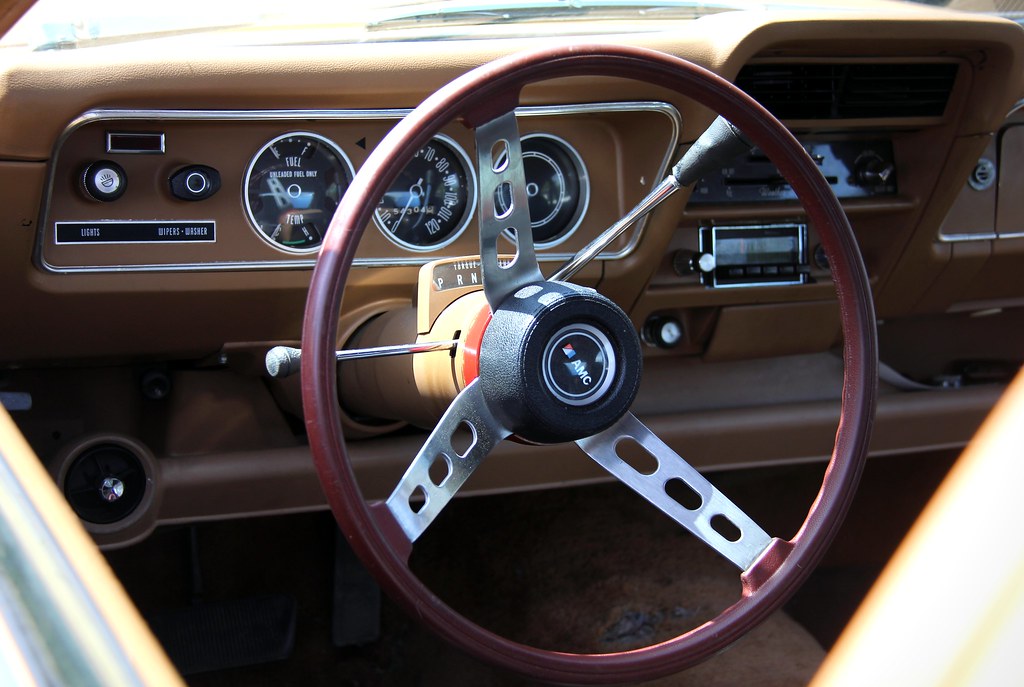 Hornet dash Hornet dash by Nick Liassides, on Flickr 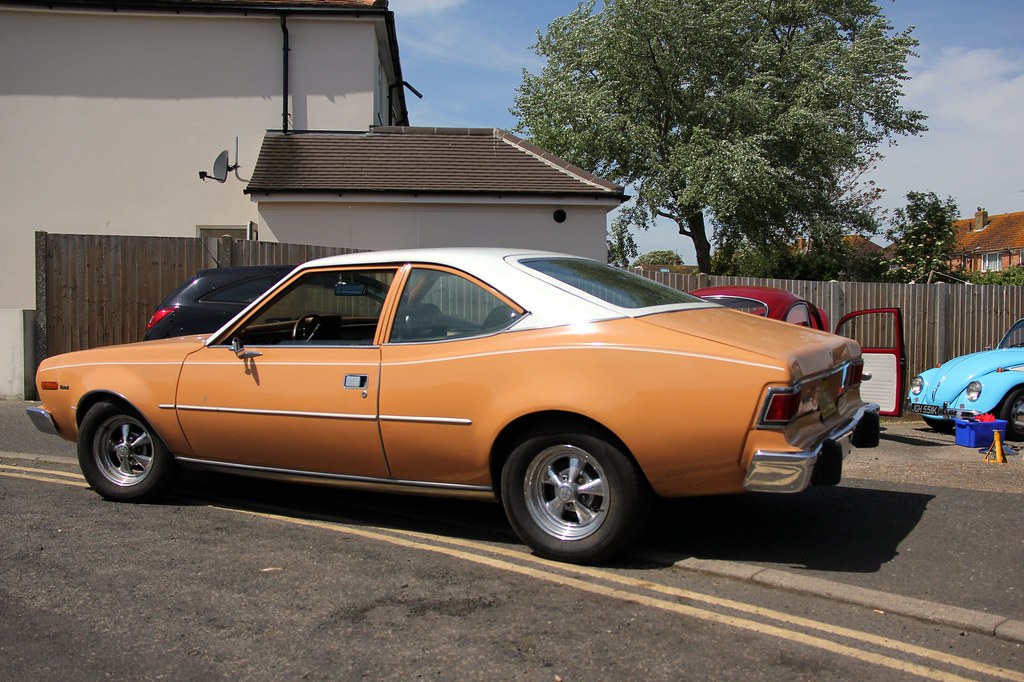 Hornet s Hornet s by Nick Liassides, on Flickr And then ol' Eeyore was off, having unloaded his Mighty Pole of Great Torque... which, as it turned out later, was nearly the source of two of our deaths (possible disclaimer for slight exaggeration)... muttering as he did so about having learned his lesson working on Beetles. I think he's still traumatised by the hours it took him trying to re-assemble the eighteen-piece jigsaws that masquerade as Beetle headlights  And now I've got to pop off and be a parent (I know, unlikely as it might sound) so tune in next time when we'll be breaking stuff, 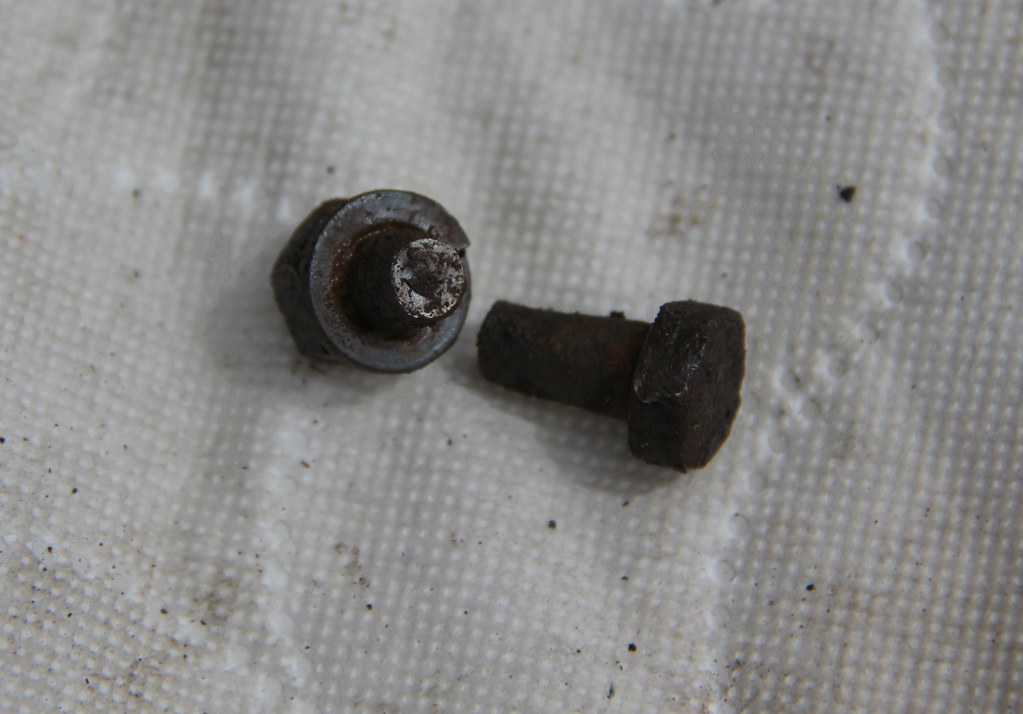 Snapped Snapped by Nick Liassides, on Flickr burning stuff, swearing (a lot) , cutting off chunks with angle grinders, and two of us nearly die * Will our intrepid heroes conquer fifty-year-old Beetle suspension arms? Or will they fail catastrophically? OOoooh, suspense 
* tiny bit of poetic license |
| |
|
|
ada7
Part of things
 
Posts: 108 
|
|
|
|
Road trip picture is quite possibly the great thing I’ve seen since United won the treble in ‘99. Love it  I don’t think you can underestimate how much we nearly died using the great pole of death, but I’ll let you explain it as it’ll be better err than I can Adam |
| |
Rotaries help make the world go around... And around and around and...
|
|
luckyseven
Posted a lot
   Owning sneering dismissive pedantry since 1970
Posts: 3,839
Club RR Member Number: 45
|
|
Oct 25, 2018 10:44:58 GMT
|
Oh yeah, I forgot about that. United did used to be a thing, didn't they?  |
| |
|
|
samta22
Club Retro Rides Member
Stuck in once more...
Posts: 1,276  Club RR Member Number: 32
|
|
Oct 25, 2018 11:32:53 GMT
|
Great write up as always. In a strange way I kinda miss the 1303s my wife restored as it was certainly 'characterful'... issue was she got to the point of being too precious and therefore afraid to use it  On the off-chance anyone reading this feels like getting in on the beetle scene, I happen to know of a reasonably rare '68 (made to look 1967), 1.3 semi-automatic one for sale...  |
| |
'37 Austin 7 '56 Austin A35 '58 Austin A35 '65 Triumph Herald 12/50 '69 MGB GT '74 MGB GT V8'73 TA22 Toyota Celica restoration'95 Mercedes SL320 '04 MGTF 135 'Cool Blue' (Mrs' Baby) '05 Land Rover Discovery 3 V8 '67 Abarth 595 (Mrs' runabout) '18 Disco V |
|
dex66
Part of things
 
Posts: 31
|
|
Oct 25, 2018 12:43:32 GMT
|
|
"""""Lewis ( dex66 of this parish) has had his Dexter for a long time. Lewis is a man of few words, but has a perfunctory Dex thread here forum.retro-rides.org/thread/203749/1966-vw-beetle-cal."""""
I am making steps to being more vocal 😁😁
|
| |
Last Edit: Oct 25, 2018 12:44:08 GMT by dex66
|
|
luckyseven
Posted a lot
   Owning sneering dismissive pedantry since 1970
Posts: 3,839
Club RR Member Number: 45
|
|
Oct 25, 2018 14:42:15 GMT
|
So there we were, wrestling with reversing potentially fifty years of gunge. The brake caliper came off easily enough, and the disc... after all the front discs are pretty much held on by little other than hope and the speedo drive. But those ball joints... and the pinch bolt for the trackrod end? 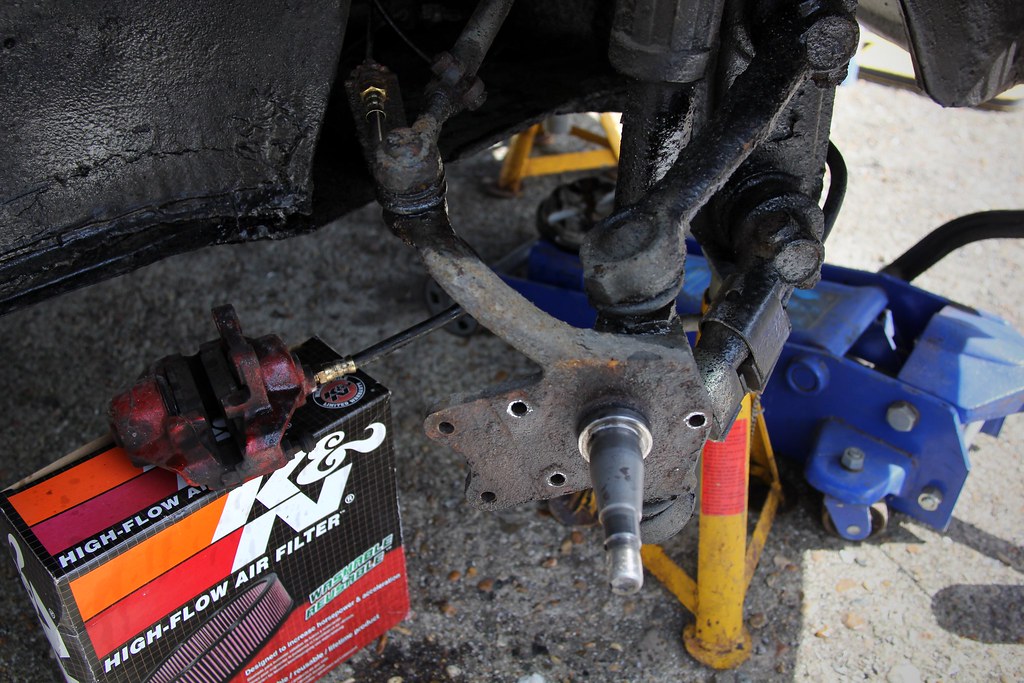 OG spindle OG spindle by Nick Liassides, on Flickr Nope  Still, at least Lewis got Dex's steering wheel swapped over while me and Ada fought with Lenny's nether parts. Good job too as someone needed to get in the garage compound he was parked in front of, and the only other option would have been steering with molegrips 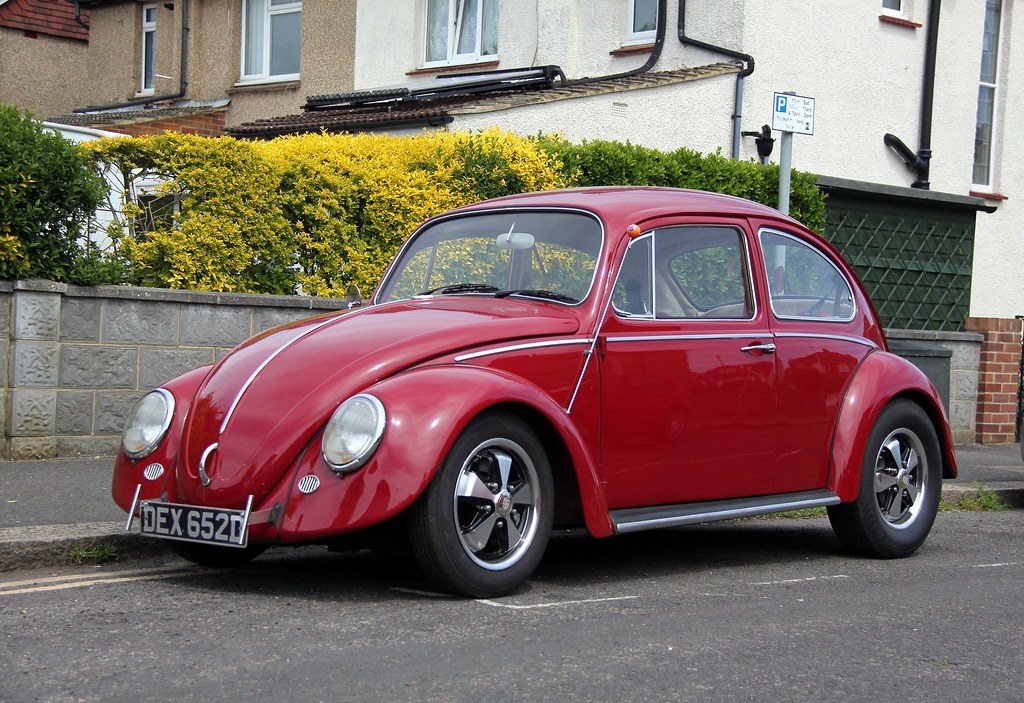 Dexter Dexter by Nick Liassides, on Flickr I think it's a Flat 4 one. When he got it at the Sandown swap meet I was a bit uncomplimentary, joking that wooden steering wheels only really belong on a boat, but now it's in place I have to concede it actually looks rather proper 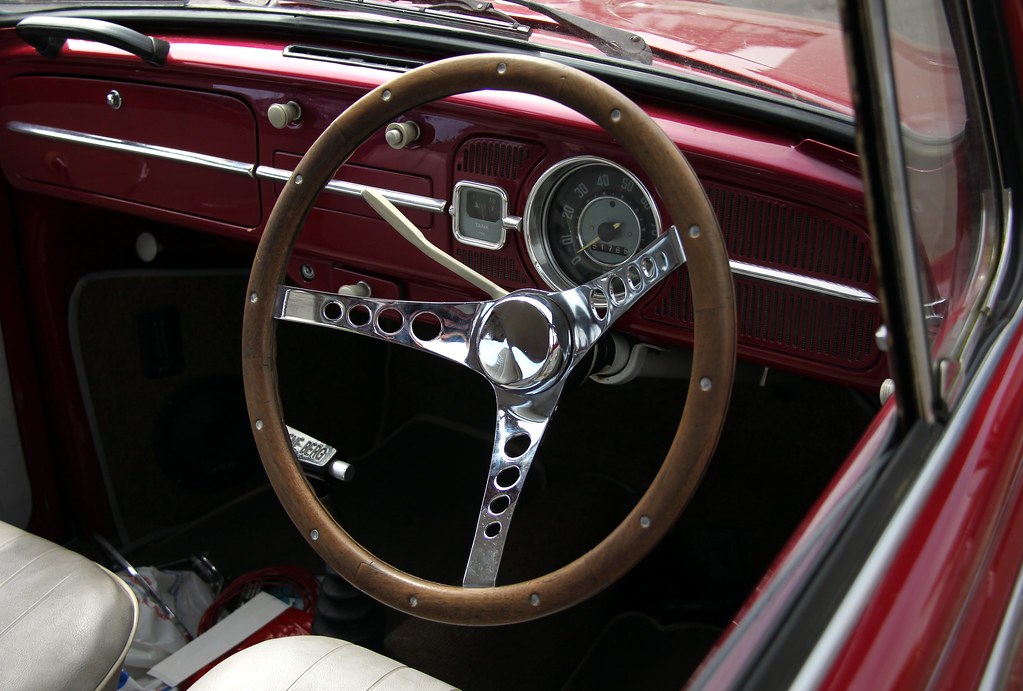 Dexters boat wheel Dexters boat wheel by Nick Liassides, on Flickr Anyway, some progress. We finally managed to get the one side pinch bolt out - by the time-honoured strategy of snapping it in half (see previous post). The other side one... well, you couldn't in all honesty call it a bolt any more 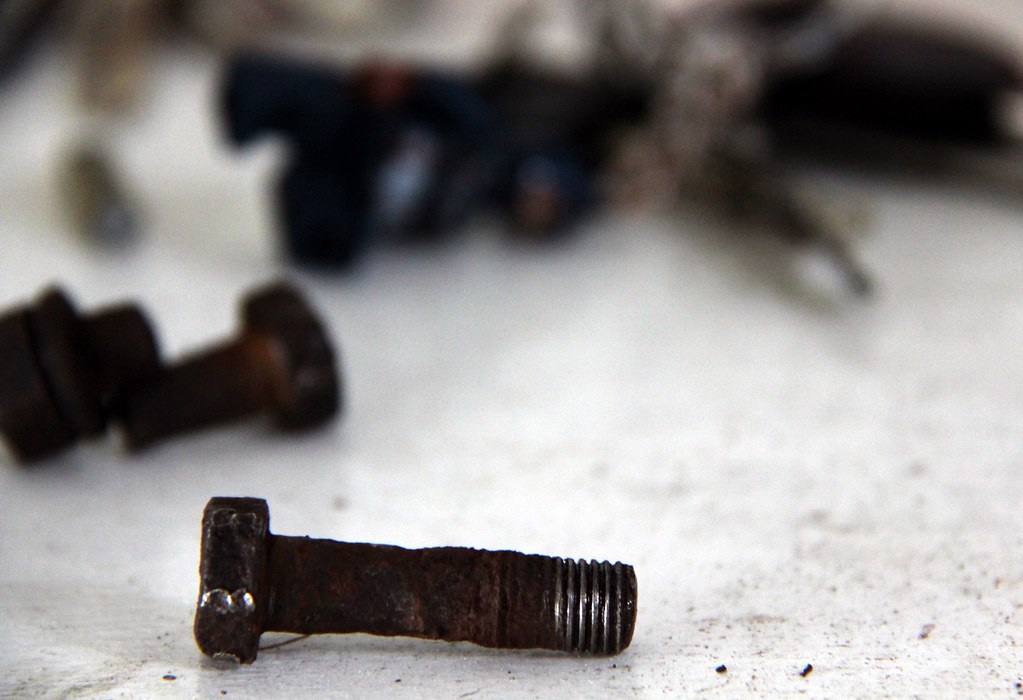 Almost snapped Almost snapped by Nick Liassides, on Flickr More a corroded, featureless stub. And eventually I dismounted the balljoints from the axle plate by the simple technique of getting fed up enough to just pull really hard on the torsion bar links and hope they moved before the entire car got physically lifted off the axle stands 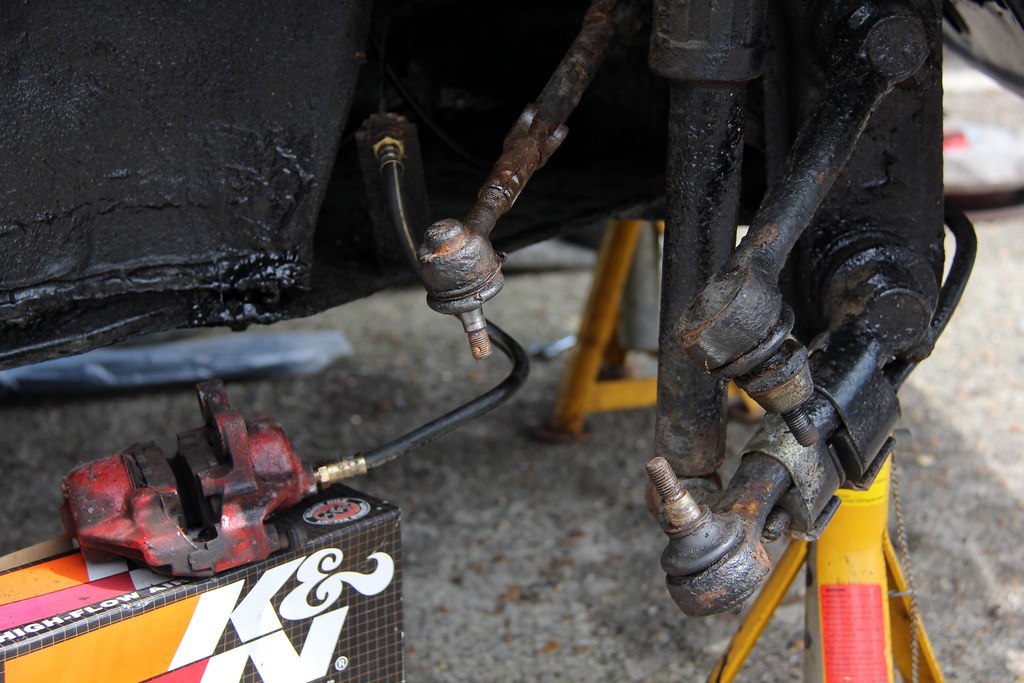 Spindle out Spindle out by Nick Liassides, on Flickr ...it was a close-run thing. The new one makes the old look like the nine stone weakling it really is. New one is all hench and buff and anabolic 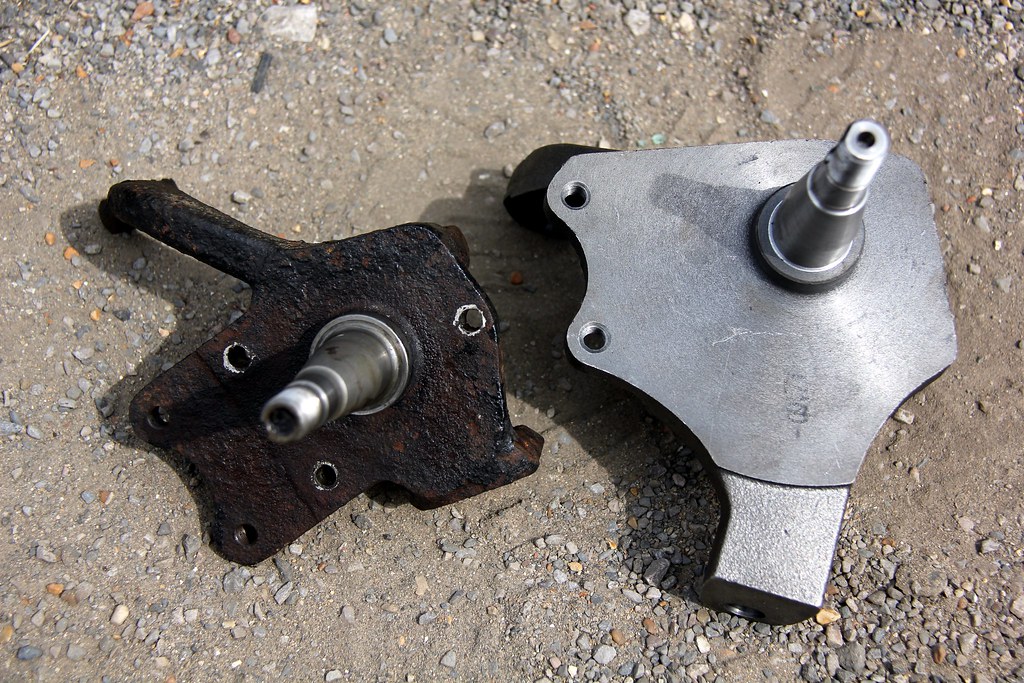 Spindle comparison Spindle comparison by Nick Liassides, on Flickr Fortunately, Lewis had borrowed some balljoint splitters from his dad, so he stopped showing us his rear end for long enough to be useful 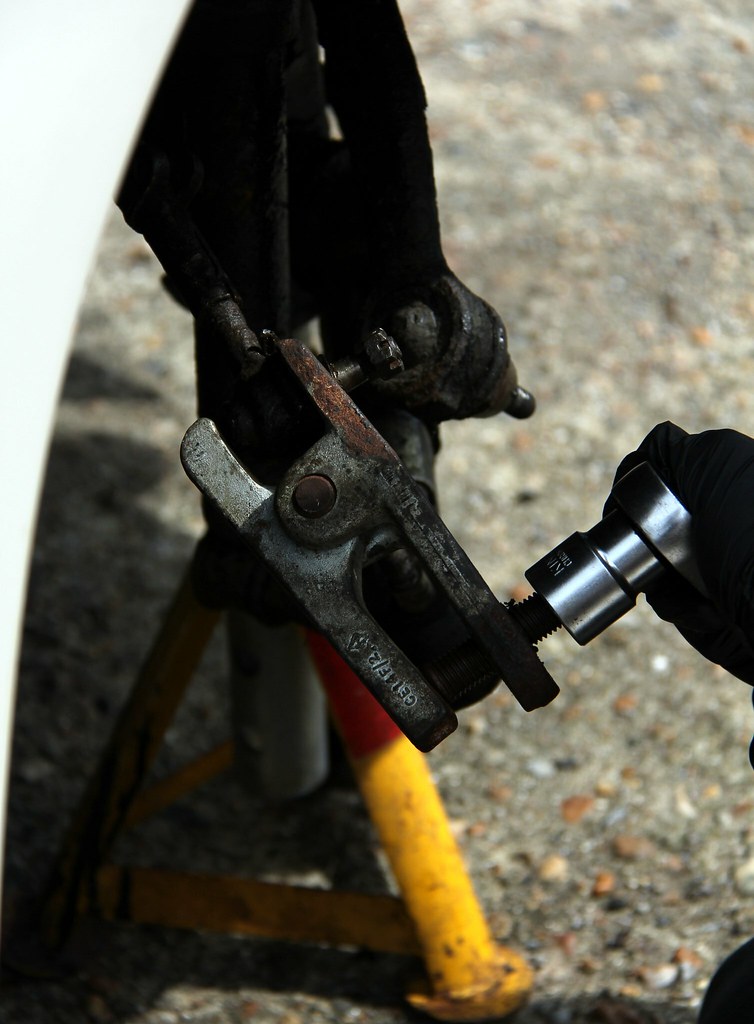 splitter leverage splitter leverage by Nick Liassides, on Flickr But that recalcitrant trackrod end... 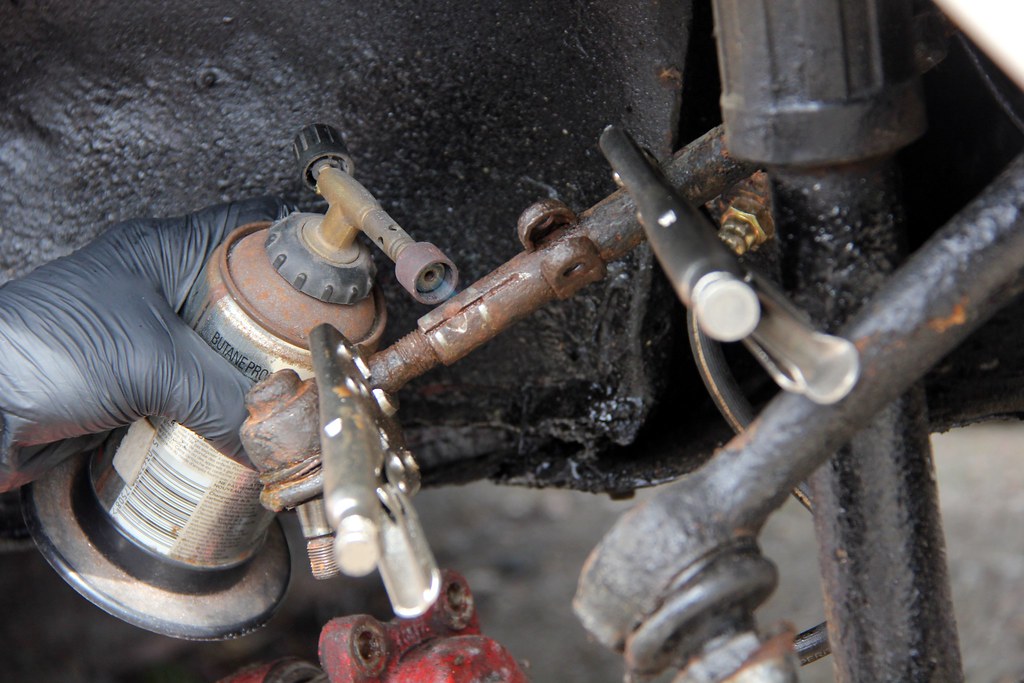 Heating Heating by Nick Liassides, on Flickr Still nope. Fire was not helping persuade it from it's aeon-long sleep, either. Finally, after much getting medieval on it, stuff began to move and we could get on with some actual progress 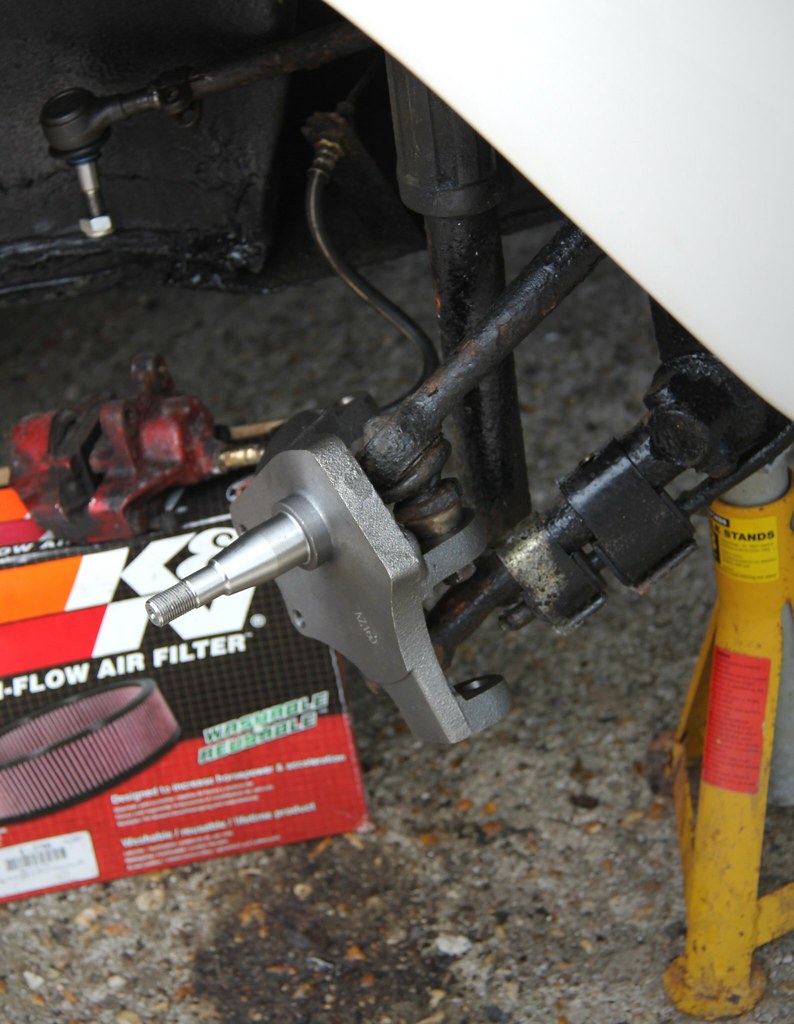 Applying spindle Applying spindle by Nick Liassides, on Flickr At this point, as the only one with a currently-functioning car, I was dispatched on a mercy mission to get the new wheels shod with some rubber. So Dolly was turned into a delivery van, and off we went down to see Grumpy Bob at Discount Tyres. 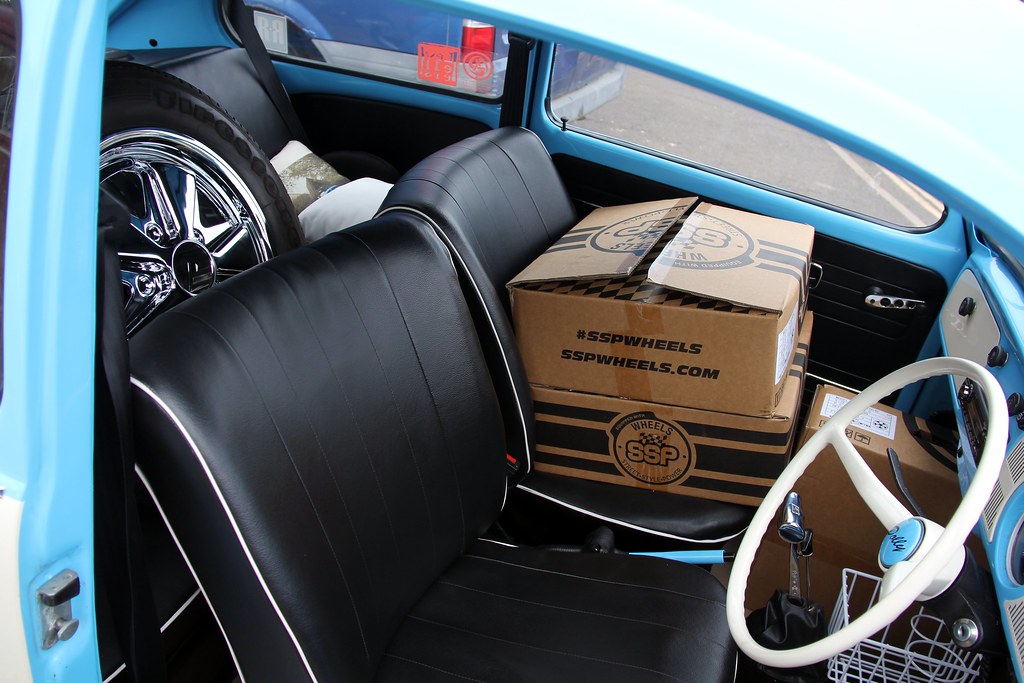 Tyre shopping Tyre shopping by Nick Liassides, on Flickr By the time I got back, the spindles were done and Ada was like a chimp picking peanuts out of poo trying to drift the new bearings into the new (old) pattern discs. 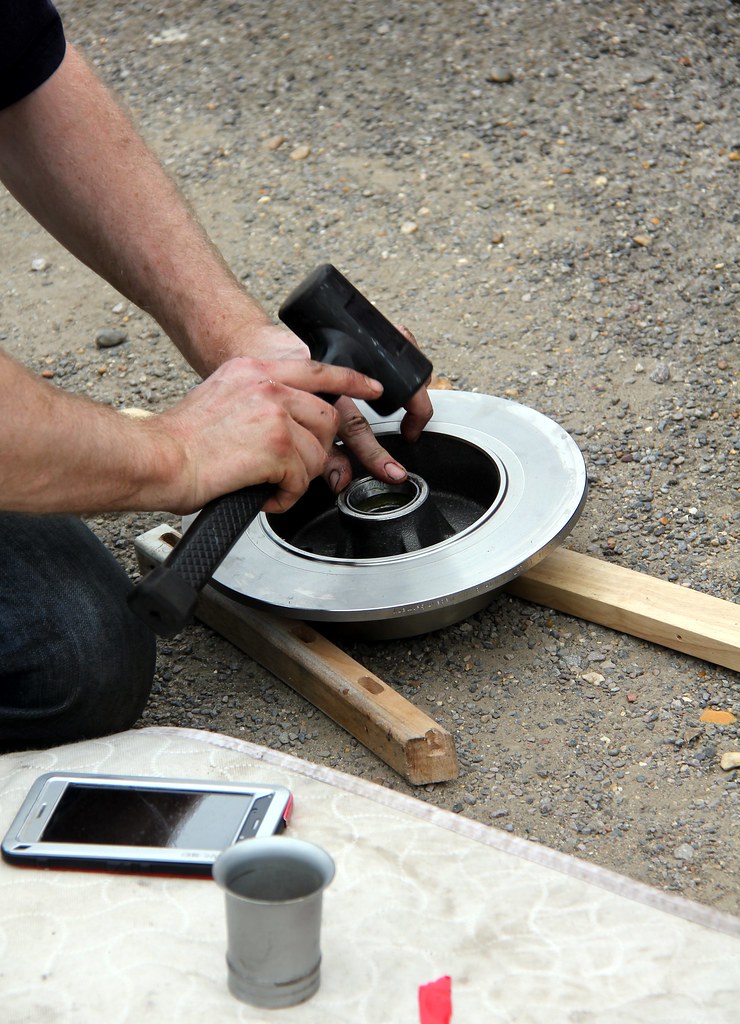 Bearing up Bearing up by Nick Liassides, on Flickr using a fascinating array of almost-the-right-size items; it appears intake trumpets off a 48IDA Weber make a good tool. Have to admit, the new shiny Fuchs(style) wheels did look good shod in their new boots. Mmm, shiny 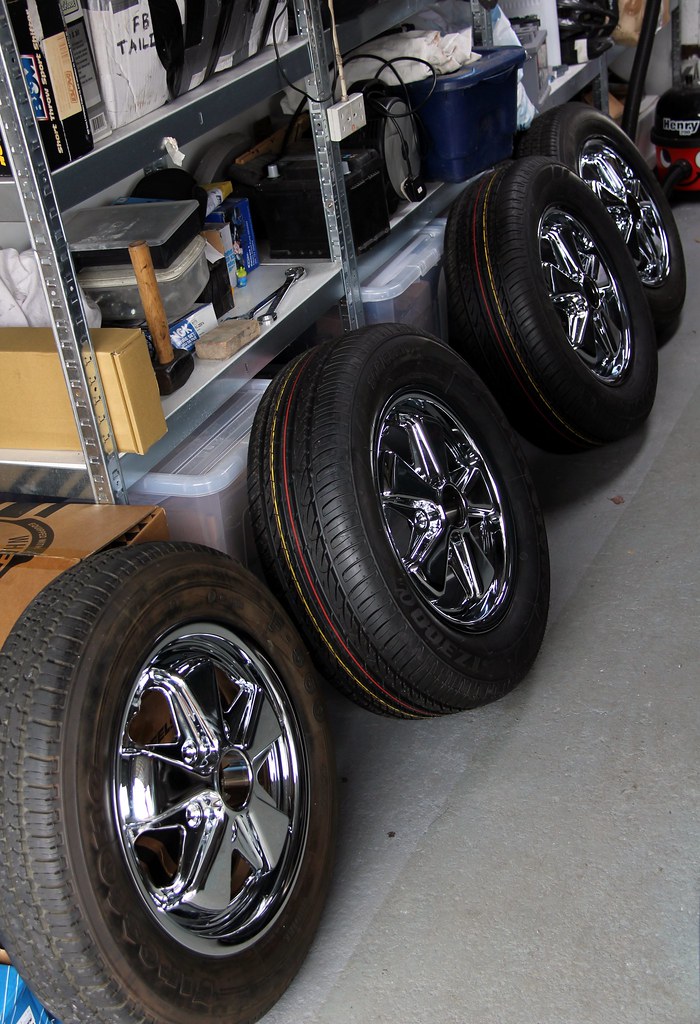 Line of shiny Line of shiny by Nick Liassides, on Flickr Re-assembly was, as it says in all the best workshop manuals, the reverse of removal, only a damned sight easier because now we weren't overcoming massively rusted and disreputable old chod 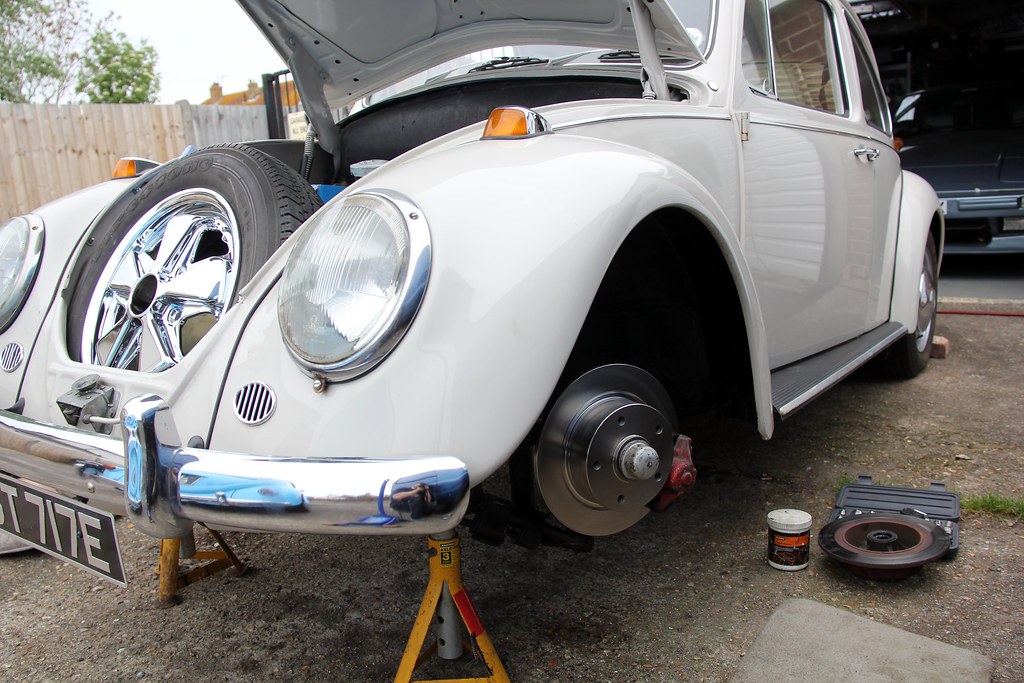 Discs on Discs on by Nick Liassides, on Flickr and it wasn't long before Lenny was sitting on his own four paws again. Winning. well... half winning 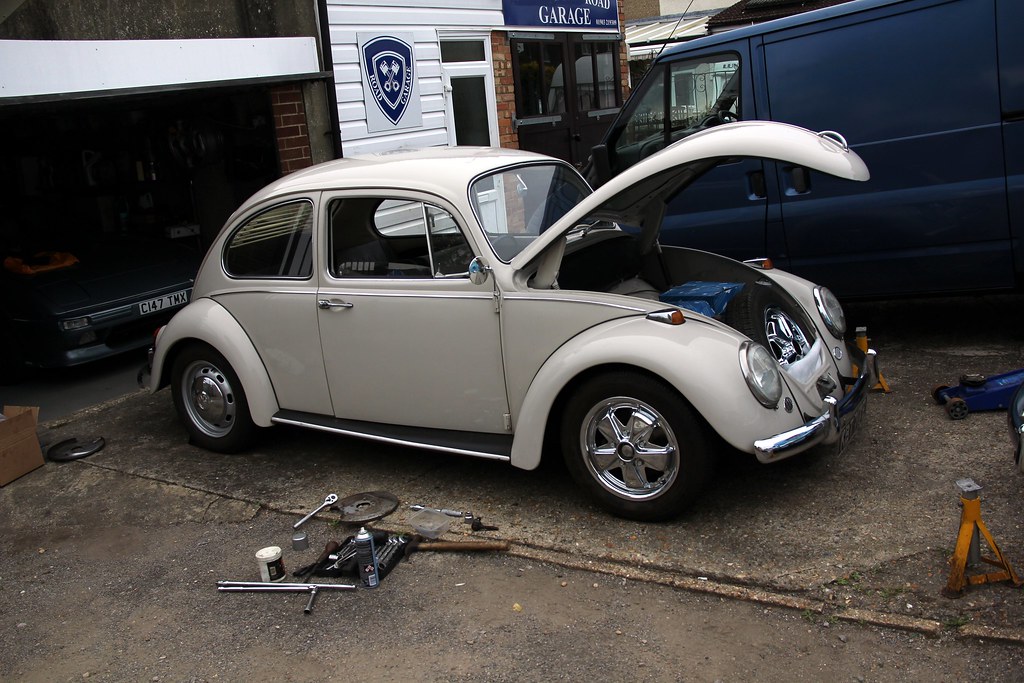 Fronts on Fronts on by Nick Liassides, on Flickr Lewis cleared off, as he had to work late shift or some other feeble excuse, and while Adam set about jacking up the rear of Lenny, I turned my attention to some essential surgery on Dolly. Remember I said about the church in the woods and how we struggled last time because the front was too low? Well, it wasn't just the numberplate that was a casualty. When we came back downt he track, there was no choice on a certain bend but to straddle the hump in the centre of the track between the ruts. And we got beached. Properly so, to the point where the horrible graunching noise ended in a complete lack of forward motion and I had to back up and try again on a slightly different trajectory. Since then the whatever-it-was had caught on speed humps, the lip of the driveway, dead foxes, all kinds of low-lying obstacles in the road. It needed sorting and something clearly wasn't right because the car wasn't that low 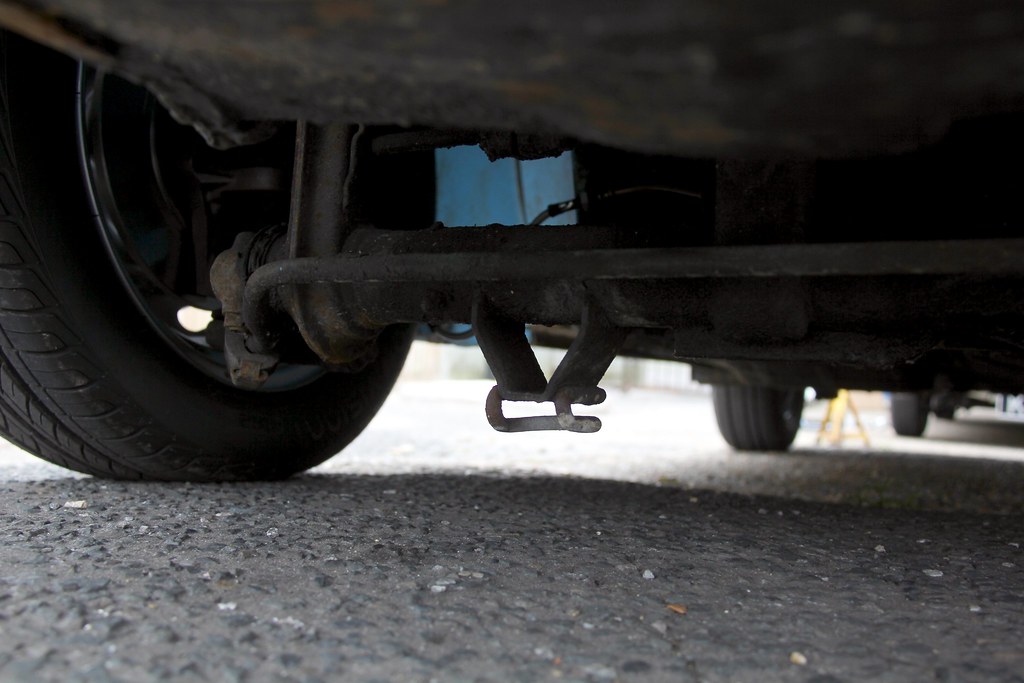 Bracket diversion Bracket diversion by Nick Liassides, on Flickr Ah yeah. That'll be what's doing it! No idea what it's meant to be... never seen it on any other Beetle beams. I guess it's a tow hook; it was certainly a gurt big thick chunk of steel and strong enough to lever both the front wheels off the ground. Having peered closely at it from every angle and reassured myself it served no structural purpose other than to be annoying, it was time to get real on it 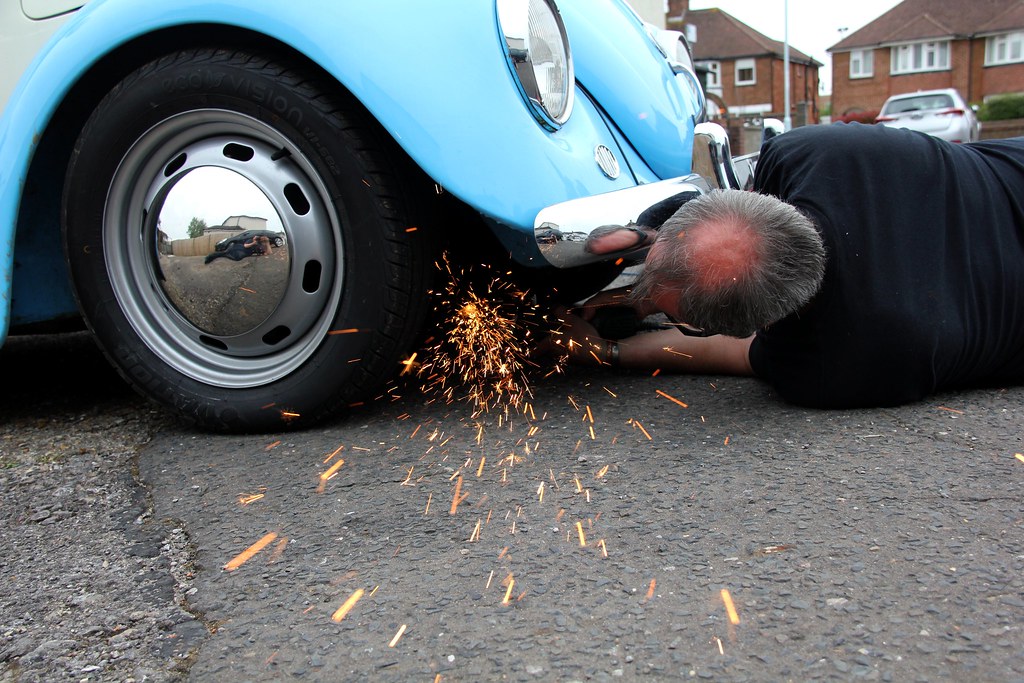 Bracket delete Bracket delete by Nick Liassides, on Flickr Doing the last few mm with a hacksaw because the grinder disc couldn't reach proved a test of lactic acid management strategies, but finally, with shaky hands, the huge boat anchor of a thing was no longer a part of my life  Bracket memento Bracket memento by Nick Liassides, on Flickr and we could return attention to Lenny's rear end. Ada had jacked the back up so we could get the wheels off. The front hubnuts had been suspiciously easy to undo, but all literature on the subject suggested the rears would be a nightmare. VW, for no reason understood by mere humans, saw fit to torque the rear hubnuts up to 250lb/ft of torque. No, you didn't miss-read that. Two hundred and fifty. Which is what's technically known in the trade as "a bleedin' lot". To be even more irritating, I didn't have a socket big enough to fit the 56mm nut. Fortunately a quick spin up to Halfords proved that they actually can be useful for something, if you're willing to pay enough for it. So we took the wheels off. Tried a couple of extensions. Failed utterly to budge the nut. Tried longer extensions. Failed utterly to budge the nut. Tried the longest extension. Managed to turn the wheels and drag the car along despite the handbrake being on and it being in gear. Hmmm. Put the wheels back on to use the ground as a big friction resistor. Still moved the car. Still didn't break the nut off. Dang. We had no choice but to resort to Eeyore's Massive Pole Of Epic Torque. Which was at the point the pair of us nearly died *. *actually really genuinely nearly didThe first murder victim was me... noticing that the pole was full of Hollywood horror film-style cobwebs, I banged it on the floor to shift them. At this point a huge and very irate-looking False Widow plopped out of the end and made a concerted effort to bite me to death. Honestly, the thing was massive, at least the size of a tarantula or an Alien facehugger, and it was seriously peevish with murder on its little arachnid mind. To say I'm arachnophobic is an understatement akin to saying "Trump makes the occasional stupid statement" but I bravely managed to overcome my terror of imminent fatal death through being killed and fight back with one of my favourite feet. Yep, I jumped on it. In fact, it's fair to say I killed it and killed it and killed it some more until it knew it was &%@#!ing dead... or actually it didn't cos it was left as a slightly greasy smear on the floor. And yes, I'm a bad person and my karma is in tatters and I'm going to hell, but I'm not having things like that lumbering around in my workspace. Nope nope nope nopeity nope And as to how Ada died *... well, take a guess * almost died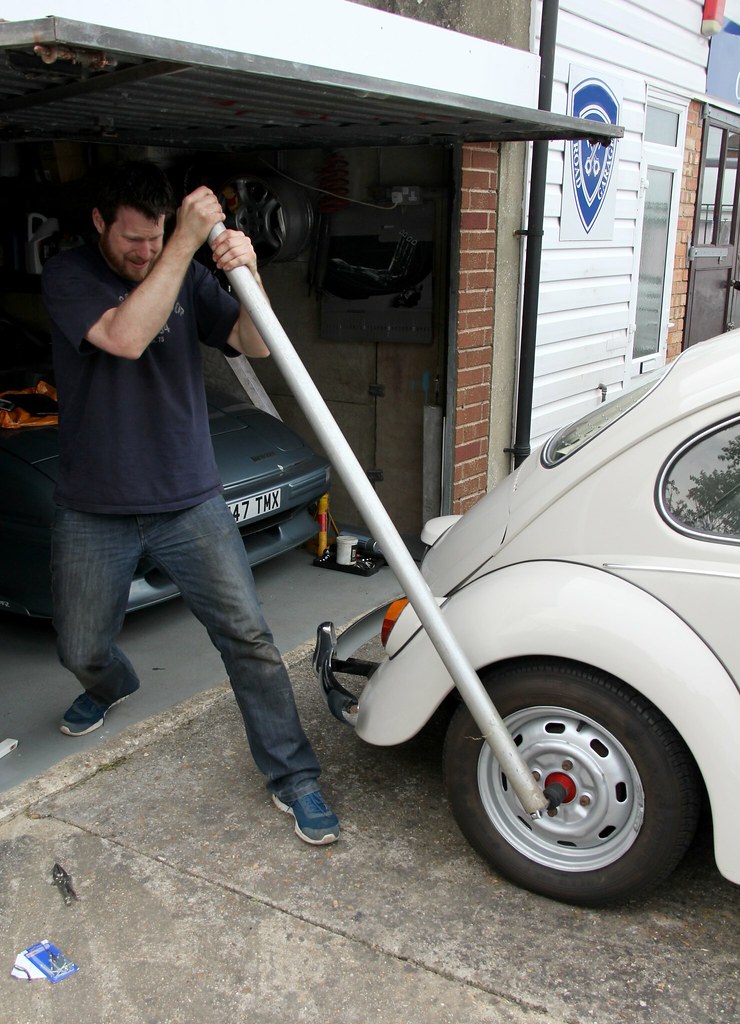 Nut rupture Nut rupture by Nick Liassides, on Flickr It appears that my King Dick extensions weren't really designed to cope with the sort of torque that can physically drag a car along the ground over the resistance of both gravity and its handbrake/gearbox. So it sheared off. On the plus side, it was extraordinarily funny watching Ada go down on his broad rear end like a muppet with the strings cut  made all the more amusing by the way he very nearly twatted his entire skull off with Eeyore's Mighty Pole in the process. But it wasn't all fun and games, so once I'd finished nearly wetting myself laughing, we tried again with another extension and this time beat the pesky nut into submission 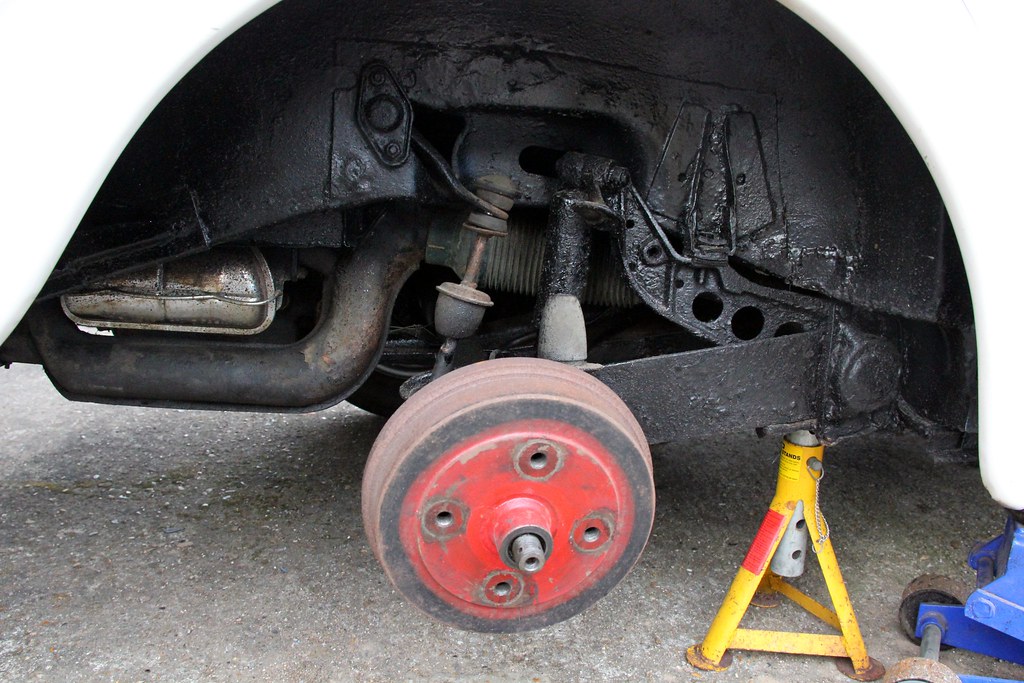 Ogdens nut gone Ogdens nut gone by Nick Liassides, on Flickr To be fair, it was now late, getting dark and we were nowhere near finished. The soss an hegg muffins had worn off and we were both starting to get a bit hangry. But we had no choice but to press on (heroically) because otherwise Lenny would be stranded on my drive with fewer than the correct number of wheels and Ada wouldn't be able to get home. So on we pressed (heroically) 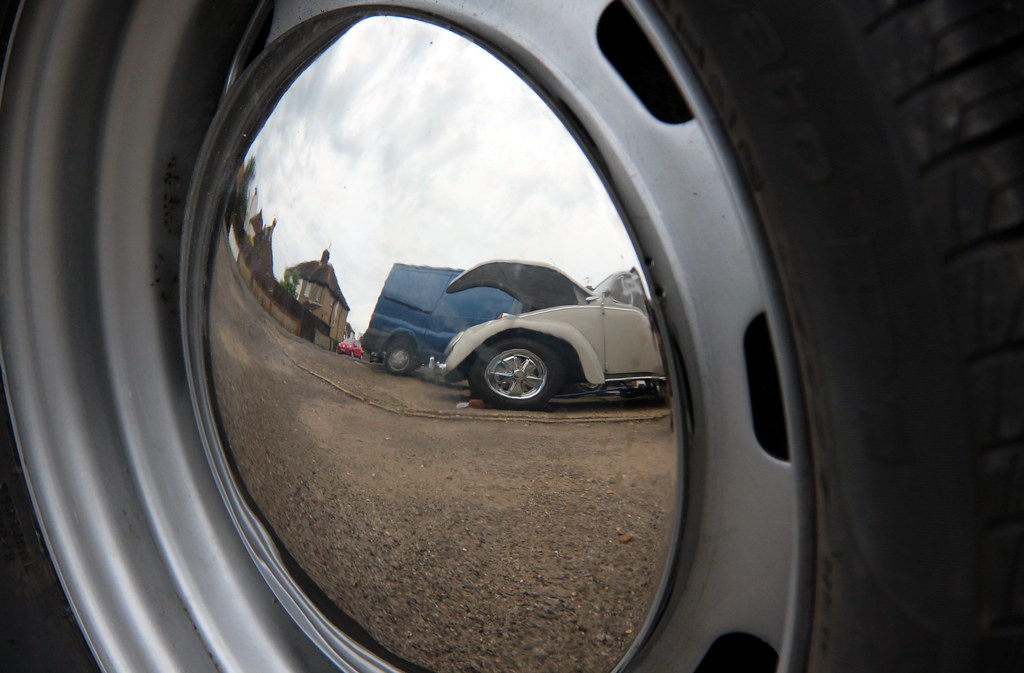 The skies bruise The skies bruise by Nick Liassides, on Flickr In record quick time we swapped over the rear drums to the new stud pattern ... it was starting to get so serious I didn't even have time for picktchers... and we could start reassembling stuff 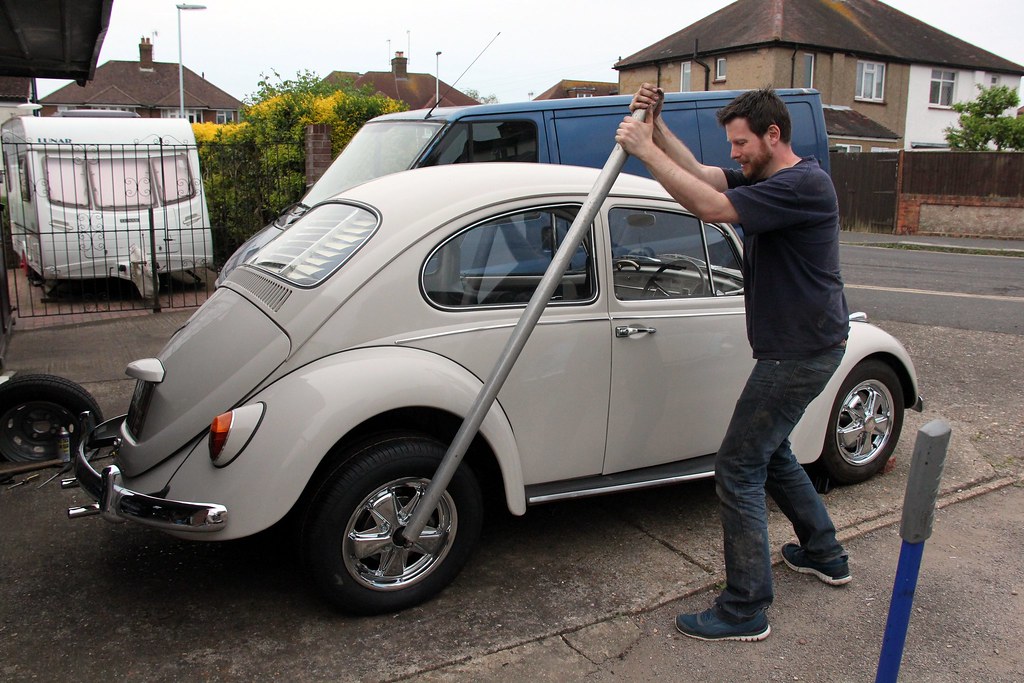 Reverse assembly Reverse assembly by Nick Liassides, on Flickr For an encore, Ada managed to curse word himself to death again *, and it was still so all-consumingly hilarious that I almost didn't mind the loss of another of my dear late father-in-law's extensions. Almost * almost death. Honestly. Really almost to death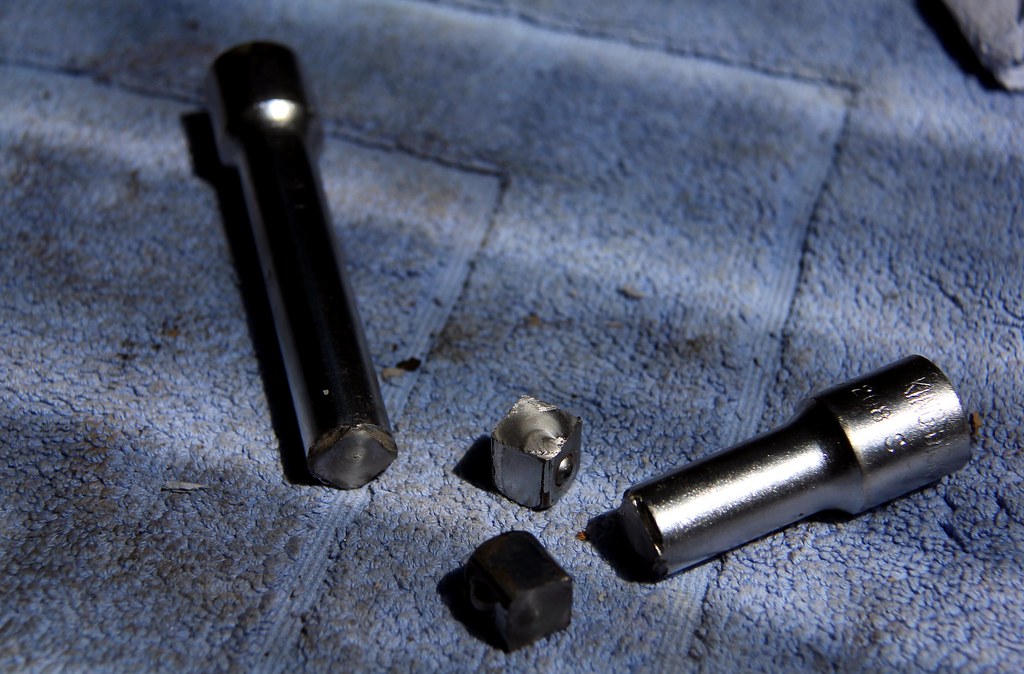 Extension murder Extension murder by Nick Liassides, on Flickr Details of why this is actually a little bit sad can be seen on this 'ere thread what I wroted some time back; forum.retro-rides.org/thread/166243/hail-king-baby Still, at least they died for a good cause. It really was getting too dark almost to see and certainly to take any half-decent photographs... as borne witness by the super-grainy insanely high ISO value here in this next picture of a chimp picking peanuts out of poo broken man desperately trying to thread a splitpin through a castellated nut using the very last reserves of his strength 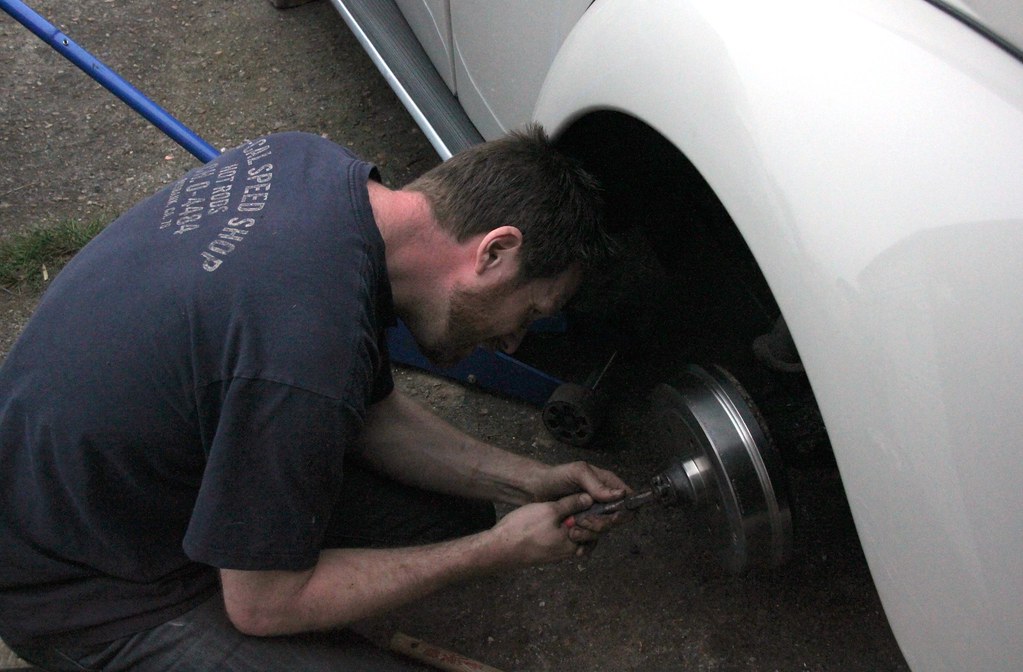 Final assembly Final assembly by Nick Liassides, on Flickr But finally, after what seemed a really long day (because it was) Lenny was back on four paws once again and able to potter round the block on a test drive through the thickening gloaming 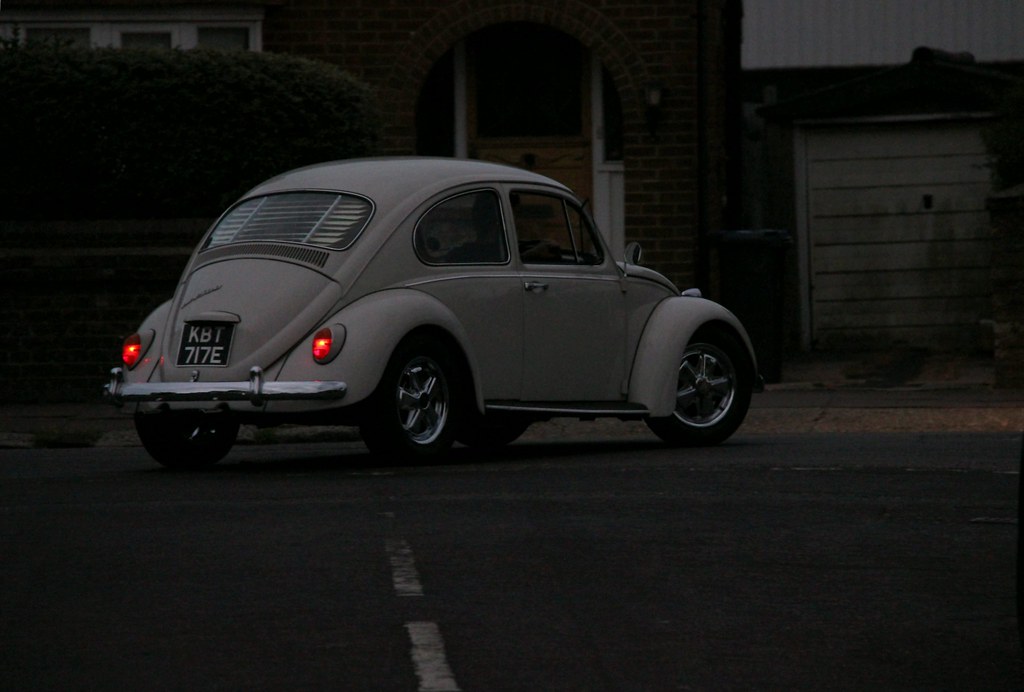 Away she goes Away she goes by Nick Liassides, on Flickr .....and make it back again  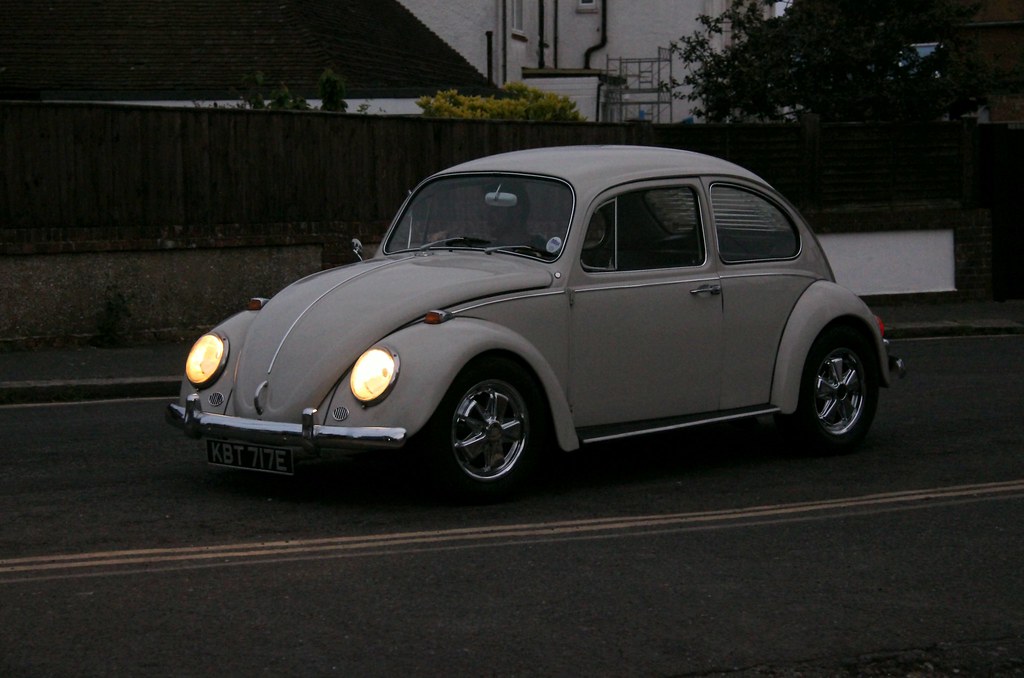 Road test Road test by Nick Liassides, on Flickr There were a few minor annoyances.... well, not so much for me as it wasn't my car. I'm only writing this up because I forgot to add these photos to Adam's thread when I had the chance and as a penance for being a wimp and getting Uncle Terry to fit the drop spindles on Dolly. And now I have a full and truly horrifying experience of exactly why I didn't want to fit the bloody things myself  *ahem* anyway, Lenny. The rear hubnuts annoyingly stuck too far proud through the centre bore to allow the centre caps to be fitted, so some spacers seemed the solution. Which of course, we didn't have. And the front tyres, being stock 155s, were a little bit big and rubbed a gnat's on the arches, though nowhere near so bad as Dolly's had. And as it grew too dark to function, there was time only for one last arty reflection shot 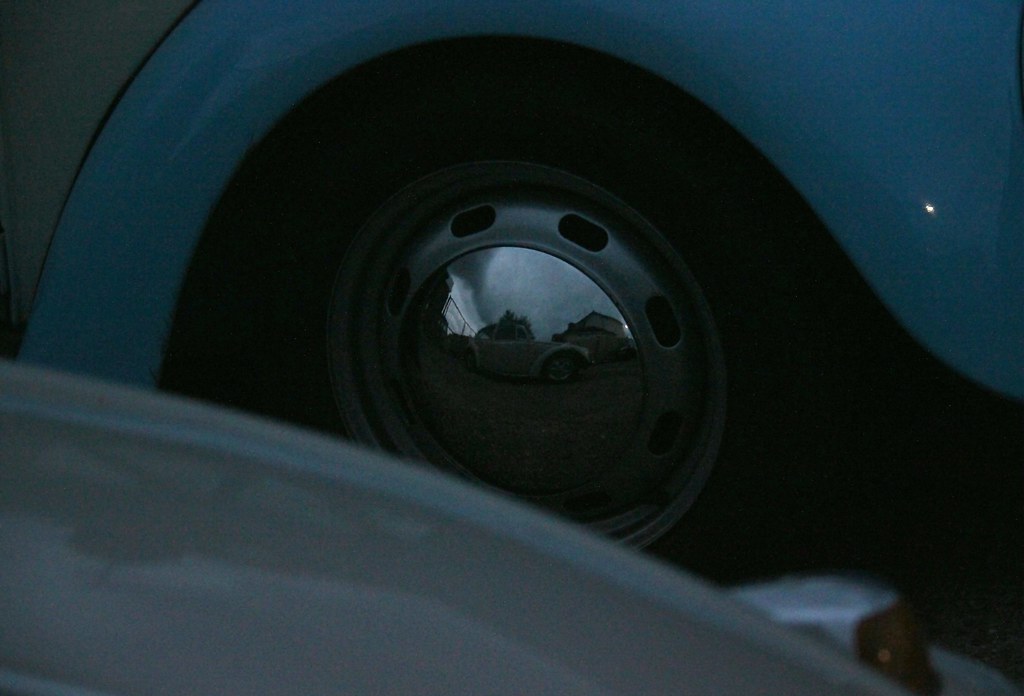 The skys gone out The skys gone out by Nick Liassides, on Flickr and we retired, following the strong lure of curry, reflecting ourselves on what a successful day overall it had been. Given that all the work had been performed by two and a half cretins with a severe lack of a clue. And essentially....all that work just to introduce an extra stud hole into each wheel hub  Still, at least my new Dolly-spec modern headlights from a few posts earlier were a lot brighter than Lenny's feeble old skool candles 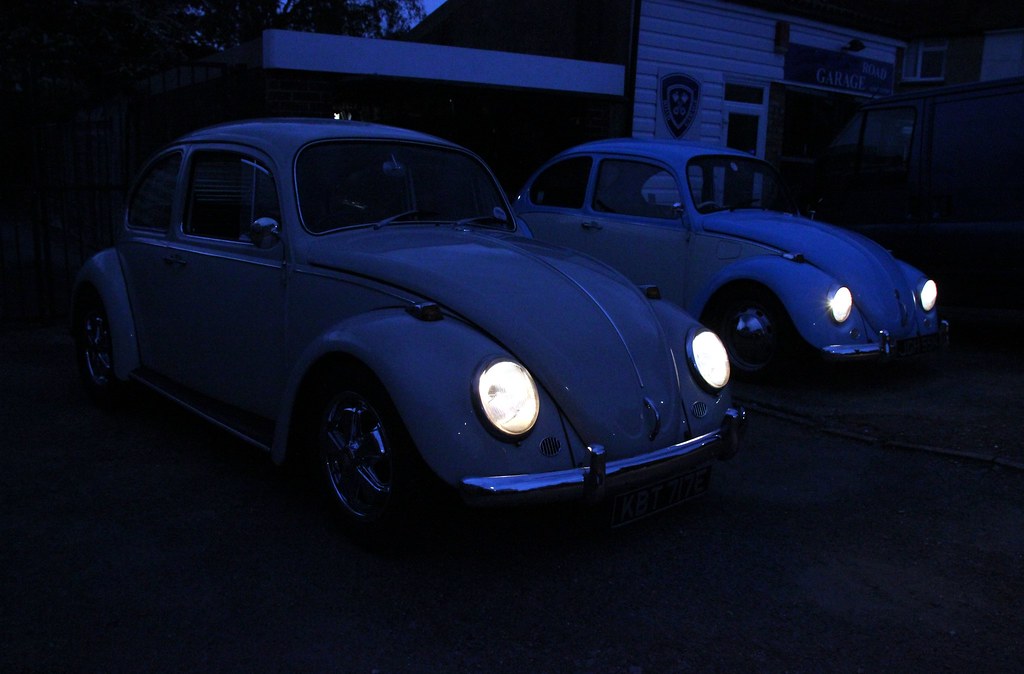 Lights out Lights out by Nick Liassides, on Flickr and that's why modern is cooler than sloper  Oh yeah, headlights. Had to mention headlights. we'll be coming back to them... AGAIN  Seems I end every other post with that line |
| |
|
|
ada7
Part of things
 
Posts: 108 
|
|
Oct 25, 2018 19:41:10 GMT
|
|
Omg I had forgotten all about you and that spider (easily done as it was tiny and well, only a spider after all, not a T Rex!)
I think I laughed as hard at you with that as you did with me when I nearly cracked my head open like a boiled egg. I honestly didn’t realise you could move your feet that fast or get out as many words (mostly 4 letter ones) as quick as you did. It was a bloody funny and frustrating day in equal measures. Lots achieved though
Adam
|
| |
Rotaries help make the world go around... And around and around and...
|
|
|
|
|
Oct 25, 2018 20:32:04 GMT
|
|
Great write-up.
Very entertaining read.
A hint for you. Get a truck tyre depot to "crack" the hub-nuts next time. Piece of the proverbial for an 1" drive air ratchet.
I've been asked to, and done it, in my past.
|
| |
|
|
luckyseven
Posted a lot
   Owning sneering dismissive pedantry since 1970
Posts: 3,839
Club RR Member Number: 45
|
|
Oct 25, 2018 21:09:42 GMT
|
Now he tells us  And that spider was huge. It was like an eight-legged spacehopper. With attitude. I saved both our lives by selflessly taking it out before it killed everyone in the entire street 
|
| |
|
|
|
|
|
|
|
Oct 25, 2018 23:32:23 GMT
|
|
Good choice on the Fuchs on Adam's Beetle - they are overused perhaps, but when they look that good its easy to see why.
|
| |
1968 Cal Look Beetle - 2007cc motor - 14.45@93mph in full street trim
1970-ish Karmann Beetle cabriolet - project soon to be re-started.
1986 Scirocco - big plans, one day!
|
|
luckyseven
Posted a lot
   Owning sneering dismissive pedantry since 1970
Posts: 3,839
Club RR Member Number: 45
|
|
Oct 26, 2018 13:51:53 GMT
|
Meh  . Well, they're shiny I suppose  That has to count for something! Right. So. Then. Headlights  Headlights, again I straightened the bowl lips some posts ago (though in real terms it was months back). But I did it in a hurry so a) they weren't quite as straight as they could have been ....well, round rather than straight, but you know what I mean. And b) I hadn't had time to paint the bits where they pliers and bending had knackered off the old paint. All the while the weather was still wet and dreek I was conscious of the fact that they'd be rotting gently behind the chrome trims. Soooooo, with a dues sense of trepidation and dread, off came the headlights again. Good job too. Amazing how fast even legendarily good steel like old VW stuff can rust away. 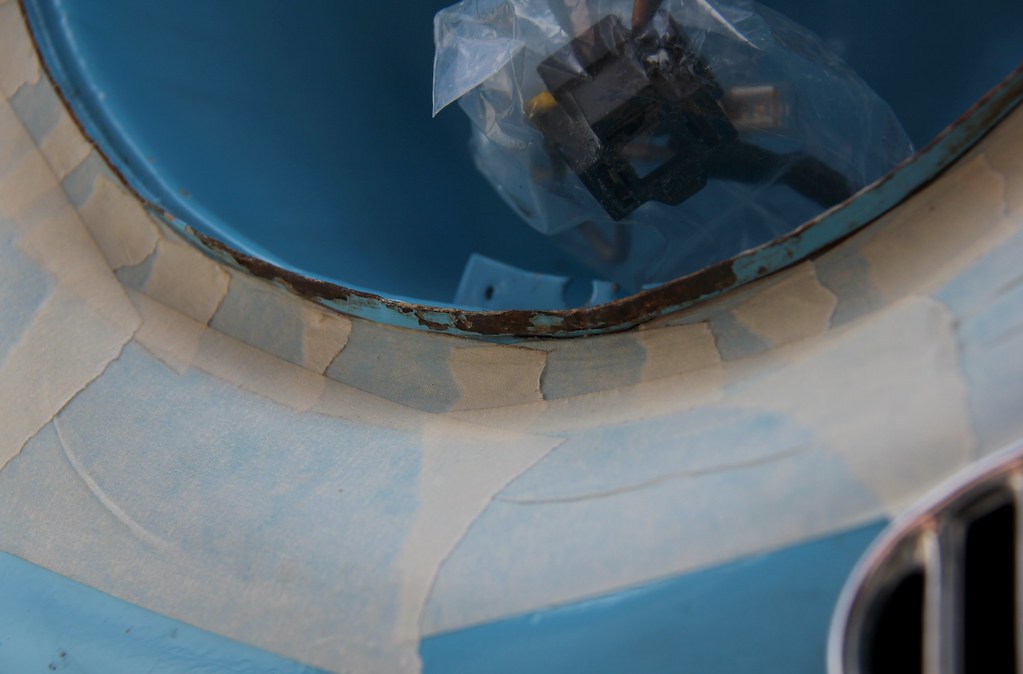 Headlamp bowl straightening Headlamp bowl straightening by Nick Liassides, on Flickr This time I spent ages with the pliers making sure the rims were obsessively in the round, taking little tiny nibbles and bending every couple of mm till I was happy. Then masked up the entire front of the car (one of my weaknesses, being paranoid about overspray!), wire-brushed the lot and etched/primed/painted everything that even looked like it might think about one day going rusty 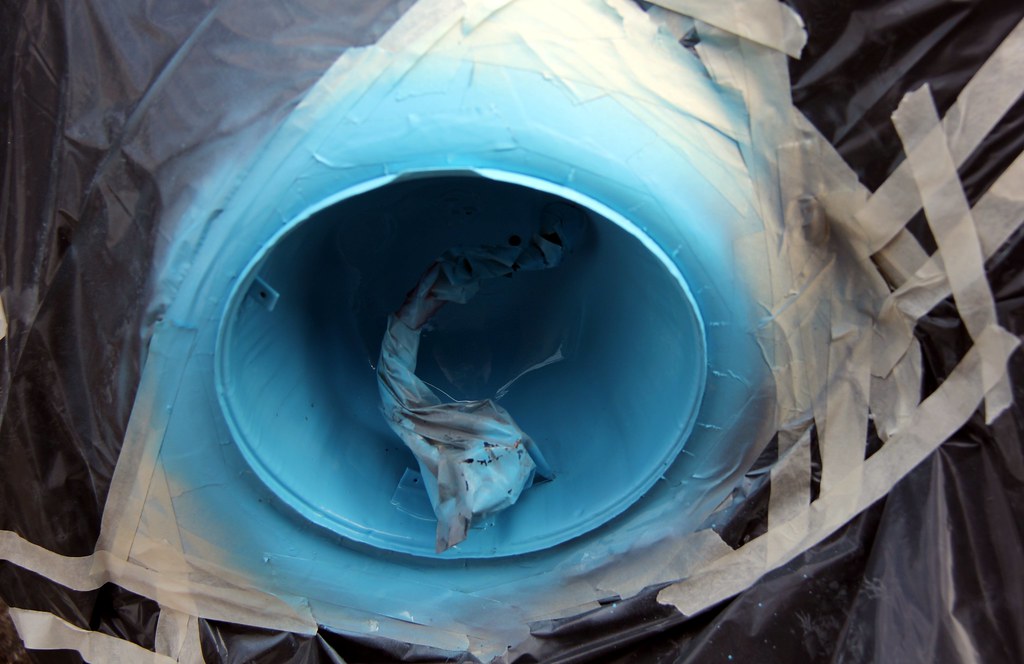 Headlamp bowl painting Headlamp bowl painting by Nick Liassides, on Flickr And when it was done, I felt reasonably pleased it didn't look like it'd been done. And I'd never have to take the stupid, fiddly, annoying headlights off ever again ** I would, of course  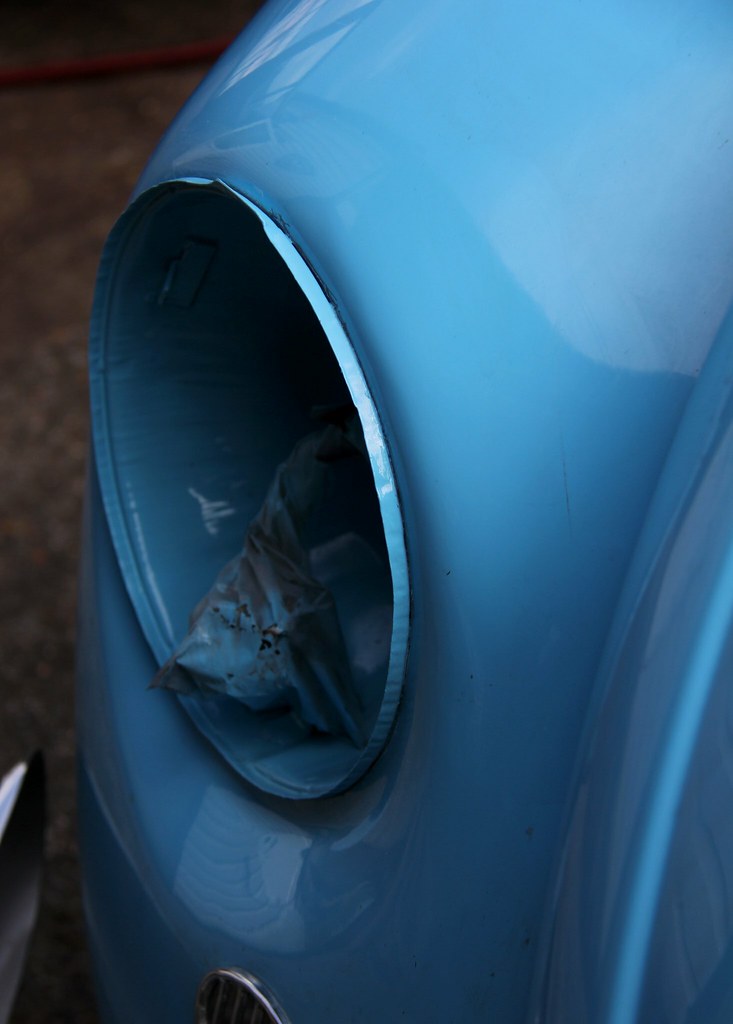 Headlamp bowl painted Headlamp bowl painted by Nick Liassides, on Flickr Next! While we were sorting out lighting, the offside indicator had been indulging in a slightly off-beat waywardness for the past few weeks, only working half the time. And I don't mean that in a "flashes on...flashes off" sort of way, I mean it didn't flash at all a lot of the time. Taking the chrome pod off revealed why 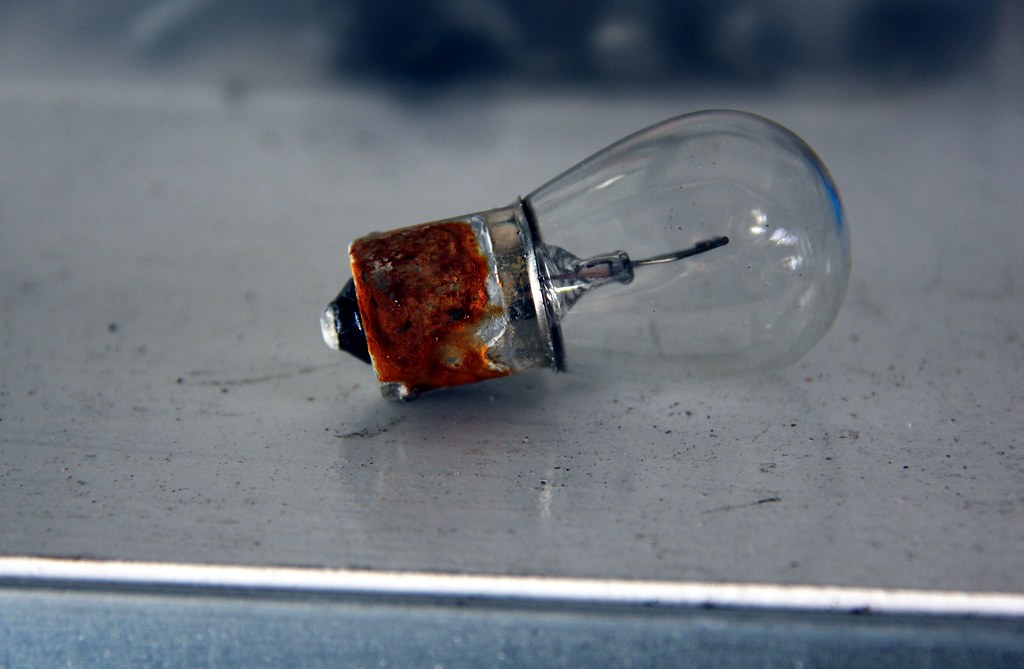 Indicator degradation Indicator degradation by Nick Liassides, on Flickr The rubber seal was pretty hard and obviously wasn't, well, sealing awfully well. I cleaned up the contacts in the bulbholder plate but this seemed like the ideal time to go through one of the rituals I have with pretty much every vehicle I've ever had. De-fried-eggifying the indicators. I mean, why wouldn't you? It's so easy that even M*x P*wer never had to dedicate a How To for it. Just take out the orange lenses, put in clear ones and change the bulbs to ones that flash orange 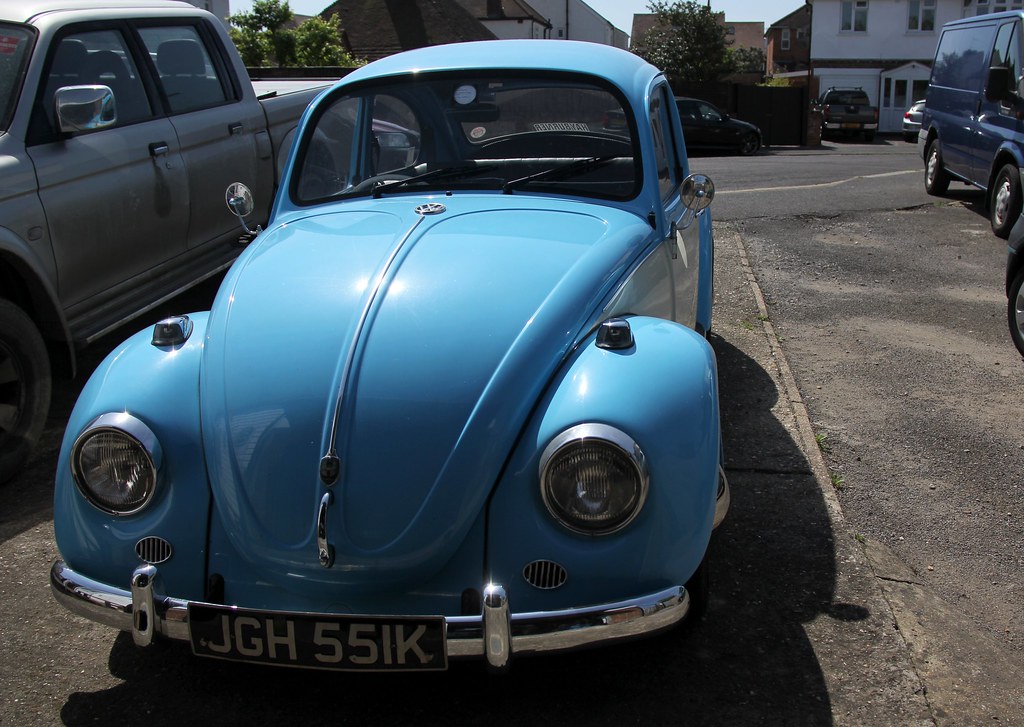 Indicators cleared Indicators cleared by Nick Liassides, on Flickr Looks a miwwion times better (IMHO) especially if you use chrome-coated bulbs to totally lose the fired-egg look you get with orange ones. And, via the magic of SCIENCE (or possibly just magic) they still flash orange! 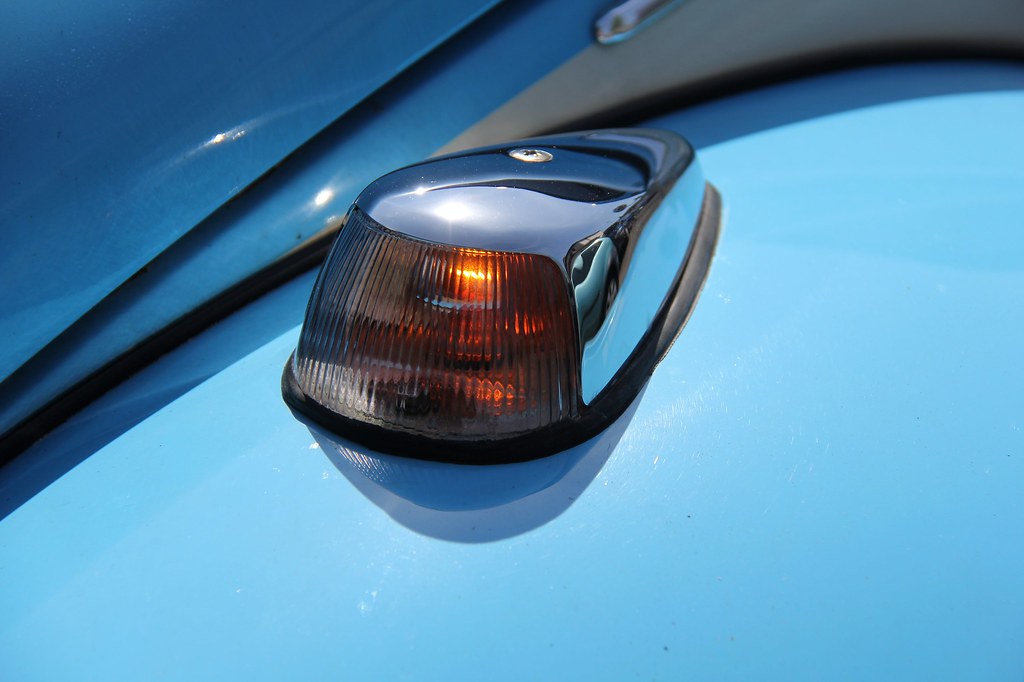 Indicator defriedeggified Indicator defriedeggified by Nick Liassides, on Flickr Next! Rear seat base, then. The rear bench squab on a Beetle just sits on random bits of body at the side, and across the front has a shaped metal bar that locates the footwell cards underneath and the seat above. Mine was rusty, and given that I hate doing anything to a bit of a car I've only got the one of in case I destroy it somehow (plus it's easier to do one off the car than have to live without the one being in the car for however long it takes) I got a secondhand one to furkle about with. It was rusty. Rustier than the one in the car, of course  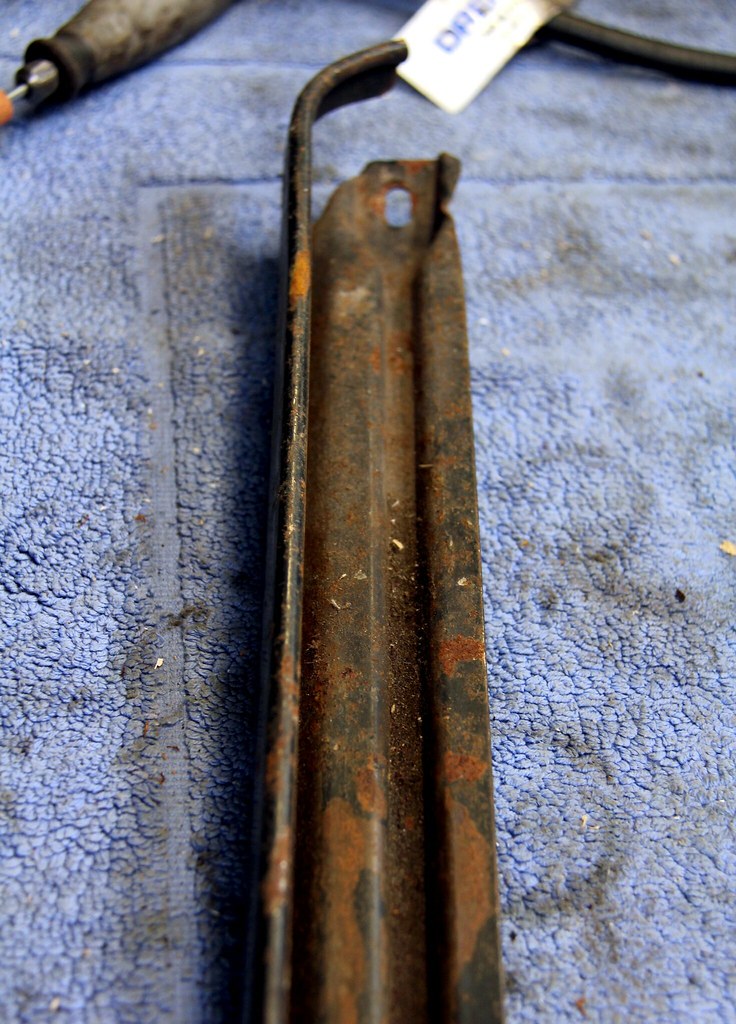 Seat bar rust Seat bar rust by Nick Liassides, on Flickr While I was stripping that back, might as well get on with something else in and around. A while ago I'd scored a dash trim that had been converted to hold a standard 52mm gauge. On earlier Beetles (such as Adam's '67) the fuel gauge had been an option, before that an aftermarket addition. By the time Dolly came off the Wolfsburg line, the fuel gauge had been incorporated into the speedo so there was no need to have the big square aperture for the Dehne or VDO ones cut into the dash trim. So my trim was just a flat grille piece. Hence the converted one. You can get these off the shelf, but this looked to me like a home-brewed conversion with brazing and stuff ... which I liked about it. Still, it was a bit rusty, so went into the magic ol' citric acid stripping bath along with some other bits I had lying around 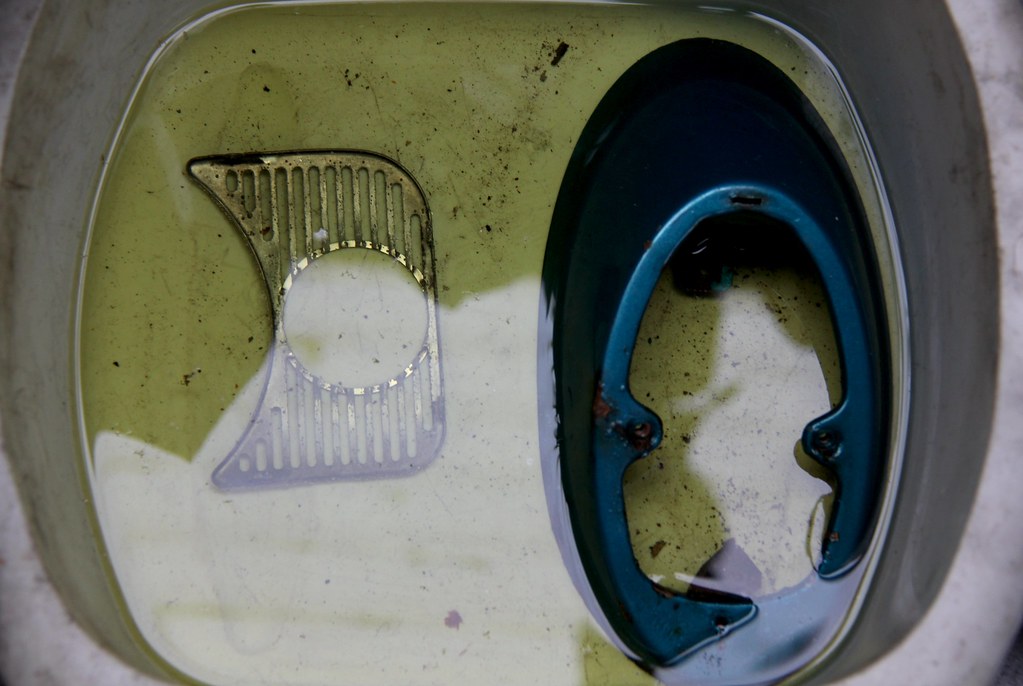 Grille cleaning Grille cleaning by Nick Liassides, on Flickr But what's the gauge that's going into the aperture, Nik? I hear you cry. Good question, I'm glad you asked. Well, as just mentioned, I didn't need a fuel gauge. Tacho? You can get a nice 52mm one but why bother? A 1200 engine is going to limit its own revs by struggling to push through the morning mists, let alone over-rev itself. Temperature? Head temp or oil are common Beetle upgrade gauges, but again, why? If it's getting warm what am I going to do about it? Sit on the hard shoulder of the M27 and wait for Dolly to have a little rest? Meh. There was only one thing I really needed, and that was 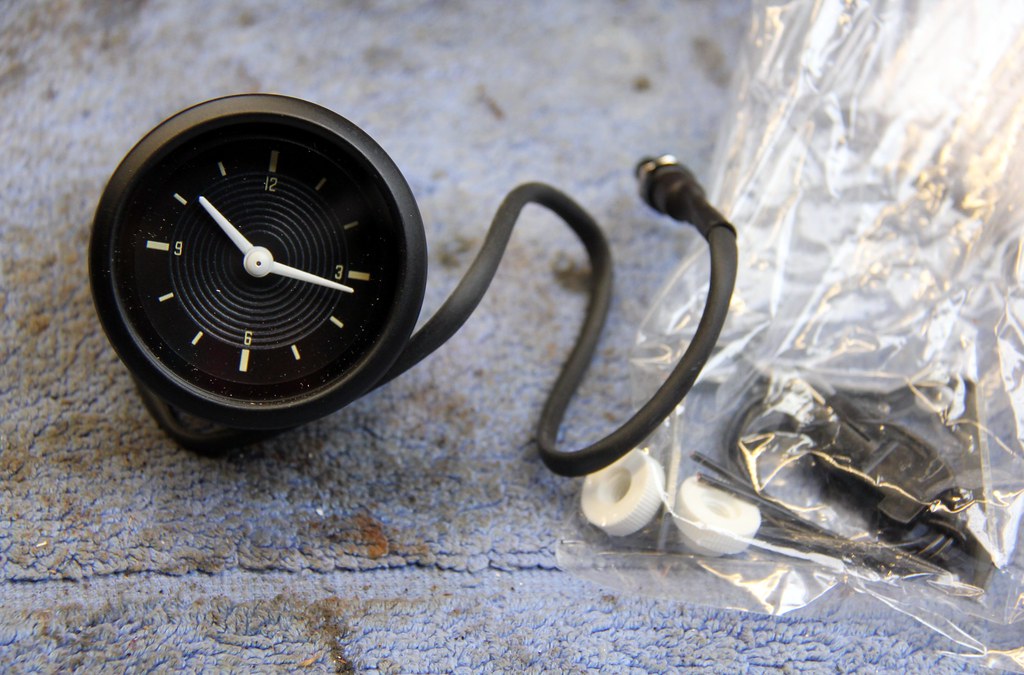 Clock Clock by Nick Liassides, on Flickr maybe it's because of my job, where I'm forced to account for every second of every day. Maybe it's growing up at a time when having a clock in your car marked you out as Someone. Someone who could afford a model a bit better than the base Popular L, anyway. Dunno why, but I just hate not knowing what the time is. And it's especially important in a 1200 Beetle, so you can tell exactly how late you're going to be. Actually, funnily enough, there's only really one route to get to Adam's place from mine, over hill, down dale and along single-carriage country roads. I've done the same trip in modern electronic cars, 450bhp sportscars and everything in between. The journey always takes an hour... exactly one hour, whether you drive like Satan and all his fiery minions are hot on your tail or whether you drive like you're taking Miss Daisy out for a promenade. Always an hour. Dolly is the only car I've ever done the trip in less than an hour. How weird is that? Anyway, time for a clock. First job was to make a gasket to cover the vents, stop air blowing right through the cabin from under the bonnet and hide the back of the wiring shambles behind 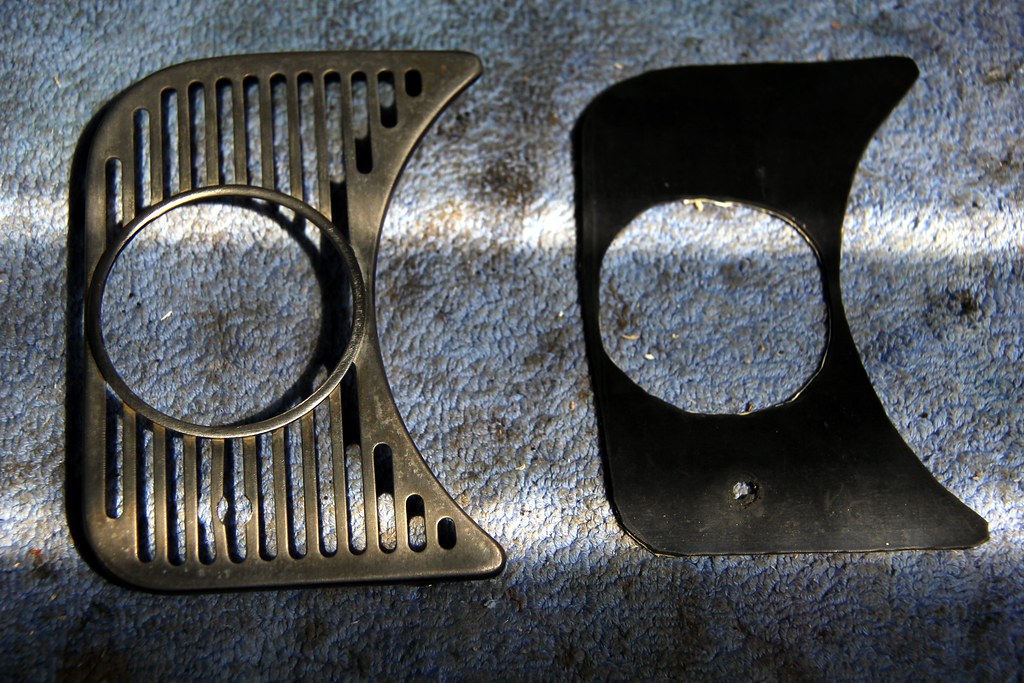 Grille and gasket Grille and gasket by Nick Liassides, on Flickr Ada let the cat out of the bag about my secret rubber sheet in his thread so I might as well show it off, lol. Trickiest part was making a small hole to allow the clock adjustment button poke through without bending horribly the tangs of the grille. Meanwhile... 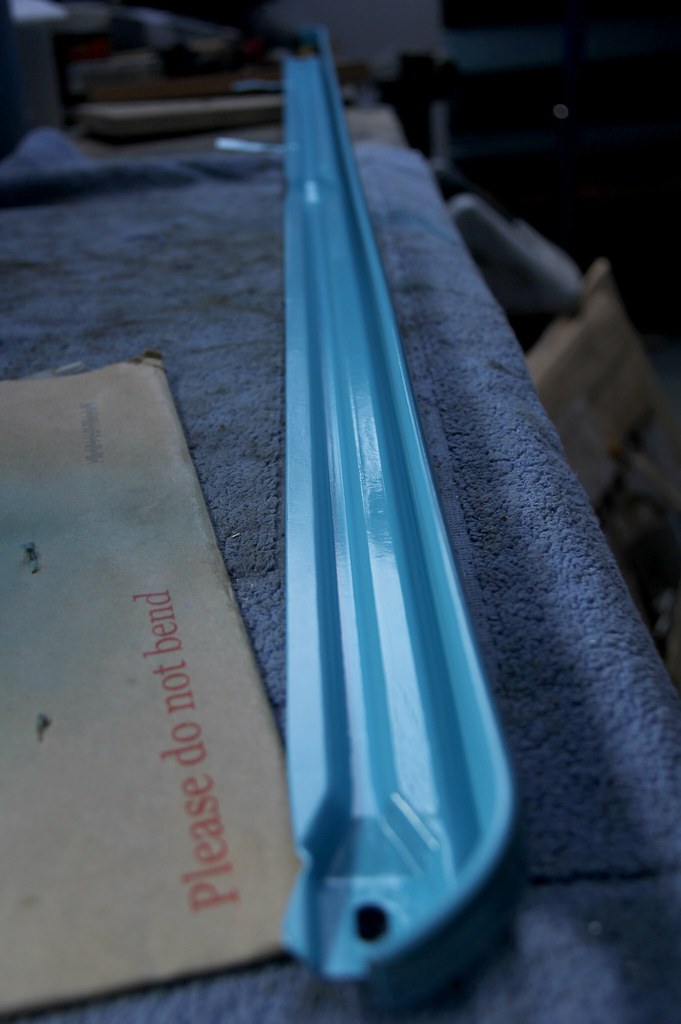 Seat bar painted Seat bar painted by Nick Liassides, on Flickr Primed and painted the seat bar in Dolly Blue (whatever that is, still never found another one the same colour. Still no idea if it's even a VW colour). And since we were chucking paint about, I did the grille panel as well. I love this clock, it's designed to match the concentric-circles motif that early VW VDO gauges such as those on Beetles and Ghias had. Even though Dolly's speedo was a later one without the rings, it was still the best fit for the cabin in my opinion 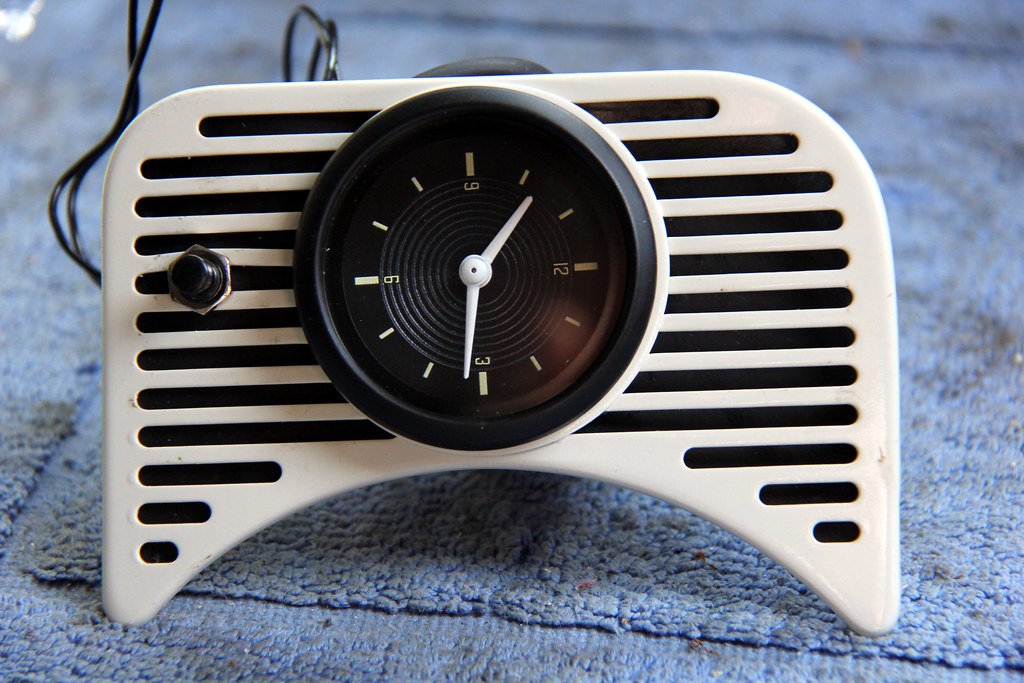 Grille with clock Grille with clock by Nick Liassides, on Flickr Funnily enough, even though Beetles had been updated to the new clocks for some four years when Dolly was born, the dash retains the cutout for the square separate VDO fuel gauge behind the grille trim. I had to make this more suitable for a round thing 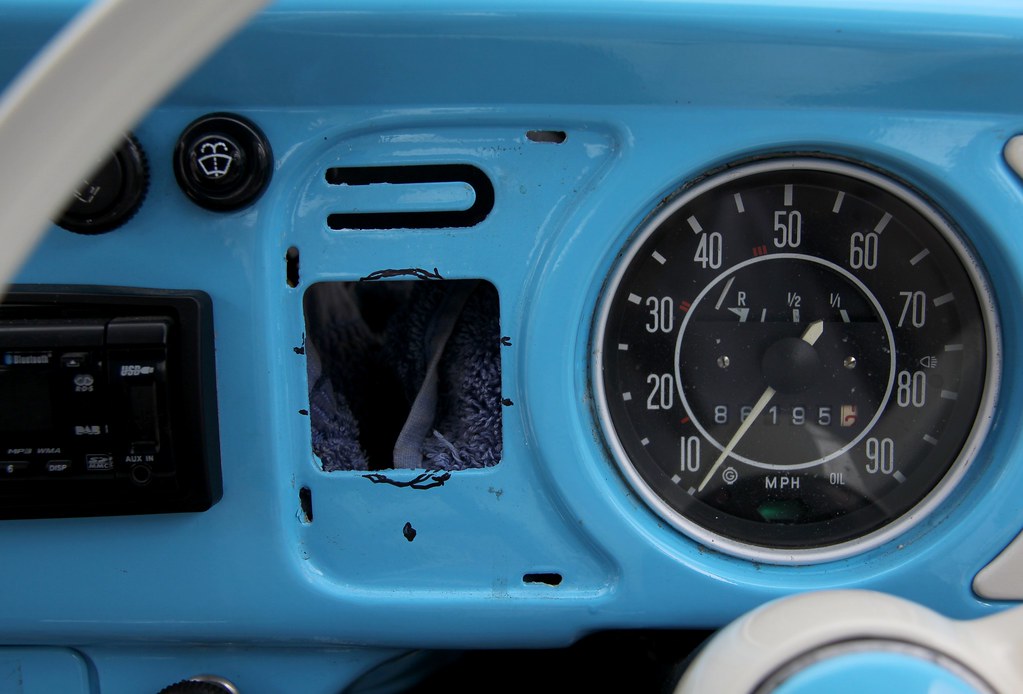 Clock hole relief Clock hole relief by Nick Liassides, on Flickr The wiring behind the dash was (is) still horrible and is still on my "to do" list. Maybe this winter  . Still, it was easy enough to steal a parasitic feed off a permanent live to the ignition, fused with a little in-line holder to avoid putting any more stress through the sketchy VW fusebox... not even three amps!  Clock wiring Clock wiring by Nick Liassides, on Flickr and there we go, one clock mounted as if it was always meant to be there. *ahem* so says me, anyway 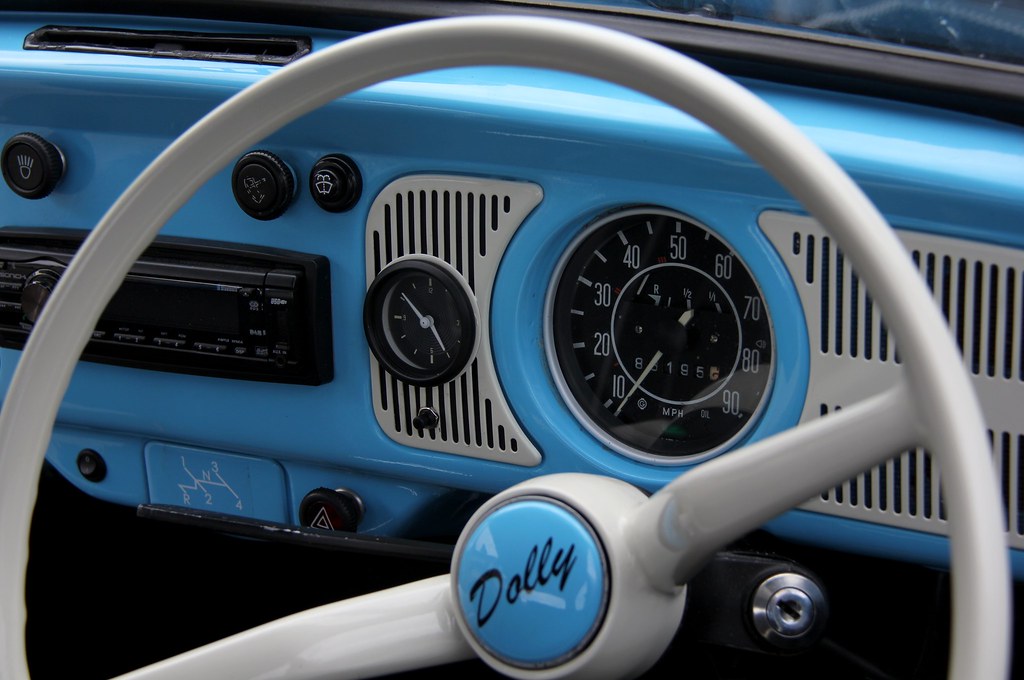 Clock fitted Clock fitted by Nick Liassides, on Flickr meanwhile, under the back seat; 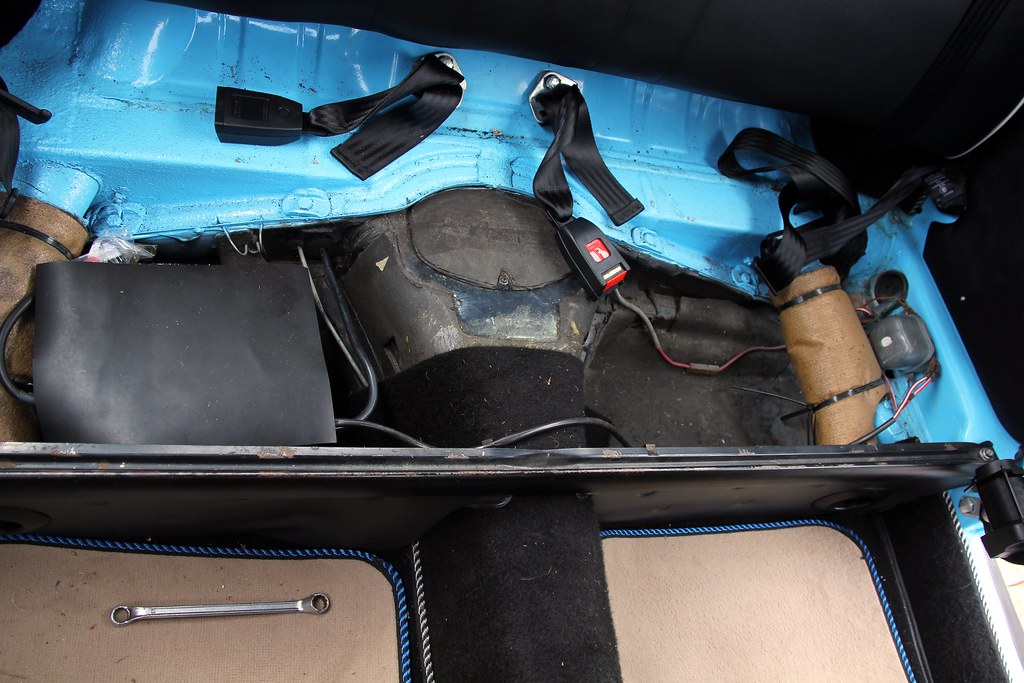 Seat bar old Seat bar old by Nick Liassides, on Flickr while we're here, might as well solve one on-going problem that'd been bugging me. See that funny-shaped plate there on the tunnel? Under that lurks the gear linkage, the end of a steel rod that runs from the gear lever to the gearbox nose. The one connects to the other via a linkage consisting of a steel cage holding two rubber blocks to take up lash. Over time the rubber denatures, the action gets all vague and it gets harder to find the gears... or, worse, predict which gear you actually have selected. Better attend to that then. The plate comes off with a single self-tapper, and under it lies the linkage. The fittings for this are pure bizarre, in a German sense of humour kinda way. A square-headed bolt (with lockwire), a giant self-tapping screw that goes into a weird-ly shaped tube that's designed to deform as the screw goes in... it's like they had a specially long night on the Schnapps the day before they designed that one, with a mission to use the most eccentric and obscure fasteners the machine shop could dream up. Because the tapper distorts its collar sleeve as it screws in, it's really hard to undo it once it's rusted together for forty-plus years, especially in a small steel box with sharp edges all round. I was hoping to leave the gear lever end undisturbed for simplicity, but in the end had to take off the shifter the free the front end of the rod and thus enable the rear end to be moved about more. So I could actually get to the stupid, annoying, ridiculous bloody daft fasteners 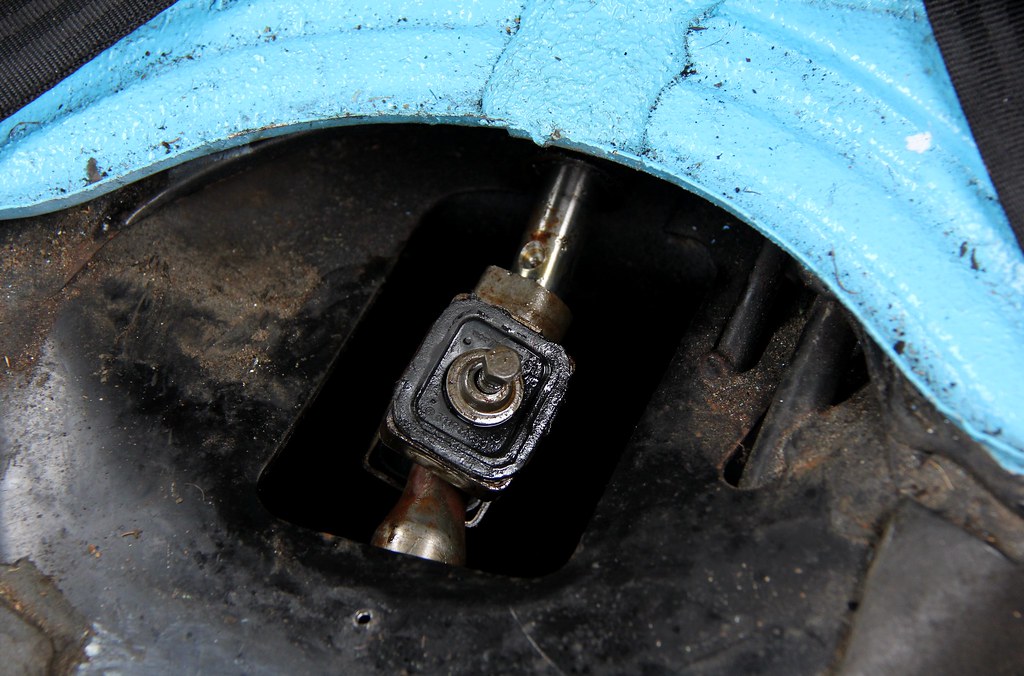 Gear linkage OG Gear linkage OG by Nick Liassides, on Flickr Inherited internet wisdom has it that going to this trouble to replace the linkage, it's wise to replace it with modern poly bushes rather than old-skool rubber. However. The kit I bought was an EMPI one, and sadly EMPI products have come a long way since the glory days of the legendary Inch Pincher being one of the first Beetle drag legends and decimate all before it. Mostly nowadays the famous Globe trademark is no longer an indication of quality parts like in its heyday, but rather an by-word for "DANGER! this packet contains the flimsiest form of Chineseum yet discovered. Do not use on anything you want to keep together more than a week" OK, that's more than one word, but you get the gist. So the advice is to re-use the original VW linkage cage unless it's rusted to oblivion and just insert the new fasteners and urethane bushes. You could see why when comparing them on the bench; the EMPI cage felt like it was folded together out of leftover KitKat wrappers, the OG VW one felt like it was forged from melted-down Panzer armour. 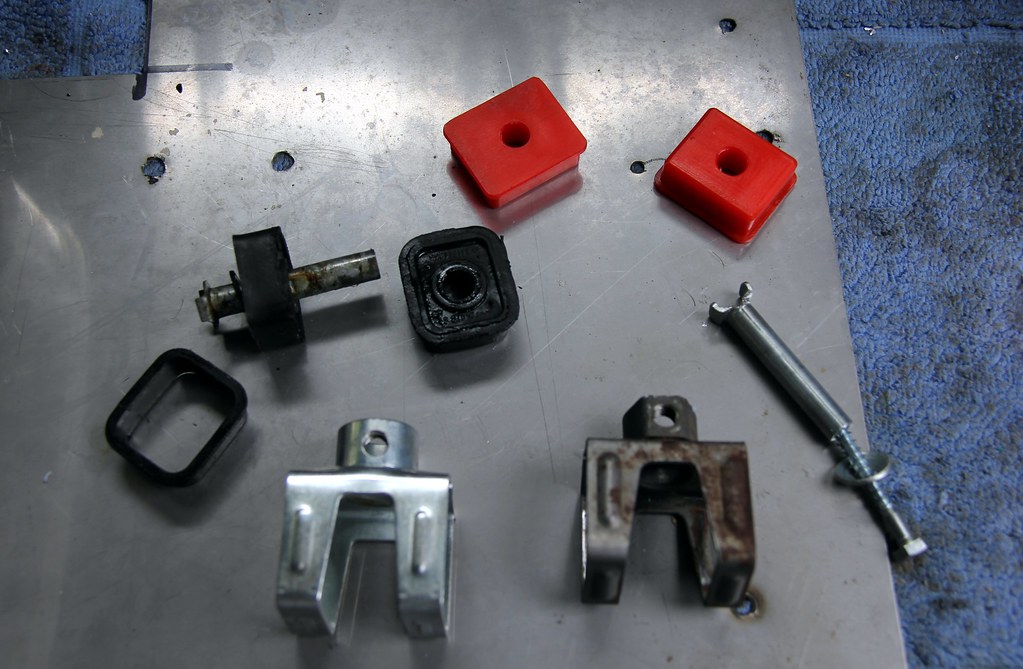 Gear linkage old v new Gear linkage old v new by Nick Liassides, on Flickr Just as well I was swapping this out though, as the original rubber blocks had gone very manky indeed and separated from their containing blocks. In with the combo of new and old bits, then, and if winding out the old deformable screw assembly had been annoying then winding the new one in was really annoying but finally I could get on with the fun part 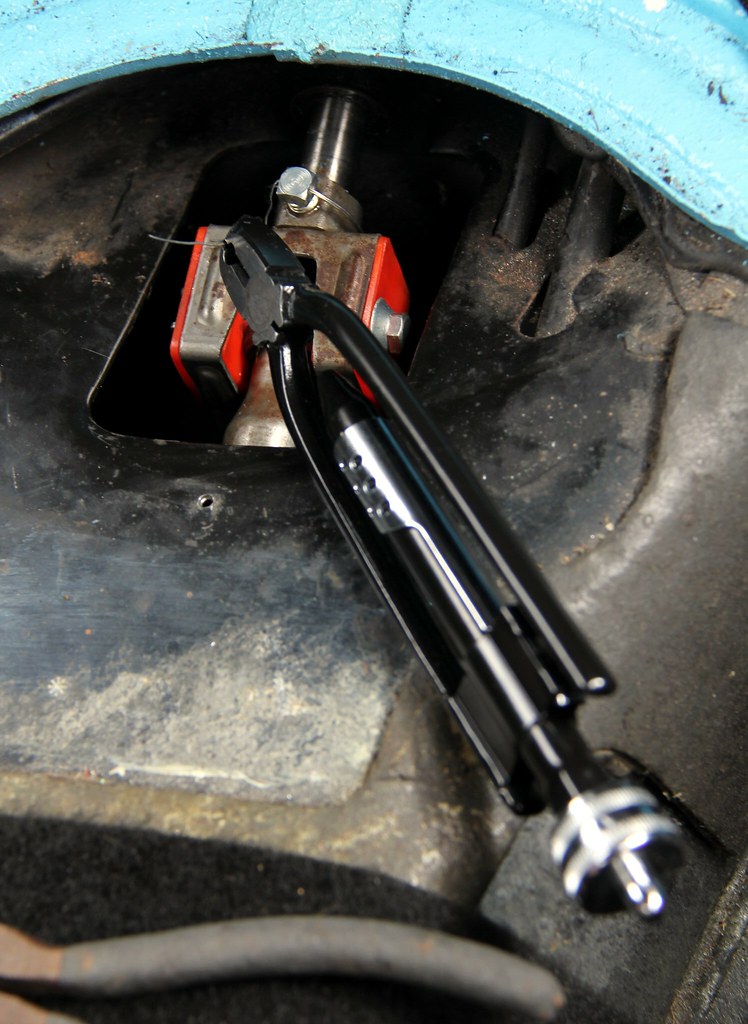 Gear linkage lockwiring Gear linkage lockwiring by Nick Liassides, on Flickr I love using lockwire pliers; not only are they a really cool little gizmo that's wonderfully simple yet delightfully efficient, but lockwiring done neatly always screams professionalism to me. It speaks of the artform Bugatti raised it to, or those hairy-chested Superbikes I grew up lusting after. And... done 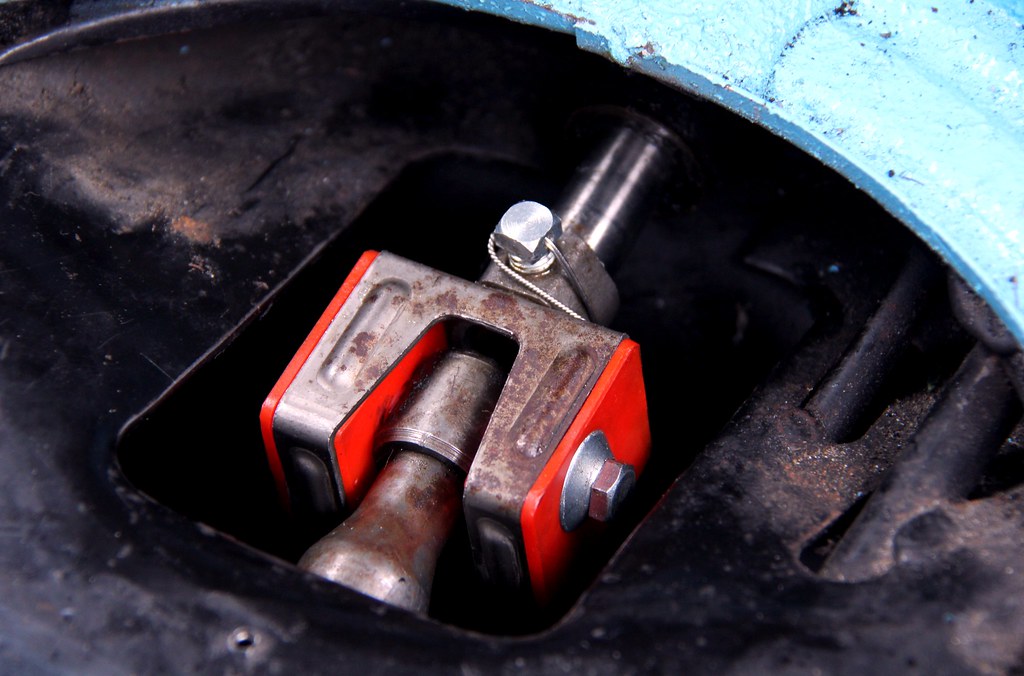 Gear linkage finished Gear linkage finished by Nick Liassides, on Flickr So all that was left... after spending ages trying to line up the gear lever properly again and tighten down the bolts by two degrees of spanner rotation at a time cos there's no smegging access through the cage... was to bung in the newly-painted seat rail 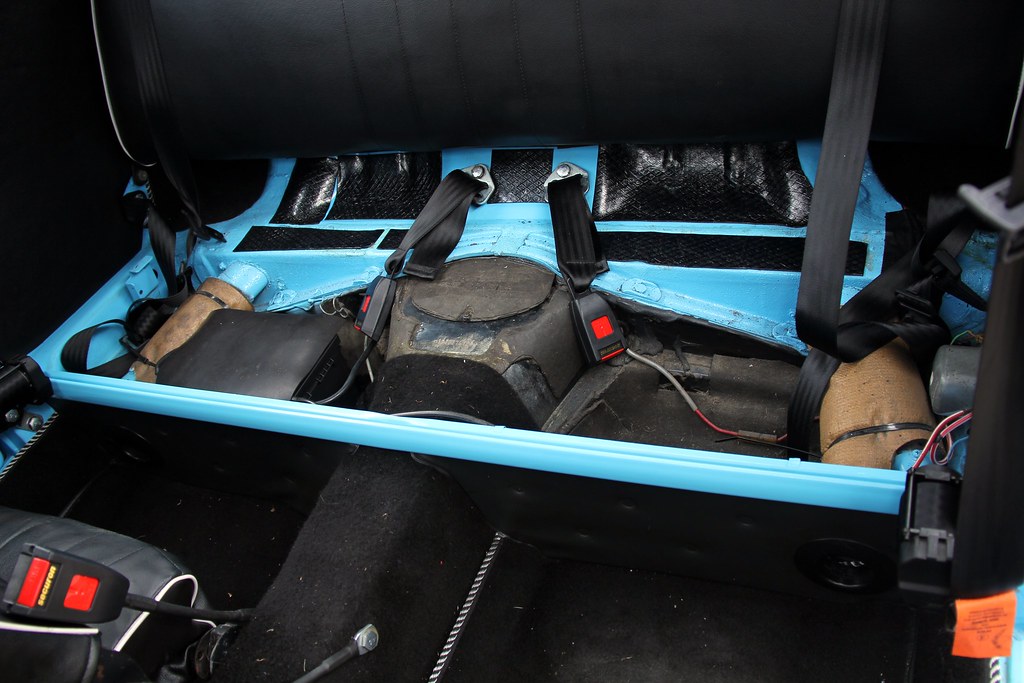 Seat bar renewed Seat bar renewed by Nick Liassides, on Flickr That's better. A nice little dash of colour to the dour coal-hole black of the rear seating 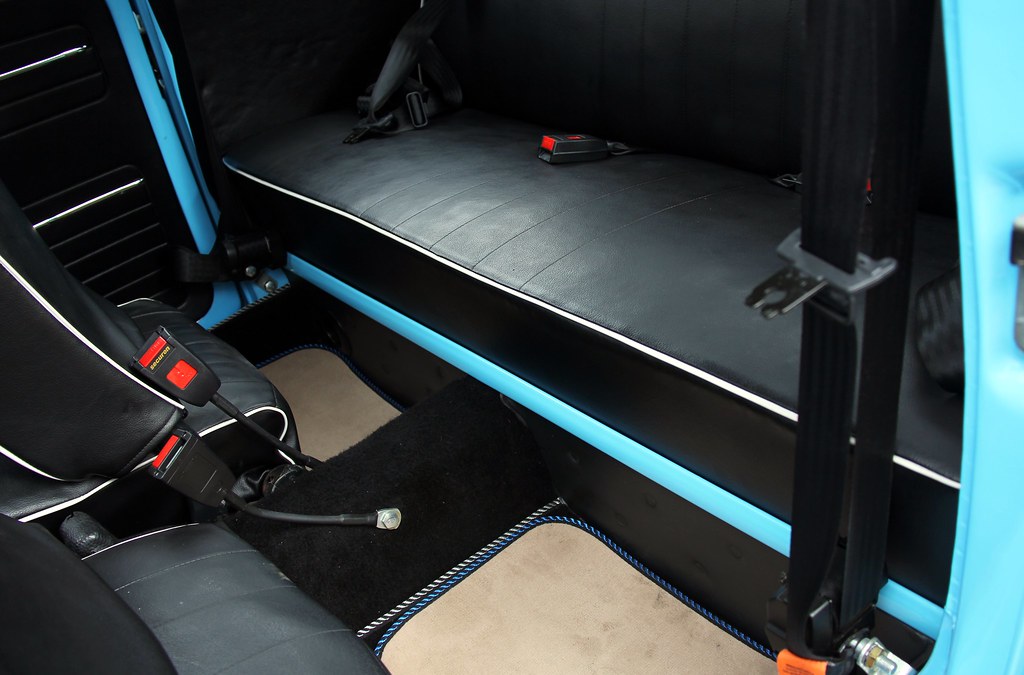 Seat bar plus seat Seat bar plus seat by Nick Liassides, on Flickr Better finish off that dash then. The clock needed light, so the best way seemed to be to steal it from the existing dash lights. These are arcane little olde-worlde spring loaded bulbholders that I was tempted to replace with maybe some LEDs but eventually discarded the idea. They work fine and there's nothing more annoying than a searingly bright gauge cluster at night... I speak from bitter experience, having had stupidly bright aftermarket gauges in the past. MY FD with one of the gauge setups was ridiculous; at night all you could see was a reflection of the gauges in the windscreen. And nothing beyond that. Anyway, it was easier to make up a new loom for the lighting than bastardise the old one. And it meant I could actually insulate the terminals, unlike the OG corroded bare ones. Hah, in your face once again, rubber-hating Germans! 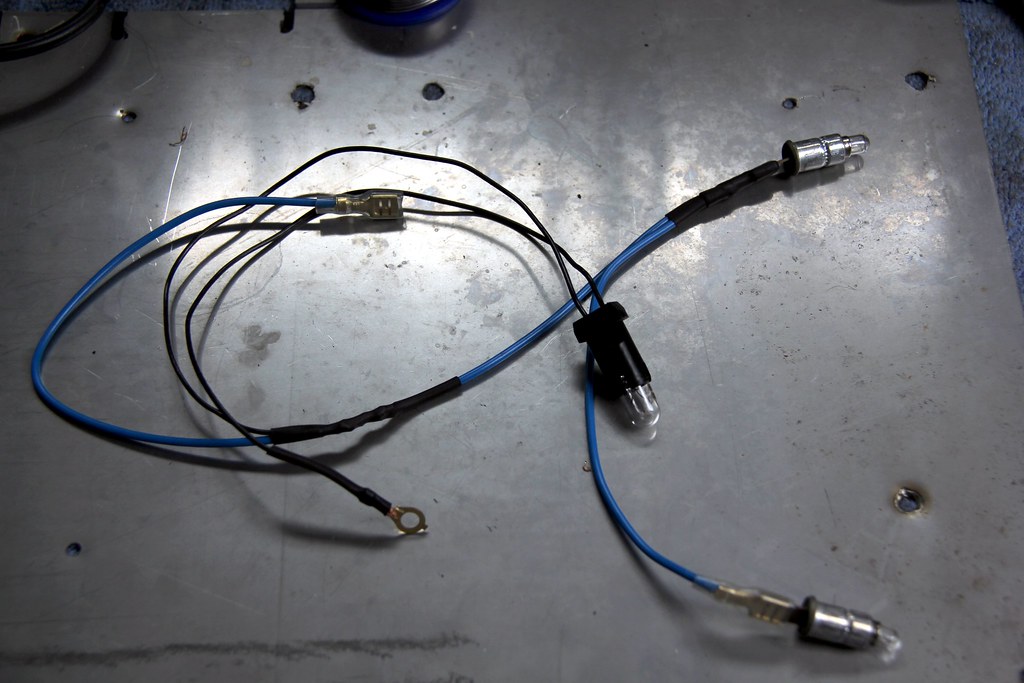 Clock light wiring Clock light wiring by Nick Liassides, on Flickr And let there be light 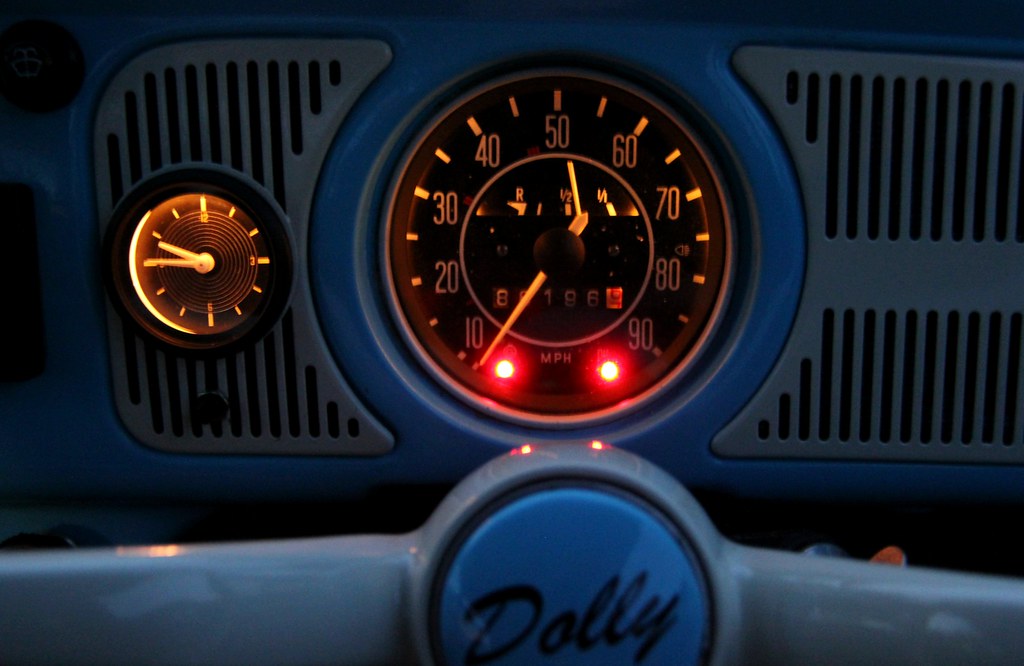 Clock finished Clock finished by Nick Liassides, on Flickr As Paul McGann says in the incomparable Withnail & I... even a stopped clock gives the right time twice a day. This one gives the right time all the time. Läuft und läuft und läuft und....  Clock lit Clock lit by Nick Liassides, on Flickr |
| |
|
|
|
|
|
Oct 26, 2018 15:57:16 GMT
|
I’ve bought a few empi bits, and there purpose seems to be to help you realise that the correct solution is to hunt down and reuse something original  Great read, thanks |
| |
|
|
luckyseven
Posted a lot
   Owning sneering dismissive pedantry since 1970
Posts: 3,839
Club RR Member Number: 45
|
|
Oct 26, 2018 16:42:21 GMT
|
Just a couple more little cosmetic touches before shiz takes a serious turn for the heavy then. Back in the day, Volkswagen actually sold heavily on the reputation for Beetle's reliability. Läuft und läuft und läuft means "runs and runs and runs", of course, and that's exactly what they did. Legendary VW advertising traded on the fact all you needed to do to keep up with your neighbours who bought a new car every year was to repaint your old Beetle... nothing else changed, after all. (Except everything; by the time the last Beetle rolled out of Pueblo production house, the only component it shared with the original KDF-Wagen of pre-war was the bonnet weather strip! Everything else had been redesigned through the years, despite the car looking broadly similar throughout). anyway, reliability; owners whose cars kept going without major repair were actually given a commemorative plaque by the factory and a letter of congratulation. Well, Dolly had long passed the magic 100 000km mark on her original engine, so it seemed reasonable to reward her stoicism. 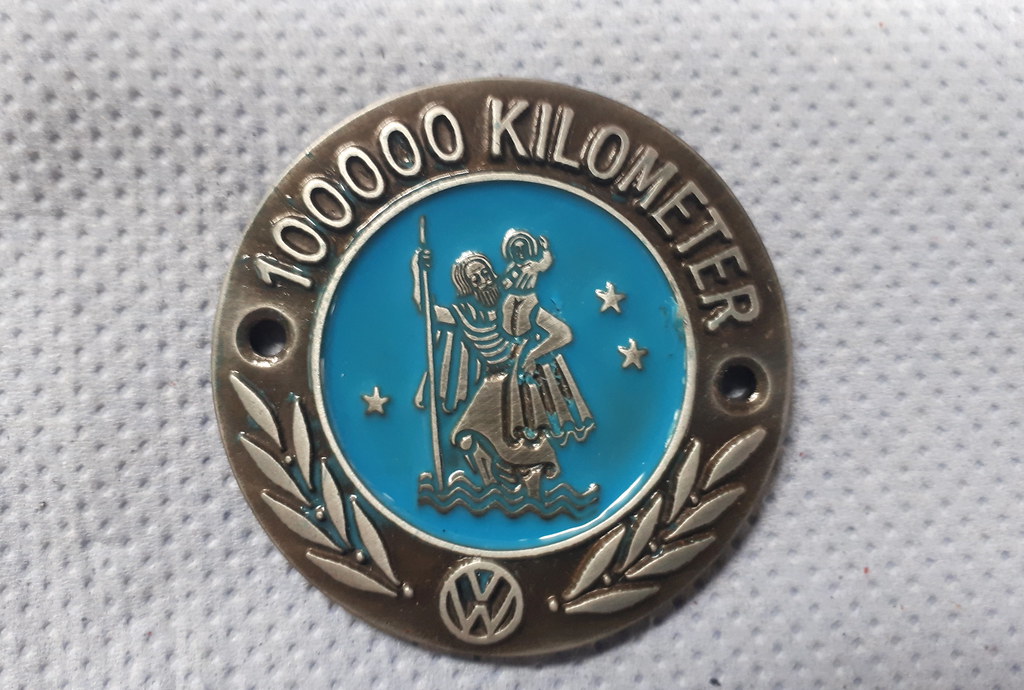 Reliability plaque Reliability plaque by Nick Liassides, on Flickr Almost certainly a reproduction, but whatever. Some might say a 70s Beetle is a reproduction of a "real" one anyway. Like I care. But the plaque was a bit... well, new. And the enamel a bit bled out. And the metal a bit... aluminiumy. If that's a word. Spellcheck suggests it ain't  Out with the art stuff and I got all Bob Ross on it's modern repro ass 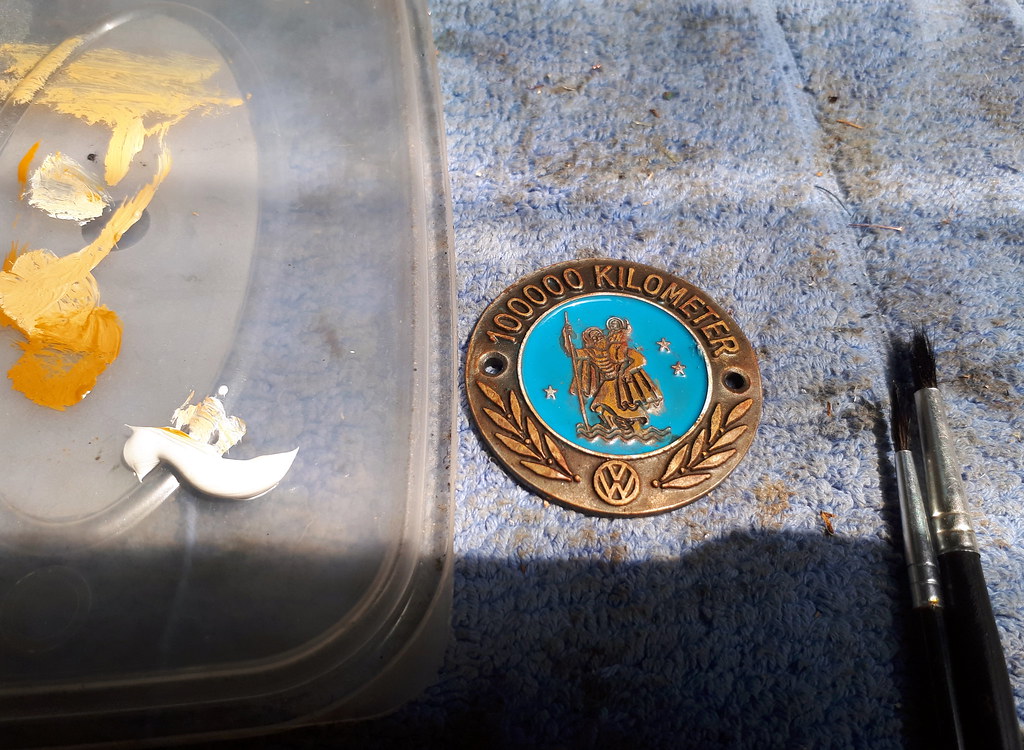 Reliability plaque aged Reliability plaque aged by Nick Liassides, on Flickr Suitably weathered, I snaffled the perfect fxings... don't tell Mrs L7. Y'see, our Thirties house had to have the doors replaced with fireproof ones when we did the loft but I kept all the original handles. So all I did was steal a couple of the pre-patinated 80 year old screws from the doorhandle escutcheons and it brought the fauxtina of the plaque together perfectly. IMHO, of course 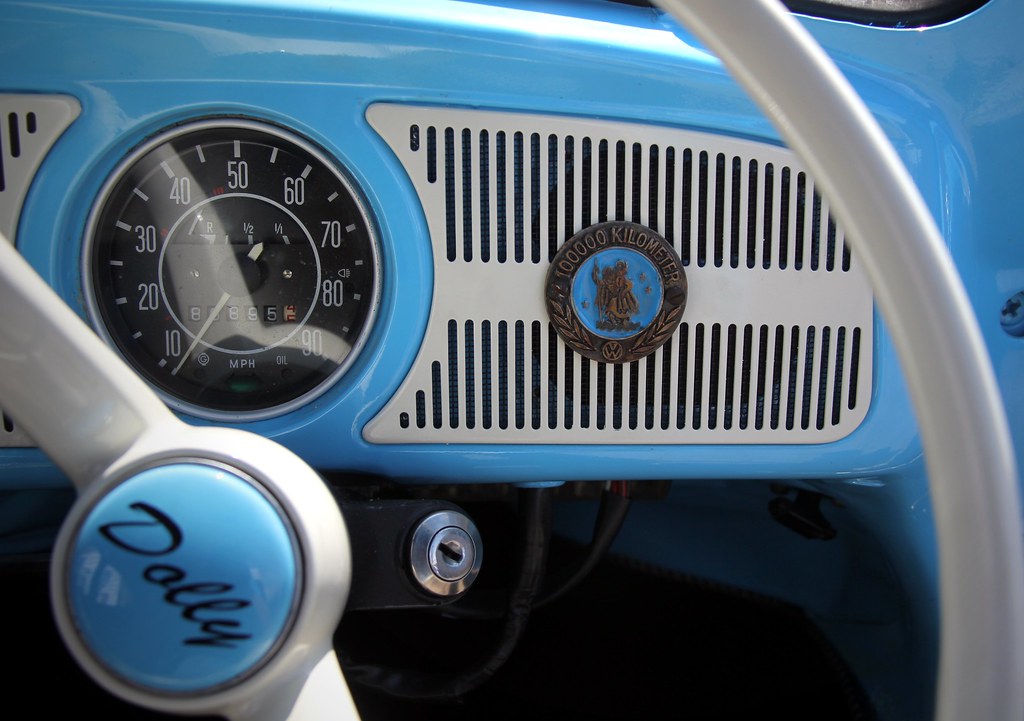 Reliability plaque fitted Reliability plaque fitted by Nick Liassides, on Flickr I've always wanted a car with a venetian blind. Ever since there was a Citroen DS Safari that lived down the street from us when I was a kid. So I bought one. It's.... errr... well, it's a bit cack, to be honest. But meh, original ones are stupid money (if you can even find one) and in all probability wouldn't fit Dolly's embarrassingly large modern rear screen anyway. So a modern repro was the only choice, courtesy of Heritage 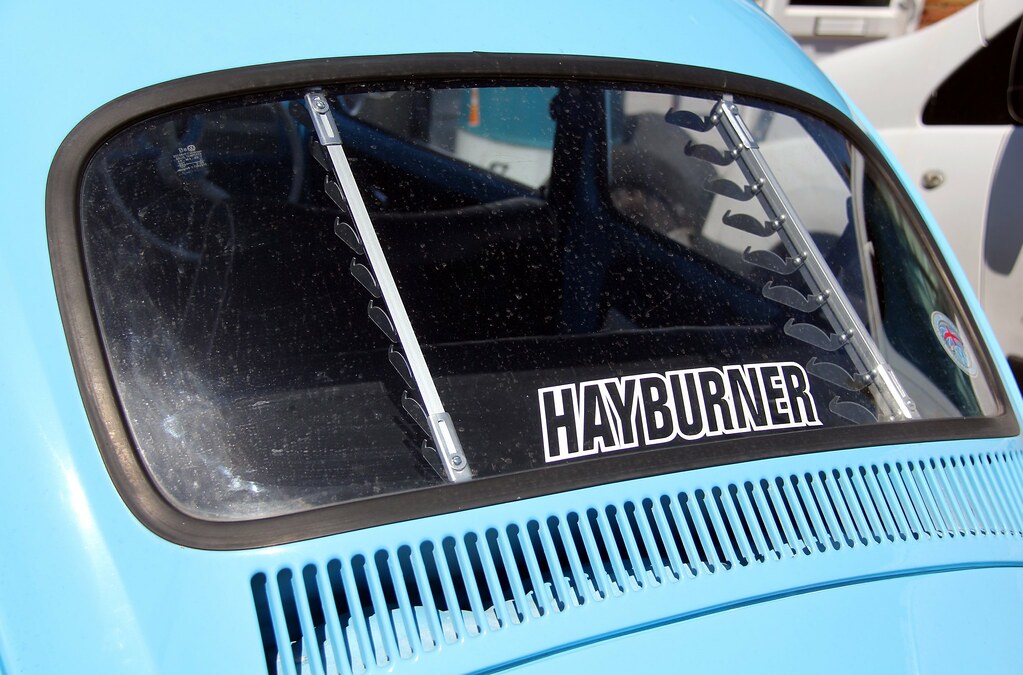 Blind spars Blind spars by Nick Liassides, on Flickr Fitting is easy. Disturbingly easy. And disturbing. Because what you basically do is wedge the spars with the hinged mounts in under the screen rubbers. And errr... that's it. The only tricky bit is spacing the little tangs out to the correct length, because as you can see, the tightening screws are on the glass side of the spar so once they're in place you can't then adjust them. It's a bit dicey because I was conscious of not taking them in and out too many times and tearing up the rubber or scratching (or worse) the glass 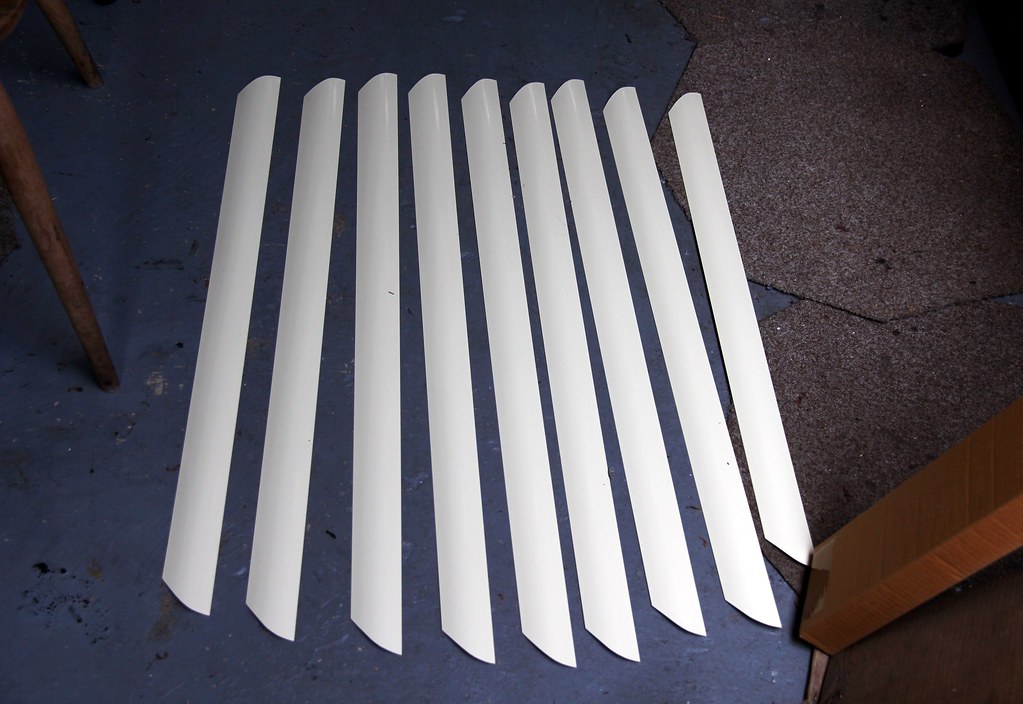 Blind slats Blind slats by Nick Liassides, on Flickr Then all that remains is to sort the slats into the vaguely correct length order to follow the width of the window. This, too, is mostly trial and error. Clip them into place and give them a week or two to straighten out and stop drooping 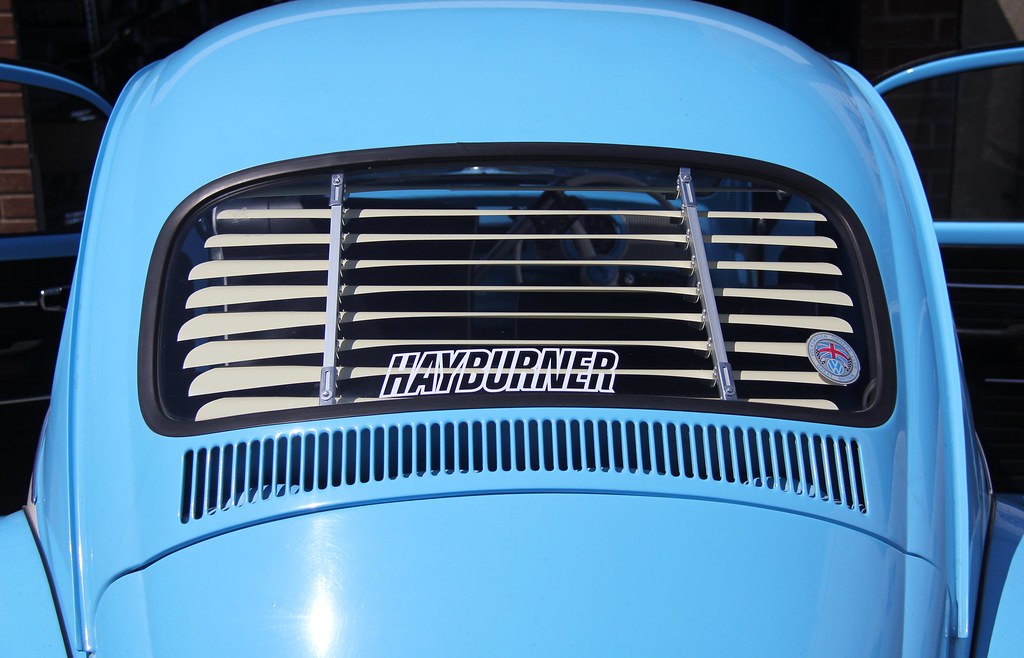 Blinded Blinded by Nick Liassides, on Flickr Done. If only all jobs were so straightforwards! I wonder if the VW OC is still a thing? 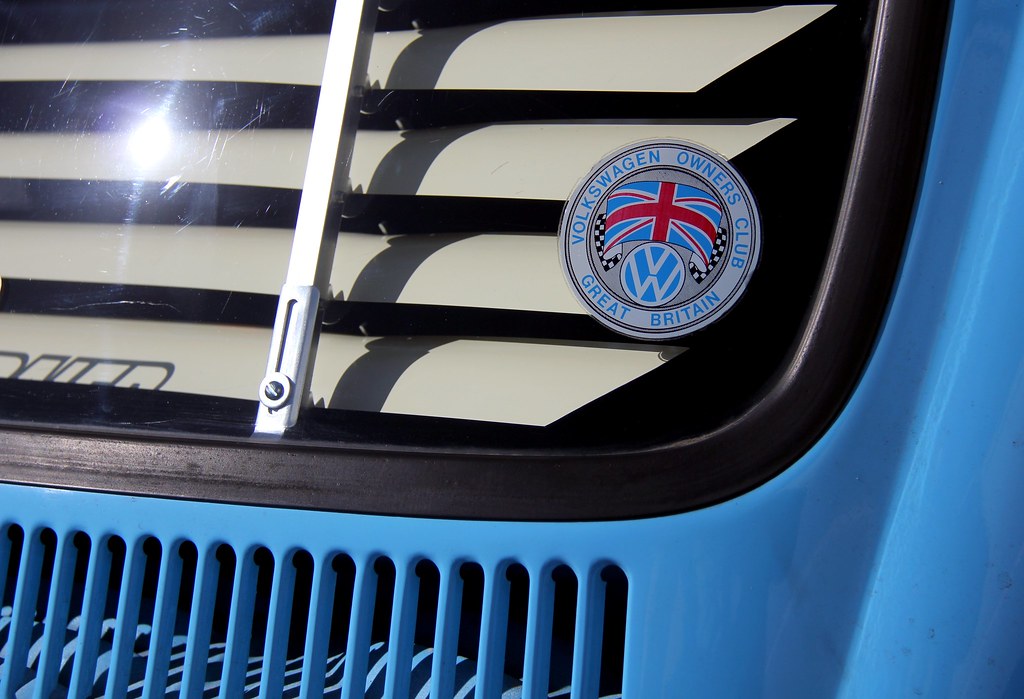 Blinded d Blinded d by Nick Liassides, on Flickr And because I hadn't done one since I got her, an oil change seemed a Good Idea. Especially since Beetles only hold like about half a pint of oil, yet rely on it heavily for cooling. And don't have an oil filter, for that matter 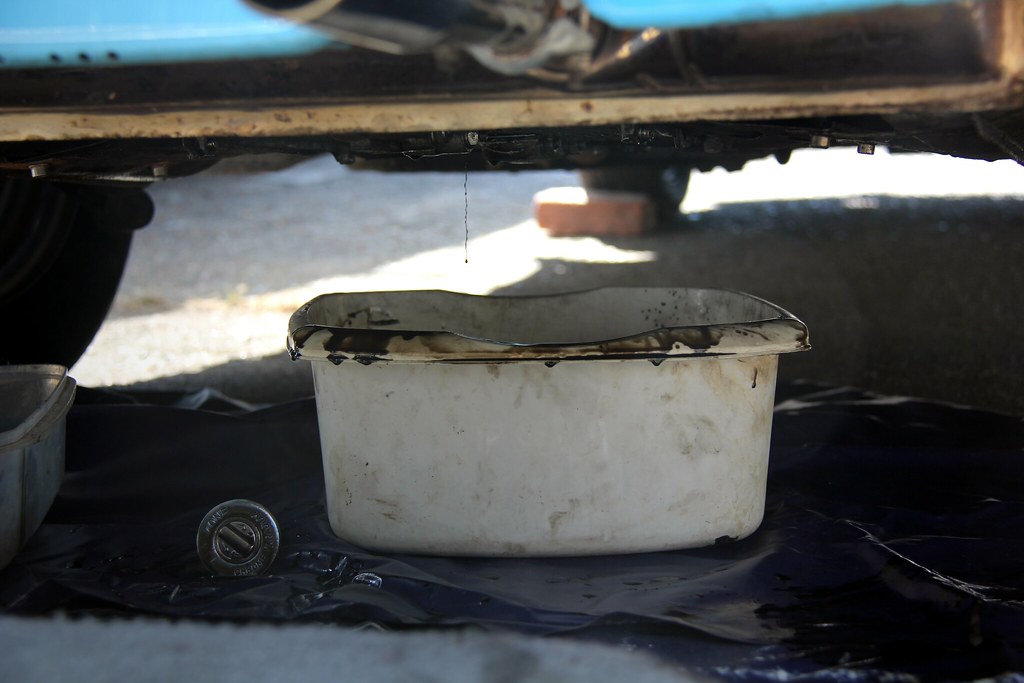 Oil changing Oil changing by Nick Liassides, on Flickr Annoyingly, Dolly doesn't even have a drain bolt in the centre of the strainer plate, meaning you have to remove the entire thing via six bolts. Which you'd have to do anyway to clear out the mesh "filter" but it means the oil goes absolutely smegging everywhere as the plate tilts about. Gahhh. Bloody Germans and their sense of humour. Anyway, I hadn't prepared for this eventuality, or I'd have ordered a plate with a drain plug. But I didn't so had no choice but to clean out the mesh screen and put back the non-drainy plate. Complete with lots of gaskets. Well, two, but that's really one too many to my mind. 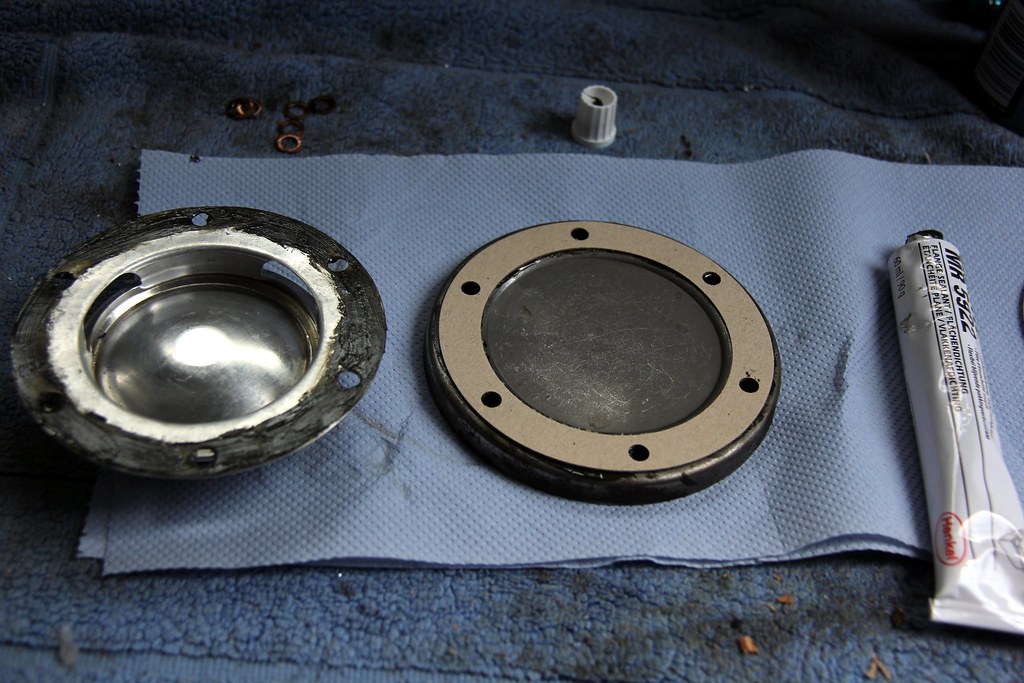 oil change gubbins oil change gubbins by Nick Liassides, on Flickr Fitting the clock had proved to me one thing... that the time is always later than you think. But philosophy aside, it had proved one other thing; I couldn't live with looking at that wiring any longer. Nope, of course I didn't dive in and sort it out, I went one better. I bought a cover, made some brackets to mount it, got some stainless wingnuts so it'd come on and off easily, and hid the whole sorry mess away out of sight and mind  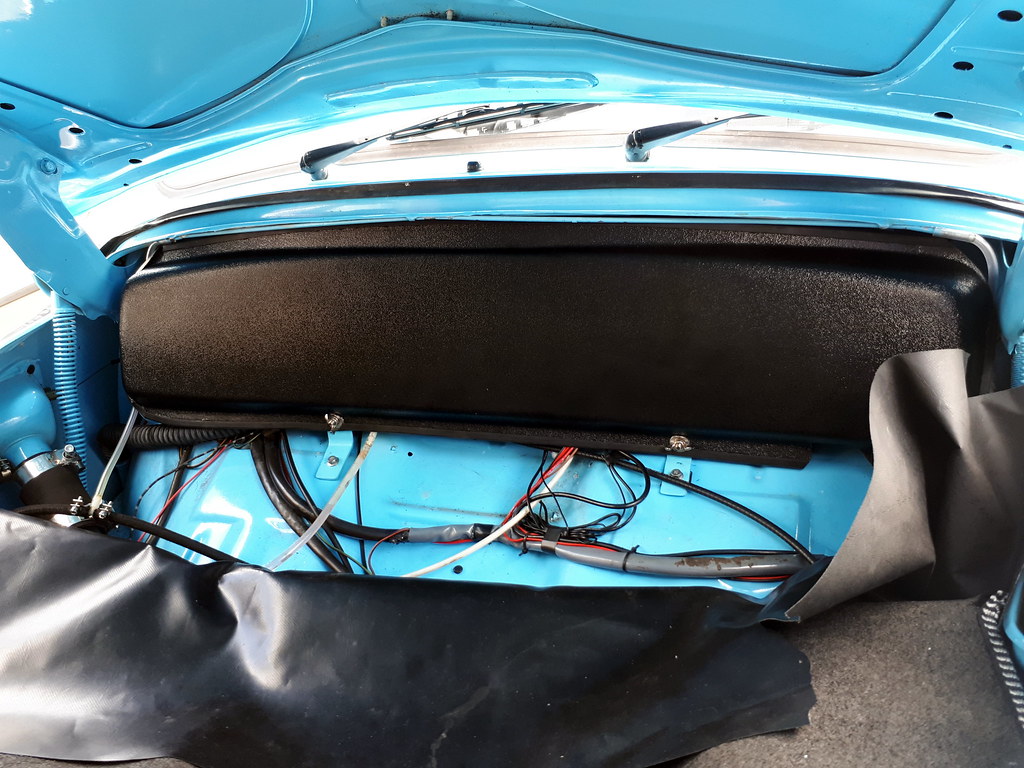 Wiring cover Wiring cover by Nick Liassides, on Flickr and finally for this round of cosmetic tarting around, one vital thing was missing from li'l Dolly 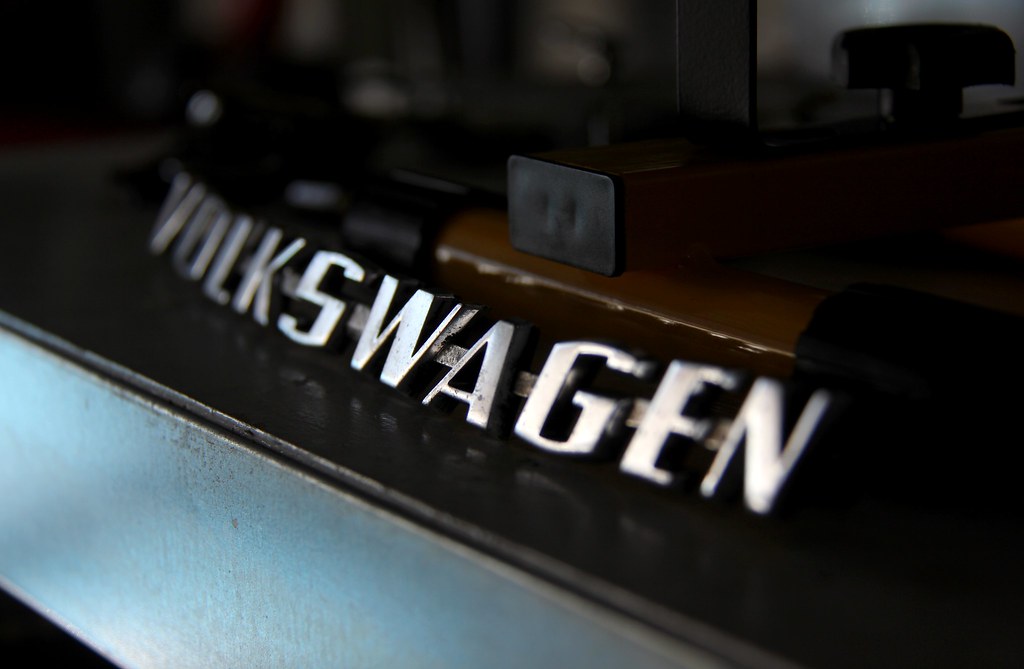 Badge Badge by Nick Liassides, on Flickr All the way from the You-nite-ED states of Wiiiiiiiide 'Murica (cos I couldn't find one cheaper in the UK...damn you, scene tax!). I'd wanted to fit one of these since getting the car, the slanted Volkwagen emblem being another thing I remember on our Beetles as a kid. So I got brave, looked at lots of photos of Beetle engine lid badges on t'net and got stuck in 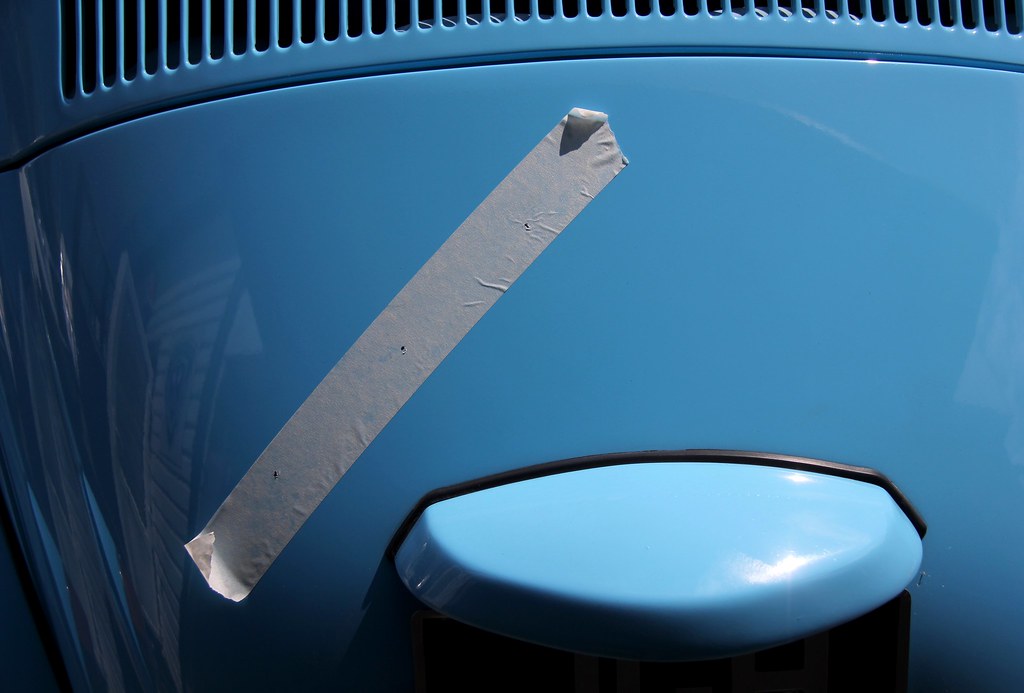 Badge holes Badge holes by Nick Liassides, on Flickr That looked about the right angle and spacing. Deep breath, summon up Brave+1 power. Drill holes in perfectly good deck lid   Badge calamity Badge calamity by Nick Liassides, on Flickr Looked OK to me. Hah, nuthin' to be worried about. Except then we went to Bugjam (thread here forum.retro-rides.org/thread/206770/perfunctory-picture-essay-bug-belatedly ) and I parked up next to Adam and Lewis with their factory-fitted bootlid badges. 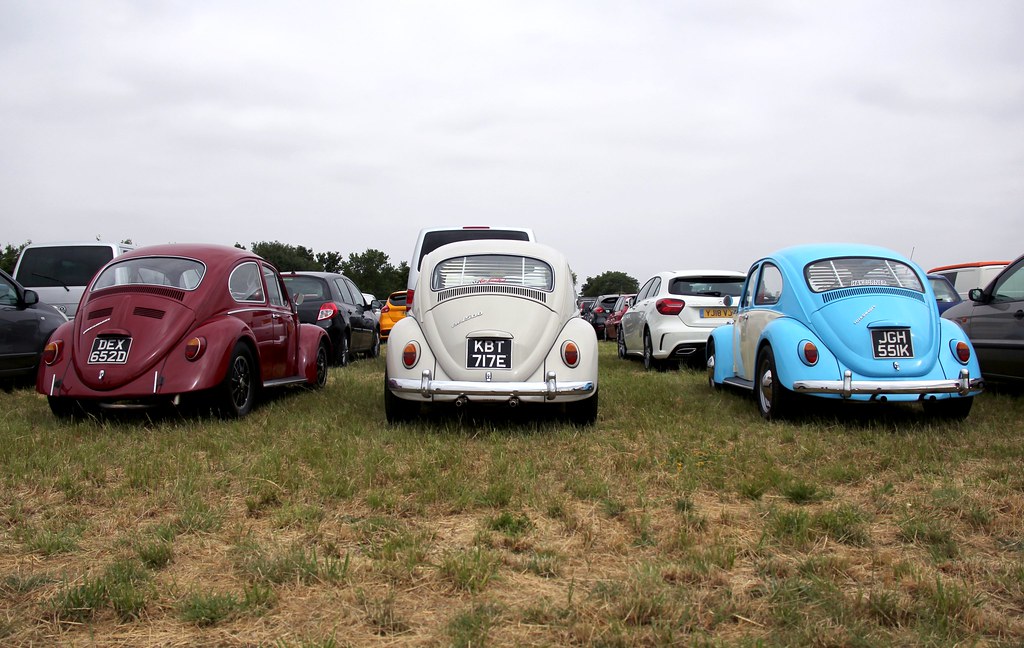 Arrival Arrival by Nick Liassides, on Flickr  Smeg Nothing like  Oh, well, tune in to the next thrilling installment, when things will be going into massive overkill mode. I can promise explosions, death * (again) and changing the car beyond all recognition. Don't miss it, groovers 
*Almost actual death, anyway. Again  |
| |
|
|
luckyseven
Posted a lot
   Owning sneering dismissive pedantry since 1970
Posts: 3,839
Club RR Member Number: 45
|
|
|
|
Hullo again  Well, obvs I couldn't leave my lovely new (old) boot badge like that at a ridiculous angle contrary to ze German dictated correct angle of attack most beauteous alignment. It must be just at the correct angle...oddly, the same one to activate the death wail of a Jericho Trumpet hanging from the undercarriage of a Ju87 Stuka. No more, no less. Pure coincidence, I'm sure. I'd have to fix it. But how? I'd drilled bleedin holes through the bootlid now, hadn't I? So they'd either be... well, holes hanging around in no man's land with no discernible purpose or I'd have to move them. Which would realistically mean welding them up. Which I can't do. So I'd have to pay someone to do it, and then obviously the paint would be knackered so it'd need re-painting. Which wasn't the worst problem; after all, I had almost a litre of colour-matched Dolly Blue already. Soooooo... if I'm resigned to painting it anyway, there's only really one sensible option; 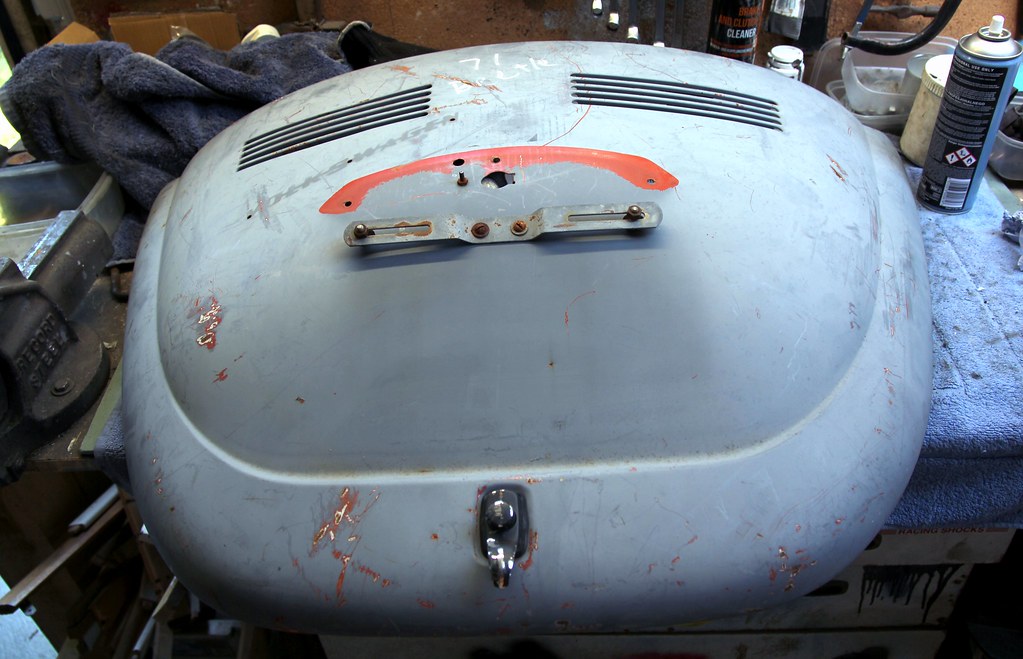 arrived outside arrived outside by Nick Liassides, on Flickr yep, a new engine lid. And what's even better, this one came with free holes drilled in the factory-specified Jericho Trumpet alignment. Yay. Only trouble was, it was in 'Murica. And I've no idea why I couldn't find one I liked in the UK, just couldn't. All the ones on eBay were either rusted beyond belief or stupidly expensive. Or had the wrong vents. Y'see, I don't like the late-model engine lids with the rows of vents right across the width of the lid. I wanted one like this, with the old skool cabriolet-style pair of vents. Because I'm fussy I suppose. Like a lot of the things VW changed throughout the long life of the Beetle, there seems little rhyme or reason as to which models got what and when, but this was definitely off a 1971 so it ought to fit and the vents were in the correct place (and so were the badge holes  ) so I don't care whether it's "correct" for my car, I'm having it. And it was cheaper to have it shipped to my door from America than it was to buy some less than a 100 miles away  While I was waiting, some other stuff happened. Dolly bobbed up on the VW Heritage facebooky bloggy thing that they do. The only reason I know this is because a mate sent me a screen grab of it... I'm hopeless at social media stuff 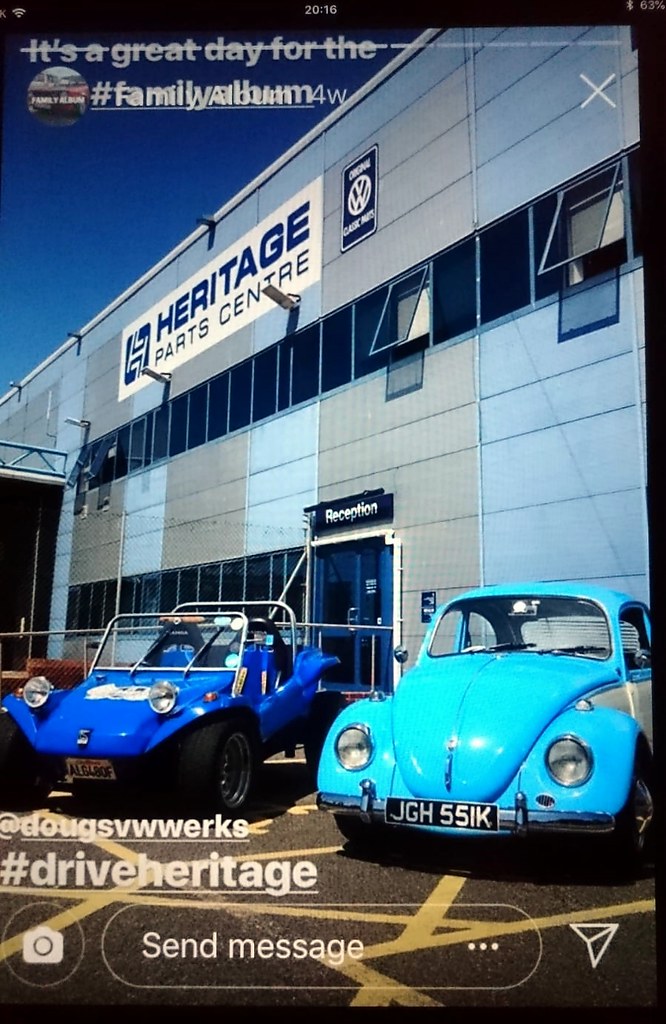 Web celeb Web celeb by Nick Liassides, on Flickr I got some photos from one of my mum's old scrapbooks from back in the day... not sure exactly which day, but this is probably sometime early 60s 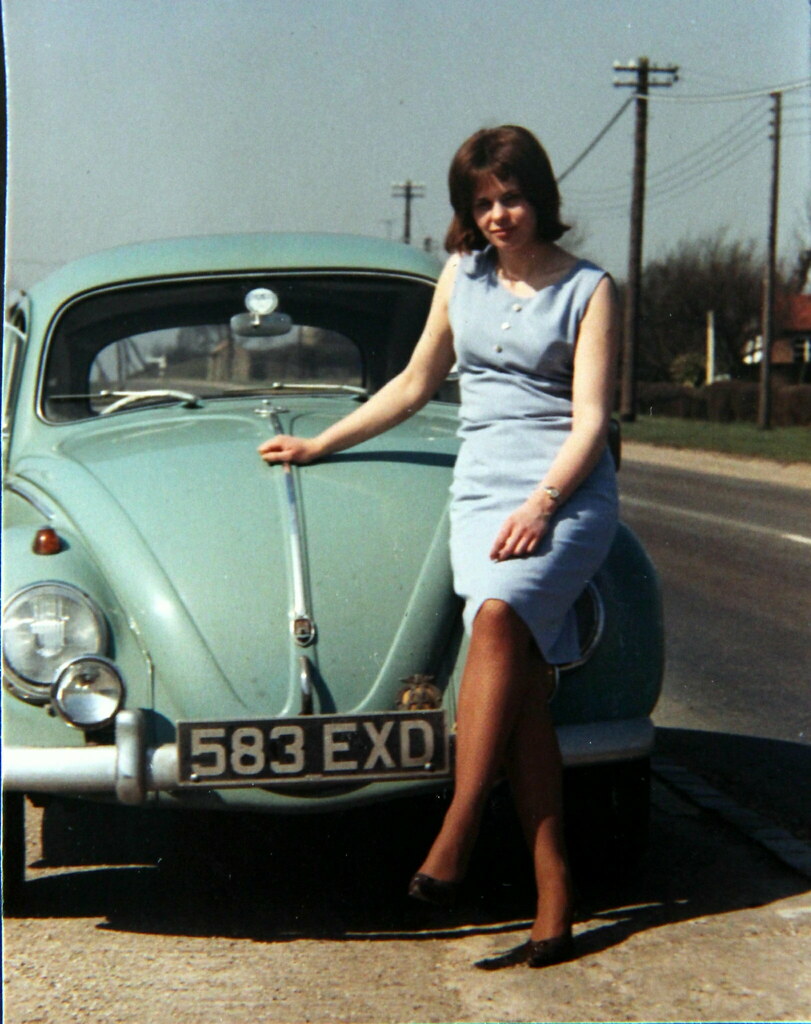 583EXD i 583EXD i by Nick Liassides, on Flickr The giant Winalot sign makes me laugh more than it should. This was apparently in the days before framing the shot  . Anyway, that's my mum with the first family Beetle, that died when I was about five 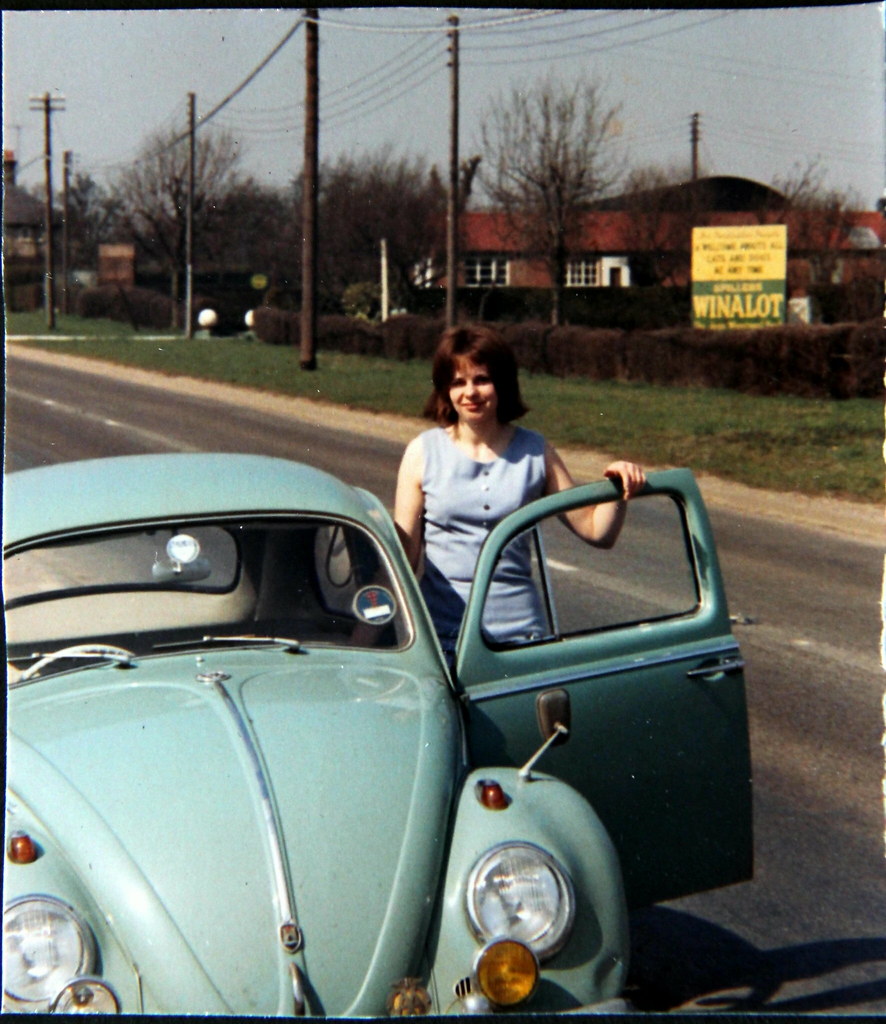 583EXD ii 583EXD ii by Nick Liassides, on Flickr ...and this was her replacement (the Beetle, not my Mum), circa 1975. The little unfeasibly excited fat kid in glasses inappropriately fondling the Beetle's flank is me. Yeah, go on. Get it out of your system. That was the first new car we'd ever had... what sort of maniac bought a new Beetle in the mid-70s? Oh yeah, my old man 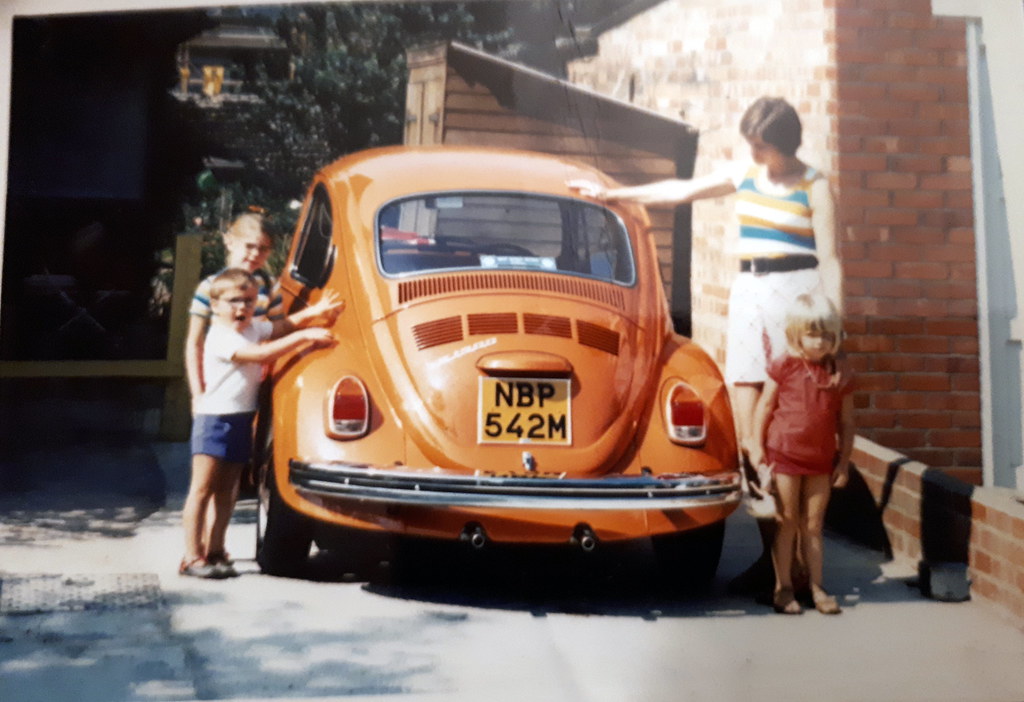 First new car First new car by Nick Liassides, on Flickr And back to the present. I gave Eeyore a lift to work one morning... about 4 a.m or so. Typically, it was when the gorgeous summer heatwave broke and we were treated to a storm of Biblical proportions. Thunder, lightning and rain so hard you struggled to stand upright in it, let alone see to drive. It was, no exaggeration, appalling. And errr... the windscreen wipers on yon Beetle are not very efficient, despite having two distinct speeds; slow and stop. It didn't matter too much, as it turned out; we hit the roundabout top of Lancing to find it was already properly flooded. A massive bow wave came up over the bonnet, splooshed across the windscreen. And all the lights went out. "Errrrm... perhaps we should get off the bypass and use the Old Shoreham Road?" ventures Eeyore, apparently deciding he had things he still wanted to live for after all. To her credit, Dolly never faltered nor failed to proceed. We just did it on sidelights alone. And when I tried to start her the next day, the battery was stone dead. Not even enough gumption to light the dash ignition lights. This required further investigation. Fuses were all fine, and I had my suspicions about what the cause was. So. Of. With. The. Headlights. AGAIN  To be fair, I would have had to do this sooner or later anyway because, yet again 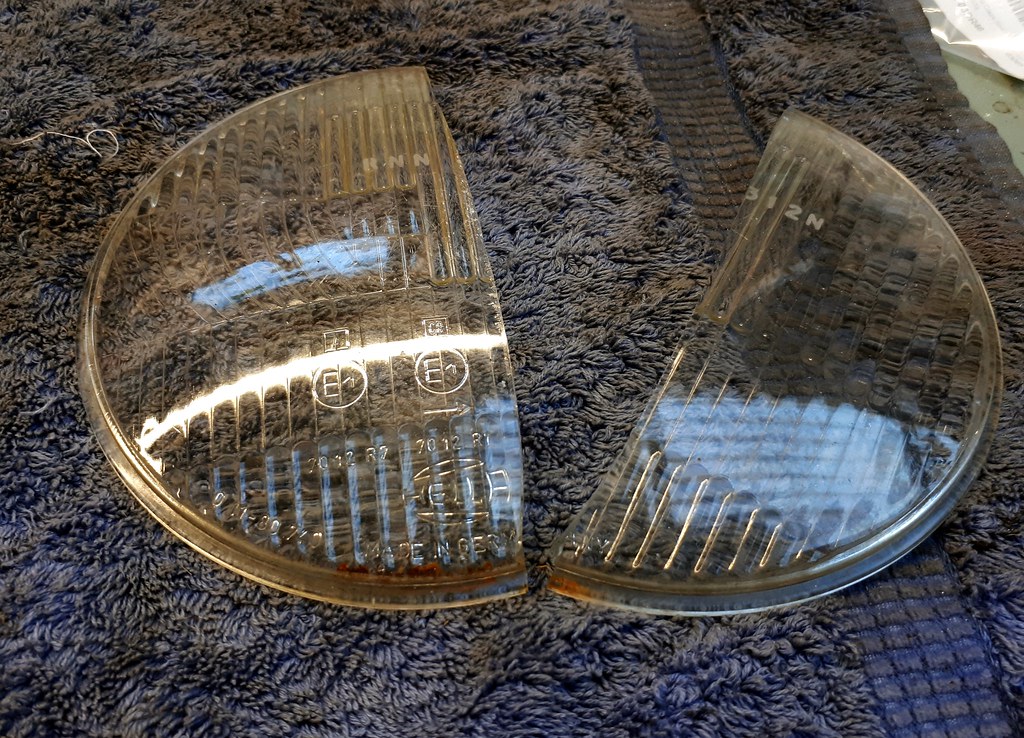 BNN312N remnant BNN312N remnant by Nick Liassides, on Flickr I wonder what happened to BNN 312N. Someone cared enough about their Beetle to etch the headlight glass with the registration number... then nothing. DVLA don't list the car, not even as off the road so I guess it must have been scrapped. And one of those lenses ended up on Dolly and then got broken by a stone or whatever. And then, one morning when God was unhappy with the world and wanted England to drown, it let a load of water in and 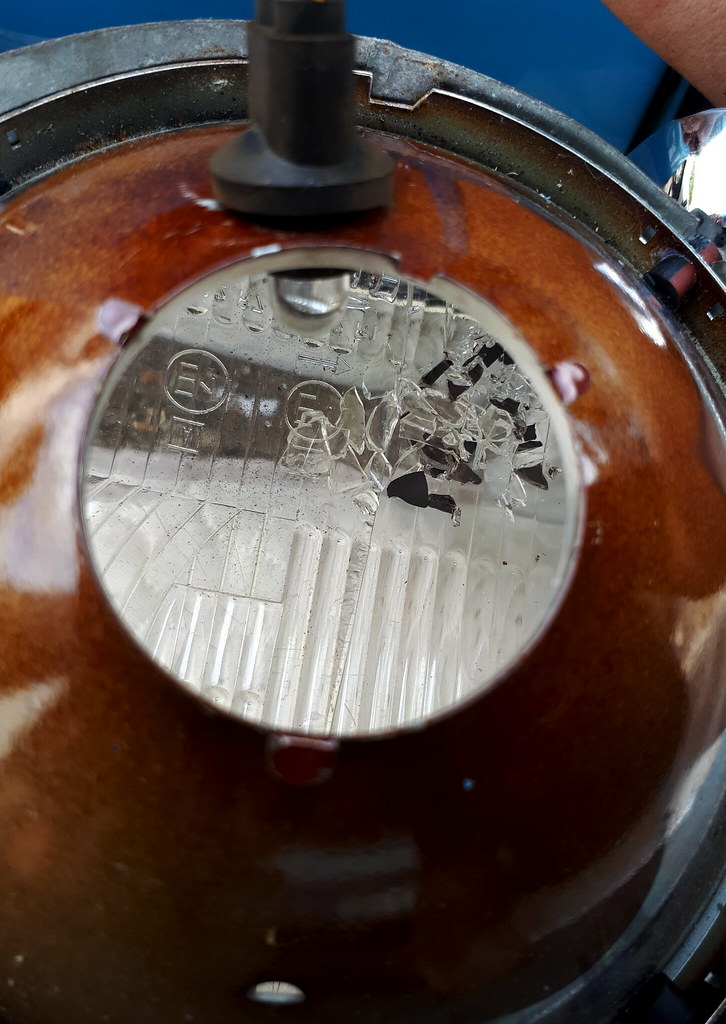 shrapnel shrapnel by Nick Liassides, on Flickr Yeah, it didn't take much imagination to work out what happened. The hot/cold stress of halogen bulbs being deluged in puddle water was enough to shatter both bulbs* * yes, I know they're lamps, not bulbs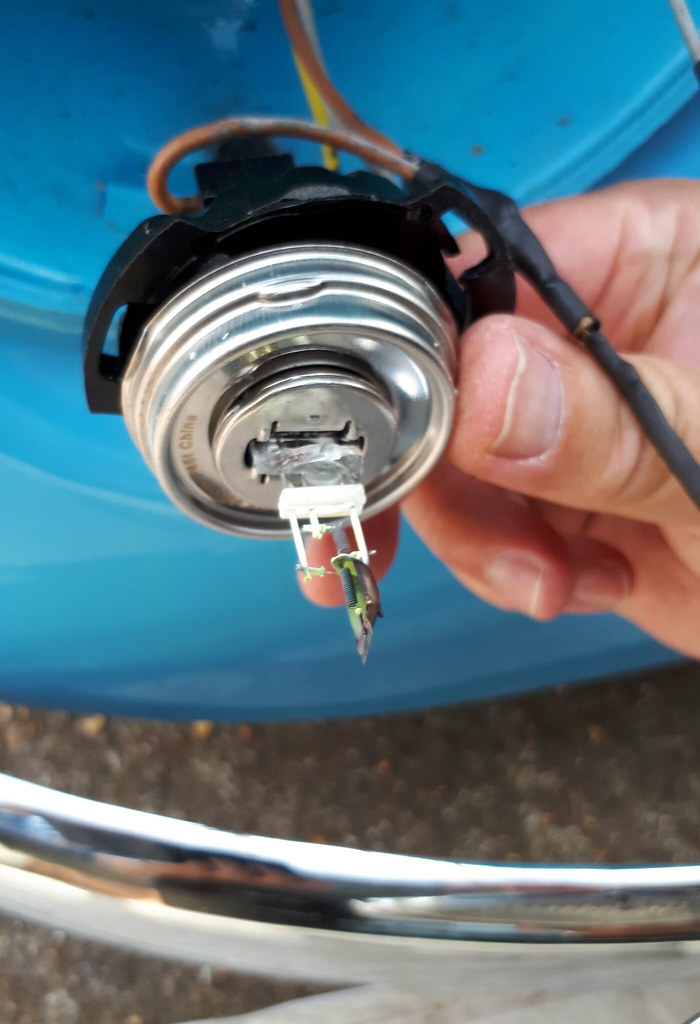 shattered H4 II shattered H4 II by Nick Liassides, on Flickr all that was left were headlight bowls full of glass fragments and some random electrode things, one or both of which, I'm presuming, were shorting enough to flatten the battery overnight 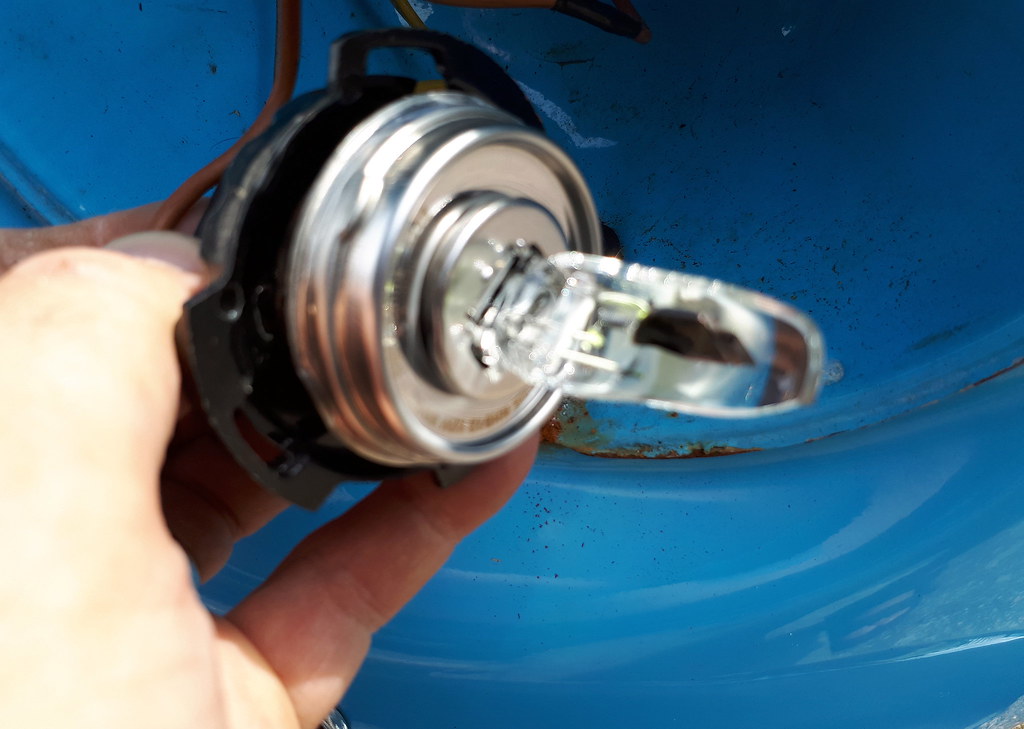 shattered H4 shattered H4 by Nick Liassides, on Flickr Legendary mobile phone photography there  This time I went all out and even splurged on new glass-to-bowl seals. It seemed prudent, given how non-waterproof the old ones I'd re-used last time had proved to be. Gave the reflectors a nice clean too, amazing how tarnished they become and how quickly  new seals new seals by Nick Liassides, on Flickr And they've worked fine ever since, and more importantly, the battery hasn't gone flat again. Right, that engine lid, then If you were going to post something halfway across the United States of Wiiiiiide 'Murica and then clear across the Atlantic Ocean to Britain, you'd want to give it a fighting chance of arriving in one piece. Or at least, un-mutilated. Not this lad. He put the engine lid in a cardboard box. And that's it. No bubble wrap, no wadded paper, not even a bit of clingfilm. Box. Lid. Bosh. Post. Done  So after the abuse of the US Mail, the salty Atlantic air and then a GPO delivery monkey, it arrived in need of a bit of remedial action, it's fair to say 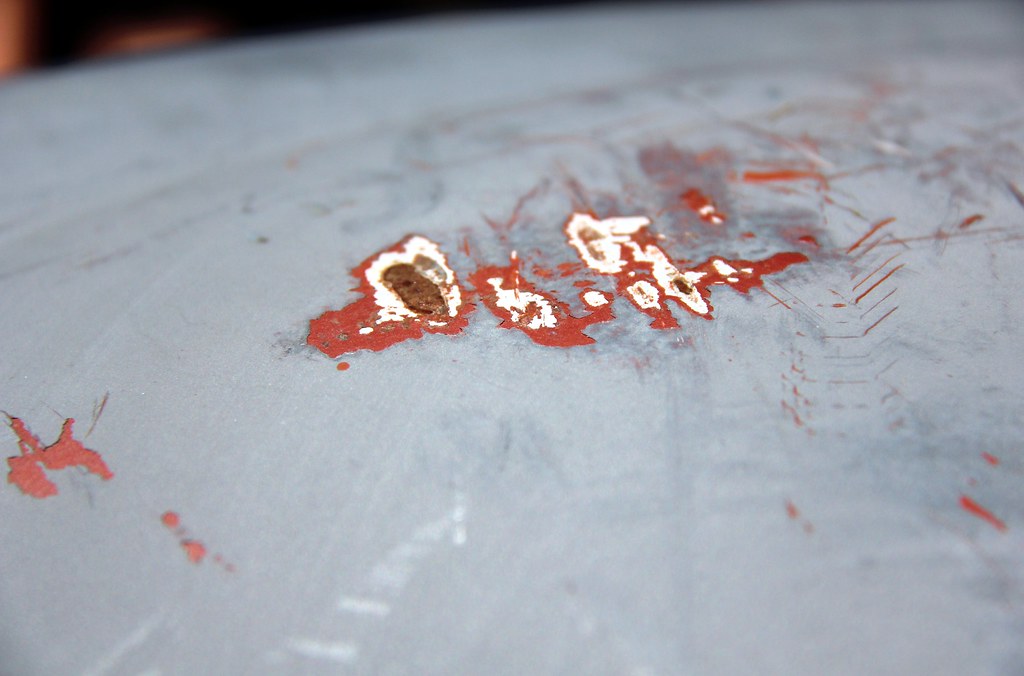 Gouges Gouges by Nick Liassides, on Flickr 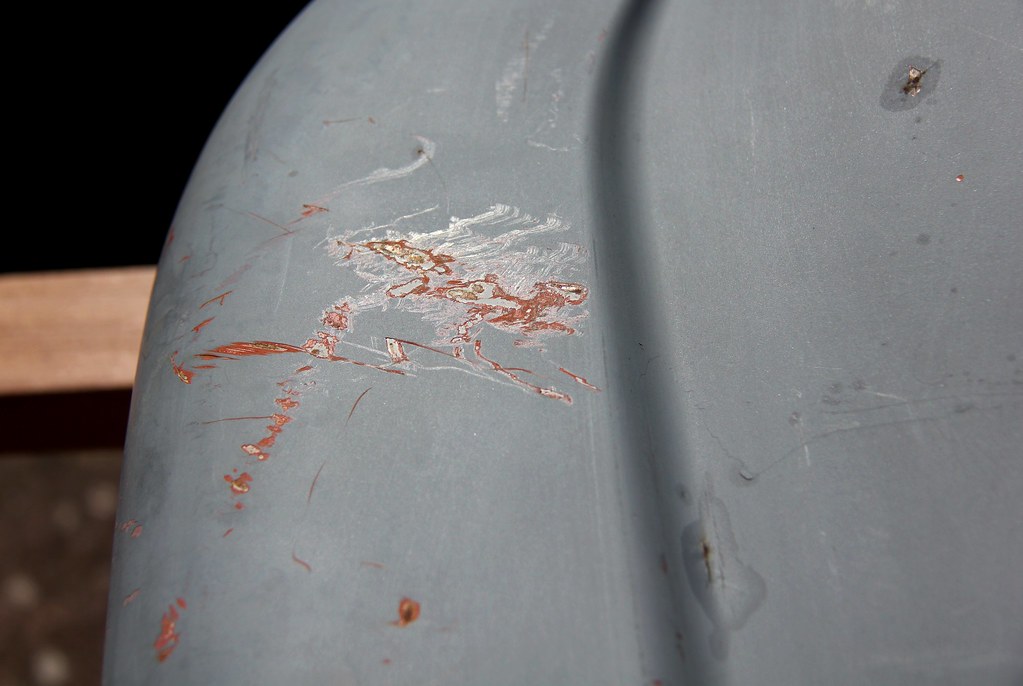 Paint damage Paint damage by Nick Liassides, on Flickr Oh well, at least (as ane fule kno) the advantage of buying from a dry US state is the lack of rust. And the rust that was there was mostly on the damaged bits and surface stuff easily got rid of. It was a bit, odd, though.... the lid was clearly orange originally, but was now in primer (patchily). But then there was the clear impression in faded primer of where the Volkswagen badge had been. So were they running their car about in primer? People are weird. 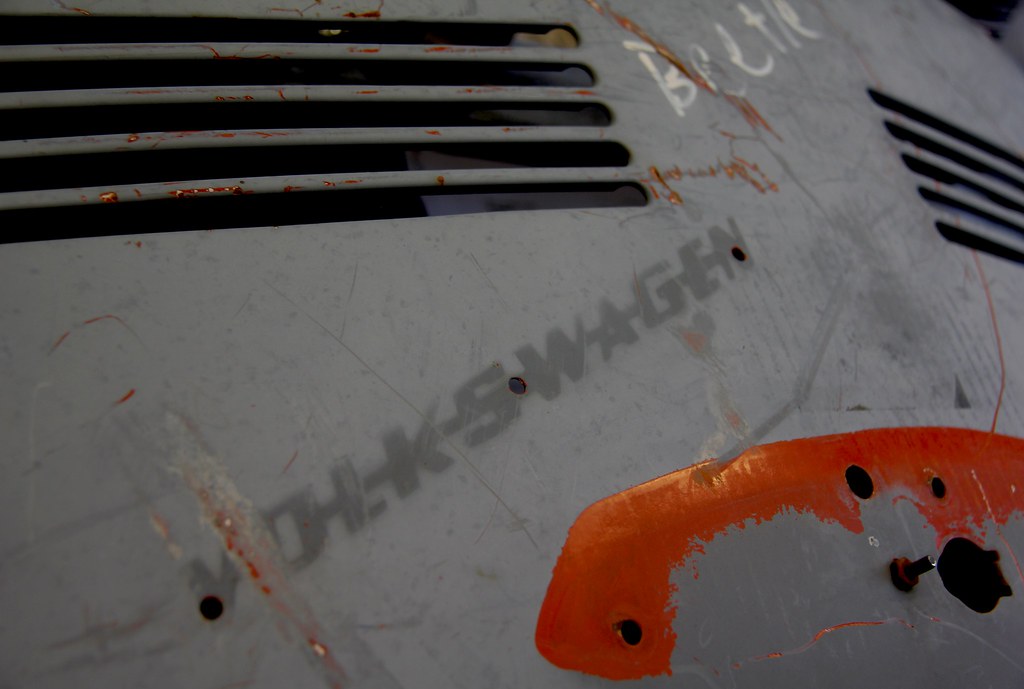 Shadow of the past Shadow of the past by Nick Liassides, on Flickr Inside, the hinge plates were rusty (but they all rust there) and it had some random internal engine bay light thing that I've never seen one of before, but again it was basically sound. Just a bit bashed about 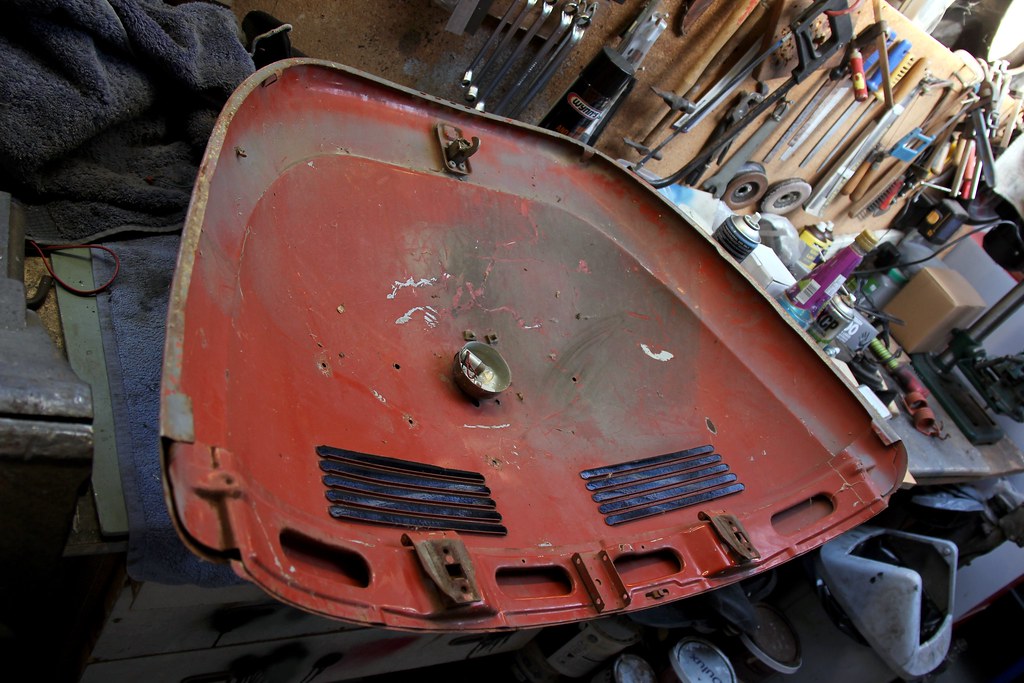 Arrived inside Arrived inside by Nick Liassides, on Flickr and very, very dirty 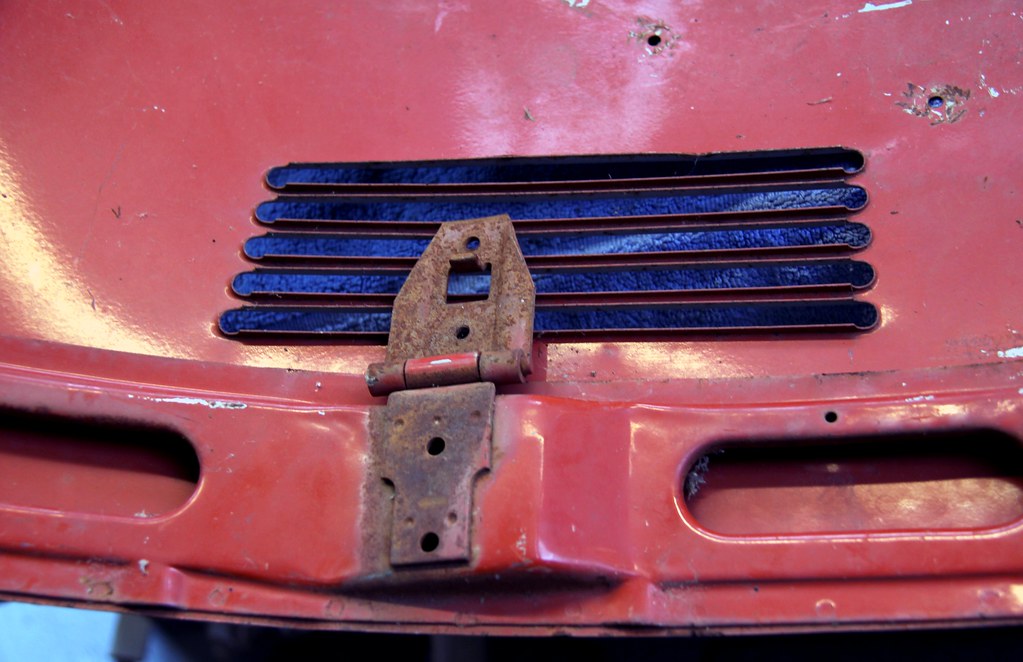 Rusty hinges Rusty hinges by Nick Liassides, on Flickr Half-expecting a black widow to plop out of some corner, extremely grumpy at having been transplanted from its balmy Western home, I got set to on cleaning this mess up |
| |
|
|
luckyseven
Posted a lot
   Owning sneering dismissive pedantry since 1970
Posts: 3,839
Club RR Member Number: 45
|
|
|
|
I've never really done metalwork on anything before; when I used to mess about with cars as a teenager they were the sort of cars that cost fifty quid and a bit of ally mesh and a lot of pug was considered bodywork. Then I had cars that were so bad that bodywork would not have been even as good as polishing a turd. Not even rolling it in glitter. Then I only had two-wheeled transport for ten years before being broken and snowed on too often lost its appeal... and after that it was plastic cars where bodywork wasn't really a thing. But I set to with a will and enthusiasm and learned by doing how to knock dents out, and also learned that Isopon has come on a long way from what I remember it being like  Rusty hinges Rusty hinges by Nick Liassides, on Flickr I didn't want to bare-metal it because rattlecan primer would presumably not stick as well as the VW stuff that was still obstinately hanging on after 47 years. But I did want to get rid of the primer some Yank fool had covered the OG paint in, because judging by the shading where the badge was, it had been on there a long time and primer absorbs moisture. I didn't want to spray my nice new Dolly blue over soggy primer that was going to peel off on the first damp day 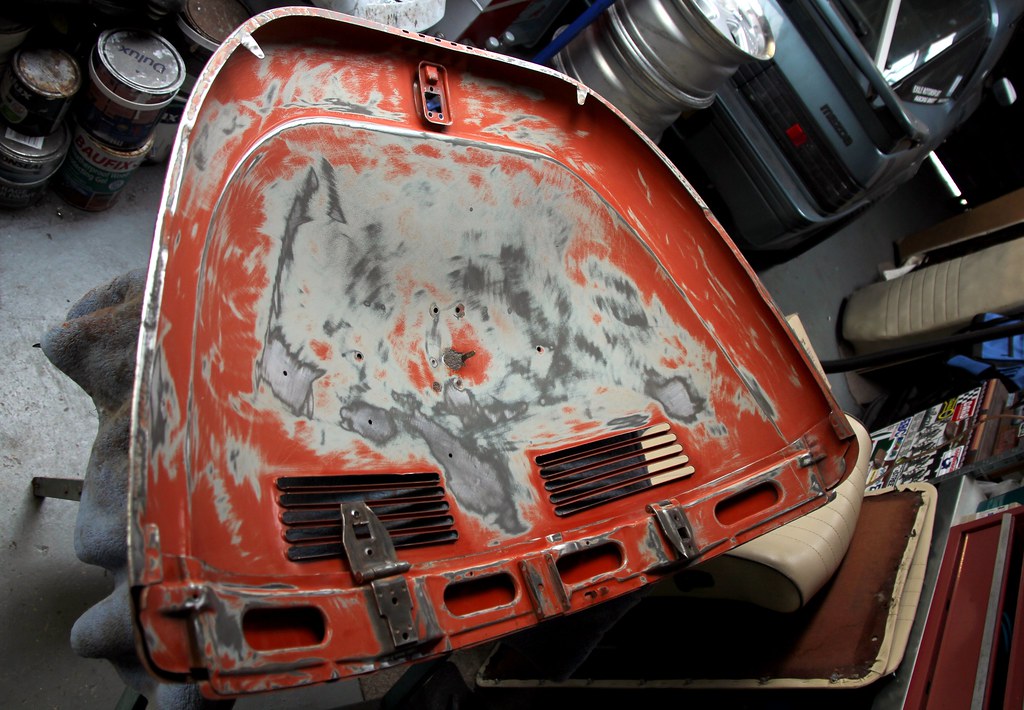 Prep inside Prep inside by Nick Liassides, on Flickr and I didn't especially care what the inside of it looked like; the current engine lid on Dolly was mostly covered with a thin film of oil and grime anyway, and when a Beetle engine lid's open it's just something to bang your head on while trying to diagnose engine faults, not something to look at in its own right. But I did get it as straight and level as possible, because why not since I was there. And cleaned off all the rust, of course 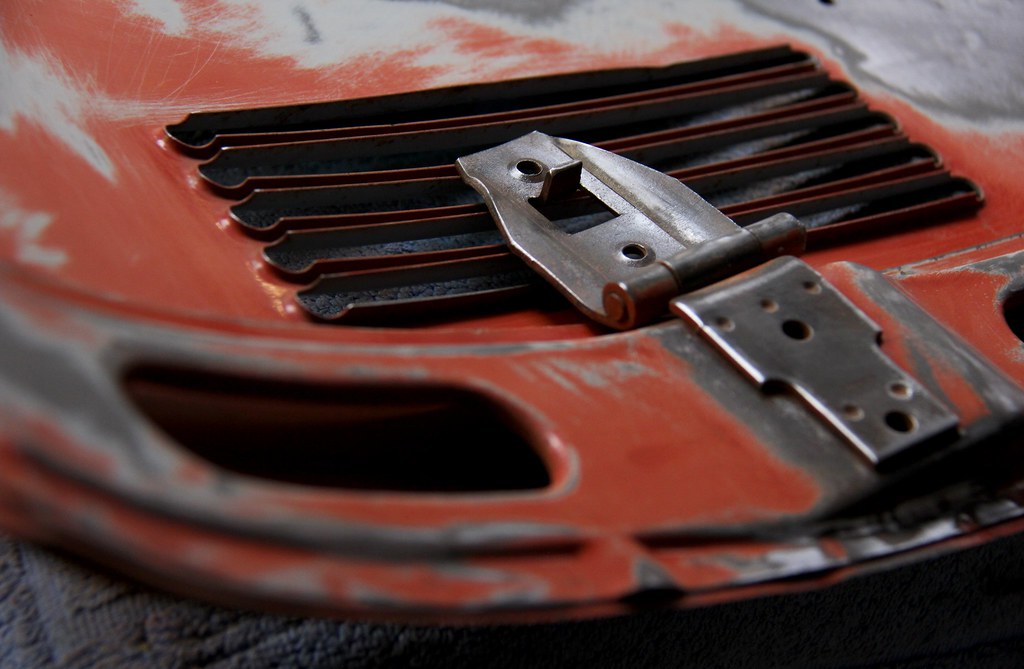 Cleaned hinge Cleaned hinge by Nick Liassides, on Flickr Eventually, it was as good inside and out as I felt it needed to be and it was time to make it beautiful again. Ada came down to snigger help stand around taking photos and offering sage advice and we got stuck in 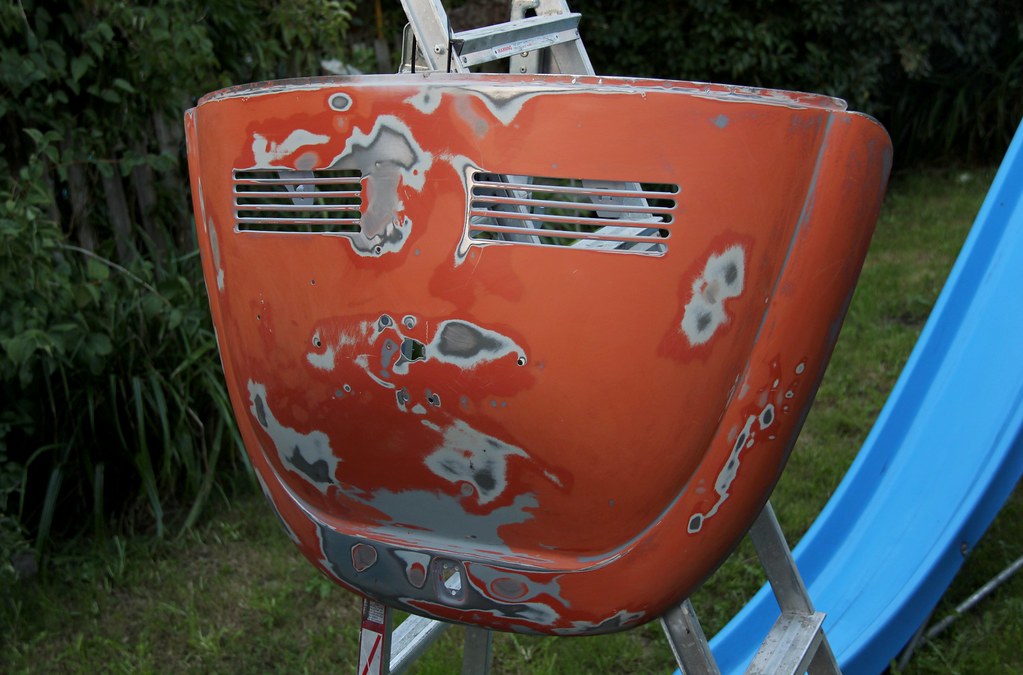 Prepped outside Prepped outside by Nick Liassides, on Flickr Note ingeniously-fabricated spray stand hastily fabricated from a couple of ladders. If wed thought harder about it we might have taken time to clean all the spiders' webs, grass clippings and generalised crud off them first. Too late now, let's go 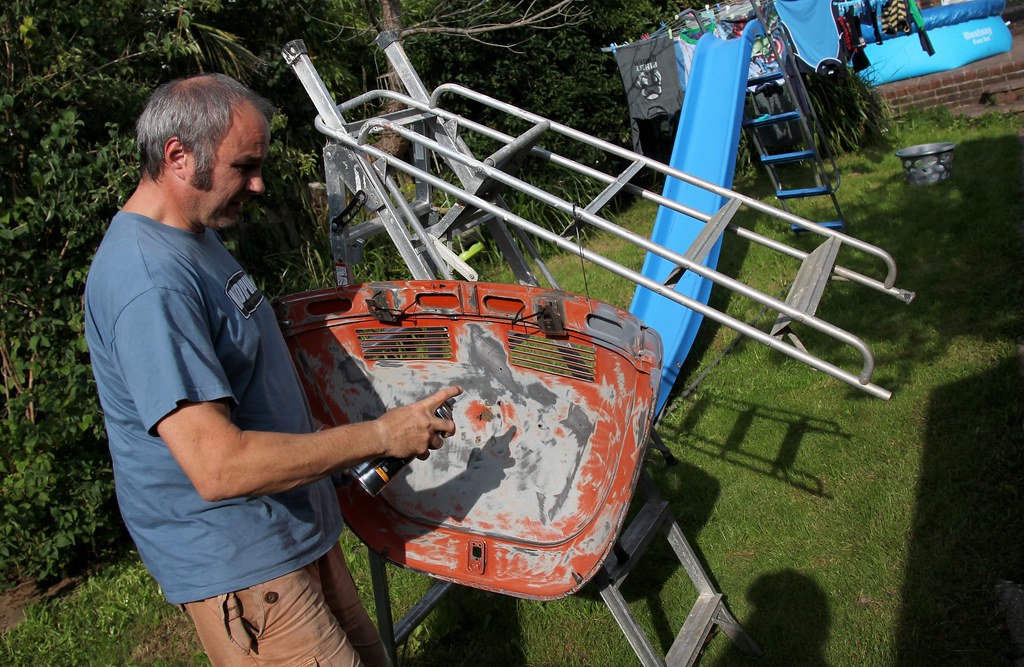 Awesome spray booth Awesome spray booth by Nick Liassides, on Flickr I started on the inside, as already mentioned, because I didn't care too much if it turned out looking cack. It looked promising, though; although it was smegging tricky getting into all the nooks and crannies of the web reinforcing without runs and blobs happening  Primer going on Primer going on by Nick Liassides, on Flickr And after etch, high build and normal primer coats, it was actually starting to show promise. A fool looking unfeasibly smug with his bodgery; 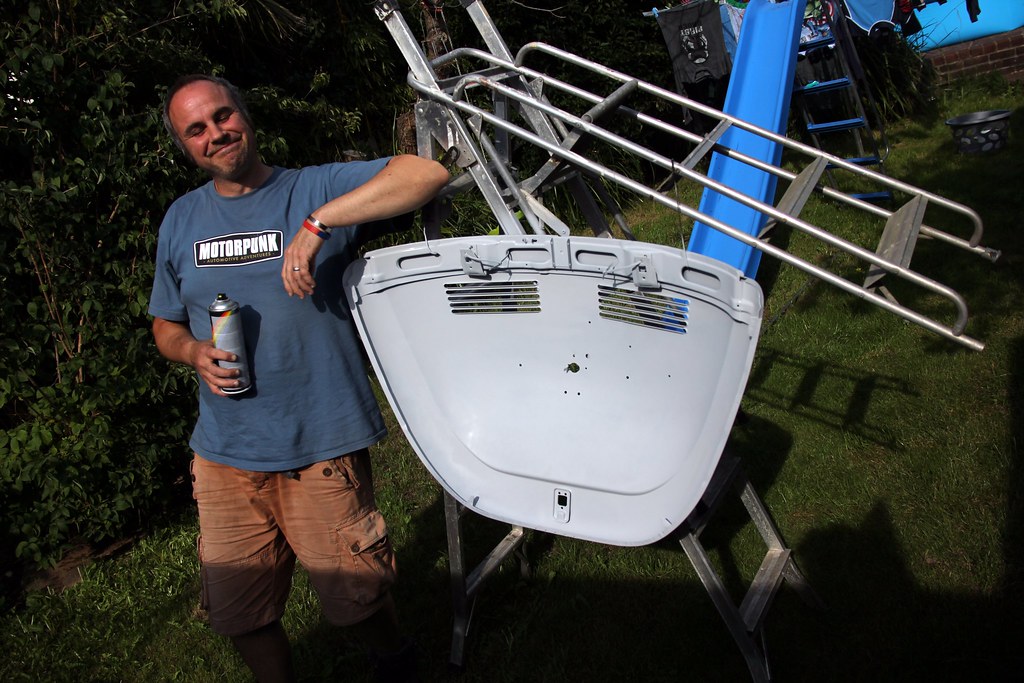 Primed inside Primed inside by Nick Liassides, on Flickr and once that was dry, we flipped it over and started on the "pretty" side 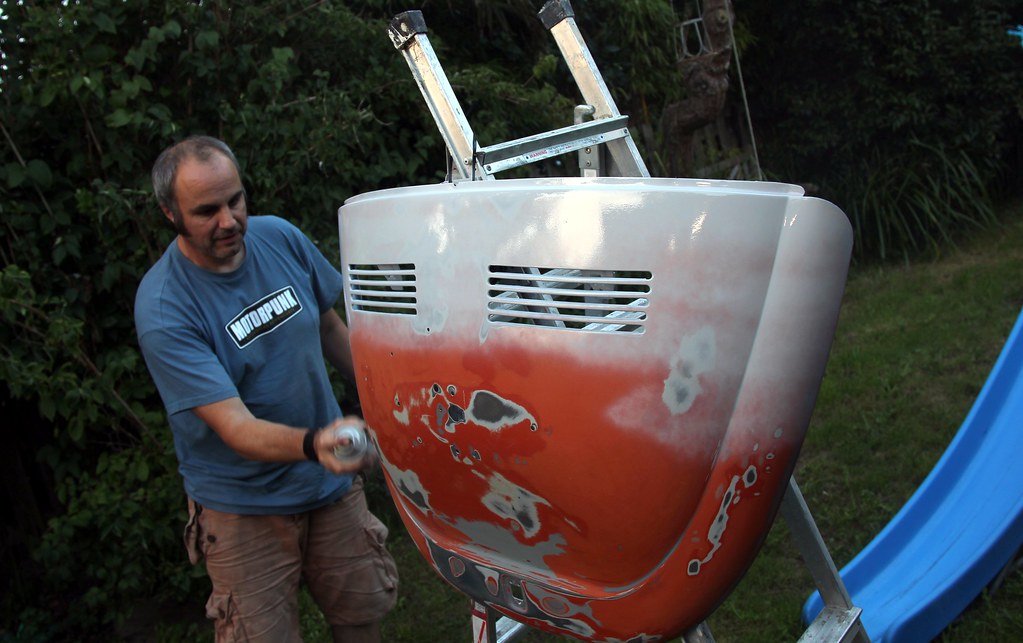 Going one colour Going one colour by Nick Liassides, on Flickr Amazingly, when it was all done there were no bees or craneflies stuck in it, it was all one uniform(ish) colour and there were no obvious massive dents or dings that had escaped notice at the prep stage. Unlikely as it may sound, it looked OK 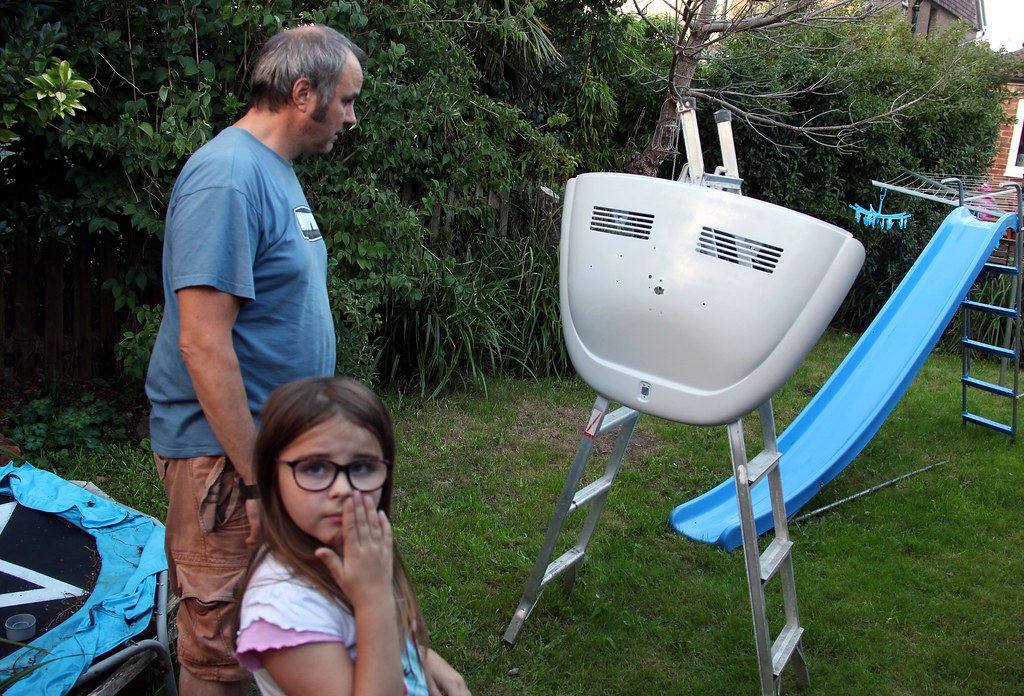 Everyones a critic Everyones a critic by Nick Liassides, on Flickr Although the li'l un doesn't seem quite so convinced  so that was that for a few days while a) the primer dried and b)I went back to work for all the hours God sends and a few more besides. Eventually, I got time to start sanding the primer back nice and smooth 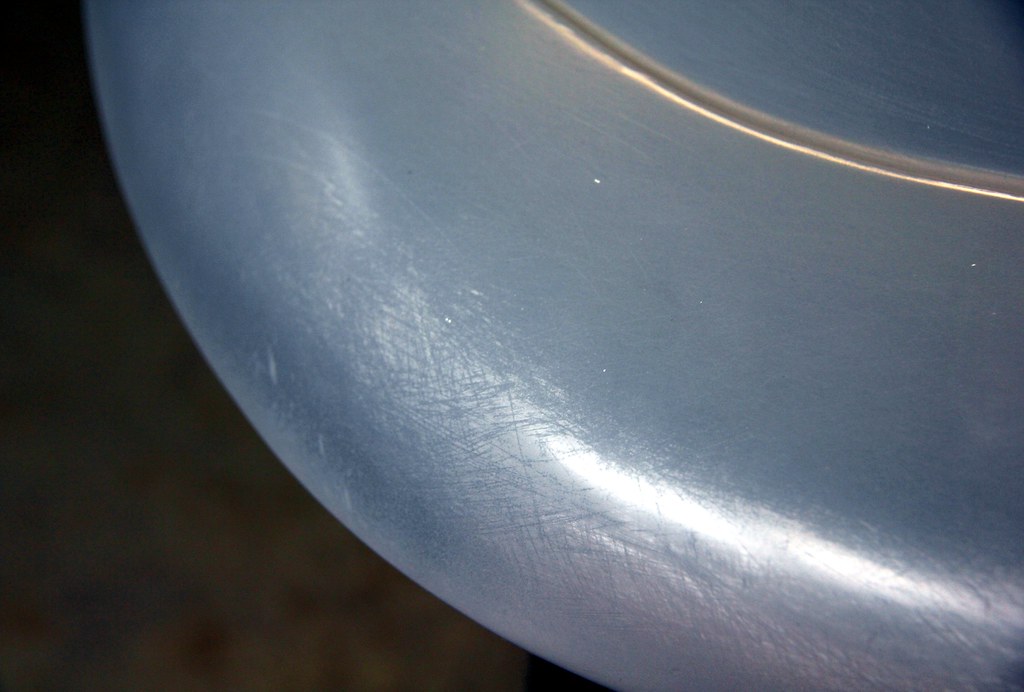 Primer sanding Primer sanding by Nick Liassides, on Flickr which of course was the point when I started finding imperfections that had made it through. Some I fixed, some I didn't because a) I don't mind stuff not being perfect when it's nearly 50 years old and the rest of the car isn't perfect; 2) there was a dent that to fix would have meant pretty much starting again from scratch and iii) I couldn't be smegging bothered. It looked alright though... 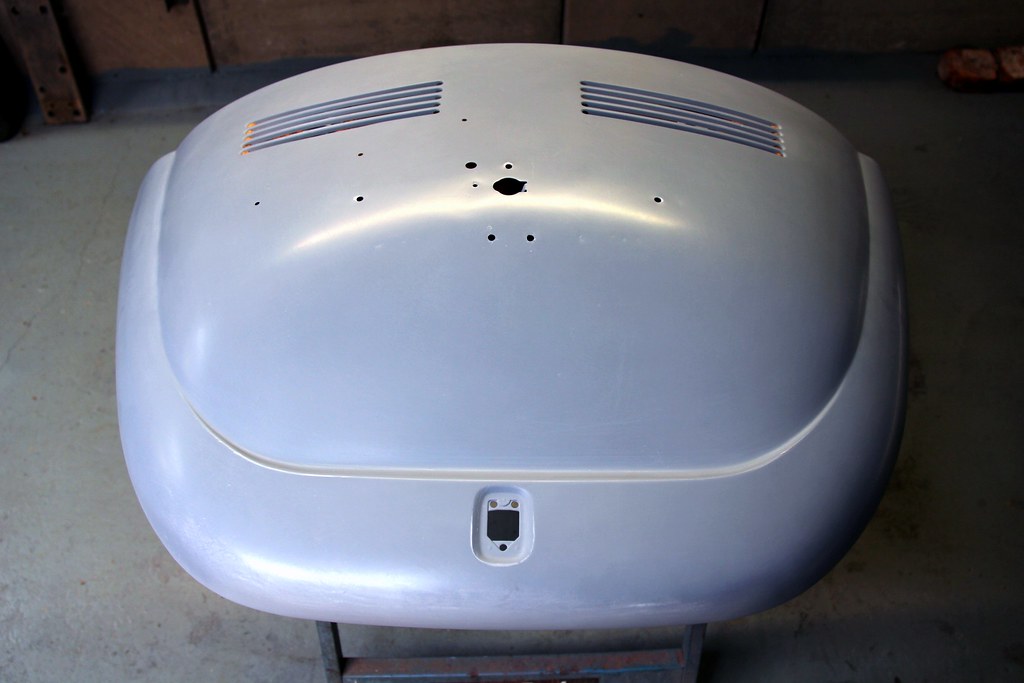 Primer sanded Primer sanded by Nick Liassides, on Flickr Time for some colour then. Given that this is the first time I've ever sprayed such a large flat surface and that I was using rattlecans in a dusty garage, it could have gone a lot worse and before long the first coat was drying in my epic and amazingly middle-class paint oven 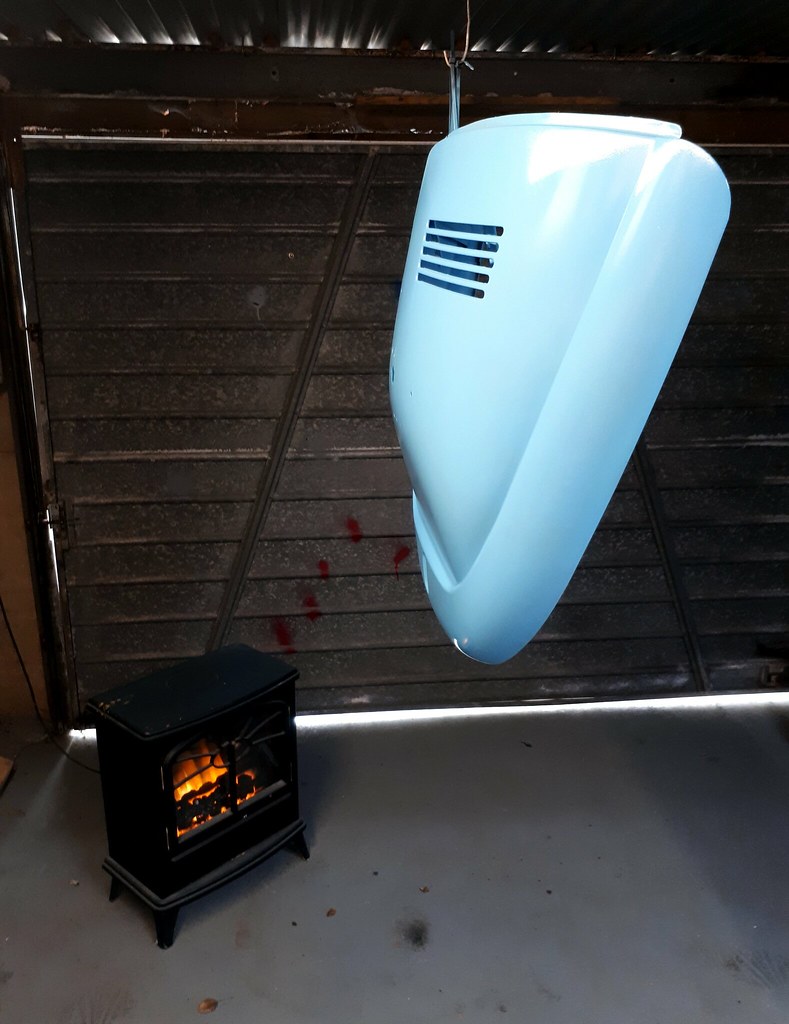 Epic spray oven Epic spray oven by Nick Liassides, on Flickr That went fine. The second coat... not so much  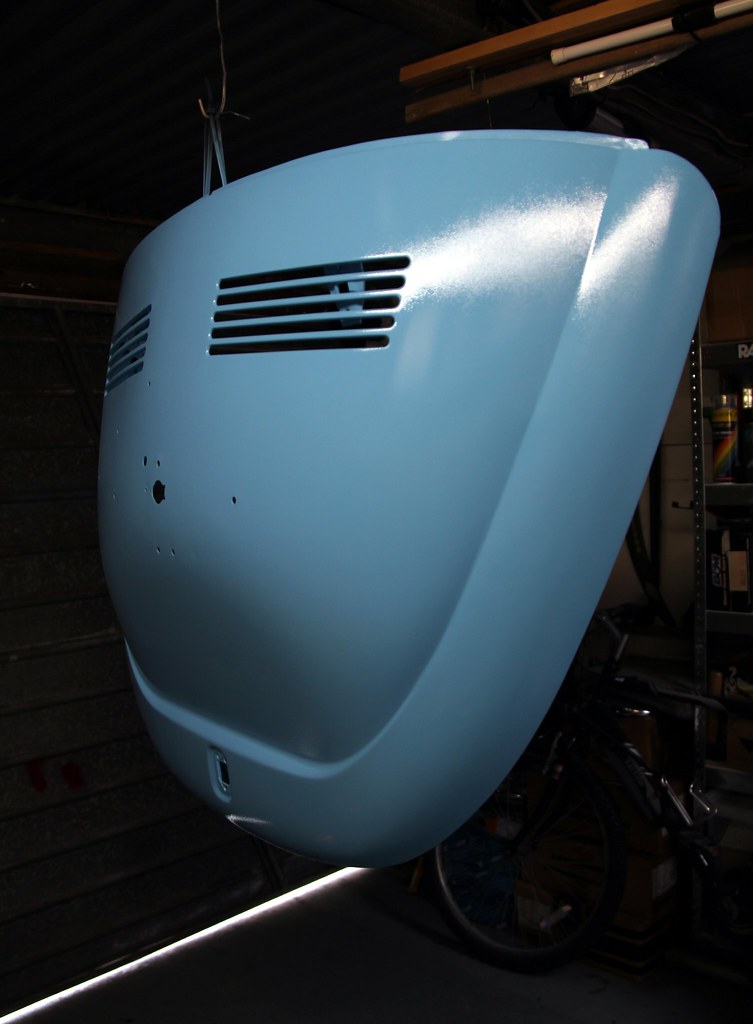 First coat First coat by Nick Liassides, on Flickr Not sure why (and I'm sure there'll be plenty of painting gurus who can tell me exactly where I went wrong... abject muppetry might be the starting point). But it was mega-hot that day and I think maybe I put the paint on too dry so it formed epic orange peel. And when I say epic, I mean the texture of Katie Price's face sans inch-thick slap. Yep, it was rough  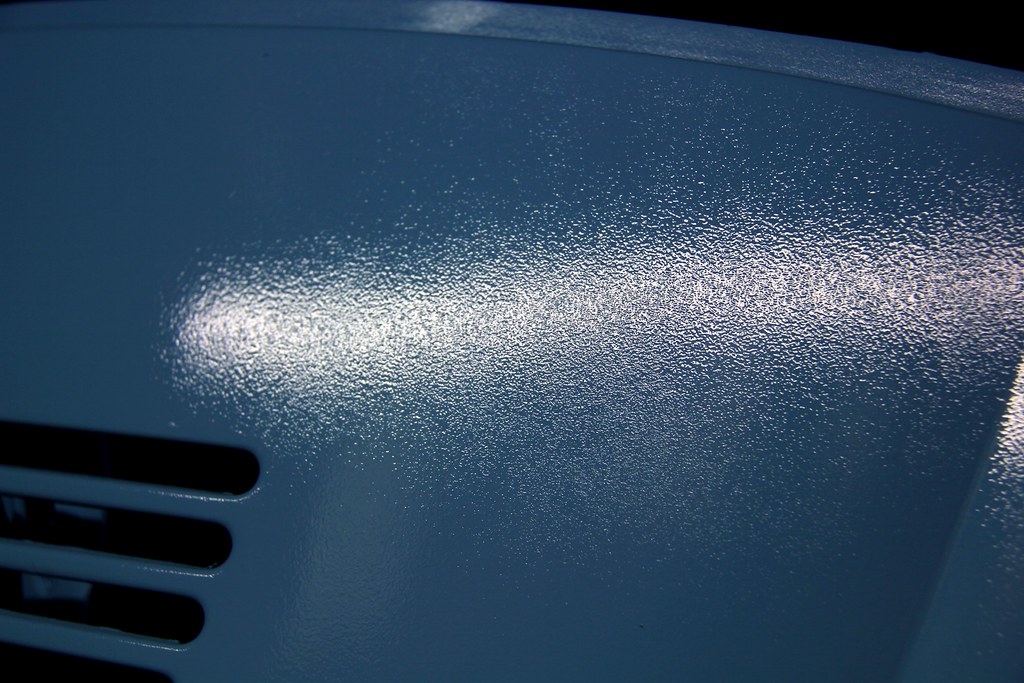 Astonishing orange peel Astonishing orange peel by Nick Liassides, on Flickr Oh well, it was done now. Nothing for it but to throw a load of lacquer over it and leave it to cure before coloursanding  Cut in half Cut in half by Nick Liassides, on Flickr And that took forever. Like, seriously hours. I didn't want to use too aggressive a grade of paper and cut right through, so it was just hours of fondling the paint gently through the medium of 1200 grit. And it'd clog, and tear and leave scrapes and generally just be annoying as hell no matter how much water I sprayed on. A proper sanding block helped, and not buying cheap Halfrauds paper helped too 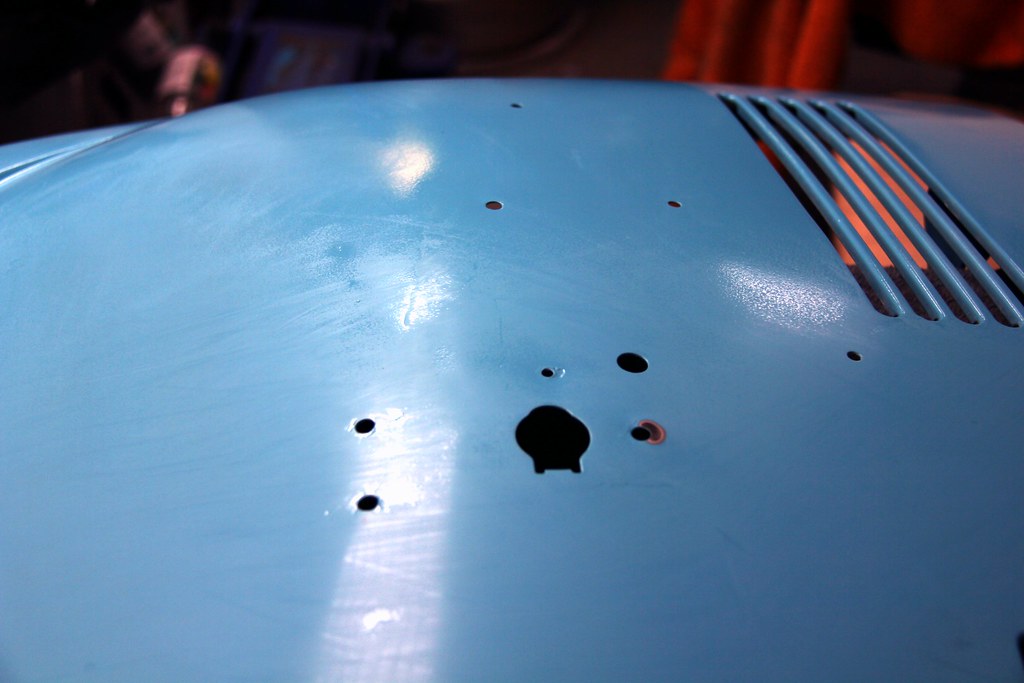 Colour sanding begins Colour sanding begins by Nick Liassides, on Flickr but eventually light could be seen at the end of the tunnel and it didn't seem to be a train 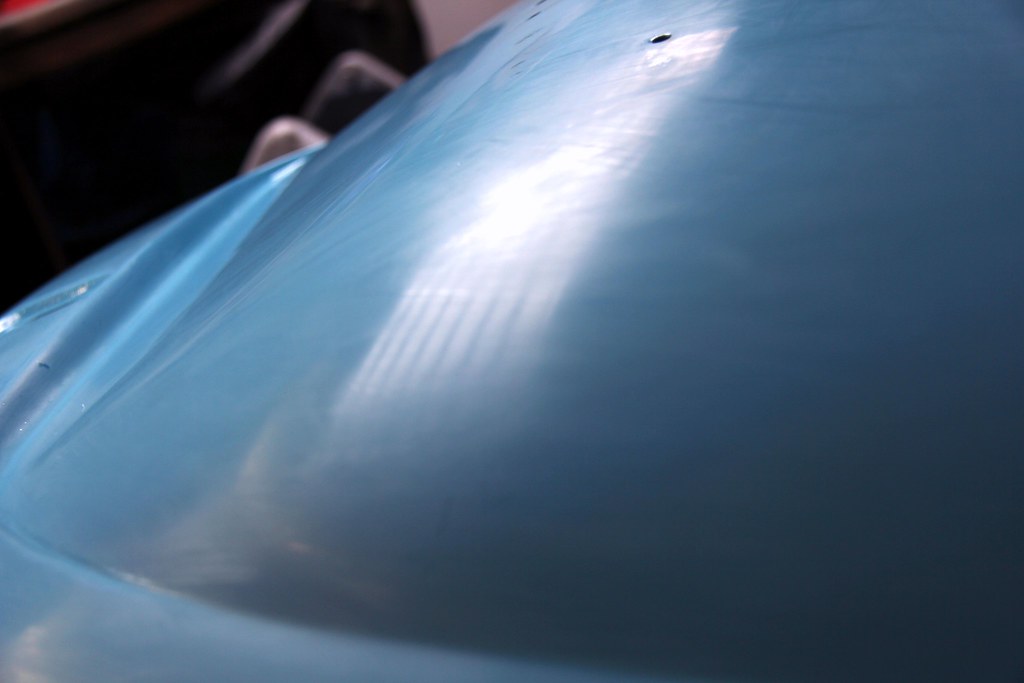 Getting smoother Getting smoother by Nick Liassides, on Flickr finally I could switch to 1500 and finally 2000 grit and it all looked rather promising. I managed to go through around some of the boltholes where I simply hadn't flattened the metal wel enough, but they were easy to touch in and would be hidden by the bonnet furniture anyway. Most importantly, I didn't manage to go through in the bits that had been worrying me; the edges and the vent grilles and suchlike 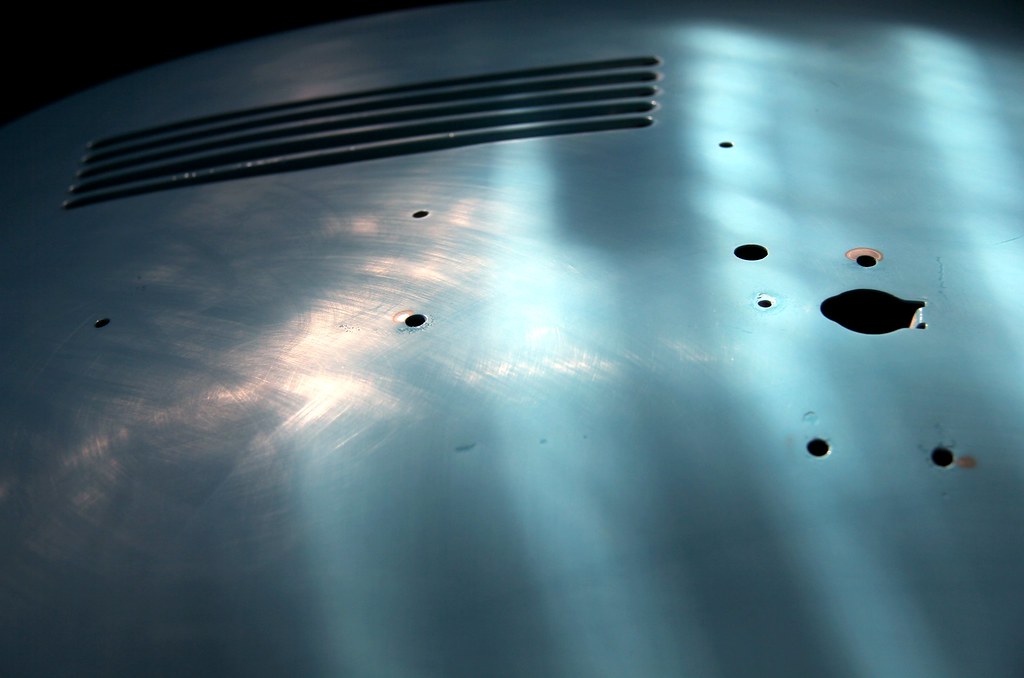 Final sanding Final sanding by Nick Liassides, on Flickr and because I'm sure if I had one I'd find uses for it, I figured I may as well get a mop... albeit the cheapest one I could find. I got a Silverline one with a package of sponges and compounds off eBay, and just went in balls-out. whilst modelling a natty ensemble made from bin liners, which mostly failed completely to keep the compound juice out of anywhere very strategic. Seriously, the stuff goes everywhere! Pretty much ruined my second-best dossing shorts  Splattered Splattered by Nick Liassides, on Flickr BUT; 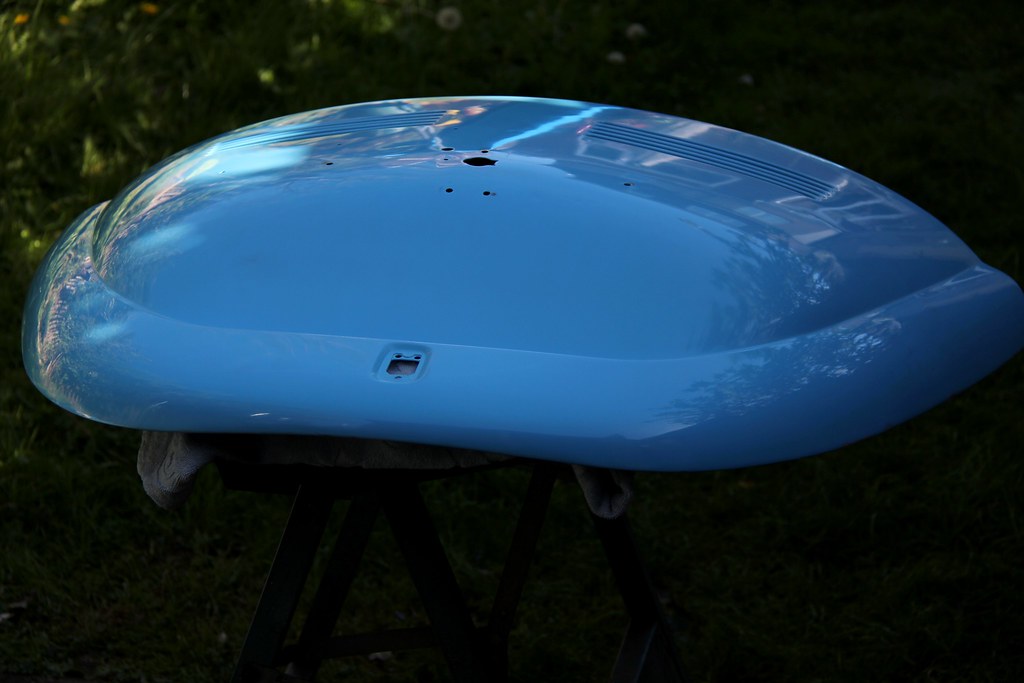 Finally shiny Finally shiny by Nick Liassides, on Flickr Damn! Shiny! The eagle-eyed will spot the ...errrr...spot where I managed to go through, just to the left and below where the numberplate will mount. I was hopeful the plate might hide it when fitted (it didn't  ) but whatever, there was no way I was re-doing the entire thing! But yeah... looks shiny enough doesn't it?  Reflection Reflection by Nick Liassides, on Flickr and so, after several weeks faffing around on and off, it was time to start transferring all the old bonnet furniture over from the OG engine lid 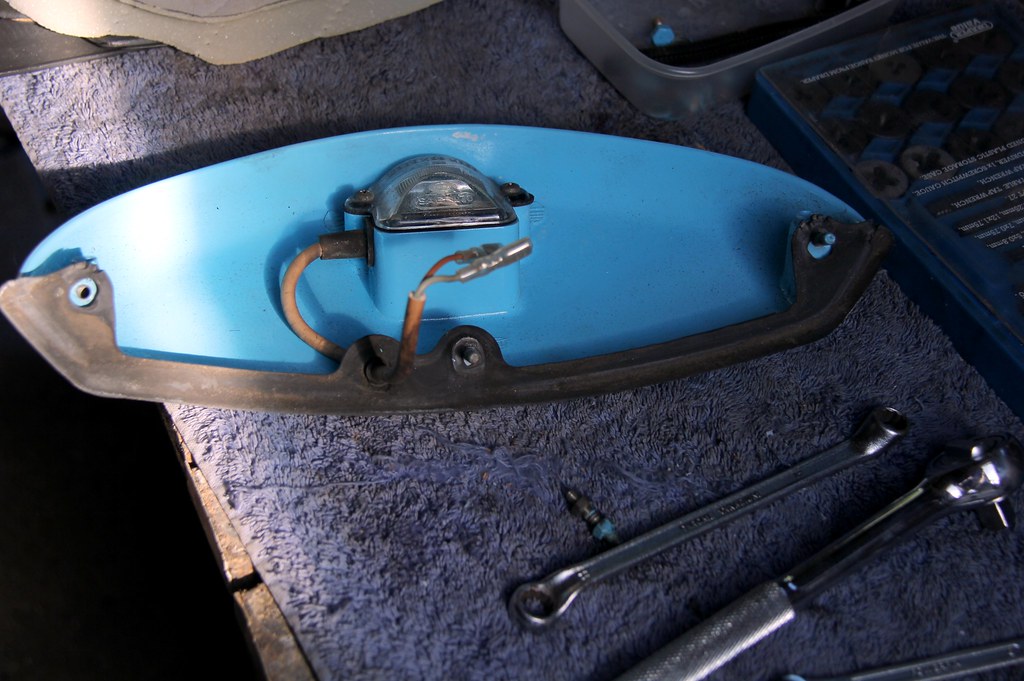 Numberplate light Numberplate light by Nick Liassides, on Flickr and add that badge that was the cause of all these shenanigans. And yes, that spot where I burned through is really annoying 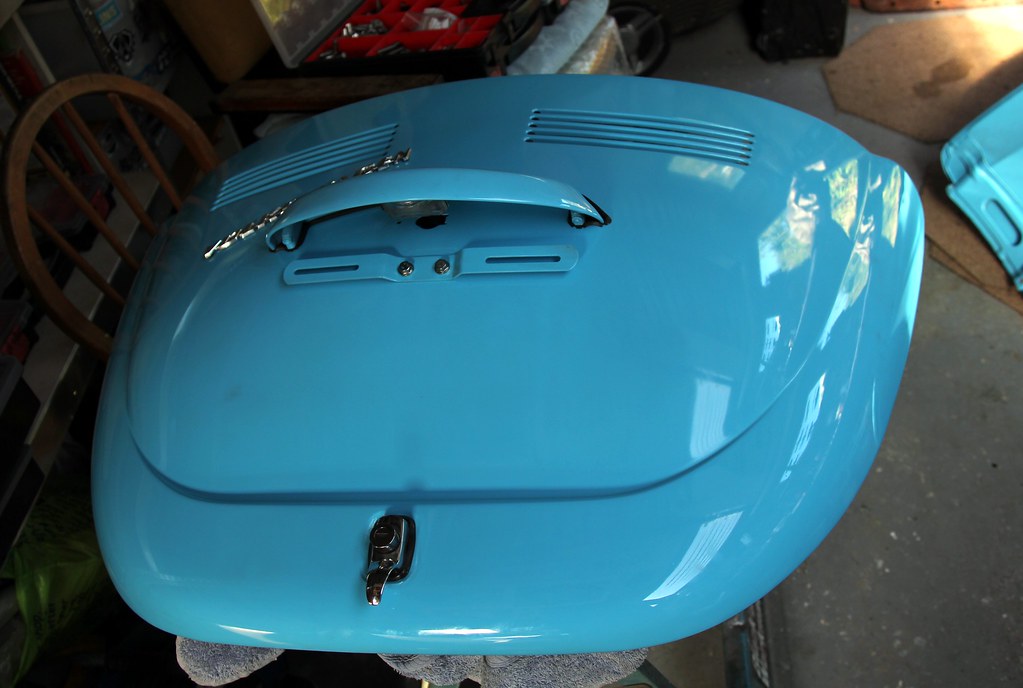 Swapping over Swapping over by Nick Liassides, on Flickr Maybe I only notice it because I know it's there? 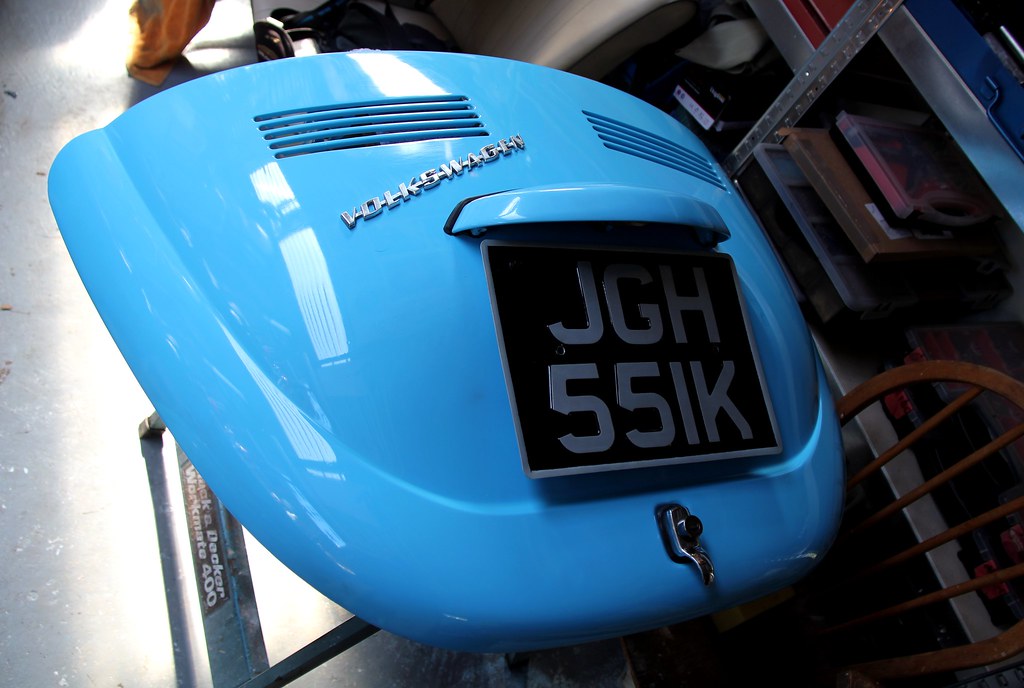 Trinkets transferred Trinkets transferred by Nick Liassides, on Flickr Then came the slightly apprehensive moment of actually fitting it to the car. what if the colour was miles out? At this point I realised I'd never even test-fitted the damned thing before I started in on paint and whatnot. It might not even fit! Nahhh.... it's a genuine VW part. Surely teutonic efficiency would mean it'd just drop straight in? surely? 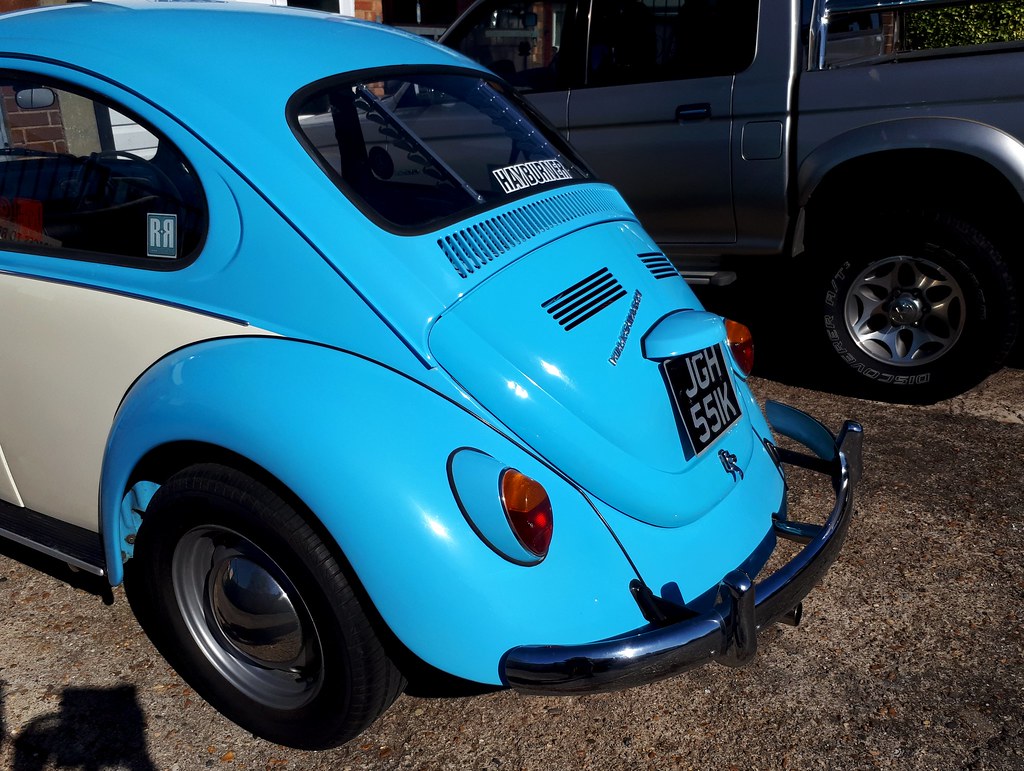 Lidded Lidded by Nick Liassides, on Flickr Errr. well, yeah. It only smegging did! (Once I'd worked out how to balance it on my head, use one hand to line up the giant bonnet spring, one hand to keep it in place and another one to get the bolt started, then another hand to grab the ratchet and wind the bolts in, all the while trying to avoid the unbelievably strong spring firing the entire lot into orbit via my face  There's probably a knack to it, but I don't think I ever want to try fitting a Beetle bonnet (snigger) singlehandedly again. It was not fun 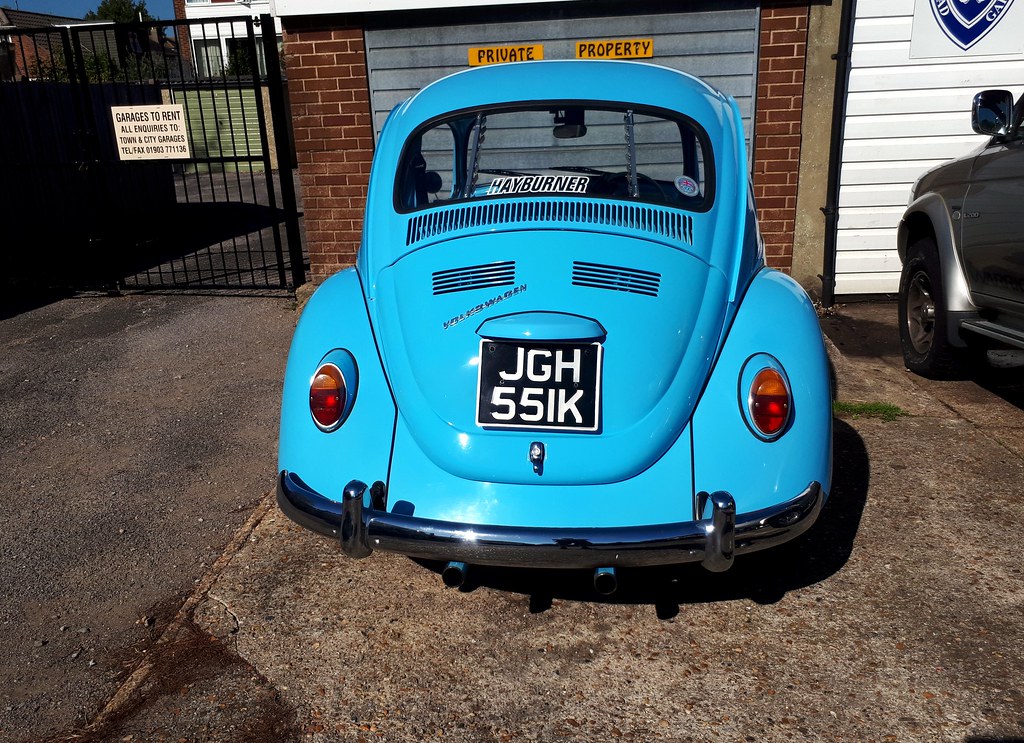 Done Done by Nick Liassides, on Flickr but it fitted... in fact, it fitted better than the OG one had, weirdly. That had needed a lot of faffing around with the latch to get it to engage, and even then it needed a damned good hard slam to latch. This one drops neatly into place with a very satisfying and extremely German snick of self-satisfaction. The colour matched, the badge was aligned to the correct Jericho Trumpet angle and all was right with the world. So next time, we'll be taking the entire car apart in search of something else to utterly knacker. Tune in to the next thrilling instalment, groovers, when we'll be going full mental 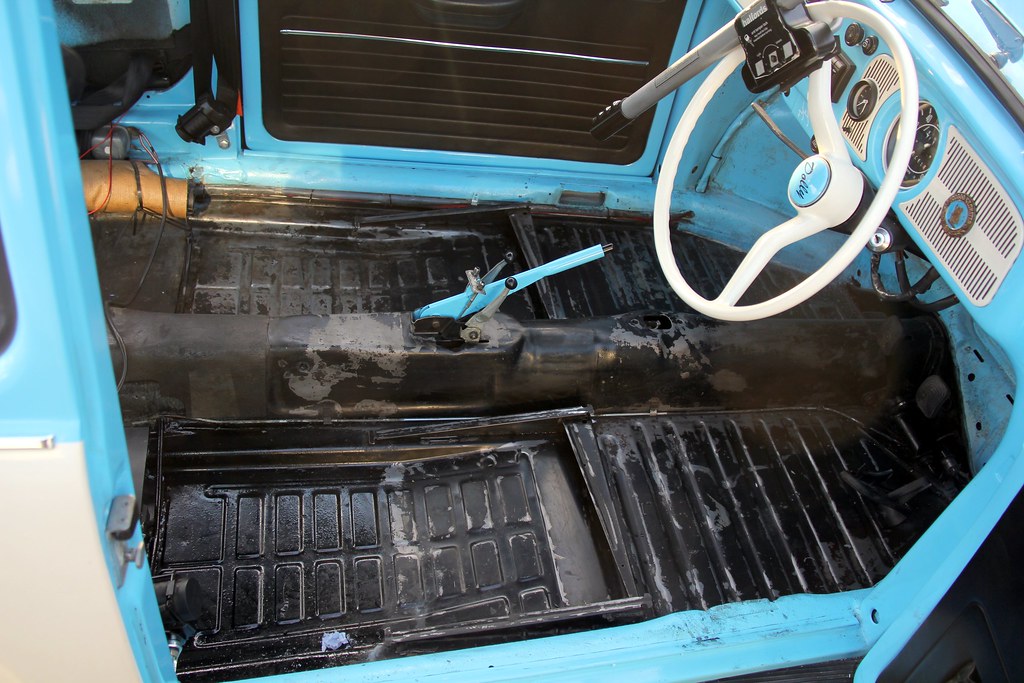 floor cleaning floor cleaning by Nick Liassides, on Flickr |
| |
|
|
|
|
|
|
|
|
You lucked out there.
Delivery, fitting, colour etc all went smoothly(ish)
BTW is there not a decent light you can buy that will bolt on, look good and work well?
|
| |
|
|
|
|
|
|
|
|
Nice. I've got to agree with you about the two-vent lid looking best. I've got one ready to cut up to graft into my '67 lid but I've been putting it off for several years! I really admire that you just fire straight into things without overthinking it!
|
| |
1968 Cal Look Beetle - 2007cc motor - 14.45@93mph in full street trim
1970-ish Karmann Beetle cabriolet - project soon to be re-started.
1986 Scirocco - big plans, one day!
|
|
ada7
Part of things
 
Posts: 108 
|
|
|
|
|
Great update as always. Does look so much better now the badge isn’t wonky donkey and the vents are a nice added touch too
You can see a lot of you in Niah at the same age, and not just the glasses.
Camera man got some good action shots of you painting
Adam
|
| |
Rotaries help make the world go around... And around and around and...
|
|
luckyseven
Posted a lot
   Owning sneering dismissive pedantry since 1970
Posts: 3,839
Club RR Member Number: 45
|
|
|
|
|
|
| |
|
|
|
|


 *thought bubble*


 You can see why. It wasn't the most epic of road trips, but at least it involved soss an hegg McMuffins and ended up at *choral paean* the Mecca of all things VW


 Sorted for parts and shiz, we returned to our little garage community to get stuck in. Well, Adam and Lewis got stuck in, I mostly mooched around being useless and taking random "art" photos of pointless things


 Still, at least Lewis got Dex's steering wheel swapped over while me and Ada fought with Lenny's nether parts. Good job too as someone needed to get in the garage compound he was parked in front of, and the only other option would have been steering with molegrips


 Oh yeah, headlights. Had to mention headlights. we'll be coming back to them... AGAIN
 . Well, they're shiny I suppose
  That has to count for something!


