jonomisfit
Club Retro Rides Member
Posts: 1,790
Club RR Member Number: 49
|
|
Jun 19, 2020 19:45:40 GMT
|
I dug out a spare sheet of plywood to help me out  P1030867 P1030867 by jono_misfit, on Flickr roughly pinned on the loom 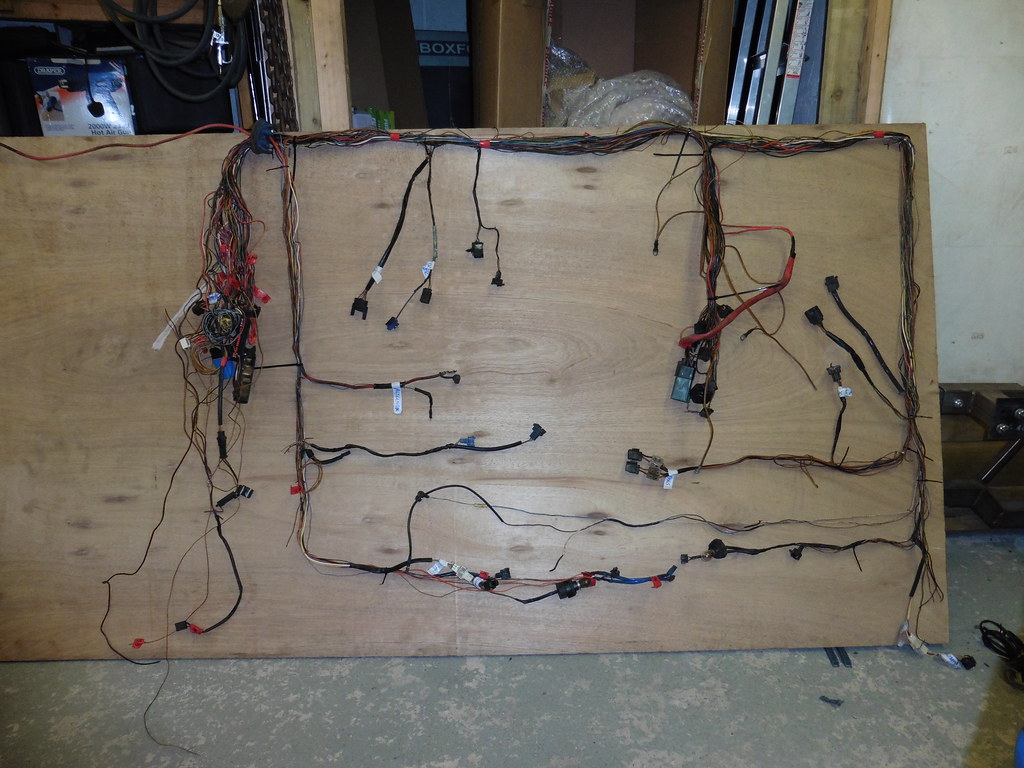 P1030868 P1030868 by jono_misfit, on Flickr started laying it out a bit  P1030869 P1030869 by jono_misfit, on Flickr and some more  P1030870 P1030870 by jono_misfit, on Flickr then started lining out to juntion and connections  P1030871 P1030871 by jono_misfit, on Flickr 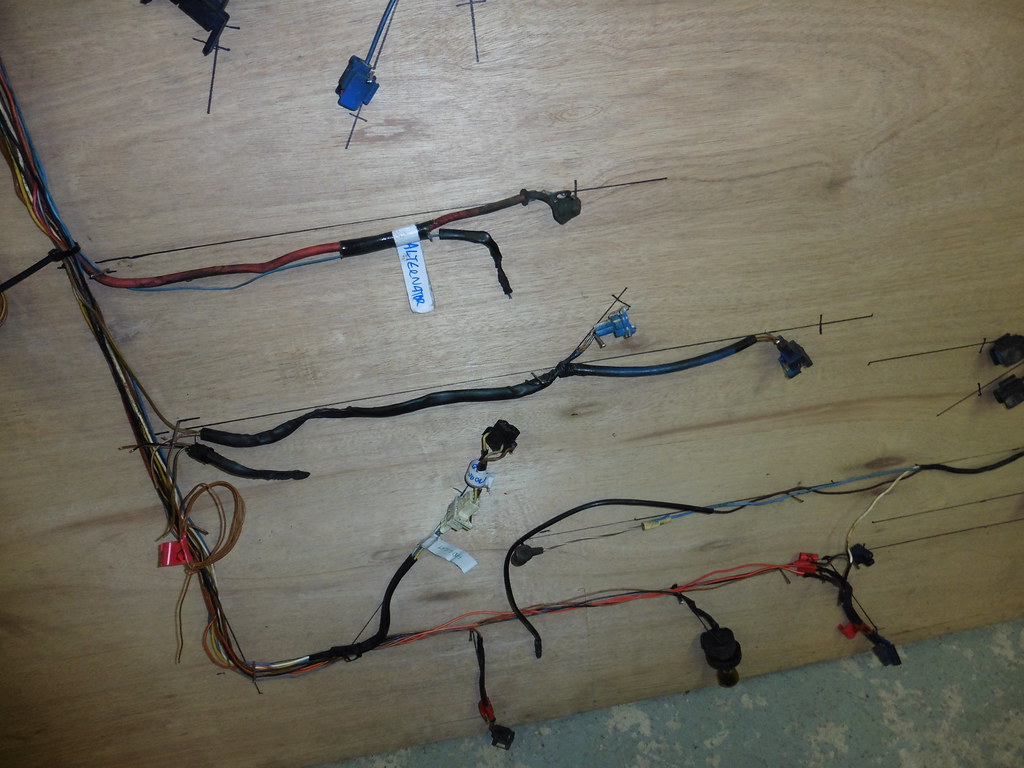 P1030872 P1030872 by jono_misfit, on Flickr started identifying some other un-needed wires and pulled them back  P1030873 P1030873 by jono_misfit, on Flickr The black line on the left hand side shows the additional length needed to get to where I need the cables to be for the centre mount console. finding some more unneeded cables and pulling back and coiling back at the fusebox connector.  P1030874 P1030874 by jono_misfit, on Flickr  P1030875 P1030875 by jono_misfit, on Flickr the big un-sorted buch of wires are mainly the radiator fan wiring / relays. These used to sit next to the battery, but my battery is inside the car, so i'll be re-wiring these to be fed from the centre panel.  P1030876 P1030876 by jono_misfit, on Flickr |
| |
|
|
|
|
jonomisfit
Club Retro Rides Member
Posts: 1,790
Club RR Member Number: 49
|
|
Jun 21, 2020 19:26:28 GMT
|
I'm sure these pictures are all blending in to one for a lot of people, but more wiring. Tracing back and tagging everything.  P1030877 P1030877 by jono_misfit, on Flickr I picked this up off EBay. Not completely correct, but correct enought to help me considerably.  P1030878 P1030878 by jono_misfit, on Flickr due to these.  P1030879 P1030879 by jono_misfit, on Flickr slowly whittling it all down to the bare minimum.  P1030880 P1030880 by jono_misfit, on Flickr I've removed some things that I may actually put back in some form, like the heater front screen control. there are also a few things that I'm going to re-route as they go completely round the houses to get places.  P1030881 P1030881 by jono_misfit, on Flickr there are a lot more wires on the left hand side, and everything coiled up isnt needed... hopefully.  P1030882 P1030882 by jono_misfit, on Flickr there were also some things missing, so i've added them in. Most notably the starter motor feed line.  P1030883 P1030883 by jono_misfit, on Flickr I'm also going to be bringing the live feed (after the cut off switch) to an insulated bulkhead post, to pass a main feed directly into the engine bay. This will give me a handy connection point for starter motor / alternator, and also a reasonably easy access jump point if ever needed.  P1030884 P1030884 by jono_misfit, on Flickr I'm also going to make use of the spare port on the passenger side of the bulkhead and shorten some routes to the fuse panel. Especially where i'm running in new connection (like the red wire above), or adding a new connection that on that side of the car. |
| |
Last Edit: Jun 21, 2020 19:28:40 GMT by jonomisfit
|
|
|
|
|
Jun 21, 2020 19:40:19 GMT
|
Ok I going to stop looking - its giving me a headache  |
| |
|
|
jonomisfit
Club Retro Rides Member
Posts: 1,790
Club RR Member Number: 49
|
|
Jun 26, 2020 15:50:27 GMT
|
After a bit of a wait due to coronavirus's impact on thing my custom top mounts turned up today.  P1030885 P1030885 by jono_misfit, on Flickr custom mounting arrangement and the spherical is sized as a direct fit to the struts mounting shaft rather than spacers. This has allowed the biggest spherical that can reasonably fit in the hole I have. They arent the genuine WRC top mounts, as they are 3x the cost and need about £1500 per corners worth of other suspension bits to work. At some point maybe, but these will get me on the road. Thought i had best check I hadnt messed up any dimensions.  P1030887 P1030887 by jono_misfit, on Flickr Fits perfectly. I put nylon washers on as I didnt want to scratch it whilst tightening up in case I needed to send back!  P1030888 P1030888 by jono_misfit, on Flickr It also clears the bonnet which was a concern....  P1030886 P1030886 by jono_misfit, on Flickr I need to make up a couple of conned spacers to allow the joint movement, then I can fit the struts and see how it sits. But I cant get in to the lathe as there's another job in the way... some other bits turned up for the wiring loom. high temp braid sleeving 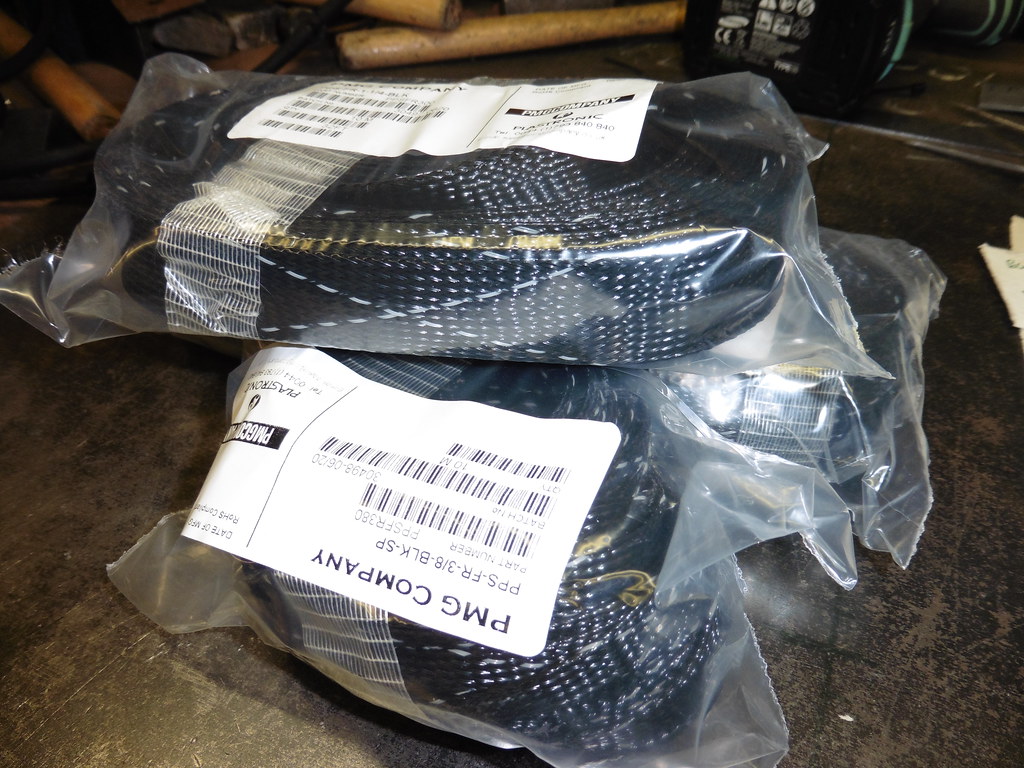 P1030889 P1030889 by jono_misfit, on Flickr in a few sizes  P1030890 P1030890 by jono_misfit, on Flickr I did a load of digging round and ended up going to PMG. Ebay prices were bonkers and the same price as a 1m length from EBay there was abot a 10m roll. so having determined I've got what I need from the car loom I started removing anything not needed and buching by funciton on the car side of the bulkhead connector.  P1030891 P1030891 by jono_misfit, on Flickr I then started looking at the dashboard wirring 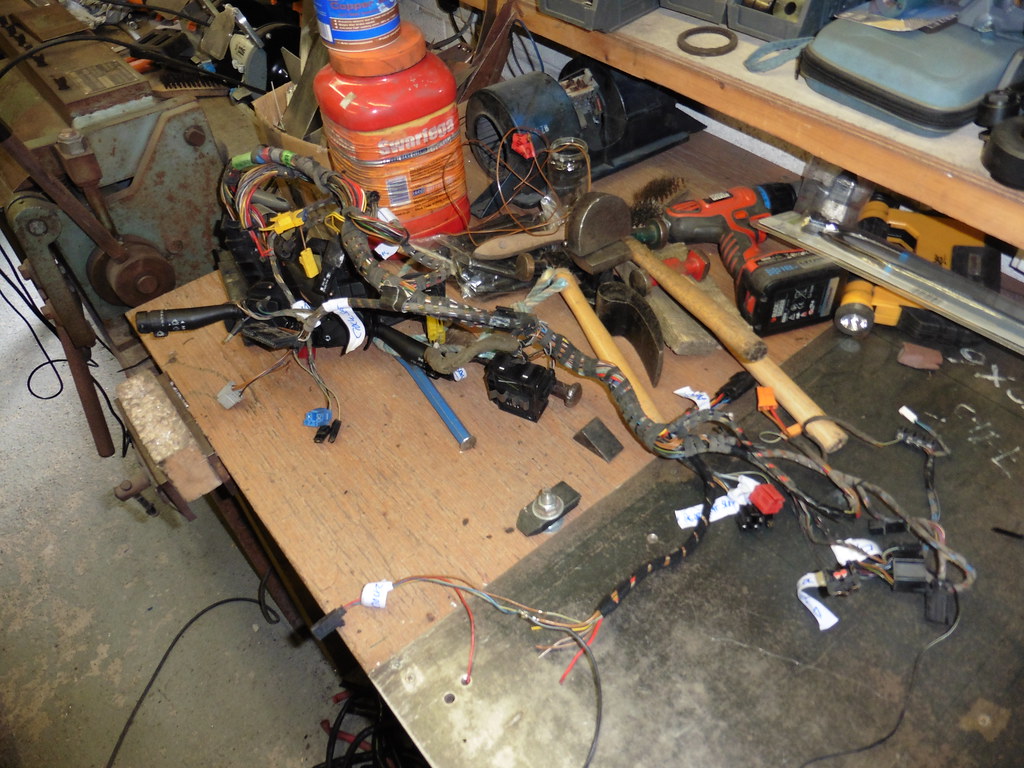 P1030892 P1030892 by jono_misfit, on Flickr which is loaded with bodges.  P1030893 P1030893 by jono_misfit, on Flickr A number of which seem to be polarity inversions for whatever reason. I need to buy a load of wirring products, but they'll have to wait until after pay day. |
| |
|
|
|
|
|
Jun 26, 2020 16:08:56 GMT
|
|
wiring is a mystery to me, but between this and the Binky show it's starting to become a little clearer
|
| |
|
|
jonomisfit
Club Retro Rides Member
Posts: 1,790
Club RR Member Number: 49
|
|
Jun 28, 2020 17:18:55 GMT
|
not many picture, an no exciting pictures, from today. All wirring related. stripped the binding from the dash loom and started working out what most things are. There were some complete anomolies that werent in the wirring diagram and looked like factory loom additions, which makes me think they are the escort cosworth guages (boost etc.) that arent in the standard loom.  P1030894 P1030894 by jono_misfit, on Flickr having gone through it all, i then realised, there's only a couple of bits i'm acutally interested in  P1030895 P1030895 by jono_misfit, on Flickr none of these! The onyl bits i'm intersted in are those that connect to the column switches (and then only if I can find a way to mount them onto the column as I'm using a sierra column not an escort one), plus the cabin blower wirring. The rest is spare. I marked up anything I cut should I ever have the need to rebuild the loom. then moved back to inside and started final config of the rear of car wirring. labled everything  P1030896 P1030896 by jono_misfit, on Flickr then pulled back the heater rear screen feed (as it wont be used) and re-routed as a second fuel pump feed.  P1030897 P1030897 by jono_misfit, on Flickr ran in a new live feed, and pulled back from the dashboard end the fuel sender wires and routed them all (plus an earth) to just above the rear turret where the guage will mount. This will be visible through the rear quarter when filling the car. With the amount the car will be used and what it will be used for, its more usefull to see the fuel level when filling, rather than when driving.  P1030898 P1030898 by jono_misfit, on Flickr Its a reasonbly common rally car trick and I'll make a small mount that goes between the cage backstay and the diagonal brace. then started straightening and binding with tape the rear loom.  P1030899 P1030899 by jono_misfit, on Flickr  P1030900 P1030900 by jono_misfit, on Flickr  P1030901 P1030901 by jono_misfit, on Flickr this is with the aim of starting to fit the braided sleeving next week... If my de-pinning tools arrive.... |
| |
|
|
jonomisfit
Club Retro Rides Member
Posts: 1,790
Club RR Member Number: 49
|
|
|
|
In an entirely unexpected turn of events my de-pinning tools have not turned up yet. No doubt they will arrive on monday.... Centre console will be tight for space so I've been at looking at other options for button mounts.  P1030902 P1030902 by jono_misfit, on Flickr May well mount the ignition switch and start button here. The i figured i needed to make some things. Ali bar  P1030903 P1030903 by jono_misfit, on Flickr cut to length and attach with the lathe a number of times.  P1030904 P1030904 by jono_misfit, on Flickr gave spacers  P1030905 P1030905 by jono_misfit, on Flickr  P1030906 P1030906 by jono_misfit, on Flickr these are just mock up ones, the actual ones will be in a decent steel but I'm also waiting on that arriving... old strut to remove  P1030907 P1030907 by jono_misfit, on Flickr new strut in.  P1030908 P1030908 by jono_misfit, on Flickr a bit of a different in damper rod size.... fitted and top mount temp bolted down 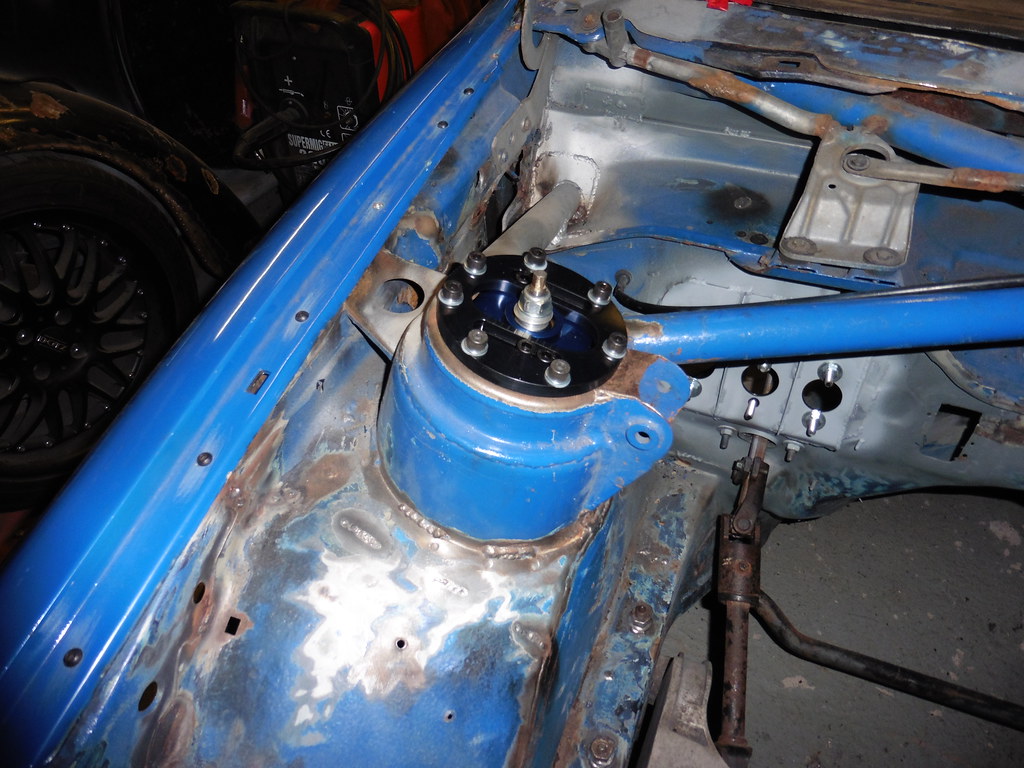 P1030909 P1030909 by jono_misfit, on Flickr I think i need to relieve it fractionally just where the strut brace mount is looks like so in  P1030910 P1030910 by jono_misfit, on Flickr and other side in  P1030911 P1030911 by jono_misfit, on Flickr i tried with the bonnet shut and there are milimiteres between the damper rod and the bonnet, but its clear.  P1030912 P1030912 by jono_misfit, on Flickr I ran out of time to fit the rears, so first job on Sunday. |
| |
|
|
|
|
|
|
|
John Do you mean "Performance Shims" Rather than Spacers? 
Nice work.
|
| |
Last Edit: Jul 3, 2020 20:56:37 GMT by peteh1969
|
|
jonomisfit
Club Retro Rides Member
Posts: 1,790
Club RR Member Number: 49
|
|
|
|
Rear dampers / coilovers fitted  P1030913 P1030913 by jono_misfit, on Flickr I'm going to have to do some mods to the rear arms to clear the dampers properly. I hacked a few bits off just to get them on, but will be tidying up and making proper return flanges.  P1030914 P1030914 by jono_misfit, on Flickr  P1030915 P1030915 by jono_misfit, on Flickr the reason for the clashes is I've got Group A rear dampers which normally go into the magnesium rear arms and the mount is a lot shallower. I can get round this by trimming back the steel arms I've got and making some tweaks. My cheap set of de-pinning tools turned up 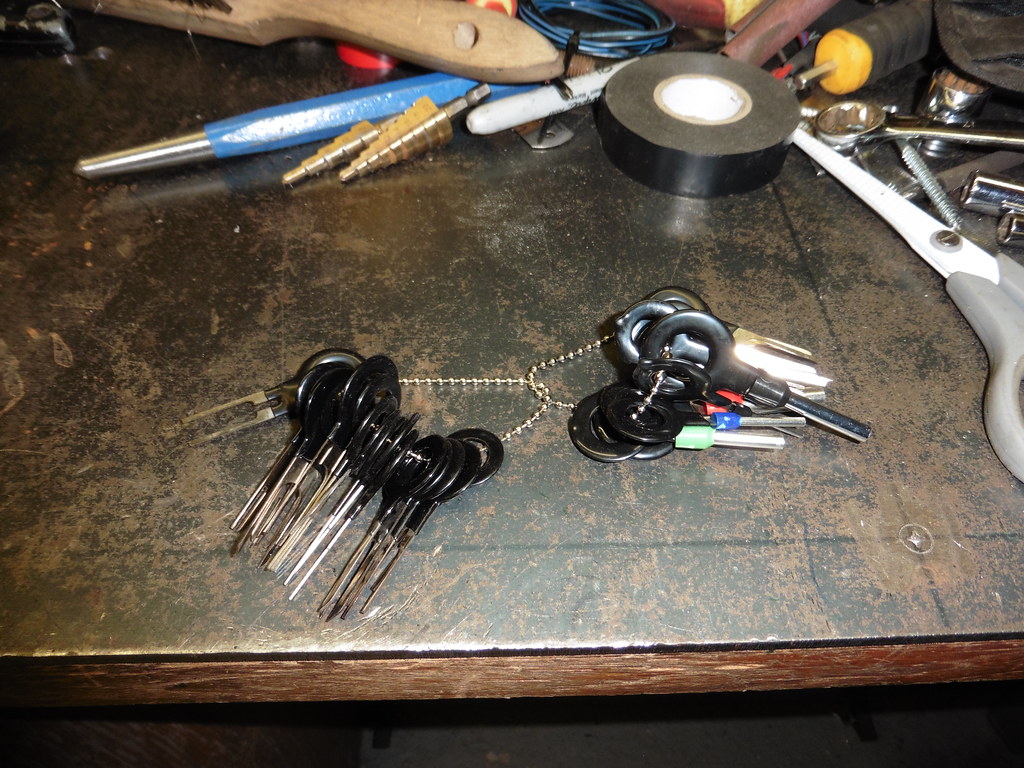 P1030916 P1030916 by jono_misfit, on Flickr you insert them into the Junior timer conectors and they push the pin latch down allowing you to withdraw the pin.  P1030917 P1030917 by jono_misfit, on Flickr I practiced on some of the spare conenctors to try and get a technique priot to doing this to ones that actually matter...  P1030918 P1030918 by jono_misfit, on Flickr I managed with the junior timer connections without issue, but I just couldnt get the junior power timer pins out without wrecking the connector. Rather than risk it on the car i'll buy a propper removal tool and see if that makes the difference. Better start on the bits of the loom i can do without de-pinning. Number plate light.  P1030919 P1030919 by jono_misfit, on Flickr nylon braid marked out to length  P1030920 P1030920 by jono_misfit, on Flickr tape applied to stop it freying once cut  P1030921 P1030921 by jono_misfit, on Flickr I used the de-pin tool to removed the connectors and fed the cables through.  P1030922 P1030922 by jono_misfit, on Flickr  P1030923 P1030923 by jono_misfit, on Flickr  P1030924 P1030924 by jono_misfit, on Flickr heat shrink onto ends.  P1030925 P1030925 by jono_misfit, on Flickr I use the heat shrink wich has a film of heat activated glue on the inside. This seals it to the braid and the cables. Stops the cables pulling through unwantedly. Mrs_Misfit has every gadget know to the human race... include one of these little lable makers.  P1030926 P1030926 by jono_misfit, on Flickr I bought some yellow lables and some heatshrink tube labels for it and tried it out  P1030927 P1030927 by jono_misfit, on Flickr make up my own code for things....  P1030928 P1030928 by jono_misfit, on Flickr gives a little lable  P1030929 P1030929 by jono_misfit, on Flickr fitted, then clear heat shrink over the top to protect it  P1030930 P1030930 by jono_misfit, on Flickr  P1030931 P1030931 by jono_misfit, on Flickr completely and utterly excessive, but at least I should know what things are in the loom now.... rear fuel guage wiring  P1030932 P1030932 by jono_misfit, on Flickr  P1030933 P1030933 by jono_misfit, on Flickr then did the fuel pump feeds and earth lines  P1030934 P1030934 by jono_misfit, on Flickr then did the cross car sheathing  P1030935 P1030935 by jono_misfit, on Flickr and applied some heatshrink to the bunch splits to hold it all firm  P1030936 P1030936 by jono_misfit, on Flickr I did the run that goes to the first rear light split (but then got stuck as need the de-pin tool), the fuel sender, and started setting up for the run to the front of the car. 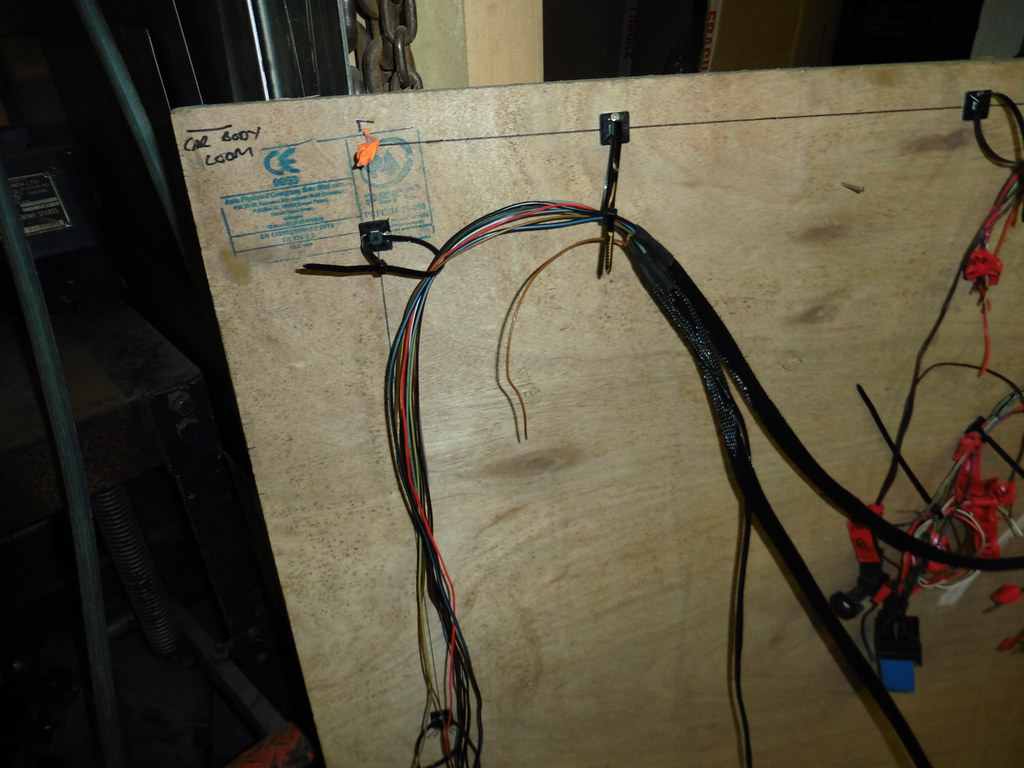 P1030937 P1030937 by jono_misfit, on Flickr Hopefully i've got my wiring right :-) |
| |
|
|
|
|
|
|
|
|
Nice attention to detail with the labels
|
| |
|
|
samta22
Club Retro Rides Member
Stuck in once more...
Posts: 1,276  Club RR Member Number: 32
|
|
|
|
|
^^^ What he said.
Excessive? Possibly. but a great idea and has got me thinking about my loom I'm playing with that the moment... I have one of those machines hiding somewhere too.
|
| |
'37 Austin 7 '56 Austin A35 '58 Austin A35 '65 Triumph Herald 12/50 '69 MGB GT '74 MGB GT V8'73 TA22 Toyota Celica restoration'95 Mercedes SL320 '04 MGTF 135 'Cool Blue' (Mrs' Baby) '05 Land Rover Discovery 3 V8 '67 Abarth 595 (Mrs' runabout) '18 Disco V |
|
melle
South West
It'll come out in the wash.
Posts: 2,010
|
|
|
|
|
|
| |
www.saabv4.com'70 Saab 96 V4 "The Devil's Own V4" '77 Saab 95 V4 van conversion project '88 Saab 900i 8V
|
|
jonomisfit
Club Retro Rides Member
Posts: 1,790
Club RR Member Number: 49
|
|
|
|
|
Thanks. Entirely excessive just how I like it 😁
And cheers for the links.
The yellow labels I'm using are heat shrink, however tests ( read fitting over cables) showed it rubs off a bit, so the clear tube protects the text.
I'm also limited on diameter of lable heatshrink by the machine so some need to be labels and the clear heat shrink keeps in place.
|
| |
|
|
melle
South West
It'll come out in the wash.
Posts: 2,010
|
|
|
|
|
Hah, looking at your photos again I now see they're sleeves, not labels. Makes sense to fit the clear tubes over them.
|
| |
www.saabv4.com'70 Saab 96 V4 "The Devil's Own V4" '77 Saab 95 V4 van conversion project '88 Saab 900i 8V
|
|
jonomisfit
Club Retro Rides Member
Posts: 1,790
Club RR Member Number: 49
|
|
|
|
Its a mix, really but it does what I need :-) continued on with the loom work  P1030938 P1030938 by jono_misfit, on Flickr  P1030939 P1030939 by jono_misfit, on Flickr still some break out labelling to do.  P1030940 P1030940 by jono_misfit, on Flickr  P1030941 P1030941 by jono_misfit, on Flickr back in the car for a final check that it lines up where needed  P1030942 P1030942 by jono_misfit, on Flickr nicelly keeps it all out the way  P1030943 P1030943 by jono_misfit, on Flickr I'm now waiting for my new de-pinning tools to arrive to finish off the back end, and my bulkhead connectors. Hopefulyl they are both here before friday. I need to get back onto the center console design so I have something to wire to.... |
| |
|
|
jonomisfit
Club Retro Rides Member
Posts: 1,790
Club RR Member Number: 49
|
|
|
|
|
My selection of actual depin tools arrived today.
They actually work. I found the right one, push it in firmly, and out pops the pin.
Success.
This will give me chance to finish the back of the loom covering on the weekend.
|
| |
|
|
|
|
|
Jul 10, 2020 10:09:36 GMT
|
|
back the loom weaving truck up a second, you can get clear shrink wrap ?
|
| |
|
|
|
|
|
Jul 10, 2020 11:14:28 GMT
|
My selection of actual depin tools arrived today. They actually work. I found the right one, push it in firmly, and out pops the pin. Success. This will give me chance to finish the back of the loom covering on the weekend. can you post a link to the tools? |
| |
|
|
jonomisfit
Club Retro Rides Member
Posts: 1,790
Club RR Member Number: 49
|
|
Jul 10, 2020 12:09:37 GMT
|
Yep. I just got some from eBay in a range of sizes. It feels a different material to normal heat shrink but I may be imagining it. I just got a cheap set of tools from eBay, but they appear to work. www.ebay.co.uk/itm/313121325043 |
| |
|
|
jonomisfit
Club Retro Rides Member
Posts: 1,790
Club RR Member Number: 49
|
|
Jul 10, 2020 17:28:53 GMT
|
|
|
| |
|
|
 P1030867 by jono_misfit, on Flickr
 P1030868 by jono_misfit, on Flickr
 P1030869 by jono_misfit, on Flickr
 P1030870 by jono_misfit, on Flickr
 P1030871 by jono_misfit, on Flickr
 P1030872 by jono_misfit, on Flickr
 P1030873 by jono_misfit, on Flickr
 P1030874 by jono_misfit, on Flickr
 P1030875 by jono_misfit, on Flickr
 P1030876 by jono_misfit, on Flickr
 P1030867 by jono_misfit, on Flickr
 P1030868 by jono_misfit, on Flickr
 P1030869 by jono_misfit, on Flickr
 P1030870 by jono_misfit, on Flickr
 P1030871 by jono_misfit, on Flickr
 P1030872 by jono_misfit, on Flickr
 P1030873 by jono_misfit, on Flickr
 P1030874 by jono_misfit, on Flickr
 P1030875 by jono_misfit, on Flickr
 P1030876 by jono_misfit, on Flickr


