jamesd1972
Club Retro Rides Member
Posts: 2,922  Club RR Member Number: 40
Member is Online
|
|
|
|
|
That shell has to be stiff as a stiff thing ! Are you going to have enough adjustment to raise the height to give it a proper workout on some rally stages....?
Is it worth the effort to change the hubs when there are so many vag group wheels available ? Just wonder if keeping to that standard might give easier options long term?
Nice work, thanks for sharing
James
|
| |
|
|
|
|
RobinJI
Posted a lot
   "Driven by the irony that only being shackled to the road could ever I be free"
Posts: 2,995
|
|
|
|
|
Thanks James. There should be adjustment enough to take the car back up to around standard ride height should I want to, which with everything under the car tucked up nice and high like I intend, would give more than enough clearance for most rallys. I don't intend to rally it at the moment as my pockets aren't that deep! but I'm trying to keep the option open in case I want to go that direction in the future.
As for wheels, the 924's don't share the standard stud pattern with most VAG stuff. They're 4x10⁸ (copying the older audi's like the engine's from) which isn't a rare pattern, but is a weirdly limited one for the choice of style and size. I intend to convert to 4x100, like smaller VW's used up until the 2000s. This gives me a whole world of choice, especially as I'll be turning the spigots down small enough to also be able to fit japanese 4x100 wheels like toyota and mazda have used a lot. The hubs I'm using come as 5x100, which isn't as plentiful for smaller or more retro looking wheels. The fact I happen to have various wheels in 4x100 already thanks to the Scirocco definitely helps make the decission too!
|
| |
Last Edit: Mar 8, 2018 18:45:55 GMT by RobinJI
|
|
jamesd1972
Club Retro Rides Member
Posts: 2,922  Club RR Member Number: 40
Member is Online
|
|
|
|
|
Thanks for explaining, all makes perfect sense now.
James
|
| |
|
|
RobinJI
Posted a lot
   "Driven by the irony that only being shackled to the road could ever I be free"
Posts: 2,995
|
|
Mar 26, 2018 20:57:54 GMT
|
The coilovers are now on order from Gaz.  I've gone for a set of their gold spec with fronts as they'd usually supply for a 924, (shortened, oversized body) then a custom aluminium coilover on the rear. They should give about 150mm of wheel travel, which is a bit more than I'll need as I'll only be able to run ~75mm of bump travel before ground and wheel tub clearance becomes an issue. It'll give me a nice range of adjustment, though, as I could run it with an extra ~30mm of ground clearance before worrying about not having enough droop travel. I've designed everything around it sitting with 80mm of ground clearance, so I'll have the option of up to about 110 easily. Gaz were really helpful but it wasn't the quickest order to put through as they seemed to prefer phone calls to emails. Normally that would be fine by me, but works been crazy with getting a new building ready to move into so I've not had much time for calls during their opening hours. With the back and forth involved in a customised product it drew out the process a bit. I'm looking farward to getting my hands on them! |
| |
Last Edit: Mar 26, 2018 21:19:16 GMT by RobinJI
|
|
RobinJI
Posted a lot
   "Driven by the irony that only being shackled to the road could ever I be free"
Posts: 2,995
|
|
|
|
In a distraction from the suspension stuff, which is a bit stalled until I finalise the designs and place an order for the laser cut bits, I made a brake pedal: 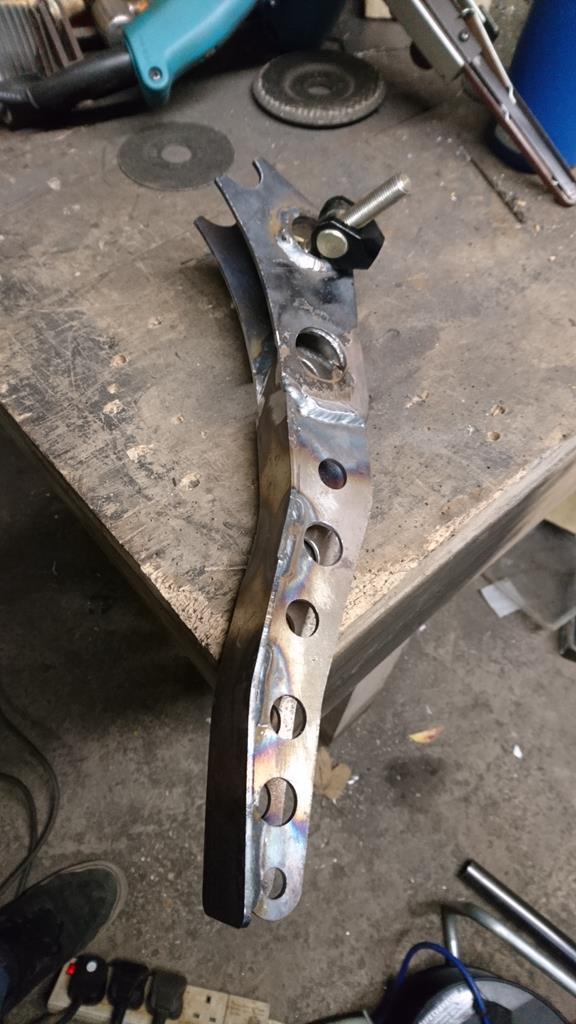 I've been trying to decide how to do the pedals for a while, as I want dual master cylinders and don't want the factory RHD system with the master cylinder on the passenger side. Normally the easy answer is a floor mounted pedal-box but due to the shape of the foot-well I'd need to move the seat back a bit, which I don't want to do. After a bit of measuring, scribbling and drawing round stuff I've come up with a plan: 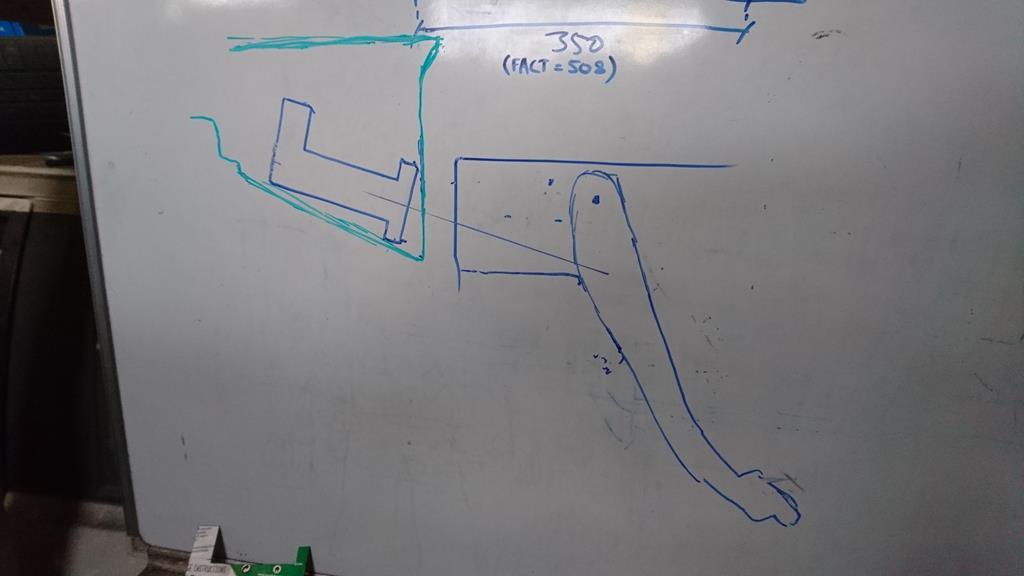 Essentially, I'll try and wedge a pair of cylinders on the bulkhead in the limited space above the wheel-tub. This does mean the cylinders will have to point up a bit so the push-rod aims low enough to keep the pedals pivot in the cabin. It also points the push-rods right through the mounting of the original pedal-box, so I'll be needing to make up a new one. I need to get some master cylinders on order but in the mean time I butchered a pedal from a partially finished pedal-box I made a while ago, extending it and moving the pivots. I still need to weld the pivot tube onto it. I'll use the matching clutch and accelerator pedals to make up a new box that'll sit where the factory one did. |
| |
Last Edit: Apr 1, 2018 16:51:56 GMT by RobinJI
|
|
RobinJI
Posted a lot
   "Driven by the irony that only being shackled to the road could ever I be free"
Posts: 2,995
|
|
|
|
I got a nice little present in the post today. 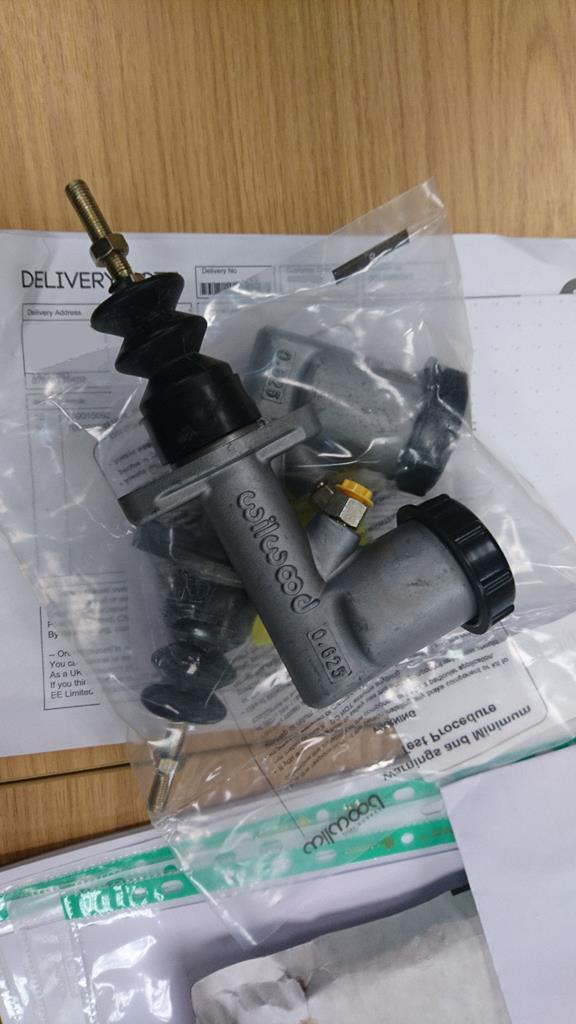 Although its a while until I'll need them functionally, having them now lets me make sure I've got the fit and clearances right as I build the pedal box up. I chose these Willwood ones as they were the cheapest cylinders I could find from a brand I'm confident in and I liked the inbuilt reservoir as space is tight, plus less joints means less complication and less places for leaks to spring. I was pleasantly surprised to see these have completely sealed reservoirs with a diaphragm to allow the fluid level to vary. Keeping the fluid sealed off away from pesky moisture filled air should keep it at its peak performance a little longer than usual. On the theme of brakes, that pedal I knocked up needs something to pivot on, so this evening was spent cleaning up my little lathe to try and knock up some bushes for the pedals. I started with a lump of phosphor bronze and a section of the tube that used to transfer the pedal movement to the passenger side. So that means they're basically standard brakes doesn't it?... 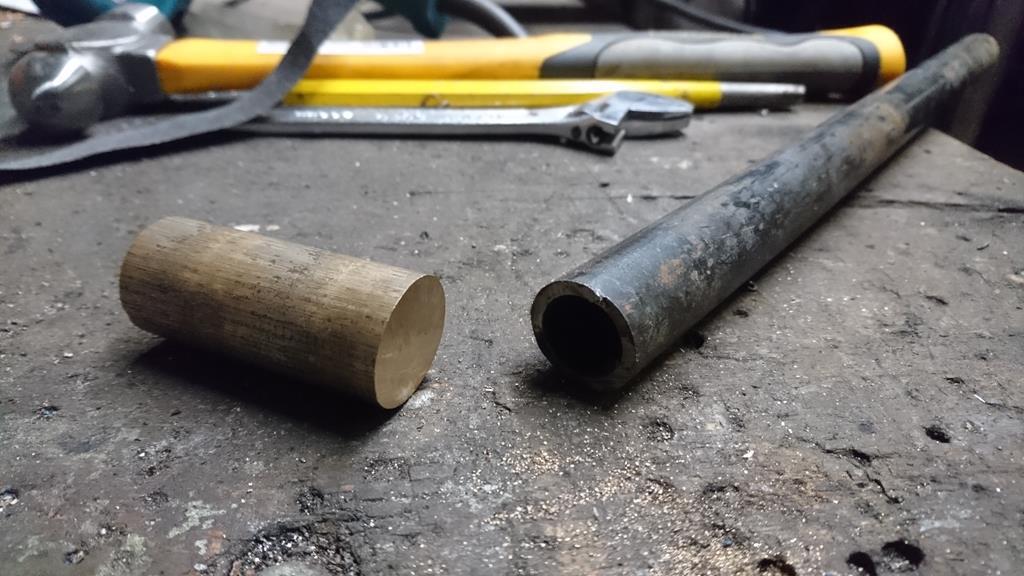 Then after a while cleaning up the abused little Chinese lathe I skimmed the bore of the tube (which is a nicely sized thick wall CDS), faced it's ends and cleaned up the outside with emery cloth, giving me a nice pivot-housing to weld onto the pedal. Next up I parted off a chunk of the phosphor bronze, faced it and turned the outer diameter of the first few mm to match the tubes O.D. Then flipped it around in the chuck, faced the other end, bored a 10mm hole through it and turned the outside down to a press fit into the tubes I.D. Then, I was hungry so I went home. Next time I'm out I'll repeat the bronze bush and weld the sleeve onto the pedal. 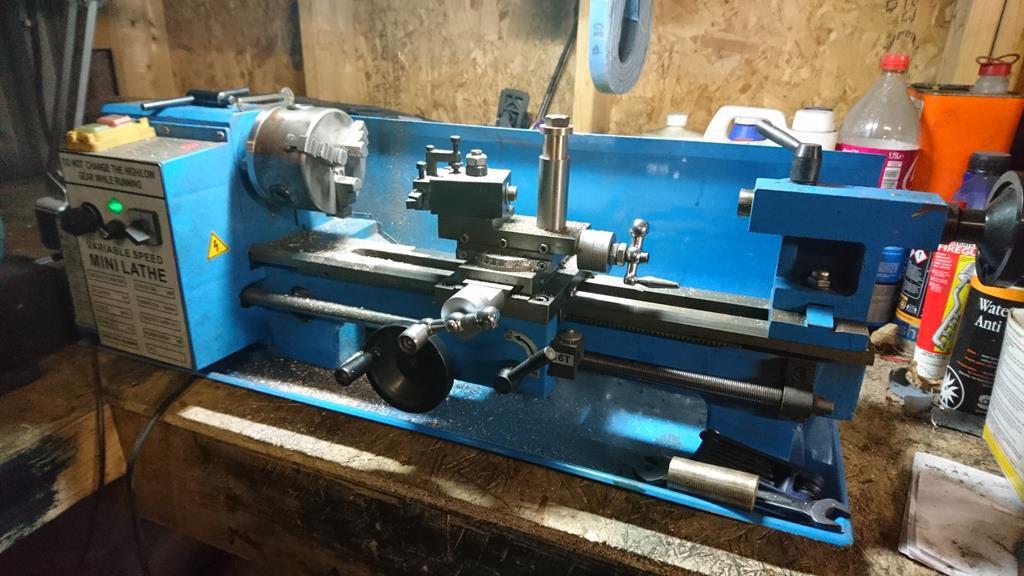 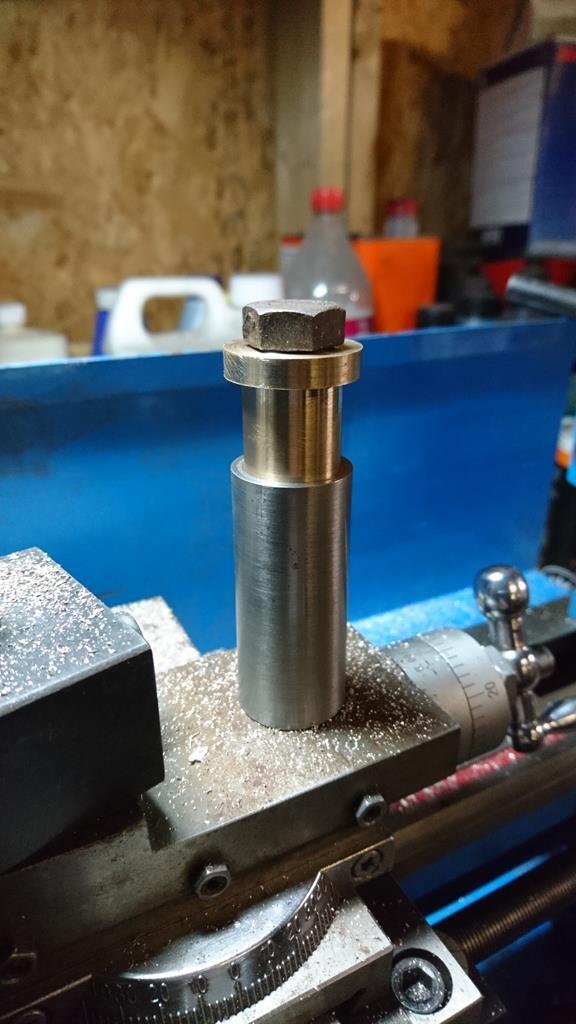 I'm hugely over-building the brake pedal, but hey, brakes are kind of important! Plus, any kind of flex in the braking system is bad for performance. |
| |
Last Edit: Apr 6, 2018 6:26:04 GMT by RobinJI
|
|
fatlad
Part of things
 
Posts: 65
|
|
|
|
|
Looking good! How do you find that lathe? Been looking at them for a while but always put off that they look like they might have loads of float or wear quickly? Cheers
|
| |
|
|
RobinJI
Posted a lot
   "Driven by the irony that only being shackled to the road could ever I be free"
Posts: 2,995
|
|
|
|
|
Thanks Fatlad.
To be honest that lathe's a bit crappy, but it is kind of usable. I bought it second hand, and I'm glad I did as I wouldn't have wanted to spend the new price on one and I'm not sure I'd bother again even second hand. I've seen companies that import them, heavily upgrade them and then sell them for a bit more, which might be worth considering as it does mostly seem to be upgradable parts that cause the issue, but by then you're looking at the kind of price that could buy something better second hand. I'm not sure what the ones Axminster Power Tools sell are like. Although they appear to be the same base machine, I wouldn't be at all surprised if they'd seen better quality control and a few choice upgrades to make them a fair bit better.
It does get alright results with a bit of patience but it comes out of adjustment much faster than I'd like, and you need a few of the accessories for it to be usable.
|
| |
|
|
RobinJI
Posted a lot
   "Driven by the irony that only being shackled to the road could ever I be free"
Posts: 2,995
|
|
|
|
Yesterday I popped out and finished off the brake pedal, knocked up a matching clutch pedal and made a start on butchering the pedalbox to suit the new brake set-up. One pair of bushes and one pivot tube ready to be welded up: 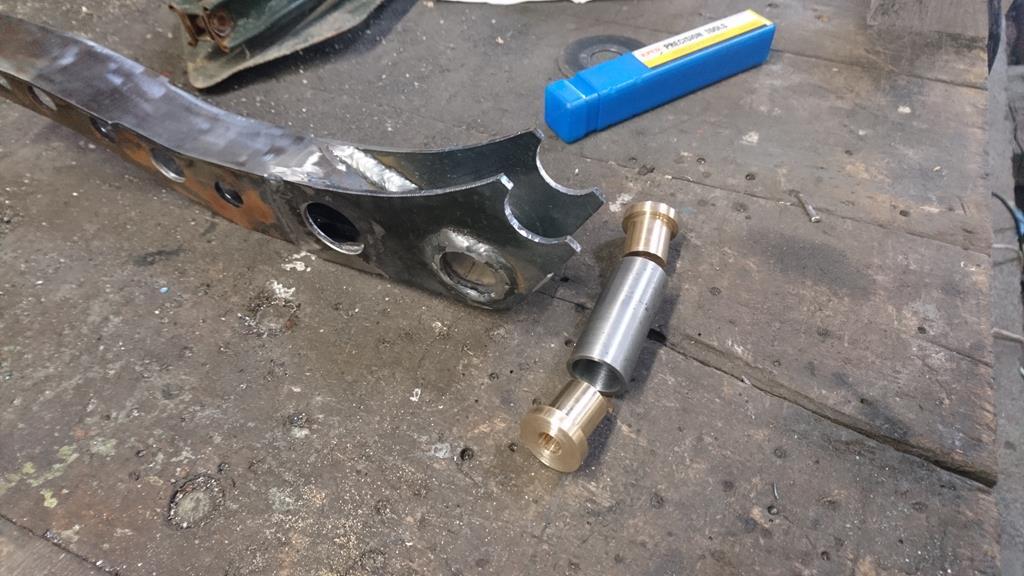 The original clutch pedal would have worked just fine as I'm keeping the factory clutch set-up, but it wouldn't have matched the brake pedal, so clearly it had to go under the knife. In a rare case of sense, I did decide to use what the factory made for the top half as it'll work just fine. 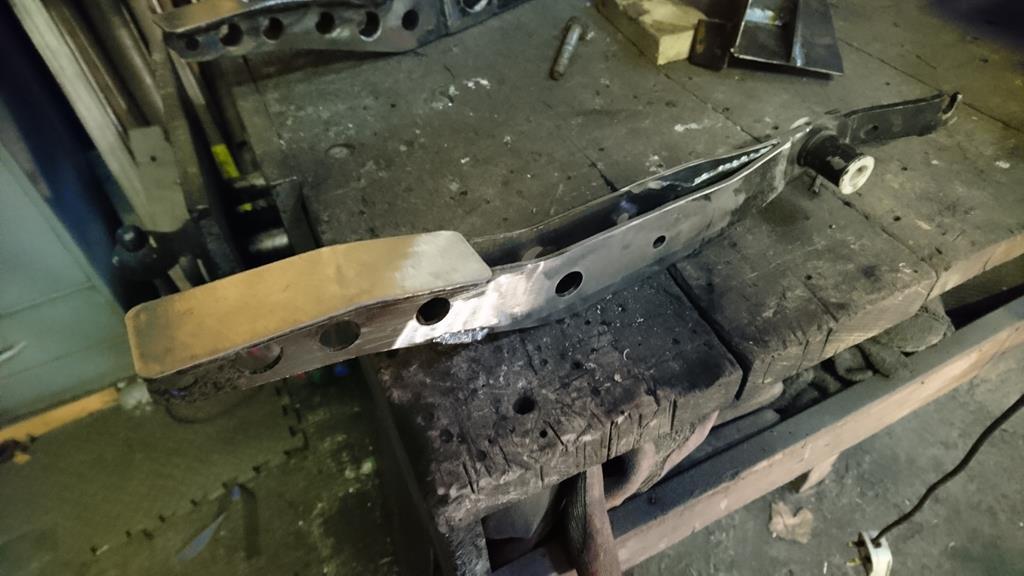 Knowing what needed to be mounted into it, I could then made a start on butchering the pedal box to fit the new brake pedal, while retaining the clutch pedals pivot. I forgot to get any before pictures but it's a simple enough thing. Essentially just a plate bolted to the underside of the scuttle with 3 sides folded down and a couple of pins sticking out of the down turns for the pedals. The brake pivot was in about the right place, but only in single shear. It originally supported just one end of the long tube that transferred your jab at the pedal over to the passenger side where the servo and master cylinder lived. Without that long tube supporting things it's design wasn't nearly man enough, so, as usual, it's time to remake things. A little chopping and welding later and I've got this: 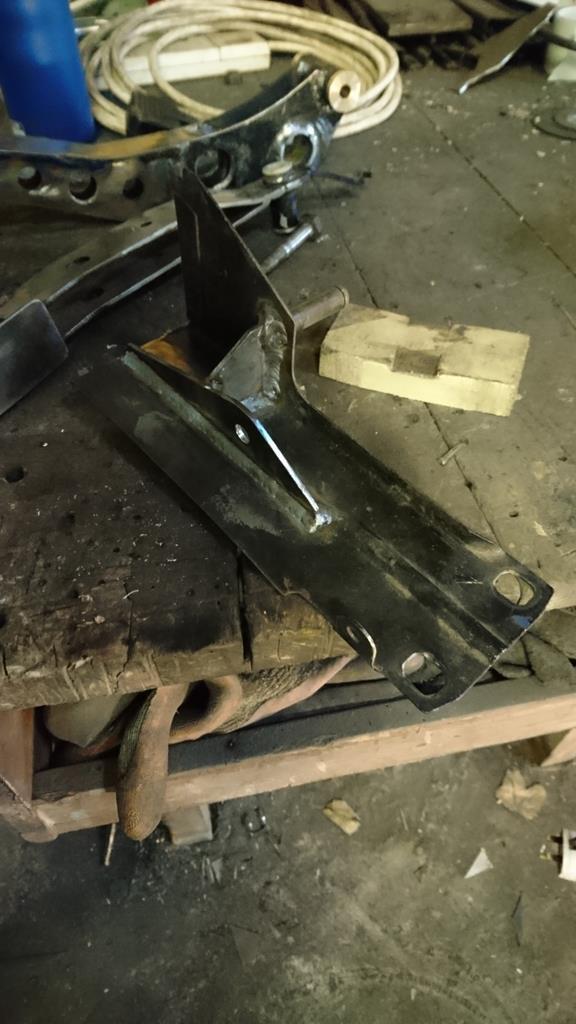 That's the clutch pedal mounted and the first side of the brake pedal mount welded on. I'll need to add another mount for the other side of the brake pedal and make up some form of mountings to the shell, as some of them were in the way of the new cylinders push-rod's path so had to go. That gives me something like this: 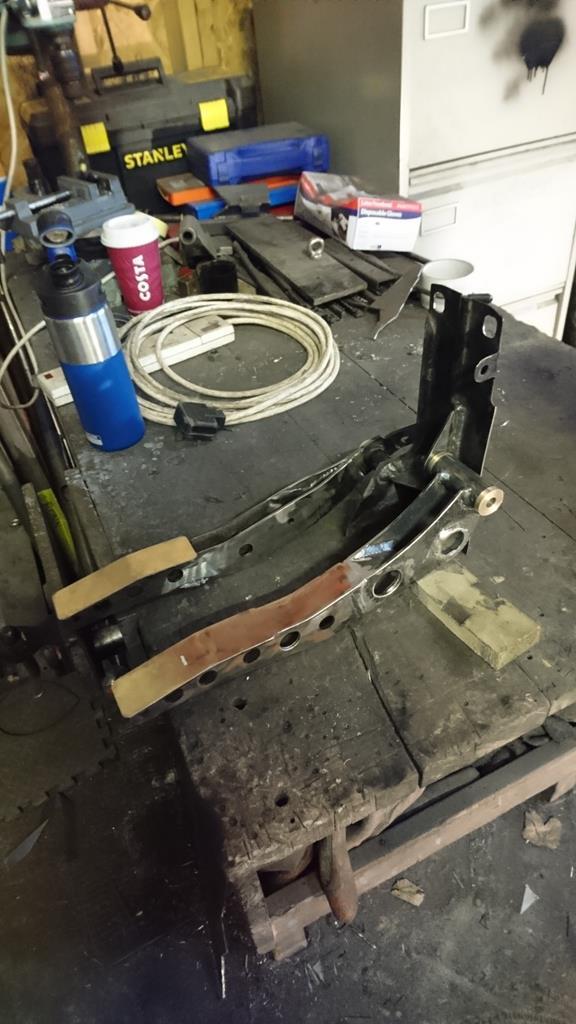 The pedals look like they're not inline but they're not in their at-rest positions, and as the pivots don't match (one's pushing, ones pulling and space is tight) they can only match at one point, like this: 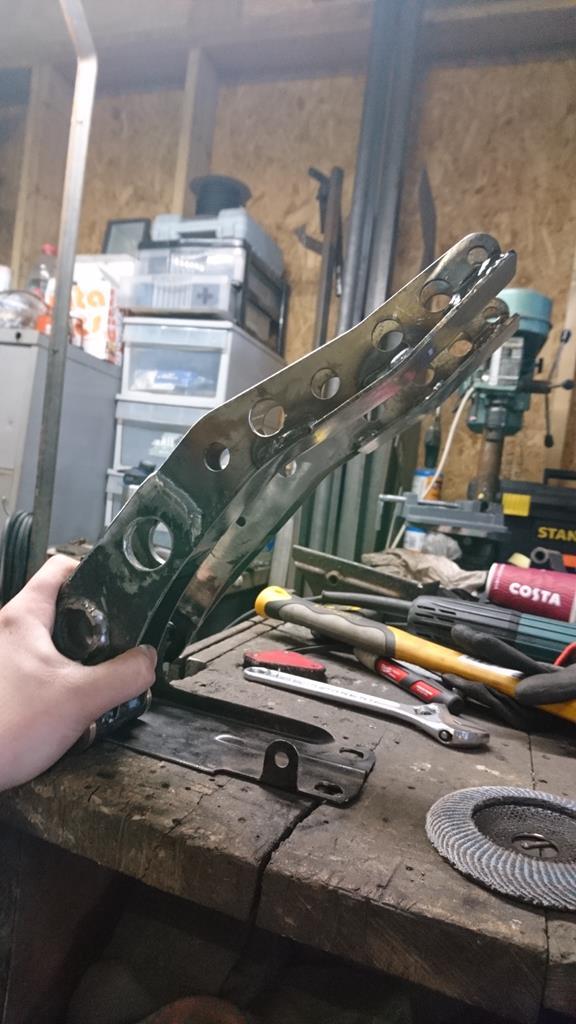 The next decision is the throttle pedal. Obviously it has to match the other two pedals, so the factory one won't do. However I'm not sure whether to keep a factory style bottom pivoting pedal, or hang a top mounted one from the pedal box along side these two. |
| |
Last Edit: Apr 8, 2018 8:49:55 GMT by RobinJI
|
|
jamesd1972
Club Retro Rides Member
Posts: 2,922  Club RR Member Number: 40
Member is Online
|
|
|
|
|
Top hinge less beetle like !
Nice fab work
James
|
| |
|
|
|
|
|
|
|
|
|
|
although, hinging the same way as your feet do, does make sense
|
| |
|
|
bstardchild
Club Retro Rides Member
Posts: 14,976
Club RR Member Number: 71
|
|
Apr 10, 2018 20:26:16 GMT
|
although, hinging the same way as your feet do, does make sense I converted a floor hinge throttle pedal (that worked on a top mounted lever) to a just a simple top hung pedal and it was no where near as delicate in terms of use/feel in fact it was very noticeable especially in initial application of the throttle (pull away etc). It took me a little while to work out that the floor mount was actually increasing travel of the foot v the actual movement of the throttle lever that it was moving so without the floor mounted pedal slowing the travel. |
| |
|
|
RobinJI
Posted a lot
   "Driven by the irony that only being shackled to the road could ever I be free"
Posts: 2,995
|
|
Apr 21, 2018 22:07:17 GMT
|
Thanks for the feedback guys. I'm not really sure what conclusion to make from it though, so I've just gone with 'I like it when things match'.  I popped out to the unit the other day to be greeted with an unpleasant surprise: 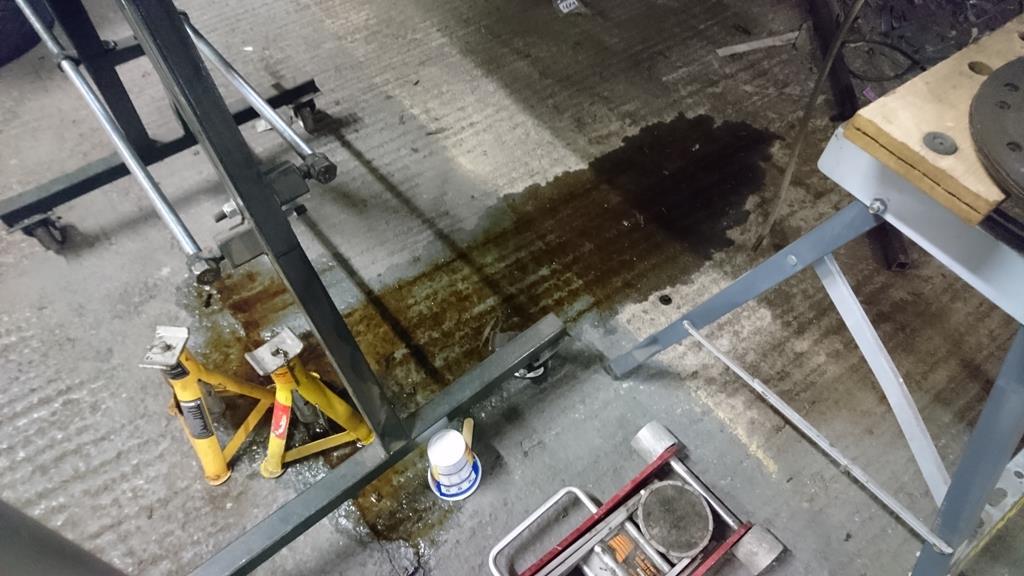 Yep, my bare shell had leaked smelly oil all over the floor.  Ahh.. That's right, I fitted the gearbox, torque tube and an old block & sump to take some measurements for the front subframe design. Ohh, and gearboxes have oil in them, and they have breathers on top of them, and I left the car completely upside down. Well.... Cock. 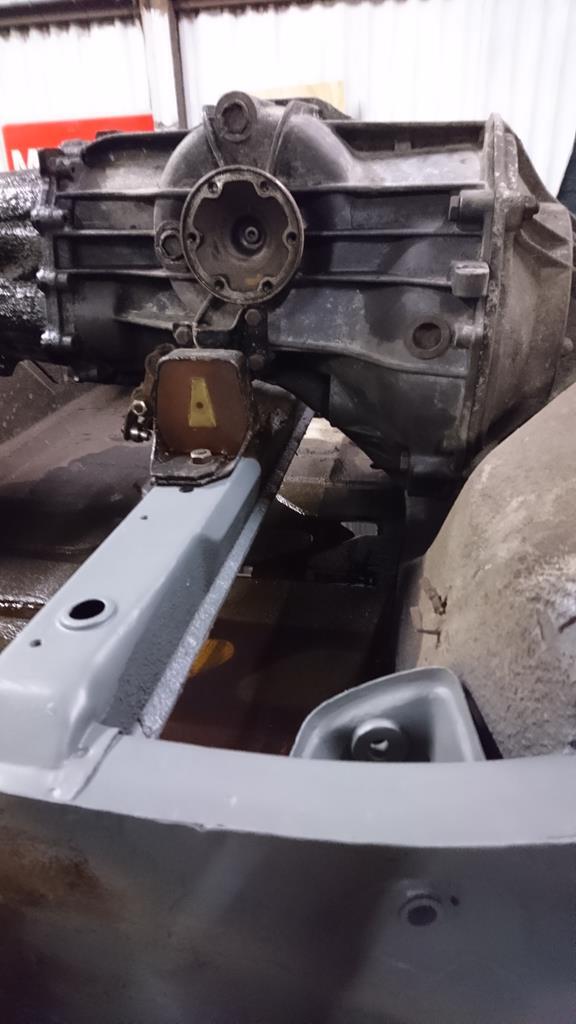 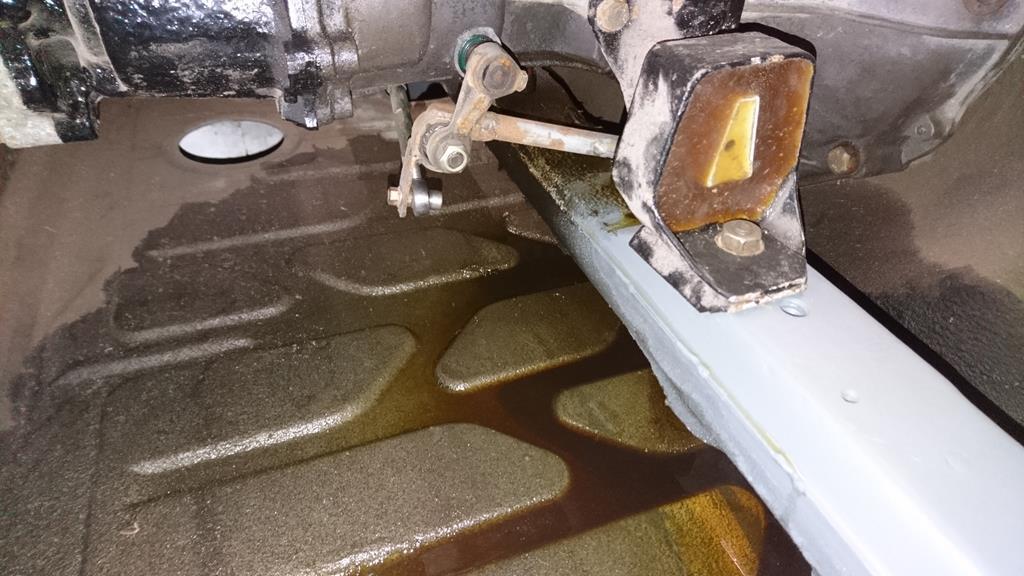 For now I'm going to choose to ignore this and carry on with the pedalbox. Adding some width: 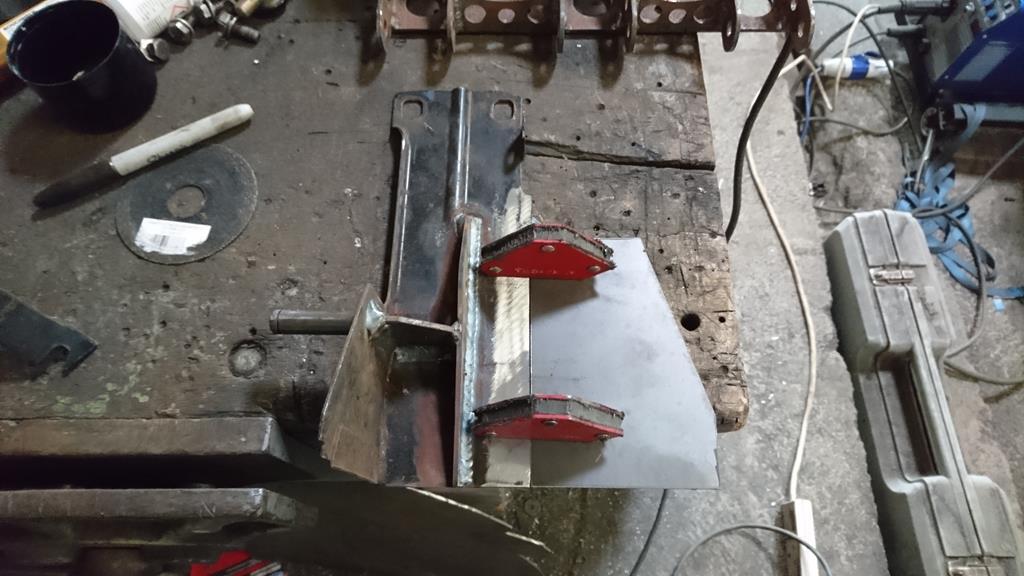 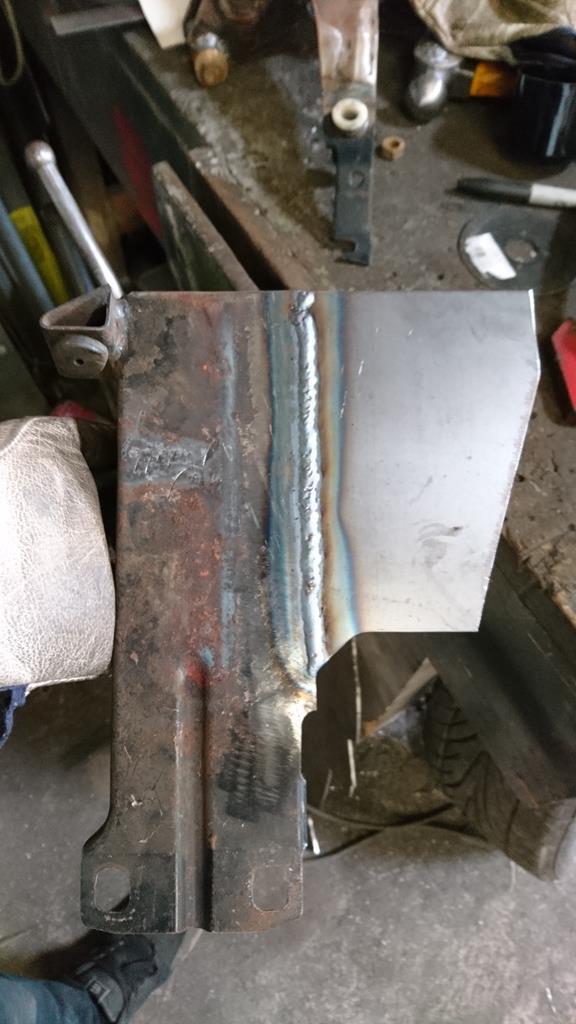 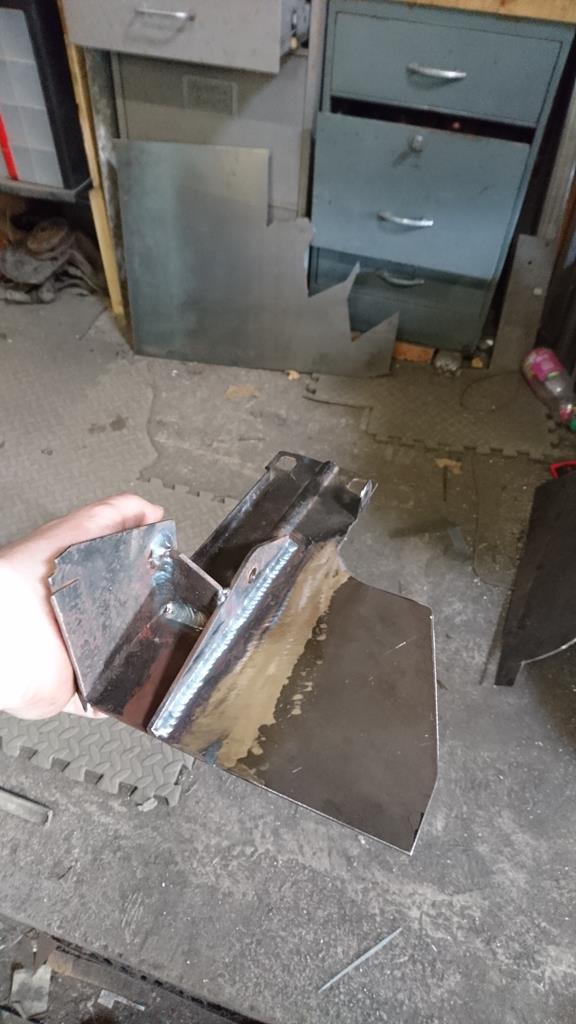 To make sure I got the throttle pedal in line with the others I tacked an old off-cut to all 3 foot-pads (is that a real name? it sounds like one), then cut the pivot end off the old throttle pedal I started out with: 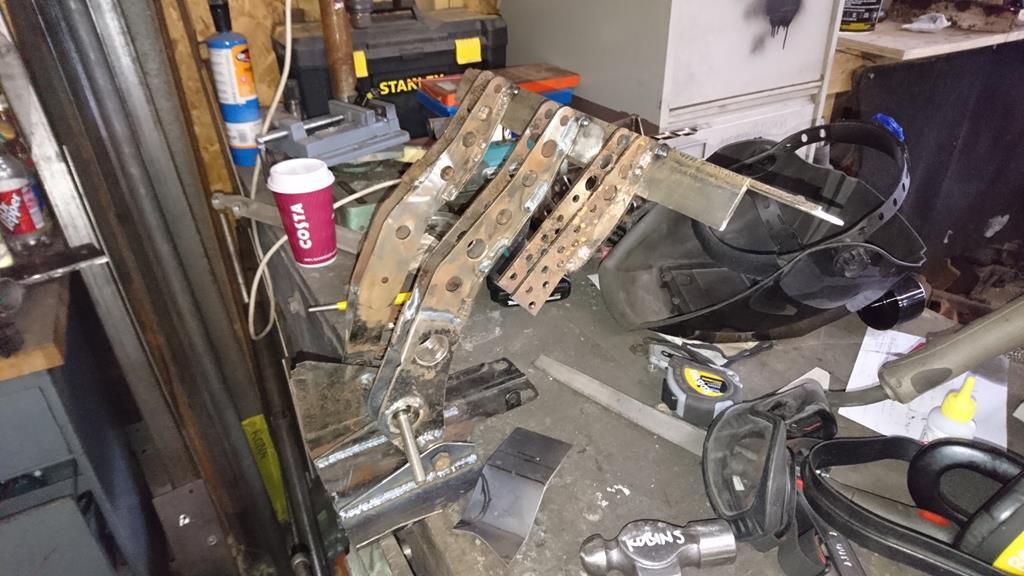 I measured a few cars around the unit to see what their pedal throw and throttle cable movement was then picked a pivot point that should give me enough adjustment to work with pretty much anything I fancy connecting it to: 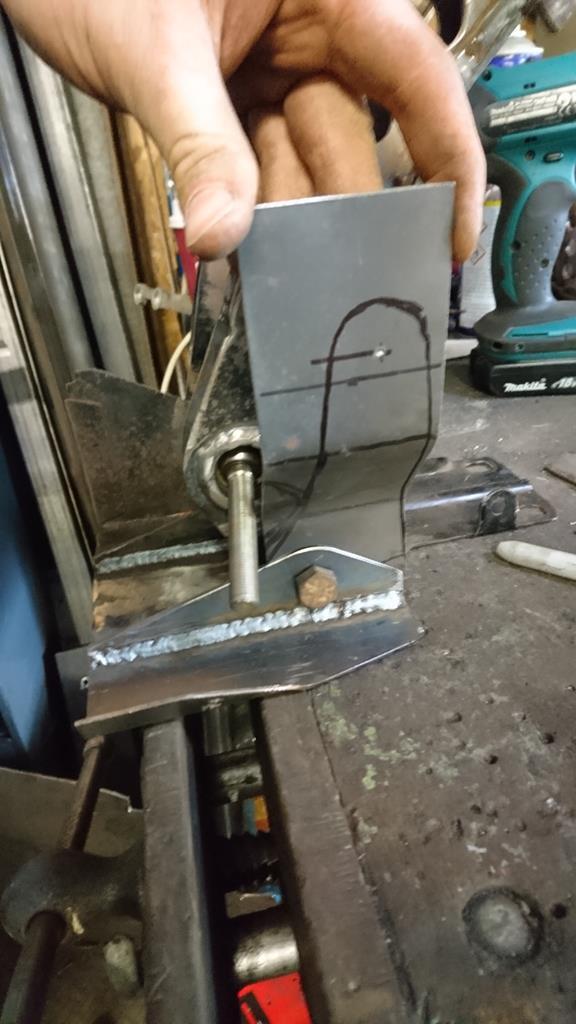 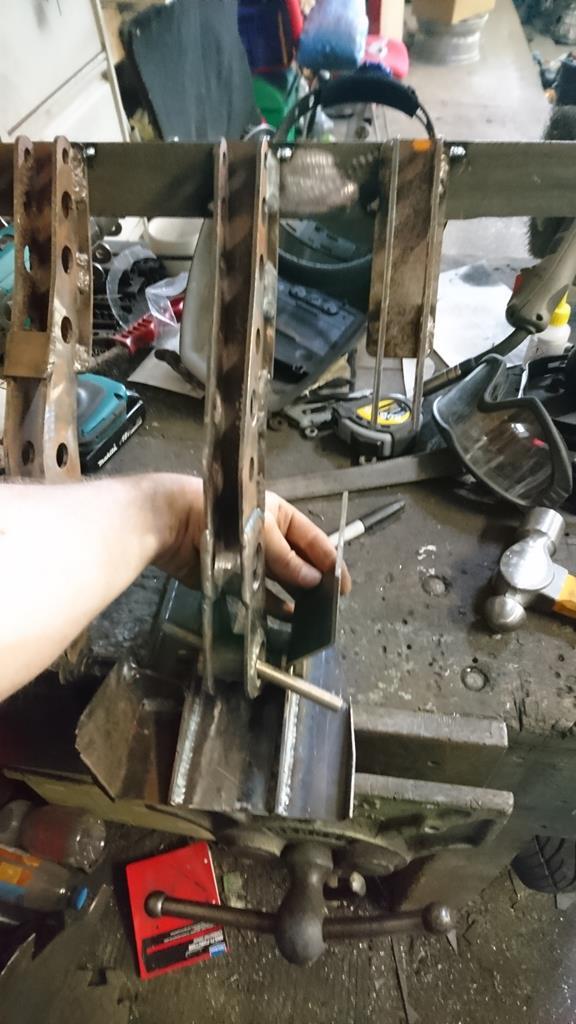 You may notice I'd also added the other half of the brake pedal pivot before this point. At this point I basically forgot I had a camera and just cracked on with the throttle pedal and its mount, so now I have this: 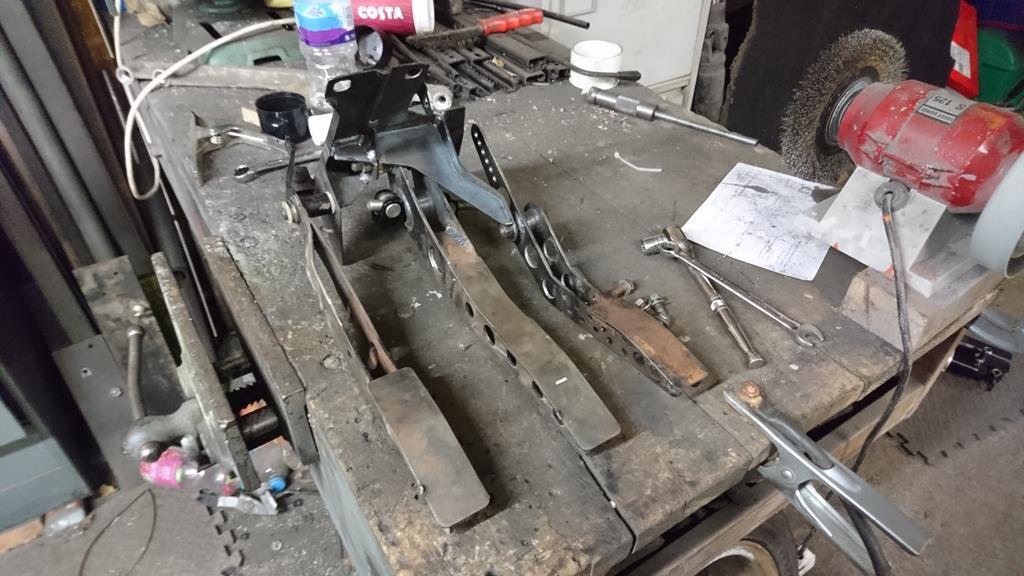 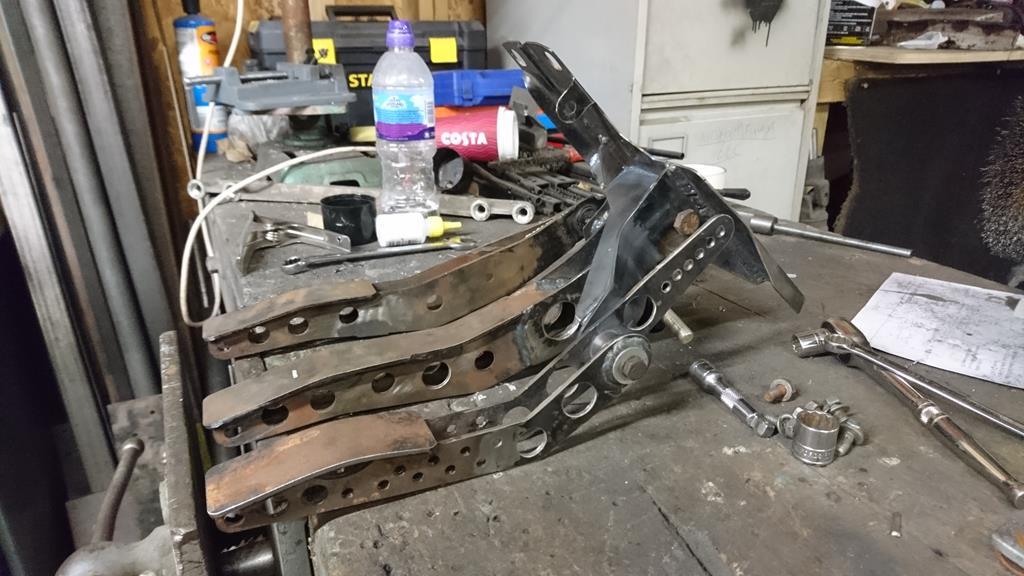 I need to turn up a bush for the throttle pedal and then I'll be onto mounting the master cylinders. Also, in shiny new stuff news  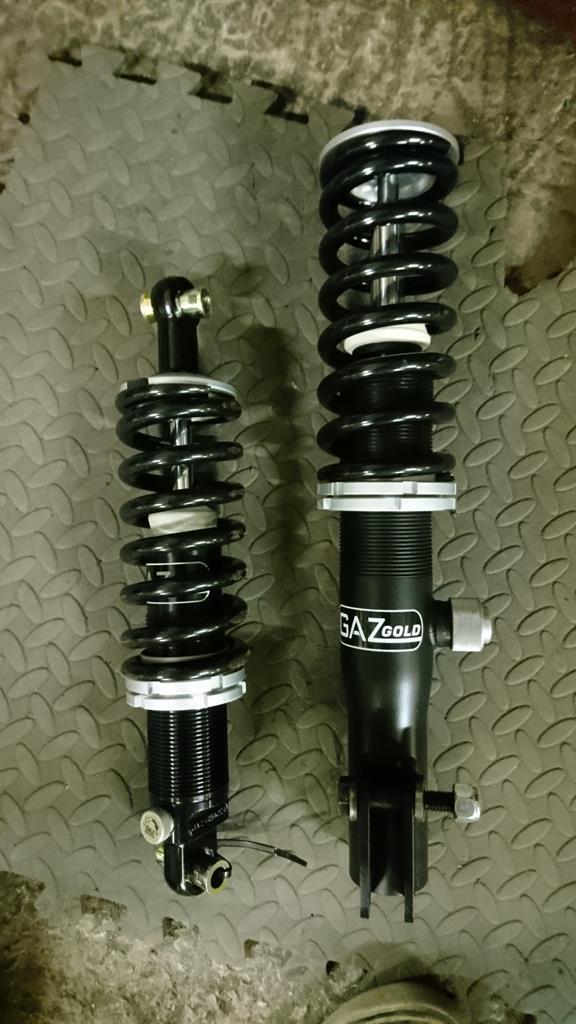 Some very nice new suspension turned up from Gaz (a week and a half sooner than expected!). They look ideal, and are another great step towards the car rolling. Now I've measured them up properly they'll be getting boxed back up and put to one side for a while until I'm at that stage. |
| |
|
|
jamesd1972
Club Retro Rides Member
Posts: 2,922  Club RR Member Number: 40
Member is Online
|
|
|
|
|
Cat litter and proper coke - will help get rid of the oily patch and smell!
My wife told me this after I left on a business trip leaving a Land rover front axle to fall over on its side after removing the diff oil seal. Had a connected garage so it stunk the whole house out.
Didn't see the oil escaping the garage when I left and run away - that would have been wrong...
Nice peddles.
James
|
| |
|
|
RobinJI
Posted a lot
   "Driven by the irony that only being shackled to the road could ever I be free"
Posts: 2,995
|
|
Apr 29, 2018 19:58:42 GMT
|
Thanks for the tip James. I may well give that a go. Work's been crazy so no physical progress, but this did just happen  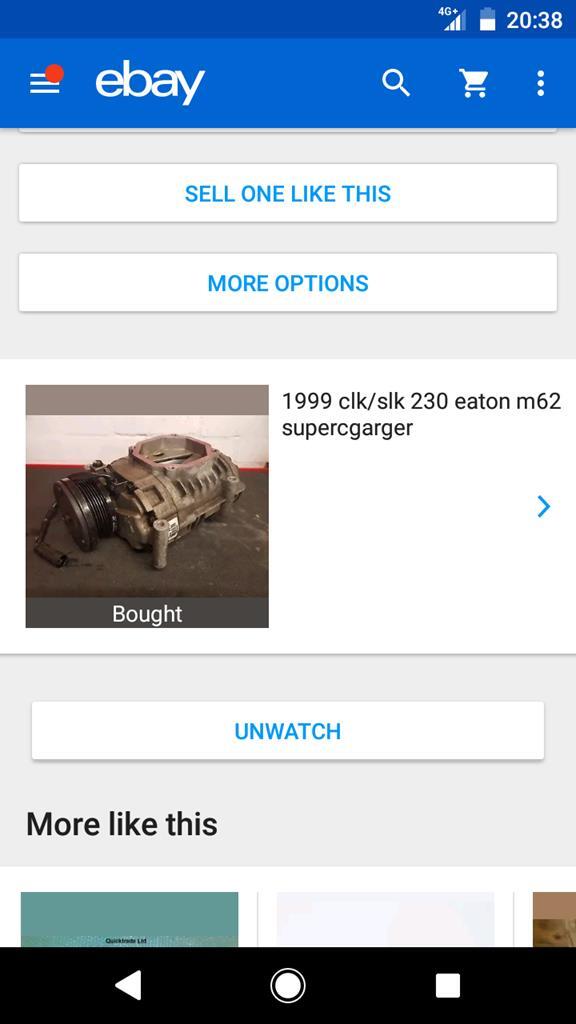 Spotting a well priced M62 on eBay finally got me to do the sums to confirm my suspicion that an M45 was a bit small, so all being well I'll have that M62 soon and can start thinking about the engines layout, bracketry and pipe-work. |
| |
Last Edit: Apr 29, 2018 19:59:12 GMT by RobinJI
|
|
|
|
|
|
|
having picked up a 944 recently I've just spent the last day or so reading from start to finish. Nice work going into this, I'm waiting for my car to be delivered then I've got the task of deciding what engine to go into it. Will be following this to see the progress  |
| |
Porsche 944
|
|
RobinJI
Posted a lot
   "Driven by the irony that only being shackled to the road could ever I be free"
Posts: 2,995
|
|
|
|
Well, life went a bit crazy with moving house and a big project due at work, so the 924's been neglected a little. I have managed to get a couple of evenings to finish swiss-cheese-ing the clutch pedal and begin getting the pedal box integrated into the shell. One drilled pedal, the slightly uneven spacing of the holes bugs me a bit, but it started with some holes already so I couldn't space then out quite right: 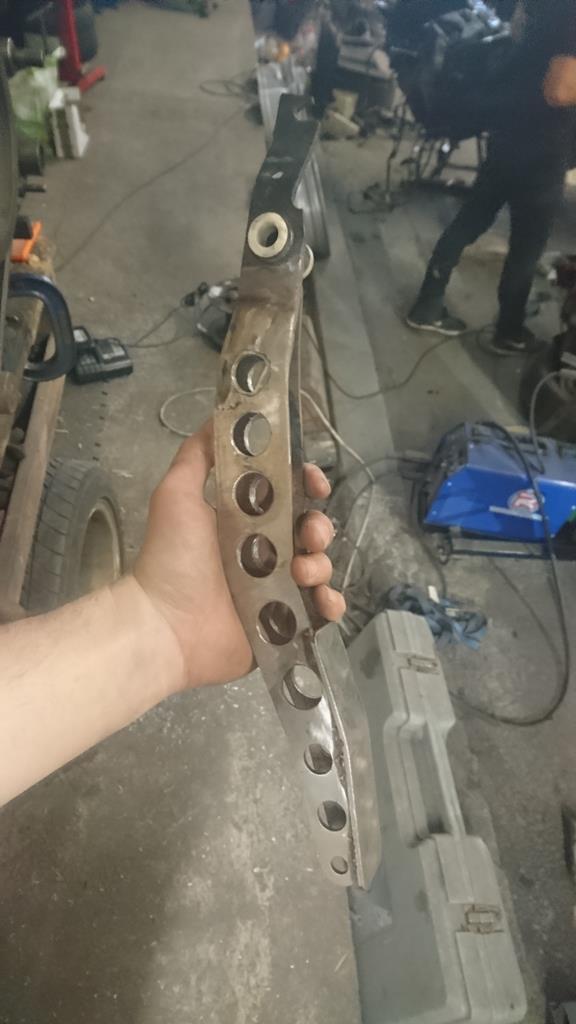 Then I knocked this little lot up: 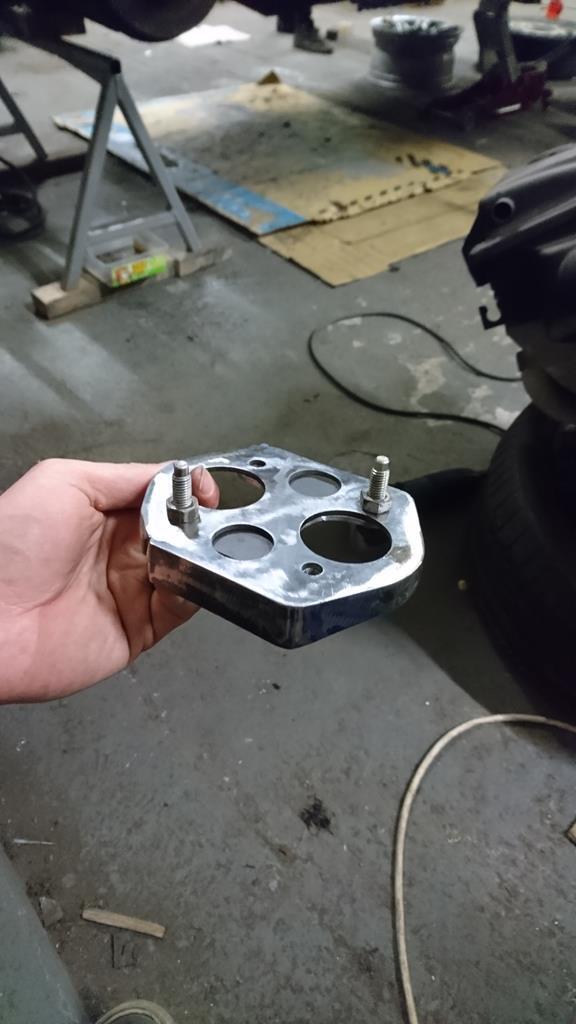 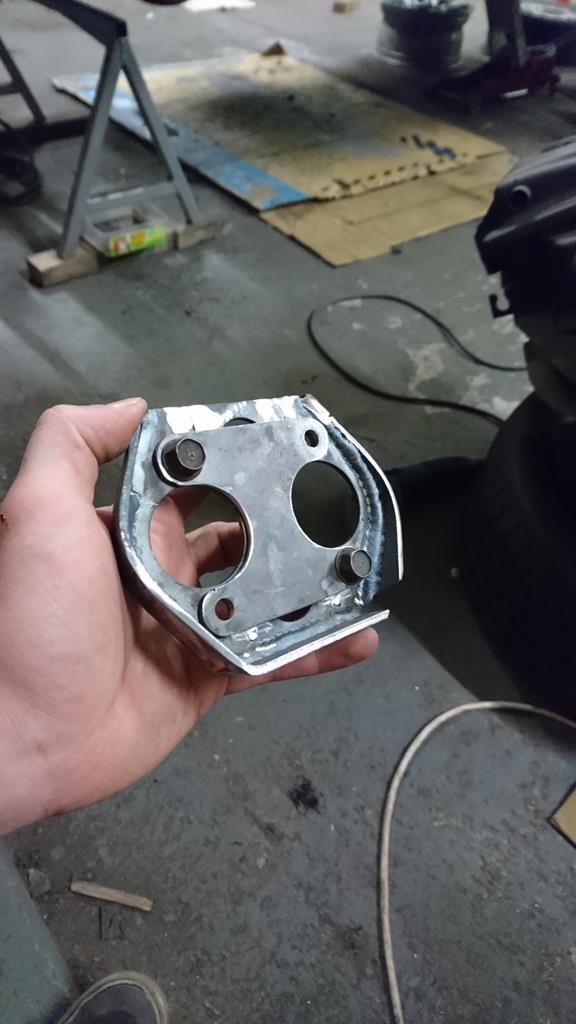 The outer piece will be welded into the bulkhead in front of the pedal box like so: 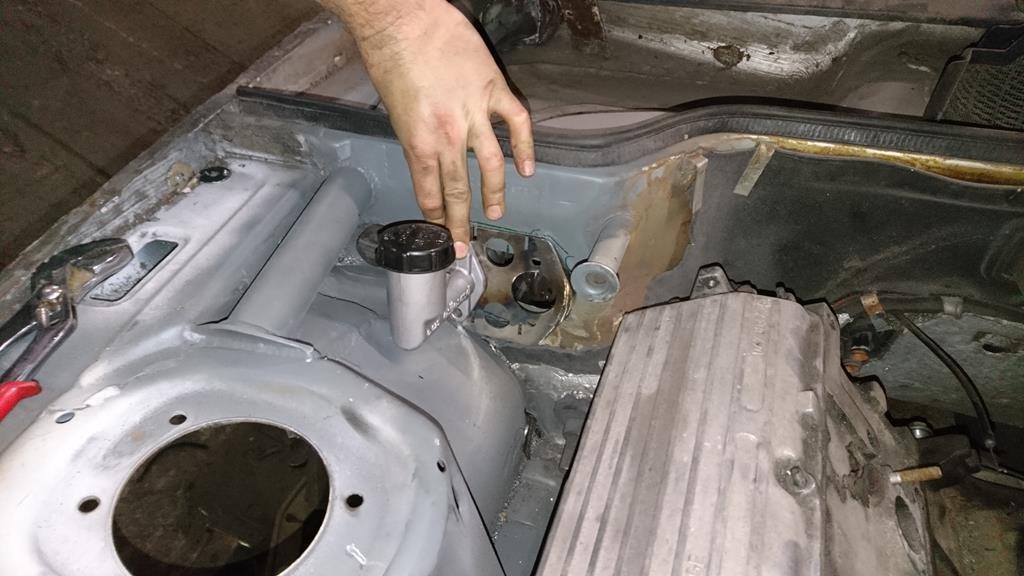 Then the inner piece will be welded to the pedal box its self with studs in it. This will keep the pedal box removable but also keep the master cylinder bolted directly to it, to keep the force-path clean and minimise flex. |
| |
|
|
|
|
|
Jun 16, 2018 12:01:43 GMT
|
|
excellent progress. nice wow factor on the pedals!
JP
|
| |
I know its spelled Norman Luxury Yacht, but its pronounced Throat Wobbler Mangrove!
|
|
RobinJI
Posted a lot
   "Driven by the irony that only being shackled to the road could ever I be free"
Posts: 2,995
|
|
Aug 23, 2018 22:14:46 GMT
|
This project hasn't quite died as the lack of posting might suggest, I've just had a pretty busy summer and I'm still trying to get to grips with the whole work/hobbies balance with the new(ish) job. It's amazing what an impact loosing a little over an hour from your evenings can have. In the few occasions I've squeezed in some work, the master cylinder mounting plate's been fully welded into the bulkhead and I've been working on generally cleaning up and zinc priming any final grotty areas to get it closer to paint. I've removed the heater box and the last few bits of sound deadening from the bulkhead too. Before I actually throw any colour at it I need to make and weld in mounts for a hydraulic handbrake, gussets for the rear shocks upper mounts, brackets for a front strut brace and add back in a 4th pedal style footrest. I'm sure I'll come up with a few other items as well as countless new holes to drill and old holes to weld up, so I'm swaying towards doing a dry build getting everything in place and working before dismantling it all for paint. The risk comes if/when I decide I'm bored of not driving it and don't want to take it back apart!  Anyway, here's how the engine bay's looking half cleaned up, you can see the master-cylinder mounts in place too: 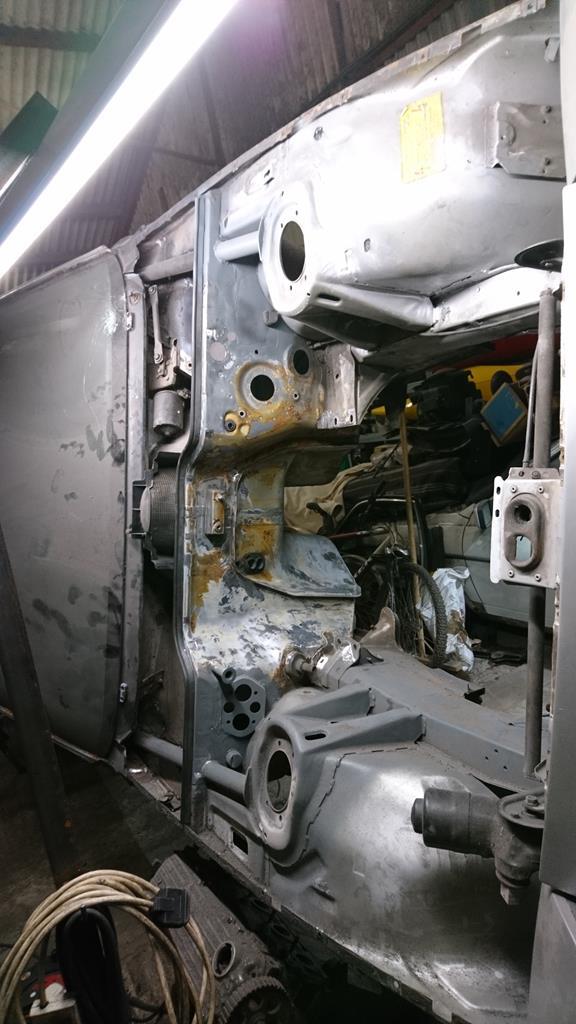 And a terrible shot of the interior: 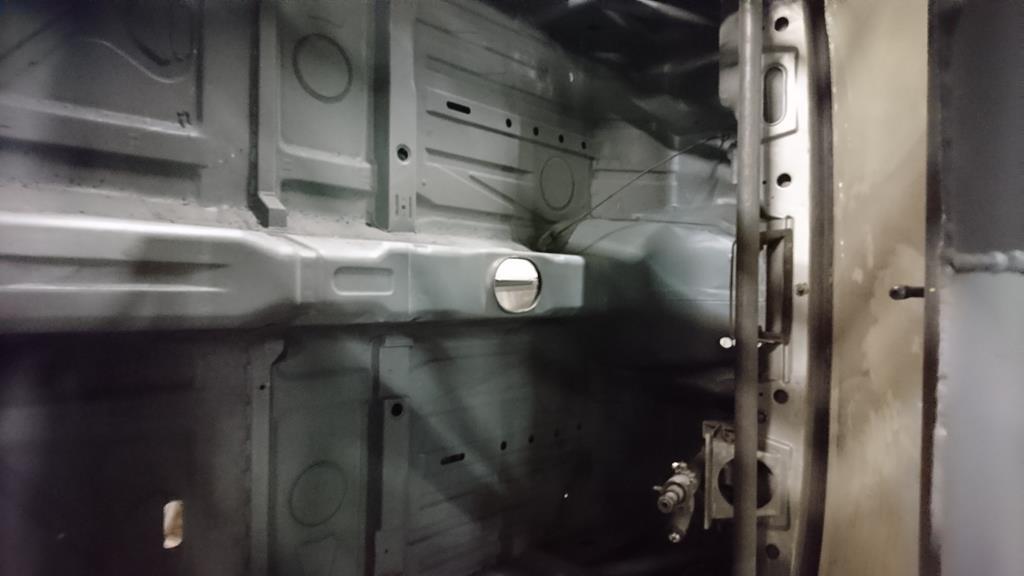 I'm off to spend a fortnight driving down the US east coast in two weeks, which I'm hugely looking farward to but sadly means I'm not expecting much progress in the next month or so! |
| |
|
|
bstardchild
Club Retro Rides Member
Posts: 14,976
Club RR Member Number: 71
|
|
Aug 23, 2018 22:27:37 GMT
|
I'm off to spend a fortnight driving down the US east coast in two weeks, which I'm hugely looking farward to but sadly means I'm not expecting much progress in the next month or so! Progress is progress however slow San Fran to LA via Highway 1 - you'll love that (passengers not so much if you are enjoying it) - can be done in a day but you'll feel it after The Car will still be here when you get back - good to see it bumped back to the top of my bookmarks edited to add - I'm a curse word and can't tell east from west...... Come inland a little if you are down that way tailofthedragon.com/Great bit of road and proves that all roads in USA aren't straight Still plan the west coast route next - you'll love Highway 1!!!! |
| |
|
|
|
|


