spacekadett
Part of things
  F*cking take that Hans Brrix!!
Posts: 838
|
|
Apr 25, 2024 14:14:55 GMT
|
|
Is there nothing compatible from slightly later Hondas’? Or is the later sohc a completely different beast 🤔. I will say that it’s many years since I’ve had one of these in pieces.
Top marks for perseverance in the face of adversity 😎
|
| |
Mechanic's rule #1... If the car works, anything left on the floor after you finished wasn't needed in the first place  |
|
|
|
logicaluk
Posted a lot
   Every days a school day round here
Posts: 1,373
|
|
Apr 26, 2024 11:04:32 GMT
|
Is there nothing compatible from slightly later Hondas’? Or is the later sohc a completely different beast 🤔. I will say that it’s many years since I’ve had one of these in pieces. Top marks for perseverance in the face of adversity 😎 Thanks for that I think I need it at the mo. I'm pretty sure there is no drop in solution as the EN4 engine from the acclaim is the drop in engine of choice for the mk 1 civic. So any of the engines with the gearbox on the drivers side would be the next easiest, an EP2 civic 1.6 at 109bhp in std trim would probably be my engine of choice, which would need engine mounts, drive shafts, ECU and complete rework on the gear shifter as it's cable shift. Right now and I want it on the road so I've got half a chance of getting the herald estate done before the end of the decade. Having said that, I like the fact it's still got it's original type engine, as the head is coming off I'll have another crack at flowing it. Dan |
| |
|
|
logicaluk
Posted a lot
   Every days a school day round here
Posts: 1,373
|
|
Apr 27, 2024 14:27:26 GMT
|
|
Small update, all the bolts are here and look promising, I've fitted the new 5V reg and fixed a broken wire on the crank sensor plug, taken some data logs and everything looks good. Next up pulling the head off. But first I've got to get the jazz ready to collect a pile of spitfire engine parts tomorrow.
Dan
|
| |
|
|
logicaluk
Posted a lot
   Every days a school day round here
Posts: 1,373
|
|
Apr 27, 2024 19:59:47 GMT
|
That wasn't as bad as I expected, a couple of hrs to get the head on the bench, the point of failure was fairly obvious. 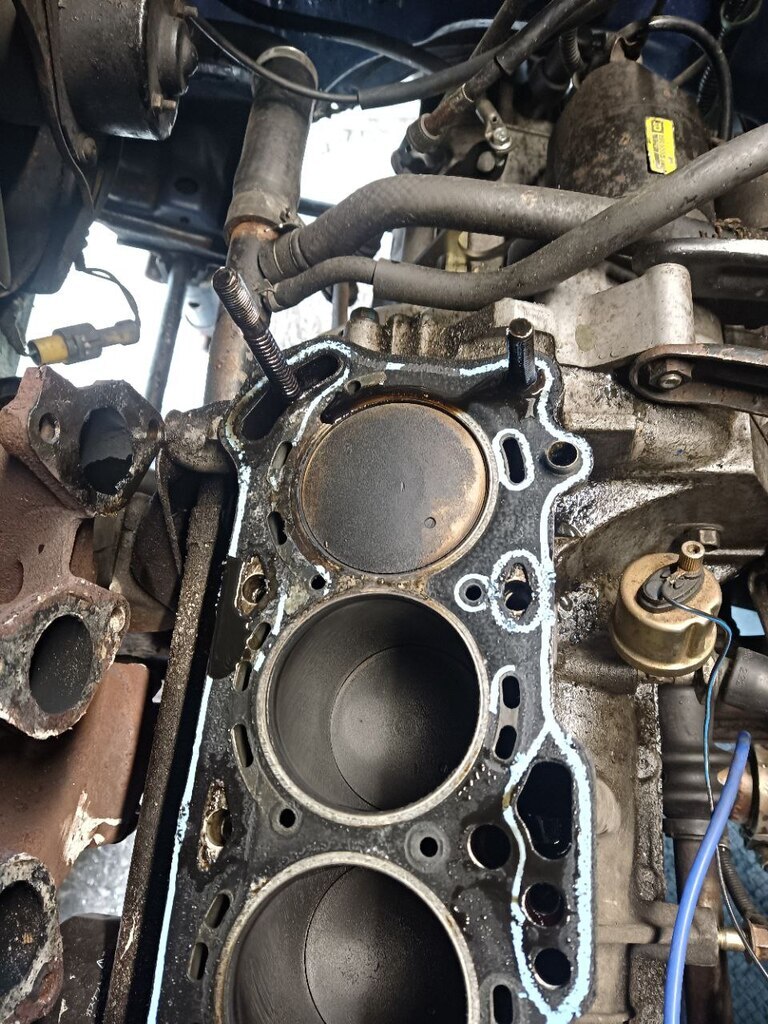 I got the head cleaned up and checked it over with a steel rule, only to find my steel rule, had more in common with a banana that a straight edge. With a straight, straight edge every thing looks great, I sought a second opinion from Barry who called it good too, along with the top of the block. Seeing as the head is off I thought ill see what sort of job I did on the head the first time, from the pics it left a lot to be desired. 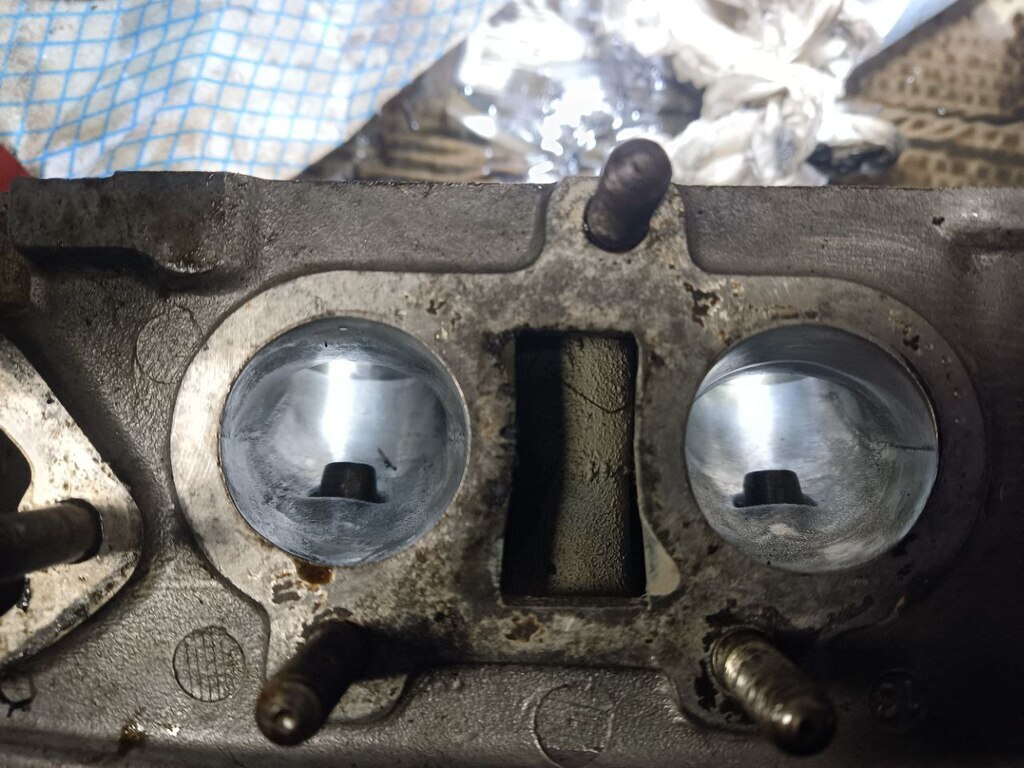 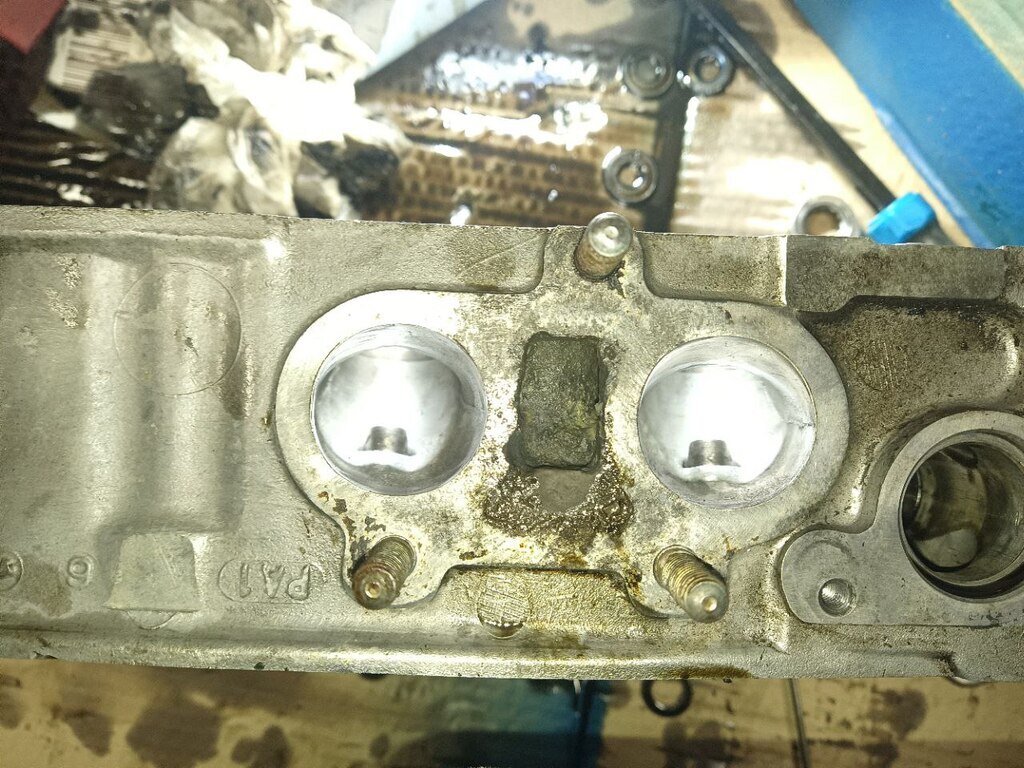 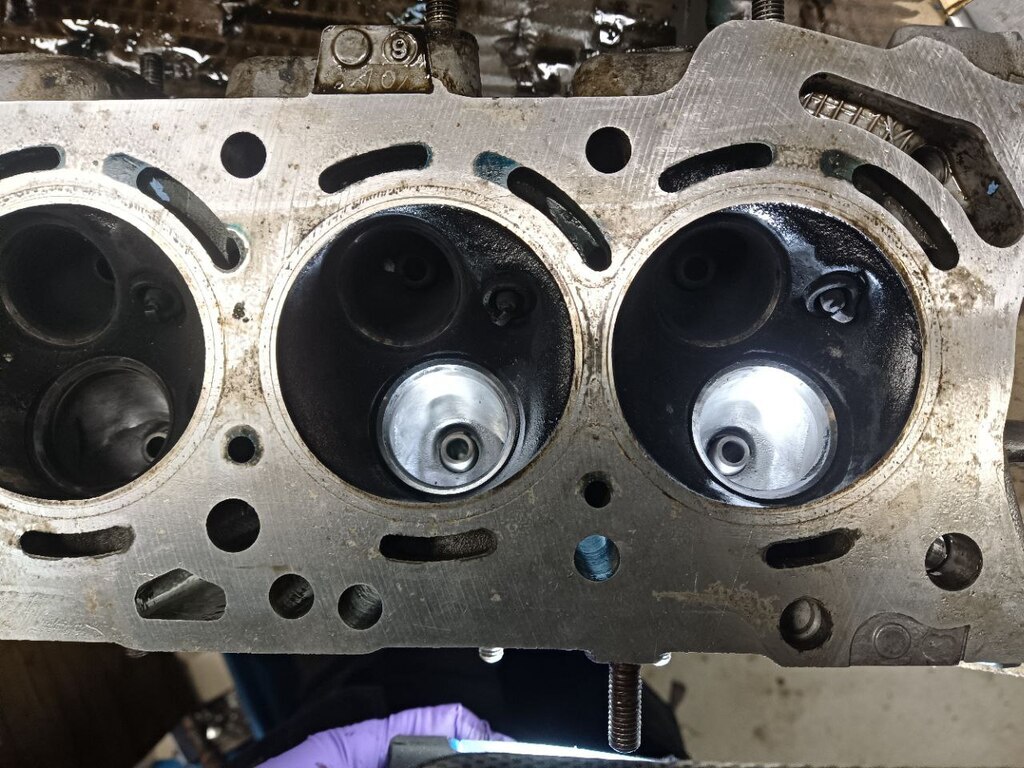 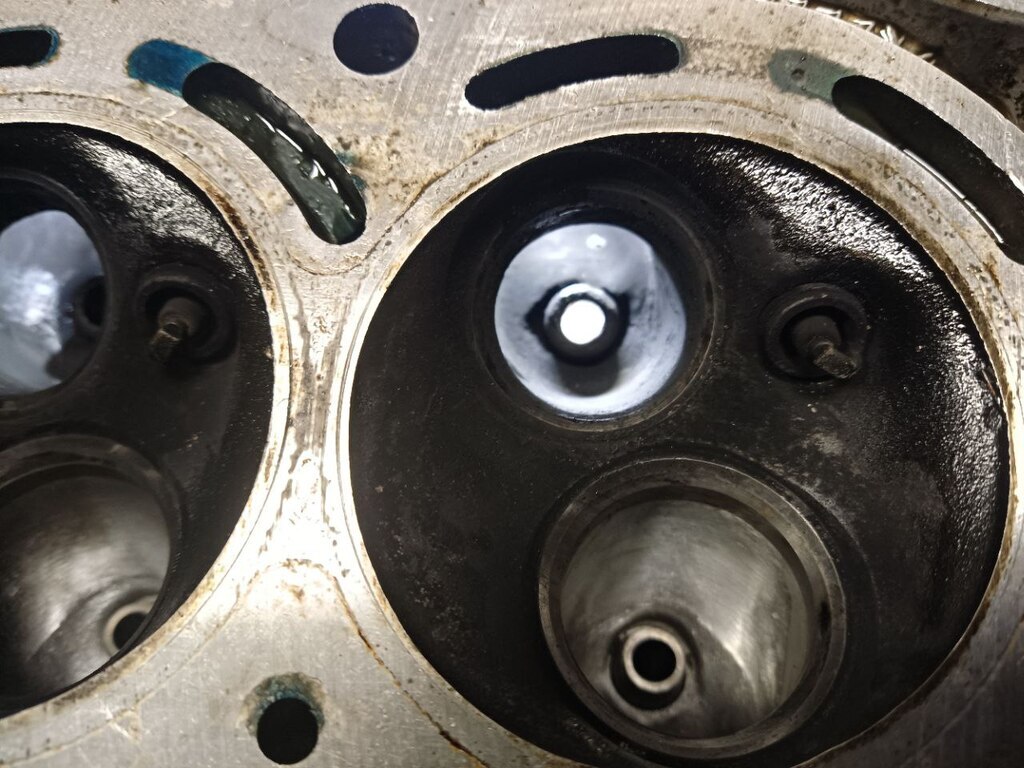 I'm amazed at the inlets, no lip and look pretty good, the short side radius has blended out well, the only thing I think I can improve is the tiny lip on the back of the valve, but I'm not sure if it's even worth it 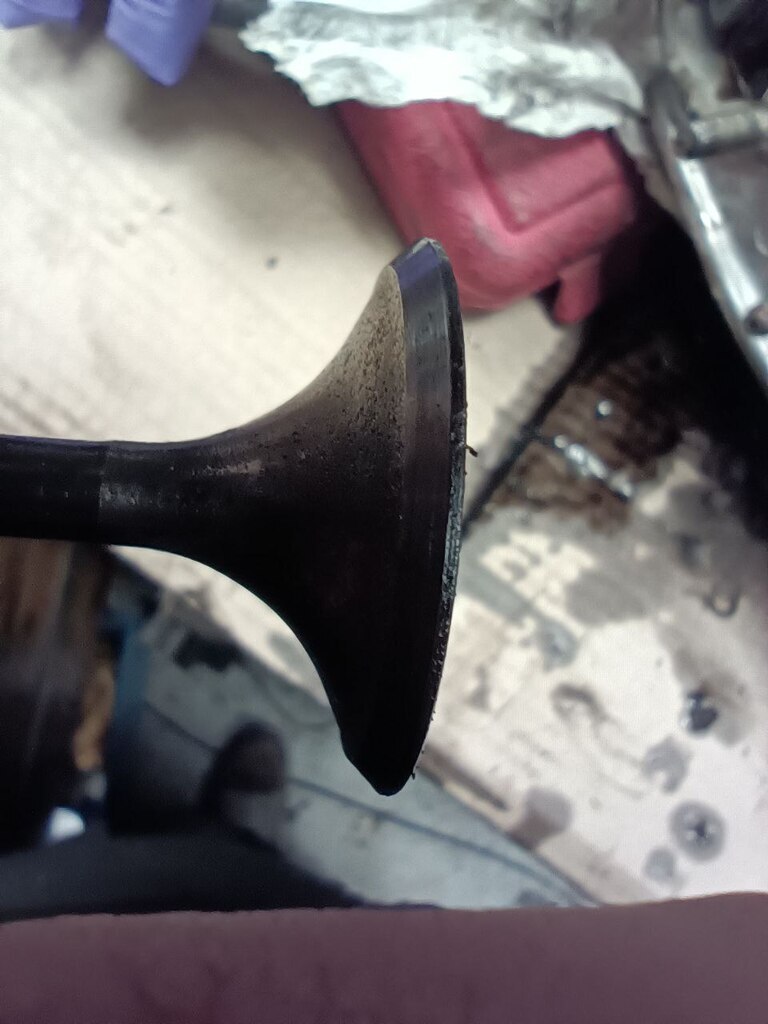 the exhaust was a lot harder to photograph as its been running on choke a lot. 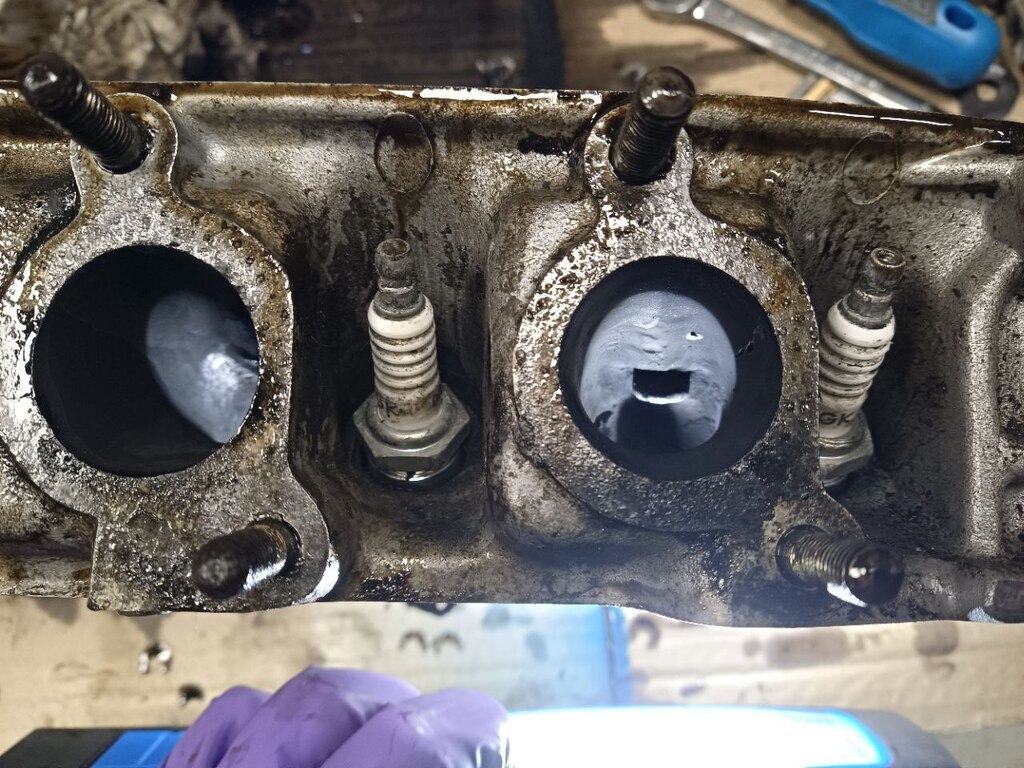 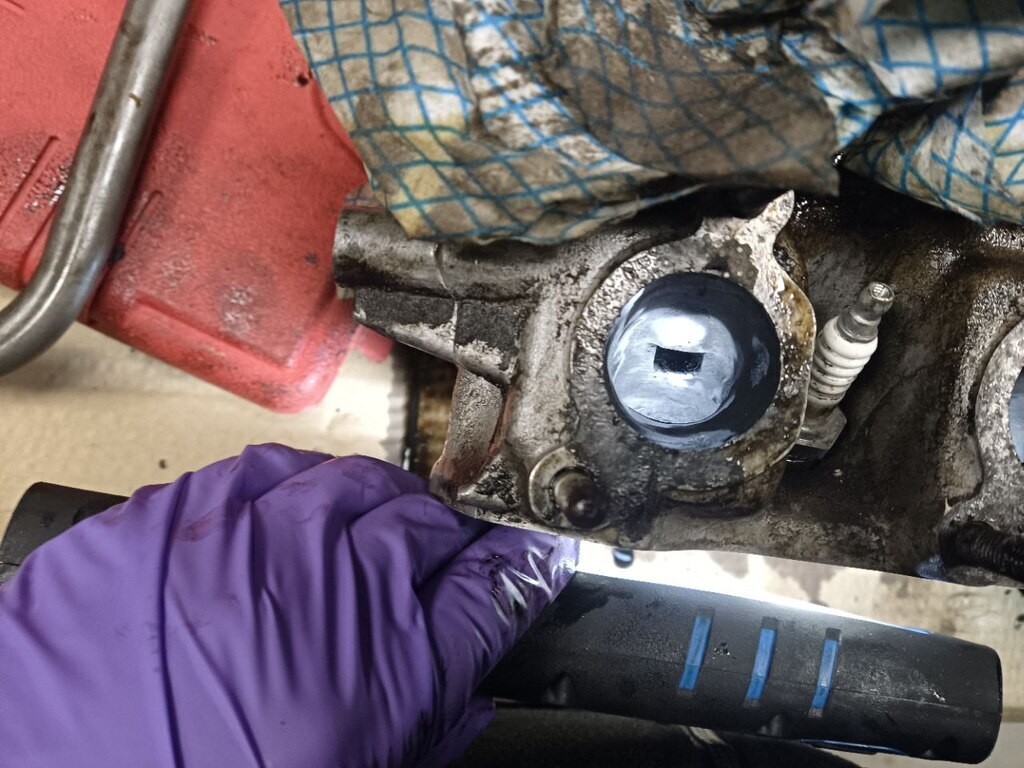 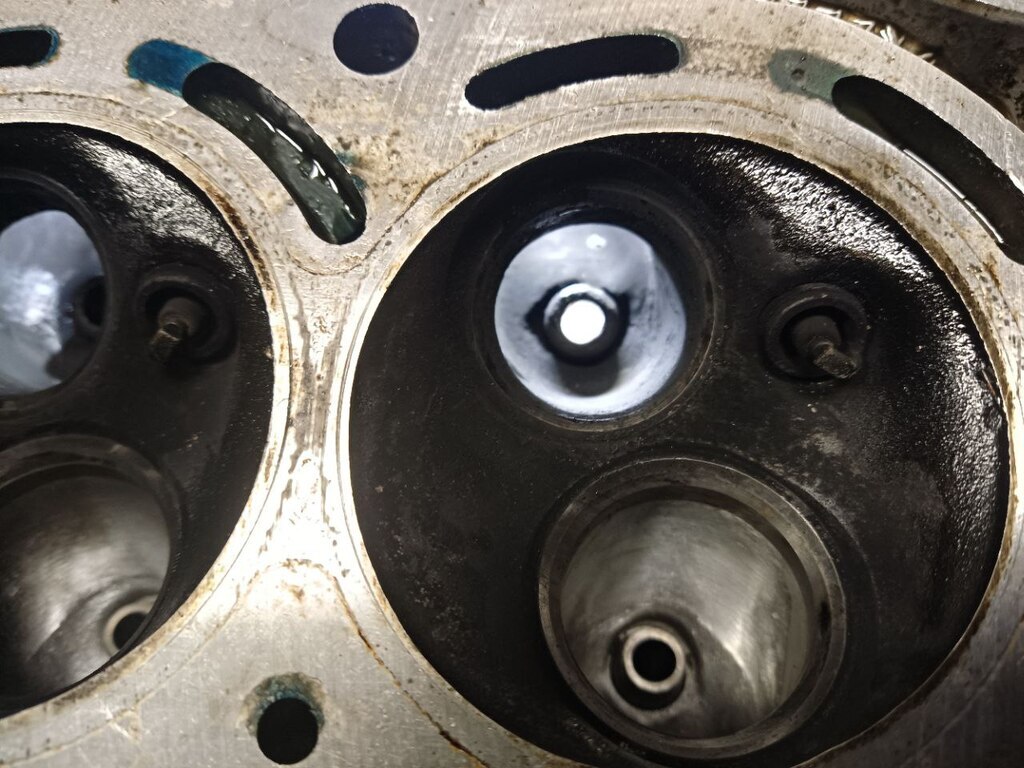 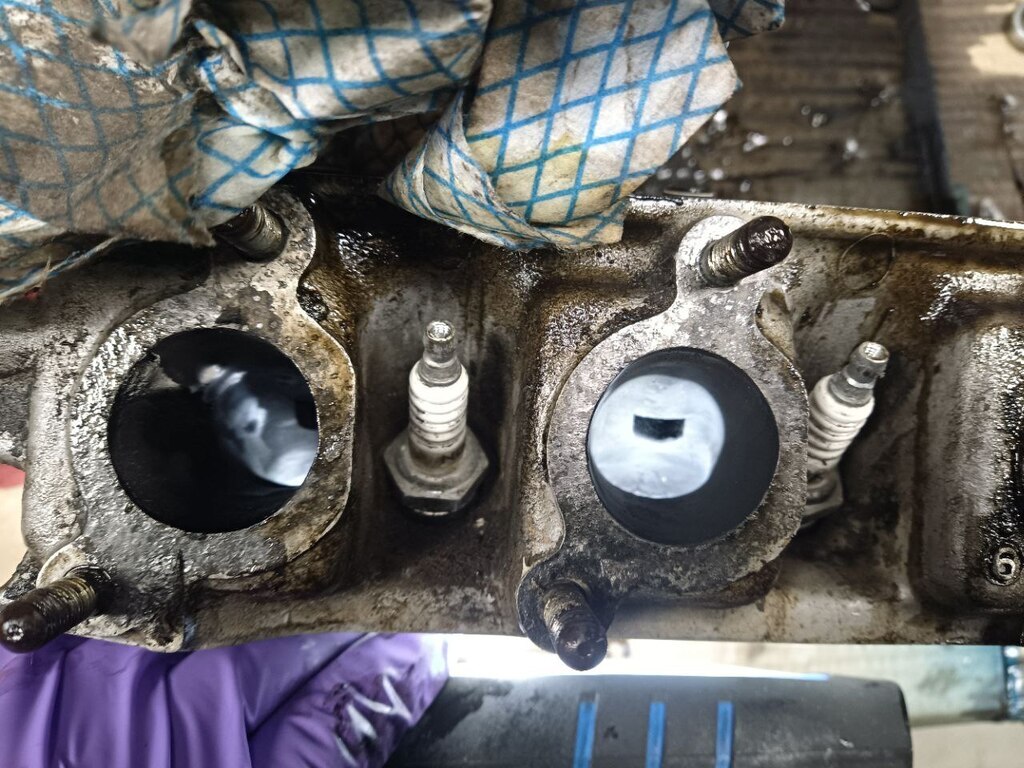 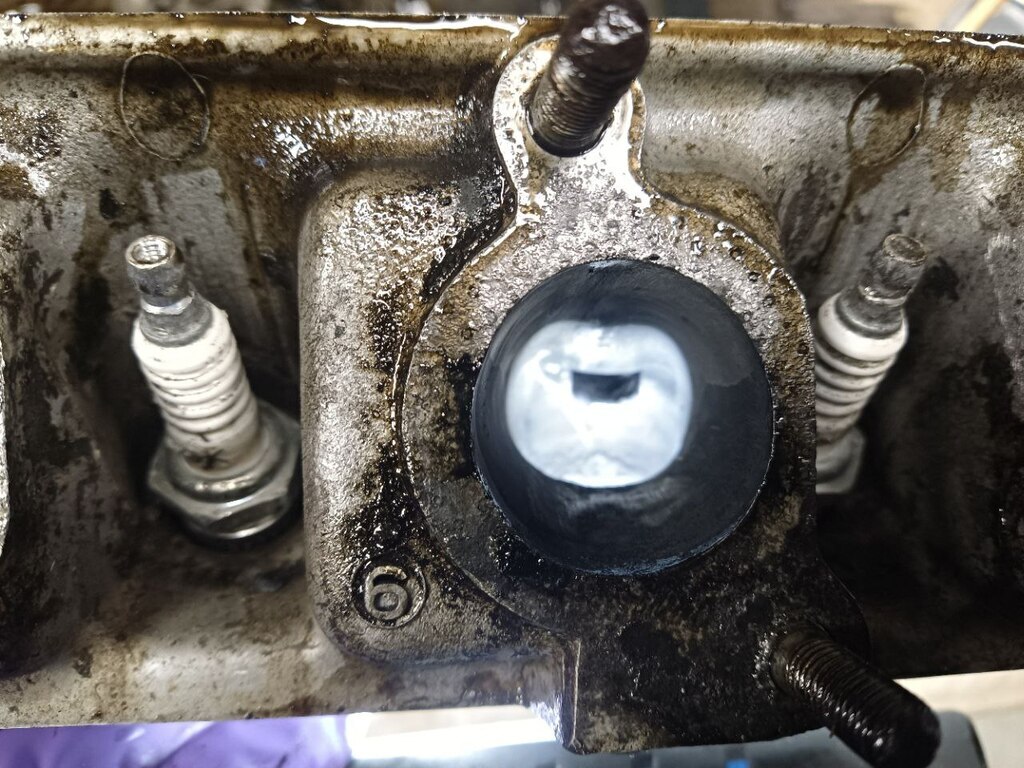 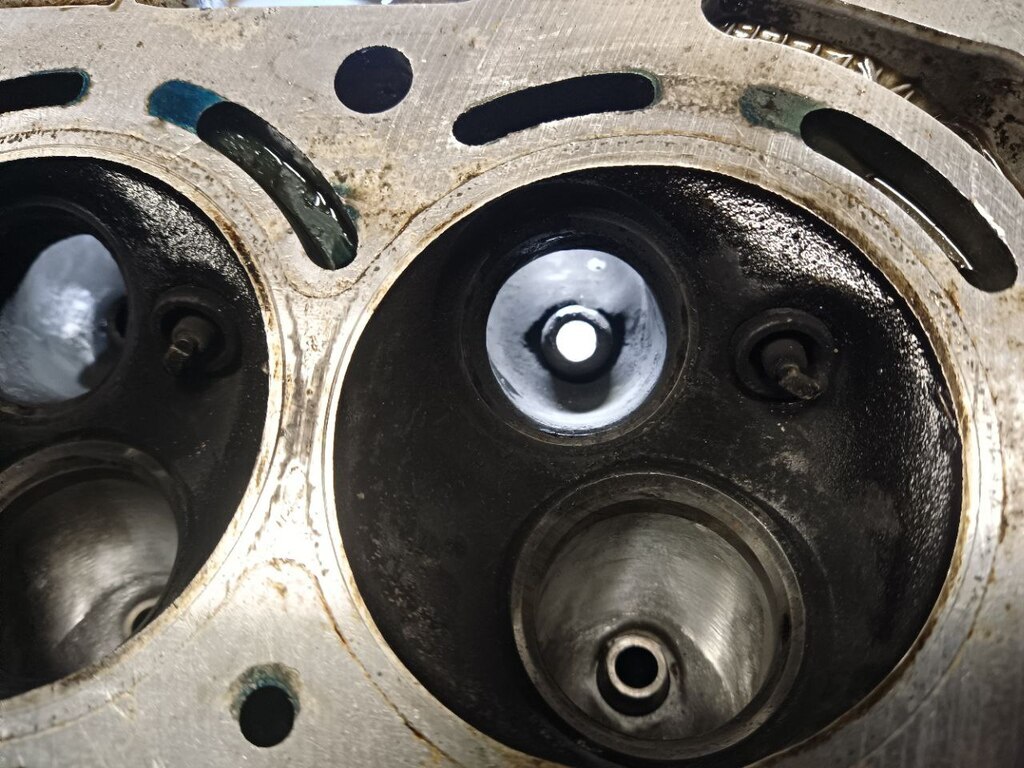 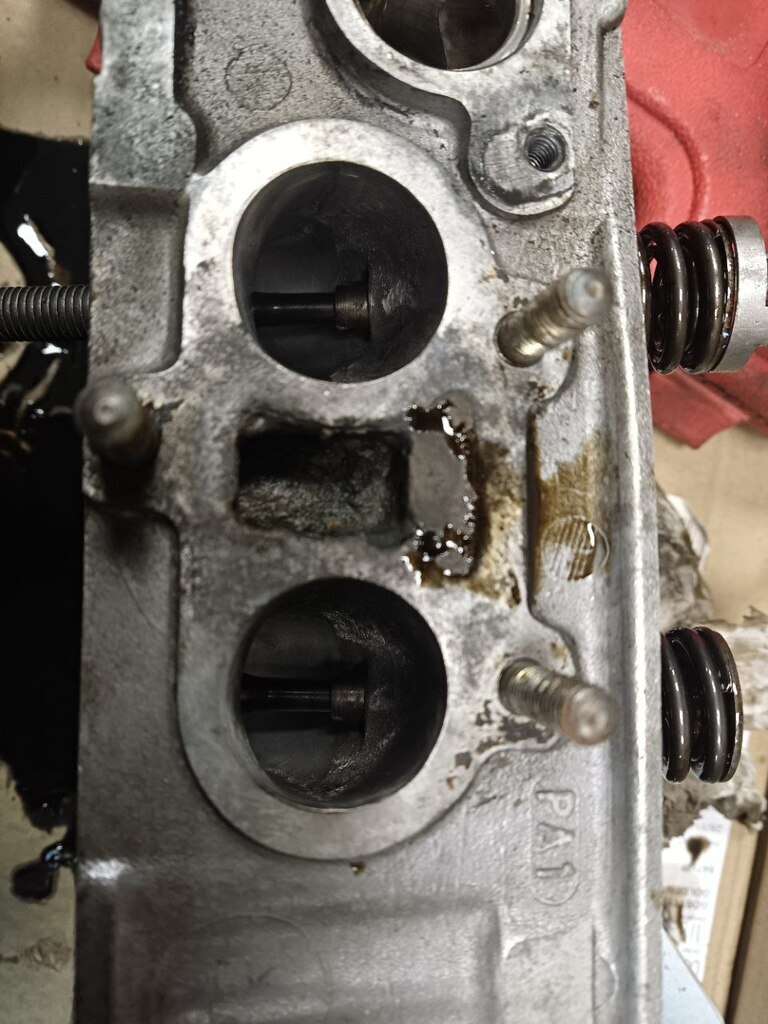 The seat is blended back in to the cylinder wall, but I reckon there is some room for improvement on the short side radius as it feels quite tight, if I opened it up a couple of millimetres, and blended it back in it should smooth the flow out. Opinions please. The head bolts look like they will fit straight in except for the one under the oil pump drive, that one will need a few mm taking off the top of the head as it turns out memories faded since I did this last, but I did buy enough head bolts so game on. Dan |
| |
|
|
logicaluk
Posted a lot
   Every days a school day round here
Posts: 1,373
|
|
Apr 27, 2024 20:12:59 GMT
|
|
My plan, such that it is, is to cut a slot at 90 degrees to the CROWN of the short side radius with a hacksaw blade that has been marked at 2mm depth of cut so i don't go too deep. Take the top of CROWN off with a burr, then blend that back in.
If the short side radius was a 90 I'd be taking the tip into 2 to 45, then cutting them into 4 22.5s thoughts?
|
| |
Last Edit: Apr 28, 2024 6:55:20 GMT by logicaluk
|
|
|
|
|
|
|
|
The back cut on the valves is worth a bit at low lifts. The rest only a flow bench will tell you.
|
| |
Proton Jumbuck-deceased :-(
2005 Kia Sorento the parts hauling heap
V8 Humber Hawk
1948 Standard12 pickup SOLD
1953 Pop build (wifey's BIVA build).
|
|
Darkspeed
Club Retro Rides Member
Posts: 4,889
Club RR Member Number: 39
|
83 Triumph Acclaim SprintDarkspeed
@darkspeed
Club Retro Rides Member 39
|
|
|
What have you taken the seat ID out to? No good doing any work in a port because the restriction is always the seat ID Measure first then Seat Valve Throat Port Typically in that order - page 10 of this thread has some notes, with a few more on page 6 and 7 of the flowbench thread. 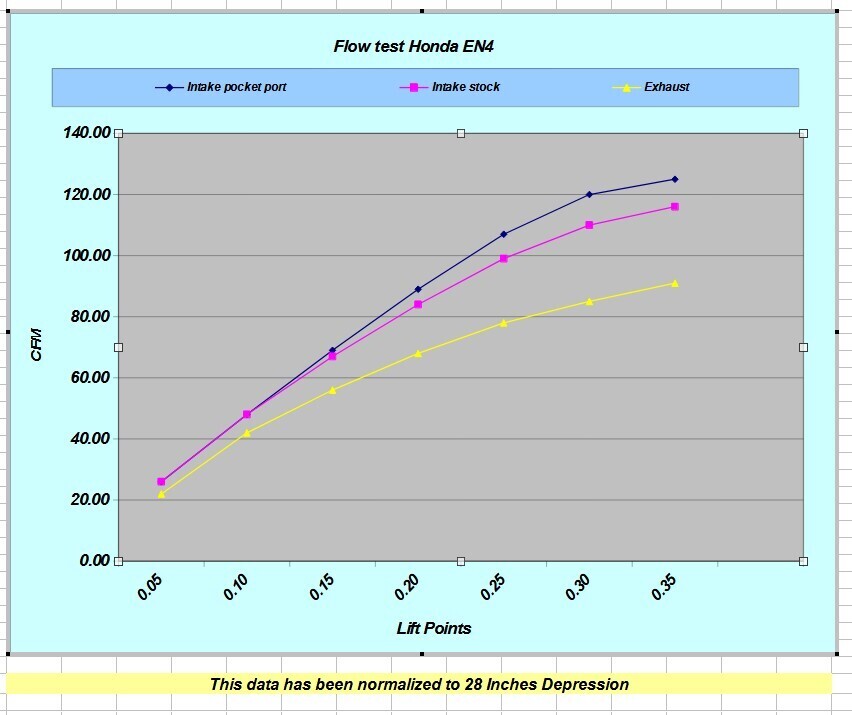 |
| |
|
|
logicaluk
Posted a lot
   Every days a school day round here
Posts: 1,373
|
|
Apr 28, 2024 14:40:17 GMT
|
Once again, DarkSpeed hits the nail on the head. With fresh eyes and a DS's words ringing in my ears, I ventured out to the garage, lapped a pair of valves in and measured, and then kicked myself for being so daft. Yep there's plenty of room for improvement in the valve seats, inlets at 30.2mm exhausts at 26.5mm lapping the valves in showed about 2mm of unused valve seat. I need a valve seat cutting tool, scratch building one is beyond my skill set at the moment, but i have these 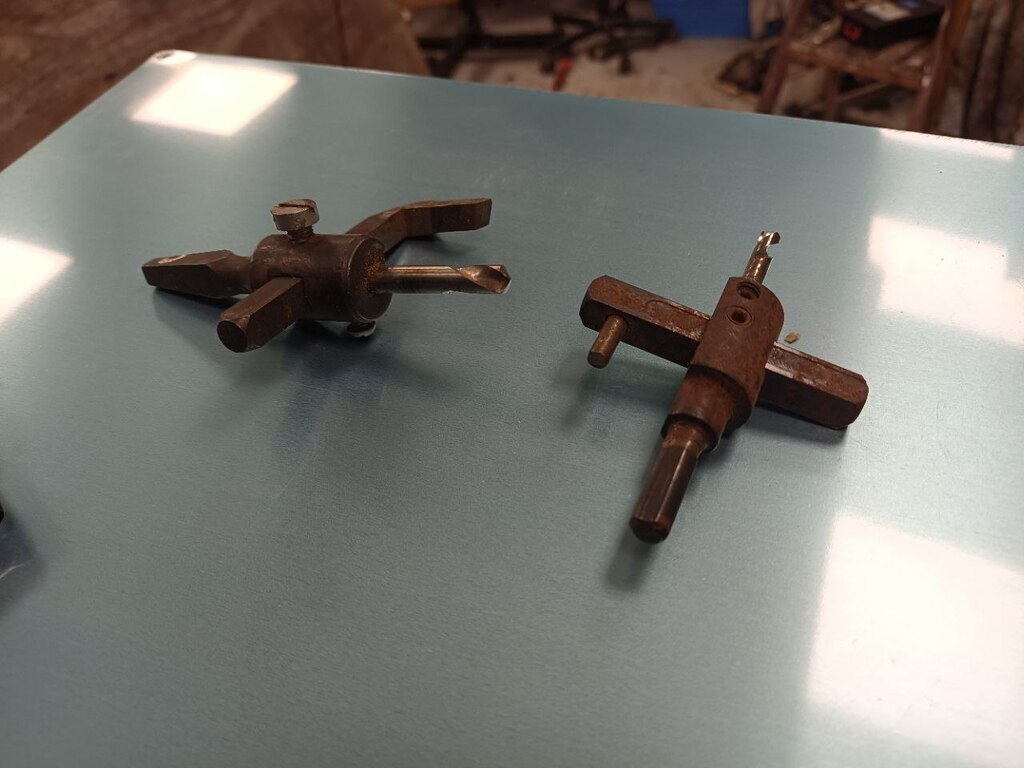 which yields this 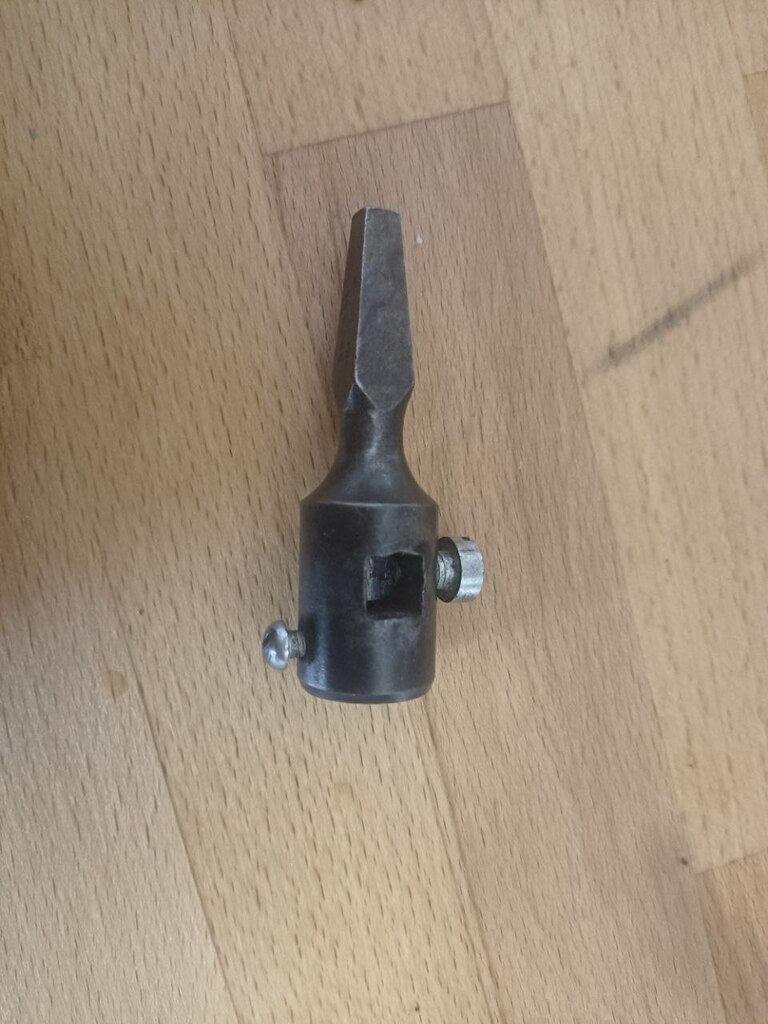 which has a square hole in it that fits this  Which means a trip to my mate's lathe, as mine's not going yet. For the square drive, turning down and the drill hole opening out to 1/4" to fit a cut down valve stem. Any better solutions? Dan |
| |
Last Edit: Apr 28, 2024 14:42:21 GMT by logicaluk
|
|
Darkspeed
Club Retro Rides Member
Posts: 4,889
Club RR Member Number: 39
|
83 Triumph Acclaim SprintDarkspeed
@darkspeed
Club Retro Rides Member 39
|
Apr 28, 2024 15:25:40 GMT
|
|
Just remember you still need a transition from the seat to the throat.
Trying to explain it writing it is a PITA so this may not be easy to follow. As the seat is on an angle of 45 degrees a 1.5 wide seat takes up just over a 1 mm of seat diameter so if you then have 1.2mm of 60 degree that takes up even less diameter - 0.6mm
So from the 36mm diameter of valve - you take 0.5 x 2 1.2 x 2 and 0.6 x 2 - and that gives you a dimension for the inner diameter of the seat.
36 - 4.5 = 31.5 you could take the seat ID to 32 and still get the 45 and the 60 transition on there - but it will need care and accuracy.
As its the same width of seat for a small valve or big valve the bigger the valve the better the benefit.
On a small valve you could use 1.2mm for the 45 width and 1.0 for the 60 to tray and maximise what you can take the ID to.
|
| |
|
|
logicaluk
Posted a lot
   Every days a school day round here
Posts: 1,373
|
|
|
|
|
Thanks DS, I think I follow you. To my untrained eye, the inlet looks pretty good, the exhaust however looks like it needs all the help it can get. I'll get out there and clean all the carbon off and have a proper look.
Having said that, I feel opening up the seats further with a new piece of home made tooling I haven't used before very risky, I don't want to damage this head in particular as it's had a lot of work done to it already.
Dan
|
| |
Last Edit: Apr 29, 2024 8:45:50 GMT by logicaluk
|
|
|
|
Darkspeed
Club Retro Rides Member
Posts: 4,889
Club RR Member Number: 39
|
83 Triumph Acclaim SprintDarkspeed
@darkspeed
Club Retro Rides Member 39
|
|
|
|
Do all the work on one that can be sacrificed unless fully confident in your abilities.
|
| |
|
|
logicaluk
Posted a lot
   Every days a school day round here
Posts: 1,373
|
|
|
|
Last evening, I spent a few hours pretending to be a tool maker. Take one well worn, 1908 drummond B lathe, add a similarly worn Barry, first job was to make the drive shaft round as it was case hardened, we tickled it with a grinder.  Center drilled it for a live centre, and turned it down. 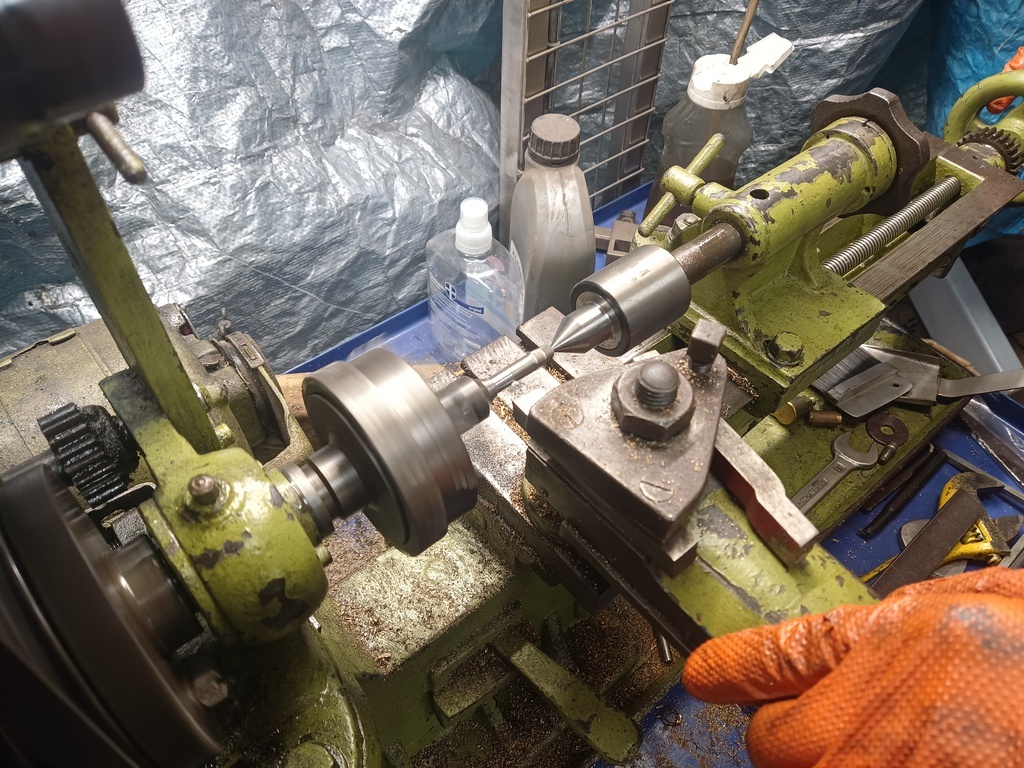 After selecting an appropriate drill bit one that should give a few thou interference fit, opened up the hole the drill bit went in to fit the cut off valve stem, which was pressed in on the big press, on the second attempt we had one with a straight valve stem. That looks like this. 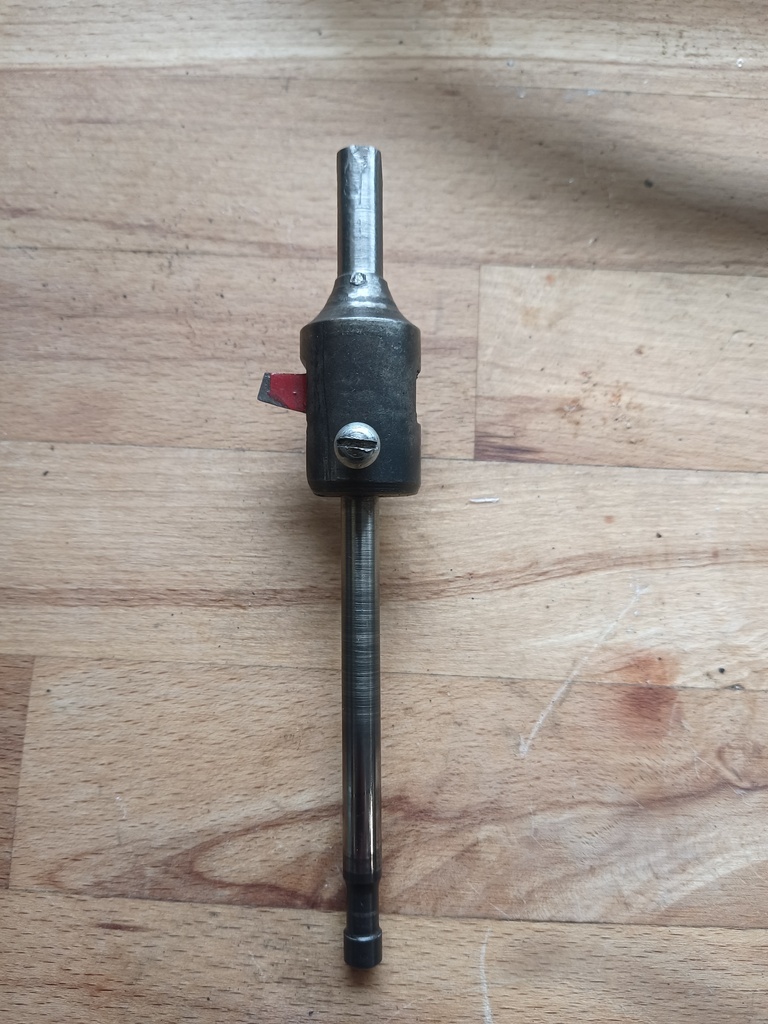 I'm not sure if I've chosen the correct cutting tool but there's another that looks promising in the box. Dan |
| |
|
|
logicaluk
Posted a lot
   Every days a school day round here
Posts: 1,373
|
|
Jun 30, 2024 19:32:57 GMT
|
|
Something just isn't right with that tool, so I think ill have to scratch build one, I've ordered a set of boring bars, hopefully the smallest one will be the correct size to build a better tool, hopefully my I might get my lathe working and get the tool made.
I'm really missing this car, but I don't want to put the engine back together till I have at least tried to make some improvements to its breathing,
A couple of weeks an ago YouTube randomly shows me a video of a K swapped Honda Jazz, (same model as my daily), and I started missing Frank more and more, which somehow brought me to a car I've had a hankering for, for several years, a Honda Del Sol, oh what a spiral I've gone down............... B16VTECtargatopedcoupegoodness. It's a sickness, I tell you, a sickness.
Must Fix Frank, Must Fix Frank, Must Fix Frank, Must Fix Frank, Must Fix Frank, Must Fix Frank, Must Fix Frank, Must Fix Frank.
|
| |
Last Edit: Jun 30, 2024 19:47:07 GMT by logicaluk
|
|
logicaluk
Posted a lot
   Every days a school day round here
Posts: 1,373
|
|
|
|
|
I'm chasing my tail, going round in circles achieving nothing except annoying myself, every time I go near the lathe I come away more curse word off with it and I seem unable to make it any better.
I think (not my strong point this week) the best solution is to put the head back on and then tackle the next reason it won't run, rather than finding more reason not to.
|
| |
|
|
logicaluk
Posted a lot
   Every days a school day round here
Posts: 1,373
|
|
|
|
It's Alive I did make the tool, but it broke the first time I used it, so that's something to look at another time. Pulling the last stud out was remarkably stiff, so it was a good job I had bought a tap especially for chasing the threads out, it's a fine metric thread don't you know, the face of the block cleaned up well. 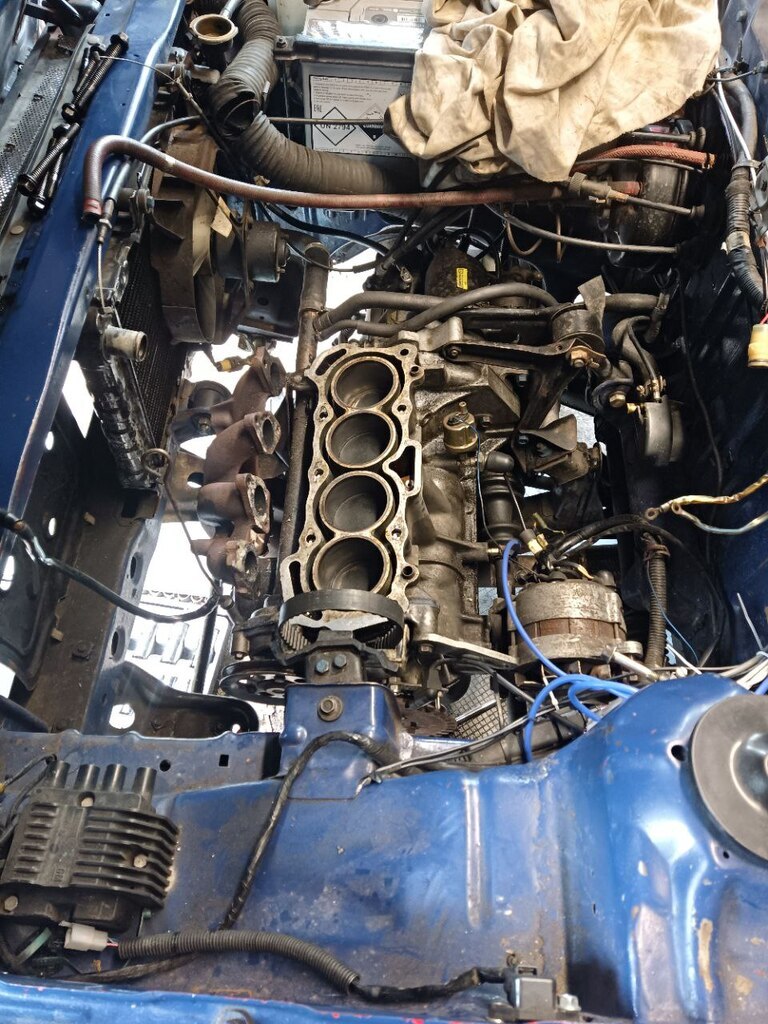 The Kia Picanto head bolts worked a treat, they came with their own washers which was lucky, the one under the oil pump drive gear just clears. 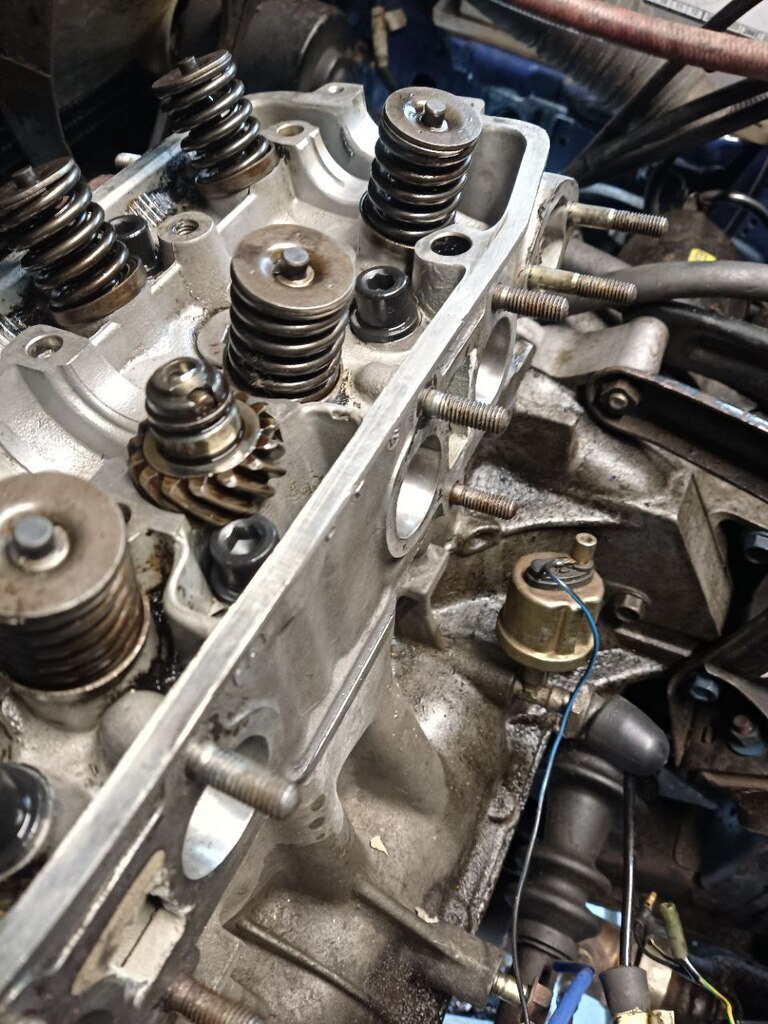 I knew the 2 rear outside corner bolts were considerably shorter as they had to pass under the fuel pump and distributor, I had bought some 12 grade bolts to suit and used the old head bolt washers under them, but the bolt that goes above the water pump is 7mm shorter than the longer ones, this was a surprise to me and nearly stopped play, until I came up with a plan, a very cunning plan, one which you have probably worked out by now. 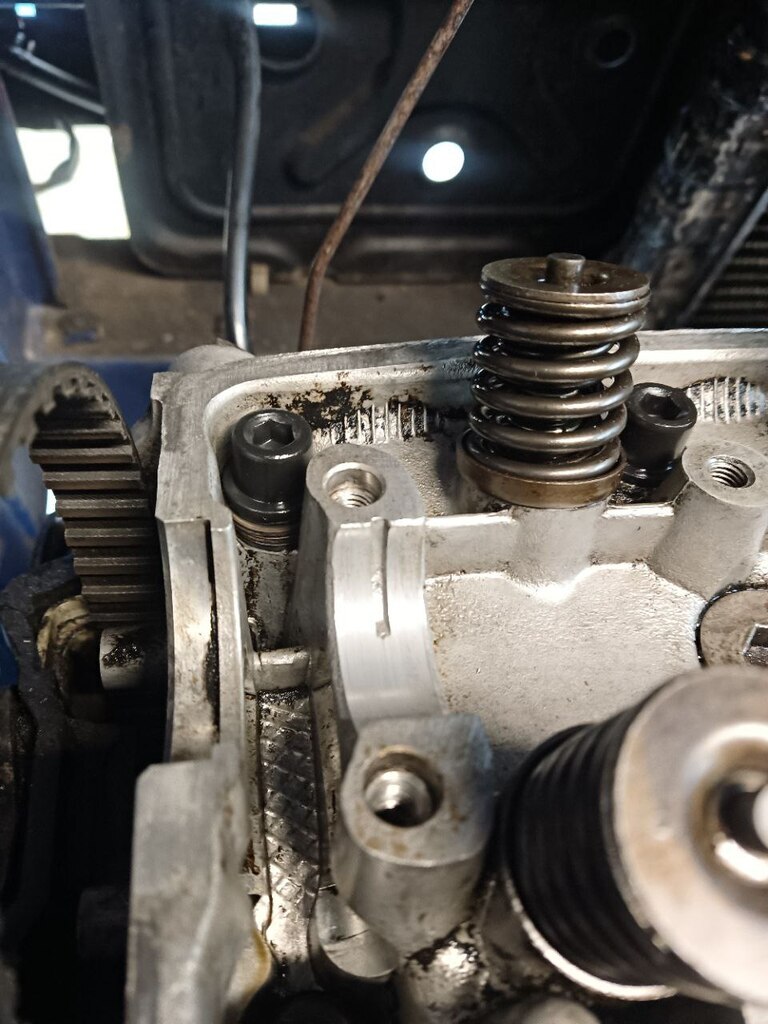 Yes a large stack of washers, there is nothing above it except the rocker cover so it will probably stay like it, unless there is a good reason not too. I gave the rocker shafts a quick once over and spotted the cap for the oil pump drive has stripped threads, there was 2 of them and both were partially stripped, and I have almost exactly a 50% failure rate at fitting Helicoils, and guess what, the first one went in perfectly, the second went in perfectly on the third attempt. 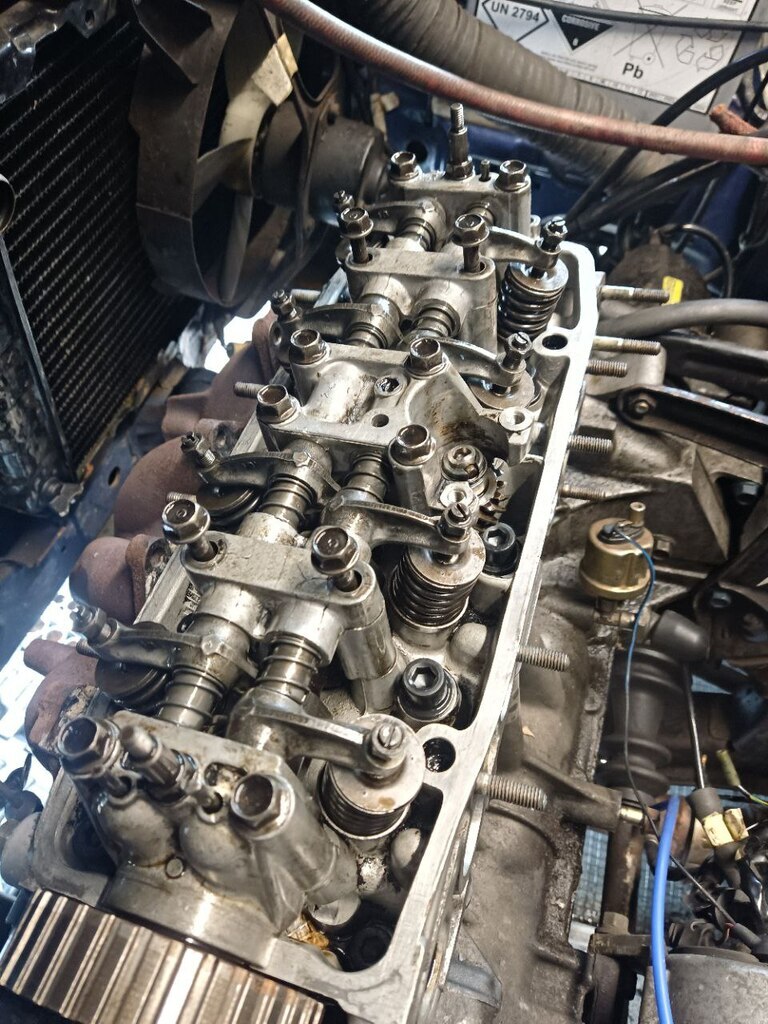 I always forget the 2 middle supports on the rocker shafts have shorter bolts. I set the timing, did the valve clearances hooked up the speeduino to the laptop, and we have a crank trigger signal, the plugs were firing but nothing, turns out the tank was dry, after a splash and dash for some of Tesco's finest E5, Frank limped in to life, I got the static timing set at 12 degrees, but he kept backfiring. I stopped and rechecked everything, finding nothing i tried to restart and nothing no sparks and crank trigger, so I stuck 2 fingers up at the speeduino and fitted the dizzy, well, I was about to when I had an idea, the last time the dizzy was in I couldn't get the timing set where I wanted it, because the swing is limited, by a slot in the baseplate, a quick trip to see the nice Mr slitty disk and that problem went away forever. With the dizzy refitted, I could get the engine up to temp and drain the oil, nice bit of NOS filter there. 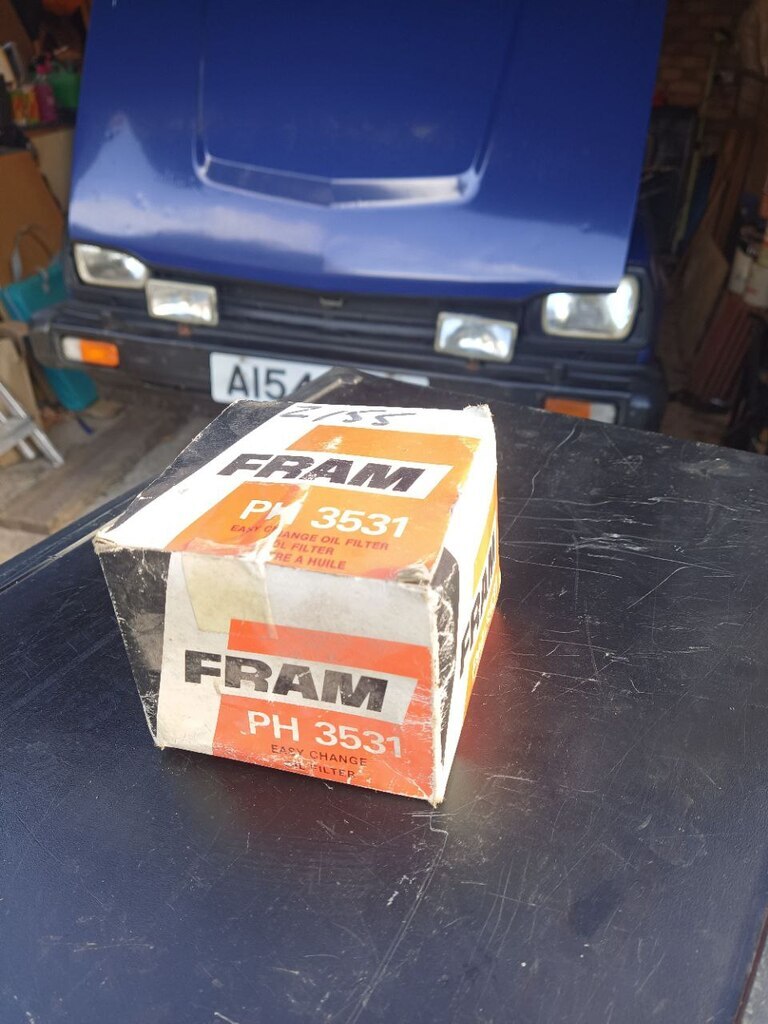 By this time it was 10 pm and getting dark so tomorrow I recheck the valve clearances, and ignition timing and go for a spin, I can't wait. |
| |
|
|
logicaluk
Posted a lot
   Every days a school day round here
Posts: 1,373
|
|
|
|
This morning I started early re checked the valve clearances and adjusted a few. rechecked and noted the cam timing, now I'm not sure how to put this correctly. When the cam was set to 0 the crank was at 11deg ATDC. 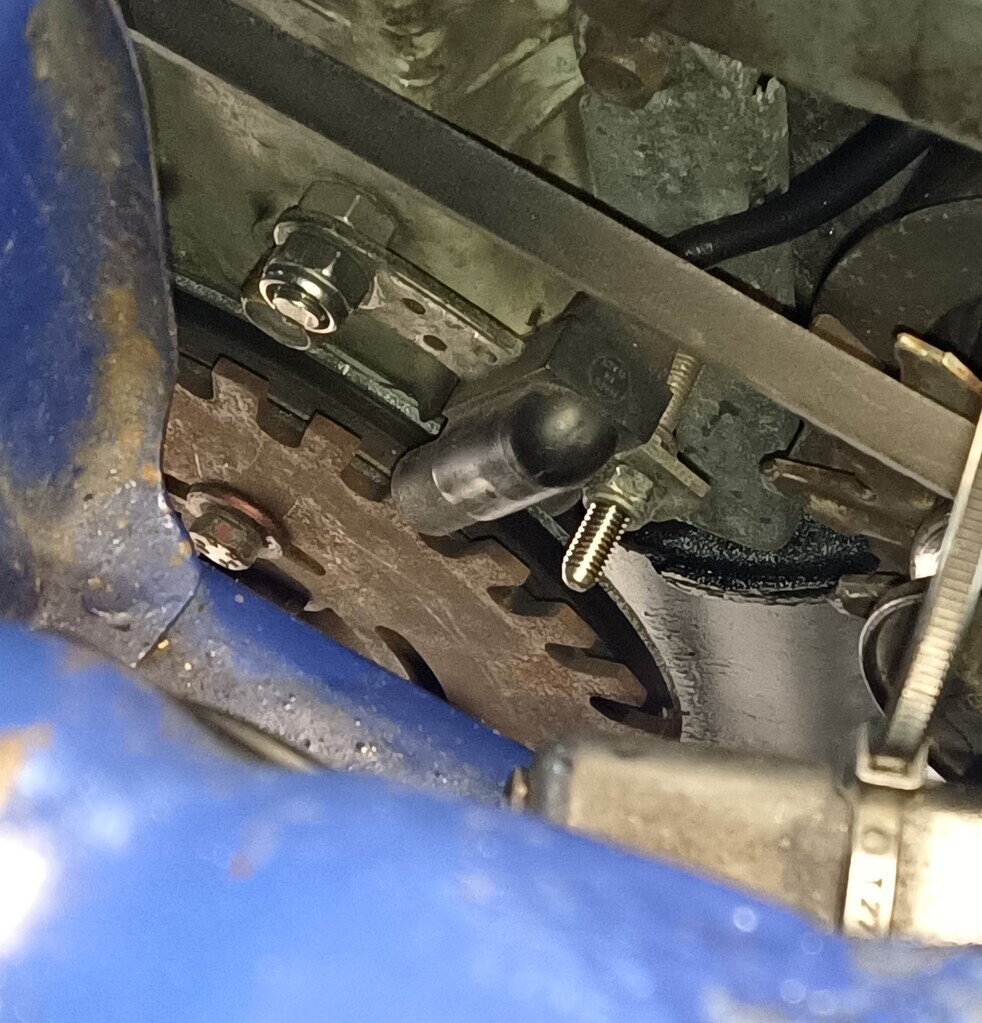 Which makes me think it's overly advanced, when Newman reground the cam they said to set it up on the original timing marks, now setting up the cam timing on a standard Acclaim, is a pain in the bum and no mistake. As when it's set by the book, the belt missaligns by 1/2 a tooth, one side is right the other is most definitely not and it sounds very wrong. next I've got access to a standard car next week to check. The ignition timing is something that has plagued me every time it's ran on the dizzy, the dizzy is driven off the cam shaft, to get it to run nicely a slightly modification to the base plate was required 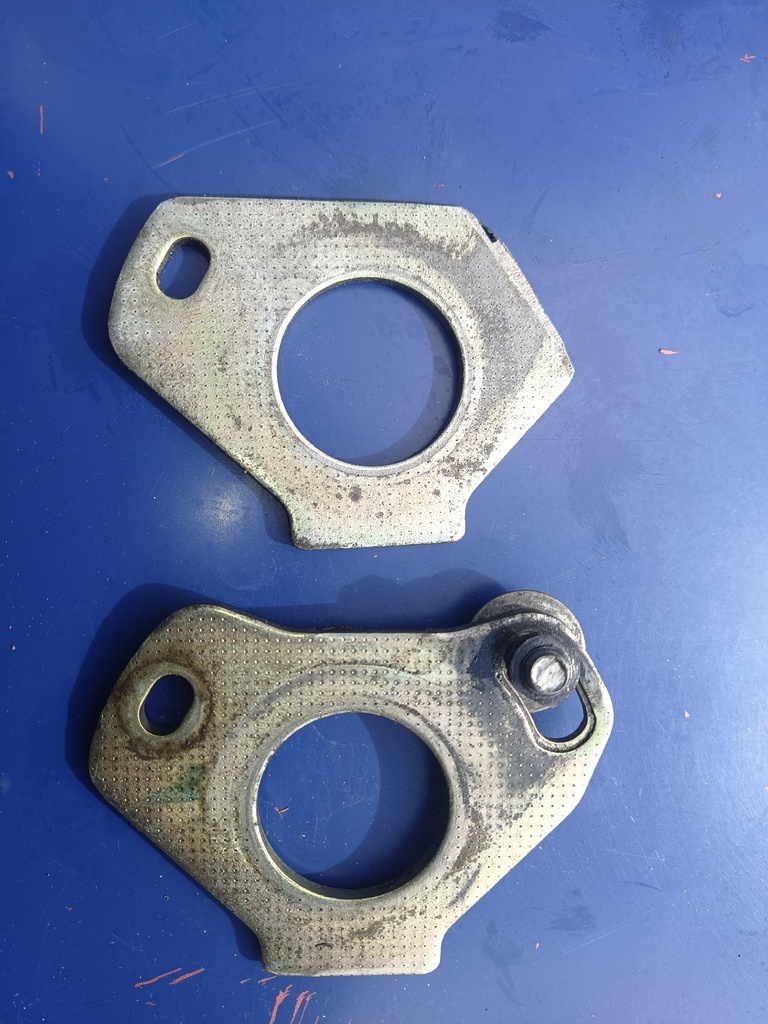 This allowed me enough adjustment that I could fit the dizzy at the wrong angle and get the ignition timing back to 11 Deg BTDC, which is correct for a manual vac advance, but this car has an auto vac advance unit and the book says it should be set to 5 Deg. To be honest I was just relieved to have it running again, I took it out for a spirited drive and it felt pretty good, not as quick as I want but close. D |
| |
Last Edit: Jul 7, 2024 20:48:19 GMT by logicaluk
|
|
logicaluk
Posted a lot
   Every days a school day round here
Posts: 1,373
|
|
|
|
Having been out for another drive, I can confirm Frank is driving just about as well as he ever has, two things have struck me, 1 the exhaust note is far less harsh and raspy, 2 the cam doesn't seem to come on anywhere in the rev range. I picked up a copy of how to build and power tune distributors, after rereading it, it estimates with a hemi head the max advance should be between 38 and 44 deg, I went and checked the specs for the acclaim dizzy, auto vac advance unit static 12deg, + 27 to 31 deg at 4000 rpm which puts it right in the ballpark, I'll have to pull the dizzy to check it but its looking good. I also got the WB O2 sensor connected to the laptop and the AFR looks good on power and rather lean at idle (this engine was designed as a lean-burn engine), but I think ill go over it again and check for leaks before I stand by those numbers though. Which just leaves the cam timing, now this is a subject I've never really understood so last night I ordered a copy of the selecting and setting up camshaft book from the same series, I've not finished reading it, but as this is the only upgraded cam available I will have to try making the best of it. I think it is currently set up at approximately 12 (crankshaft) degrees advanced, But I've got to get my head around the whole crank vs cam degree thing, but as far as I can see I have 3 choice to set it up. 1 the cam pulley that's currently fitted has 4 keyways cut in to it, which should give me 1/4 tooth adjustability, which equates to 2.8125 deg of cam rotation. 2 Offset woodruff keys, I'm sure they are out there, but I can't seem to find them in 4mm wide to check the rest of the dims. 3 a vernier pulley, of course none of the available ones that I can find have the same pulley dims, I need a 32 tooth pulley 94mm across by 24mm thick, with a 20mm hole in the centre, and a 4mm wide keyway. as there is as much chance of me finding one as me winning the lotto, I'm going for a DIY solution, if I can get it centred in the lathe properly it's defiantly doable. heres some pics from my archive. 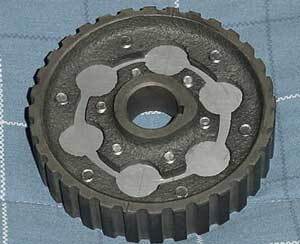 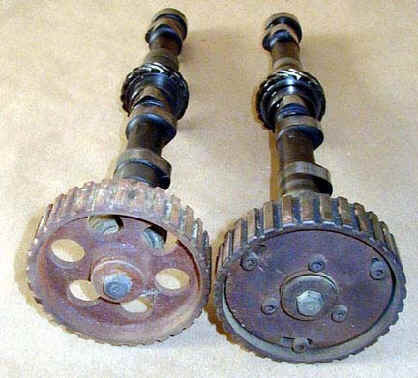 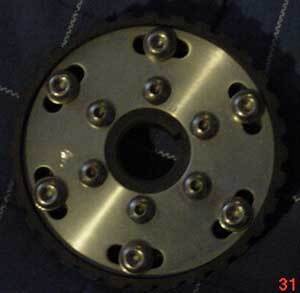 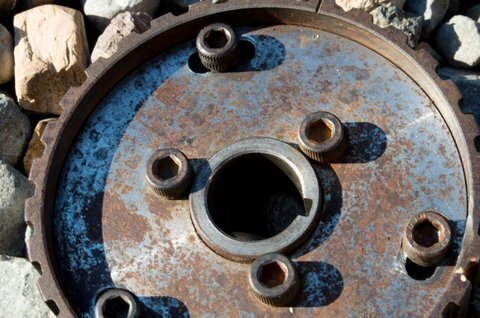 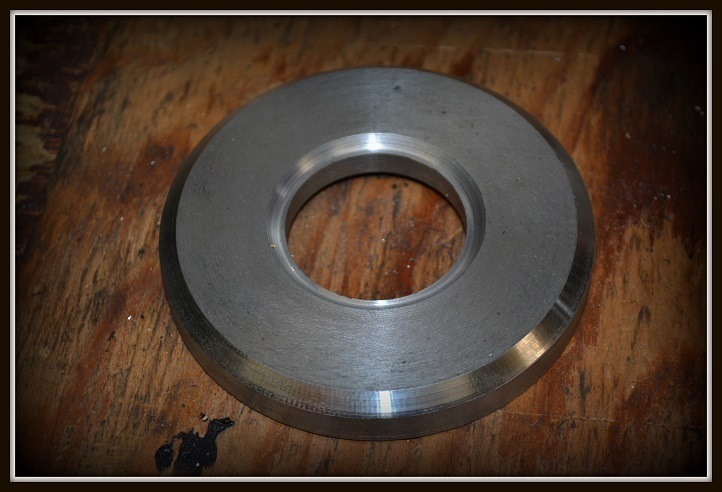 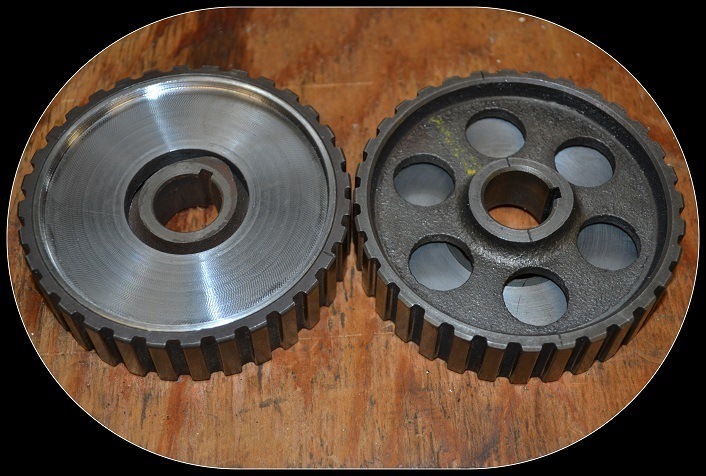 Right my brain hurts. Night D |
| |
Last Edit: Jul 8, 2024 22:30:57 GMT by logicaluk
|
|
logicaluk
Posted a lot
   Every days a school day round here
Posts: 1,373
|
|
|
|
This evening I blasted and painted a crank pulley but forgot to take a pic. While that was drying, I chucked this in the lathe 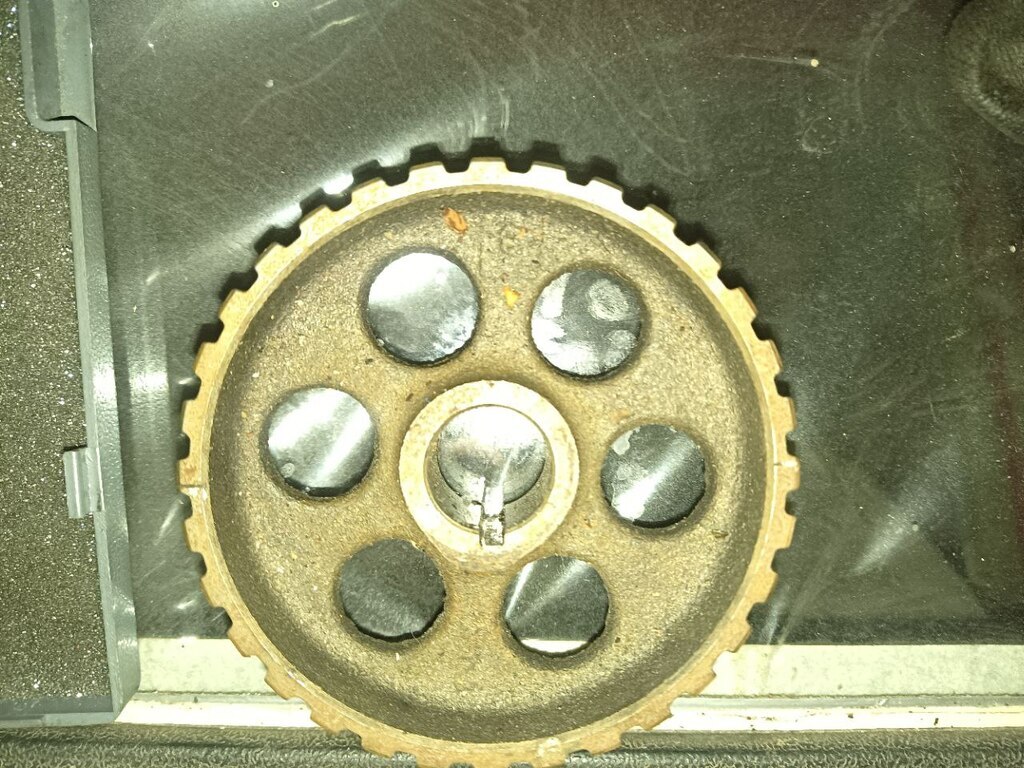 And spent ages getting it as centred, before doing this. 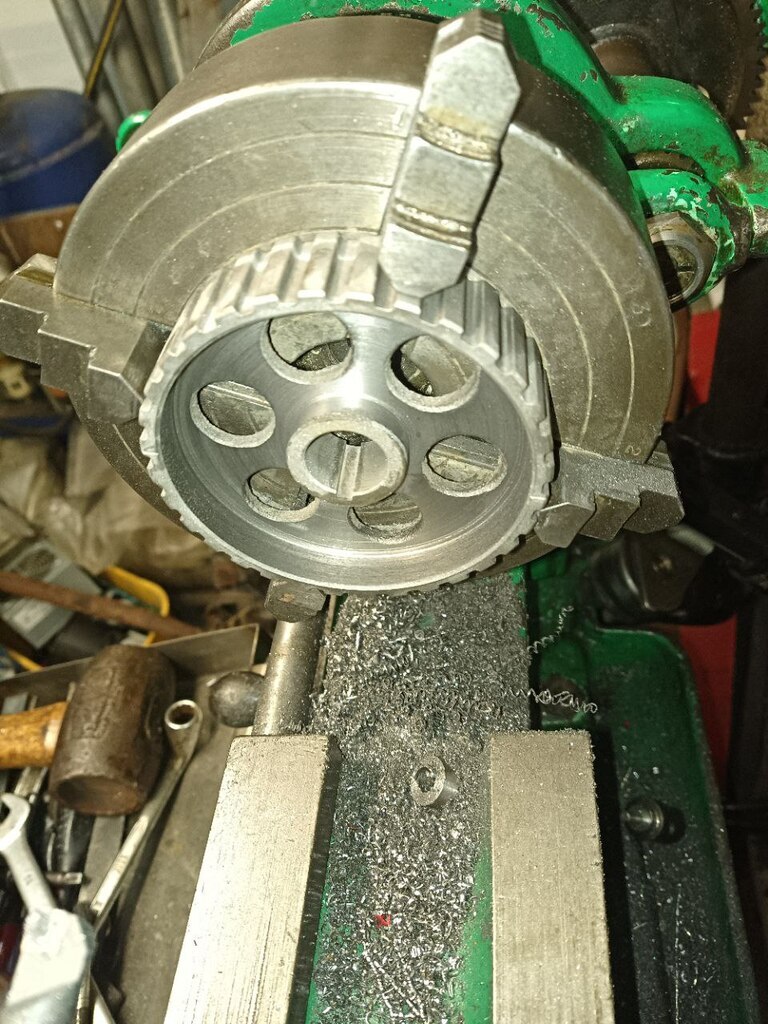 Tomorrow hopefully ill make the plate to go in the centre. |
| |
|
|
|
|
|
|
|
|
A much cleverer person than me will soon be along, I'm sure - but I read your last two posts and wondered the following:-
- What's the standard full ignition advance figure? 38-44 degrees is a lot of advance (usually required in pretty poor heads like Ford crossflows with long flame paths so that the fire is started early enough, rather than efficient high-squish multi-valve heads). Your 27-32degrees at 4000RPM sounds reasonable - I'm not sure what the mention of the vac advance unit was for, though, as the vac advance unit will add timing at part throttle, it has no effect at what. It doesn't add 12 degrees to any timing figure anywhere.
- Running the cam advanced would be trying to make the engine stronger lower in the rev range - perhaps why you commented that the engine doesn't seem to come "on the cam". 12 degrees is an awful lot of timing advance. Standard timing or perhaps a few degrees retarded would aim for better power at high RPM (all else being equal and the engine able to make use of the different breathing).
And completely agree that an adjustable pulley is the best way to get the timing exactly where you want it without offset keys/dowels being available.
|
| |
Last Edit: Jul 9, 2024 20:40:07 GMT by turbogeek
Living vicariously through other people's projects!
|
|
logicaluk
Posted a lot
   Every days a school day round here
Posts: 1,373
|
|
|
|
|
Hi turbo, I'm learning and relying on books and advice, ill try to answer the best I can, and please feel free to say what ever.
I mentioned the vac advance unit as the manual and auto cars use different amounts of vac advance 13-17deg for a manual and 4-8deg for auto and different static advance, 5deg for manual 12deg for auto.
Mechanical advance for an unmodified acclaim both manual and auto is
1000 rpm 0-1
2000 rpm 12-17
3000 rpm 20-24
4000 rpm 27-32degrees
- What's the standard full ignition advance figure?
38-44 degrees is what the book said would be the maximum for a hemi head.
Ignition timing is something I will be coming back to later once I've played with the cam timing
- Running the cam advanced would be trying to make the engine stronger lower in the rev range - perhaps why you commented that the engine doesn't seem to come "on the cam". 12 degrees is an awful lot of timing advance. Standard timing or perhaps a few degrees retarded would aim for better power at high RPM (all else being equal and the engine able to make use of the different breathing).
12° was how I described it it may not be 12, as that's where the crank was when the cam alignment marks were lined up, I'm planning to check the specs of my reground cam
I'm going to check where the crank sits when the pulley aligns on the standard set up mark on a friends' car later in the week.
|
| |
Last Edit: Jul 10, 2024 18:17:46 GMT by logicaluk
|
|
|
|


