logicaluk
Posted a lot
   Every days a school day round here
Posts: 1,373
|
|
Mar 12, 2024 22:43:11 GMT
|
It took some time, but I finally found an encloser I'm happy with, not only that, but it was a bargain, most places on eBay were £13 -£15 I got 2 for £17, even better and much to my surprise it was on royal fail 48hr and had arrived when i got home from work today (Tuesday) it's the perfect size to get all the plugs on one side 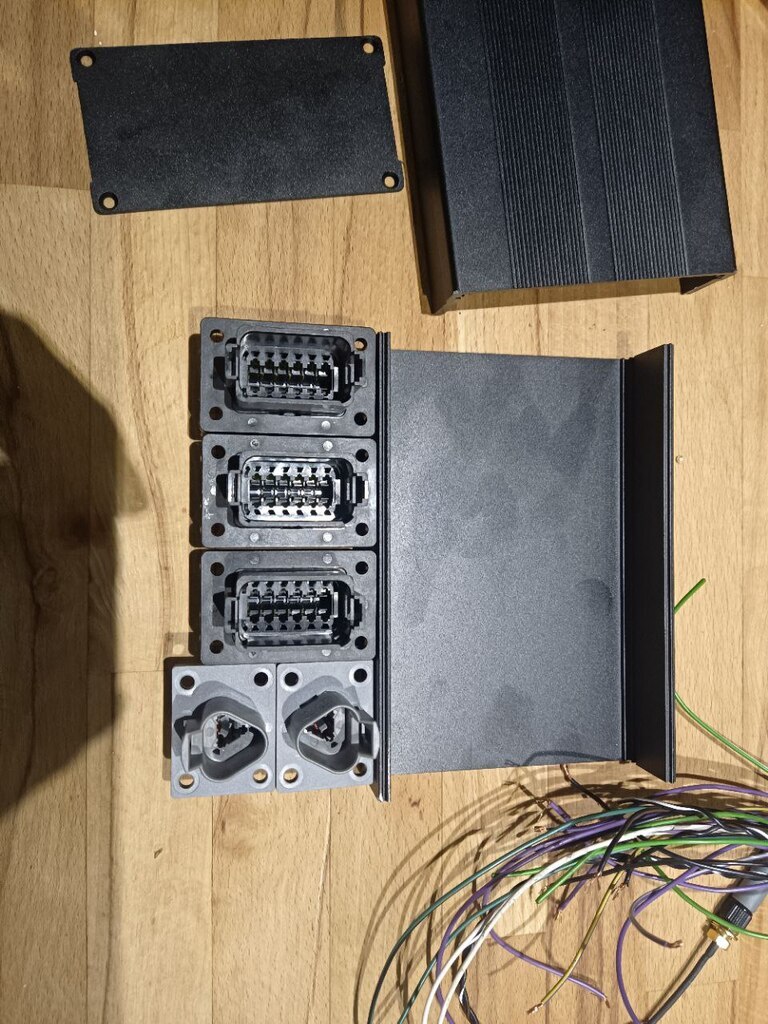 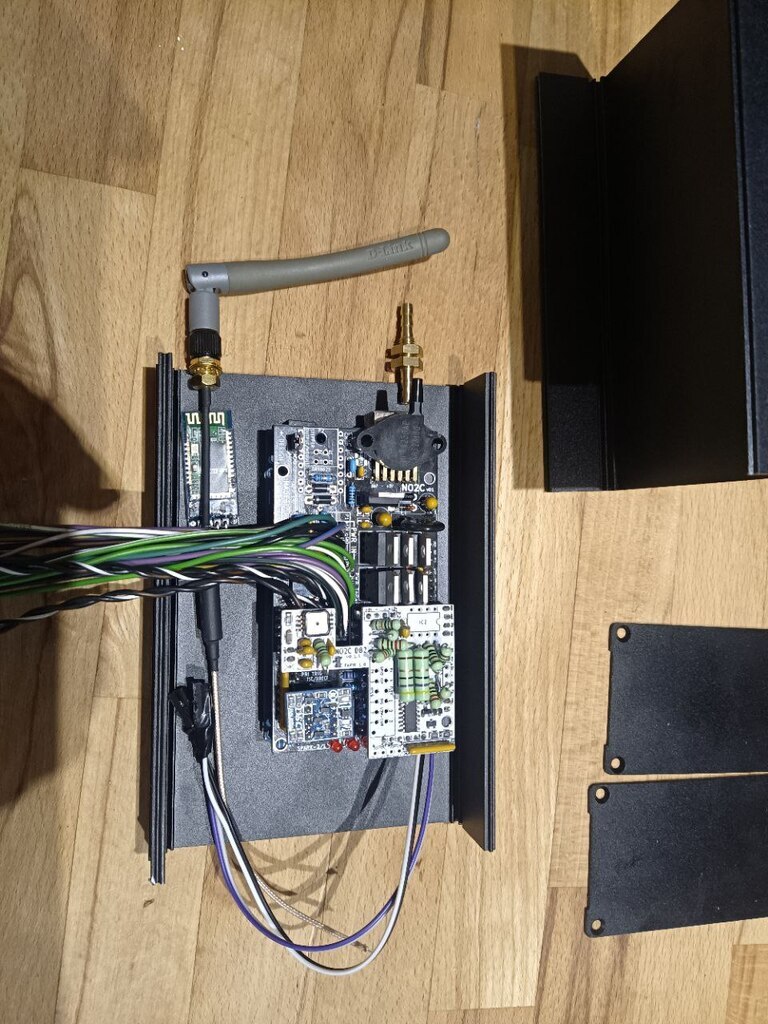 Here's the plan for the layout. 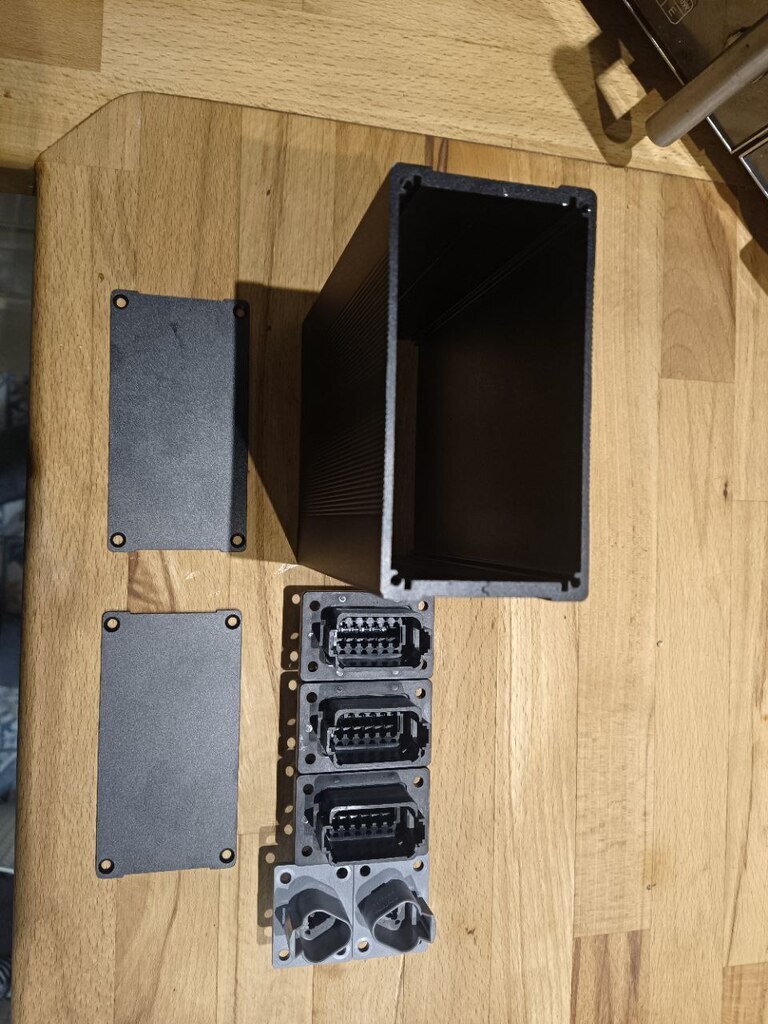 But I'm still bashing my head against the wiki for the Speeduino if anyone can help with a docker running on a Raspberry Pi, I'm trying to get it to connect to GitHub so other people can see it. forum.retro-rides.org/thread/226706/computer-help-trying-run-wikiif you use github |
| |
Last Edit: Mar 12, 2024 23:03:23 GMT by logicaluk
|
|
|
|
jimi
Club Retro Rides Member
Posts: 2,254 
|
|
|
|
Any help LINKY ? I've found their Pi How-to's to be excellent  |
| |
Black is not a colour ! .... Its the absence of colour
|
|
logicaluk
Posted a lot
   Every days a school day round here
Posts: 1,373
|
|
|
|
Any help LINKY ? I've found their Pi How-to's to be excellent  That looks just like I set it up the problem is getting it linked to my GitHub so everyone can access it. Thanks Dan |
| |
Last Edit: Mar 13, 2024 11:59:01 GMT by logicaluk
|
|
jimi
Club Retro Rides Member
Posts: 2,254 
|
|
Mar 13, 2024 21:10:20 GMT
|
|
Have You checked your router/pc/firewall isn't blocking the connection ?
|
| |
Black is not a colour ! .... Its the absence of colour
|
|
logicaluk
Posted a lot
   Every days a school day round here
Posts: 1,373
|
|
|
|
I think I found the problem wiki.js can't use a password protected SSH key and GitHub won't accept a non password protected SSH key. so it's back to the drawing board. Thanks jimi maybe now I can get back to the car. Dan |
| |
Last Edit: Mar 14, 2024 6:54:52 GMT by logicaluk
|
|
|
|
|
Mar 16, 2024 11:31:53 GMT
|
Interesting stuff. I've been thinking about ECU options for the SD1 and Speeduino was one of them. Ideally I'd want to do a little less course batch-firing than the 14CUX (batch fire by bank), so I'd be looking at the V3 or V4 boards at least. Following along! Can definitely recommend Speeduino in SD1s. Mine was batch fire (alternating with firing order, not bank by bank) and was recommended not to bother with sequential or anything on the old RV8 as it wouldnt benfit from it. tasteslikepetrol.net/category/projects/speeduino/page/2/ |
| |
|
|
logicaluk
Posted a lot
   Every days a school day round here
Posts: 1,373
|
|
Mar 17, 2024 15:32:00 GMT
|
With Saturday being perfect spannering weather I decided it was high time I did some, today's job was to finalize the layout for the Speeduino case, and find somewhere to put it. Frank had eaten all the pixies in the battery, so after spending 30 mins trying to locate my jump pack I gave up and pulled the henormous jumping battery out and fired him up, got him out the garage and parked up, I opened the boot to retrieve a 10mm spanner only to find the jump pack in the boot. Doh The location of the ECU will dictate the layout of the case, Micro Squirt sat on the back of a plate with the connections facing forwards, up behind the glove box, then there was a fuse and relay panel lower down at the back of the lower parcel shelf. The Speeduino is twice the size, but I can put the connectors where ever works. 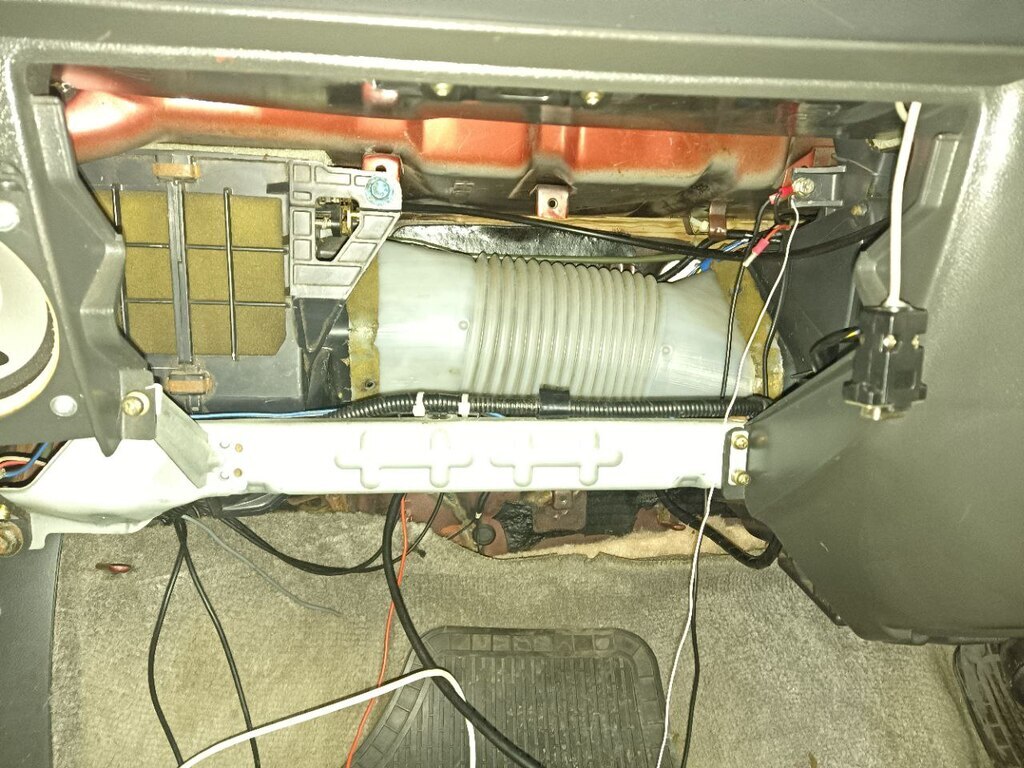 Yep loads of space, but the glove box needs to go back in and there's not much in the way of mounting points, what about the engine bay?well this box isn't waterproof so that's not a risk I'd be happy taking so back to the glove box area, all the cabling comes through the A/C piping hole just in front of the heater box, yes A/C was available as an optional extra, iv never seen a working one and only seen the A/C button in 2 Acclaims. I refitted the glove box and had a look-up the back, something it would appear the designers never did. 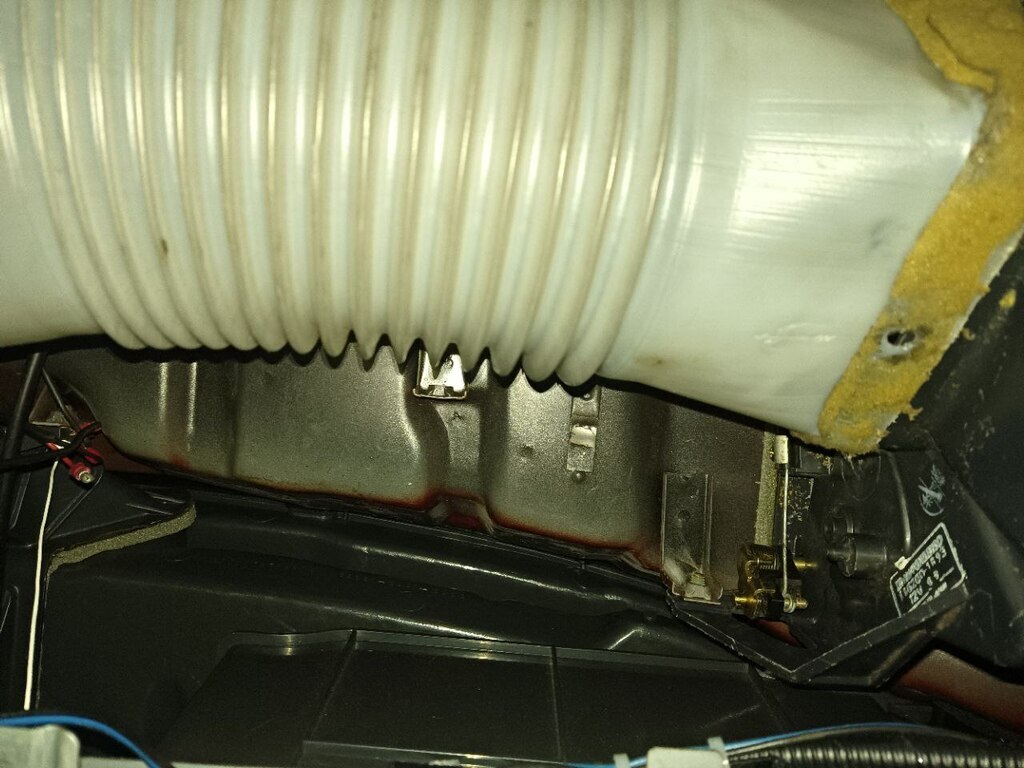 Because there is a cavernous space behind the glovebox, which means we have a winner, I can use the old mounting bracket and bolt it to the back of the case, it will only have one bolt but the Micro Squirt has done several thousand miles with no issue, so fingers crossed. I then realized I might just possibly have enough room to get the fuses and relays in too. Then spent the rest of the day hacking some holes into the case and ended up with this. 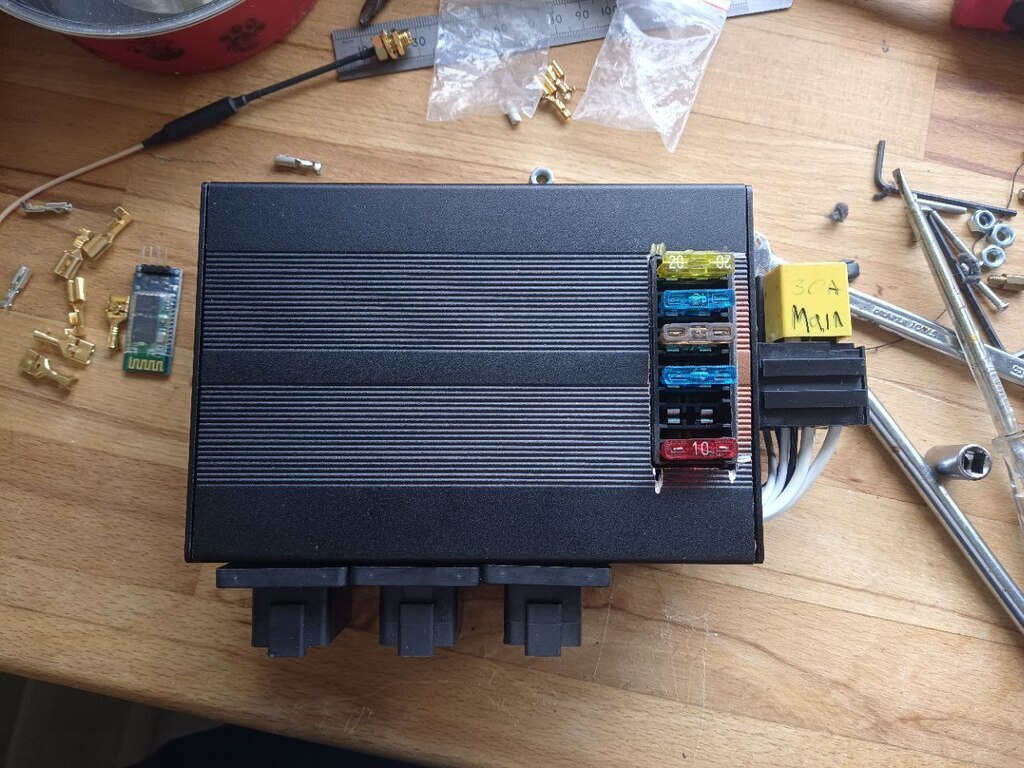 Well almost that, as the fuse holder which used to be pop riveted in place now neds to be height adjustable and has M5 mounting holes, it won't take M6 as there's not enough room for nut, and it turned out I have about 15 M5 bolts of varying lengths, 7 M5 washers and 2 nuts, one nyloc and one plain, FFS, M4 no problem M6 loads M5 almost nothing. So this morning I popped over to a mate who had 10 M5 nuts, well he did have 10 M5 nuts, he doesn't any more. Then, when it stopped raining, I added a couple of rivnuts to Frank's bulkhead and fitted the new coil pack, the lead to number 2 plug only just reaches. 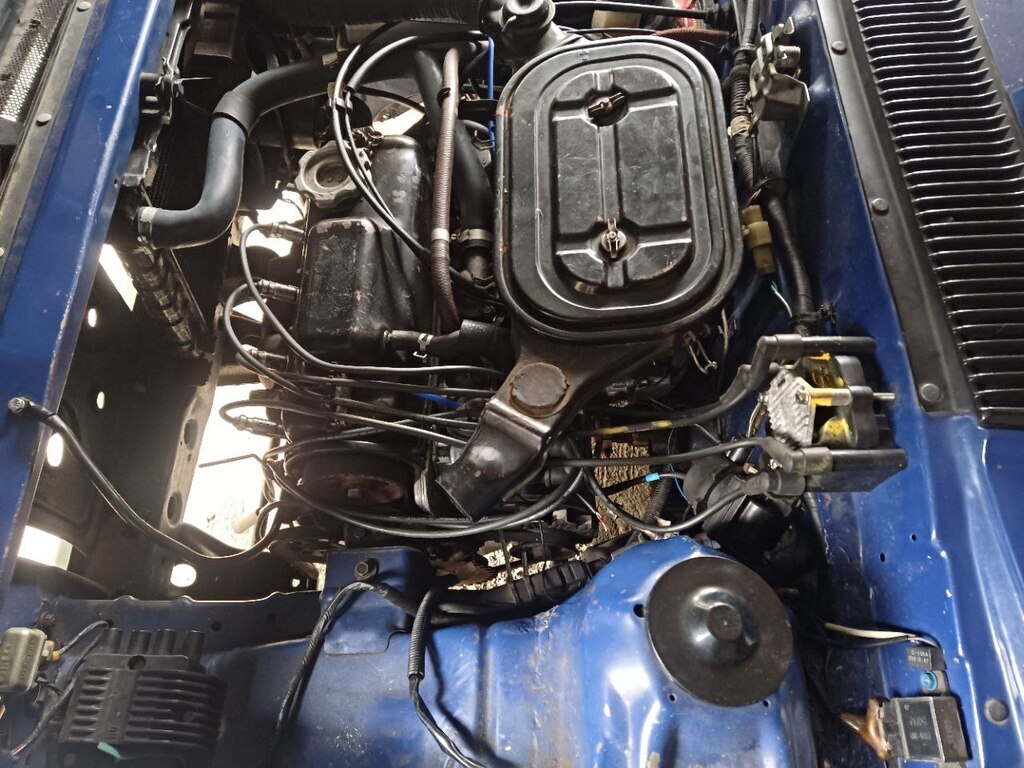 As long as I remember to borrow the crimping tool from work, ill have the ECU finished this week, then I'm on to making a new engine bay loom. |
| |
|
|
logicaluk
Posted a lot
   Every days a school day round here
Posts: 1,373
|
|
Mar 24, 2024 21:52:32 GMT
|
Well that was the weekend that was, and this is what happened. Saturday I was rudely awoken by the dustman, and thought about leaving the house. No I was awoken but the bloody cat talking at 6am well I say talking she said wow, but at 6am and couldn't get back to sleep, by 7am I was assembling the tools of loom manufacture, as I had cunningly acquired the proper pin crimping tool, now I could have crimped them with a normal crimp but if you got access to the proper crimp one is going to use it. 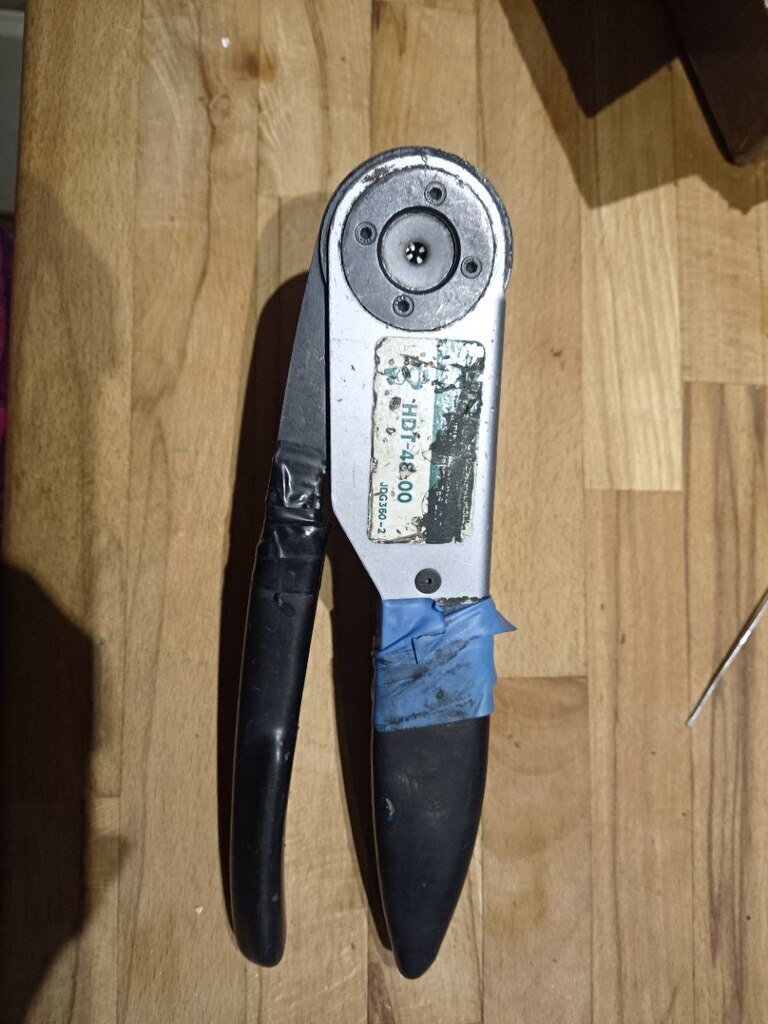 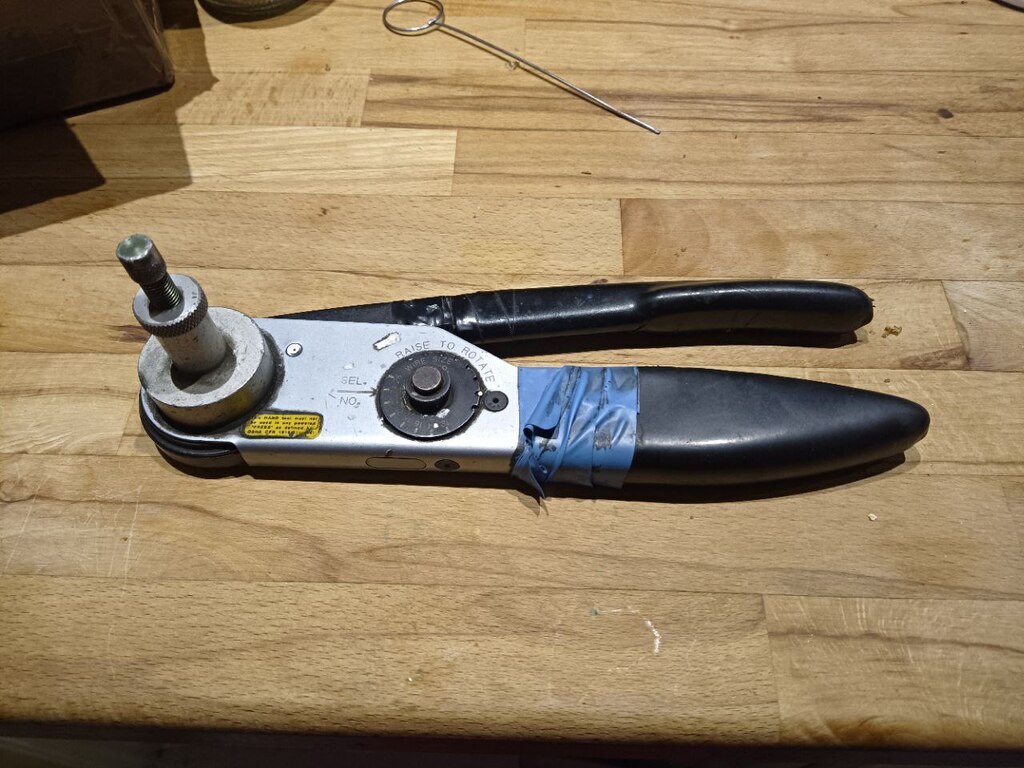 It being a Deutsch crimp tool, I've looked for them on eBay and the cheapest I can find is a new one for £199, it is a little cumbersome to use, but it crimps the pin on the wire almost perfectly, I only had 2 Fail the pull test because the wire was ridiculously thin, so I soldered them, with over 60 pins crimped the word success springs to mind, anyway I'm getting ahead of my self. First job was to take the laptop and cloth tape measure, and roughly figure out what's going where, there are 4 important points, ECU, bulkhead, block and battery. Using these dims, I pinned the ECU plugs and worked out the branches one just inside the bulkhead one just outside and everything else splits out at the back of the block, I'd bought reusable Tywraps for this very purpose, but completely forgot about them until I was almost dome After a solid morning's work, I had this. 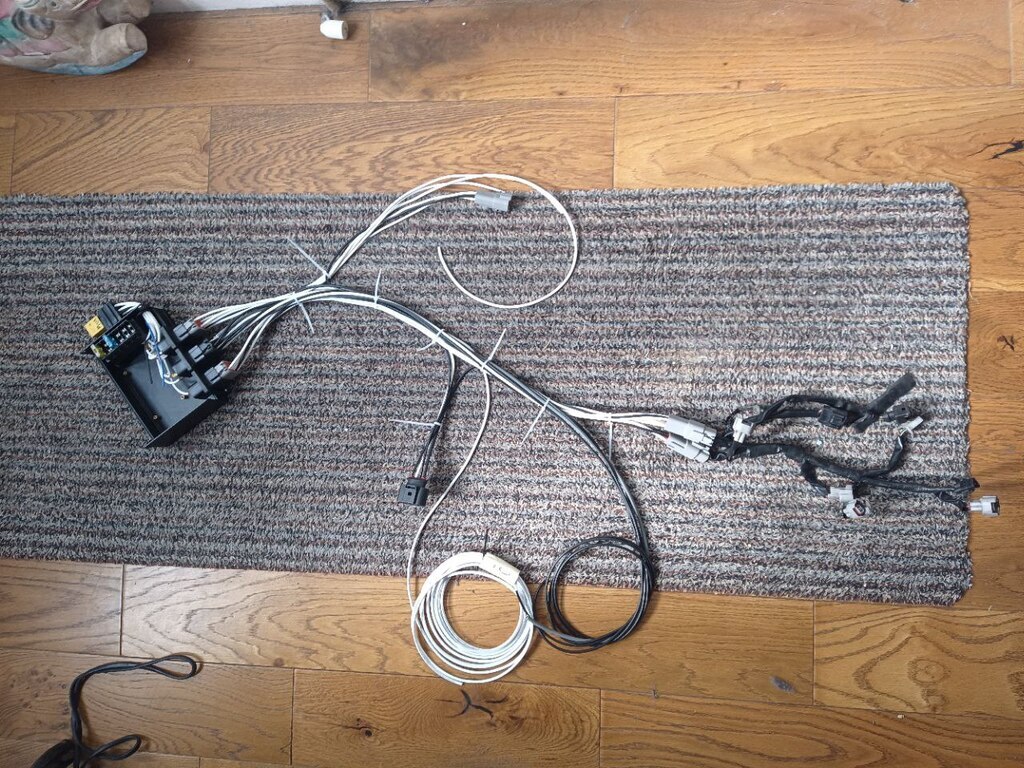 Which was ready for its first light toss, which led to taking the case apart to affix a bracket, a bracket of such cunning even the likes of Binkys own mystic mechanical gurus wouldn't contemplate, no they would have spotted this curveball 9 years ago found a better mounting solution, I went for reusing the flat steel sheet that the last ECU was mounted to and hung it off a fresh bolt. No Pics as the Garage Frank lives in doesn't have much light, and I was working by torchlight and most importantly I didn't have my phone with me. The afternoon was spent changing a couple of components (I hate desoldering through hole components), and finishing off the boards then crimping the socket pins, strangely the socket pins are male and the plugs female. Sunday morning once again the cooking fat wakes me up at 5.45am then this time snuggles down on the bed and goes to sleep right beside me, not for long as I have my petty revenge, waking her up every 5-10 mins for the next hour and a half, Engage Smug Mode. I got up, had a cup of lemon green tea, such is my want in the morning, before I got started on the ECU I have to finish off an unfinished job from a couple of years ago, when I fitted the new kitchen worktops and sink, I also fitted a filtered water tap, but hadn't plumbed it in. This hadn't been a problem as the jug filter was working fine and Wilko had plenty of filters in stock, alas Wilko is no more and so was our supply of water filters. The problem is the plumbing under the sink doesn't suit the new taps, so a reengineering was needed, I don't like plumbing, especially the sort that takes place in the back of a cupboard with no room to work. At this point something went wrong, My mood crashed, and I was hit by the wave of depression, that has been stalking me for the last couple of weeks. I managed to drag myself through it fighting with one joint that really didn't want to be watertight and needed the whole thing stripping out to tighten, but I think it's OK now, ill check it again tomorrow. This left me feeling like all I wanted to do was to go back to bed, and either wake up on Thursday or never again. I have learnt that when I feel like this the most important thing to do is to find someone to talk to, luckily I did and a couple of hours later I managed to start on the ECU, this was a very absorbing and the concentration helped me fight my way back to feeling OK. 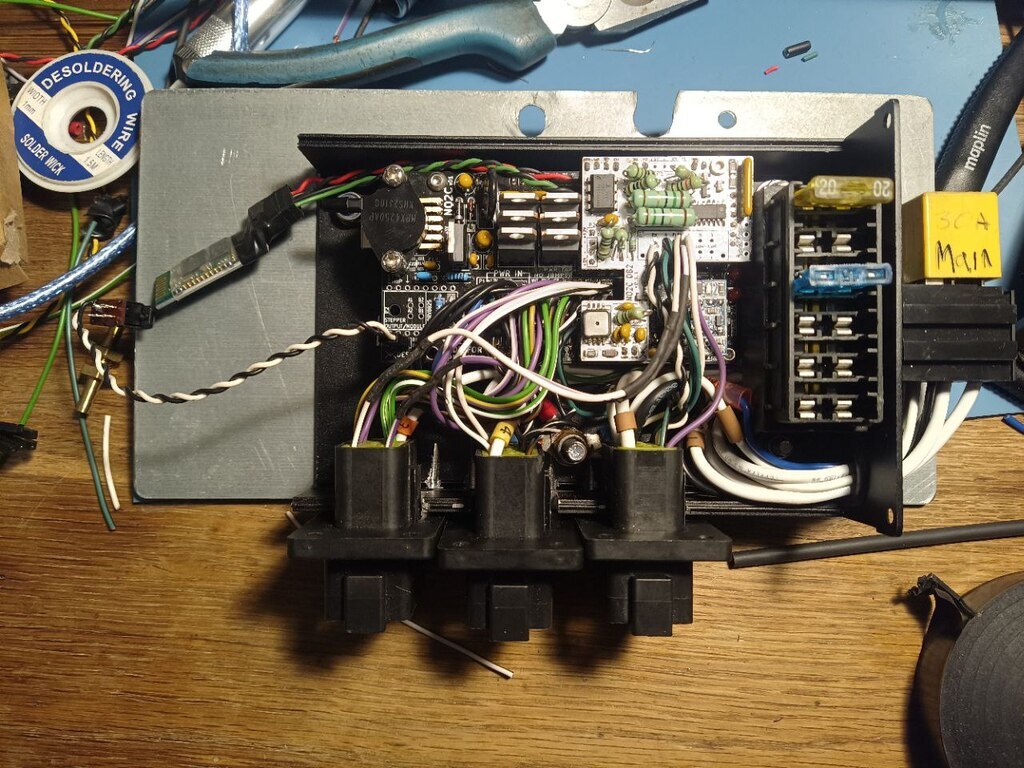 Yes, I know there are 2 wires I cut short and had to lengthen, but I'm calling it a win. Now it's all in the car, I've adjusted the branches to fit better, found the crash sensor, so in the event of a crash if the engine is able to run, it will kill the ignition feed to the ECU. I just need to remake the O2 Sensor connector for the new Deutsch plug, connect power and block grounds and ill be able to see if it still verks. Dan |
| |
Last Edit: Mar 24, 2024 22:04:43 GMT by logicaluk
|
|
logicaluk
Posted a lot
   Every days a school day round here
Posts: 1,373
|
|
Mar 29, 2024 13:19:48 GMT
|
|
When one makes a small mistake, and of all the available outcomes it's the worst possible, what do you do?
Order another Arduino Mega and hope for the best (but expecting the worst)
When I pinned the loom I mixed up 2 of the 3 identical plugs plug 3, pin 1 is the 12v feed, and out of the 36 available options I managed to connect it to plug 1, pin 1 which of course is the most sensitive pin possible the 5v rail.
Go me.
|
| |
|
|
|
|
|
Mar 29, 2024 14:47:30 GMT
|
|
🙁That’s upsetting. And it was going so well……
……keep at it - I have no doubt you’ll win in the end though!
|
| |
1967 Triumph Vitesse convertible (old friend)
1996 Audi A6 2.5 TDI Avant (still durability testing)
1972 GT6 Mk3 (Restored after loong rest & getting the hang of being a car again)
|
|
|
|
logicaluk
Posted a lot
   Every days a school day round here
Posts: 1,373
|
|
|
|
Just for future reference I'm a f'in idiot. To recap I blew it up, bought a replacement speeduino mega from Amazon for £14, which was, in true Amazon Prime style delivered the very next day, I used the speeduino speediloader to load up the latest firmware, and re-attached the the NO2C, plugged it in to the loom and fired up tuner studio, only to find stuff not working properly, so of course I blamed myself for wrecking it (again) pulled all back out of the car and shut the garage door and walked away from it. In the meantime I went to buy the Mrs an electric bike pump as she's off on a 200k ISH bike ride in Mallorca, AliExpress was the cheapest whilst I was on there I spotted this.  If there's 2 things I like it's test equipment and bargains, this ticked both boxes and was duly delivered 8 days later. It turned out to be far better than expected and extremely useful, I was convinced I'd blown something else up on the board, so Sunday morning I took over the dinning table made a few test leads to connect the loom up to the engine simulator and set about following the signals to see what what causing the strange behaviour on TS, none of the inputs were doing what they were supposed to, some did nothing others caused a different guage to move. First I followed the voltages from the simulator outputs to the plugs, and on to the board and through the NO2C board to the pin that goes down to the Arduino, which seems to be right, so after 3 or 4 hrs of following circuit diagrams and scratching my head, and going round in circles I realised the board choice was set wrong in TS, doh. Suddenly the whole thing sprung to life in front of me. So I had spent the last few weeks giving the ECU side eye and it in turn was sending me pissy you broke me vibes for nothing. 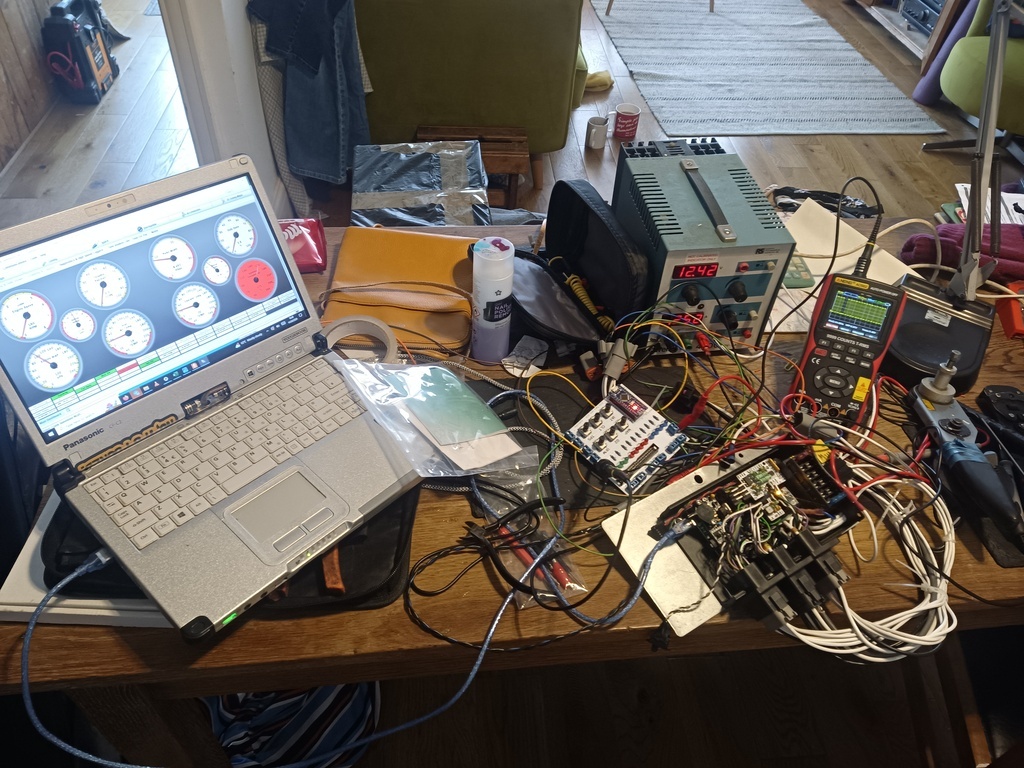 There it is, finally working on the dinning table. Hopefully I'll get it fitted during the week, ready for drive it day on Sunday. Dan |
| |
|
|
logicaluk
Posted a lot
   Every days a school day round here
Posts: 1,373
|
|
|
|
|
Last night I chucked it in the car only to find, it had developed flatarse batternogoanosity. Left it on trickle charge overnight.
I've cleared Saturday for setting it up ready for drive it day on Sunday.
We're meeting up at Starbuks in Barton, driving to Lincoln to meet another group and driving around Lincolnshire till we find Cleethorpes for fish and chips. Anyone want to join us?
Dan
|
| |
Last Edit: Apr 17, 2024 9:30:41 GMT by logicaluk
|
|
logicaluk
Posted a lot
   Every days a school day round here
Posts: 1,373
|
|
|
|
I had a couple of hours free after work on Friday and a fully charged battery, which span the engine over perfectly, but we still had a no start condition. Further investigation revealed, after questioning weather the VR conditioner was working/plugged in properly and whether I had the jumpers set to bypass the VR conditioner and had roasted another Arduino, that the crank sensor was outputting 0v but has 230 ohms resistance which is odd seeing as it was working before I blew up the microsquirt. 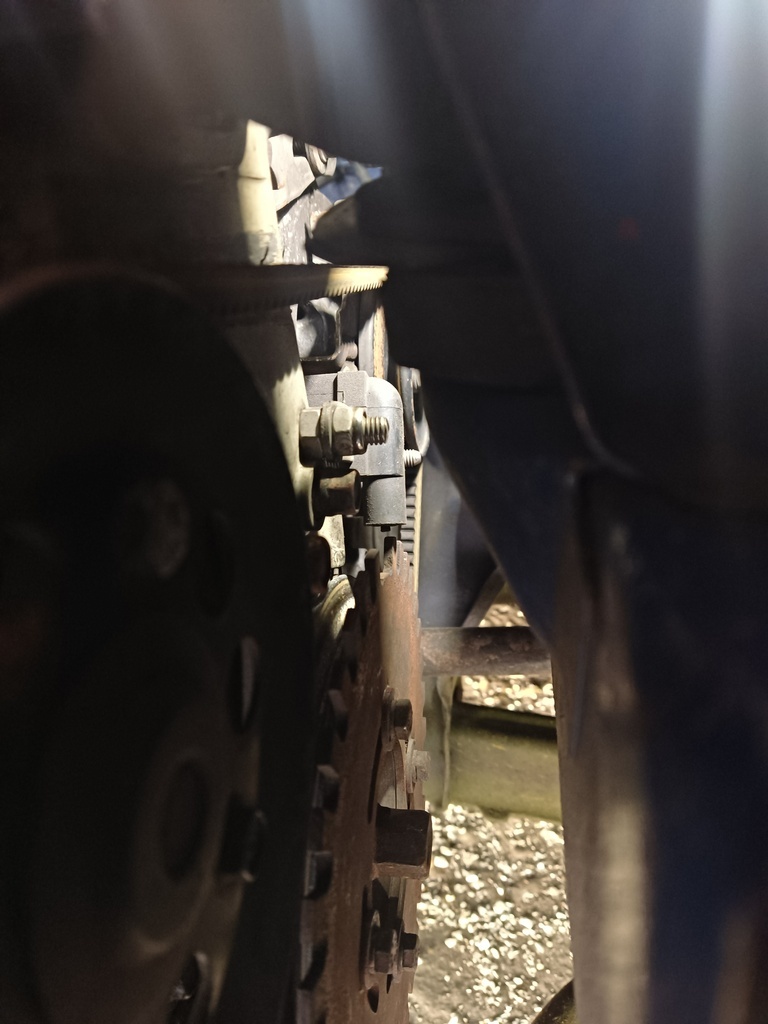 Looks like the first job is to realign the sensor. Dan |
| |
|
|
|
|
|
|
|
|
you've probably got it covered but in cade not crank sensors have to be wired the right way round, I found this out on the first megajolt I fitted!
|
| |
|
|
logicaluk
Posted a lot
   Every days a school day round here
Posts: 1,373
|
|
Apr 20, 2024 16:29:21 GMT
|
|
Well that's it GAME OVER, do not pass go, do not collect £200.
How did I get there?
Here's how, First I realigned the crank sensor so it was directly over the trigger wheel, I could then get a trigger signal when the engine was running but not when it was cranking, I removed the crank sensor and filled one of the mounting holes 1mm oval and re fitted it, this closed the air gap to around 0.5mm, that got a fairly good signal and the spark channel LEDs lit up, I went through the settings and eventually got it to start, but something was awry with the crank signal I did try switching the sensor pins over, but it didn't work at all then, it would miss-fire stumble and stall, according to the data logs it seems to have been getting a big pulse from somewhere, that happening repeatedly lifted the head and is now pressurizing the cooling system.
I've got a couple of head gaskets in stock but as I've been collecting the bits for a 1440cc engine, so I don't see the point in fixing this one, or maybe I should give up and fit a d16v1 from a 2002 civic.
Mr Piddled Off of Hull
|
| |
|
|
Darkspeed
Club Retro Rides Member
Posts: 4,889
Club RR Member Number: 39
|
83 Triumph Acclaim SprintDarkspeed
@darkspeed
Club Retro Rides Member 39
|
Apr 20, 2024 17:43:11 GMT
|
|
That's a bit of a ... thing. Fitting something bigger gets my vote.
|
| |
|
|
logicaluk
Posted a lot
   Every days a school day round here
Posts: 1,373
|
|
Apr 23, 2024 19:11:56 GMT
|
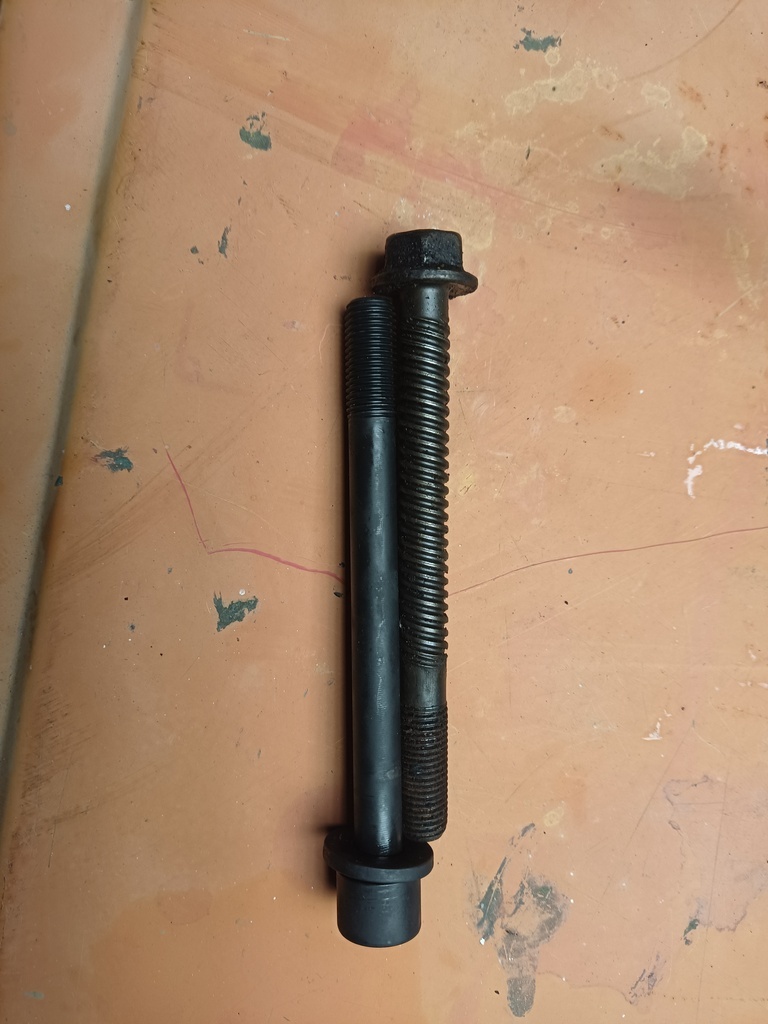
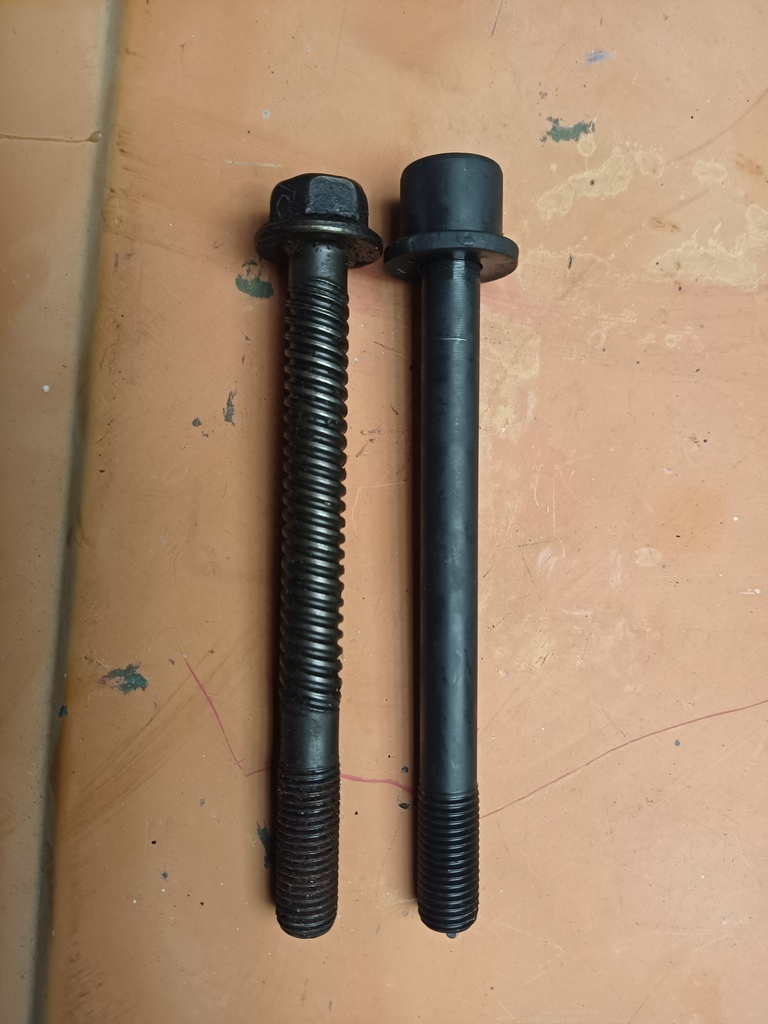
Having meditated and slept on it, I have decided not to take the car up the common, and give it the Viking funeral it so richly deserves, nor am I going to take the easy path of a modern 16 valved VTEC power, no I'm going to double down, stick to my guns and make this hair brained plan work, (unless someone wants to sell me a 125BHPish Honda engine and gearbox, for not a lot of money). I think the HGF was down to 2 things, 1 incorrect ignition timing at start up, causing the engine to kick back, (hopefully ill get the Speeduino working) and 2, most critically reused stretch bolts, here are the little blighters from another engine. 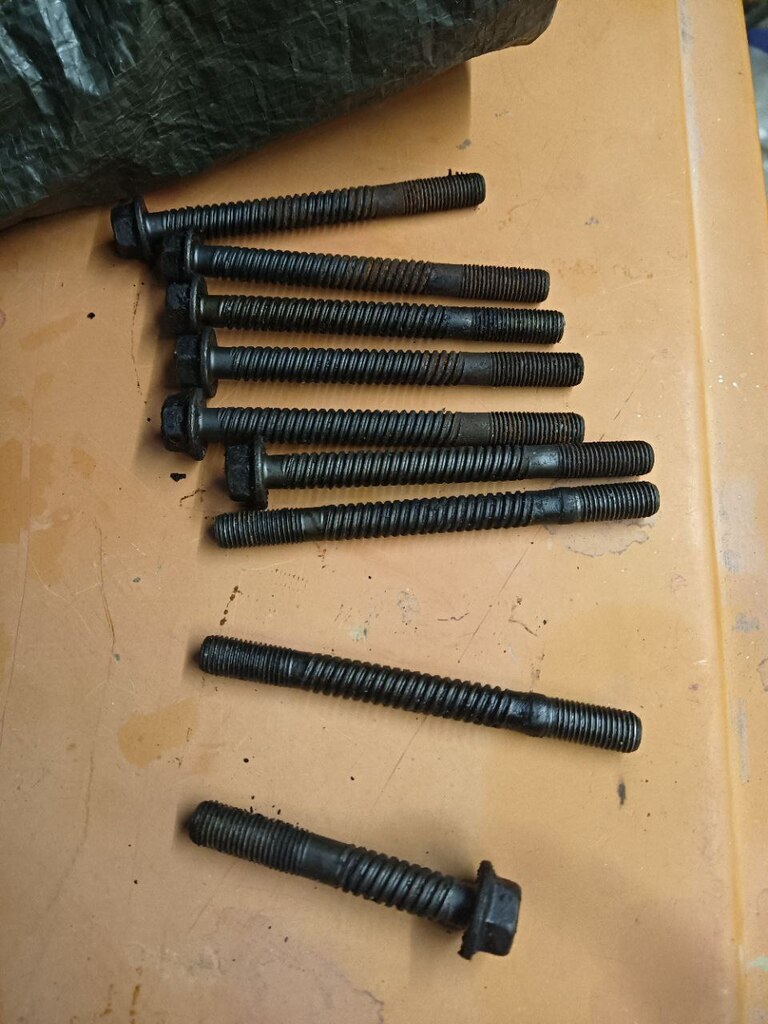 That's 6 x M10x1.25x105mm bolts 2 x M10x1.25x115mm studs 1 x M10x1.25x60mm bolt The 2 studs go in the back corners, under the fuel pump and dizzy drive, but as they are longer than the bolts, I wonder if they are to aid mounting? The 1 short bolt goes under the oil pump drive, Of course acclaim head bolts are made of unobtainium, so I opened a six-pack of GoogleFu on it, and spent the evening on the confuser, getting nowhere really fast. Apparently some people have used shortened BMW MINI N series engine head bolts, but these are torque to yield at 1-22lbf(30Nm) 2-1/4 turn 3-1/4 turn, which seems close considering, the Acclaim head is torqued 1-22lbf (29Nm) 2-40lbf (54Nm) and I didn't really want to use them unless I had to, the search continued. eBay wasn't helping much, Google was a bit pants, until I came across engine parts UK, in amongst their catalogue section is the Payen head-bolt catalogue in PDF format which is searchable, after some time, I came across HBS378 a pack of 10 M10x1.25x106.5mm hex head bolts for a Kia Picanto 1.1 from 04/04 on, that don't appear to be torque to yield. Which gave me a cross-reference to FAI B2193 on eBay for £25. The Picanto head is torqued 1-56Nm (41lbf) 2-69Nm (50lbf), so it's pretty much right where it needs to be, that just leaves me with one problem the short head bolt that goes under the oil pump drive so I've ordered a grade 12.9 M10x1.25x60mm bolt, the torque spec for a grade 12.9 is 73Nm, any thoughts? Dan |
| |
Last Edit: Apr 23, 2024 19:56:49 GMT by logicaluk
|
|
Darkspeed
Club Retro Rides Member
Posts: 4,889
Club RR Member Number: 39
|
83 Triumph Acclaim SprintDarkspeed
@darkspeed
Club Retro Rides Member 39
|
Apr 23, 2024 19:42:22 GMT
|
...nor am I going to take the easy path of a modern 16 valved VTEC power, no I'm going to double down, stick to my guns and make this hair brained plan work... That fine line between dogged determination and foolhardiness.  |
| |
|
|
logicaluk
Posted a lot
   Every days a school day round here
Posts: 1,373
|
|
Apr 23, 2024 19:59:34 GMT
|
...nor am I going to take the easy path of a modern 16 valved VTEC power, no I'm going to double down, stick to my guns and make this hair brained plan work... That fine line between dogged determination and foolhardiness.  yep, sticking with this engine is the quicker, cheaper option. So ill go with that for now. |
| |
|
|
|
|
|
|


