|
|
|
Mar 16, 2018 22:56:34 GMT
|
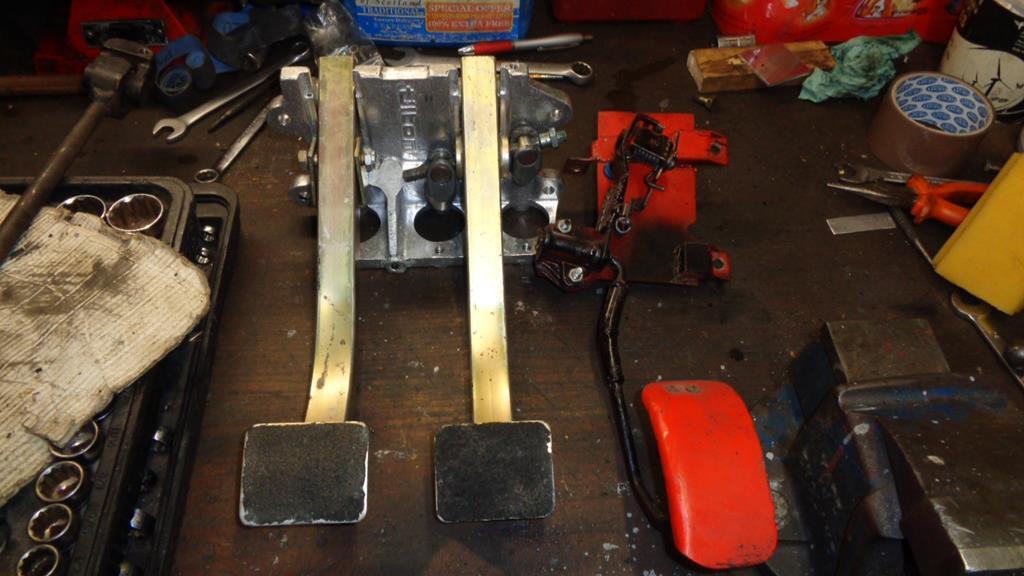
Whilst it wasn’t snowing.... which may or may not happen over the weekend we fitted the front wheels and spacers tonight    Bolted the carb on  (Looks a bit new and shiny, should we try and age it with tea bags like a school art project  ) And got the clutch pedal fitted, which nicely is in line with the brake  Hopefully get some time after work tomorrow (and some photos in daylight  ) |
| |
|
|
|
|
|
|
|
Mar 17, 2018 20:13:27 GMT
|
Few more bits done this afternoon. Lucy is working tonight and tomorrow night, so had to have a kip... before that we made some brackets, and whilst she was asleep we quietly welded them in Welded some tabs for a panel to hold the regulator at the back, and cut a panel, we are going to fold the edges before we fit that.  Welded some tabs in for a dash panel, and made a CAD template and then cut an ally panel,  Welded some in for the bonnet, they are better than the previous ones, but we’ll need to look at the fit  Then took it back up the farm, so assuming the weather doesn’t get too bad we’ll do some more up there tomorrow Not achieved loads, but considering the weather and working under the tarp, not bad   |
| |
|
|
|
|
|
Mar 17, 2018 21:07:40 GMT
|
|
Coming together nicely chaps
Nice work again, this is an inspirational build for younger RR members
|
| |
Fraud owners club member
2003 W211 Mercedes E class
1989 Sierra sapphire
1998 ex bt fiesta van
|
|
|
|
|
Mar 18, 2018 11:27:35 GMT
|
Looking great, lots of progress as usual! Love the fibe flare/whip light but just a heads up - though you probably know already, that you can not use your whip light on the road - unless you get one that shows red to the back and white to the front! No vehicle should be fitted with a lamp which shows a red light to the front No vehicle should be fited with a lamp capable of showing light to rear other than a red light White lights at the front are permitted Only red lights are permitted to be seen from the rear of the vehicle You can't fit green lights to your car at all (green lights may only be fitted to medical practitioners' vehicles) www.legislation.gov.uk/uksi/1989/1796/contents/made#(Tii)iicolourlightshownlampreflectorNot sure if you can use a red one as a brake light (or 2 yellow ones as indicators...) |
| |
|
|
|
|
|
Mar 18, 2018 12:02:23 GMT
|
Looking great, lots of progress as usual! Love the fibe flare/whip light but just a heads up - though you probably know already, that you can not use your whip light on the road - unless you get one that shows red to the back and white to the front! No vehicle should be fitted with a lamp which shows a red light to the front No vehicle should be fited with a lamp capable of showing light to rear other than a red light White lights at the front are permitted Only red lights are permitted to be seen from the rear of the vehicle You can't fit green lights to your car at all (green lights may only be fitted to medical practitioners' vehicles) www.legislation.gov.uk/uksi/1989/1796/contents/made#(Tii)iicolourlightshownlampreflectorNot sure if you can use a red one as a brake light (or 2 yellow ones as indicators...) Yeah, was aware it wasn’t allowed on the road... but did have the thought about fitting a red one as a brake light (had thought that could just run a strip of tape up the front edge so it only shows to the rear A lot of decisions are based on the whims of an 11 year old, or an adults perception of what they may be  |
| |
|
|
|
|
|
Mar 18, 2018 13:54:37 GMT
|
Of course the reason I know is that when I saw yours I immediately went off to see how much they were and if they are legal- despite being a bit older than 11  Personally I am thinking 2 yellow ones for indicators! |
| |
|
|
|
|
|
Mar 18, 2018 15:52:03 GMT
|
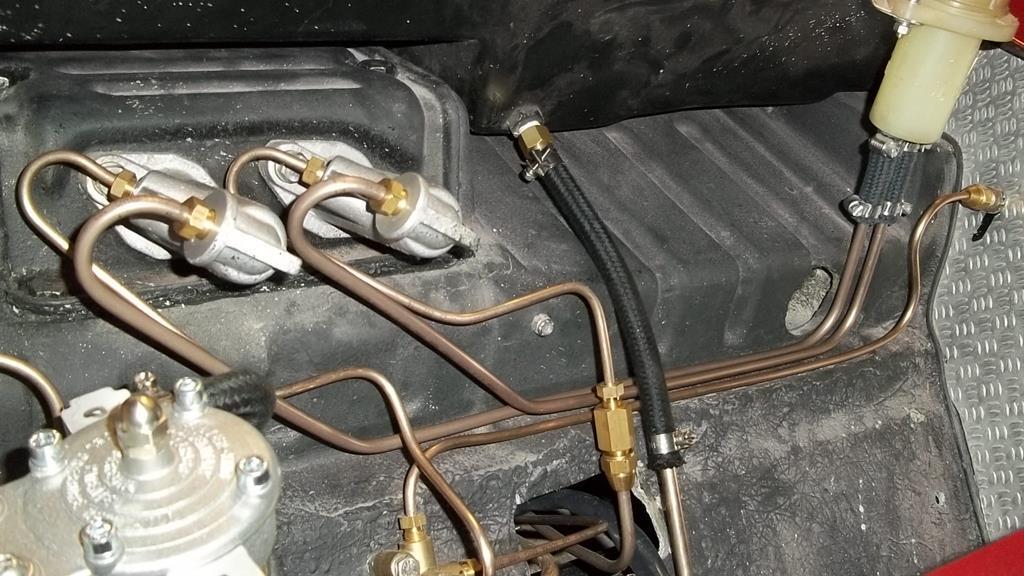
We did a bit.... Plumber in the clutch master cylinder, and properly ran the hard line (one of the flexys looks a bit tight, it isn’t... but we will have to look at that when we tidy everything up)  Made a flare at the slave cylinder, and found the union wouldn’t work.... so we can home and got some lunch, and I thought I should order another Union.... except it needs M10, for some reason I’d bought a 5/16 specially for it, and we had loads of M10s... so after lunch we redid it, and it now works  And  Put it in gear and tried to push it, then Tom pressed the clutch pedal and it moves... so seems to be all good (I guess we need to check it’s not slipping when we run the engine) We fitted the speedo  And a bonnet badge   |
| |
|
|
|
|
|
Mar 18, 2018 19:26:55 GMT
|
Next weekend I’m away... So it’s looking like good Friday to work on it next, but our plan is to, 1)Tighten up the clutch pedal assembly 2)Fit the regulator 3)Run Some battery cable from battery to regulator, and then to starter 4)Fit a couple of earth straps 5)Run some fuel hose, and put some fuel in it! 6)Reattach the throttle cable 7)Start it up 8)Drive it  The plan was to have it driving by Easter, so we might make it, if it all goes well  |
| |
|
|
|
|
|
Mar 18, 2018 20:07:05 GMT
|
|
I've been watching this for some time and it's great work! It'll be great to see it running in a few weeks - it'll shift too!
|
| |
1966 Ford Cortina GT
2018 Ford Fiesta ST
Full time engineer, part time waffler on Youtube - see Jim_Builds
|
|
|
|
|
Mar 19, 2018 20:43:16 GMT
|
A very small update, Wanted a cover for the pulleys, just in case! Found one on a Facebook group, and it turned up today!!  And next big thing to do is wiring, so been looking at fuseboxes. CBS do a 12 circuit one for about 110. Or we can go for a modular one... but the price climbs once you’ve bought terminals and all the bits. Any recommendations for where to go? |
| |
|
|
93fxdl
Posted a lot
   Enter your message here...
Posts: 2,019
|
|
|
|
|
Provided you are able to wait for delivery from China, I have found Amazon a good source of connectors relays etc
Takes a bit of searching to find the best bulk buys though
Ttfn Glenn
|
| |
|
|
MiataMark
Club Retro Rides Member
Posts: 2,971
Club RR Member Number: 29
|
|
|
|
Provided you are able to wait for delivery from China, I have found Amazon a good source of connectors relays etc Takes a bit of searching to find the best bulk buys though Ttfn Glenn There are some good discounts at Maplins at the moment  p.s. just to add this is my favourite build thread by far |
| |
Last Edit: Mar 20, 2018 7:44:33 GMT by MiataMark
1990 Mazda MX-52012 BMW 118i (170bhp) - white appliance 2011 Land Rover Freelander 2 TD4 2003 Land Rover Discovery II TD52007 Alfa Romeo 159 Sportwagon JTDm
|
|
|
|
|
Mar 20, 2018 10:43:13 GMT
|
Provided you are able to wait for delivery from China, I have found Amazon a good source of connectors relays etc Takes a bit of searching to find the best bulk buys though Ttfn Glenn There are some good discounts at Maplins at the moment  p.s. just to add this is my favourite build thread by far My brother in law is a commissioning electrician, and is in process of changing jobs.... they won’t put him on gardening leave but aren’t giving him anything to do either. Spoke to him this morning and he’s bored.... so he is spending his day investigating I think (and being paid for it  ) he mentioned Maplin too... hadn’t heard until this morning  |
| |
|
|
|
|
|
Mar 22, 2018 22:22:43 GMT
|
Didn’t want to put magnets and sensors on a drive wheel, So when we got the acewell speedo, we also got the S12 cable drive speed sensor. This takes a square drive (which a standard vw cable is) and an m12 nut (which the vw isn’t) but I had a plan Cut the nut off of the vw cable with a dremel  And had sourced a ferrule and knurled m12 nut from a motorbike shop online  So crimped the ferrule on (and taped the end.... because I couldn’t find the heatshrink)  Won’t try it until we wire the speedo up, but hopefully we can just route the cable under the dash and it’ll be out of the way |
| |
|
|
Darkspeed
Club Retro Rides Member
Posts: 4,882
Club RR Member Number: 39
|
|
Mar 22, 2018 23:36:54 GMT
|
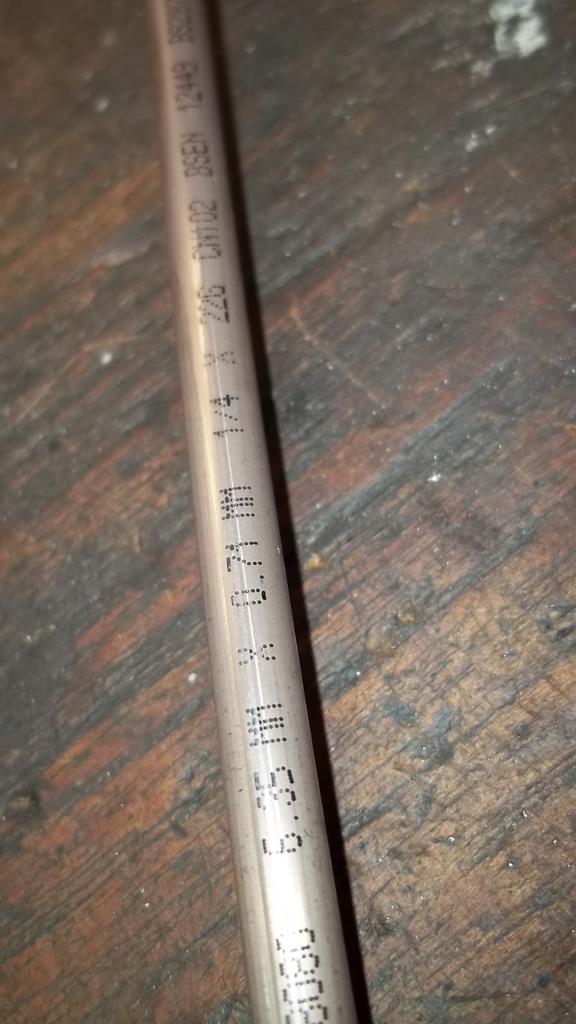
What size is the clutch line ? 3/16 tubing. I ask that because usually with a rear engine car the clutch line has to be 1/4" tubing - The clutch moves a lot of fluid and although it works fine when pressing the clutch when the clutch is released it releases slow due to the fluid being forced back into the m/c.   G15 - rear engine enlarge the tubing as soon as it leaves the M/C and goes all the way to the slave in 1/4" - I think Imp's are the same. |
| |
|
|
|
|
|
|
|
What size is the clutch line ? 3/16 tubing. I ask that because usually with a rear engine car the clutch line has to be 1/4" tubing - The clutch moves a lot of fluid and although it works fine when pressing the clutch when the clutch is released it releases slow due to the fluid being forced back into the m/c.   G15 - rear engine enlarge the tubing as soon as it leaves the M/C and goes all the way to the slave in 1/4" - I think Imp's are the same. Yeah, it’s 3/16.... I guess it would just be a case of changing the hard line? The flexi should be ok? |
| |
|
|
Darkspeed
Club Retro Rides Member
Posts: 4,882
Club RR Member Number: 39
|
|
|
|
Yeah, it’s 3/16.... I guess it would just be a case of changing the hard line? The flexi should be ok? The flexi looks a short enough line for it to be okay but it depends on what internal diameters the manufacturer has used on the hose and the fittings - Some of the fittings have really small bores through the threaded parts - On the IMP/G15 the Flexi is at the transaxle end due to the movement and the flexi is a big bore type so the smallest bore is the initial short length of full bore 3/16. Strato's was 1/4" braided Flexi all the way through using an adapter at the M/C . |
| |
|
|
Darkspeed
Club Retro Rides Member
Posts: 4,882
Club RR Member Number: 39
|
|
Mar 23, 2018 19:03:18 GMT
|
And got the clutch pedal fitted, which nicely is in line with the brake  Typically when you assemble these you keep the clevis connections as close as you can to the pivot - normally there would be large washers that would be positioned between the clevis conns and the pivot bush. The way that is assembled appears to splay the rods to the m/c's and they should be absolutely parallel. I do not have a good photo I can find easily unfortunately but the result is that the clevis conns to the m/c's need to as close to the pivot as possible - the further they are apart the less effective the change in the central pivot position is. 50mm apart if you move 5 mm off centre - 20/30 60mm apart 25/35 70mm apart 30/40 - same pivot movement but but significantly different leverages/bias. ETA - Plus as the centre pivot just floats around in that bush - the clevis' being close to the bush are the only things stopping the pivot floating about all over the place changing the bias as it pleases. |
| |
Last Edit: Mar 24, 2018 13:29:57 GMT by Darkspeed
|
|
|
|
|
Mar 27, 2018 19:55:21 GMT
|
And got the clutch pedal fitted, which nicely is in line with the brake  Typically when you assemble these you keep the clevis connections as close as you can to the pivot - normally there would be large washers that would be positioned between the clevis conns and the pivot bush. The way that is assembled appears to splay the rods to the m/c's and they should be absolutely parallel. I do not have a good photo I can find easily unfortunately but the result is that the clevis conns to the m/c's need to as close to the pivot as possible - the further they are apart the less effective the change in the central pivot position is. 50mm apart if you move 5 mm off centre - 20/30 60mm apart 25/35 70mm apart 30/40 - same pivot movement but but significantly different leverages/bias. ETA - Plus as the centre pivot just floats around in that bush - the clevis' being close to the bush are the only things stopping the pivot floating about all over the place changing the bias as it pleases. Thanks, was aware we’d have to come back to this as, as you’ve said the pivot moves about and the braking isn’t consistent.... but wasn’t too worried at the minute (or hadn’t really stopped to think about how we should fix it) But if I get some washers, we can pack out the rod between the pivot and clevis and then move washers to adjust later. BlackPop had mentioned some American threads about setting the bias, and we’ll need to do that too... unless you have any tips? |
| |
|
|
Darkspeed
Club Retro Rides Member
Posts: 4,882
Club RR Member Number: 39
|
|
Mar 27, 2018 22:16:42 GMT
|
I have dug out the Tilton set-up from the Strato's and I will take a few pictures of how I set them up - Washers wise its one washer each side of the bush no packing out the the washers are just for the threaded clevis to slide agains. For rear engine the set up is also very different to a front engine as you have a far greater bias to the rear - Normally a Rear engine will have discs the same diameter all around as the back end will do a lot more work. First off you need to remove/unwind the push rods from the clevis joints and then wind the clevis joints on the bar further making sure that the pivot is central as you do it. Pictures will help so will get them sorted over the Easter weekend but this old one will give you an idea of where they should be positioned  |
| |
|
|


 )
)
 )
)


 )
)
 )
)


