|
|
|
Apr 19, 2016 17:08:12 GMT
|
I also repaired the water tank (had to chase a pin hole top right) 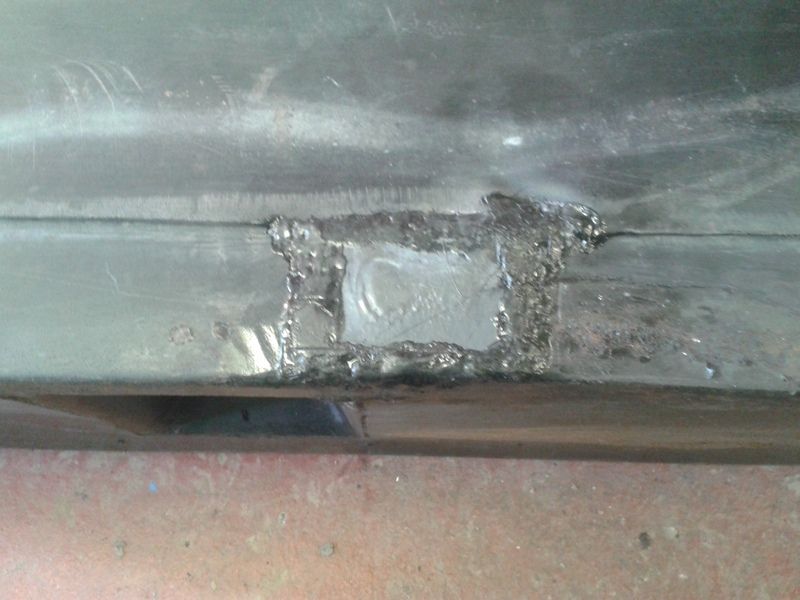 I ordered a sample of material for the interior. Seats are great but the cloth centers on the front seats are completely shot. Think ill get the centers re done in this 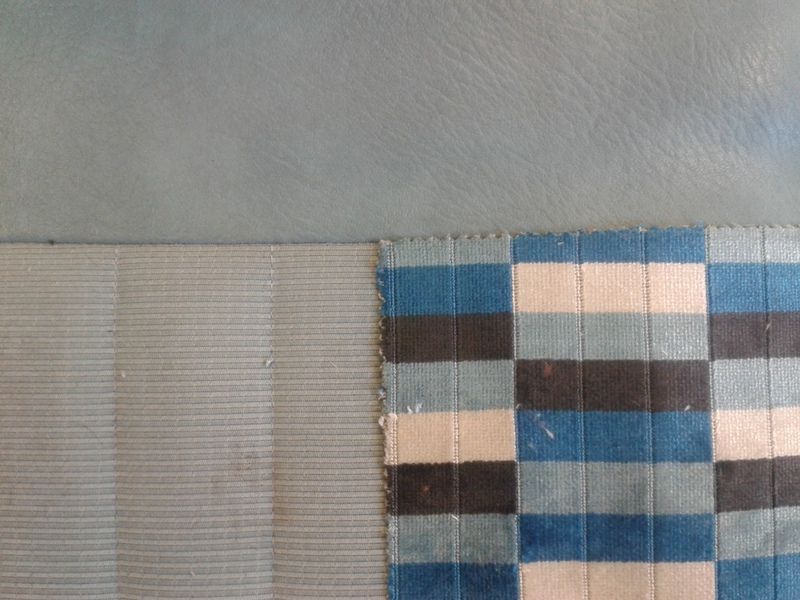 Its a copy (in blue rather that orange) of the late 70's material used by london underground on busses and trains. |
| |
|
|
|
|
|
|
|
Apr 24, 2016 19:26:43 GMT
|
Front end is all back together with new shocks. I wont know how much lower it is untill its fitted. 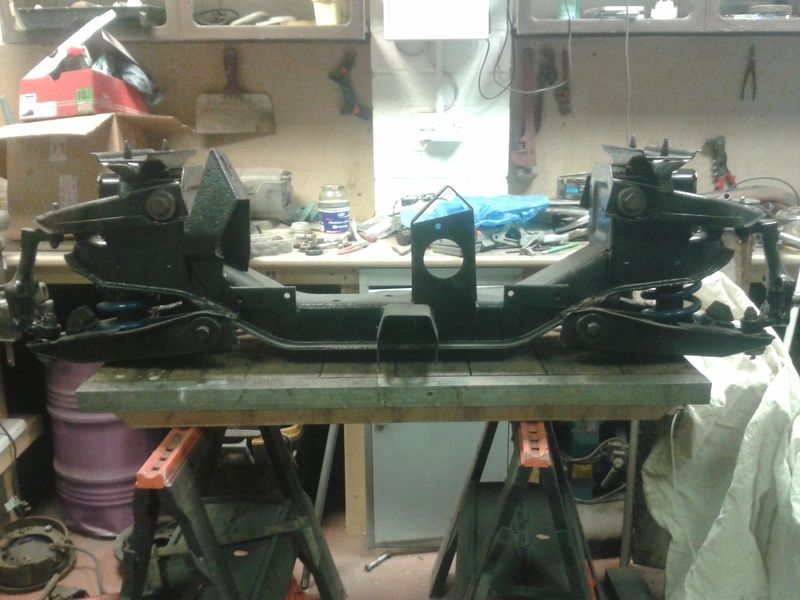 I need to weld the chassis leg and rebuild the head so easiest to pull the engine and front suspension together. This will have to wait untill I can get it over to a friends workshop in a few days/weeks (not sure yet). Therefore, annoyingly, no conclusion to all this until then. |
| |
|
|
|
|
|
Apr 24, 2016 19:48:32 GMT
|
So as the lowering has gone as far as I can at the moment I decided to have a look at this 5x6" stupidity. The only part that will fit in my lathe (1902 drummond if your interested) is the front hub so I chucked it up in my 3 jaw on the inner bearing race seat and clocked it off the outer bearing race seat 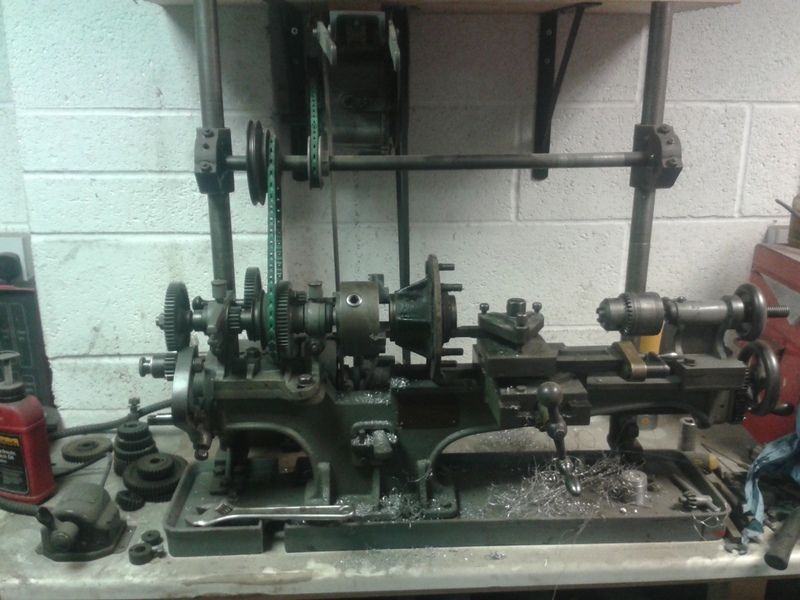 I then scored a line at 4.75" 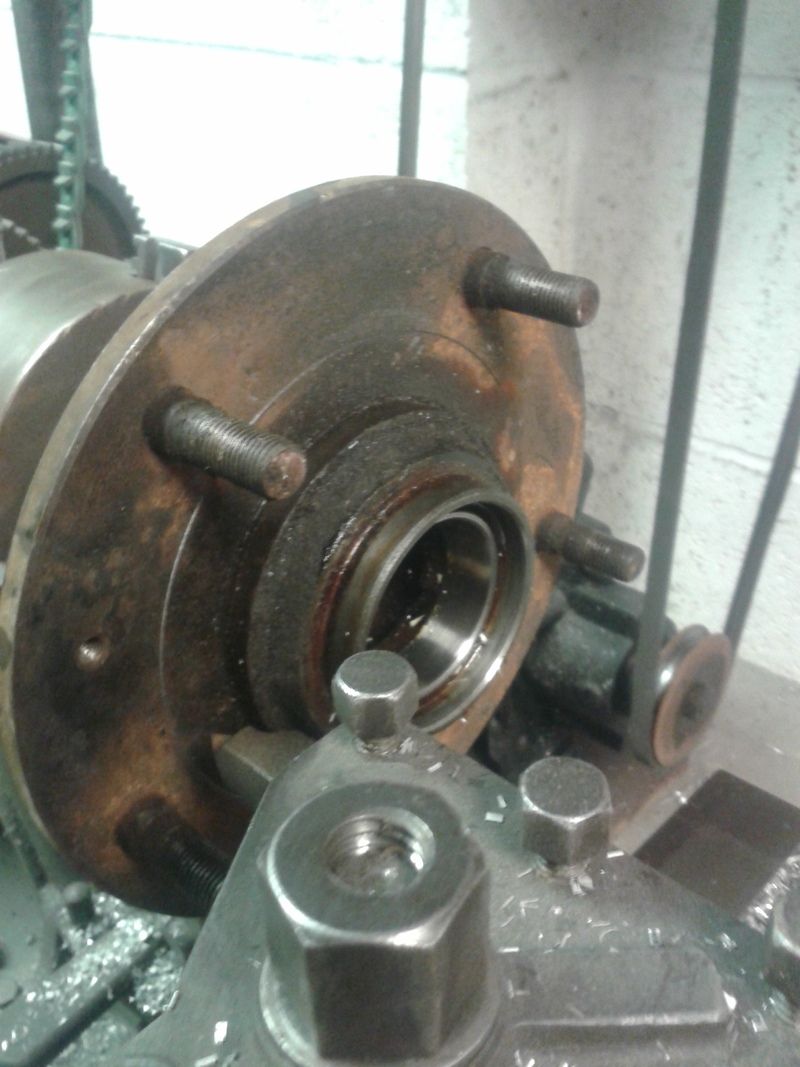 I put a 60 tooth gear on the spindle and locked another gear to the screwcutting gear quadrant 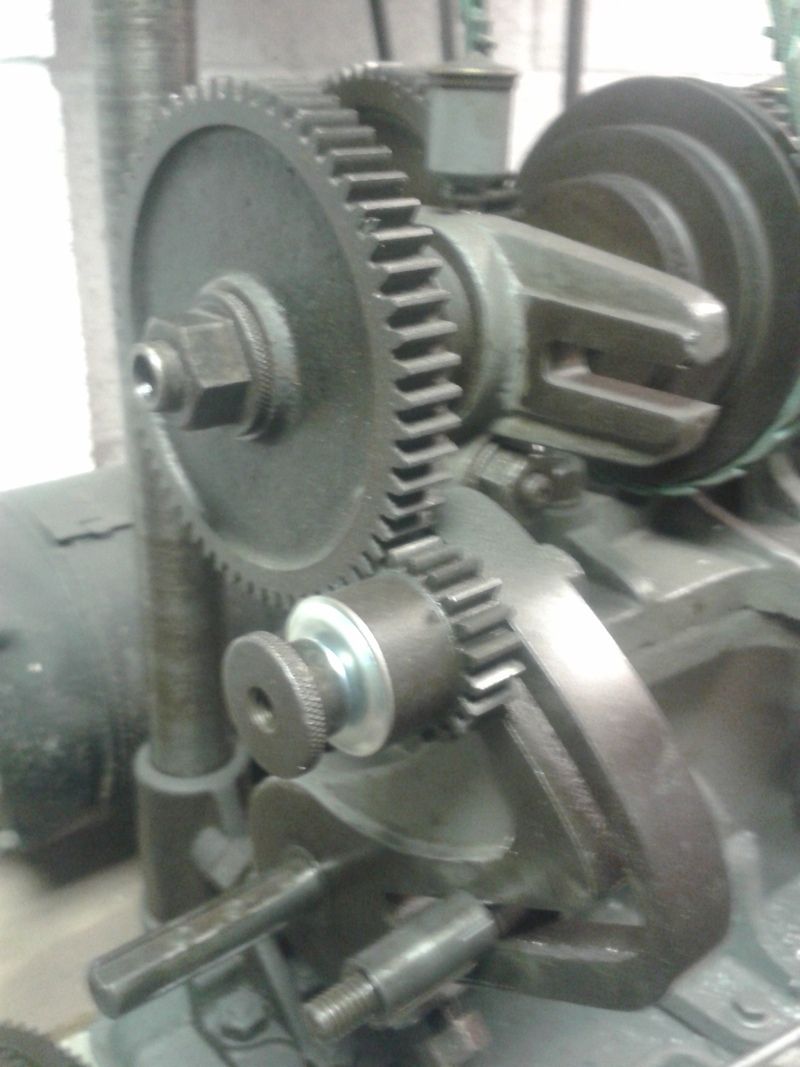 This can be swung out the way so I can rotate the spindle by 12 teeth and then swing the quadrant back to lock the spindle meaning I can use it as a dividing head. 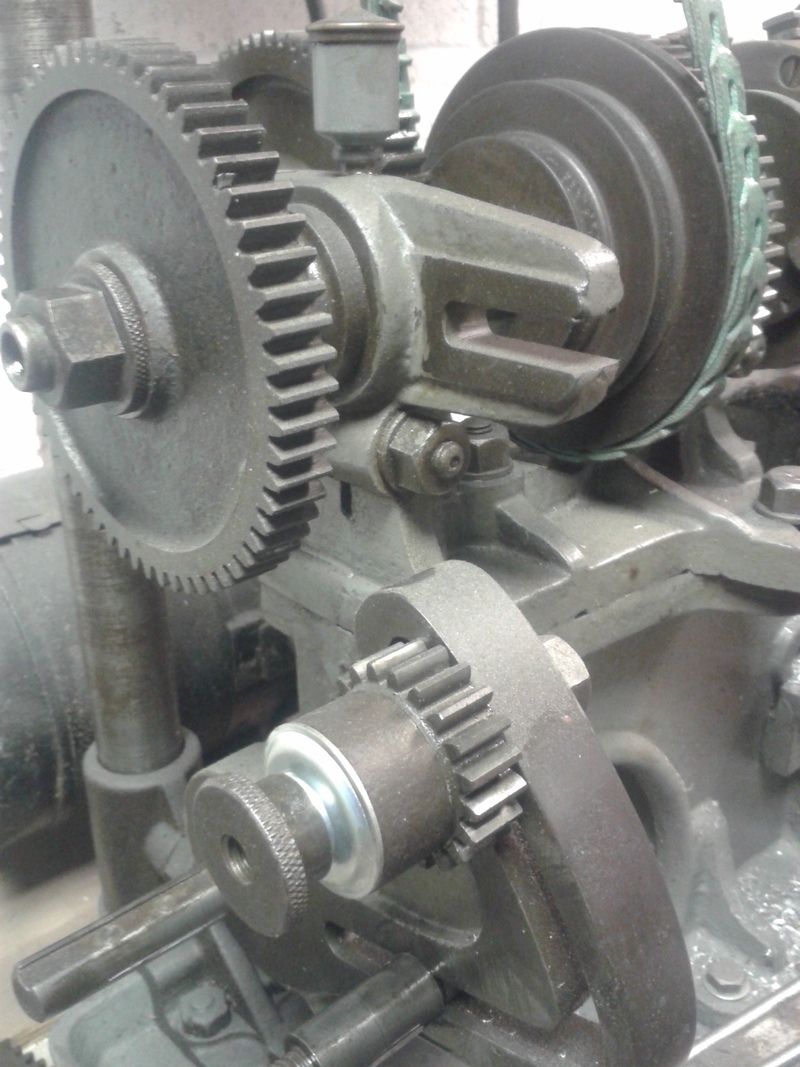 I pressed the tool into the hub and run it in and out a little to mark across the pcd line 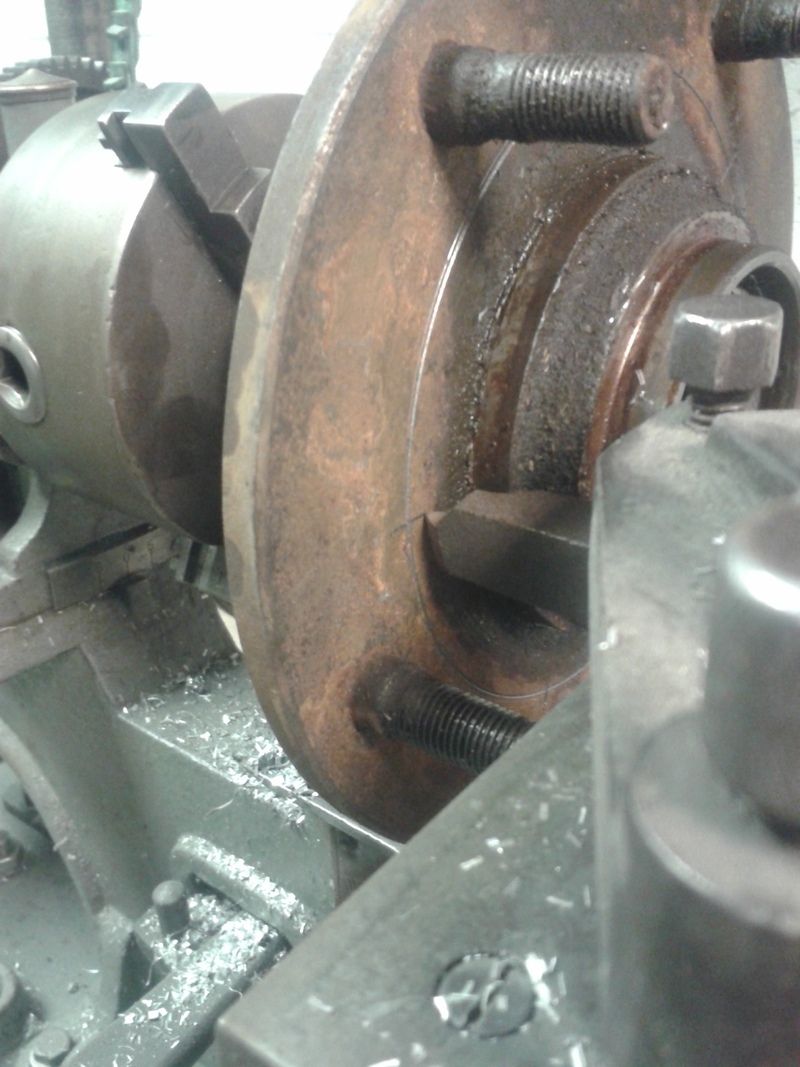 I put the new holes halfway between the old holes and the ribs on the back of the hub  so this 'should' be an accurate marking of 5x4.75". 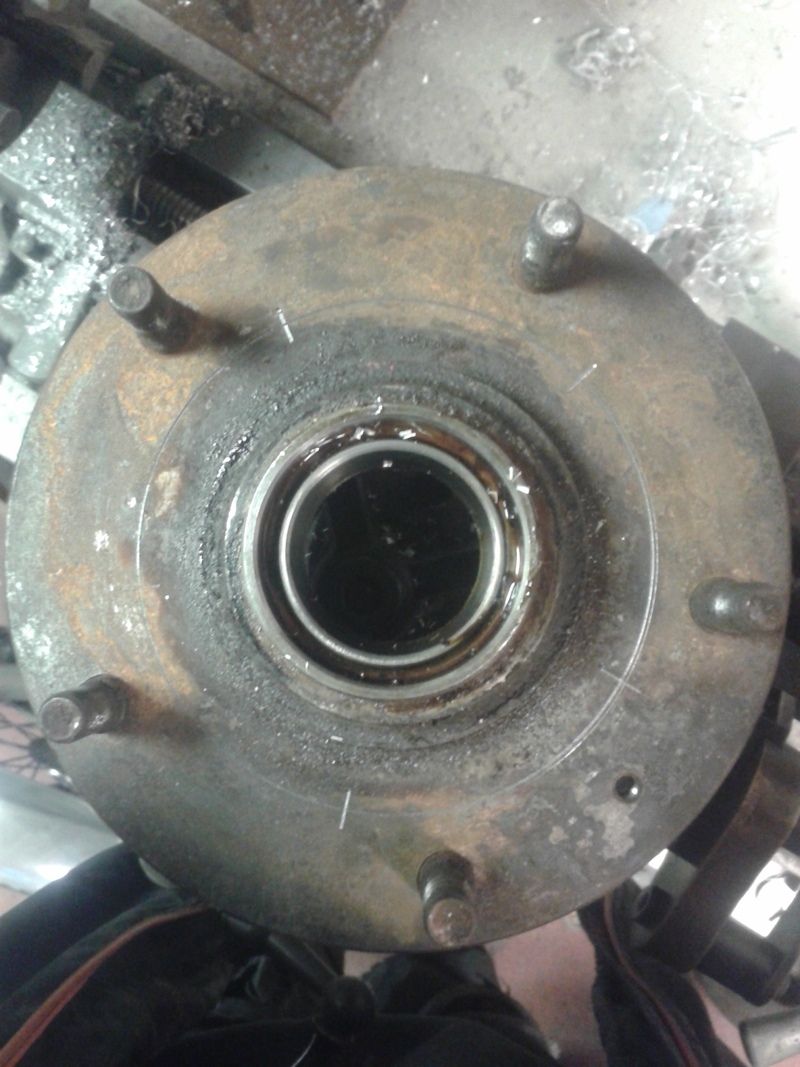 I could get another in there too  I eill then put it in my pillar drill (1950's kerry super 8 if your interested, 8 speed and back geared  ) and drill the new holes. 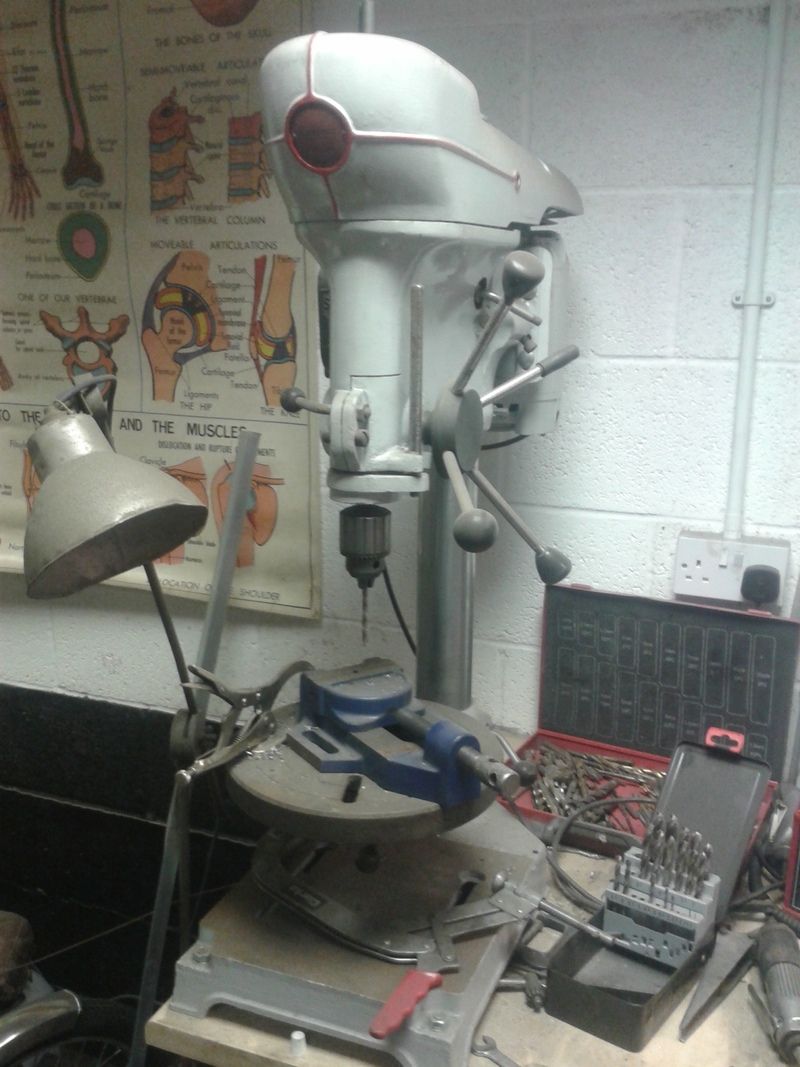 Once piloted ill bolt the drum to the hub and use the hub as a guide to drill the drums then use one of those drums as a guide to drill the second hub and the rear halfshafts. The drill head and table can be swung iff the end of the bench so hopefully ill get a halfshaft under it. Should all work ok. |
| |
|
|
|
|
|
Apr 24, 2016 19:54:44 GMT
|
|
|
| |
|
|
|
|
|
Apr 24, 2016 19:55:54 GMT
|
|
Cool, I like a bit of camper action. I would have that drill in my sitting room, just to look at.
|
| |
|
|
|
|
|
Apr 24, 2016 20:00:55 GMT
|
Cool, I like a bit of camper action. I would have that drill in my sitting room, just to look at. It was in my kitchen for quite a while when I got it as I stripped it and cleaned 60 years of grease, oil and dirt off it in the kitchen sink then re painted it. Its ace, very heavy duty, unstoppable In backgeared mode, and has no play to speak of. Table rotates like a rotary table and tilts to do angled holes. I can bolt something to the table and get every single mm of table underneath the drill bit. I used it to drill 80 odd holes in my motorbikes brake discs  |
| |
|
|
|
|
|
Apr 24, 2016 20:07:38 GMT
|
|
I scrapped the bigger brother of your Drummond about 18 months ago....
It came out of a long since abandoned blacksmith's workshop and the lads dropped it at my house with their hiab.
It was a similar vintage to yours, but it turned out to be in really bad shape - someone had manage to strip some teeth off the main gears unfortunately.
I couldn't even give it away, so I just ended up breaking it down and taking it over the bridge. It weighed almost 3/4ton - my poor (company) Mondeo estate looked less than impressed with it all in the back!
|
| |
|
|
|
|
|
Apr 24, 2016 20:15:22 GMT
|
|
The bigger ones arent as sought after.
Mine is mega early, and quite rare. Was onwed by an old model engineer and has obviously been worked on. The only play is in the half nut on the main screw but they have been replaced at some point so not that bad. When I have more experience ill make a new nut and leadscrew.
The cross slide isnt original, he has managed to machine and fit a far better set up that standard on to it.
I have a 3 speed gearbox with it and a clutched and braked 40's industrial singer sewing machine motor.
Its great.
I had to get the spindle hard chromed and reground but it only cost me £60 to get done and eliminated all play in the headstock.
I'm still learning and reading old books at the moment though. Lots to learn.
|
| |
|
|
melle
South West
It'll come out in the wash.
Posts: 2,011
|
|
Apr 25, 2016 21:11:04 GMT
|
|
Wow, beautiful machines.
|
| |
www.saabv4.com'70 Saab 96 V4 "The Devil's Own V4" '77 Saab 95 V4 van conversion project '88 Saab 900i 8V
|
|
sb
Part of things
 
Posts: 725 
|
|
Apr 26, 2016 12:18:49 GMT
|
|
So after seeing the photoshop thread and the panel beating I've finally read your actual build! Some nice work going on so I'm looking forward to seeing where this goes.
|
| |
|
|
|
|
|
|
|
Apr 26, 2016 14:31:56 GMT
|
Thanks  Currently knocking back some high build primer on the bonnet and covering everything in dust! Including my wifes half built cafe racer which she's not best pleased about LOL. I'm also being incredibly indecisive about wheels so have halted progress on redrilling. I just cant decide if to go small and wide and extend the arches (if so, 14's? 15's? Or 14 front 15 rear) or if to go 17/18 and go for more of a modern look (doubt ill achieve tuck). Alot depends on how low I can go without raising the floor and notching the chassis. I'm sort of flitting about at the moment working on various bits while I let the final plan form itself. Considering the original plan was a panel van in jps colours with a lotus twin cam, I'm already flying blind. The current photoshop is favourite but by no means definate. |
| |
Last Edit: Apr 26, 2016 14:53:58 GMT by VW
|
|
|
|
|
Apr 29, 2016 16:29:12 GMT
|
I finished the bonnet ive been working on (see linked thread earlier) so put a coat of black on to protect it. 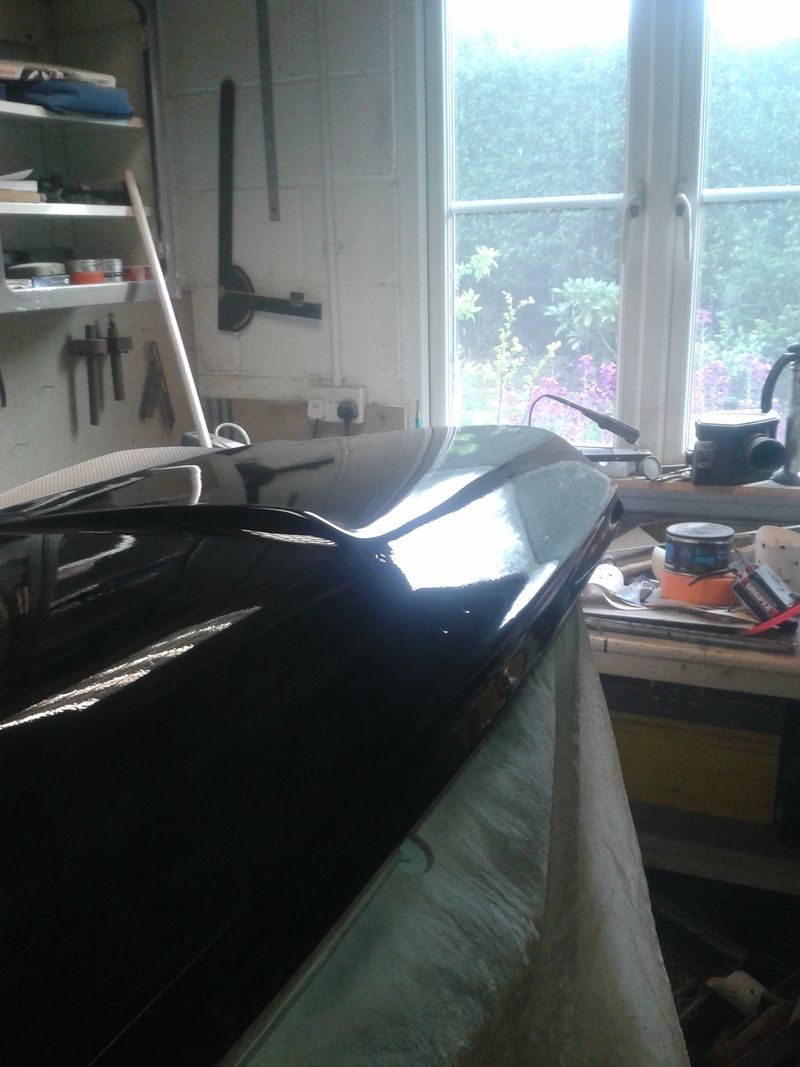 I also just picked up a 2mx1m sheet of steel so I can start doing the welding this weekend if the rain/snow stays away. £20+ vat. Not bad. In other news, I'm now considering just banding out the some stock steels and spending the wheel money on some nice bf goodrich radial t/a's. I thought black n blue, low, wide 14" steels painted light grey with big white letter tyres:) All subject to change though! |
| |
|
|
|
|
|
Apr 29, 2016 16:38:17 GMT
|
Also did the badges. I did consider nosing and decking but for some reason I want to keep the badges. When flatting the letters back I exposed some copper. I thought they were just ally but turns out there plated. Never mind. 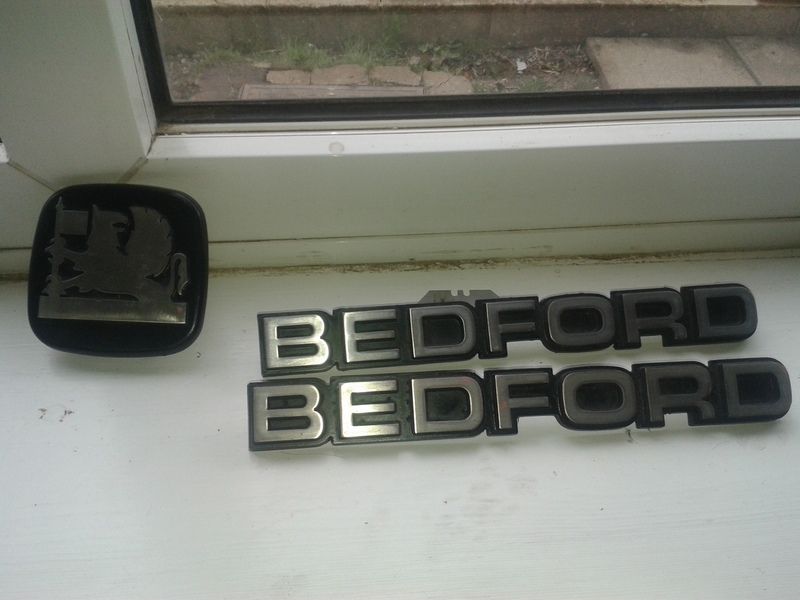 |
| |
|
|
|
|
|
Apr 29, 2016 17:41:47 GMT
|
|
Just bookmarked this , totally different camper to be rebuilding and I admire the work you are doing, look forward to seeing more, good luck with it atb Danny
|
| |
Fraud owners club member
2003 W211 Mercedes E class
1989 Sierra sapphire
1998 ex bt fiesta van
|
|
|
|
|
Apr 29, 2016 17:52:11 GMT
|
Wow, bookmarked! I'm honoured  Ive not even really done anything to it yet LOL. Might be an unusual option to modify these days as there are none left, but the cf vans were the backbone of 70's uk van culture! I'm going for more of a early/mid 90's 'street machine' style though with a touch of modern and a touch of muscle car. |
| |
Last Edit: Apr 29, 2016 17:52:42 GMT by VW
|
|
|
|
|
|
|
Weathers been good and ive had a few bits of time so made a start on the rot. This van is good, very good, but still rusty. Started at the back, don't know why. Rear valance 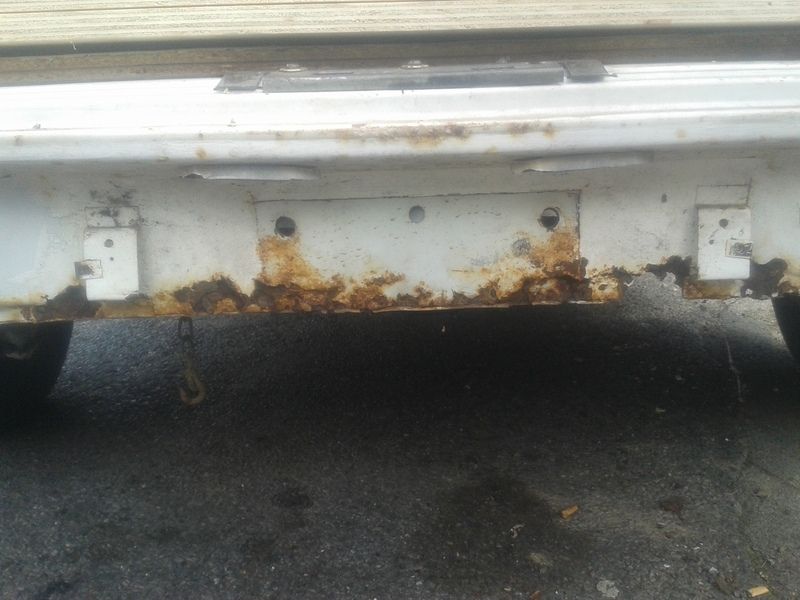 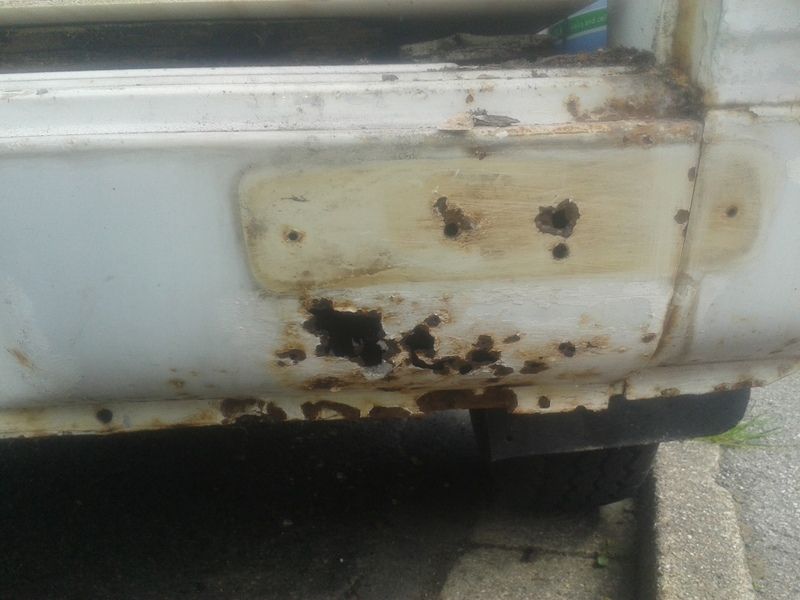 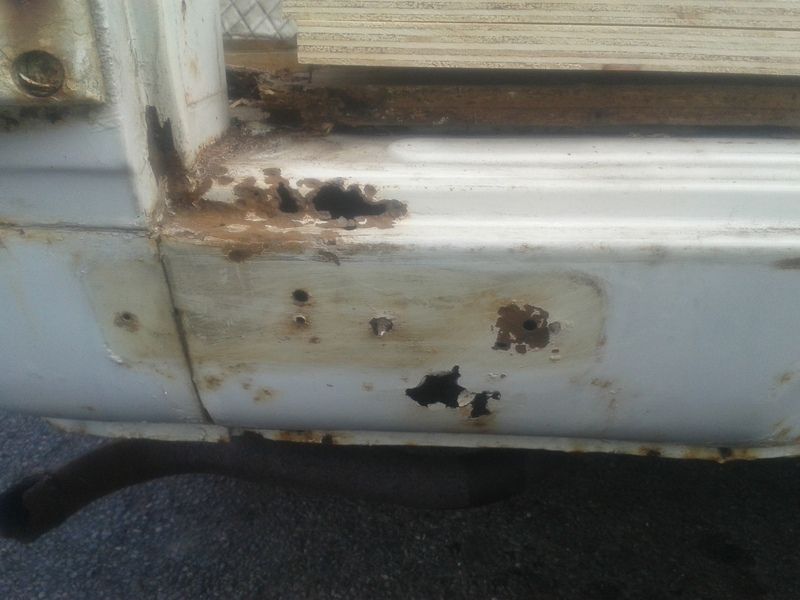 |
| |
|
|
|
|
|
|
|
Bad pics but underneath and all inner pannels are good 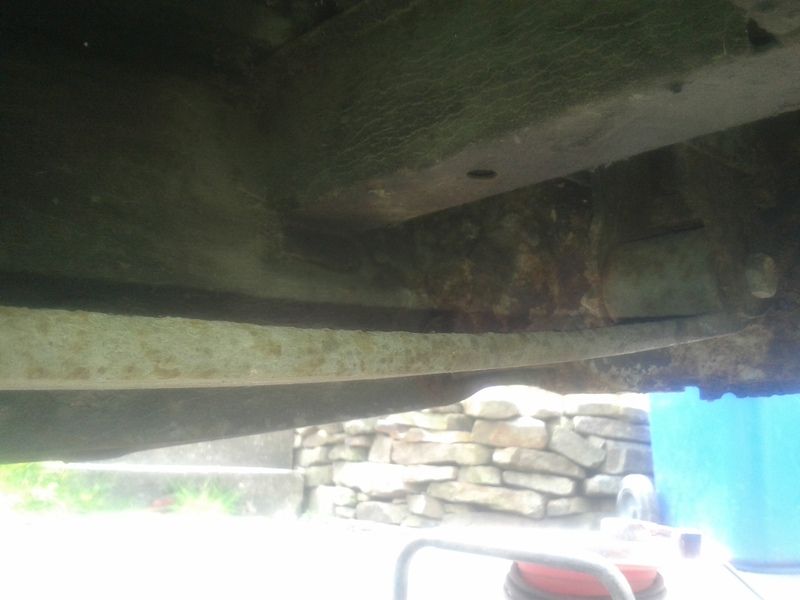 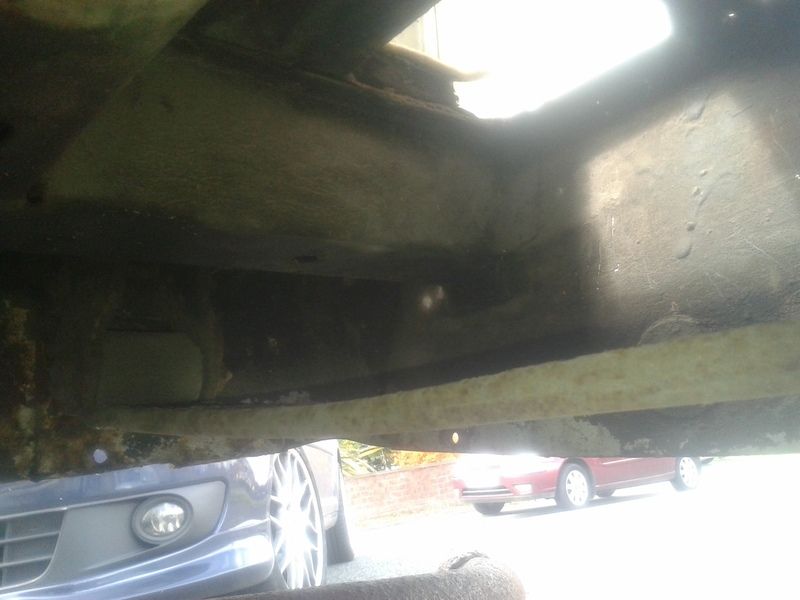 No interim pics, but both valance ends done and inner pannel in the middle. 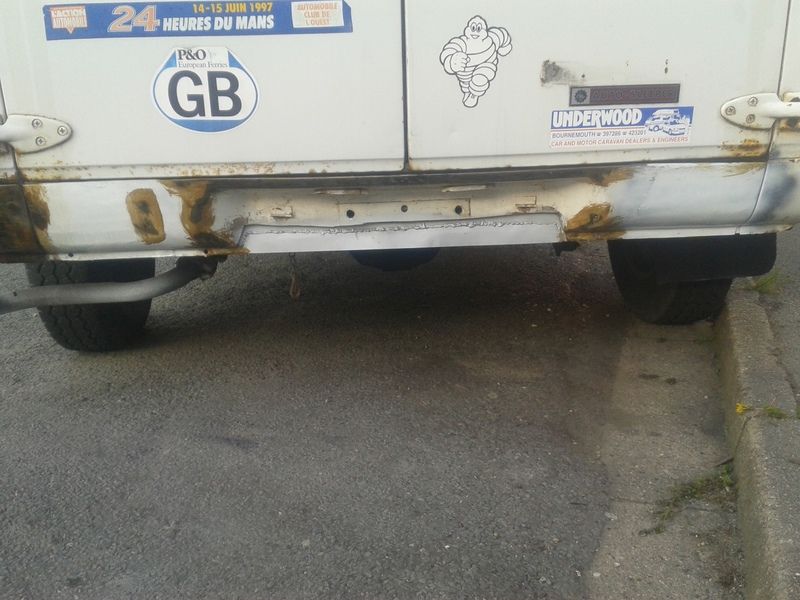 Center section has been made and will hopefully go in tomorrow. It looks rough as ive just ground, etch primed and cheapo rattled it for now to keep the weather off. Ill fill, seam seal and paint the van in sections so its all tidy and white then use it for a bit while I sort out the colour change. Edit I just looked at these pics and noticed the drivers side of the valance doesnt follow the bottom of the rear door. Looking at the rot pic it never did. Valance has never been replaced so it must have left the factory like that. I didnt replace the top or edge so nothings moved. Its covered by a sill step trim plate anyway. |
| |
Last Edit: May 4, 2016 18:36:33 GMT by VW
|
|
|
|
|
|
|
So I then looked at the passenger rear quater. bit of filler in it and a few pinholes and surface rust so I wire wheeled it all out, welded the pin holes and treated the bare metal. Ill repair the corners in the wheelarch next. 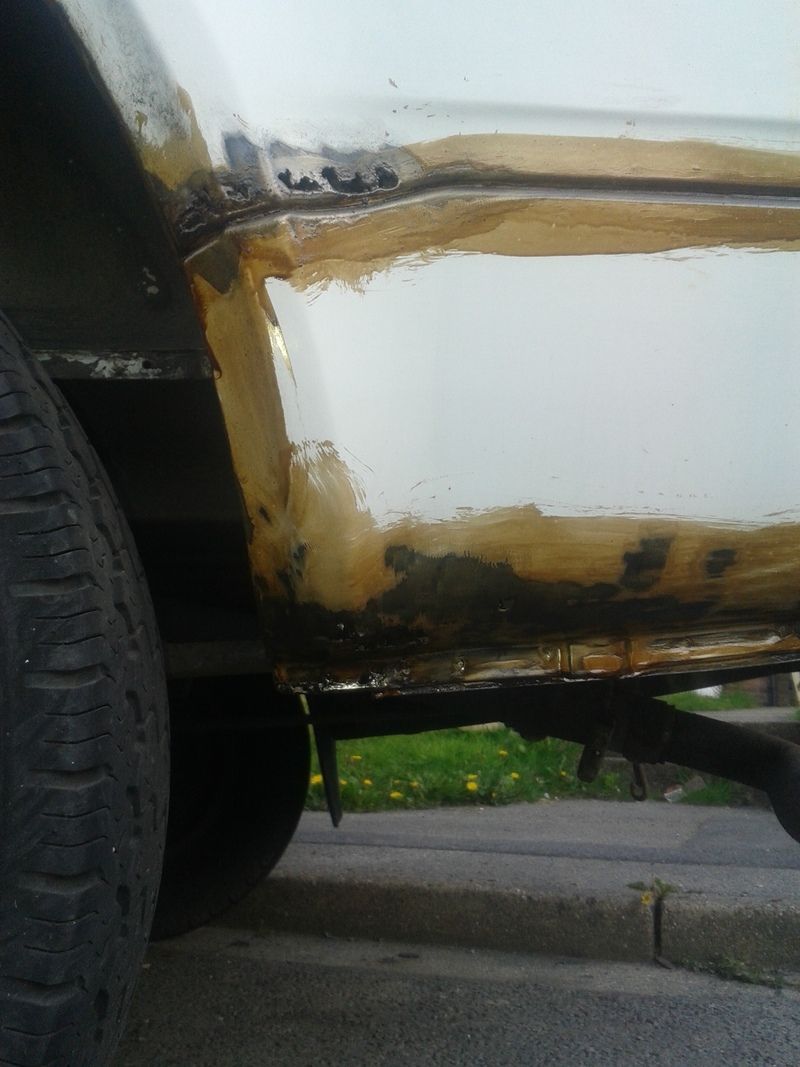 Inside. these corners are rear quater and sill where they meet the arch and wheel tubs. 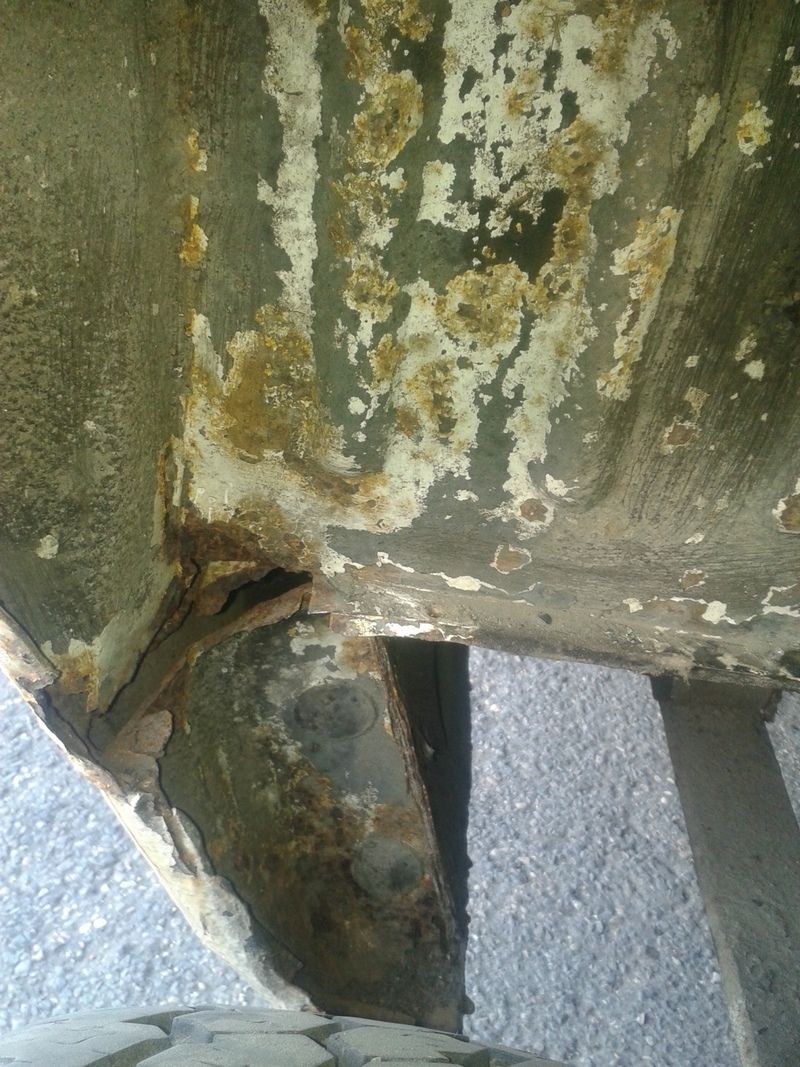 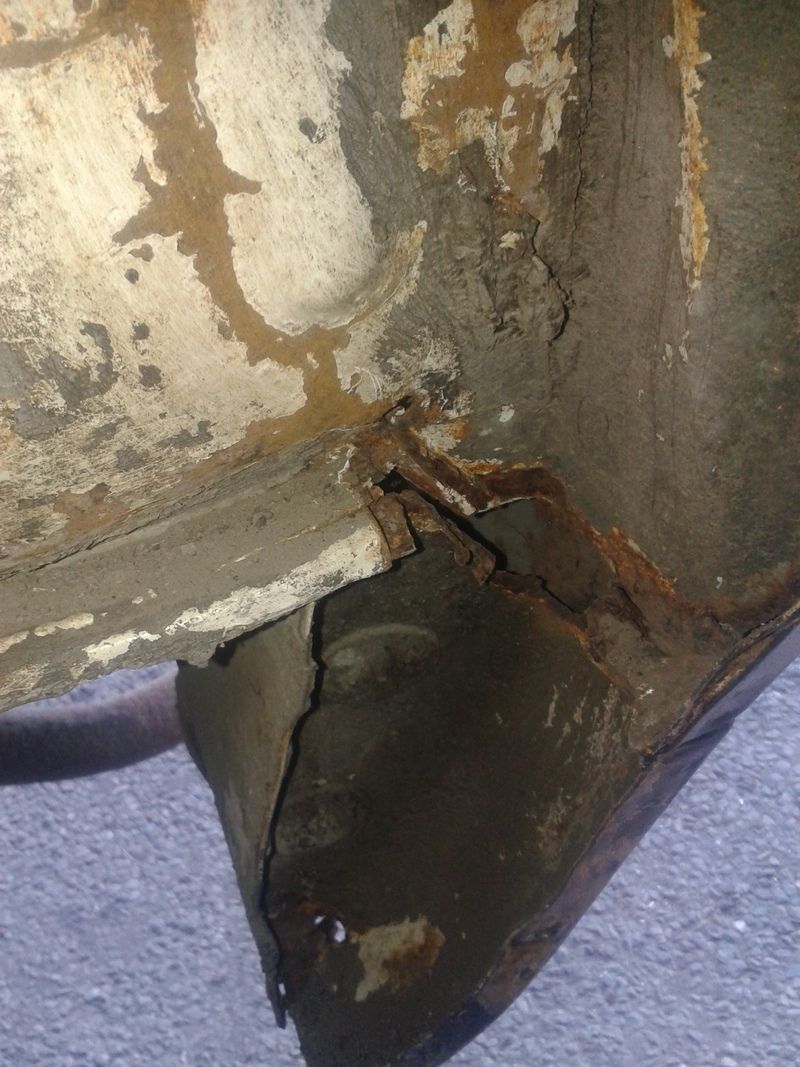 There a little grotty in the corners but the holes are almost factory. The panels never seemed to meet and were full of seam sealer. The sealer had gone hard, started cracking out and hence the corners are rusting. A couple of afternoons and the weekend will sort all this out then ill drop the petrol tank and start on the other side. So far neighbours seem ok with grinding, cutting and welding on the roadside LOL. |
| |
|
|
|
|
|
|
|
|
Don't know how I missed this. You have some cool tools. I had a Drummond round bed that I rescued from a skip a couple of years back. Went to a good home. I like proper like tools !
|
| |
|
|
|
|
|
|
|
Don't know how I missed this. You have some cool tools. I had a Drummond round bed that I rescued from a skip a couple of years back. Went to a good home. I like proper like tools ! Thanks. Ive slowly been gathering tools all my life, like we all do, but I built my workshop over the last couple of years so have been buying more stuff. None of it was expensive, drill was £50 (proper bargain) but I had to go 200 miles each way to get it. Lathe was £300 and was pupe indulgence but its art to me as much as it is a machine tool. I have a cool old 60's kennedy power hacksaw too. |
| |
|
|
|
|


