Darkspeed
Club Retro Rides Member
Posts: 4,846
Club RR Member Number: 39
|
|
Oct 17, 2022 21:00:59 GMT
|
Made a second mount and found some nylon that will do as spacers. Only tacked together at the moment in case they need any adjustment. 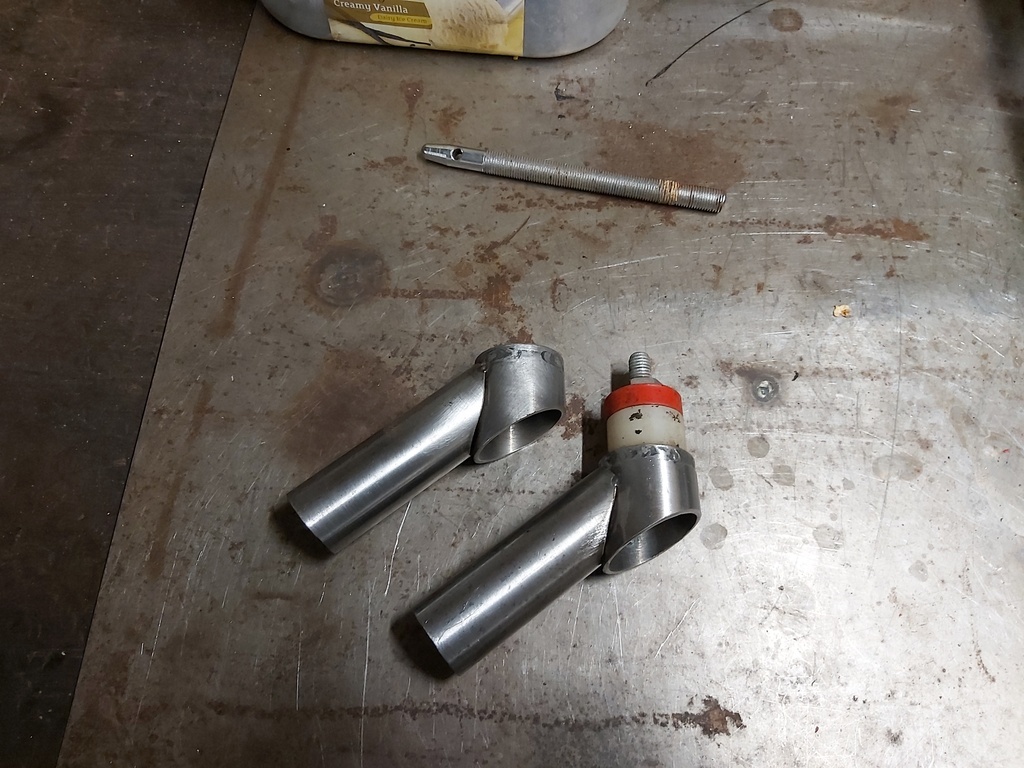 Need to go and buy some masking tape as I cannot find any anywhere Wheels and tyres should be getting done this week. |
| |
Last Edit: Oct 17, 2022 21:01:44 GMT by Darkspeed
|
|
|
|
Darkspeed
Club Retro Rides Member
Posts: 4,846
Club RR Member Number: 39
|
|
Oct 19, 2022 21:01:34 GMT
|
Picked up a few rolls of masking tape ready for marking up prior to drilling the shell for the front indicators and the engine cover pin mounts. 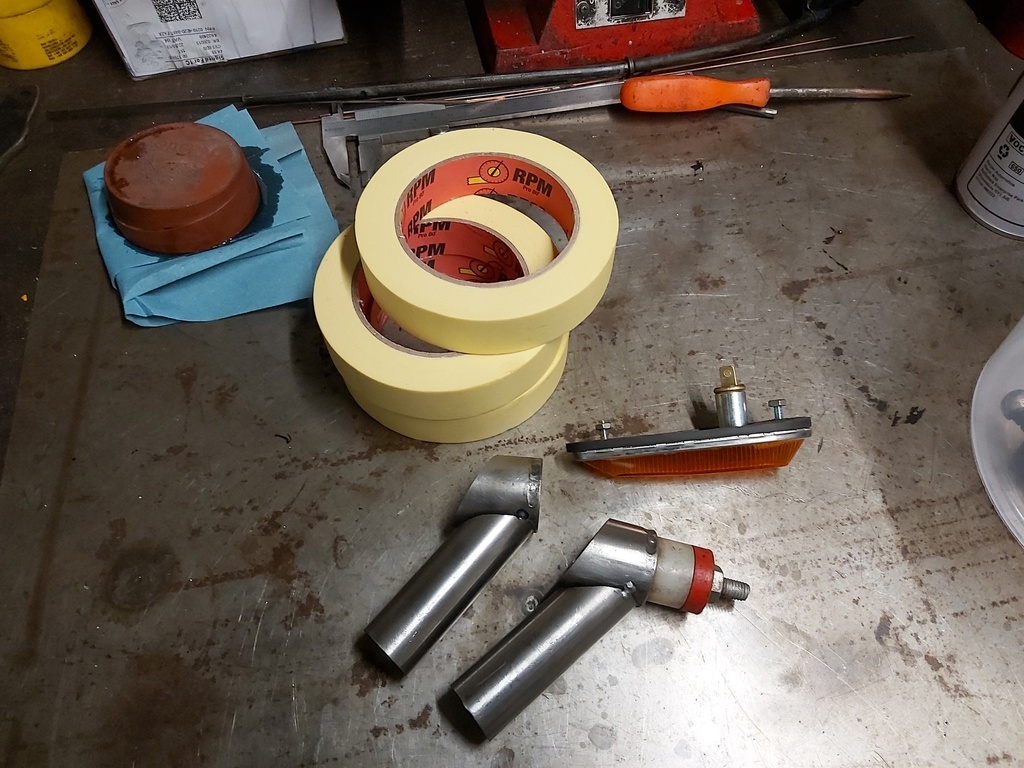 We also had a full pause at the top of the drive followed by the disapproving slow head shake from someone who lives in the street today- Ooops - guilty chuckle. The lad had brought one of his mates around to show him the Stratos and as I need a gallon of petrol for the lawn mower I did a deal that if they went and filled the can I would make the Strat let out some noise in return. Win win win- we all get to chuckle like teenagers bent over a flipped engine cover listening to V6 a howl, annoy an old person and I get free petrol for the mower. My neighbour came out, told the boys that I am building the car for her and it needs to be finished by Xmas - she loves the way it sounds like a Ferrari - LOL |
| |
|
|
Darkspeed
Club Retro Rides Member
Posts: 4,846
Club RR Member Number: 39
|
|
Oct 22, 2022 19:33:48 GMT
|
No making noise today - sulky face. Marked and drilled the body for the side repeaters - being a Q I do not need to have them fitted but I love the heritage of the Fulvia / Ferrari teardrops 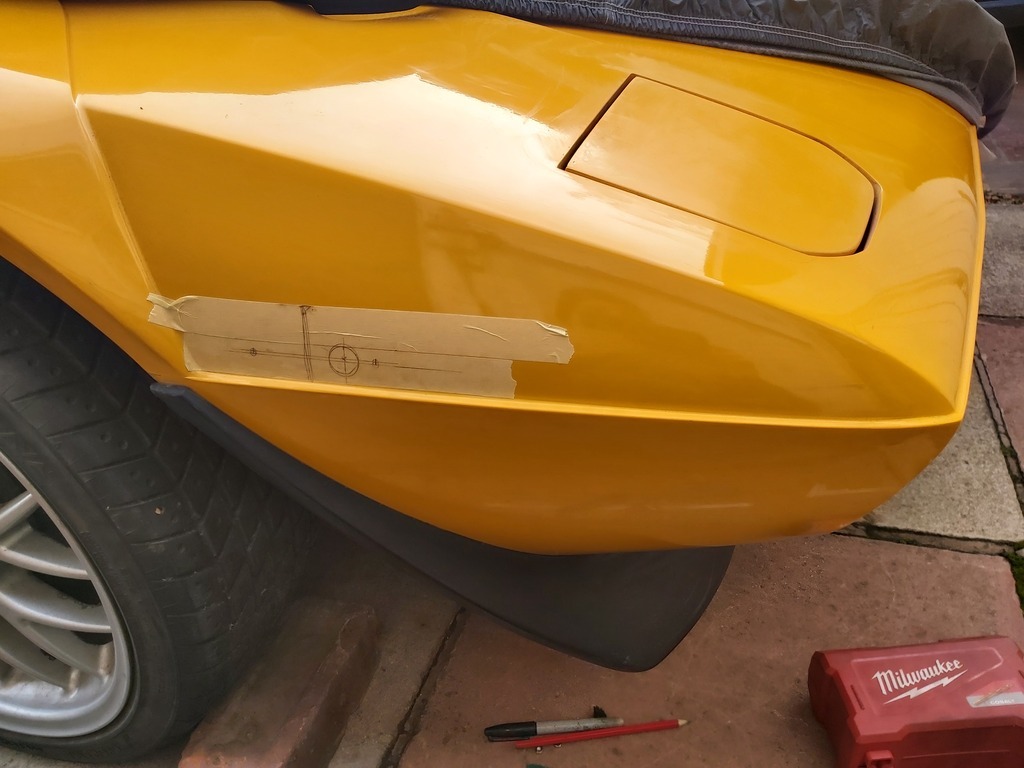 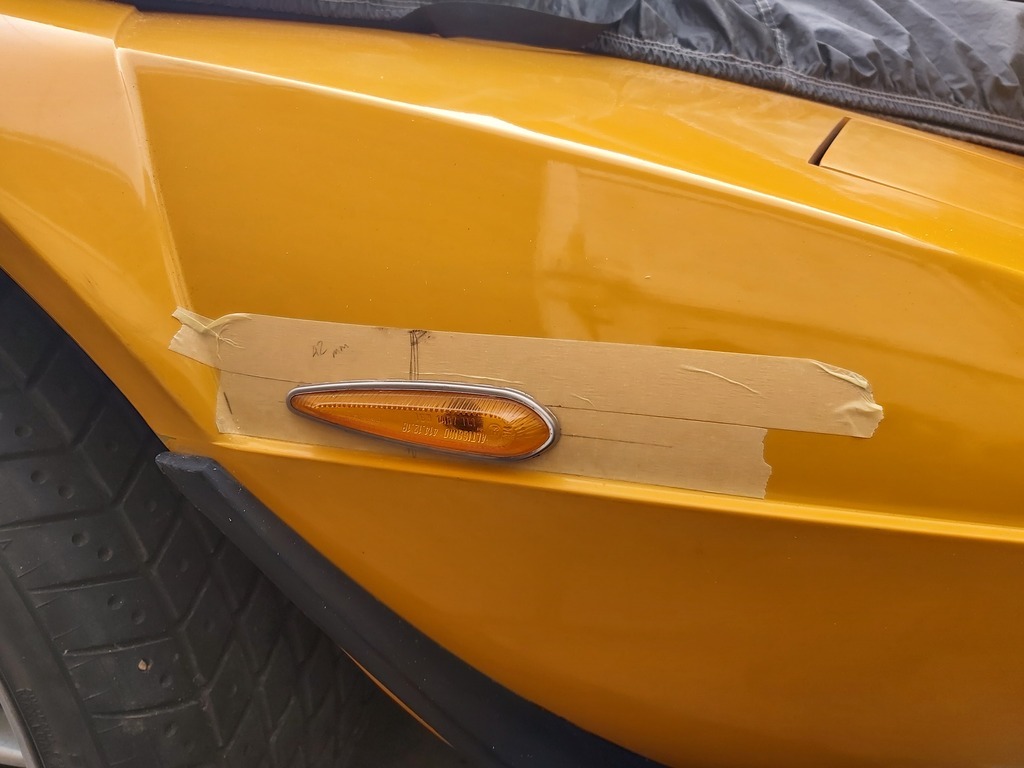  Then set to marking for the engine cover pin position. Not going to be easy for alignment as the pins need to be vertical when looking from the back of the car but follow the slope of the cover when looking at the side. 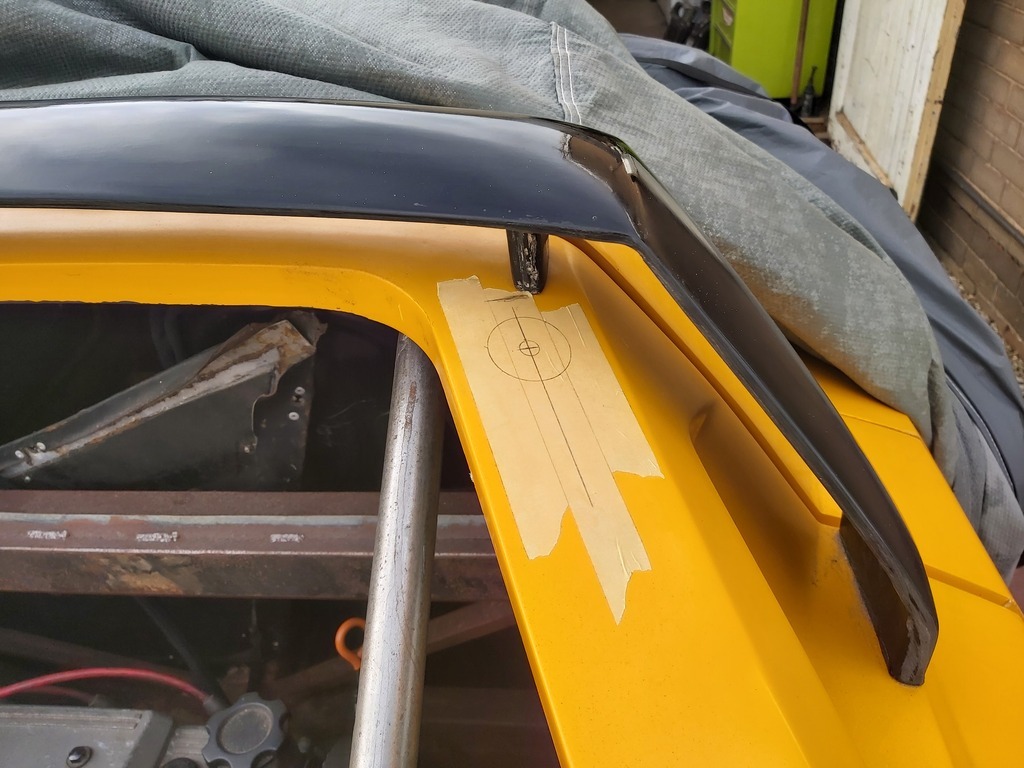 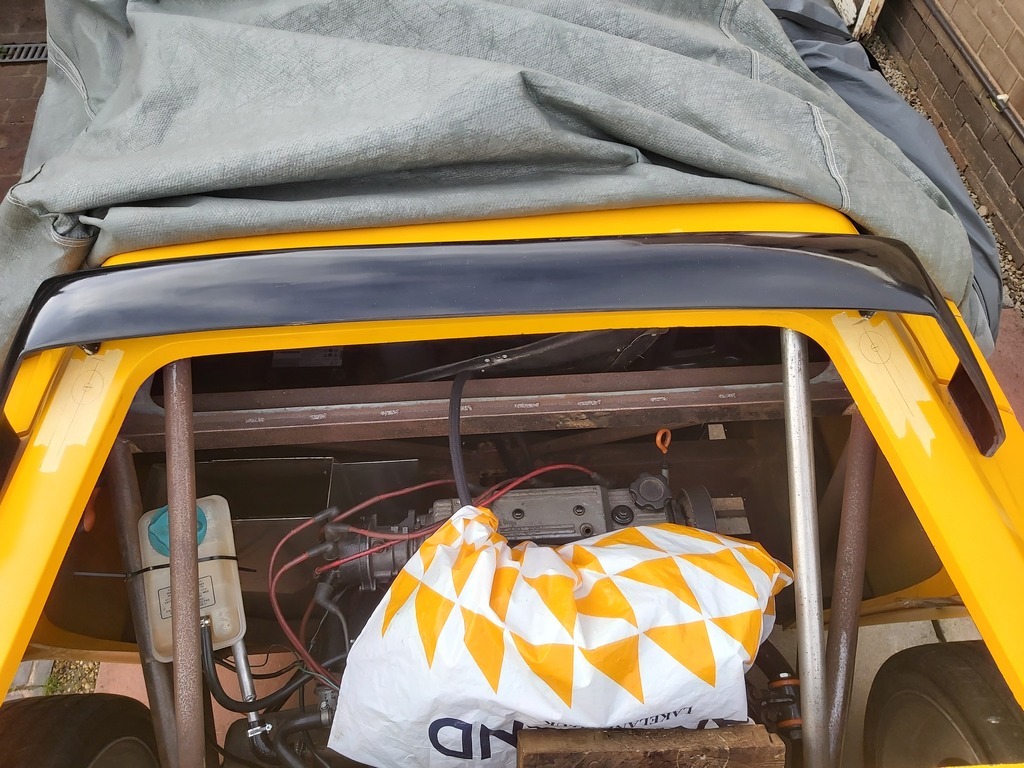 Project for sale if someone fancies one - over on the SEC forum  I also found these two pictures on www.lanciastratos.com/en/photo where there are some great images but these two that have captured the expressions are just priceless. This one I call - "have you washed that" 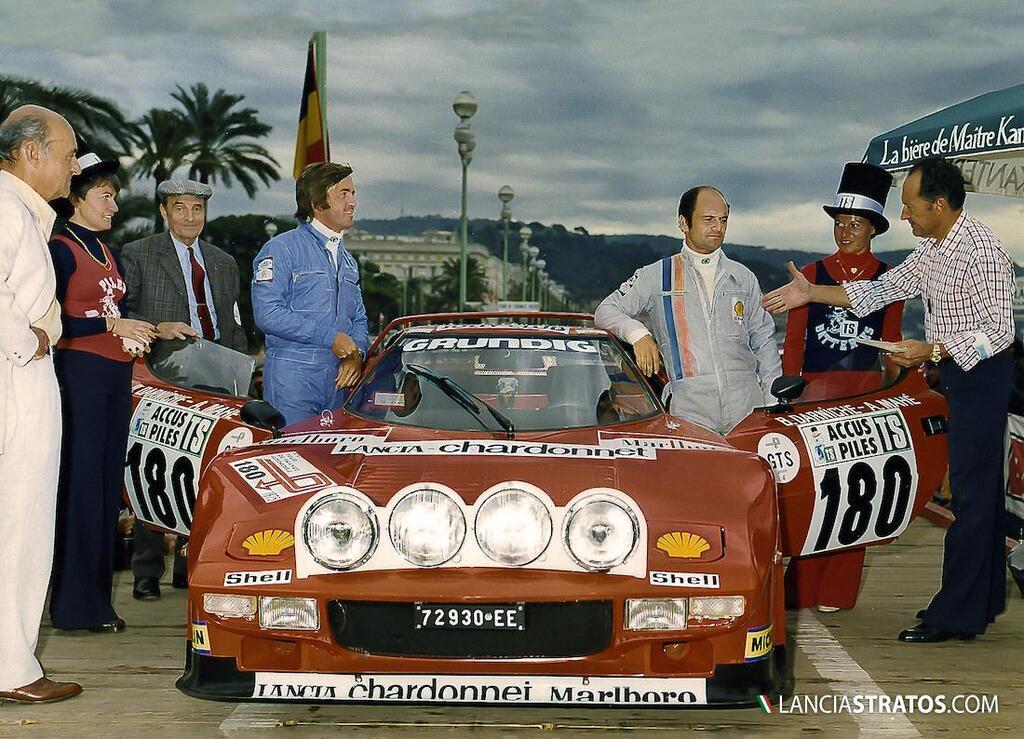 And this one "This f'ing watch better still be on Italian time"  |
| |
Last Edit: Oct 23, 2022 8:21:26 GMT by Darkspeed
|
|
|
|
|
Oct 22, 2022 21:31:54 GMT
|
|
Wow. First time I've seen a red Chardonnet Stratos! Being sort of similar events, maybe the works team lent them a Giro one for the Tour (that deep front dam...) and simply plastered some stickers on it?
Nice RAC picture too (I suppose it is the RAC?). Munari? looks suitably worried.
Those were the days. Lovely.
Strange but true: many years later one of the sponsors for the Chardonnet team was a company specialising in toupees, which Nanard Darniche duly wore.
|
| |
Last Edit: Oct 22, 2022 21:33:00 GMT by Cisitalia
|
|
Darkspeed
Club Retro Rides Member
Posts: 4,846
Club RR Member Number: 39
|
|
|
|
Strange but true: many years later one of the sponsors for the Chardonnet team was a company specialising in toupees, which Nanard Darniche duly wore. He dropped a like on one of my posts on the Litton rebuild on Instagram - he has more hair now than he ever had! - I think mine left me as it knew that I was always going to be too busy to look after it properly. |
| |
|
|
|
|
|
Oct 23, 2022 10:09:34 GMT
|
|
I know what you mean,
I think my forehead and my fringe have fallen out lol,
Nigel
|
| |
BMW E39 525i Sport
BMW E46 320d Sport Touring (now sold on.)
BMW E30 325 Touring (now sold on.)
BMW E30 320 Cabriolet (Project car - currently for sale.)
|
|
Darkspeed
Club Retro Rides Member
Posts: 4,846
Club RR Member Number: 39
|
|
Oct 27, 2022 13:23:37 GMT
|
If there is anyone reading this that is considering the above project on the SEC pages better act fast with a good offer as I have hopefully convinced the owner to hold back on selling it and see if over the winter we can get it past the project block it hit and get the momentum going again on it. Collected the wheels today. If being critical we are at the limit of acceptable stretch on the rears but I knew it would be close with the 255's on the 10's but the wider wheels they give me the option of going to 285's or wider in the future for now they look peachy  The wheel studs are too long on the front and a little too short on the back so will need to be addressed. However the wheel offset, sizes and colour has nailed it for me and is how I'd hoped it would be. 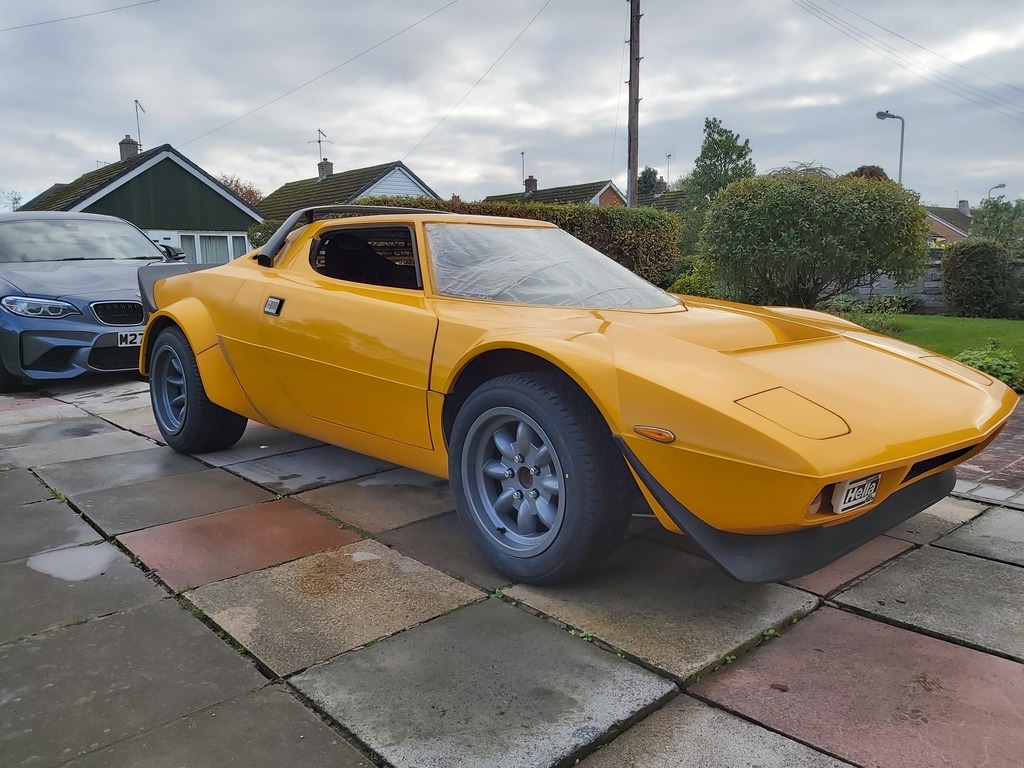 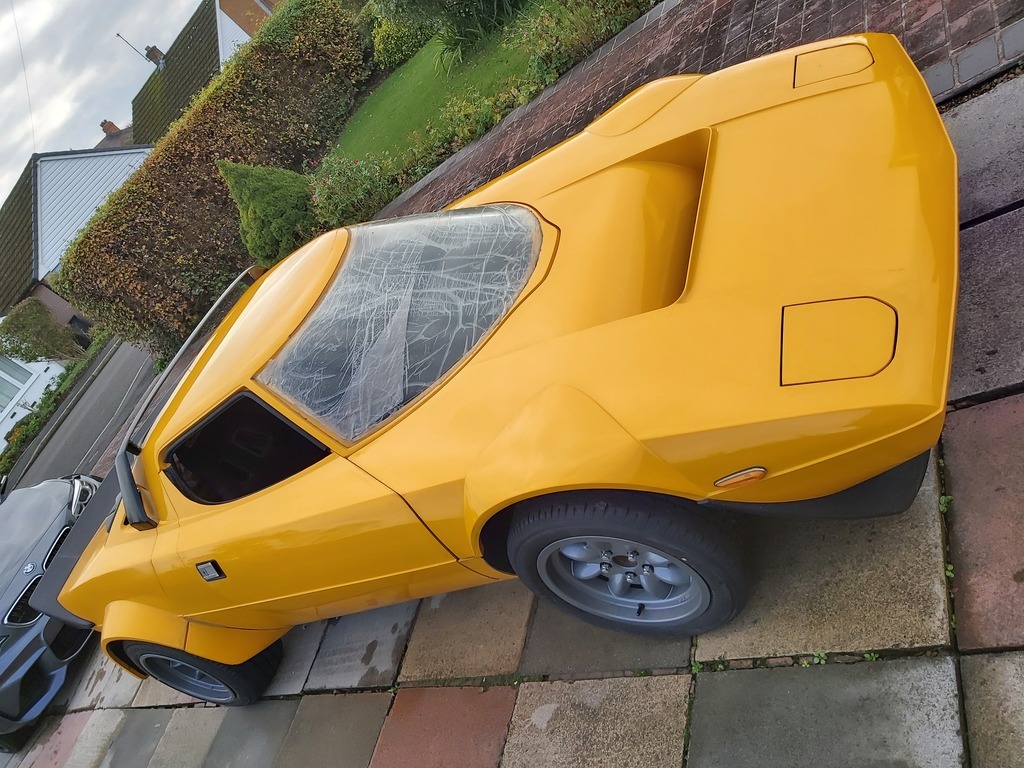   The discs that looked far too small now look about right  And the 255 just about manage to provide enough fill at the rear.  Best get on with those rear clam pins |
| |
Last Edit: Oct 27, 2022 13:28:14 GMT by Darkspeed
|
|
stealthstylz
Club Retro Rides Member
Posts: 14,928
Club RR Member Number: 174
|
|
Oct 27, 2022 14:12:00 GMT
|
|
That looks great, you just need to machine yourself a forestry key and go play on the tracks in the dark lol.
|
| |
|
|
teaboy
Posted a lot
 Make tea, not war.
Posts: 2,084
|
|
Oct 27, 2022 18:05:53 GMT
|
|
It's looking pretty good now, DS.
|
| |
|
|
Darkspeed
Club Retro Rides Member
Posts: 4,846
Club RR Member Number: 39
|
|
|
|
That looks great, you just need to machine yourself a forestry key and go play on the tracks in the dark lol. I will leave that for one of those rally replica types - just dry tarmac for me. It's looking pretty good now, DS. The JCB Fastrac look is not everyones cup of tea but it pleases me. |
| |
|
|
|
|
|
Oct 28, 2022 17:38:31 GMT
|
|
Oh My! Those wheels look sharp against the yellow!
|
| |
74 Mk1 Escort 1360, 1971 Vauxhall Victor SL2000 Estate.
|
|
Darkspeed
Club Retro Rides Member
Posts: 4,846
Club RR Member Number: 39
|
|
|
|
Carried on with the clam mounts by taking a brave pill and drilling into my pristine rear bodywork.  Next was to make up an alignment jig to match to those holes. 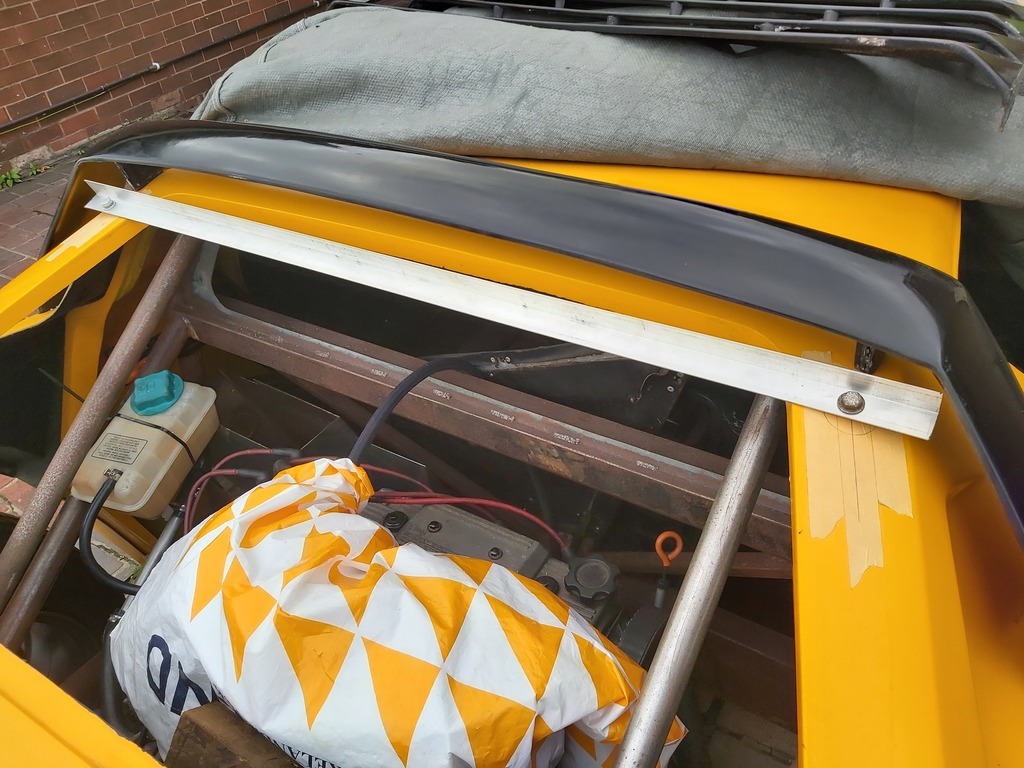 And then fix the mounts to the jig 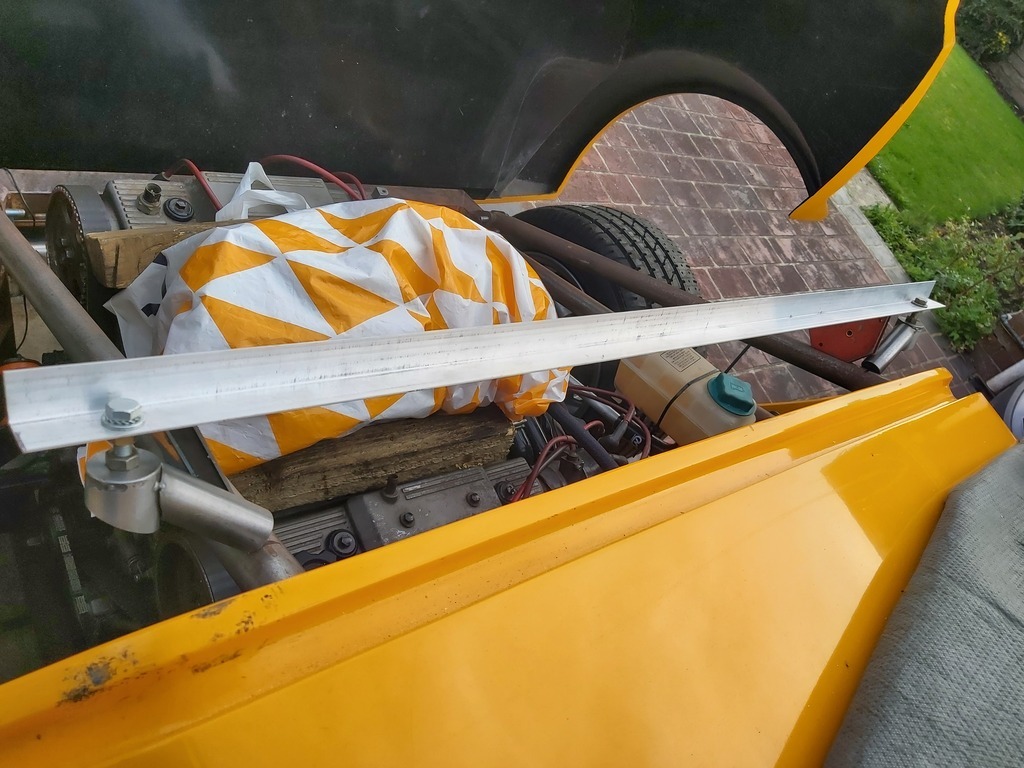 Make a mark as well as I can where the mounts will go and also measure the differences between the angle of the bodywork - 22 degrees and the angle of the back stay tube - 32 degrees. 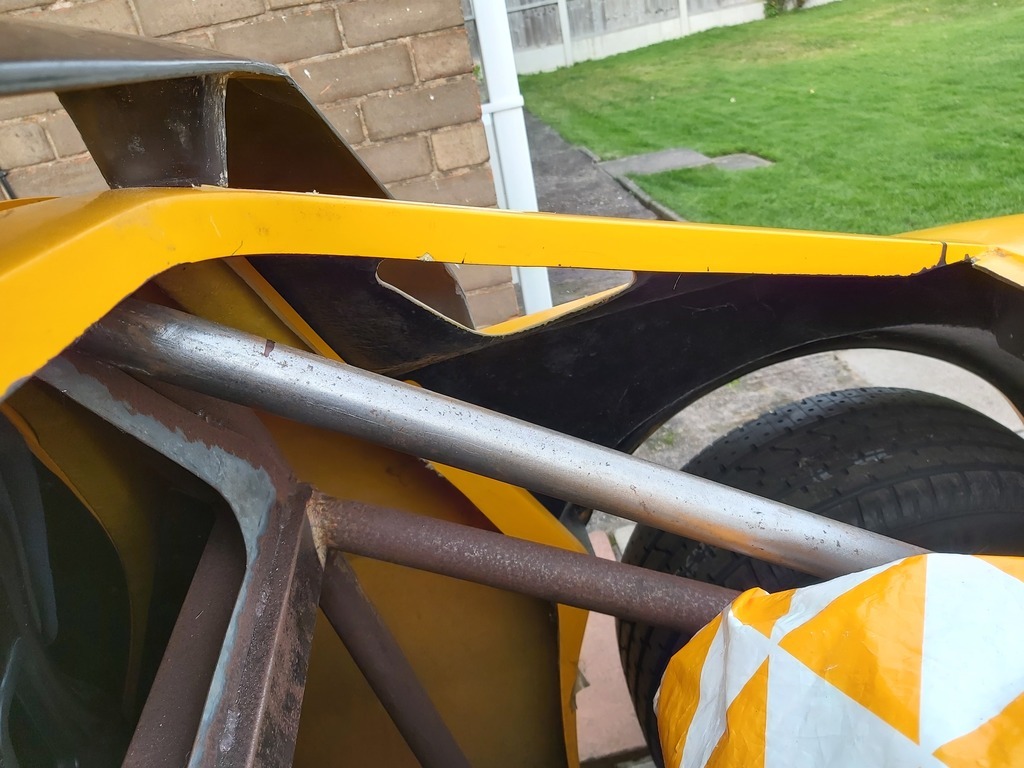 Next job is to make the notches in the 25mm tube for the 32mm backstay at an angle of 10 degrees - I foresee some quite wide gaps and bridging tacks in my future.... But before that I need to spend time adjusting and aligning the bodywork. I may in the future machine up something like these. Ooops not like that - that was something I found when searching for something suitable cake for teaboy and was always rather partial to Diana Rigg. No the alignment cones used here. I was directed to the two vids in this series by Cisitalia and they are really informative about the detail in components of an original Strato's And for those without the time to watch the vid the alignment cones look like this 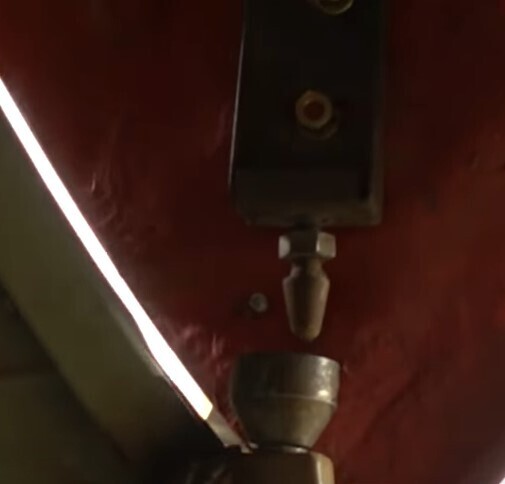 Fnar Fnar... |
| |
Last Edit: Oct 29, 2022 8:52:02 GMT by Darkspeed
|
|
Darkspeed
Club Retro Rides Member
Posts: 4,846
Club RR Member Number: 39
|
|
Oct 30, 2022 22:29:28 GMT
|
Not much to report on - ran a hole saw through the clam mounts at the required angle - was hoping for a break in the rain today to try a fit up but that did not happen so I have cleared the garage to make space to get half the car in so I can work when its not so nice - trouble is that the back end is sooooo wide its still not and easy thing to work on. 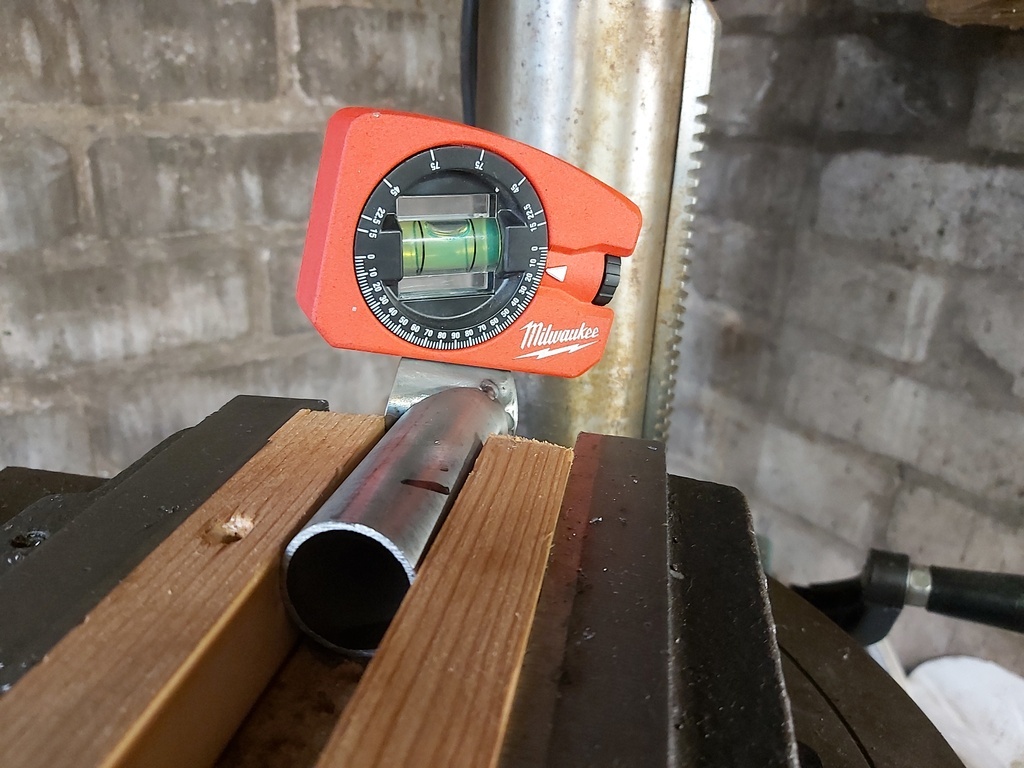 Parts of one of the driveshafts got a coat of paint though 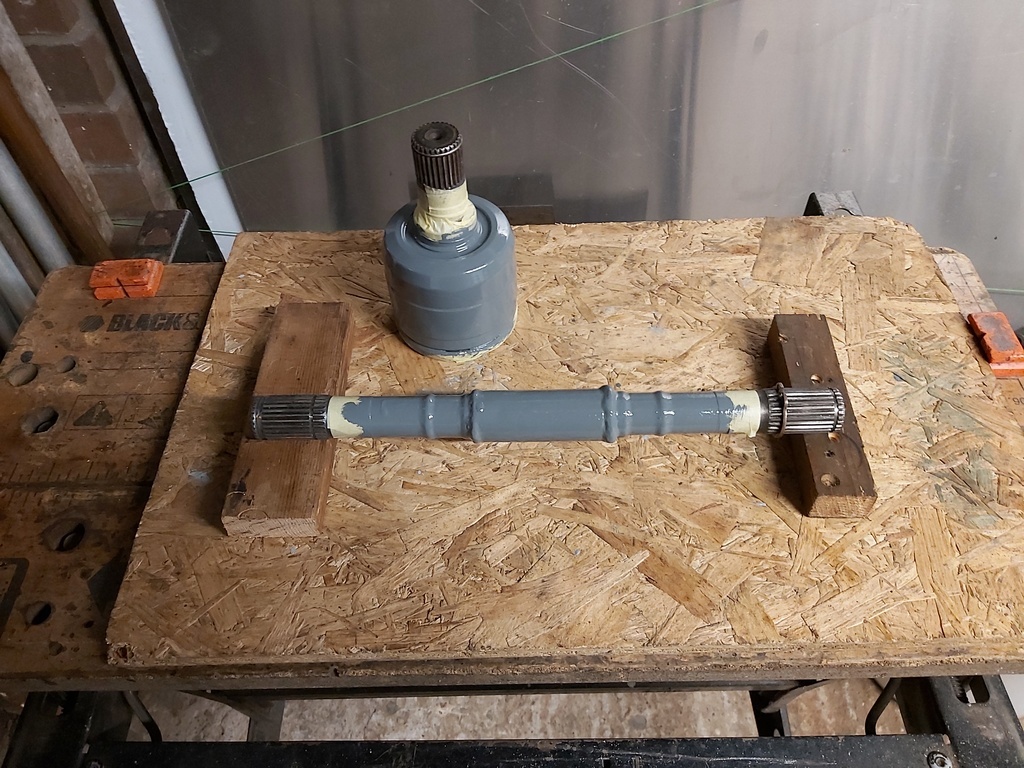 And then onto doing the same to this one 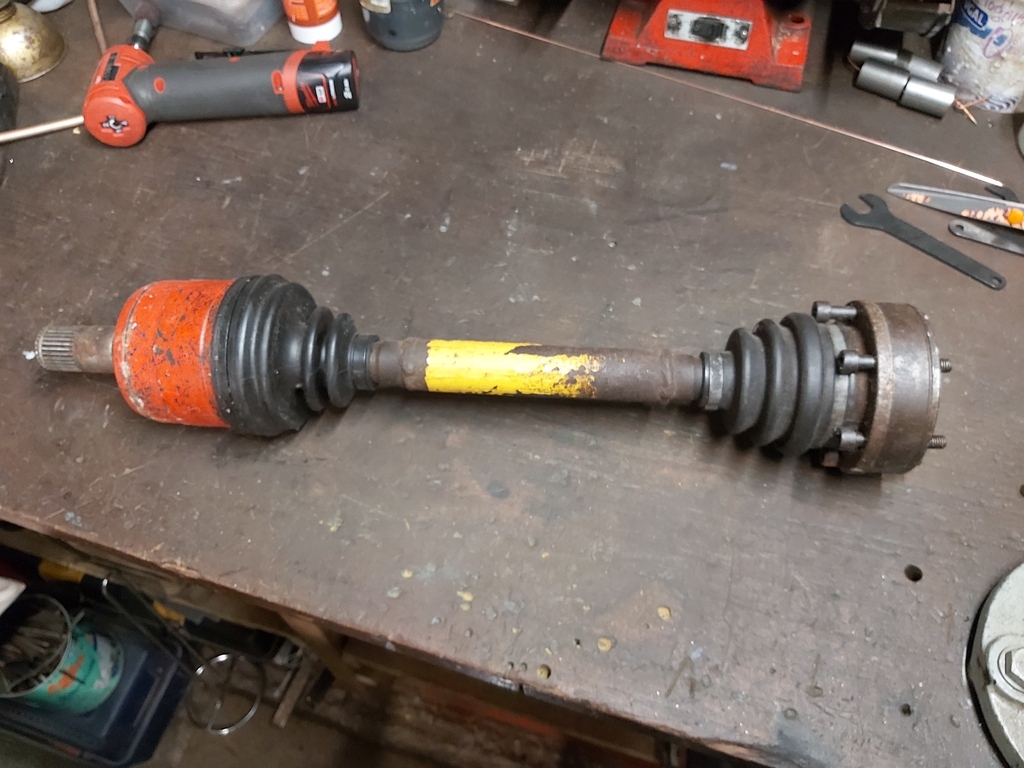 |
| |
|
|
Darkspeed
Club Retro Rides Member
Posts: 4,846
Club RR Member Number: 39
|
|
|
|
As mentioned on the G27 thread I had a bit of work to do on my neighbours Hyundai Amica. Although a bit of rust at the rear around the mounting for the rear beam its was actually the front that was also a failure that turned out to be worse. Got it all done and finished within a week so no charge for the retest - written off to back on the road - and one happy lady - this is how bad the front mount was when I eventually got the lower arm out - bolt seized into the bush - typical - It did fight me and test my patience a couple of times. 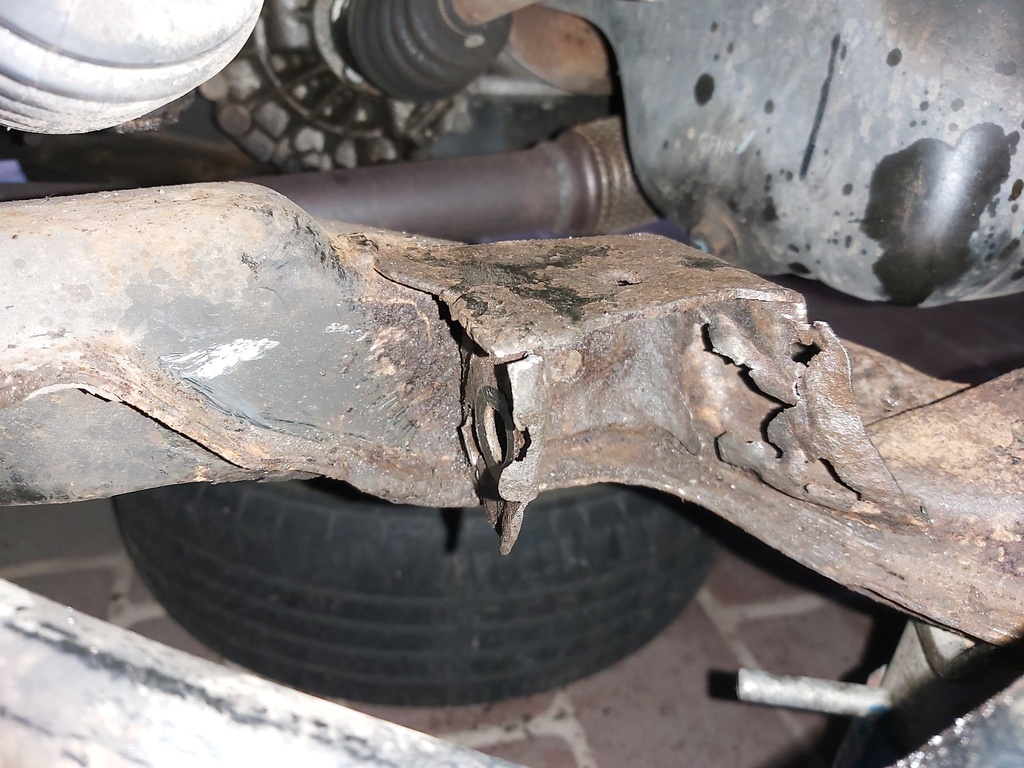 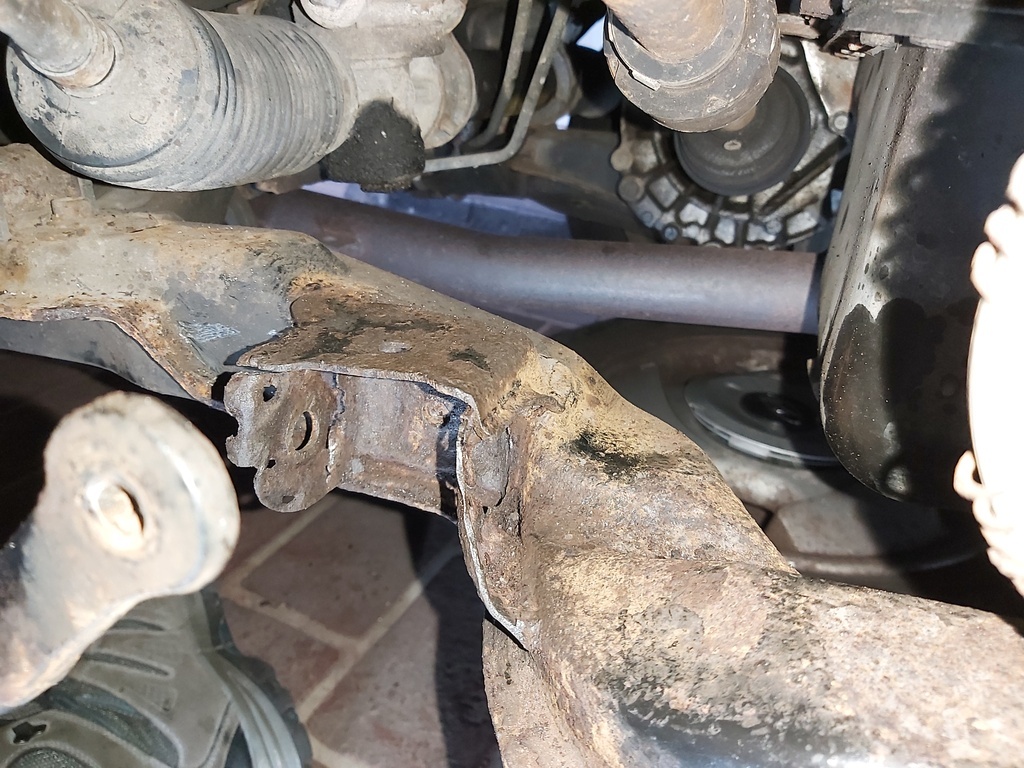 It has set me back a little on my own projects but worth the smile when she knocked on the door this afternoon with the pass  Did get the rear clam mounts to the point of test fit. 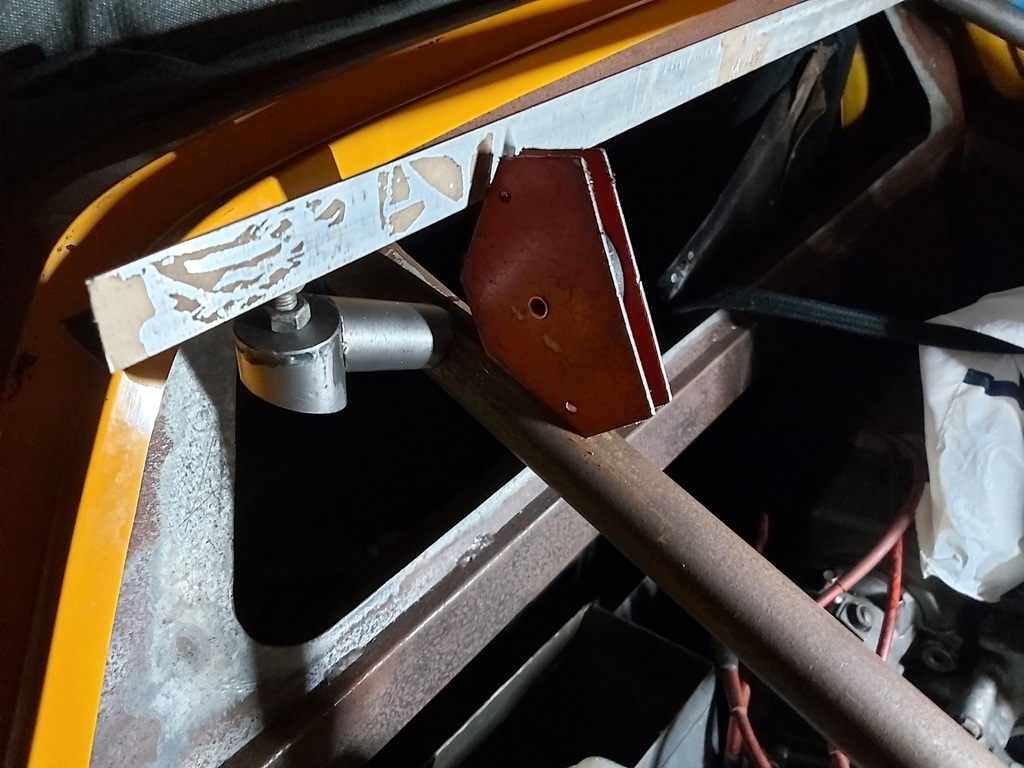 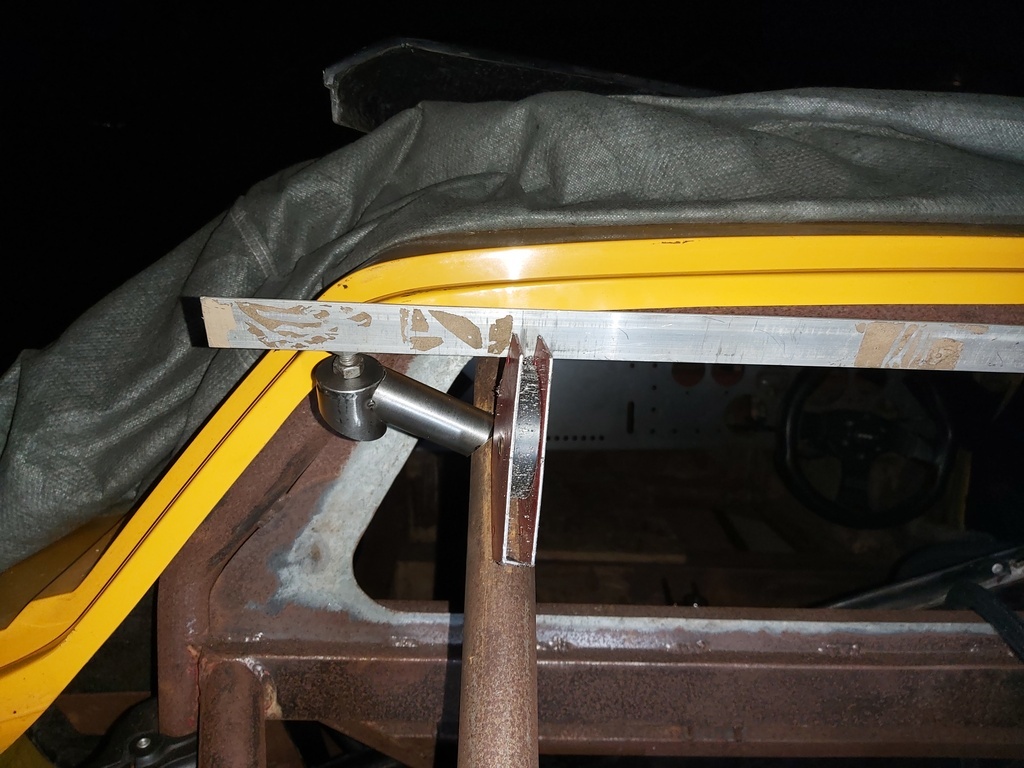 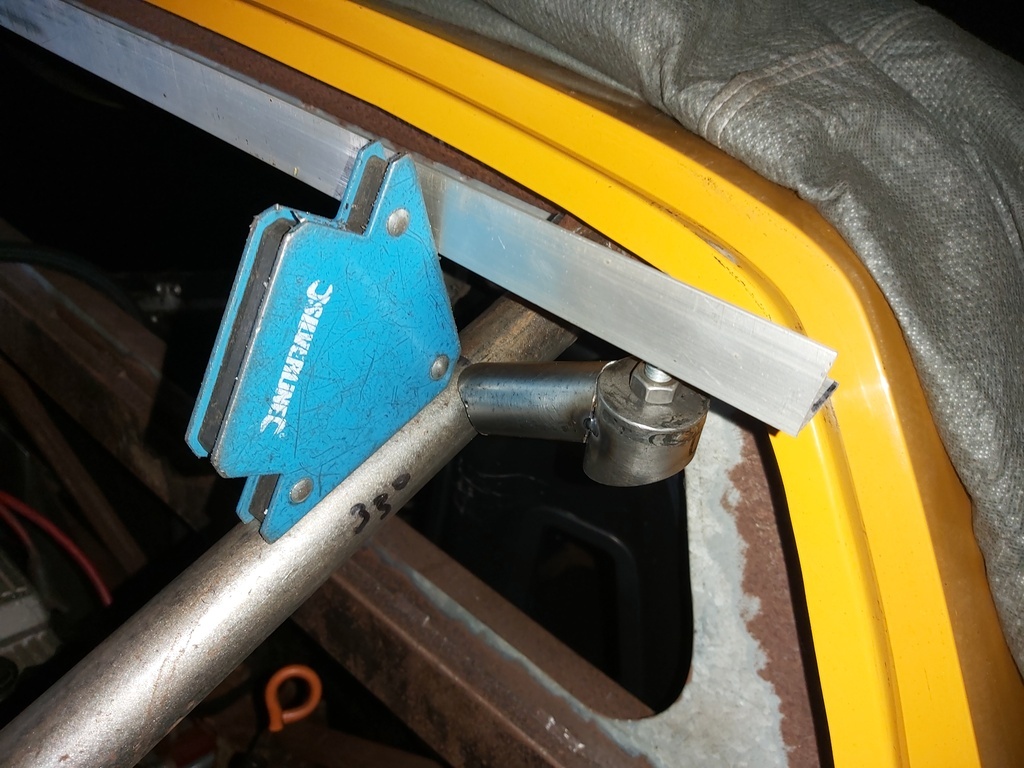 Just some adjustment on the clam shut lines before tacking in. |
| |
|
|
Darkspeed
Club Retro Rides Member
Posts: 4,846
Club RR Member Number: 39
|
|
Nov 13, 2022 21:47:46 GMT
|
Final bit of work on the neighbours Amica replacing a shield piece that I had left off for the MOT. My lad wanted to see the completed work so I also took a couple of snaps. 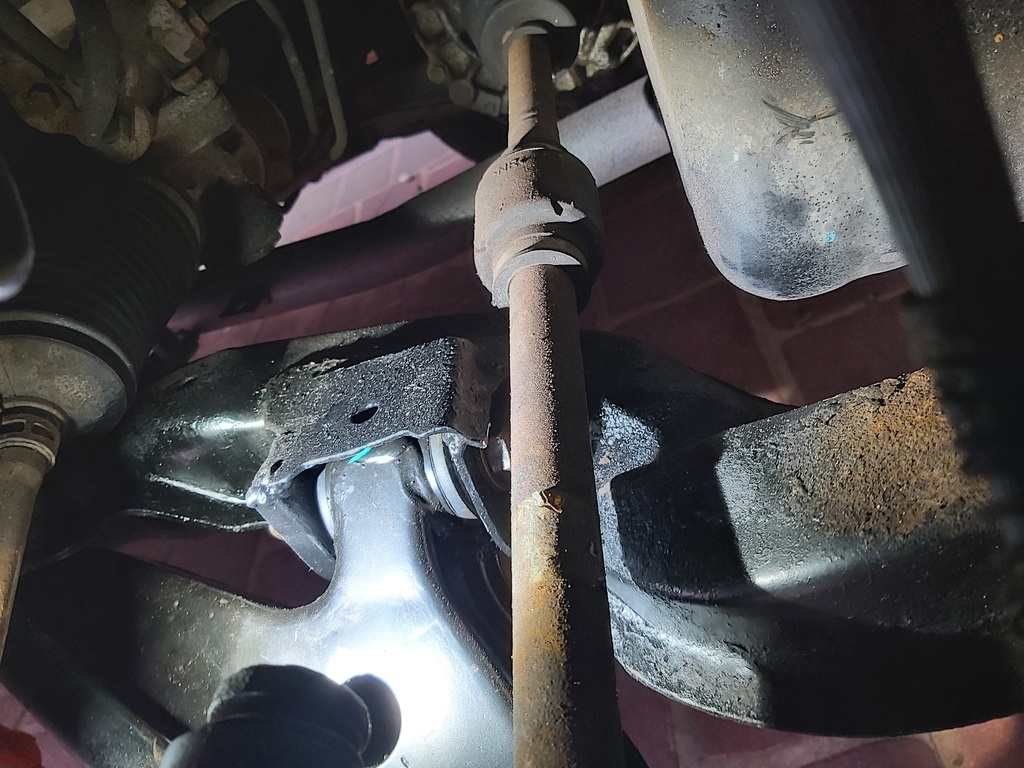 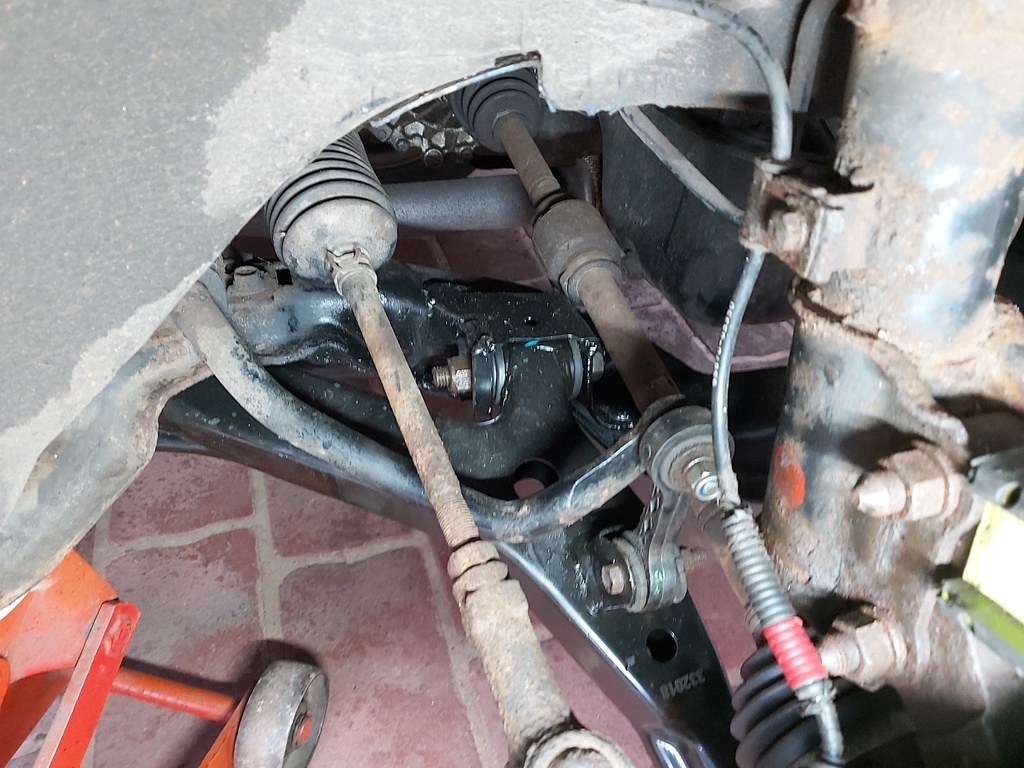 And the repair at the rear - which was one of those weld to rusty metal upside down jobs - This is it completed just brushed with some Hydrate 80. After the photo it got a good blast of some some satin black paint I had kicking about. 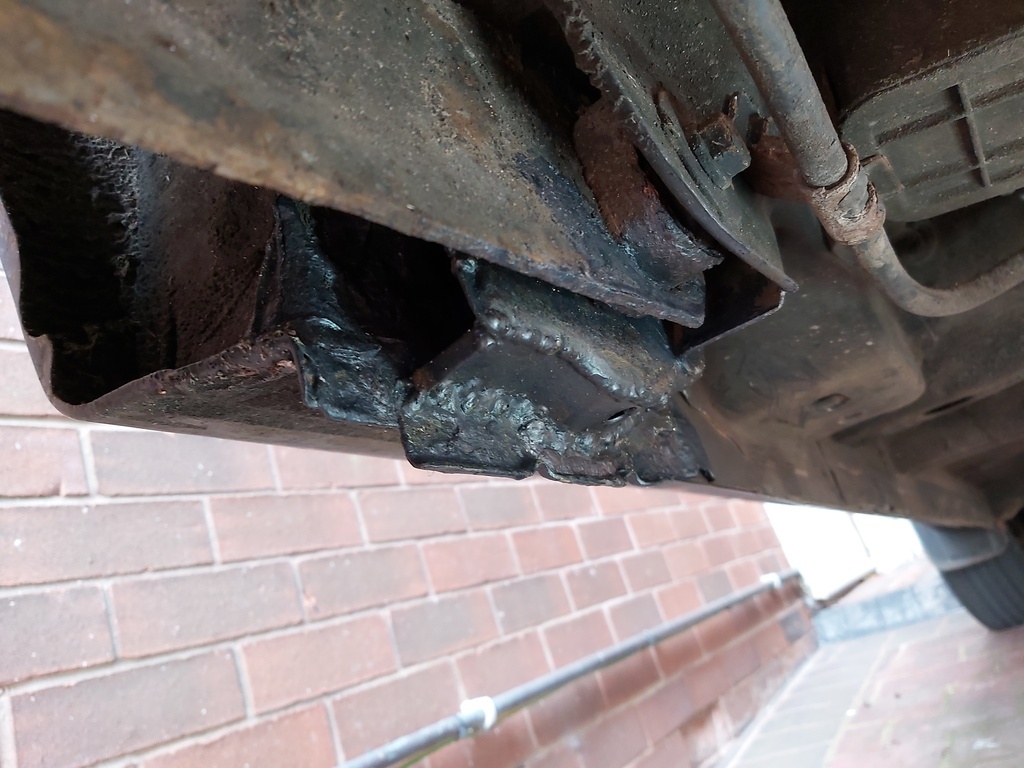 The other side which is also getting a bit crusty - noted as an advisory - but not extensively holed through like this side, also got scraped out and given a good coat. Final job will be to give the N/S front lower arm mount a clean up and H80 applied as well - the other advisory - I will then roll it out onto the road and give it a thorough pressure wash. With that done I got back to the work on the Litton. 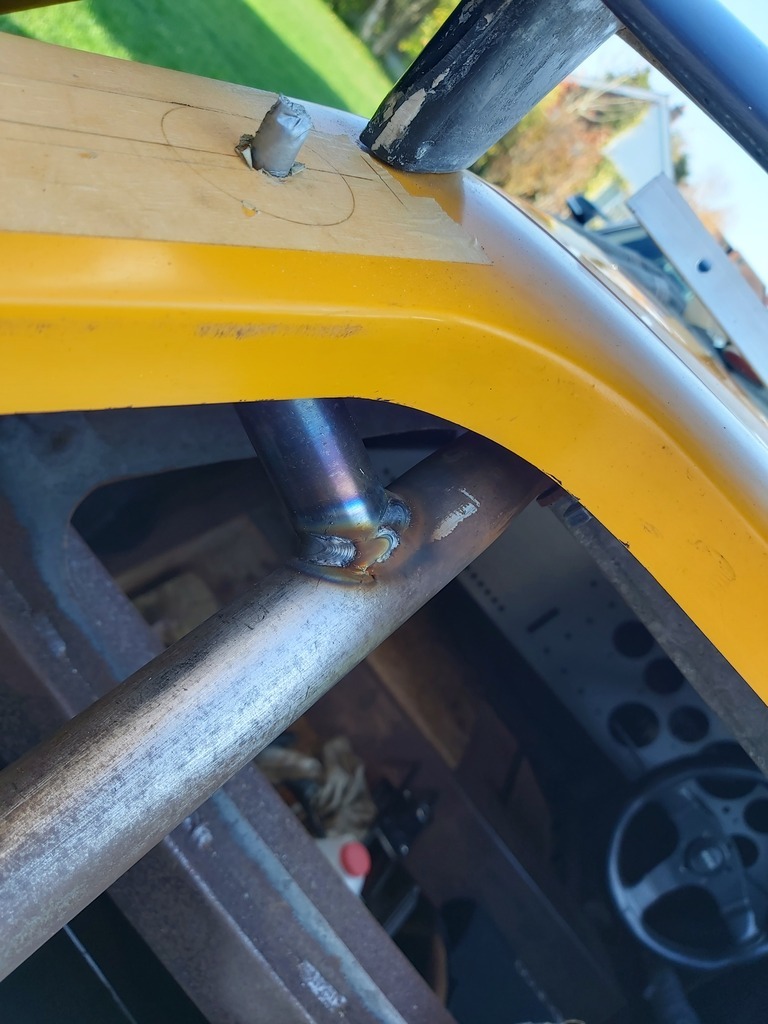 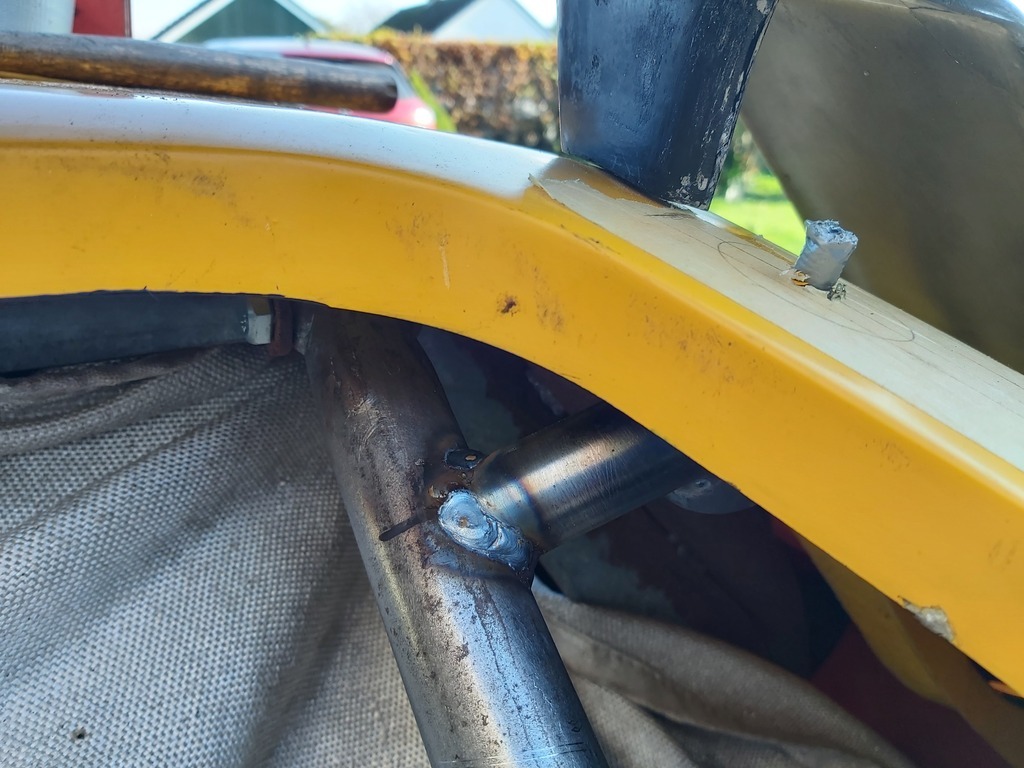  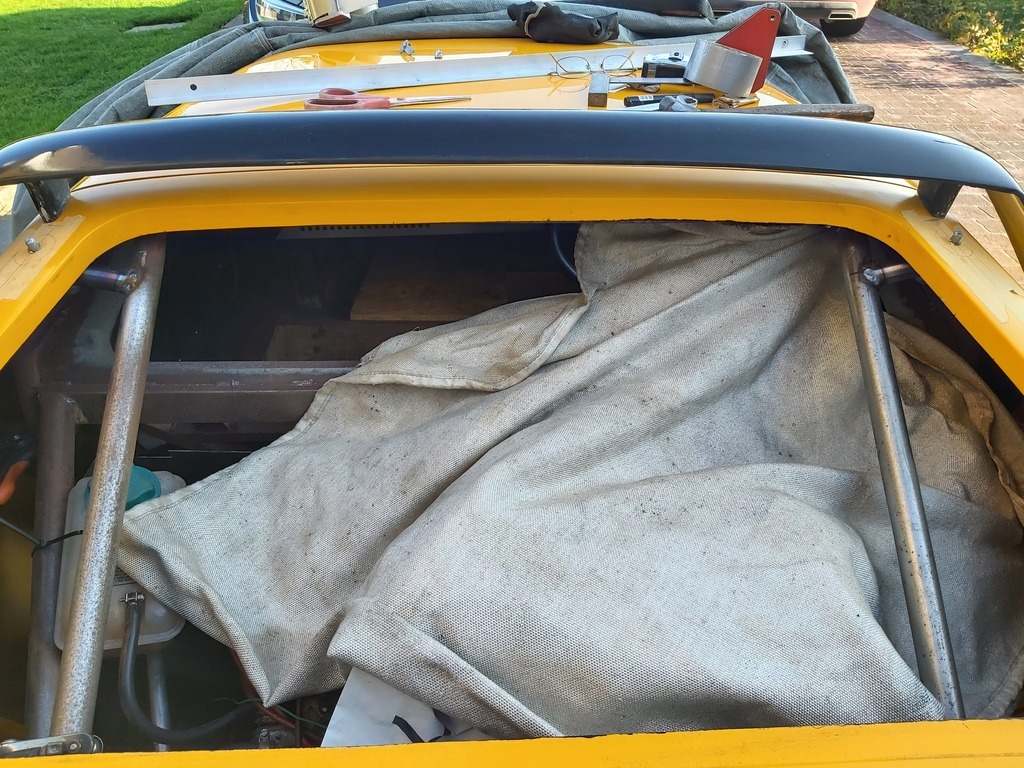 Removed and fully welded. Final job before closing up for the day and going to watch the F1 with my Amica driving Ferrari fanatic neighbour was a bit of work on the gear change support. 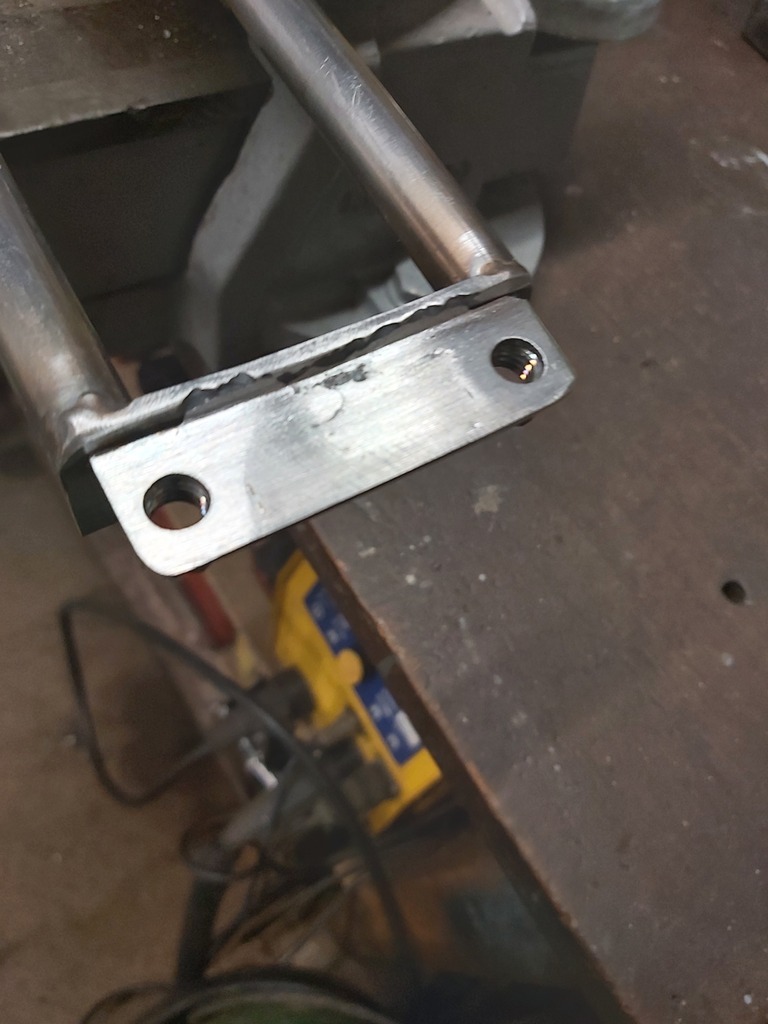 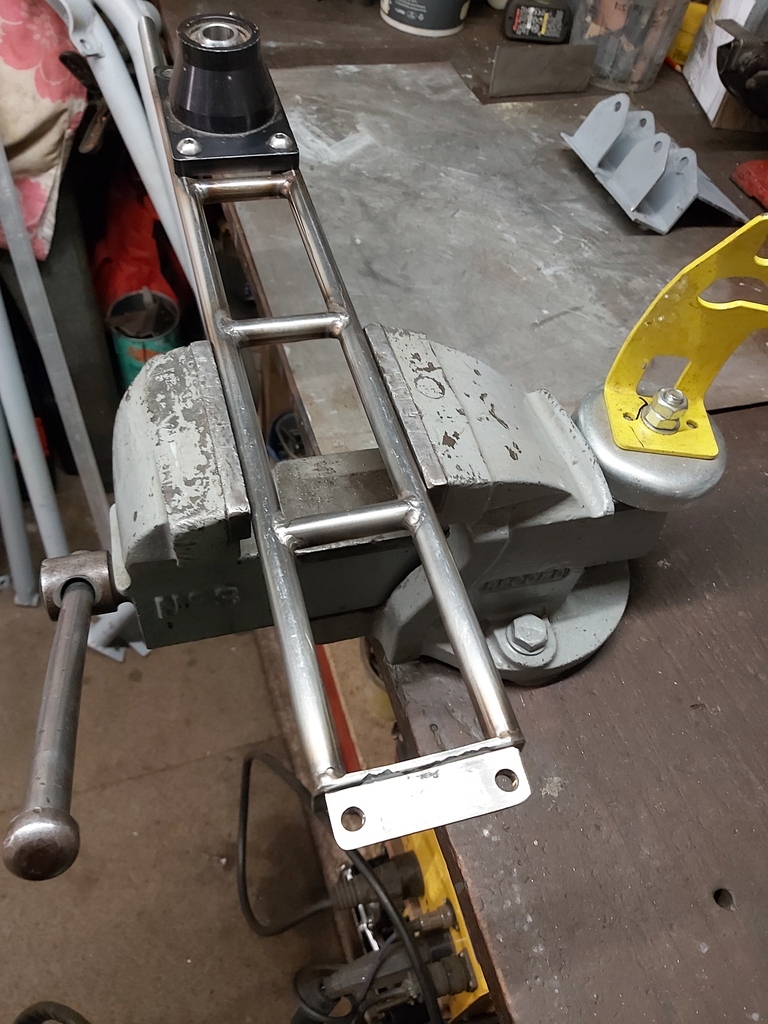 The two captive nuts provide the fixing for the bracket as well as for the handbrake - work will continue on this to complete the full gearchange mechanism. |
| |
|
|
Darkspeed
Club Retro Rides Member
Posts: 4,846
Club RR Member Number: 39
|
|
Nov 14, 2022 22:05:59 GMT
|
A work soundtrack for this week I will have to come up with a name for my spaceship! The gear shift mount fits like so. 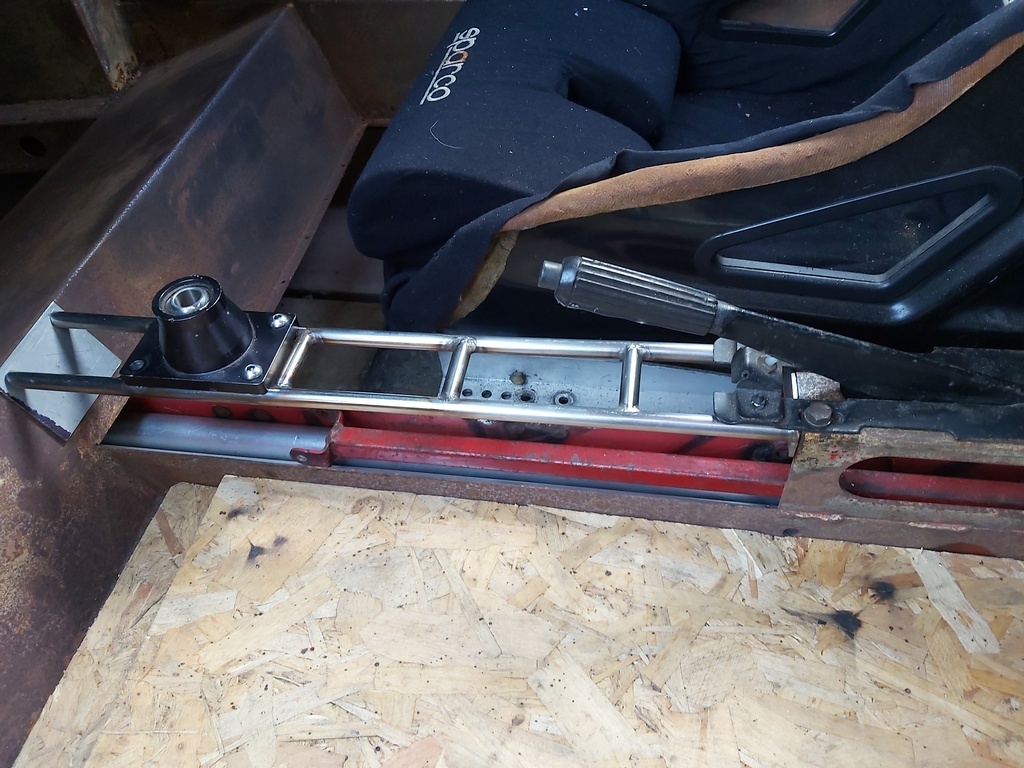 Replaces this  Next job strip the car ready to take it for blasting. |
| |
|
|
|
|
|
|
|
|
Arr ,, the put together, then take it apart again saga
|
| |
|
|
Darkspeed
Club Retro Rides Member
Posts: 4,846
Club RR Member Number: 39
|
|
Nov 19, 2022 22:51:49 GMT
|
Yep, And as the weather was due to be less than fine - I made use of the bright but chilly weather. 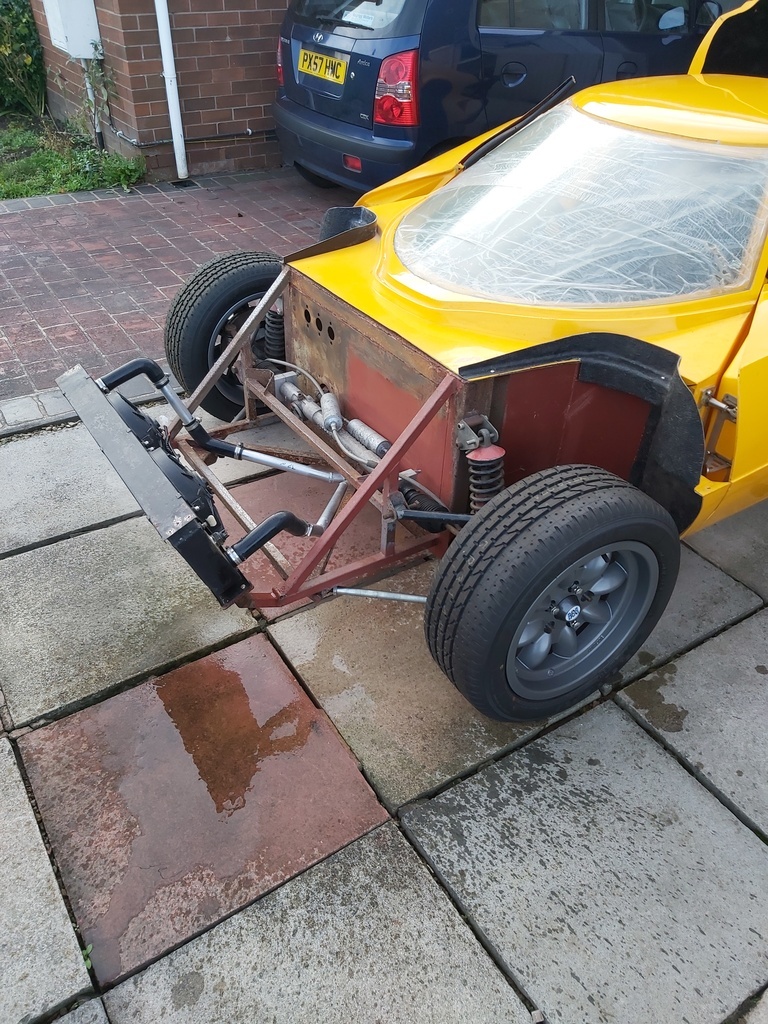 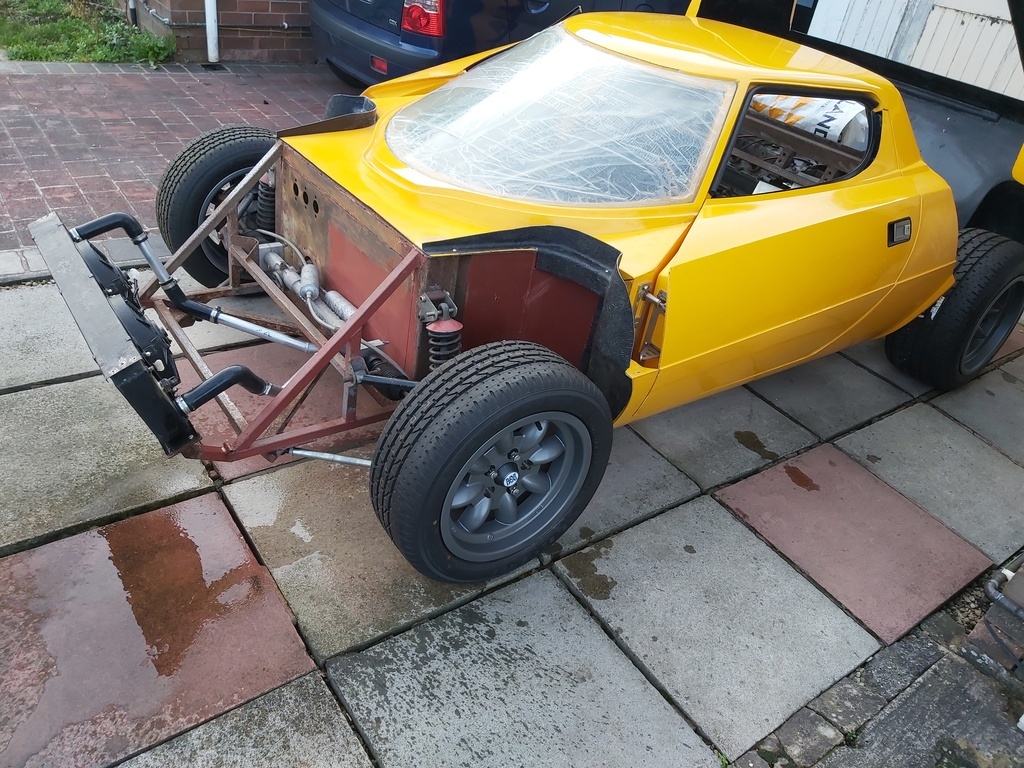 To strip the car for a few final jobs before blasting - hopefully I will get a dry couple of hours at some point to get the motor out. 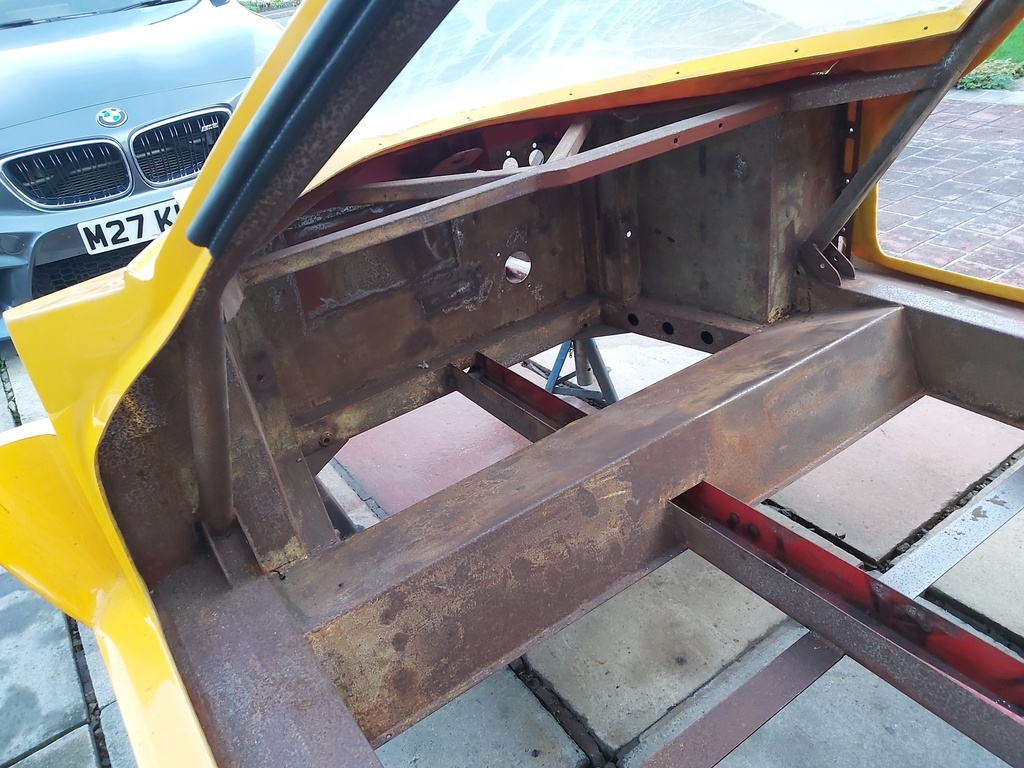 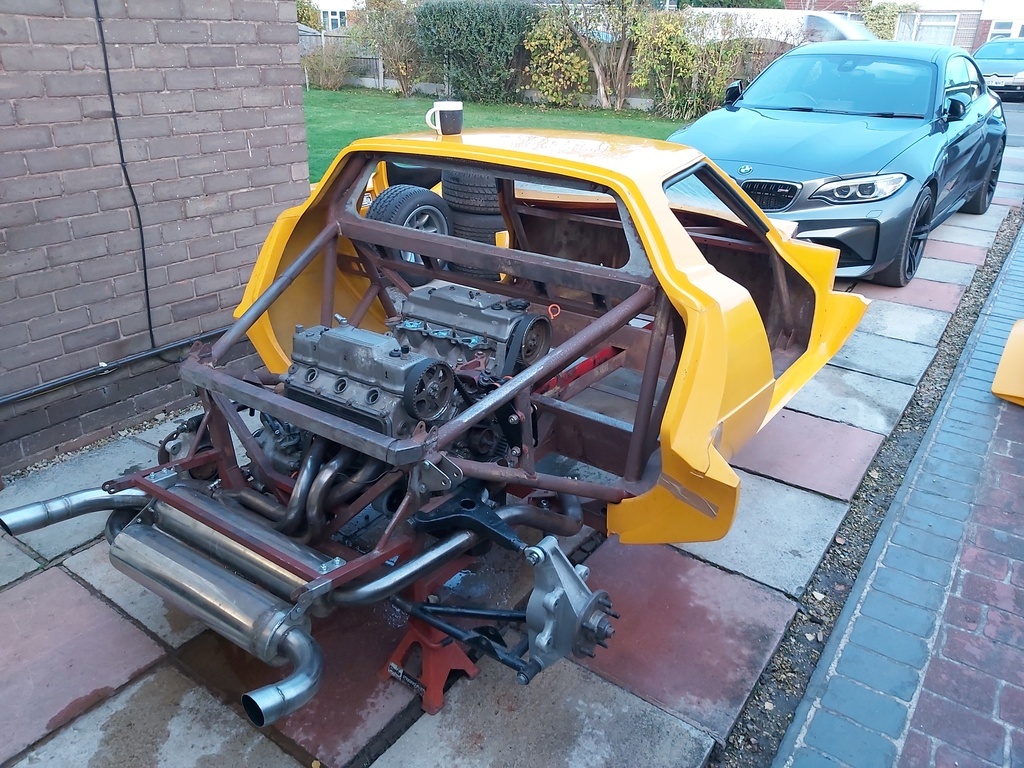 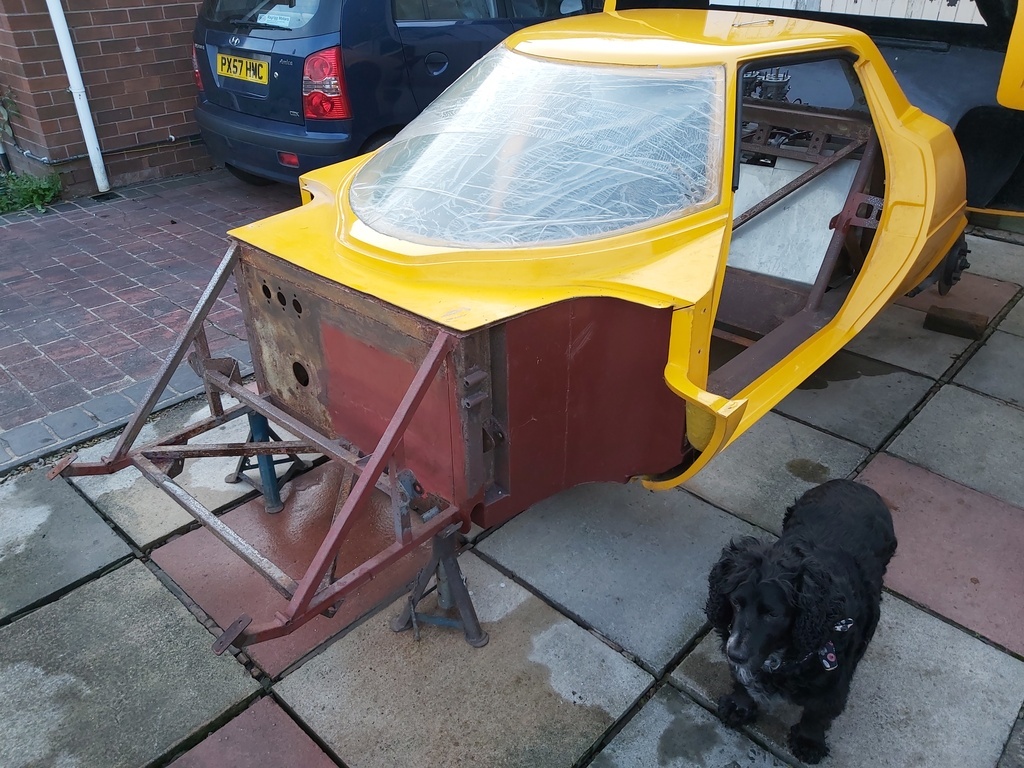 By the time I had finished it was very dark and only the engine was left. |
| |
|
|
Darkspeed
Club Retro Rides Member
Posts: 4,846
Club RR Member Number: 39
|
|
Nov 20, 2022 16:21:26 GMT
|
Once the temperature had risen to mid singles - It was out into the sunshine to pull the engine. 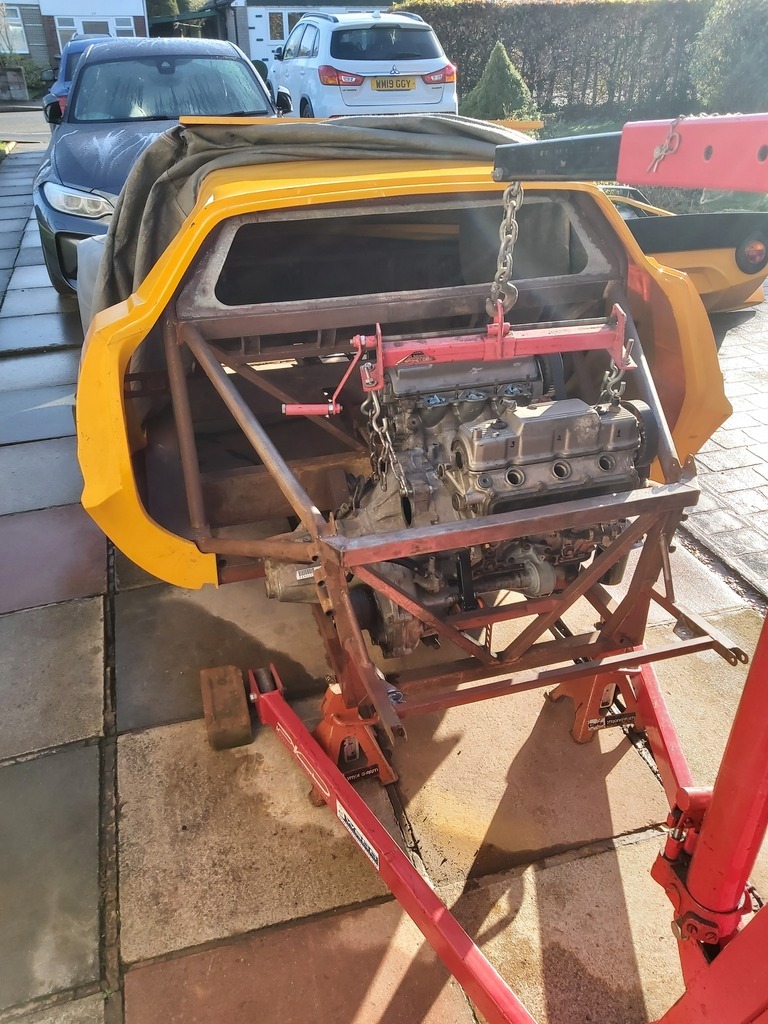 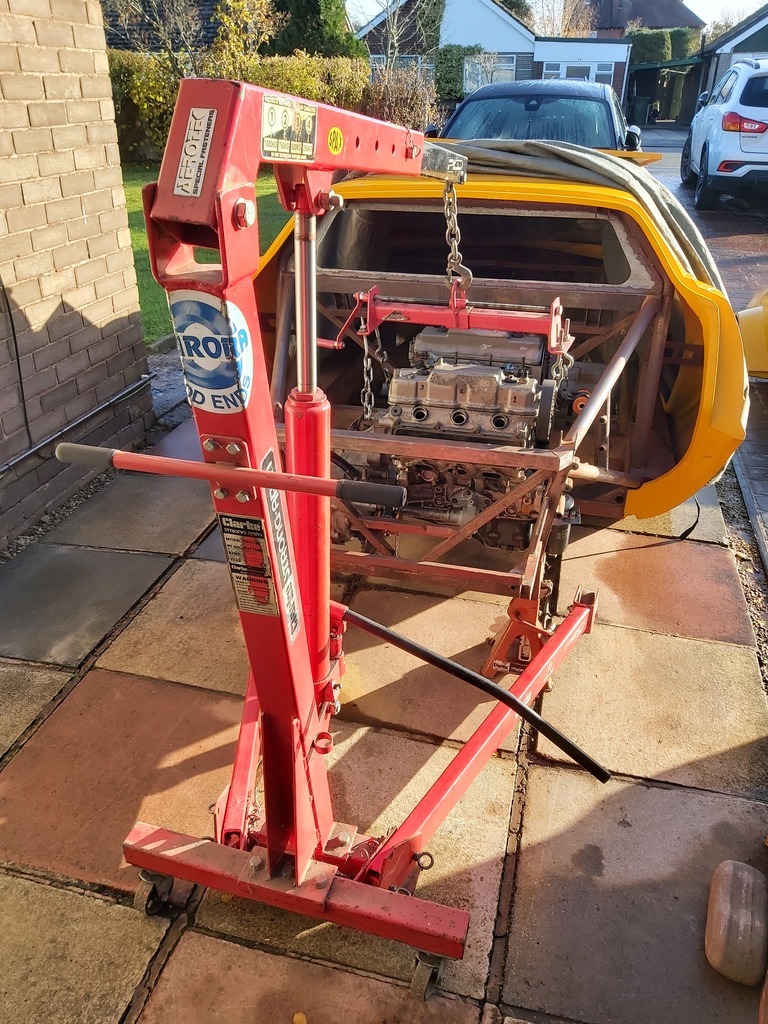 Balance point of the assembly 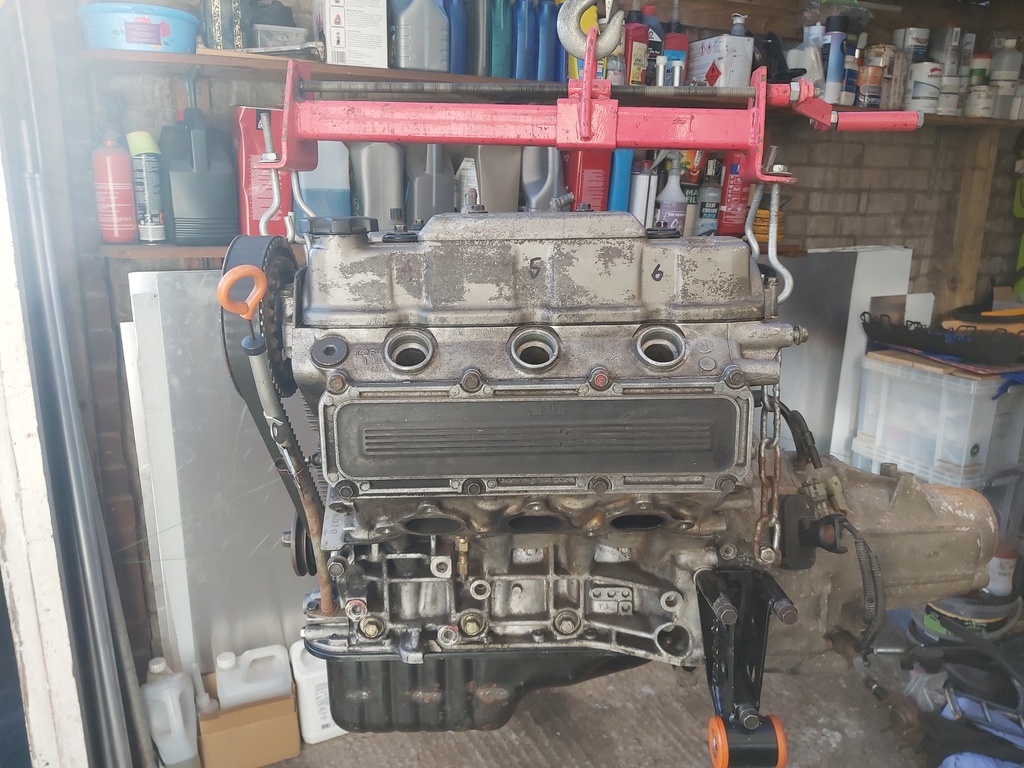 Job done 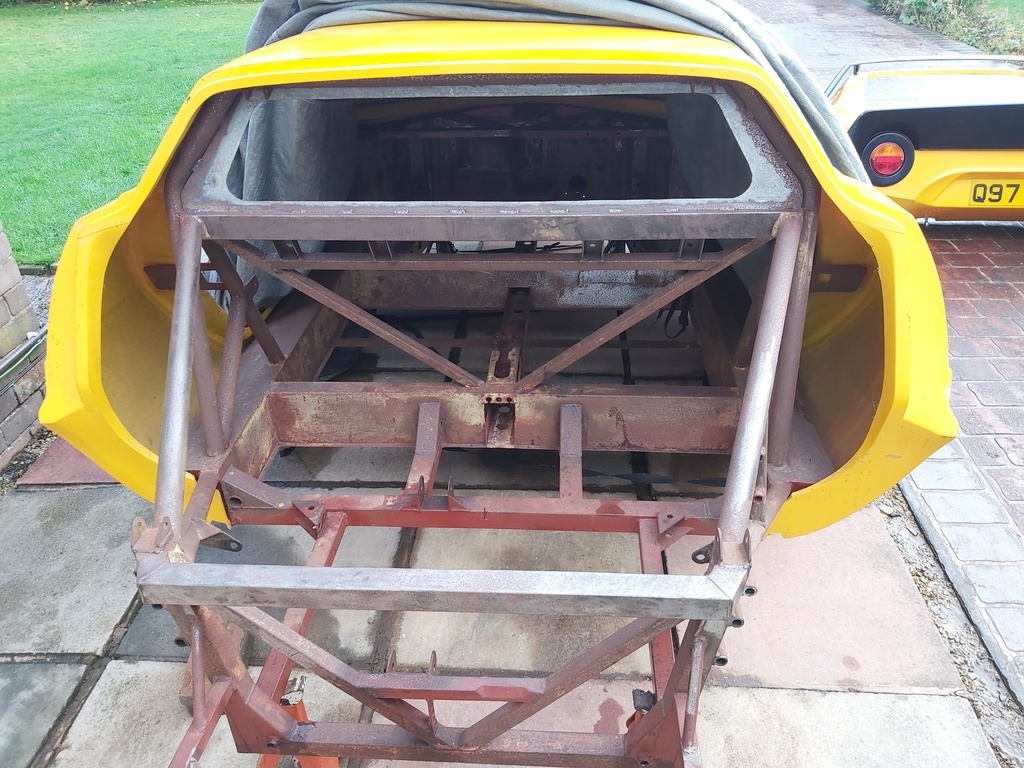 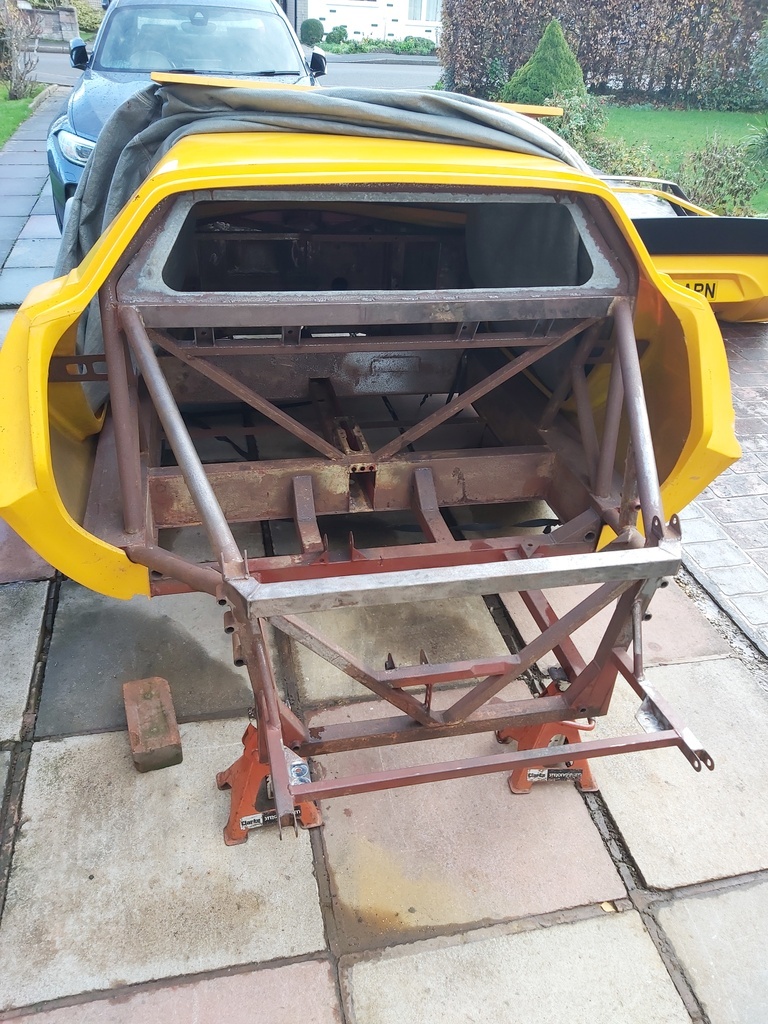 One bit of welding I want to do before it goes for blasting is to run a flange around a suspension bracket - It's not cracked or broken but it just looks weak. 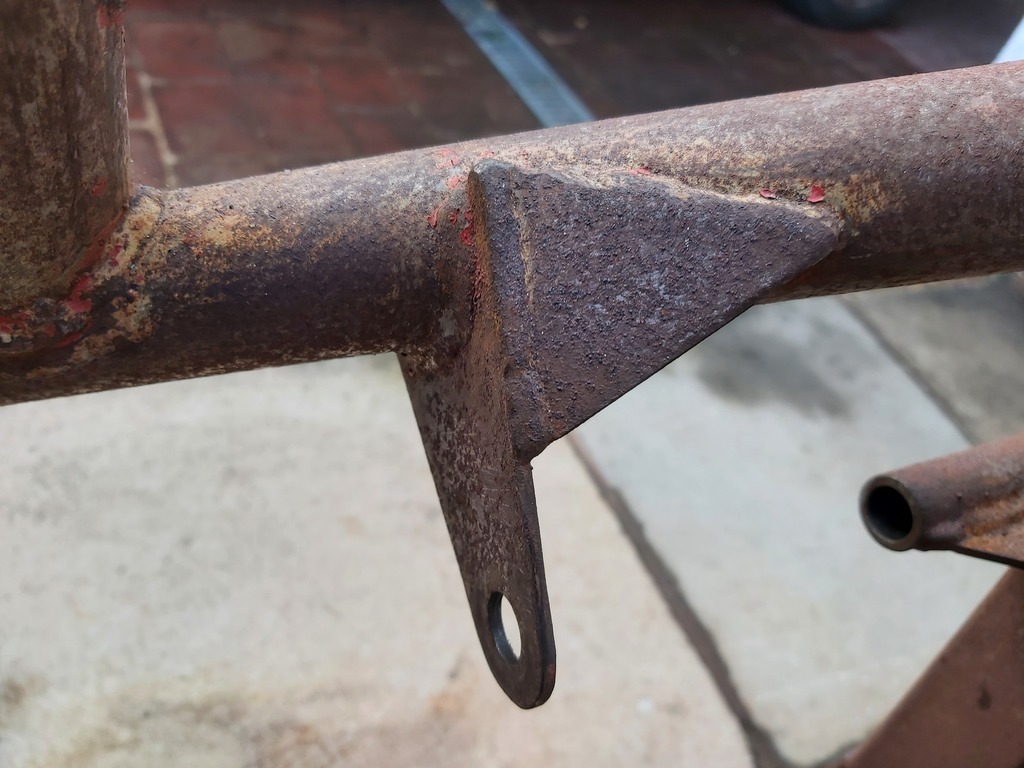 |
| |
|
|
|
|
|
Nov 20, 2022 16:52:58 GMT
|
|
Nothing to add apart from very much enjoy reading the updates on your project!
|
| |
|
|


