Darkspeed
Club Retro Rides Member
Posts: 4,846
Club RR Member Number: 39
|
|
Sept 23, 2022 16:58:00 GMT
|
Hopefully this works Hmmmm - we appear to have some technical issues ........ Doh! ETA Technical issues with me not turning on my speakers - what an  . |
| |
Last Edit: Sept 23, 2022 17:02:33 GMT by Darkspeed
|
|
|
|
|
|
|
Sept 23, 2022 18:07:11 GMT
|
|
fantastic progress
|
| |
|
|
|
|
|
Sept 23, 2022 18:11:37 GMT
|
Nice, I can almost smell the fuel  |
| |
Needs a bigger hammer mate.......
|
|
16grit
Part of things

Posts: 214
|
|
Sept 23, 2022 20:00:29 GMT
|
|
All that work of yours, here's the prize..
|
| |
|
|
Darkspeed
Club Retro Rides Member
Posts: 4,846
Club RR Member Number: 39
|
|
|
|
|
Wound the idle mixture screws in a bit and then a bit more and then some more - Started at 2.5 turns and finished with 1 turn - tweaked the throttle screws and did a basic carb match with the old tube and lug hole.
Speaking of lug holes - a fave band from the 80's of mine
Engine idles nice and cleanly now and revs up quite nicely, I had thought that maybe the idle jets were a bit big but at 50's they should be about right. Next job must be to find TDC and check where we are with the timing.
After making some noise and warming things through engine wise I trimmed some of the GF panels around the front of the car. Need to buy some GF supplies and do some panel mods as the panels that I have are to suit the LB chassis which is different to mine.
|
| |
|
|
Darkspeed
Club Retro Rides Member
Posts: 4,846
Club RR Member Number: 39
|
|
|
|
|
Another day interrupting the neighbours peace and quiet - Although the local stunt pilot was outdoing me in that regard.
Vroom Vroom
The brake calipers got a rub down and a coat of satin Black ready for the new pistons and seals and the weeping rad temp sender boss got fixed - However with this fixed it highlighted another leak on the bottom of the end of the tank - I may give up on this rad now and get one of the LDV rads.
I have also fitted the rear lights and been searching through all the boxes looking at all of the accrued parts for this build.
If it stays dry tomorrow I may pop the doors on for a quick photo op and fit some of the other odds and ends. In the week I will try and get the tyres mounted.
|
| |
|
|
Darkspeed
Club Retro Rides Member
Posts: 4,846
Club RR Member Number: 39
|
|
|
|
Before the car gets taken apart to get the chassis blasted I decided to grab all of the parts boxes and do some quick assembly works. It really started with just putting the rear lights on to take a picture from an angle to imaging a more complete car and then progressed from there. 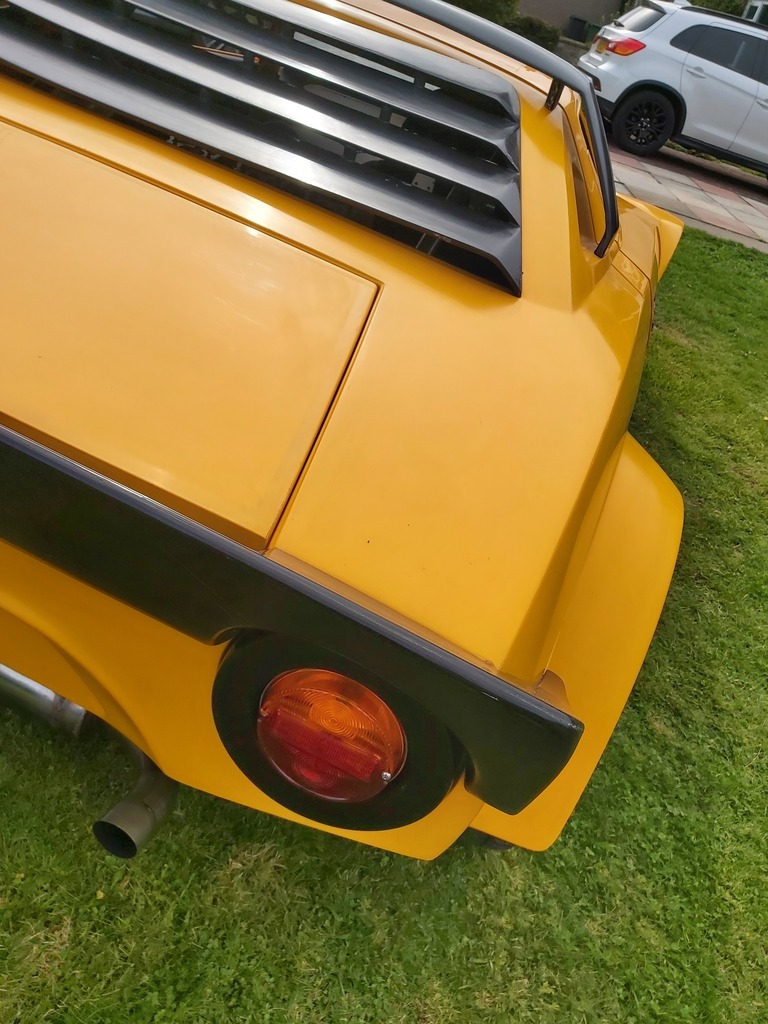 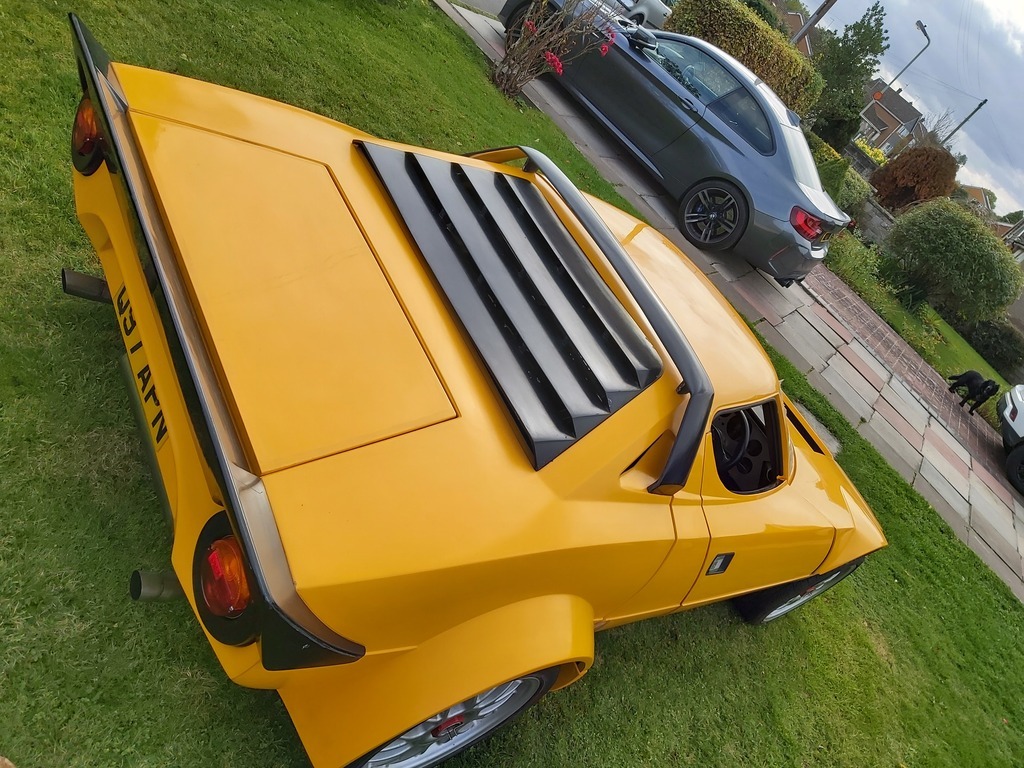 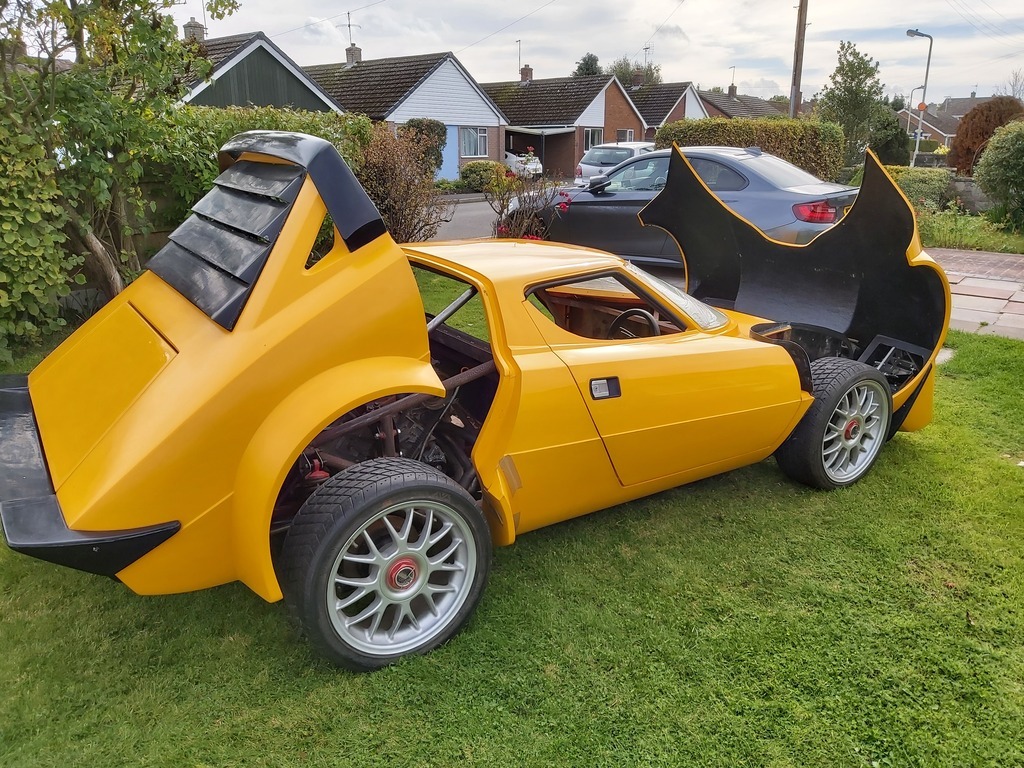 I was not going to bother with the passenger side. 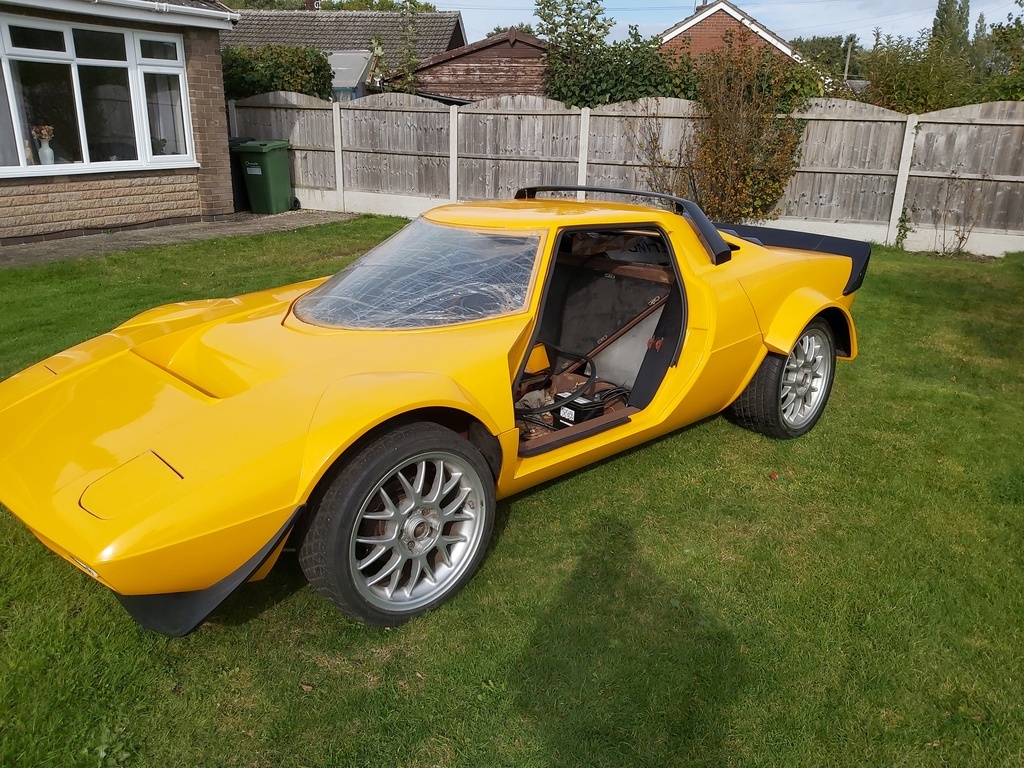 But as all the parts were in the garage. 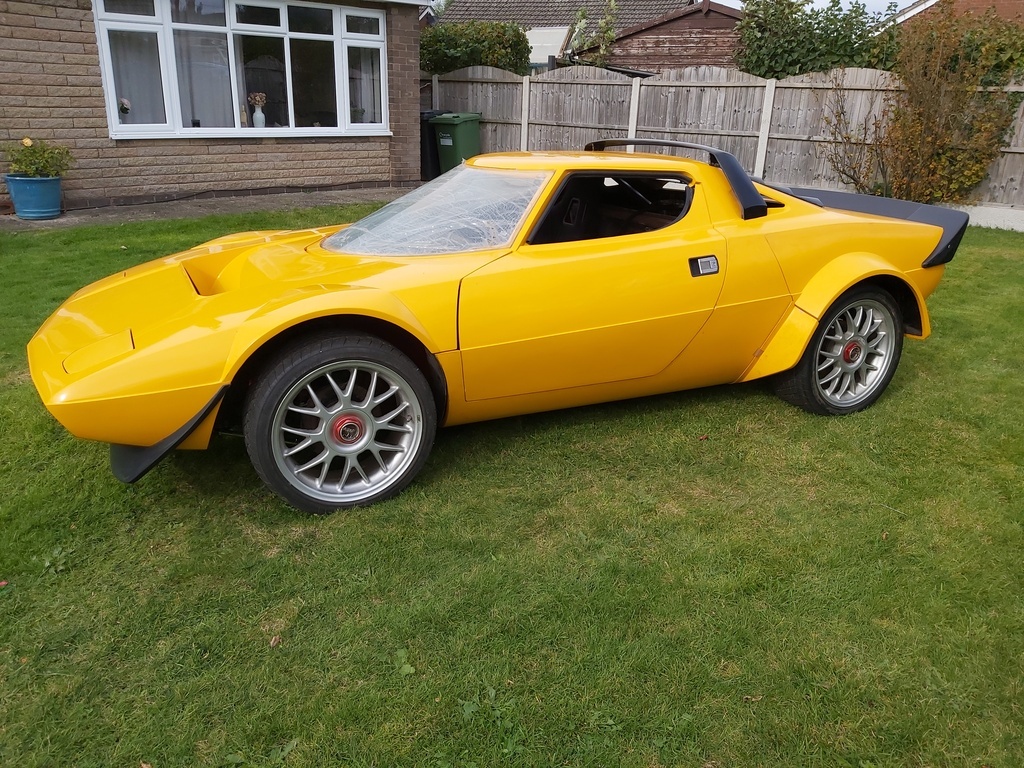 Popped the dash seat and a door bar in as well  It is quite snug in a Strato's  Front side repeaters are the next job |
| |
|
|
Darkspeed
Club Retro Rides Member
Posts: 4,846
Club RR Member Number: 39
|
|
|
|
And that view 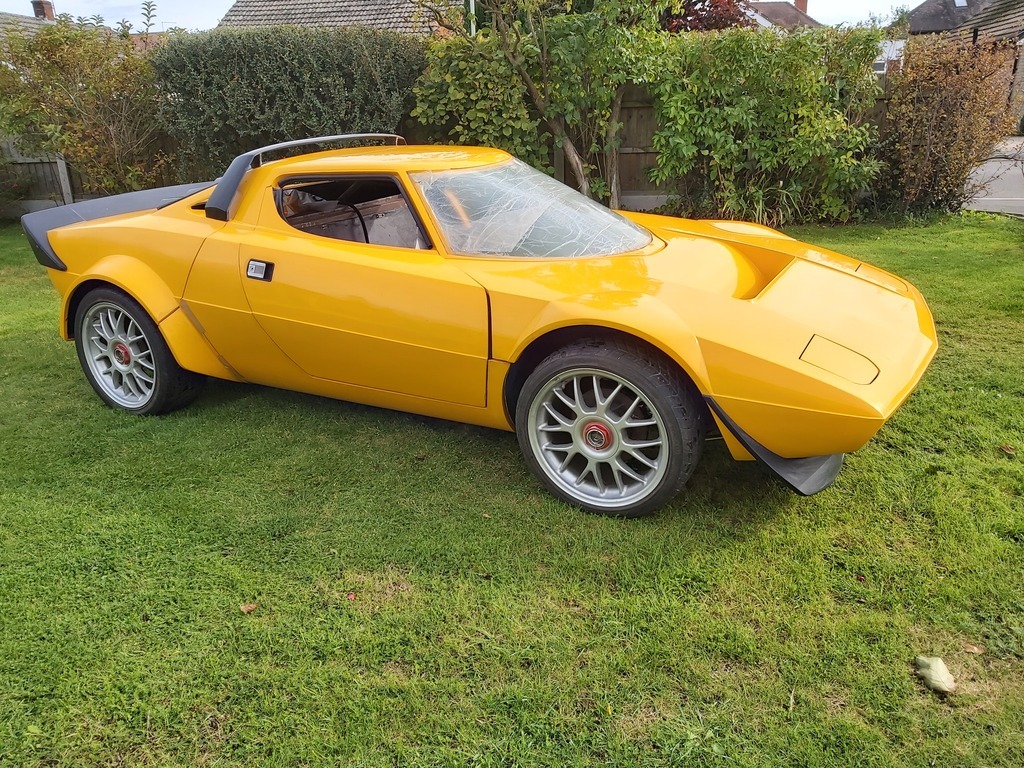 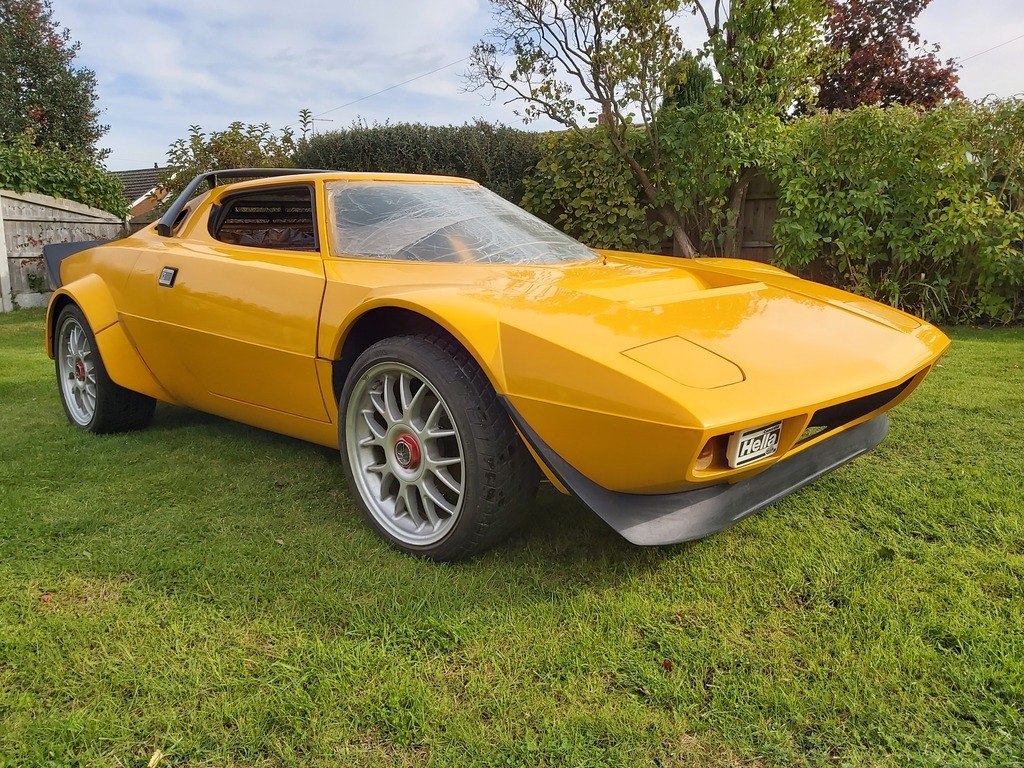 And it makes Vroom Vroom noises |
| |
|
|
|
|
|
|
|
|
Good show! It looks fantastic, and will be even nicer once you fit the Minilites.
After this – and, not least the succesful start with the carbs – I am sure you feel much happier and fired up about the whole project. Best of luck and keep up the good work!
|
| |
|
|
Darkspeed
Club Retro Rides Member
Posts: 4,846
Club RR Member Number: 39
|
|
|
|
|
It certainly helps bolster the motivation reserves. Me and the lad also did the obligatory sit in - he's somewhat slimmer than me - probably by 4 or 5 stone and a couple of inches shorter and even for him getting in was challenging. The type of seat and the door-bar do not make it a simple operation but once you are in you are in - getting out is even more of a task. For me.... well it would probably make for a popular YouTube short.
Will do my best to get the Minilites and the A008's sorted ASAP
|
| |
|
|
|
|
|
|
|
|
Legend has it that the very first time Markku Alén tried one he had to have the top of his helmet sawn off.
Having been basically designed, prototyped and developed around il Drago Munari didn't help at all the lanky Finns (or Walter Röhrl, for that matter) who came later.
I strongly suspect the car will end up being drivable (if maybe not fully road-ready) much earlier than you envisaged a few months ago.
Cheers!
|
| |
|
|
Darkspeed
Club Retro Rides Member
Posts: 4,846
Club RR Member Number: 39
|
|
|
|
|
The seat is currently sitting on a piece of 20mm particle board and puts the top of the old noggin perilously close to the roof and in very close proximity to the roll cage tube over the door. A crash helmet would certainly benefit from a flat top and also need to have a nicely radiused concave element to the RHS to prevent driver developing a nasty crick to the neck. The seat being a bit too upright props you up too much, with a bit of rake it should make things more comfortable. However its still stealing an inch here and there as its a very small space - the Diminutive G15 is spacious in comparison.
Although it looks like its at a point where the average eBay project seller will describe it at "95% complete and a few weekend's will see it finished" I am under no illusion as to the amount of work that is still ahead - I am still way behind the point where most builders are when they go and pick up their kit from the factory and then take 3-20 years to build it.....
|
| |
|
|
|
|
|
|
|
|
Looking Good! Keep at it! For what it's worth, I'd keep those wheels on it.....
|
| |
|
|
Darkspeed
Club Retro Rides Member
Posts: 4,846
Club RR Member Number: 39
|
|
Oct 10, 2022 18:26:55 GMT
|
Looking Good! Keep at it! For what it's worth, I'd keep those wheels on it..... Thanks I am certainly going to try and keep things going - The wheels however have one too many negatives against them and are destined for sale or scrap - There will probably be more interest/value in the caps/nut/spring assembly and nut spanner than the wheels themselves. |
| |
|
|
tdk
Part of things
Posts: 958 
|
|
Oct 10, 2022 19:12:52 GMT
|
|
How did I not spot this before? Love it.
|
| |
|
|
Darkspeed
Club Retro Rides Member
Posts: 4,846
Club RR Member Number: 39
|
|
Oct 10, 2022 20:07:18 GMT
|
How did I not spot this before? Love it. Welcome - Its been a slow burn and only just gaining momentum. Rebuilt the front calipers - rears I think I will buy new and they can be transferred to the G27 when I settle on where I am going. 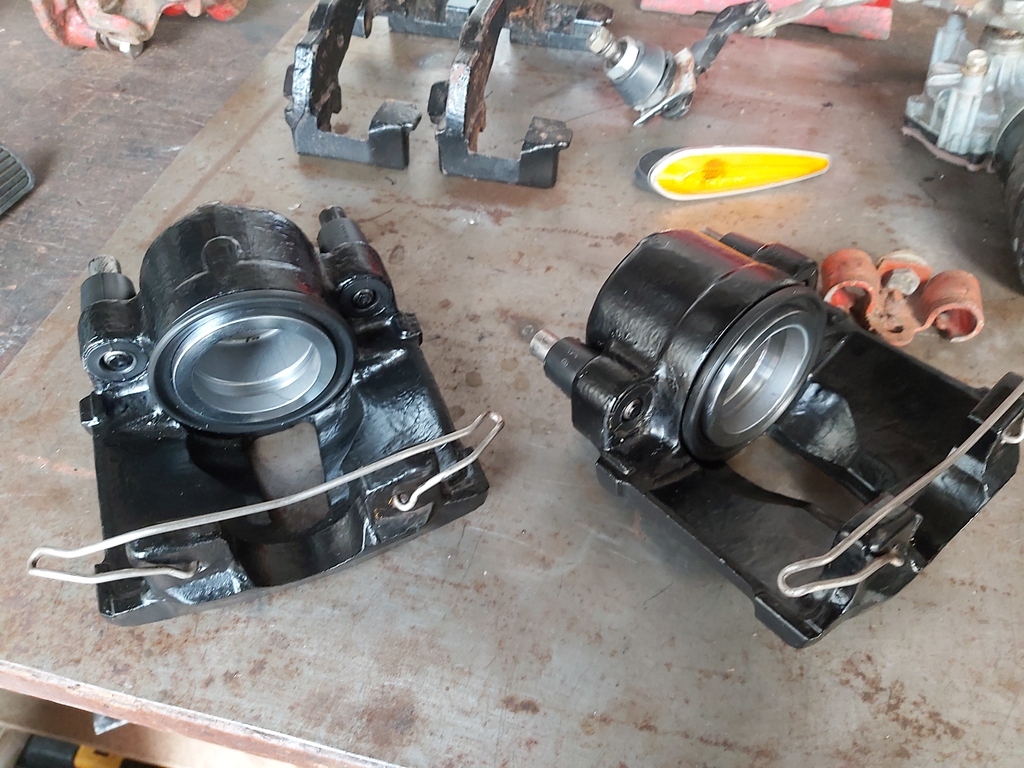 Also pulled a few other parts from the boxes . Need to beat the ugly out of that linkage for the wiper 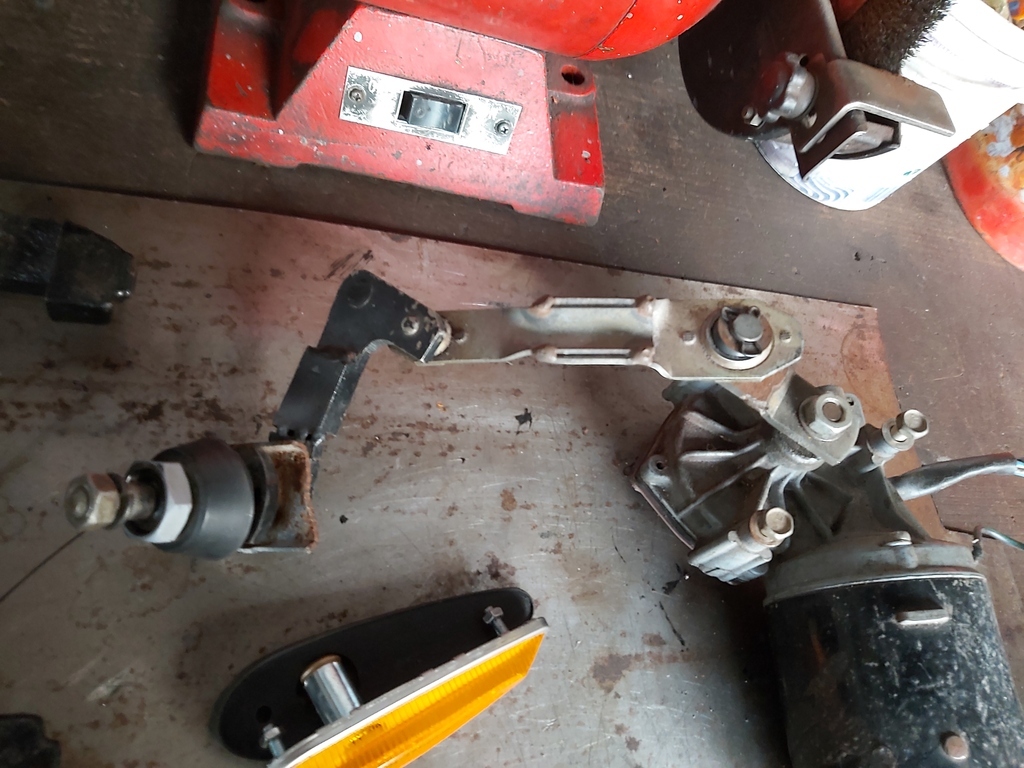 Fix the side repeaters to the front wing 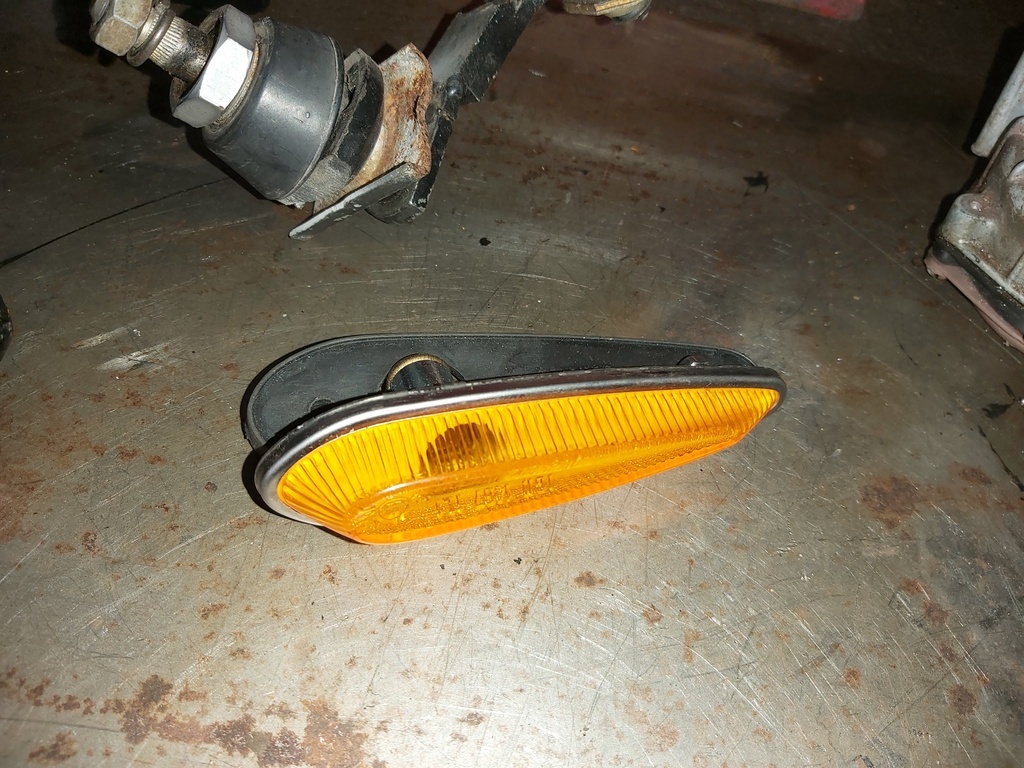 Make an accelerator pedal from these parts 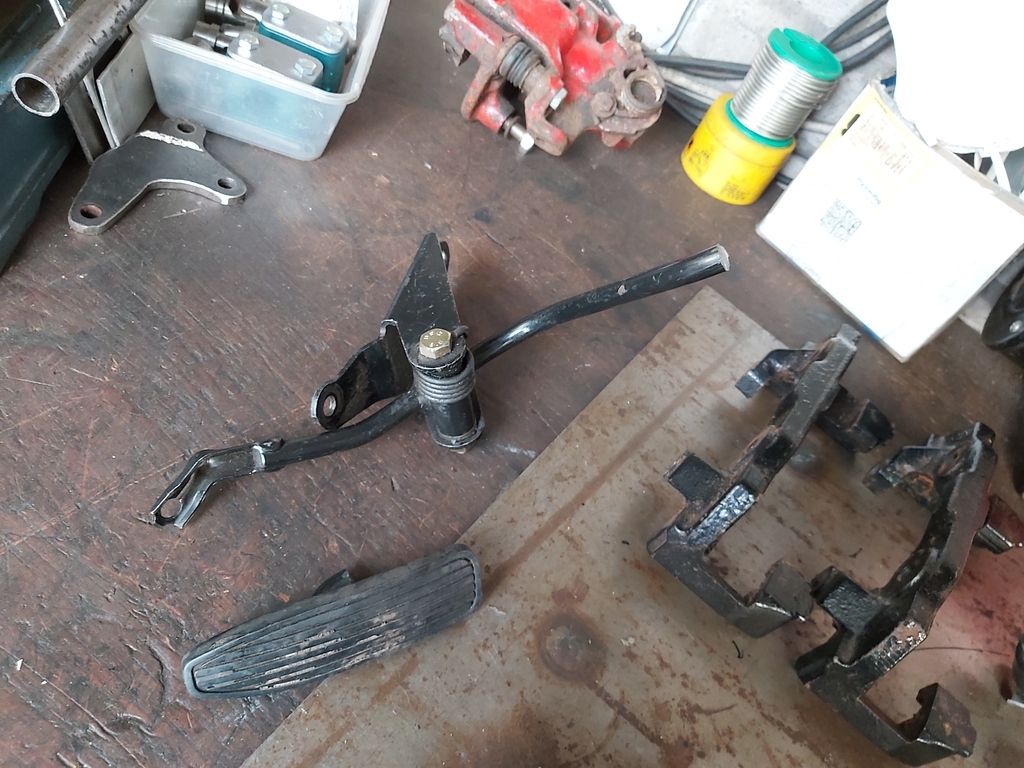 |
| |
|
|
Darkspeed
Club Retro Rides Member
Posts: 4,846
Club RR Member Number: 39
|
|
Oct 13, 2022 17:17:47 GMT
|
Made a start on removing the ugly from some of the parts associated with the wiper mech and the handbrake cable retainers - not only will they be less hideous - even though they will be unseen - they will be lighter. 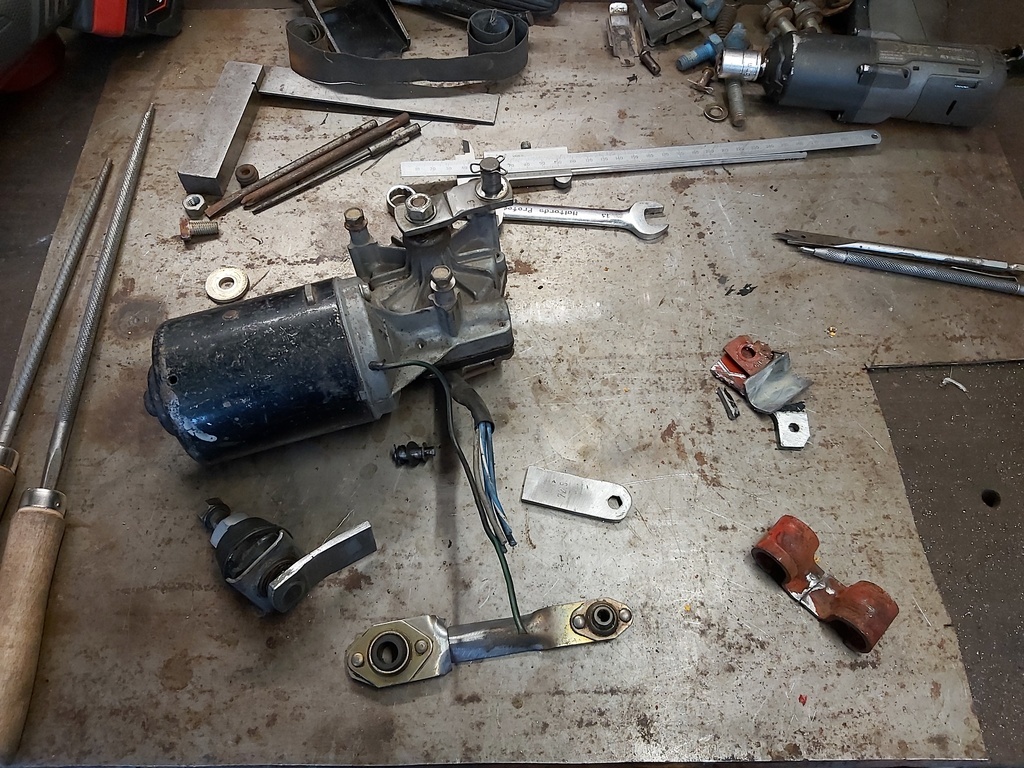 For the brakes - I have decided to send the original Ford calipers off for refurbishment rather than purchase of some new "no make" generic quality unknown stuff. 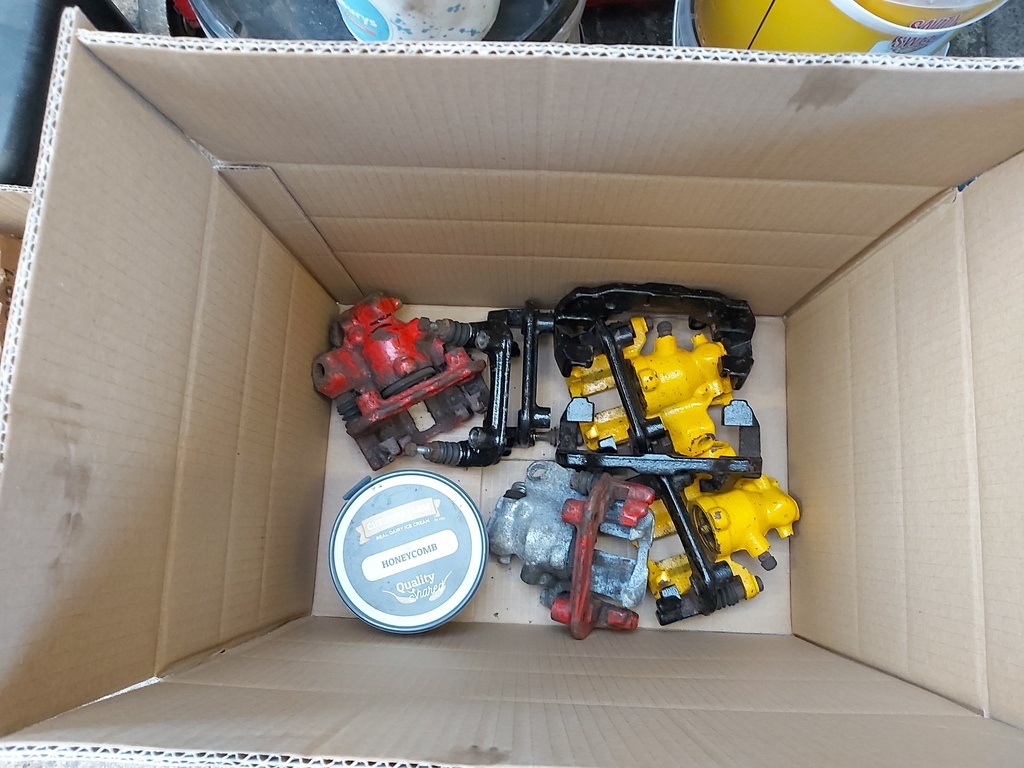 I have also found a place that will blast the chassis which is just 3.5 miles away. I am going to sort out some G15 parts to get done whilst I make the preparations to strip the the car down. |
| |
|
|
|
|
|
Oct 14, 2022 14:50:26 GMT
|
|
Really good to hear it running and looking so nearly complete! But I can guess how much will be needed from now on!!
|
| |
|
|
Darkspeed
Club Retro Rides Member
Posts: 4,846
Club RR Member Number: 39
|
|
Oct 14, 2022 16:37:18 GMT
|
Really good to hear it running and looking so nearly complete! But I can guess how much will be needed from now on!! I'm 8 years in so far........ hopefully I'm past half way  |
| |
|
|
Darkspeed
Club Retro Rides Member
Posts: 4,846
Club RR Member Number: 39
|
|
Oct 16, 2022 18:29:33 GMT
|
The wiper mech looks a bit better than it did above. Not fully finished or painted yet as I need to check the alignment when its in place and rotating. 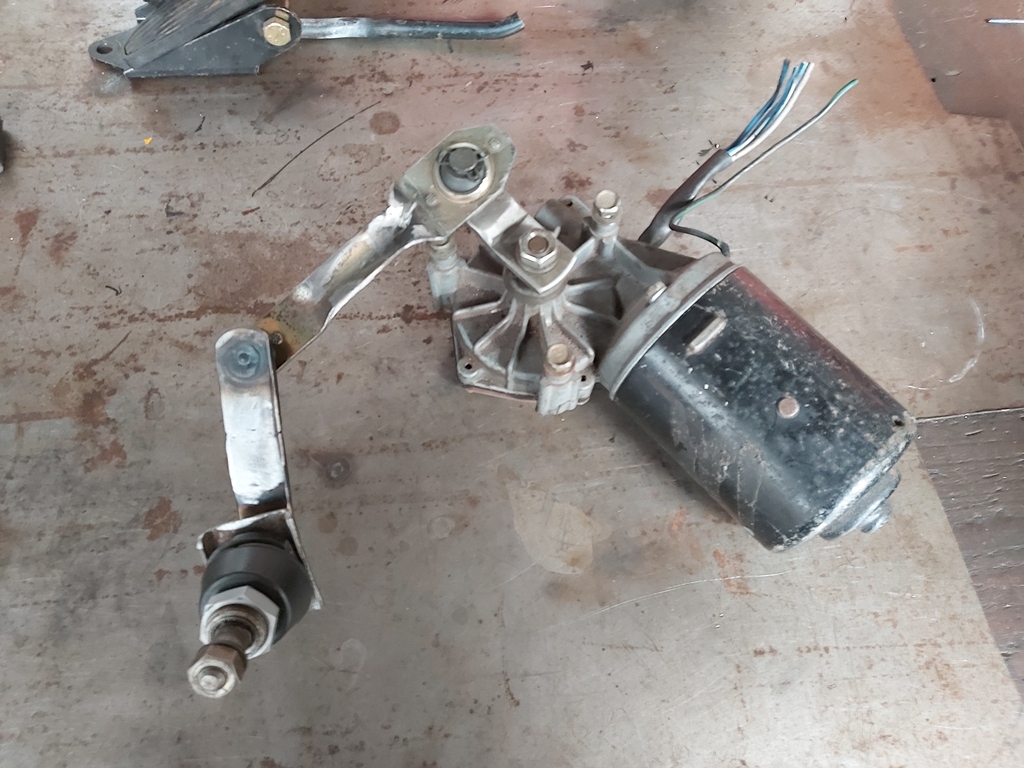 After running the car up and making much noise - the sound is addictive - I let things cool off and started looking at the rear clam locking pin mounts. These are not easy on this car and usually they end up looking less than engineered. I need to get from that back stay to a point just behind the roof spoiler mount. 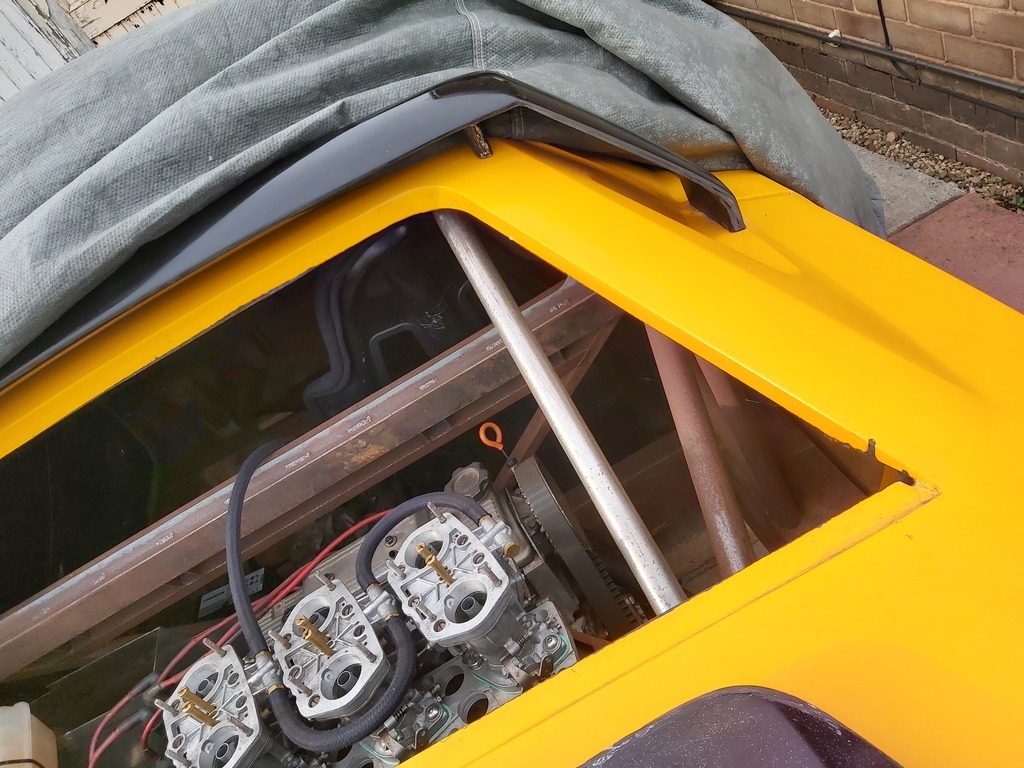 the tube from backstay needs to up and to the right but the mount itself needs to be angled down in two planes to follow the slope of the cover.  for the mount I had some CDS tube but the wall was too thick.  it took a while and a few trials but I started to get there. 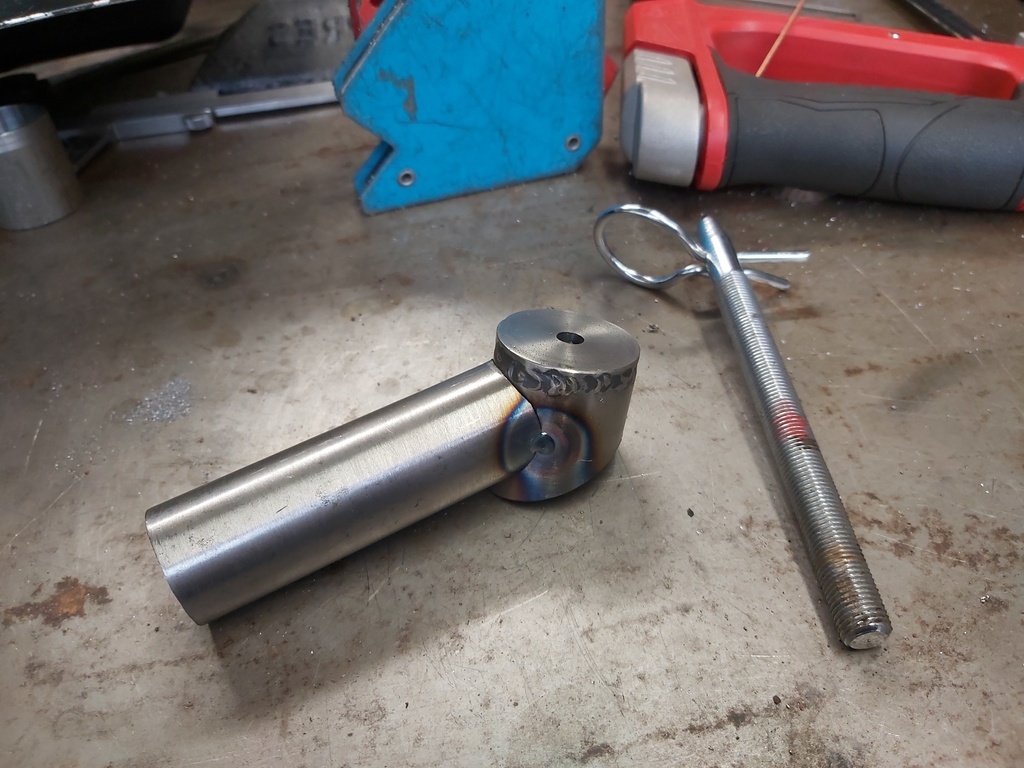 I now need to drill the body to get a final position and then make up a spacer to set the mount the desired distance and correct angles from the body so I can get the final notch done on the leg. 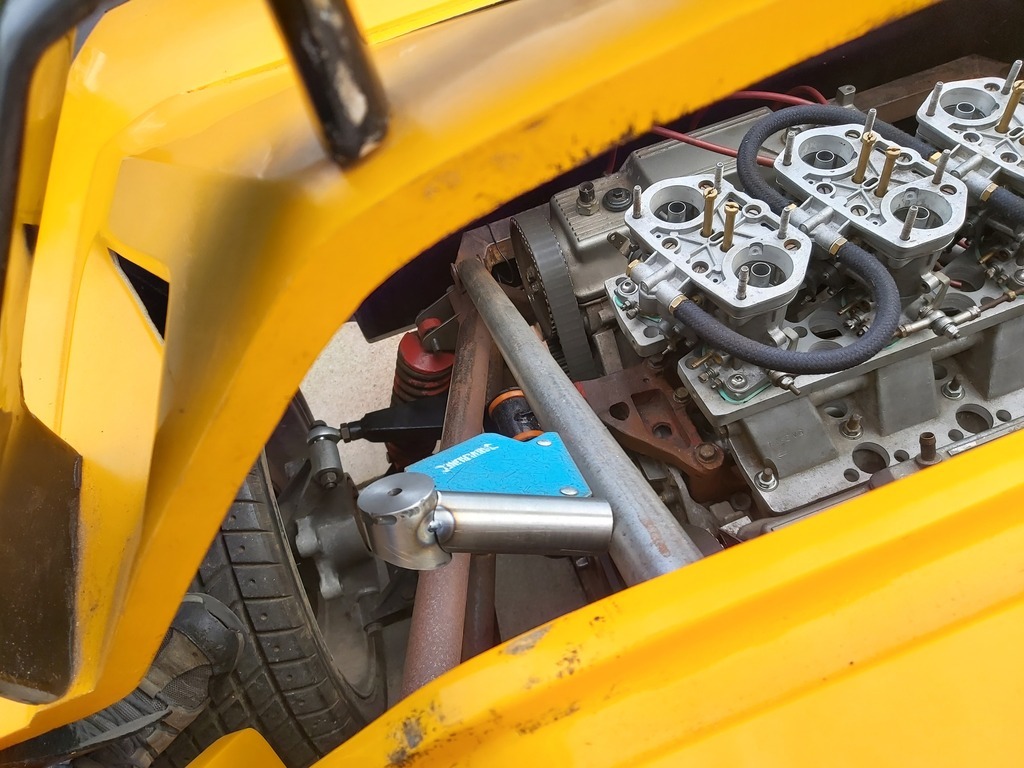 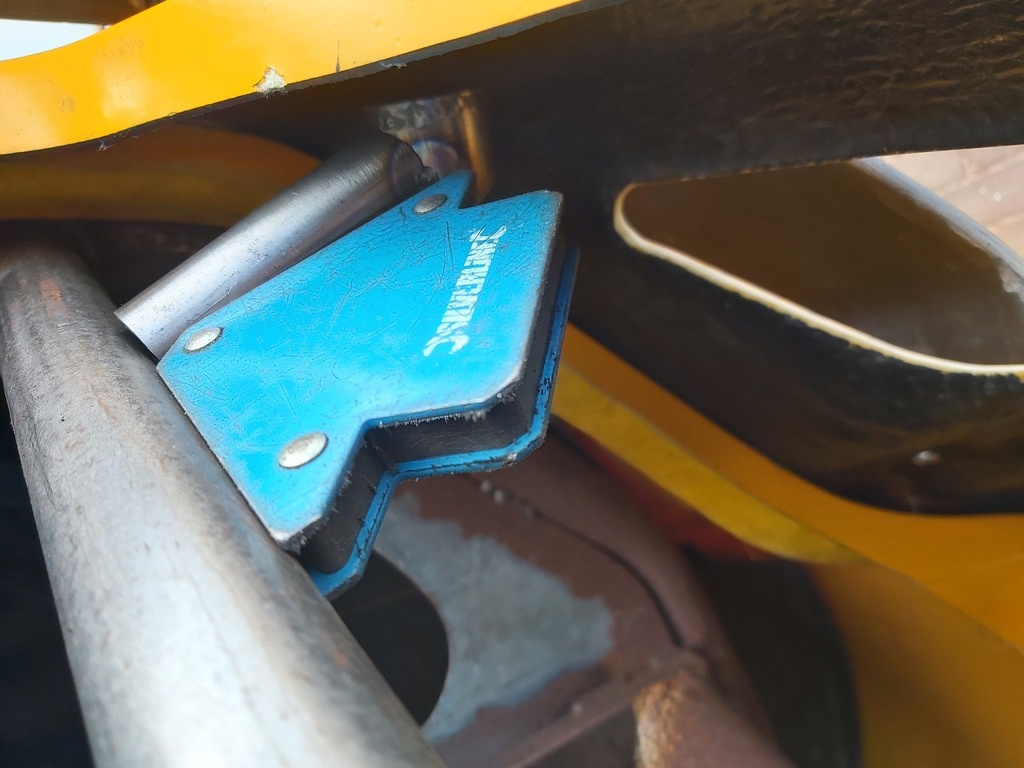 |
| |
|
|


