MiataMark
Club Retro Rides Member
Posts: 2,971
Club RR Member Number: 29
|
|
Dec 17, 2019 11:35:31 GMT
|
I have to say that I'm lucky in that there are 2 (actually 3 but I don't have personal experience of the 3rd) L-R specialists near me that I would recommend. The main one I use (Swindon 4x4) I've been going to for around 20 years, I'm going to take the MX5 there for some work on brake lines to give him a change of scene! Although in a nearby unit they're building a Ford Pop with a River V8. Of course this will totally jinx the Discovery now  |
| |
1990 Mazda MX-52012 BMW 118i (170bhp) - white appliance 2011 Land Rover Freelander 2 TD4 2003 Land Rover Discovery II TD52007 Alfa Romeo 159 Sportwagon JTDm
|
|
|
|
samta22
Club Retro Rides Member
Stuck in once more...
Posts: 1,276  Club RR Member Number: 32
|
|
Dec 17, 2019 13:24:40 GMT
|
Oh,never even noticed their "Other Toys", But I think there are 2 "specialists" within a short distance Not sure you would have ever come across this lot Ian unless you were passing the Sevenoaks Weald. Seemingly they are good at what they do but sadly tend to be more bothered about this sort of thing and don't have time for much else.  Conversely the guys at RCV in East Peckham couldn't have been more helpful, fitted me in as soon as they could and kept me up to date with everything going on - have no issue in paying for good service, particularly on things that are beyond my capabilities with the equipment I have. For everything else I'll continue to sort myself as I still have a terrible affliction of not trusting folk to do things properly.  *Rant warning* Case in point, and I know this is probably my own fault for using them - Amazon. Ordered a couple of hard to find on the high st presents... was out at the weekend playing with Celica and had a notification to say they had been 'handed to resident'. Alarm bells went off and even though I was supposed to be staying away that night I drove home to rescue the parcels which were predictably left on the doorstep in the pouring rain, given we have a front garden that's a huge 8ft from the pavement it wasn't the best hiding place  ... the next one was even better as that was 'handed to the receptionist'... I did wonder for a brief moment if they meant SWMBO  , but considering that she was out with me at the time it was again predictably found on the doorstep... *Rant over* Of course this will totally jinx the Discovery now  Yup of course it will have, they have ways of knowing these things  Have a pic of a finished Celica as rant penance... one day   |
| |
Last Edit: Dec 17, 2019 13:25:46 GMT by samta22
'37 Austin 7 '56 Austin A35 '58 Austin A35 '65 Triumph Herald 12/50 '69 MGB GT '74 MGB GT V8'73 TA22 Toyota Celica restoration'95 Mercedes SL320 '04 MGTF 135 'Cool Blue' (Mrs' Baby) '05 Land Rover Discovery 3 V8 '67 Abarth 595 (Mrs' runabout) '18 Disco V |
|
samta22
Club Retro Rides Member
Stuck in once more...
Posts: 1,276  Club RR Member Number: 32
|
|
Dec 24, 2019 14:21:13 GMT
|
Brief window of time over the weekend meant that I could get an afternoon in the workshop before the rest of the Xmas jobs kicked in. So decided I'd start on repairing the rear quarter. Usual CAD approach meant that I was soon in position to start shaping up a bit of metal to fill the void  Used the Cleco pins to hold bits in place while I moulded the rest. Why moulded? Well I wanted to ensure a close fit to the existing metal work before it was removed so I could pattern and bolt holes etc. from underneath 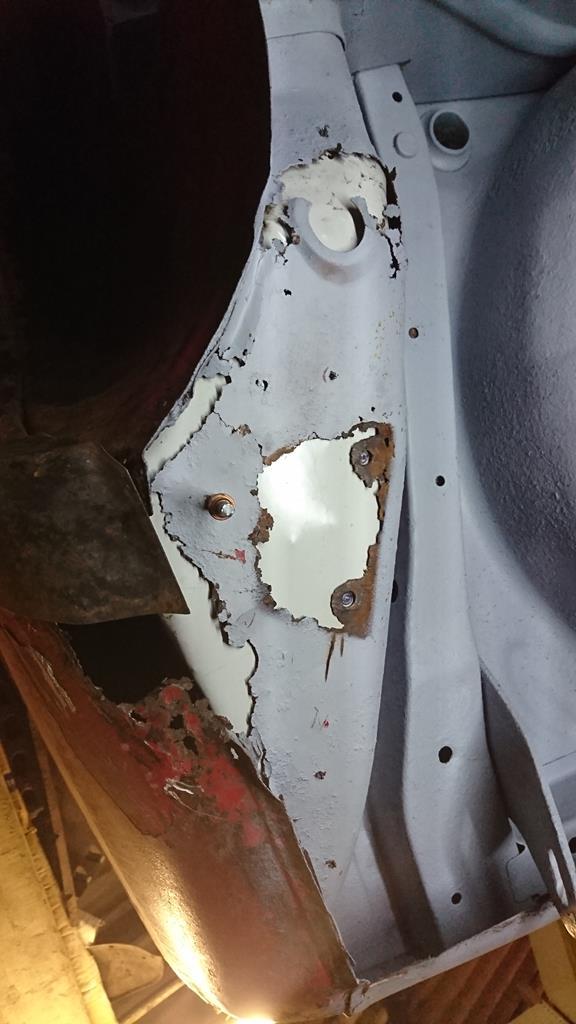 Once done I could then test fit the position of jack clamp on top 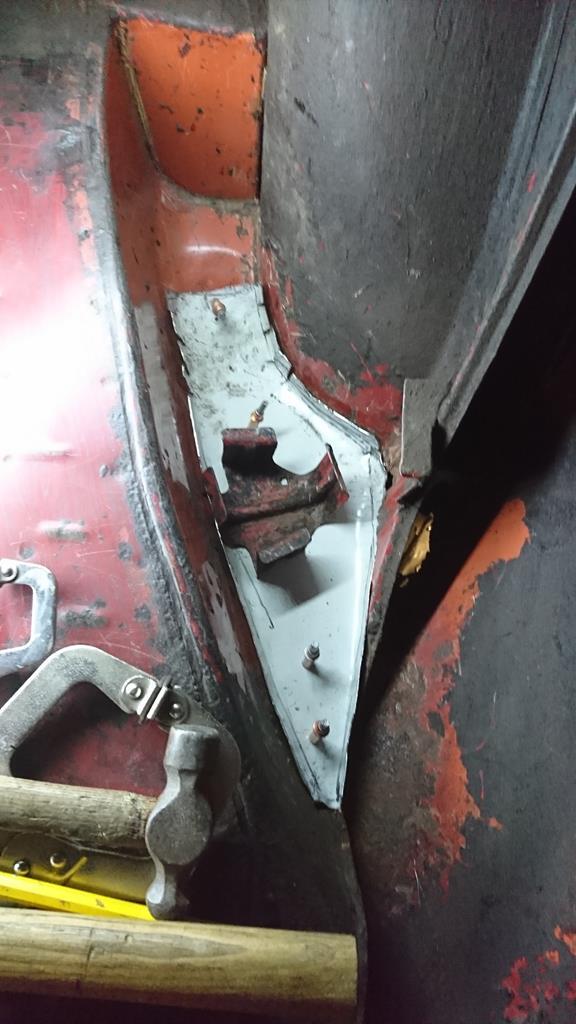 Job done. I'll leave that as is for now while I move on the the inner and outer arch which I need to position accurately before I can tie it all together as the three panels meet in that bottom corner. 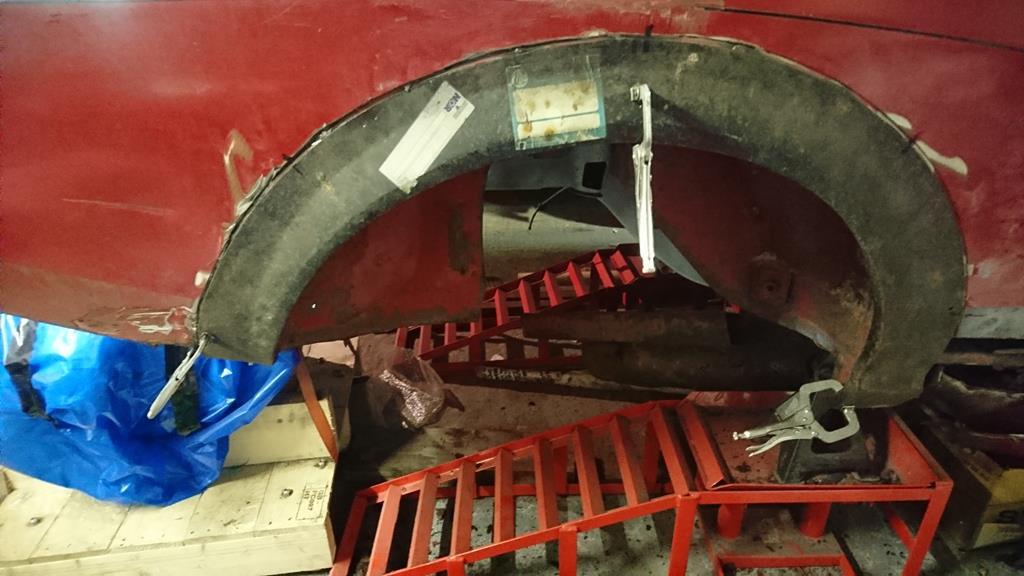 Have a great Christmas one and all, here's to much tinkering over the hols and in the New Year. Chef duties now beckon 😂😂 ![]() |
| |
'37 Austin 7 '56 Austin A35 '58 Austin A35 '65 Triumph Herald 12/50 '69 MGB GT '74 MGB GT V8'73 TA22 Toyota Celica restoration'95 Mercedes SL320 '04 MGTF 135 'Cool Blue' (Mrs' Baby) '05 Land Rover Discovery 3 V8 '67 Abarth 595 (Mrs' runabout) '18 Disco V |
|
|
|
|
Dec 24, 2019 16:35:19 GMT
|
|
Nice work on how you formed and fitted that repair panel.
Are the wheelarch repair sections something that was once sold by the aftermarket?
Best, John
|
| |
|
|
Phil H
Posted a lot
  
Posts: 1,448
Club RR Member Number: 133
|
|
Dec 24, 2019 17:03:46 GMT
|
|
Rant allowed (missed the previous update) - equally I have a low tolerance for poor service (or goods for that matter although I expect chocolate teapots if that’s all I’m paying for). It seems it some organisations/people that getting what you’ve paid for seems a bit of a high aim..
Like your thinking in the “make new before removing old” - must remember that some day!
|
| |
|
|
|
|
|
Dec 24, 2019 19:58:05 GMT
|
|
Your rant is fully allowed - One of my suppliers has it coming in the new year - they used to be good at what they did but over the last few months have simply fallen apart and I'm buggered if I going to wait weeks for the delivery of what are specialist yet common to the market automotive refinishing abrasives - already lined a new independent supplier up - I don't have anytime for 'pretend' service
|
| |
Last Edit: Dec 24, 2019 20:28:13 GMT by Deleted
|
|
samta22
Club Retro Rides Member
Stuck in once more...
Posts: 1,276  Club RR Member Number: 32
|
|
|
|
Firstly, Happy New Year all, trust you had a enjoyable festive period and the start to 2020 has been good so far. As for my car antics over the break, well in truth not much on my two projects, however I did at least get some car-related stuff done - more on that shortly... Nice work on how you formed and fitted that repair panel. Are the wheelarch repair sections something that was once sold by the aftermarket? Best, John John, yes the arch repair panel is NOS that was sold back in the 80's and 90's from what I understand. These cars used to rust prolifically in these areas so was quite a sizeable market at the time. While not a bad panel in terms of fit, as per the example I've removed, their effectiveness was often down to how they were fitted at the time which seemingly was not well, often with tack welds and then smothered in filler to hide the underlying rust that was left on the car... exactly as was done to mine in fact. The panel I have is technically not quite period correct for this car as it should have rounded arch lips, but as these are all but non-existent needs must etc. Like your thinking in the “make new before removing old” - must remember that some day! Phil, indeed  for tricky shaped panels such as this with curves in all directions, plus lots of tabs that need to be made, it is the best way forward for me, assuming there is enough strength in the car I can also use the existing panel as a bit of a former, it's not always the case however... There is another project that I've started to sort the mess on where lots was cut out to begin with - best not to ask who, how or why it happened but it did. For those of you who have seen grizz 's C10 thread - slow and steady repairs in piecemeal chunks is definitely the right way forward - otherwise it ends up like this (H&S freaks look away now...  ) 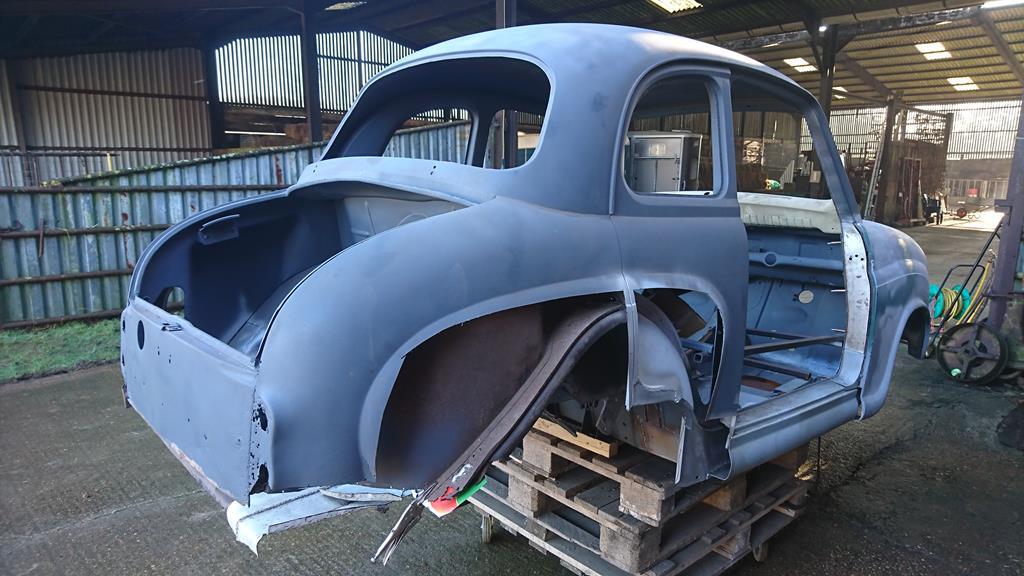 Yes it's a bit of a complete horror show and a definitely lesson in how not to approach a restoration. Still it's a challenge and I'm (currently) looking forward to rectifying it. Which reminds me, I need to put an order in for a load of new lot of sheet metal as definitely won't have enough to do this and everything else! The front end however is at least now back together and, dare I say it, almost looking like it should! 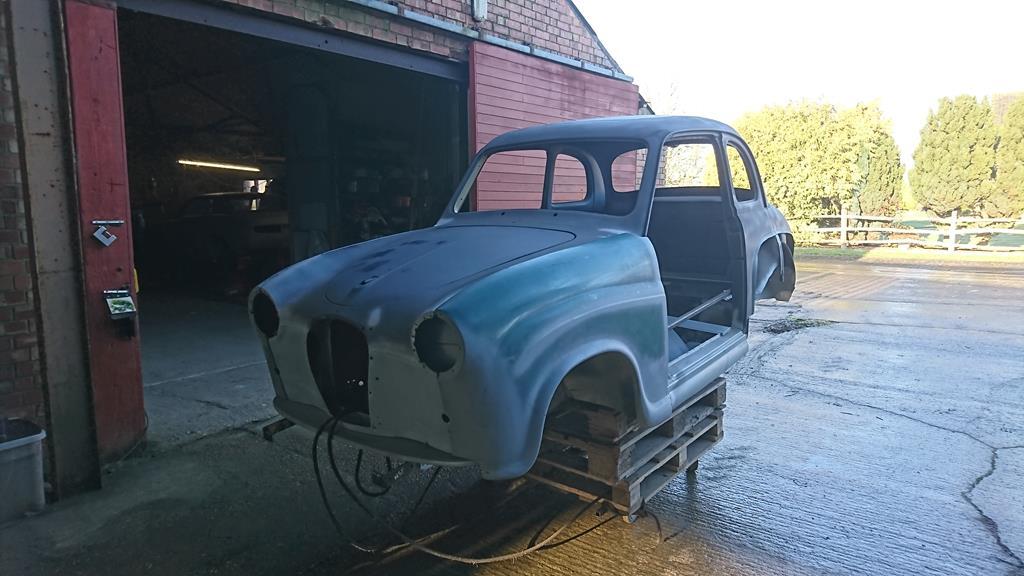 Talking of the A35, one of the days over xmas, we made a start on fitting up the rotisserie fixings, generously given to me by v8ian . Front brackets bolted on no problem at all..  The rear fixings, for reasons you will have already seen, need to wait a little while yet  . Part of the reason for this is that when the car was originally blasted, very little of the rear suspension brackets and leaf spring fixings remained. To solve this I ended up buying another very rough A35 shell, however crucially though the rear fixings are still in place for me to make a jig from, however until I do that and weld things in place, I can't get it on the spit to sort the rest - catch 22. The alternative as a temporary measure is to flip it on a mattress... however that might be easier said than done. More thought needed... So as we couldn't do that, it was on with tidying the work already started in prep for getting our heads round it all once more. Only thing for it was to break out the grinders and flap wheels 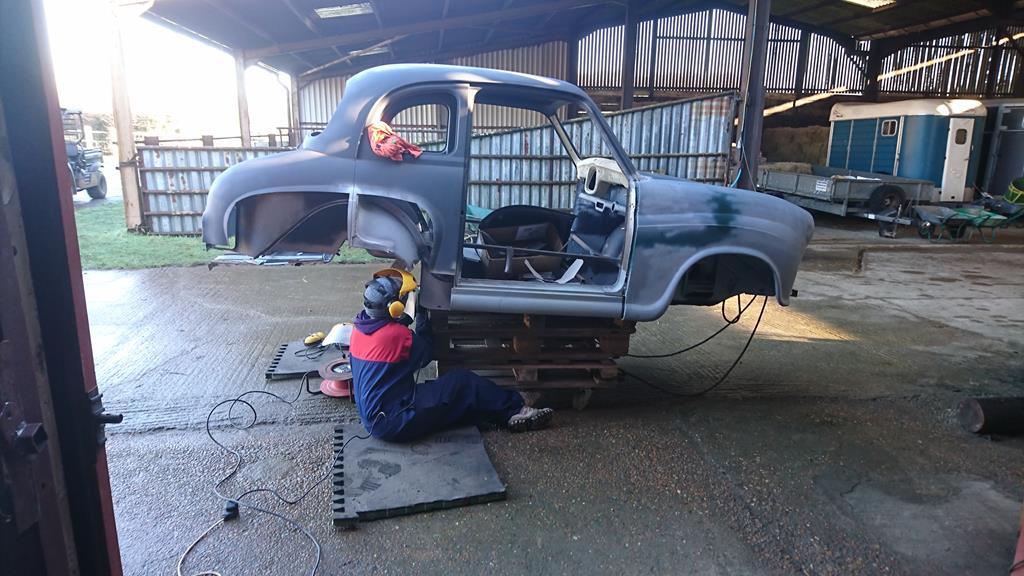 SWMBO was happy at least.  As for the Celica... well it got uncovered while I had a damn good tidy of the workshop in prep for some serious time in the coming weeks (seems it's an annual event at this time of year, last year being in prep for the NEC resto show!) 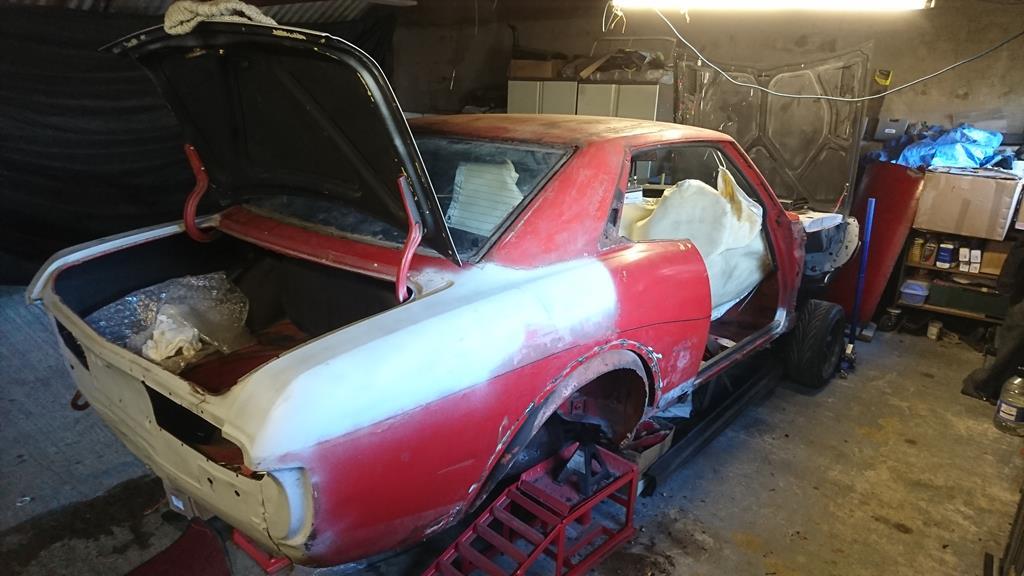  You'll notice the line of wet flooring in the above, alas it's one of the joys of the place having an asbestos roof and condensation forming when it's cold - you get rained on! Part of the reason for working on the A35 outside that day it's that bad! As has been discussed in other threads - sadly for me, it also means that I can't leave any metal in there exposed for more than a day at this time of year as it rusts almost before your eyes  - bstardchild, @grumpynorthener - yes I am jealous  . Still beggars can't be choosers so it is what it is. Anyway back to the reason for the tidy, well asides the fact that it was well overdue, was that I wanted to put in some new racking to move some parts, and shift some of the lesser-used tools out of the way. I also wanted to set up the previous latest addition (yes I'd still not got round to it!). I say previous as we were also given a new pillar drill over xmas (see above photo). However before I could do so, this thing needed to go on a diet and so had a date with the grinder and cutting disc.  In reality I didn't have to take a lot off, just modify one of the front tray edges so I could more easily slide the grinder in. I also had to adjust the position of the pull handle as it was in the way of the torch and earth clamp connections... simply a case of drilling the handle and moving the support brackets to a different location. 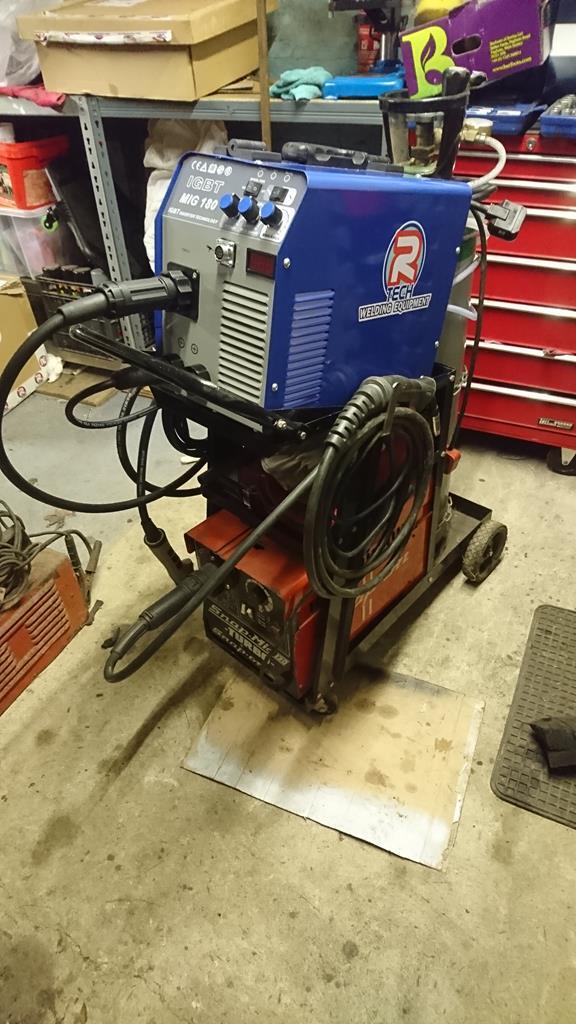 Just need to set the regulator up now with flow meter and order a gas splitter so I can alternate between them if needed (different size wires). Looking forward to finally using it in anger this weekend - no really this time! |
| |
'37 Austin 7 '56 Austin A35 '58 Austin A35 '65 Triumph Herald 12/50 '69 MGB GT '74 MGB GT V8'73 TA22 Toyota Celica restoration'95 Mercedes SL320 '04 MGTF 135 'Cool Blue' (Mrs' Baby) '05 Land Rover Discovery 3 V8 '67 Abarth 595 (Mrs' runabout) '18 Disco V |
|
|
|
|
|
|
As has been discussed in other threads - sadly for me, it also means that I can't leave any metal in there exposed for more than a day at this time of year as it rusts almost before your eyes  - bstardchild, @grumpynorthener - yes I am jealous  . Still beggars can't be choosers so it is what it is. I was amazed, my experiences have always been bare metal to rust in moment.... but then I don’t have a garage, so I don’t run in those elite circles  Excellent, Christmas progress is worth double points! |
| |
|
|
|
|
|
|
|
|
Sam - Could you not create yourself a simple timber frame and cover it with a sheet of DPC or a tarp to underdraw the roof - I did so many years ago when I had the corner of old very leaky & drafty workshop - effectively built a cocoon tent type structure that had a blow heater at one end - did me for 2 years - even painted several motors to very good effect in it - wasn't perfect but it certainty did the job
|
| |
|
|
samta22
Club Retro Rides Member
Stuck in once more...
Posts: 1,276  Club RR Member Number: 32
|
|
|
|
Sam - Could you not create yourself a simple timber frame and cover it with a sheet of DPC or a tarp to underdraw the roof - I did so many years ago when I had the corner of old very leaky & drafty workshop - effectively built a cocoon tent type structure that had a blow heater at one end - did me for 2 years - even painted several motors to very good effect in it - wasn't perfect but it certainty did the job Funny you should mention that, I have been toying with getting hold of one of those cheap outdoor garages for a while... although it may be overkill and I suspect the novelty of getting in and out of it all the time may soon wear off! The other thought was to use the blue tarp I picked up when I blasted the underside so interesting you've done similar in the past. While tidying up over the hols I dug it out (can be seen in the first Celica pic) and so was thinking of utilising it somehow, perhaps even just off the roof trusses as a starting point. I'm planning to head over there tomorrow so depending on how bad conditions are I might see if I can rig something up so I can at least work without fear of being dripped on  |
| |
'37 Austin 7 '56 Austin A35 '58 Austin A35 '65 Triumph Herald 12/50 '69 MGB GT '74 MGB GT V8'73 TA22 Toyota Celica restoration'95 Mercedes SL320 '04 MGTF 135 'Cool Blue' (Mrs' Baby) '05 Land Rover Discovery 3 V8 '67 Abarth 595 (Mrs' runabout) '18 Disco V |
|
|
|
|
|
|
|
|
|
I imagine the air flow is one of the more important points in stopping the condensation from dripping through?
Might be able to use a few computer fans or something to push the air around?
|
| |
|
|
samta22
Club Retro Rides Member
Stuck in once more...
Posts: 1,276  Club RR Member Number: 32
|
|
|
|
I imagine the air flow is one of the more important points in stopping the condensation from dripping through? Might be able to use a few computer fans or something to push the air around? Alas it might need a bit more than a few computer fans as it's about raising the temp of the asbestos sheeting when there's a frost. Will give it some thought though, biggest issue would be working out how that might be done when I'm not around. To give an idea of size you can see the Celica hiding in the background of the front-end A35 photo above. |
| |
'37 Austin 7 '56 Austin A35 '58 Austin A35 '65 Triumph Herald 12/50 '69 MGB GT '74 MGB GT V8'73 TA22 Toyota Celica restoration'95 Mercedes SL320 '04 MGTF 135 'Cool Blue' (Mrs' Baby) '05 Land Rover Discovery 3 V8 '67 Abarth 595 (Mrs' runabout) '18 Disco V |
|
|
|
|
|
|
|
Ah! I didn't realise that was the same shed!
|
| |
|
|
samta22
Club Retro Rides Member
Stuck in once more...
Posts: 1,276  Club RR Member Number: 32
|
|
|
|
Driving over to the workshop on saturday while whistling 'raindrops keep falling on my head' 😂😂, I was somewhat optimistic, why so? well it was the first proper day for weeks where I had completely uninterrupted playtime. No places to be, no requirements to be sociable, just me, the radio, tools and a plan... (well of sorts) As an unexpected bonus there was no need to tarp up, all seemed to be relatively dry and drip-free for a change so I was able to just crack on. First job was to sort the welders now that the missing piece of the puzzle had arrived from R-Tech - a gas feed splitter. Soon had everything fitted together and even added the flow meter they threw in as well so I don't use more gas than I need. 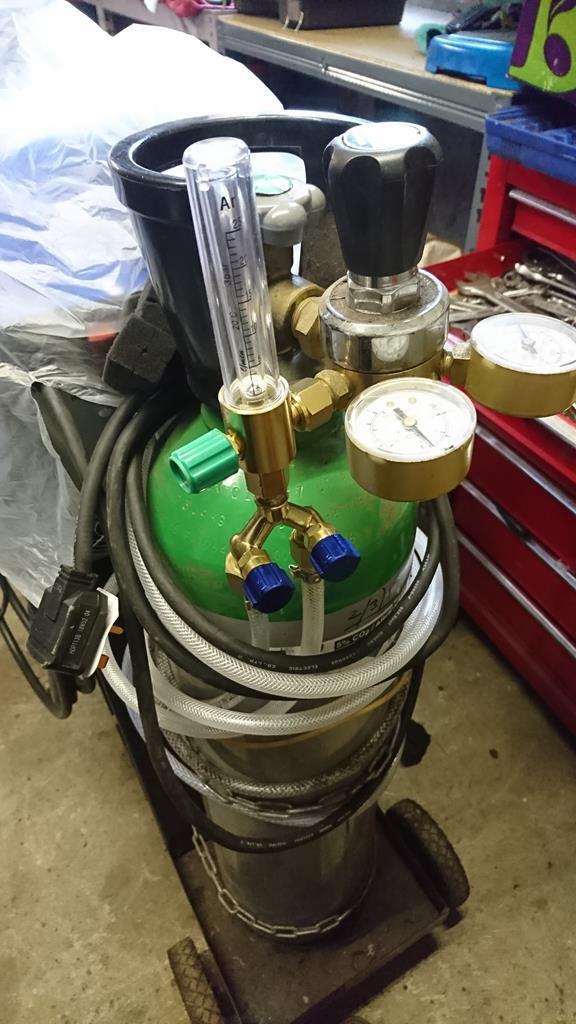 It was then onto the sills... what was I saying previously about things rusting if left untreated? Even though these bits had been lying in the car, the inner faces left face up were showing the effects of the damp  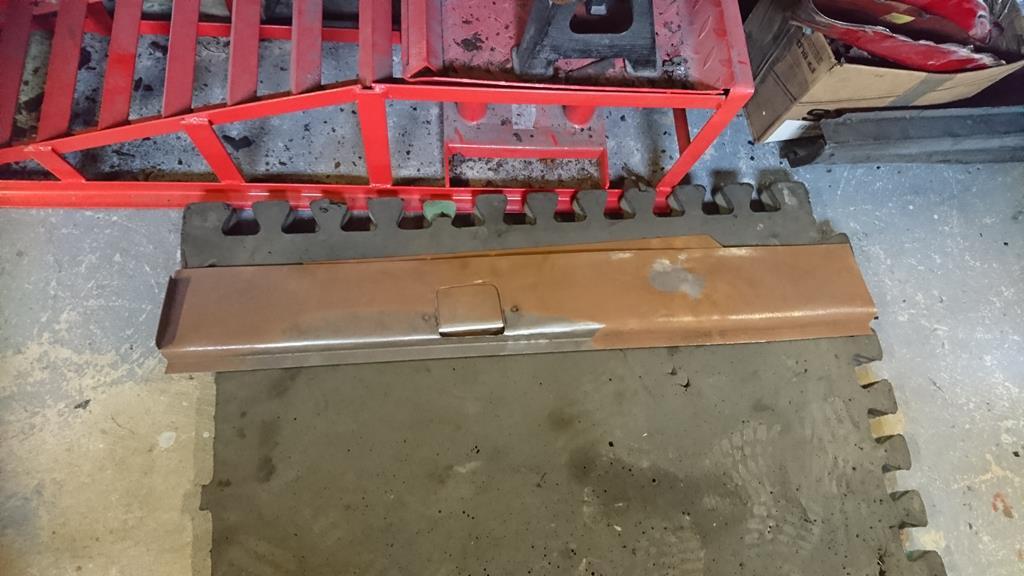 Conversely the other side seemed to have escaped unscathed where they had been oiled in the past 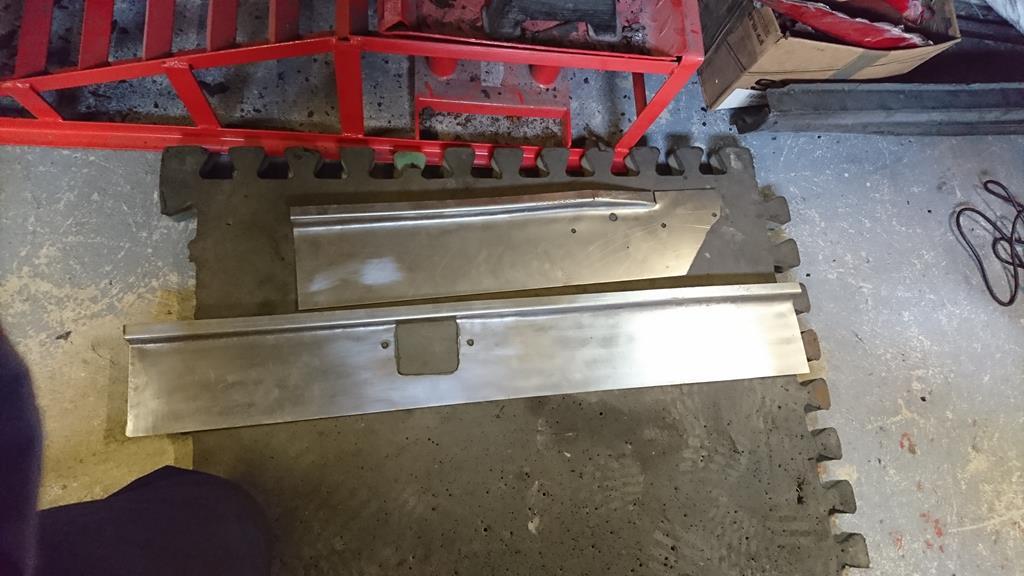 However before these two parts could go anywhere near the car, I needed to finish removing the remnants of what I left behind last time, which meant a lot of spot weld drilling and removing of hidden rust traps 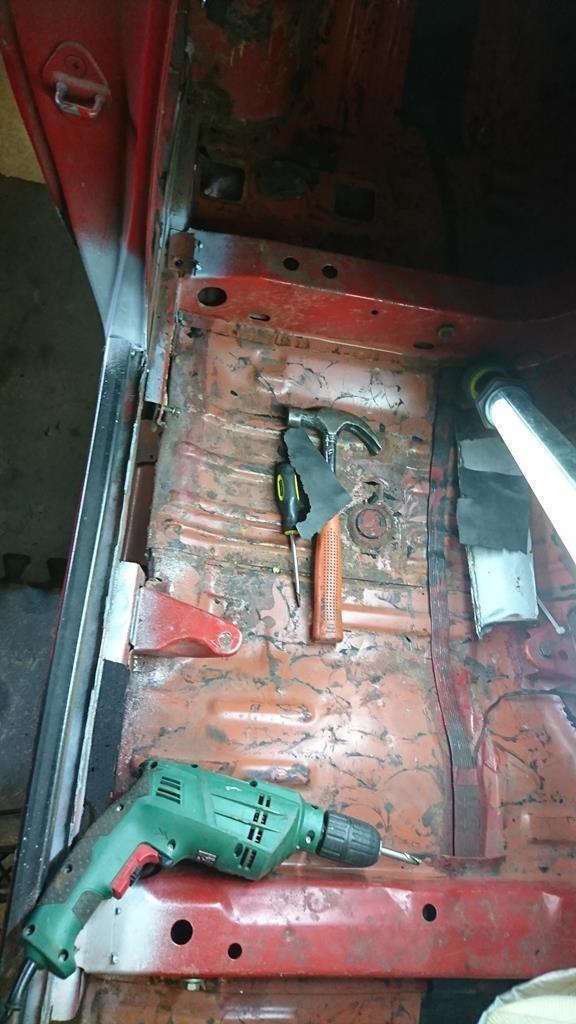 Never the most fun of jobs, but a bit of work with the drill, flap wheel, cutting disc and small hammer and sharpened chisel and things were soon looking a bit better 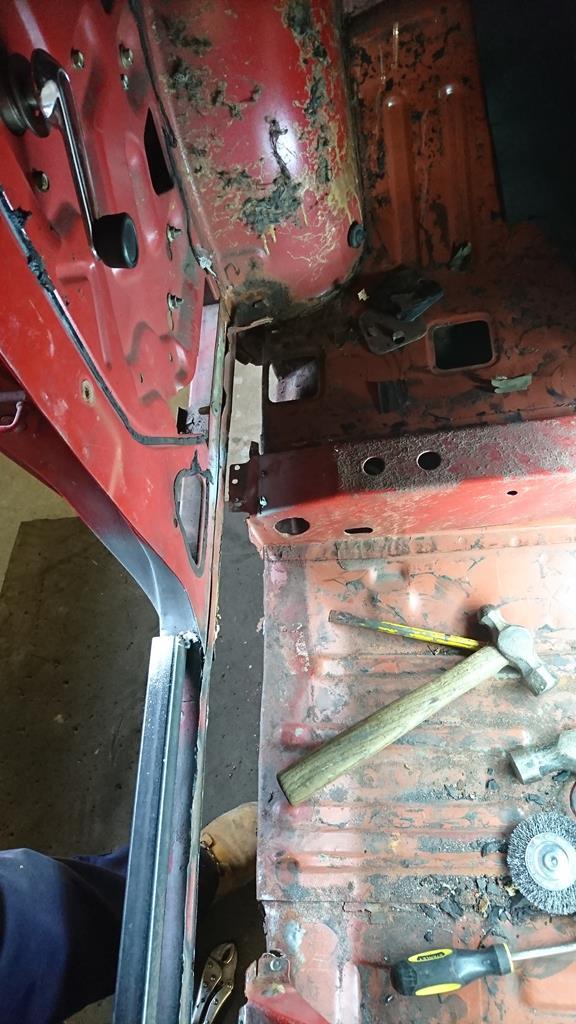  Next job was then to remove the very top of what remained of inner sill (you can just see it in the above pic running parallel to the box section), however before I started on that I wanted to add some more bracing as I didn't want to lose the line of what remained of the outer sill while drilling and manhandling it. More box section cut and sound deadening removed before braces were welded. 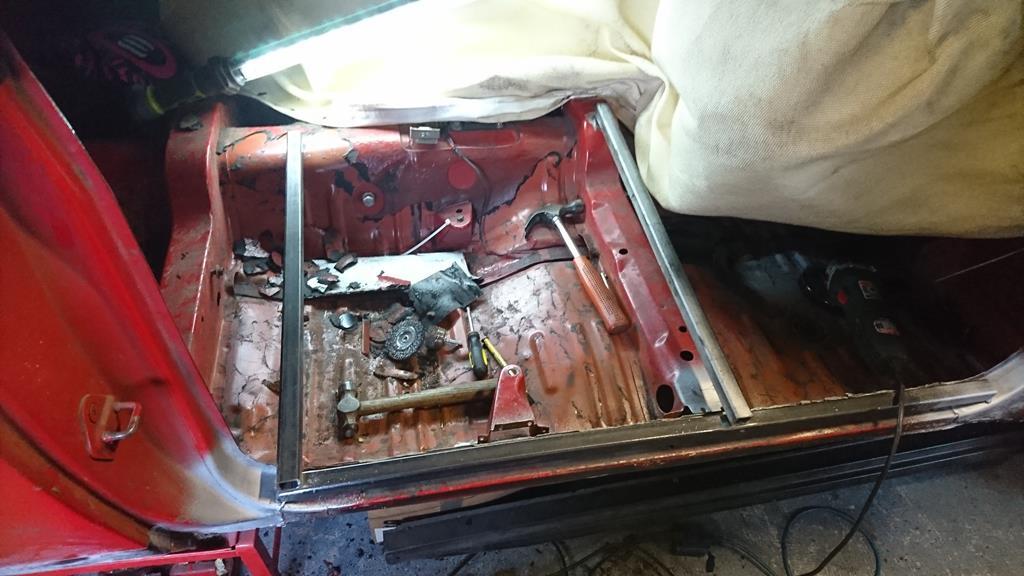 As it happens, the more I did on the day, the more I noticed how rotten the top of the original outer sill is. Unlike the other side, I think I'm going to end up replacing it, however for the time being and before I chopped any more out it could stay and act as a guide while I positioned the inner panels. Inner lip removed  Inner sill replacement panels starting to get positioned 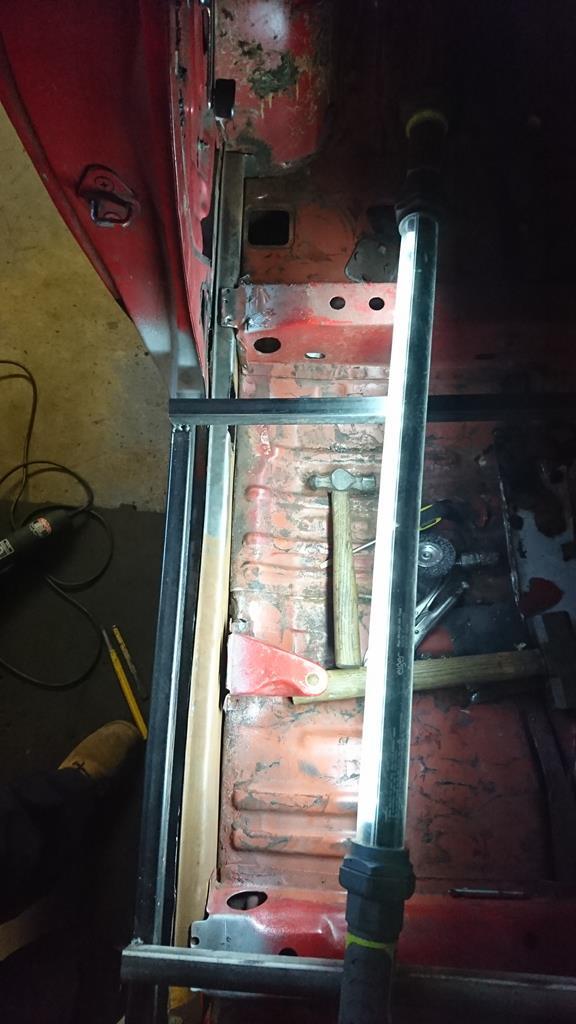 For the rear section to fit properly, I had to open up the join where the wheel arch meets the floor so I could insert the inner sill tab, as it effectively goes through the floor and is then welded to the front of the arch  After a bit of a fight I got the rear in the right place and clamped up - you can see the state of the outer too. 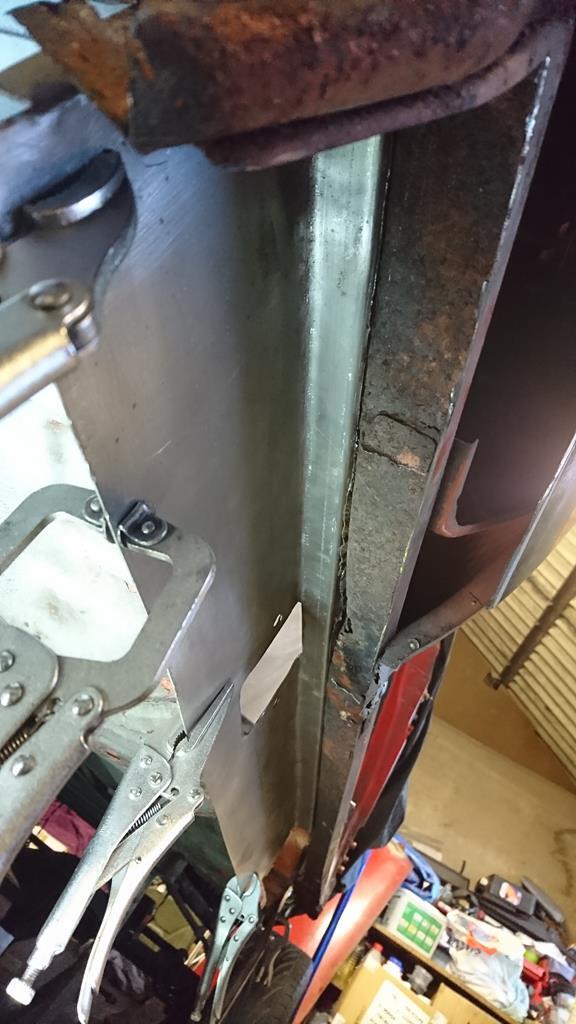  On with the front then 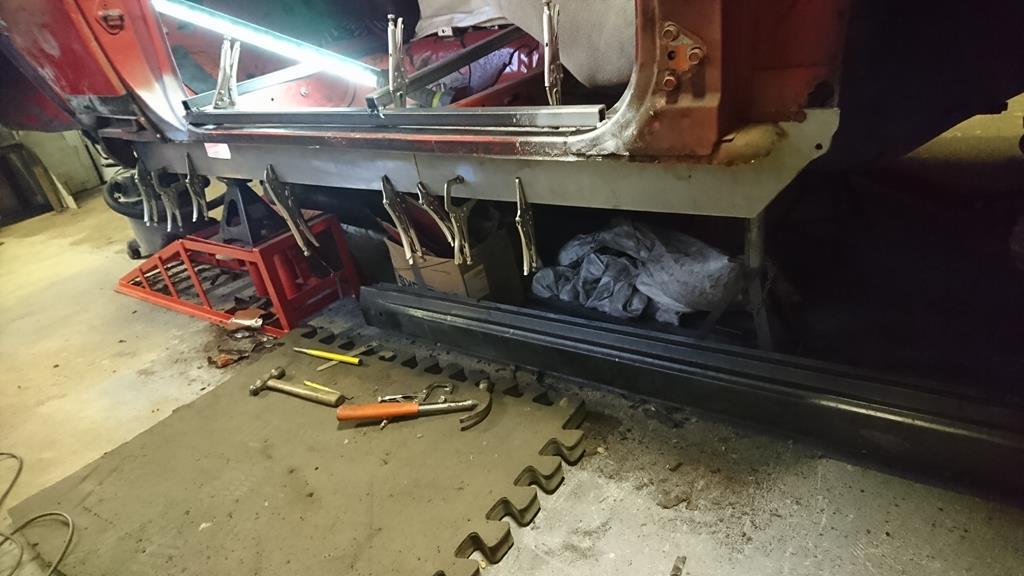 Starting to look better 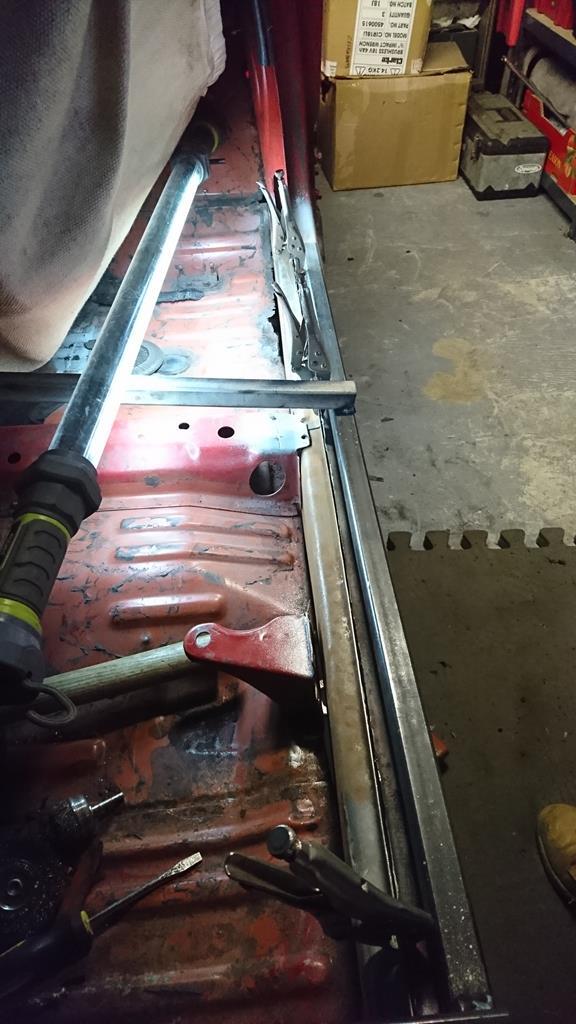 Once I was happy with where it was positioned and before anything moved it was clamped with every spare one I had!   Time to break out the clecos pins. Why the pins? well clamps are ok but tend to get in the way of fitting other panels, you can also knock them off and cause yourself more problems later on. So I like to add pins all round, knowing that if I remove one or two then the panel isn't likely to go anywhere before I make things more permanent. 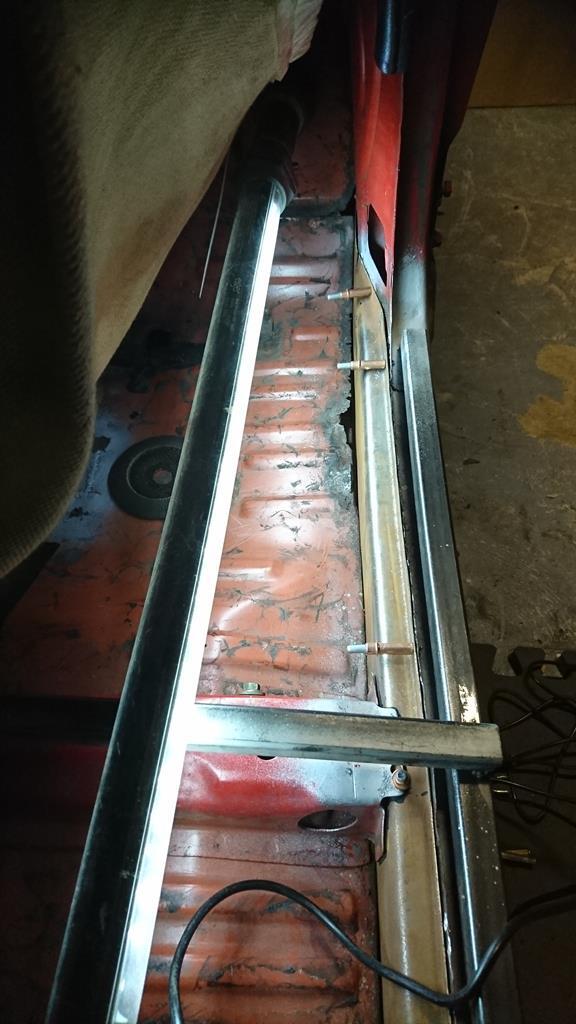 Check out the underside of that floor - plenty of sections already on the list for replacement  Once everywhere was pinned the clamps could be removed. All was starting to look like it should at last  Oh and before anyone asks - I didn't make the same mistake as last time around (proof I do still learn things!), I refitted the splash guard to see where it met the front inner sill mounting point 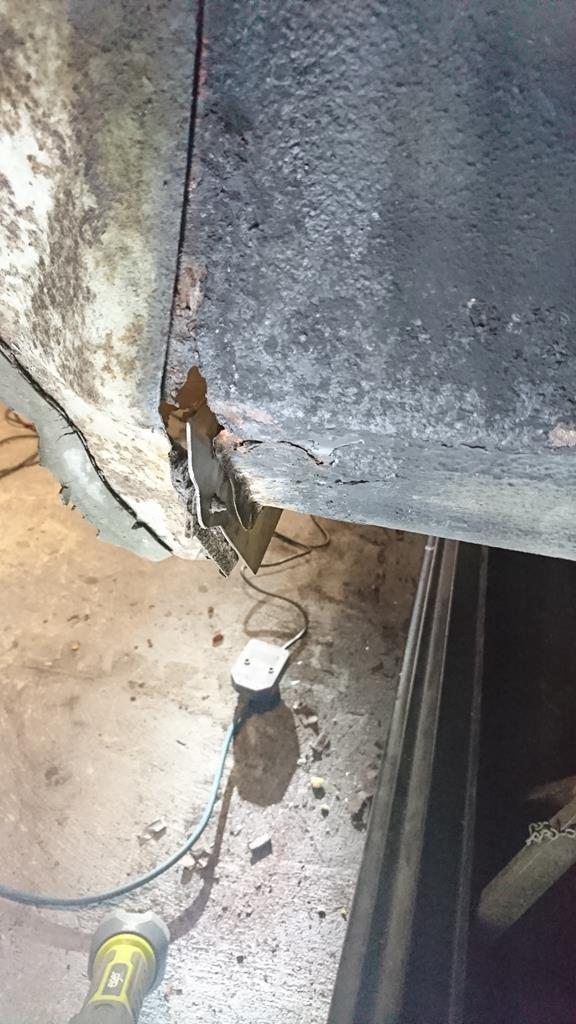 Bullseye!  So with the major job of the day done (and not wanting to push my luck!), it was time for a quick tidy up 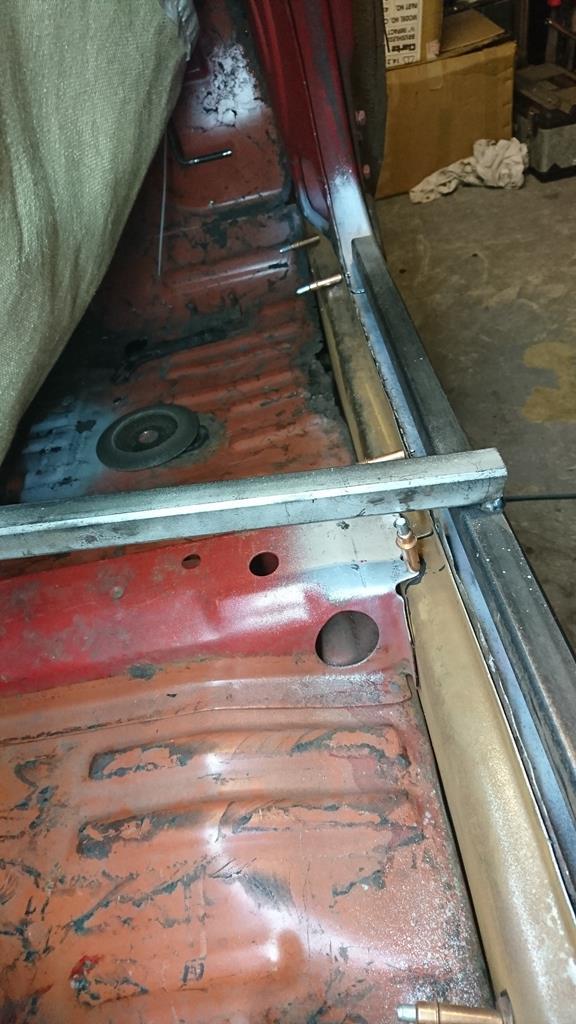 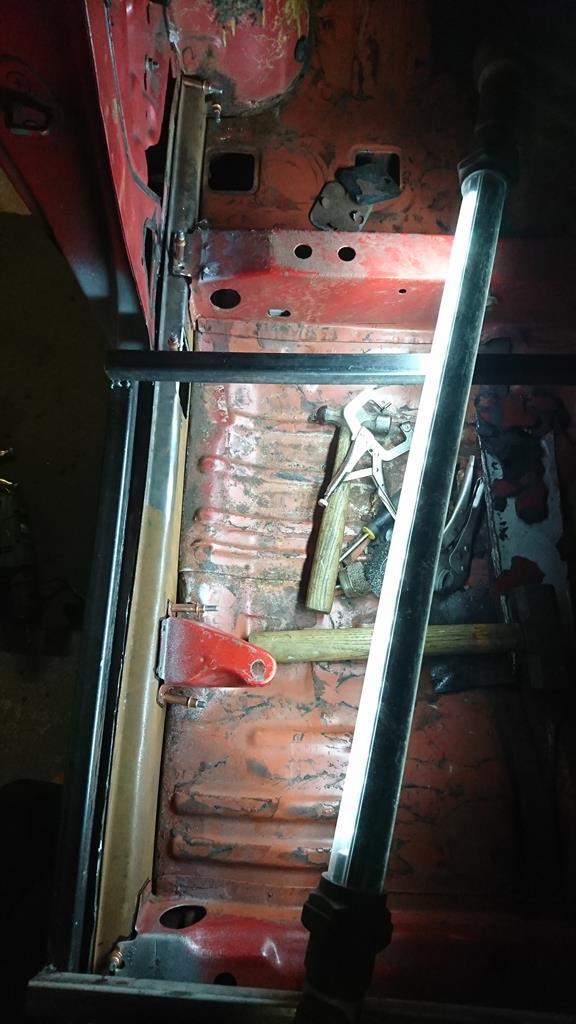 ...and onto something else - sorting the inner and outer parts of the rear arch using two new outer repair panels as per the other side. After a fair bit of time, shaping, fitting, marking, taking off, fettling, refitting, more marking, taking off etc. etc. I soon got to a point I was relatively happy with how it looked 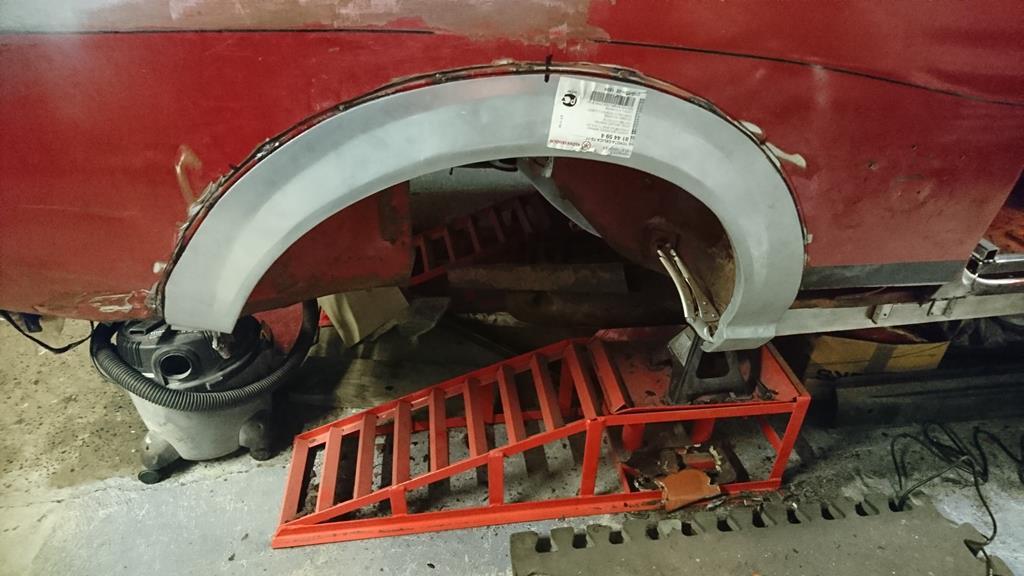  You can just see the inner arch underneath 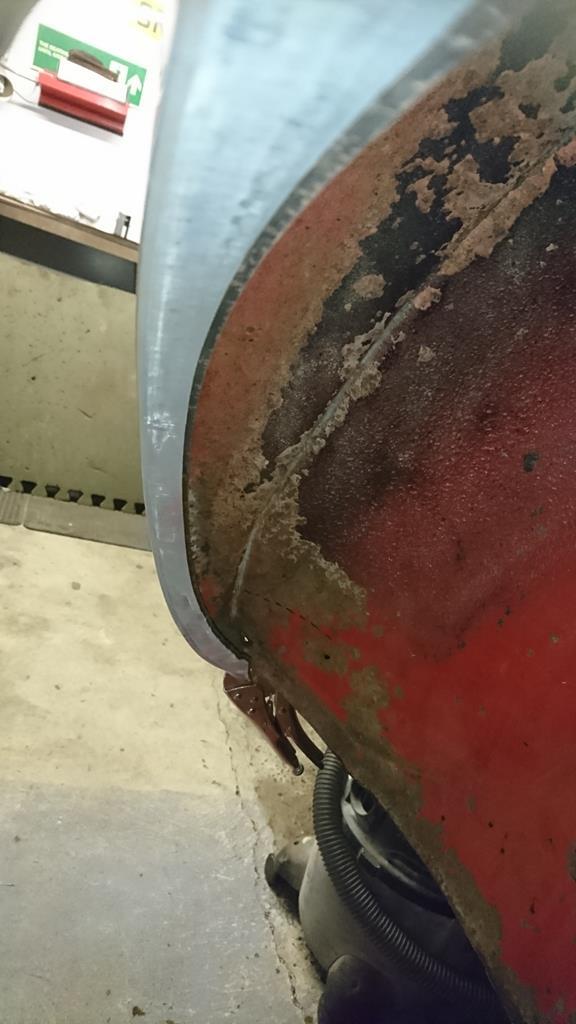 Next stage will be to shape the replacement inner arch a bit more and then let it into the existing one... am off to re-read a few pages back to remind myself how I did it this time last year  I might not be the quickest, but all in all it was a very satisfying day. |
| |
'37 Austin 7 '56 Austin A35 '58 Austin A35 '65 Triumph Herald 12/50 '69 MGB GT '74 MGB GT V8'73 TA22 Toyota Celica restoration'95 Mercedes SL320 '04 MGTF 135 'Cool Blue' (Mrs' Baby) '05 Land Rover Discovery 3 V8 '67 Abarth 595 (Mrs' runabout) '18 Disco V |
|
|
|
|
|
|
|
Had I only known....
I skipped a gazebo 6x3 meters just before Christmas. All complete with a tear in the roof that was gaffa taped up. Would have been ideal 🙄😊
|
| |
|
|
samta22
Club Retro Rides Member
Stuck in once more...
Posts: 1,276  Club RR Member Number: 32
|
|
|
|
Next time...  |
| |
'37 Austin 7 '56 Austin A35 '58 Austin A35 '65 Triumph Herald 12/50 '69 MGB GT '74 MGB GT V8'73 TA22 Toyota Celica restoration'95 Mercedes SL320 '04 MGTF 135 'Cool Blue' (Mrs' Baby) '05 Land Rover Discovery 3 V8 '67 Abarth 595 (Mrs' runabout) '18 Disco V |
|
samta22
Club Retro Rides Member
Stuck in once more...
Posts: 1,276  Club RR Member Number: 32
|
|
Jan 12, 2020 22:57:26 GMT
|
Back to it then...  The plan was to try and get all of the patch panels made up, and if I had time then back on with the inner arch repair. As it happened some were easier than others to make, others took quite a bit of forming and shaping. I blame my OCD as other 'expert' restorers of these just weld in flat plate and are done with it, content in the knowledge that they're under carpet and so out of sight, out of mind. I for some reason can't live with that so make things slightly harder for myself!  So time to get under the car to see what I was dealing with 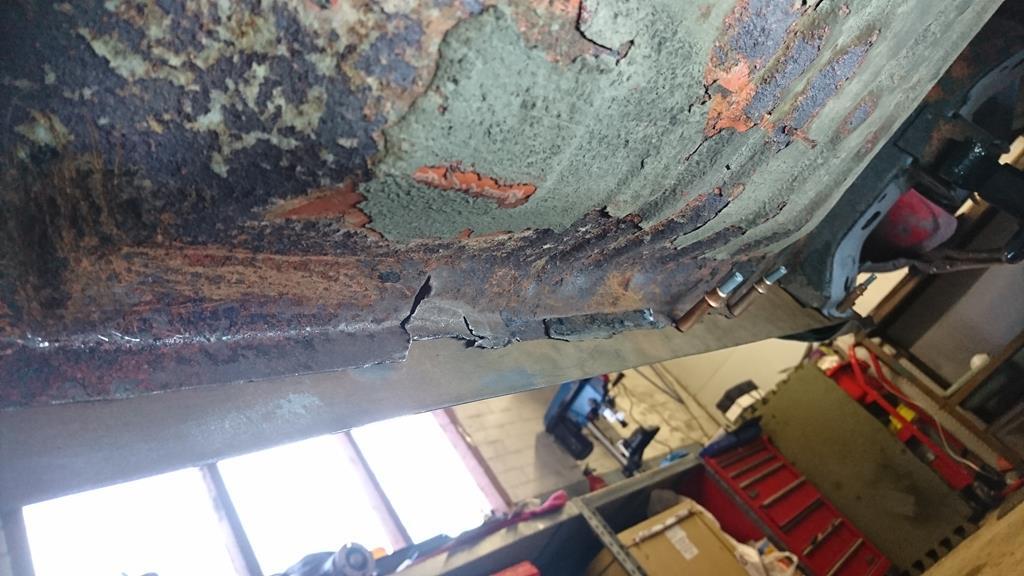 Some areas definitely need some tlc, other sections are remarkably fine, just need cleaning up  Front was definitely going to need some time spent 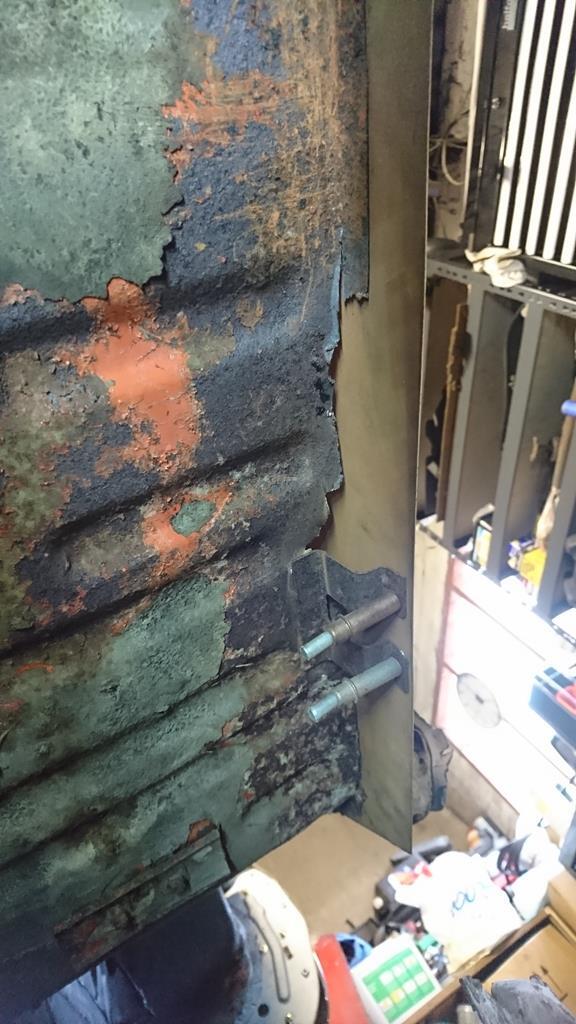 so I started with the rear  . Out with the cardboard and once templated it was time to start folding  cut the lip out of the way  and proceeded to start shaping up the repair section  Now annoyingly, but not really surprisingly, Toyota decided it would be a great idea to put a join in the floor halfway through the rear section, overlapping the two parts... which means of course it rusts. it also means I had to make a seperate repair up and needed to step where they overlap. now my compressor-powered joggler hasn't got a deep enough jaw to create a big enough step so I had to get creative with the hammer  which left me  then rinse and repeat for the front section, except this time I needed to match the ridges that are already in the floor (there's that OCD again!). So after marking up, a small piece of pipe was put in the vice to hammer over, and eventually I had something that wasn't far off a good match. (bit hard to see with the light but you get the idea)  onto the front then, and where the edge of the arch meets the floor, outer sill and inner sill 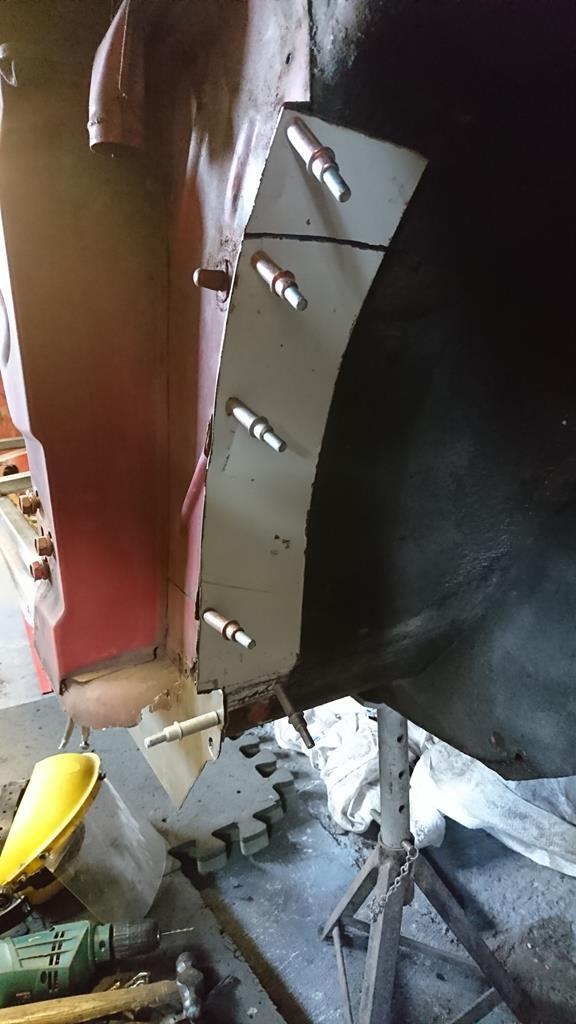 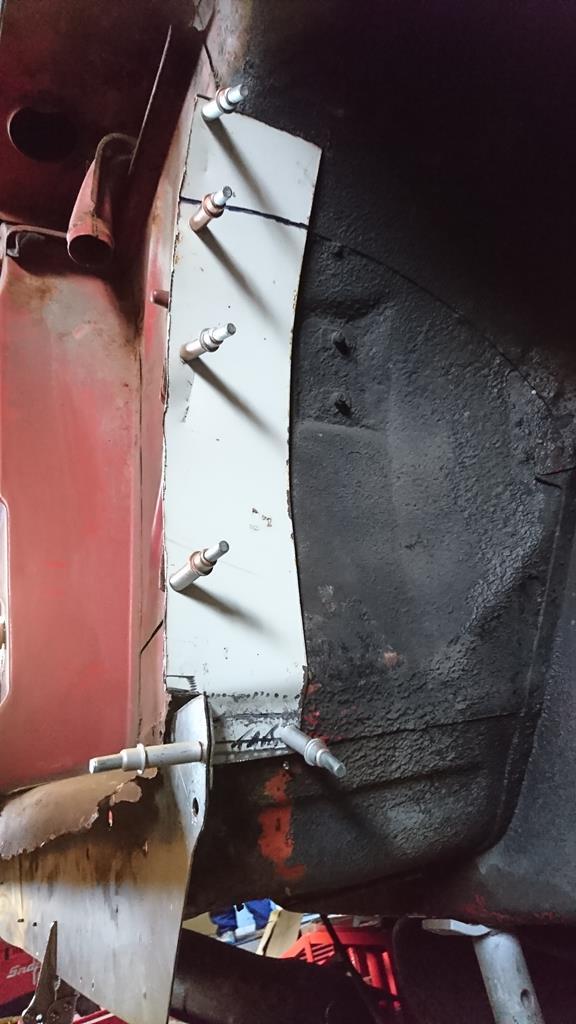 Tried to keep pinning things as I went so I have a reference for when I take it all off for etching and painting. Last section was the inner wing kick panel which was err... ventilated.  Repair made up and then stepped 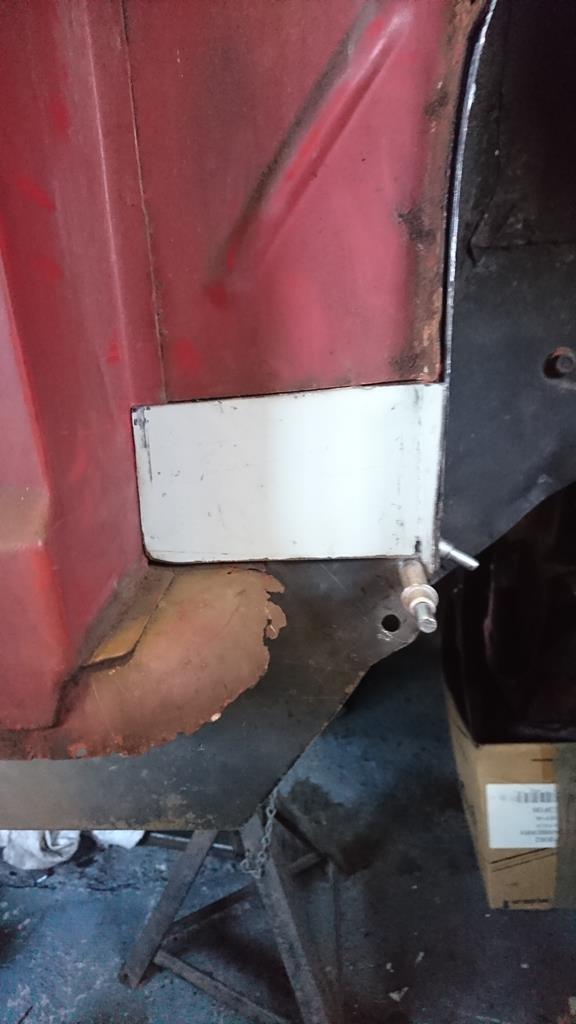 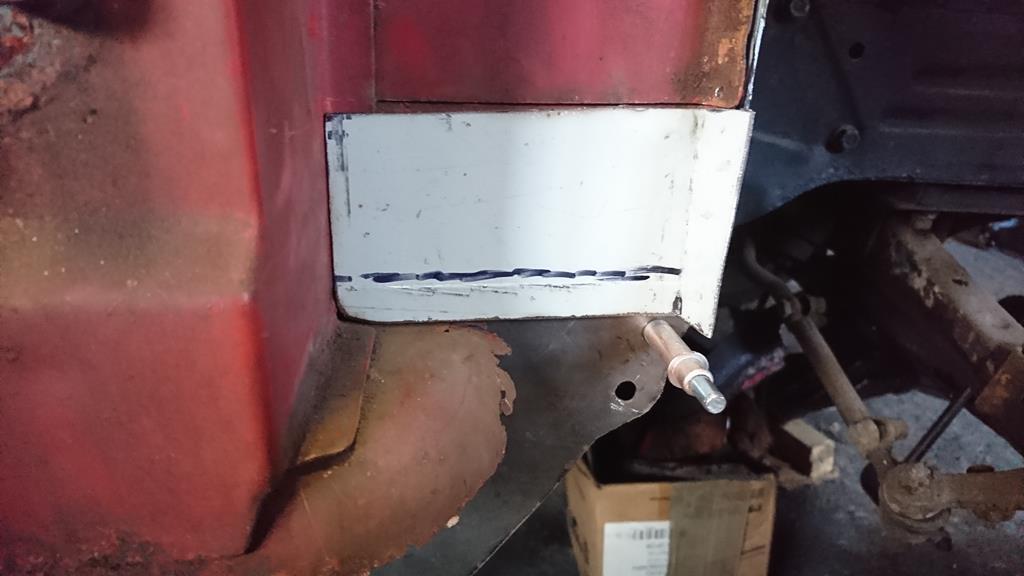 and after a little more fettling, including stepping the rear edge, it was pinned/clamped in place  Which meant the front was all then complete 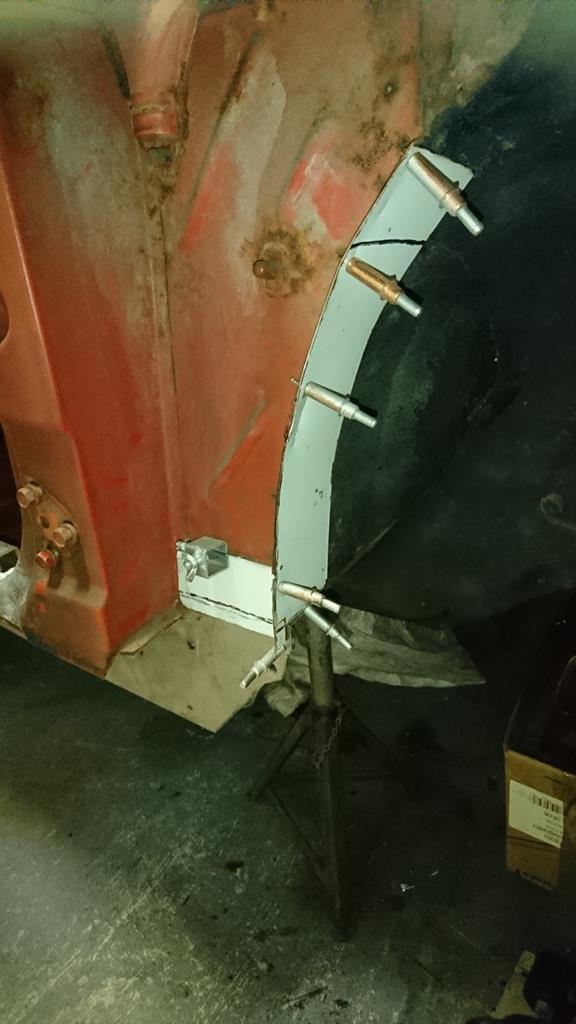 Before I starting chopping things out I decided I'd get the new welder set up and dialled in. As SWMBO was doing some bits on the A35 and wanted some holes welded, I thought I may as well have a play on that  . Nothing much to say other than why the hell did I not buy the thing sooner?! So nice to use, much more controllable and dare I say it, the welds are much nicer to boot. Alas time wasn't on my side so no rear arch and no welding of the repair panels, but I am now very much looking forward to getting stuck in to the welding on the celica, just a minor issue of 5 days of the day job. B*gger. |
| |
'37 Austin 7 '56 Austin A35 '58 Austin A35 '65 Triumph Herald 12/50 '69 MGB GT '74 MGB GT V8'73 TA22 Toyota Celica restoration'95 Mercedes SL320 '04 MGTF 135 'Cool Blue' (Mrs' Baby) '05 Land Rover Discovery 3 V8 '67 Abarth 595 (Mrs' runabout) '18 Disco V |
|
|
|
|
Jan 13, 2020 14:00:33 GMT
|
|
Sam - I keep trying advise everyone that a good invertor based MIG is the core of any decent vehicle restoration - it makes your life so much easier - but time & again the worlds so called 'MIG experts' will climb out their boxes to tell me that a transformer based machine is better - even some of the professionals think so - I'm quite happy for them to struggle on whilst we know better*
*Quoted on my opinion & experience and devoid of any contempt / arrogance or any other factor that others may wish to level at the points made above
|
| |
|
|
samta22
Club Retro Rides Member
Stuck in once more...
Posts: 1,276  Club RR Member Number: 32
|
|
Jan 13, 2020 16:41:52 GMT
|
Sam - I keep trying advise everyone that a good invertor based MIG is the core of any decent vehicle restoration - it makes your life so much easier - but time & again the worlds so called 'MIG experts' will climb out their boxes to tell me that a transformer based machine is better - even some of the professionals think so - I'm quite happy for them to struggle on whilst we know better* *Quoted on my opinion & experience and devoid of any contempt / arrogance or any other factor that others may wish to level at the points made above Indeed, for what it's worth as a 'token hobbyist' and given my quick 45 min play I'm more than inclined to agree - each to their own and all that  The difference is night and day for me. Control, sensitivity, penetration, small gas overrun after you've let the trigger off (appreciate that might be machine-based). Just was so easy to use. I think the best indication for how much nicer it was compared to my her ladyships Snap On machine (don't get me wrong, that is still a good/capable machine), is that all I've thought about today is playing some more with it... yes, all very, very sad but hey it's a new toy!  The downside is that I'm now thinking about all my previous welding and wondering whether I should go back and re-do it! 😂 |
| |
'37 Austin 7 '56 Austin A35 '58 Austin A35 '65 Triumph Herald 12/50 '69 MGB GT '74 MGB GT V8'73 TA22 Toyota Celica restoration'95 Mercedes SL320 '04 MGTF 135 'Cool Blue' (Mrs' Baby) '05 Land Rover Discovery 3 V8 '67 Abarth 595 (Mrs' runabout) '18 Disco V |
|
|
|
|
Jan 13, 2020 18:00:42 GMT
|
|
Can we see some side to side comparison welds on a bit of scrap to see the difference?
Still working on my man maths & little 'side jobs' that are building up my 'new welder fund' before ringing R Tech.
|
| |
|
|
|
|


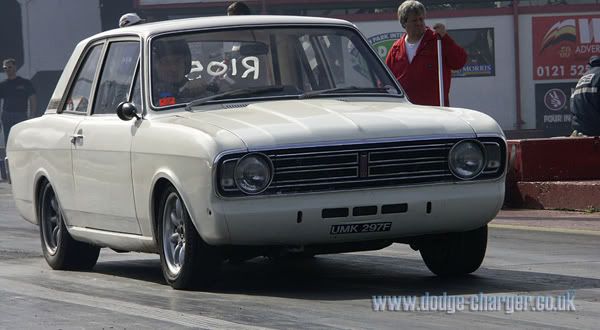


 ... the next one was even better as that was 'handed to the receptionist'... I did wonder for a brief moment if they meant SWMBO
  , but considering that she was out with me at the time it was again predictably found on the doorstep... *Rant over*


 )
)


 -
- 


