goldnrust
West Midlands
Minimalist
Posts: 1,887
|
|
|
|
Cheers guys. Yeah, you just can't beat the feel of a 2 stroke when it comes on the pipe. Rubbish for just getting places, but brilliant fun when out for a play. I tried to get a quick video clip of how the bike sounds last night, but it didn't end very well... You get just about enough time to hear it come on the pipe nicely in 1st then the phone starts slipping from when I though I'd securely wedged it.... It smashed to pieces when it hit the floor, but somehow the main board is still working so I was able to get the video off! Off phone shopping this morning haha. Bastardchild, because I raised the exhaust port by grinding the port, rather than lifting the barrel, which would have raised the transfer ports at the same time, the compression ratio would have remained standard. I do need to look at the heads soon though. The stock heads are an old hemispherical design with offset plugs. With the porting and exhausts I've had to back the ignition timing down quite a bit and still worry about knock at times. I'd like to convert them to centre plug and maybe even to a proper squish head at some stage. One step ahead of you on the Suzuki badges, I painted them the same grey/green as the exhaust silencers and polished the letters off. 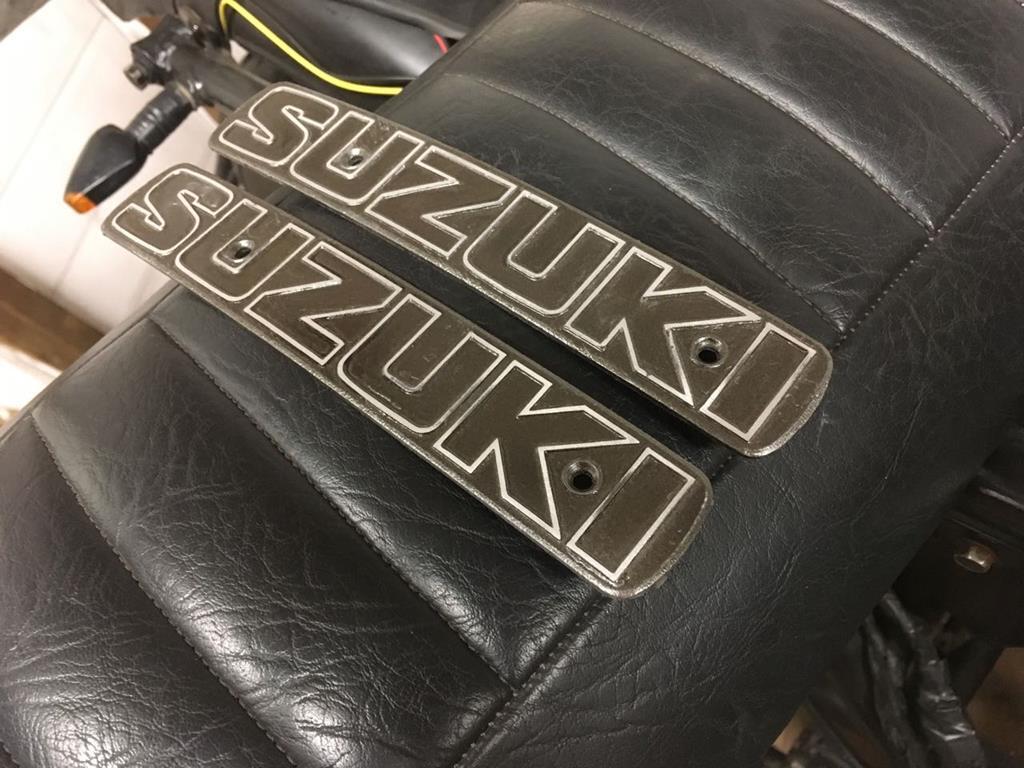 |
| |
|
|
|
|
bstardchild
Club Retro Rides Member
Posts: 14,971
Club RR Member Number: 71
|
|
|
|
|
Which port closes last - transfer or exhaust?
It’s normally the exhaust and you will have lowered the effective compression ratio by raising it by 3mm - you need to get some of thst back or all you will hsve done is raise the peak power point and lower the bhp at the same time.
Nice job on the badges much better
|
| |
|
|
goldnrust
West Midlands
Minimalist
Posts: 1,887
|
|
|
|
Ah you're thinking about the effective compression ratio the Japanese manufacturers used to quote, based on the trapped volume after all the ports are closed. By that logic it's only a 285cc engine, not 500cc  The problem with that theory is it ignores the role of the expansion chamber exhaust. With a properly tuned exhaust, when the transfer ports open fresh air/fuel mix will actually fill the cylinder and keep flowing out into the exhaust. When the transfer ports close, and the exhaust port is still open, the pressure waves in the exhaust will force the 'lost' air/fuel back in giving a self supercharging effect. Later exhaust port closing (with a properly tuned pipe) = more time to force the 'lost' air/fuel back in for that supercharged effect. But you're right that its going to move to move the power up in the rev range, at the expense of low range power. |
| |
|
|
|
|
|
|
|
|
Lovely machine :-) at 28 I just passed my cbt, love a proper classic bike. Bookmarked!
|
| |
|
|
|
|
|
|
|
A stroker on spannies, sounds like a fetish  but brings back some great memories for me.
I was a Yamaha man; RD250A,RD400E, LC350 and RD500YPVS. A few friends had GT250, GT500, GT550 and GT750, Gamma's, Kawasaki KH,S and H two strokes, When I think of the clouds of blue smoke the ring-a-ding of expansion chambers as a group of us would tear off down the roads the neighbours must have hated us!
Always nice to see an old stroker back in use, good work there albeit not my taste in mods.
Should have an intro track on the vids, something like Purple Haze by Jimi Hendrix seems appropriate.
|
| |
Needs a bigger hammer mate.......
|
|
bstardchild
Club Retro Rides Member
Posts: 14,971
Club RR Member Number: 71
|
|
Jun 17, 2018 21:02:59 GMT
|
A stroker on spannies, sounds like a fetish  but brings back some great memories for me. I was a Yamaha man; RD250A,RD400E, LC350 and RD500YPVS. A few friends had GT250, GT500, GT550 and GT750, Gamma's, Kawasaki KH,S and H two strokes, When I think of the clouds of blue smoke the ring-a-ding of expansion chambers as a group of us would tear off down the roads the neighbours must have hated us! Saw this today 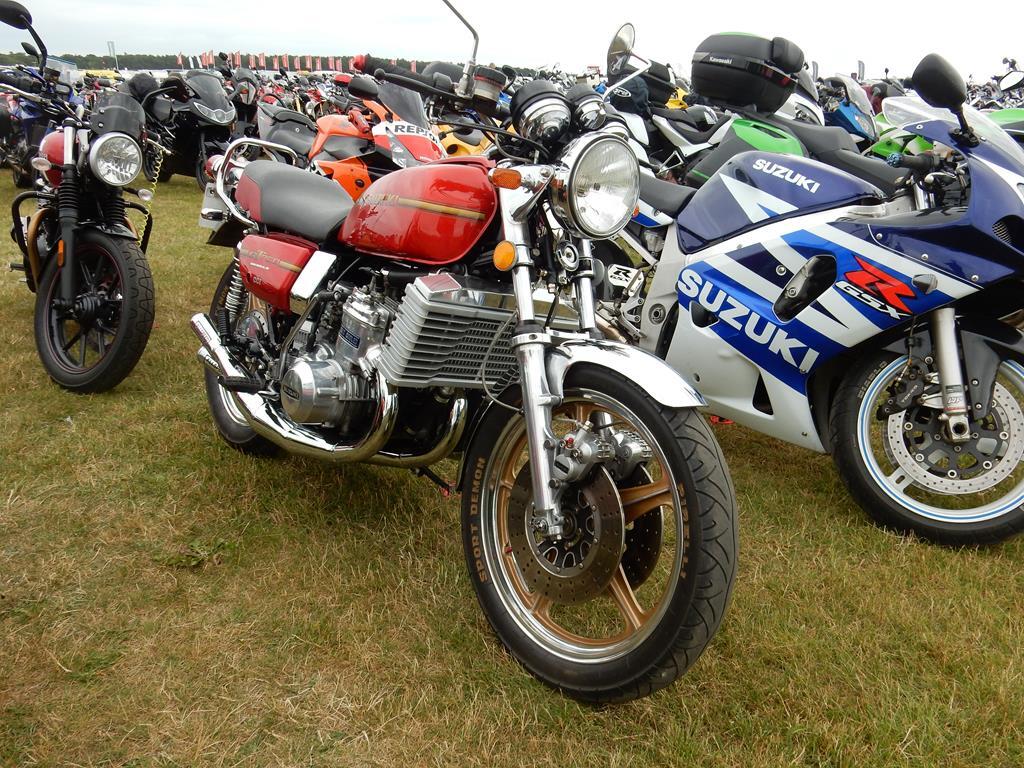 I was hoping to hear it leave as a kettle on allspeeds sounds utterly sublime |
| |
|
|
|
|
|
|
|
Got an acquaintance locally who's properly into kettles , has three at the moment. When the Gt750 club do ride outs the smog gets reported on the weather  |
| |
Needs a bigger hammer mate.......
|
|
goldnrust
West Midlands
Minimalist
Posts: 1,887
|
|
|
|
2 years since I updated this... eek. Well I've still got the bike, which means it's surpassed my Mx5 and my old RGV250 as my longest kept vehicle! Has much happened in the past couple of years to the bike? Not huge amounts, but it's slowly evolving and I'm chipping away at the issues. 18 months ago I pulled the engine out once again, as I was chasing the vibration issues that this bike has always suffered from. 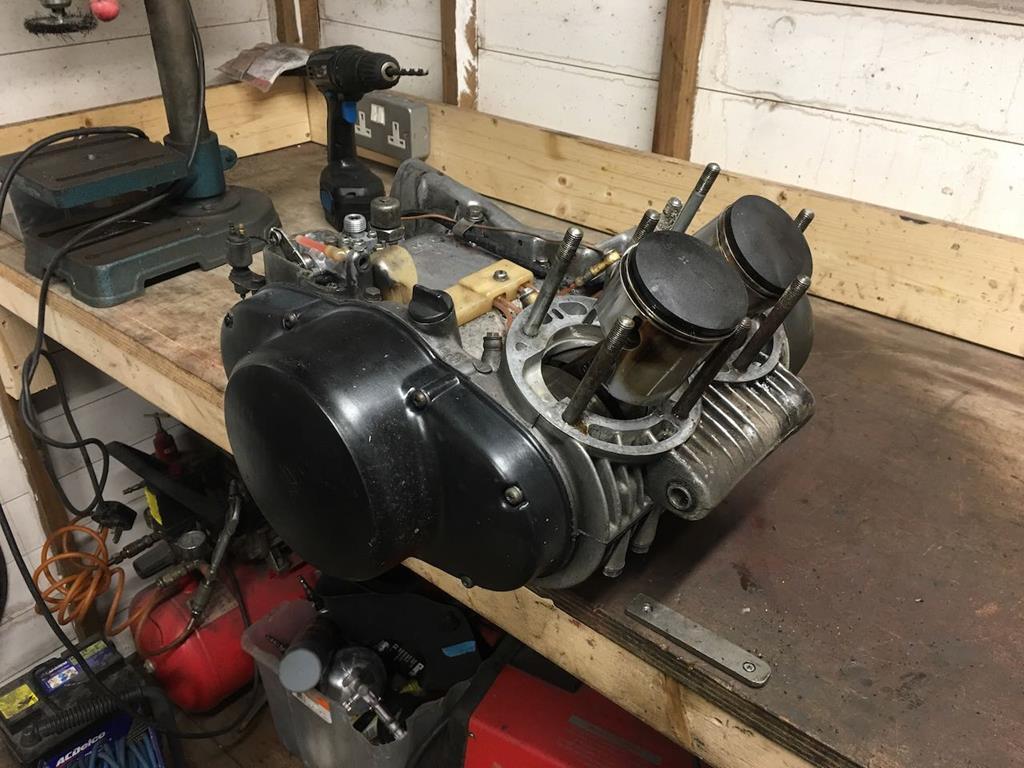 I made several changes to try and help the situation. Firstly I had another go at truing my crank, and made some small improvements. 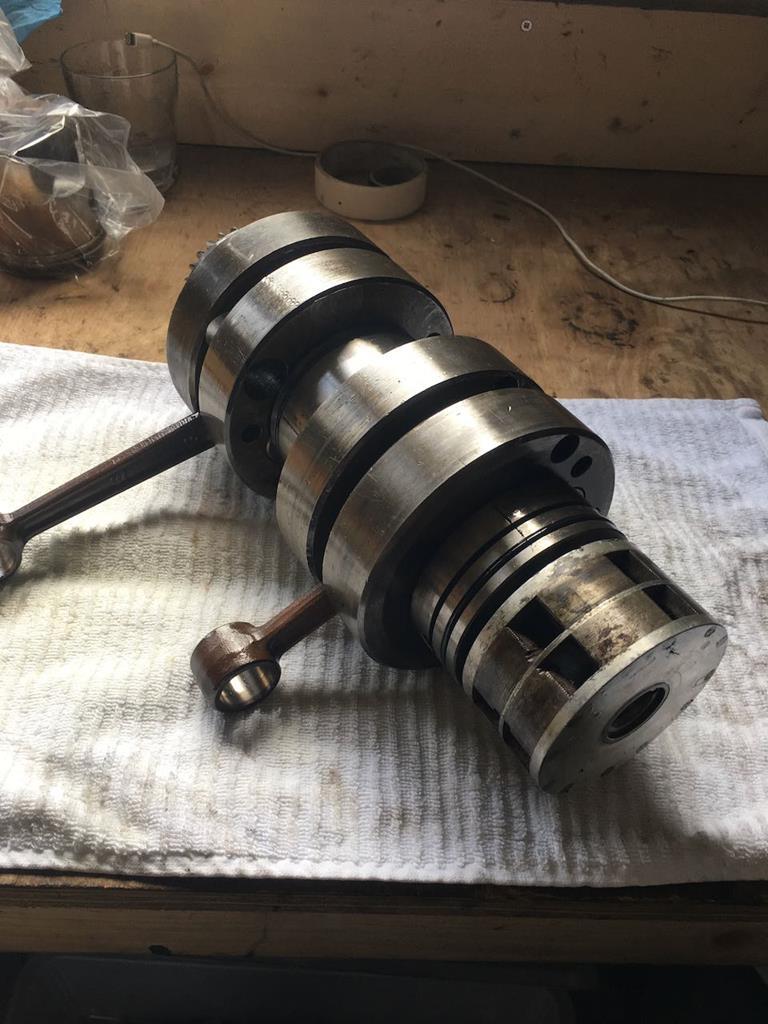 I think in the future what I'd like to do, especially now I own a press, is to get the crank fully stripped down and pop it on a lathe and clean up the crank webs and make sure they are perfectly round and balanced. Maybe that's a job for next winter... Anyway, while the engine was apart I went back over my initial porting job and decided it could be improved upon. There was a slight difference in the port heights too when I remeasured them, so I evened that out which could help reduce the vibes. 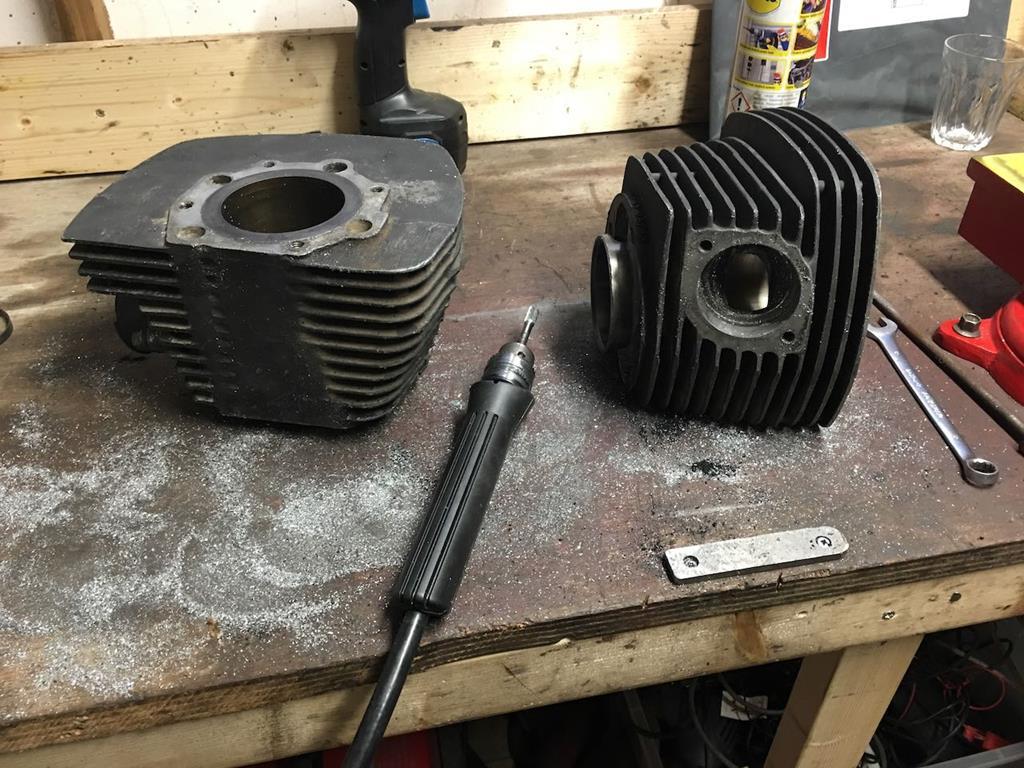 The end result was a touch more exhaust port duration and a touch more intake port duration. Another job for next winter might be to try filing my pistons (which will need changing soon so can be treated as disposable) to see how the engine responds to some more transfer port duration. And last but not least I drilled out the engine mounts in my cases to accept the much larger and more compliant engine mounting bushes from the later GT750 model. 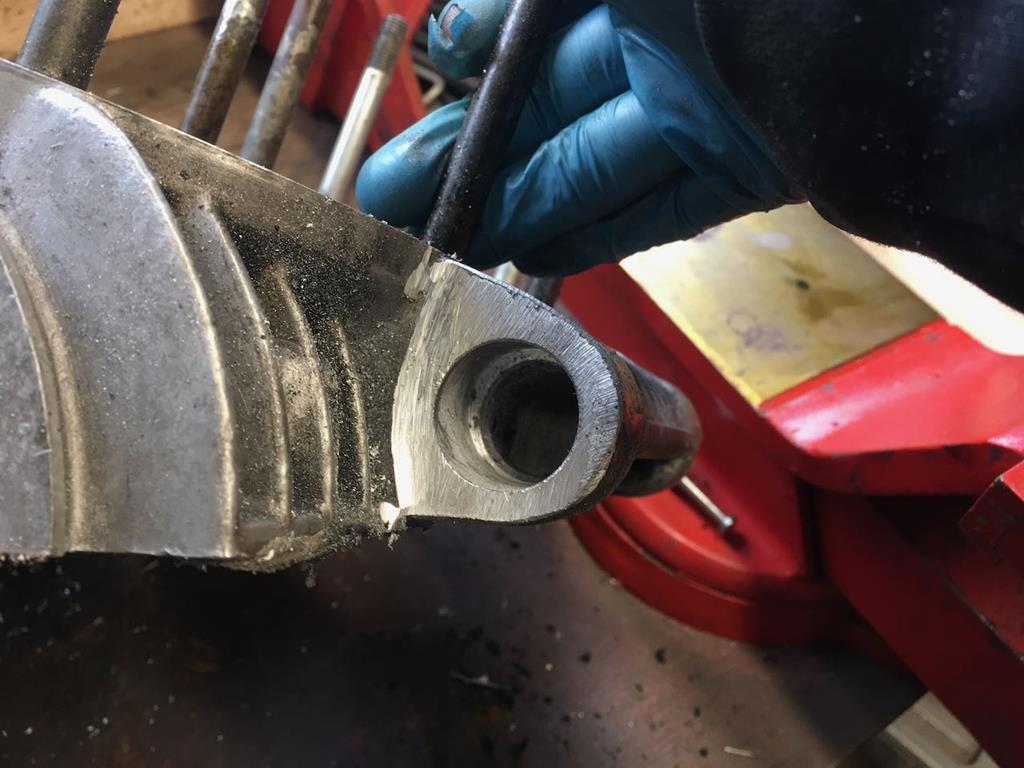 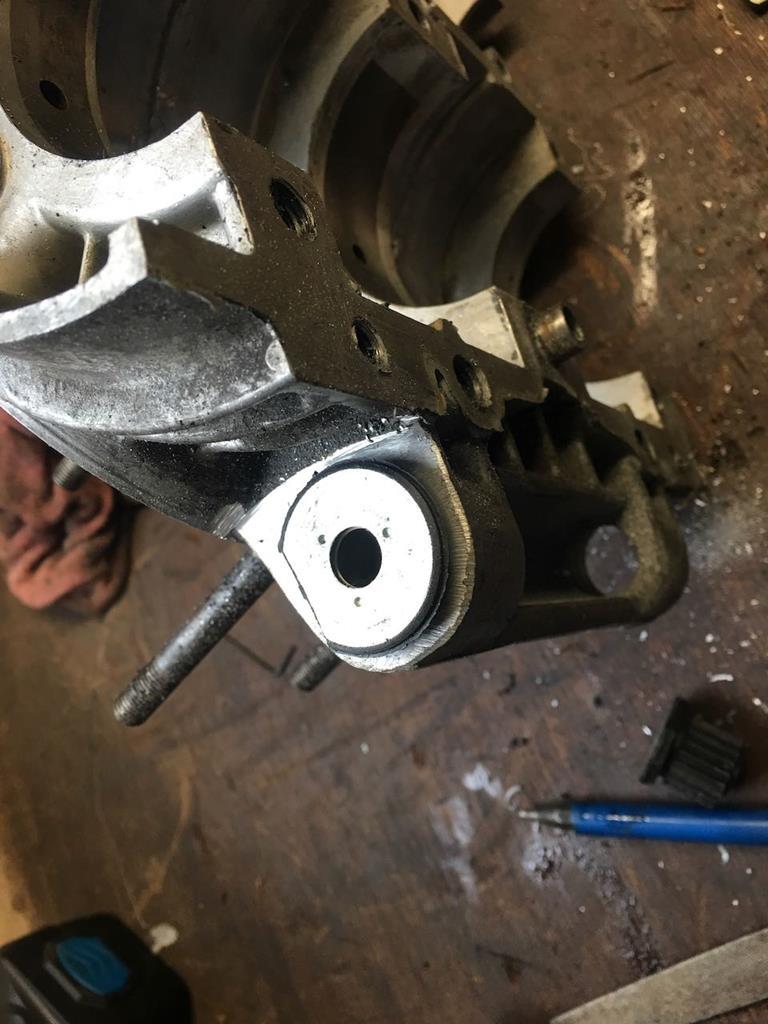 Putting the bike back together and going for a ride, there was a definitely improvement in the vibes, I think mostly coming from the softer engine mounts rather than anything else! I essentially then rode the bike around like that, as it slowly looked rougher and rougher. Not helped by a visit to the motorbike she at the NEC in November 2018, when my friend rossonza convinced me it was a good idea that we rode up on bikes. In the rain, in November. My bike pretty much rusted in front of my eyes.   I also got bored with the patchy blue tank and decided to paint it black, which promptly reacted with one of the layers below it and just looked even worse. 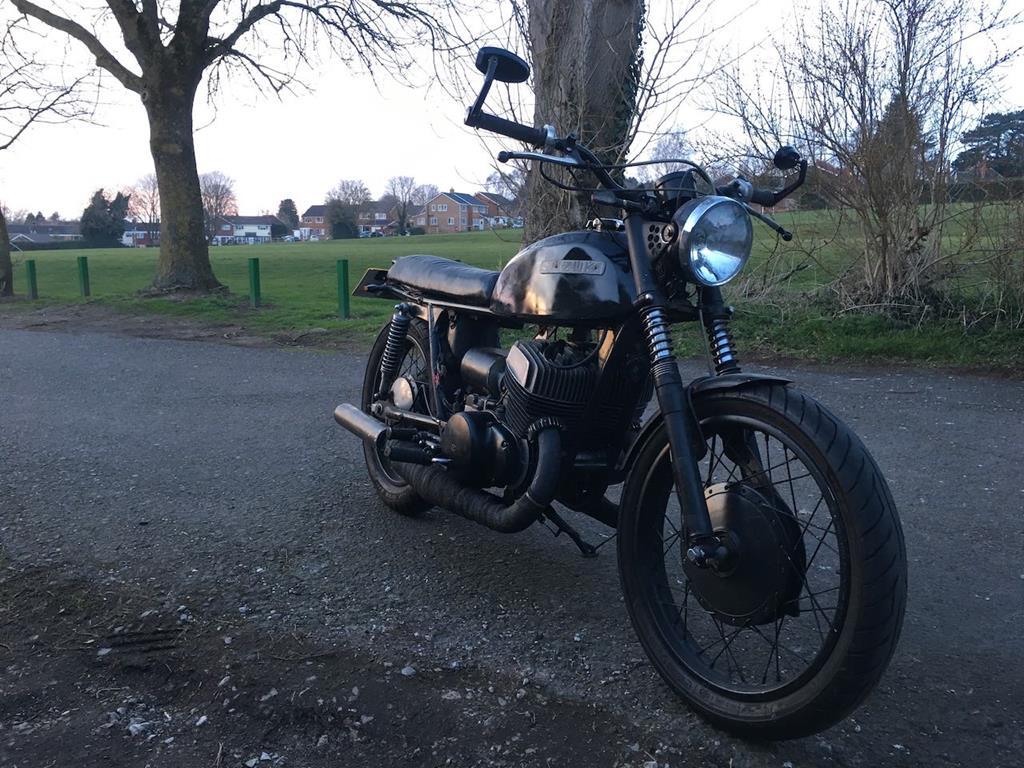 |
| |
|
|
goldnrust
West Midlands
Minimalist
Posts: 1,887
|
|
|
|
The second half of 2019 left me a bit distracted with some sort of rubbish old British car.... and so we roll into spring 2020 when we're all stuck at home! I was feeling grumpy looking at the bikes poorly painted black tank, so one night I decided to let some steam off and get wild with some left over paint cans. 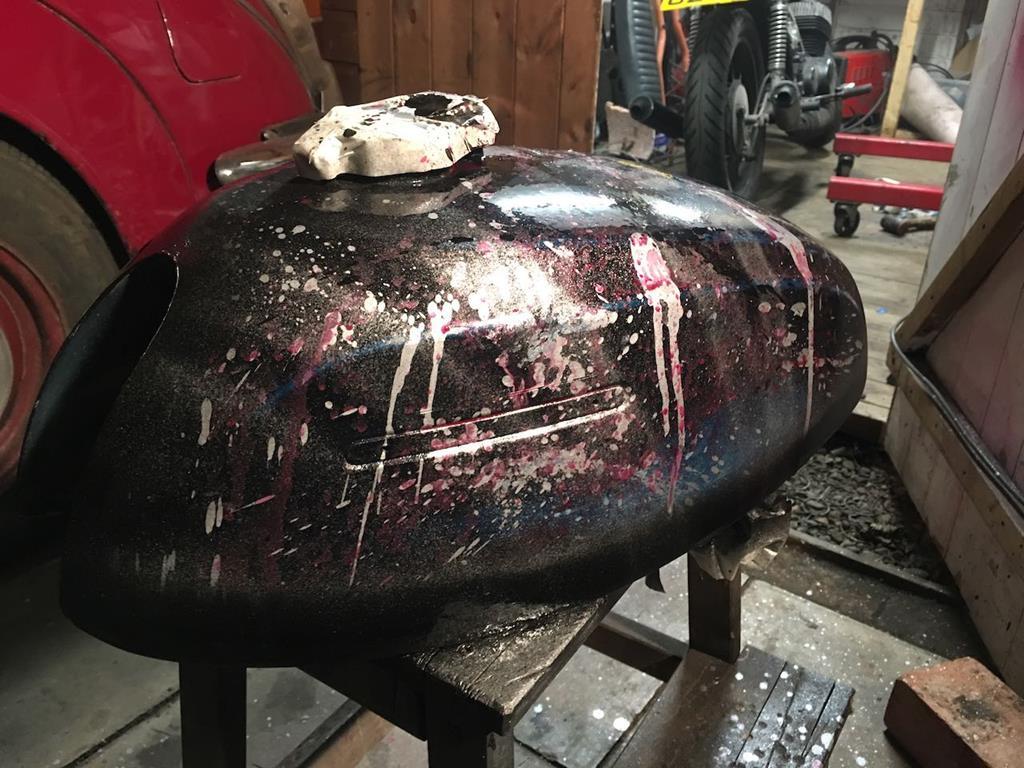 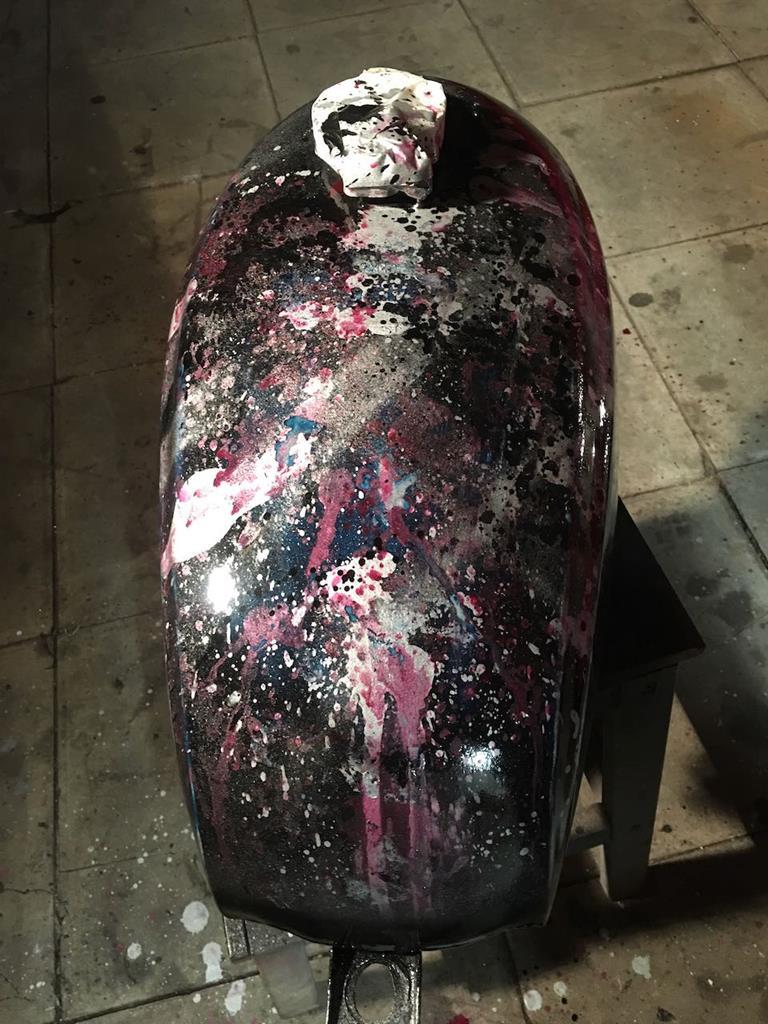 It's at least a lot more interesting that the plain black which wasn't even shiny because it had reacted! I also took this time to reflect on the fact that most of my modifications to try and make the bike a bit quieter and more civilised, aside from wapping the exhausts, had made little difference. So I decided to reverse them. Going back to an external stinger design on the exhaust with a more traditional silencer and removing my air box definitely gained me a bit of power back. You don't feel it when you incrementally add these things one at a time but clearly they were having a bigger overall impact than I realised. And even better, by adding a small slightly narrower extension to the end of my new silencers I've actually got the exhaust quieter than before I started.  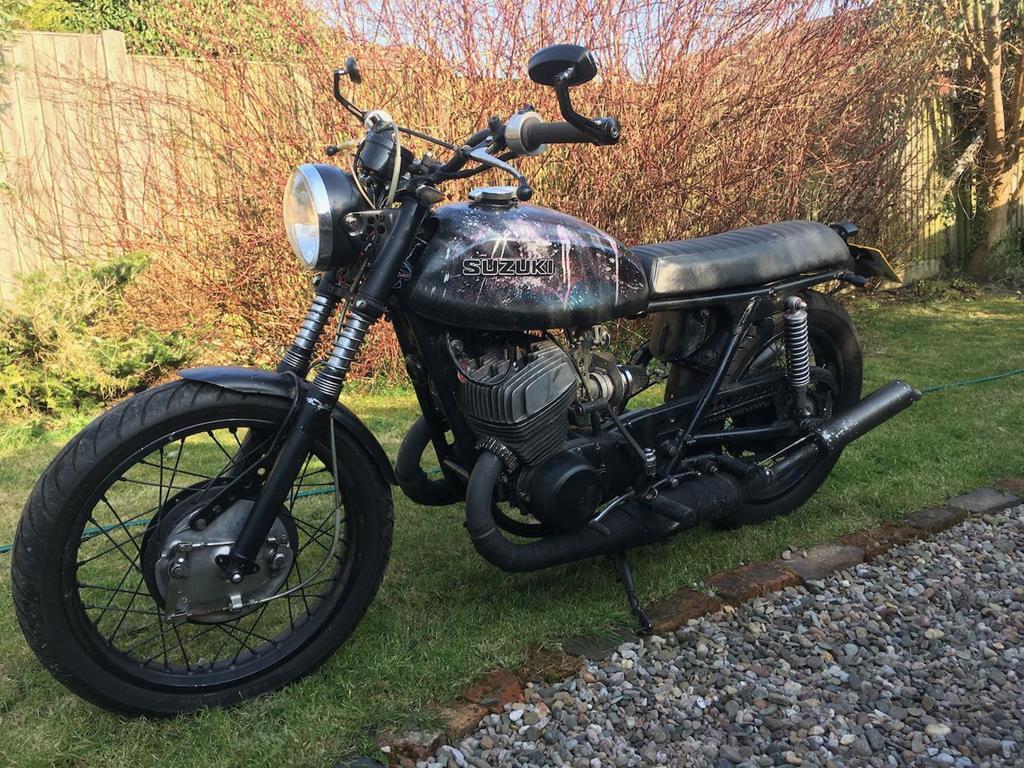 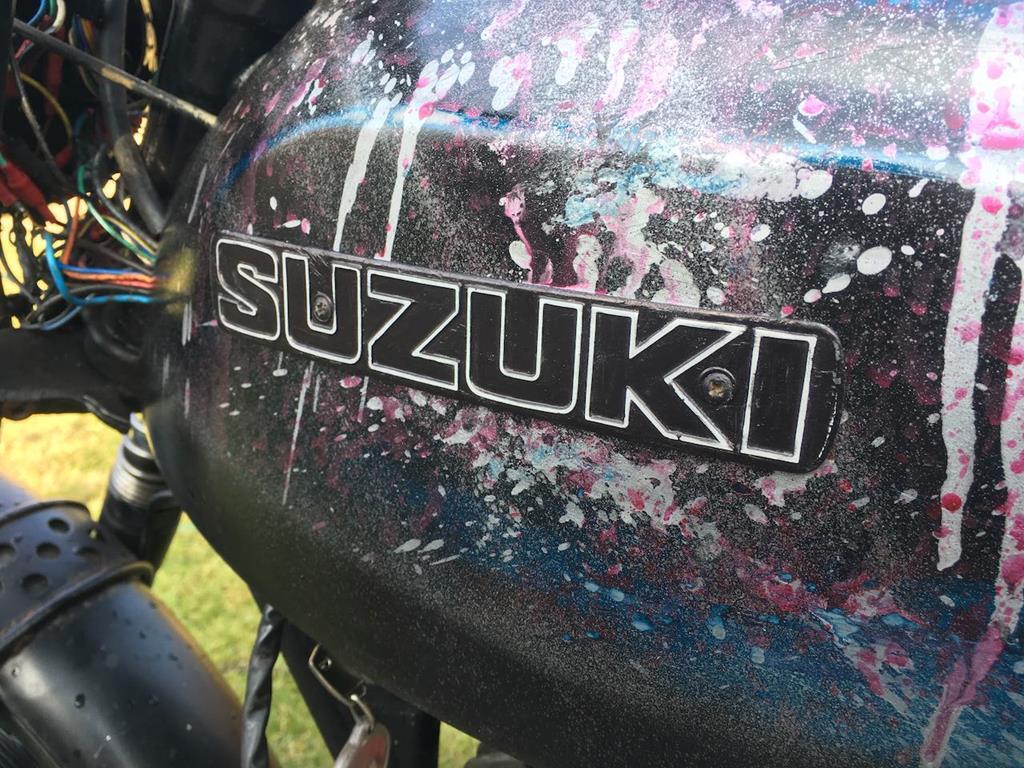 My next lockdown fix for the bike was to redesign my seat. My first attempt had looked good, but was pretty uncomfortable! Part of the problem was that it was very shallow. I didn't want to raise it up any more by adding foam, as this would spoil the lines, so instead I hatched a plan to lower the seat base in order to make room for extra padding. It started by moving various bits of electronics and bracketry that were living under the seat down a couple of inches so they sat below the level of the frame. 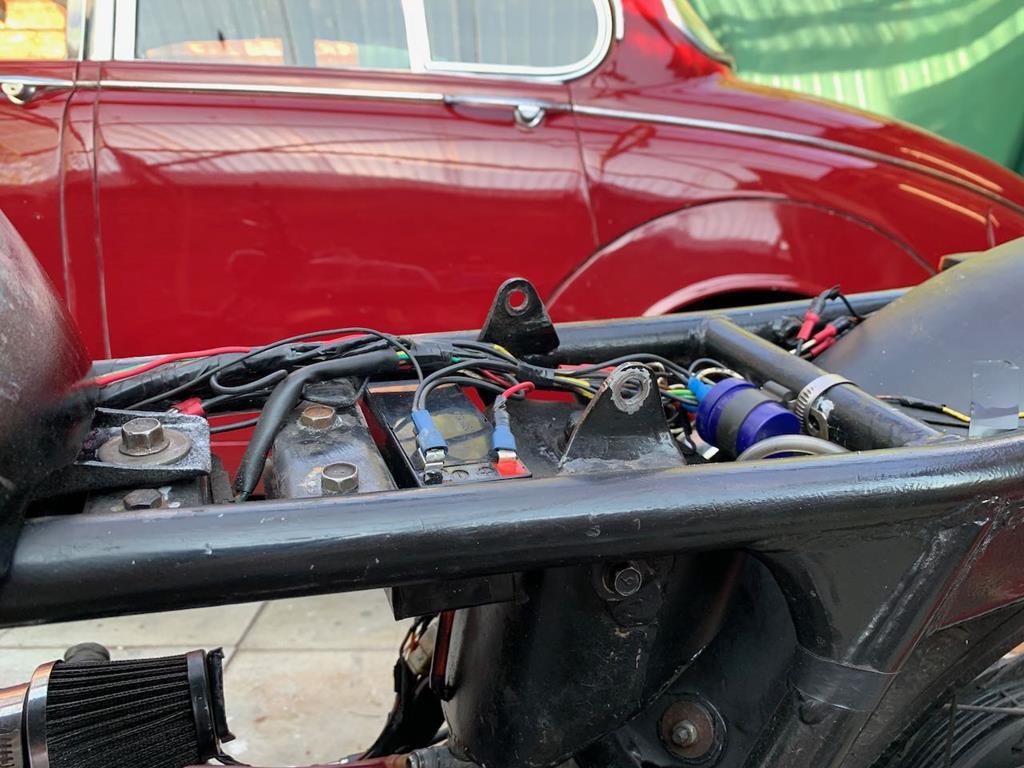 Then I could make some new lower seat mounts and a new metal seat pan that sat nice and close to the frame. I also made it a bit wider. 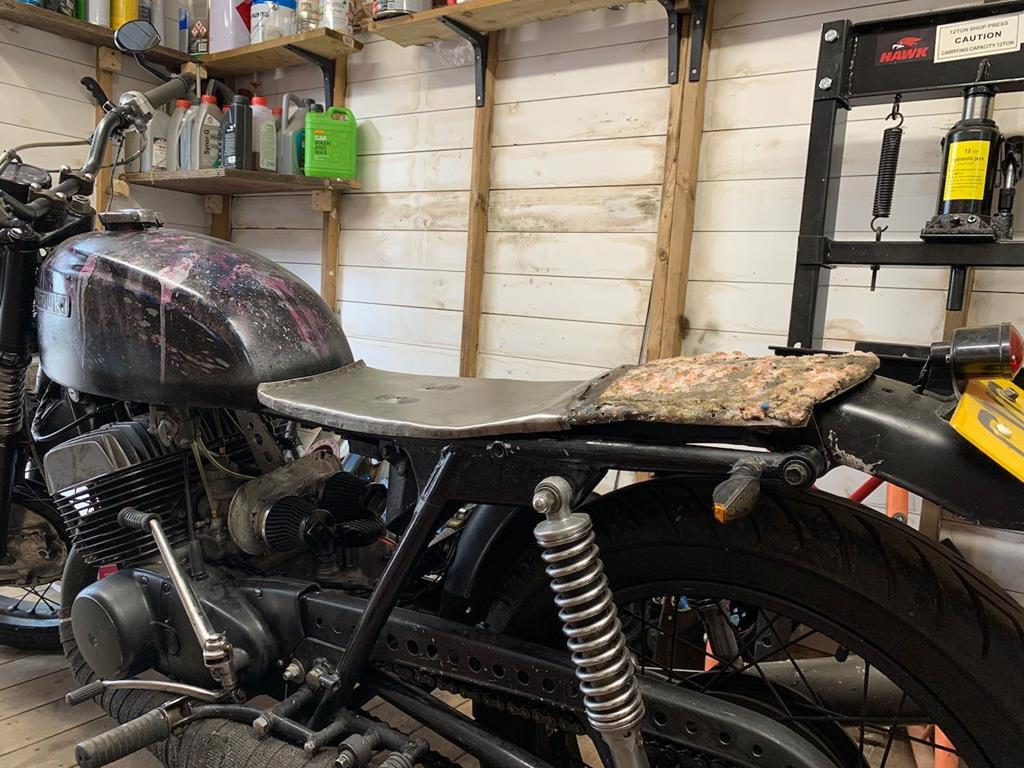 Covering this in seat foam to the same height as the old seat, I'd about doubled the depth of padding. My pillion isn't so lucky... they only get a touch more padding! But not many people are brave enough to ride on the back of this bike with me, so it's not a big deal! With all the sewing practice I've been having with the Daimler, knocking up a replacement seat cover was pretty straight forward and we were back out on the road. 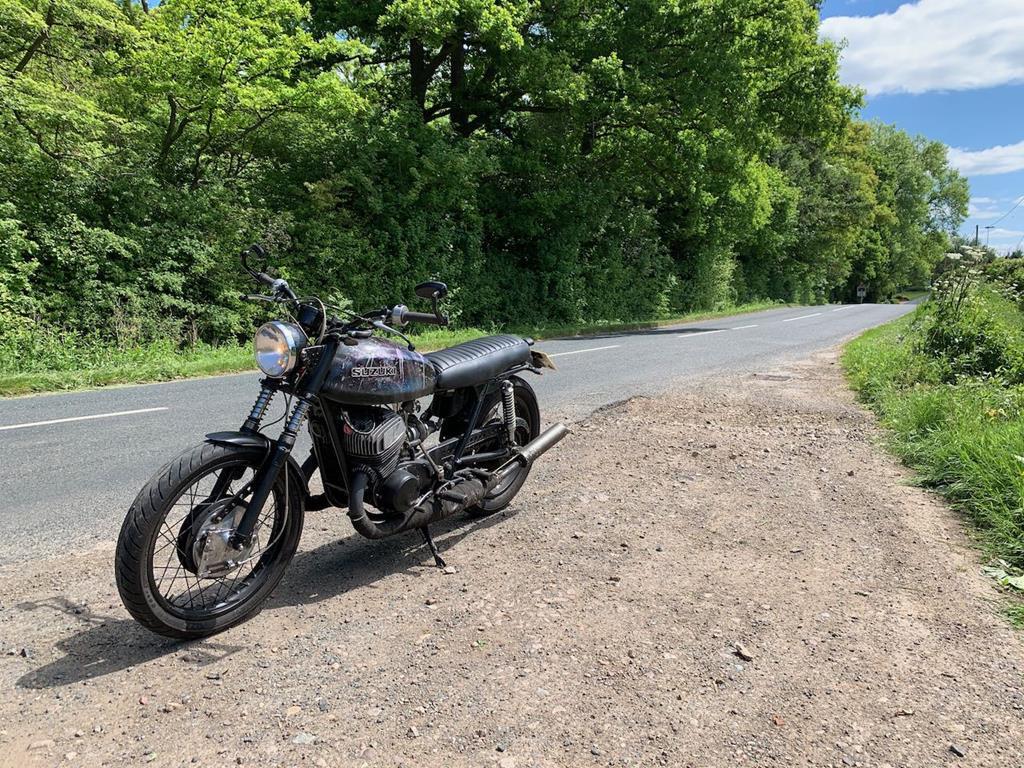 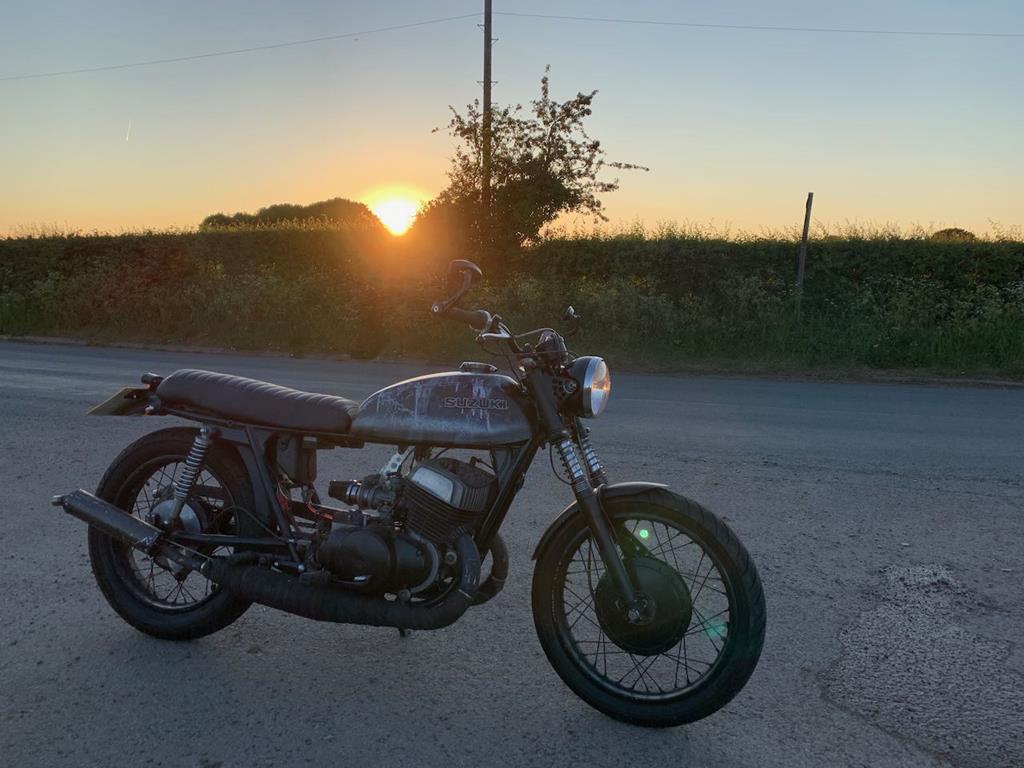 It's been lovely to be able to get out and escape the world a bit out on two wheels, even if it was only relatively short trips to pick up a bit of shopping and things initially. The seat is considerably more comfortable, so thats a good success. And now I've had a bit more time to tweak my carb settings to match my new exhausts and intake, the engines running better than it ever has. In fact it's running well enough that my current biggest issue is that the clutch is slipping under full power. Upshifts when on the pipe are decidedly slurred! And if the gearbox oil is still a bit cold, then it will properly slip the clutch when the bike comes onto the pipe. I might have to see what I can do to fix that! |
| |
Last Edit: Jun 7, 2020 19:41:18 GMT by goldnrust
|
|
|
|
|
|
|
|
excellent , i can still remember porting a gt380 at 18 from that book .owner got clocked by the police at 125 lol.
|
| |
|
|
|
|
|
|
|
|
|
|
Had a T500 as my first motorbike at 18. It was cheap and i bought it after looking at a Jawa which was sold at the the time i arrived Went for a drive every day. These bikes have a seperate tank and pump for the 2 stroke oil. Clearly remember that i was adjusting this pump because i was afraid it did not get enough oil. At every light, i left a huge cloud of blue smoke. Spent a lot of time working on it. After that i had 10 plus motorbikes but always 4 stroke. Good memorys though.
Peter
|
| |
|
|
goldnrust
West Midlands
Minimalist
Posts: 1,887
|
|
|
|
Ah the sound of those 2 stroke triples is wonderful ivanhoew! I've read 3 of the Bell books now, the 2 stroke tuning book, 4 stroke tuning and the force induction tuning book. They've all been really interesting and a good read. I've also read Jennings 2 stroke book, but that was a good while ago and I can't really remember much of it! haha. Thanks for reminding me petervdv, I knew there was something else I did this spring on the bike, and that was to rebuild the oil pump! It is helpful having the oil injection system, I've owned bikes that need premixing (and my Rx7 did too!) and it gets a bit tedious doing the mixing at the petrol pump! |
| |
Last Edit: Jun 8, 2020 19:06:00 GMT by goldnrust
|
|
goldnrust
West Midlands
Minimalist
Posts: 1,887
|
|
Dec 25, 2020 22:40:24 GMT
|
Well it's finally time to start on my 2019 2020 winter rebuild of the bike (I was planning on doing this last winter but a silly old Daimler kept me busy and I didn't get round to it  ). 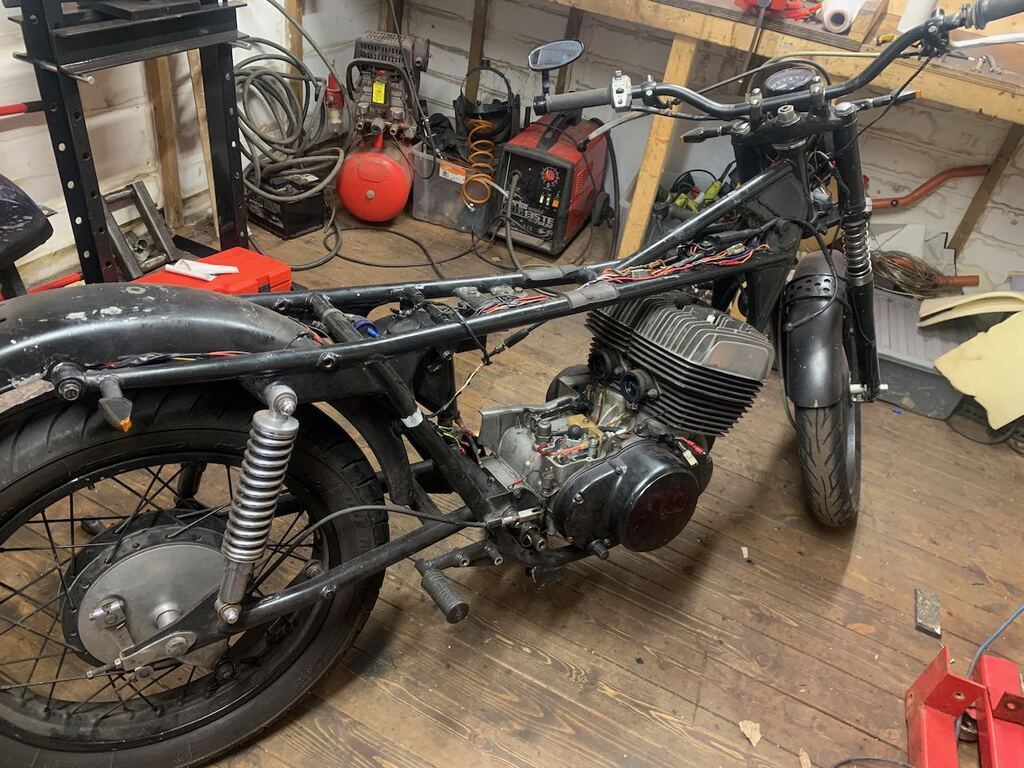 Starting to strip it down here, isn't it nice to work on a motorbike, tucked up in the shed with a heater! Nothing so heavy it needs a crane to move it, no lying on my back underneath it, I'm not sure why I bother working on cars when bikes are this much more pleasant to work on!  So the plan this winter is: • Refresh the engine, inc head work, big end/con rod change and looking into false neutral between 4th-5th. • Rebuild forks with new seals • Build a new loom from scratch to replace the quickly bodged together one I made 4 years ago which has been hacked about several times since. • All the other small problems I've been putting off for years because I don't wanna take apart a working bike to fix them. I thought I'd start with the engine, it didn't take long to have it out and on the bench. 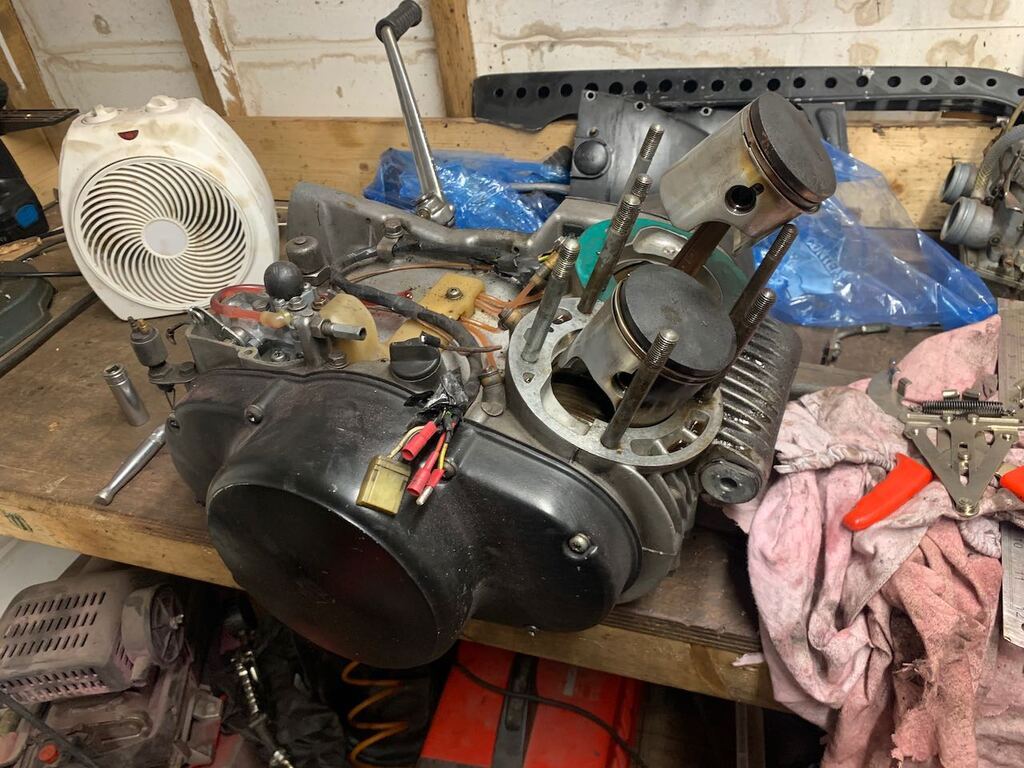 First impressions are that there's nothing too scary to see. Looking closer though I saw that the inner edge of the head gasket had been beaten up. 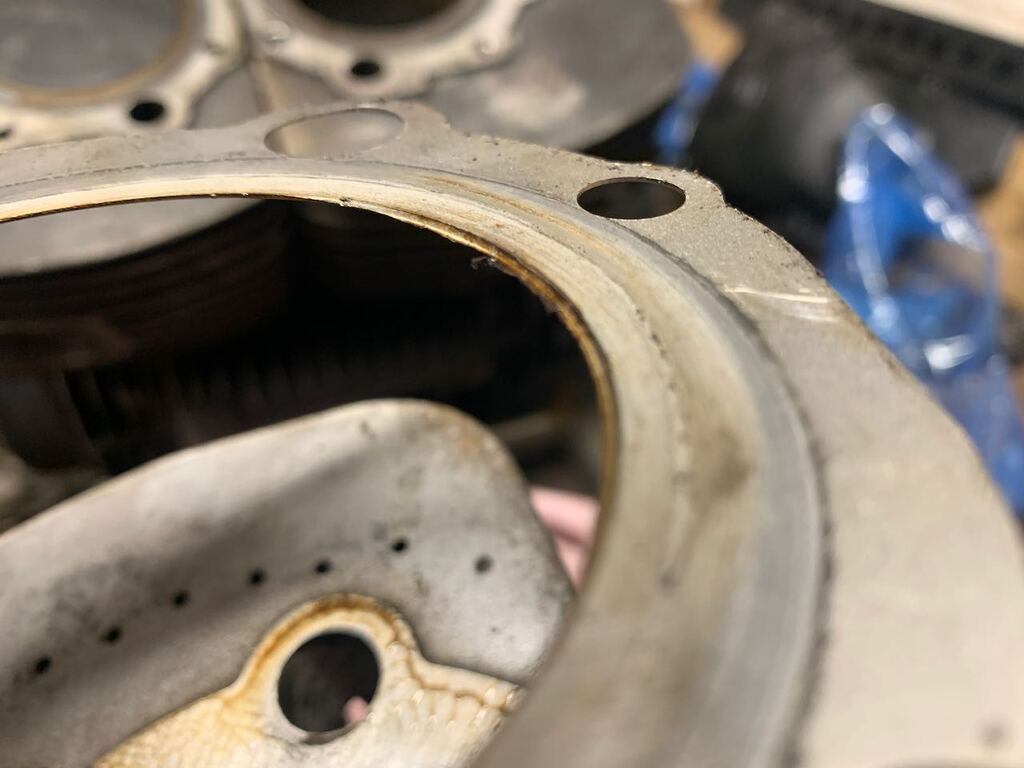 Which really isn't good. From the shape of the damage it was clear that the piston had been coming very very close to hitting the head. The gasket was beaten down to 0.15 - 0.2mm thick where the piston had been hitting it. that was definitely a disaster waiting to happen and good I found it now. I think there are several problems that have come together to cause this. Firstly doing a piston to head clearance check with some solder taped to the piston... 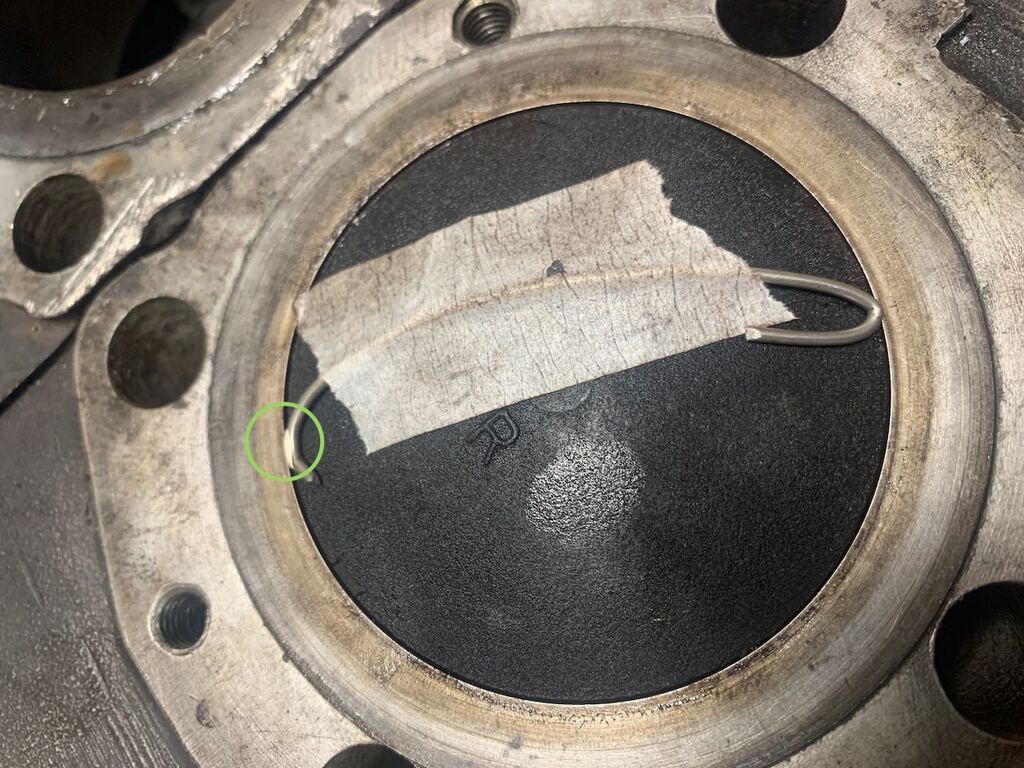 ... I was getting about 0.7-0.8mm, which is a bit tight for a 250cc cylinder. Really I want that to be approx 1-1.2mm according to the books I've got. On top of this the big end bearings are on the wear limit now, any wear in the bearing will show by letting the piston move further up the bore and closer to the head when being run. I was already planning to change the big ends and con rods, so that will help. Looking at the head the other half of the problem revealed itself. 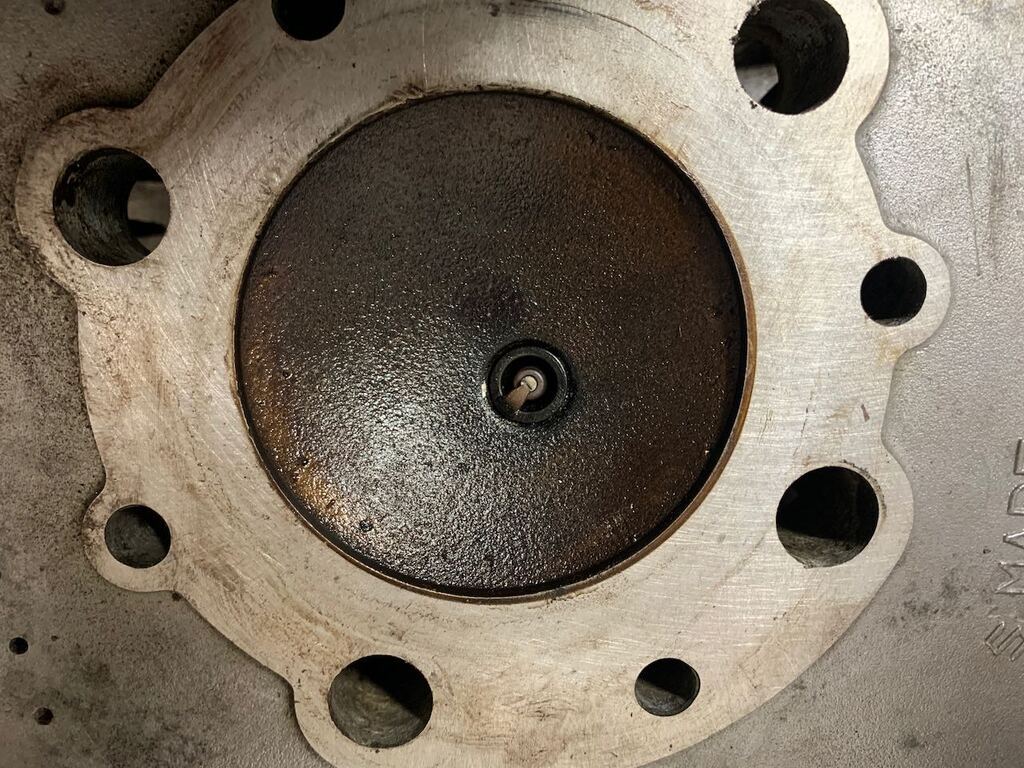 The standard bore was 70mm, but my barrels have been bored out to 71mm because of damage to the cylinder walls. The head profile essentially has a 3-4mm deep section where the bore continues, before the corner and the roof of the chamber, this had not been taken out to 71mm and so was essentially 1mm too small. You can see the carbon build up in a thin ring round the face of the head where it was exposed to the combustion. It's this overlap that was getting so close to the piston, and causing the clearance issue. The head gasket itself also only had a 70mm hole for the bore, and will need trimming. To compound this problem, the head is not a very precise fit on the bores, and as you can see from that carbon build up, had ended up offset from the bore when tightened down. So what I needed to do was to open out the bore in the head to match the barrel and then find a way to locate the head on the barrel more accurately. At first I thought it might be time to buy a lathe (been on the want list for a while!) but then I calculated that because of the offset finning on the heads I'd need a lathe than could handle an 11" diameter and realising that nothing that big would ever fit in my shed, and that it's silly to buy such an expensive tool for a small job I went to plan B for a more basic fix. I dug out the spare cracked head to experiment with and started by marking out a 1mm band round the head. 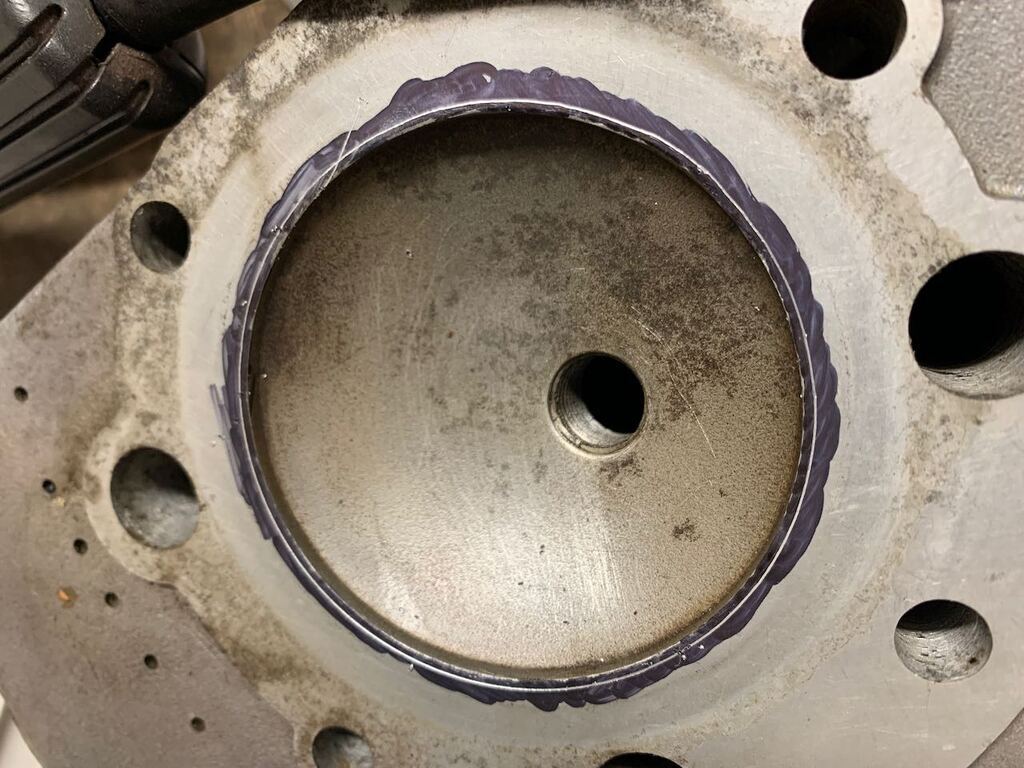 And then went at it with a small carbide burr on a die grinder. 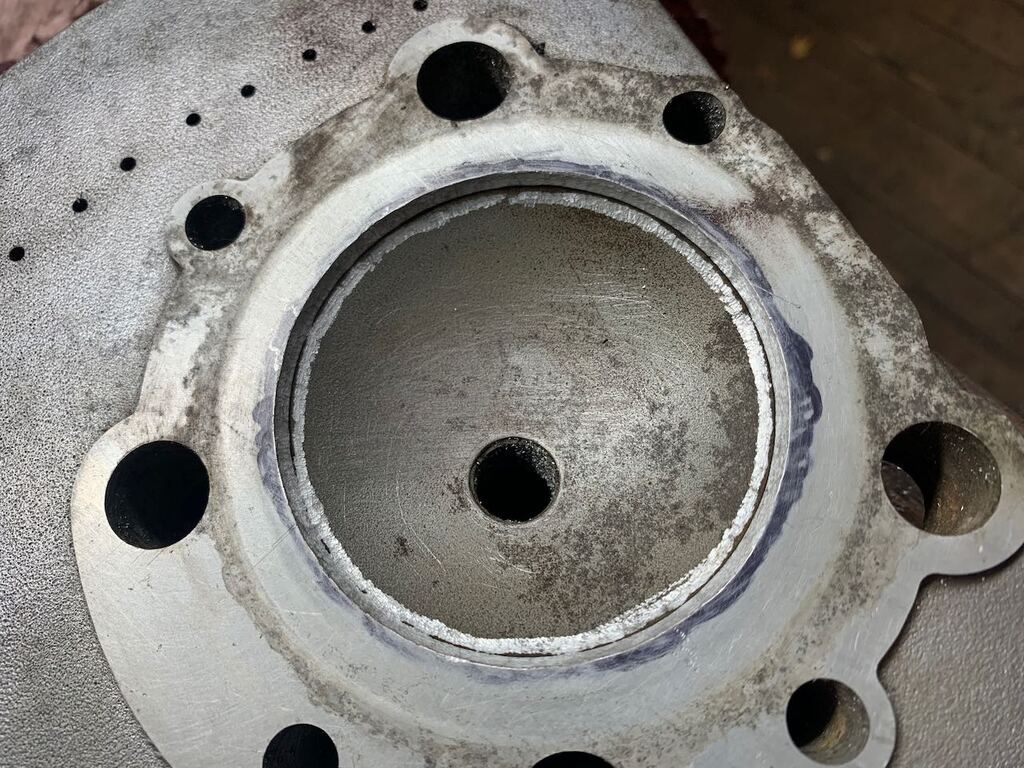 I'd got a bit aggressive and caught the roof of the combustion chamber more than I'd liked but the concept worked and I was able to keep pretty neat and close to my line, so I figured this would work just fine. On to the real head, and seeing as I was already taking power tools to it, I figured In for a penny in for a pound and It was time to try and convert the heads to centre spark plug. The standard heads have the spark plugs offset towards the intake side of the chamber. The idea here is that it spreads the combustion heat more evenly over the piston top. The downside is that because the gasses on the exhaust side of the piston are very hot (because the exhaust heats the piston) and are a long was from the spark plug this results in poor resistance to detonation. As things have come on a lot since the 60s when this bike was designed, and modern pistons are less prone to melting and so have a small requirement for the heat management, it's now thought more important (in a basic chamber like this) to have the spark plug centralised. With the spark plug in the centre the flame front can more evenly and quickly cover the piston top and so it will help improve the detonation resistance, allowing me to run more spark advance and make more power. So I took a brave pill, and broke out the welder. 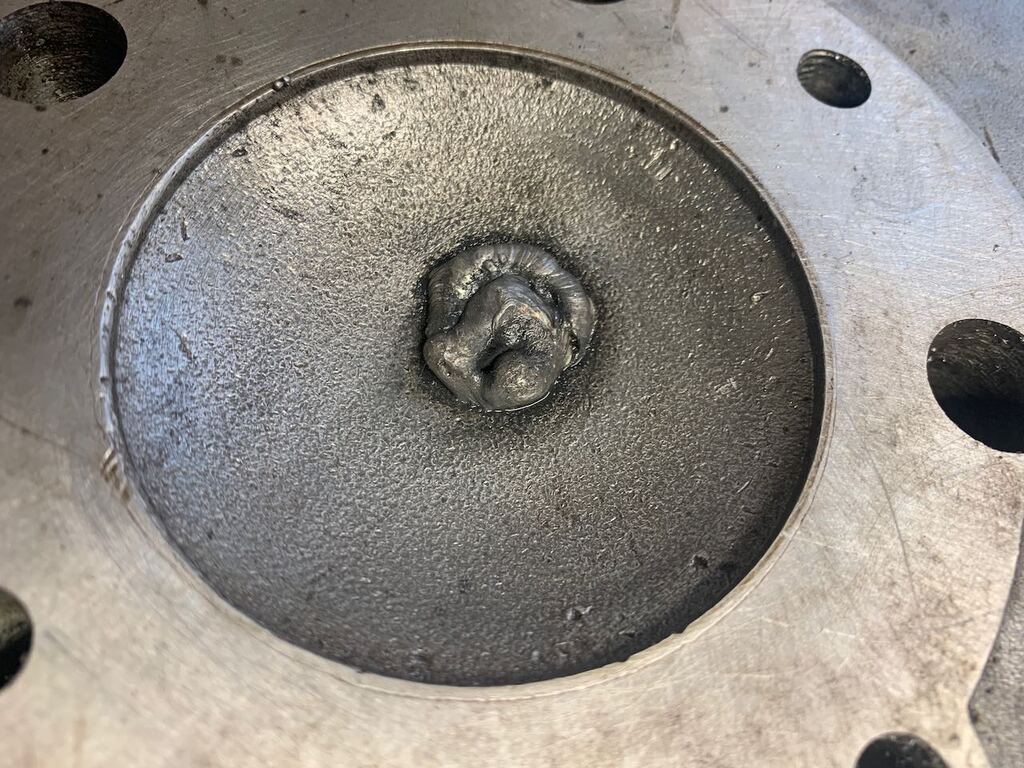 Probably one of the better bits of aluminium MIG I've done, so I'm pleased with that. And in this example it's going to be ground down so you've never know it wasn't done on a fancy TIG set-up.  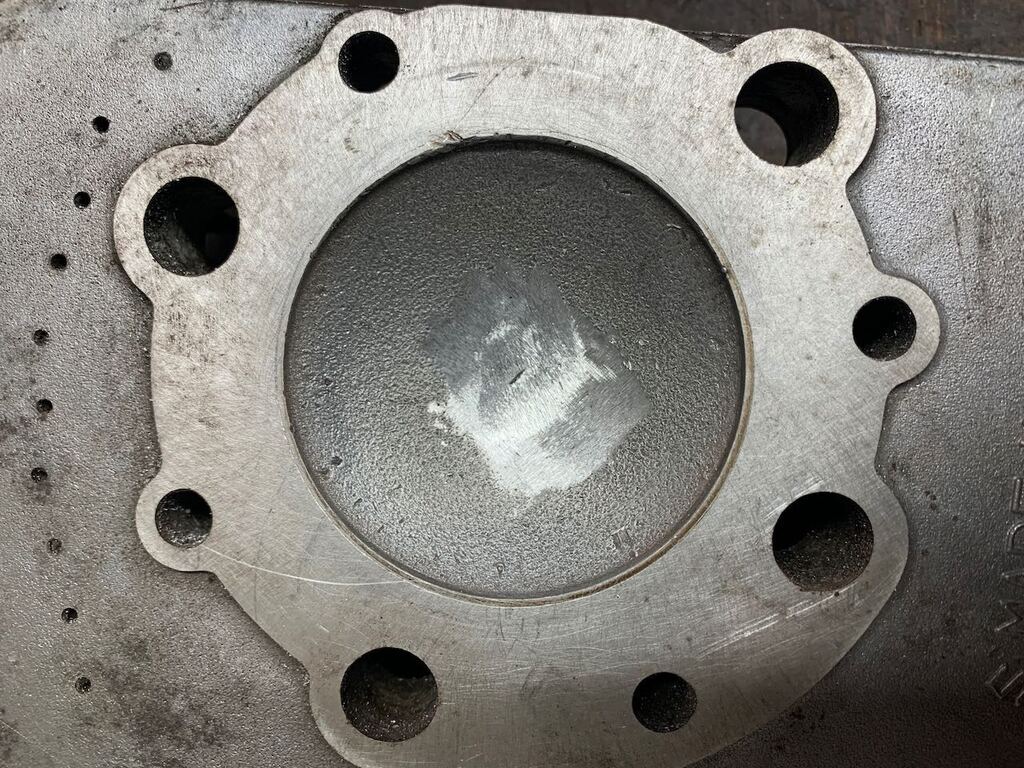 Once I'd marked out whereto new spark plug hole would go, I drilled through and then had to knock out a couple of fins to make room for the plug. There's still some more die grinding and finger sanding work to do here to tidy things up and leave a flat surface for the plug to tighten up against. 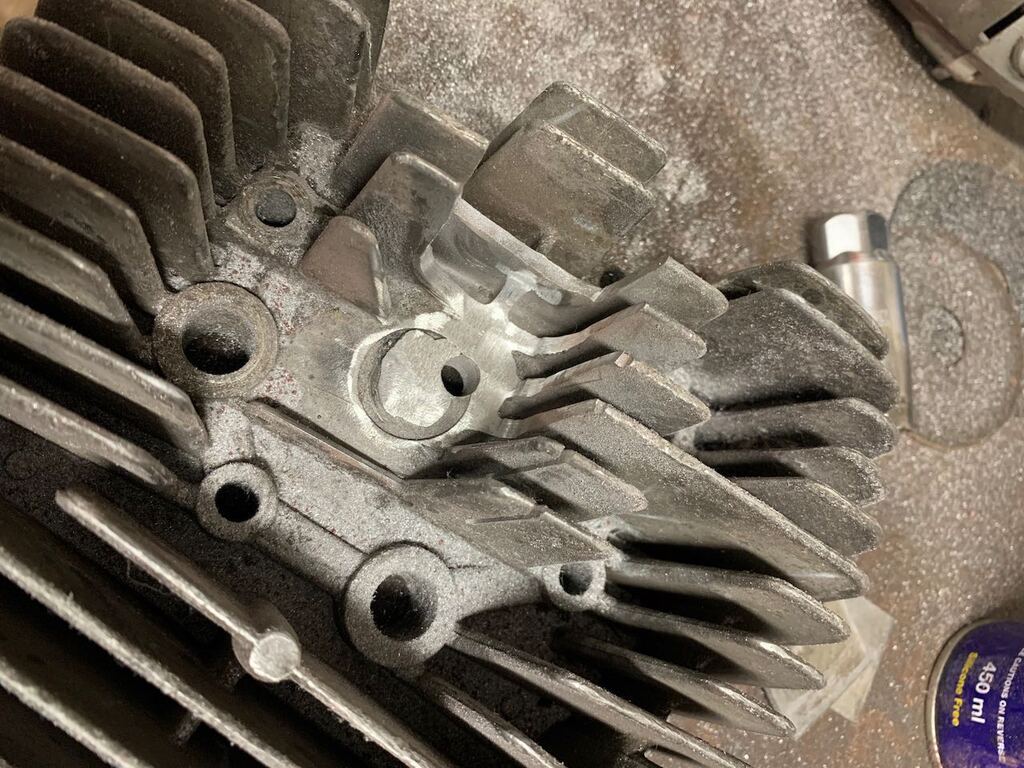 I bought a spark plug thread repair kit which handily came with the right M14x1.25 tap and a plug seat cutter, which would give me a decent flat surface for the spark plug to seal against. That all went smoothly and soon I was able to test a spark plug in the head. You can also see I've opened out the bore here as tested on my spare head. I've taken it out to about 71.5/72mm, a touch wider than north bore, to leave a bit of wiggle room for when the head is mounted to the barrel without it overlapping into the bore. 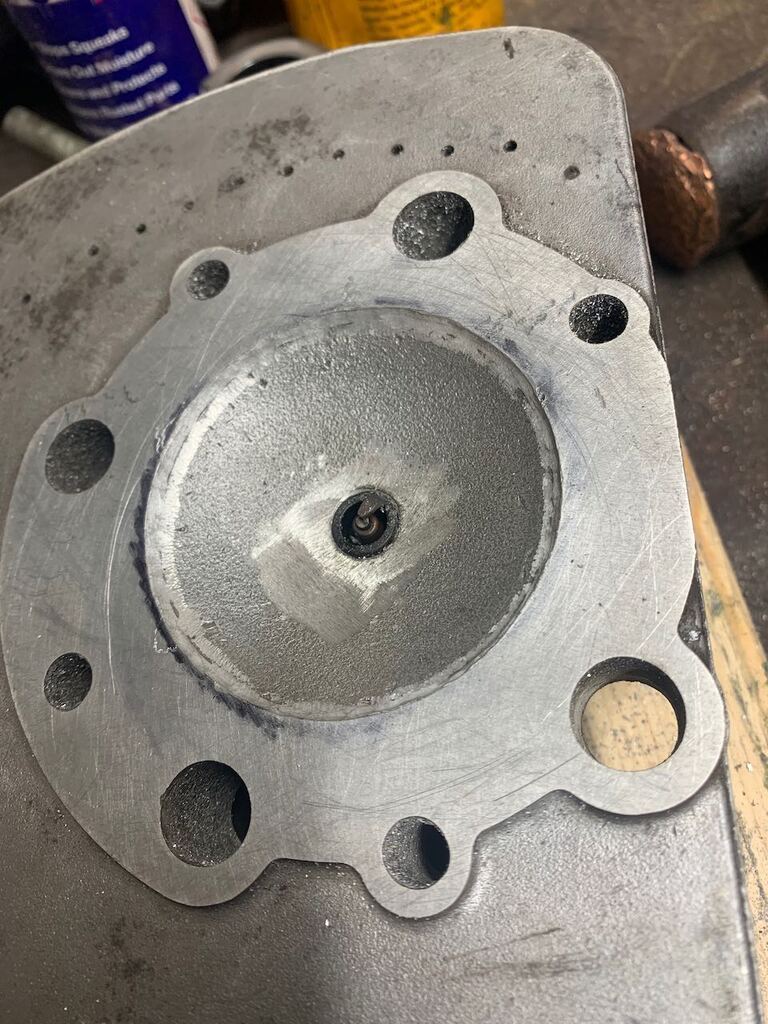 The final step was to measure the head capacity and compare it to the measurements I took before I started. 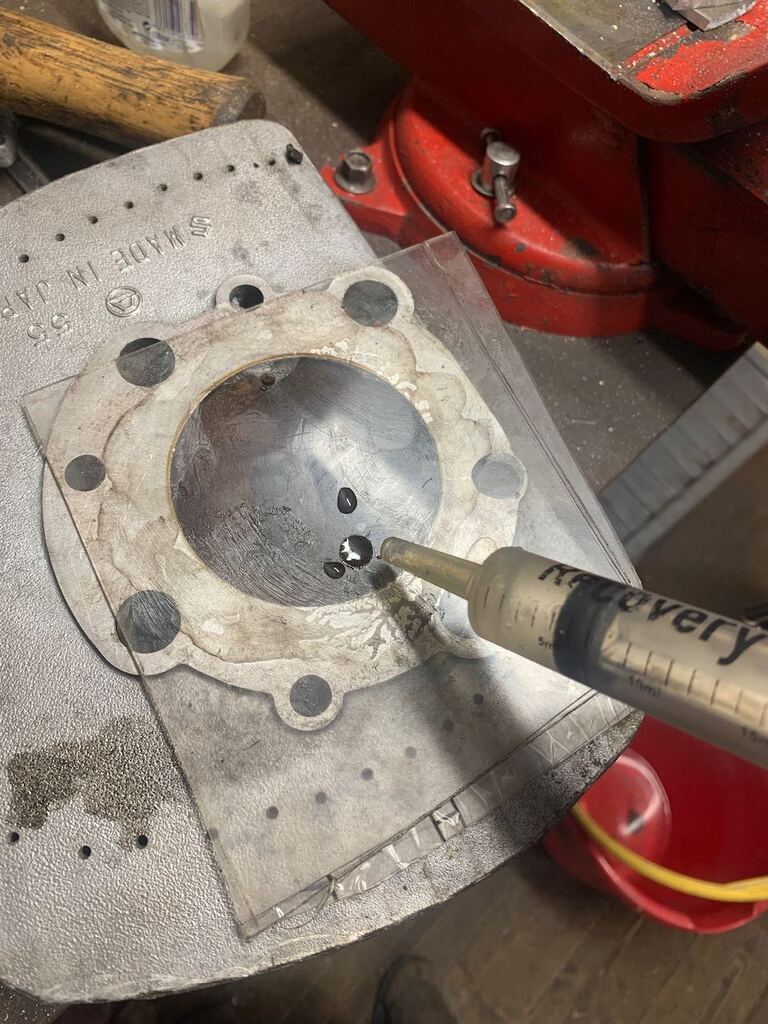 It had gained about 1cc of volume, so I lapped it down on some Wet & dry atop a sheet of glass till I'd got back to the same volume (and therefore same compression ratio) as when I started. So there we have it, one finished head. 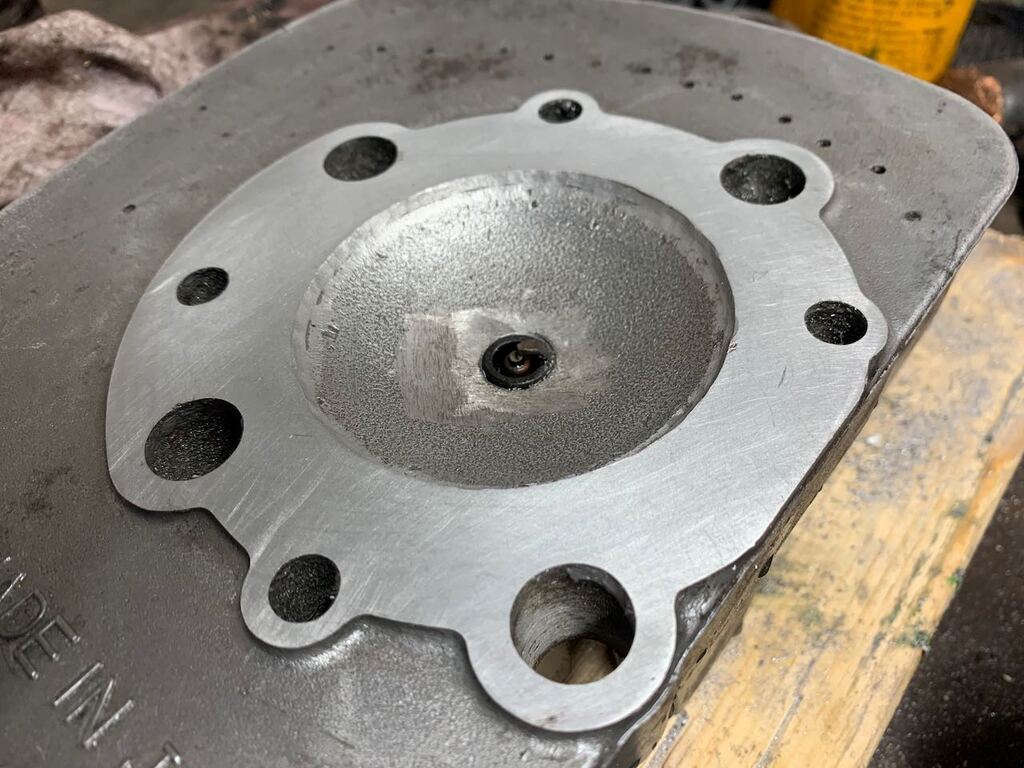 I did the other one in parallel at the same time, so the heads are almost done. What I need to do now is work out how to make sure they line up with the barrels better than the sloppy standard fit. I've investigated the low tech way... wrapping some tape round the sleeve nuts that go through the head and barrel so they are a tighter fit with less room to slop. This makes a big difference, but it's not a nice engineering solution. The proper way to do it would be to add some dowels, but I need to look into how much work that would be and how easy it would be to do. In the mean time, the pistons are next up to face the die grinder! I've felt for a while that there's a bit of a flat spot in the mid range and that the bike is a bit 'pipey'. Looking back over my original porting calculations and comparing this to the books specs, I think my transfer port time is a bit on the short side and this won't be helping. By all accounts trying to modify the top half of the transfer ports is risky, and can soon ruin an engine if you make a mistake. The book suggest that it's much safer to modify the piston, and it's much easier to replace the piston if it turns out to be a step in the wrong direction too. I plan to grind 1mm off the top of the piston where the transfer ports are, adding approx 5° duration to the transfer port time. I've marked it out, so next time I'm out there I can get these ground off and then can have a nice clean up of all the aluminium debris before I start looking at the bottom end of the engine. 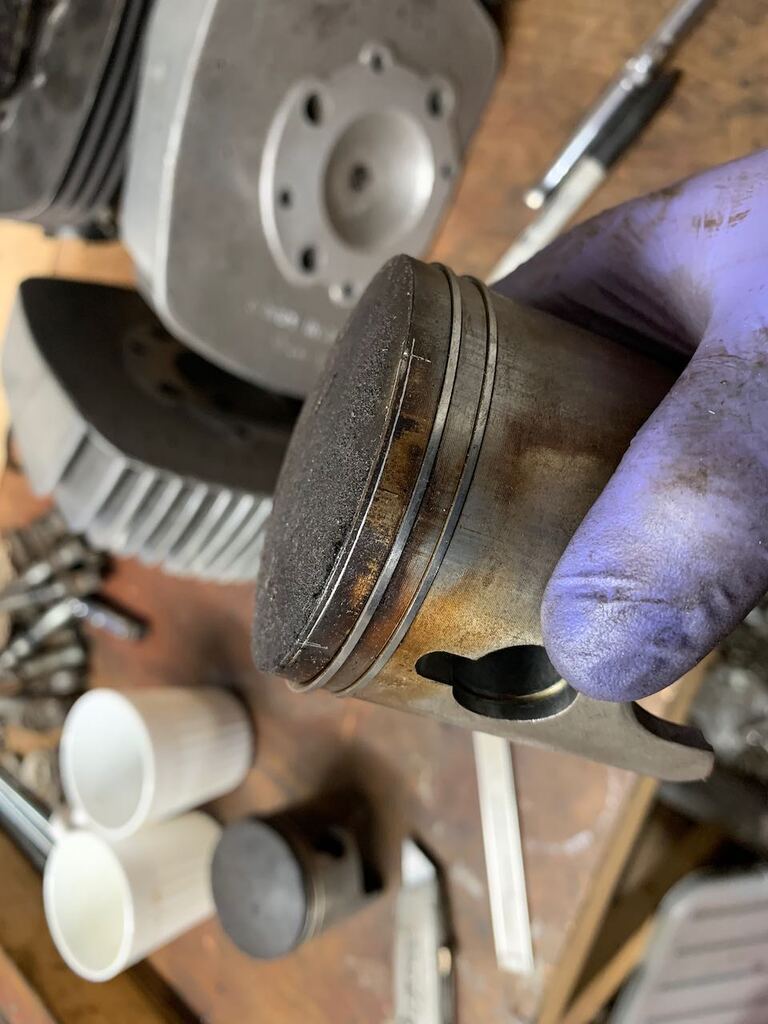 |
| |
Last Edit: Dec 25, 2020 22:46:41 GMT by goldnrust
|
|
|
|
|
|
|
Never really done anything with two-strokes so, like the rotary, this is all a bit dark-arty to me and makes for fascinating reading.  |
| |
|
|
|
|
|
|
|
|
Just read this thread from start to finish - absolute top class work. Love these bike threads as they combine two things I really like: motorcycles and the goodness of Retro Rides.
Looking forward to seeing the evolution!
|
| |
|
|
goldnrust
West Midlands
Minimalist
Posts: 1,887
|
|
|
|
Thanks guys. Just like rotaries, georgeb, 2 strokes aren't actually that complex, but just a little 'different' to 'normal' 4 stroke engines. 2 strokes are a whole lot more simple than rotaries to be fair! I've been plodding on with the engine work, the cold has slowed me down as my little heater in the shed is nearly keeping up. My breath was freezing to the engine parts I was working on the other day  . Anyway, I got the piston tops ground away as discussed at the end of the last post. 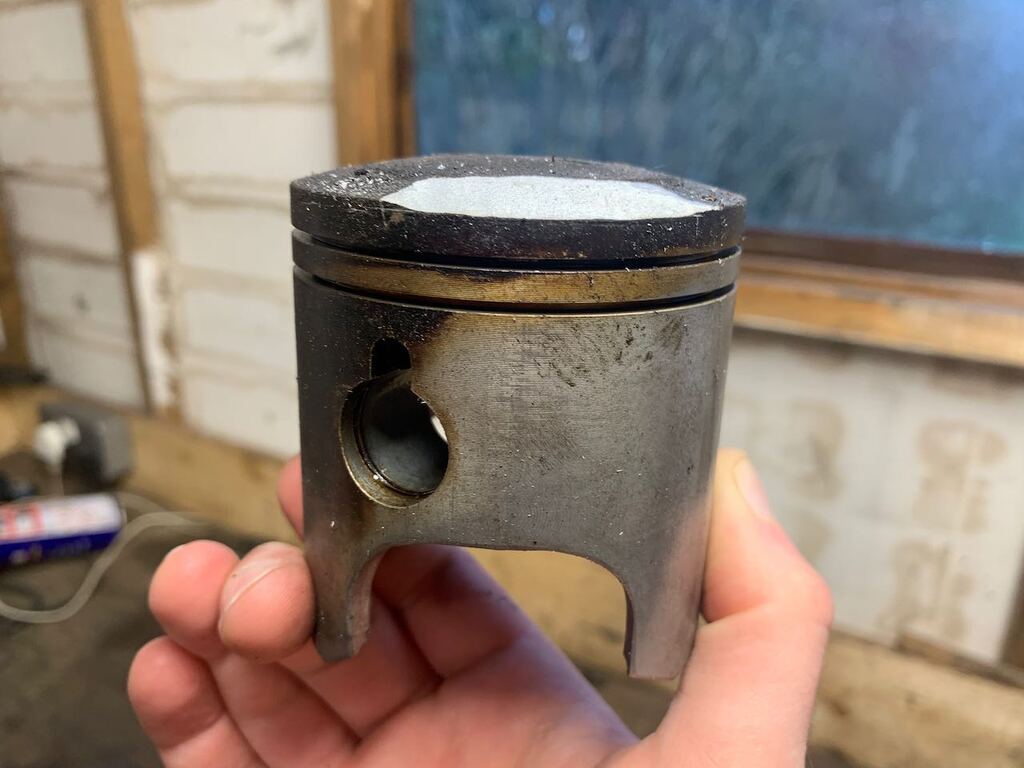 It will be interesting to see how that impacts the power band.  The pistons, like the rest of the engine components, now need a proper clean up and de-carbon. That can wait till I'm ready to put it back together though, as I don't really have a clean space to keep stuff in. I've got the rest of the engine stripped apart now and roughly sorted into boxes. The clutch assembly came off easily and all looks ok. 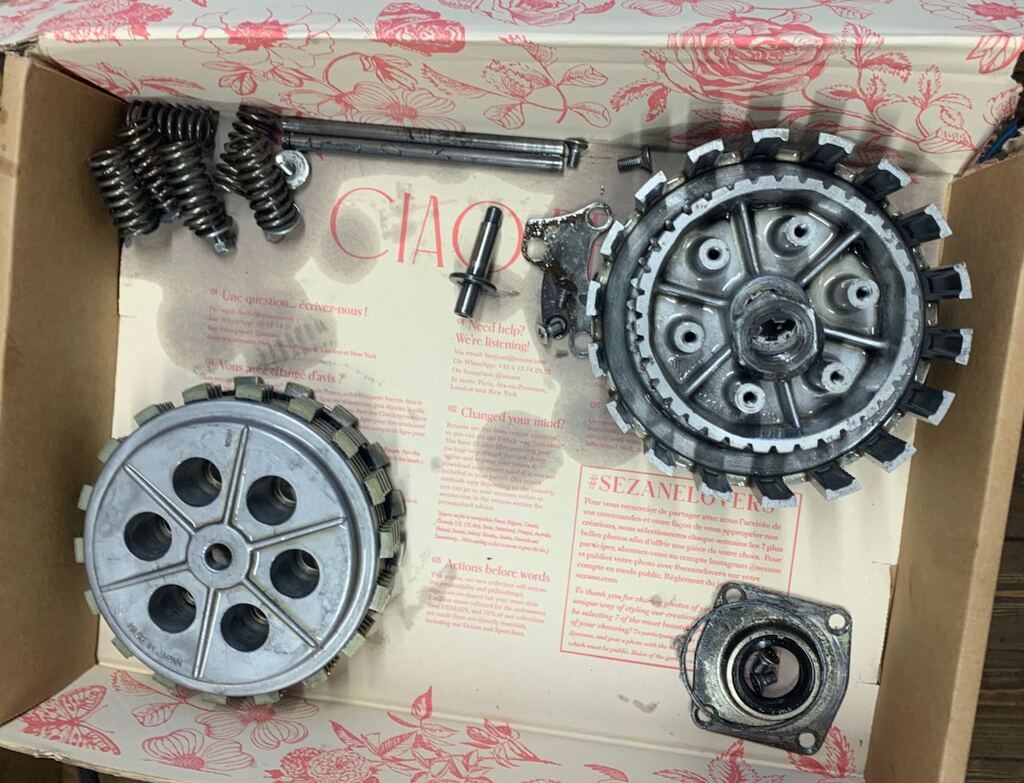 As previously mentioned I have been having some clutch slip issues, despite having new clutch plates. One of my Christmas presents was a new set of clutch springs and comparing the new springs to the old, the old have clearly relaxed with age as they are shorter. I'm hoping this will do the trick. New on left, old on right, if it's not obvious. 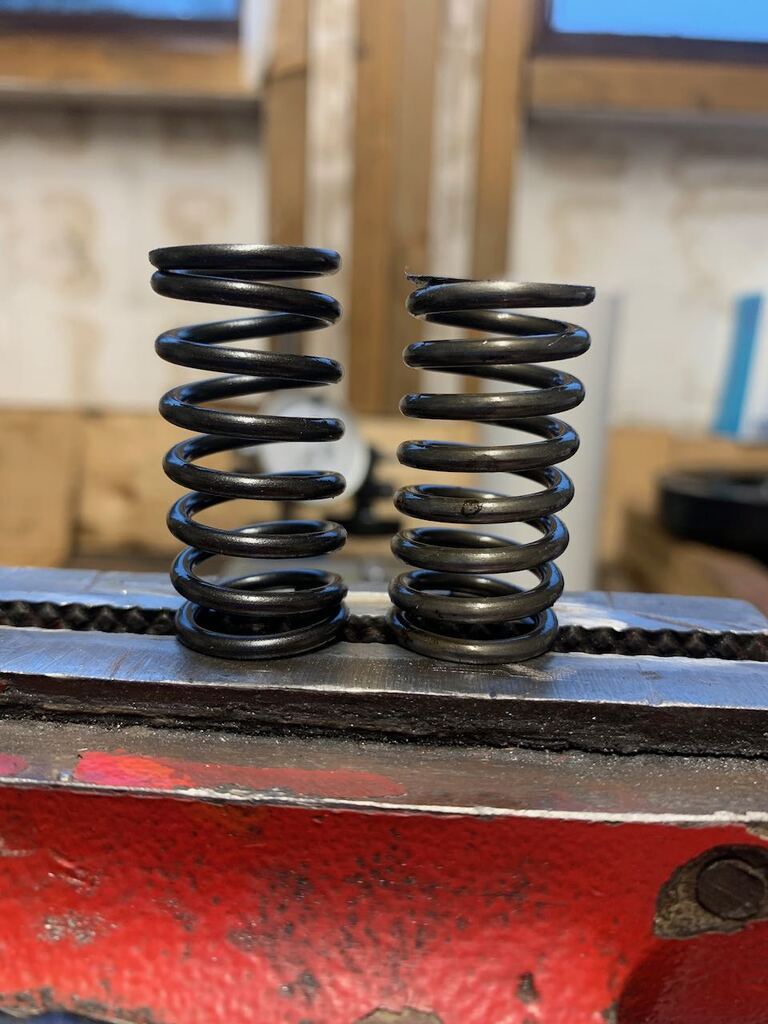 I also got the gearbox all apart, again all looking pretty good. 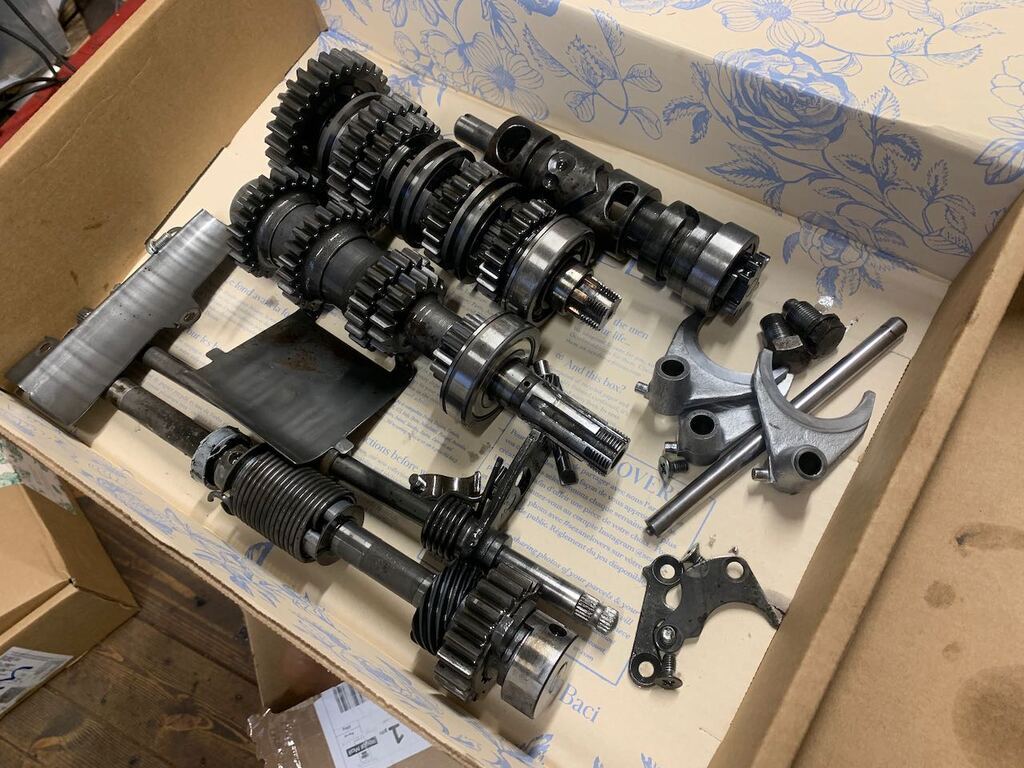 One of the issues I was hoping to solve during this rebuild was to get rid of the false neutral that can be found between 4th and 5th, but try as I might I really couldn't find anything wrong in the gearbox. I was expecting to find some obvious wear or burs or something, but couldn't see anything like that. Maybe I'm just expecting a bit much of such an old gearbox design? I doubt it will make any difference, but I took some extra time to polish the selector shaft and the 'pegs' on the selector forks that contact the selector drum, in the hope that making these sliding contact surfaces as smooth as possible will help it slide easily into gear. 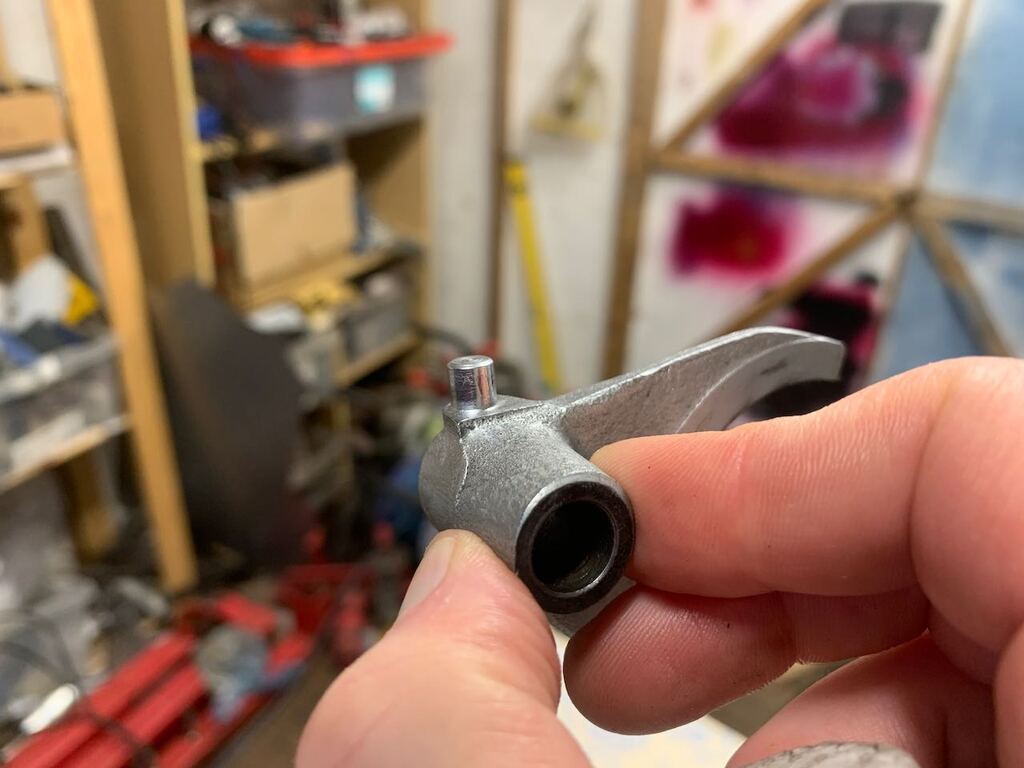 Last but not least I started stripping the crank. 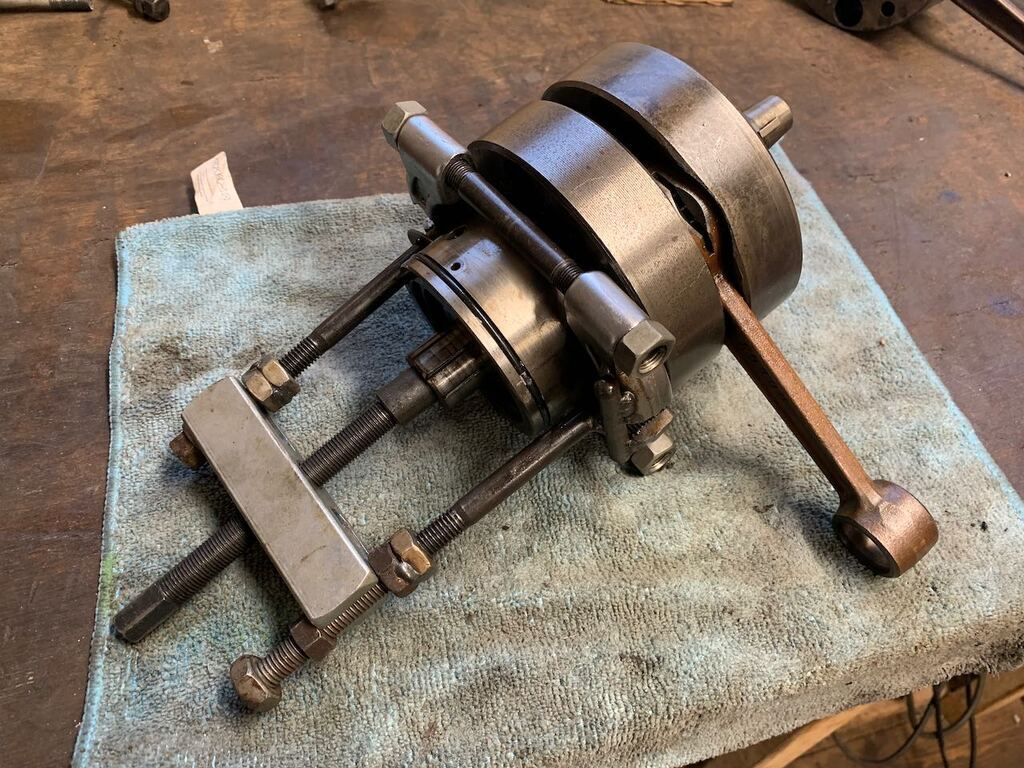 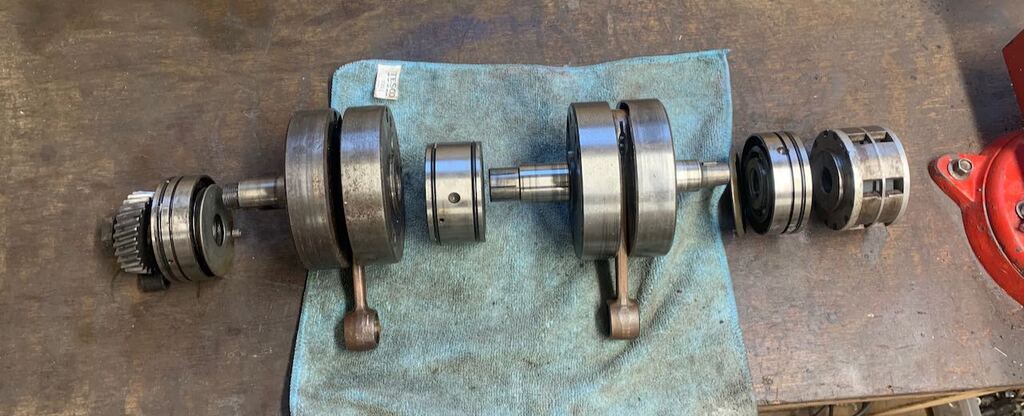 The main bearings and seals are all fairly new (replaced in my ownership) but the big end and con rod are the originals. One way to measure big end wear is by measuring how far the little end can move side of side via the radial play in the big end, often called little end shake. Mine was coming in at 2mm, the recommended limit is about 1.3mm, so it's time they were changed. Suzuki no longer make con rods or big end bearings for the t500, but there are some aftermarket sets out there. So I need to make up some sort of jig so I can use my press to separate the crank webs now. Might have to order some steel to make it with. In other news I've bought another car... so as my garage time this winter is now being spread thinner, I've scaled back my motorbike plans a bit. I'm going to get the engine done, and deal with the leaking fork seal, but then I'm just gonna stick it back together and the cosmetics and untidy wiring can be a problem for next year  |
| |
|
|
goldnrust
West Midlands
Minimalist
Posts: 1,887
|
|
|
|
No more engine progress today, as I'm waiting for some steel to build a jig to separate the crank with. But as I had some time, I thought I'd push on with the forks. The problem was clear... 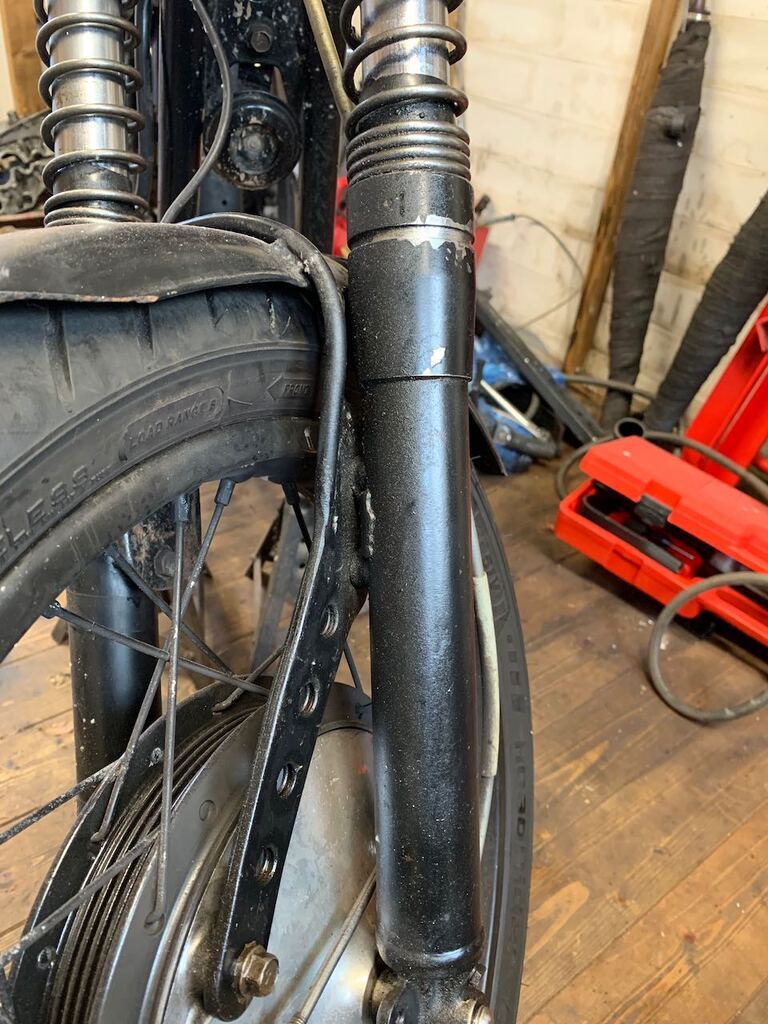 The seal, especially on the left leg, was leaking. It wasn't pouring out, but it was definitely leaking. It's a very basic old fashioned fork, as demonstrated by the quaint external springs! This meant it was very straight forward to remove the legs and replace the seals. 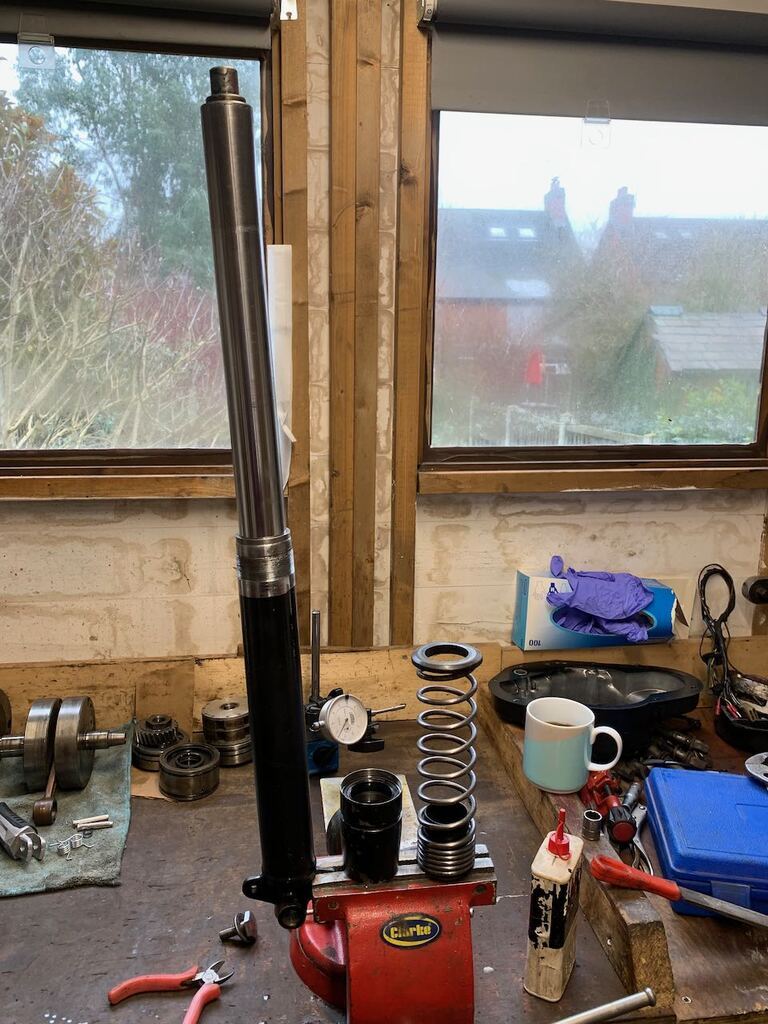 The stanchions look a bit worn in places, but are smooth and not pitted, so I think it was just a dirt issue causing the leak. 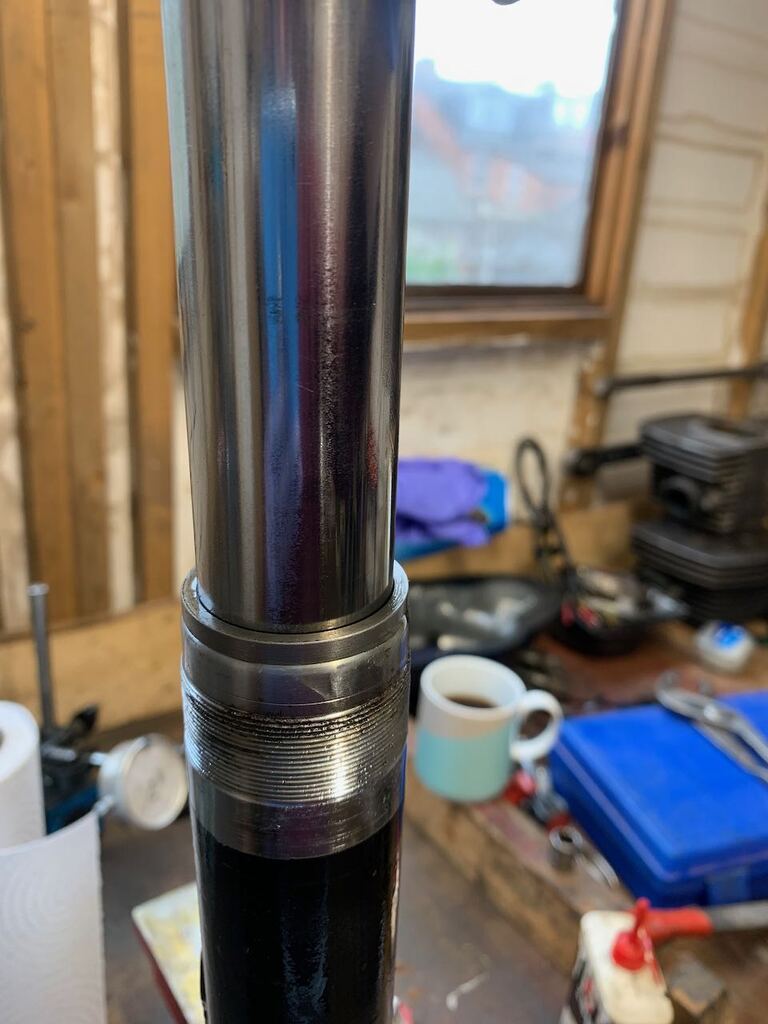 I did replace the seals in 2017 when I first assembled the bike, but I don't know if I used official Suzuki seals or cheap ones. I went for official Suzuki this time. A couple of hours later and I had both forks legs cleaned, seals replaced and then assembled back on to the bike. 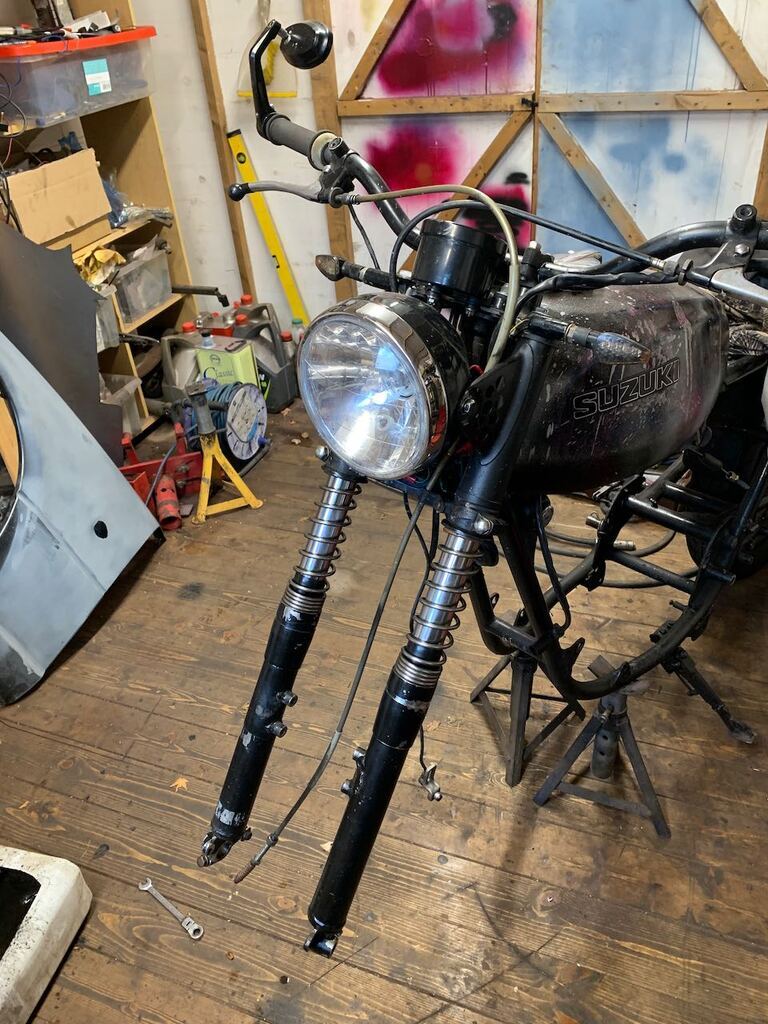 In another bit of small progress I've been wanting to replace my footpegs for a while, the rubber is old, perished and very hard, more like plastic than rubber! 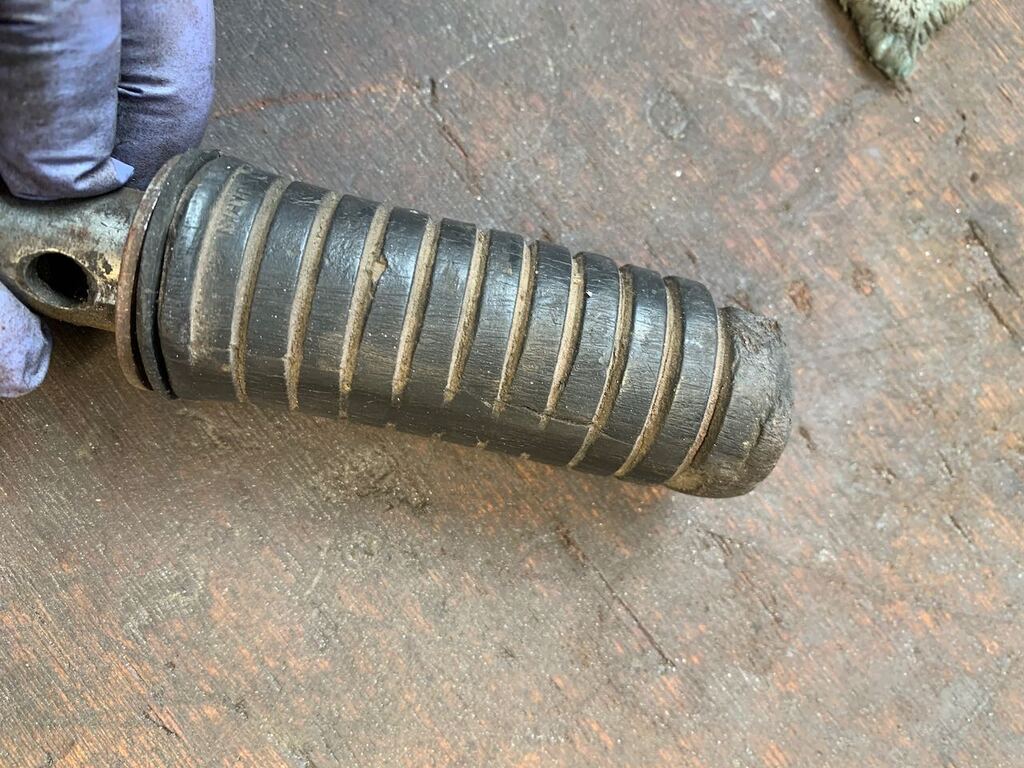 Sadly the T500 '68-'73 footpegs aren't available and although I managed to find some for a '74-'75 T500 they were quite a different design and I couldn't seem to find the right '74-'75 foot peg brackets that I'd need to use with them. Looking around online I noticed that lots of more modern Suzuki footpegs actually looked like they mounted in a similar way to my originals, and knowing Suzuki don't change things if they don't have to (case in point the head stock has barely changed in decades, so it's quite possible to bolt a whole modern GSXR front end on to my 70s frame) I thought there was a chance they would fit. My bargain eBay Bandit footpads arrived today. They were just a fraction too thick to slide into the T500 brackets, but that was soon remedied with a file. 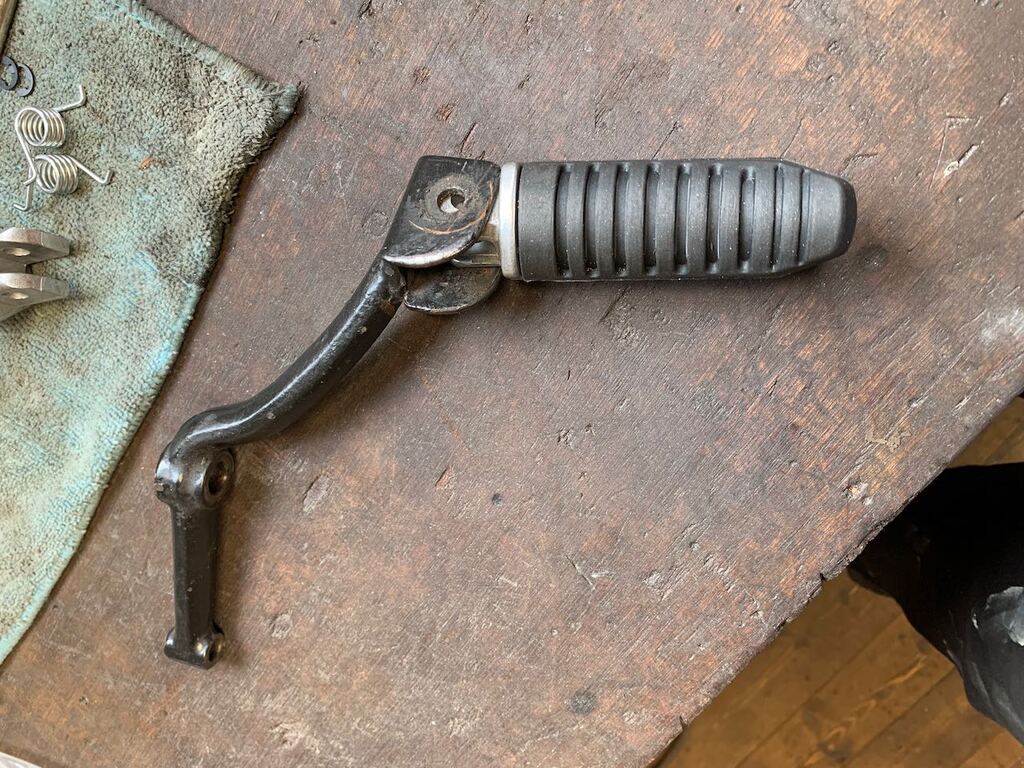 With a bit more file/grinder work to the bracket those are going to fit just fine and should be grippier and more comfortable than the originals. They might need a bit of black paint treatment so they don't stand out as much though! |
| |
|
|
TessierAshpool
Club Retro Rides Member
Posts: 520
Club RR Member Number: 168
|
|
|
|
Nicely done  the Suzuki parts bin is great, I built a custom 750 Katana a few years back and raided the parts bin from Bandit, TL1000, SV and more. There's loads of knowledge out there too, oldskoolsuzuki were great for that |
| |
|
|
goldnrust
West Midlands
Minimalist
Posts: 1,887
|
|
Jan 16, 2021 21:01:22 GMT
|
Yes I was pleasantly surprised by how interchangeable parts are TessierAshpool. Since the last update, I got the foot pegs finished off, and there gonna work well. They still need a splash of paint though! 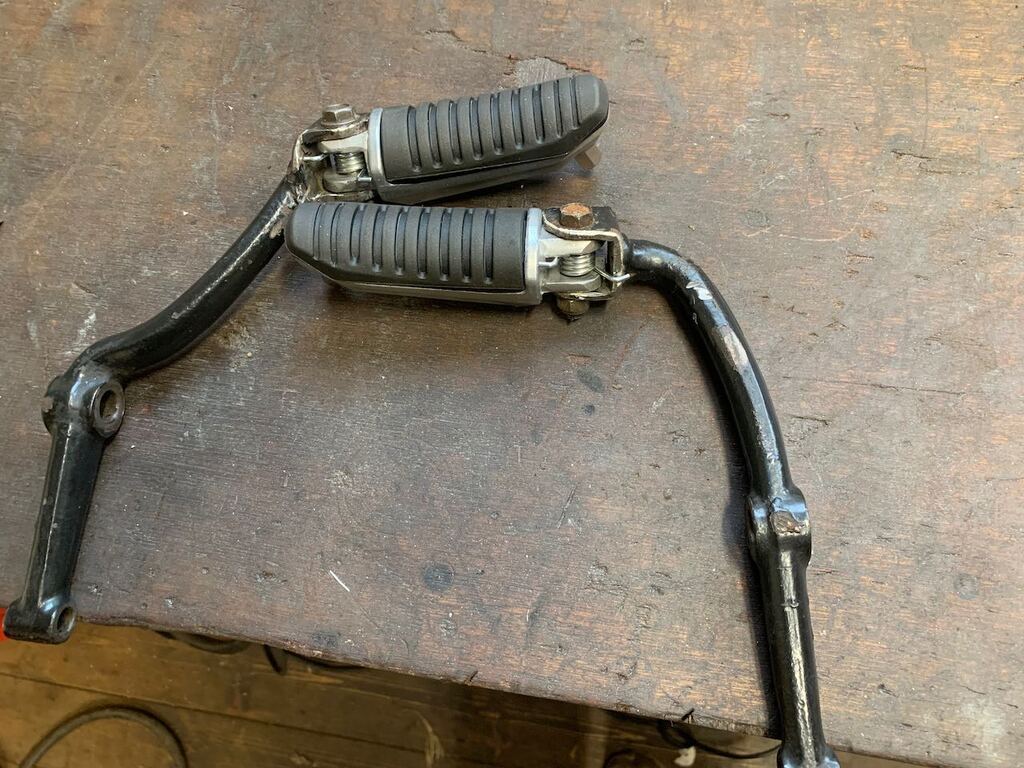 I look forward to seeing if they feel grippier and whether they absorb the vibrations any better. I've been able to make some good engine progress in the past fortnight. The first stage of which was my steel arriving to build a jig to help me separate the crank webs. 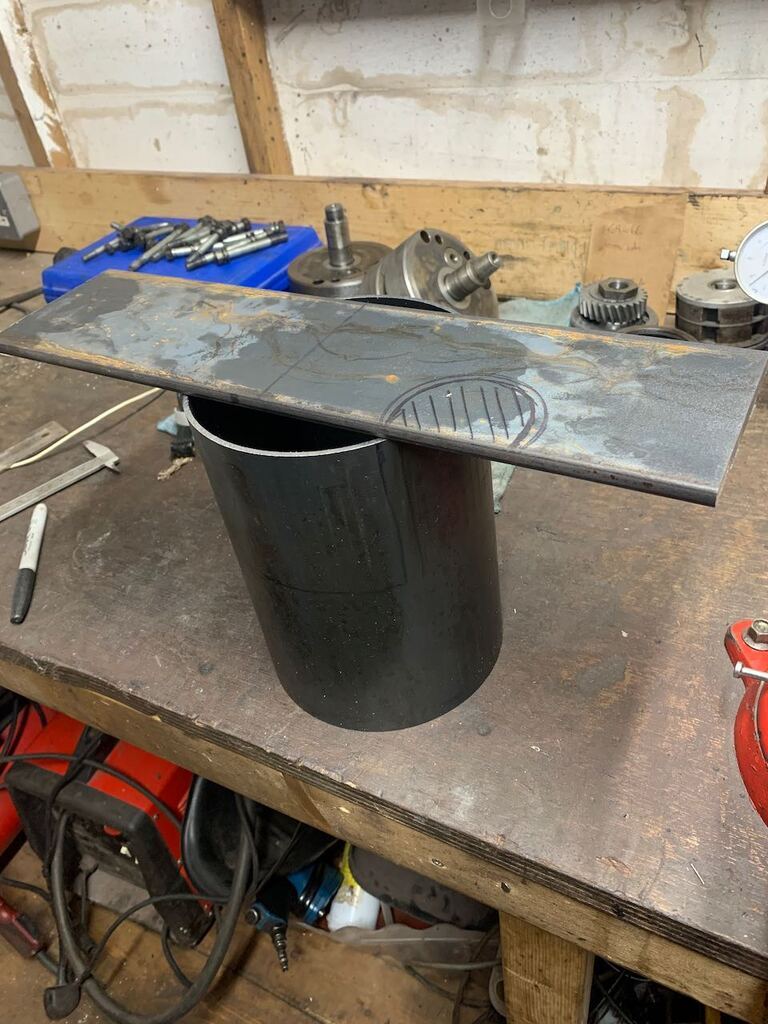 I was a bit worried I might have gone overkill with it, but clearly as you can see from this picture of it in use... 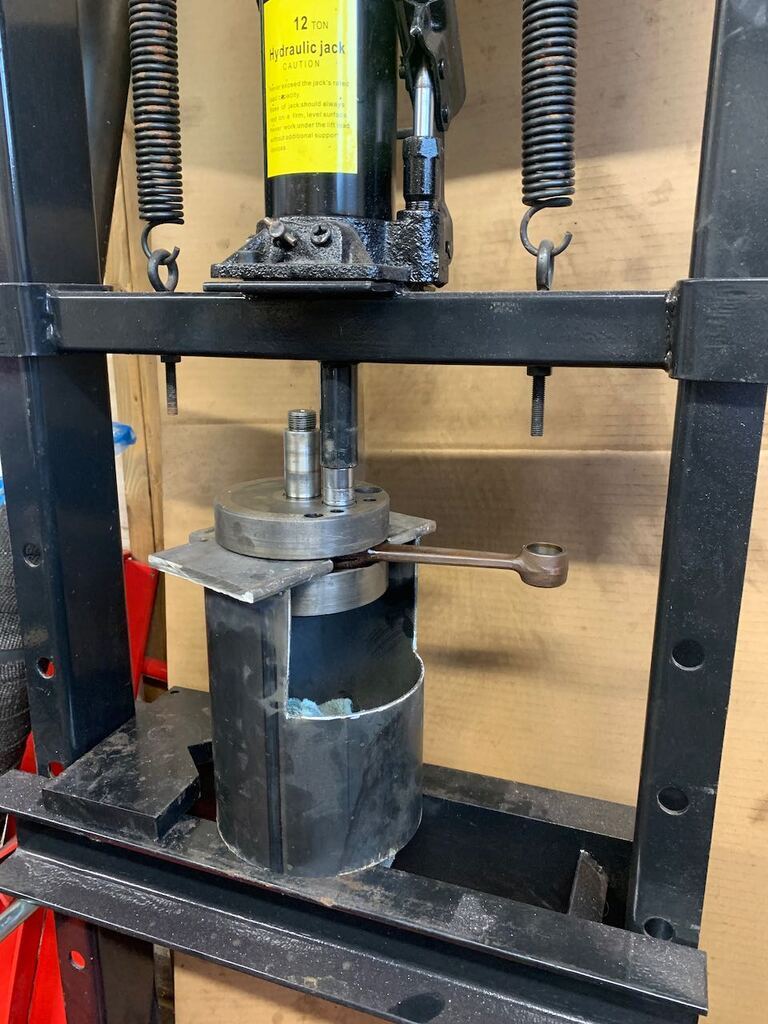 ... it was barely strong enough! It was starting to buckle under the pressure by the time I was done. Despite looking a bit crumpled, the jig did it's job and in no time I had the crank apart. The big end bearings fell to bits as I took the con rods, off, which really shows just how worn they were. 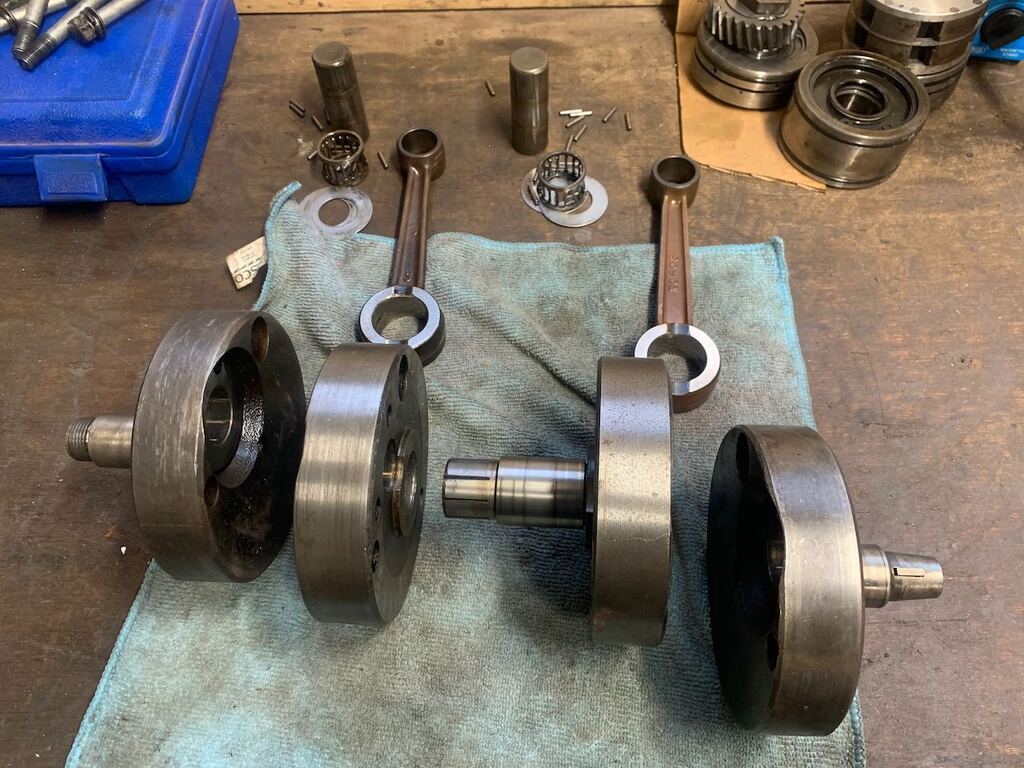 I had been holding off on ordering the new con rods till I'd managed to get to this stage, as I was a bit worried my small press and home made jig might not be up to the task and I might end up having to take the crank somewhere to be rebuilt. But with the successful dismantling, I was able to order the new cold rods and bearing kits and get ready to start reassembling. The new con rods look good. Suzuki no longer make them, and with the bike being comparatively rare there aren't many options, but I did manage to find one supplier who was selling kits for the T500. 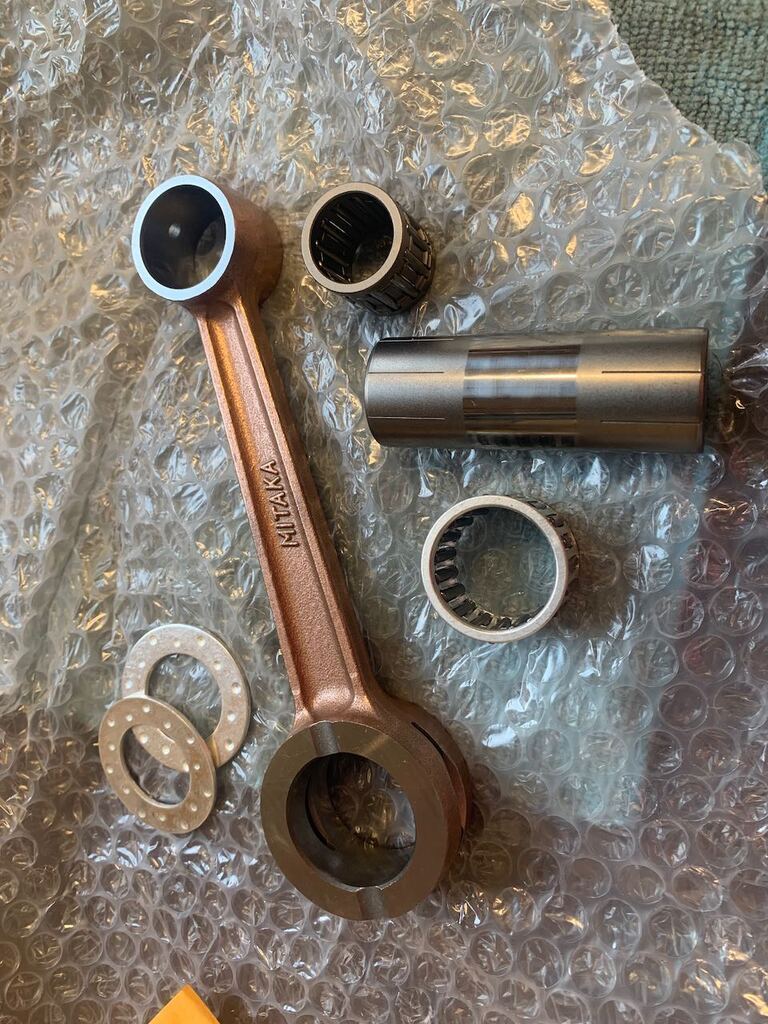 Assembly was going to be the reverse of the removal (as Haynes would say...), so step one was to press the new crank pin into the webs with the new big end bearings and con rods. 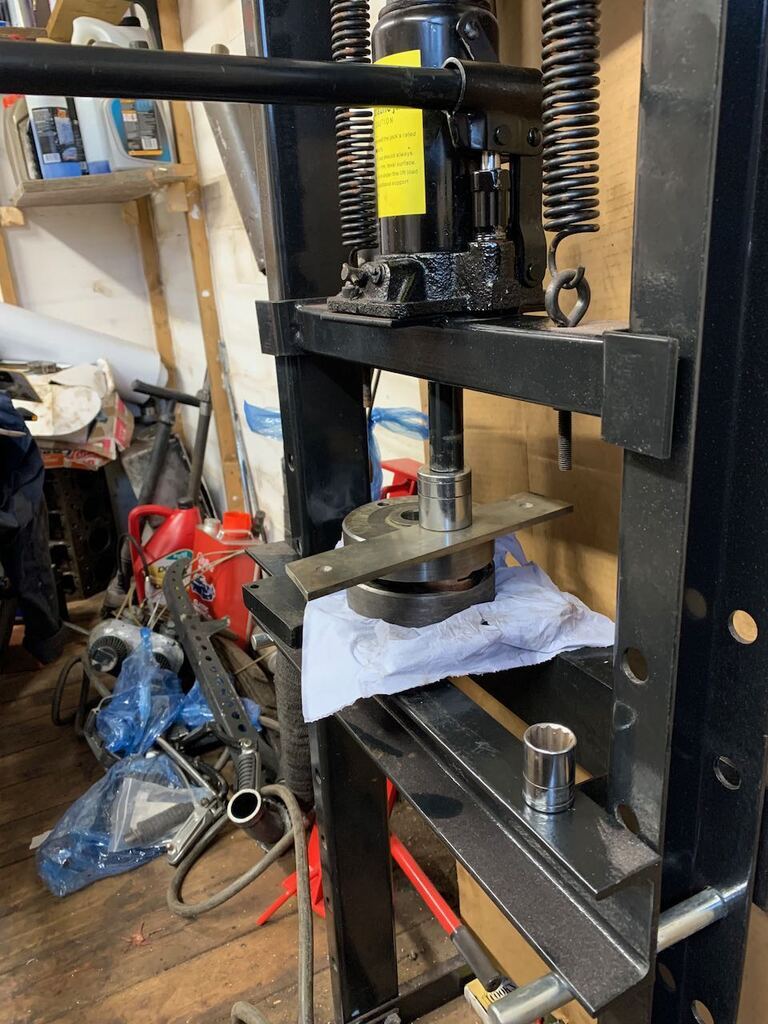 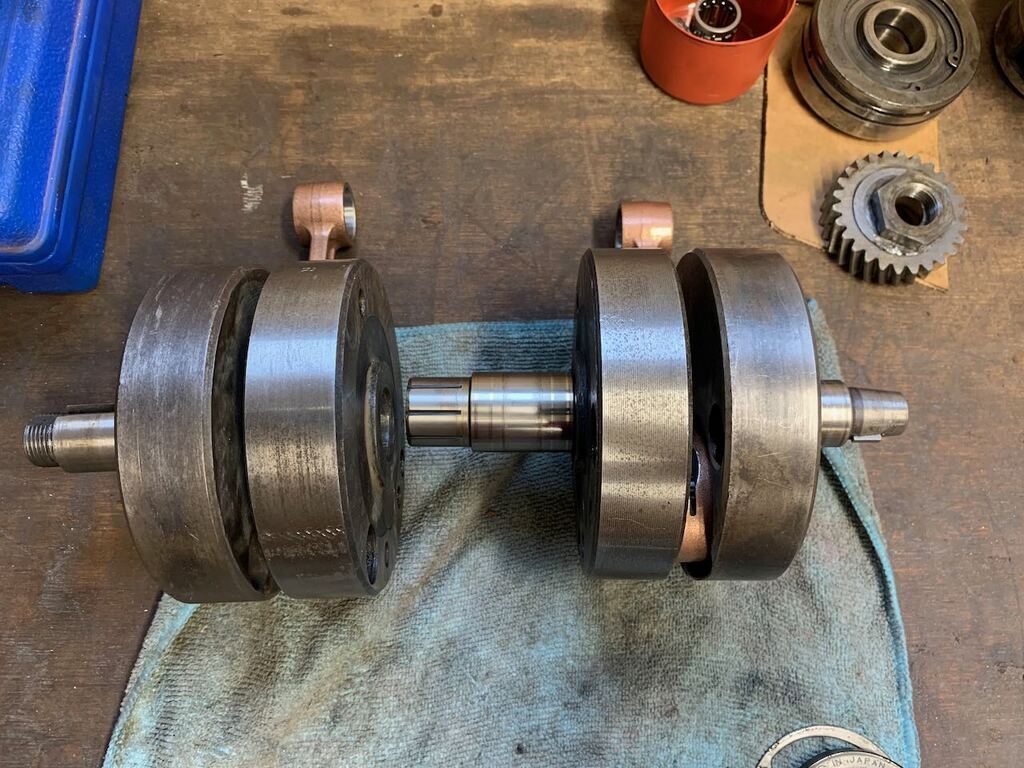 Next up was to refit the bearings, which is when I got a bit worried. I hadn't thought about the fact that I'd need to remove the crank seals to press the bearings on. The previous time I did this, I had new seals so just removed the old ones without a care for damaging them. I almost gave up for the day, but decided I'd just see if I could get the seals out carefully. 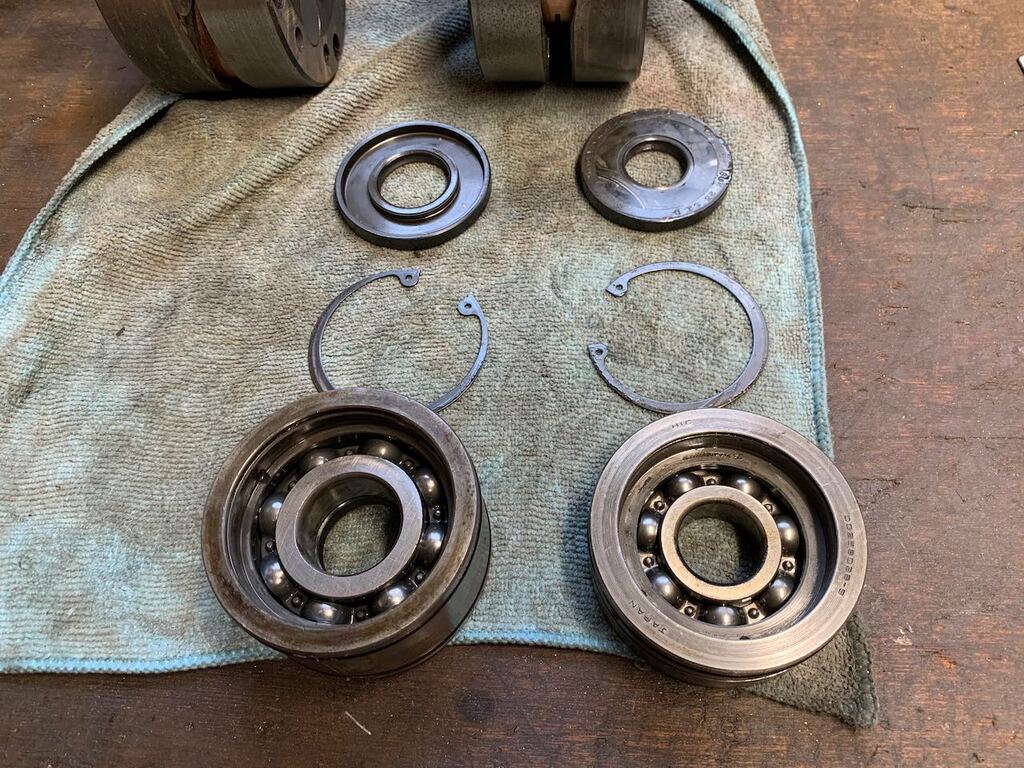 Helpfully they came out with little fuss, so I could move on to the next stage and press the bearings back on, then refit the seals. 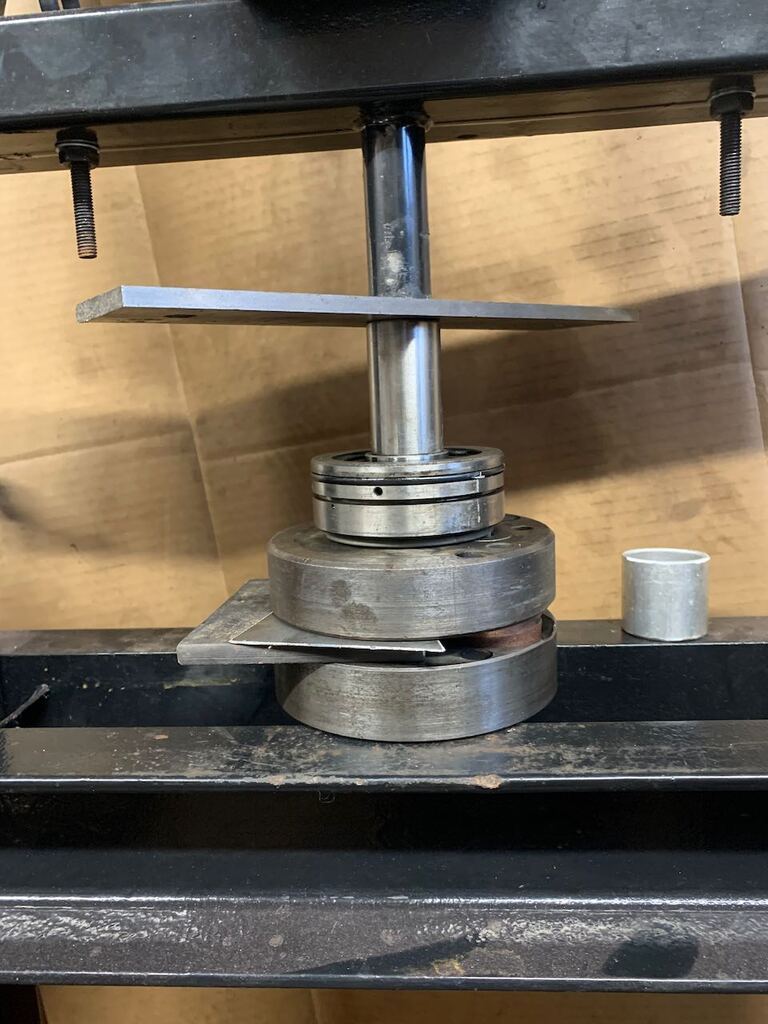 Finally it was time to press the two halves of the crank together! 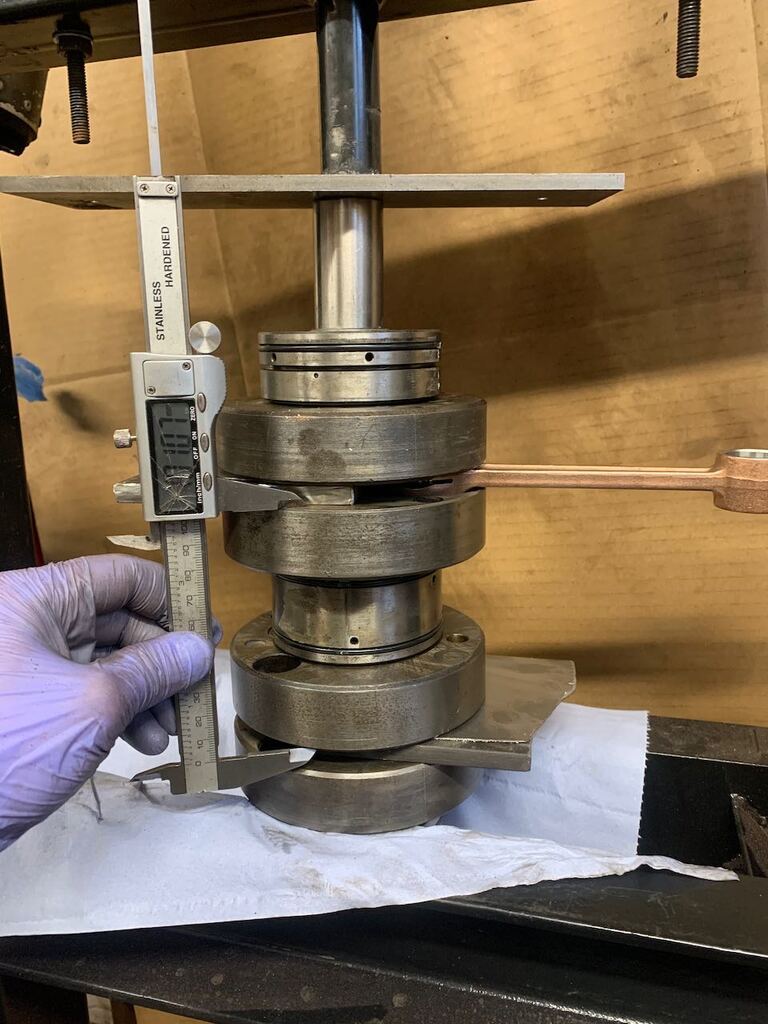 Here you can see that I've packed out the space between the crank webs, so the pressure of the press wouldn't just bend them. I've also got the (broken) callipers there measuring the distance across the webs. The book spec is 101mm +- 0.1mm, so at 100.07mm, that's spot on. So I had the crank back together, which is good. The press had just about coped, though was now wounded with a leaking seal from me pushing it harder than it was probably designed for  Now the real fun of truing the crank can begin! 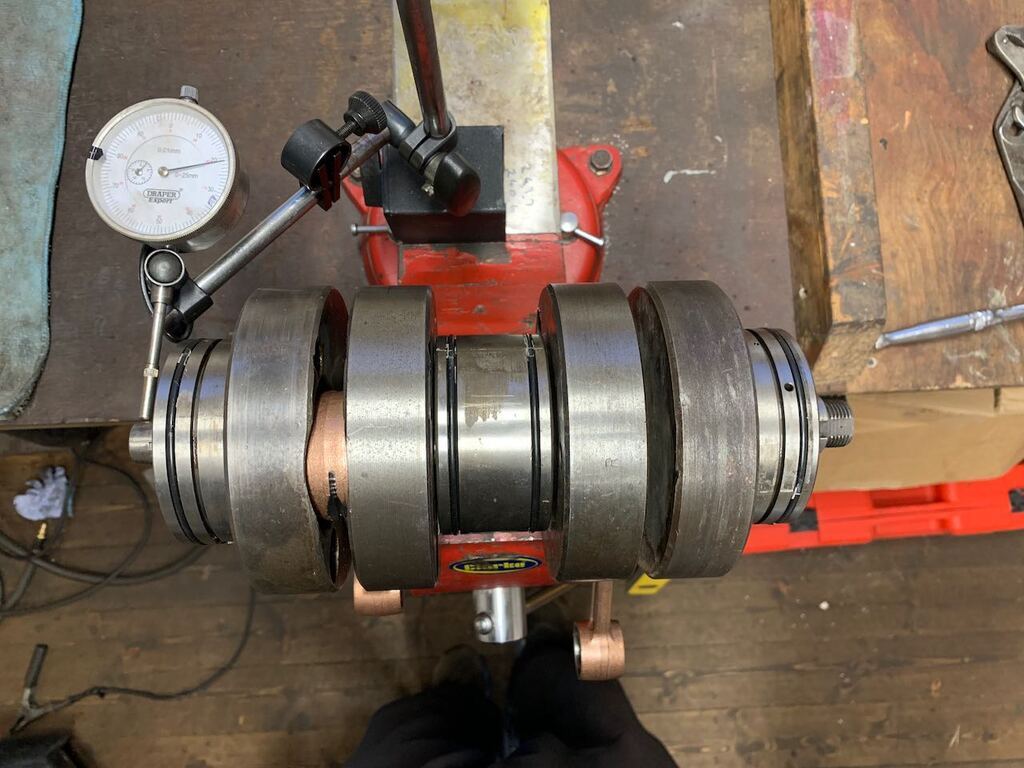 This broadly involves supporting the crank at various points while turning it and measuring the run out. Then getting the biggest copper faced / dead blow hammer that you can find and whacking the crank with it, till the run out is reduced. There's a bit more science with working out where to hit the crank, but you really do have to hit it harder than feels appropriate for a piece of precision engineering that you're you're trying to get true to within 0.001"! I started by supporting it by the centre bearing and working on the left and right webs separately to account for any run out from the crank pin. I've got it pretty close as far as that is concerned. So next I need to support the crank by the outer most ends and measure run out at the middle, which will let me know about any run out from where the two halves of the crank press together. But that will be a job for next time! |
| |
|
|
goldnrust
West Midlands
Minimalist
Posts: 1,887
|
|
Jan 31, 2021 19:17:16 GMT
|
Well that was fun!  Truing a 2 cylinder crank is not much fun compared to 1 cylinder cranks. There's just so many more variables, so it's harder to work out where to hit it with the hammer to make it straighter! I started by trying to true it supported by the centre bearing, as I had seen from some images online. The idea here is that you can kinda treat it like two separate 1 cylinder cranks, but it soon became apparent that the (minimal) axial play in the centre bearing meant that the results I was getting weren't consistent, so a new approach was required. 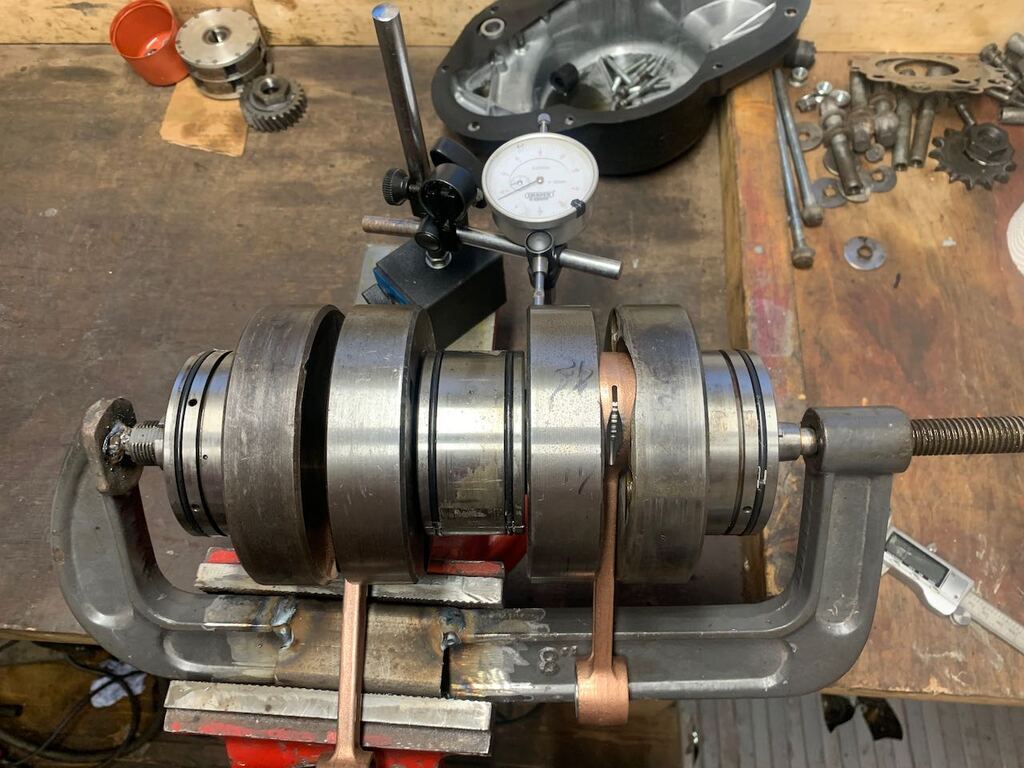 A big G-clamp was sacrificed and an alternative truing stand came to life. As this supported the crank directly, the bearing play was now removed from the equation. In order to true it, I took measurements from each outer bearing and one from each side of the centre bearing, and marked each high spot and low spot on the webs, before trying to decide which web needed a tweak to bring it in to line. With a single dial gauge that needed repositioning to take each of these measurements, it probably took 15 mins to get a set of measurements, then I'd whack the crank with a hammer and have to start over, so it was a slow process! Eventually I did get it true to 0.001", which has got to be much better than last time. If for no other reason that last time I trued it against the webs rather than the bearings, and it turns out one of my webs is about 0.005" out of round! I need a lathe then I could sort that out! but that's a job for next time...(Hopefully several years time!) With the crank finally straight it was fairly plain sailing to assemble the bottom end. 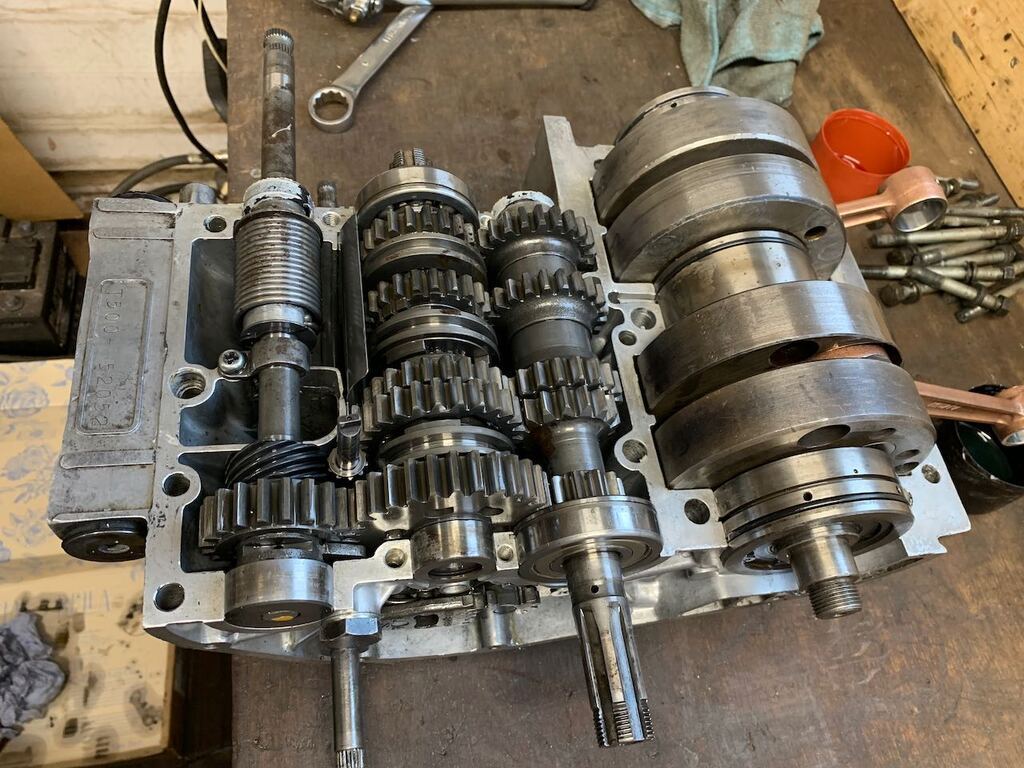 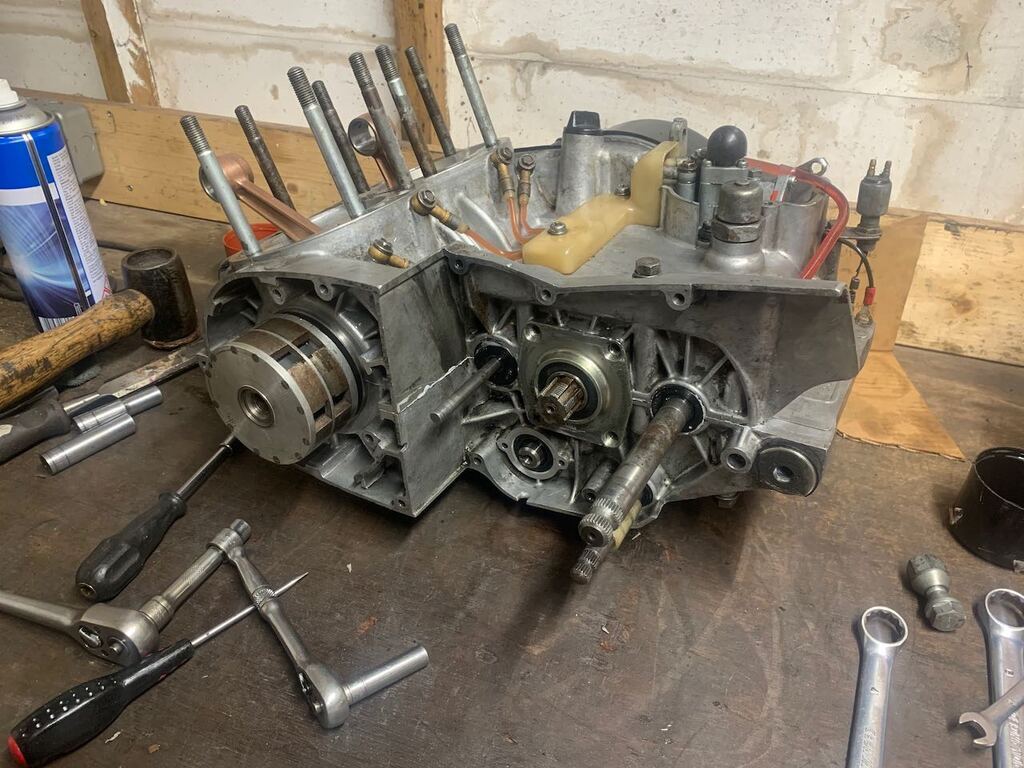 Before putting the top end together, I decided to weigh my pistons, just out of interest really. I didn't expect them to be that different to each other. Well... They turned out to be 6g different! It doesn't sound like a lot, but when the pistons only weigh 240g each that's actually quite a bit. Most books would say you'd want the pistons within 0.5g and preferably down to 0.1g. I spent quite some time carefully finding aluminium I could safely grind away from the heavy piston till I got them to match. I didn't think to get any pictures, but it was quite a bit of aluminium to remove, so hopefully I've managed to remove it from the right areas without weakening the piston! Assembling the top end took just a few minutes after that... 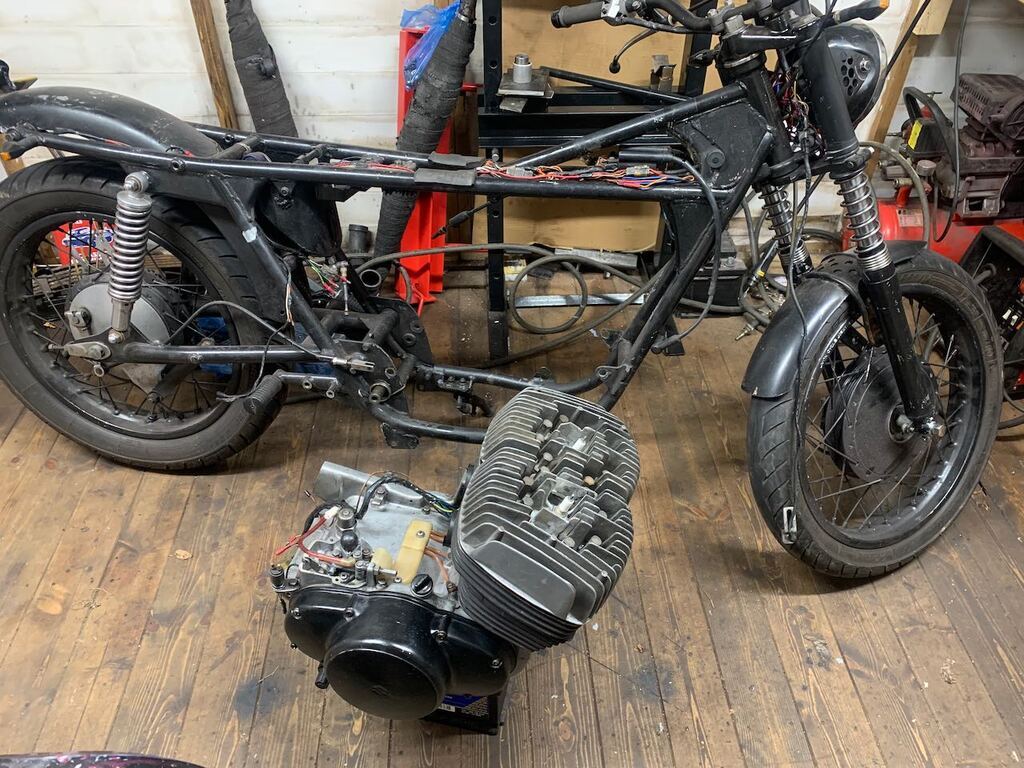 .. and the engine was soon safely back in the frame and it felt like a complete motorbike again! 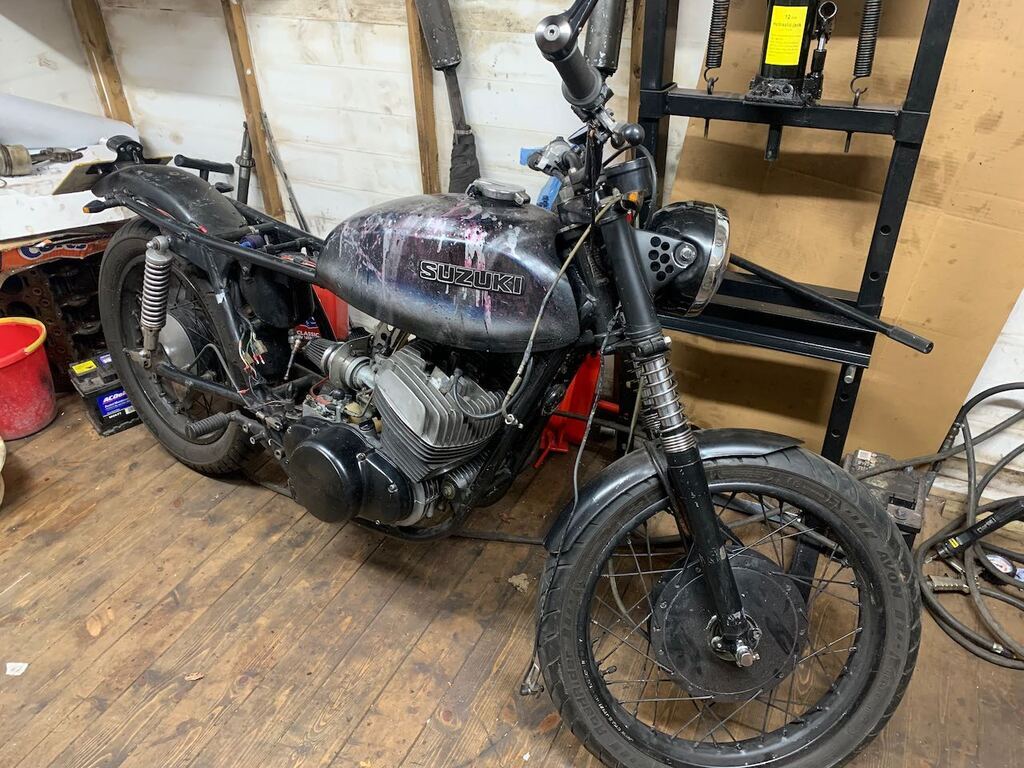 There's a few bits left to bolt on there, exhausts being the big one, but it didn't take long to sort that. The moment of truth was to give it a kick and see if it ran! I'm pleased to say it did, it fired up on the second kick and ran happily. I'd like to say it sounded less rattly than before, and smoother, but until I get chance to take it for a proper ride to confirm it could just be placebo effect! I've worked hard on it therefore it must be better...  That probably wont be till lockdown ends. More importantly, I've got an Mx5 and a Daimler currently in bits and blocking the shed doors, so I need to fix those before I can physically get it out! haha |
| |
|
|
|
|


 but brings back some great memories for me.


 I also got bored with the patchy blue tank and decided to paint it black, which promptly reacted with one of the layers below it and just looked even worse.


