|
|
|
Sept 7, 2019 21:46:06 GMT
|
Not sure whether I've mentioned this before, but this gets pretty hot inside the cabin in the summer. So the plan over the winter is to fit air conditioning, which was an option when it was new (although I've never seen it fitted to a UK car). So far I've just been collecting parts, including the condenser from a Rover 45 (a £36 bargain from Rimmer Bros!)... 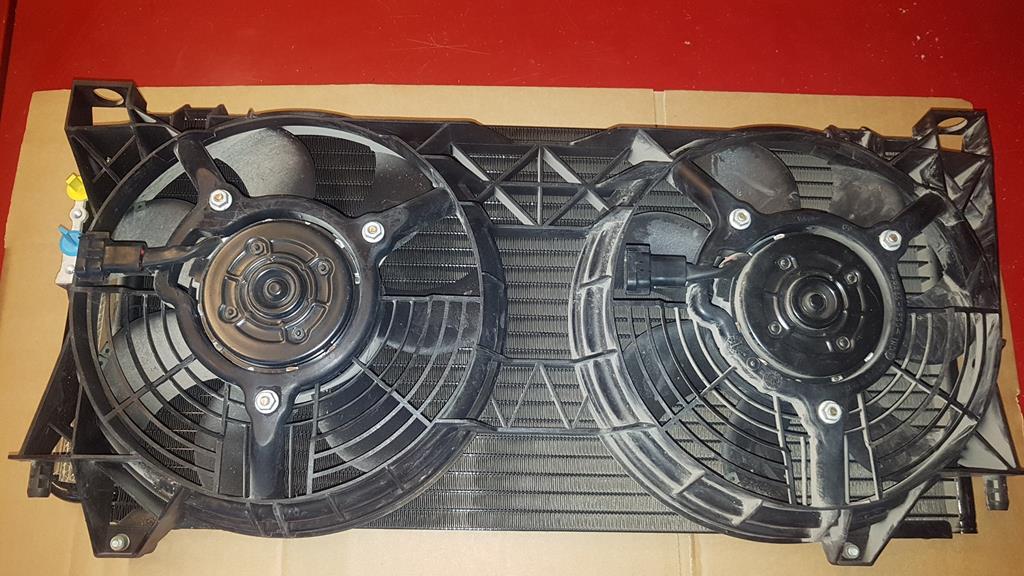 ...a universal receiver/drier (which should tuck away behind the O/S headlight)... 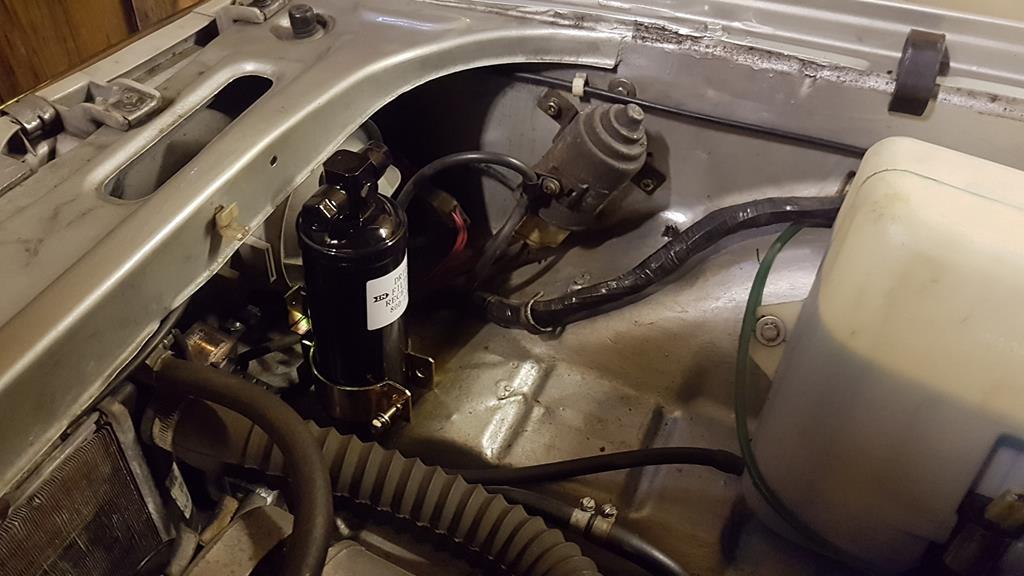 ...and a compact compressor to mount where the PAS pump would normally sit. 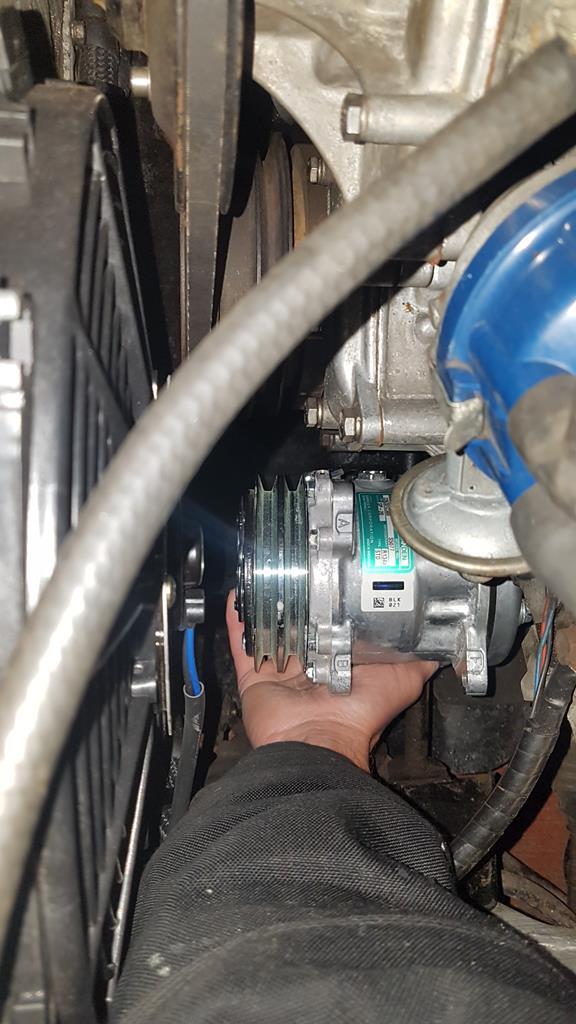 This I've chosen for a number of reasons; firstly given the relative ratios of the crank and compressor pulleys it's going to be spinning significantly faster than engine rpm - so I need a compressor with a high maximum speed. Secondly, again given the high rpm I will get a decent amount of cooling power at lower speeds, so a smaller displacement compressor fits the bill. And thirdly, a smaller unit weighs less, and will be easier to locate. I still need to buy the hoses and fittings, and the evaporator which will live behind the dashboard - hopefully there is enough space in the heater box. Lastly, another photo of the car working for a living - collecting a log splitter the other weekend!  |
| |
Sometimes, others may not understand why you like a car so much. Sometimes, you may not even understand why you like a car so much. But none of that matters; all that matters is that you like the car, and having it makes you happy.
|
|
|
|
|
|
|
Sept 30, 2019 20:48:35 GMT
|
As you can tell, this is a little low geared with the Cortina 2.3 V6 rear axle (3.44:1 ratio). So I've been wondering about raising the gearing for a while. 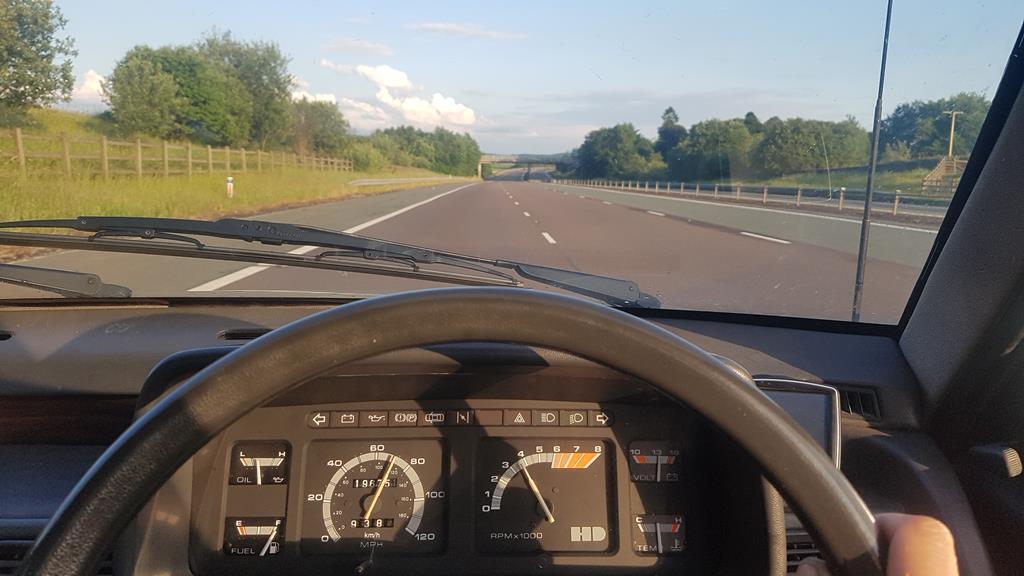 Unfortunately this the tallest ratio available for the Cortina, however the axle is basically the Atlas unit (as fitted to Transits, P100s and Capris) but in a Cortina casing. So, I reckon that I could swap the CROWNwheel and pinion from a V6 Capri, which has a 3.09:1 ratio, to make it a bit more long-legged. Which is what I've just bought, complete with diff too:  If this is less worn than my diff I can swap the whole thing, otherwise just the CWP. It'll be the first time I've delved into the internals, apart from the simple task of changing the wheel bearings. I may as well change the diff and pinion bearings while it's all in bits too. Anyone reading this who has experience with the Ford Atlas axle? There's some interesting info here: www.classicfordmag.co.uk/wp-content/uploads/2017/01/definitive-guide-to-atlas-axles-classic-ford.pdfbut at the moment I haven't seen a definitive guide to preload and backlash values. I should add that I've not found anyone online who's swapped bits from a Capri to a Cortina axle, or vice versa, so I'm not 100% sure it's possible! Biggest potential stumbling block is the pinion length, as if that's significantly different I haven't got a hope. |
| |
Sometimes, others may not understand why you like a car so much. Sometimes, you may not even understand why you like a car so much. But none of that matters; all that matters is that you like the car, and having it makes you happy.
|
|
|
|
|
Sept 30, 2019 21:00:57 GMT
|
|
Is it possible to swap the whole rear end? Might even be easier.
|
| |
|
|
|
|
|
Sept 30, 2019 21:14:25 GMT
|
|
Unfortunately not so simple - Capri axle is wider, and located on leaf springs rather than coils. So the Capri diff casting doesn't have the mounting points for the location arms used on Cortinas and Stellars. Not impossible, but more work than I fancy when my main winter project is supposed to be fitting AC!
|
| |
Last Edit: Sept 30, 2019 21:16:02 GMT by matfenwick
Sometimes, others may not understand why you like a car so much. Sometimes, you may not even understand why you like a car so much. But none of that matters; all that matters is that you like the car, and having it makes you happy.
|
|
|
|
|
|
|
|
If you can’t change the diff ratio easily, maybe you can find an alternative 5th gear ratio for the gearbox.
Great car, by the way.
|
| |
|
|
|
|
|
|
|
|
Thanks! It's the R380 gearbox I've fitted, and I reckon I've got the van version for which information is scarce. It's not just the top gear which is too short, but all the gears really. First is too low to be useful, and I can be in 3rd by 20mph.
I've been doing some calculations (based on driving at set rpm in each gear) myself, and if I make the assumption that the 2.3 Cortina axle contains the standard 3.44:1 diff, my gear ratios are as follows:
1st - 4.81:1
2nd - 3.04:1
3rd - 1.82:1
4th - 1.21:1
5th - 1:1
If however, I do have the 'standard' R380 ratios, that means I must have a 4.11:1 diff ratio. Once I fit the 3.09:1 diff I'll either be geared to a realistic 134 mph (rather than the theoretical 120 mph at present), or a massive 161 mph! Which I doubt I'd have the power (or the balls!) to reach. I think if I do find I have a 4.11:1 diff then I won't fit the 3.09, but look out for one which is more suited.
|
| |
Sometimes, others may not understand why you like a car so much. Sometimes, you may not even understand why you like a car so much. But none of that matters; all that matters is that you like the car, and having it makes you happy.
|
|
Darkspeed
Club Retro Rides Member
Posts: 4,883
Club RR Member Number: 39
|
|
|
|
|
Far more likely that you have 4.11:1 than anything other than a 1:1 in 4th.
|
| |
|
|
|
|
|
|
|
|
That would be my suspicion too, especially as 4.11:1 is a valid Atlas ratio. But I did remove the axle from a 2.3 Cortina myself back in 2002, and it still had the 3.44:1 tag present (not that it proves anything). I'll probably count the number of turns on a wheel versus the input flange, before I open it up!
|
| |
Sometimes, others may not understand why you like a car so much. Sometimes, you may not even understand why you like a car so much. But none of that matters; all that matters is that you like the car, and having it makes you happy.
|
|
Darkspeed
Club Retro Rides Member
Posts: 4,883
Club RR Member Number: 39
|
|
|
|
Unfortunately not so simple - Capri axle is wider, and located on leaf springs rather than coils. So the Capri diff casting doesn't have the mounting points for the location arms used on Cortinas and Stellars. Not impossible, but more work than I fancy when my main winter project is supposed to be fitting AC! The Capri Axle is narrower than the Cortina 3/4/5 and the MK1 Capri is narrower than the Mk2/3 - Capri 1 could also be the same as the MK2 Cortina - not sure. The 3.08 would be a good option as 5th would become a genuine overdrive type gear so relaxed cruising. Very similar in overall gearing and performance to a 2.8i Capri I would imagine. How accurate is the speedo - In most cars I have messed about with re axle ratio's the speed v engine rpm reads the same as the old axle taken out as it was matched to that turns per mile. Cheers Andrew |
| |
|
|
|
|
|
|
|
|
Sorry, must have mis-remembered the way round for width.
The speedo is within 1mph of the sat nav at 40mph, drifting to 2mph low at 60mph. I'm running it from the cruise control speed sensor next to the propshaft which drives a motor (connected to the speedo cable) at a proportional speed. I can calibrate this to suit whatever gearbox and axle ratio I end up with, fortunately.
|
| |
Sometimes, others may not understand why you like a car so much. Sometimes, you may not even understand why you like a car so much. But none of that matters; all that matters is that you like the car, and having it makes you happy.
|
|
|
|
Darkspeed
Club Retro Rides Member
Posts: 4,883
Club RR Member Number: 39
|
|
|
|
|
If its in the budget it may be worth getting hold of another Cortina casing and fully rebuilding that with the 3.08 to swap in as a complete assembly. The car is only off the road for half a day if done that way.
|
| |
|
|
|
|
|
Oct 10, 2019 11:28:27 GMT
|
|
That's a good point, but I'll be taking the car off the road when the salty season starts, so time isn't pressing. Plus I've done the wheel bearings already on this axle, plus shot blasted/painted it.
My local garage knows someone who rebuilds these axles for the rally boys, so I could always take it there if I don't fancy the job myself.
|
| |
Sometimes, others may not understand why you like a car so much. Sometimes, you may not even understand why you like a car so much. But none of that matters; all that matters is that you like the car, and having it makes you happy.
|
|
|
|
|
Nov 23, 2019 21:50:44 GMT
|
I've made a bit of progress with the AC installation, starting with the radiator switch wiring as I want the second set of contacts to operate the twin condenser fans if the coolant temperature continues to rise. The existing fan switch (closes at 90 deg C) is to be replaced with a twin contact switch from a BX, as I recall they close one contact at 87 deg C, and the other at 92 deg C. As the engine gets hot, first the rear fan will suck air through, then if the temperature continues to rise, both front fans will switch in. Handily the BX switch has the same M22 x 1.5 thread as the Audi radiator.  The AC will operate the twin fans in front of the condenser and radiator via a trinary switch on the receiver/drier. (This both stops the compressor functioning at dangerously high and low pressures, but also operates the fans only when the pressure in the AC system demands it). The rear radiator fan will only be operated by coolant temperature. This is the receiver drier, with the trinary pressure switch on top: 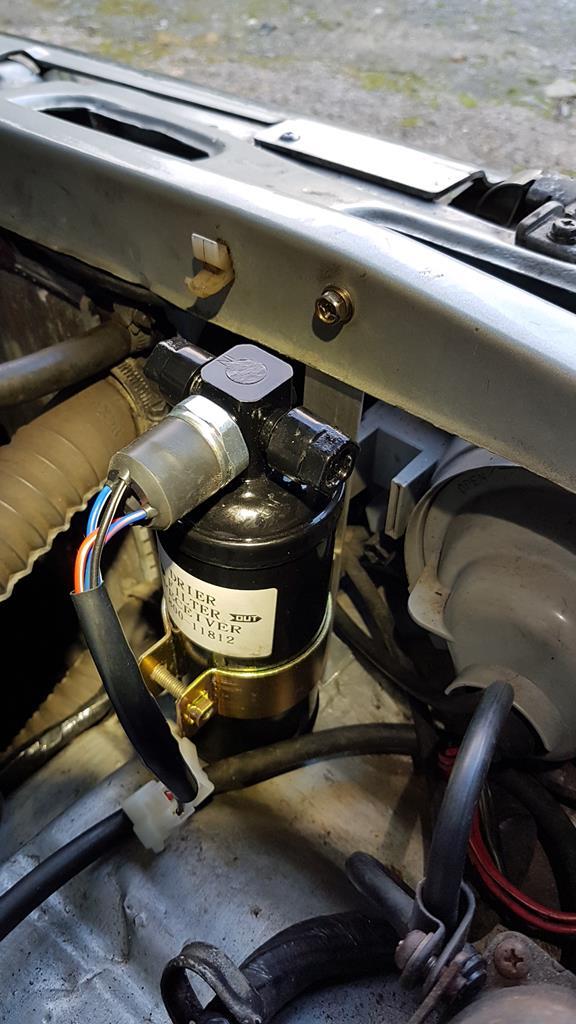 The pressure switch connectors were a pain to source, but doing so lets me keep a standard off the shelf part, and looks neat :-) 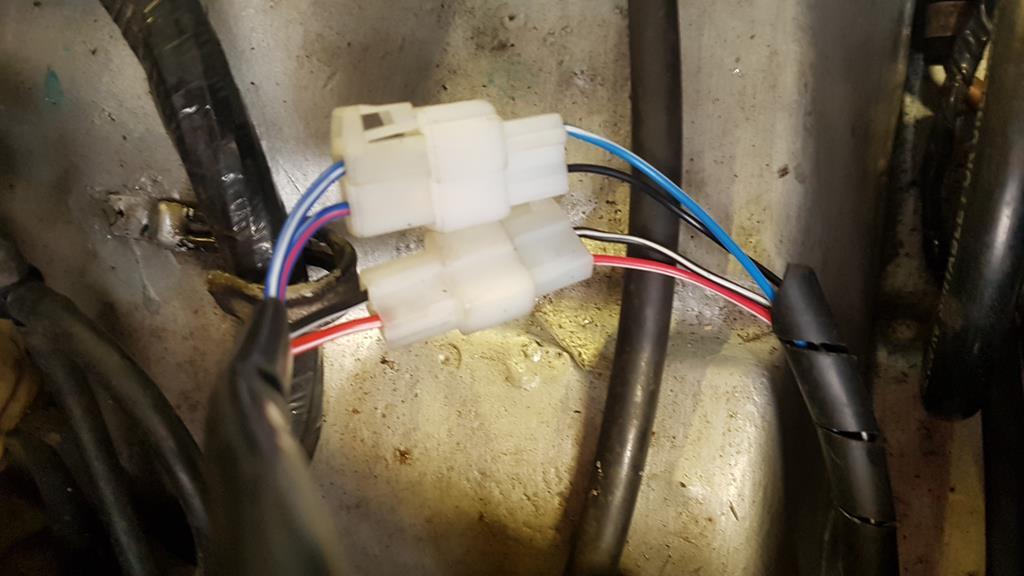 Then ran the wiring to a new relay for the additional twin fans. I still need to wrap the loom, which I'll do once I know everything is working correctly.  I cut some universal compressor mounting plates up to fit in the space a PAS pump would normally sit. To get a good belt line I needed to space out the compressor 6mm from the front of the timing cover, so I simply overlapped the 6mm plate, and temporarily clamped in place with a small G clamp while I checked alignment: 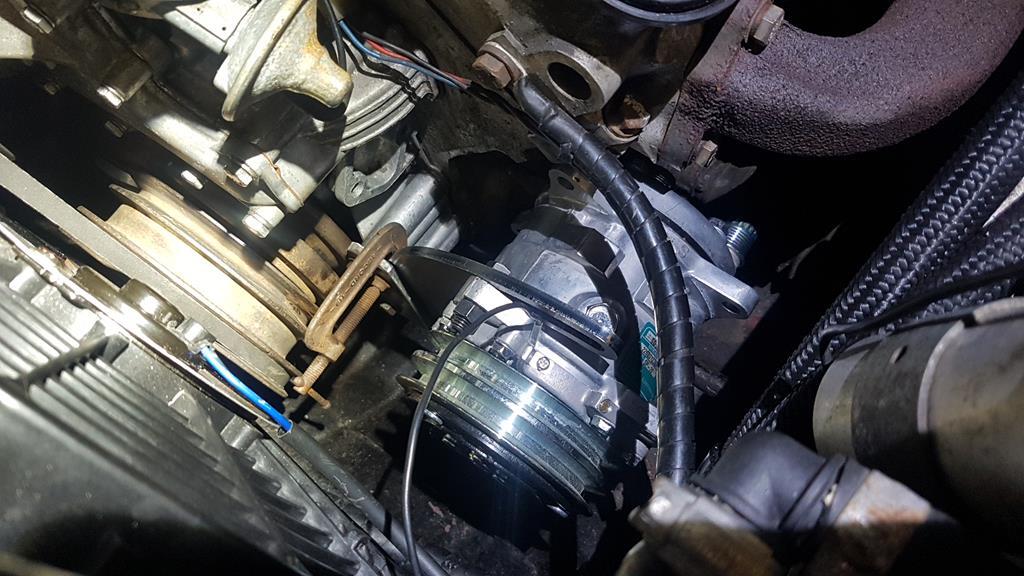 All seemed good so I tacked them together and mocked up the spacing of the compressor lugs with a couple of bolts. I could then see where in free space the rear mount was sitting. There are two bosses on the block that I will use, by welding a plate at right angles to the rear mount. Access is a little tricky, but all I need to do is drill the plate, bolt to the block and tack it to the mount. The proper welding can be done on the bench, assuming it doesn't distort too much on cooling. I've had to grind the head slightly to clear the compressor mount bolt head, hence all the swarf!  I made up a plate with holes to match the bosses on the block... 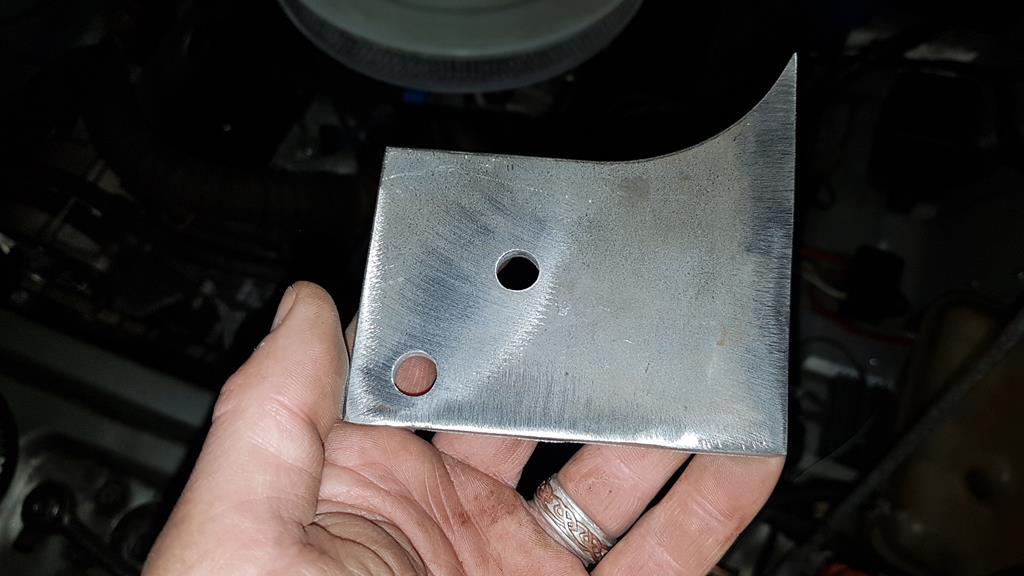 ...so once that was bolted on I tacked it to the rear mount. Then I could unbolt both, weld up properly, and paint. My welding was a bit splattery and I don't know why, but got good penetration so the joins are strong at least.  Happily there was no noticeable distortion, so the two mounts were still in the right place to fix the compressor between. A 925mm belt was the right length to drive it, so this was the end result.  I'm actually really pleased with this; it's turned out to fit perfectly, and I'm *just* able to get the full range of adjustment without fouling anything. Time to see it in action! This is the view from inside the cabin, and although the light illuminates the pressure switch is doing its job and stopping the compressor clutch from engaging. 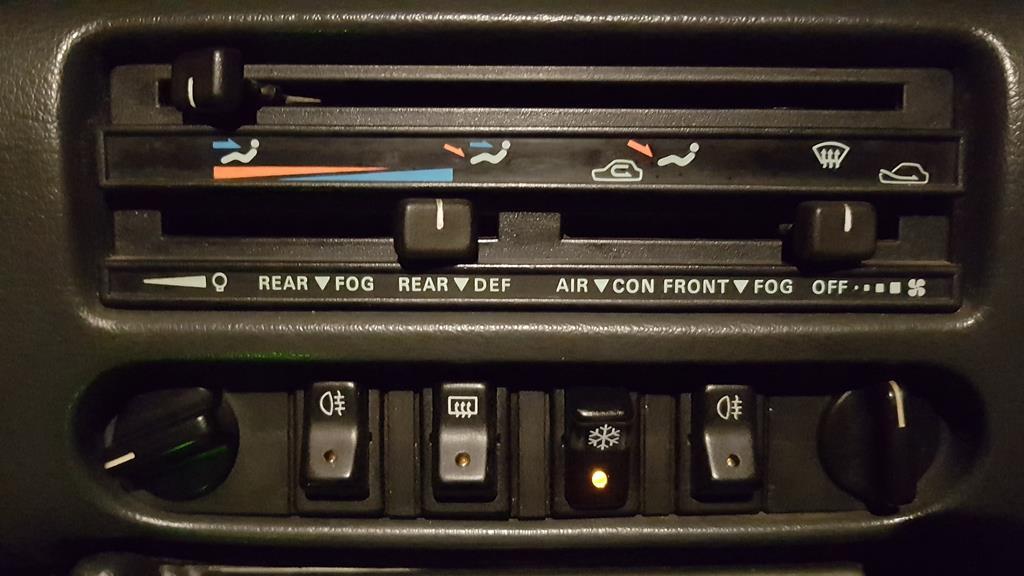 |
| |
Last Edit: Nov 23, 2019 21:56:37 GMT by matfenwick
Sometimes, others may not understand why you like a car so much. Sometimes, you may not even understand why you like a car so much. But none of that matters; all that matters is that you like the car, and having it makes you happy.
|
|
|
|
|
Mar 13, 2020 22:19:57 GMT
|
Spotted this in Betws y Coed today, looking great  |
| |
|
|
|
|
|
|
|
|
Cheers, did you catch me driving through?
I've got an update to add regarding the AC and diff swap, but picture loading is a PITA.
|
| |
Sometimes, others may not understand why you like a car so much. Sometimes, you may not even understand why you like a car so much. But none of that matters; all that matters is that you like the car, and having it makes you happy.
|
|
|
|
|
Mar 14, 2020 22:12:59 GMT
|
Cheers, did you catch me driving through? I've got an update to add regarding the AC and diff swap, but picture loading is a PITA. No I spotted it parked in the car park not far from the Ugly House, thought I cant remember the last time I saw a Stellar, then remembered it was probably here, then remembered it was that one  |
| |
|
|
|
|
|
Mar 14, 2020 22:17:54 GMT
|
I've spent a bit of time installing more of the AC system, starting with the condenser. I made up a couple of brackets that it could sit on.  Then added connectors for the condenser fans...  ...before mounting it in position.  For Christmas I got a proper crimp too to allow me to make up the hoses - both satisfying and avoids me having to rely on someone else to make them from my measurements. 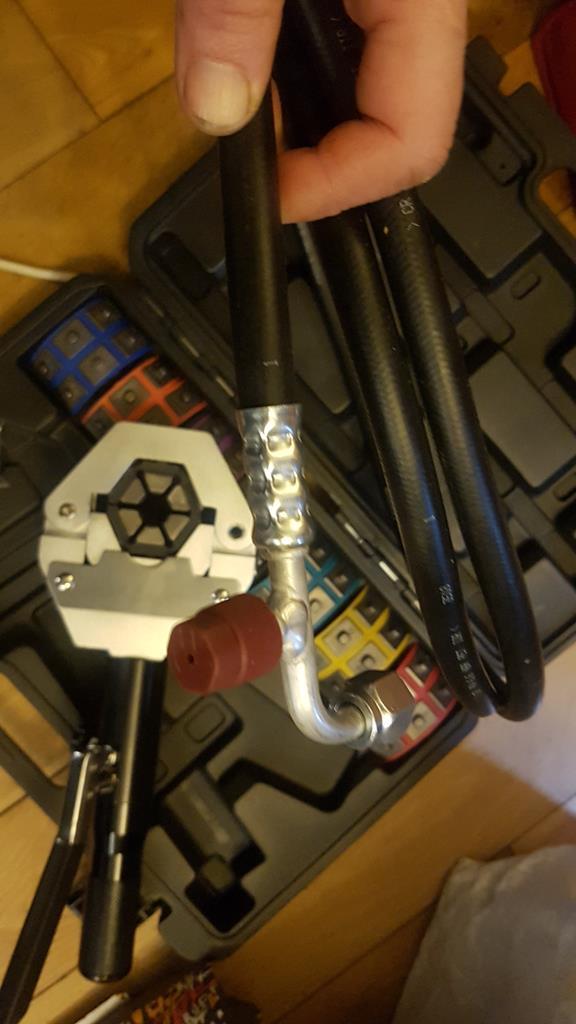 Hoses run from the compressor... 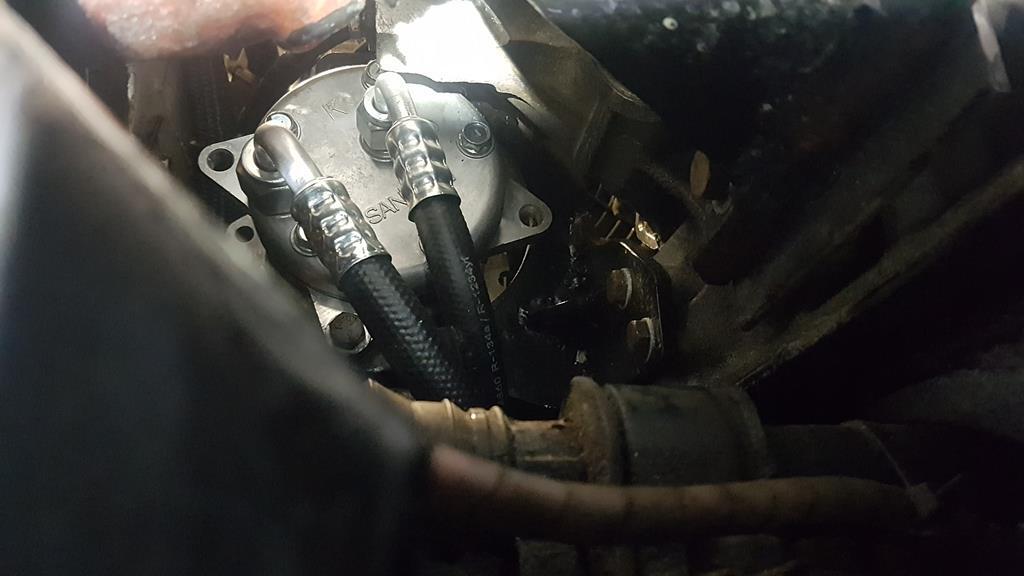 ...to the condenser... 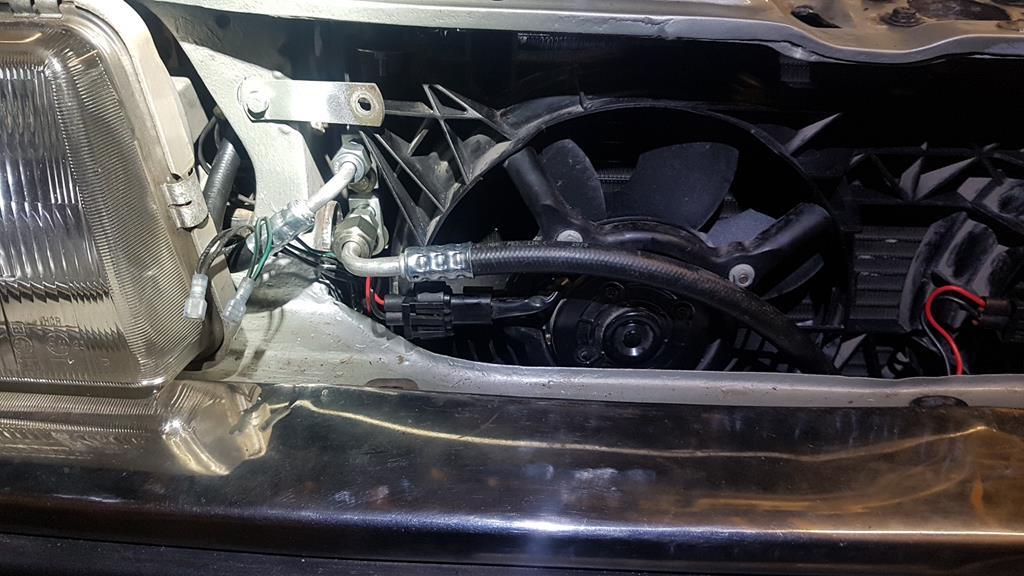 ...then receiver/drier... 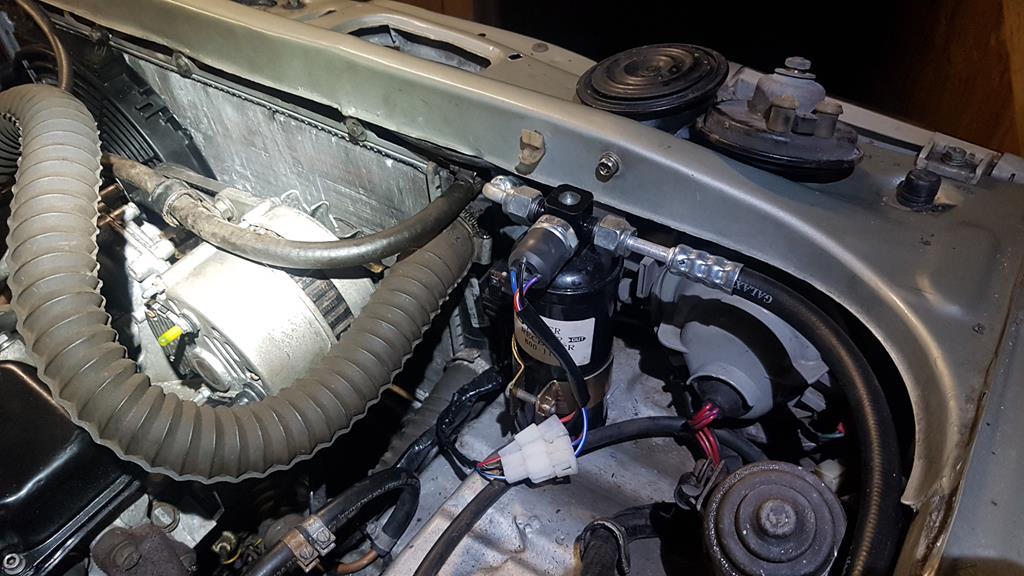 ...before going to bulkhead fittings, and back to the compressor.  Once the hoses were done I had to make up some different horn brackets, and job done! 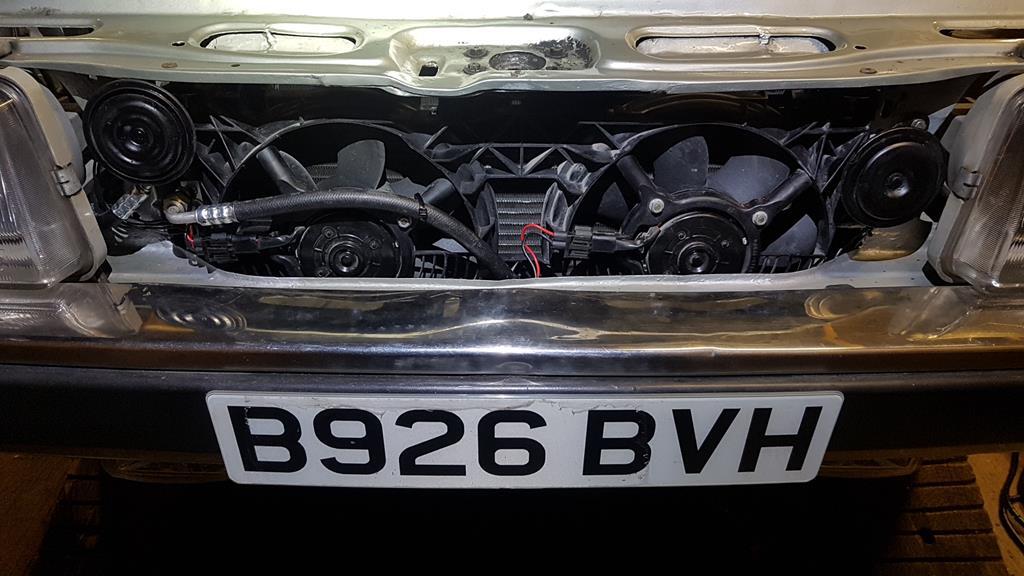 And with the grille back on, it's all neatly hidden :-) 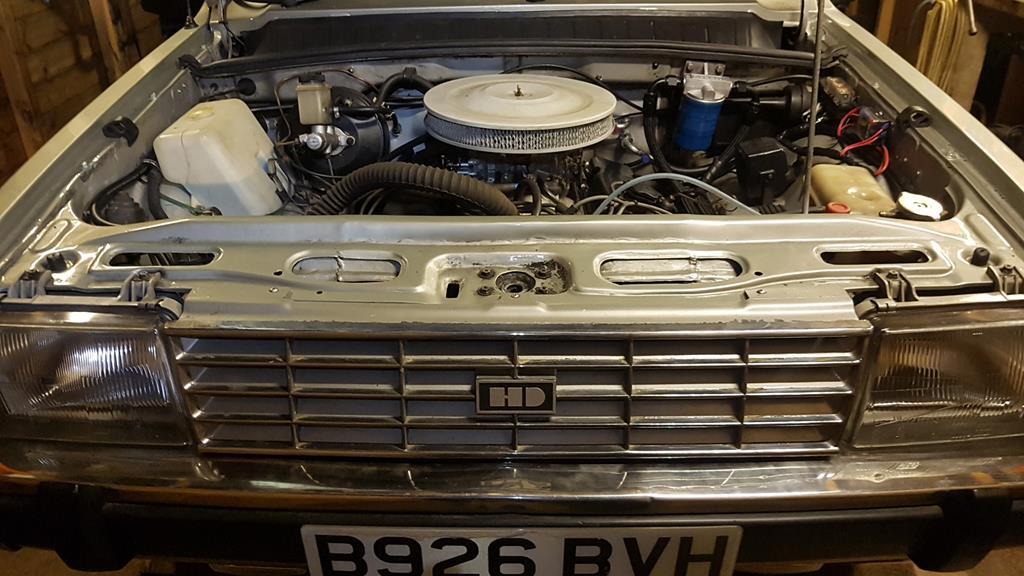 So, onto the axle. I took it to a guy who'd been recommended to me from several sources, and he must have been in his 70s but still keeping busy in his workshop. (Four lathes, a couple of milling machines and a spotless workbench made me rather jealous!) He reckoned my longstanding oil leak was down to a pattern wheel bearing, which I'd replaced after the previous one also leaked. I'd managed to get decent quality diff bearings:  But all the UK suppliers drew a blank with quality wheel bearings; one telling me that the only one he could get hold of currently, he wouldn't want to sell. Fortunately the chap doing the diff had a massive stash of genuine Ford spares, and only charged me £28 for it which I thought was very reasonable! Reassembled it moved smoothly, with very little backlash. 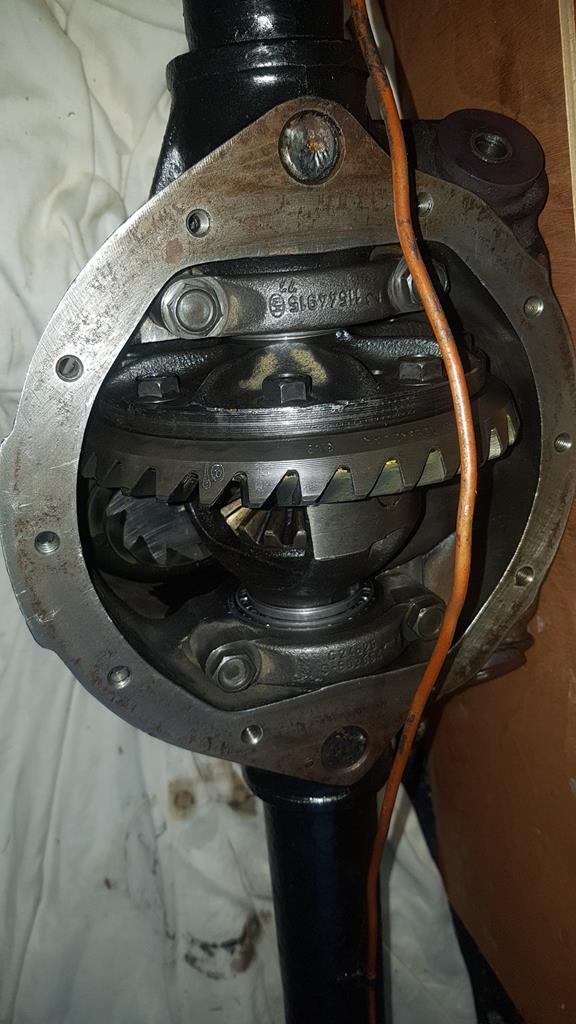 So, onto fitting it. Before I did I thought I'd measure the rear springs, as I was sure it used to sit lower at the back, comparing theses old and new photos:   Hmmm, something isn't quite right here!  TBH I'm surprised I didn't twig sooner, but just put the handing down to being spoilt by the improvements in modern cars, rather than any fundamental fault. I'd bought those springs from a reputable supplier back in the early 2000s, so thought they'd be OK! I worked out that a set of Cortina Mk5 springs would be 1" lower than standard, but non-progressively wound so should sag less and give me the right height, so bought a set from Rally Design this time. 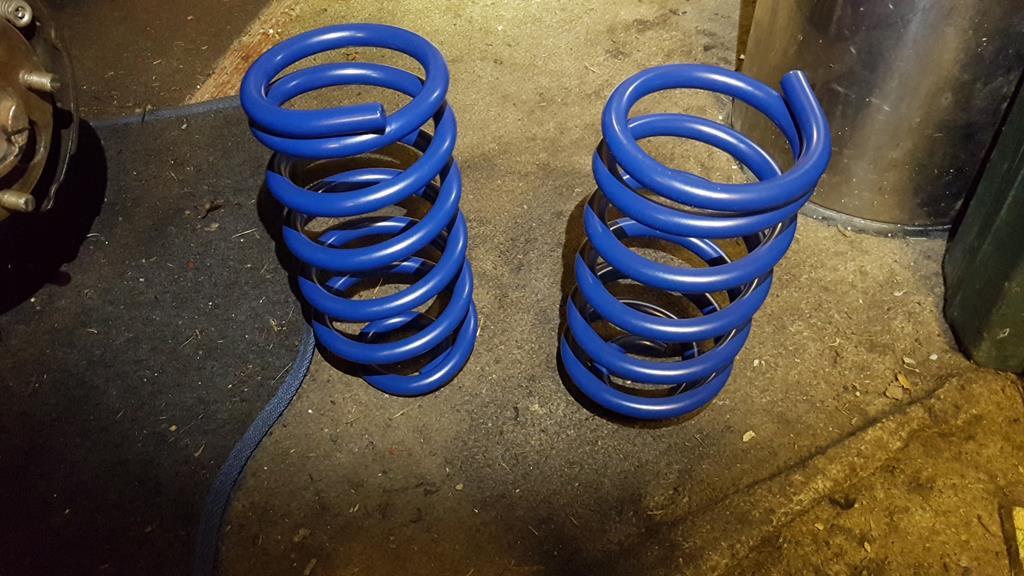 Then the simple job of putting the axle back in, connecting everything back up and bleeding/refilling as needed.  Back on its wheels it looks spot on to me! 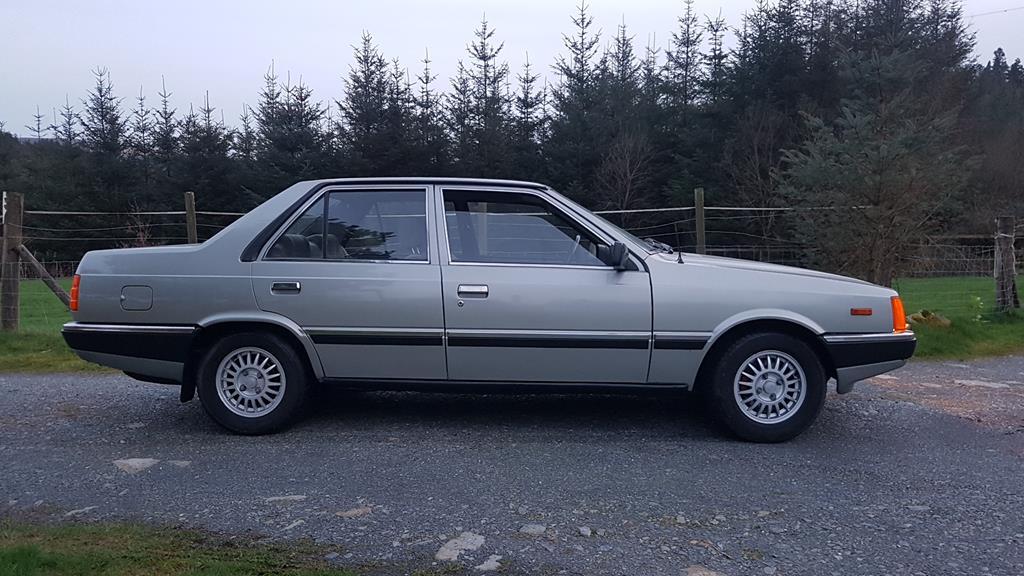 And more importantly, drives a lot better too. Acceleration doesn't seem to be blunted by the taller diff, and if anything overall acceleration is quicker as I have to make fewer gear changes before I run out of revs. Around 800rpm lower at 70mph, so should save a little fuel too...I call that a win-win! |
| |
Last Edit: Mar 14, 2020 22:21:10 GMT by matfenwick
Sometimes, others may not understand why you like a car so much. Sometimes, you may not even understand why you like a car so much. But none of that matters; all that matters is that you like the car, and having it makes you happy.
|
|
|
|
|
Mar 14, 2020 22:26:20 GMT
|
Cheers, did you catch me driving through? I've got an update to add regarding the AC and diff swap, but picture loading is a PITA. No I spotted it parked in the car park not far from the Ugly House, thought I cant remember the last time I saw a Stellar, then remembered it was probably here, then remembered it was that one  Ah, I'd just parked up there to go for a run in the hills. I had a bit of fun on the way out of Betws y Coed, stuck behind a dodderer doing well below the 40mph limit. The Civic Type R behind me was obviously impatient to get past us both, and presumably was quite surprised to see the old Hyundai with a National Trust sticker, surge away with a V8 bellow as soon as the overtaking lane became available :-D |
| |
Sometimes, others may not understand why you like a car so much. Sometimes, you may not even understand why you like a car so much. But none of that matters; all that matters is that you like the car, and having it makes you happy.
|
|
|
|
|
May 21, 2020 22:09:14 GMT
|
Although I've been working during lockdown, we've been staying at home the rest of the time, so inbetween DIY tasks and chores I've managed to escape to the workshop to progress the AC installation. The last stage was to mount the evaporator under the dashboard - my plan was to fit something in this ducting... 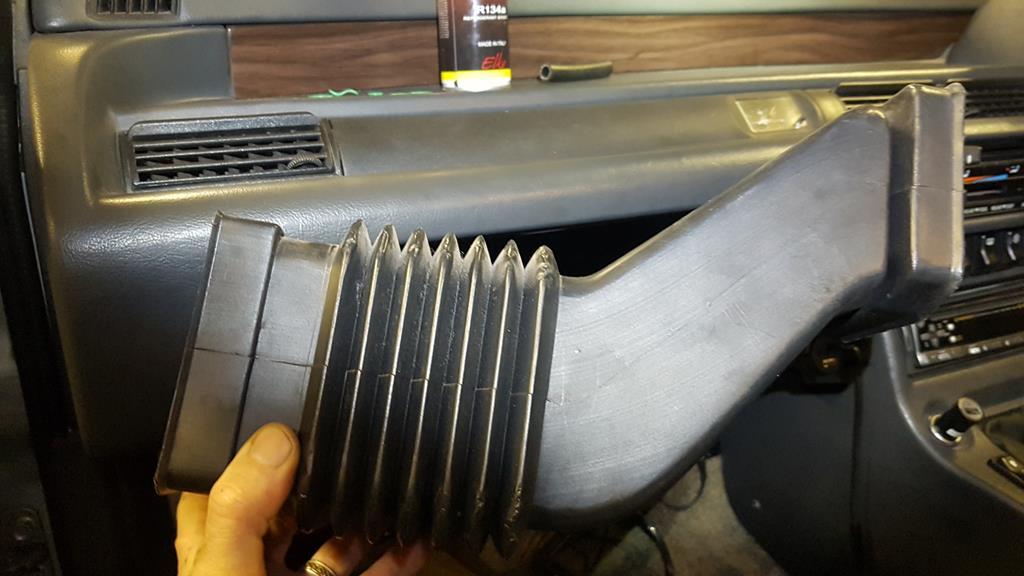 ...which sits between the blower motor on the left, and the heater matrix assembly on the right, connected to the bulkhead fittings I've already installed. 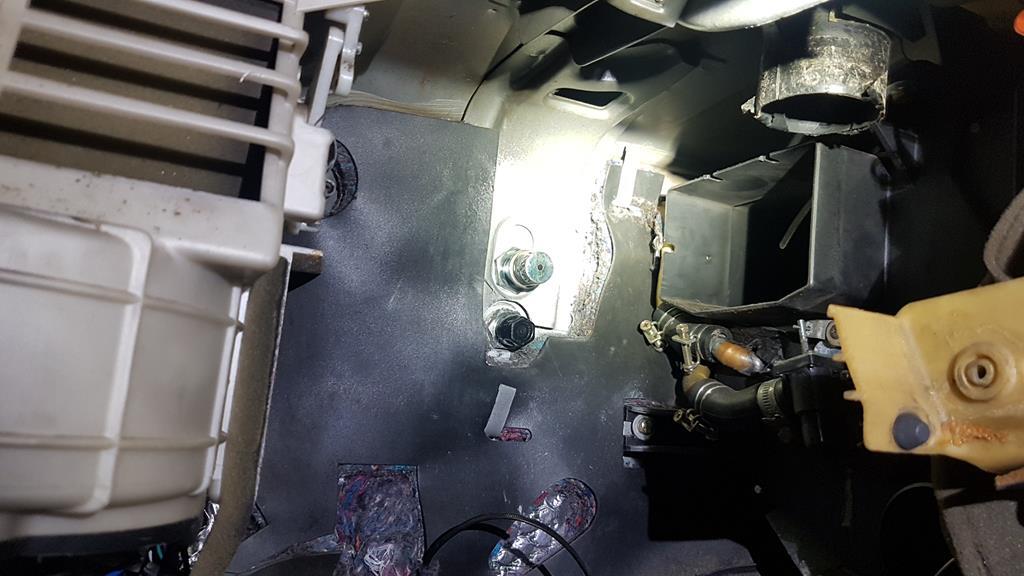 I spent hours drawling Google images, and bought one for a Hyundai Amica (keeping it OEM) as I thought it should fit. 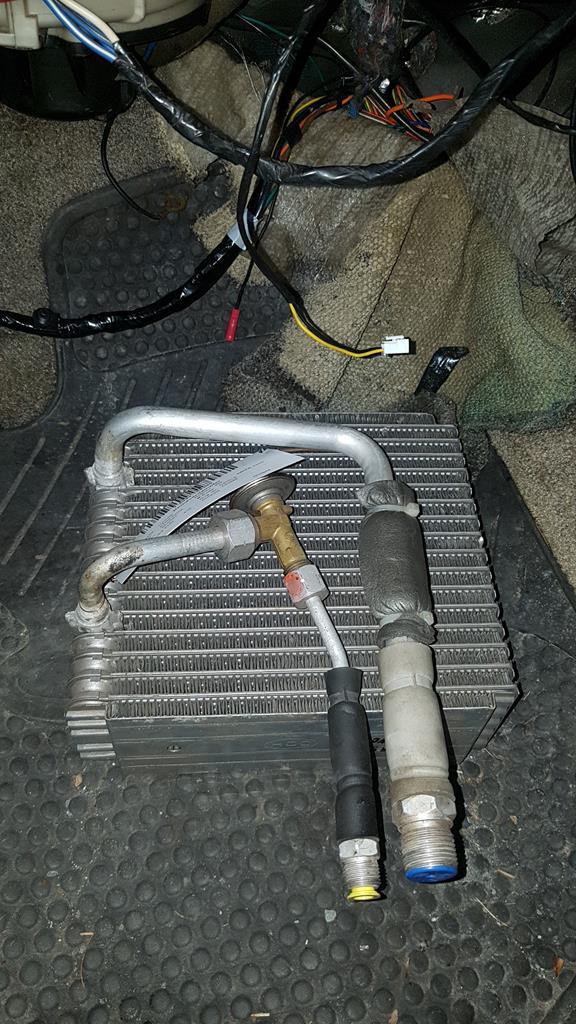 However once I tried to place it in the available space, it was just too big, the pipes were in the wrong direction, and I'd still need to make a case for it.  Plan B was a lucky find with a universal evaporator, including a case! Smaller, and connections where I wanted them :-) 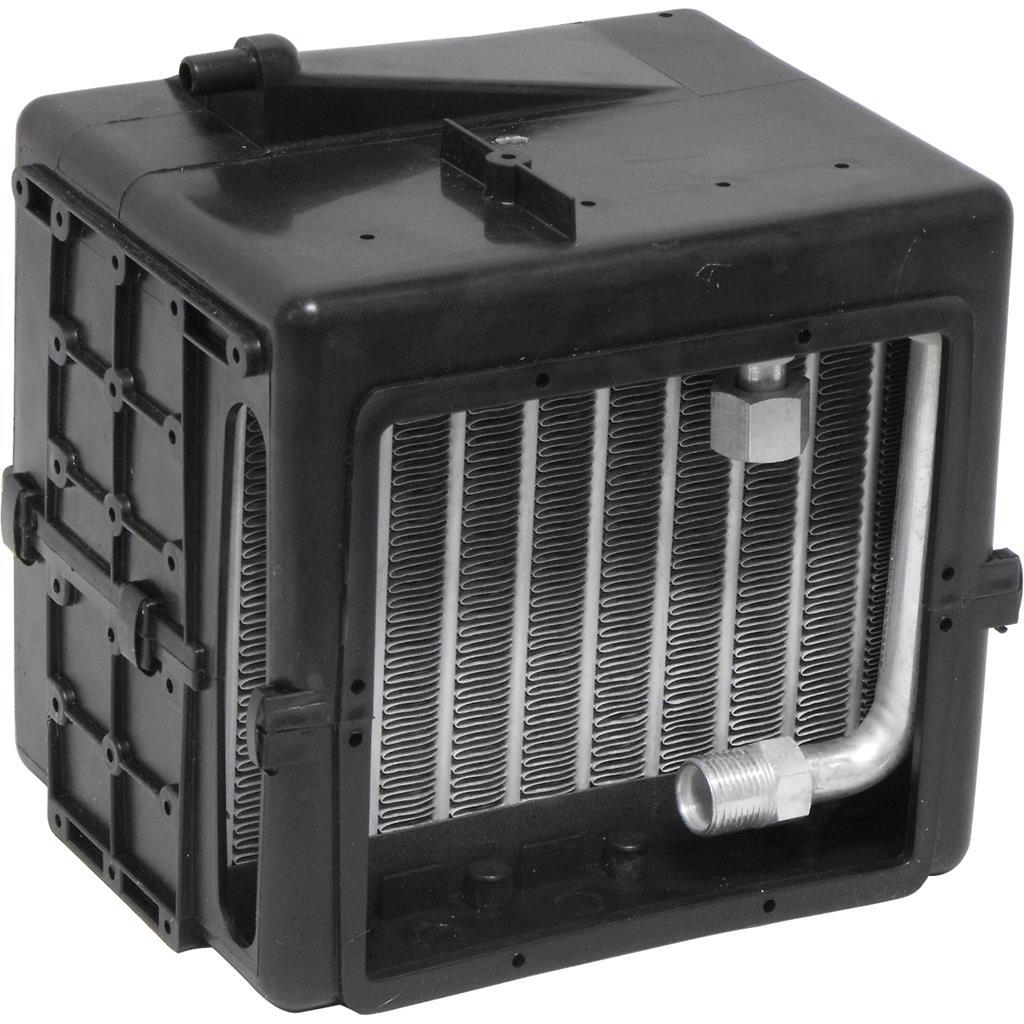 I made up a hose for the inlet and fitted a thermal expansion valve, but the outlet needed a bit of ingenuity with some 45 degree fittings and a welder, to match up with the bulkhead connections. With hindsight I'd have drilled the holes for these afterwards, although I was fairly limited not to foul the rocker cover in the engine bay. 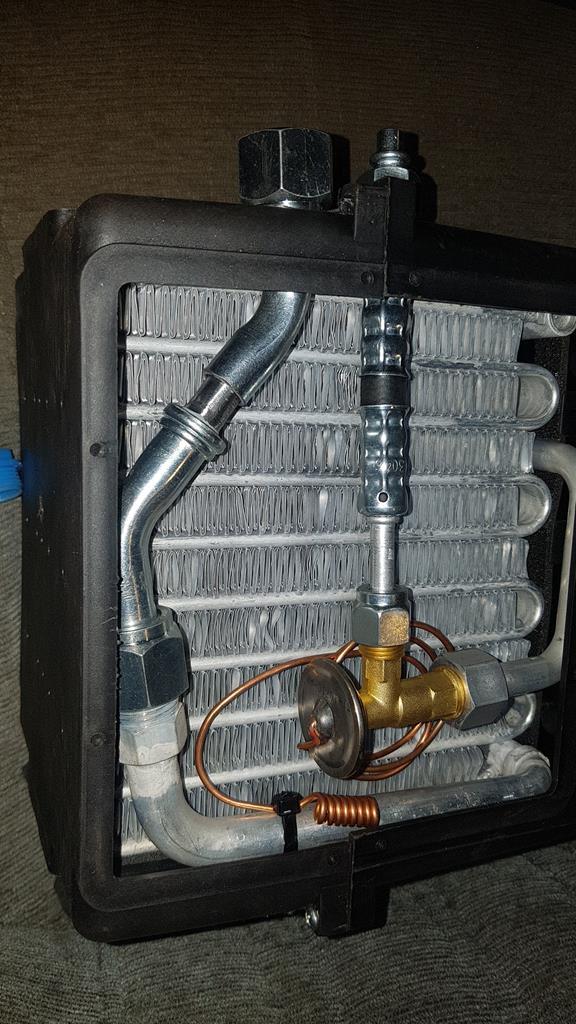 Then I could lift the evaporator unit into position, and connect it all up. 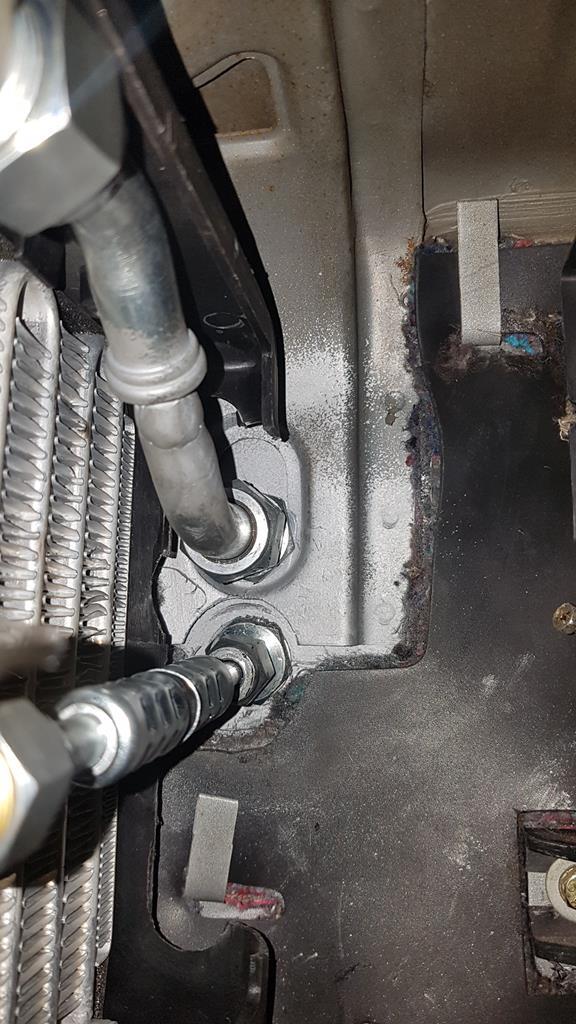 Next stage was to cut the ducting down, and bond it to a plate I could screw to the evaporator outlet...  ...now painted and in position, linked to the heater matrix assembly. 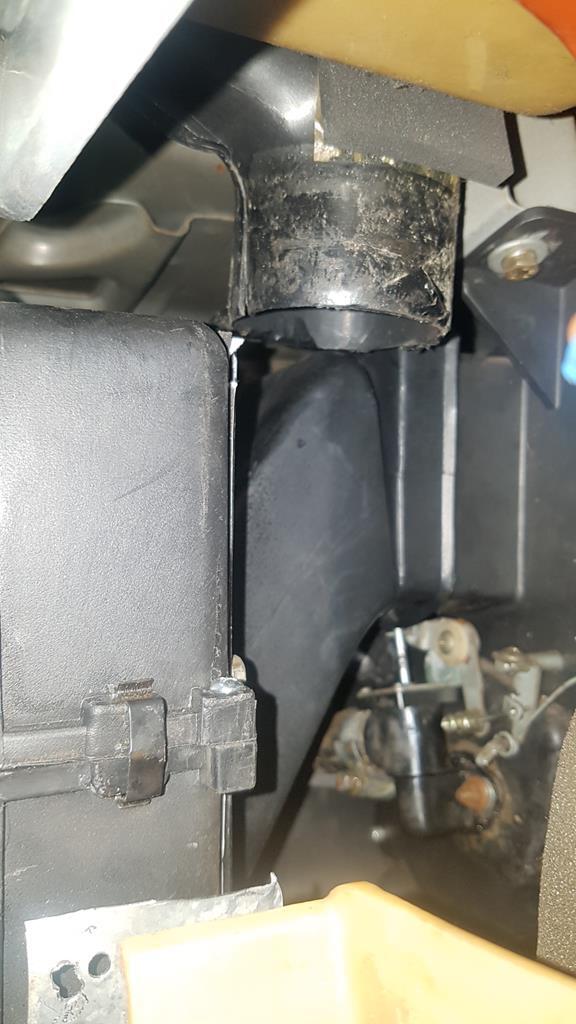 More ducting was then replaced - you can see it was a bit of a 3D jigsaw to get everything in the right place!  On the inlet side I made up a similar plate, although I had to make a removable section so I could slide the blower motor into place. 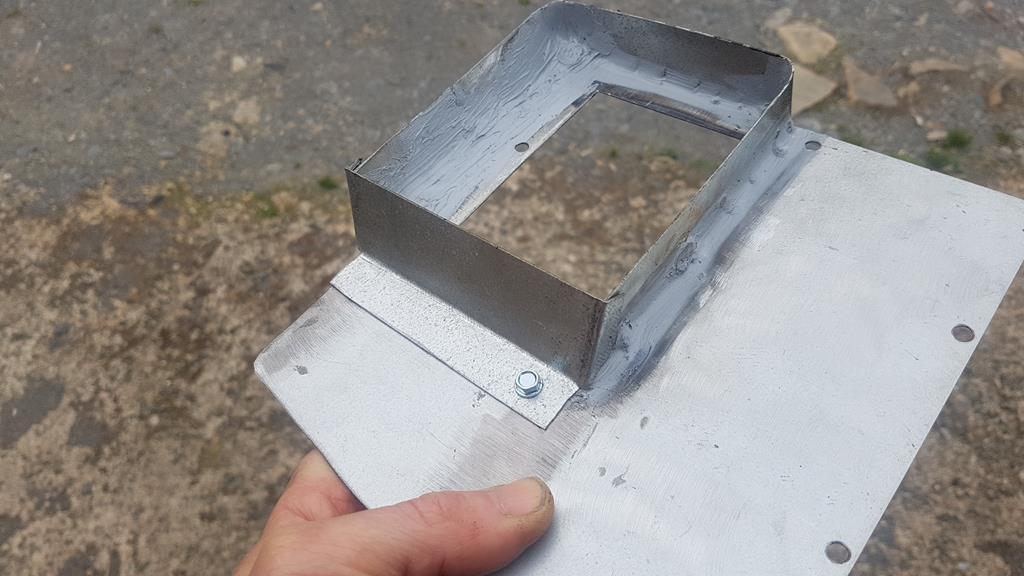 Here in position. 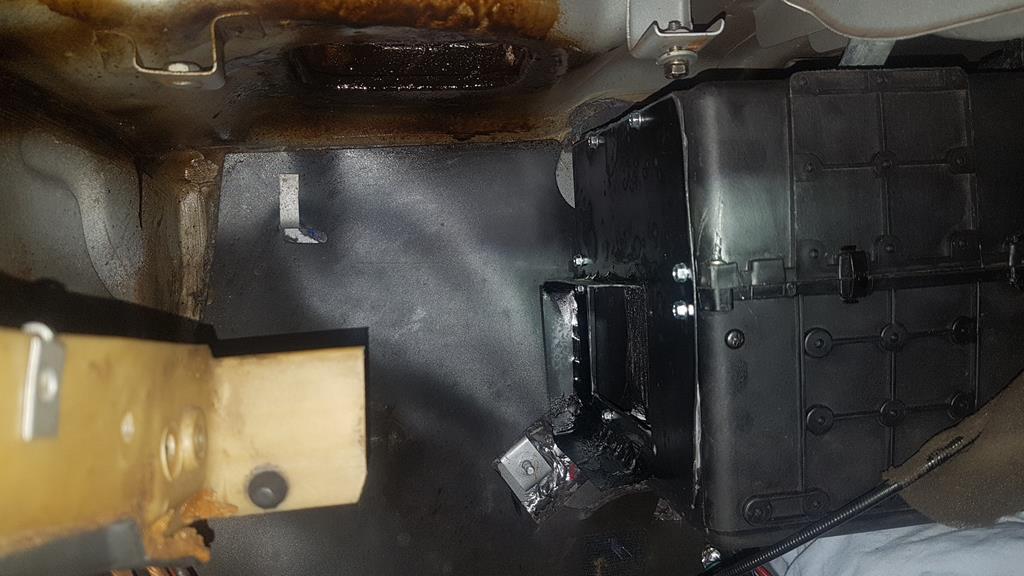 And blower motor slotted in. 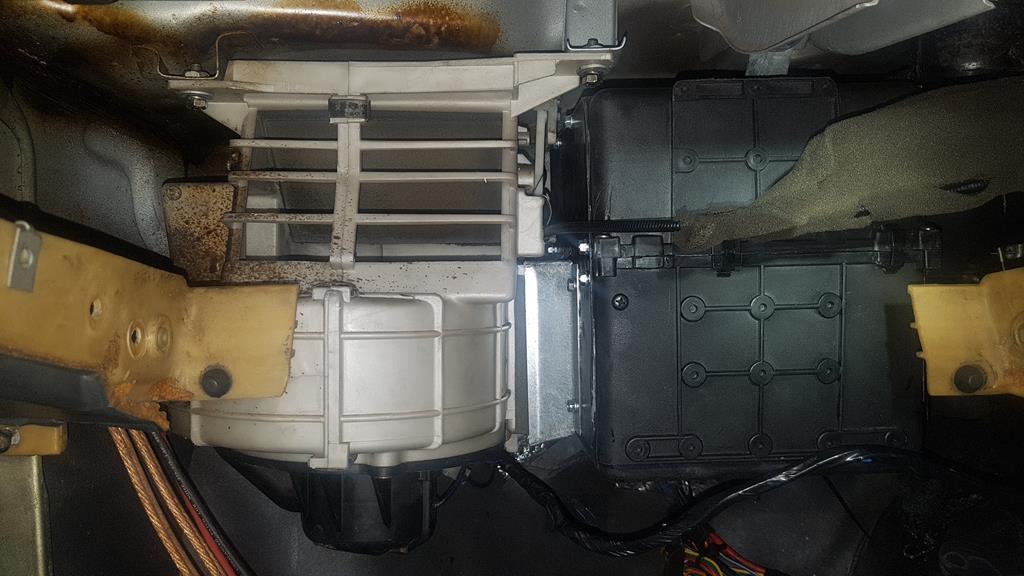 There's very little space for the recirculation flap on the motor casing, but fortunately just enough. Then the last piece of ducting could be put in for the passenger face vent, together with a thermostat to cycle the compressor, to prevent the evaporator from icing up. 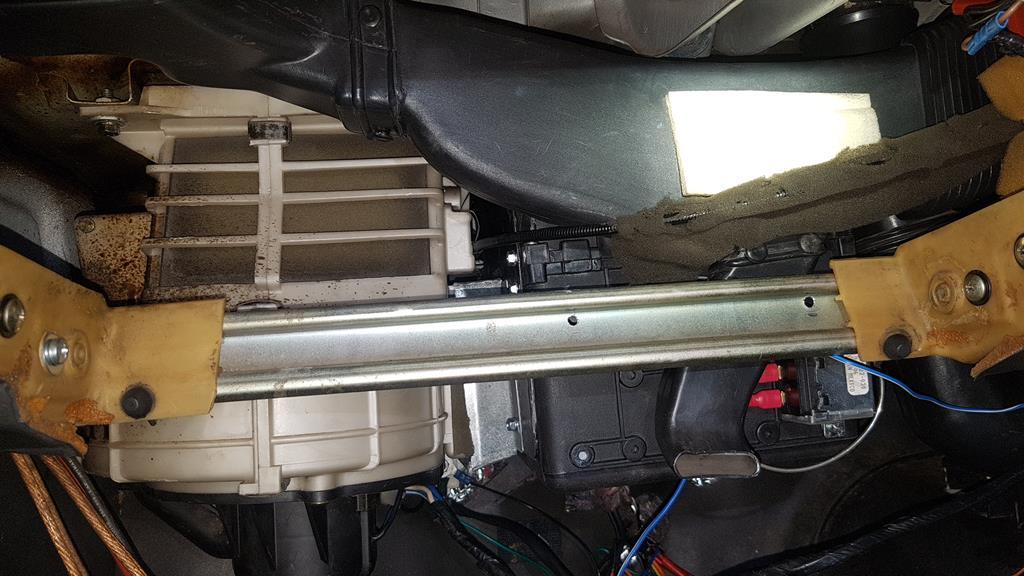 Then was the nerve-wracking job of pumping it down to see whether it would hold a vacuum! 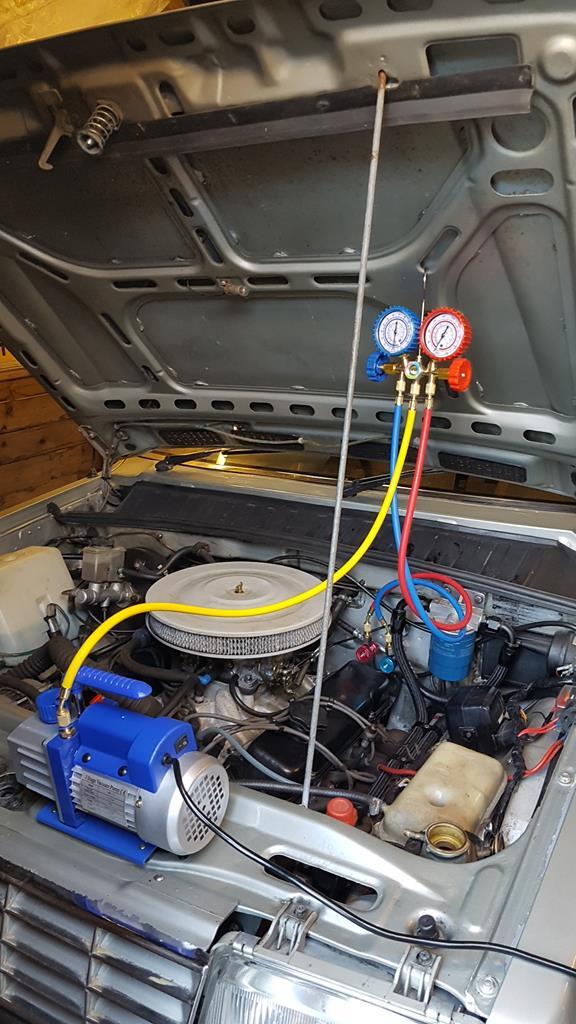 I've just used a cheap Chinese vacuum pump, as I figure I'm hardly going to be giving it heavy usage. Once I knew it was leak tight and not loosing any measurable vacuum over 24 hours, I could charge the system with refrigerant. 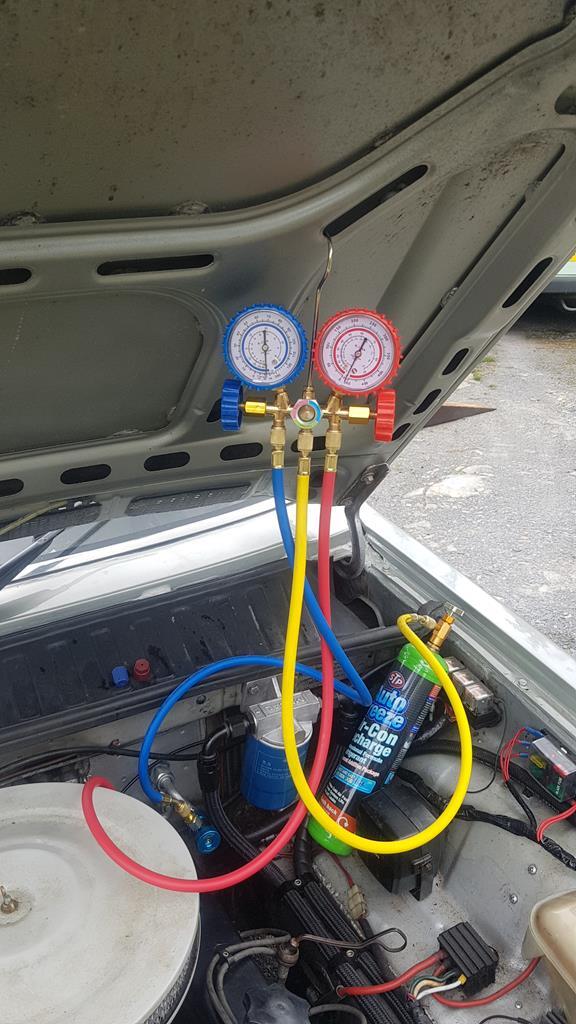 I basically just filled until the vent temperature didn't get any lower, whilst keeping an eye on the pressures. Temperature stabilised at just under 9 degrees C, which corresponded to a high side pressure of about 200psi which is in the right sort of ball park. I was hopeful of getting the vent temperature down a bit once on the move, with more airflow and the compressor spinning faster. So, what did I get down to? 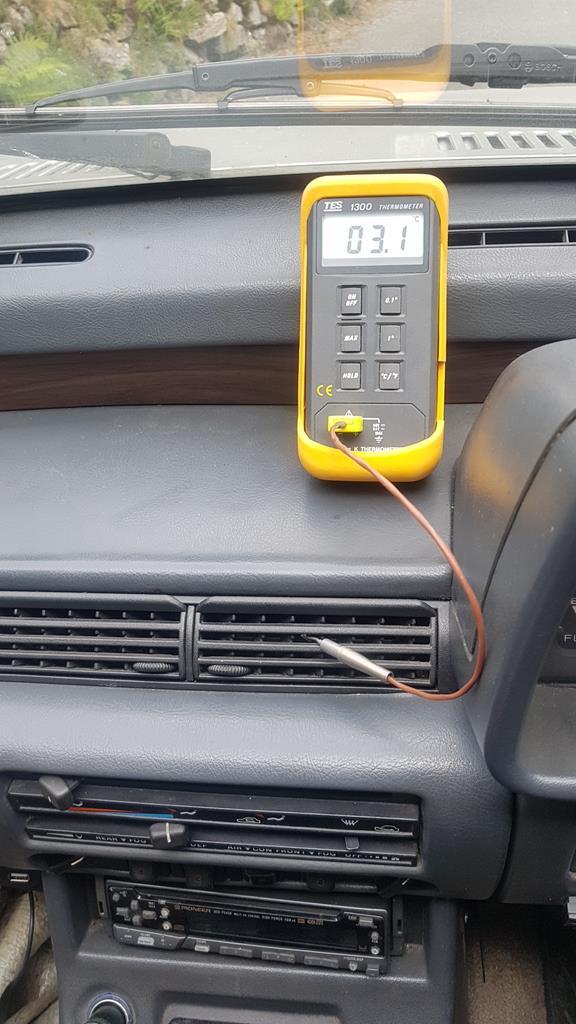 I'd call that a RESULT! It all seems to work better than I could have imagined :-) Now to hopefully enjoy the summer in it... |
| |
Sometimes, others may not understand why you like a car so much. Sometimes, you may not even understand why you like a car so much. But none of that matters; all that matters is that you like the car, and having it makes you happy.
|
|
mk2cossie
Club Retro Rides Member
Posts: 3,063  Club RR Member Number: 77
|
|
May 21, 2020 22:14:39 GMT
|
A very nice addition there  And just in time for the heat wave too! You'll also benefit in winter time with quicker demisting of the windscreen too  |
| |
|
|
|
|


