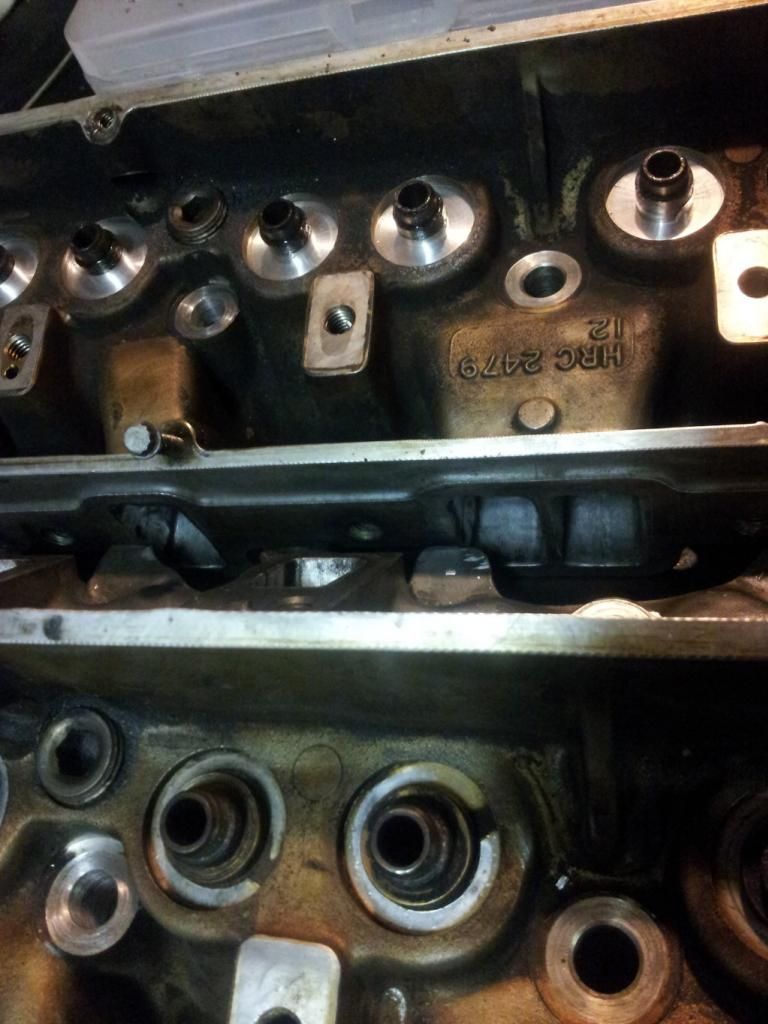
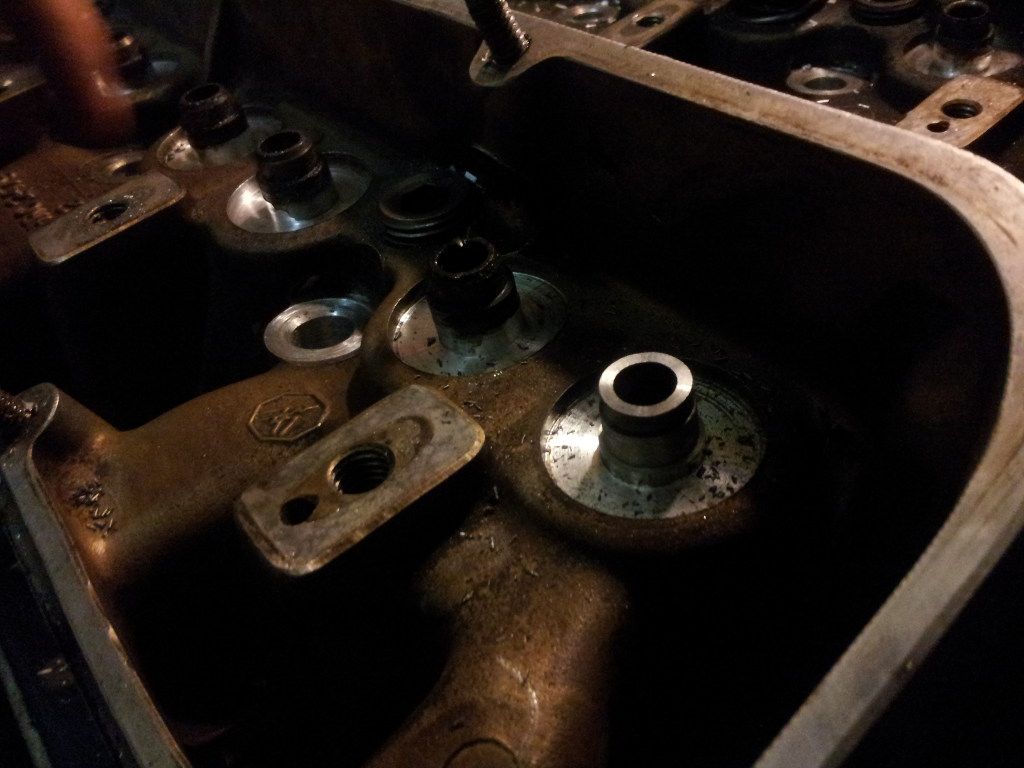
I don't come on here much other than to browse about now and then but thought some might be interested in the latest project.
It was very early one Saturday morning just passed that Peter, a friend, and I were discussing the fact that there is an upcoming local club meet at Santapod the next weekend for the RYWB and neither of us currently have a car we can take as they were all off the road. This we both decided was unacceptable. After not much pondering we came to the conclusion that the Rover P6 would be a perfect drag/race/drift car and that we needed to get a 4.6 V8 by the end of the weekend.
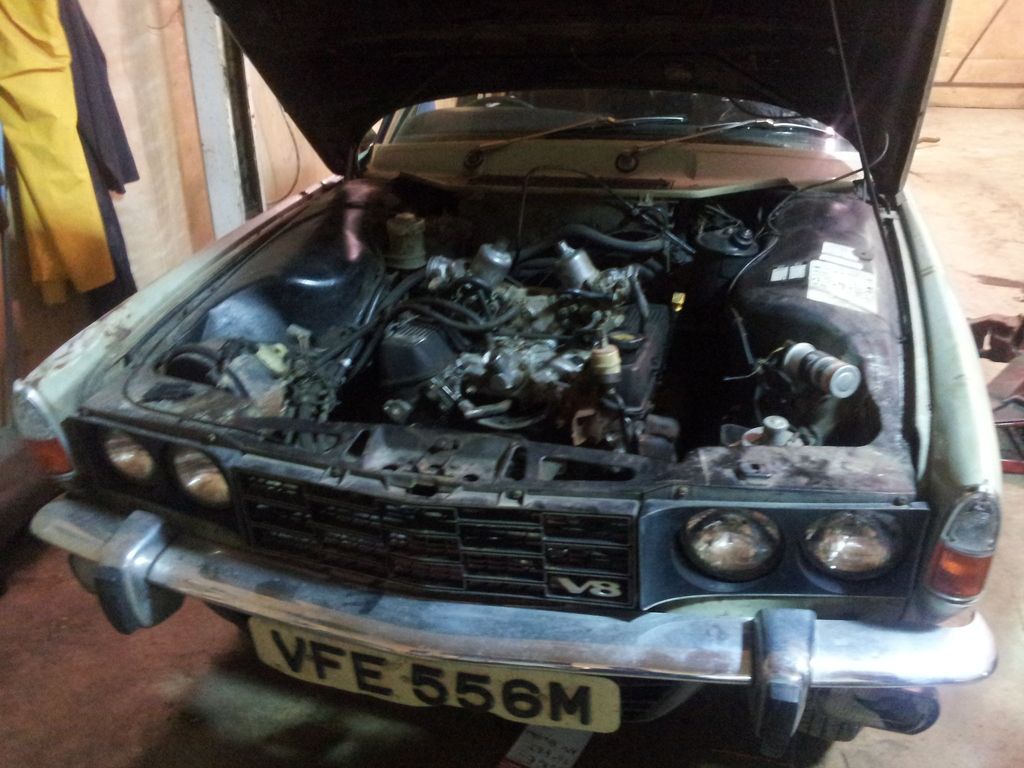
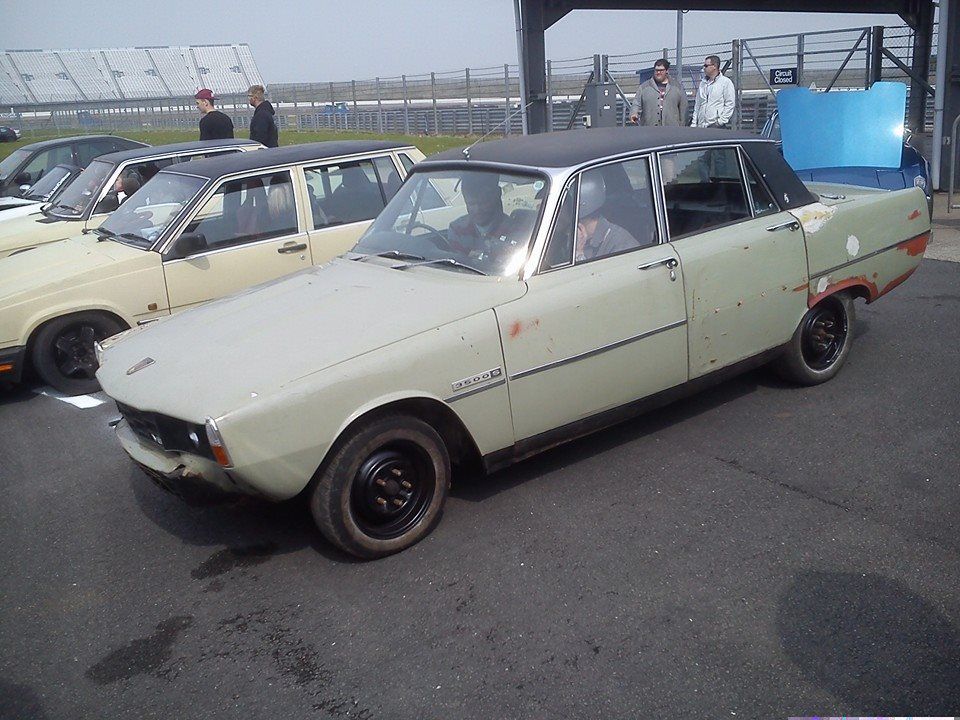
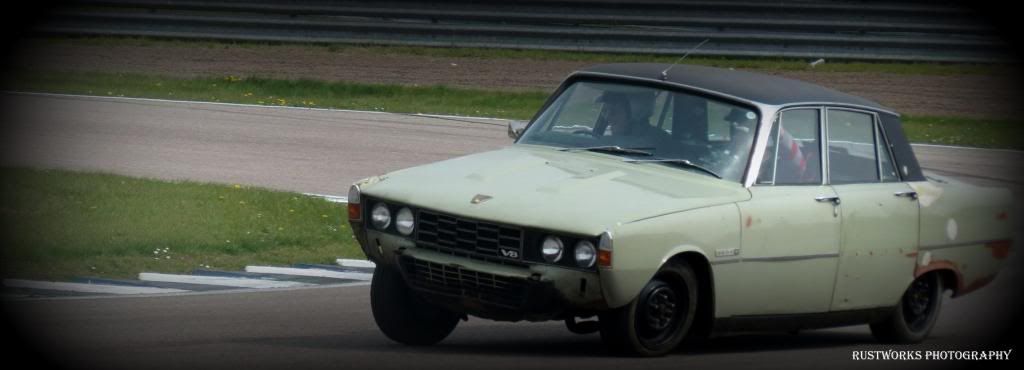
So this is the beast. A Rover P6 3.5 V8 which has not been on the road since the 1980s. The body repairs were done before it was taken off the road. Peters friend kindly donated the car - so it seemed the right thing to make something out of it.
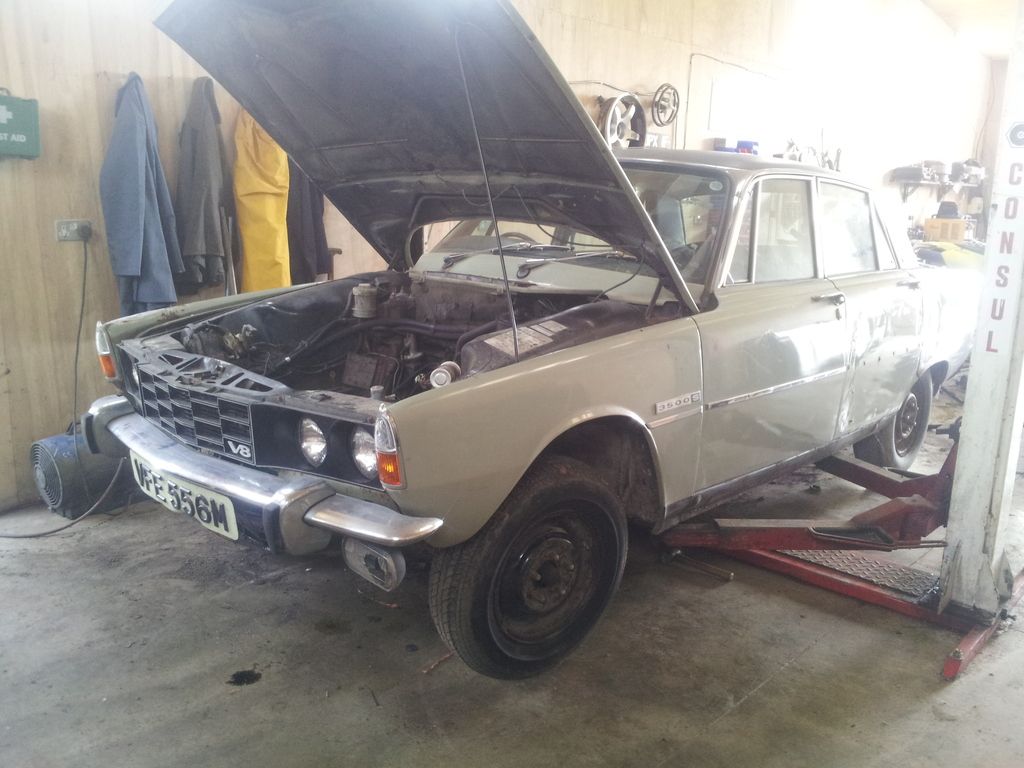
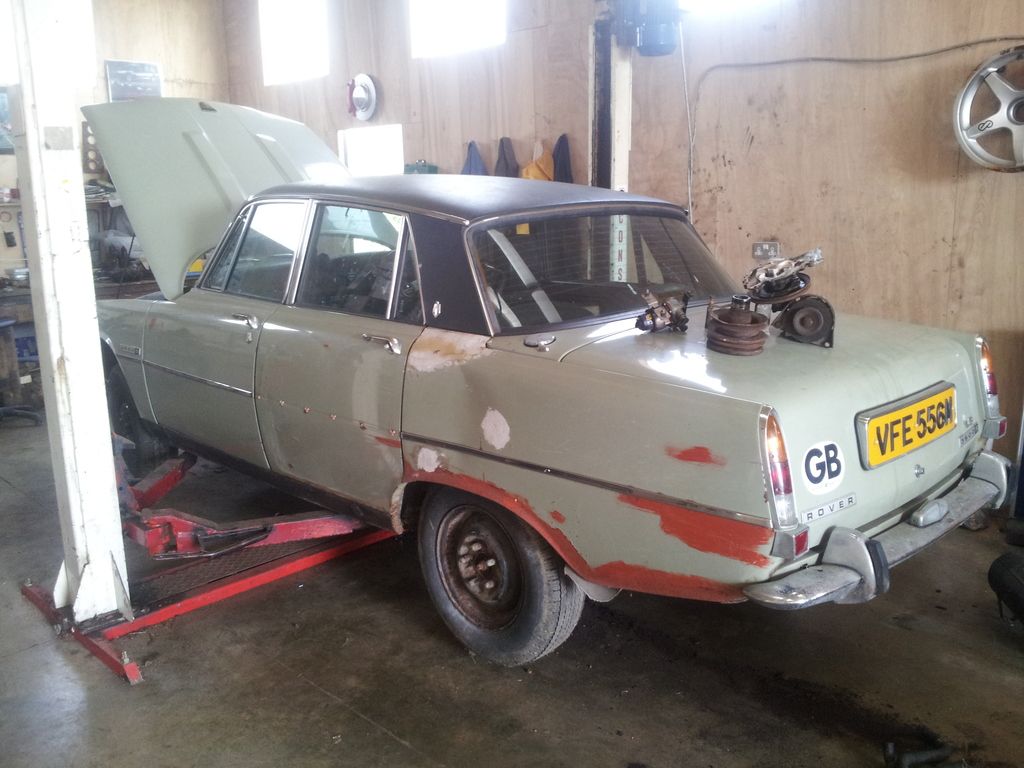
We were determined to find an engine that very weekend. After many phone calls we found one fairly close by (well..a four hour round trip) at a reasonable price - we wanted one with fairly low miles that had not been on LPG and of course ithad to be the big 4.6 V8 nothing else was considered. Late 90s Range Rovers are the best source for these. The trip in itself was eventful - having a blowout on the trailer and no spare but thankfully Farmer Boy Tom came to the rescue with a spare. Not wanting to waste time started stripping the engine while on the trailer. Pete headed off on a mission to get food. I had some odd looks from people - not surprising considering I was stripping an engine, half on the kerb, half on the road in quite a nice village with in a trailer with no car hooked to it.
Our target was to have the car ready to race in 5 days so with no time to slack, we were working in the evenings and I took time off work to attempt our goal. Not wanting to keep the EFI from the 4.6 that had to be swapped over for the carb setup from the 3.5. As did the front case, pulleys, water pump and so on. Thankfully this is a straightforward swap (the 4.6 being based on the 3.5 despite many years between them)
The 4.6 with all the modern gubbins on it:
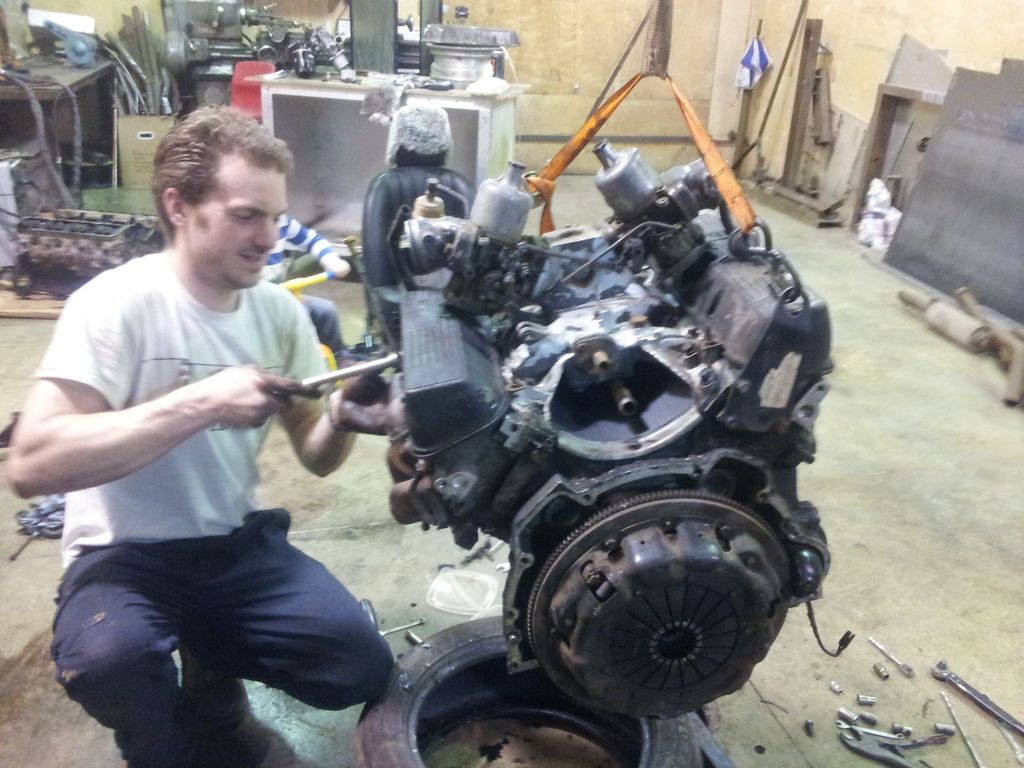
And there we have it - the 4.6 with the manifold and carbs from the 3.5. These are 1.75" carbs which will strangle the engine top end, but they will do for now:
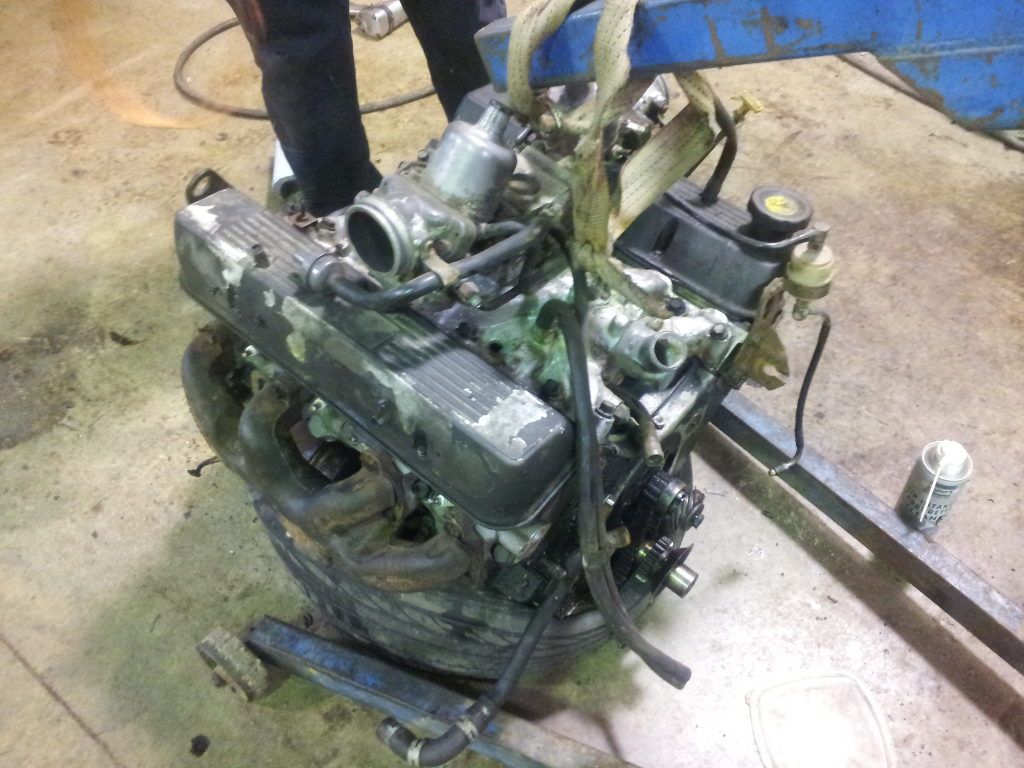
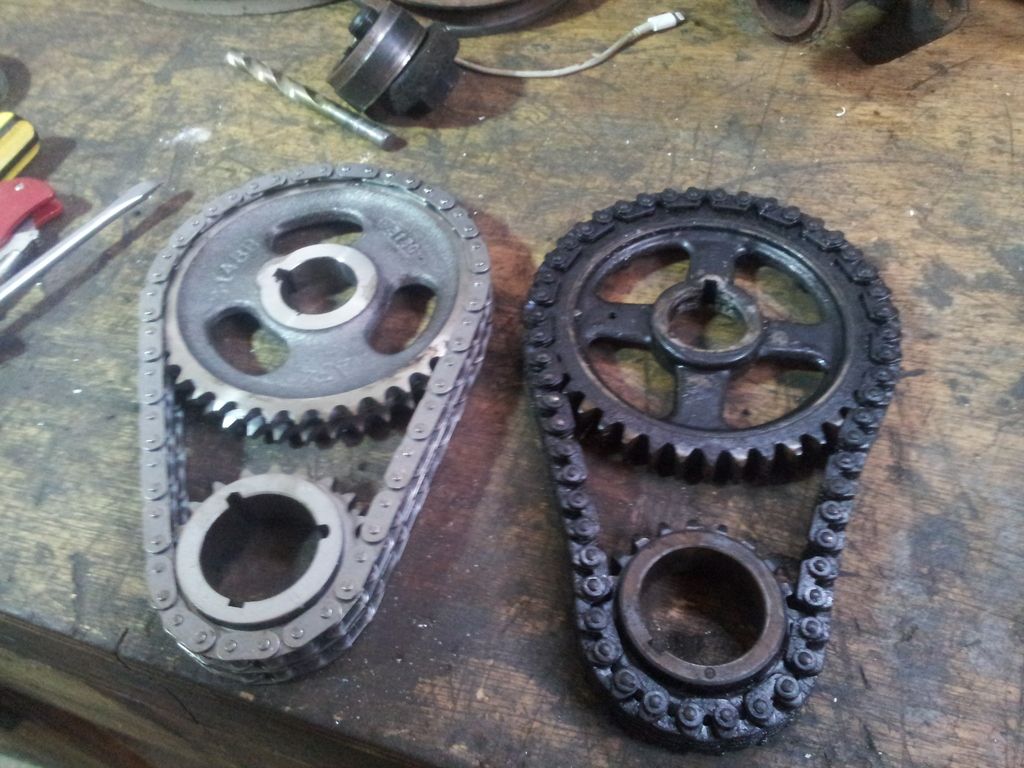
Then the front of the engine had to be swapped over. Not complicated really. Our only setback was that the timing gear and chain from the old engine was seriously worn out and we could not use the one from the old engine due to the design (apparently the gear from the Range Rover P38 was the only one different to every other Rover V8). So we ordered a fancy strong one and it arrived next day
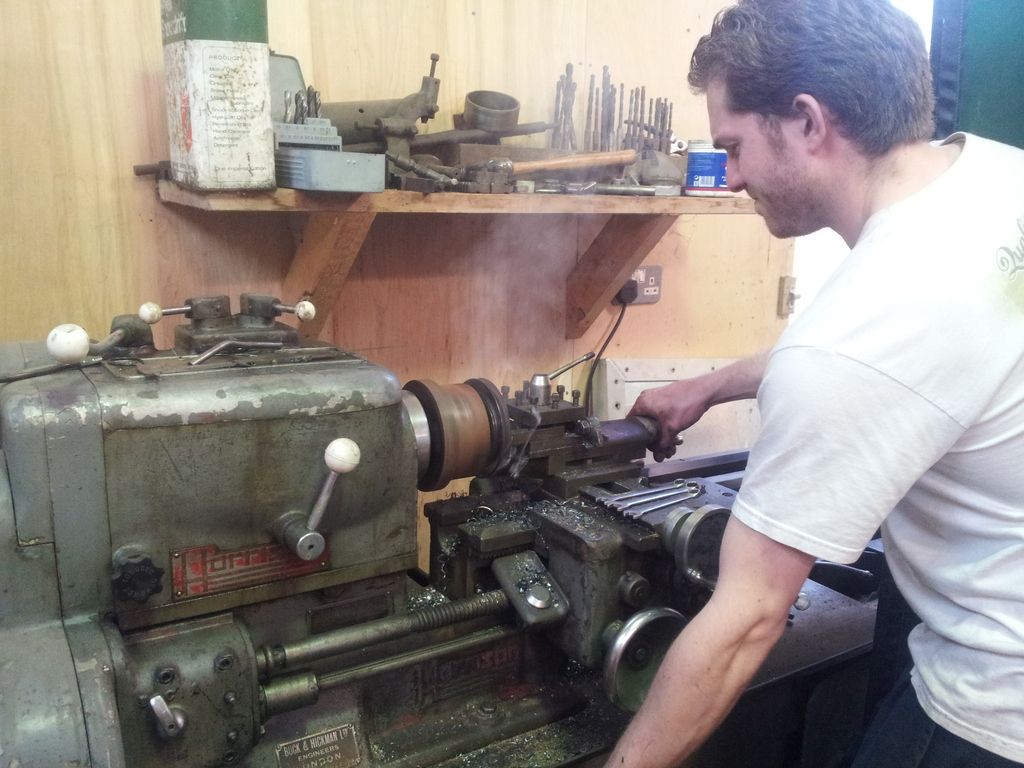
Another issue is that the front pulley from the P6 was broken and again cannot use the new one. So Pete had to do some fabricating with the broken one and scrap yard finds:
New engine sat on the mounts Bolted straight up to the mounts and bellhousing (had to change the flywheel of course as the engine came out of an auto):
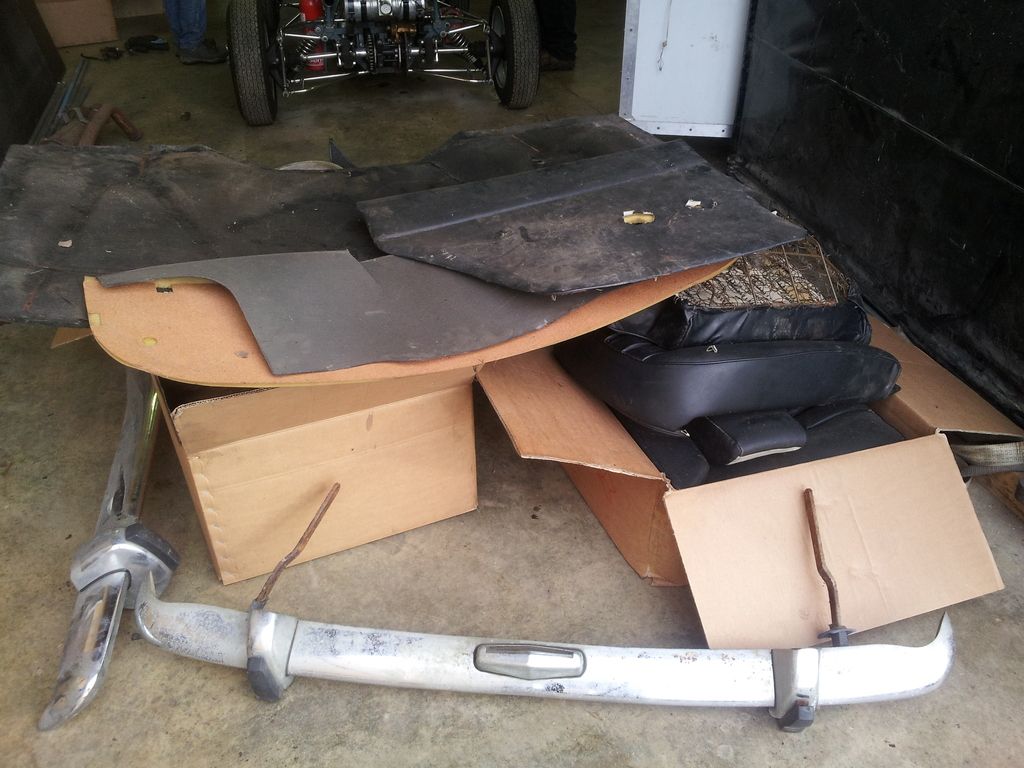
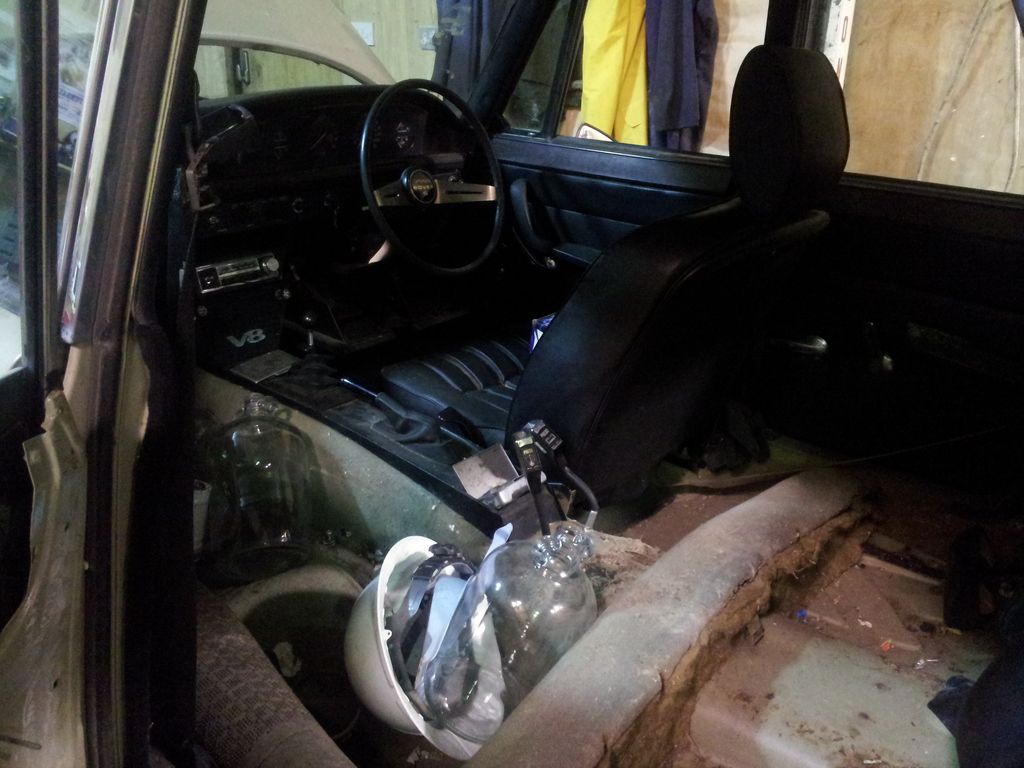
Because race car, interior had to come out. There's a good 60KG there.
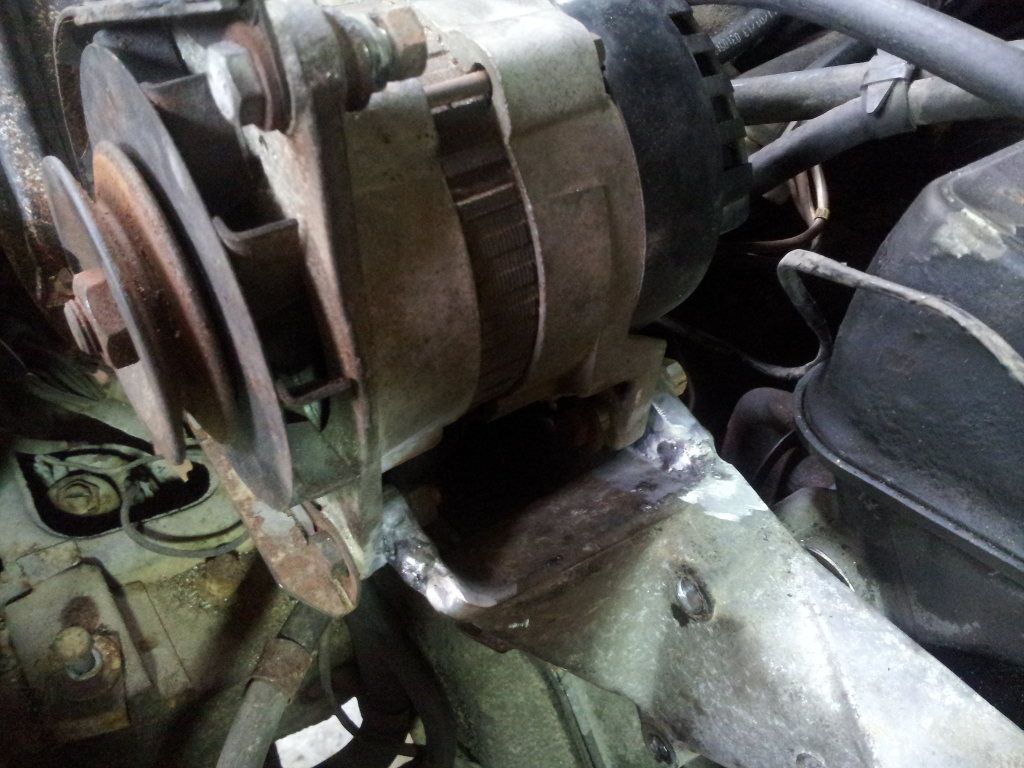
Alternator bracket welded back together:
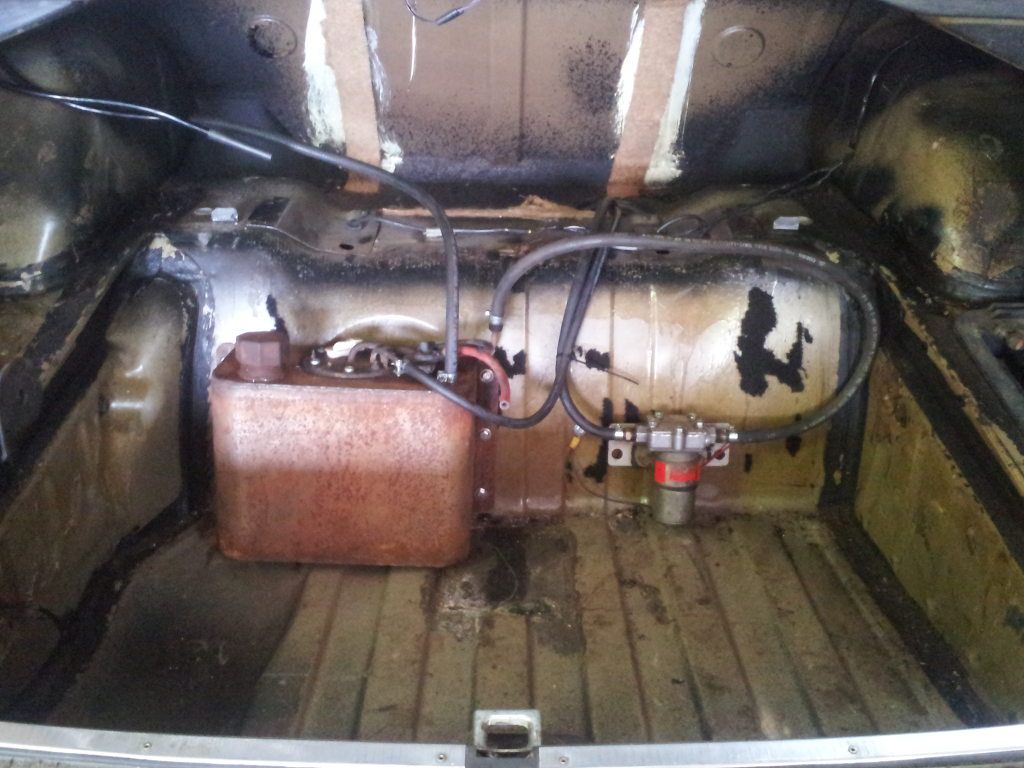
Holley fuel pump and race cell installed with new lines etc:
And it runs - see link to video below:
www.facebook.com/photo.php?v=10154081912810145&set=vb.698935144
So after a little fettling on the morning of the RWYB day the engine was running very sweet. The first every road test was in order. With a quick whiz around the field we were happy and a little surprised that the brakes worked and it went forwards and backwards. Loaded onto the trailer and off we go Alex left, Peter right:
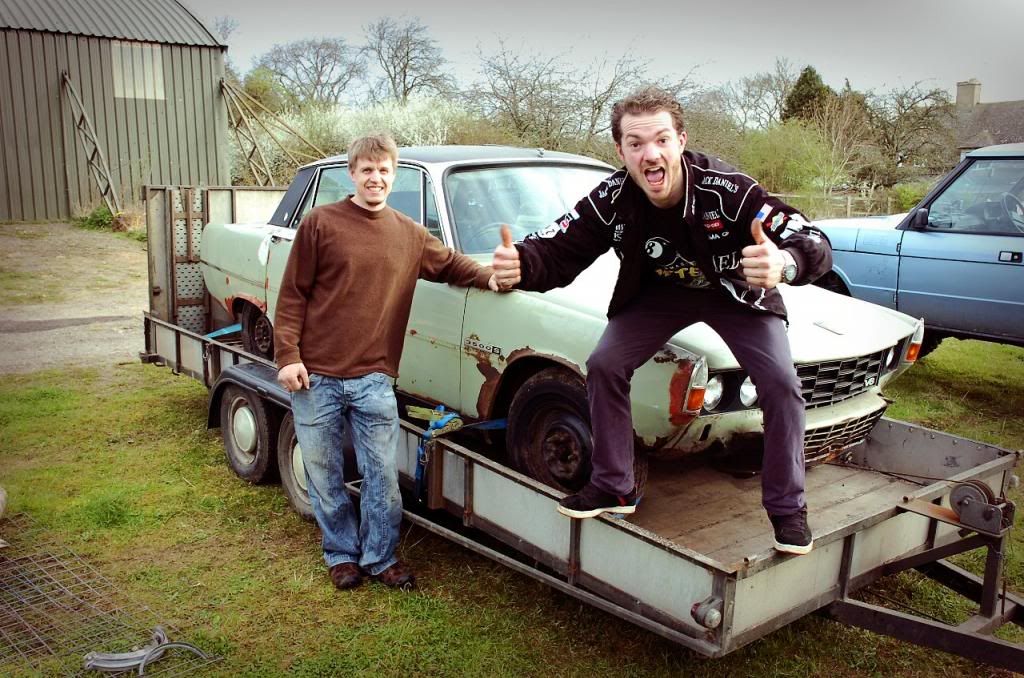
Upon arrival and a drive around the car park it was evident that the clutch was dead and we had no chance of getting any power down. But we had came this far - to give up now would not be sporting. So Pete took it up the strip gently easing the throttle into what you could only call a gradual increase in speed rather than acceleration. Managed to get to 30MPH. But we can honestly say that we took a car destined for scrap to one with a beefy engine and a run on the drag strip in less than 5 days. Very happy with that.
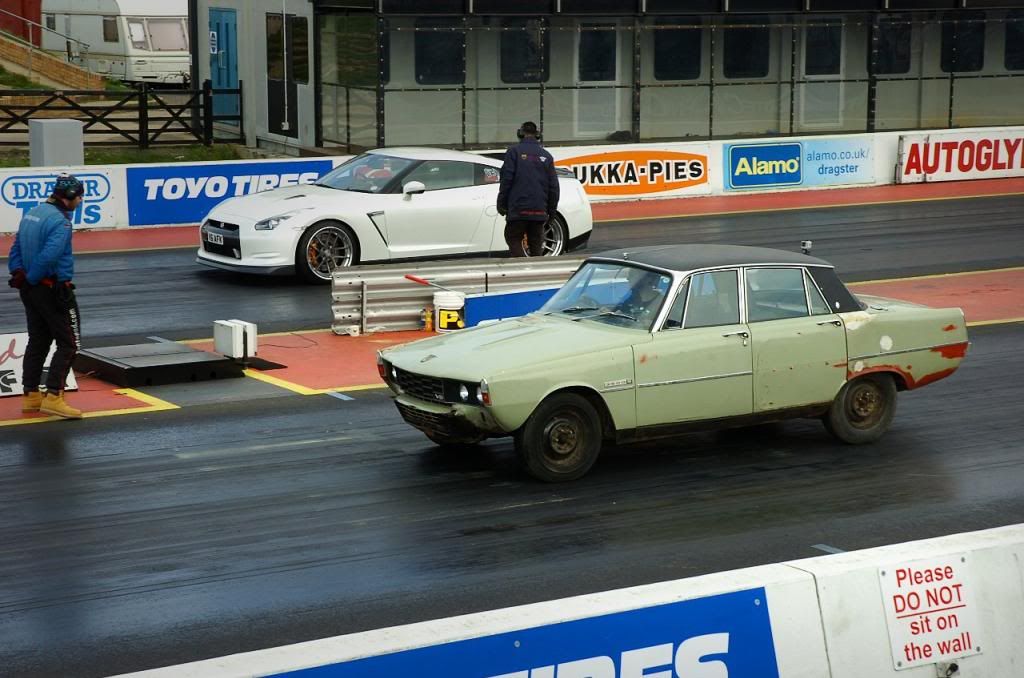
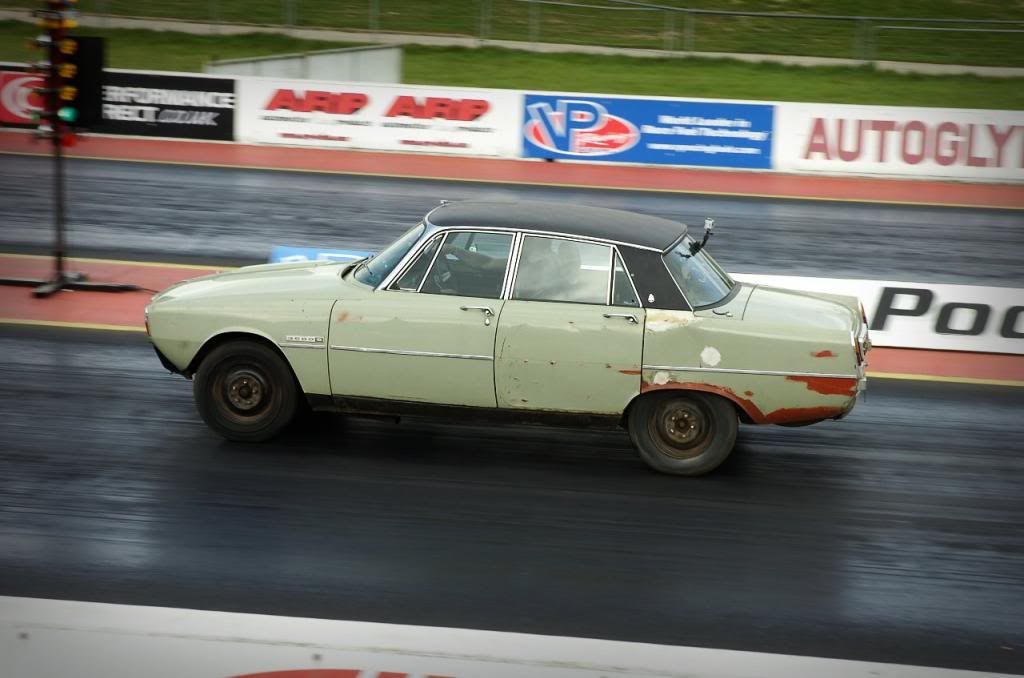
We thought we might be able to make a modification to the clutch with a big 'ol screwdriver so we took the box out in the car park at Santapod. Nope, as expected clutch is dead and not a lot we can do. At least that is one job out of the way now the box is out.
Shortly after coming back from Santapod we bought this:
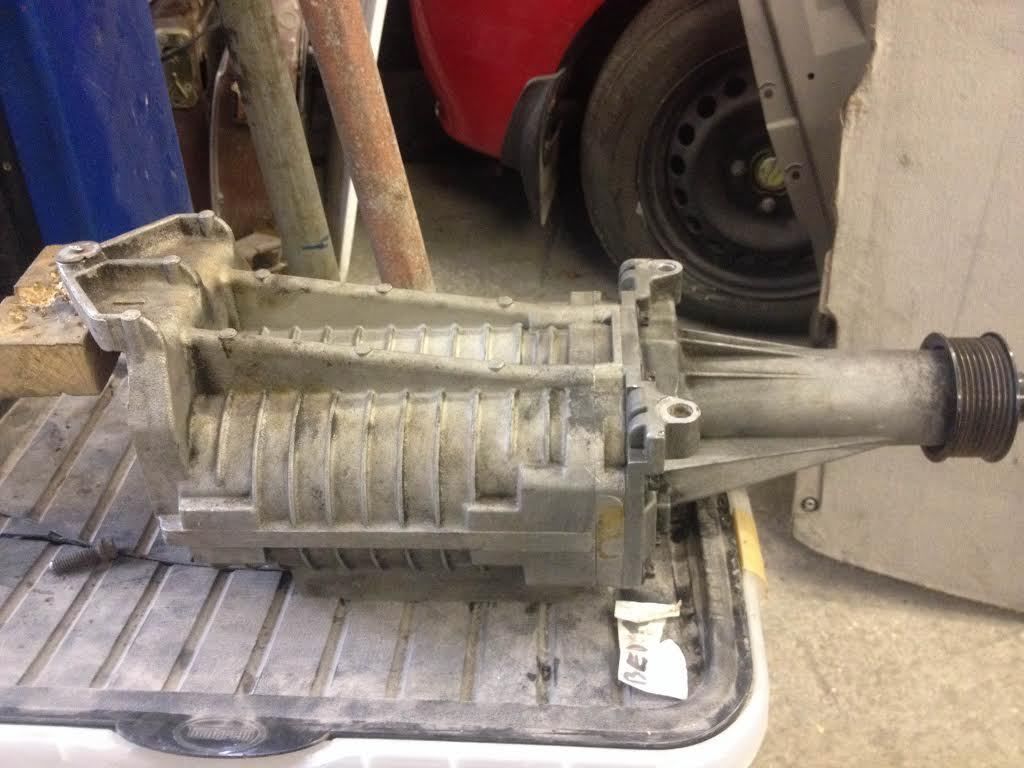
It's an Eaton M112 Supercharger, originally from a Jag XKR 4.2 - in that car it produces 420BHP. Now of course our engine is much older and less efficient, it gives some idea that this is something decent. We were going to go down the route of 2" SU carbs and twin turbo. Problem is that the engine bay was pre-determined by the weird suspension setup so there is not a lot of room in there - we could make it work but none of the options we particularly liked. Supercharger = like
Details of the supercharger here: www.eaton.com/Eaton/ProductsServices/Automotive/AutomotiveAftermarket/Superchargers/PCT_221797
We have also purchased the 2" SU carbs and looking into modifying the standard inlet manifold to take the supercharger.
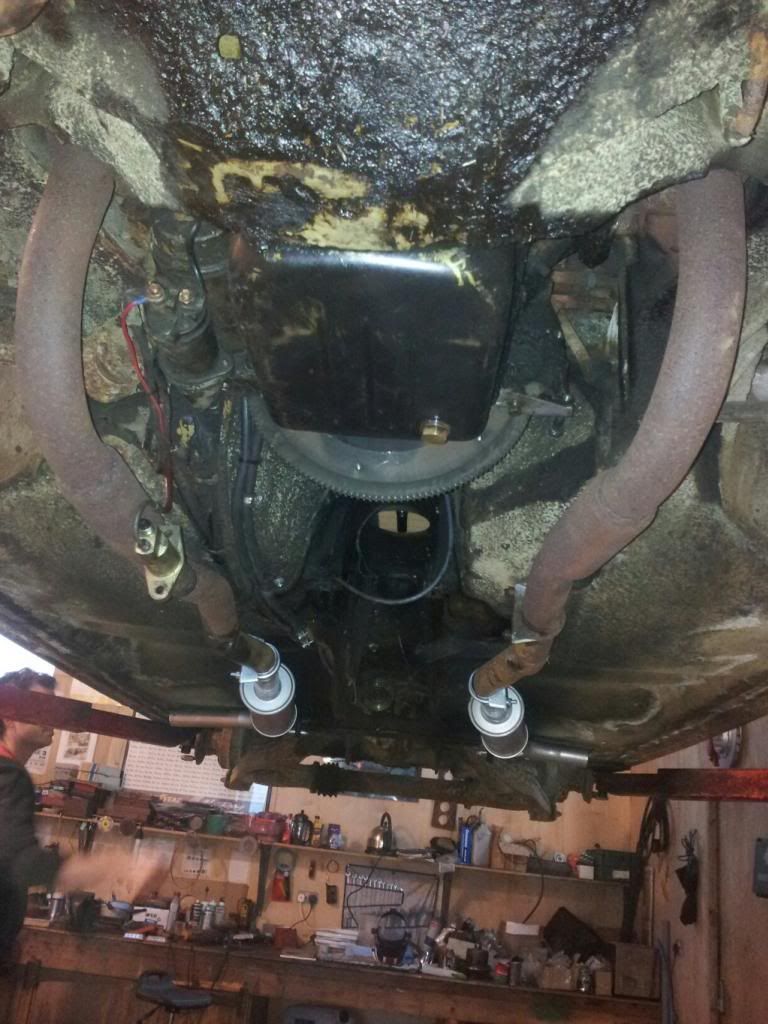
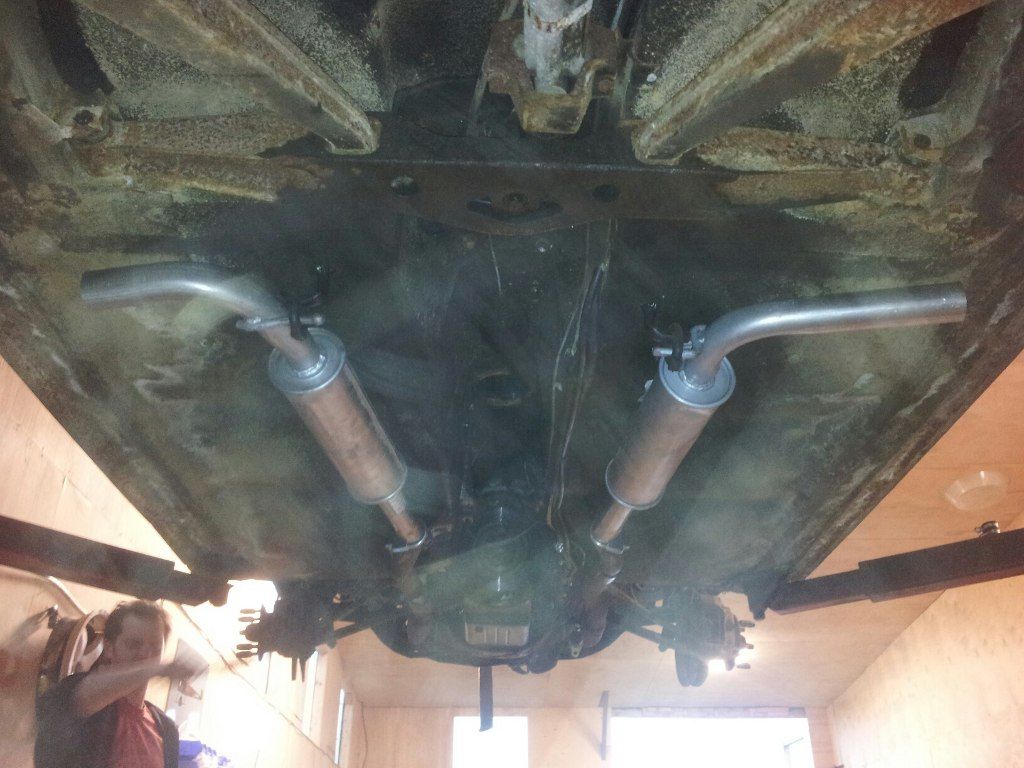
After much searching about in the back rooms of the local auto factors found some suitable silencers. Made up some mounting points. Sorted! Just needs some tailpipe trims to finish:
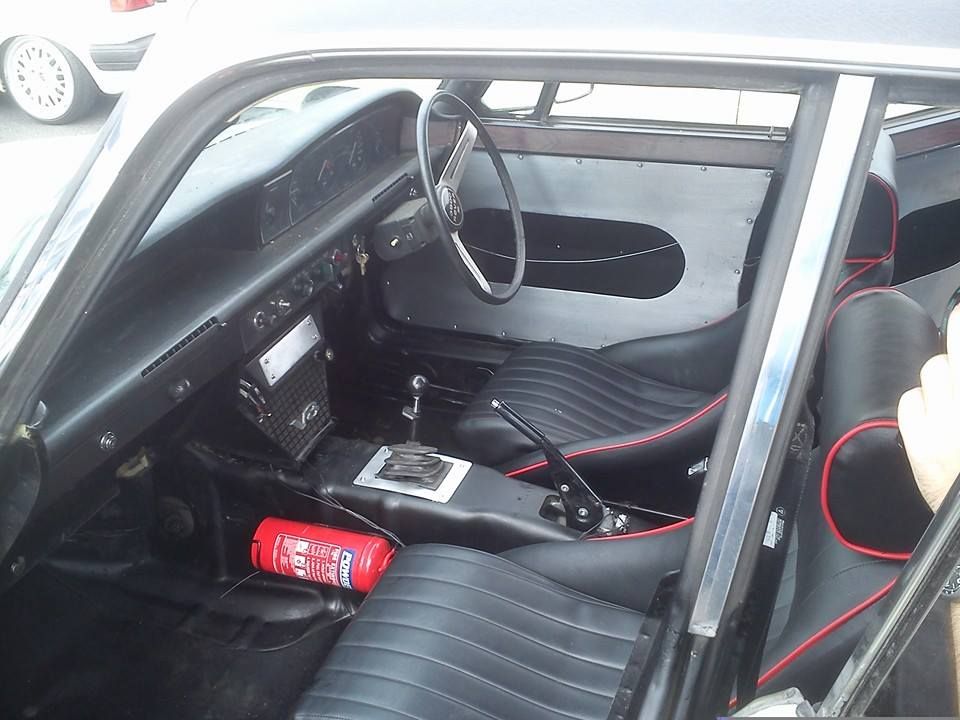
about two weeks into the build did a little more work for the autotest event we were entering that Sunday. Added cords for fire extinguisher and battery isolator:


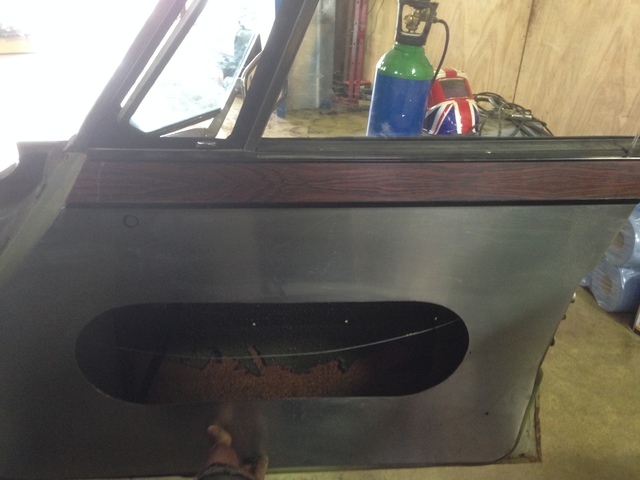
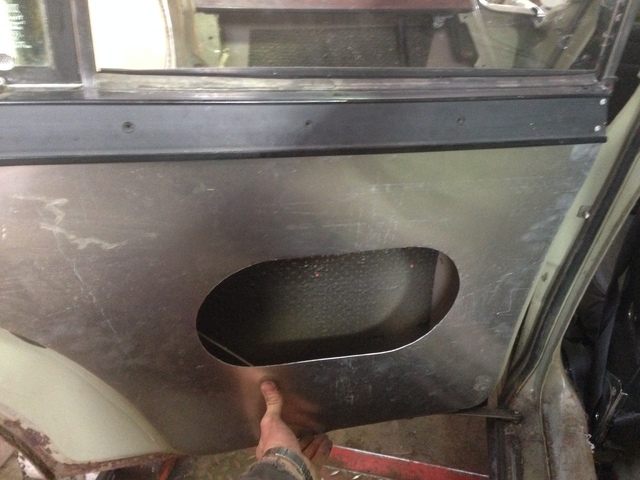
Made some aluminium door cards. We wanted to keep the wood for a bit of character but cut down on weight a tad:
Sunday saw the Rover going to the autotest day with PMC at Rockingham. It was a first for me. I was fairly useless with getting the route correct but thankfully Peter was pretty good at pointing me in the right direction
I am sure Peter will agree with me on this one saying it was a massive amount of fun and was a good way to test out the Rover. It found us a few leaks which we will fix in due course. Also found out that the oil pressure is zero on idle once the oil gets warm which is not great - uprated oil pump gears will solve that and need to sort the radiator. Nothing fell off or snapped which was a bonus. The amount of body roll is quite alarming (not that we held back) but that will be addressed shortly. We were told by bystanders that the tyres were flexing so much the metal of the rims came very close to scraping the ground
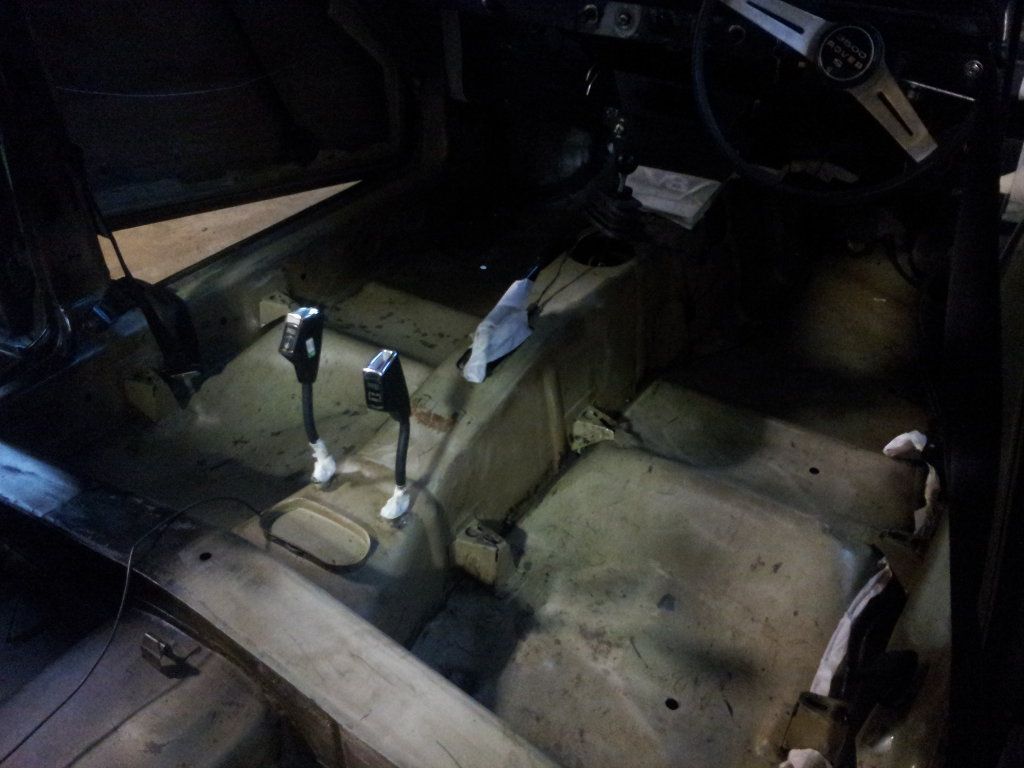
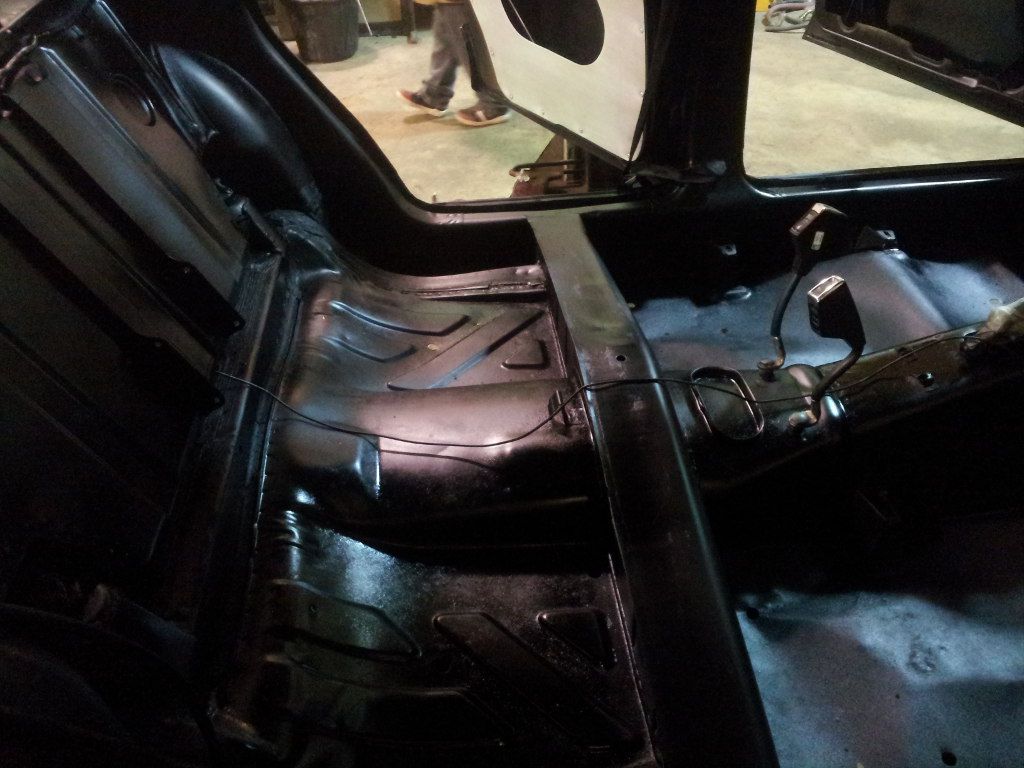
Sorted out the interior. Stripped it out including all the sound deadening - it took a lot of scraping, wire brushing, thinners and farting but we got there:
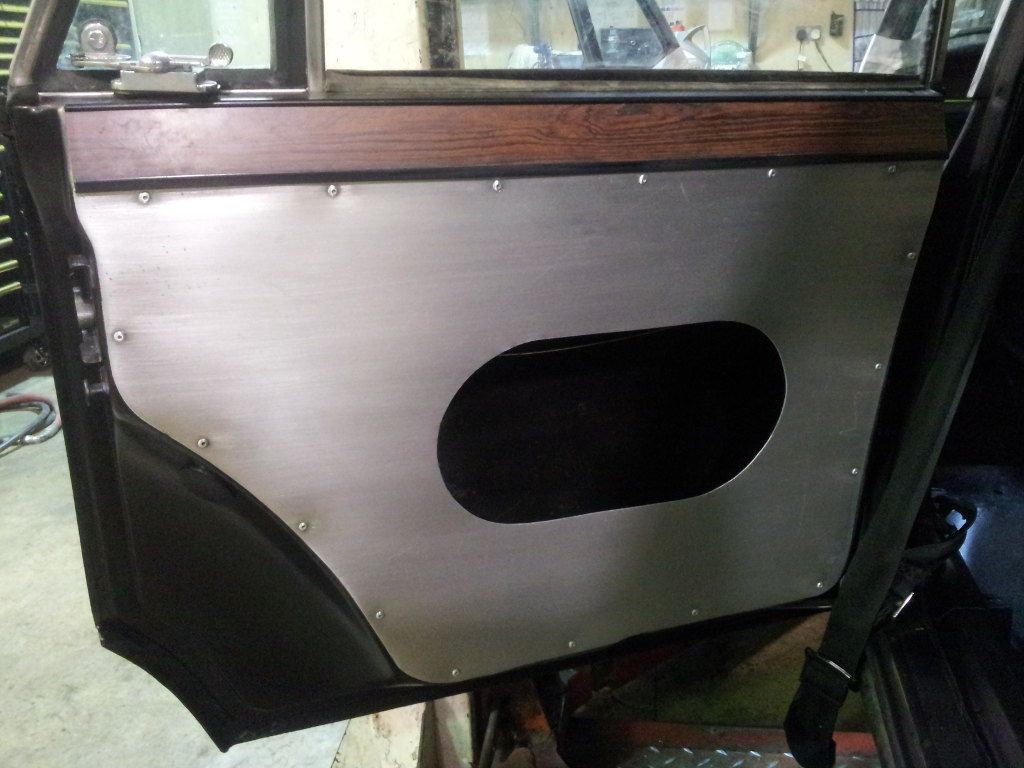
Door cards fitted and a quick go over with a scotch brite pad to give it a brushed look:
Corbeau bucket seats fitted. I think it's rather nice
Now towards the end of April:
did a taster session at Rockingham on the day that Retro Cars had a bit of a thing on. Was great fun giving it some beans round the track. Clearly we need to do some more work...it...well...as you can see from the pics leans a little! With the recently fitted Avo adjustable shocks turned up to also max that helped things a little. Brakes were pretty rubbish and didn't have much grip. But of course we will work on these things
A few pics from the day:
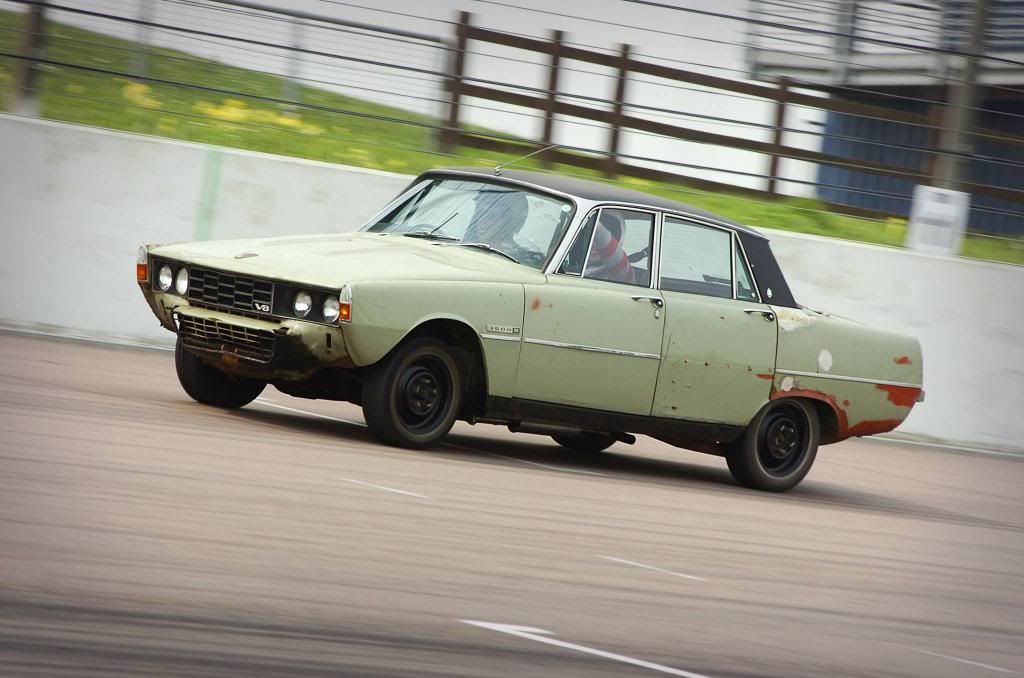
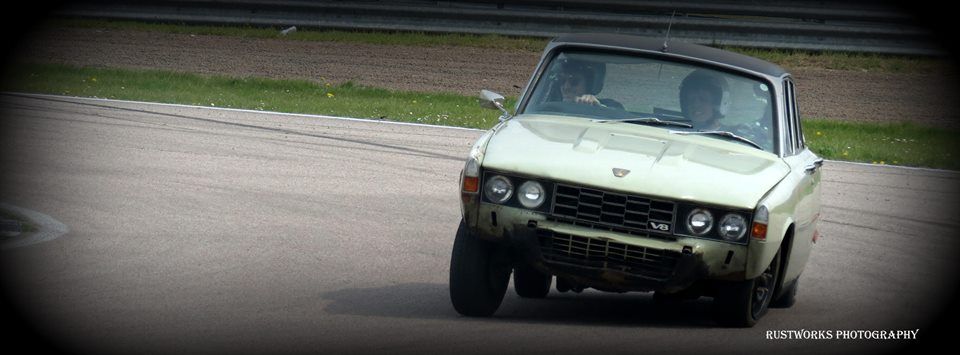
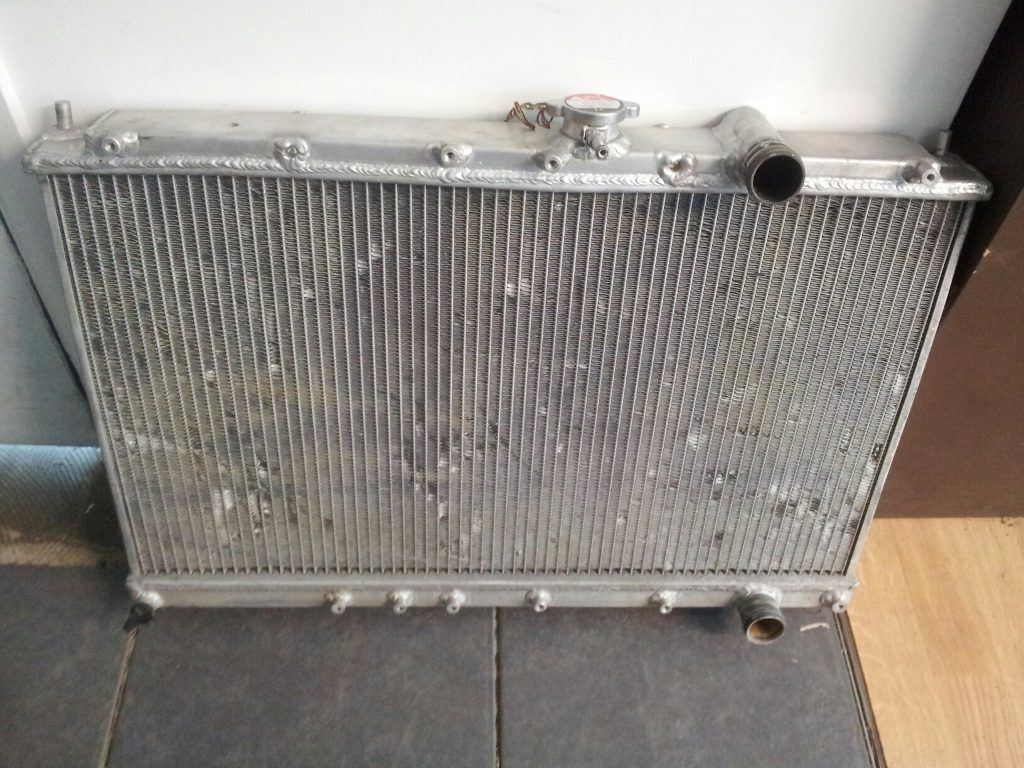
Still in April and loads of goodies have now arrived including this, an alloy rad from an Evo 1/2/3. It is only an ebay special but it will do a damn better job than a radiator with 3 rows missing, soldered up, and using bits of wood zip tied to the bottom in an attempt to stop it expanding
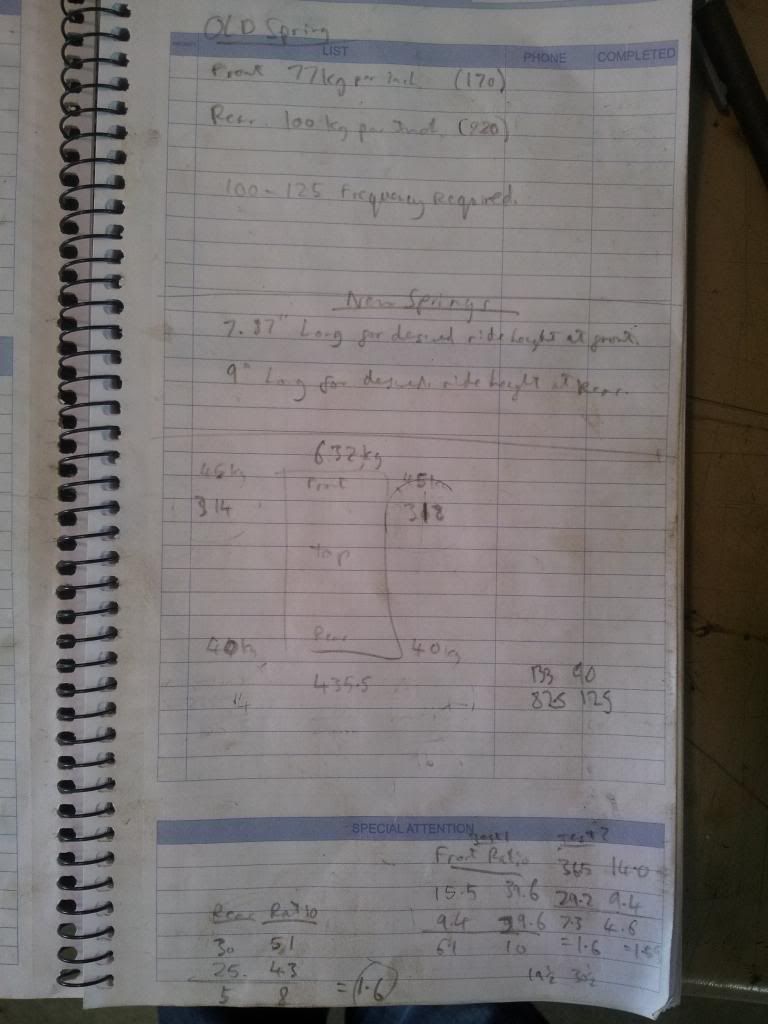
e have been pondering suspension setups. We were going to do down the ARB route to stiffen things up but after Peter having a quick chat with Lozz it's evident that ARB should be the last resort as a bit of extra tweaking rather than a solution to body roll. Much better to get decent springs and then go from there. Soon we will figure out the length, poundage and so on and probably get a set made up.
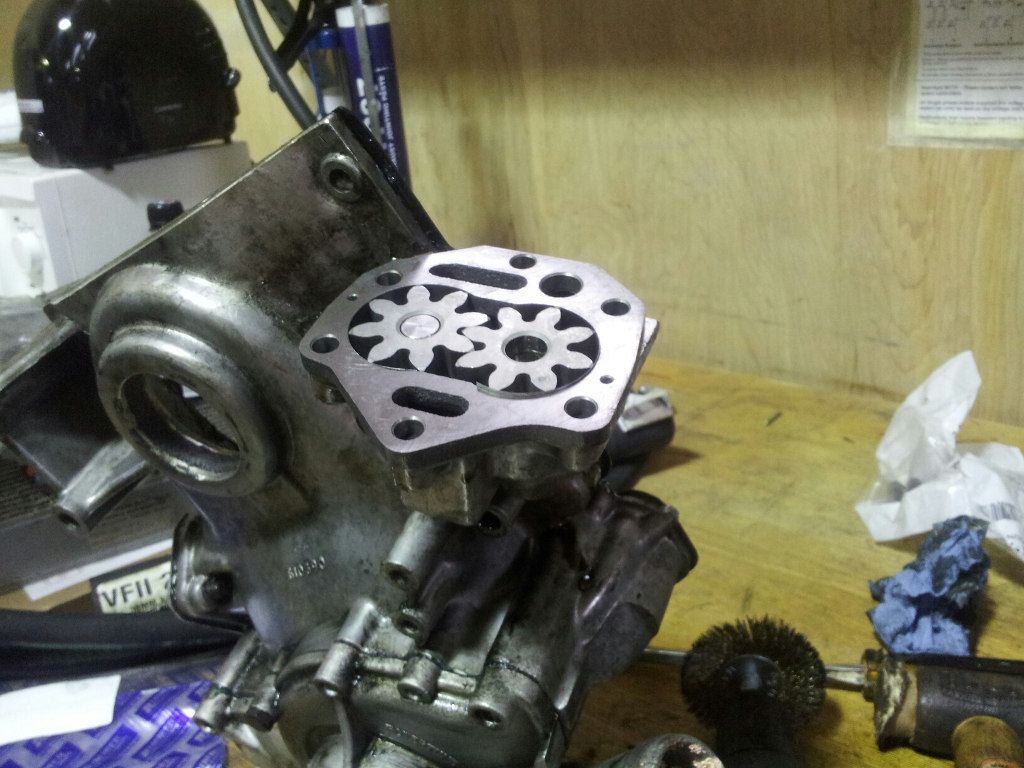
Progress has been good. As mentioned before we had oil pressure issues. We are running a 4.6V8 with the front cover etc (including oil pump) from the 3.5V8 we have mated to it - ending up with 0 PSI on idle and not much better running when warm. The front crankshaft oil seal was also leaking so that got replaced. To up the pressure to "normal" we got an uprated gear kit for the oil cooler. You get taller gears, a spacer, gaskets and shims to get the spacing correct. A very nicely made bit of kit:
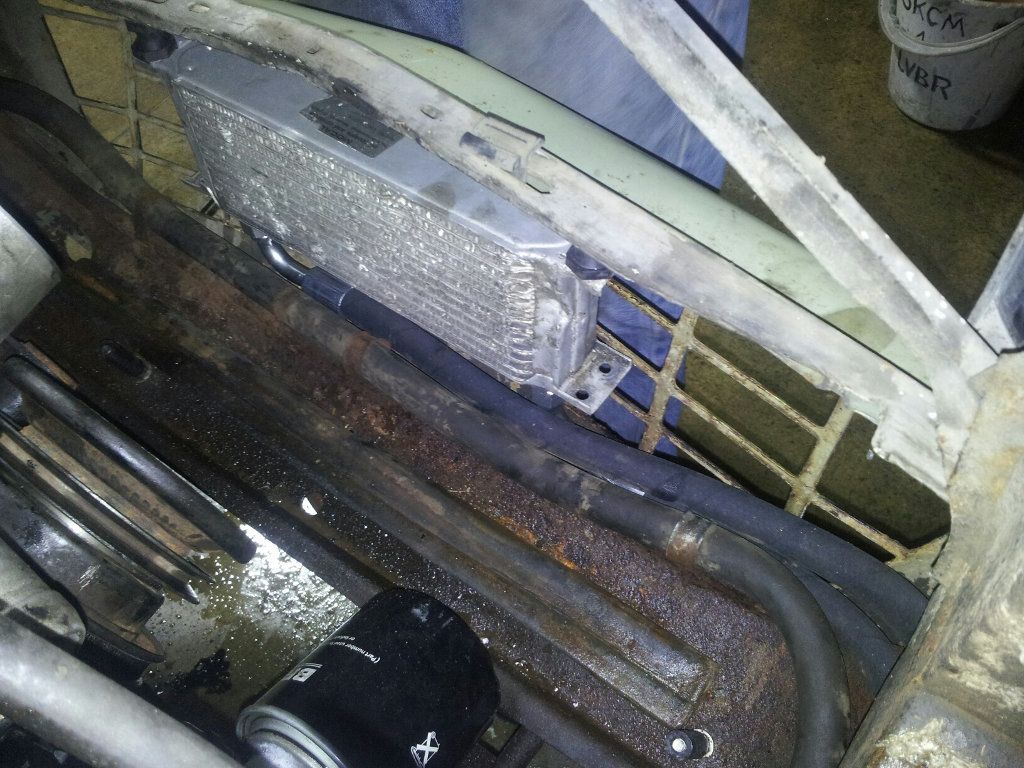
And a Mocal oil cooler and Mocal sandwich plate to keep the oil temperate down a bit - it's a bit of a tight fit and we might have to take the water radiator out to do an oil change but oh well!
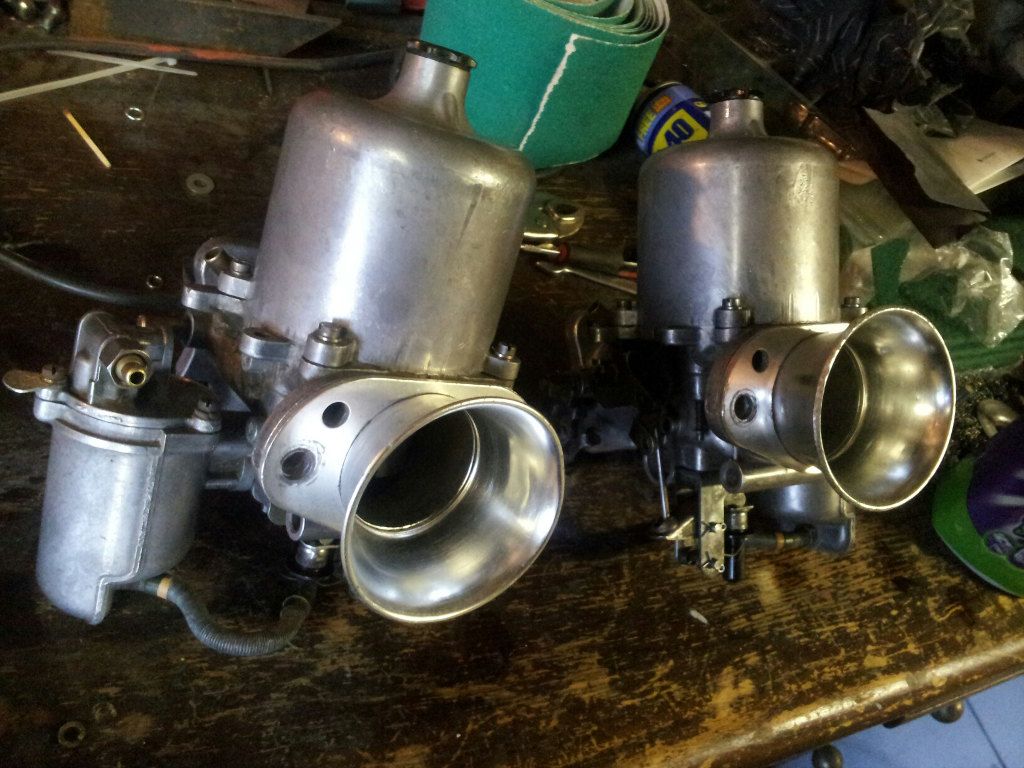
Also re-furbished the carbs. I had the simple task of making them nice and clean, Peter had the harder job of stripping them down, making new parts and re-assembly. Nice trumpets hey - that is what we will see front the drivers seat peaking through the bonnet bulge
Now running at 10PSI on idle and 30PSI running when running and warm - which seems about right for these V8 engines. Got the radiator installed and electric fan mounted but forgot to get a picture of those.
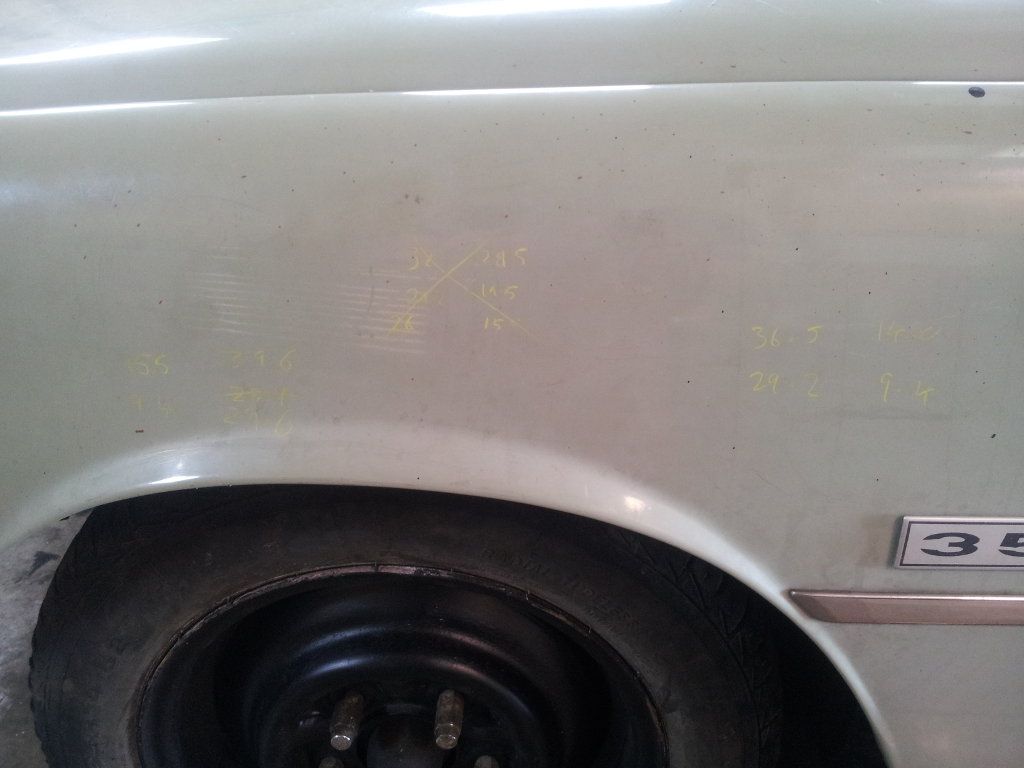
Beginning of May getting the suspension sorted out. It's not all guess work!
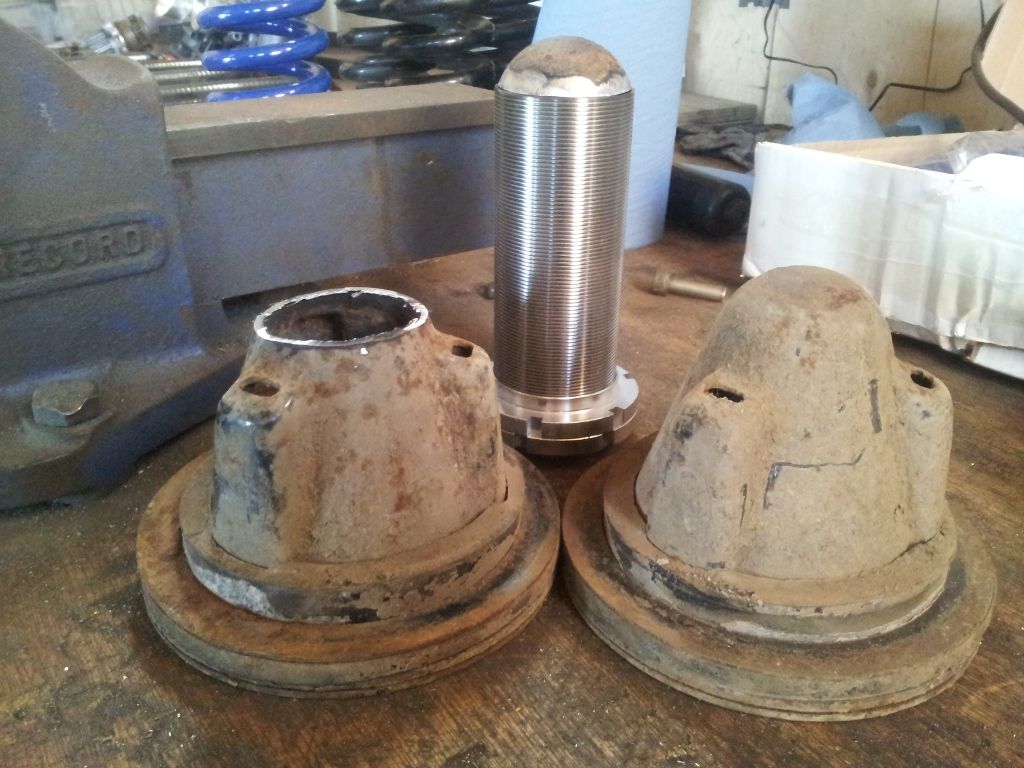
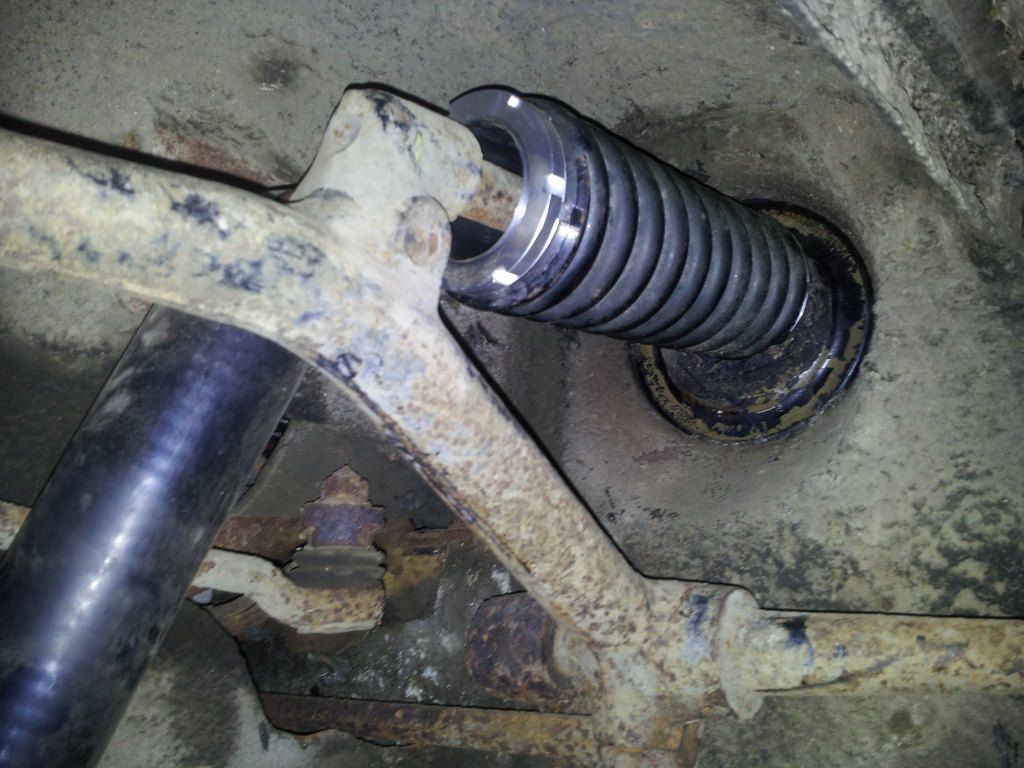
Had some inspiration at Donnington from the Rover P6 race car. And that is to convert front and rear to 2.5" springs. This means it's much easier to change the springs to different lengths and poundage, as well as being cheaper than getting springs made to our requirements. Bought an adjustable coil over spring seat kit for the front. Then lobbed off the top of the old seats and mated the two. A spring seat was bolted (1" higher than centre for better spring location) to the bulkhead:
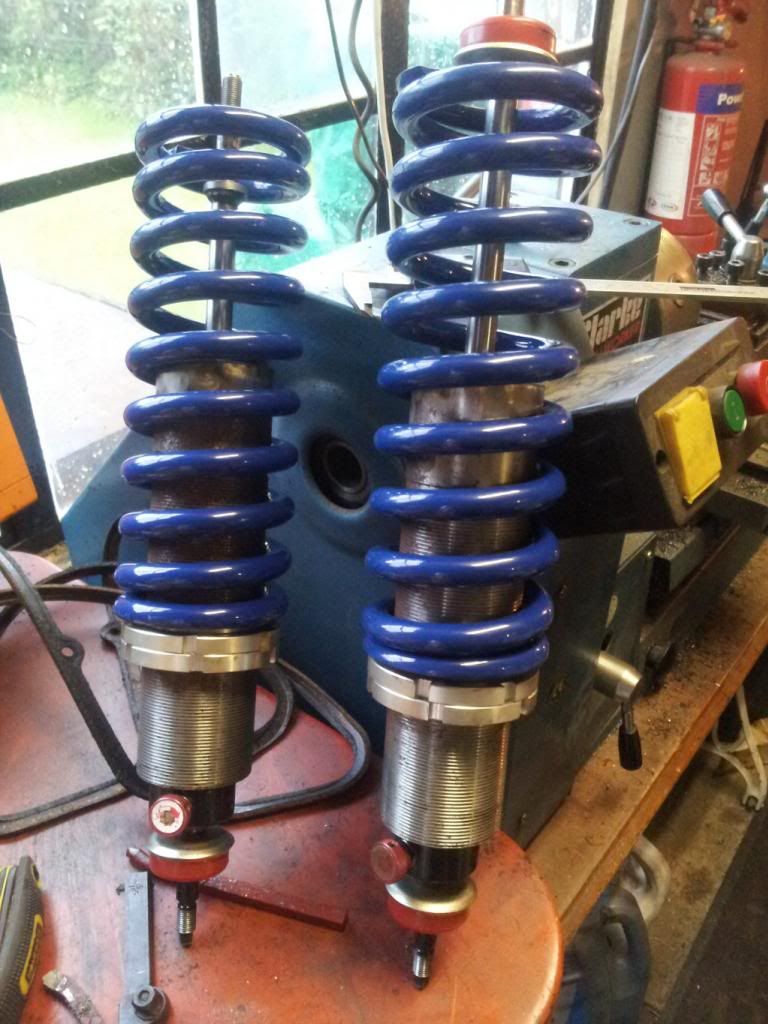
Peter came up with a very good design for making coil overs at the rear. Some old coil overs were butchered for the conversion. Standard 2.5" spring now sit over the Avo coilovers. Much lathing, cutting, grinding and welding later:
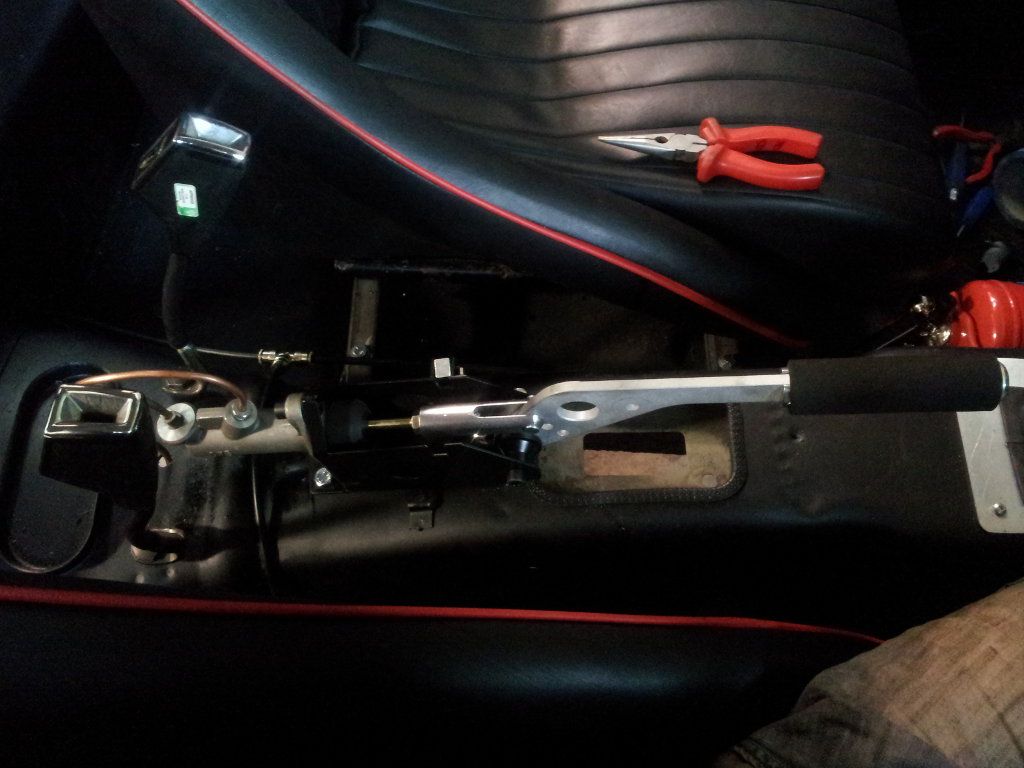
Hydraulic handbrake fitted (needs some work until it's effective):
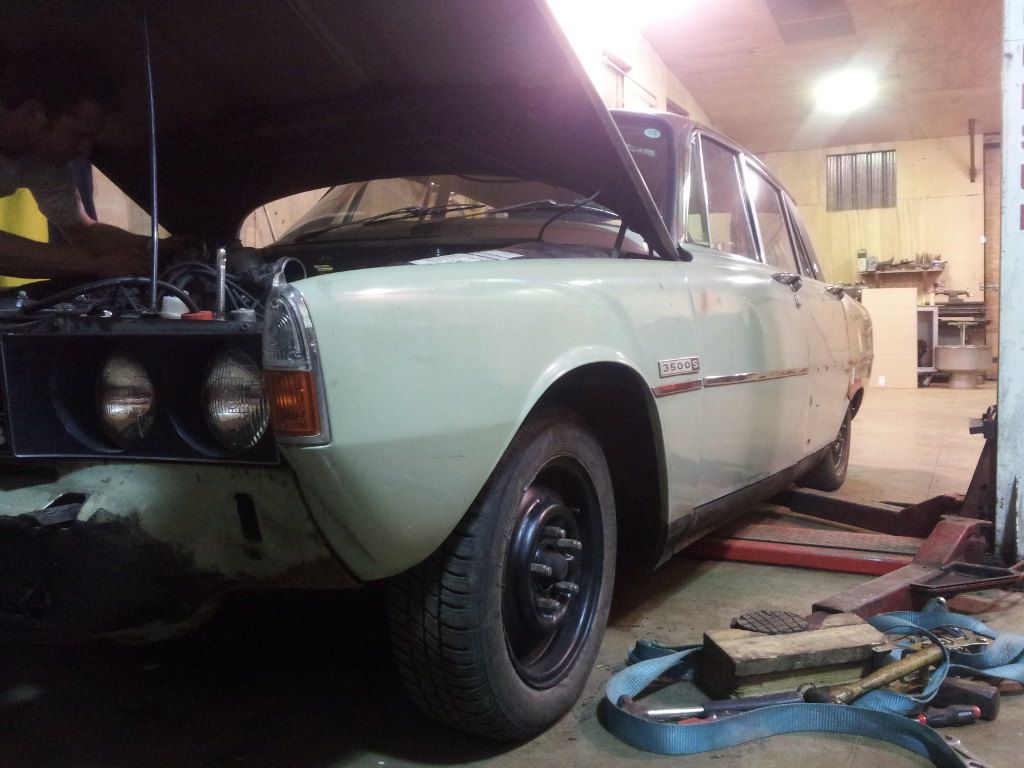
Sits about right I reckon:
11th of May went yesterday at Rockingham. What an improvement! Yes it still rolls as you will see from the picture but no where near as much - you can throw it around now without the worry that it might fall over! With decent rubber, rear brakes that work and poly bushes it will be better still. Had great fun
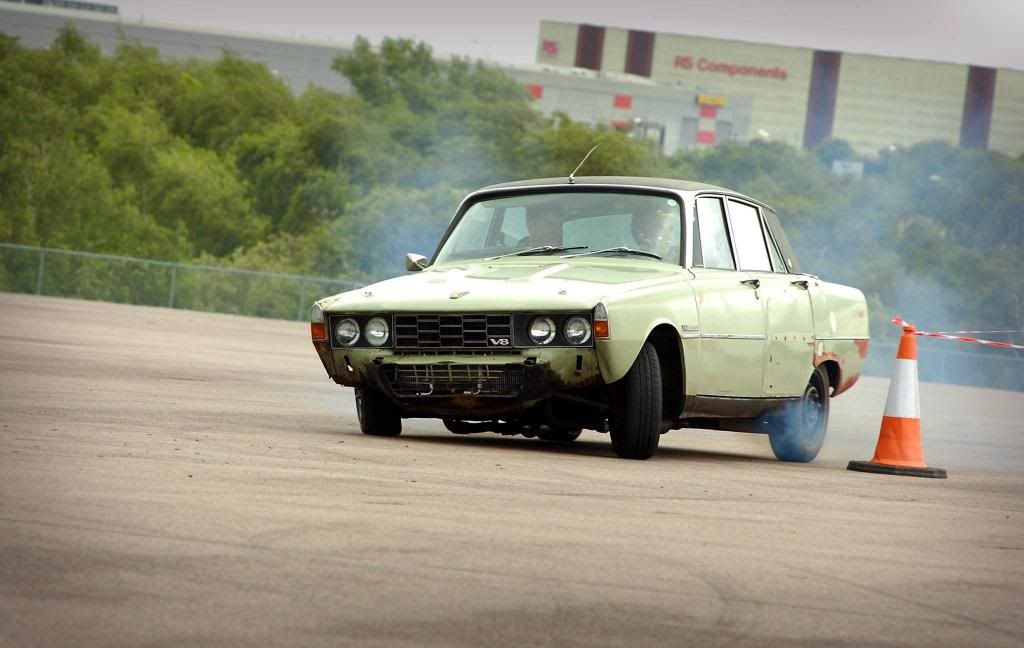
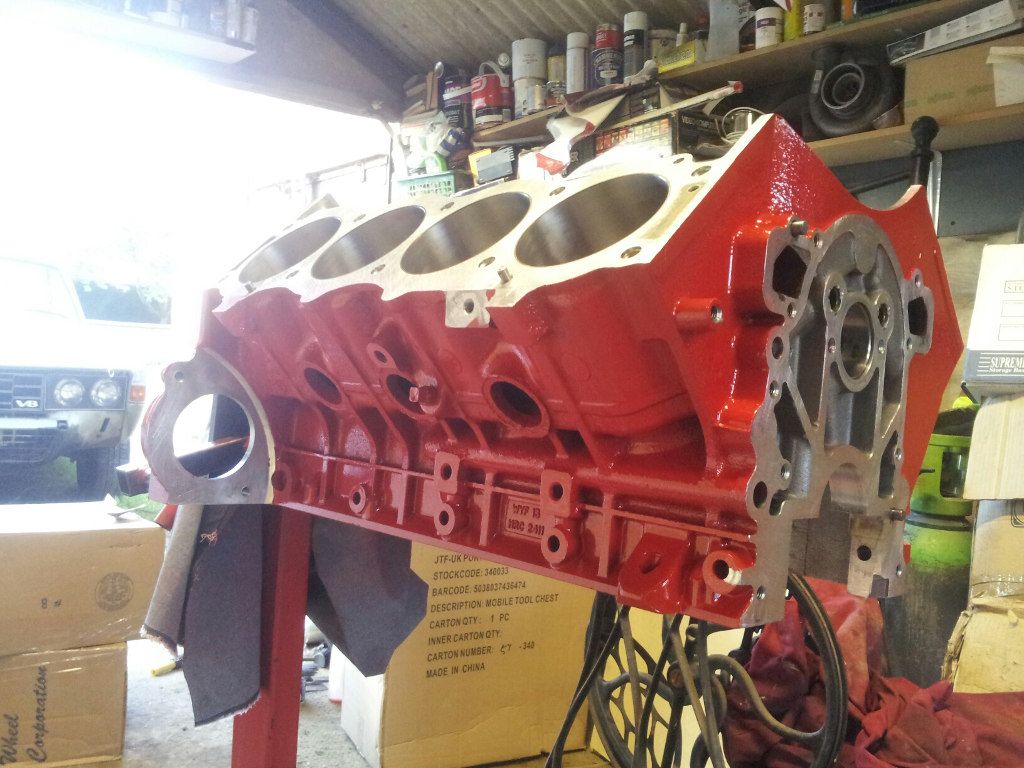
As clearly shown in the picture above, we have quite a bit of blue smoke. Not ones to hang around as soon as we got back we stripped the engine apart. It'll need a bit of work, put it that way! Engine out and the rebuild starts. Wanted to finish it to a half decent standard so sprayed painted the block:
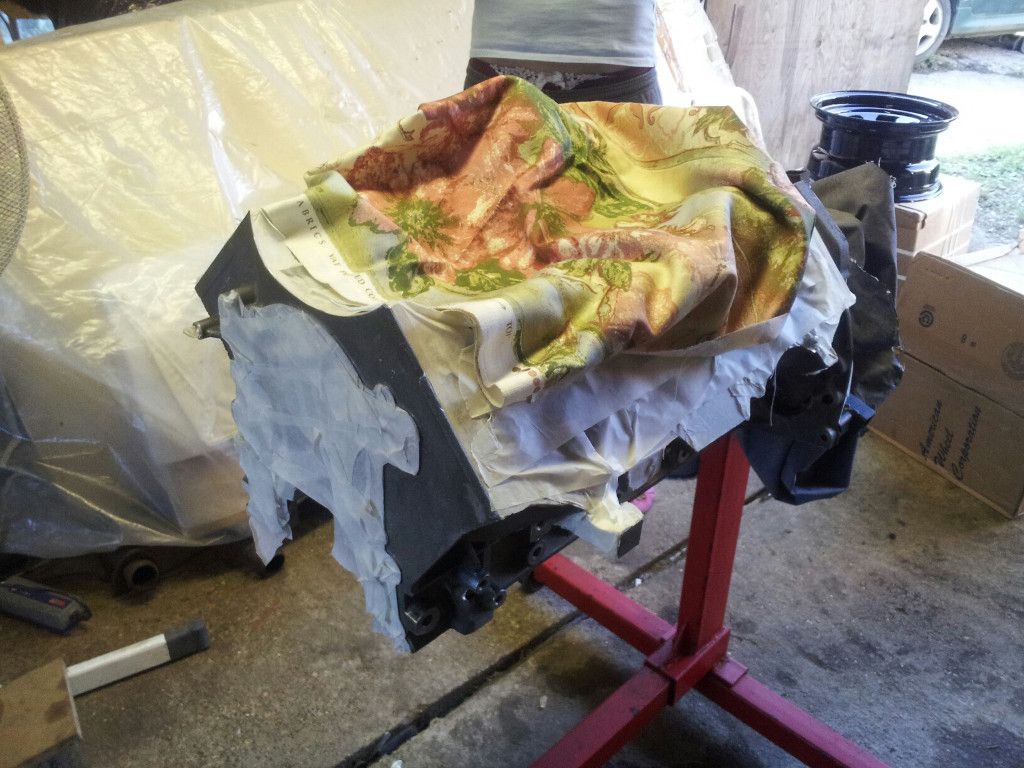
Pretty hey?:
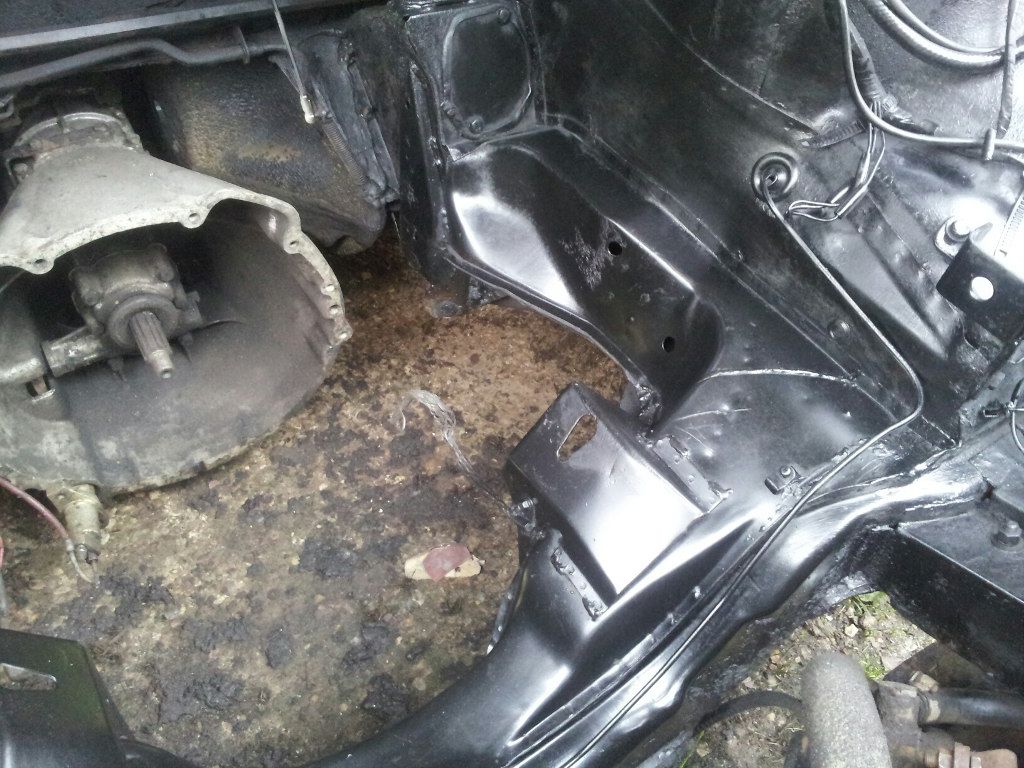
Gave the engine bay a spruce up too:
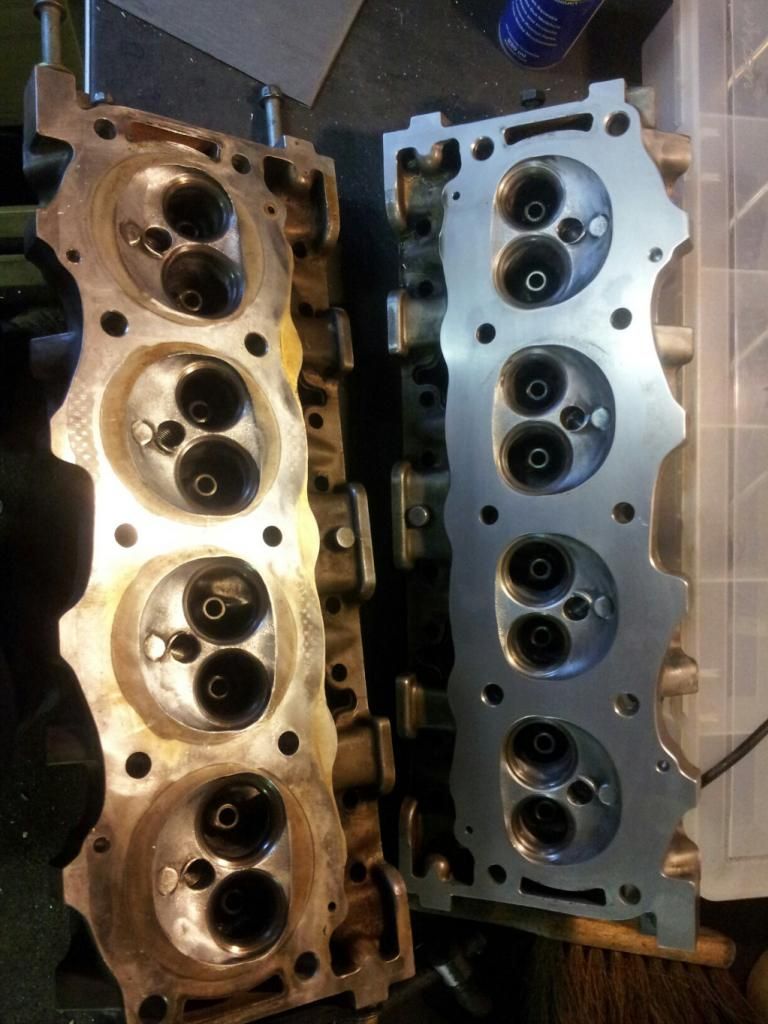
Spent a little while sanding down the head with a sheet of glass and paper. Before:
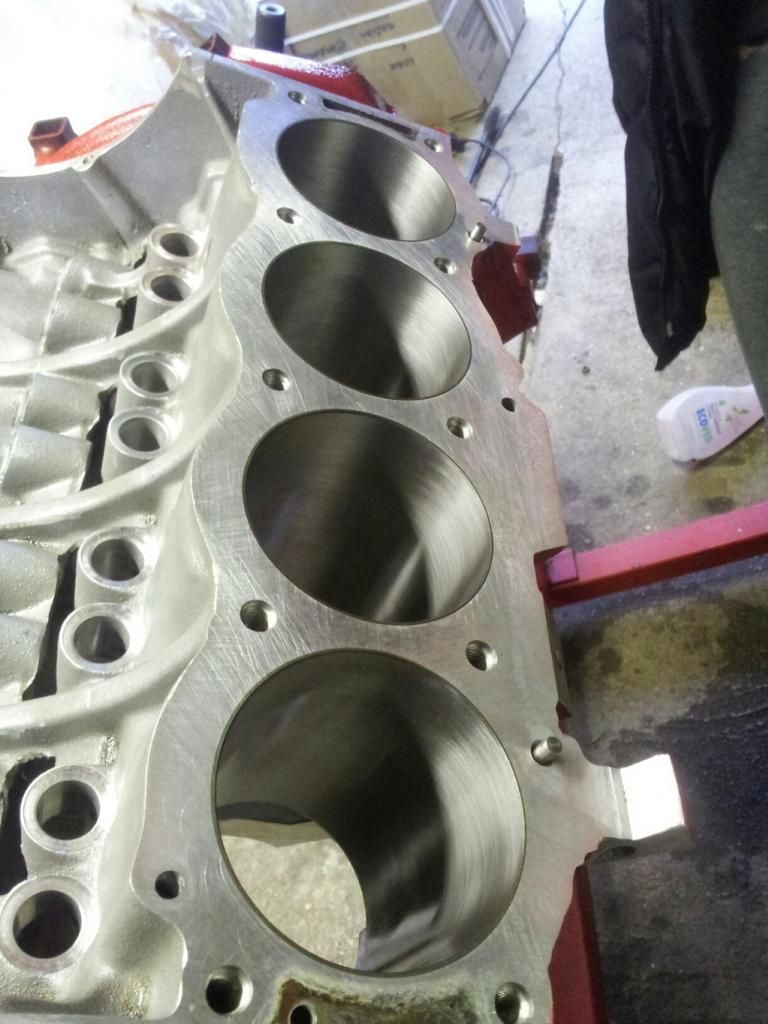
(the other side, but you get the idea) After. Good what you can do with a sheet of glass from an old picture. Decent surface I'd say:
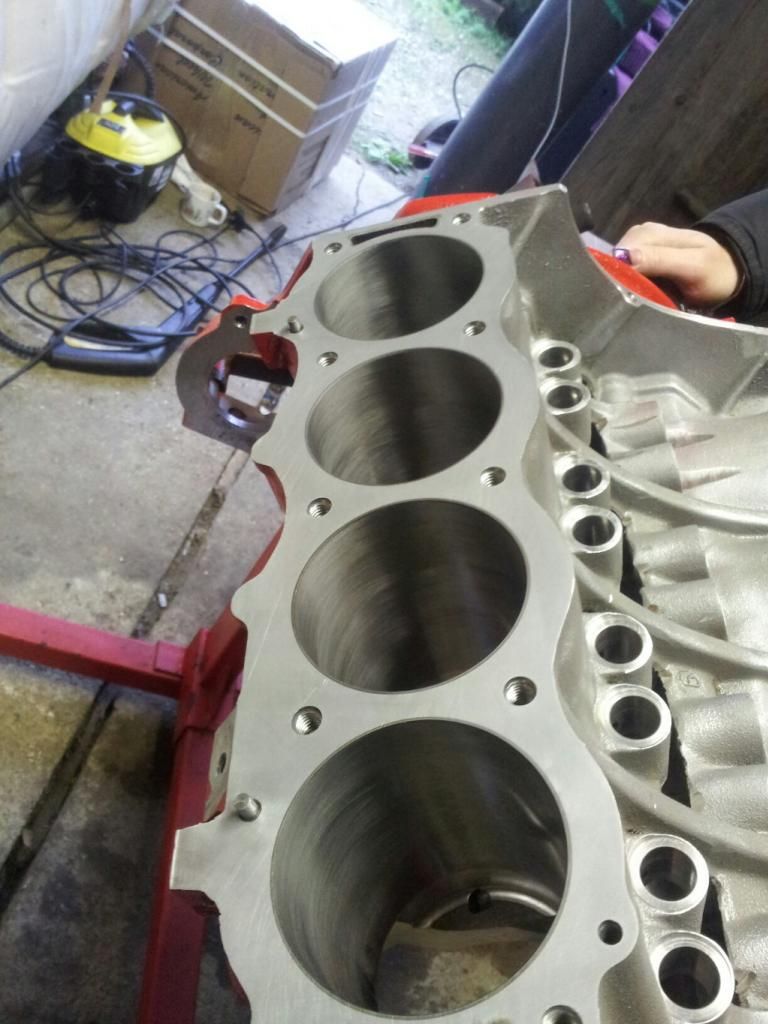
Peter has been doing a fair bit of head work. I had the easy task with the glass and paper again!:
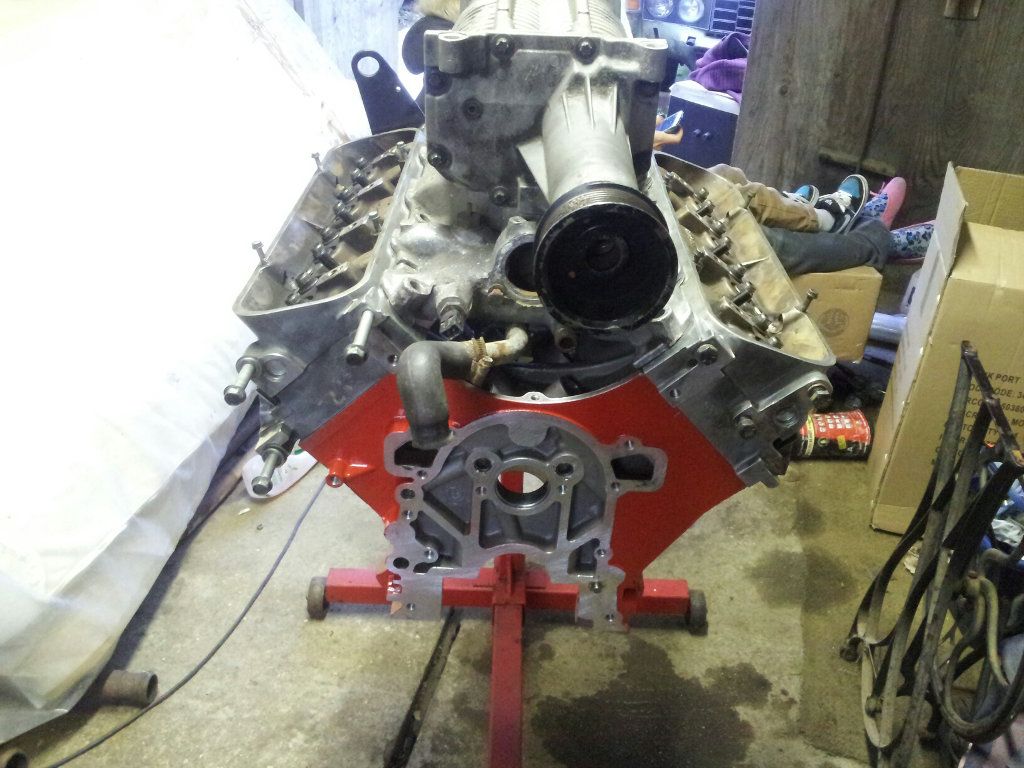
Brief mockup of the supercharger:
New wheels arrived from America and got some Dunlop race tyres (which later found out are not much good so we need a re-think) so I had to rush over and see the trial fit. Needless to say, a little work is required on the rear end so we had a go at rolling the arches and bashing bits with the big hammer. Some success. But this will not be so easy on the fibre glass wings we will fit. Hmm, rubs more than a little:
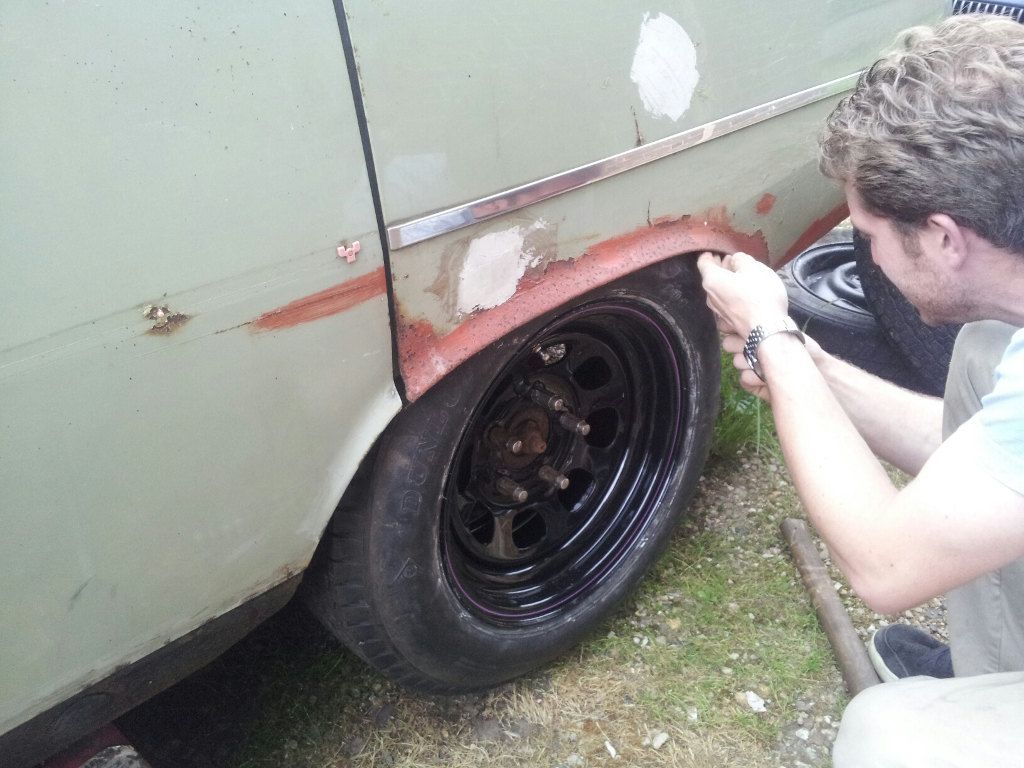
Brute force time!:
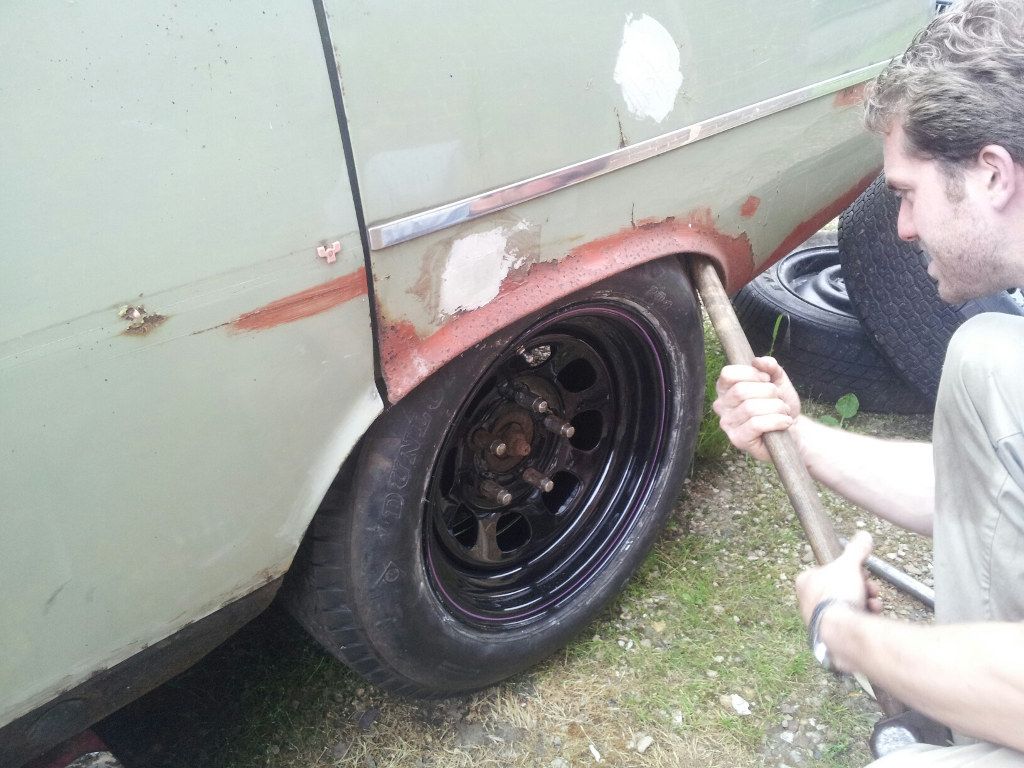
(car sits high at the front as no engine in there) I think the front wings will only require a little trimming:
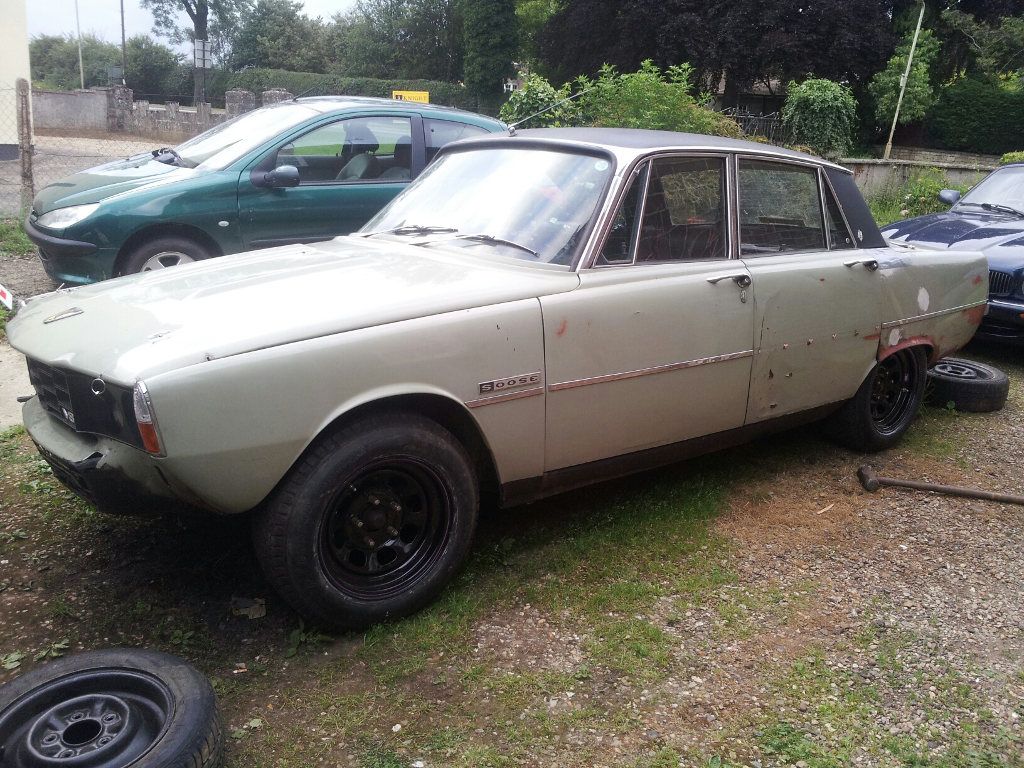
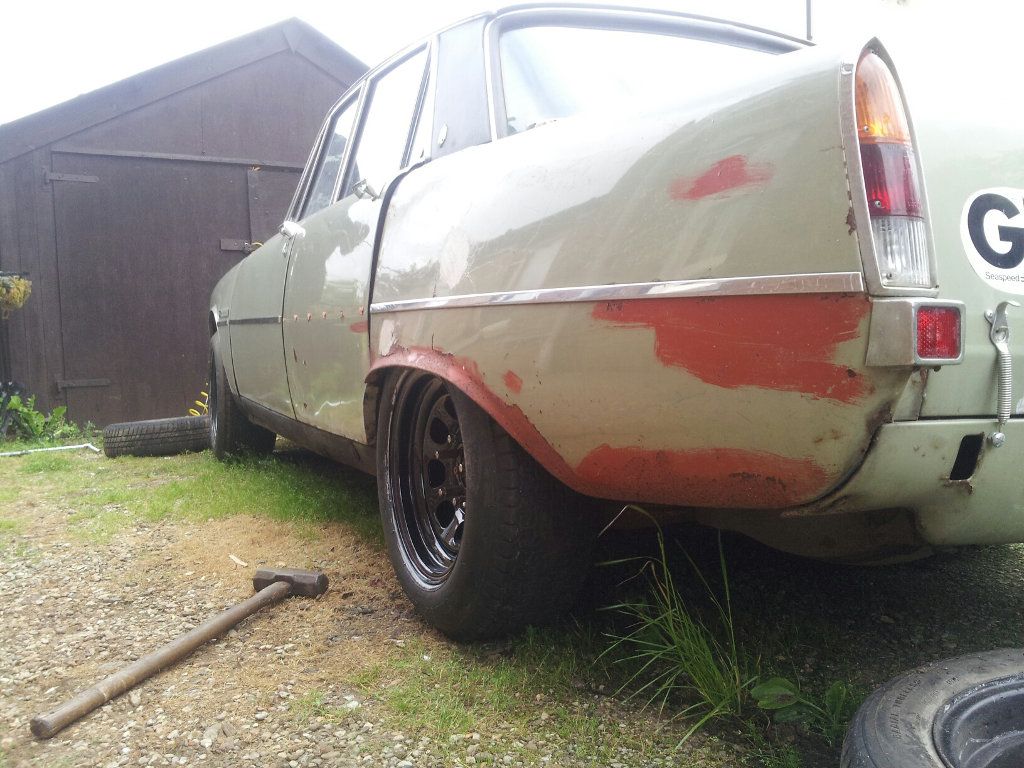
Sent various bits off to get balanced (after we balanced them in the shed and they were all spot on). Slight modification to improve oil flow:
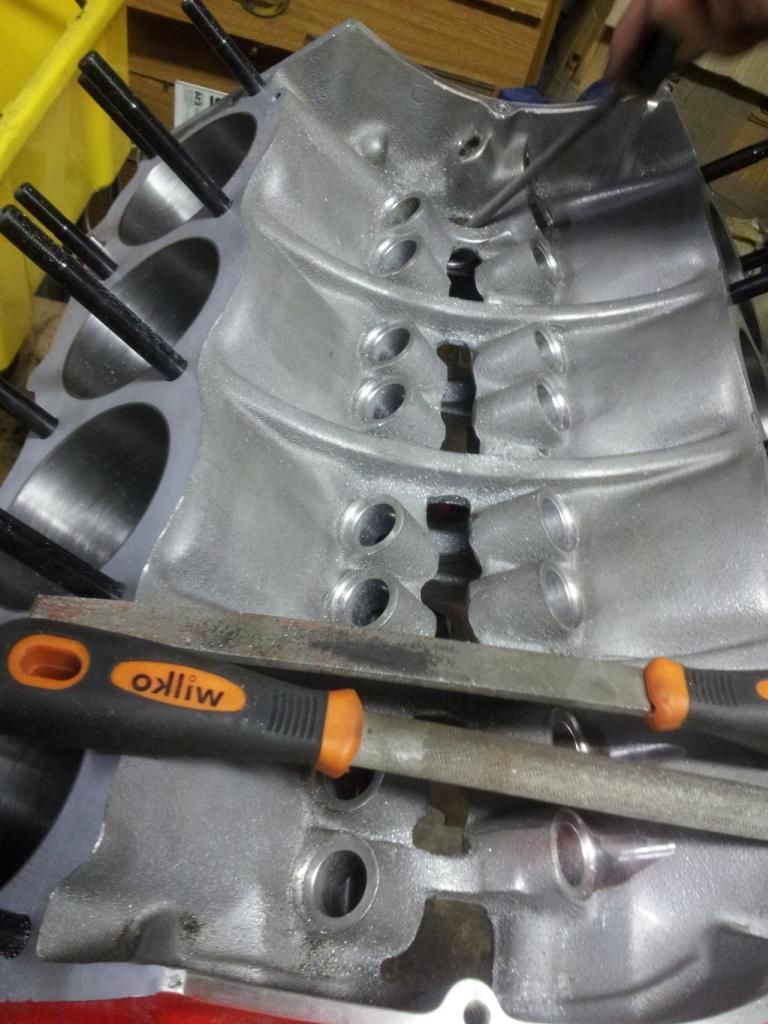
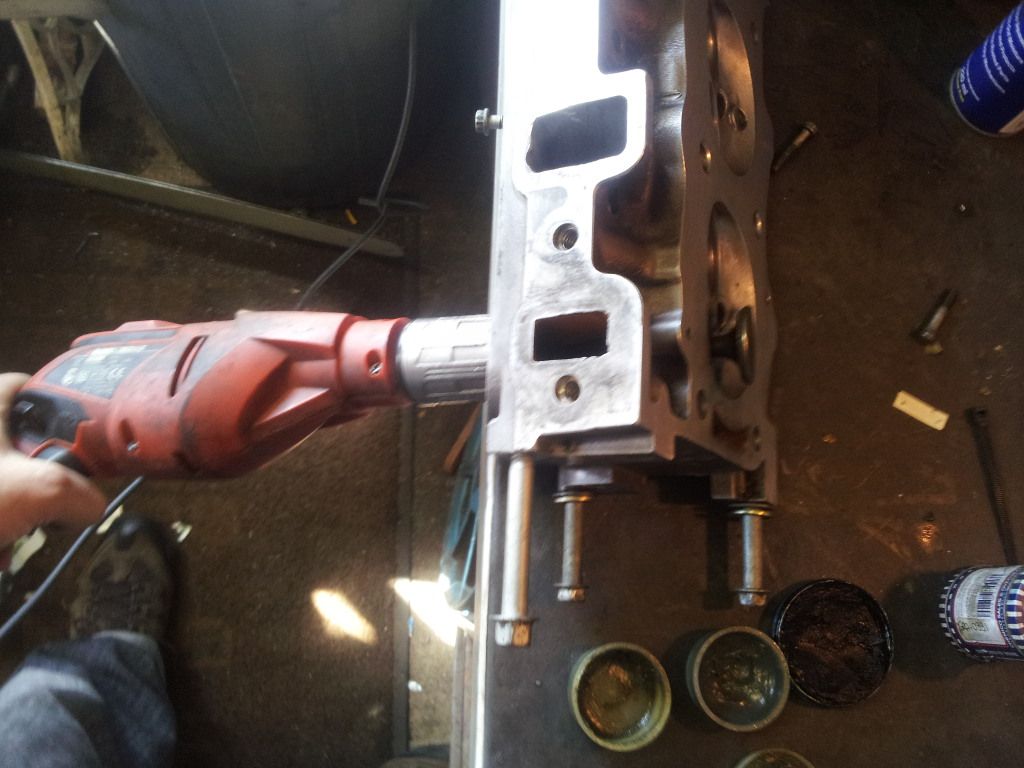
Meanwhile I carried on with the valves and head. Course and then fine paste was used on exhaust valves, fine only required for inlet. Crude using the drill to spin the valves but it does the job
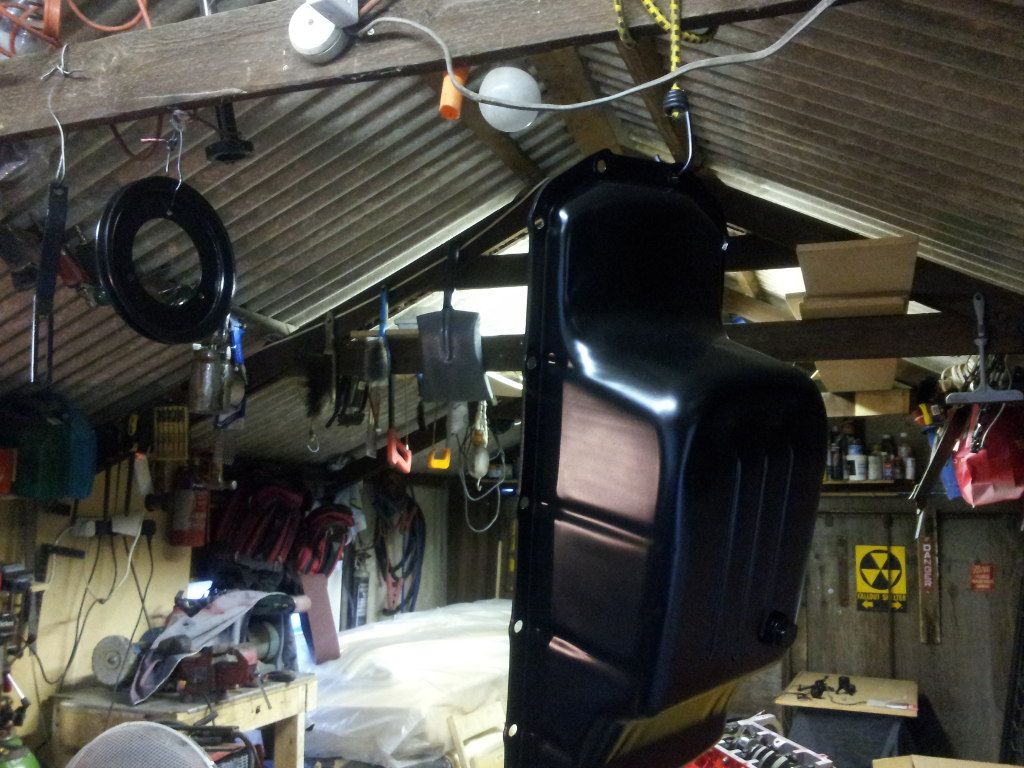
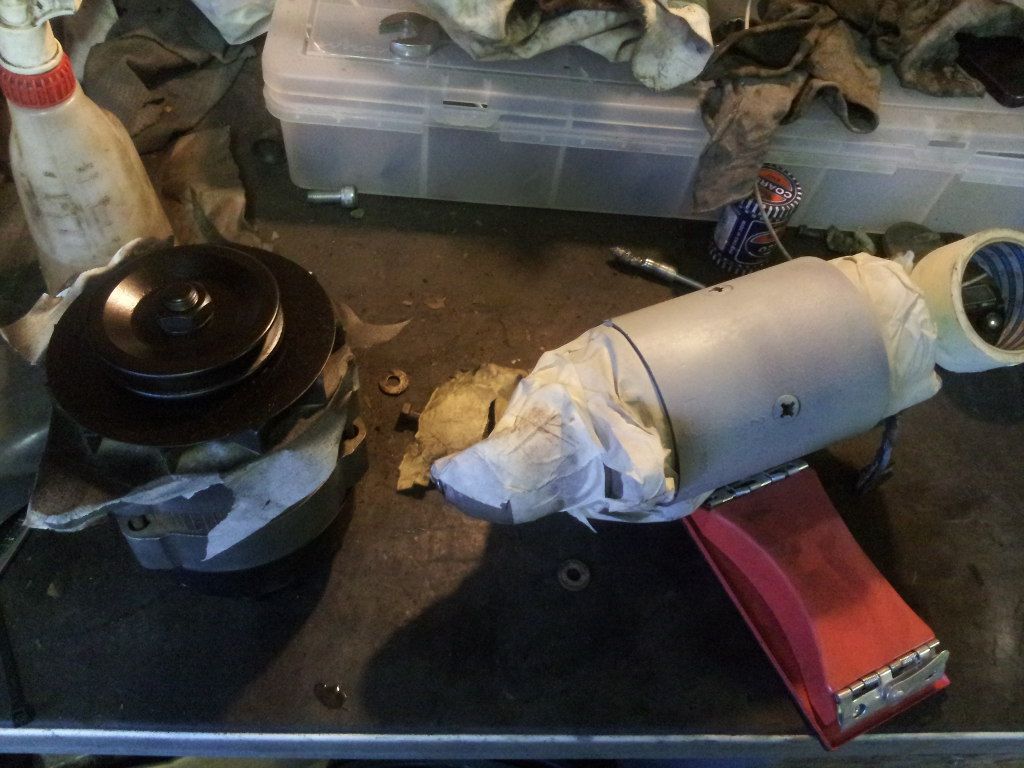
Cleaned up various parts and painted - it would be rude not to compliment the shiny block.
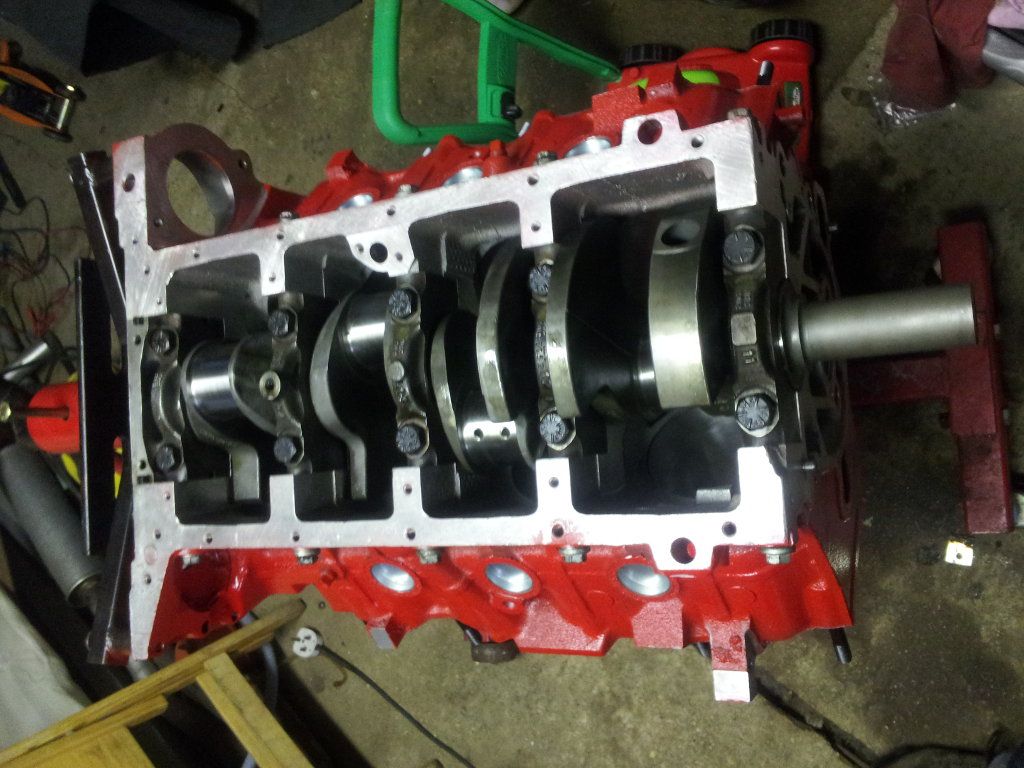
Meanwhile, Peter installed the crankshaft:
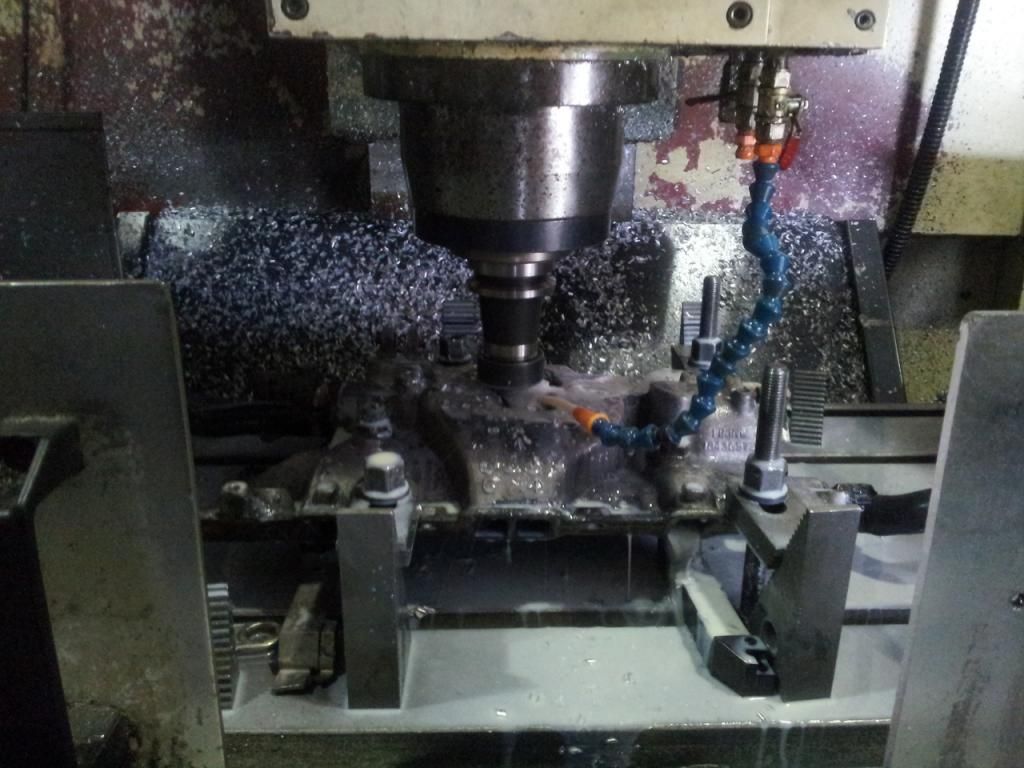
Now mid August, wairing for the Crowler camshaft and other top end bits to arrive Me and Pete spent a good part of the weekend on the Rover. Main target was to get the charger mounted on the adapted inlet manifold. So you take a stock Rover V8 manifold and leave it to Peter to enlarge somewhat on the mill:
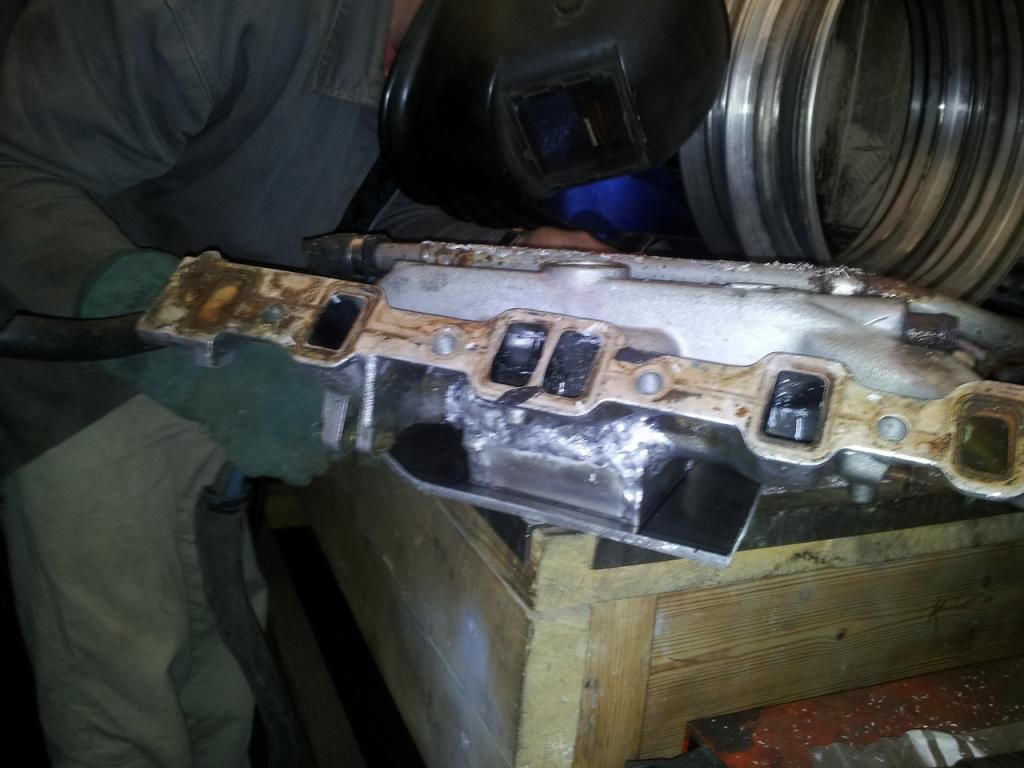
Meanwhile Alex takes way to long to cut strips of aluminium which Pete welds onto the manifold. Plenty of weld so we can smooth it out later:
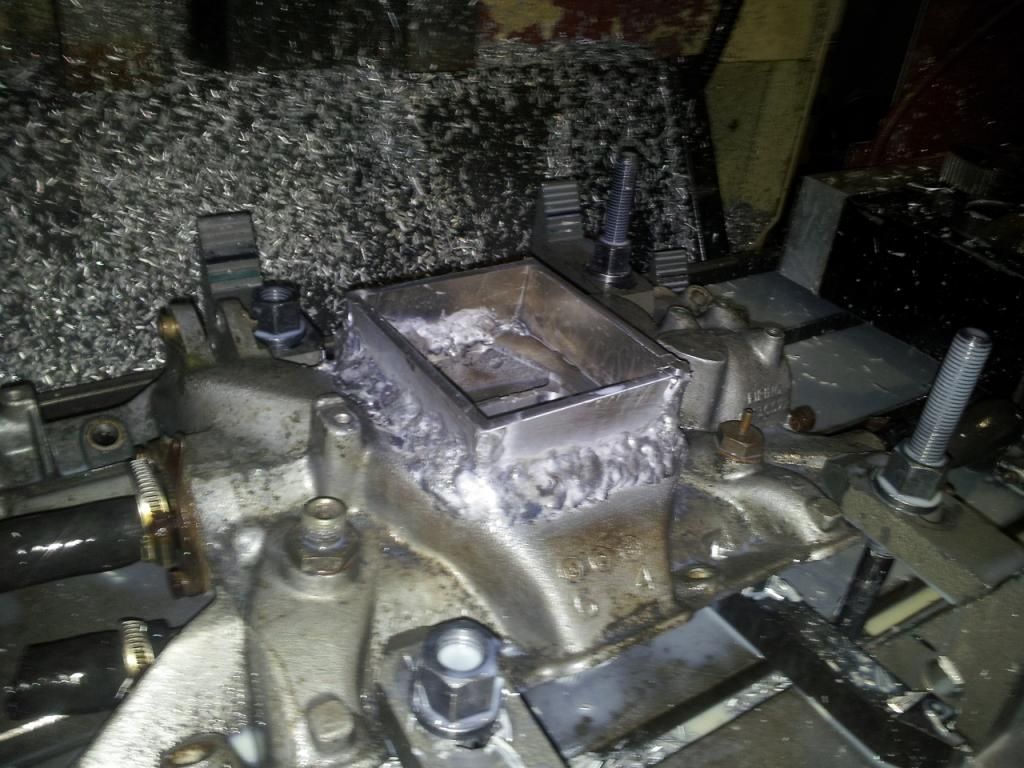
Welded up, ready for the top of these uprights to be milled to the correct length:
I cut a plate ready for Peter to weld it on and get to work on the mill again:
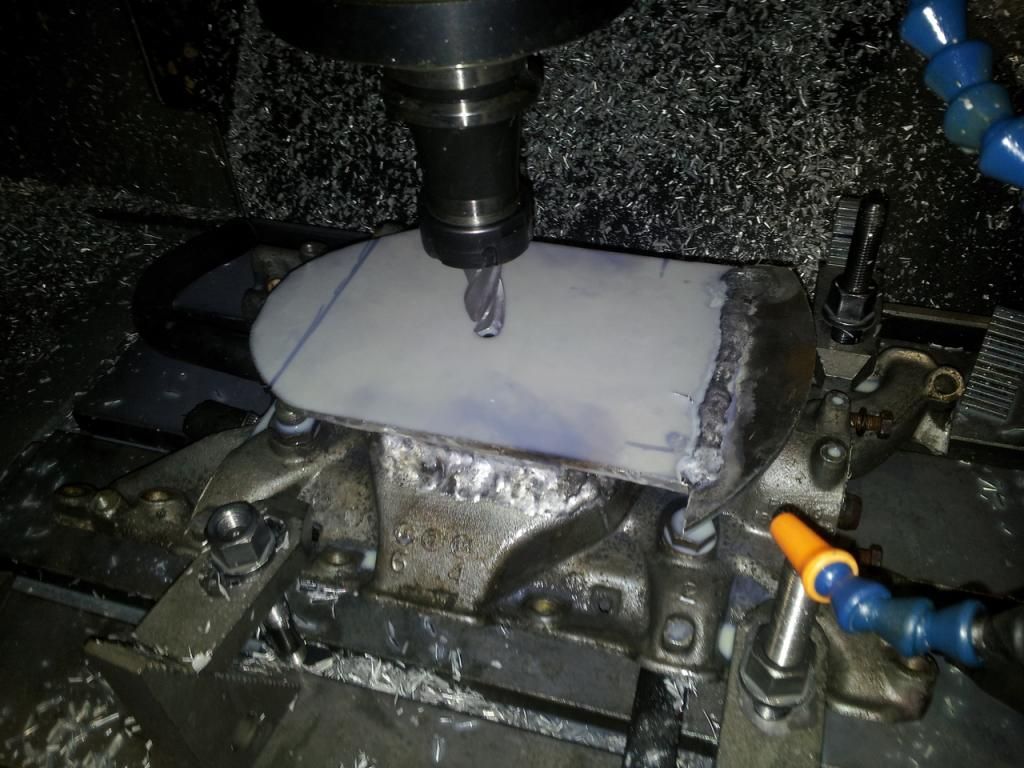
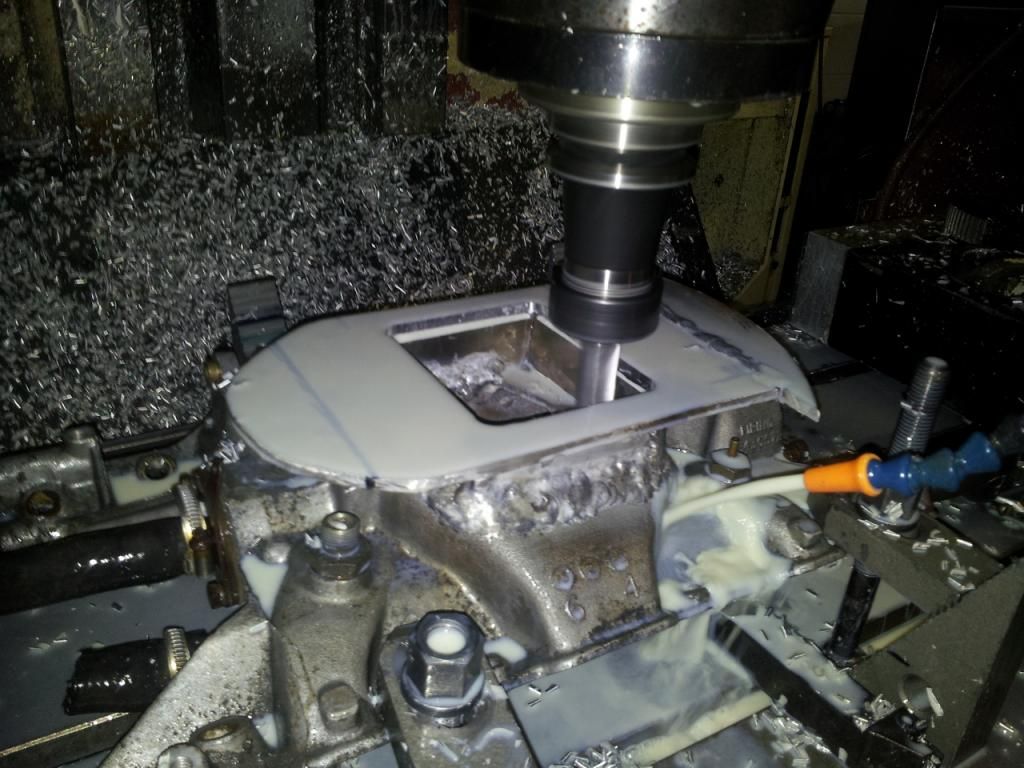
Next trial fit:
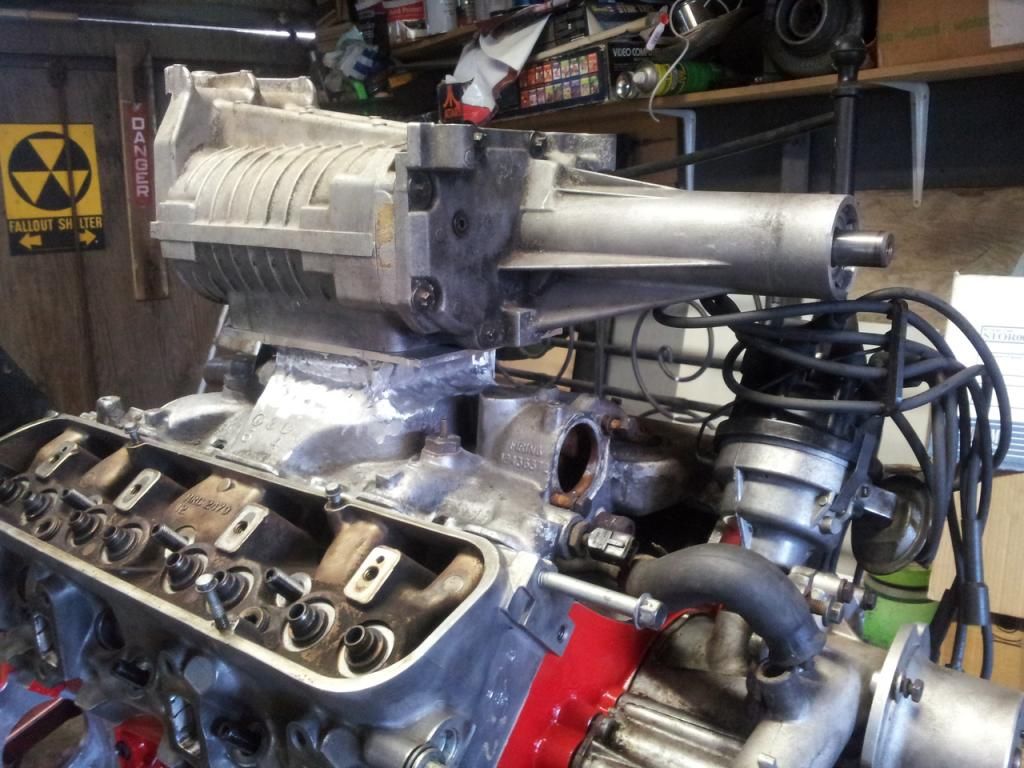
ast thing on Sunday polished up the rocker covers a bit. They are not perfect but they are certainly less manky. Trial fitted and zip tied the 2X 2" SU carbs to the back of the charger to get an idea of what it will look like. Crude measurements show that it it may well fit into the engine bay with no modification to the bonnet:
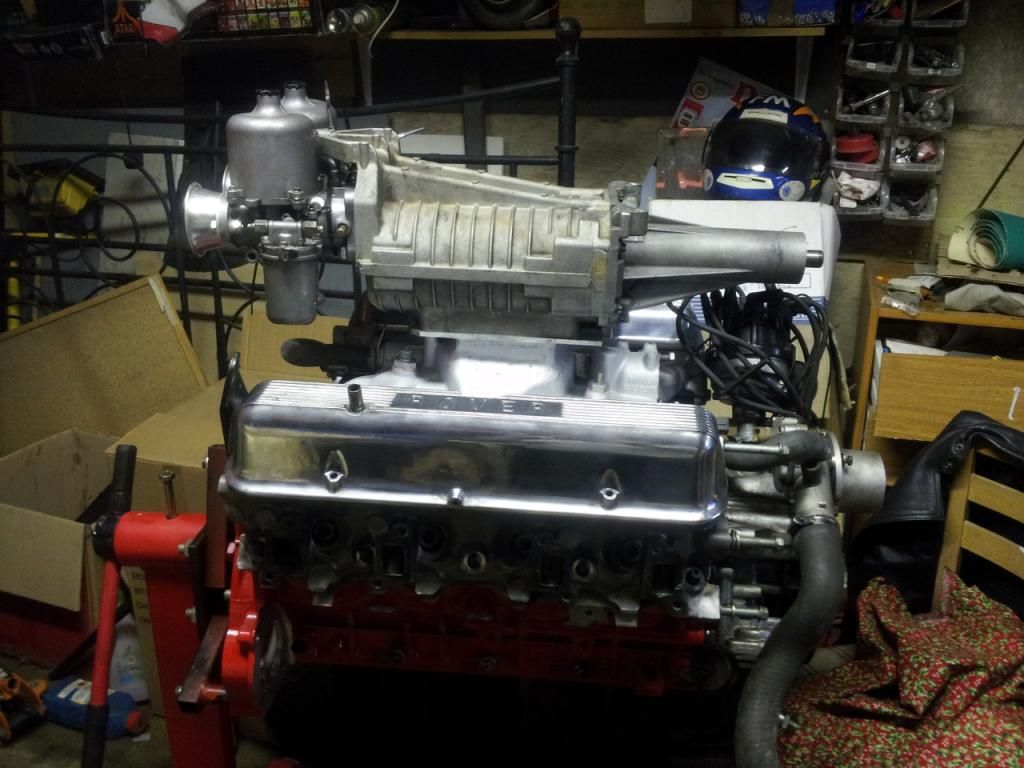
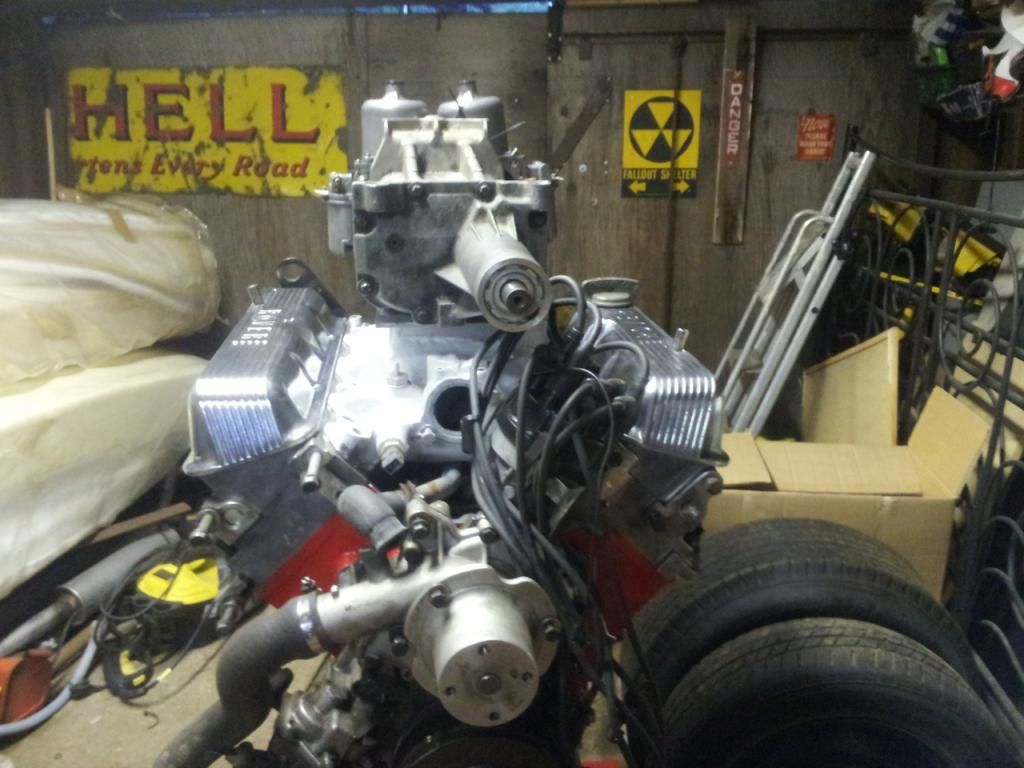
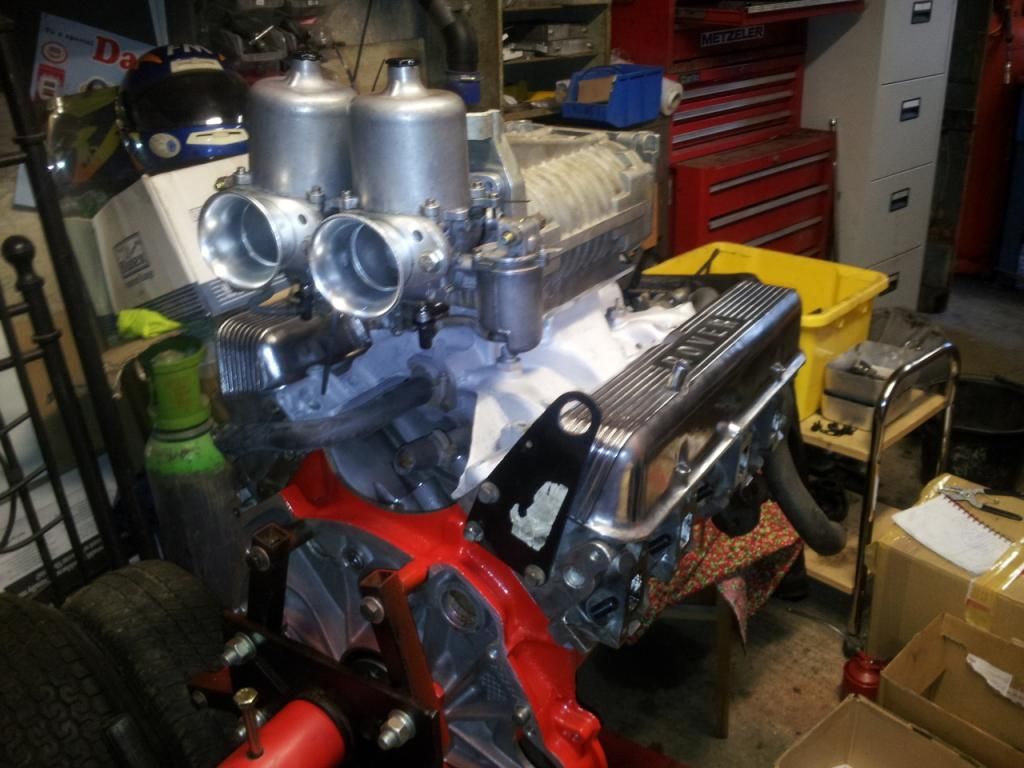
We are both very happy with the progress Next up will be making carbs to charger manifold and the rest of the engine (head, mainly) work and then assembly time
It was very early one Saturday morning just passed that Peter, a friend, and I were discussing the fact that there is an upcoming local club meet at Santapod the next weekend for the RYWB and neither of us currently have a car we can take as they were all off the road. This we both decided was unacceptable. After not much pondering we came to the conclusion that the Rover P6 would be a perfect drag/race/drift car and that we needed to get a 4.6 V8 by the end of the weekend.
So this is the beast. A Rover P6 3.5 V8 which has not been on the road since the 1980s. The body repairs were done before it was taken off the road. Peters friend kindly donated the car - so it seemed the right thing to make something out of it.


We were determined to find an engine that very weekend. After many phone calls we found one fairly close by (well..a four hour round trip) at a reasonable price - we wanted one with fairly low miles that had not been on LPG and of course ithad to be the big 4.6 V8 nothing else was considered. Late 90s Range Rovers are the best source for these. The trip in itself was eventful - having a blowout on the trailer and no spare but thankfully Farmer Boy Tom came to the rescue with a spare. Not wanting to waste time started stripping the engine while on the trailer. Pete headed off on a mission to get food. I had some odd looks from people - not surprising considering I was stripping an engine, half on the kerb, half on the road in quite a nice village with in a trailer with no car hooked to it.
Our target was to have the car ready to race in 5 days so with no time to slack, we were working in the evenings and I took time off work to attempt our goal. Not wanting to keep the EFI from the 4.6 that had to be swapped over for the carb setup from the 3.5. As did the front case, pulleys, water pump and so on. Thankfully this is a straightforward swap (the 4.6 being based on the 3.5 despite many years between them)
The 4.6 with all the modern gubbins on it:

And there we have it - the 4.6 with the manifold and carbs from the 3.5. These are 1.75" carbs which will strangle the engine top end, but they will do for now:

Then the front of the engine had to be swapped over. Not complicated really. Our only setback was that the timing gear and chain from the old engine was seriously worn out and we could not use the one from the old engine due to the design (apparently the gear from the Range Rover P38 was the only one different to every other Rover V8). So we ordered a fancy strong one and it arrived next day


Another issue is that the front pulley from the P6 was broken and again cannot use the new one. So Pete had to do some fabricating with the broken one and scrap yard finds:

New engine sat on the mounts
 Bolted straight up to the mounts and bellhousing (had to change the flywheel of course as the engine came out of an auto):
Because race car, interior had to come out. There's a good 60KG there.


Alternator bracket welded back together:

Holley fuel pump and race cell installed with new lines etc:

And it runs - see link to video below:
www.facebook.com/photo.php?v=10154081912810145&set=vb.698935144
So after a little fettling on the morning of the RWYB day the engine was running very sweet. The first every road test was in order. With a quick whiz around the field we were happy and a little surprised that the brakes worked and it went forwards and backwards. Loaded onto the trailer and off we go Alex left, Peter right:

Upon arrival and a drive around the car park it was evident that the clutch was dead and we had no chance of getting any power down. But we had came this far - to give up now would not be sporting. So Pete took it up the strip gently easing the throttle into what you could only call a gradual increase in speed rather than acceleration. Managed to get to 30MPH. But we can honestly say that we took a car destined for scrap to one with a beefy engine and a run on the drag strip in less than 5 days. Very happy with that.


We thought we might be able to make a modification to the clutch with a big 'ol screwdriver so we took the box out in the car park at Santapod. Nope, as expected clutch is dead and not a lot we can do. At least that is one job out of the way now the box is out.
Shortly after coming back from Santapod we bought this:

It's an Eaton M112 Supercharger, originally from a Jag XKR 4.2 - in that car it produces 420BHP. Now of course our engine is much older and less efficient, it gives some idea that this is something decent. We were going to go down the route of 2" SU carbs and twin turbo. Problem is that the engine bay was pre-determined by the weird suspension setup so there is not a lot of room in there - we could make it work but none of the options we particularly liked. Supercharger = like

Details of the supercharger here: www.eaton.com/Eaton/ProductsServices/Automotive/AutomotiveAftermarket/Superchargers/PCT_221797
We have also purchased the 2" SU carbs and looking into modifying the standard inlet manifold to take the supercharger.
After much searching about in the back rooms of the local auto factors found some suitable silencers. Made up some mounting points. Sorted! Just needs some tailpipe trims to finish:


about two weeks into the build did a little more work for the autotest event we were entering that Sunday. Added cords for fire extinguisher and battery isolator:


Made some aluminium door cards. We wanted to keep the wood for a bit of character but cut down on weight a tad:


Sunday saw the Rover going to the autotest day with PMC at Rockingham. It was a first for me. I was fairly useless with getting the route correct but thankfully Peter was pretty good at pointing me in the right direction

I am sure Peter will agree with me on this one saying it was a massive amount of fun and was a good way to test out the Rover. It found us a few leaks which we will fix in due course. Also found out that the oil pressure is zero on idle once the oil gets warm which is not great - uprated oil pump gears will solve that and need to sort the radiator. Nothing fell off or snapped which was a bonus. The amount of body roll is quite alarming (not that we held back) but that will be addressed shortly. We were told by bystanders that the tyres were flexing so much the metal of the rims came very close to scraping the ground

Sorted out the interior. Stripped it out including all the sound deadening - it took a lot of scraping, wire brushing, thinners and farting but we got there:


Door cards fitted and a quick go over with a scotch brite pad to give it a brushed look:

Corbeau bucket seats fitted. I think it's rather nice


Now towards the end of April:
did a taster session at Rockingham on the day that Retro Cars had a bit of a thing on. Was great fun giving it some beans round the track. Clearly we need to do some more work...it...well...as you can see from the pics leans a little! With the recently fitted Avo adjustable shocks turned up to also max that helped things a little. Brakes were pretty rubbish and didn't have much grip. But of course we will work on these things

A few pics from the day:


Still in April and loads of goodies have now arrived including this, an alloy rad from an Evo 1/2/3. It is only an ebay special but it will do a damn better job than a radiator with 3 rows missing, soldered up, and using bits of wood zip tied to the bottom in an attempt to stop it expanding


e have been pondering suspension setups. We were going to do down the ARB route to stiffen things up but after Peter having a quick chat with Lozz it's evident that ARB should be the last resort as a bit of extra tweaking rather than a solution to body roll. Much better to get decent springs and then go from there. Soon we will figure out the length, poundage and so on and probably get a set made up.
Progress has been good. As mentioned before we had oil pressure issues. We are running a 4.6V8 with the front cover etc (including oil pump) from the 3.5V8 we have mated to it - ending up with 0 PSI on idle and not much better running when warm. The front crankshaft oil seal was also leaking so that got replaced. To up the pressure to "normal" we got an uprated gear kit for the oil cooler. You get taller gears, a spacer, gaskets and shims to get the spacing correct. A very nicely made bit of kit:

And a Mocal oil cooler and Mocal sandwich plate to keep the oil temperate down a bit - it's a bit of a tight fit and we might have to take the water radiator out to do an oil change but oh well!

Also re-furbished the carbs. I had the simple task of making them nice and clean, Peter had the harder job of stripping them down, making new parts and re-assembly. Nice trumpets hey - that is what we will see front the drivers seat peaking through the bonnet bulge


Now running at 10PSI on idle and 30PSI running when running and warm - which seems about right for these V8 engines. Got the radiator installed and electric fan mounted but forgot to get a picture of those.
Beginning of May getting the suspension sorted out. It's not all guess work!


Had some inspiration at Donnington from the Rover P6 race car. And that is to convert front and rear to 2.5" springs. This means it's much easier to change the springs to different lengths and poundage, as well as being cheaper than getting springs made to our requirements. Bought an adjustable coil over spring seat kit for the front. Then lobbed off the top of the old seats and mated the two. A spring seat was bolted (1" higher than centre for better spring location) to the bulkhead:


Peter came up with a very good design for making coil overs at the rear. Some old coil overs were butchered for the conversion. Standard 2.5" spring now sit over the Avo coilovers. Much lathing, cutting, grinding and welding later:

Hydraulic handbrake fitted (needs some work until it's effective):

Sits about right I reckon:

11th of May went yesterday at Rockingham. What an improvement! Yes it still rolls as you will see from the picture but no where near as much - you can throw it around now without the worry that it might fall over! With decent rubber, rear brakes that work and poly bushes it will be better still. Had great fun


As clearly shown in the picture above, we have quite a bit of blue smoke. Not ones to hang around as soon as we got back we stripped the engine apart. It'll need a bit of work, put it that way! Engine out and the rebuild starts. Wanted to finish it to a half decent standard so sprayed painted the block:

Pretty hey?:

Gave the engine bay a spruce up too:

Spent a little while sanding down the head with a sheet of glass and paper. Before:

(the other side, but you get the idea) After. Good what you can do with a sheet of glass from an old picture. Decent surface I'd say:

Peter has been doing a fair bit of head work. I had the easy task with the glass and paper again!:

Brief mockup of the supercharger:

New wheels arrived from America and got some Dunlop race tyres (which later found out are not much good so we need a re-think) so I had to rush over and see the trial fit. Needless to say, a little work is required on the rear end so we had a go at rolling the arches and bashing bits with the big hammer. Some success. But this will not be so easy on the fibre glass wings we will fit. Hmm, rubs more than a little:

Brute force time!:

(car sits high at the front as no engine in there) I think the front wings will only require a little trimming:


Sent various bits off to get balanced (after we balanced them in the shed and they were all spot on). Slight modification to improve oil flow:

Meanwhile I carried on with the valves and head. Course and then fine paste was used on exhaust valves, fine only required for inlet. Crude using the drill to spin the valves but it does the job

Cleaned up various parts and painted - it would be rude not to compliment the shiny block.


Meanwhile, Peter installed the crankshaft:

Now mid August, wairing for the Crowler camshaft and other top end bits to arrive Me and Pete spent a good part of the weekend on the Rover. Main target was to get the charger mounted on the adapted inlet manifold. So you take a stock Rover V8 manifold and leave it to Peter to enlarge somewhat on the mill:

Meanwhile Alex takes way to long to cut strips of aluminium which Pete welds onto the manifold. Plenty of weld so we can smooth it out later:

Welded up, ready for the top of these uprights to be milled to the correct length:

I cut a plate ready for Peter to weld it on and get to work on the mill again:


Next trial fit:

ast thing on Sunday polished up the rocker covers a bit. They are not perfect but they are certainly less manky. Trial fitted and zip tied the 2X 2" SU carbs to the back of the charger to get an idea of what it will look like. Crude measurements show that it it may well fit into the engine bay with no modification to the bonnet:


We are both very happy with the progress
 Next up will be making carbs to charger manifold and the rest of the engine (head, mainly) work and then assembly time


 )
)
