|
|
|
|
|
I'm afraid all this lockdown malarkey has put the kybosh on much progress. I'll put together an update soon with what bits I have been able to do though. With the intercooler as it is I'd just be slightly wary of making sure your radiator is really high efficiency and as large as you can fit if you tune the OM606 at all as they do run hot. Not ideal but I'm looking at running a top mount scooped through the bonnet or a low mount angled one when I take it out of the estate and put it into my truck. Cracking work and idea though, I am following with much interest - you're just a step ahead of me here so I'm sure I'll be referencing back to this, Max & Sowens threads quite often! Thanks! I'm a bit wary of potential cooling issues... the standard Patrol radiator is a hulking great thing so I'm hoping that it'll cope having the intercooler ahead of it. The engine is staying in standard tune until I've ironed all the bugs out, so I'm hoping temps will stay manageable. |
| |
|
|
|
|
|
|
|
Apr 10, 2020 20:55:38 GMT
|
As mentioned, this pandemic has thrown a spanner in the works of this project and pretty much everything else! However I'm still able to make bits of progress, so I thought I'd put together a little update. The holes in the bulkhead needed enlarging to get the boost pipes through from the intercooler. After failing with a recip saw (foot too big) and unable to get in with a grinder, I used a 54mm hole punch to chomp out the metal until the holes were the right size. 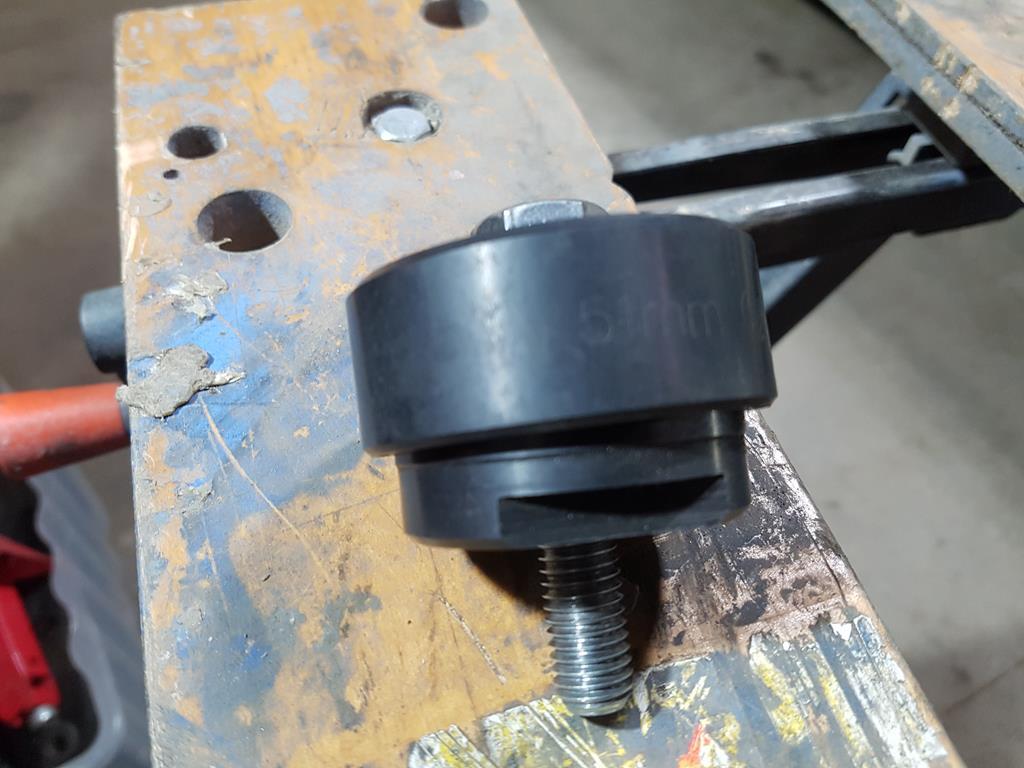 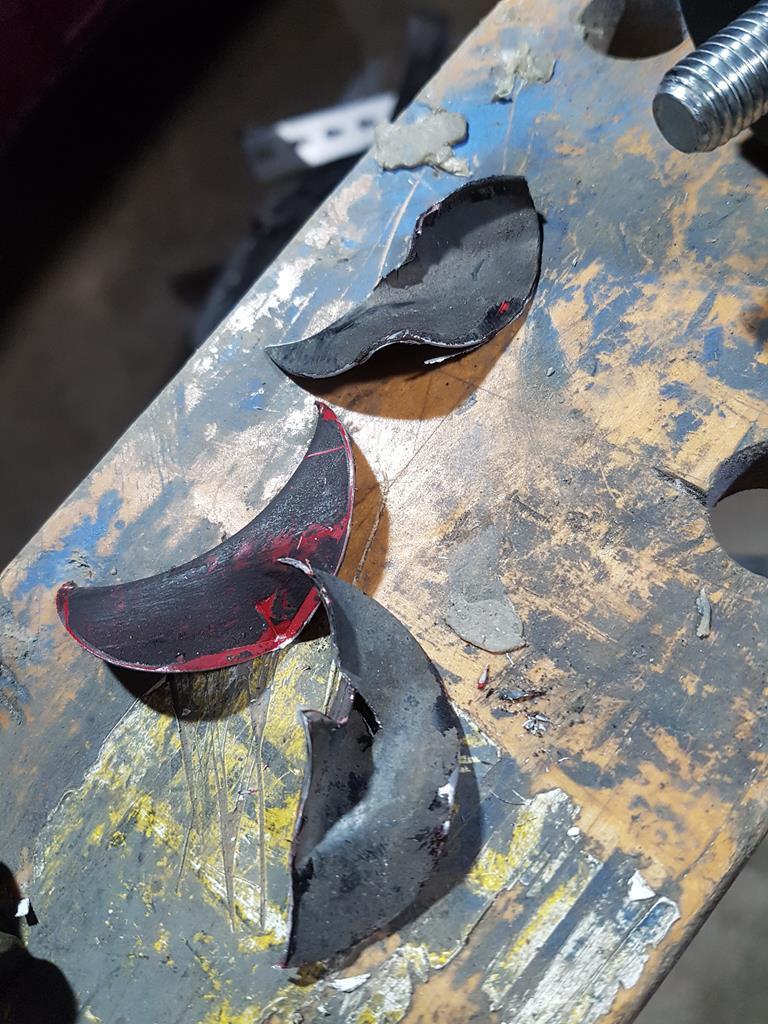 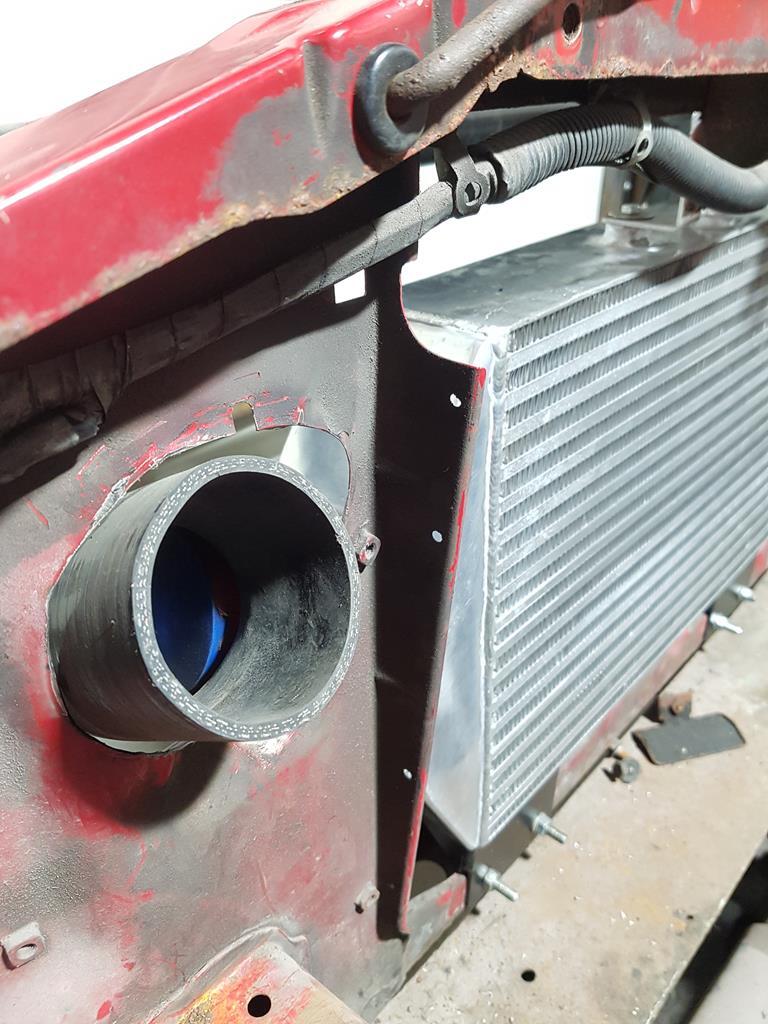 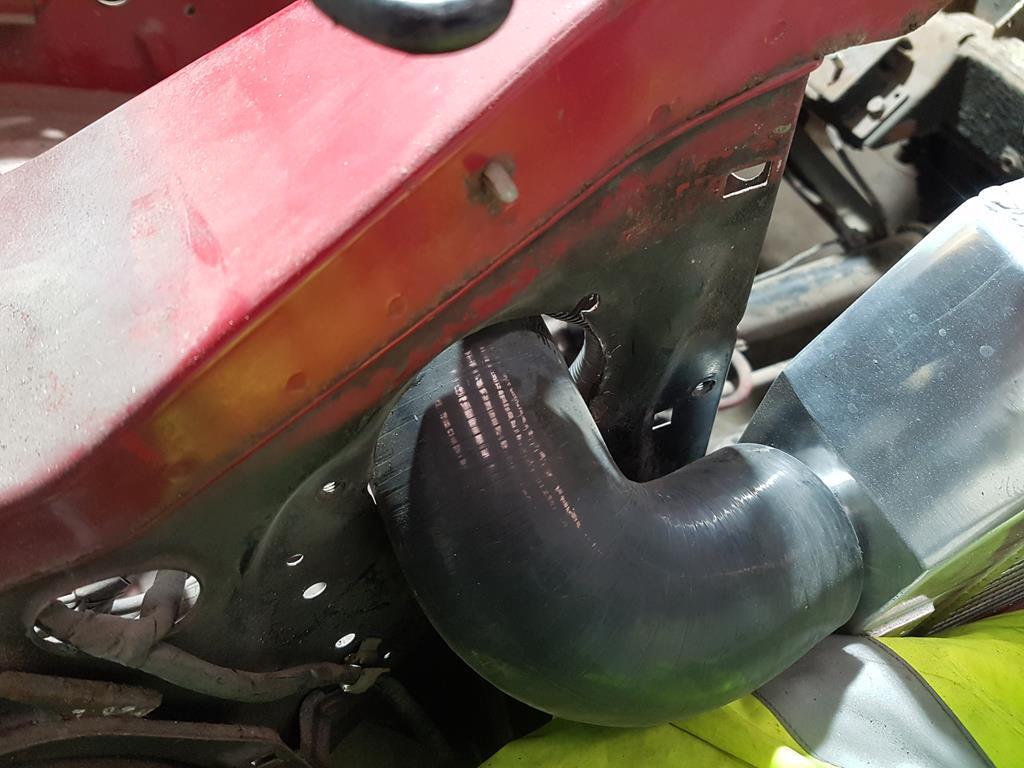 I then took a file to the edge to neaten it all up, painted the metal with a bit of primer and satin black, and put some edge trim around the holes... 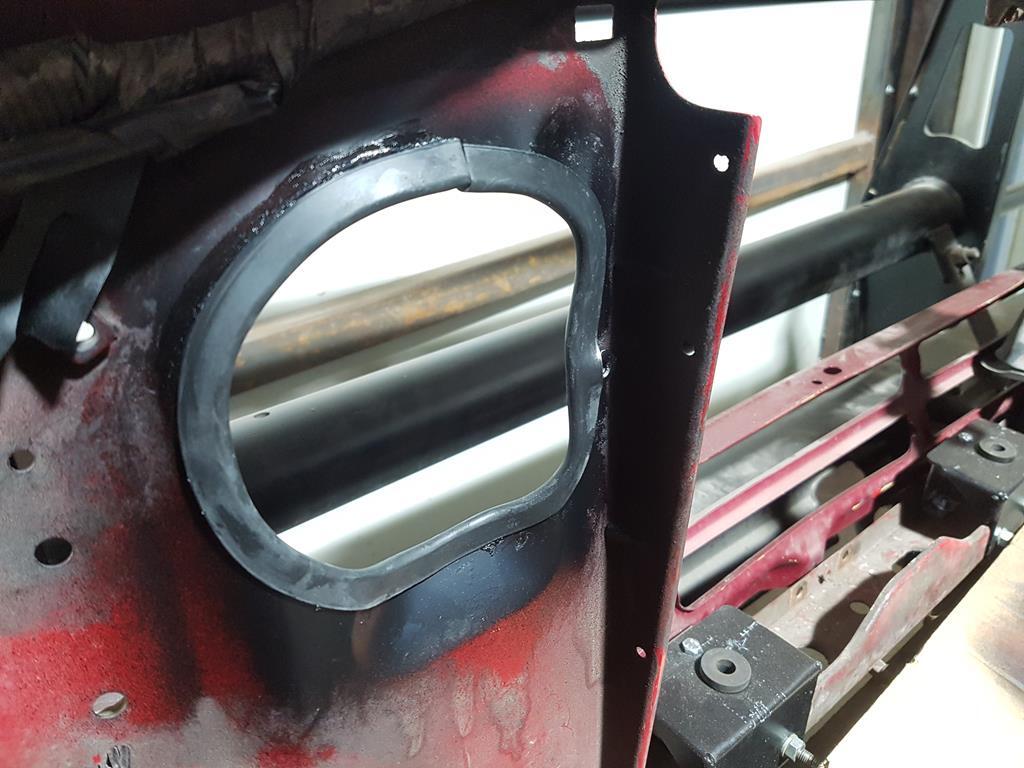 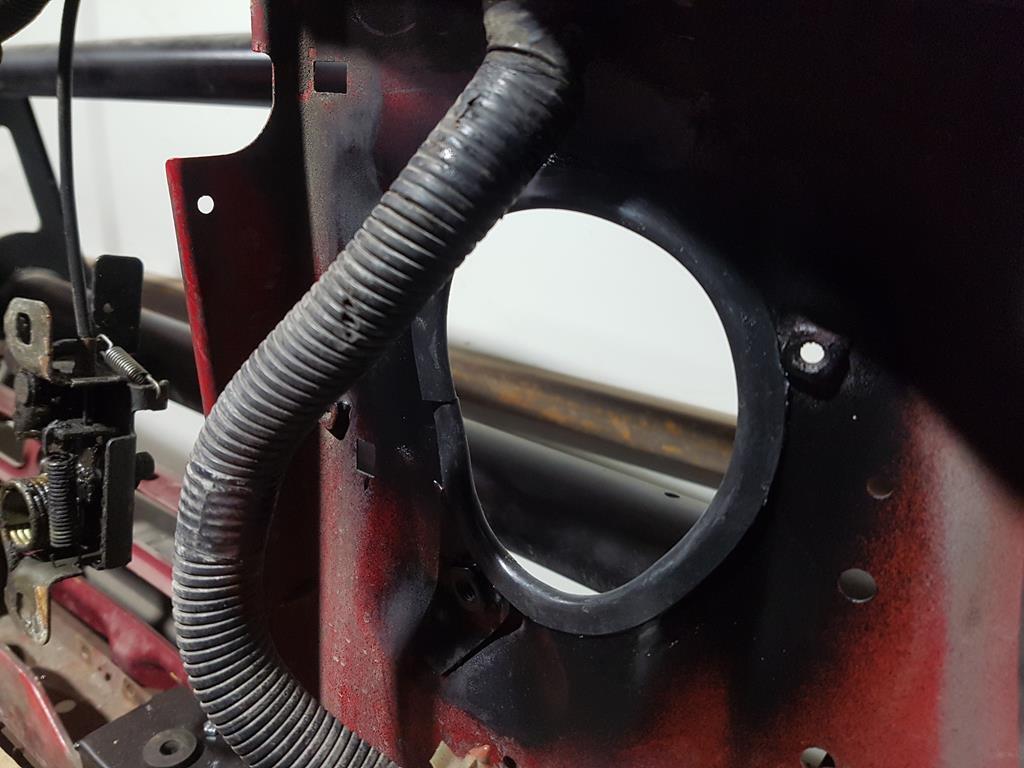 Job done. I shall re-mount the intercooler soon and start planning where the pipes need to go inside the engine bay, although I'm limited until I get the engine in the hole. That rather major piece of the puzzle is still up in the air. My plan to gather the parts to make it a reality have been hit by the pandemic, but I got a bit of news yesterday and the parts may finally be on the way. Sorry for being a bit cryptic but I'll put a post together when it's all here and I see whether it works or not (!) Meanwhile, I picked up a snorkel for beer money (OK, a snorkel head and some pipe...) so thought I'd have a play and see if I could make it fit. 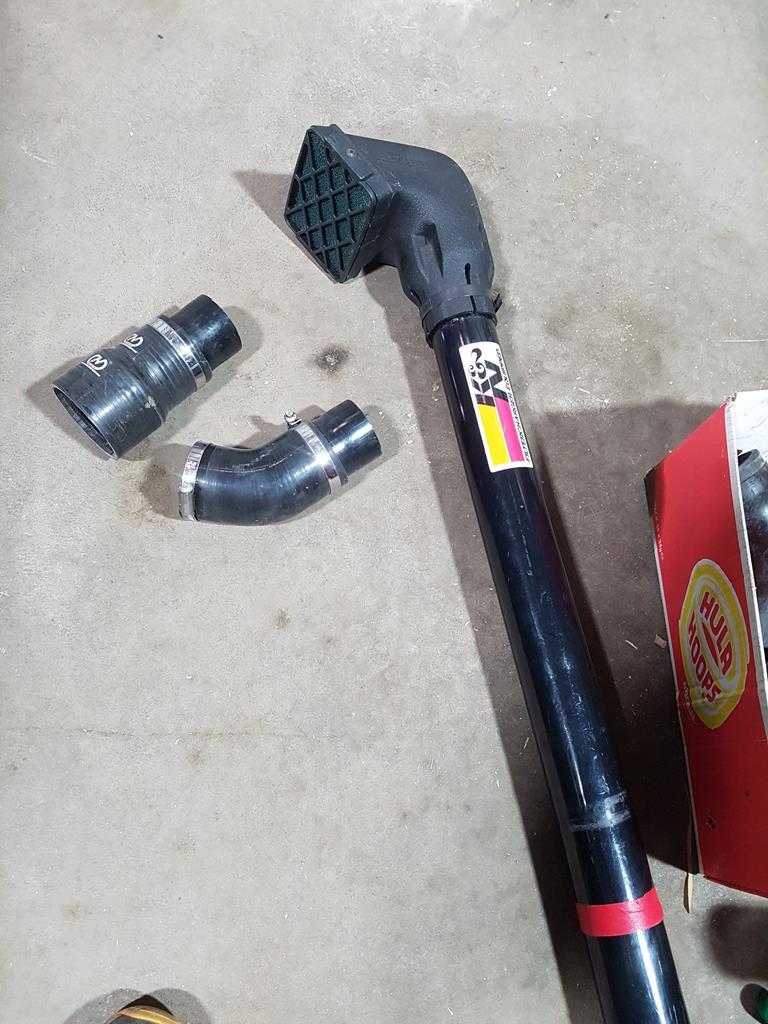 Chopped it about a bit... 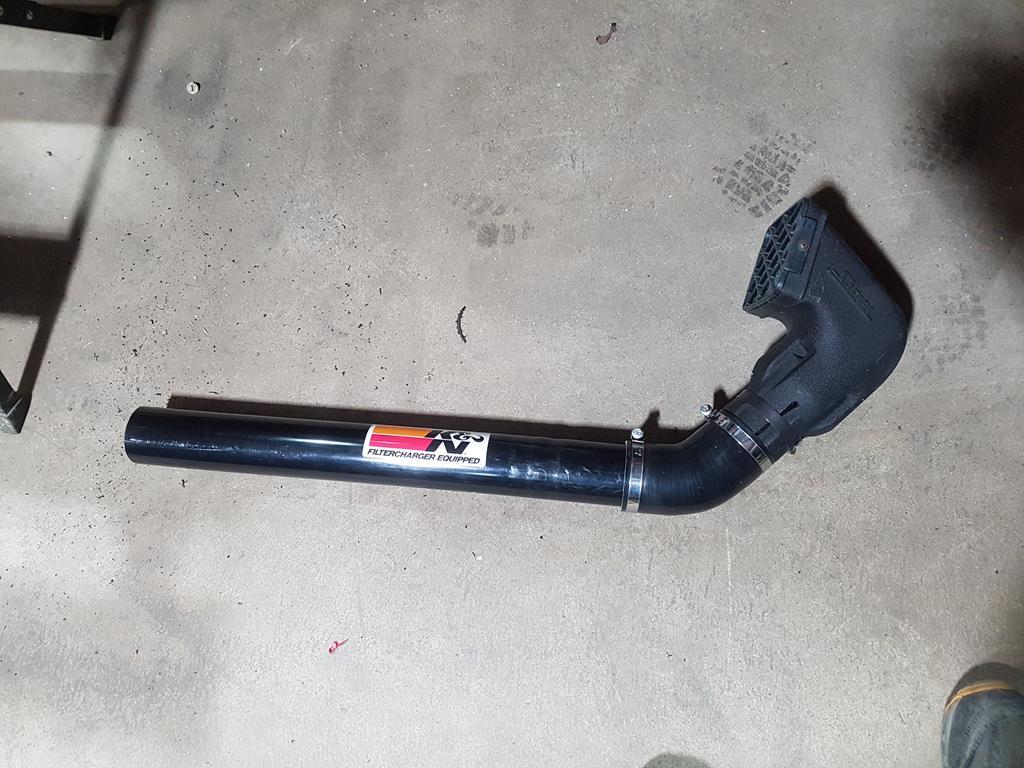 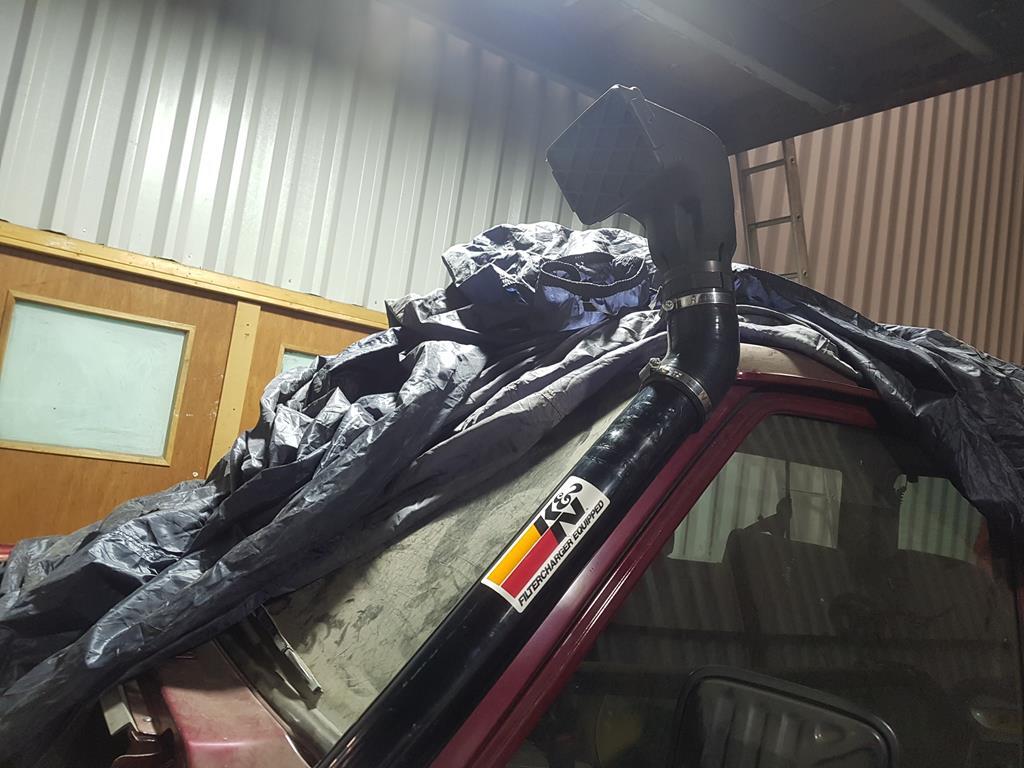 I'm just holding it against the A-Pillar in the last pic. It needs to come down a bit, but you get the idea. I may yet pick up a proper snorkel kit as the bit down the wing looks difficult to achieve neatly with straight pipe and if I'm going to chop a big hole in my wing I might aswell do it properly! More little updates will be coming soon! |
| |
|
|
|
|
|
Apr 26, 2020 18:57:22 GMT
|
Time for a bit of an update. Unfortunately it's not the engine-related update I'd like to give as I'm still waiting for parts, but I decided go all in on a proper snorkel having offered up the one I had in my lock-up the other week. I ordered a specific snorkel for my Patrol from a seller in Poland (it arrived very quickly, considering the situation). 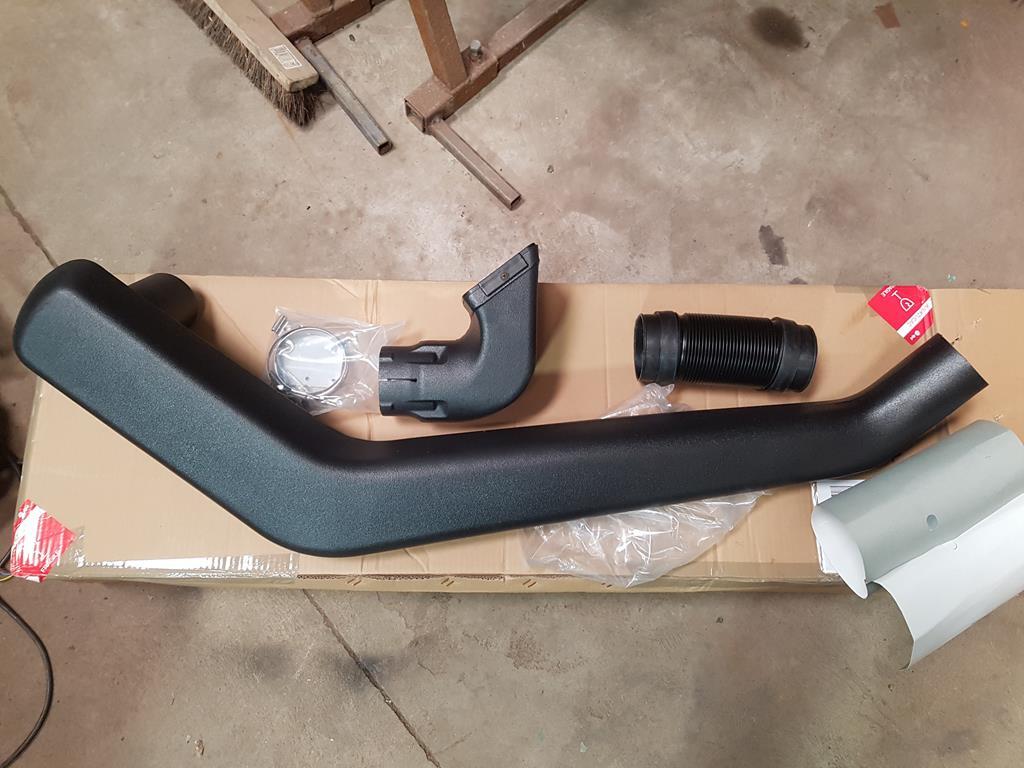 Fitting it involves cutting a great big hole in my wing, so I took a deep breath and after marking it out carefully with the template provided, set about it with the hole saw. Gulp! 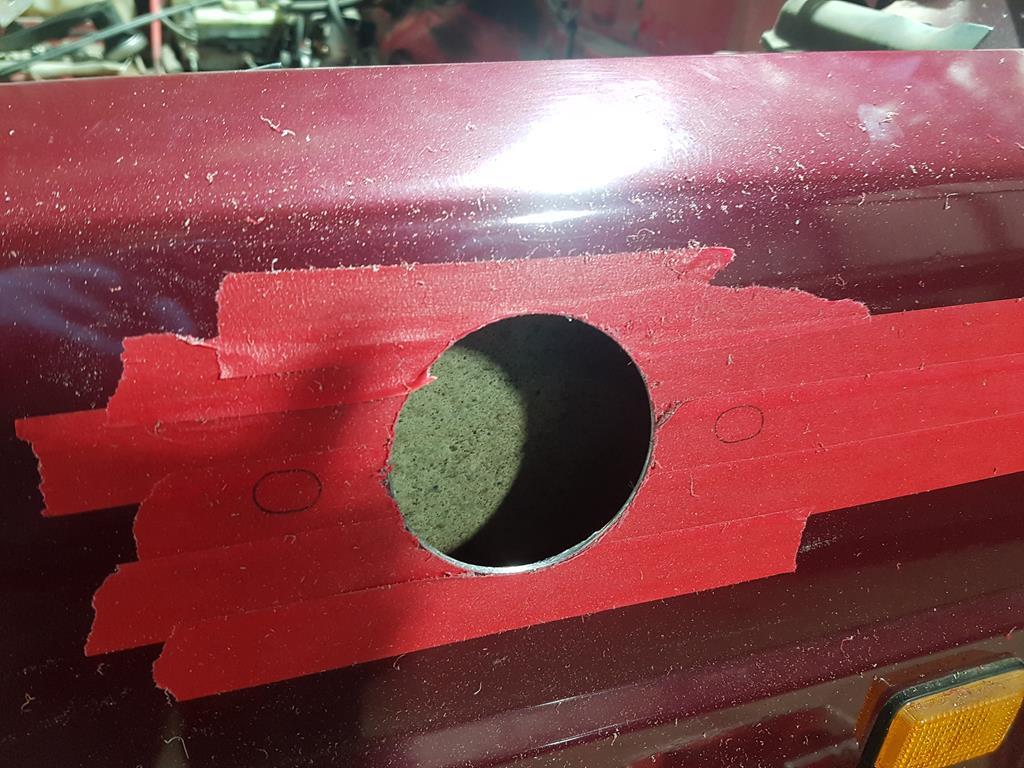 No going back now! One little surprise was an extra inner wing... an inner inner wing if you will. So the hole saw was put through that too! 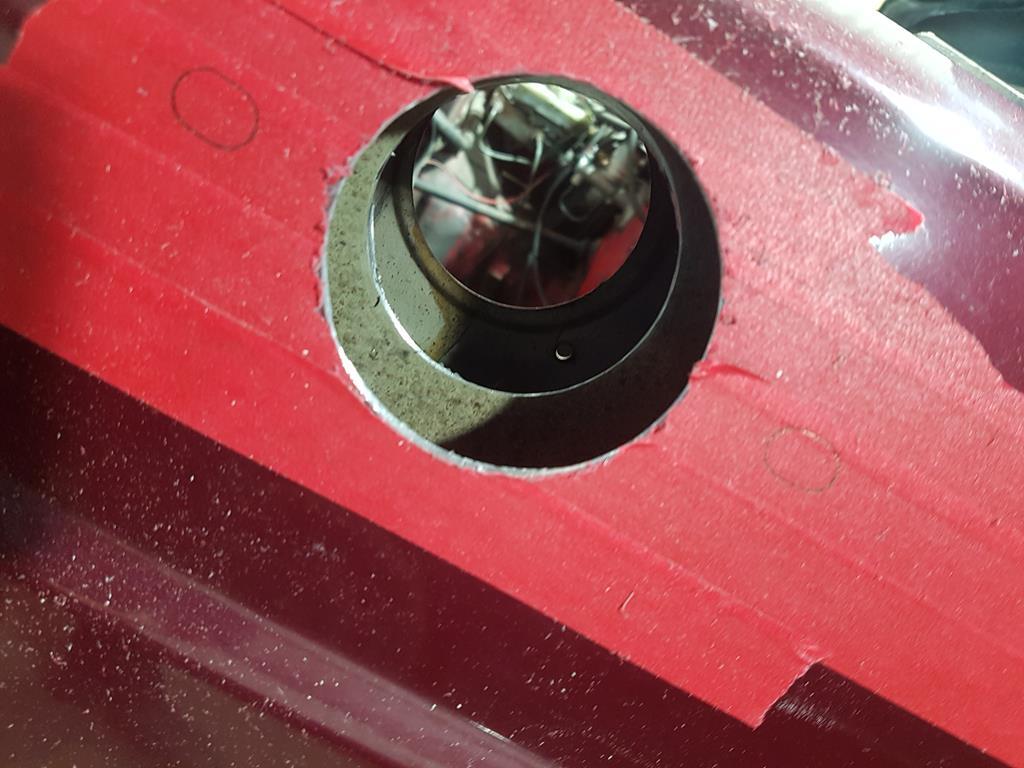 The actual inner wing already had a hole for the snorkel from factory, but this was too small. I enlarged the holes with a die grinder until the snorkel fit through them all comfortably. The metalwork was given some fresh paint, and I took the opportunity to spray in some cavity wax before bolting up the snorkel... 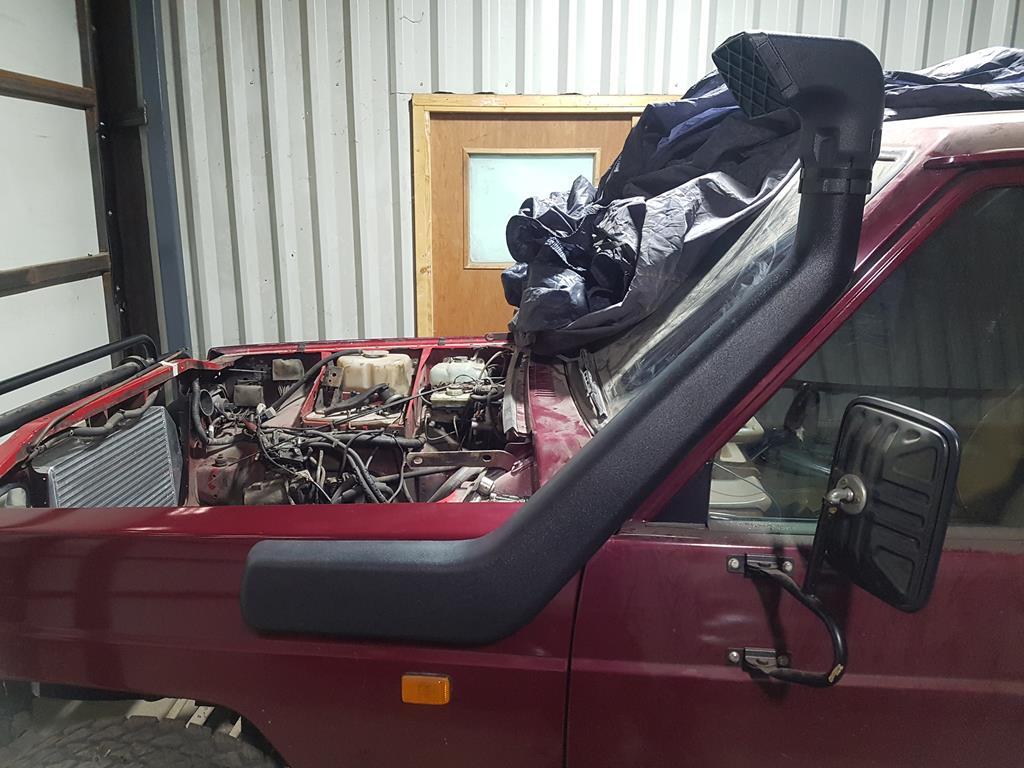 Looks the business! I've been thinking about what air box to use, and after a bit of research decided on a Land Rover Defender item. They're available new, and used ones seem to be not much cheaper so I ordered new. This means I can mount the air box somewhere on the nearside inner wing, plumb the snorkel into the side and then run a pipe across to the turbo. 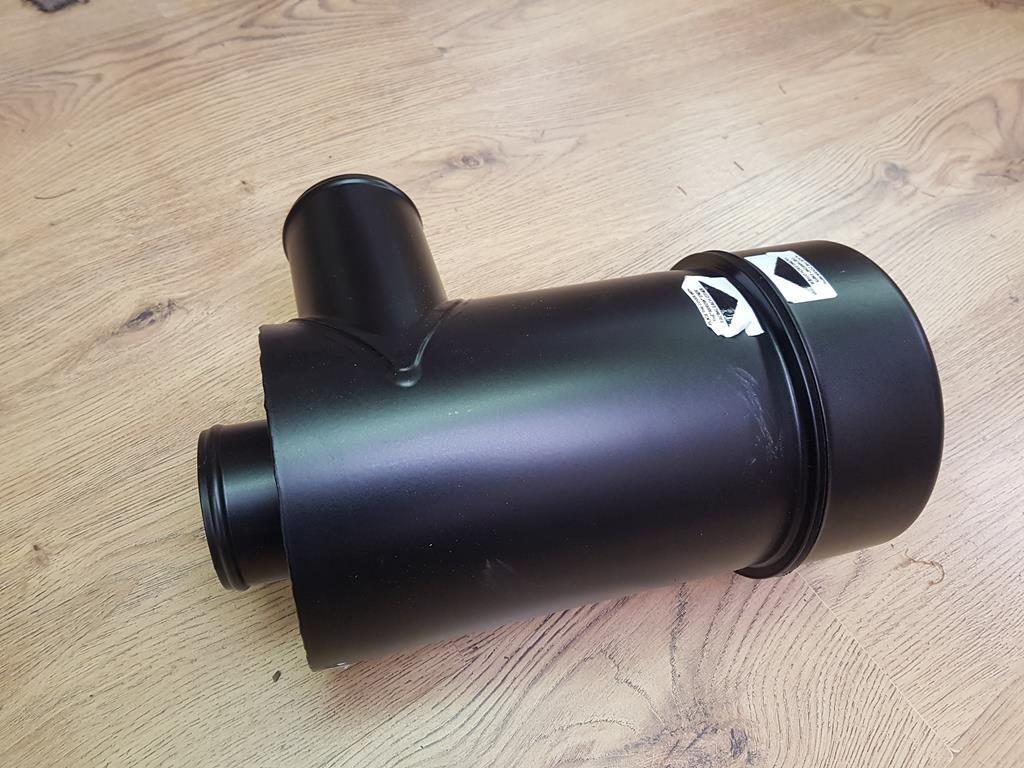 So there we have it. I'll wait until the engine is in before mounting the air box as I want to make sure it's not going to be in the way. Hopefully the next update should have some news about the engine conversion! |
| |
|
|
|
|
|
May 10, 2020 18:34:23 GMT
|
A bit more progress, and I had a very long-awaited delivery from Portugal! A while back, I mentioned that I was looking for a way to keep the Nissan gearbox rather than swapping in a Land Rover box. The obstacle stopping me making an adaptor plate for my Patrol gearbox was that I couldn't find an L-series bolt pattern drawing anywhere, and I wasn't confident about getting accurate measurements from the transmission itself without sending it off to be put on a CMM bed. The bellhousings are removable, and Nissan used different bellhousings for their other engines in the Patrol. I'd seen photos on the internet of the SD33 diesel bellhousing and it looked to be a simple circular bolt pattern, and some people on the internet said it was an SAE 4 pattern. If I used one of those, then I could CAD up an adapter with two known bolt patterns accurately centred! I trawled ebay, Facebook and asked breakers to no avail. However they are really popular in Spain and Portugal, and my mate's inlaws are Portuguese. I found an SD33 gearbox in Portugal, and through my mate, his Portuguese wife, her brother in Portugal and the seller, a sale was agreed for the bargain price of 100 Euros! I figured for that price I could pay to ship a pallet over here and it still wouldn't be that pricey, and I'd have a spare gearbox. I sent over 100 Euros to a random email address, and waited. A long LONG time passed. One thing I've learned from living in Portugal once upon a time, is that things happen at their own pace over there. Eventually I got word that the transaction had occurred! I asked for photos... another few weeks passed... and I got one. Of the bellhousing. No gearbox. OK, not to worry, it's the bit I need and it will be cheaper to ship. Then Coronavirus happened and Portugal went into lockdown, soon followed by us. After another week or two, the bellhousing was shipped and eventually it arrived! I eagerly unwrapped it, keen to know if my gamble had paid off. Well, I can state that the internet is WRONG (collective gasp!) and the gearbox isn't an SAE pattern. It is, however, a concentric circular bolt pattern which means I can still use it. It's also very short! 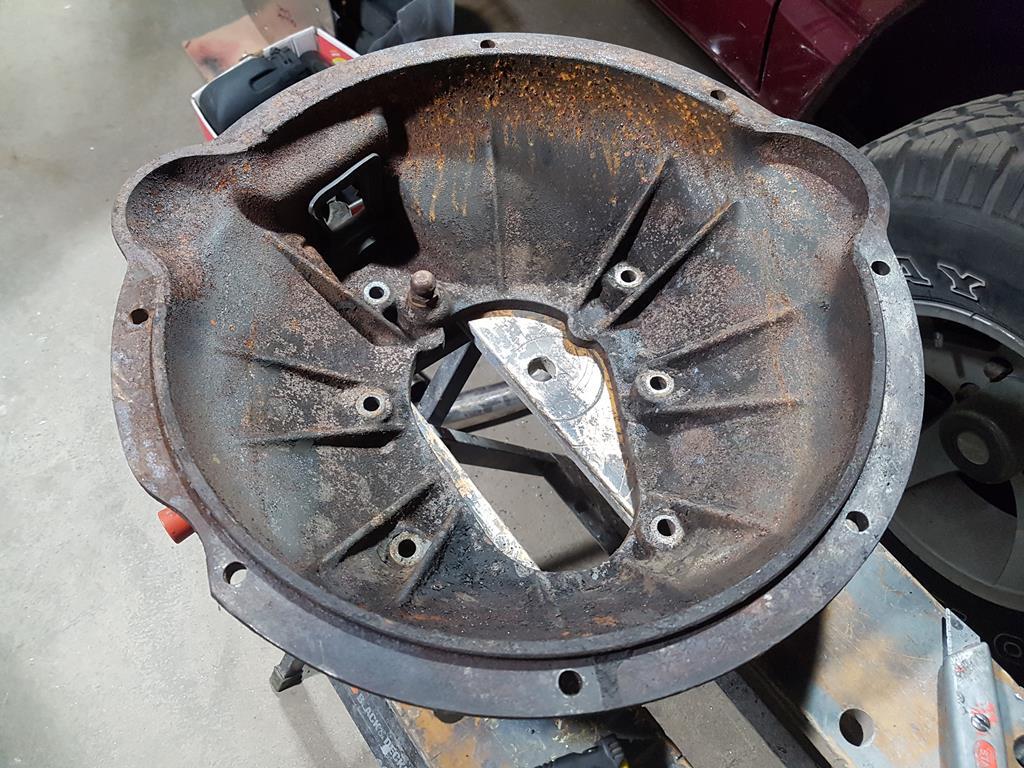 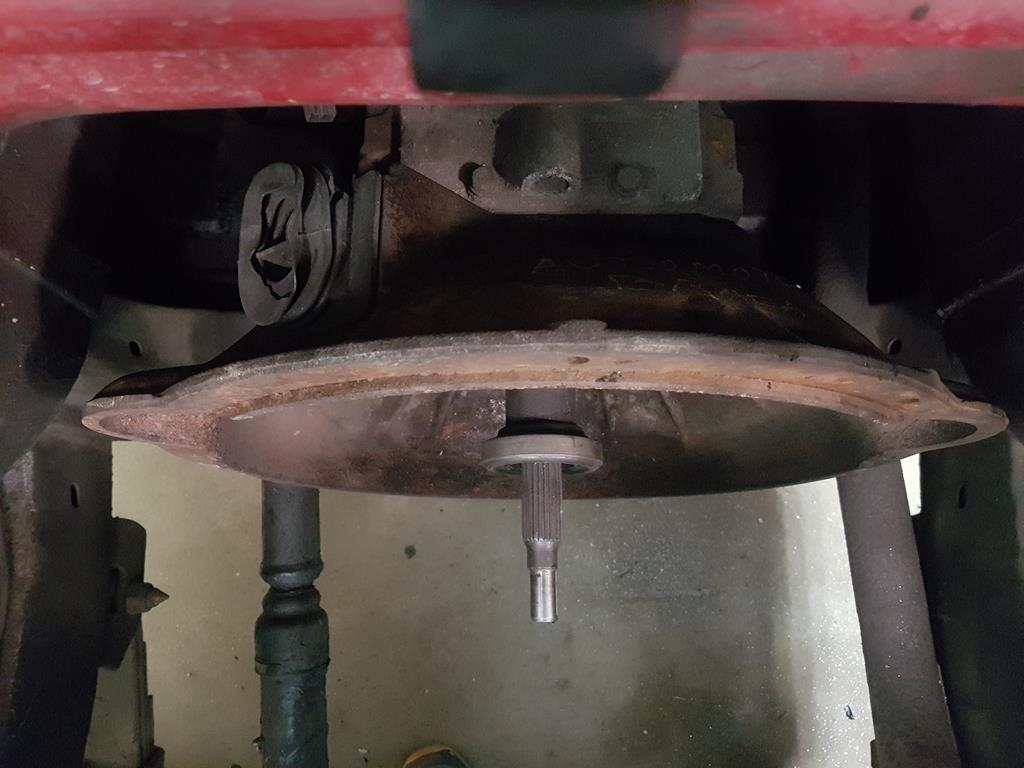 Luckily the internet was right about it bolting up to my transmission! I think the confusion about the bolt pattern comes from the various flywheel housings that the SD33 uses in various industrial applications. A lot of these are SAE, depending on application. It's also the reason why the bellhousing is so short, as it bolts up to a flywheel housing normally. So then, I need a very thick adaptor plate. I took some measurements of the input shaft, clutch assembly and spigot recess and drew something up on CAD. Luckily it seems that there aren't any problems with holes overlapping. That's a big old chunk of metal though! 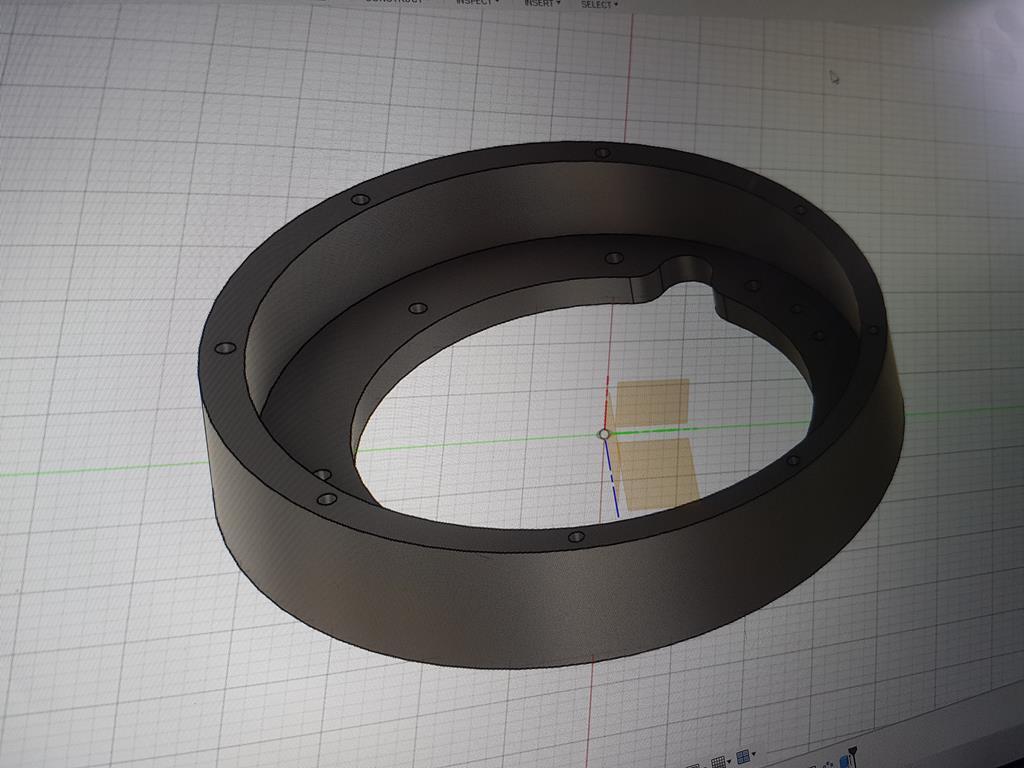 I'll speak to some engineers about the best way to go about making it... While I was figuring all this out, I decided to measure up the Land Rover transmission in case that was still the way I decided to go. It turns out that the engine would sit 20cm further forward using the V8 bellhousing and Suffix-J 'box in the same position as the Patrol 'box, and moving it back so the engine was in a more sensible position would create a lot of work at the back of the transmission as there wasn't really room for the bigger Landy box. So, that settled it really. Massive adaptor it is! I'll just add that I'm considering making a spacer for the back of the bellhousing to bring it towards the engine so that I don't need such a thick adapter, but that will create a problem with the clutch fork geometry - could be easily solved, but could be a headache if I install it and it's not right. |
| |
Last Edit: May 10, 2020 20:21:51 GMT by BenzBoy
|
|
|
|
|
May 10, 2020 19:47:25 GMT
|
|
\o/
Got to love a Patrol. Good luck with your conversion.
|
| |
|
|
|
|
|
|
|
|
Good job, I'd go with what you are up to and just the forward adapter, keep things as simple as possible.
|
| |
1987 Supercharged BMW R1150 Citroen 2cv Hillclimb Monster
1995 Renault Master Mk1 Race Transporter
1994 Mazda MX5 Mk1 / NA Road Going Class Hillclimber
1991 UMM Alter II Crew Cab OM606 SuperTurbo Diesel MegaUMM Overlander
1992 UMM Alter II Station Wagon
1980 UMM Cournil - survivor - resto project
1979 Lomax 224
2014 VW T5.1 Transporter Kombi Highline
|
|
|
|
|
|
|
|
How about lasercutting the two flanges from steel and then putting a metal plate between them, like banded steel wheels. (kinda hard to explain in english.. 🤔)
Measuring them out accurately for welding would be some work but you could make a jig for it.
|
| |
|
|
|
|
|
Feb 21, 2021 11:56:10 GMT
|
Sorry for the radio silence on this... I have been chipping away at it, it's just that other things have got in the way. Anyway, time for an update! I was at the point where I had the adaptor plate all drawn up and ready to go. I'd got a quote to have it machined, which was a sizeable chunk of money but then it was a sizeable chunk of work! I was a little hesitant. If I'd got my measurements wrong, it would be a very expensive workshop door stop I was about to buy myself. There would be no scope for adjustment, it would be sh*t or bust. Then after an evening's meandering on the internet, I found myself on a Russian language UAZ forum (that was a really, REALLY convoluted rabbit hole!). I ascertained (thanks to Google translate) that they were having a discussion about adapting a Nissan Patrol transmission to fit the UAZ engine, and someone helpfully provided pictures. So with a bit of adaption to my own set-up, I figured out a method to fit a Mercedes 722.6 auto bellhousing (which bolts to the OM606) onto the Nissan Patrol transmission. And I could do it all with the tools and equipment available to me! Here's how I did it. First of all I needed to order a round disk of aluminium. I did some calculations and worked out the desired length of the bellhousing assembly, which gave me the thickness of the piece of aluminium I needed. A 300mm disk 40mm thick. Quite a chunk! 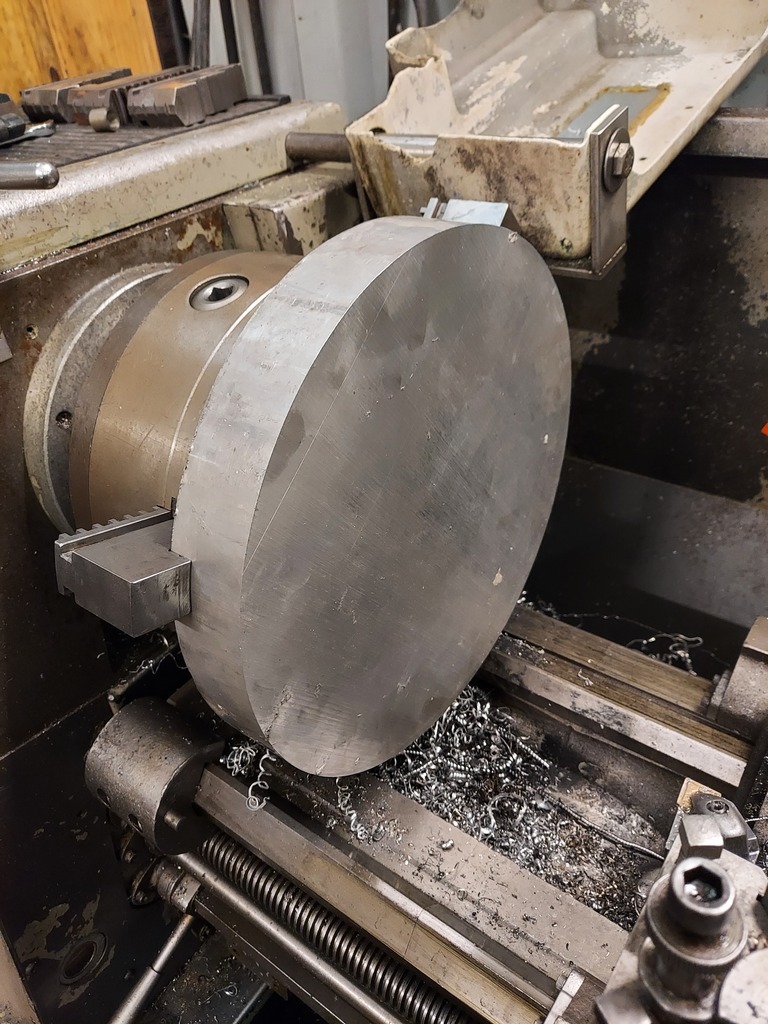 Here I'm facing it up in the lathe. A machine I've wanted to learn how to use for a while, and this was a great opportunity. Luckily I know people with some cool toys who let me play on them! 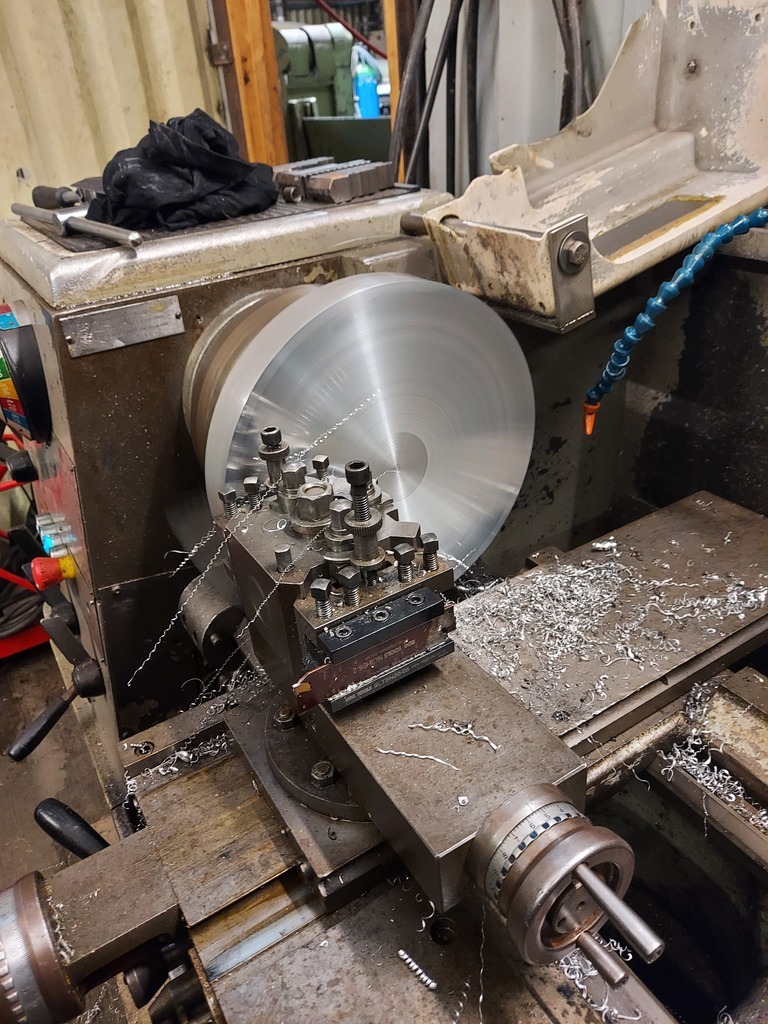 I then put a hole in the centre the exact diameter of the transmission input shaft sleeve. This means that critically, the adapter will be central to the input shaft. 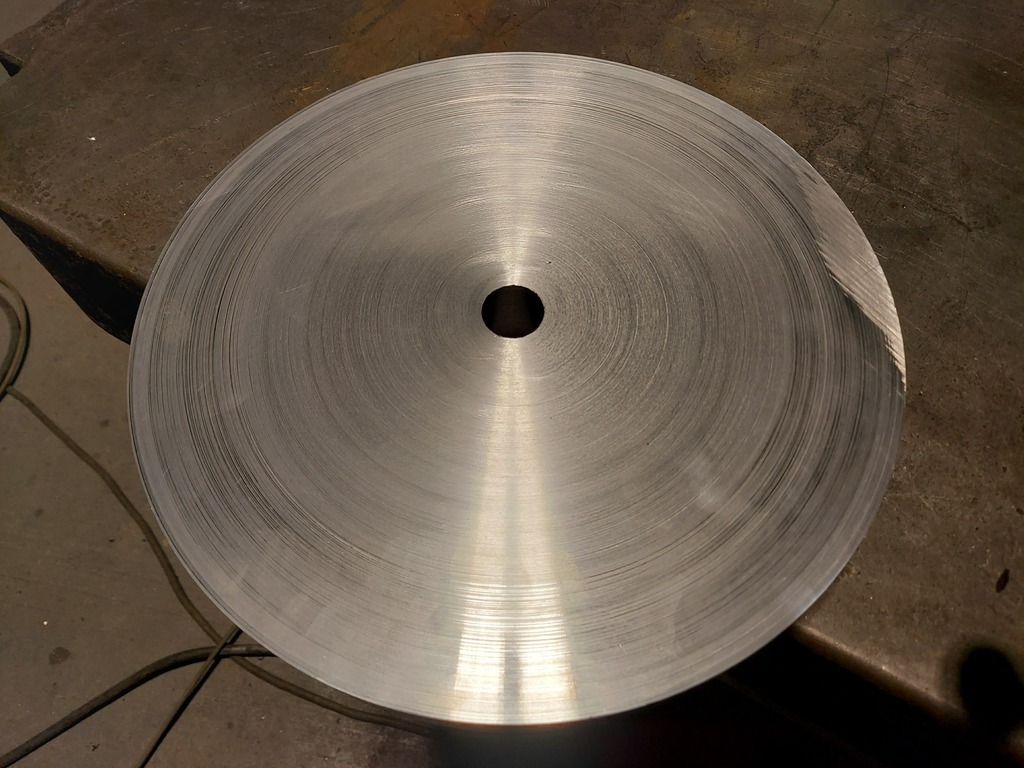 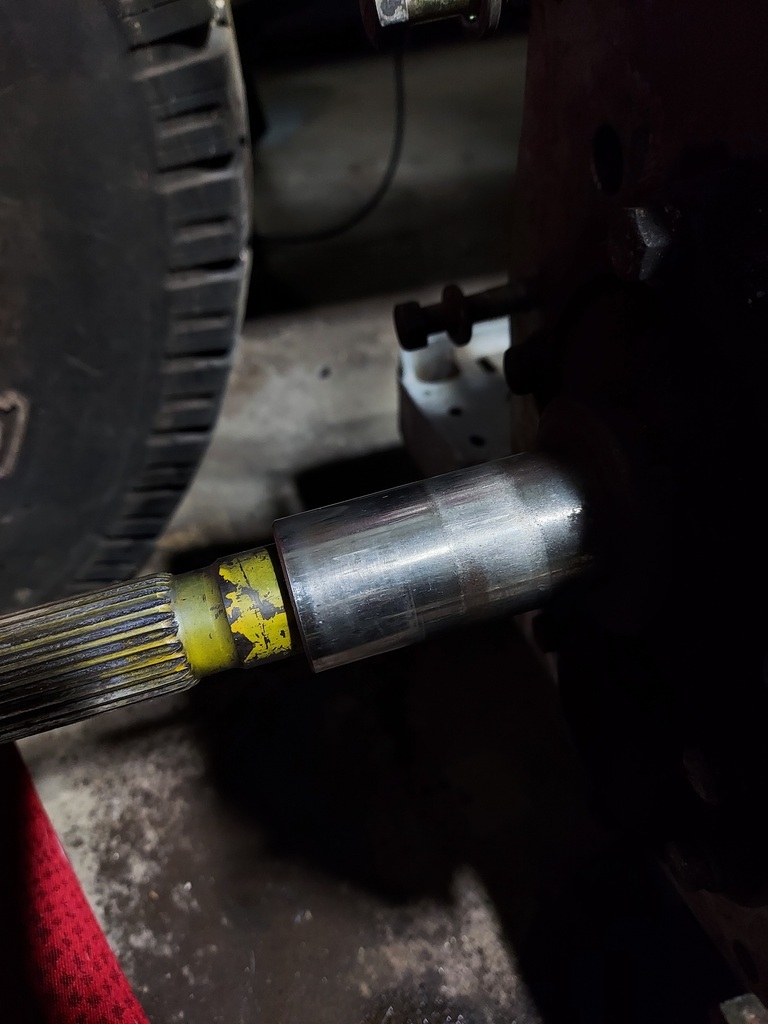 I then got some pointed tip grub screws and wound them into the gearbox face, slid the adapter over the sleeve and gave it a few firm taps. This marked the points which the holes need to be in order to bolt the adaptor to the transmission. 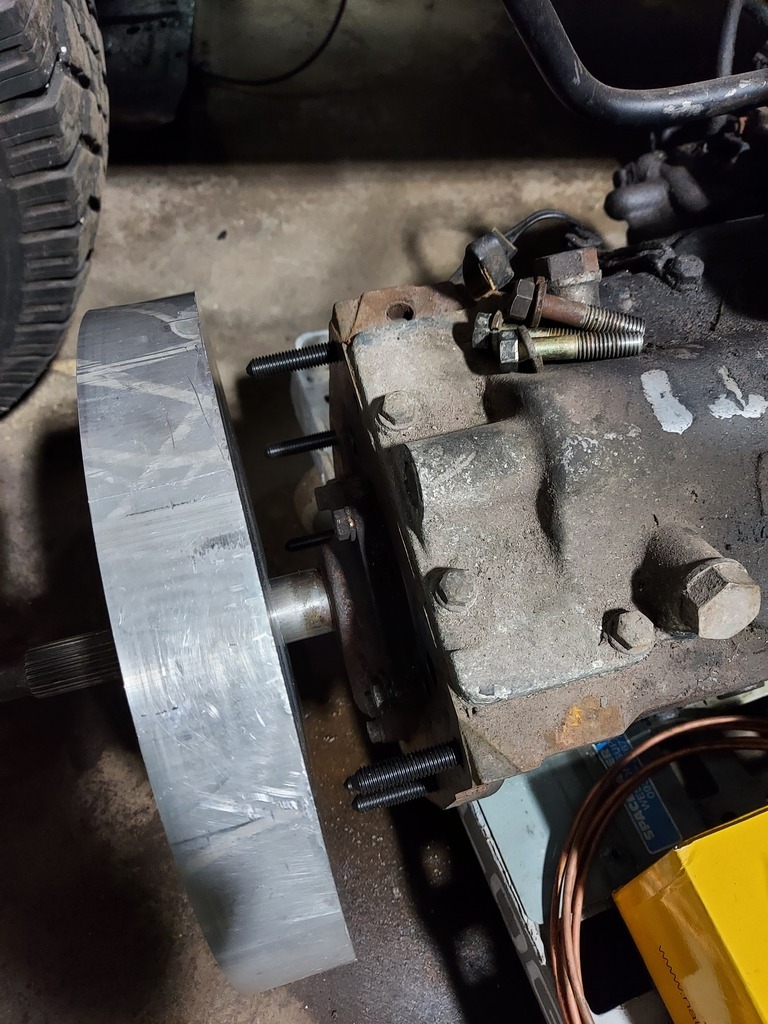 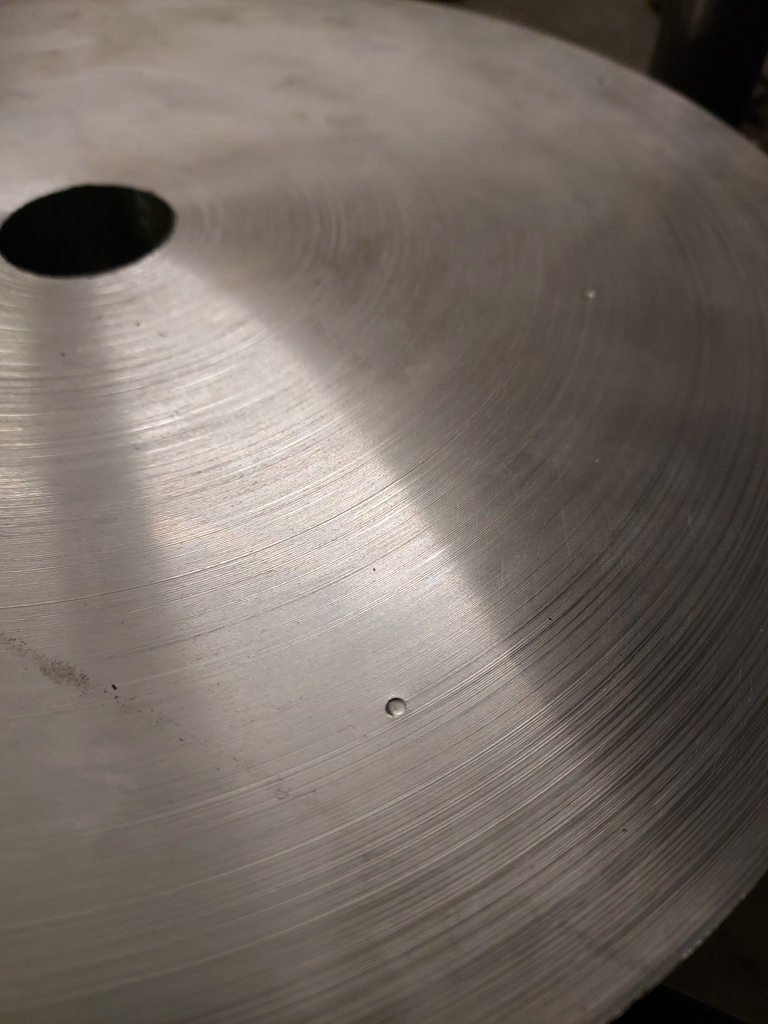 The holes were then drilled 0.5mm oversize to allow ease of fitment, and countersunk to accept tapered seat bolts so that they give a flat face to fit the bellhousing. 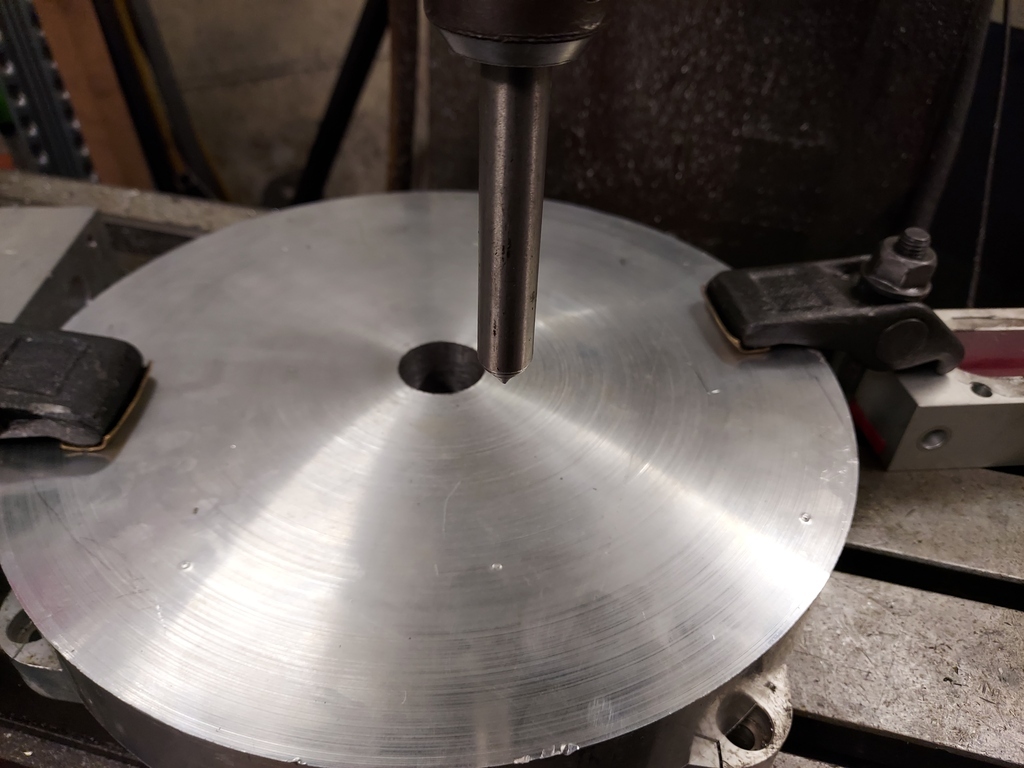 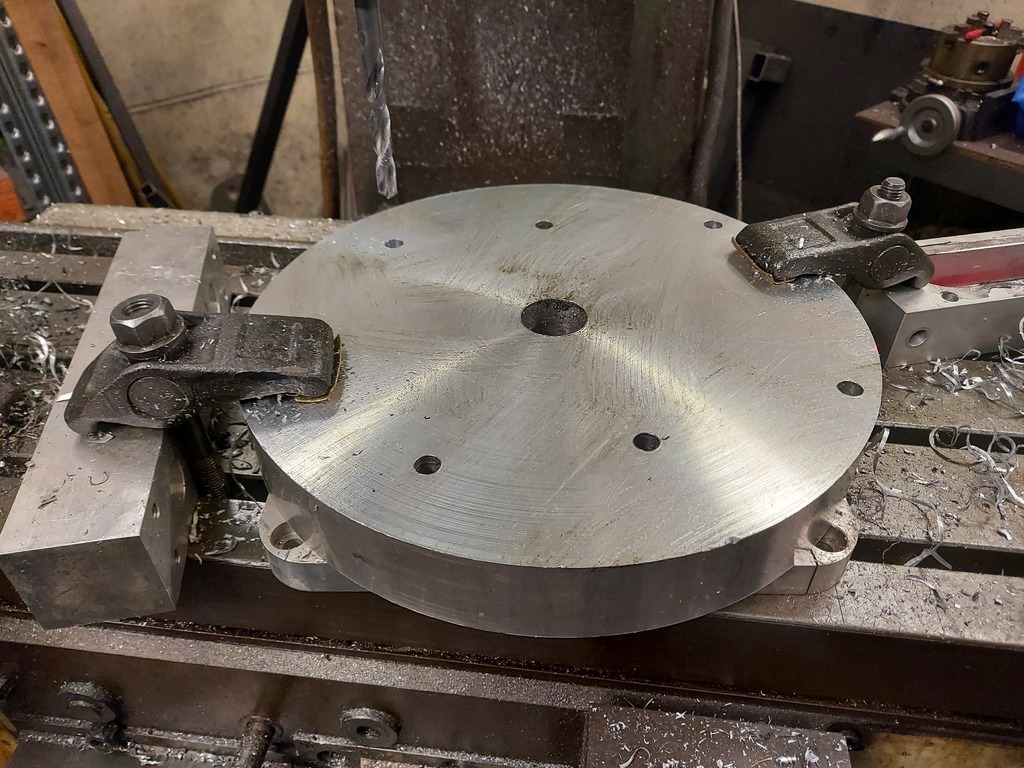 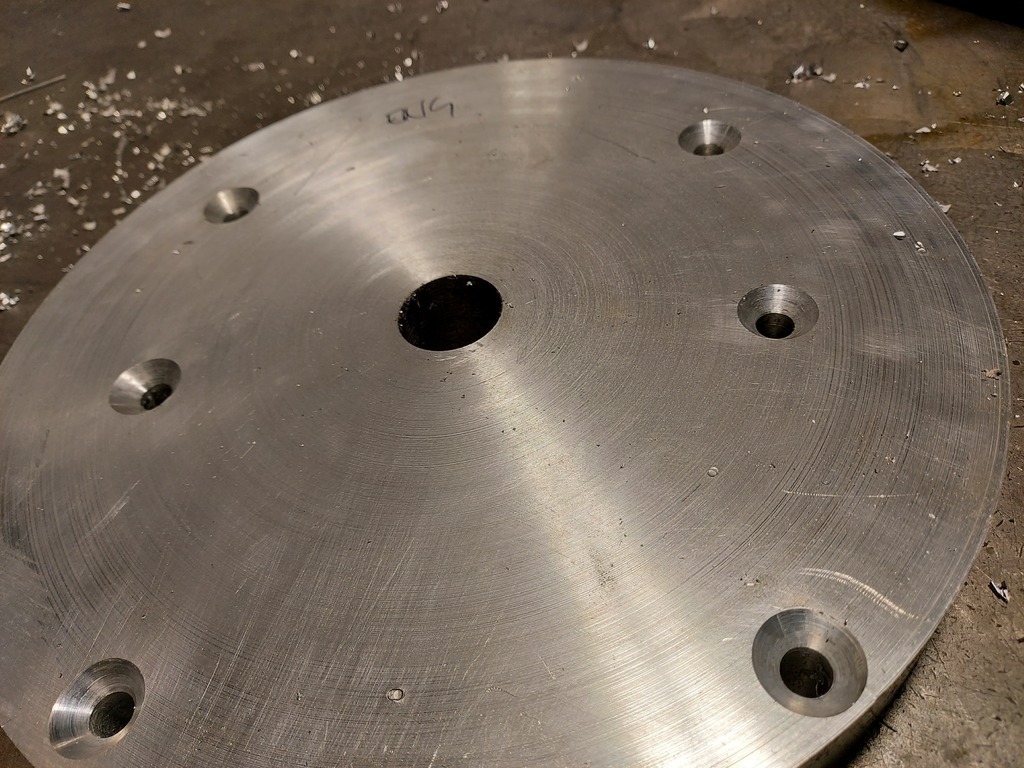 So that's the gearbox side sorted. I then needed to make the bellhousing bolt to the adaptor accurately. A pin was machined, with one end the exact diameter of the input shaft sleeve, and the other end the same diameter as the central register on the bellhousing. 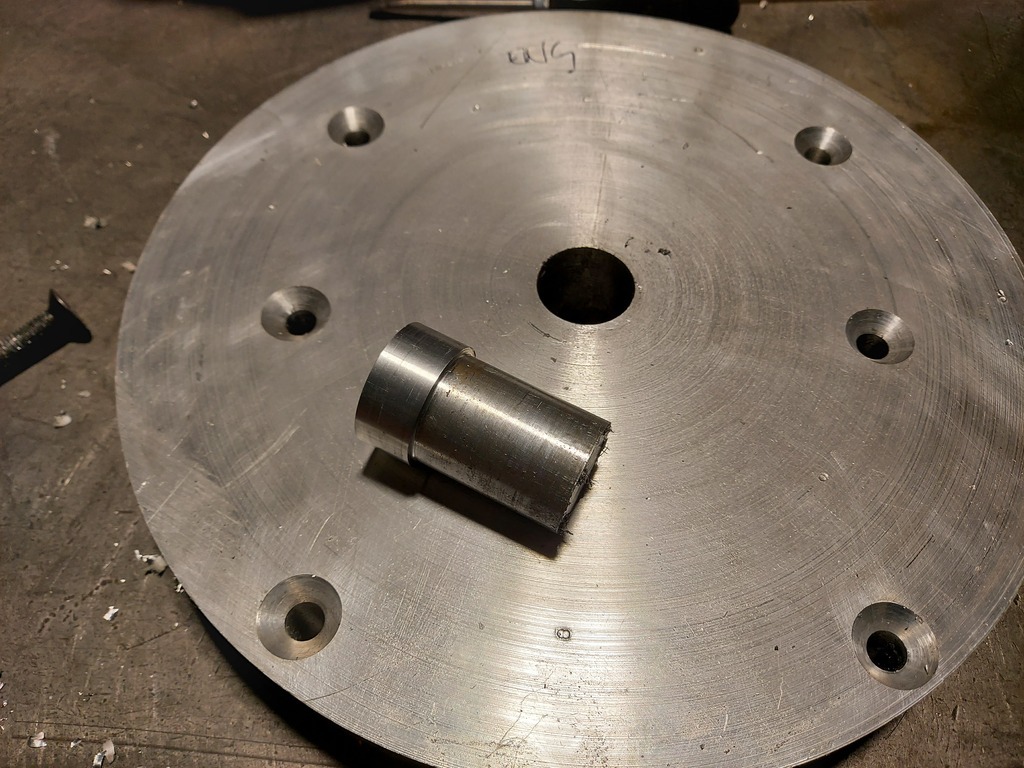 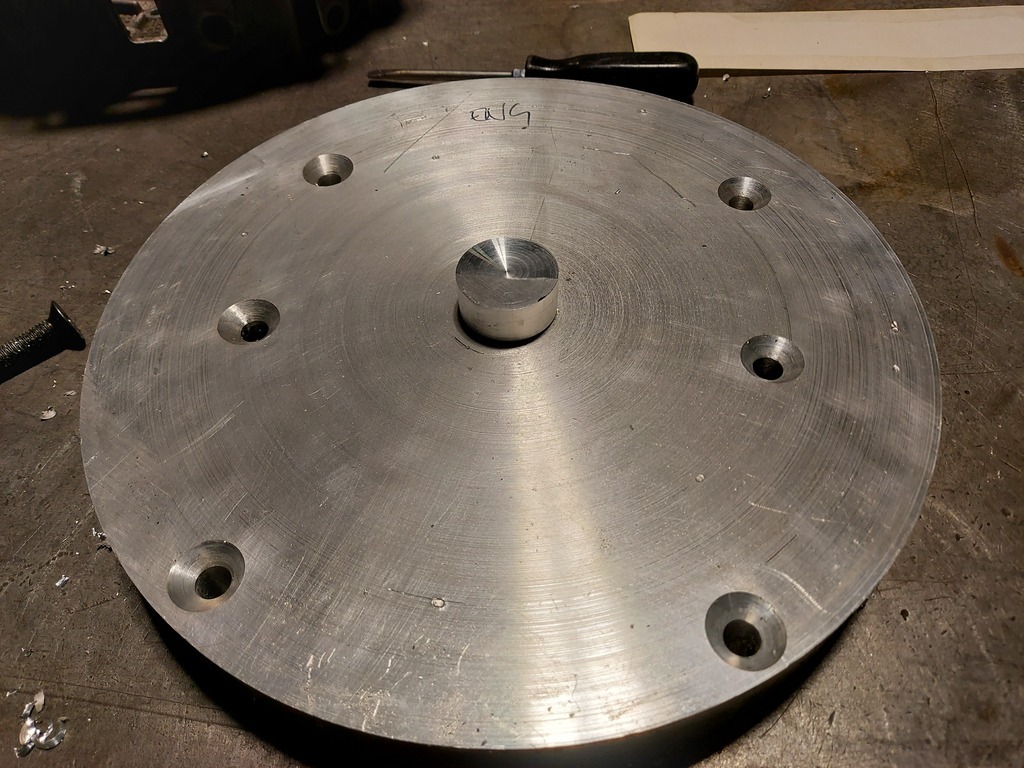 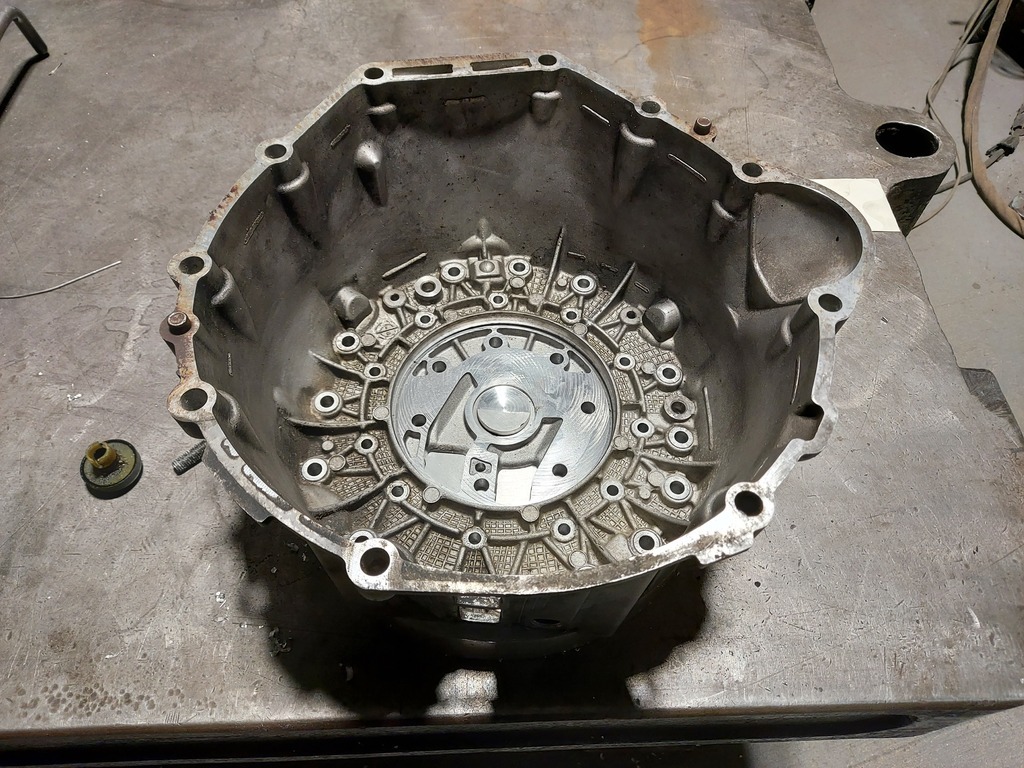 The OM606 sits at 15 degrees to the offside in its normal installation, so I did a bit of measuring and got the bellhousing clocked at the correct angle. I then used a transfer punch of the same diameter as the bolt holes to mark through their position on the adaptor, being careful to choose holes which don't conflict with the bolts holding the adaptor to the gearbox. As the transmission holes are slightly oversized from factory, I figured that there was a danger that the bellhousing could be bolted out of alignment as there would be no central register to fit it to on the gearbox. So I decided to take a belt and braces approach and install two locating dowels. That way if there is a bit of slack in the bolt holes it's not going to matter. 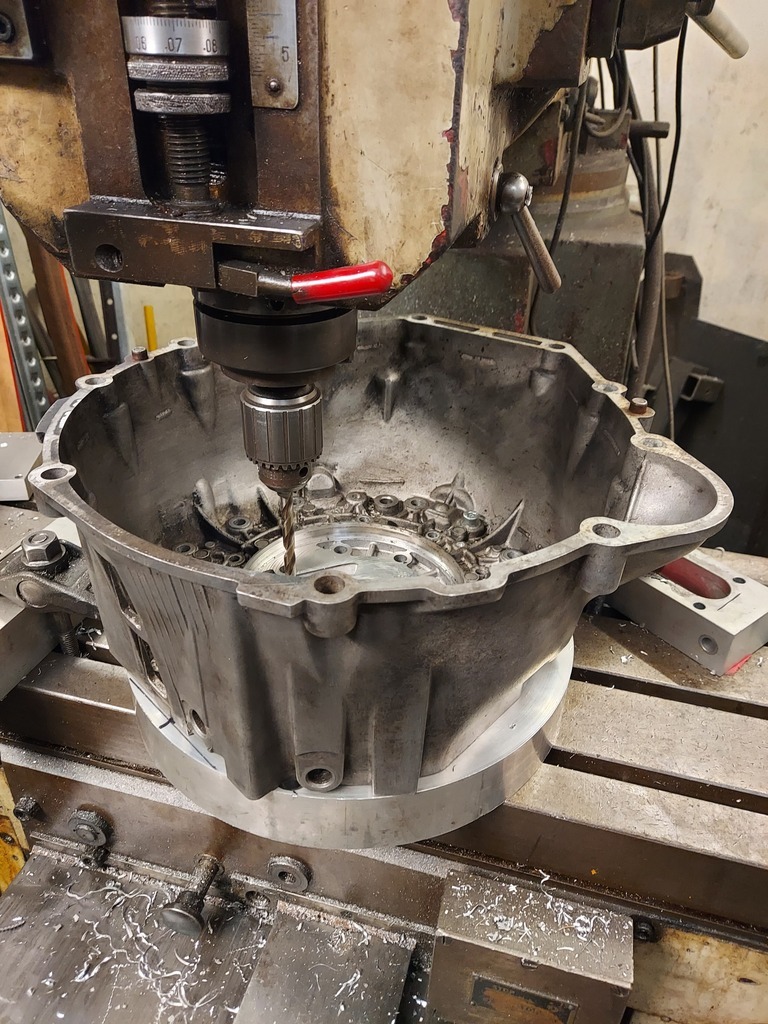 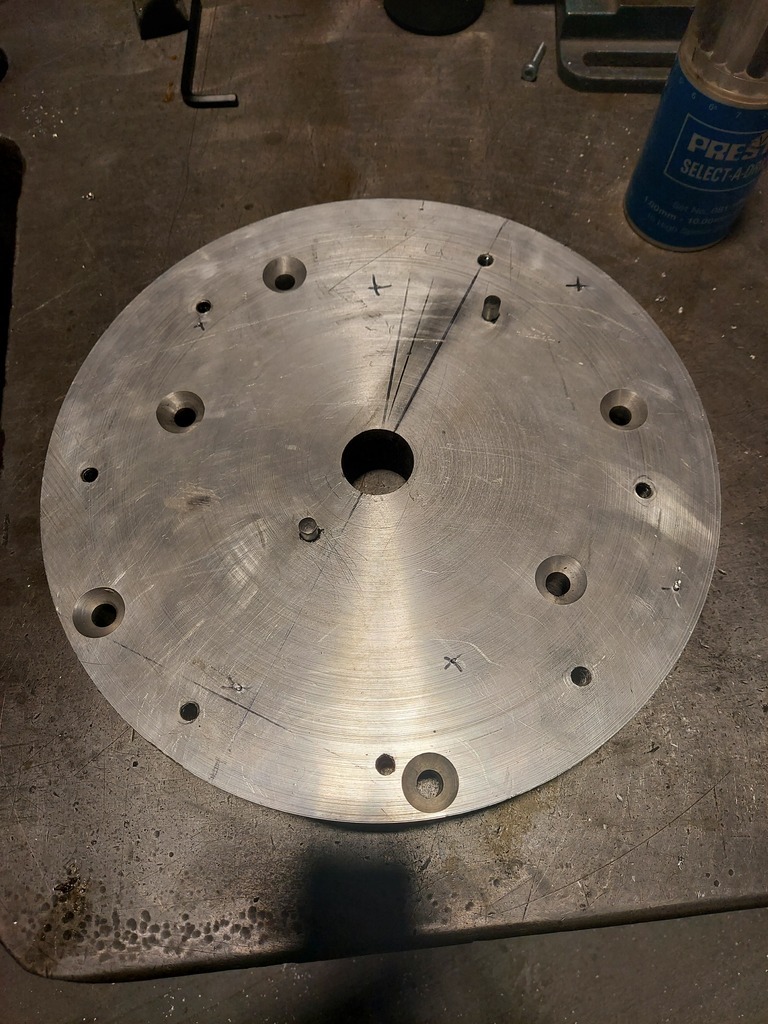 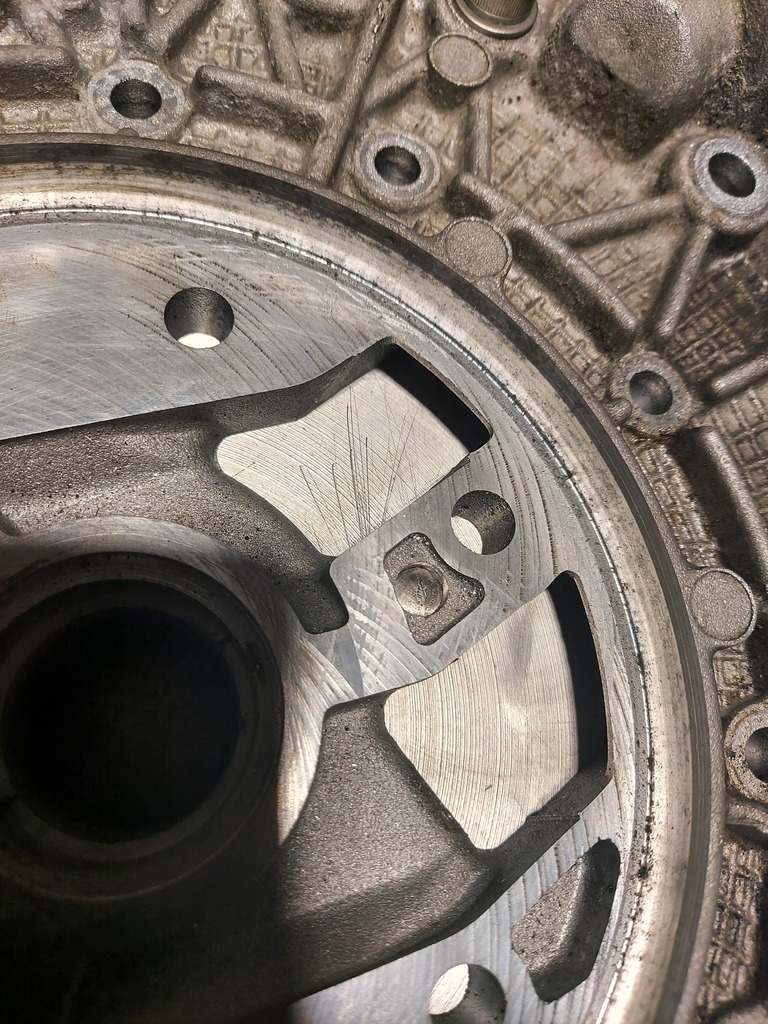 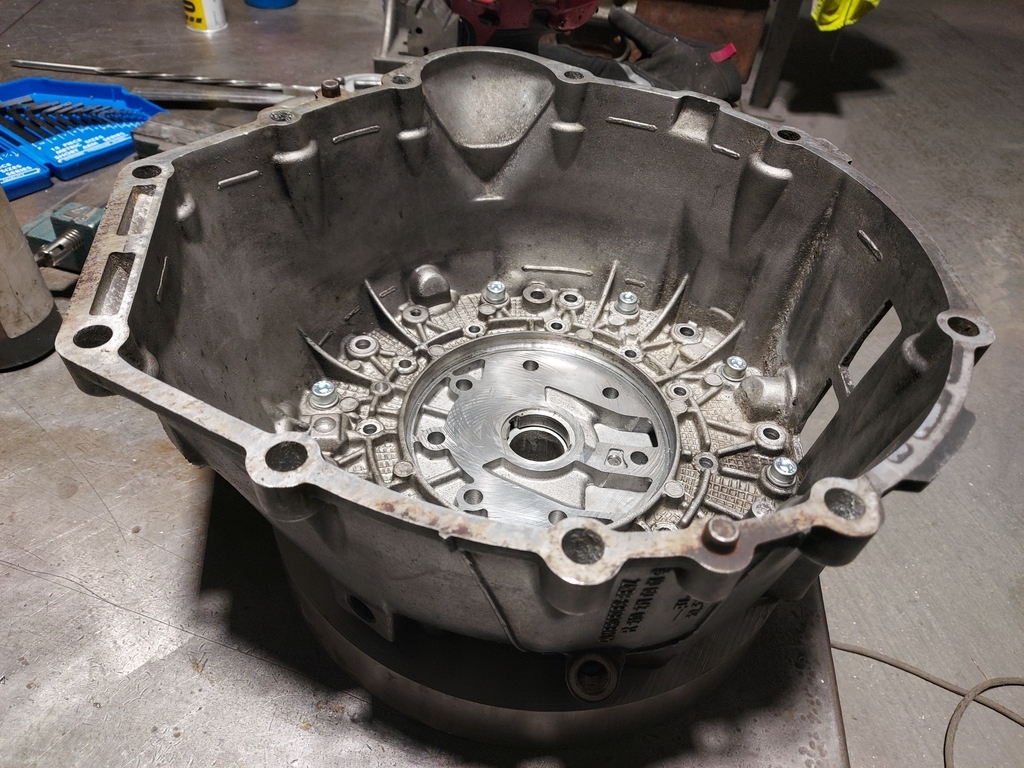 The assembly is coming together now! There was one more step to get it to work - the gearbox sleeve plate sits rather proud of the gearbox face. In the normal set-up the Patrol bellhousing has a cut-out to clear it. I needed to hollow out 25-30mm from the back of the adaptor to make it sit flush with the gearbox face. This means me getting familiar with another machine I've not used before - a milling machine. After a 5 minute crash-course on how to use it, I set about chewing chunks out of my hard work! 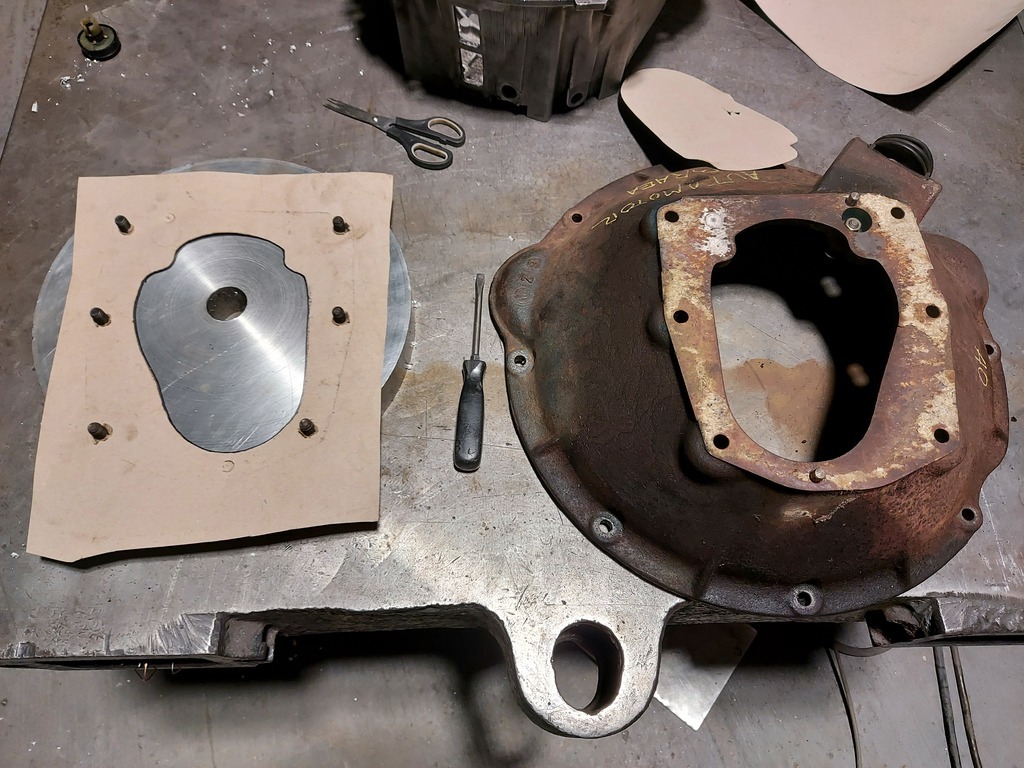 Here you can see the cut out in the original bellhousing (see, that bellhousing which I had sent from Portugal at great expense DID come in handy!). You may also notice that I've marked on the shape of the cutout the wrong way round. Fortunately this was noticed before I set about machining! 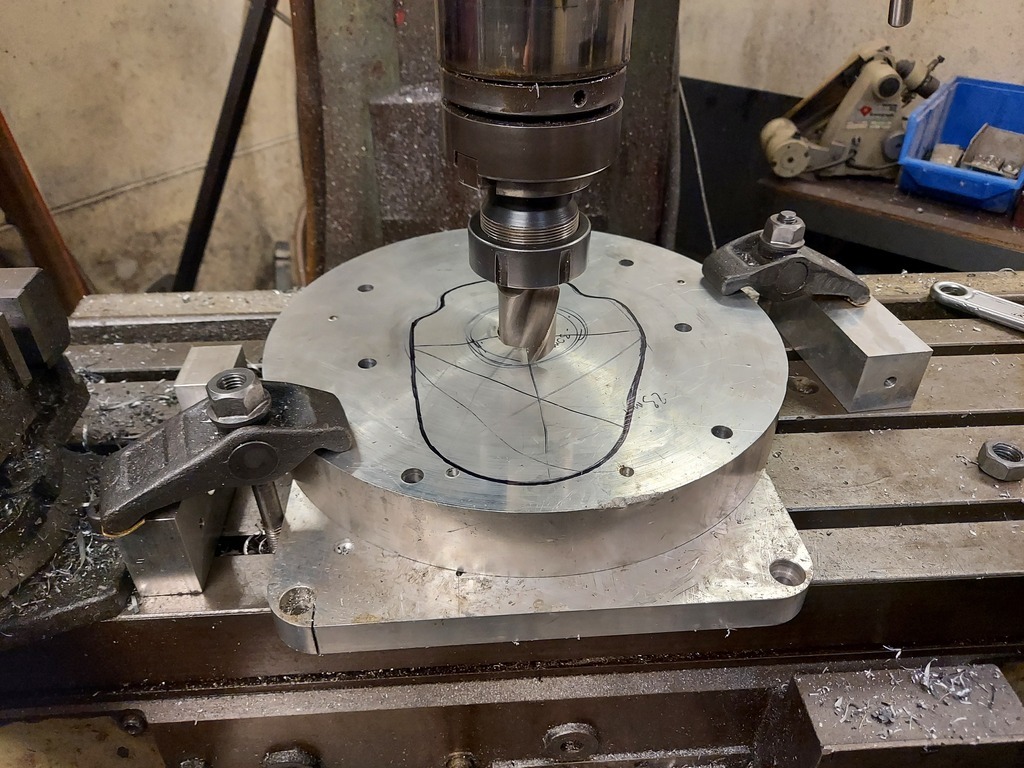 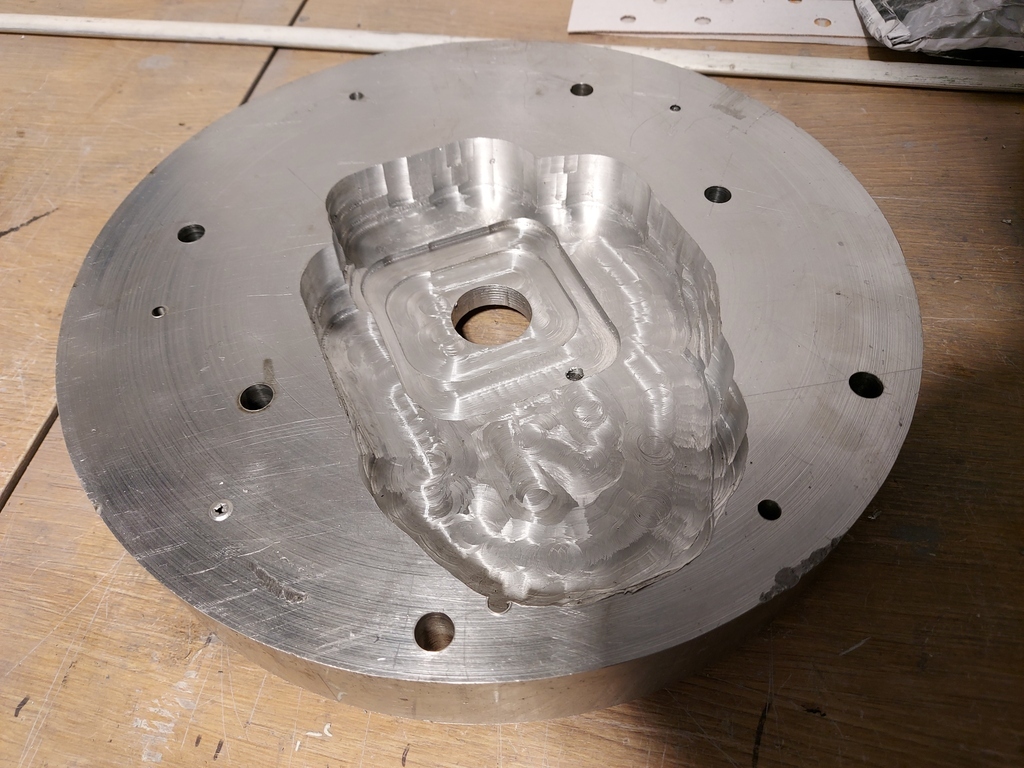 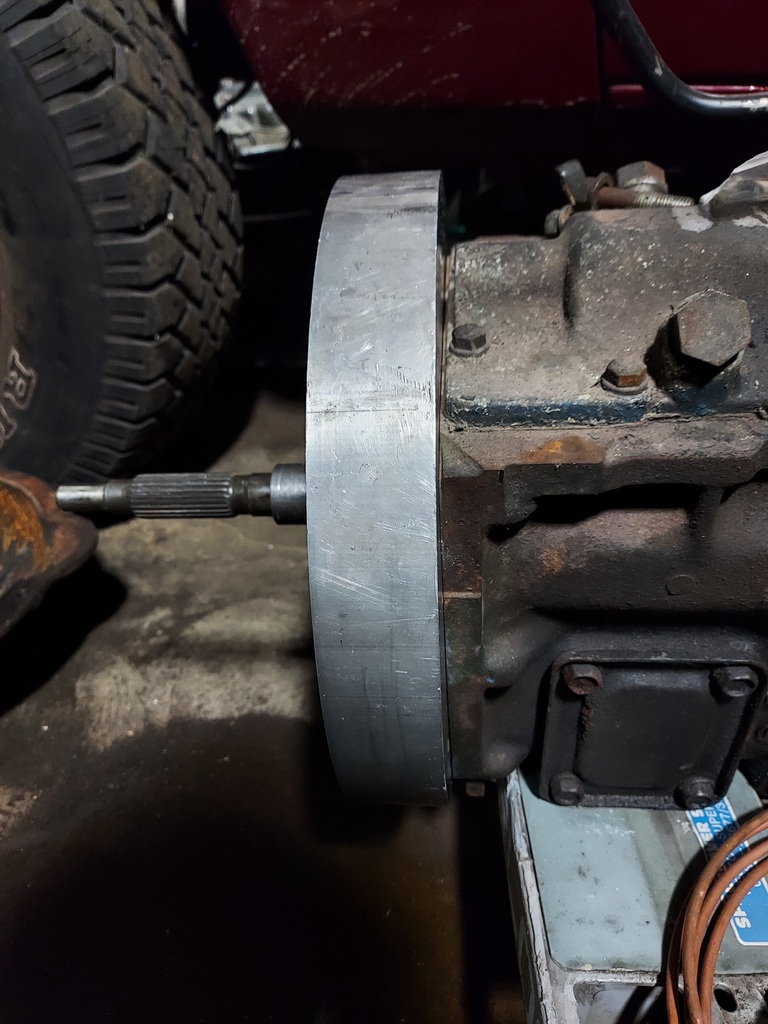 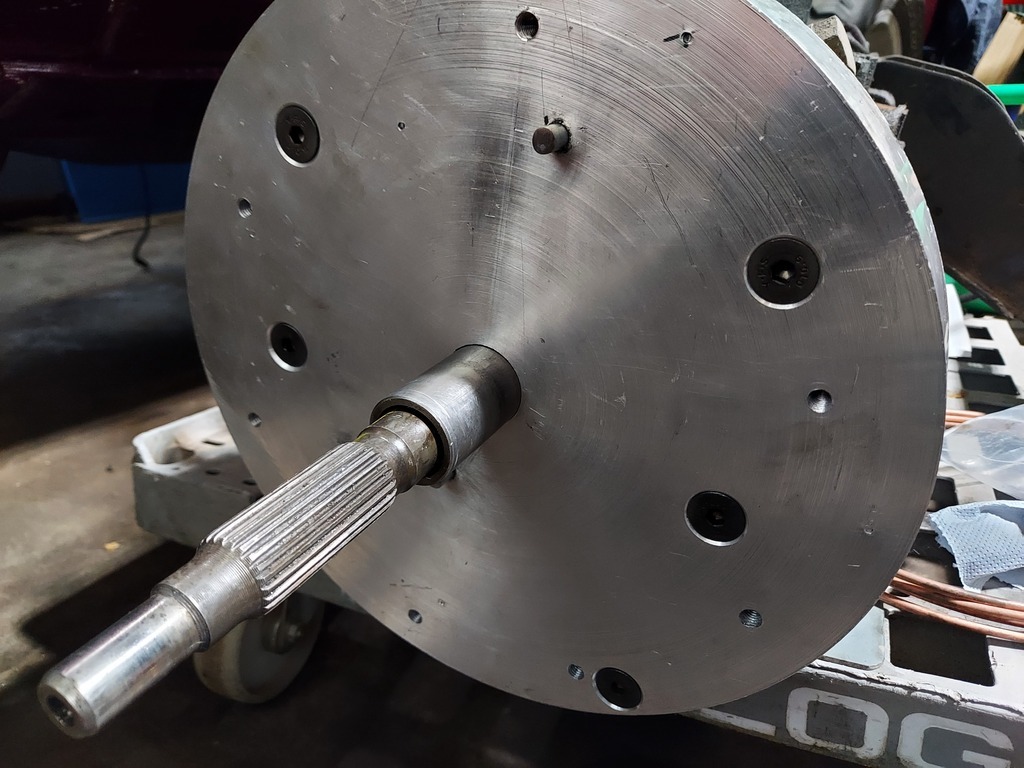 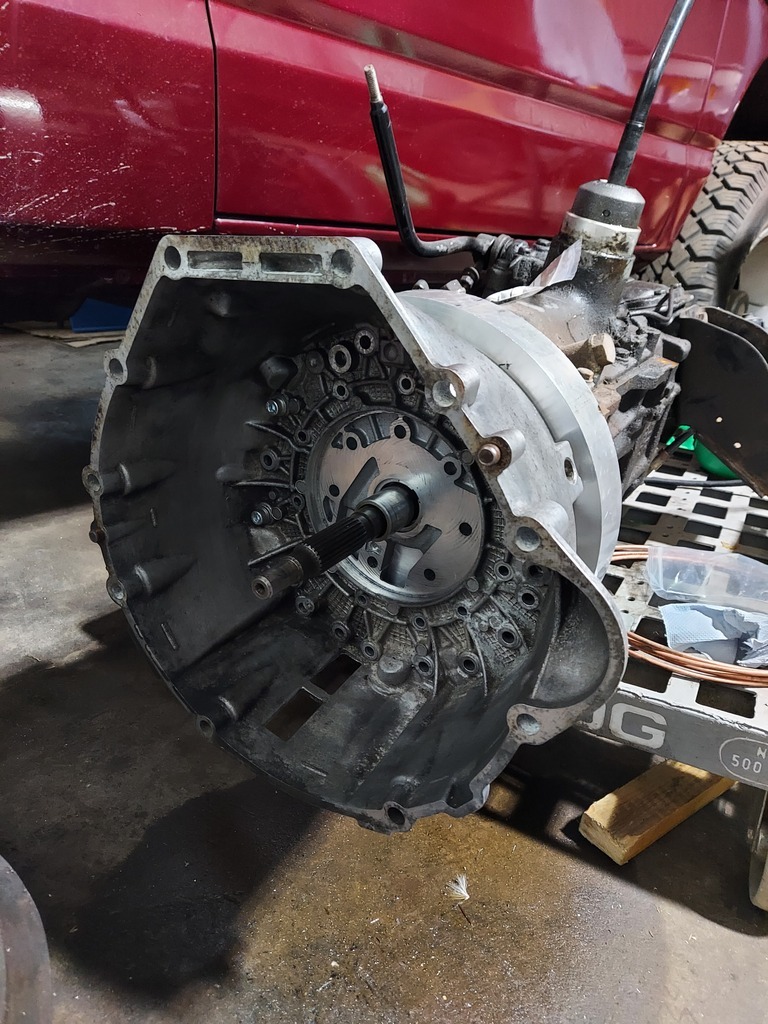 And there we have it! One Nissan Patrol to OM606 adaptor completed. This work was done over a long period, with a few hours stolen here and there over weeks and months to get it done. It was a big obstacle that I needed to overcome to make this engine fit, and now I've done it I feel like the project has some momentum again. The next conundrum is the clutch. I'm aiming to use the Nissan clutch fork however I need to do some work on the geometry and release bearing components. The other option is a concentric slave cylinder, but I'm not sure I like the idea of it being an engine-out job to change the slave cylinder, plus I have the headache of figuring out how to bleed the thing. More research needed on this, but it's not a show-stopper by any means. |
| |
Last Edit: Feb 21, 2021 12:24:21 GMT by BenzBoy
|
|
|
|
|
Feb 21, 2021 14:19:01 GMT
|
|
Neat job on the adapter!
Daan
|
| |
|
|
|
|
|
Feb 22, 2021 12:20:38 GMT
|
Neat job on the adapter! Daan Thanks! It's definitely been a learning process, but I was determined to solve the problem without changine the gearbox and then having a load of other problems to solve. I may need to tweak the thickness of the adaptor, because at the moment I don't think I'm getting full spline engagement through the clutch plate. I need to double check my measurements but I suspect shaving a few mm off of the adapter might be necessary. Not a huge task and I did make it on the thick side for this reason. |
| |
|
|
|
|
|
|
|
|
|
Better than tying to add a couple of mm!  Great work and nice to see progress. |
| |
|
|
|
|
|
Feb 24, 2021 22:12:19 GMT
|
Further to the adaptor, I've been busy at the other end of the vehicle too. The reason I had to take the Patrol off the road soon after its fresh MOT was due to the fuel tank springing a leak. I dropped the tank to repair it, and this naturally snowballed into a full engine transplant... New replacement tanks are pretty much unavailable. There's one 4x4 parts place offering new ones for £1300 but I'm not convinced they're the same as mine, and £1300 buys lots of other cool stuff! I did consider repairing my tank but having dropped it out I realised it was fairly crusty and had been repaired at least once before. I started looking for a similarly sized alternative, and decided that the Range Rover Classic fuel tank might be a good candidate. They're cheap, readily available, the filler neck is on the same side and the capacity is fairly similar. Dimensionally it should fit in the hole too. Plus, I could buy an EFI one, have the lift pump in the top and fit the V8 petrol's pick-up pipe and sender in the side of the tank but use it as a return! 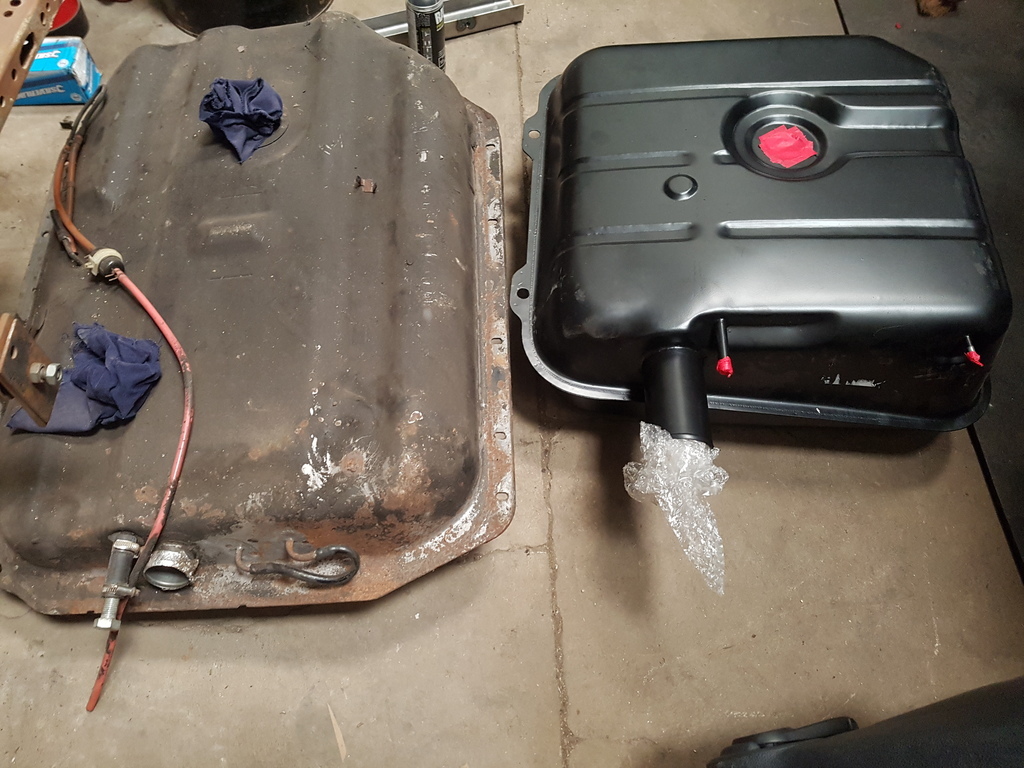 Here's the Patrol tank next to the Rangie. I know what you're thinking, the Patrol one looks way bigger! But there's only a few litres in it, and what the RR one lacks in width, it makes up for in depth. Time to test fit it into the hole... 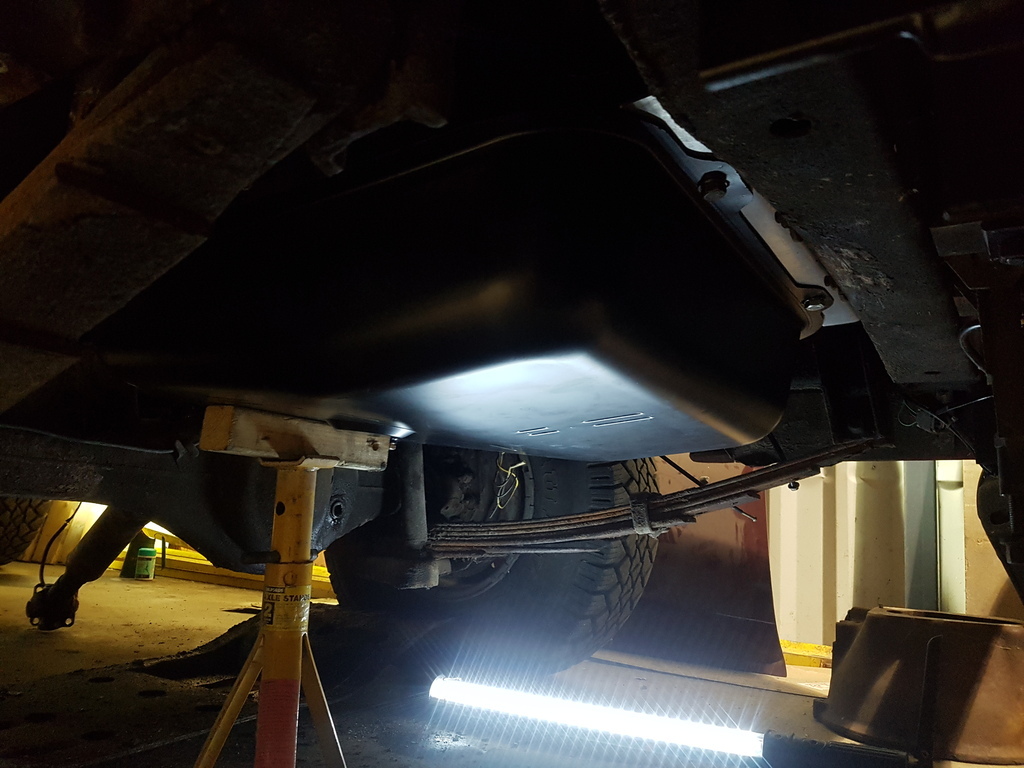 Seems like a good fit. I'd removed the spare wheel carrier mechanism from underneath to drop the tank, but I doubt I'll be refitting it as it was very crusty and I have the rear mounted spare now. Plus I need the space for the tank. After measuring carefully where I wanted the tank to fit, I made some brackets that fit to the original mounting points on the truck. 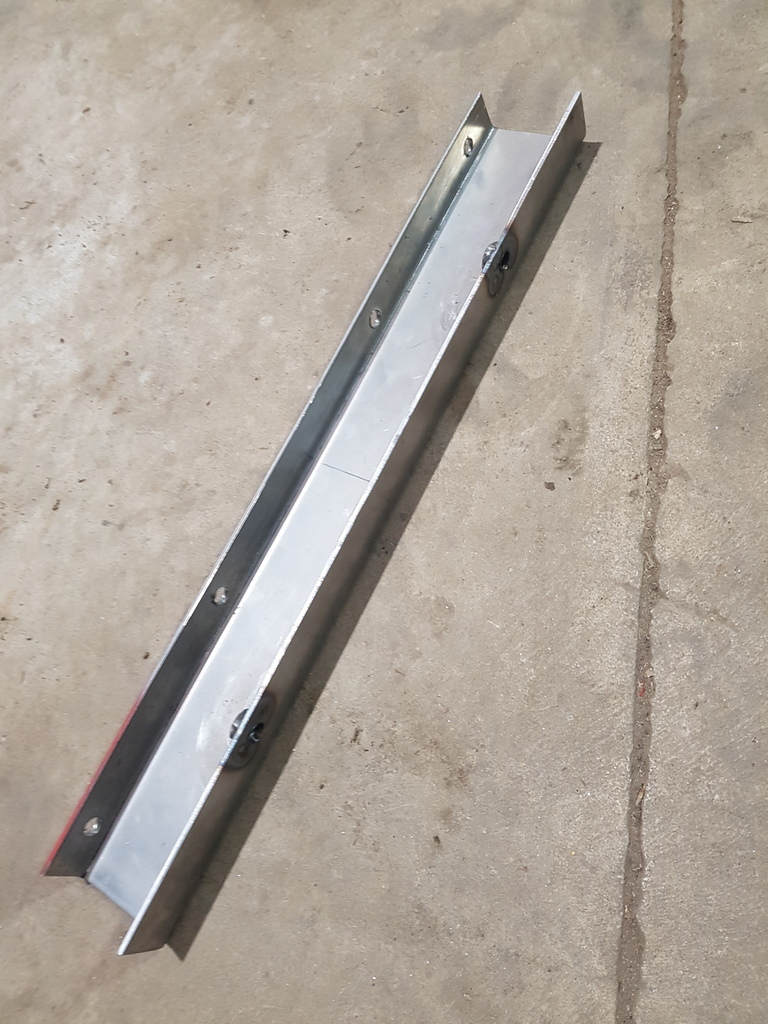 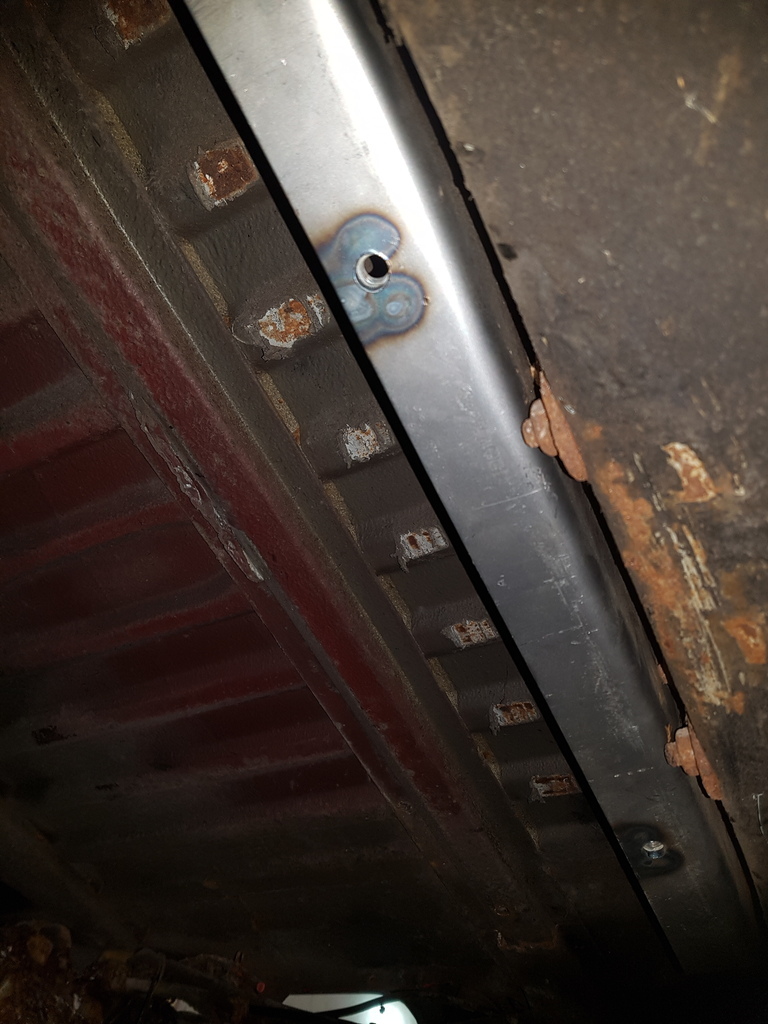 New tanks generally aren't that well protected, so I decided to give this one a bit more of a chance of lasting. The local paint shop were promoting aerosol versions of the Raptor truck bed liner. The spray gun applied Raptor is incredibly tough stuff. I hadn't tried the spray can so thought I'd take the opportunity. It's still a 2k product, so after you press the button underneath and release the hardener you've got a certain amount of time to get the stuff where you want it to be before it goes off. The aerosol application isn't as good as a gun, but it won't ever be. However it's fine for something like this, and I managed to cover my tank, and the brackets I'd made, and surprisingly not much of myself, in the Raptor. 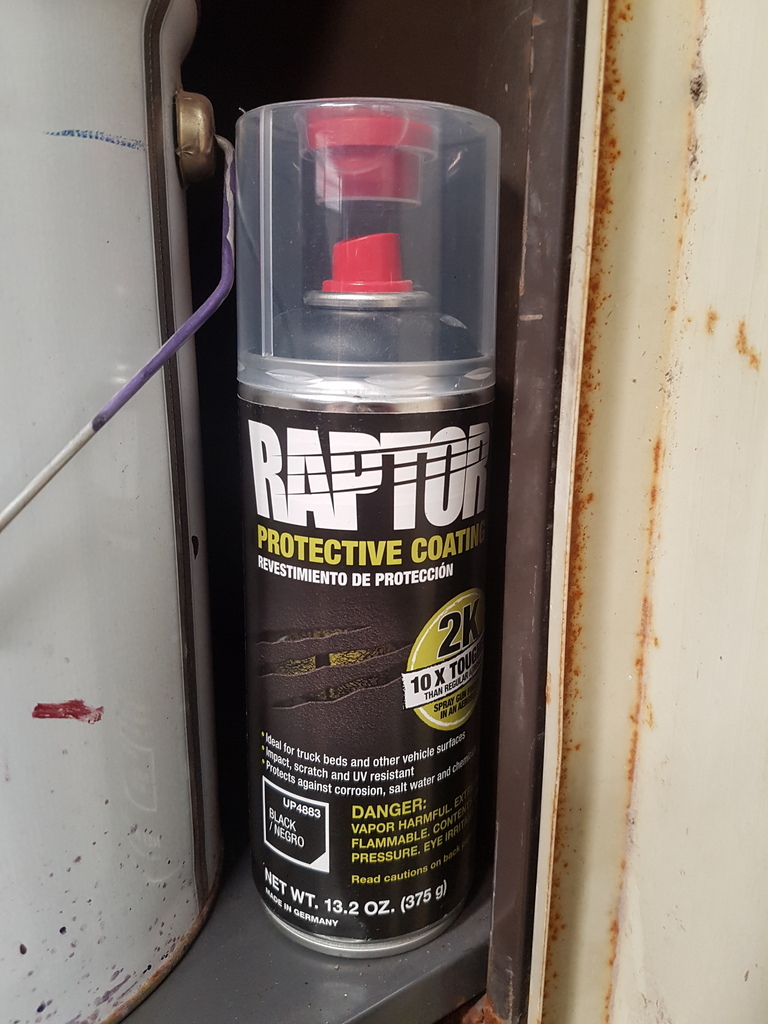 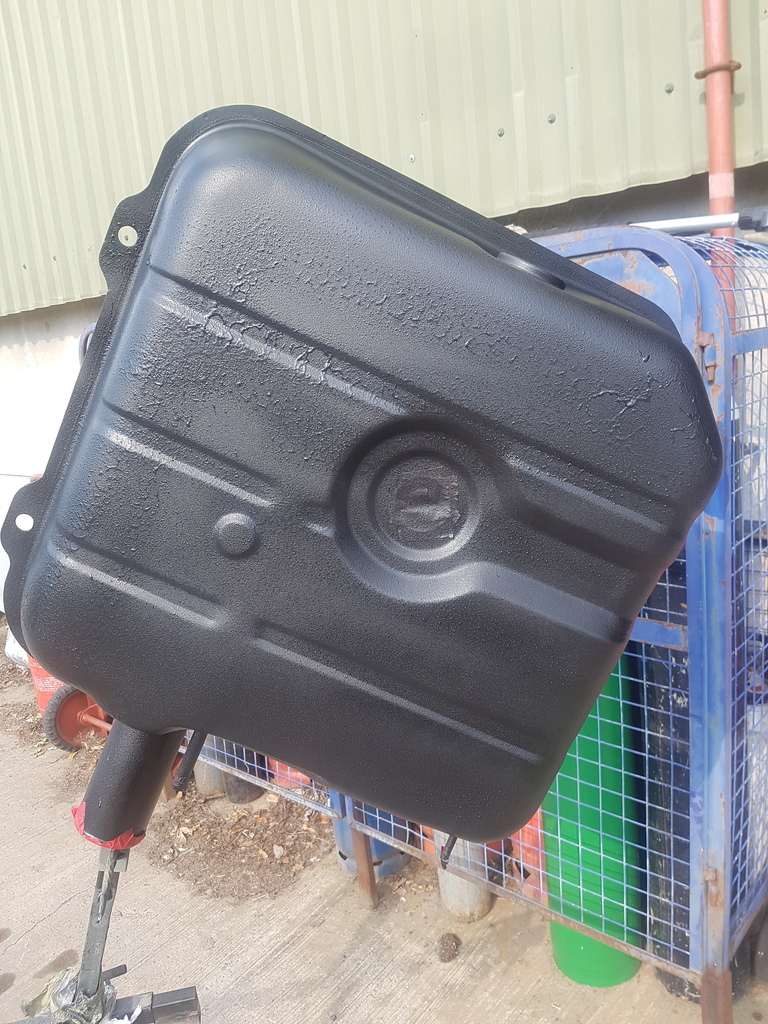 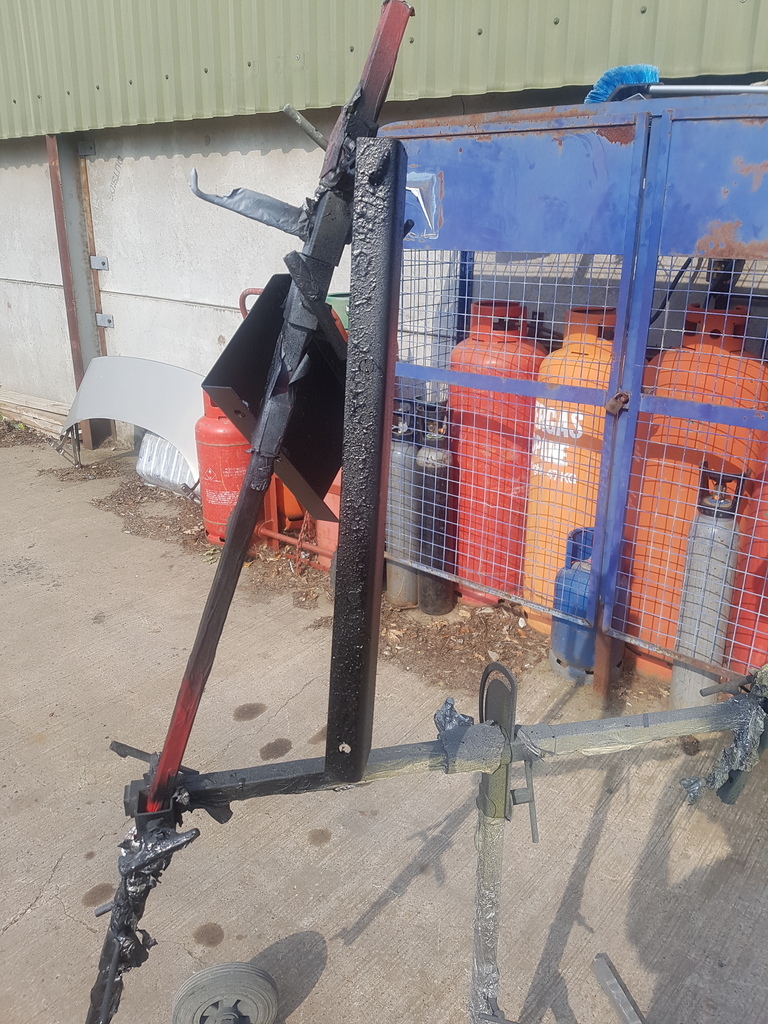 The tank fittings were bought new (God I love Land Rover stuff... so cheap!!) and seeing as I plan to run new fuel hose front to rear, I had AN fittings welded to the ends (my TIG welding skills are terrible, so I got someone else to do it!) 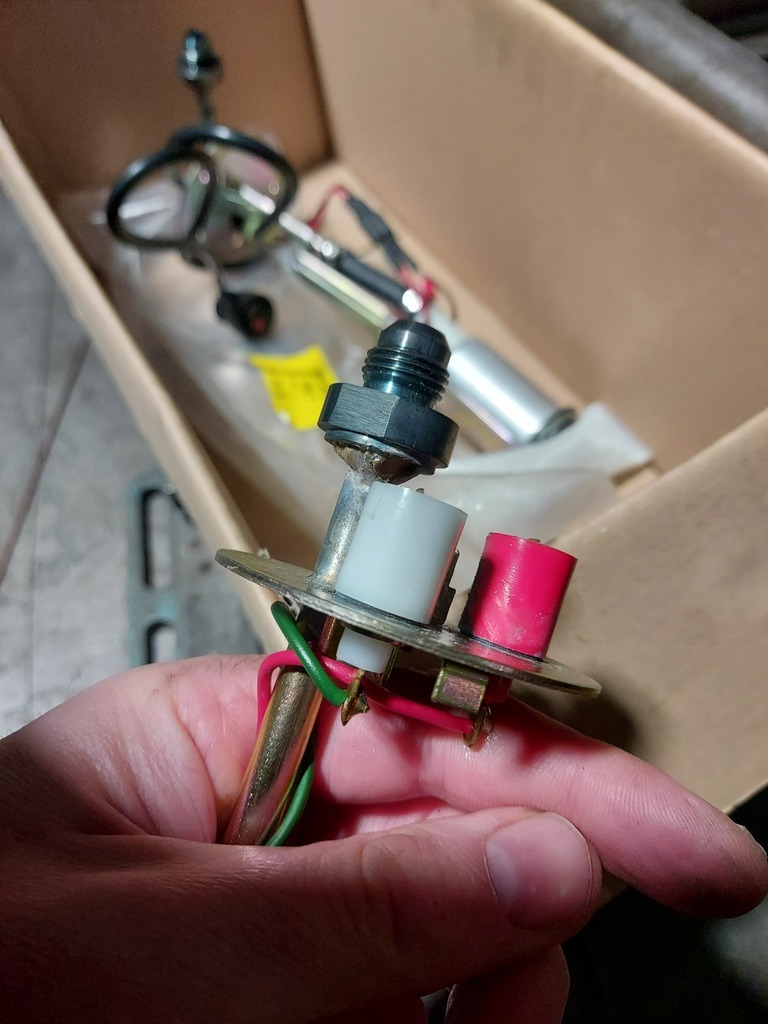 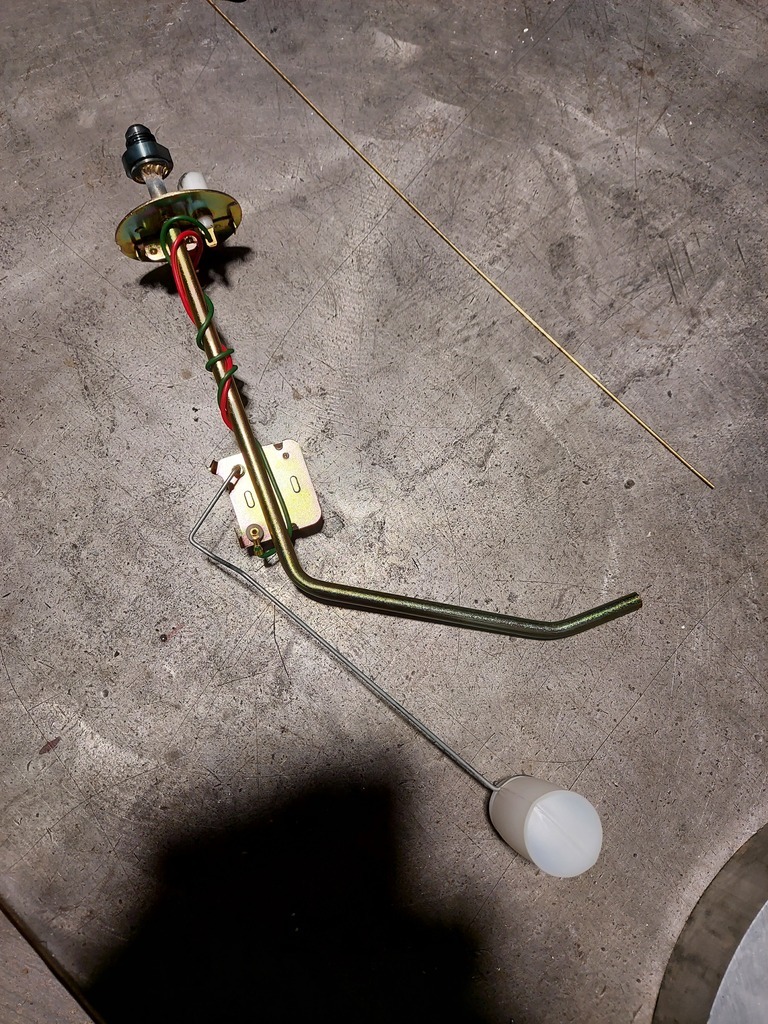 Before I fit the tank I need to rustproof the underside, and remove the crusty old fuel lines. I also need to fit shiny new fuel lines with AN fittings. I intend to use the Mercedes OM606 lift pump on the back of mechanical pump, so I'll take the in-tank one out and replace it with a length of pipe. When I start making bigger power I'll need a powerful lift pump, so this set-up gives me that option in the future. |
| |
Last Edit: Feb 24, 2021 22:39:42 GMT by BenzBoy
|
|
|
|
|
Feb 28, 2021 11:10:44 GMT
|
I did a bit of testing of clutch parts yesterday. I wanted to avoid using a concentric clutch cylinder, simply due to accessibility when it came to changing it. The Patrol clutch bearing carrier looks like this: 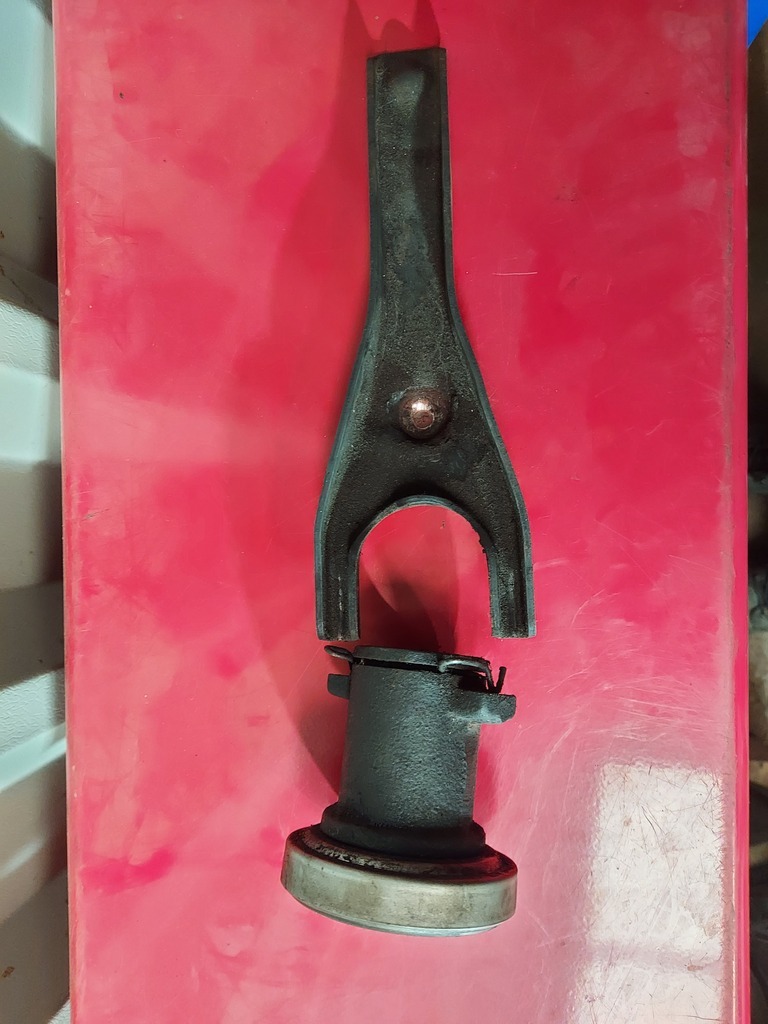 And installed on the gearbox with the new adaptor and bellhousing, sits here: 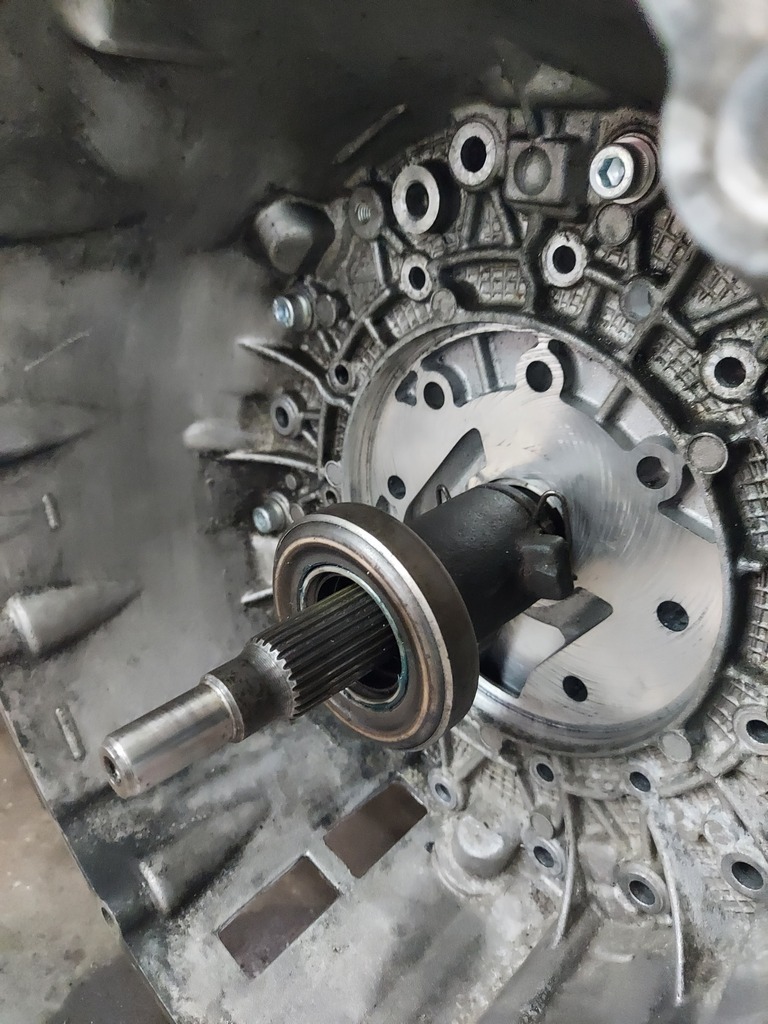 Realistically it's going to have to sit further forward to allow for the clutch fork, and at this point there isn't enough of the input shaft sleeve for the bearing carrier to travel on. Also I suspect the bearing will be too far forward. I had a hunch that the Nissan Skyline gearbox had the same input shaft sleeve, and I knew that the Datsun Z 'box did. These had a shorter bearing carrier which might work. Luckily I could borrow a Skyline R32 clutch fork and bearing to test it... 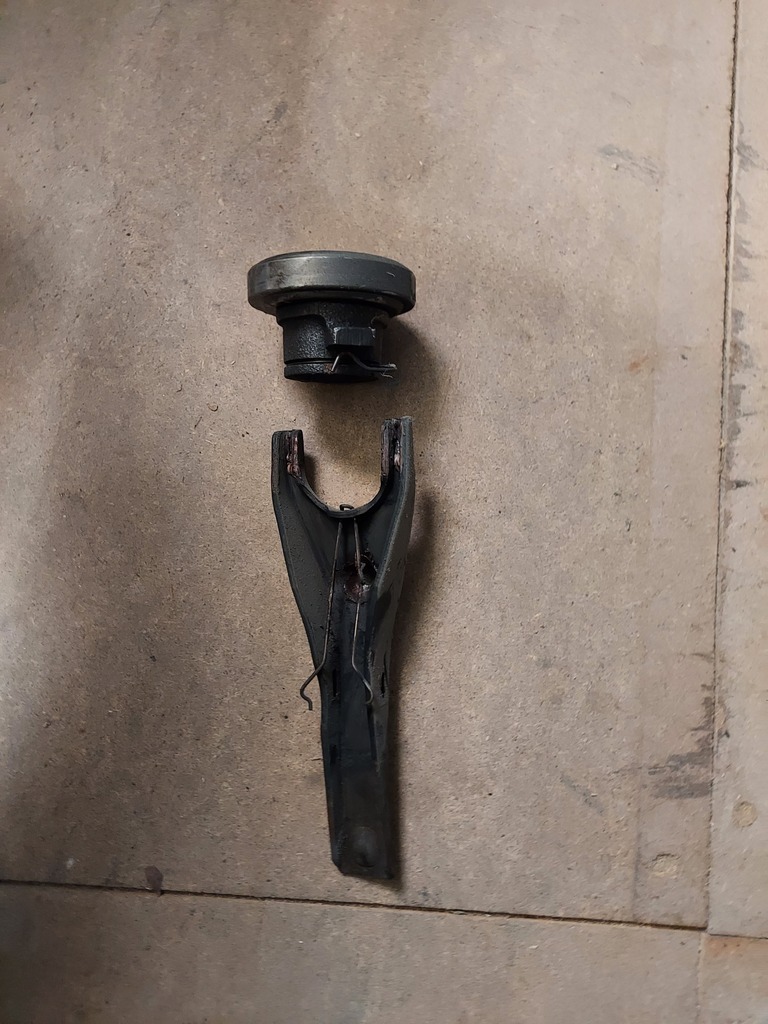 You can see that the bearing carrier is a lot shorter, and it sits nicely over the input shaft sleeve... 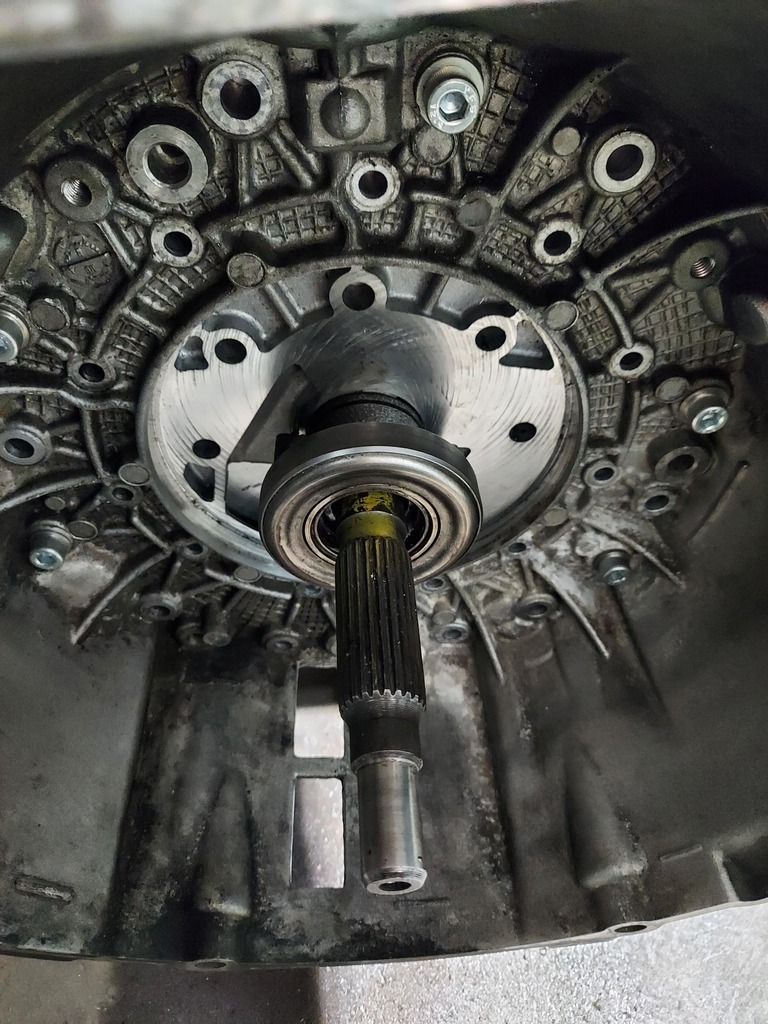 Even with it moving forward to allow for the fork it looked like it might stand a chance of working, however there is still not enough of the input shaft sleeve for it to travel on. Looks like the regular clutch fork and bearing set-up is out the window then! In any case, the Nissan release bearings are designed for a straight finger clutch diaphragm, but the Mercedes is a bent finger type, so requires a different (flat) bearing profile. I was going to cross that bridge when I reached it, but it looks like I won't need to now. I bought a Mercedes Sprinter CSC, as this will definitely work with my Mercedes Sprinter clutch. However, it looks like this: 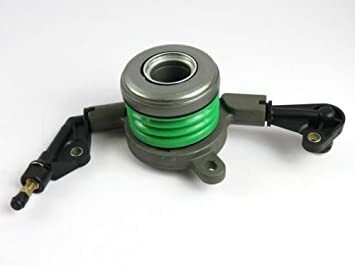 It's a bit of a pain in the backside to make it fit inside the bellhousing. So I've given that to my mate with an OM606-powered Volvo whose cylinder is leaking, and I've took a punt on a GM one which is more compact, and looks like it has a suitable flat-faced bearing that will be compatible with the bent finger Merc clutch diaphragm. In other news, I was all set to shave a few mm off the adaptor, but did a bit more measuring beforehand. As it stands I get almost full spline engagement. I might be 1mm shy but I reckon my measurements are +/- 1mm anyway, so that should be good enough. Besides, if I go too far the end of the input shaft may not sit in a desirable place for the spigot bearing to fit. This is something I'll be tackling in a future installment - the Mercedes spigot bearing is too small for the Nissan shaft and sits too far forwards, but I have a plan for this and I'll reveal more when I get to that part. I'm inching closer to getting engine and 'box bolted together, which will be a brilliant milestone! |
| |
|
|
|
|
|
Sept 5, 2021 15:28:48 GMT
|
Time for a little update, as I've been chipping away at this little project bit by bit. The updates aren't as frequent as I'd like, but I have very little time to spend on the project so each update is the culmination of an hour here and an afternoon there! Anyway, we're inching closer to the union of Mercedes and Nissan oily bits. Last time, I left off having selected the concentric clutch slave for the project. I then had to somehow get it to mount to a Mercedes automatic bellhousing! By my calculations, the slave needed to sit 30mm further towards the clutch fingers so that it will be adequately engaged. So I ordered a 6 inch disc of aluminium of the appropriate thickness and got busy on the lathe... 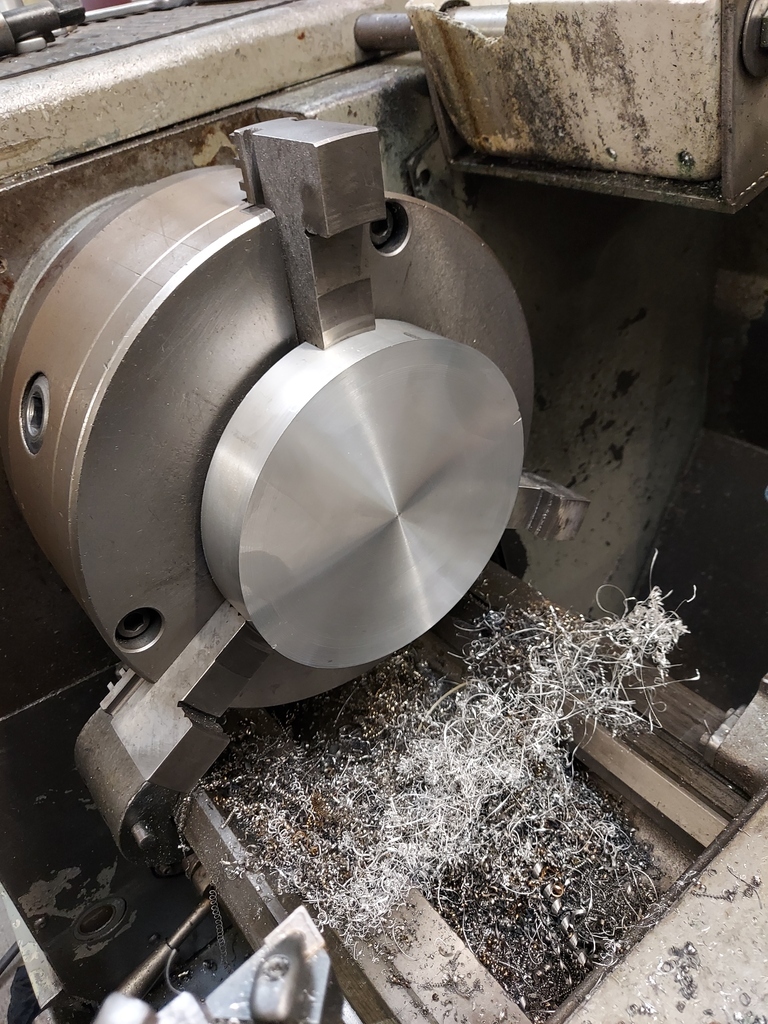 This project is the first time I've done any lathe work, so I'm learning as I go with it. I first faced up both surfaces, then reduced the diameter by a few mm so it fit nice and snug within a circular recess in the bellhousing. I then put a hole in the centre in order for it to fit concentrically over the input shaft sleeve. I planned to adapt the centering pin, which I'd made previously to centralise the adaptor and bellhousing, to align the slave cylinder. As the cyliner internal bore is smaller than the input shaft sleeve I needed to reduce this diameter. I also machined a recess into the adaptor as the cylinder I'm using also had an built in gearbox oil seal for the original application. I don't need this, but without the recess it won't sit flush with the adaptor. 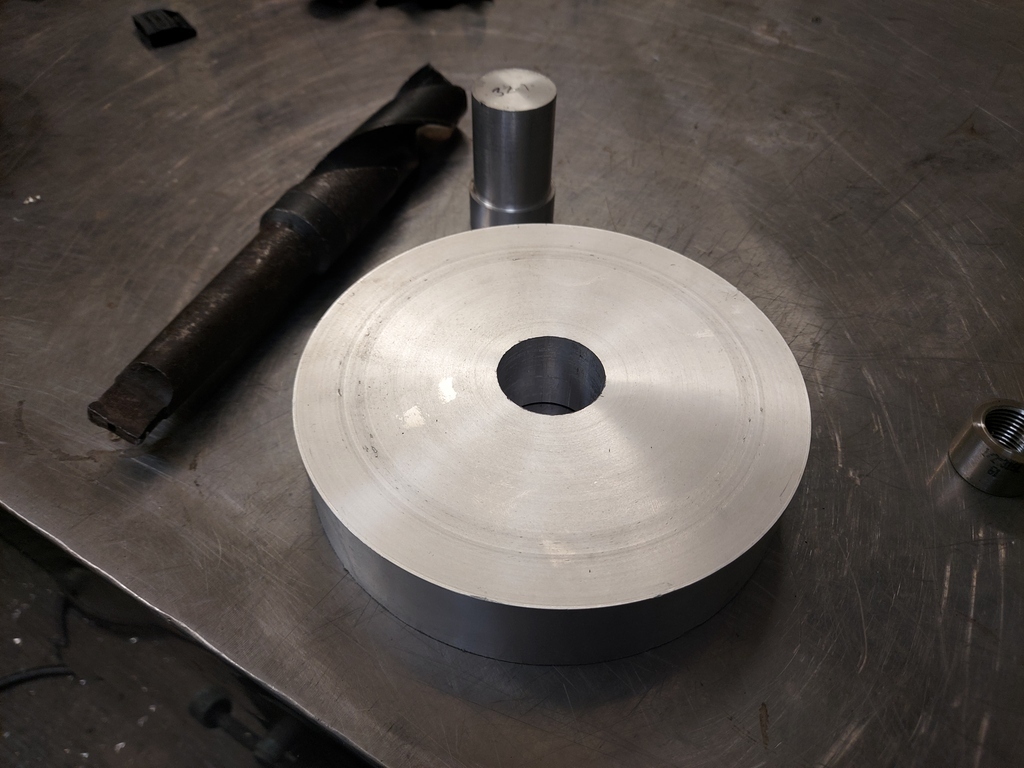 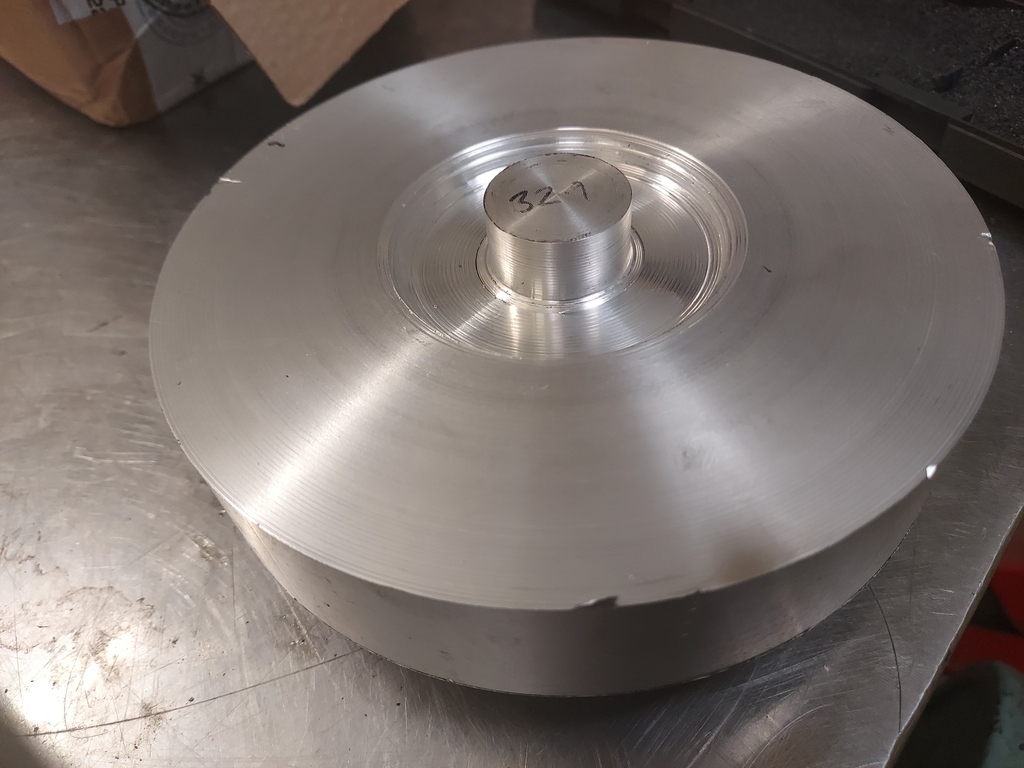 Holes in the bellhousing were repurposed to attach the slave cylinder adaptor. I countersunk them so that the fasteners fit flush. I then drilled and tapped the front of the adaptor so that the cylinder bolts to the adaptor with the pipe union pointing to 12 o'clock. This cyliner doesn't have a bleed nipple so will be fun to bleed I'm sure. I think this feature, and the oil seal arrangement, means I probably would have gone for a different cylinder in hindsight, but we're here now so I just need to make it work. 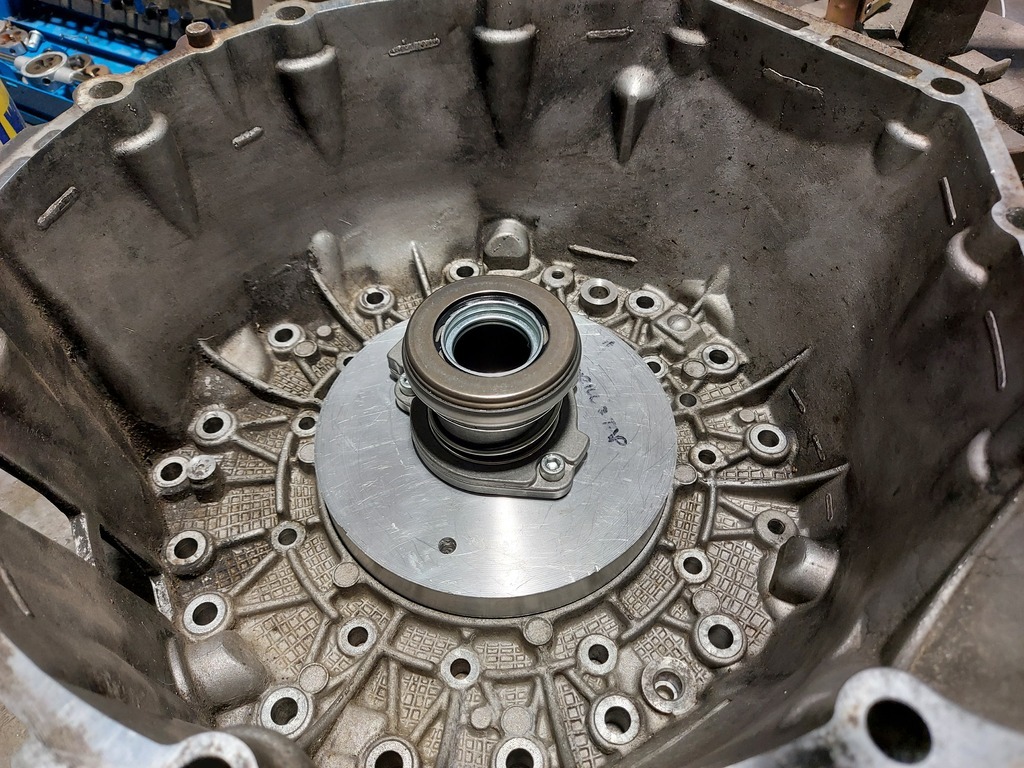 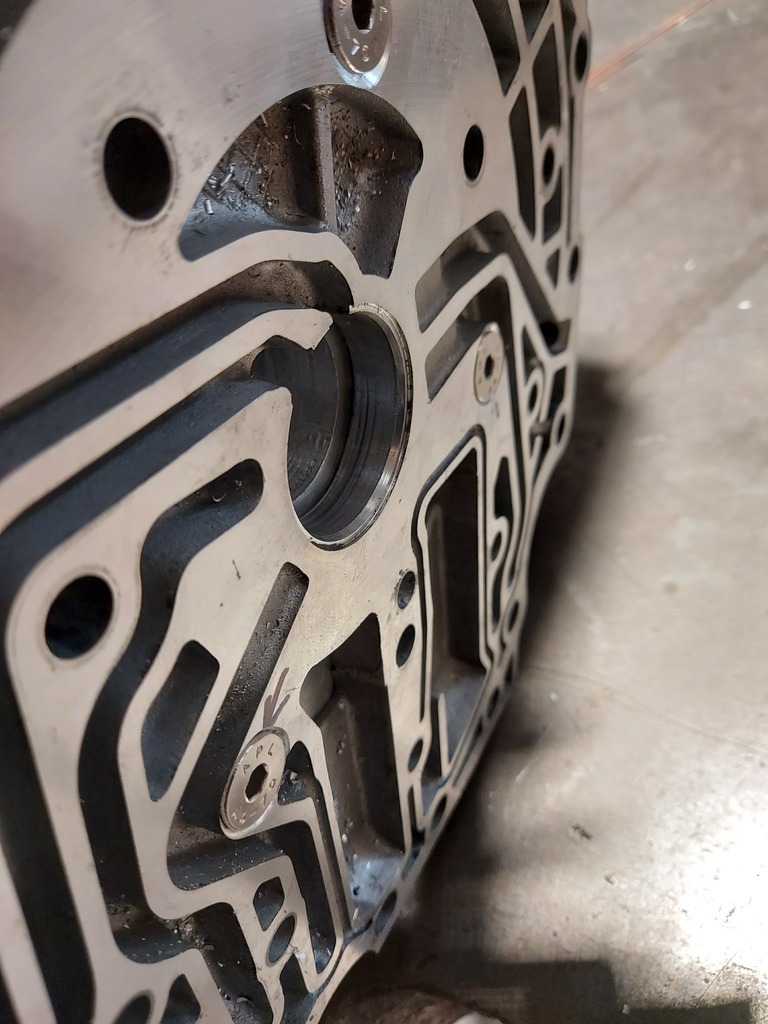 I then made up a short pipe from the cylinder to outide the bellhousing. I used a convenient blank in the casting to put a male fitting ready to take a flexi to the master cylinder when the gearbox is back in. The black pipe is a rubber sleeve I slid over the pipe to stop it chafing on the bellhousing. 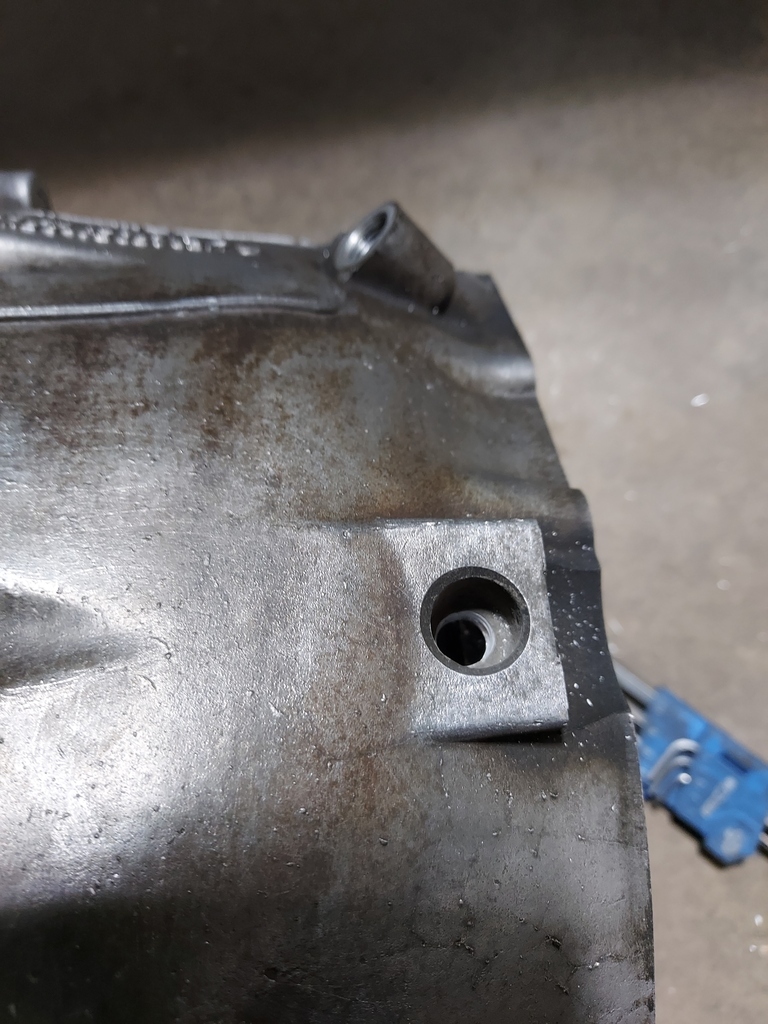 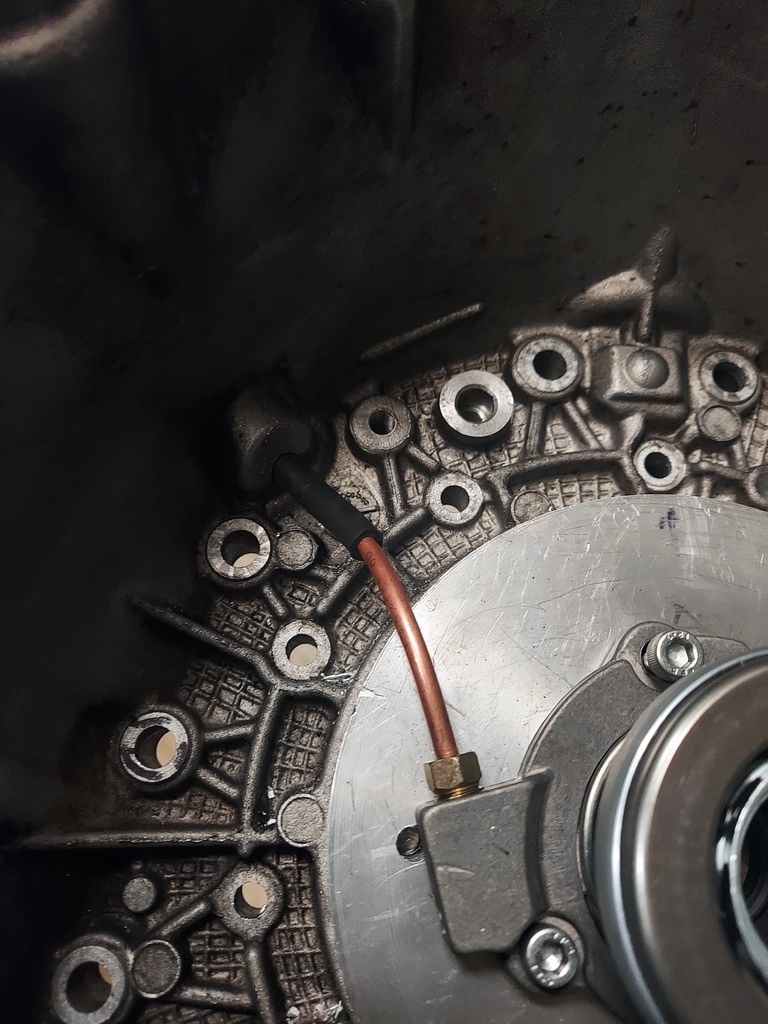 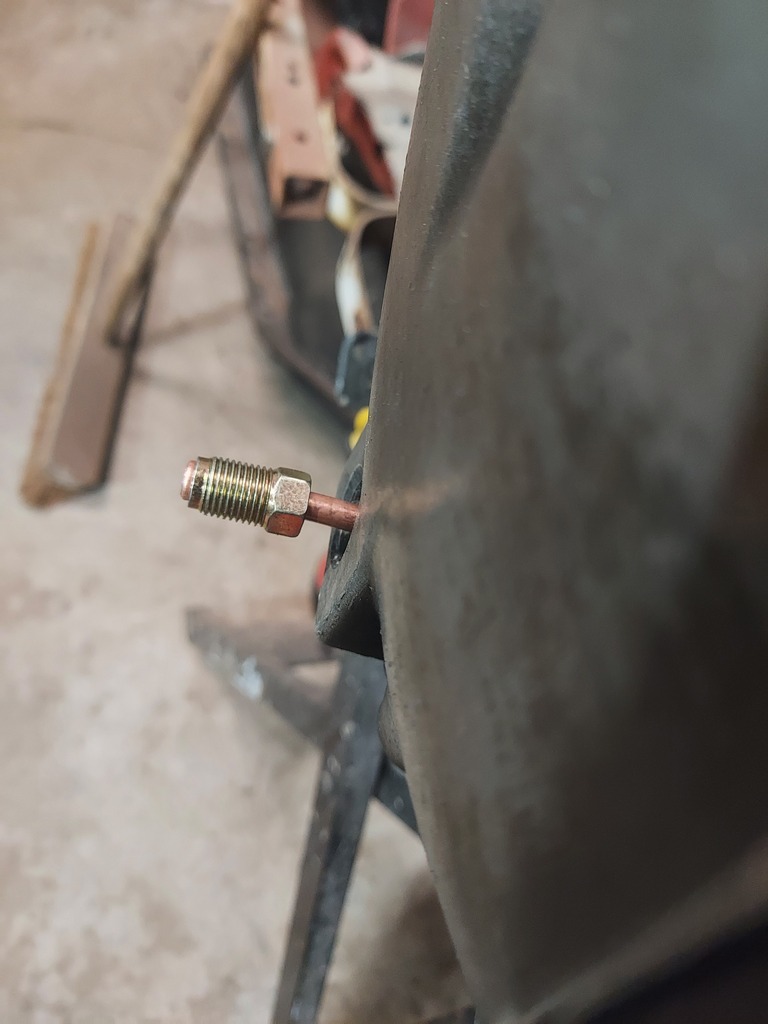 So that's the clutch arrangement hopefully sorted. I'll only know for sure when it's all bolted together though! Another machining job I needed to tackle was the spigot bearing. I'd got the engine and transmission at a distance which meant I had good spline engagement with the clutch, but this meant that the end of the input shaft sat rather far inside the flywheel (in fact, through the other end!). This meant that if I put the spigot bearing centrally in the flywheel there was a risk that a step in the input shaft would hit the bearing, and stop the gearbox and engine surfaces mating. Or at the very least It could put pressure on the input shaft and break something. I measured and measured again... it was close, it may or may not be an issue depending on how accurate my measurements were (hey, I'm no engineer!). I decided it wasn't worth the risk, and seeing as I needed to make an adaptor to fit the Nissan spigot bearing anyway, I might aswell design it so that it sits further towards the engine and avoids any issues with the input shaft step-up. 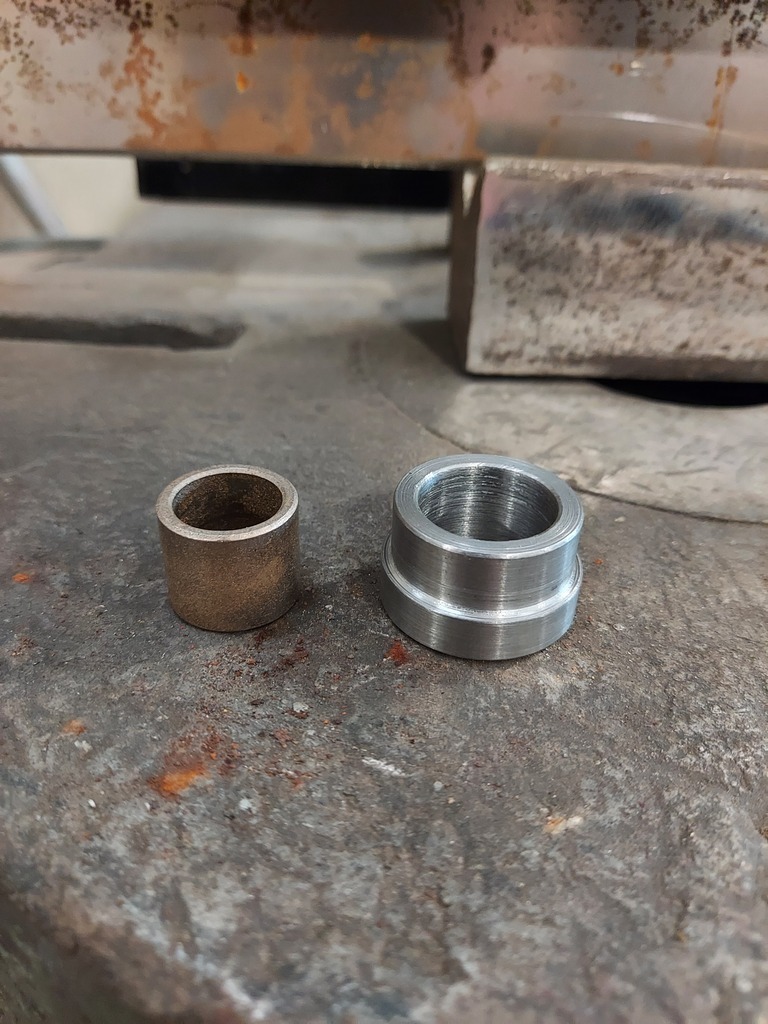 Here we have the adaptor, with the Nissan L28 spigot bearing. I designed it to be a press fit into the flywheel, and the bearing is a press fit into the steel adaptor. Full disclosure: I actually got a mate to make this piece after I gave him the dimensions. I just didn't have the time, and it needed to be super precise and I didn't want to mess it up. 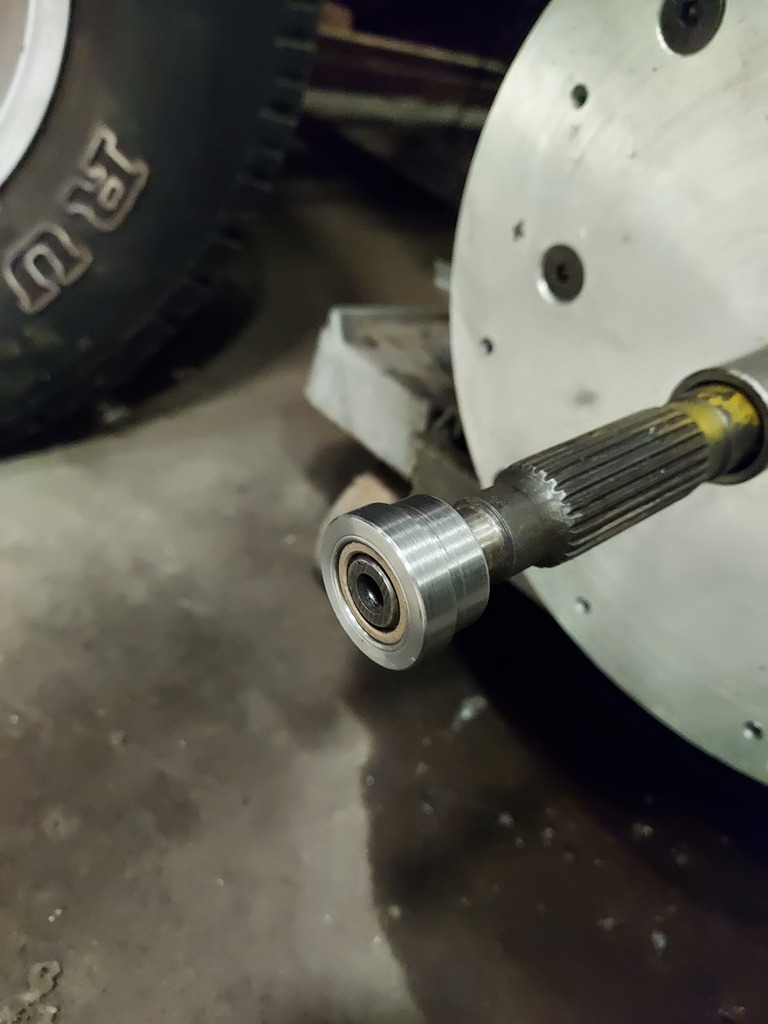 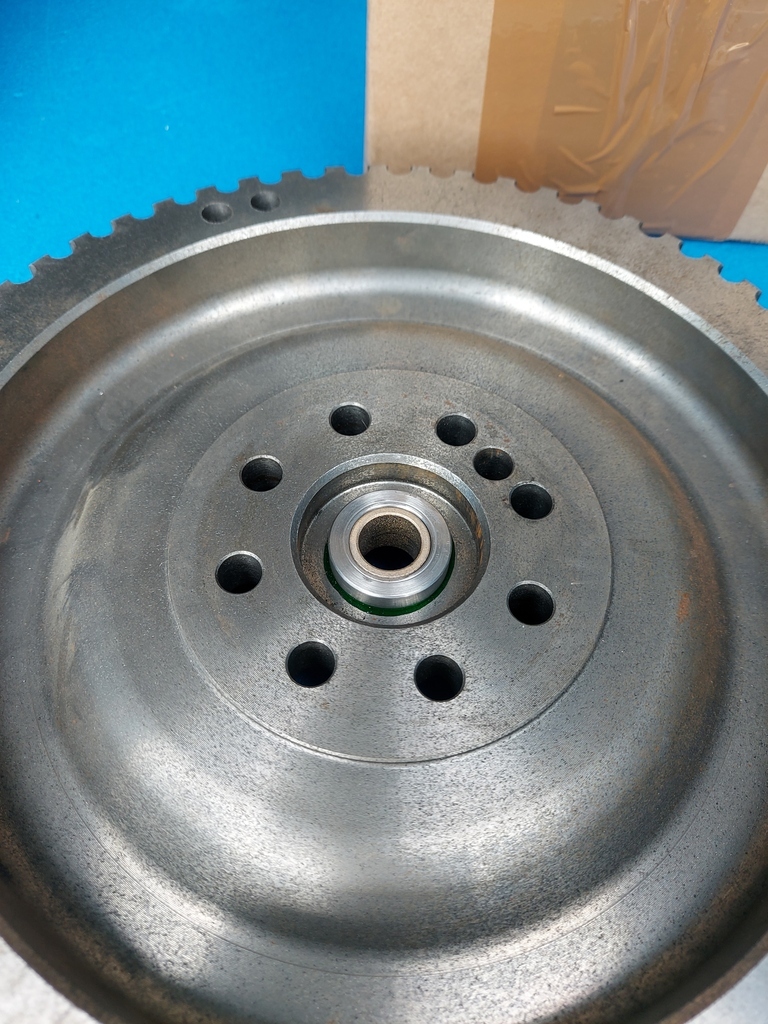 I test fitted it on the input shaft after I pressed the bearing in just to make sure it hadn't distorted, then pressed it into the back of the flywheel. You can see the step in the input shaft in the photo. 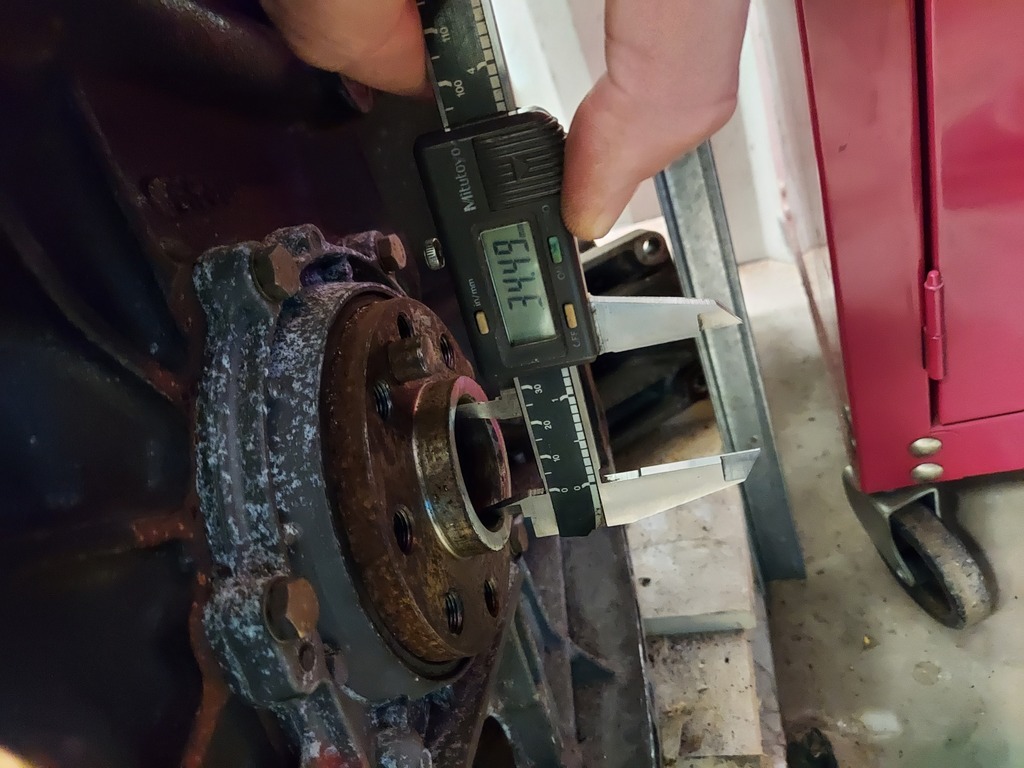 The flywheel bolts flush with the crankshaft flange, howerver there is a centre bore running quite deep into the crank flange, and my adapter is a few mm smaller in diameter. This positions the spigot bearing to run on the end of the input shaft. So that's all the engine and gearbox adaptors made! My next step is to test it all by joining the engine and gearbox and crossing fingers and toes that all this theory actually works... You'll have to look out for a future update to see whether it's worked or not (Oh god I hope it works!!) Other jobs I've done on the Patrol is undersealing the area above the fuel tank. It wasn't particularly bad, but I wanted to throw something on there while I had the opportunity. It was a messy old job but worth doing to keep any rust at bay. 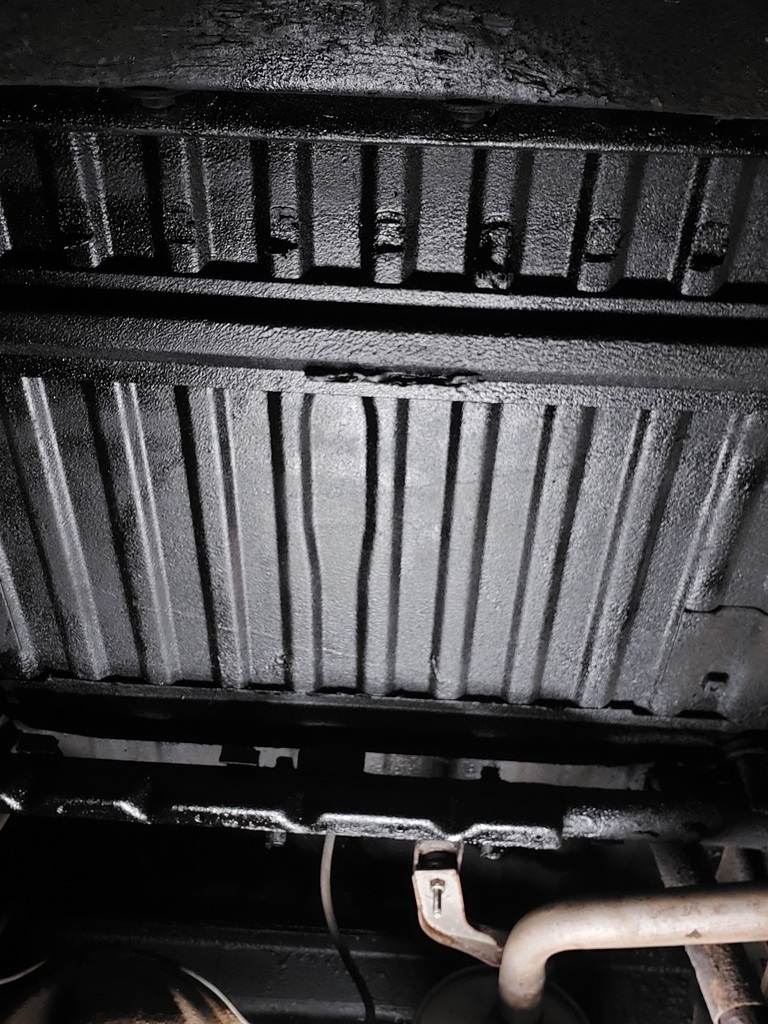 I also removed all of the old fuel lines and the fuel pump. The lines were in terrible condition and I think one more year of use would have given me multiple fuel leaks. This was a pretty horrendous job! Lots of rusted fasteners, upside-down angle grinding, grit and rust in the eyes... you know how it is. Had to be done though! Braided fuel lines will be going in before the gearbox gets bolted in. 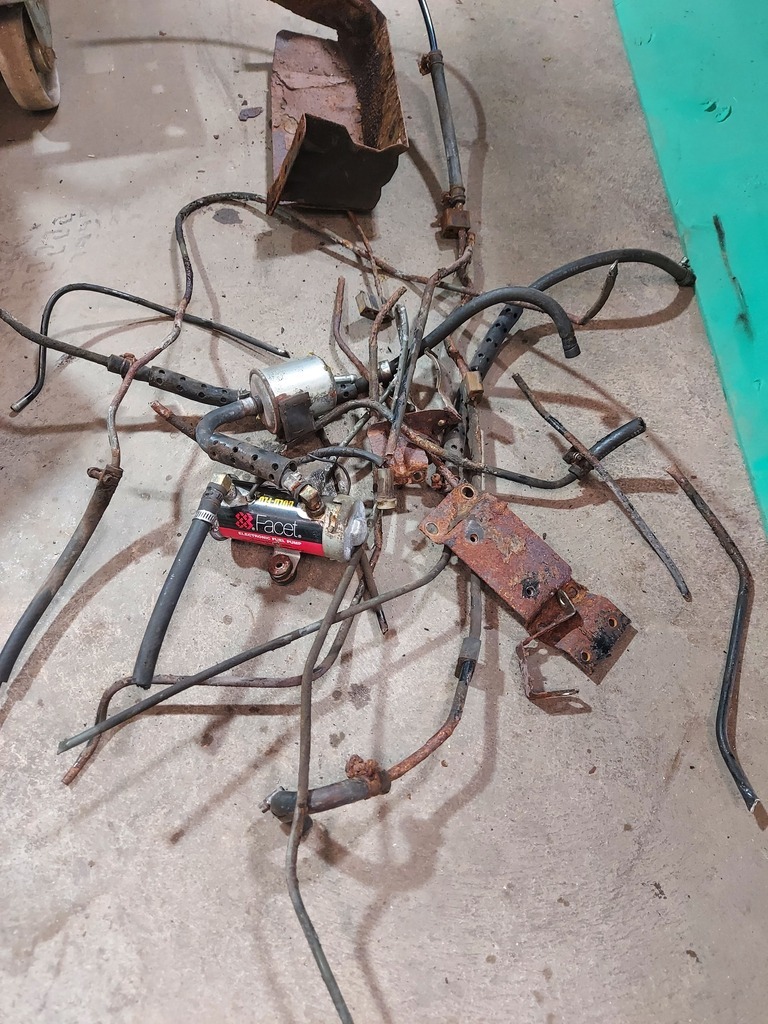 So that's us pretty much up to date. I've gone into quite a lot of detail with all the adaptors and machining, I hope it's not too dry to read through! I figured it might help someone else who is contemplating doing a conversion where no adaptors exist. This project is a bit of a slow burner, I only get a few hours to work on it each week so progress is slow and steady! Retro Rides Gathering gave me a boost of inspiration though, I really REALLY want to finish it in time for RRG22... not that I want the pressure of a deadline... |
| |
Last Edit: Sept 5, 2021 16:17:42 GMT by BenzBoy
|
|
|
|
|
Sept 5, 2021 17:13:23 GMT
|
|
Great progress I'm sure you have considered these but there are a couple of things I learn't the hard way you might want to consider
Is the centre of the cylinder on the gearbox side supported? If it isn't when you press the clutch pedal for the first time you get a pop and all the fluid poors out of the clutch housing. In my case follwed by a tirade of bad language!
To bleed the cylinder fill it before fitting the engine to gearbox, easiest way is to put a bit of rubber vacuum hose on the feed line dunk it in a bottle of brake fluid and compress the cylinder with your hand, let it go slowly and it virtually fills the cylinder then when you bolt it to the engine it pushes any remaining air out.
|
| |
Last Edit: Sept 5, 2021 17:14:13 GMT by kevins
|
|
|
|
|
Sept 5, 2021 18:21:18 GMT
|
Great progress I'm sure you have considered these but there are a couple of things I learn't the hard way you might want to consider Is the centre of the cylinder on the gearbox side supported? If it isn't when you press the clutch pedal for the first time you get a pop and all the fluid poors out of the clutch housing. In my case follwed by a tirade of bad language! To bleed the cylinder fill it before fitting the engine to gearbox, easiest way is to put a bit of rubber vacuum hose on the feed line dunk it in a bottle of brake fluid and compress the cylinder with your hand, let it go slowly and it virtually fills the cylinder then when you bolt it to the engine it pushes any remaining air out. From what I can see, the cylinder runs on its own internal shaft. Certainly in applications like the Astra and Corsa gearboxes there's nothing supporting the CSC. I'll need to trim down the shaft sleeve on my gearbox as it's bigger than the bore of the CSC. Seems like it should work like that... Unless I've overlooked something? Thanks for the tips on getting the air out. As I said in the post, I would have gone for a different CSV had I known about the bleed nipple but I'd already bought 2 different cylinders and just figured I'd go with it! |
| |
|
|
|
|
|
Sept 5, 2021 18:55:55 GMT
|
Its a corsa one i used, if you look closely the centre part on the back is a steel top hat inside the circular part which locates it held in with 3 small areas of peening, this is just for assembly the std corsa set up clamps it firmly in, mine didn't. I had to.make a ring to support it which in my case reacted against the original front cover on a morris minor gearbox. This gives an idea of the construction its the part numbered 36 which came out, it forms the inside bore for the piston to seal against, the outside sealing against the housing. Also shown as the part with a darker silver finish in the photo. 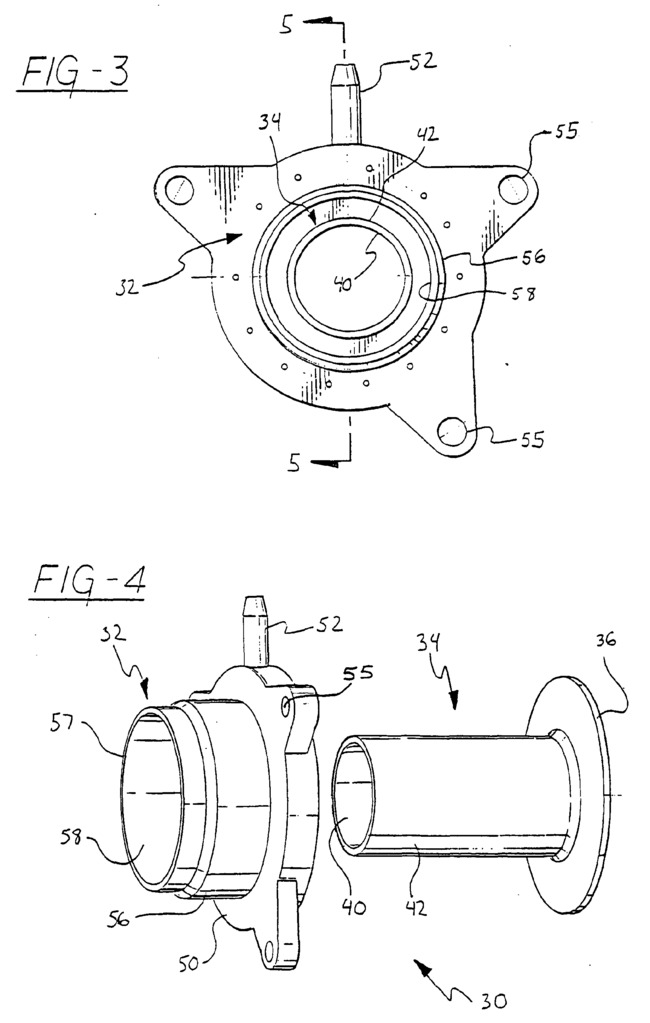 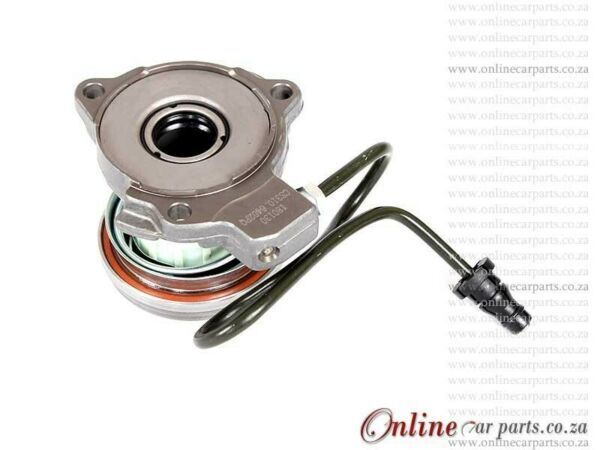 |
| |
Last Edit: Sept 5, 2021 18:59:57 GMT by kevins
|
|
|
|
|
Sept 5, 2021 19:07:22 GMT
|
|
Ah I think I see what you mean now... Are you saying that the shaft moved backwards towards the gearbox when it was operated, and pee'd fluid everywhere?
I'll have a look next time I'm at the workshop and see if that is the case with mine. You could have saved me a big headache there!
|
| |
|
|
|
|
|
Sept 5, 2021 19:17:09 GMT
|
|
Yes it came back into the gearbox, I'm guessing it's going to take you more than the 3/4 hour it took us to get the minor box out if you have the same issue!
Kev
|
| |
|
|
|
|
|
Sept 5, 2021 19:37:08 GMT
|
|
Thanks for the heads up! I'll double check. Yes it will definitely be a long job getting the gearbox out again!!
|
| |
Last Edit: Sept 5, 2021 19:37:49 GMT by BenzBoy
|
|
|
|
 With the intercooler as it is I'd just be slightly wary of making sure your radiator is really high efficiency and as large as you can fit if you tune the OM606 at all as they do run hot.


