|
|
|
Apr 18, 2015 17:33:05 GMT
|
The last time i stuck some pictures on here, the car was looking a bit worse for wear. Now it still looks a bit worse for wear, but its road worthy! After getting 3 of the 4 corners that needed attention done, the new house was ready to move into so the car needed to be moved. Started off by sticking all the bits back on, re doing the wiring at the rear, then checking it all worked. It did, so I drove it over. The only issues that showed up on the drive over were that the brakes only seemed to be working on the front left. Fast forwards a few days to today, Upon closer inspection, the front right calliper has seized and its leaking and Its dumped fluid onto the new pads  atleast i had a spare set of new (3 years ago) callipers on the Capri, so i liberated those and put them on the Hillman: 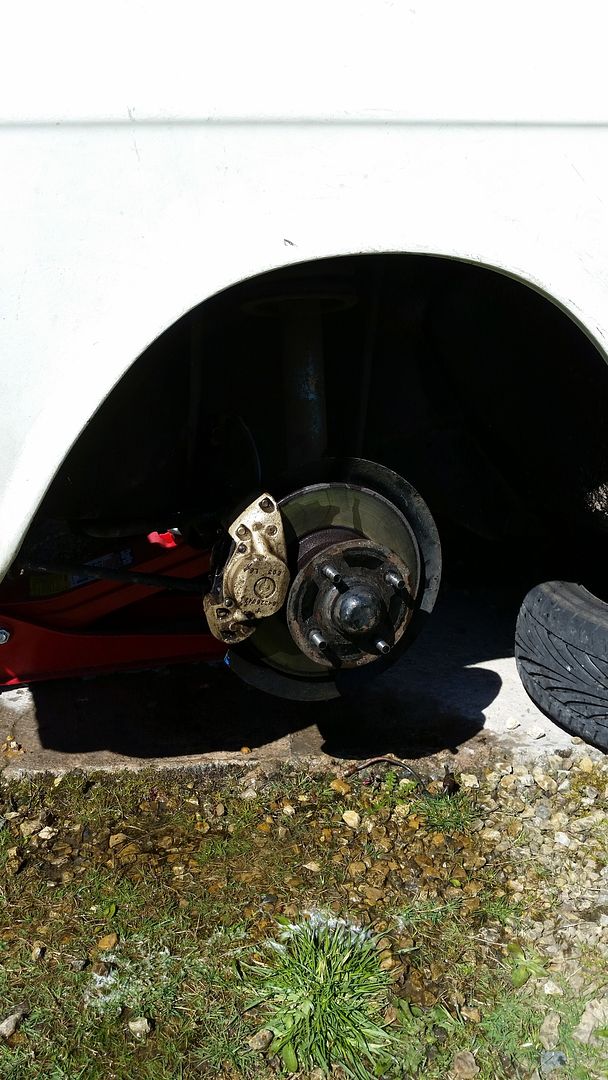 I stuck the new pads back in, hoping i could burn the oil off, re bedding in the pads, but although it is much, much better, its still pulling to the left, so new pads are required. Now its all working and the sun is shining i thought what better excuse for a drive out: 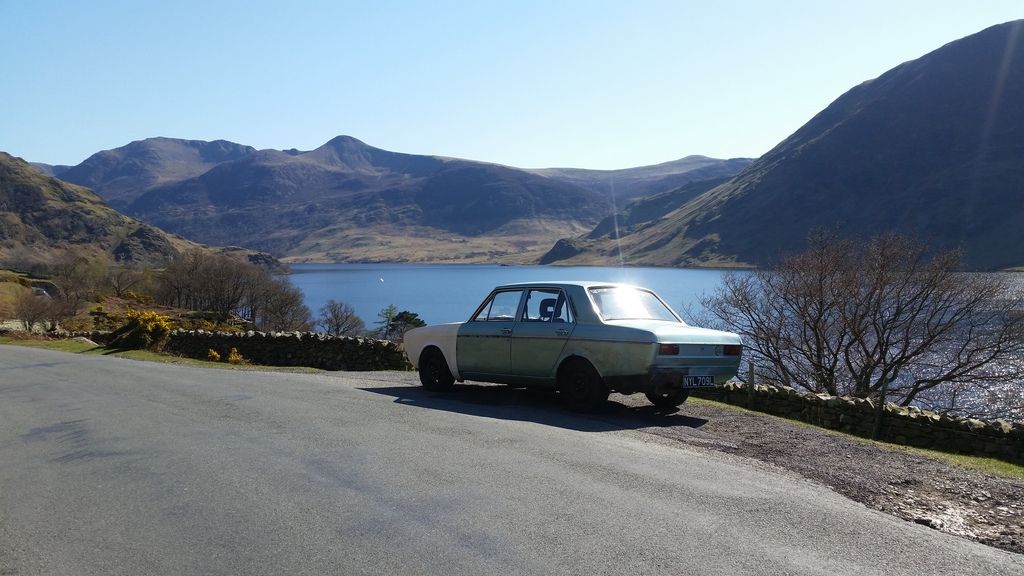 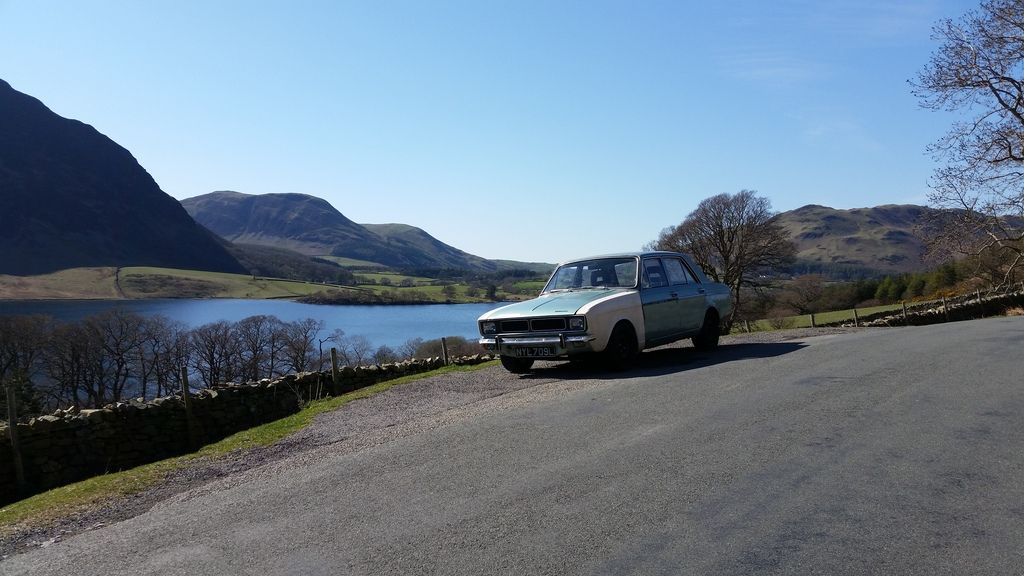 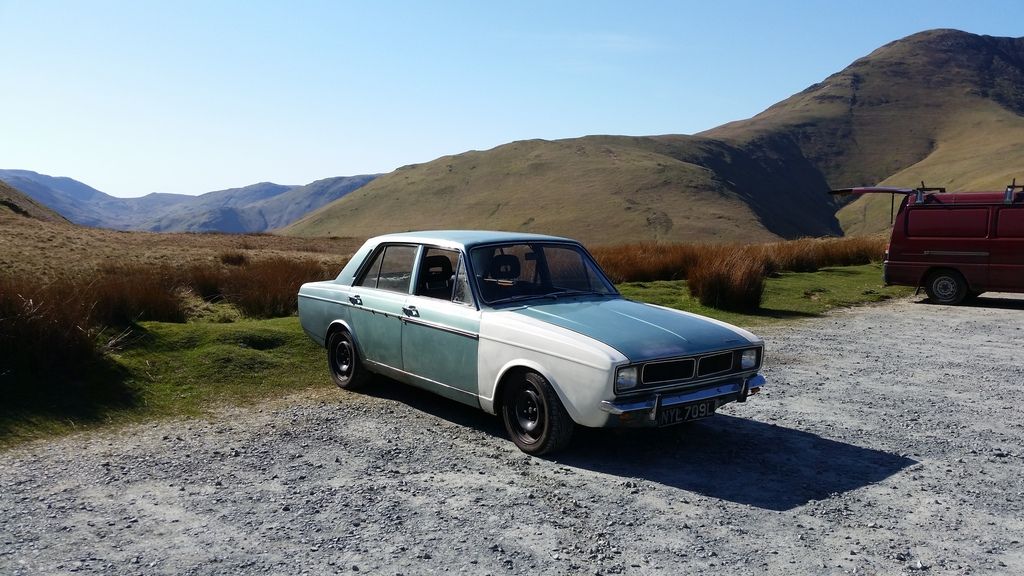 Another added bonus from the recent house move is the discovery of an old photo of me with my first Hunter: 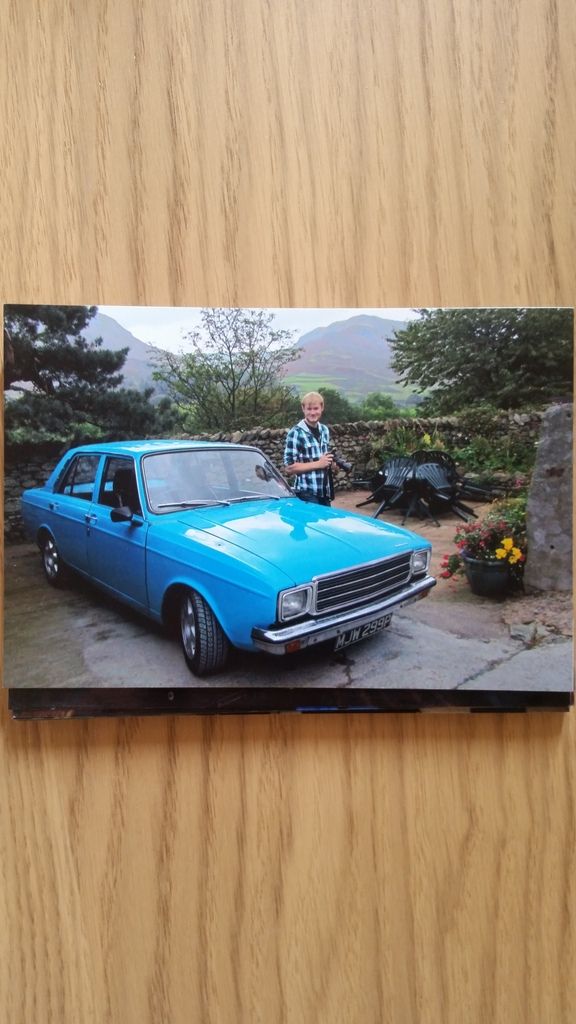 Should i paint this one the same colour? I liked it then so i think ill like it now  That's all for now, I currently don't have a garage, so there wont be a lot getting done until my old house sells to fund the garage! James |
| |
Too many projects, not enough time.
|
|
|
|
|
|
|
Apr 19, 2015 13:16:33 GMT
|
Looking good James   ??. You certainly aren't afraid of a bit of chopping and welding  ?. Two questions for you m8 - How well did your fiberglass wings fit?(good idea with the strengthening brace) Also I am early stages with fitting the rotary 13b in my hunter and having clearing issues without running engine and box at a slant. I see your mx5 lump is sitting slightly down in the backend too, was that to avoid cutting trans tunnel? Thanks for any advice and info. I am a fan of your blue colour from your original hunter  ? Cheers James S |
| |
|
|
|
|
|
Apr 19, 2015 13:18:58 GMT
|
Looking good James   ??. You certainly aren't afraid of a bit of chopping and welding  ?. Two questions for you m8 - How well did your fiberglass wings fit?(good idea with the strengthening brace) Also I am early stages with fitting the rotary 13b in my hunter and having clearing issues without running engine and box at a slant. I see your mx5 lump is sitting slightly down in the backend too, was that to avoid cutting trans tunnel? Thanks for any advice and info. I am a fan of your blue colour from your original hunter  ? Cheers James S /\ the question marks where meant to be emojies  |
| |
|
|
|
|
|
Apr 23, 2015 13:13:17 GMT
|
|
Sent you a pm james88, let me know if you didn't get it. Been away this week "team building " so there's been no work done on the car. Had enough signal to buy some bits though so they should be waiting for me when I get home!
|
| |
Too many projects, not enough time.
|
|
|
|
|
Apr 23, 2015 19:37:26 GMT
|
|
Try boiling the pads to get the fluid out of them, it works with shoes so should work with pads too
|
| |
|
|
andy-v
Part of things
  i like cookies :D
Posts: 358 
|
|
|
|
great thread and a great read, learnt to drive in one of these  30 years ago, same colour car in the last pic, this is all me father would buy brother and sister had a hillman too, four in the family back in the good old days when we was young. |
| |
|
|
|
|
|
Jun 27, 2015 20:08:08 GMT
|
Well its been a while, but welcome to the new house! There's tea in the pot and milk in the fridge so make yourself's at home  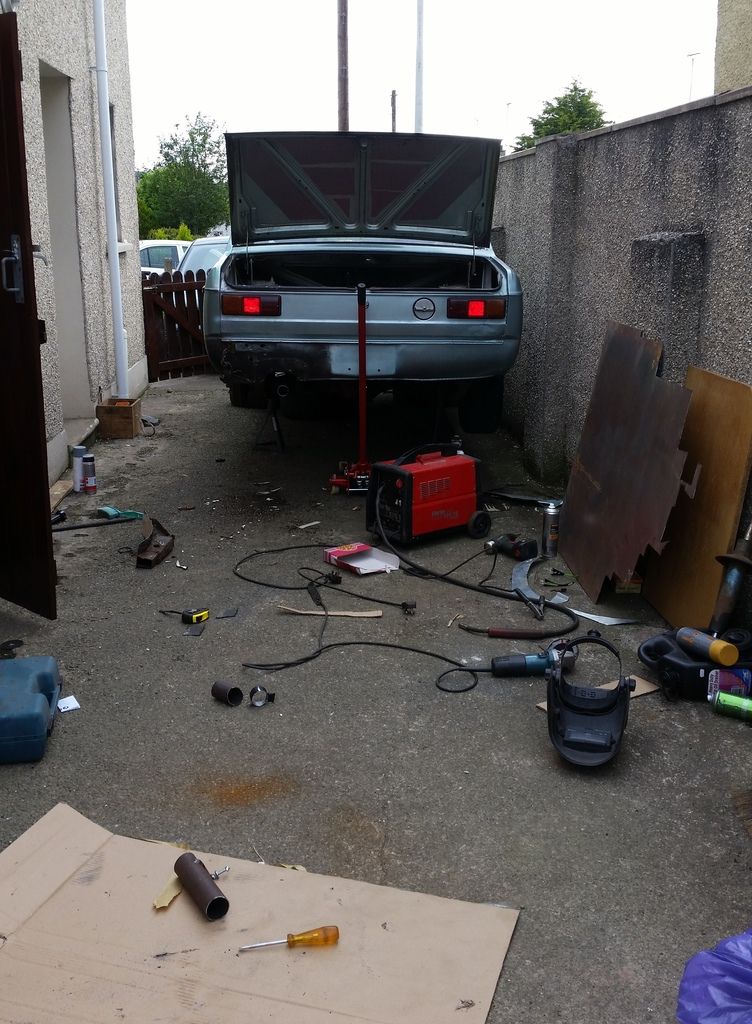 The garage hasn't been built yet as i am still waiting for the buyers to finish buying my old house but i've been keeping myself busy with the hillman. I was running out of things to do so I decided that i'd best get it MOT'd so i can drive it again. I dropped it off and when I got there to pick it up the tester was helping himself to a new yellow rusty hole marking crayon and filling the printer with fresh paper, always a good sign  Two sheets of fails later I was on my way home to begin the repairs. So far i have done 3 of the 4 corners, leaving the NSR till last. That's where the majority of fails were on rust, along with not having an indicator warning light and sidelights (Headlights don't count!  ) and a leaky strut. I started with the strut as i had already bought the parts to convert it to coilovers which are as follows; - MK4 golf front coilovers - E46 bmw top mounts - 2" exhaust couplings Now here's the good bit, I could have bought fancy dampers, coilover conversion tubes and blue paint to recreate every set of struts on a worked on mk2 escort / capri, but that would be too expensive for me. I also have a MK4 golf on the drive to get measurements off. The struts on the golf attach at the base by being clamped into the hub, these are a 50mm diameter strut. The hillman struts are also 2" external diameter so by cutting the top off the hillman strut, sliding over the 2" exhaust clamp tube (which was a thicker wall thickness than the struts) then sliding the mk4 golf coilover into it and buzzing it all together with the MIG you have a strut which uses a damper/ spring combo that's not 43 years old. Hurrah! To compliment this i stuck on some fancy top mounts. I thought i would treat myself (£40 from evilbay), but i'm glad i did as the hillman ones fell apart when i removed them, so no wonder the steering felt a little stiffer than it used too! 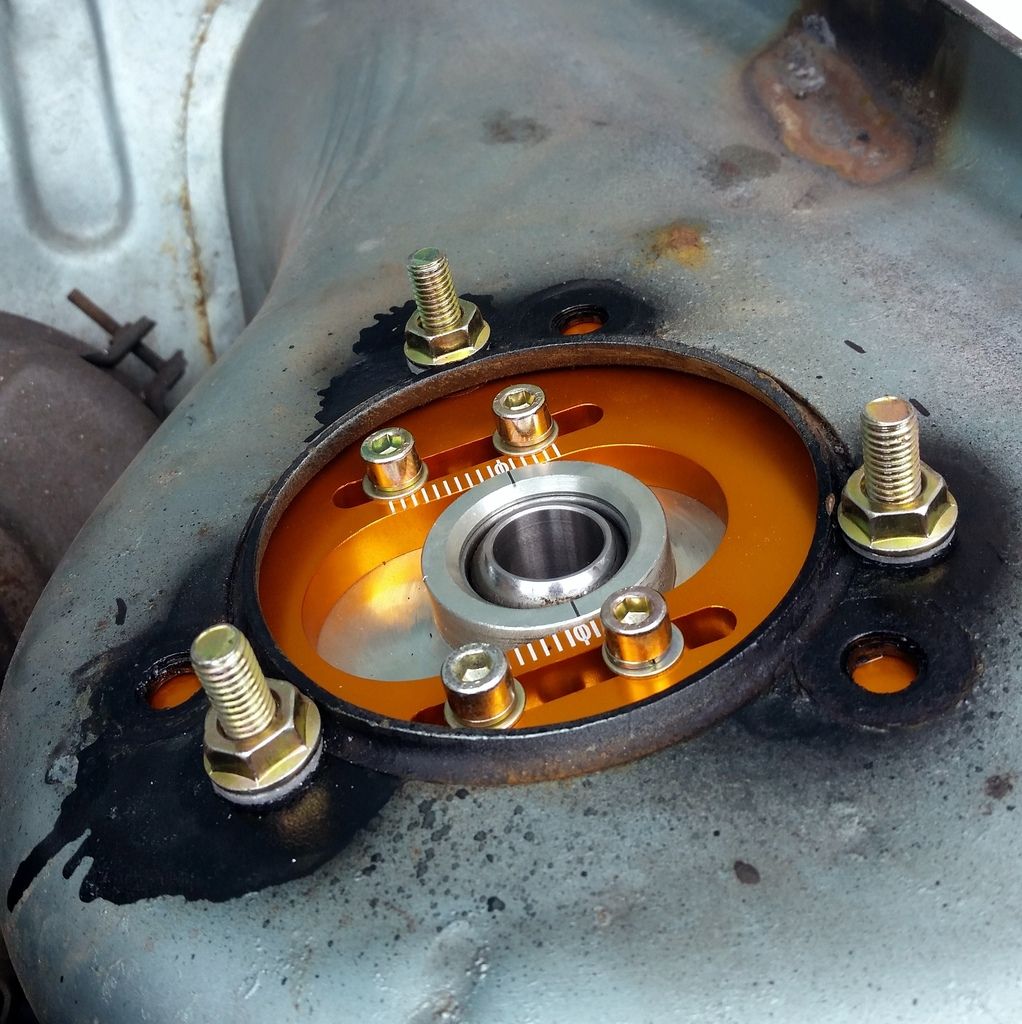 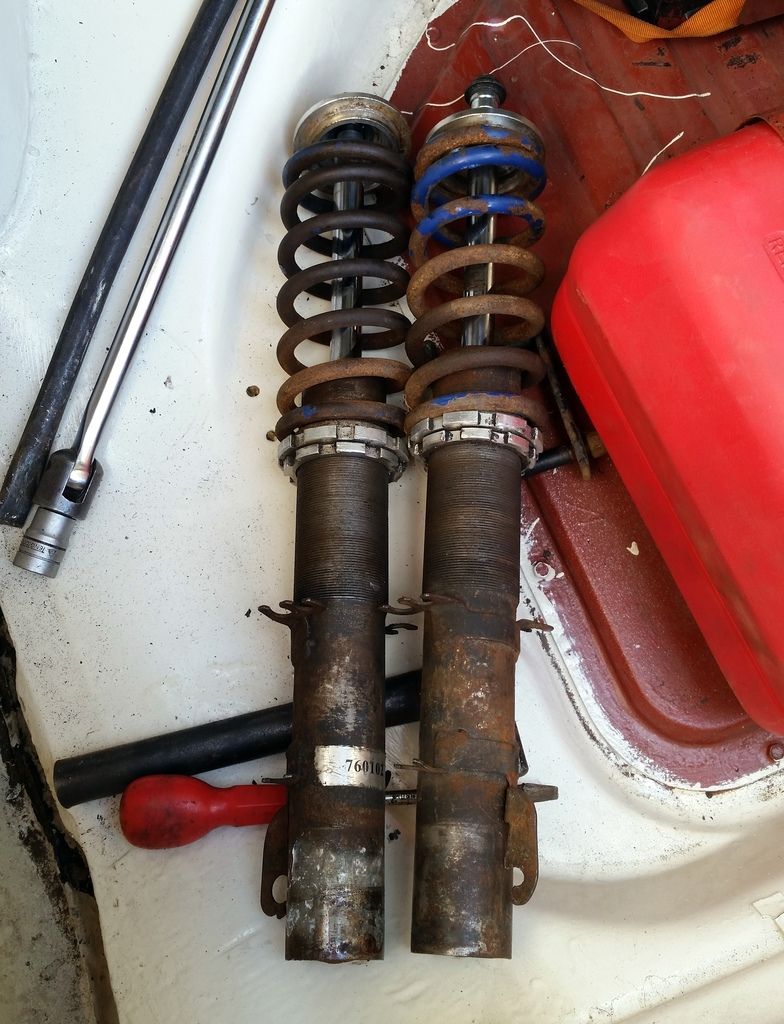 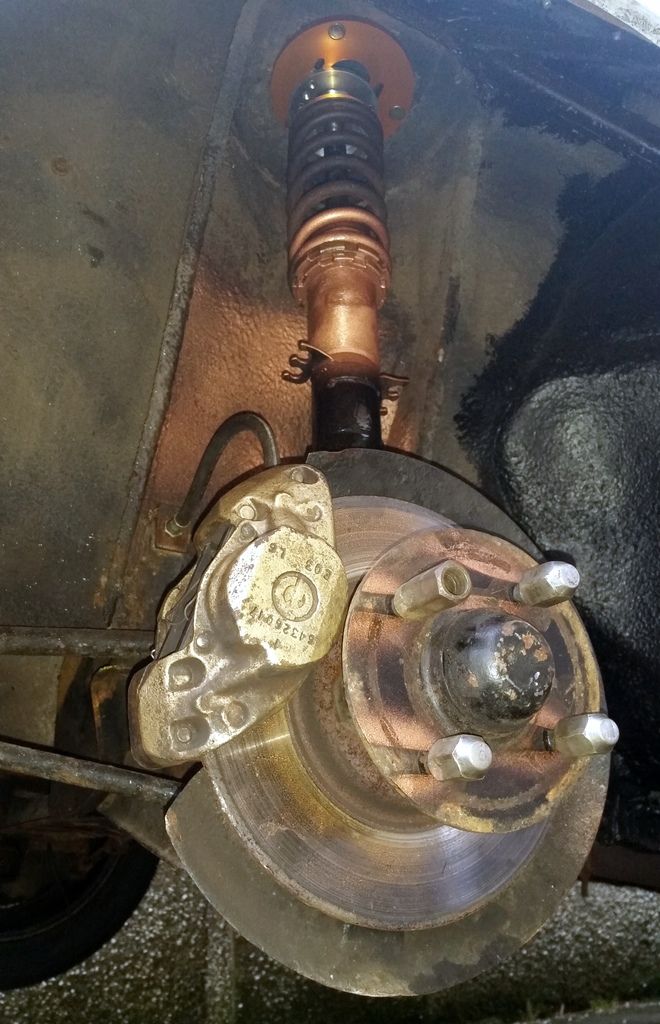 I also found all this in the oil after cutting them open. No wonder they didn't do much damping! 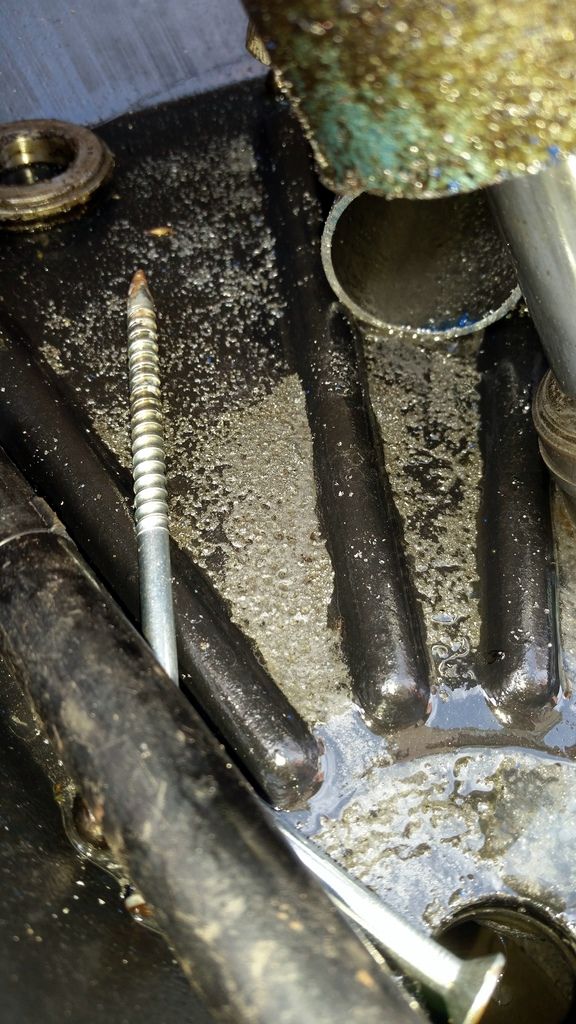 Next up was the rust repairs. I've always liked wide arches, but only on a full on race car. The arches on the hillman, however, go almost straight down and don't let the car go very low at the rear due to rubbage. so the solution: 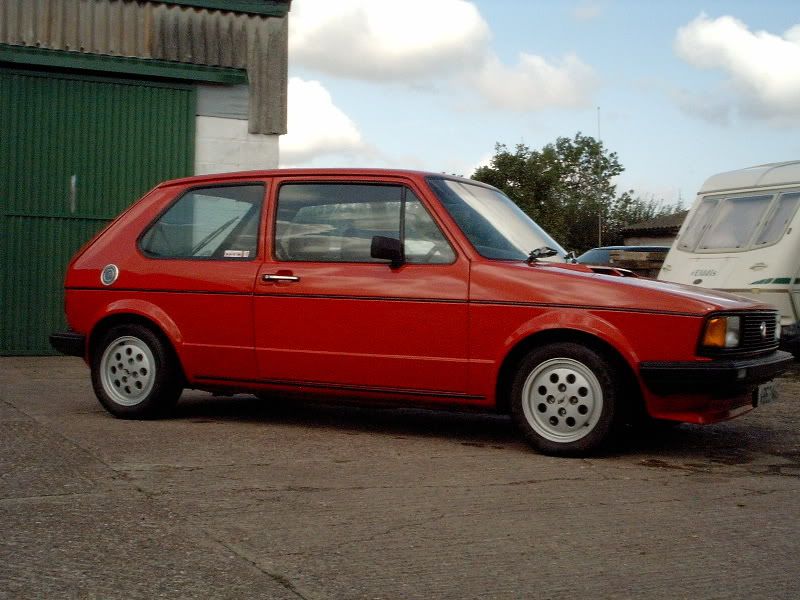 Mk1 golf arches for a subtle but almost factory flare  So after finding the previously repaired and now rotten arch was held on with bodyfiller(deja-vu anyone) I set about cutting the rust out, which escalated, resulting in the other half of the boot floor coming out (pictures to follow tomorrow), and the end of the sill getting repaired aswell! 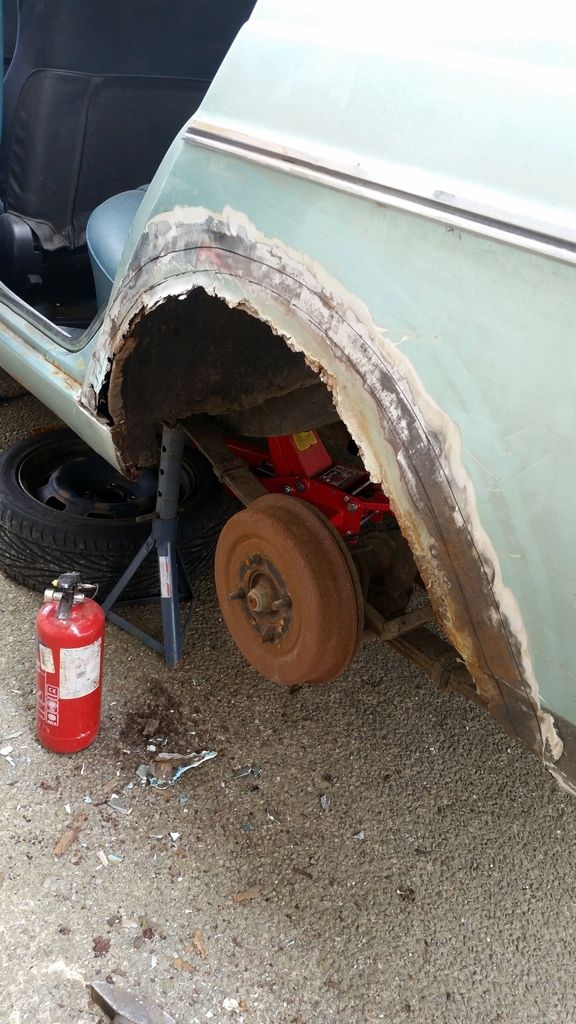 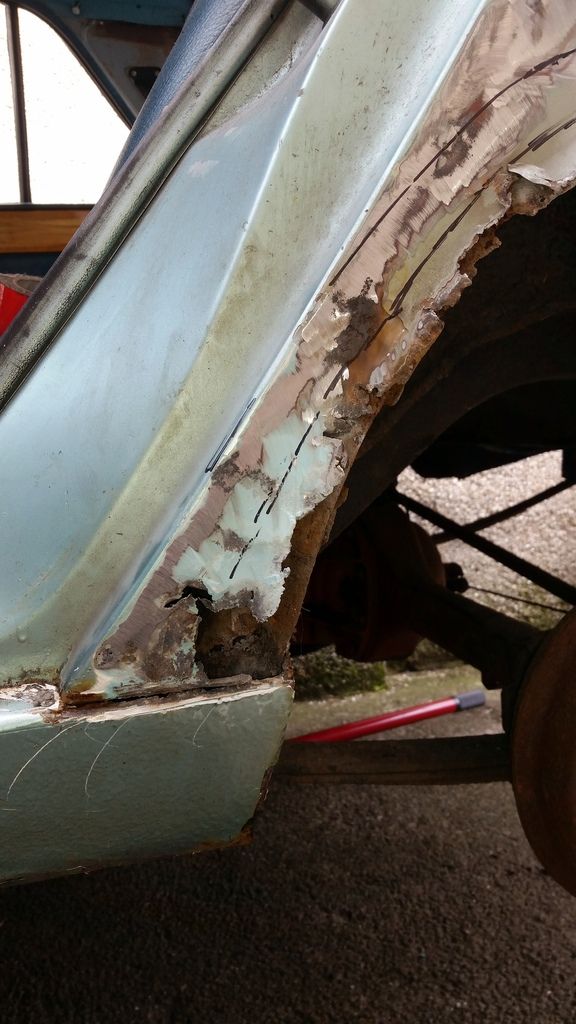 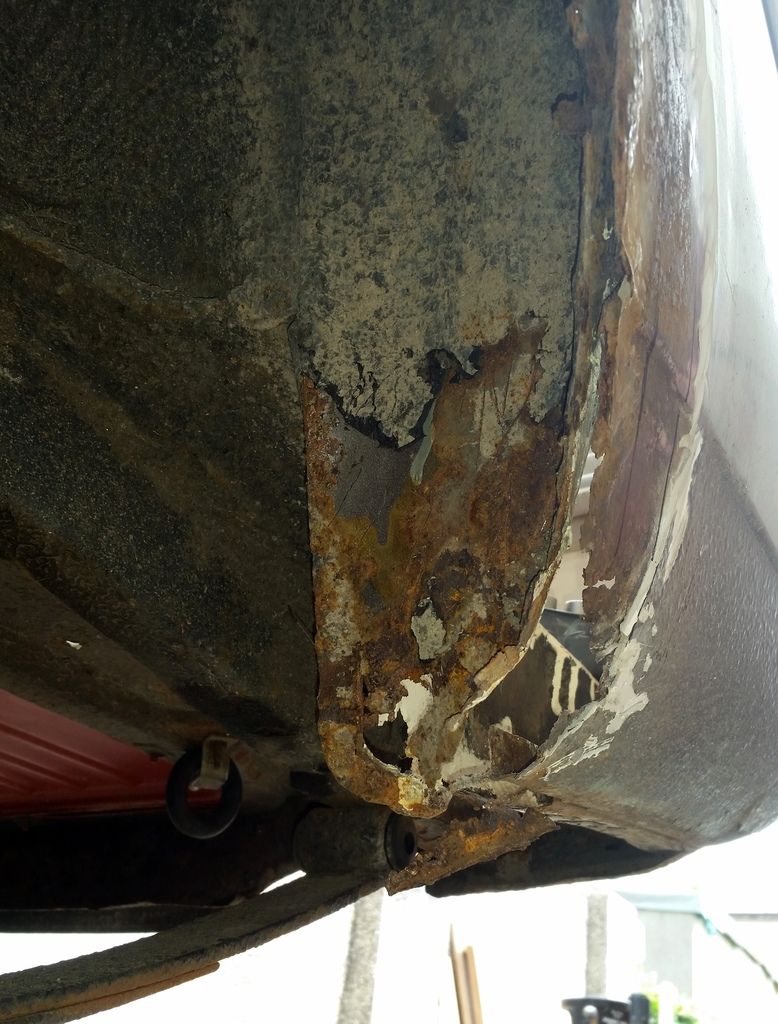 It doesn't look too bad in the pictures, but its kept me busy all day, out in the sun  But then the good news came. I'm going to need bigger wheels! 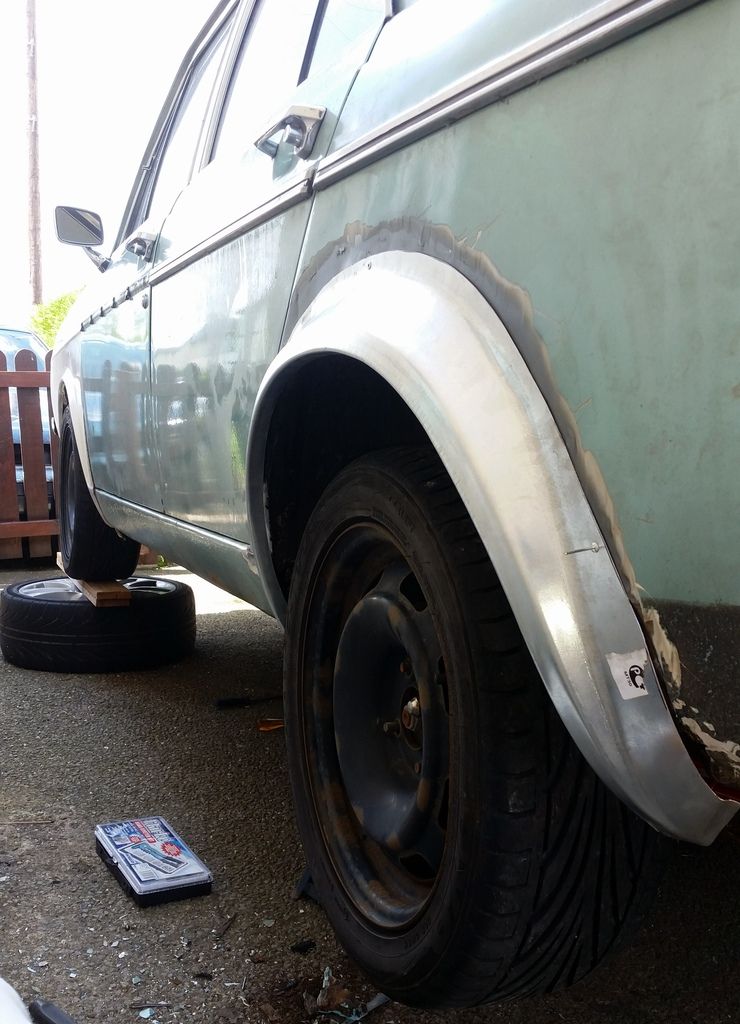 That's all for tonight folks. James |
| |
Too many projects, not enough time.
|
|
|
|
|
Jun 28, 2015 17:37:34 GMT
|
After a late start this morning due to the rain, I set about finishing up the passenger side. It didn't take very long as it only needed some seam sealer then some paint over the top. Here's the section I ended up replacing on the boot floor/ spring hanger: 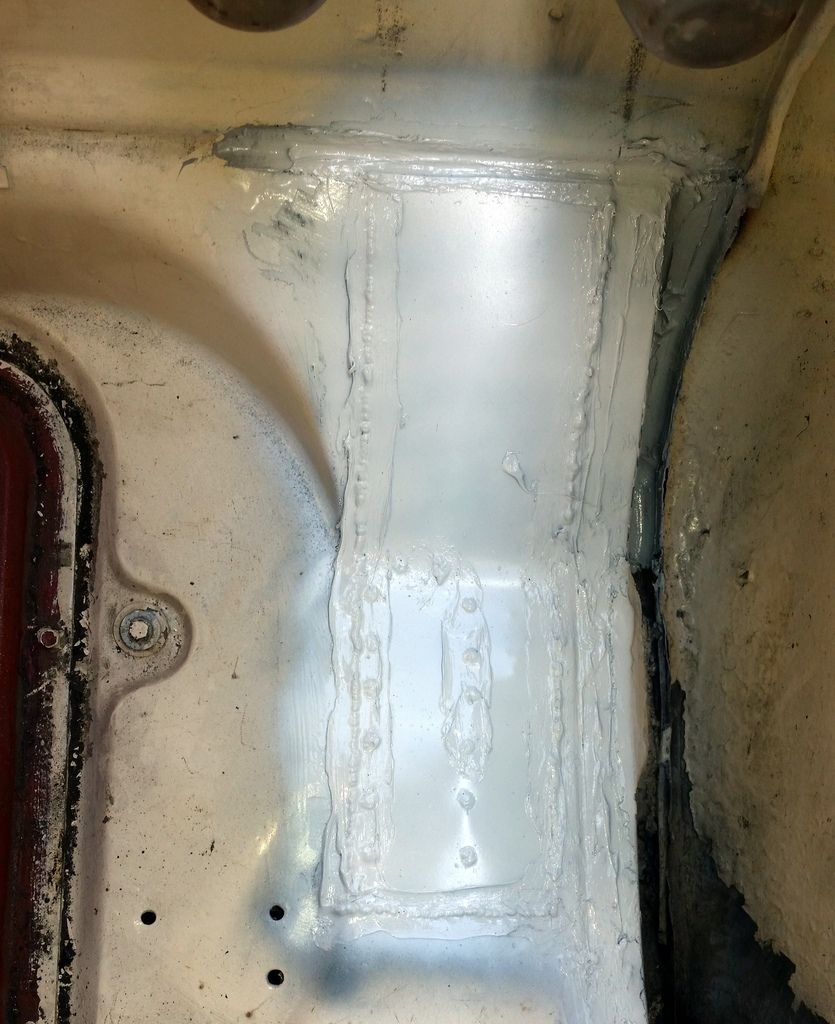 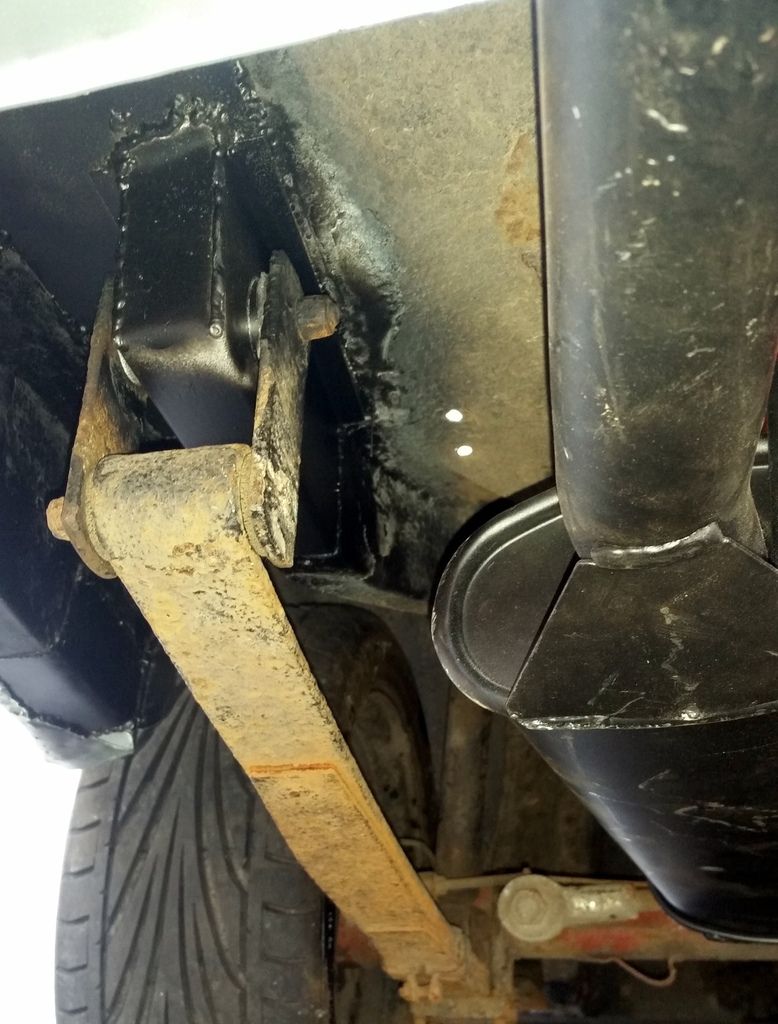 Looks horrible but id rather that than have it rusting or a little water sneaking past the welds.... Done: 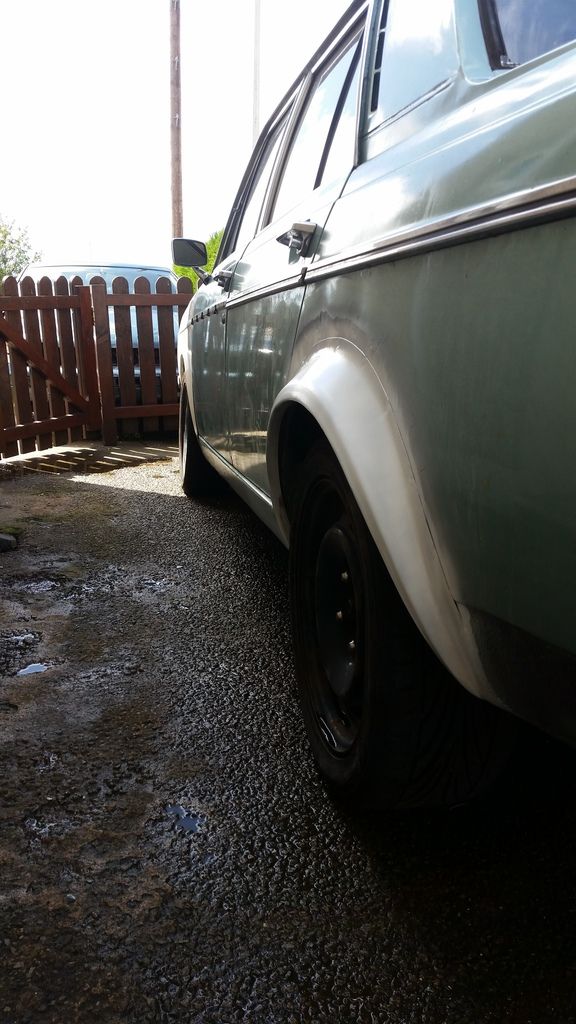 Anyway with that done, I fired her up and spun her round so I could work on the driver side. I wasn't looking forwards to this as i only put the whole rear quarter on a few months back, but needs must and at least I knew i was cutting into fresh metal and not loads of rust! A short time later and i was done: 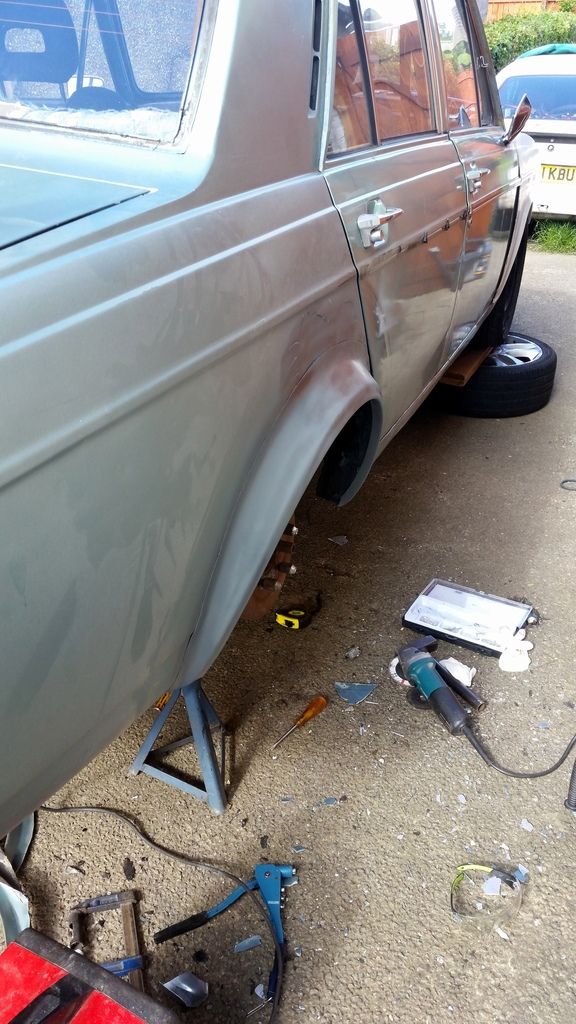 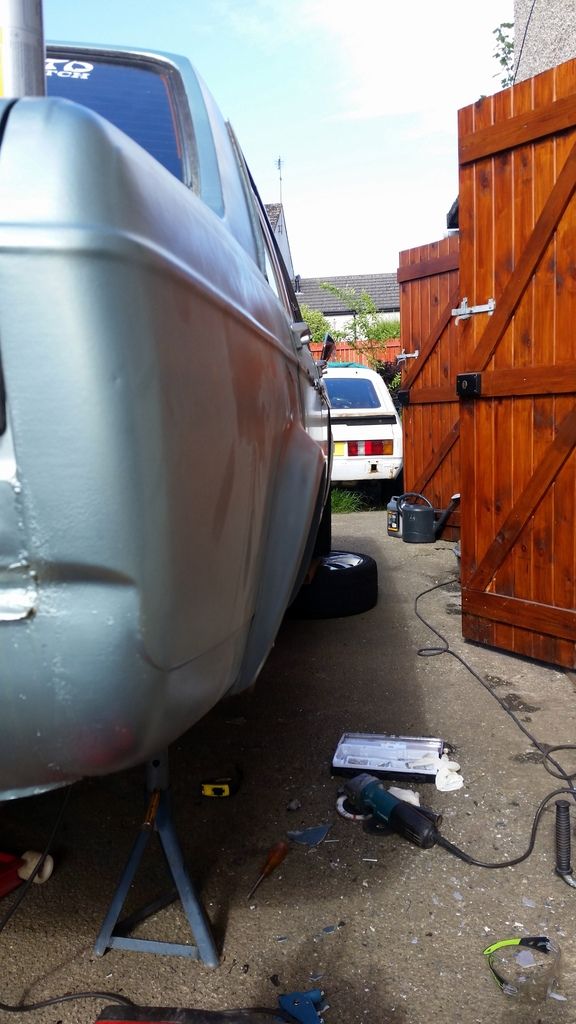 Just one more bit of rust to do now then the lights, then the indicator bulb, then some other bits and its ready for the re-test  James. |
| |
Too many projects, not enough time.
|
|
sherv
Part of things
  BEAMS VVTi Powered 1987 ST162 Celica ..More power.Better brakes.Coilover suspension.Still 80's Cool.
Posts: 80 
|
|
Jun 29, 2015 19:21:09 GMT
|
|
Enjoyed looking through this thread,its good to see someone just doing their own thing,pretty cool!
|
| |
|
|
|
|
|
|
|
I can now confirm that i have a valid MOT   More updates to follow when i get bored of driving it! James |
| |
Too many projects, not enough time.
|
|
|
|
v8jim
Posted a lot
  
Posts: 1,304
|
|
|
|
|
Been watching this for a while it's always an interesting read. Golf arches look good did they need much tweaking?
|
| |
Max sig pic size: 80px
|
|
|
|
|
|
|
|
nothing major v8jim. The hardest part is where the front of the arch has a step in it to match up with the shape of the golfs body. I just bashed this flat, but you cut 90% of this part off, otherwise it would get welded over the back door!
|
| |
Too many projects, not enough time.
|
|
|
|
|
|
|
|
Just re read the whole lot again. How's it coming along?
|
| |
|
|
|
|
|
Nov 20, 2015 22:54:50 GMT
|
|
Its still here minidave81 ! Its currently sat under a tarp awaiting a new engine. The old lump packed it when it ran out of oil at 7000rpmso ive put a slightly higher compression motor together along with some bigger ITB's and a few other bits.
I still haven't got my garage built yet (hence the tarp!) but thats the only thing holding me back currently (aside from the lack of money!)
James.
|
| |
Too many projects, not enough time.
|
|
|
|
|
Nov 21, 2015 16:23:33 GMT
|
|
Awesome. Lack of ££'s is always the biggest problem. Now I seem to have some reliability In mine. I'm stuck for the reasons to hold off doing any mods on it. Did the poly bushed rear springs make much difference to the ride?
|
| |
|
|
|
|
|
Nov 23, 2015 19:44:03 GMT
|
|
They made quite a big deference over the knackered old bushings! They are still going strong too, even after having the turbo motor and a welded diff trying to squash them. They didnt make the ride harsh at all. It doesn't exactly ride like a new rolls royce, but it was still comfier than the daily haha
James.
|
| |
Too many projects, not enough time.
|
|
|
|
|
Feb 20, 2016 13:12:22 GMT
|
Since i last wrote on here i've fit the new engine along with rewiring the whole car and updating the MS2 before starting to re do the map on it from scratch. The old engine spun some bearings due to oil starvation on the limiter (doh) so i built up a fresh engine using my 99 head and an 04 block (with 60something and 50someting miles on) to end up with a bone stock motor that has 10.something : 1 compression. Matched up to the bigger throttle bodies and a new exhaust manifold, she breaths very well! Whilst fitting the new motor, i modified the sub frame so that it sits much lover, putting the engine and gearbox at a better angle which has reduced the propshaft/gearbox vibration it had, but magnified all the engine vibrations as i have hard mounted it ! I havent got many pictures throughout this process as ive been doing it in the rain down the side of my house so heres a short video to enjoy: The main problem i have is that i currently have no air filters as there's no where to fit them and the bike airbox wont fit! To get around this ive drawn up some velocity stacks that'll bolt onto the front of the 'bodies and allow me to fit my old socks over them for filters  These should be done this week, one in ABS and the other in PLA so i'll do an update when they have been fitted and report back! 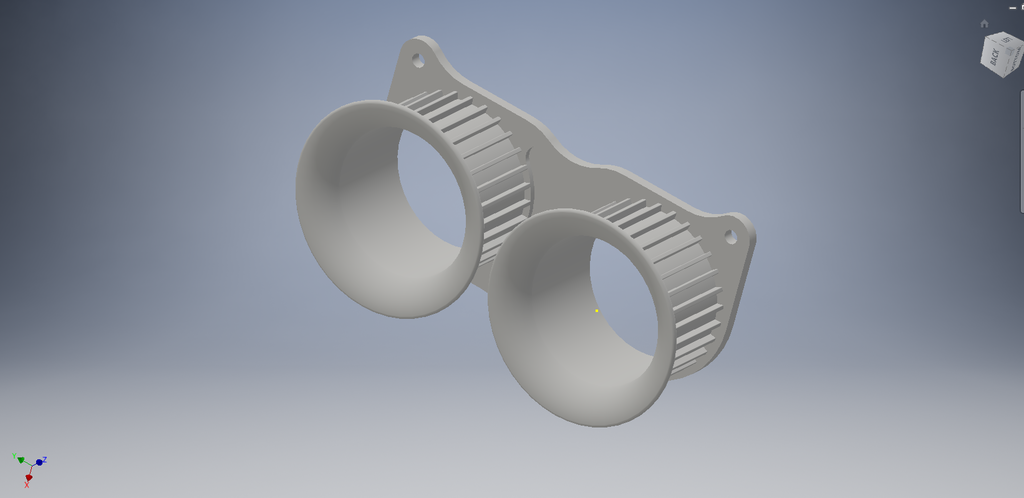 James |
| |
Too many projects, not enough time.
|
|
|
|
|
Feb 20, 2016 16:51:28 GMT
|
Love the video mate! Thanks for sharing, massive thumbs up  |
| |
|
|
|
|
|
Feb 21, 2016 17:24:07 GMT
|
Love the video mate! Thanks for sharing, massive thumbs up  Thanks James88 When the weather gets a bit nicer, or i get my garage built ill do a proper walkround video and show what i've done. |
| |
Too many projects, not enough time.
|
|
stevietuck
Posted a lot
   Never argue with idiots,they drag you down to their level then beat you with their expertise!
Posts: 1,350
|
|
Feb 21, 2016 17:51:30 GMT
|
That sounds bl00dy brilliant, just listened through earphones and it put a massive smile on my face!  |
| |
|
|
|
|
 atleast i had a spare set of new (3 years ago) callipers on the Capri, so i liberated those and put them on the Hillman:


 atleast i had a spare set of new (3 years ago) callipers on the Capri, so i liberated those and put them on the Hillman:


 ) and a leaky strut.


