|
|
|
|
|
Every now and then a modification comes along that really does make a difference. Remember my door? Creased all the way down, due to a failed door check strap some time in its past, in fact when opening it up, removing all the filler, it seems this door has been repaired at least twice before. 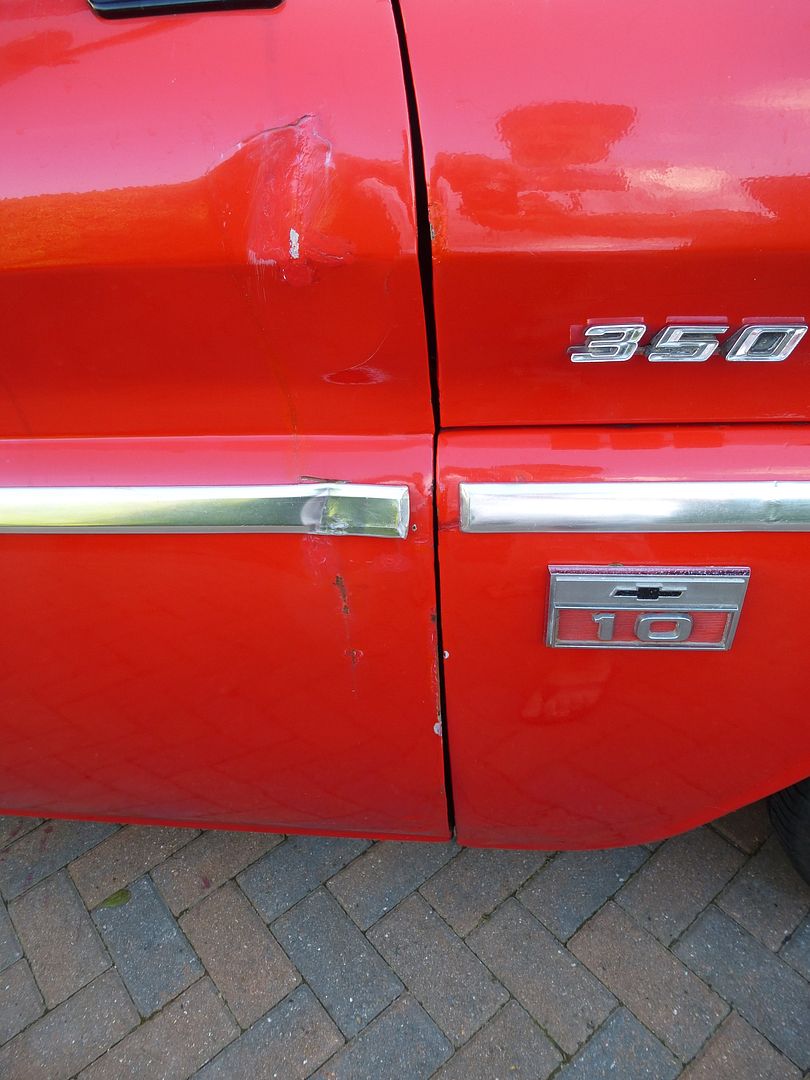  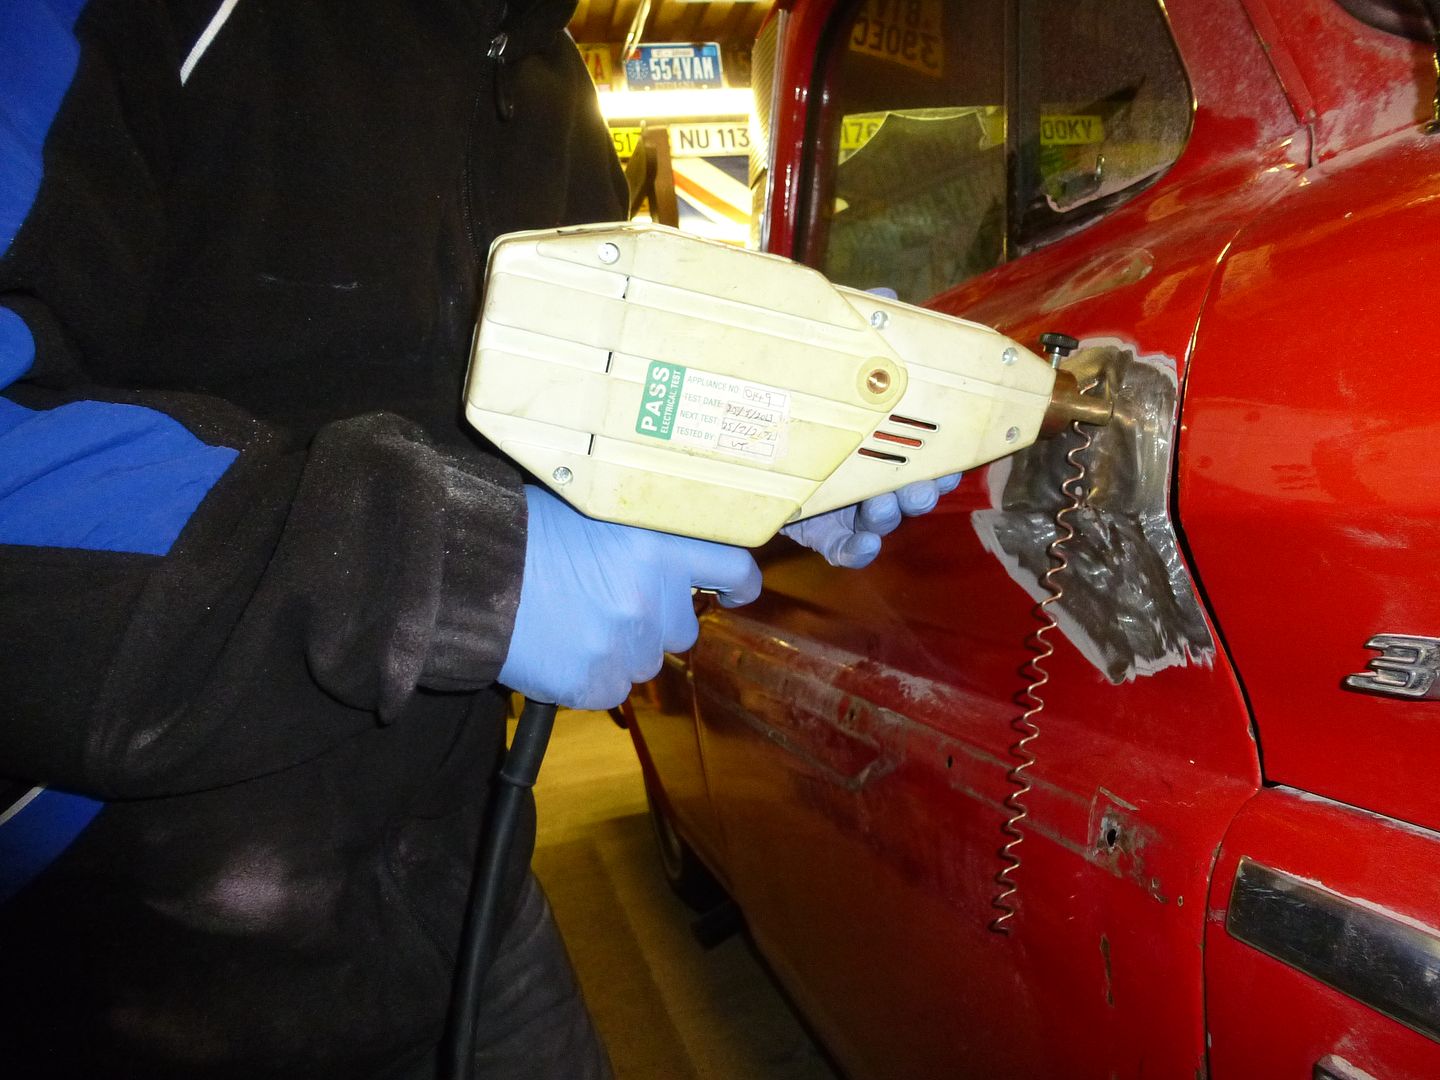 So someone at some point figured out that the door check straps from a Jeep Cherokee fits and is truly plug and play. Except, the front and rears are different, They both fit, but the rears are even longer than the original Chevy parts, which could lead to another crease. So some guys cut and redrill or weld them. Along comes another mod, the fronts are quite a bit shorter, but have a thick rubber stopper ...... So cut the rubber in half and you get the best of both worlds. CLICKY LINKY 67-72chevytrucks.com/vboard/showthread.php?t=668783Thanks to Jay "Lugnutz65" for figuring this one out and photographing the detail. I hope to have a pair of these on their way from the USA soon, as there are none available in the UK right now. |
| |
Last Edit: Apr 30, 2015 7:20:15 GMT by grizz
|
|
|
|
|
|
|
Apr 30, 2015 19:44:38 GMT
|
KiwiKev, hotrod builder extraordinaire built one of these a few years ago, I wanted one as well...... CHECK HIS GARAGE THREAD HERE: www.garagejournal.com/forum/showthread.php?t=64560What I will be aiming for. 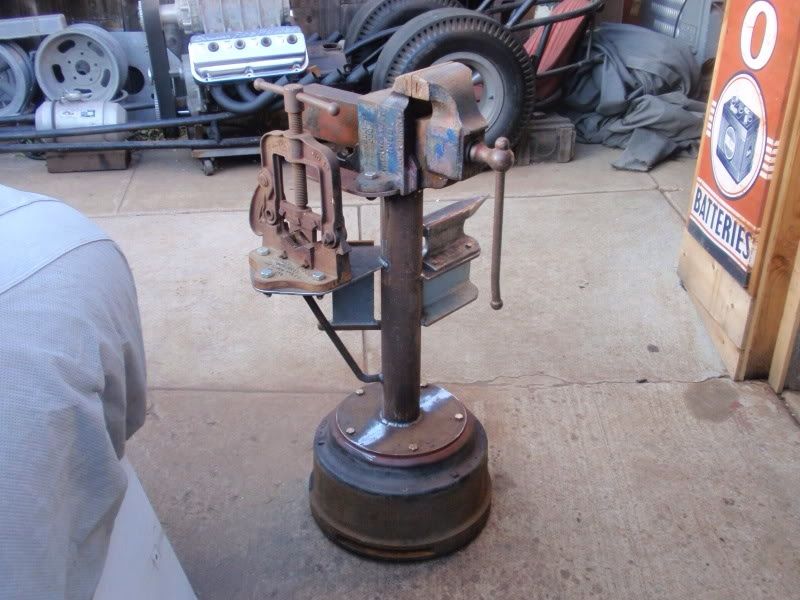 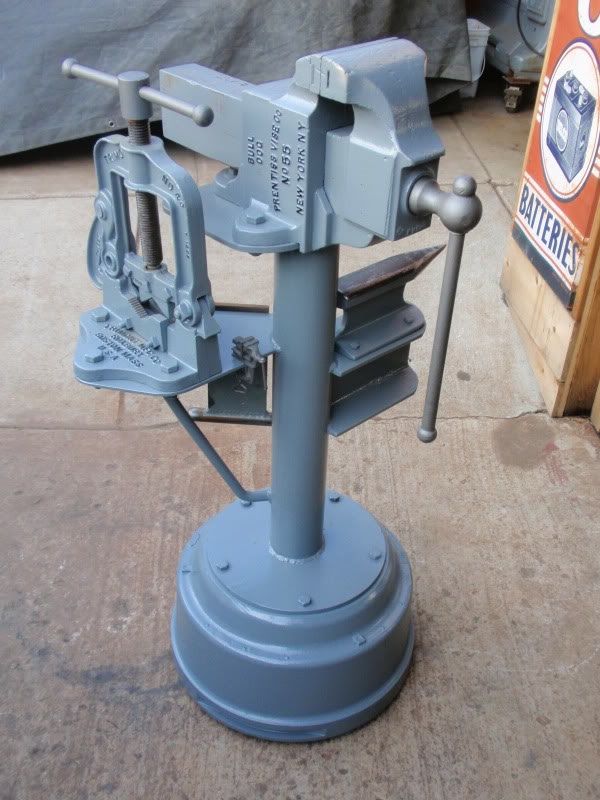 Motivated by friend Clem in Fayetteville, Arkansas I thought I would show this mini-build as well in case someone wanted to copy it. So I started to collect bits and pieces as time went on. Some bits found, some donated and some purchased, the most expensive by memory was £3.00 for the Lion no2 vice. The pipe vice was 50p at a bootfair last year, and the little vice found at the tip. The small anvil made of a bit of mini railway line. There is also a larger bit of rail line for hammering on. Truck brake drum was donated free by a local truck service station and the piece of RSJ found by friend Woodsie in a skip. 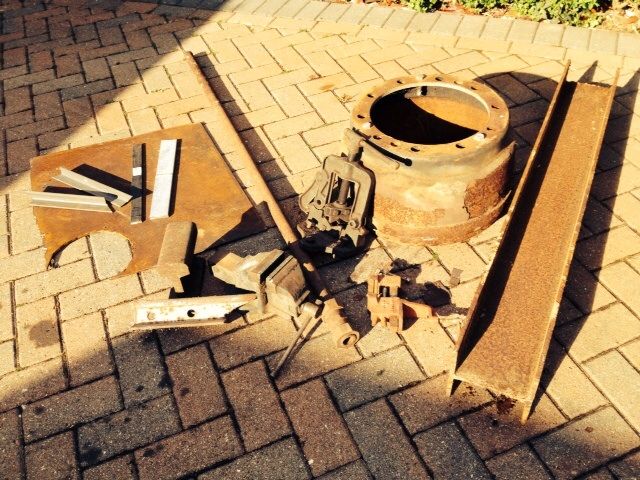 So I started off by just cleaning up the bits that will be added to the tool post (no idea what it should be called) 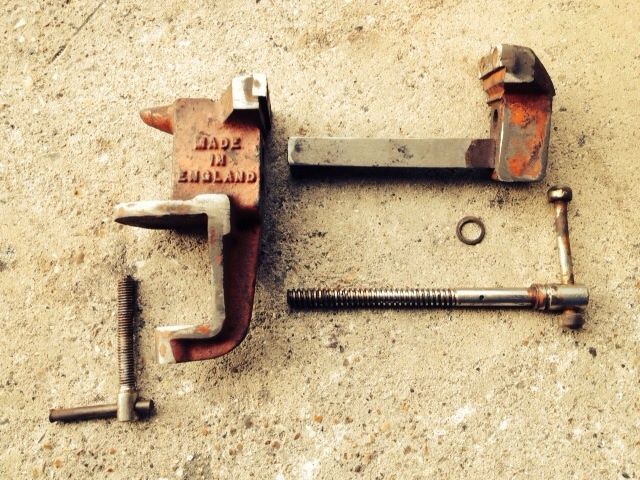 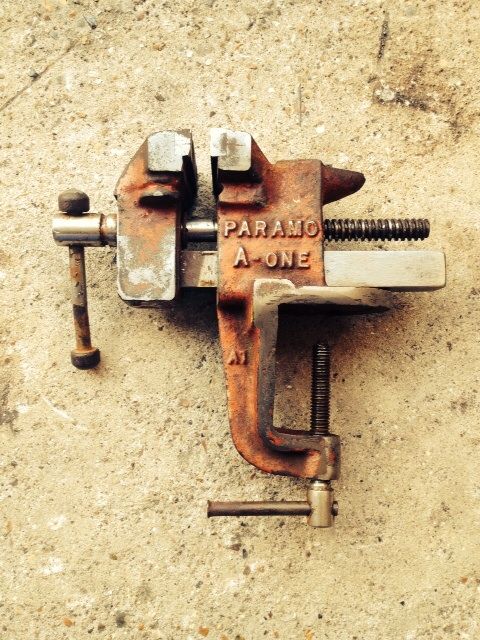 No2 Lion vice cleaned up, just the oil and dirt at this point. 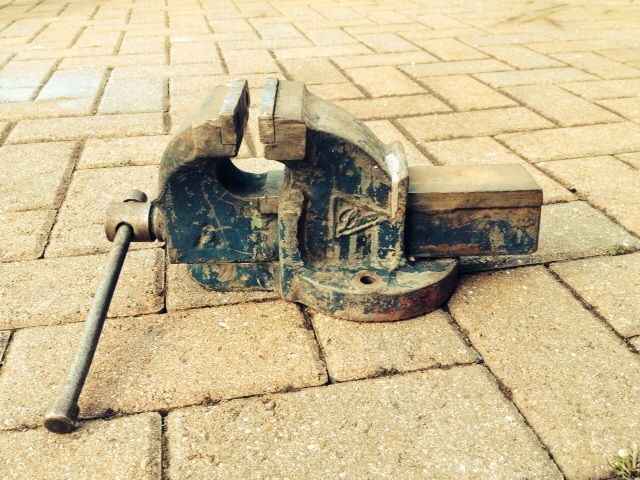 My favourite is this 50p pipe vice. 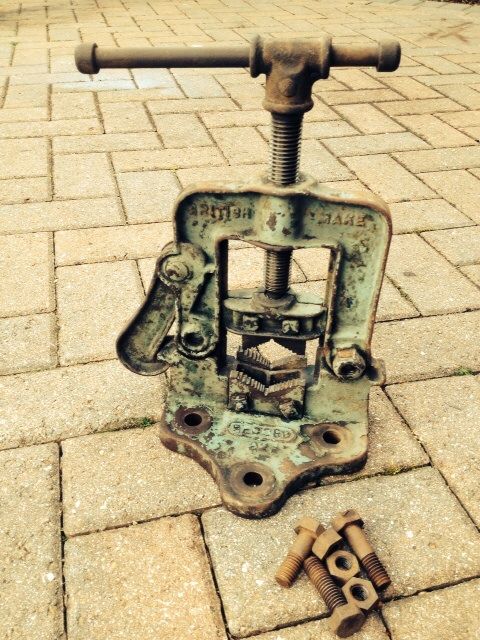 Next up I need to plan what goes where and to keep it functionally balanced. More after the weekend if you are interested. |
| |
|
|
jpsmit
Posted a lot
  
Posts: 1,274
|
|
|
|
|
Oh yes, so very interested. More please!
|
| |
|
|
|
|
|
|
|
I wouldn't even paint them. Just give them some clear to keep things tidy. That patina is great and would look even better when all the bits and pieces are stuck together in different colours.  Only thing I would recommend is adding a small axle and pair of wheels on one side so that you can tip it over and wheel it around instead of heaving it about whenever you wish to use it. Or use a fridge trolley, I guess. |
| |
|
|
|
|
|
|
|
... More after the weekend if you are interested. Blame me, but I can not remember anything un-interesting you ever wrote up here?! thirded! this thread is like family now, we start getting worried if we don't hear anything  |
| |
|
|
|
|
|
|
|
I wouldn't even paint them. Just give them some clear to keep things tidy. That patina is great and would look even better when all the bits and pieces are stuck together in different colours.  Only thing I would recommend is adding a small axle and pair of wheels on one side so that you can tip it over and wheel it around instead of heaving it about whenever you wish to use it. Or use a fridge trolley, I guess. Great call on the paint and colour, I do like the "lived in" look myself, and would have missed a trick, had I painted it all in the colour I had in mind. The wheels idea was already there,as these pieces are individually all bloody heavy, so together will be a hernia waiting to happen. I have a small sack barrow hidden under the caravan shed that I had in mind for this. Skateboard wheels would do as well on the tip over stage. |
| |
|
|
|
|
|
|
|
|
Hi, don't forget to put three pads or feet on the bottom so that it stands steady on uneven ground, nothing worse than trying to cut some thing with it wobbling about.
I expect you already know that, so ignore me.
Colin
|
| |
|
|
|
|
|
|
|
Hi, don't forget to put three pads or feet on the bottom so that it stands steady on uneven ground, nothing worse than trying to cut some thing with it wobbling about. I expect you already know that, so ignore me. Colin Not at all Colin, I often screw up, I just cover it over. Though, saying that, the drive is all block paving, so naturally not perfect. I have been experiencing insomnia for some time. This morning was noting new, so after surfing the web for a few hours, in bed on the iPad, it was up, feed cats, myself and down to the garage to play quietly as Nicola had threatened me with some seriously debilitating injuries if I were to cut and grind at 6am. So 6.30 is not 6.00 or is it? Anyway, I decided to keep the garage door shop and started by making a long nosed mini Anvil from the one I made a few years ago. It works fine, but I also realised that sometimes you need to shove stuff like pipe deeper over a point to work it. 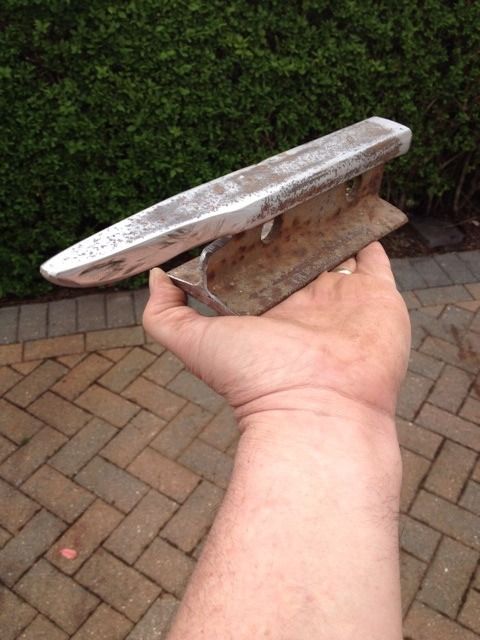 Later I opened up the garage and decided to start using one of the quiet tools so that I would not wake up the neighbourhood. I had just started when I felt a hand on my shoulder........ Ooooopppsss.....!!! Well, not that bad, Nicola wanted to get to the shops early so got up, showered while I was tiptoeing around the garage and came to see if I wanted a cuppa tea. So I made her take a pic of the quiet tool. Compressor running inside the garage, and plasma cutter outside. This is a bit quicker, albeit rougher than a 9" grinder. Cutting the post to size, I went for 780mm although the standard size should be around 750mm for a table top to mount stuff onto. 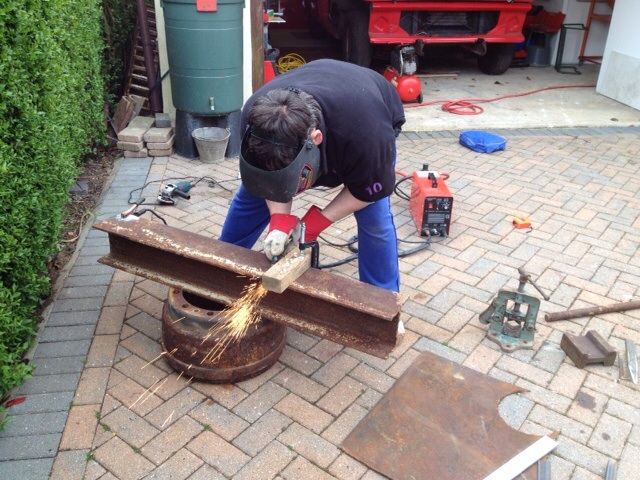 Next up, plate steel for the base and table. |
| |
|
|
|
|
|
|
|
Plasma cutter came in handy. RSJ was 10mm and this steel plate about 6mm. 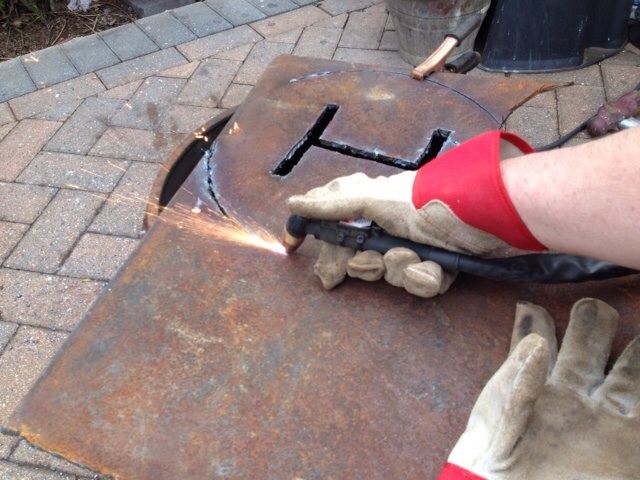 H shaped cut out for steel to fit through. Welded in place. 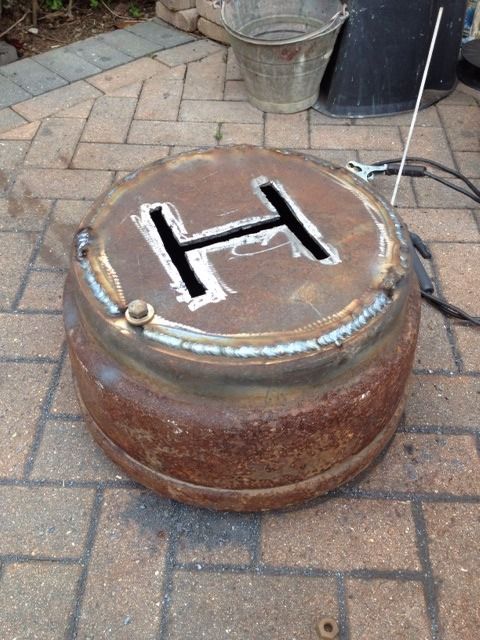 Initial mock up. 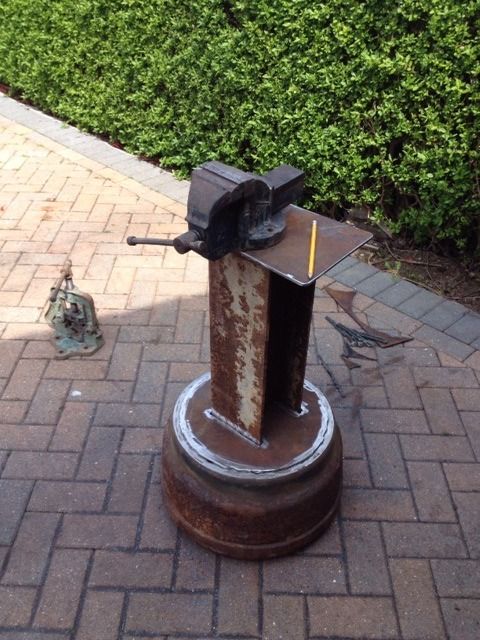 Marked out, cut out and finished, drilled. 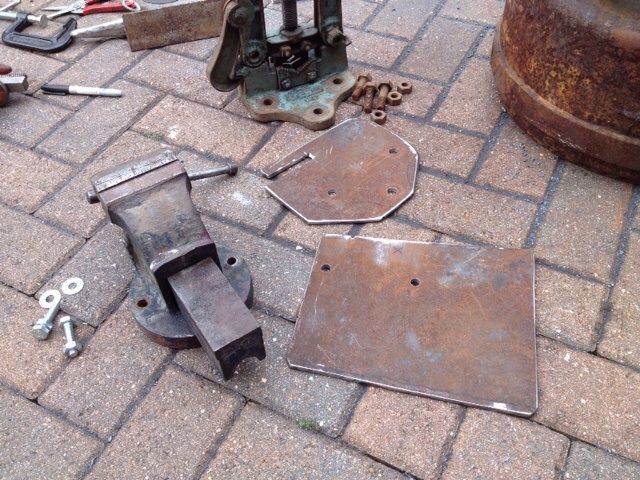 Base plates welded in place. 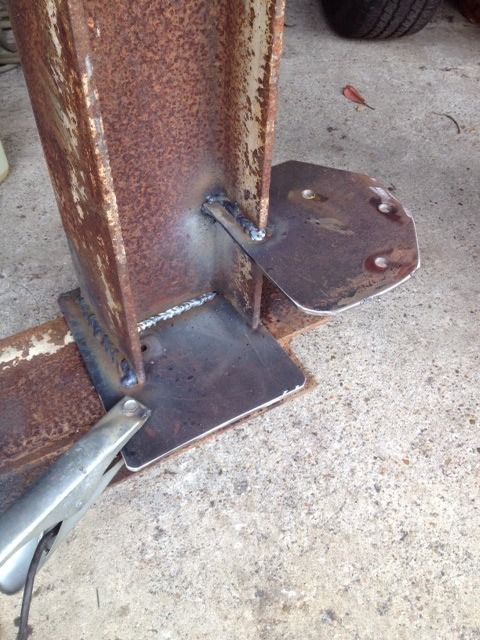 Post welded in place. 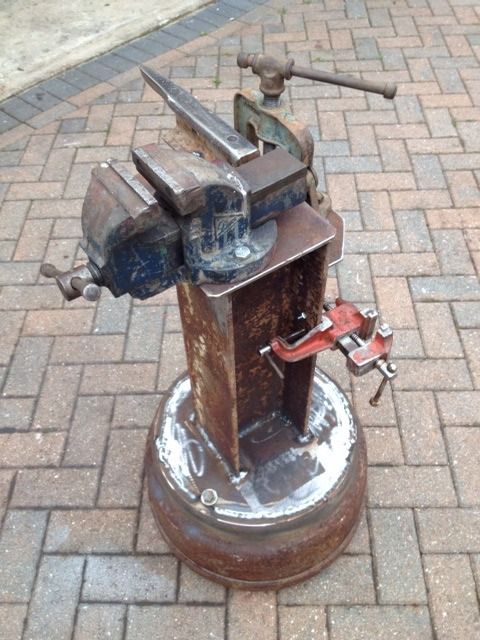 Different angle. 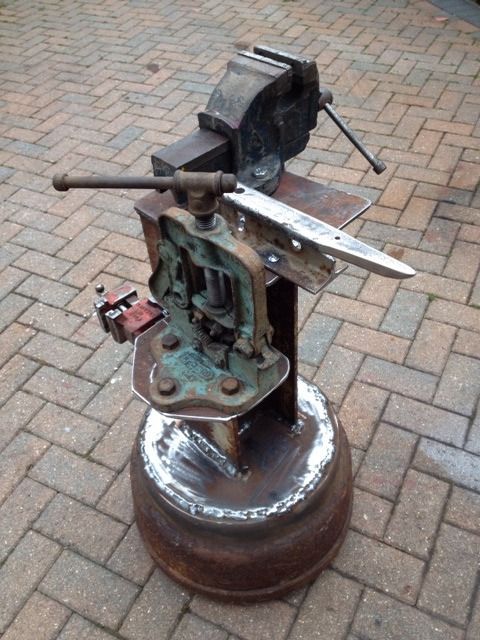 Yes, I am pleased. I will paint just the base, without the vices and tools. Keeping them in their original paint. |
| |
|
|
|
|
|
|
|
|
seriously hench piece of kit. to be honest probably got more mass than your average work bench. good for hitting stuff on !
|
| |
|
|
retrolegends
Club Retro Rides Member
Winging it.....Since 1971.
Posts: 3,726
Club RR Member Number: 94
|
|
|
|
Blame me, but I can not remember anything un-interesting you ever wrote up here?! thirded! this thread is like family now, we start getting worried if we don't hear anything  My weekend isn't complete without checking this thread! It's about time you had a TV programme, Sort of like ScrapHeap Challenge crossed with Fast N Loud with a bit of cooking thrown in too. It's a winner surely!  |
| |
1974 Hillman Avenger 1500DL1992 Volvo 240SE1975 Datsun Cherry 100a flying custard1965 Hillman SuperMinx Rock N Roller1974 Austin Allegrat Mk1 1.3SDL1980 Austin Allegro Mk3 1.3L1982 Austin Allegro Mk3 on banded steels2003 Saab 9-3 Convertible 220bhp TurboNutter1966 Morris Minor 1000 (Doris) 2019 Abarth 595C Turismo (not retro but awesome fun) www.facebook.com/DatsunCherry100a |
|
|
|
|
|
|
seriously hench piece of kit. to be honest probably got more mass than your average work bench. good for hitting stuff on ! Definitely. I always hate grinding and cutting inside the garage, and to be honest, often it is better to have the vice right next to the job. Resisted the urge, in fact, started then promptly stopped welding a 6" length of railway line onto the base as another bashing place. |
| |
Last Edit: May 3, 2015 7:25:54 GMT by grizz
|
|
|
|
|
|
|
thirded! this thread is like family now, we start getting worried if we don't hear anything  My weekend isn't complete without checking this thread! It's about time you had a TV programme, Sort of like ScrapHeap Challenge crossed with Fast N Loud with a bit of cooking thrown in too. It's a winner surely!  Thanks mate, I do take that as a compliment. I guess if I was cleverer, I would have started a blog somewhere online, but because I am subscribed to, and use about 12 different forums of varying descriptions, I tend to do the write up here, as Retro Rides is my personal favourite and "home page" then I copy and paste, with editing onto the other places I go. It would be cool though, to try fill a programme slot with "stuff" |
| |
|
|
|
|
|
|
|
Raining here since 04.00 which meant no bootfair, this is two weeks running now we had weekend rain...... So I am suffering with a bit of withdrawal symptoms. Went down to the garage at 06.00 to move the stand indoors and dry it, as I want to clean up the brake drum and RSJ a bit with a flap wheel before getting some old grey marine paint I still have from when I painted out the rear of the '63 Transit van a few years ago. I had thought of painting everything one colour originally, but the also thought about it and had it pointed out to me that they had all "earned their stripes" over time and deserved to keep their original paint. When I did the little anvil's screw down holes I decided to also drill a pair of holes into the top aspect of it, one large and one small for those times when you need to bend and whack something very squarely. 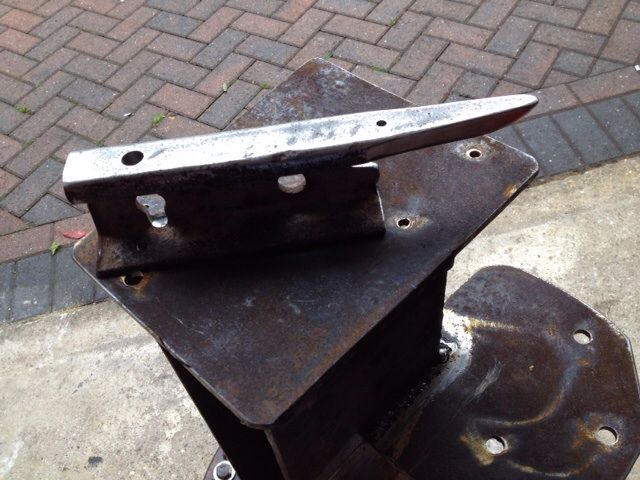 I had been asked by "1/2 Cup" in Australia what I thought the stand weighed. Without tools attached it is just over 82 or in old English 12 Stone 8 The tools weigh another 18kg or 2 stone 11 So the total weight is 100kg or 15 stone 5 in English. 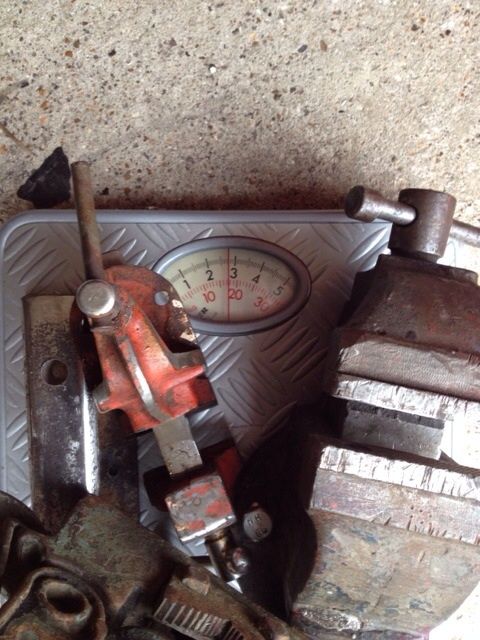 Heavy bloody thing I tell you, even rolling it about without the tools attached. Decided that I will flap wheel the scabby rust of the base and post followed by some Hammerite. Black of course, as that is what I have. |
| |
|
|
|
|
|
|
|
Never one to leave Well, Alone..... I found some Poo Brown Hammerite this afternoon and after grinding the whole stand clean with a pair of flap wheels, I proceeded to brown it up. Kept the two plates Hammerite grey and some detail around the base and up the RSJ edges. Will add the tools tomorrow, then Job Done! 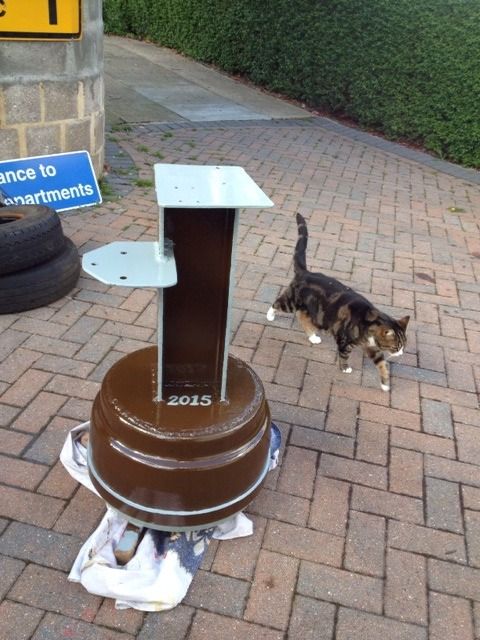 Perfect way to spend some bank holiday weekend time.. |
| |
|
|
|
|
|
|
|
Added the tools to the stand. Also made two hooks that are attached to the underside of the bolts for hanging hammers etch from. Very pleased with the outcome of this whole stand. 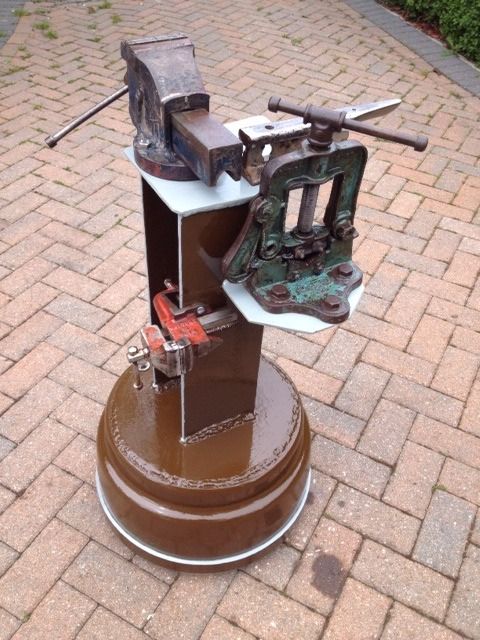 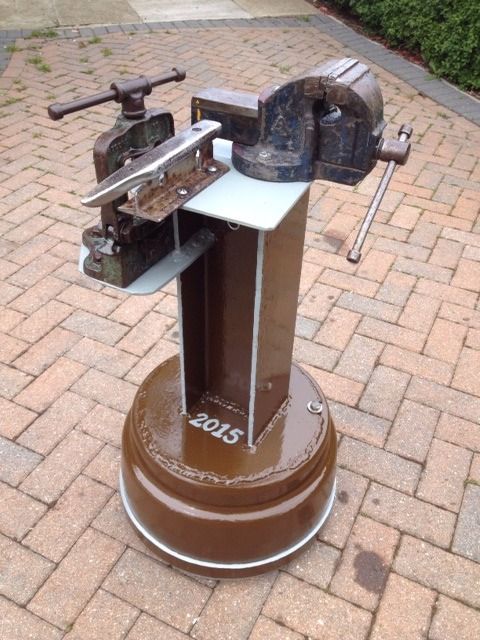 I guess I have now run out of excuses with the truck, and need to be getting back to messing with it, and getting some rust etc sorted. |
| |
|
|
delux
Part of things
  There's treasure everywhere!
Posts: 531
|
|
|
|
|
So cool!
|
| |
|
|
Speedle
Posted a lot
   Need a Country Rock band in the Hampshire Area? https://www.facebook.com/DirtRoadDiaryUK
Posts: 2,221
|
|
|
|
|
Excellent use of materials mate very impressed!
|
| |
|
|
|
|
|
|
|
Thanks mate, not as cool as your car. Have put your Love & Thunder sticker on the new job diary. |
| |
|
|
|
|
|
|
|
Excellent use of materials mate very impressed! Pretty much anyone can do it, I hope to see more guys do them now, really useful, already used it once. |
| |
|
|


