|
|
|
Dec 12, 2012 13:40:19 GMT
|
So finally decided to get a thread going for my Herald. I bought it just over two years ago now. It needed a bit of tinkering and tarting up, but as its my daily it was ideal. Structurally and mechanically sound, not rot, a little surface rust here and there. Paint wasnt perfect, same with the interior. A few pics of when I bought it. (hopefully the pictures arent too big) 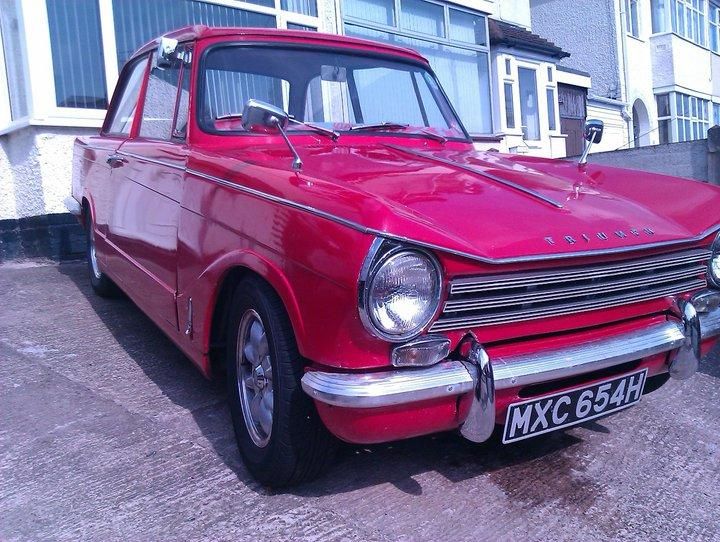 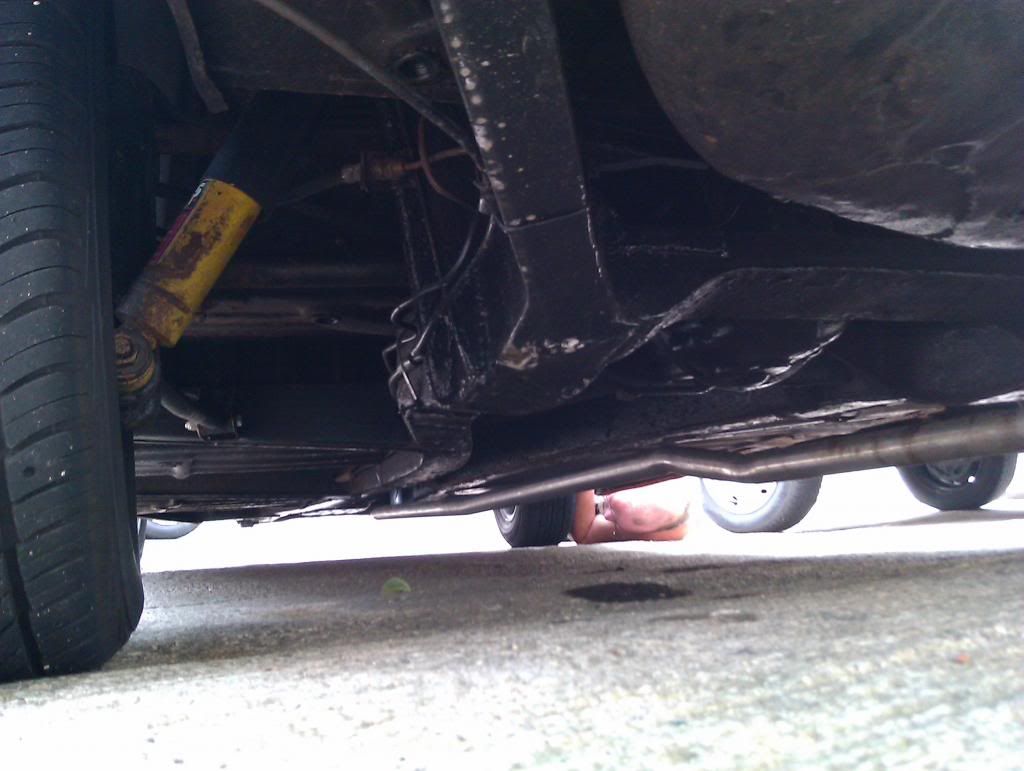 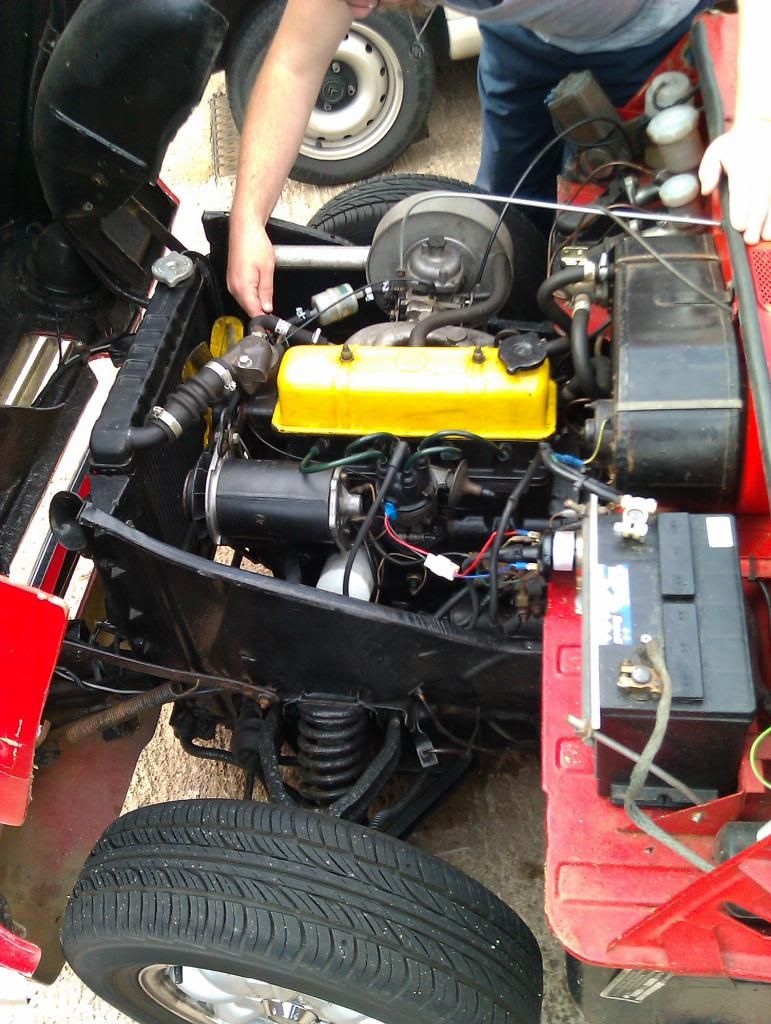 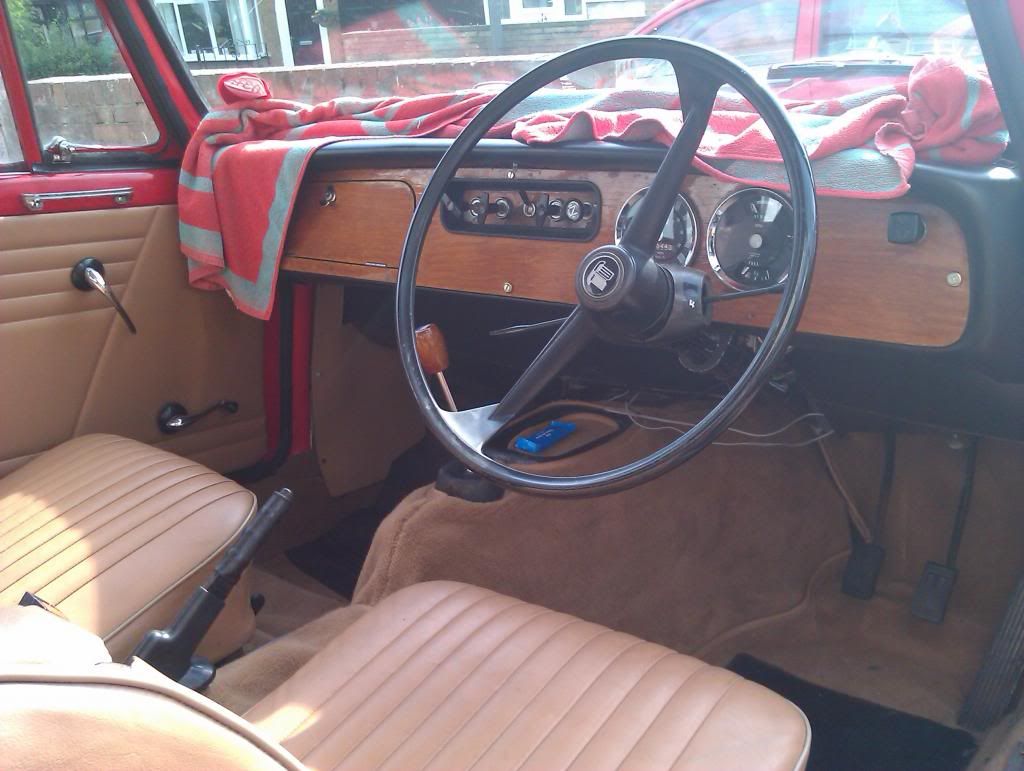 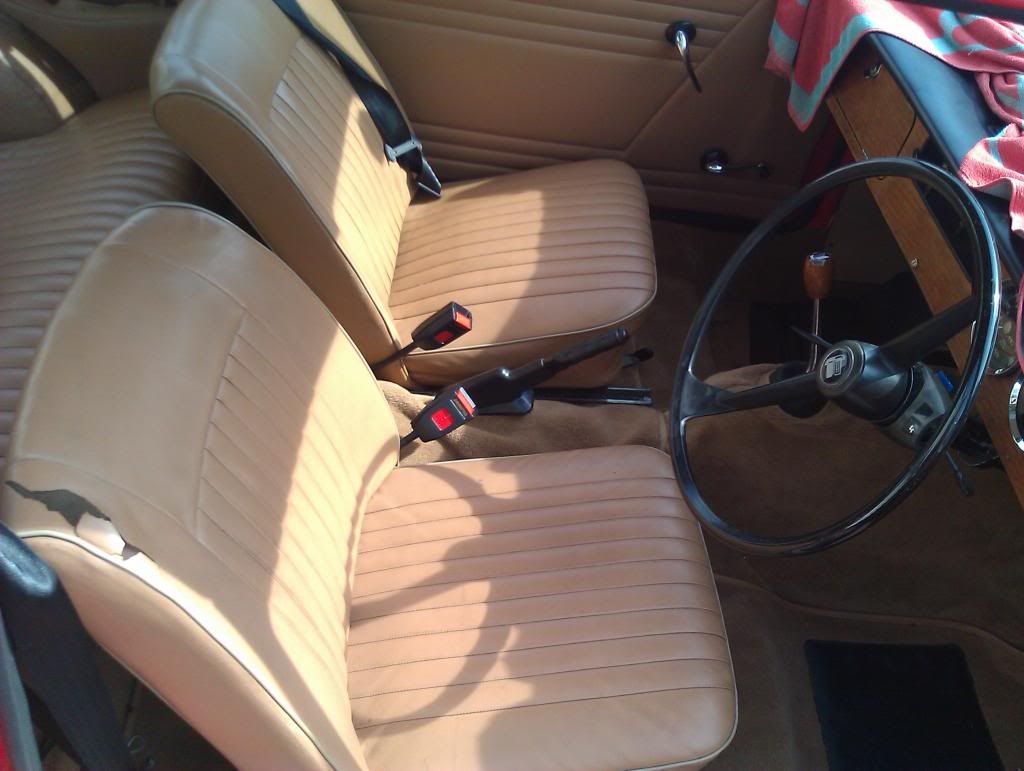 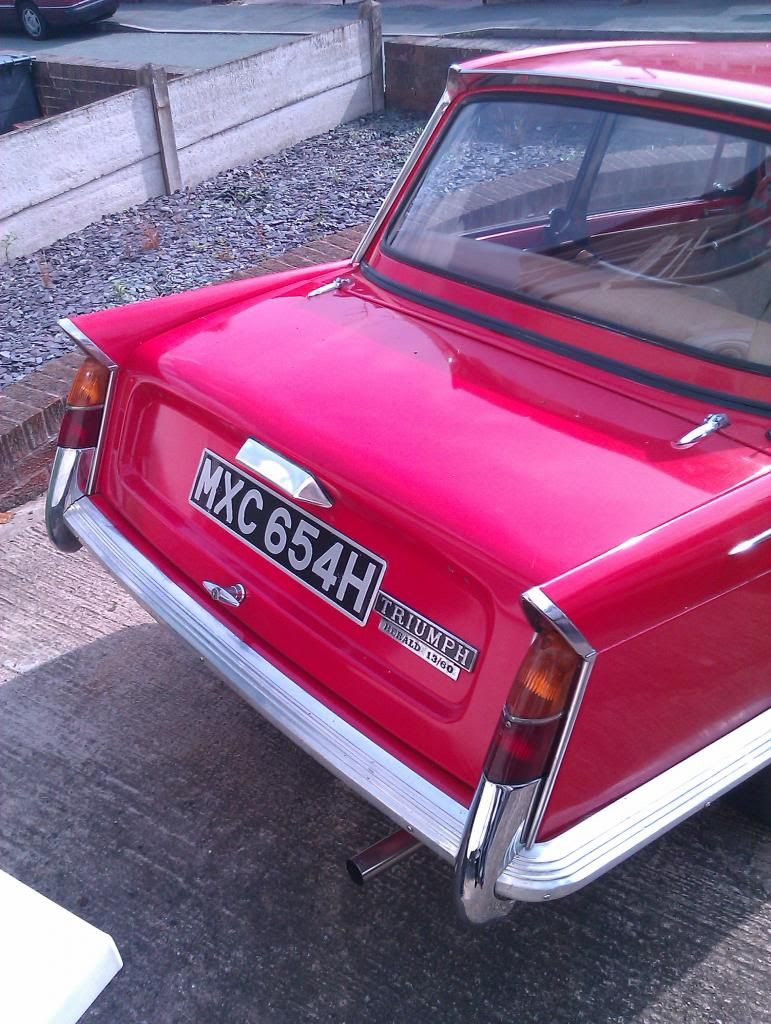 Ran it as it was for a while, no major mishaps, a few times I ran out of power, so removed the dynamo which was on its way out and replaced with an alternator, replaced the headlights with halogen ones. MOTs have only required small jobs, a seized wheel cylinder replaced, a new indicator stalk and a perished bush on the lower wishbone. New one and old one. Had bought all new polys and nuts/bolts as I'm gonna replace pretty much all the suspension soon anyway. 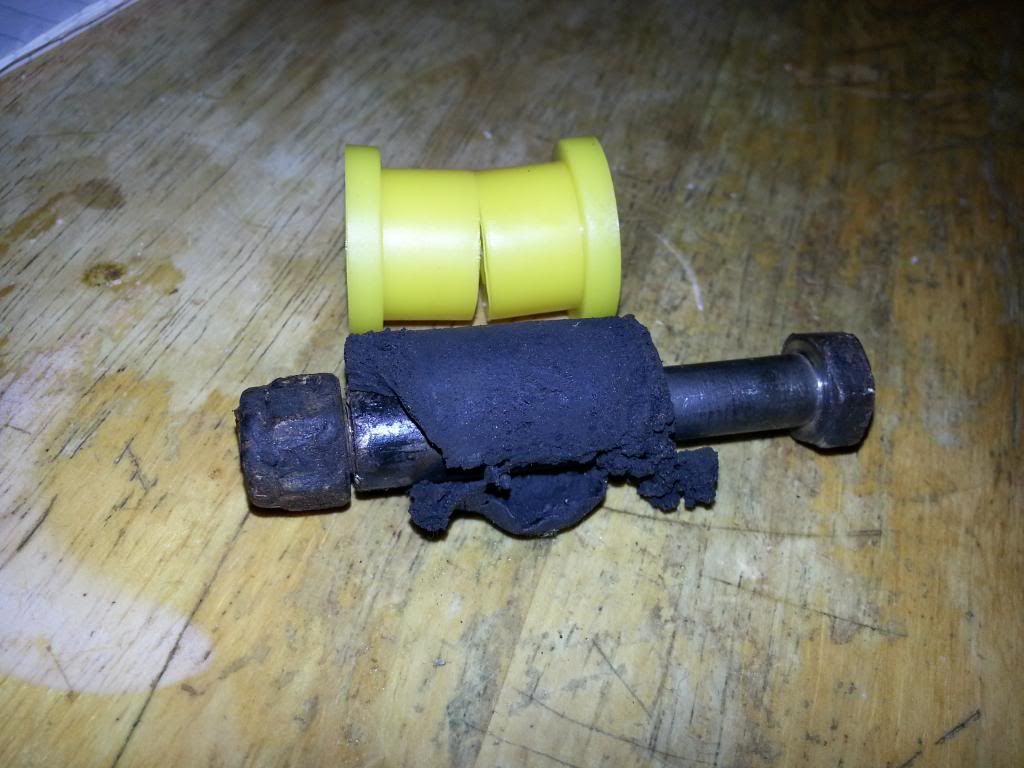 One job that was tackled relatively early was fitting a radio and speakers. It had previously been done (or started) before by a previous owner, ariel was in place and wired to the front, along with speaker wire, cut at both ends. I decided on a suitable place for the speakers would be in the front footwell opposite the tunnel, nice sized hollow there. I had already made up my mind that any mods would be not permanent, in that I could put the car back to factory standard if I wanted to. So new kickboards were cut out of hardboard. 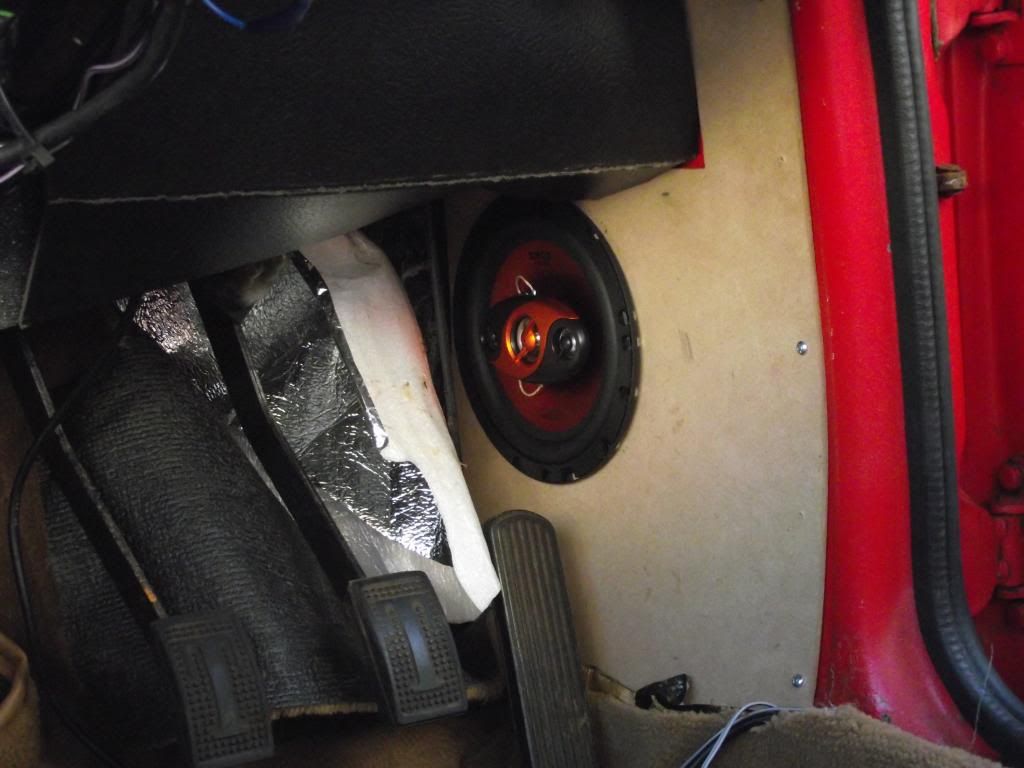 The speakers were test fitted and the boards carpeted. I had decided that the carpet would be black when I got round to getting one, so I got some black acoustic carpet from the net. 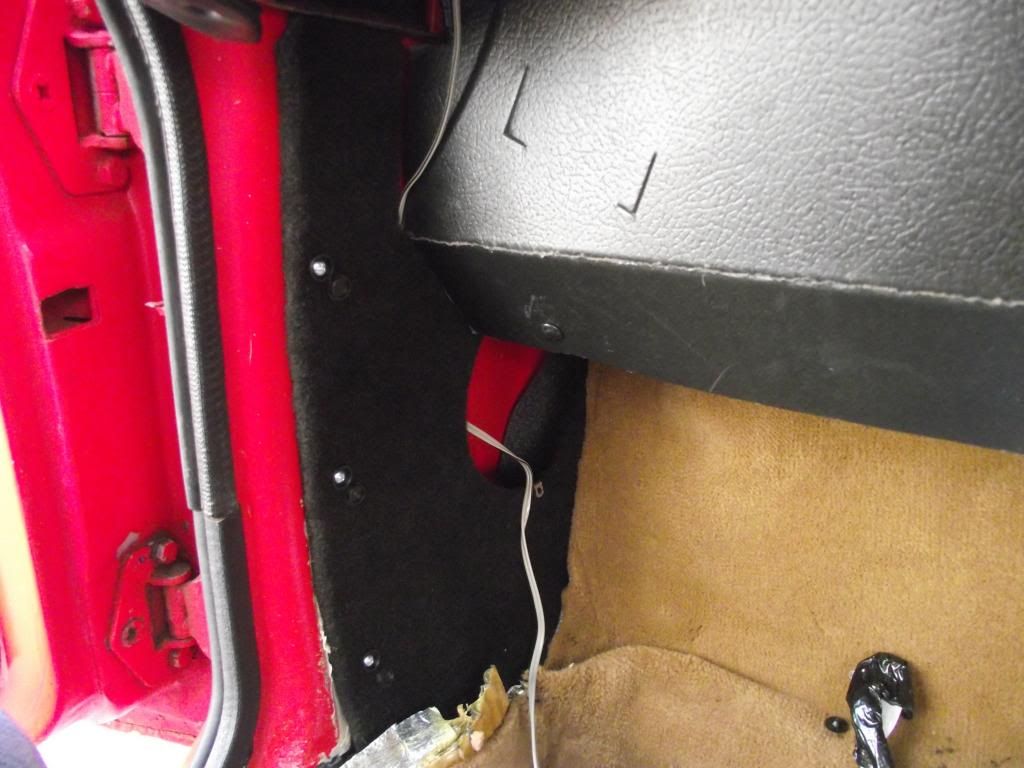 Covered and new wiring running running round the back of the panel. And with the speaker fitted. 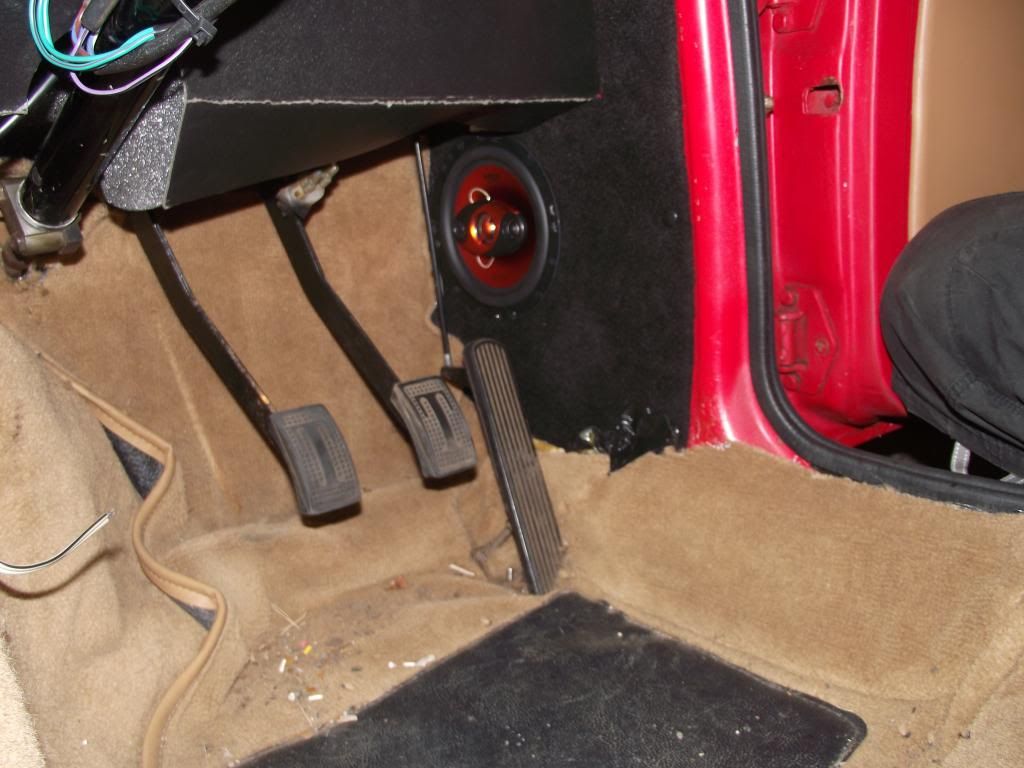 Fairly inconspiuous location and uses otherwise dead space. So aside from the usual fettling nothing major happened for a while. Until I got fed up of the badly fitted carpet, it kept catching when I tried to move the seats backwards and forwards, eventually ripping along the seam, and the seats themselves. They could of done with new foam and the drivers side needed recovering. A few internet searches later and I found that Jaguar XJS front seats fitted without major modification. This 'good' idea opened a can of worms, the conversation with my dad going along the lines of 'well if I'm replacing the seats, why not do the carpet at the same time, in fact the dash is looking worse for wear I could sort that aswel.' In the end a full interior refurb was in the pipeline. Gathering parts from the good old internet auction sites and autojumbles followed and soon I'd got pretty much everthing I needed. More to follow. Chris |
| |
|
|
|
|
djefk
Part of things

Posts: 844
|
|
Dec 12, 2012 14:23:57 GMT
|
|
What a smashing car! One of my favourites, I've had a 13/60 convertible and a 1200 convertible project that I never really started way before that. I will defo own another one day.
One thought - Would those speakers be better protected and a shade more subtle behind their black mesh?
|
| |
|
|
|
|
|
Dec 12, 2012 14:57:18 GMT
|
Nice car. Good to see another Herald here!  I installed a set of speakers in the kick panels in my '61 1200 'vert as well. Good place for them and they sound pretty good too. |
| |
|
|
|
|
|
Dec 12, 2012 15:13:16 GMT
|
In my mind with the new interior was that it needed to be comfortable, period look, on a budget (I'm 21 with a part-time job) and no major alterations required (I can't weld, and also so I can return to factory if needed/wanted) So on with the strip down. You all know how it goes, start one job find something else that needs doing and so on. This was no different. Stripping down commenced, and was pleased to see underneath the layers of glue and various other unknown materials stuck to it, that the floor was really solid.  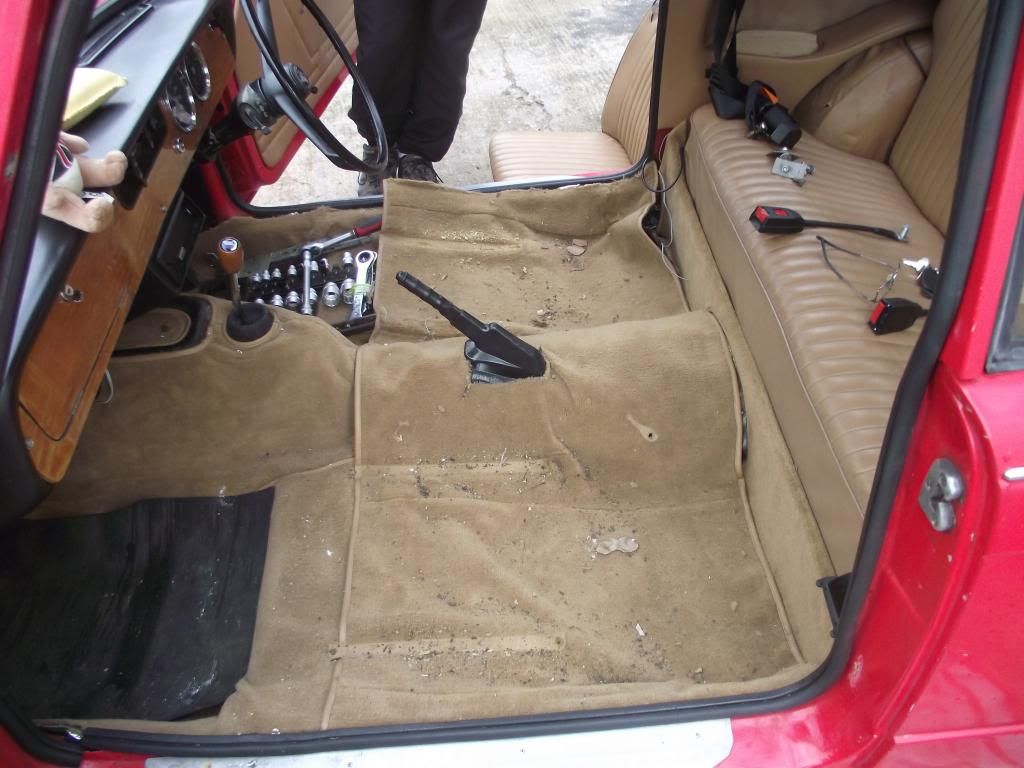 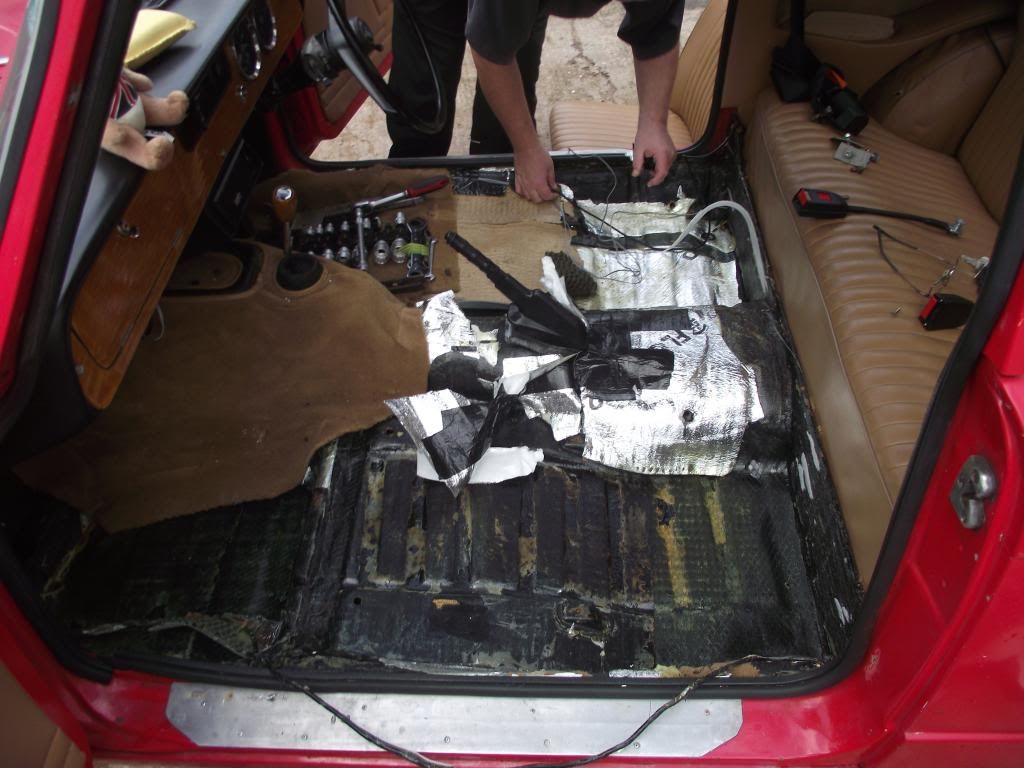 Went without a hitch until this point. All the carpets and seats were out, and next time I got a chance to do some work on it, I noticed a relatively large puddle in both front footwells. curseword. Also noticed this aswel. 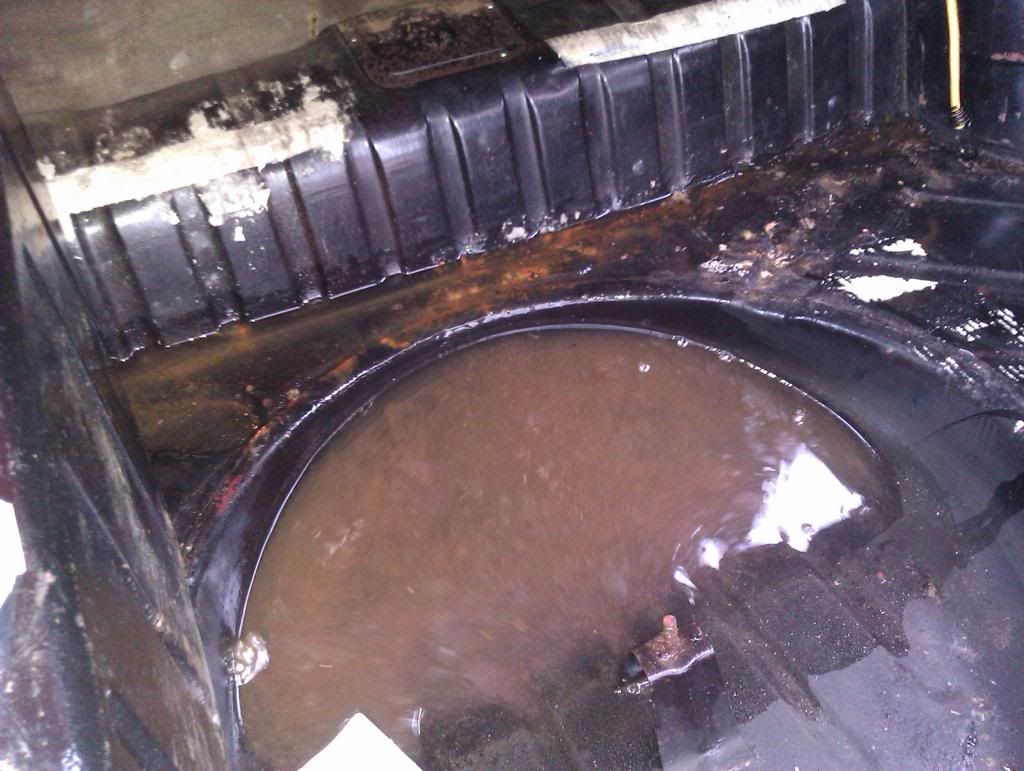 After a bit of investigation we found the culprit. The tunnel. One of the old fibreboard types it had been badly bodged in the past with a thick glob of sealant all the way around it, but it had not really worked. I could nearly my whole hand through the tunnel into the engine bay. 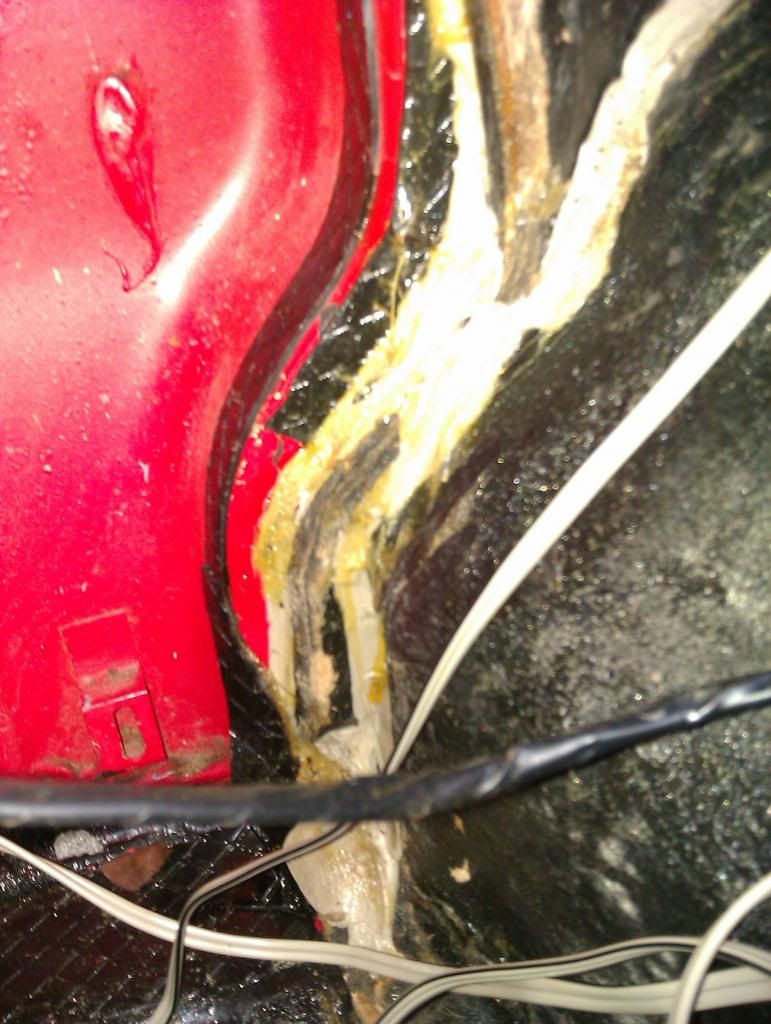 New fibreglass tunnel and all new fittings later, we were ready to fit. Or at least, that was the plan. Until we noticed this. 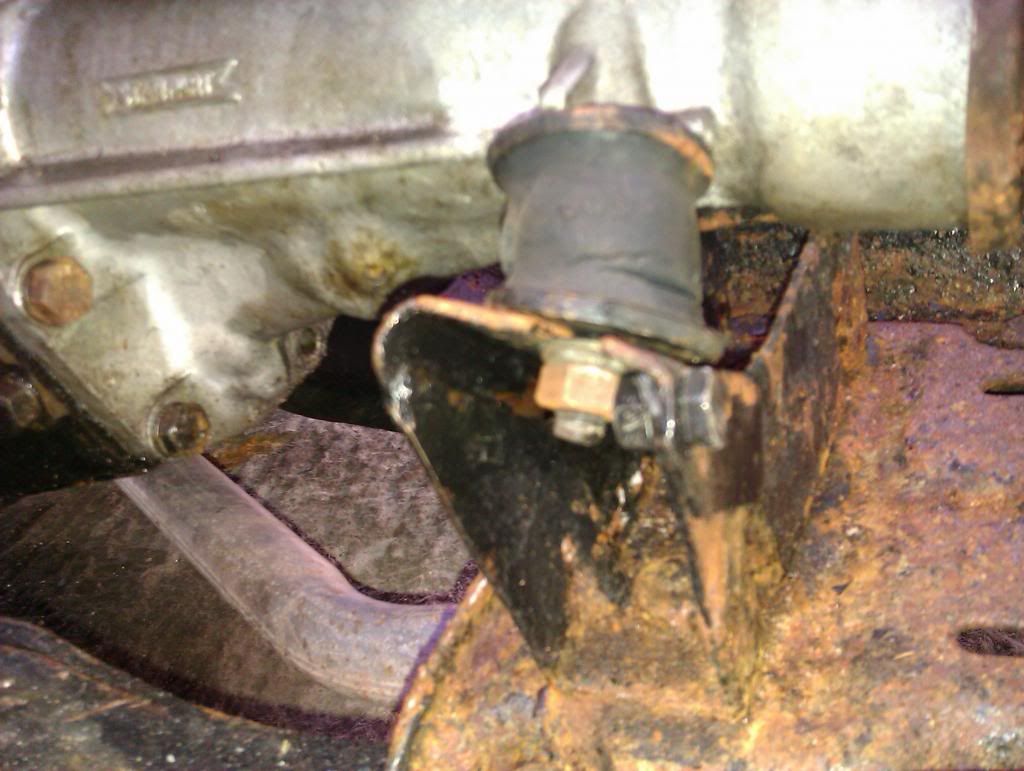 Perished bushes on the gearbox mounts, and the mount itself, we assume had broken in the past and someone had bolted it back together to repair it (the bolt on the right hand side of the mount) Luckily managed to get hold of a recon mount and new bushes were fitted. New tunnel on and painted black. 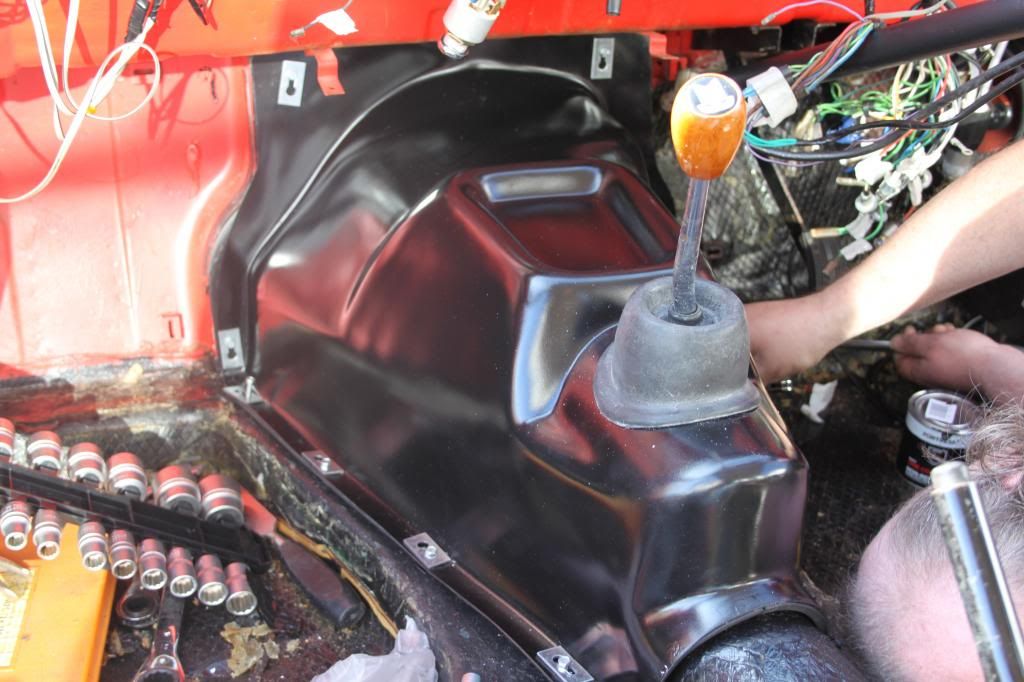 Could finally get back on track with the interior. First and biggest job was the front seats. Jag XJS seats were chosen as they don't look too out of place, had a high back, as I found the Herald ones to low on my back and most importantly it was a relatively easy task to get them to fit. A bit of research on the net and I decided the best way to fit the seats was with two T pieces of ally bolted to create an I shape. (Someone else has done it like this before, and this seemed the easiest/best way to do it). The ally (either 4mm or 6mm, cant remember which) was cut down to size and mocked in. 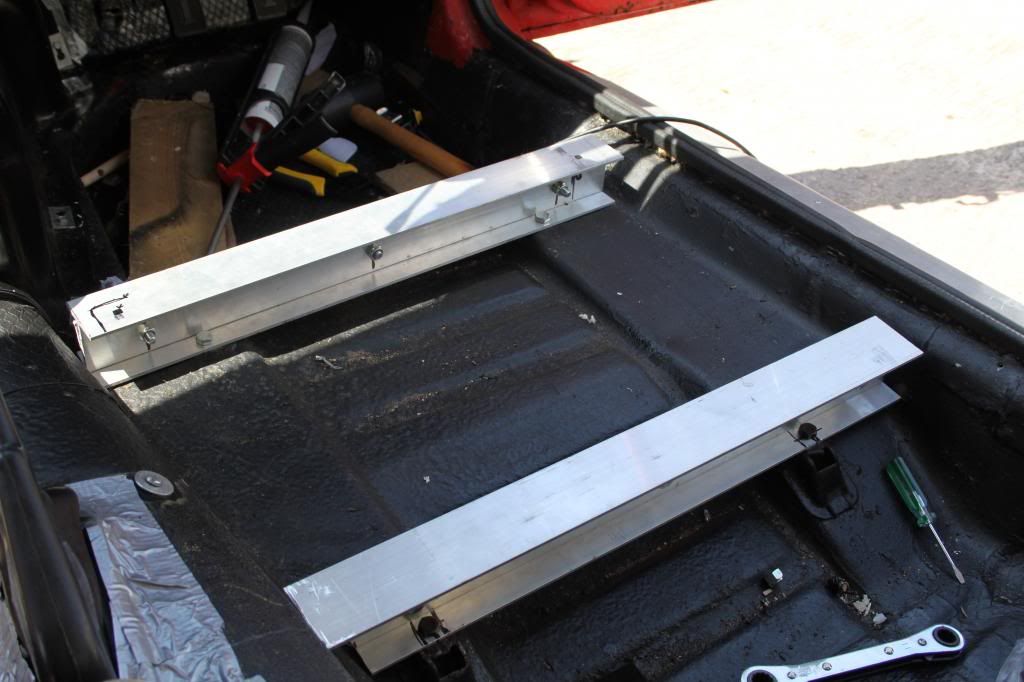 The bolts to the floor fit through the existing seat mounts, so no new holes needed drilling there, and the top ones which are about 2 inches further out each side than the base is so the Jag runners can be retained. A dent in the tunnel above the prop needed to be made to get the seat to slide back enough. 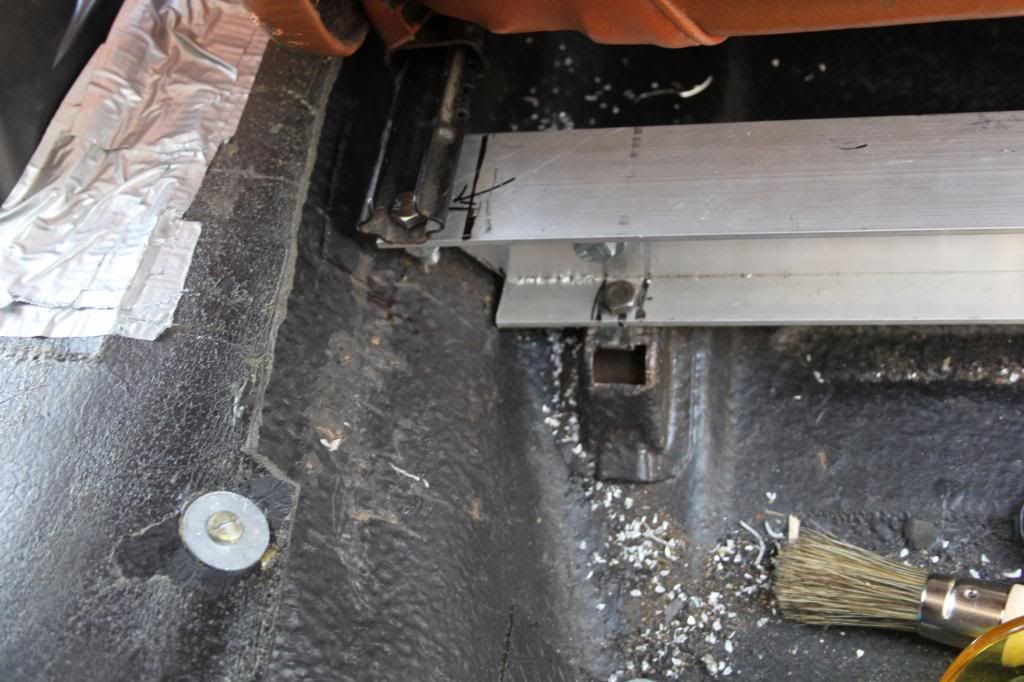 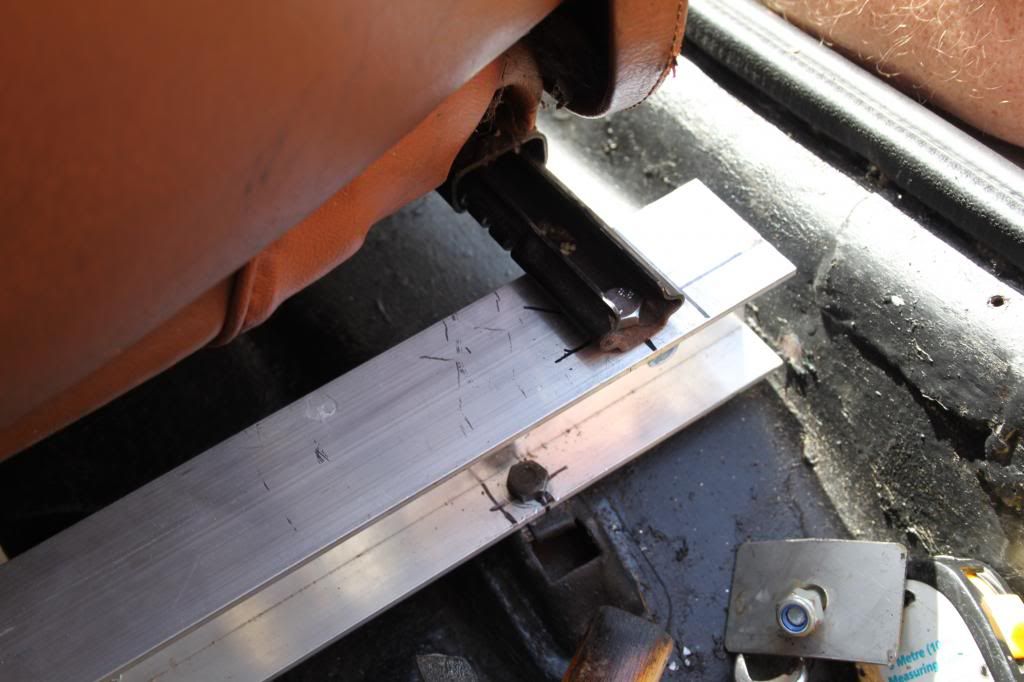 Now that the seats were fitted it was time to take them out again, so the dash and carpets could be sorted. I'd managed to pick up a dash cheap from an autojumble so that was sanded down. 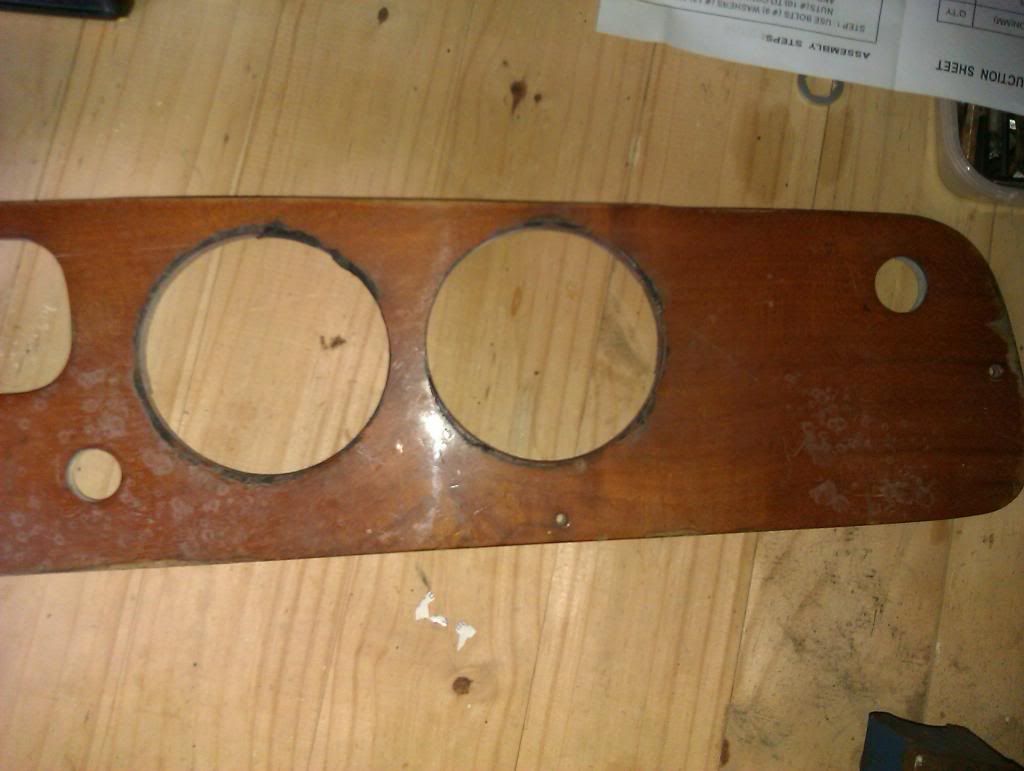 and an iron-on veneer was bought. Fairly simple to fit, iron on the sheet on veneer, once it had set trim down to size then its ready for colouring. Some wood dye and colour wax took care of that. 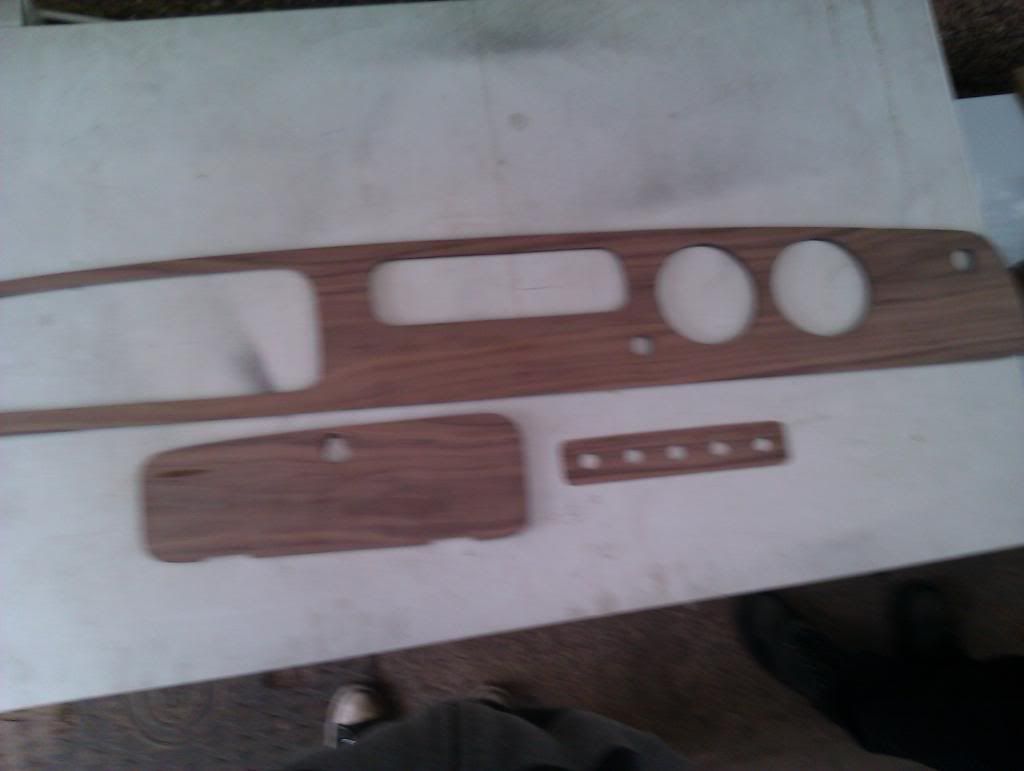 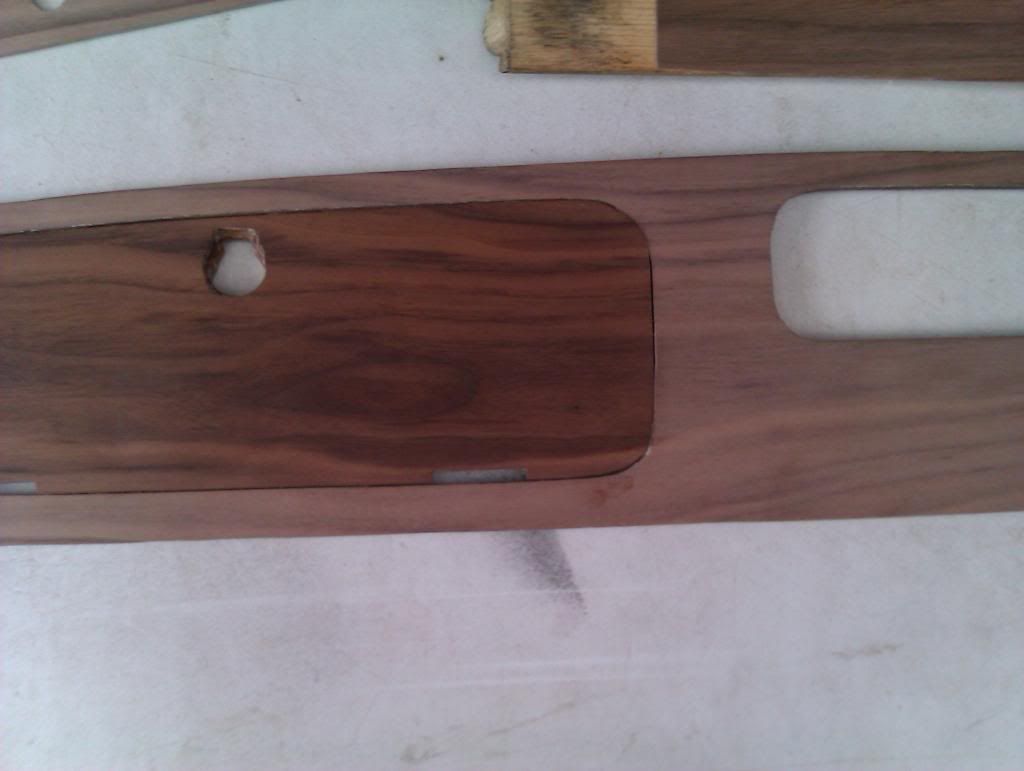 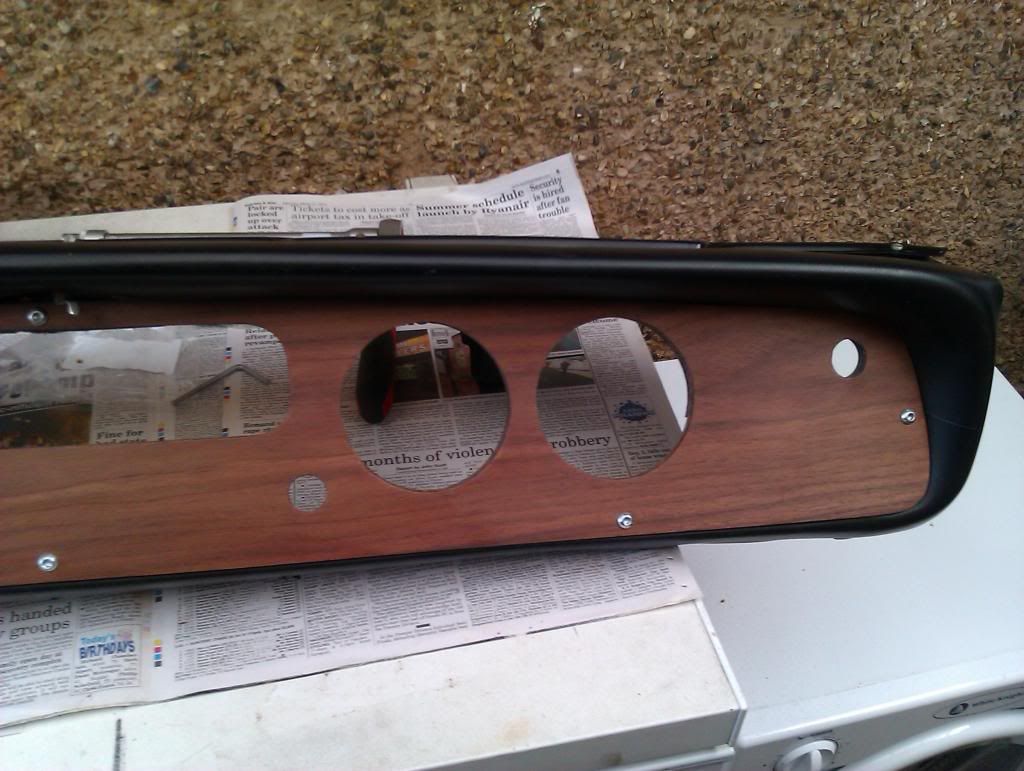 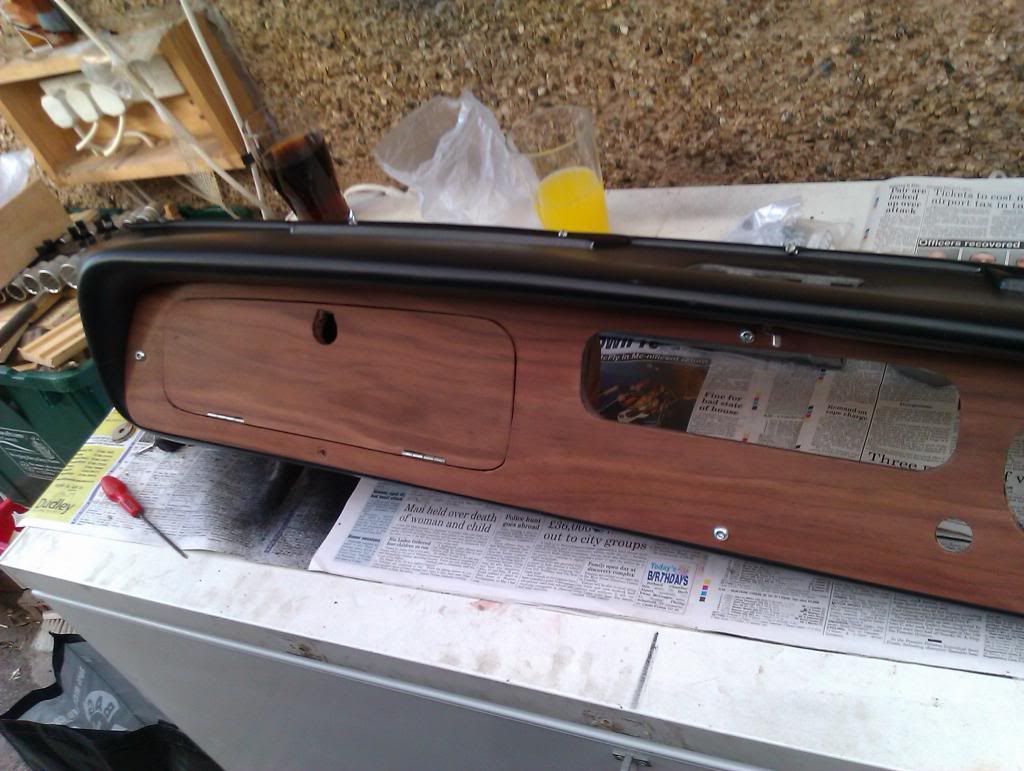 Got some allen headed bolts to fix the dash to the brackets, look a bit smarter than the assorted phillips screws that were there previously. 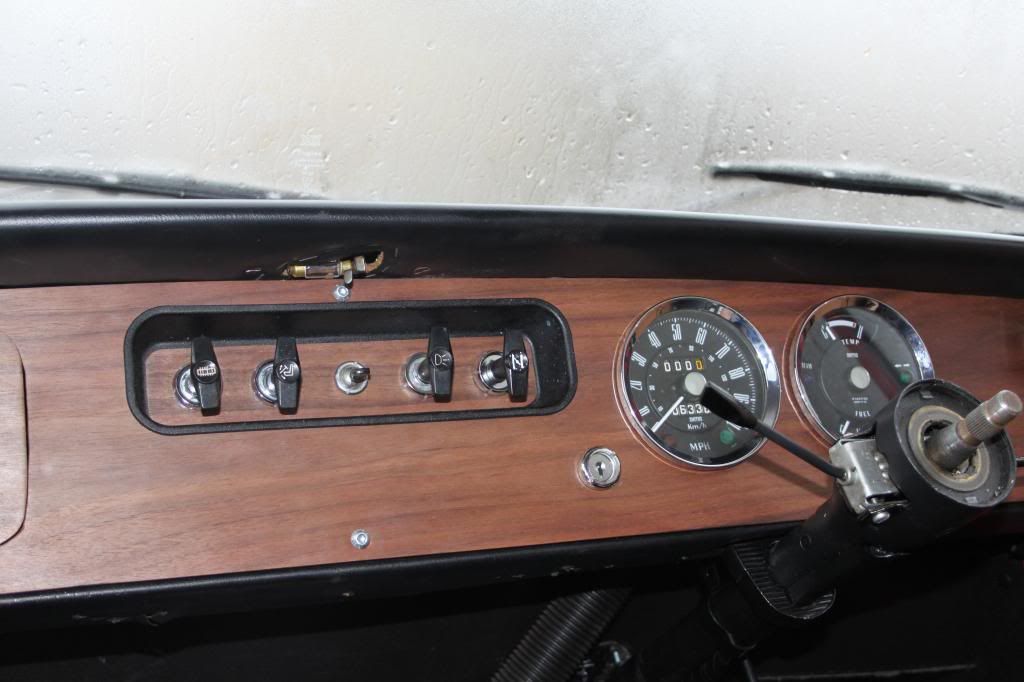 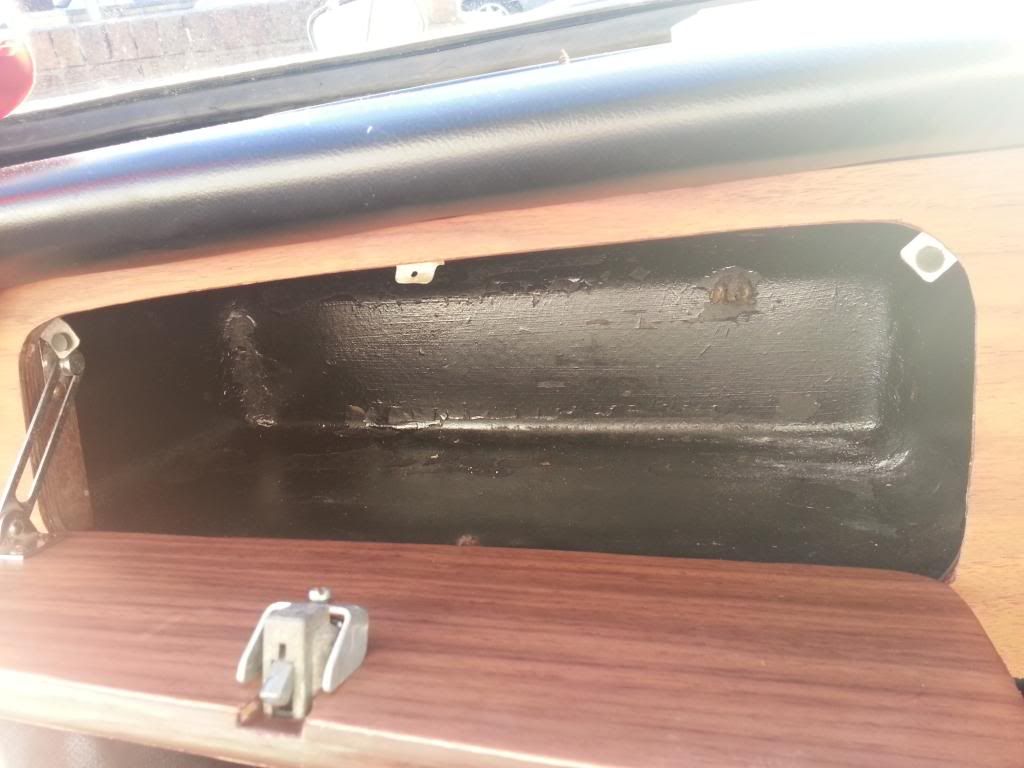 The inside of the glovebox had been painted but still looked a bit scruffy, so out with the left over acoustic carpet from the speaker boards, and that was put in. (pictures a bit naff, sorry) 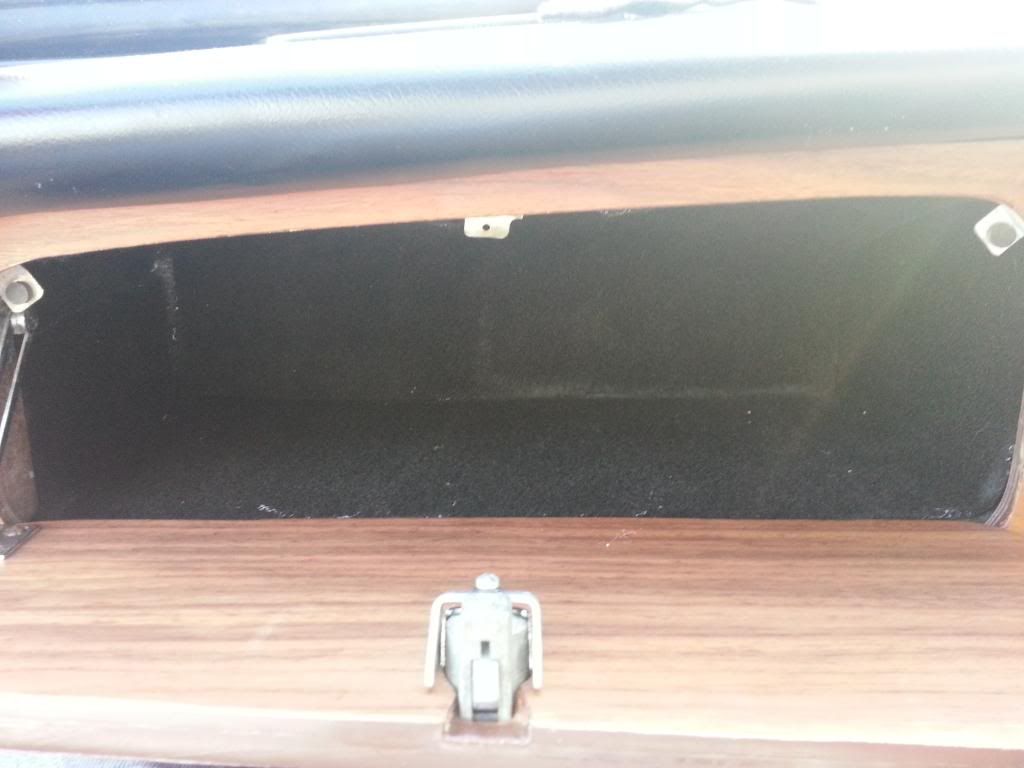 I also got a spitfire steering wheel to replace the bus like orignal, an internet auction purchase. 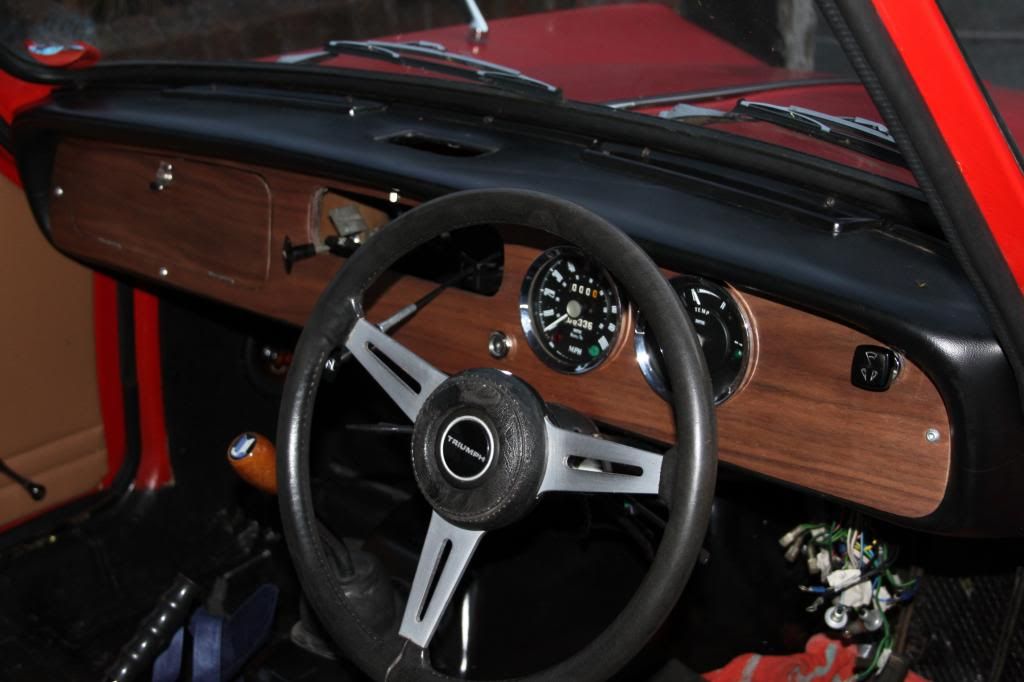 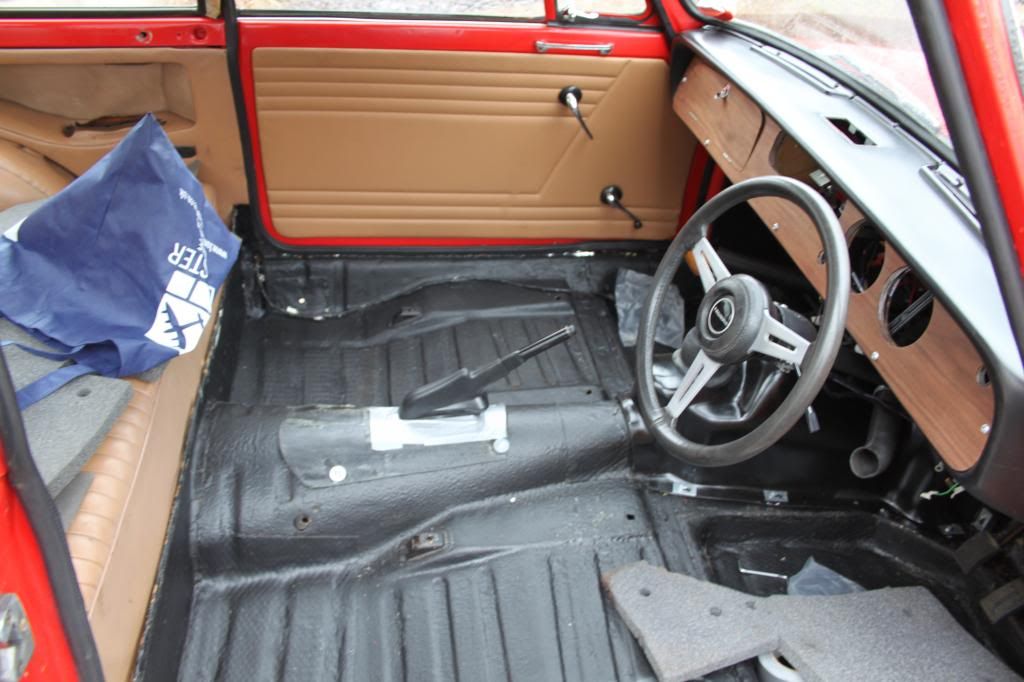 The floors got a coat of black hammerite and then it was on to the door cards. The front was a direct replacement, tan for black (second hand). 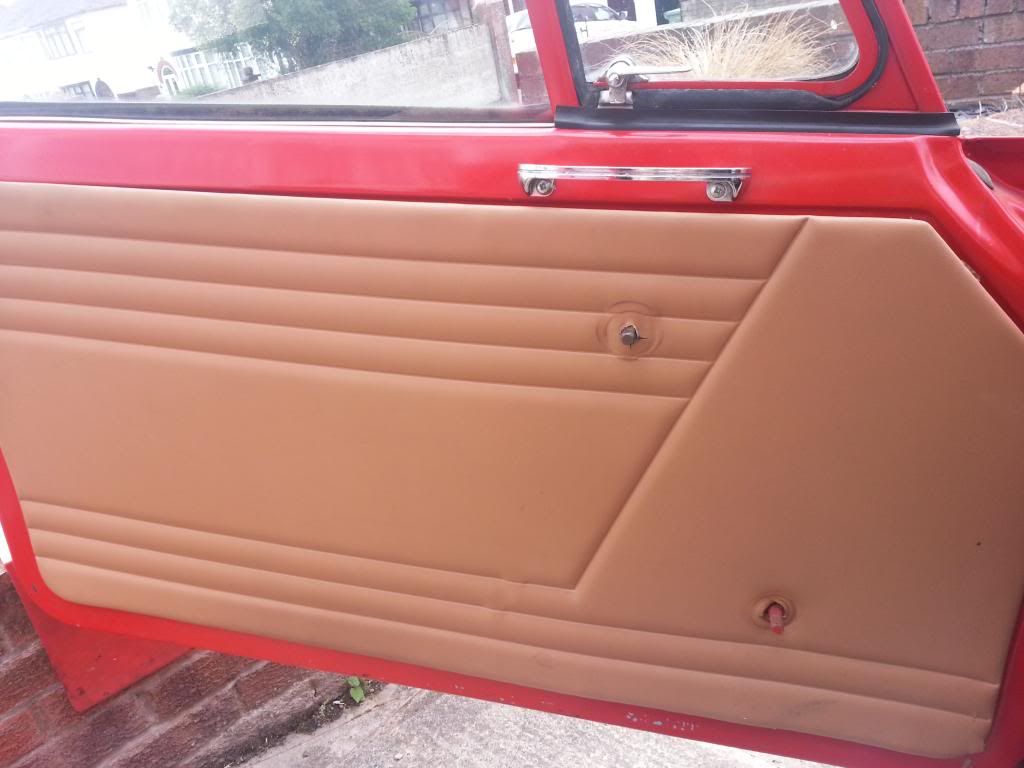  The back was a different story. A decision to recover rather than replace (new ones seem extortionately expensive) and the originals were in a right state. Some leatherette and some of that acoustic carpet again were the chosen materials. 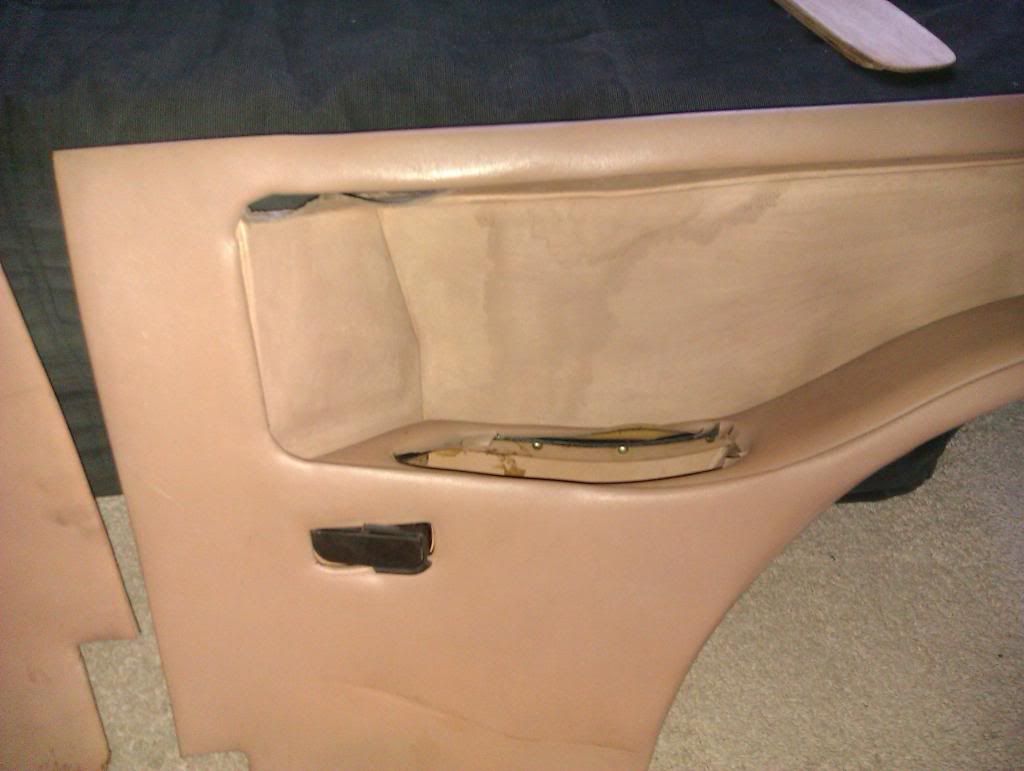 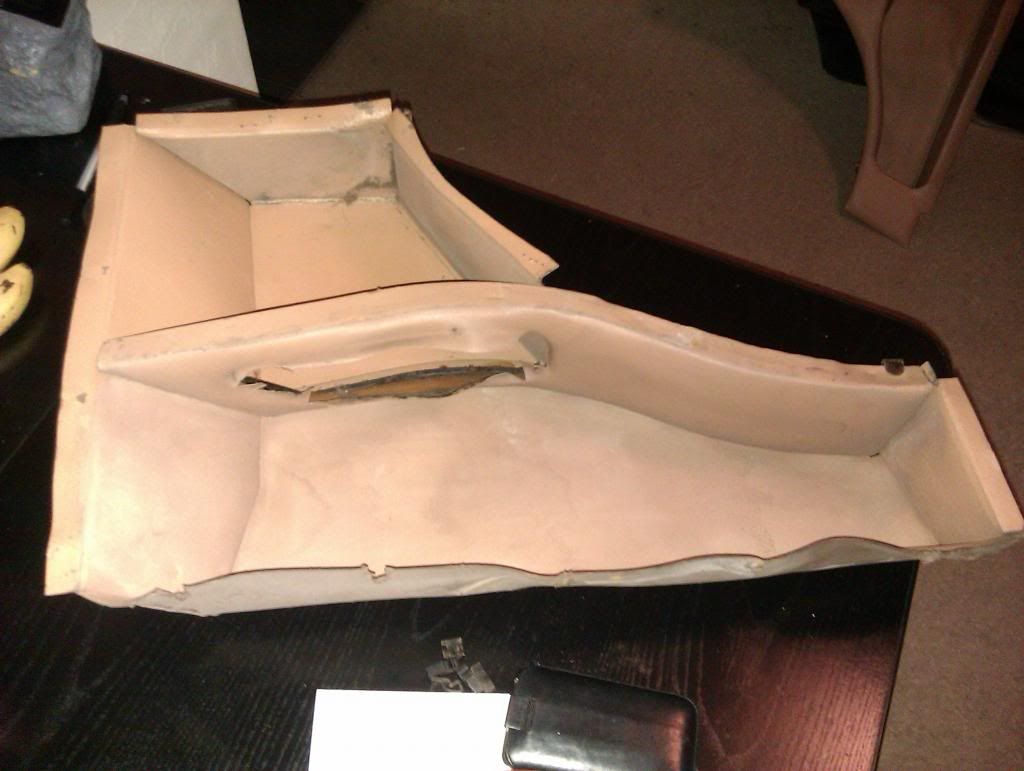 They were stripped down to the components and the old vinyl removed. 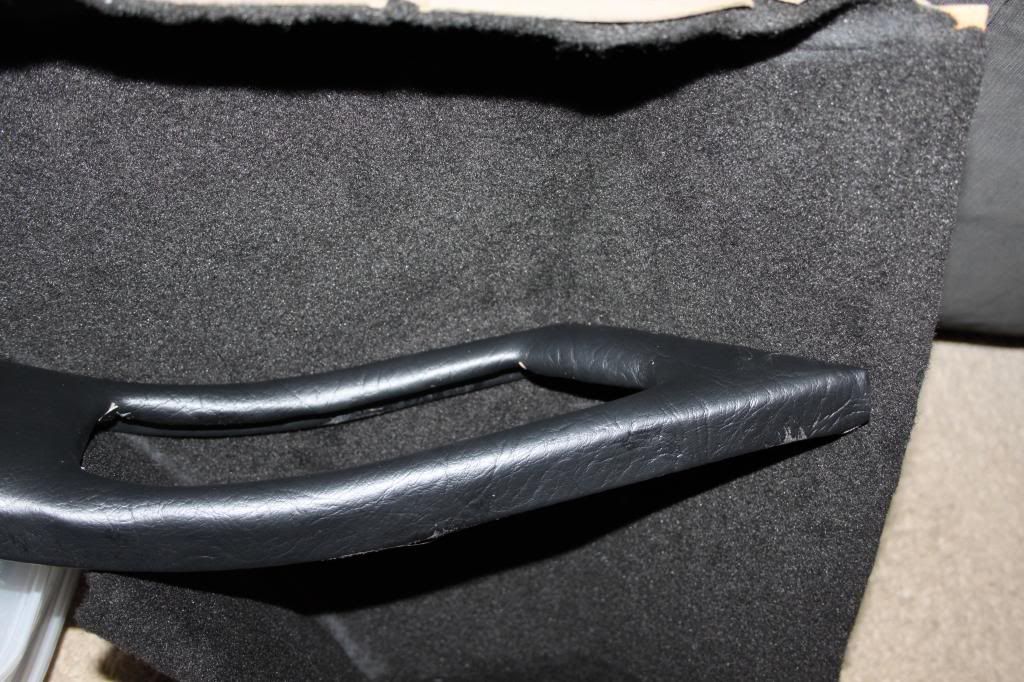 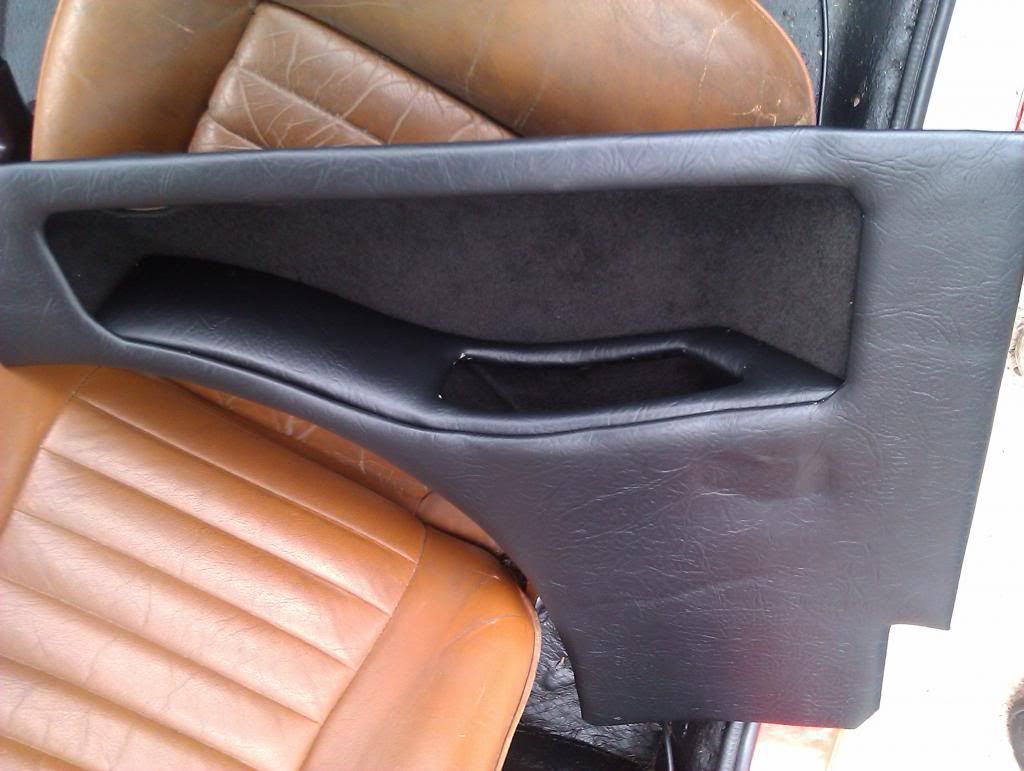 The ashtrays were also blanked out and covered as they went needed. Next. Seats and carpets. Chris |
| |
|
|
djefk
Part of things
Posts: 844
|
|
Dec 12, 2012 15:17:59 GMT
|
|
Amazing results you're getting here - This car is turning into a real cracker!
|
| |
|
|
|
|
|
Dec 12, 2012 15:31:46 GMT
|
Cheers guys. djefk - Thats something I'm working on, theres a little too much curve in the panel to fit the mesh as is. Thinking to put some dowels in to move the mesh away slightly. Back Seat. Someone had used what I can only assume to be old flooring as sound deadening under the back seat. So that was ripped out and everything given a lick of paint, and some rubber stripping that was laying about in the shed was fitted. And the old wheel arch covers, the less said about that the better. Again acoustic carpet to the rescue. 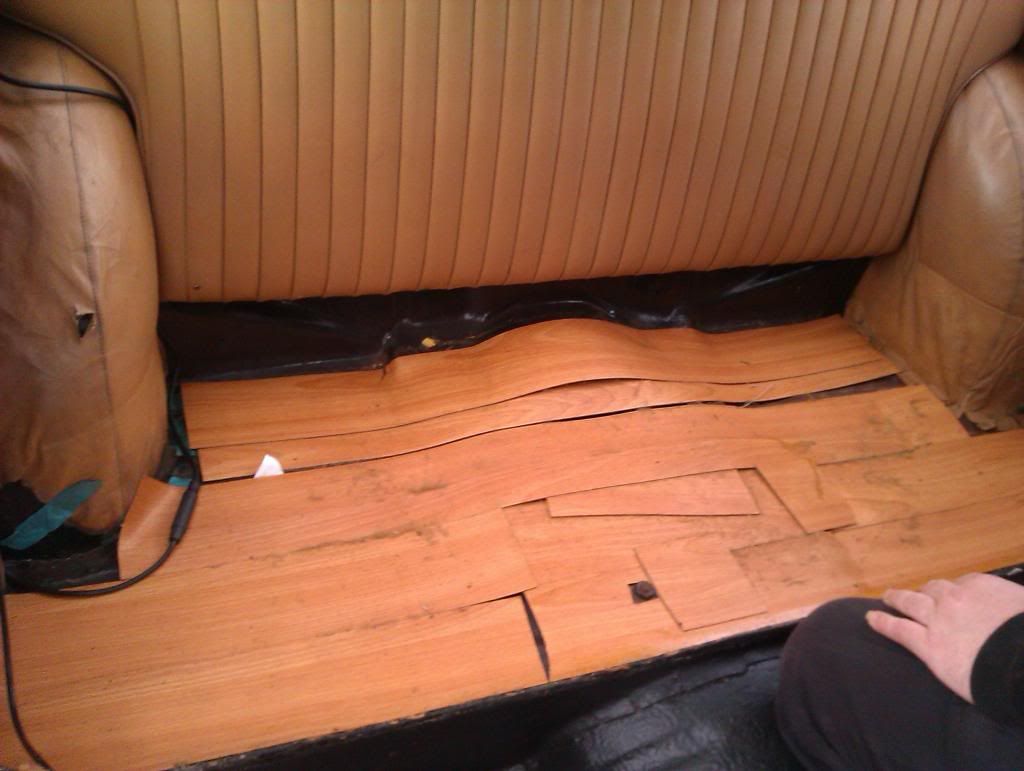 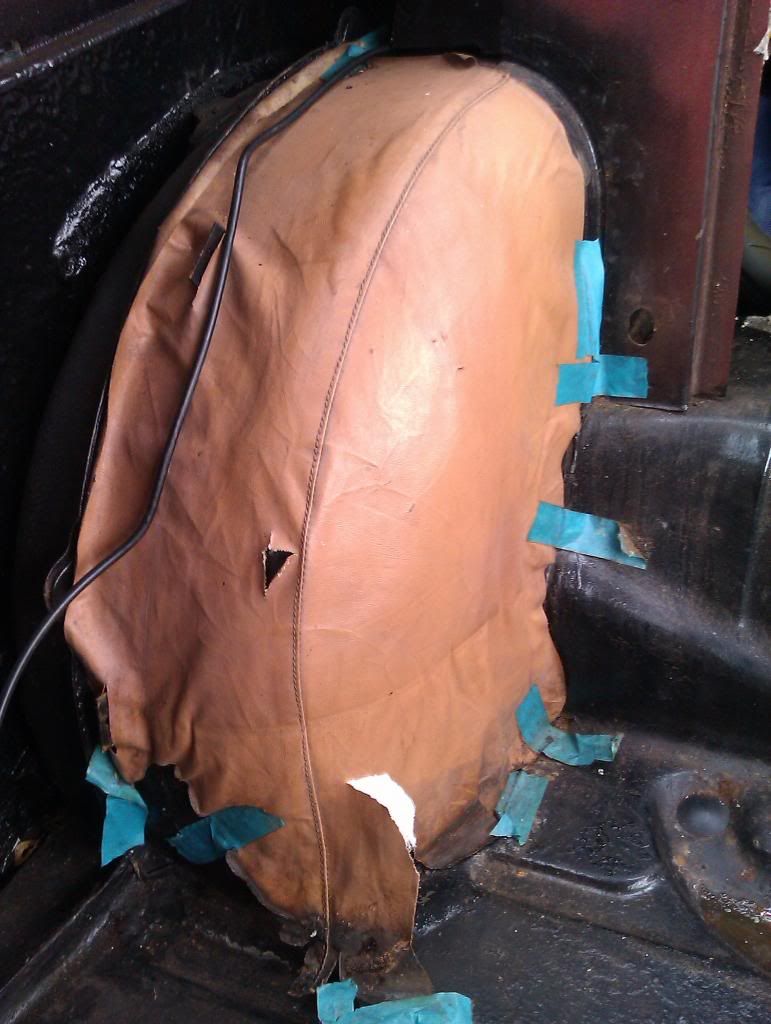 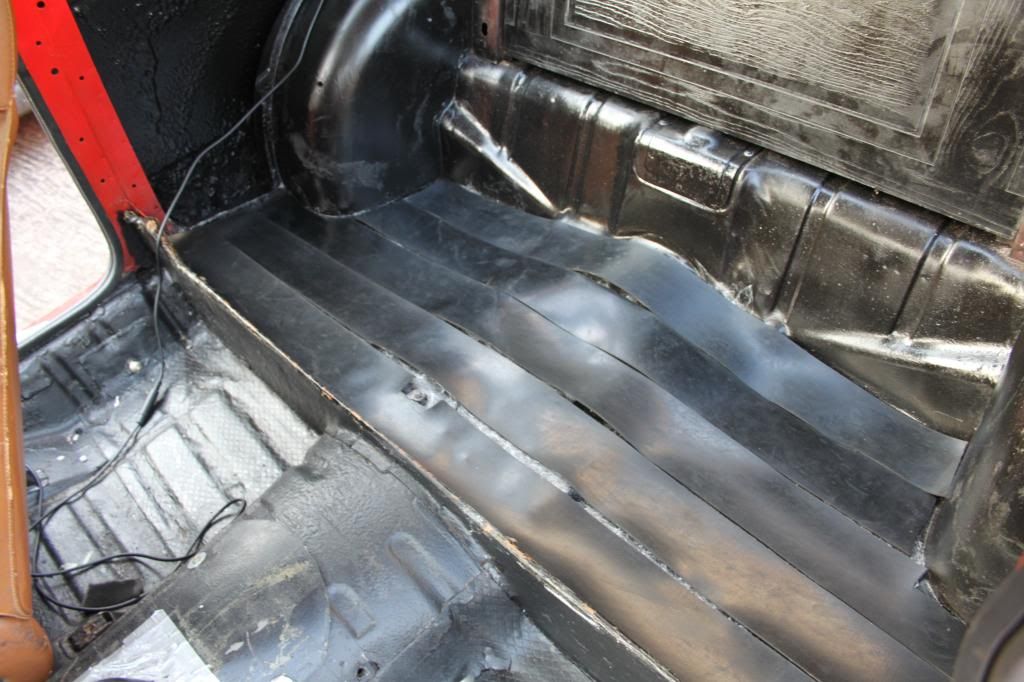 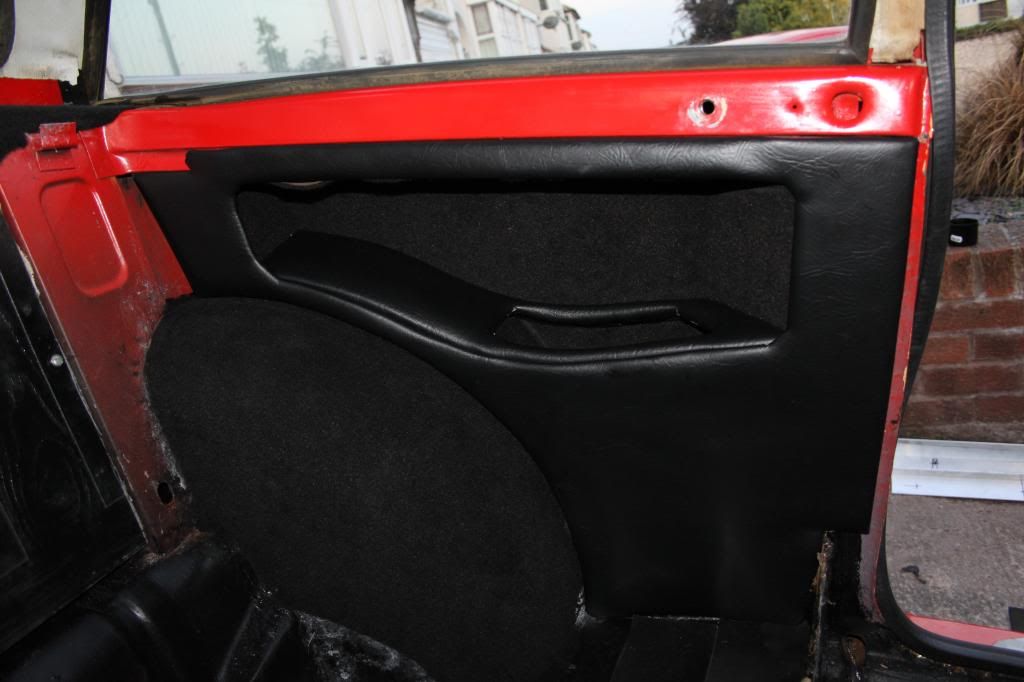 I couldnt get hold a back seat in black for a while, so a bit of research and I found some spray on leather/vinyl paint. But it didnt quite go to plan. It was almost as the stuff wouldnt dry and just stayed very sticky. Put an old sheet on as a temporary measure, but when it was removed it certainly left its mark! I bought a s/h back seat and front door cards along with a chunk of other herald parts, so new seat swiftly went in. 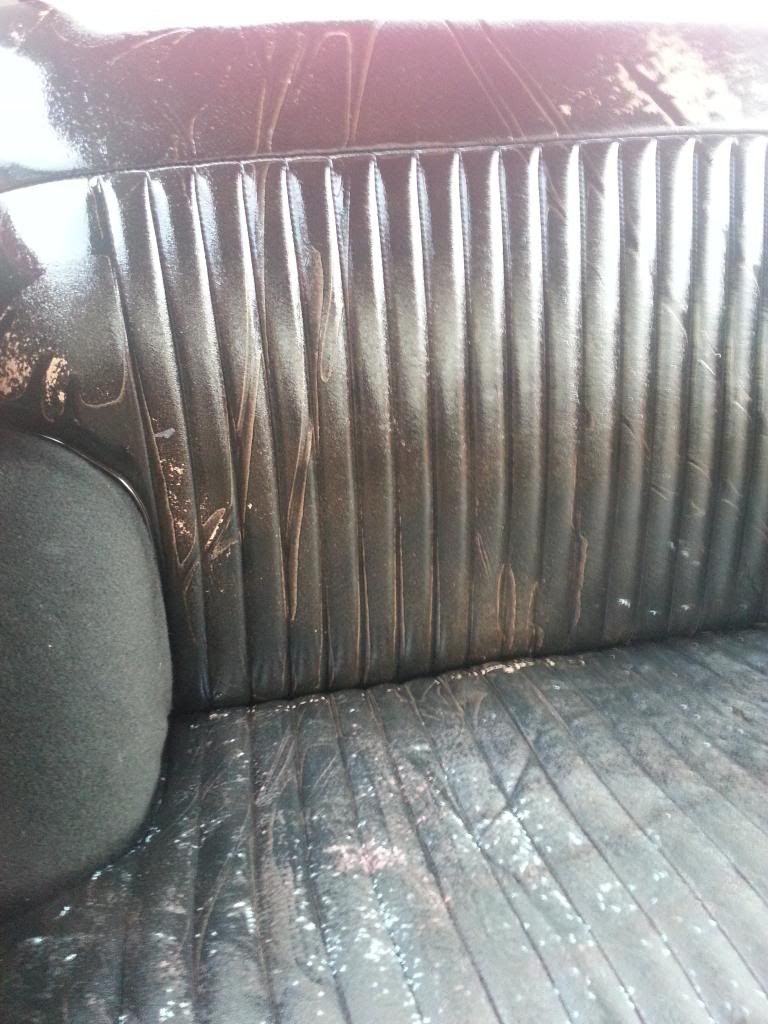 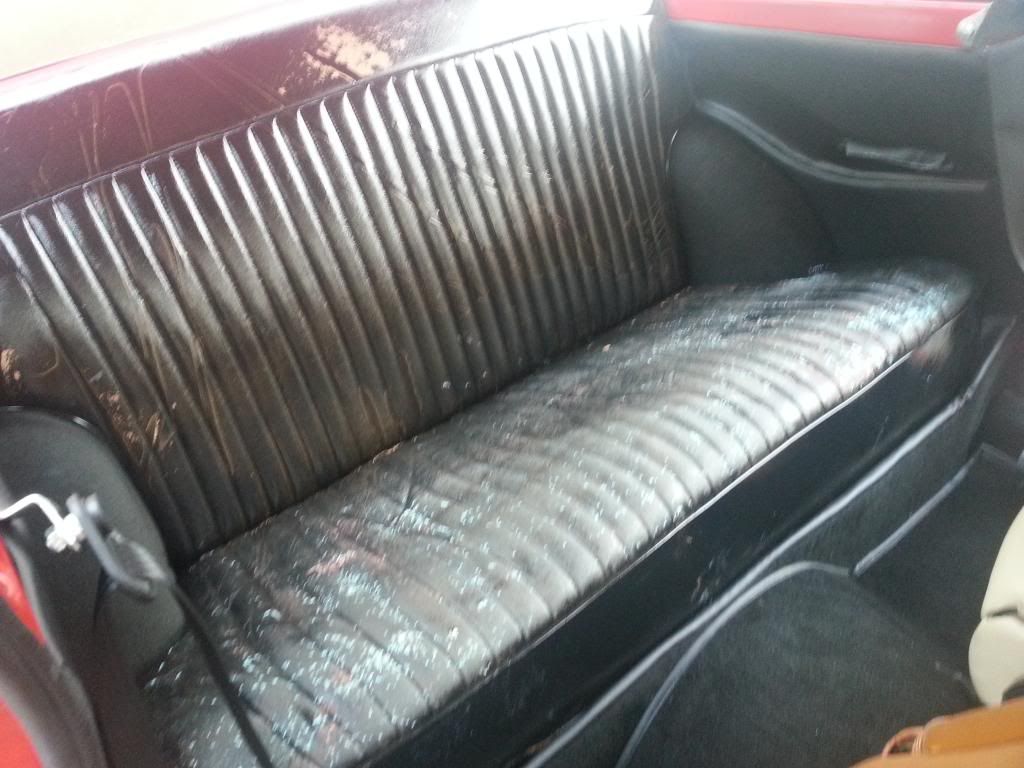 You can see the state the painted one was in, compared to the new one  Carpets in, and front seat brackets painted and fitted. 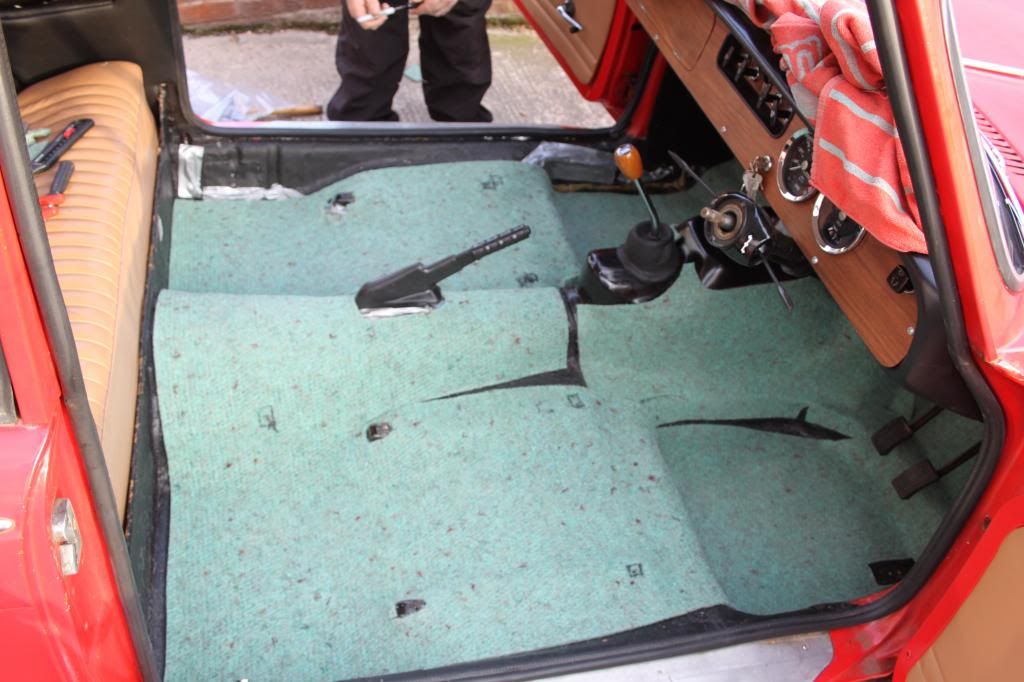 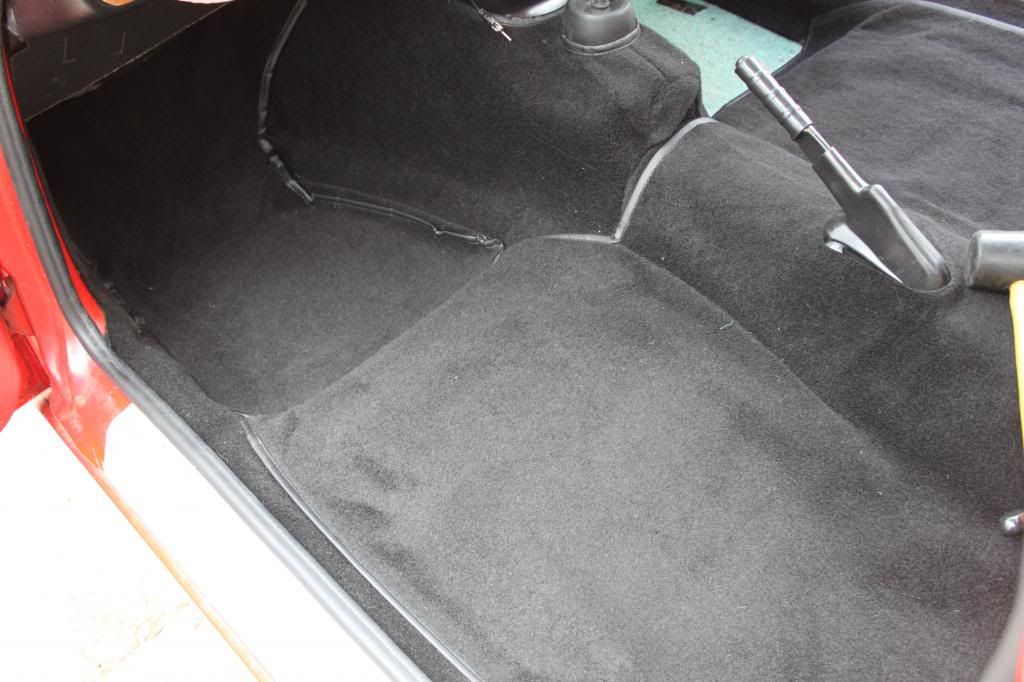 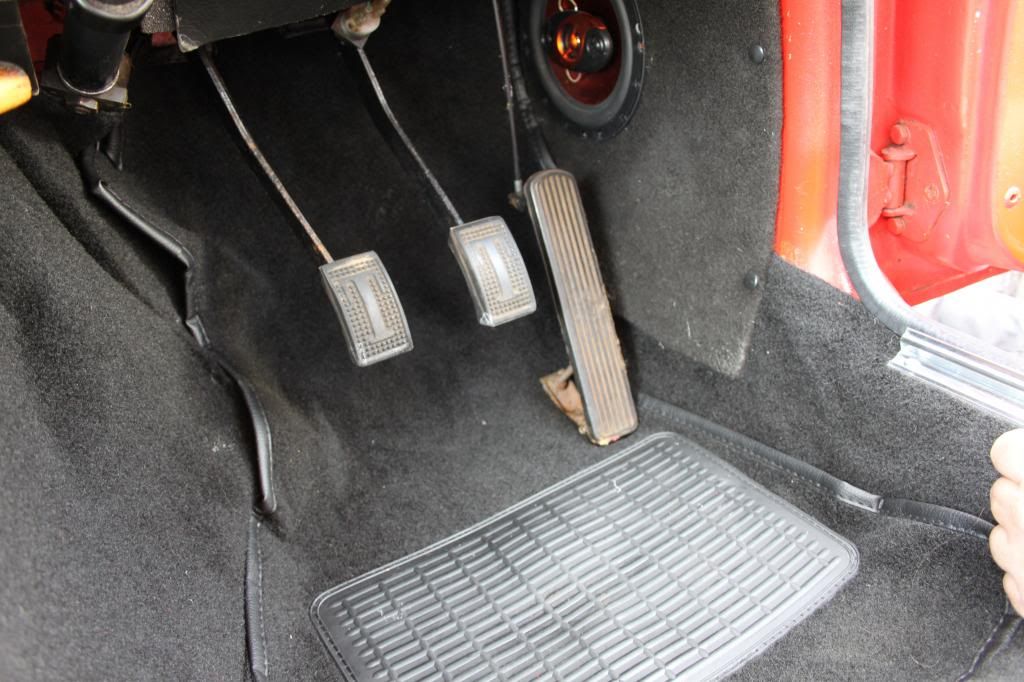 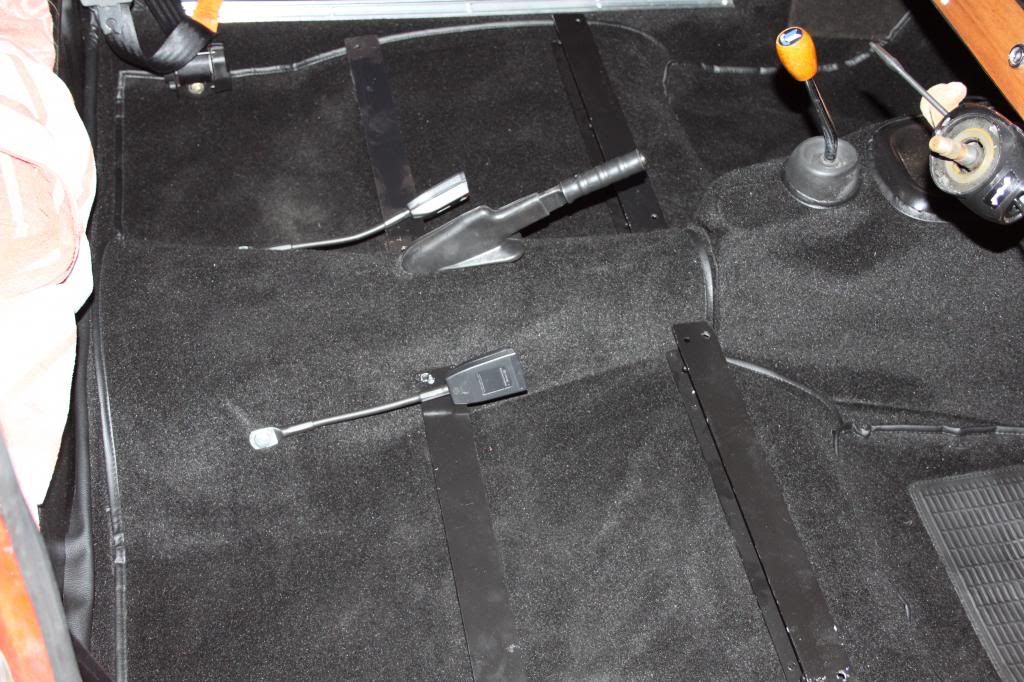 Carpets still arent a perfect fit, but they are a hell of a lot tidier than the previous ones. The front seats were then just a case of bolting in. 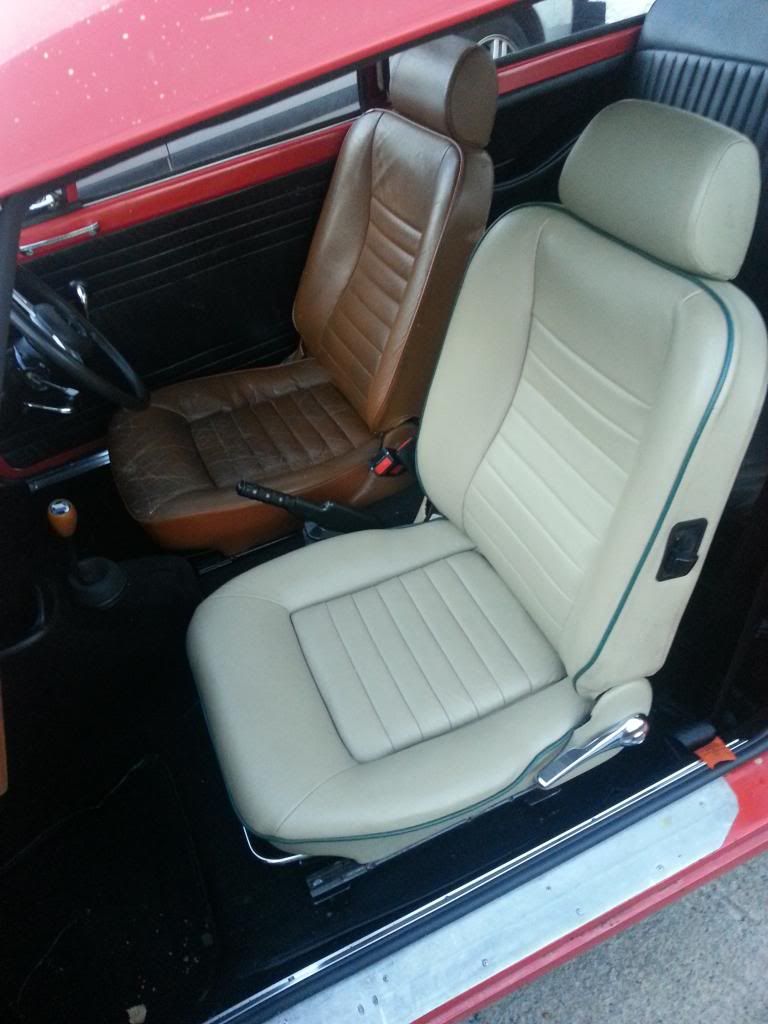 Bit patchwork at the minute, but either gonna get them recovered, find a black pair, or try with a leather dye rather than paint. Thats all on the interior situation at the minute, need to re-do the dash, the iron on veneer has bubbled, so when I get chance it'l be glue veneered. Also have some wood cappings for the doors, which will be colour matched to the dash. |
| |
|
|
|
|
|
Dec 12, 2012 15:44:30 GMT
|
To bring things up to date. Recently had a problem with the car cutting out, as though it wasnt getting enough fuel. Had a look at the fuel pump, and the outlet pipe from the pump to the carb was leaking at the joint with the pump. A new fuel pump was sourced along with new hoses and a roll of copper pipe. Might aswel replace the whole fuel lines in one go. The under car copper line was in 3 pieces from tank to pump, and only connected by pushing an inch or so of hose on, no clips in sight, and the hose was perished and starting to split. not good. So new fuel lines, new fuel pump and all new air/water hoses while I was at it (these were on there way out aswel), but the car still wasnt quite right. Called a chap who does tuning, and he discovered whichever previous owner had converted the car to electronic ignition had put the positive to negative and vice versa on the coil, and I had just been burning the coil. Decided to go back to traditional points as its cheaper and easier to carry replacements, and then the tuner came back and set the timing and mixture (had been running very rich, and the needlevalve on the carb was partially blocked.) Now running better than it has since I've owned it. Couple of jobs need tackling such as the panel gaps, the fibreglass bonnet is a poor fit, and doors need adjusting, as you can see. 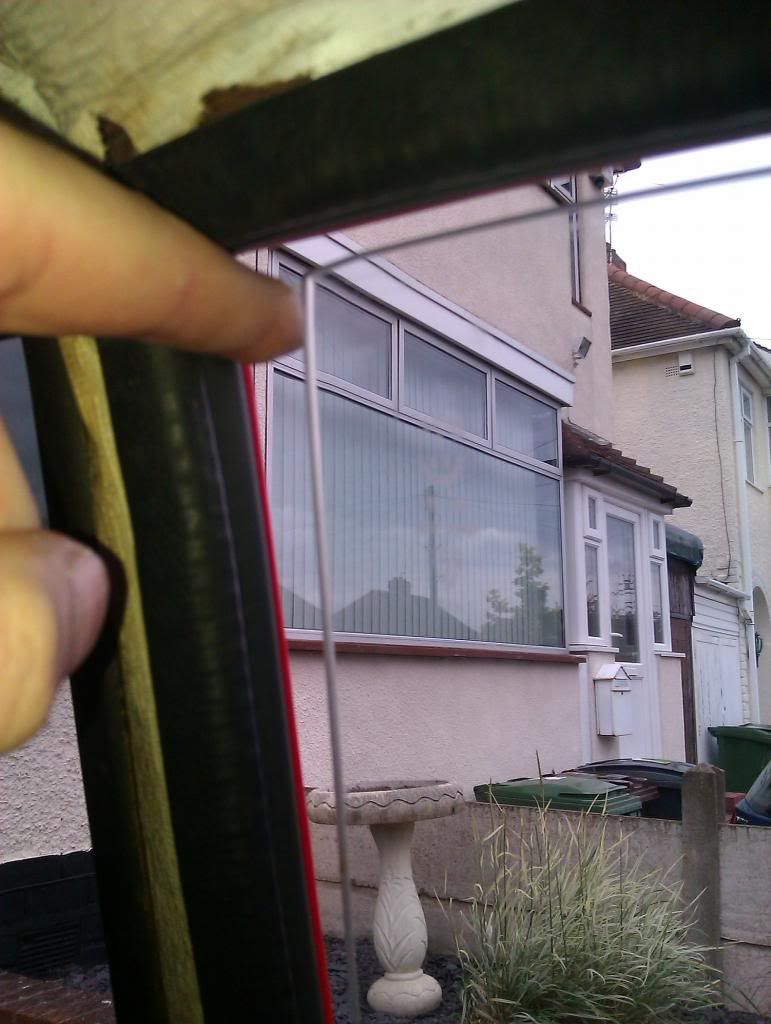 I have a new headliner to fit, and have also got rid of the yellow rocker cover for a bit of 'bling'.  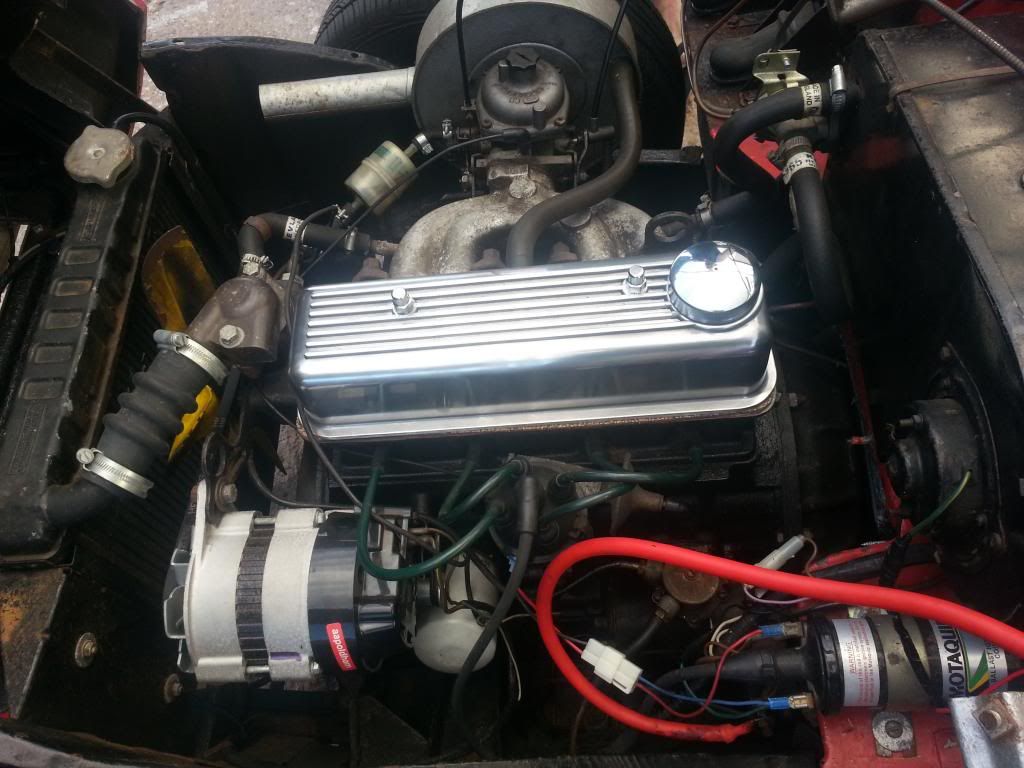 So thats about it for now really. Next big job is the suspension overhaul. All new polys, nuts/bolts and shocks and springs, antiroll bars and the associated gubbins. Cheers Chris |
| |
|
|
adam73bgt
Club Retro Rides Member
Posts: 4,867
Club RR Member Number: 58
|
1970 Triumph Herald 13/60adam73bgt
@adam73bgt
Club Retro Rides Member 58
|
Dec 12, 2012 16:55:04 GMT
|
really tidy looking herald you've got there! i like how you seem to be doing/have done all the jobs i want to do to my MGBGT  those XJS seats seem to fit in there really nicely, i initially thought they'd be way too big lol I did the door seals on my car recently and i have a similar problem with the window not sealing, oh the joy of having pillarless doors |
| |
|
|
MrSpeedy
East Midlands
www.vintagediesels.co.uk
Posts: 4,786 
|
|
Dec 12, 2012 18:10:36 GMT
|
That's looking good there fella  TBH, if you hadn't have said, I wouldn't have noticed that your bonnet was a 'glass one. It fits a damn sight better than mine does! I also have the same problem with the door glass, I just choose to ignore it!! lol |
| |
|
|
|
|
|
|
|
|
Smashing job on that interior and quite a tidy motor, have seen people fit electirc heated XJS seats into a Vitesse before nice!
|
| |
|
|
|
|
Seth
South East
MorrisOxford TriumphMirald HillmanMinx BorgwardIsabellaCombi
Posts: 15,514
|
|
Dec 13, 2012 10:39:13 GMT
|
Those Jag seats work a treat  Will be fab when everything matches as everything else looks really smart. |
| |

Follow your dreams or you might as well be a vegetable. |
|
|
|
|
Dec 13, 2012 12:50:04 GMT
|
|
Thanks guys.
Adam73bgt - had a look at your thread, the wood cappings youve done look great, and it definately seems were doing the same sorta jobs
MrSpeedy - Out of interest how is your bonnet braced on the sides and the middle, as when i got mine there was a bit of wood in the metal frame by the opening hinges on the inside. I'll try and find a picture of it.
As regards the Jag seats, I'd seen the most common swap was for MX5 ones, and the first time I saw Jags suggested I thought they would be way to big, but after seeing a pic of some they do fit suprisingly well and easily.
Cheers
Chris
|
| |
|
|
|
|
|
|
|
So a bit of an unexpected update. Havent really had chance to do anything over christmas due to work and uni commitments and the glorious weather we've been having. The obligatory snow picture. 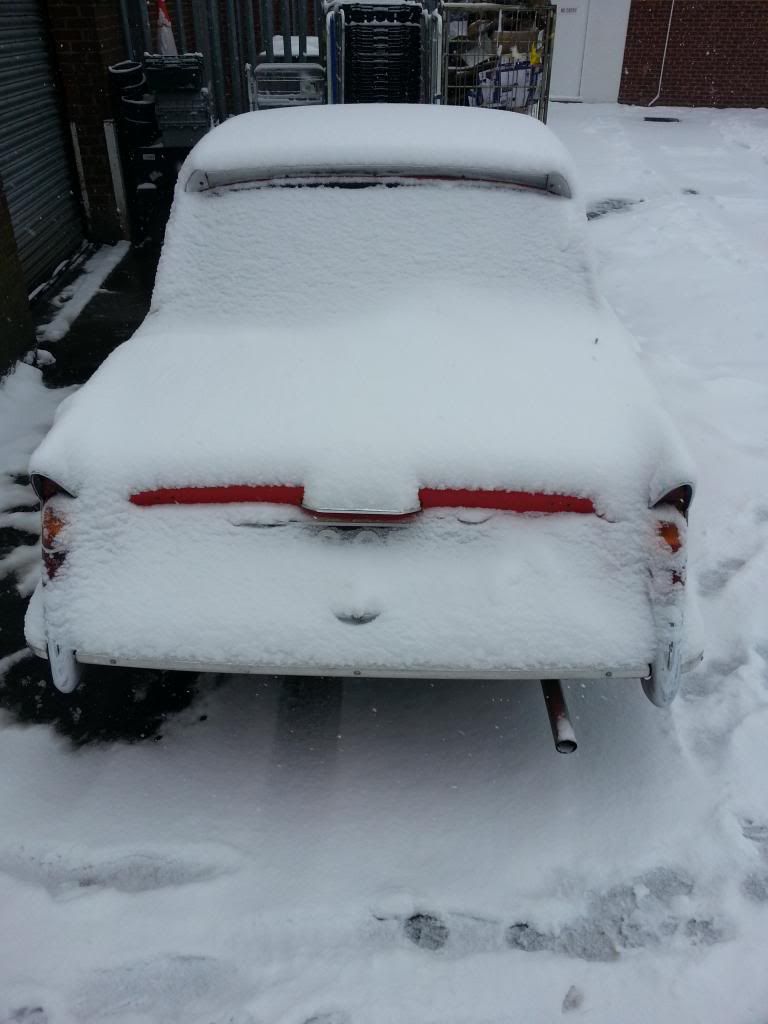 Some goodies for the suspension overhaul 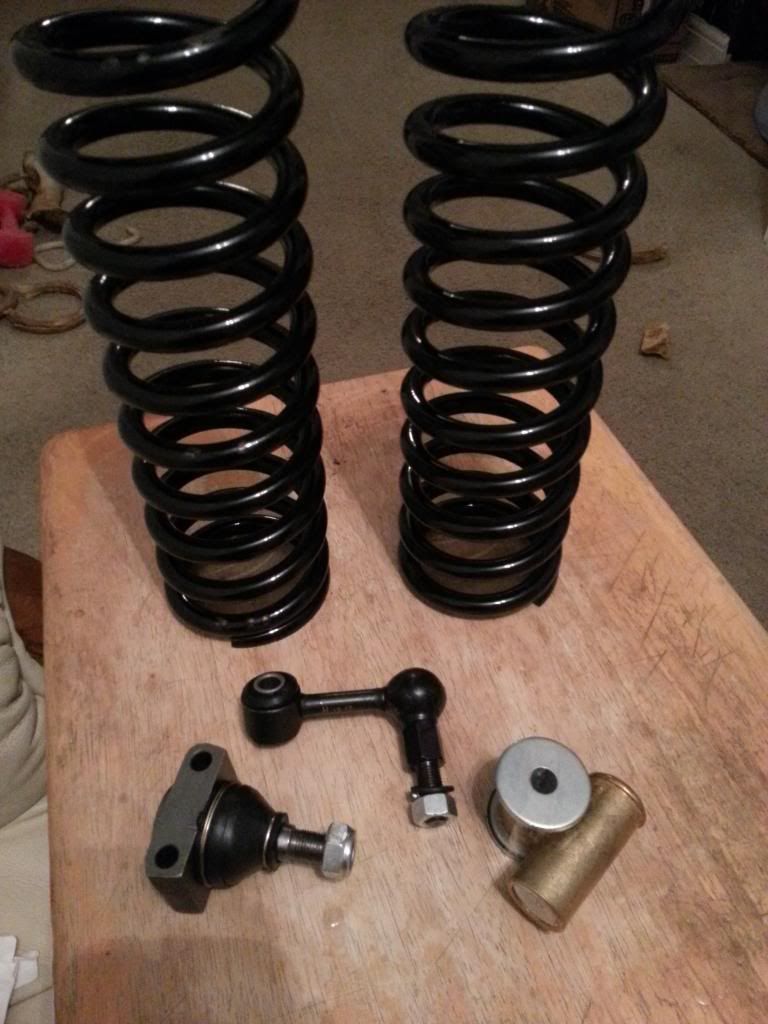 That was my plan for the next update, however, as per, something else crops ups. Just as I was taking the dog out yesterday I copped a whiff of petrol. Had a look and there was fuel p**sing out of the fuel filler neck. Not quite sure how it was leaking from there. I knew I was going to have to replace the tank at some point, as the old one had been bodged in the extreme. (more on that later, when I get some pics of it) So rather than cleaning out a spare tank I've got and risking it leaking or still having some muck in the bottom, I decided the best course was a new one. 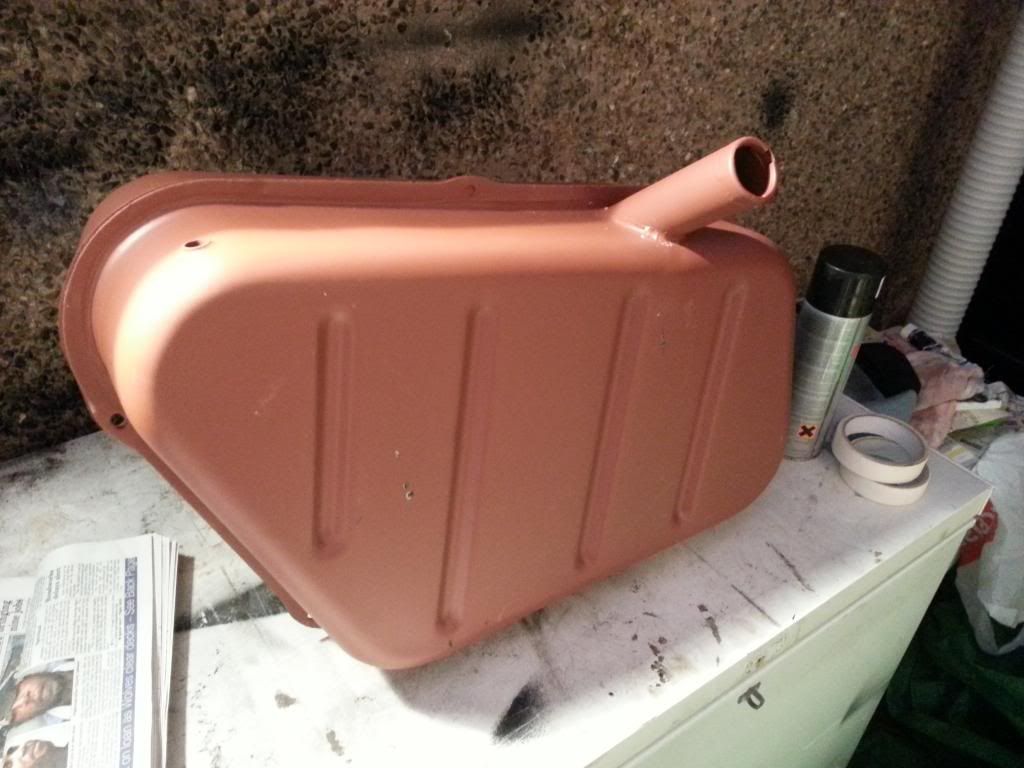 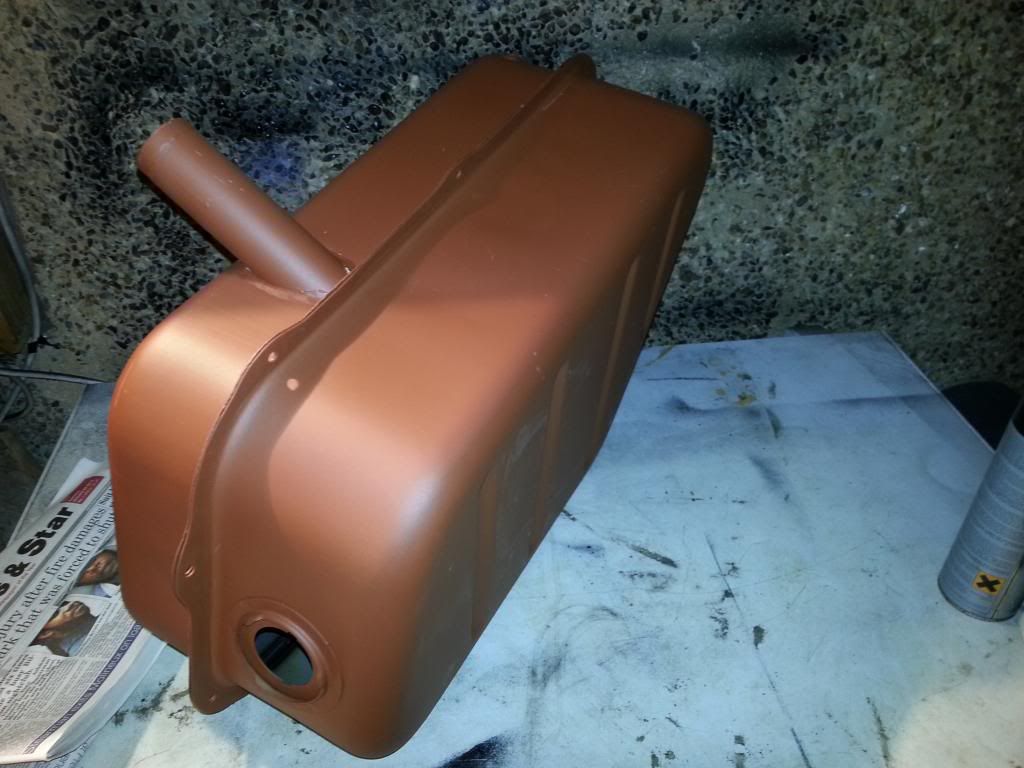 Ready for a coat of black paint on the freezer top spray area. I'll try and get some pics of it done tomorrow. It also means I get to finally use this 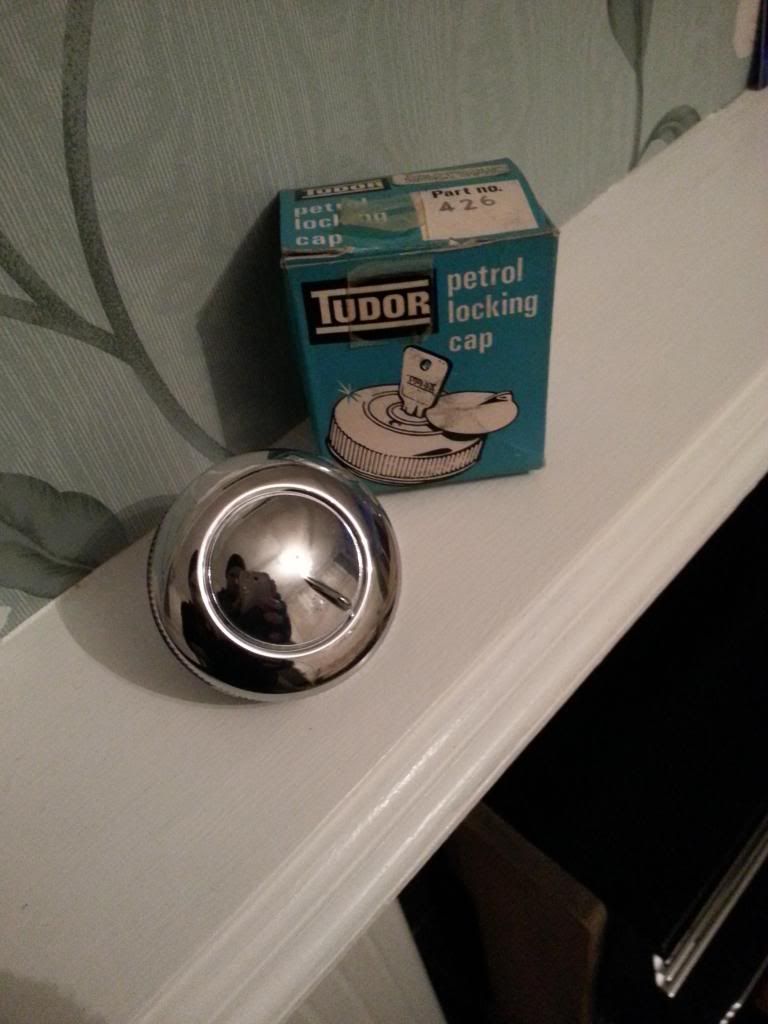 A NOS Tudor locking petrol cap that doesnt fit on the current setup. (again more on this later) Also picked this up last year, don't think I've put a pic up yet. But this is planned to go on soon aswel 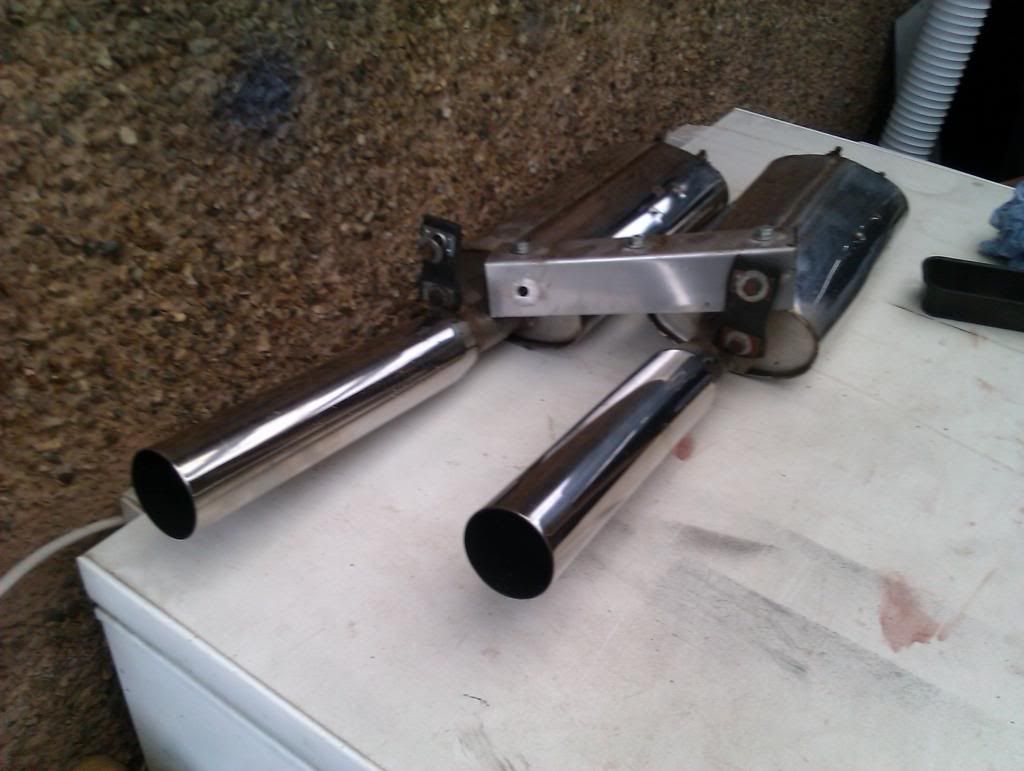 So thats about it for now, hopefully will get the tank sorted in the next week or so. Cheers Chris |
| |
|
|
carltonx
Part of things
yardie in brum
Posts: 645
|
|
|
|
|
looking good are they lowered springs
|
| |
Potentially offensive comment deleted. You are welcome to remove this text, but not replace it with more bigotry. If the need to express that opinion is particularly important, please let me know and I'll delete your account for you.
Maximum signature image height: 80 pixels.
|
|
|
|
|
|
|
looking good are they lowered springs cheers, the new ones are standard road springs. The ones on at the minute are lowerer, two coils less than these, but its sitting a bit too low, and on full lock is scraping the arches. Tank painted black, just trying to sort out the line out of the top now. 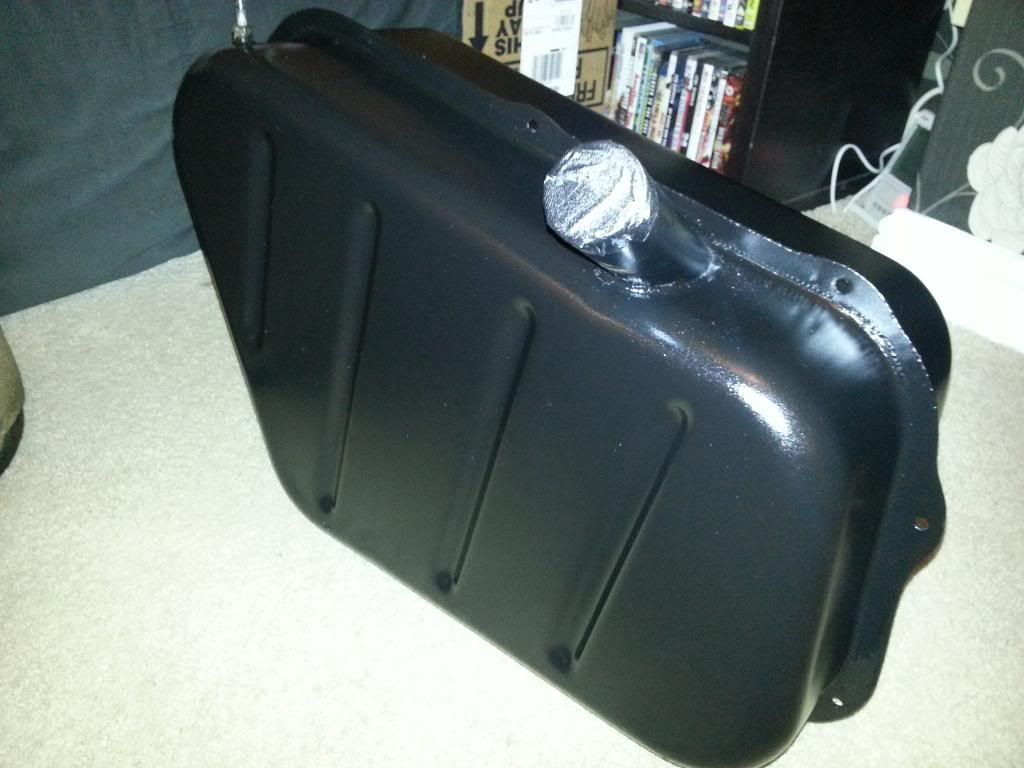 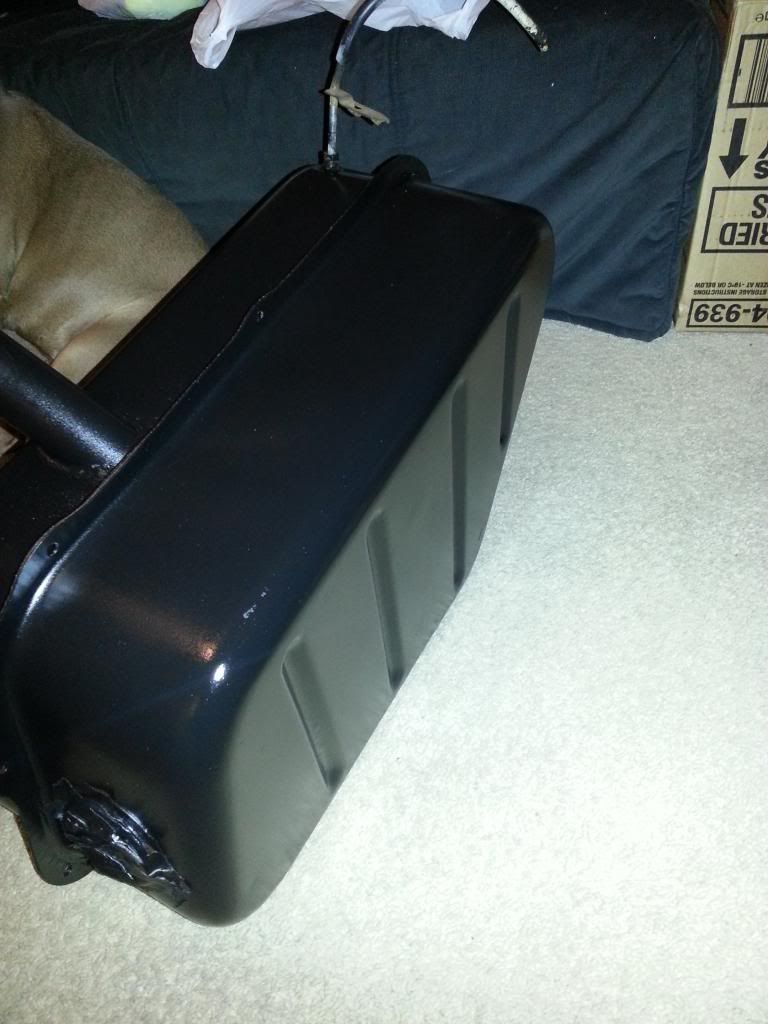 Hopefully have some more updates this week as I've got a few days off work. Cheers |
| |
|
|
|
|
|
|
|
|
Looking alot better now.....nice work mate. The black gearbox cover looks heaps better...not hard to top that cardboard piece of curse word. Those shiney new exhausts will look excellent. Shame to see it left out in the snow mind... I hope the weather is on the up.... Hottest, driest summer in 50 years here in NZ
|
| |
69 Herald 13/60 with Turbo 1600 MX5 engine, Lexus 5 link rear end, 17in wheels,300mm ventilated disc's and subaru 4 pot calipers
|
|
|
|
|
|
|
Franknstein - Cheers mate. Yeah those carboard ones are shocking. The snow pic was at work, had it wrapped up when I was at home, one of the downsides of British weather and nowhere covered for the car. Still chilly and going dark early, meaning havent been able to vast amounts today. That hot weather sounds nice compared to over here! Right so, another update. Got the tank all painted up, and tried to sort out the outlet pipe. However when it was screwed in, it twisted as the reserve tap should, but can also be pulled out which is not ideal. Going to get an olive for it tomorrow, so as time was getting on and havent got inside space to work, me and my dad got to work getting the old fuel tank out. I knew that it had been bodged, but didnt realise to what extent. Fitting wise, theres a bolt at the back edge, one on the top, top corner and one down the bottom corner. Theres a bracket of some sorts on the bottom that sits in the wheel well but, not exactly sure what its for, but it stopped the old tank pushing in all the way. Please excuse the shoddy camera phone pics 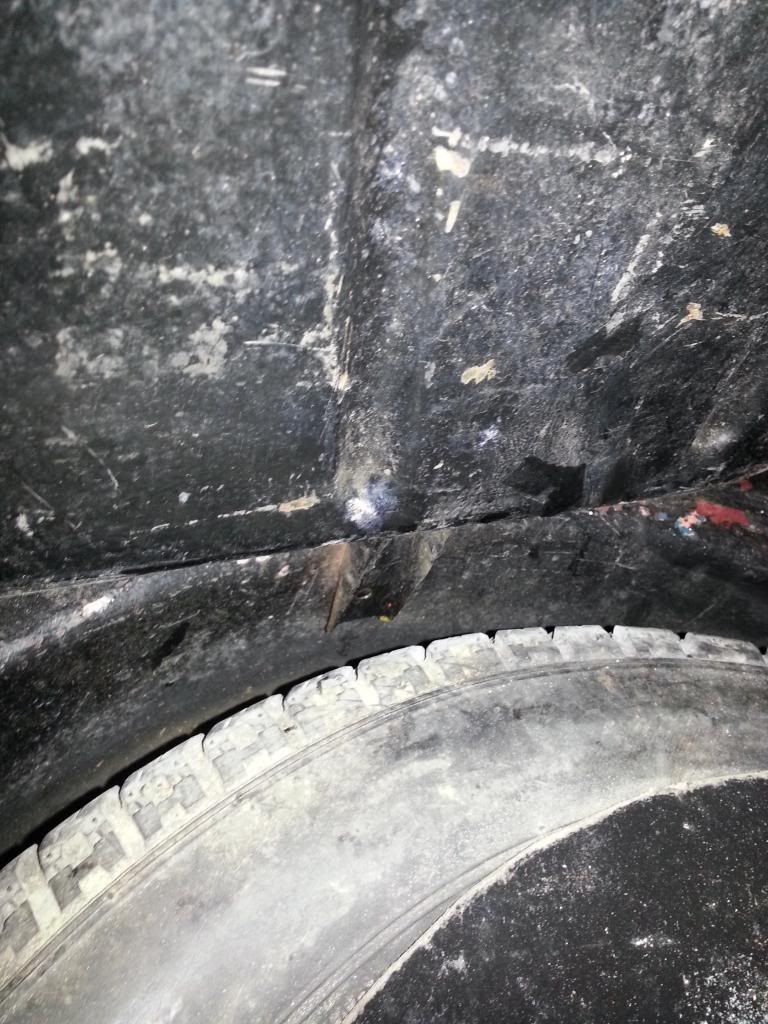 That meant that this mounting point needed to be bodged. It seems it wasnt actually bolted to anything  (The chisel is there to hold it in place as its not particularly secure) 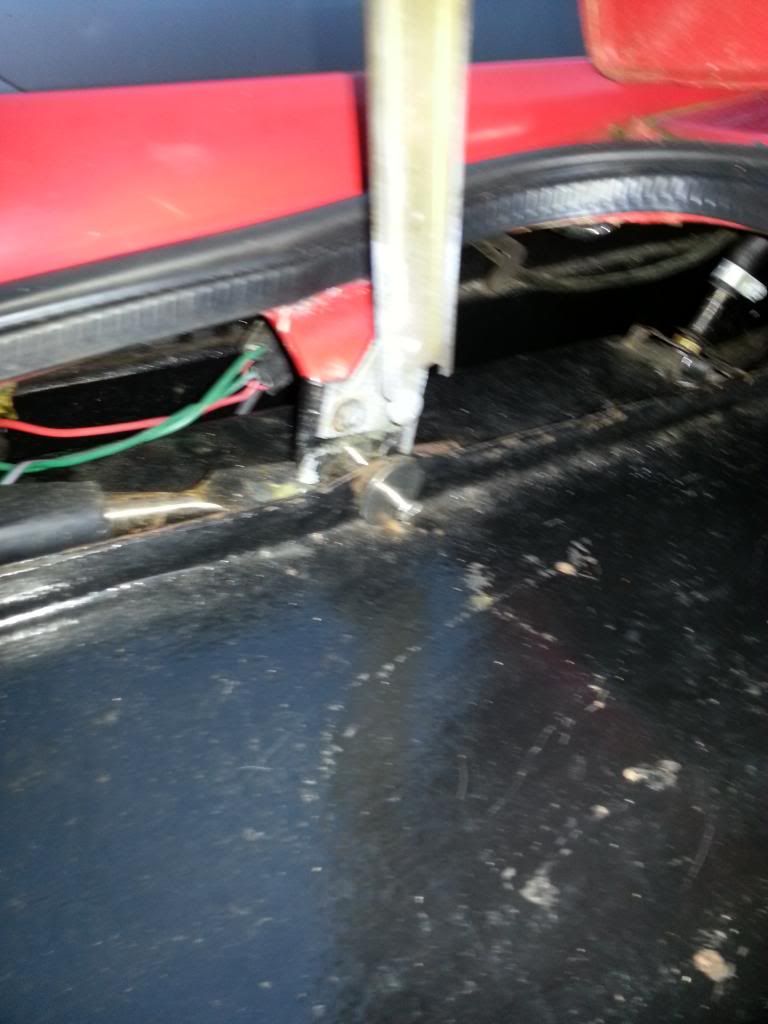 Then theres this one, thats held with a cable tie. 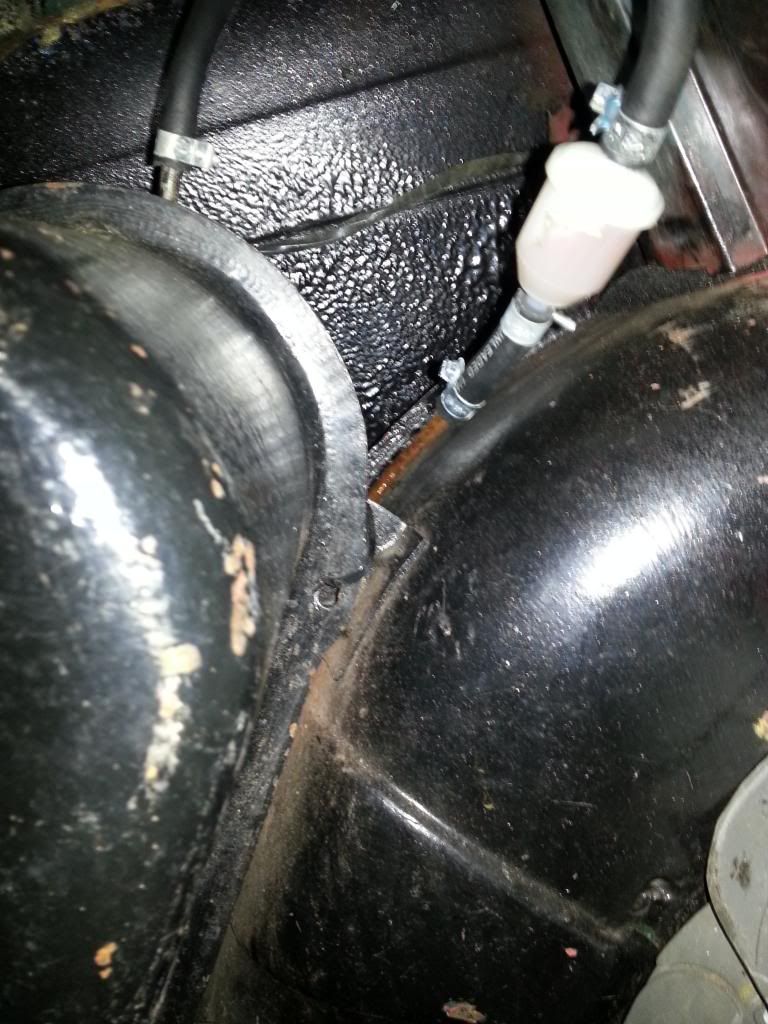 And this one that a previous owner hasnt bothered to put anything in at all. (Just to the left of the bottom of the wheel well.) 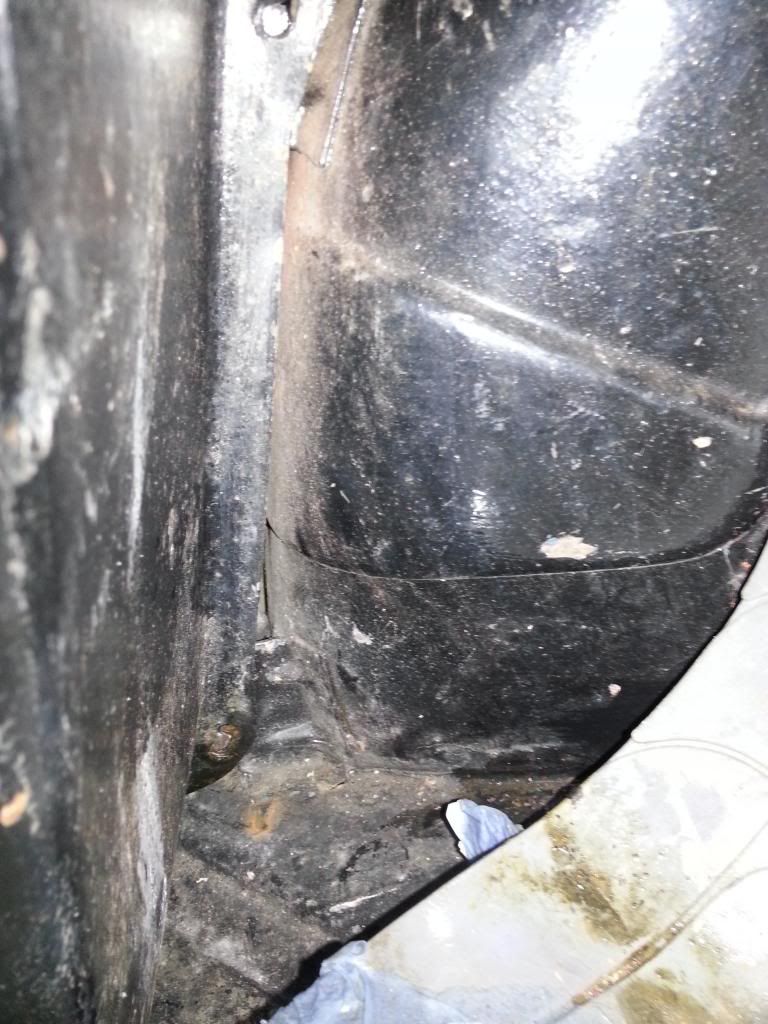 So it meant it was only really held in by one bolt. Excellent! The fuel filler neck was the biggest concerning point. I knew there had been something done to it, as the Heralds and Vitesse's(?) have a 3-pin locking petrol cap, and mine had a 2 pin, but it was a herald tank. As it turns out someone had cut the filler neck and replaced the top half of it. Not a problem in itself. However when its been done like this.... 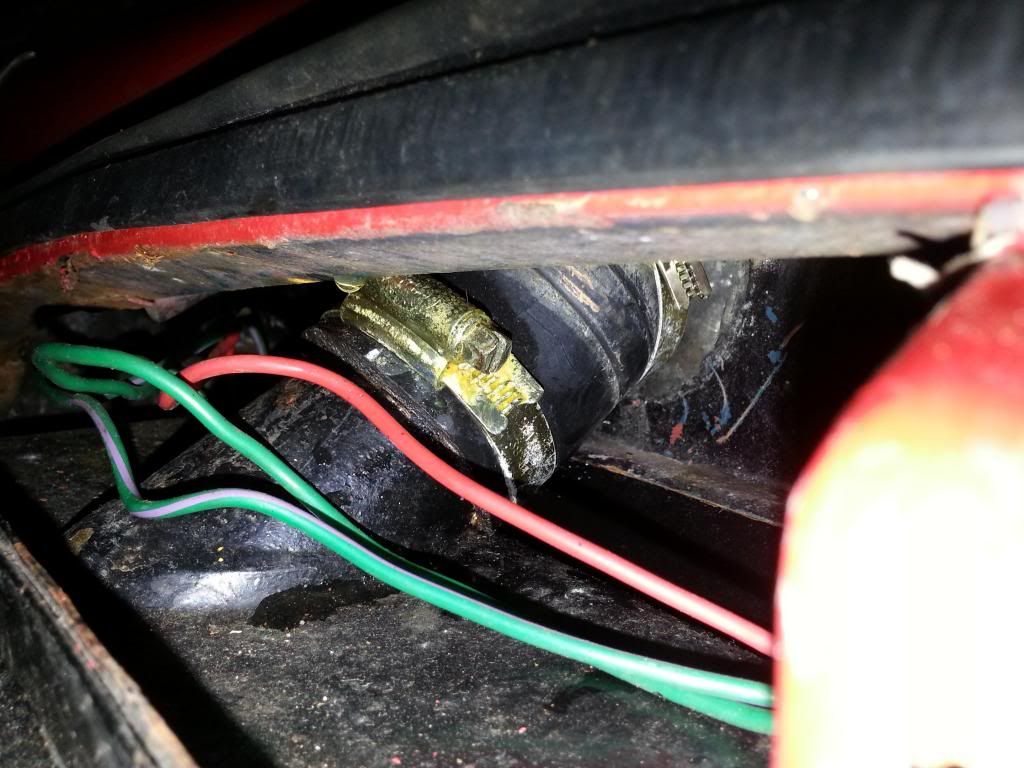 A piece of rubber hose jubilee clipped on. Not the brightest idea imo. Had a bit of a surprise when it came to lifting the tank out though, what we thought it had in was a tenners woth of petrol in, turned out to be a full tank. Guessing its a dodgy sender unit as the fuel gauge only ever went half way, but when I filled it the pump would click as though it was full. Few panicky occasions of @oh s**t I'm nearly out of fuel' could have been avoided. So tanks out, hopefully the new one will be in tomorrow. Cheers |
| |
|
|
|
|
|
Jun 21, 2013 17:59:24 GMT
|
It's been a while since I've updated this. Not got huge amounts done, mainly due to work commitments and weather, but I'm at last getting somewhere. New fuel tank and sender unit is up and running. 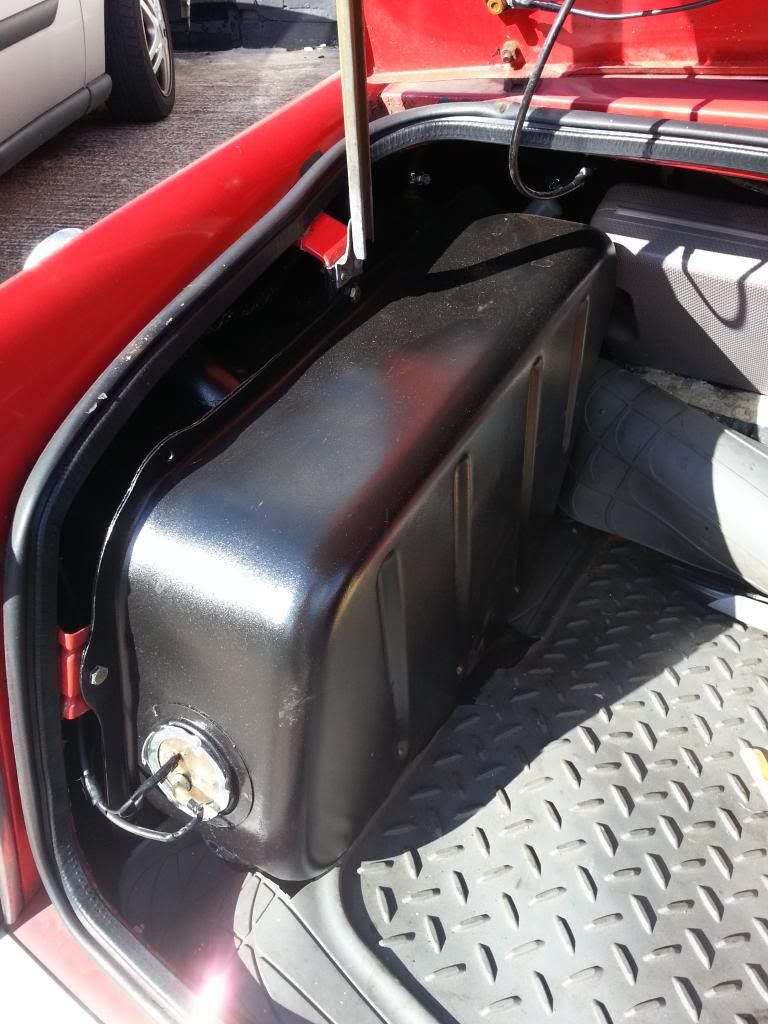 As per usual with older cars, the whole go to do one simple thing and something else crops up... Went to adjust the handbrake and while we had the rear wheels off, do the suspension aswel. As we were working half on the road, we did the handbrake one side, not a problem, then turned the car round for the otherside. 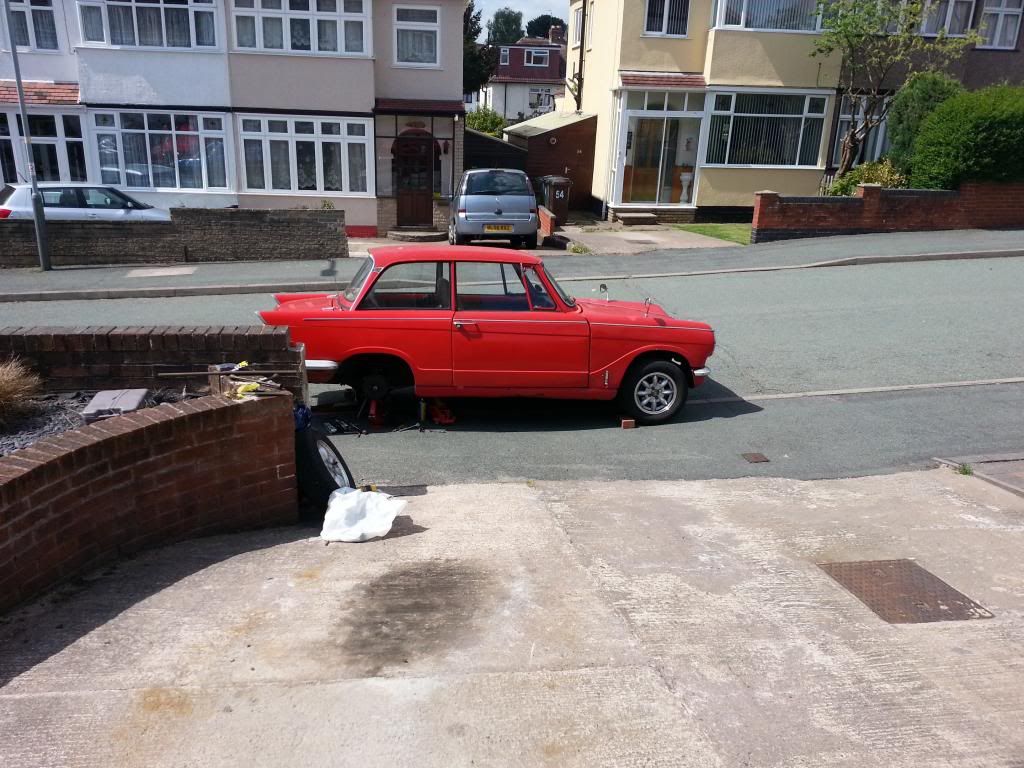 We noticed that the brake drum was about half an inch away from the back plate. After looking into it we decided that a replacement driveshaft was on the cards, and because of lack of time and place to do it, took it to a friends garage. 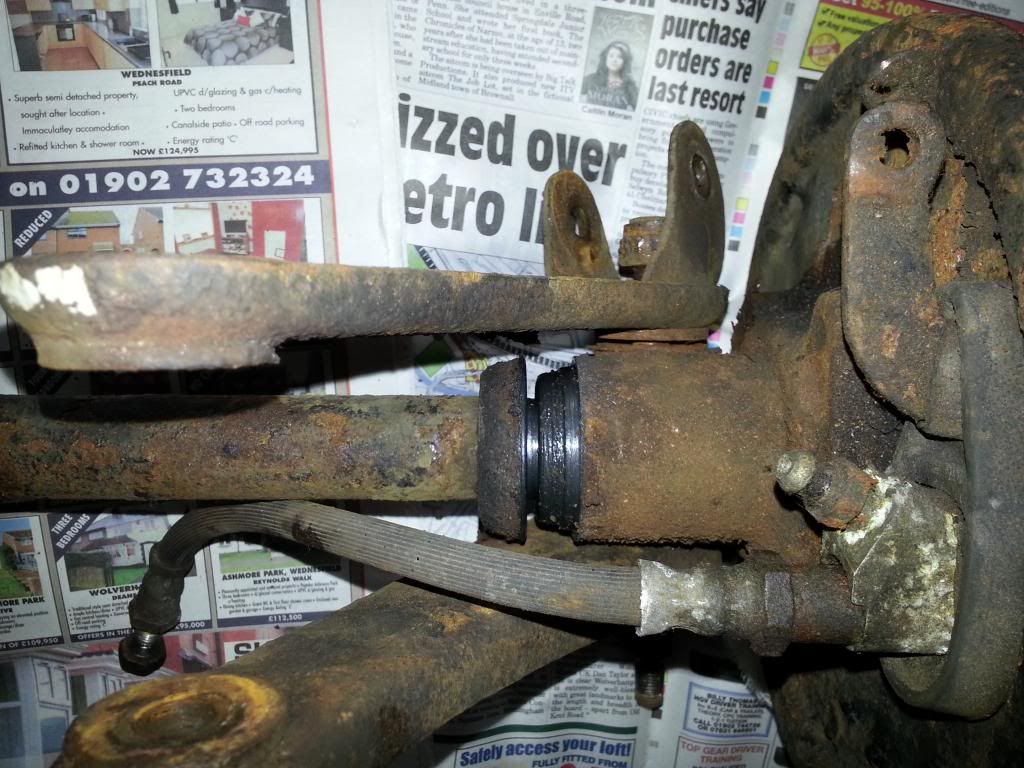 As you can see the shaft had separated (found out the bearing in the shaft where it goes into the back plate had come apart. Luckily theres a place a 20 minute drive from me, where I got a repro driveshaft and the bracket that fits the leaf spring and lower shock. Also on the old driveshaft, because the rear shocks are set too low, it has rubbed against the chassis, and carved a couple of mm deep grove into the driveshaft. 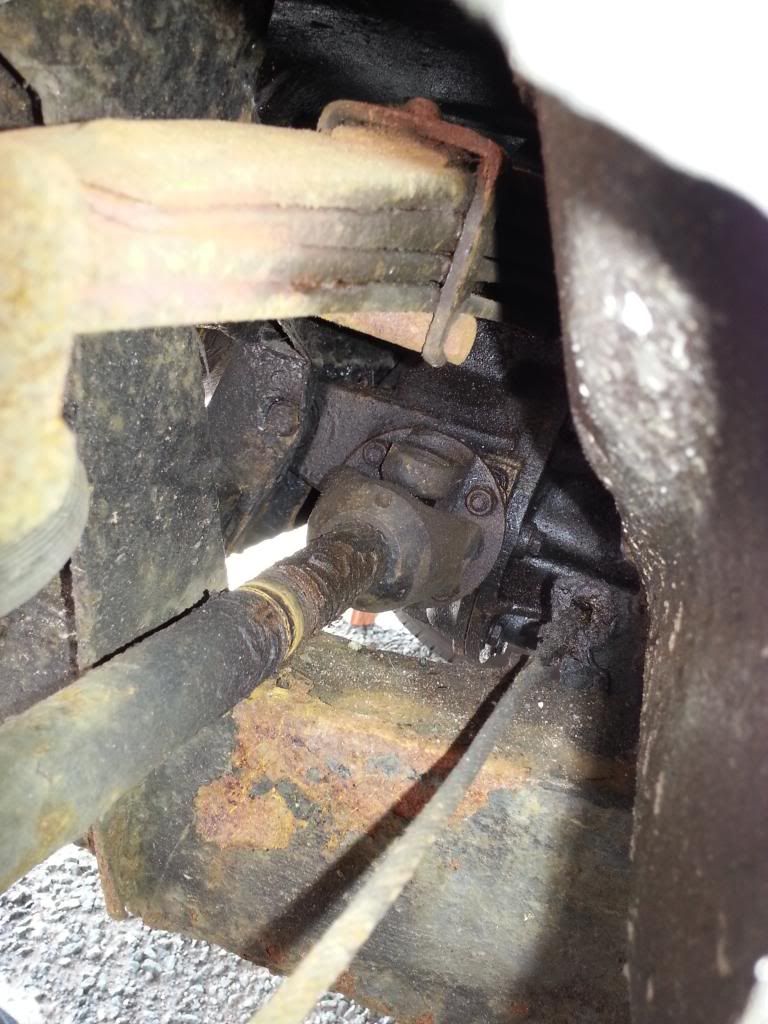 So those were fitted for us, and we got her home and made a start on the suspension. It appeared that a previous owner had spent a fair amount of time and money lowering the car. The springs on the front are 2 coils less than standard, and the back had a pair of very rusty Spax adjustable shocks and a leaf spring from a Spitfire. (The Spit springs have 5 leaves, while Herald/Vitesse have 11) 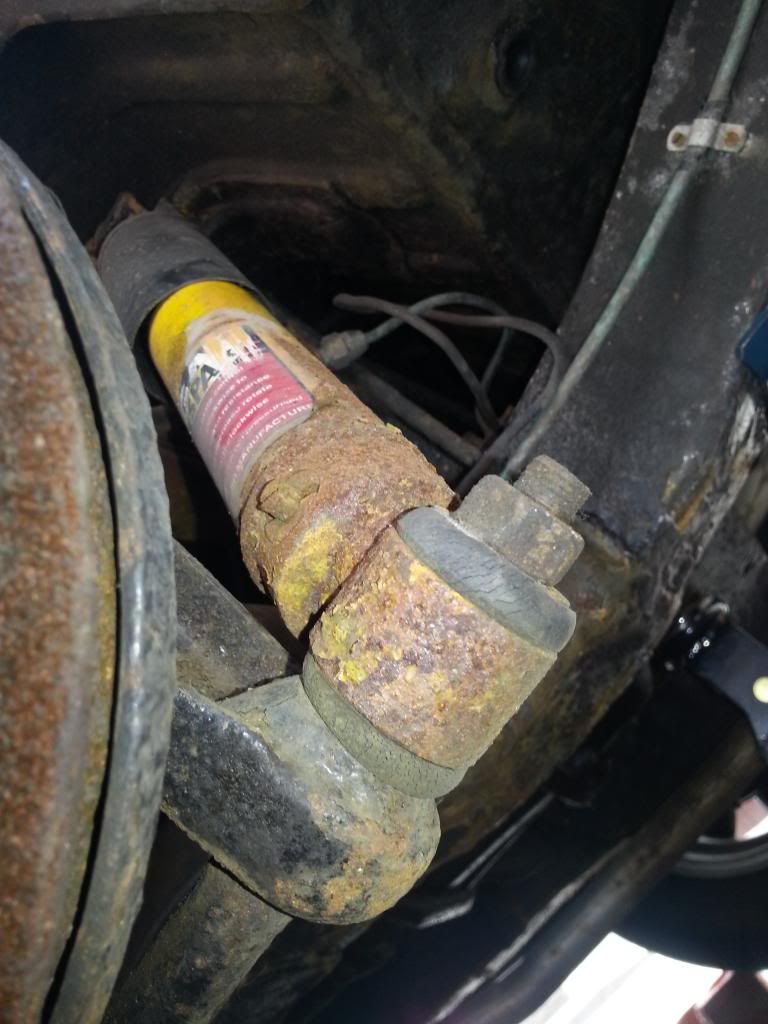 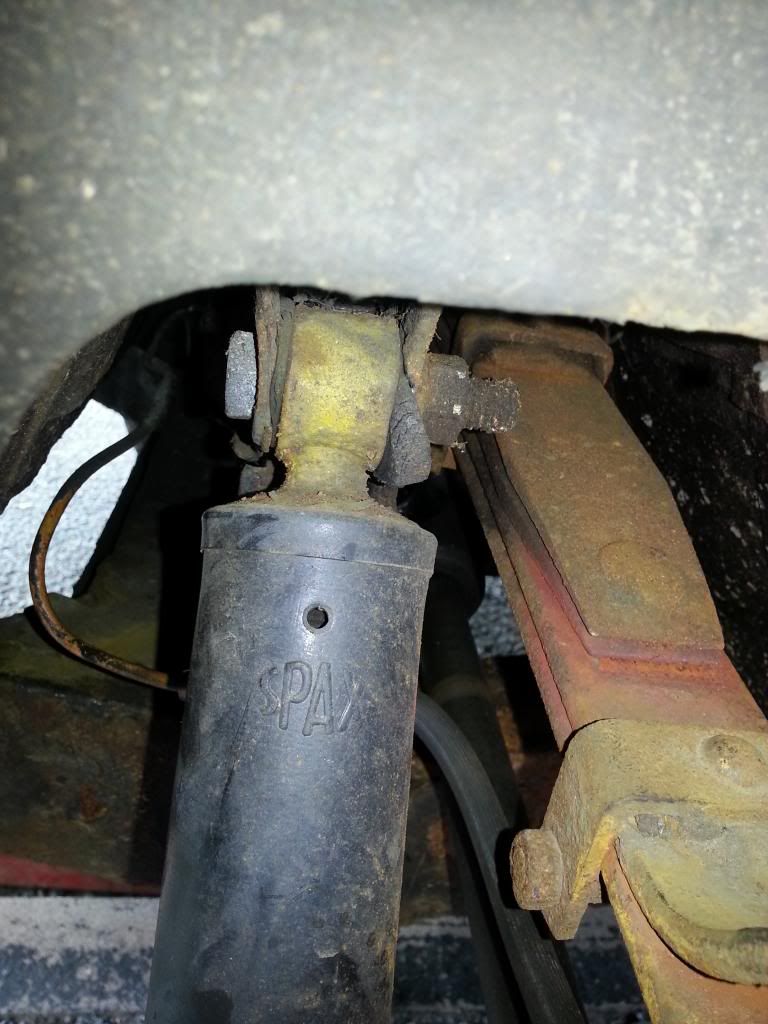 So new standard shocks, polys and nuts/bolts fitted. 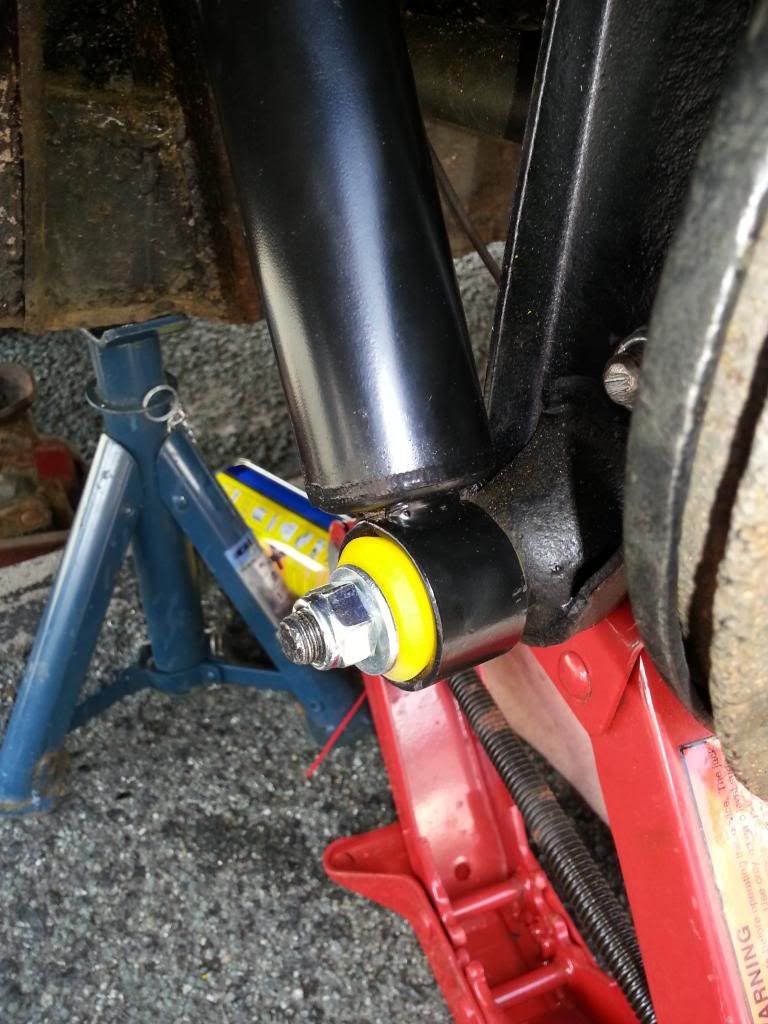 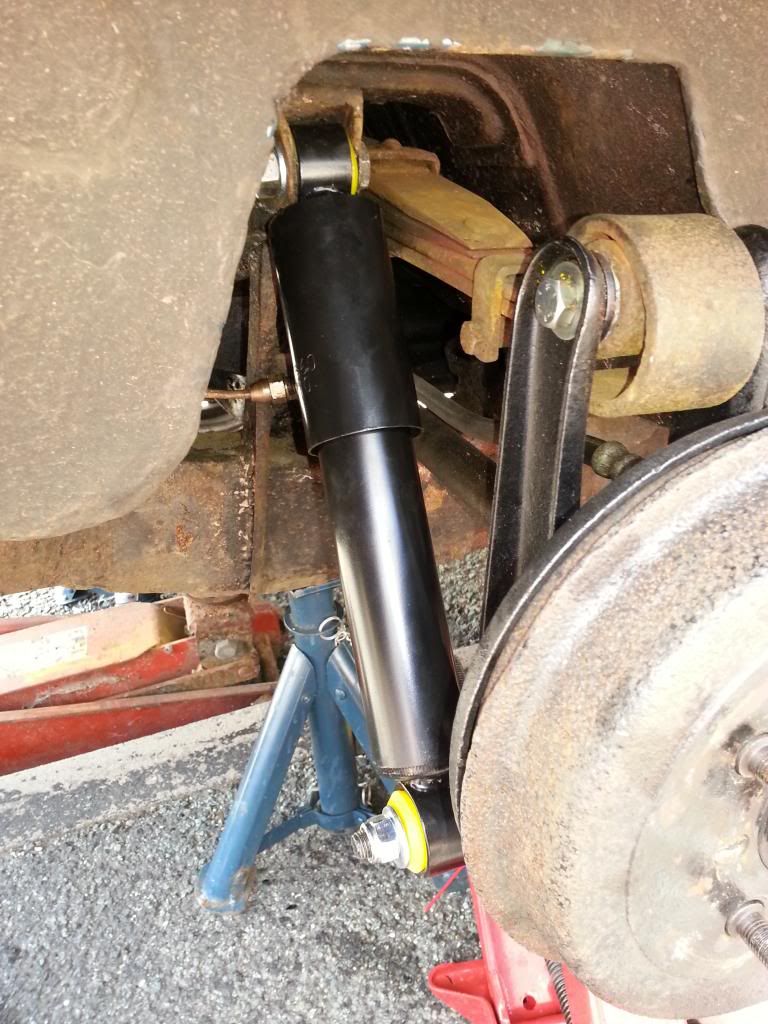 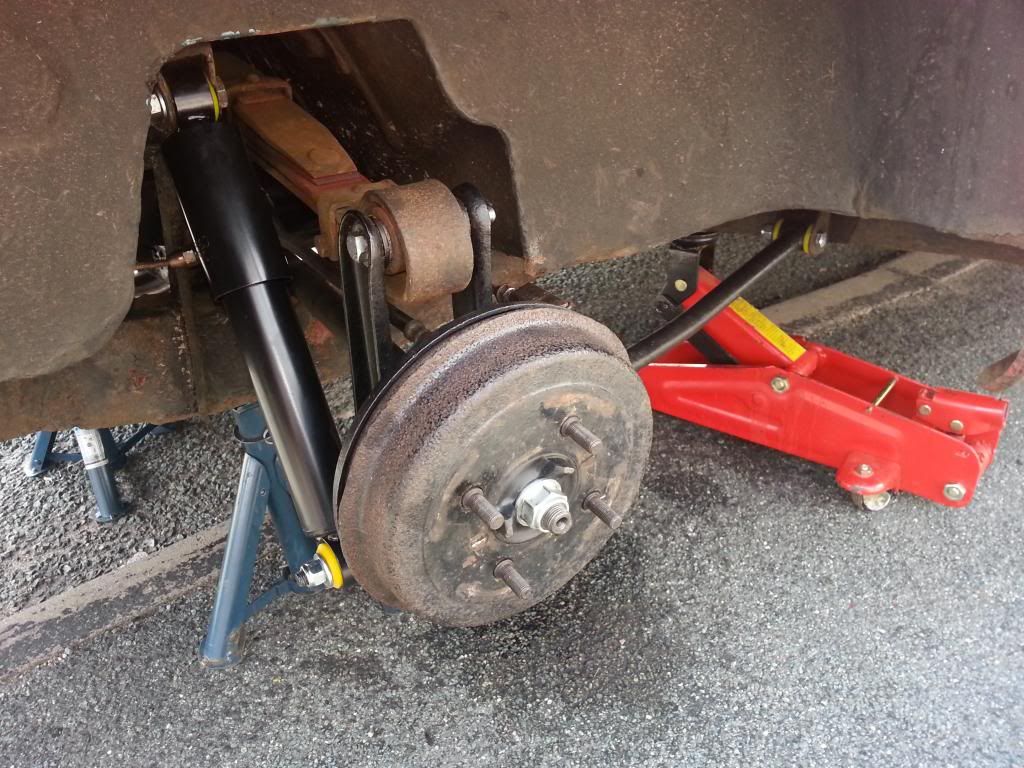 Theres still some work to be done, and once its Mot'ed at the end of the month, the next job will be get her up in the air, paint and underseal the underneath, try and get a leafspring, and fit the front suspension. (I'm on my 3rd different set of spring compressors now, the first one the hooks were too thick to go in the coils, while the others were too big to allow the shocker to fit up the middle) Also did my first long journey in her at the weekend. A 220 mile round trip to Barmouth, up steep hills etc, a fully loaded car, and it did it with absolutley no problems, and I averaged about 35 to the gallon. Well chuffed! Cheers Chris |
| |
|
|
carltonx
Part of things
yardie in brum
Posts: 645
|
|
Jun 21, 2013 18:33:20 GMT
|
are you now running all standard suspension ? how are you finding it ? mine was terrable the best thing I done was lower it back and front  |
| |
Last Edit: Jun 21, 2013 18:34:01 GMT by carltonx
Potentially offensive comment deleted. You are welcome to remove this text, but not replace it with more bigotry. If the need to express that opinion is particularly important, please let me know and I'll delete your account for you.
Maximum signature image height: 80 pixels.
|
|
|
|
|
Jun 21, 2013 18:38:35 GMT
|
|
Just standard shocks on the back atm, got standard coils and shocks for the front to be fitted, still on spit leaf, gonna see how the rake is with the front done. Finding it a lot better so far, but having said that the bits that have been removed so far have been well shot, so its difficult to compare. Also having problems at the front with wheels scraping on the arches, so it needs to go up a bit at least. Yours looks good mate, the wheels are looking smart.
|
| |
|
|
|
|


 I installed a set of speakers in the kick panels in my '61 1200 'vert as well. Good place for them and they sound pretty good too.


 Will be fab when everything matches as everything else looks really smart.
 (The chisel is there to hold it in place as its not particularly secure)


