|
|
|
May 29, 2012 20:32:59 GMT
|
Thanks again Seth, I owe you one  I'll give it a good going over before I do anything with it but it feels OK when turned by hand. Dan almost managed to bring me someone else's diff by mistake ;D Whilst it was the modern part it was escaping from, it was the fault of the person that installed it for reading Chingrish websites of re-manufacturers rather than just looking at the label on the alternator itself! |
| |
...proper medallion man chest wig motoring. |
|
|
|
|
|
|
|
|
I had a little look at the diff that I got from Seth for welding up and going skidding to sit at slightly safer cruising speeds on A roads and not having read up on how the actual conversion is done, was a little concerned that the casing looked totally different to what was on the car already. 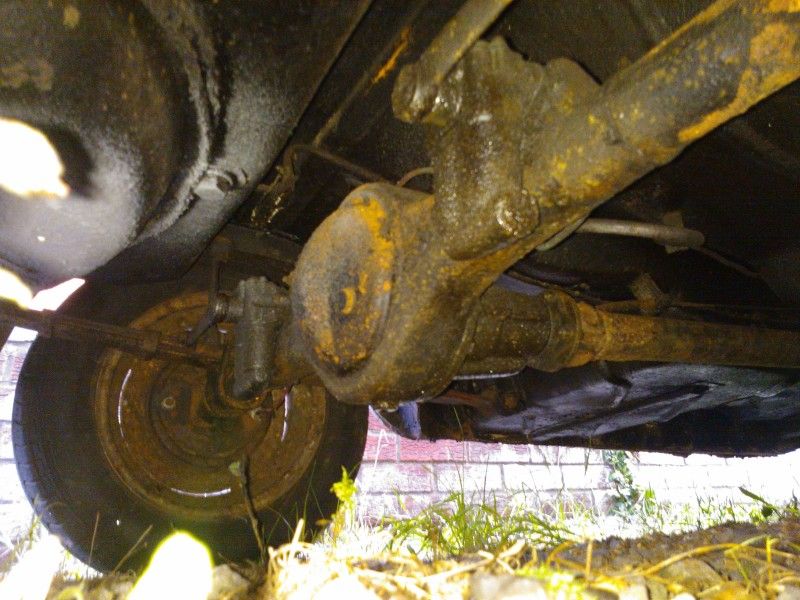 There are obviously differences due to the way it mounts in a Herald compared to in a Standard.  This is the stamping that confirms it's the one I need though, and a quick test to satisfy myself that the ratio is correct confirmed that it's 'about 4 to 1, ish' so I'm happy on that front.  A knowledgable person on the Standard Motor Club forum has explained roughly the process to me. I need to undo the allen head bolts behind the output flanges and knock them out, undo the ring of 8 bolts holding it all together and pull the diff out of its casing. Then it's a case of doing something similar on the existing axle and swapping it all round. Simple  I'll try to get photos and report back. I'm hoping to make a start this weekend. |
| |
...proper medallion man chest wig motoring. |
|
Dez
Club Retro Rides Member
And I won't sit down. And I won't shut up. And most of all I will not grow up.
Posts: 11,784
Club RR Member Number: 34
|
1955 Standard 10Dez
@dez
Club Retro Rides Member 34
|
|
|
you can sort that steering wheel out pretty easily with some black milliput, its a pretty good match for shonky old hard black plastic steering wheels. oh, and axle under springs?! why has this not been axle flipped yet?! makes perfect sense to do it the same time as the diff swap  |
| |
|
|
|
|
|
|
|
|
Now you mention it, the Portamig feels wasted if it's not used regularly ;D This is exactly the reason I wanted my plaything car not to be a daily as well. I remembered you (Dez) had a good post about axle flipping on you Escort van but I've had a look and the pics are all dead unfortunately. I know what the idea of it is, but I like the way you did it to minimise measuring in lining up the spring seats.
Thanks for the Milliput tip, too. I'll grab some next time I'm somewhere crafty.
|
| |
...proper medallion man chest wig motoring. |
|
Dez
Club Retro Rides Member
And I won't sit down. And I won't shut up. And most of all I will not grow up.
Posts: 11,784
Club RR Member Number: 34
|
1955 Standard 10Dez
@dez
Club Retro Rides Member 34
|
|
|
smg.photobucket.com/albums/v617/dezaster/escort%20van/pics will be in there somewhere tbh id actually use a slightly different technique to do yours though. you may actually want to be able to move the axle away from its original mounting angle a few degrees, to stop you killing the pinion bearing, depending on how misaligned the two prop flanges become. it would be more like how i did my commer van, but the pics of that are long gone. shocks mounts look easy to flip around too, depending on the scrubline. you should easily be able to do it in a weekend including fitting the new diff and cleaning everything up, can write you a quick how-to/order of attack of you want
|
| |
|
|
Seth
South East
MorrisOxford TriumphMirald HillmanMinx BorgwardIsabellaCombi
Posts: 15,538
|
|
|
|
Probably worth pulling one of the Standard's half shafts out and comparing it to the short shafts you'll be taking out the diff sides to make sure the splines are the same before you go to the trouble of pulling the diff out of the standard. Never really looked under the back of one of these before. I'm amazed the shocks are bolted to the axle, just to up the unsrpung weight a bit more... |
| |

Follow your dreams or you might as well be a vegetable. |
|
|
|
|
|
|
Quick order of attack would be really useful, if it's no trouble I reckon I'd do alright but it'd take faaar less time with the voice of experience to help me along the way. The ability to change the angle of the spring mounts makes sense now you've said it. I'll do some measuring to figure it out |
| |
...proper medallion man chest wig motoring. |
|
Dez
Club Retro Rides Member
And I won't sit down. And I won't shut up. And most of all I will not grow up.
Posts: 11,784
Club RR Member Number: 34
|
1955 Standard 10Dez
@dez
Club Retro Rides Member 34
|
|
|
|
well, something like this-
jack up, axle stands under something isnt the springs or axle(sills/outriggers depending on how good they are).
wheels off
handbrake cables/linkage(i don't know what it has, rod id expect at that age?) loosened and removed
clamp rear flexi and undo at axle end- stops brakes emptying the entire system of fluid.
prop off
shocks off- maybe measure up and see if they can also be flipped to under-axle without effecting scrubline first. if not youll have to shorten the drop-arms instead.
undo all the u-bolts/spring saddle guff- support axle with jack first. make a note of the order the bits fit in.
axle can now be dropped down and rolled out on jack. then swap the diff with it out, plus carefully cut/grind back the welds on the saddles. I usually find you can go 3/4 of the way through then whack em with a hammer and chisel to split em off without risking going through the axle casing. if you do have to cut through something, chunks missing from the brackets don't matter as much as chunks missing from the casing!
bits missing from the brackets can be welded up easily as they go back on. get the tubes cleaned back nice and round, brackets matter less. if you end up moving the shock brackets do them as well now. otherwise, youll need to remove the drop arms and cut and shut them the same amount as youve moved the axle up.
I then also usually undo the rear spring shackles and drop the springs to the floor. its easier to get the axle behind the car with wheels on and roll it under then lift the springs up to it then try to manhandle the axle in from the side over the top of the springs.
take the bolt out that holds the spring pack together on each side, flip it over so it goes in from the other side and refit.
loosely refit all the u-bolt stuff to the axle/springs, in reverse order, including the brackets youve cut off, just slot them in for the mo. youll probly have to take the wheels back off to do this so support it back on the jack, then jack the axle up on the diff to lift the rear end of the springs back into place and refit the shackles.
check the axle is centred, then do the u-bolts up to almost-tight, but so you can still twist the diff around by hitting it with a soft hammer.
refit the wheels and the prop, and drop down onto its wheels. adjust pinion angle as neccessary by hitting it up/down til prop is looking happy, then tack saddles in place.
jack it back up, wheels off, disassemble u-bolt bits so you can get in to weld saddles back on properly. then slap a bit of paint about on em.
now refit everything, inc handbrake, shocks, etc. but doint do the u-bolts up tight. take the hose clamp off and then bleed the brakes (should bleed up pretty easy as there can only be air in the rear axle portion of pipes), then drive the car down the road/drive/etc, letting it roll to a stop without braking, then lay under it and nip the u-bolts up. this will make sure the rear axle is tracking right.
thats only a rough guide, ive probly forgot little bits, but I think you should get the jist of things from that?
|
| |
Last Edit: Jun 6, 2012 23:11:56 GMT by Dez
|
|
|
|
|
Jun 15, 2012 11:34:02 GMT
|
Thank you Dez. I've read through that a few times and it will be a massive help. Unfortunately, real life is getting in the way a little so I haven't got anything done.. This photo demonstrates the drop arm issue 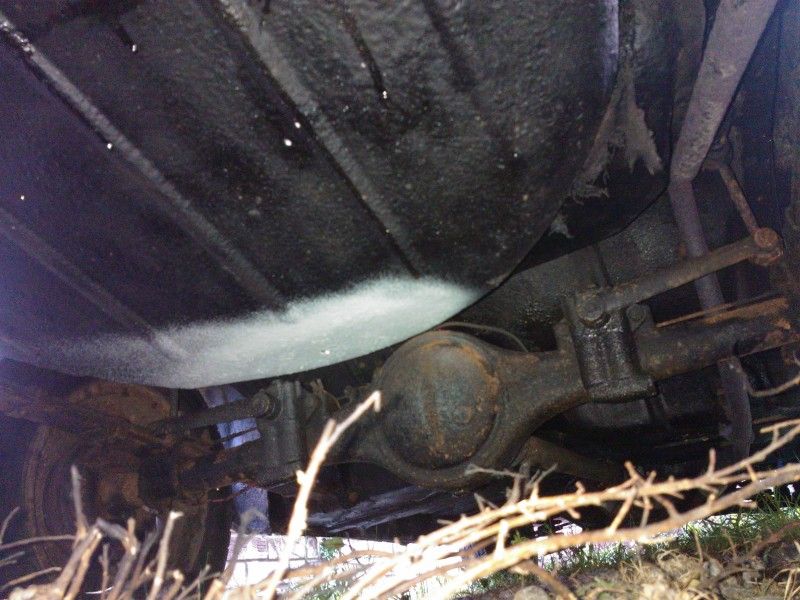 Unfortunately, it has been confirmed to me that the diff I got from Seth isn't suitable due to a difference in the number of splines. Annoying but not the end of the world. I'll just go slowly until something else pops up ;D Seth- Would you like me to redeposit it in your garden? It's due its (last ever compulsary) MOT within the next month so I'll resolve a couple issues, such as the hole in the floor, lack of washers and lack of reflectors before shoving it through the test and seeing how it gets on. After that I think the modifying will start proper. My only limitiations are time and money  EDIT: did I say time and money? I meant time, money, skill and tools ;D |
| |
Last Edit: Jun 15, 2012 11:34:54 GMT by ben711200
...proper medallion man chest wig motoring. |
|
|
|
|
Jun 17, 2012 15:41:45 GMT
|
|
You're doing a great job so far with the little 10. They are lovely little things and I considered owning one myself, maybe one day. The beauty of the 10 is that it is relatively simple in mechanical terms and any panel repair should also be quite straighforward.
Tools can be built up over times as money allows. Halfords do a really good imperial ratchet spanner set for not a huge amount of money (I can vouch for how handy they are on my Triumph 1300). I have been lucky enough to get spanners, sockets, axle stands from 'freecycle' which has really helped.
Keep going and as others have mebntioned, take loads of piccies.
All the best.
Ken
|
| |
|
|
|
|
|
|
1955 Standard 10Robinxr4i
@robinxr4i
Club Retro Rides Member 143
|
Jun 17, 2012 17:43:13 GMT
|
|
Last MOT lol, has it been established if you can continue to MOT it after? Just for peice of mind ect.
Time, money, skill and tools need to work out a way of generating all of these!
|
| |
Sierra - here we go again! He has an illness, it's not his fault.
|
|
|
|
|
Jun 17, 2012 20:29:42 GMT
|
Thanks for the words of encouragement, Ken. I have a fairly good selection of hand tools, but a lack of indoor space and some bigger tools slows progress (it doesn't halt it entirely ;D ) Robin- I haven't looked for a few weeks. Last time I looked there was only the mention of voluntary MOTs in the official announcement but I'm not aware that any provision has been made yet for exempt vehicles to be officially tested. If I can get an official voluntary MOT then I will, if not, I guess it'll be a case of going to a garage and saying 'I'd like you to look at all items that used to be testable on my car and provide me with a list of what's dodgy please' I put the doorcard back in and trundled through the countryside this weekend. Most enjoyable |
| |
...proper medallion man chest wig motoring. |
|
|
|
|
Jun 17, 2012 22:26:36 GMT
|
I put the doorcard back in and trundled through the countryside this weekend. Most enjoyable This is totally what this car is about - trundling enjoyably ;D |
| |
1989 Peugeot 205. You know, the one that was parked in a ditch on the campsite at RRG'17... the glass is always full. but the ratio of air to water may vary. |
|
craig1010cc
Club Retro Rides Member
Posts: 2,998
Club RR Member Number: 35
|
1955 Standard 10craig1010cc
@craig1010cc
Club Retro Rides Member 35
|
|
|
Indeed, what can be better than a trundle in something as cool as this |
| |
|
|
|
|
|
|
|
|
There will still be a MOT test for them if you want it done its just a voluntary thing.
|
| |
1977 datsun 810 180b estate |
|
|
|
1955 Standard 10BenzBoy
@benzboy
Club Retro Rides Member 7
|
Jun 18, 2012 20:38:46 GMT
|
|
I've just read through this thread - what a great car! I'm hoping that it will be making an appearance at RRG this year? Will be great to see it in the metal.
|
| |
|
|
Seth
South East
MorrisOxford TriumphMirald HillmanMinx BorgwardIsabellaCombi
Posts: 15,538
|
|
Jun 18, 2012 20:49:38 GMT
|
|
Ah, sorry about the diff then. Out of interest then, which ones do fit? The earlier ones up to whatever no. it was I posted?
|
| |
Follow your dreams or you might as well be a vegetable.
|
|
|
|
|
Jun 18, 2012 21:03:03 GMT
|
Ah, sorry about the diff then. Out of interest then, which ones do fit? The earlier ones up to whatever no. it was I posted? This is what I've been told on the Standard Motor Club forum Which is a little annoying, but not the end of the world. No need to apologise, Seth. You said it may not be an early one and I was naive enough to think that the same code meant it'd be the same.. I'm very grateful for you donating it and to Dan for getting it to me. I'll keep hold of it and return it to you if you'd like it back? |
| |
...proper medallion man chest wig motoring. |
|
|
|
|
Jun 18, 2012 21:05:58 GMT
|
I've just read through this thread - what a great car! I'm hoping that it will be making an appearance at RRG this year? Will be great to see it in the metal. Thanks It will absolutely be at the Gathering all weekend. I'll keep an eye out for you- Facebook tells me on a very regular basis that I probably know you so it'd be rude not to |
| |
...proper medallion man chest wig motoring. |
|
|
|
|
Jun 22, 2012 21:25:15 GMT
|
I'm on a bit of a bid to make things run a bit nicer without really having to do continual maintenance and stuff. Which is why there is a thread here about upgrading to electronic ignition and changing the dizzy itself. Mmmm, shiny bits 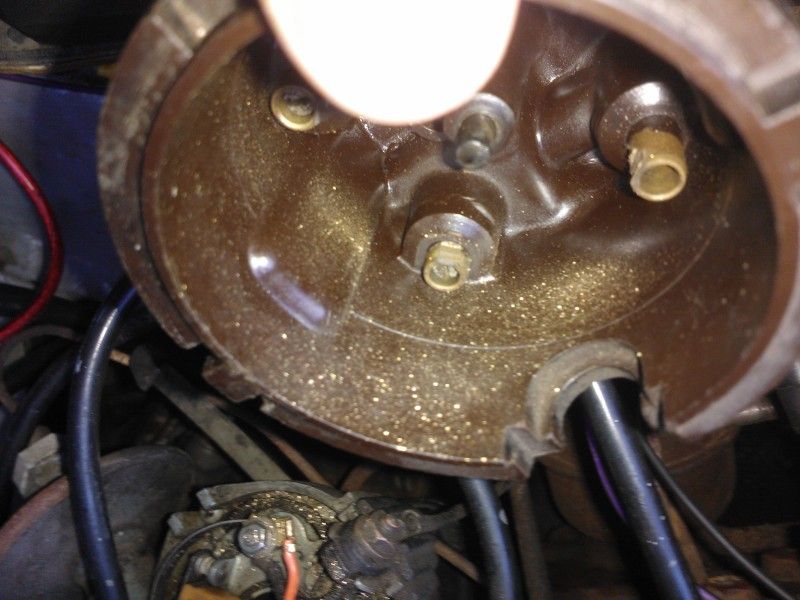 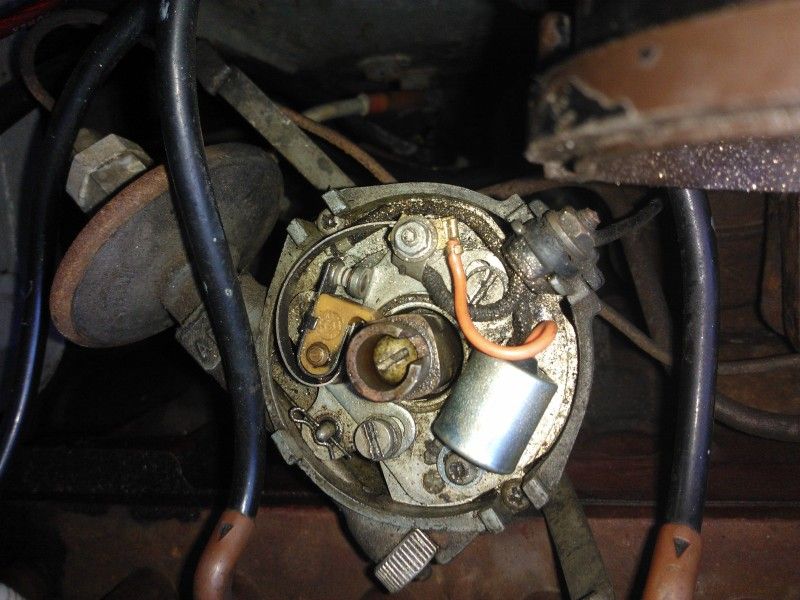 Also, anyone would think I had it booked in for its test on Monday by the silly cabletied reflectors..  |
| |
...proper medallion man chest wig motoring. |
|
|
|


 I'll give it a good going over before I do anything with it but it feels OK when turned by hand. Dan almost managed to bring me someone else's diff by mistake ;D


