|
|
|
Jun 29, 2016 19:04:12 GMT
|
|
Spot on that mate. Mine had to have a couple if repairs around the window too. Who made that nice alloy fuel tank for you?
Also where do you run the rest of your exhaust? Does it go under the rear cradle?
|
| |
|
|
|
|
mk2cossie
Club Retro Rides Member
Posts: 3,061  Club RR Member Number: 77
|
|
Jun 29, 2016 20:36:00 GMT
|
Spot on that mate. Mine had to have a couple if repairs around the window too. Who made that nice alloy fuel tank for you? Also where do you run the rest of your exhaust? Does it go under the rear cradle? The fuel tank was made years ago by someone that Powerspeed knew. Wasnt too pricey either, but could do with some baffles inside it really as I have discovered from track days at Brands and when cornering left slightly enthusiastic on the roads  Both pipes do indeed go underneath the cradle, and the offside one right underneath the tank as well  |
| |
|
|
mk2cossie
Club Retro Rides Member
Posts: 3,061  Club RR Member Number: 77
|
|
Jun 29, 2016 20:45:42 GMT
|
Hopefully a pic to illustrate the rear end  |
| |
|
|
mk2cossie
Club Retro Rides Member
Posts: 3,061  Club RR Member Number: 77
|
|
Jul 17, 2016 22:11:11 GMT
|
|
|
| |
Last Edit: Jul 17, 2016 22:13:55 GMT by mk2cossie
|
|
|
|
|
Jul 18, 2016 21:32:01 GMT
|
|
Top job Paul. Hope to do something similar with mine soon.
|
| |
1982 Granada 2.8 Ghia X - SOLD ☹️
1976 Mini Clubman Estate - Getting there slowly.
|
|
mr
Posted a lot
  
Posts: 1,619
|
|
|
|
|
Always nice to see another granada getting a refurb.looking forward to seeing this all finished and shiny
|
| |
Got the car from 105 bhp at the crank to 152 at the wheels.nitrous going on next.....if it ain't broke,keep bolting on go faster parts until it is........ www.fordgranadaclubuk.freefo.de |
|
mk2cossie
Club Retro Rides Member
Posts: 3,061  Club RR Member Number: 77
|
|
Jul 26, 2016 12:35:32 GMT
|
It's all going to be a bit quiet this week, as the welder man is on holiday this week to the south of France  However, I did sneak down there last night whilst he was finishing up his van conversion and made some progress on my car as well as resetting the lights on his vans dashboard  So, I started with one perfectly functioning fuel tank 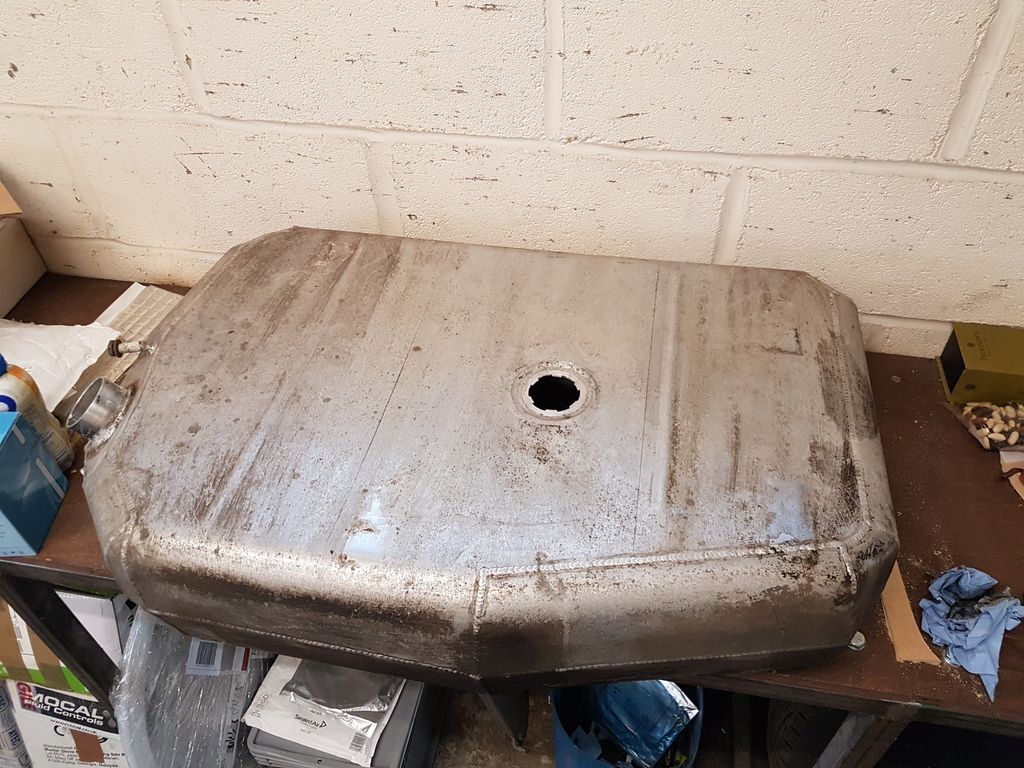 that looks like this inside through the sender hole 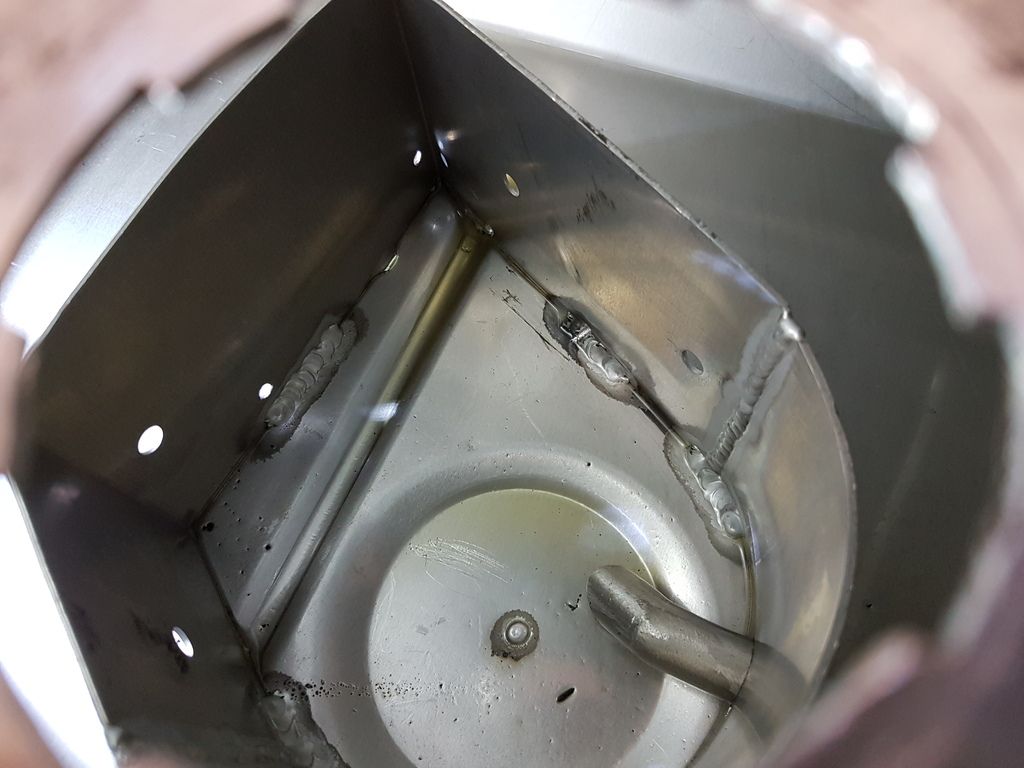 and through the filler neck  And a few holes drilled and a battery powered jigsaw later I had this   A little bit of CAD (everyones favourite type of car work  ) 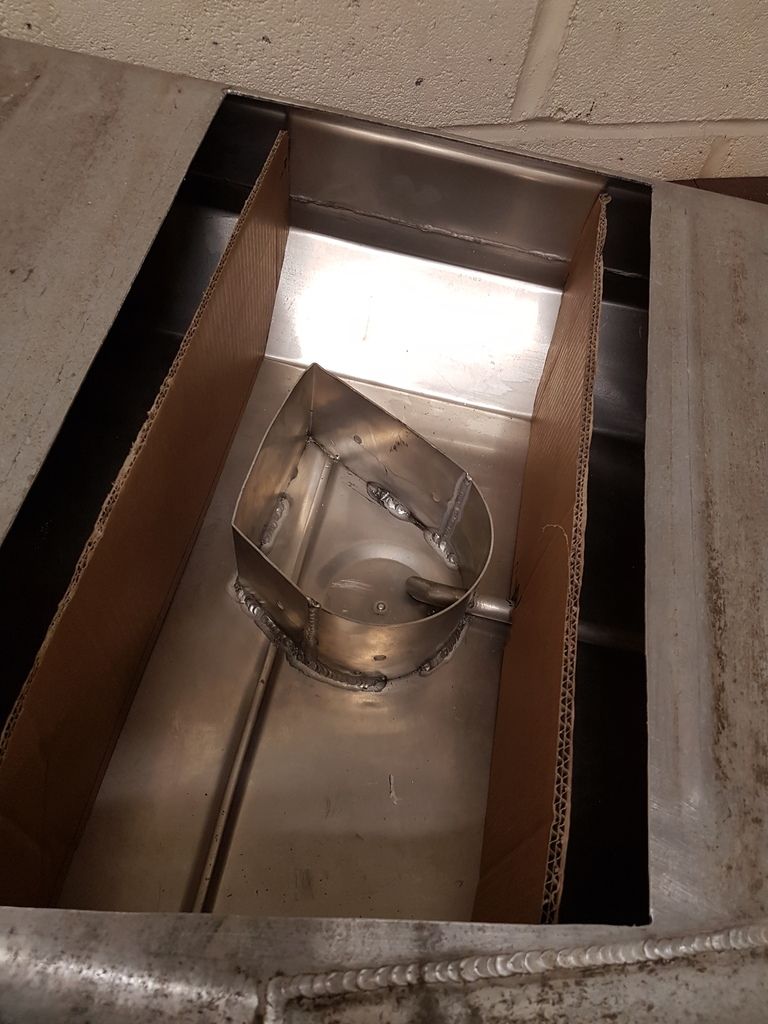 And those will be transferred to whatever thickness alloy sheet and welded in to almost separate the swirl pot area from the main part of the tank and have a one way valve in each baffle as well   |
| |
|
|
eurogranada
Europe
To tinker or not to tinker, that is the question...
Posts: 2,556
|
|
Jul 26, 2016 12:58:51 GMT
|
|
And you're doing this why?? Still running out of fuel while cornering or something?
|
| |
|
|
mk2cossie
Club Retro Rides Member
Posts: 3,061  Club RR Member Number: 77
|
|
Jul 26, 2016 15:57:19 GMT
|
And you're doing this why?? Still running out of fuel while cornering or something? Yup, going left with near half a tank of fuel and if its anything more than just a miss daisy kind of drive it gets fuel starvation, and I have actually managed to get it to cut out and sulk for a while before letting it settle and restart again  Not much fun to have happen on track at Brands Hatch with a Saxo right on my tail out of Graham Hill bend either  |
| |
|
|
mk2cossie
Club Retro Rides Member
Posts: 3,061  Club RR Member Number: 77
|
|
|
|
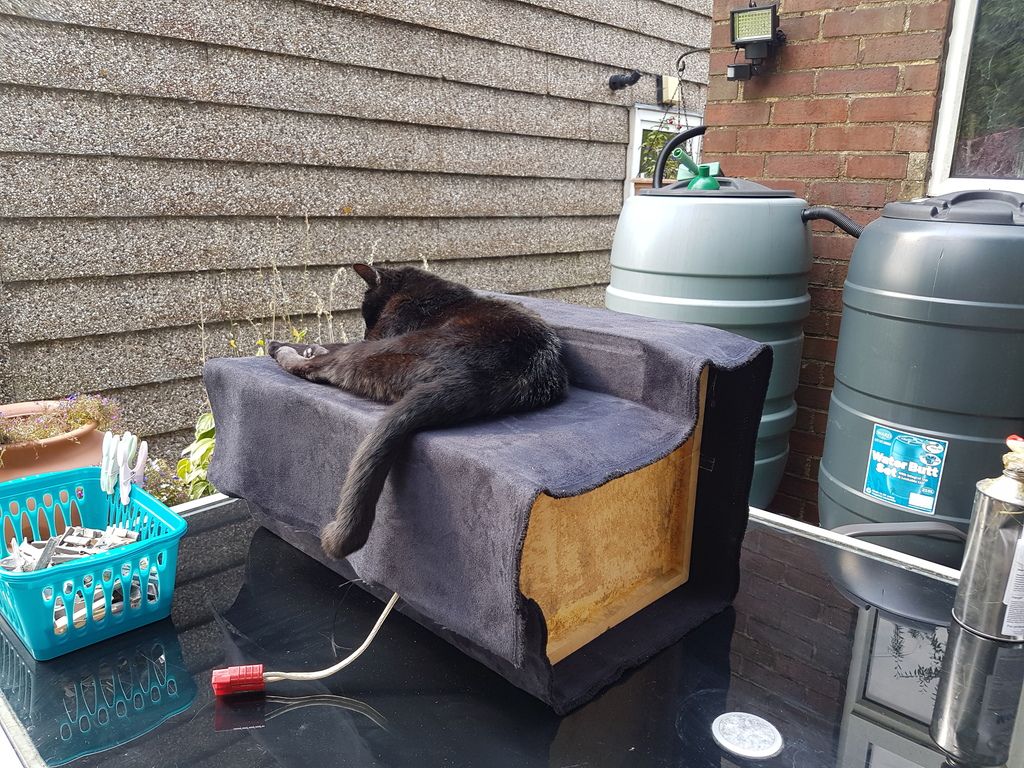
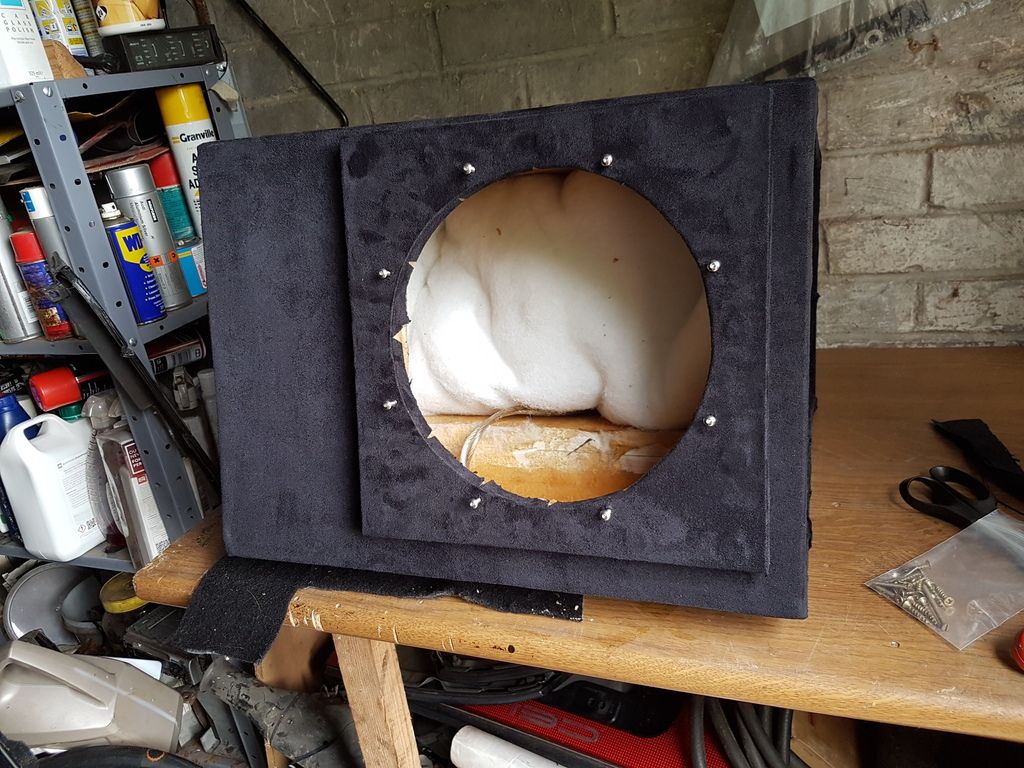
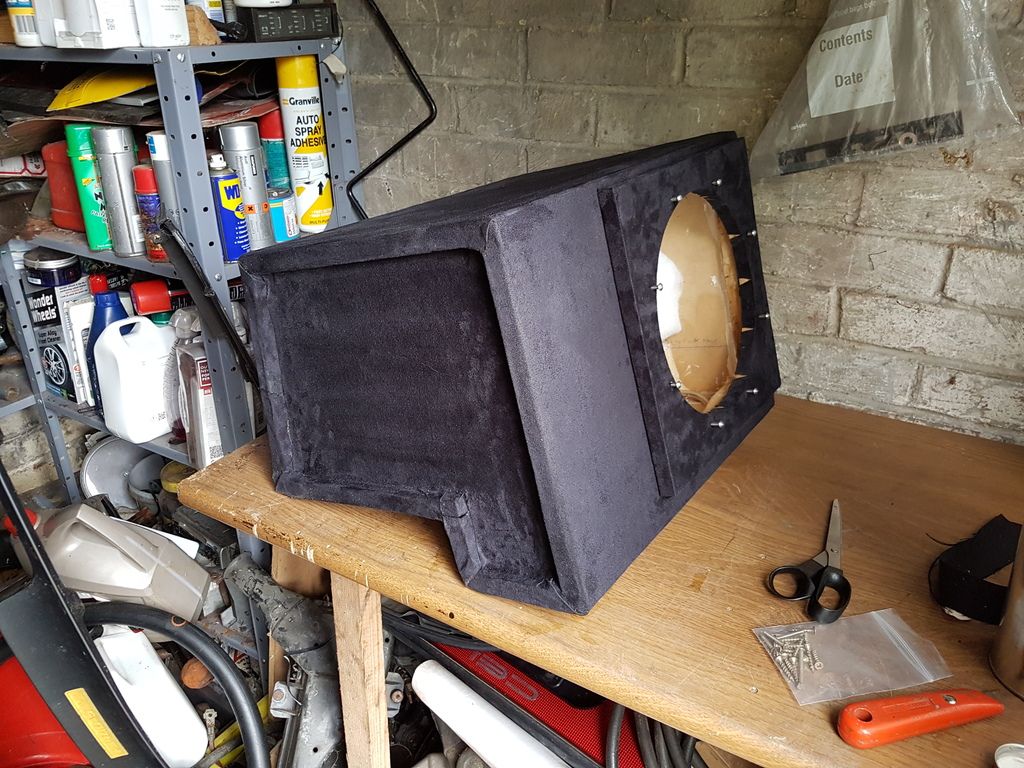
Still no progress updates, as I think my friendly welder is back on it today  However, I thought you retro rides lot may be interested to see the door builds I make up in a little bit of spare time I had several years ago. By no means perfect and they were/are my first attempt at such work  It all started off with wanting a bit more oomph from the Kenwood dual mag speakers that were just screwed in to the standard door cards. They worked alright, but that was as good as you could get with flappy door cards  So I started out with some pieces of MDF (kindly laser cut at the missus work by a friend) and a base board made to follow the curve of the bottom of the door card itself 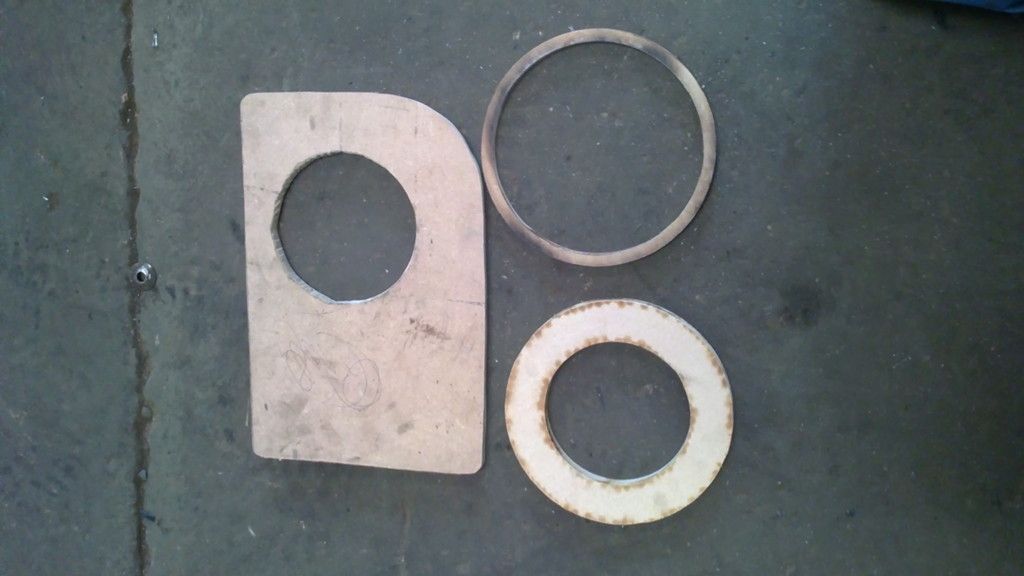 With the aid of a glue gun and some thin strips of metal stuck roughly in to the angle I was after 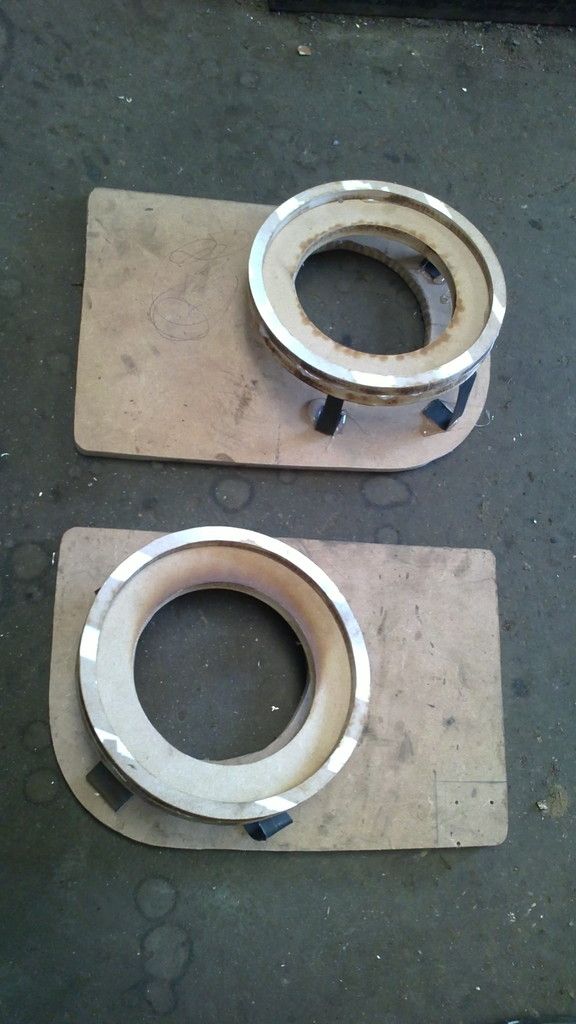 Then it was just a case of choosing some material to stretch over the front of the whole thing (just cheap polishing clothers in my case) and covering that with resin to set hard 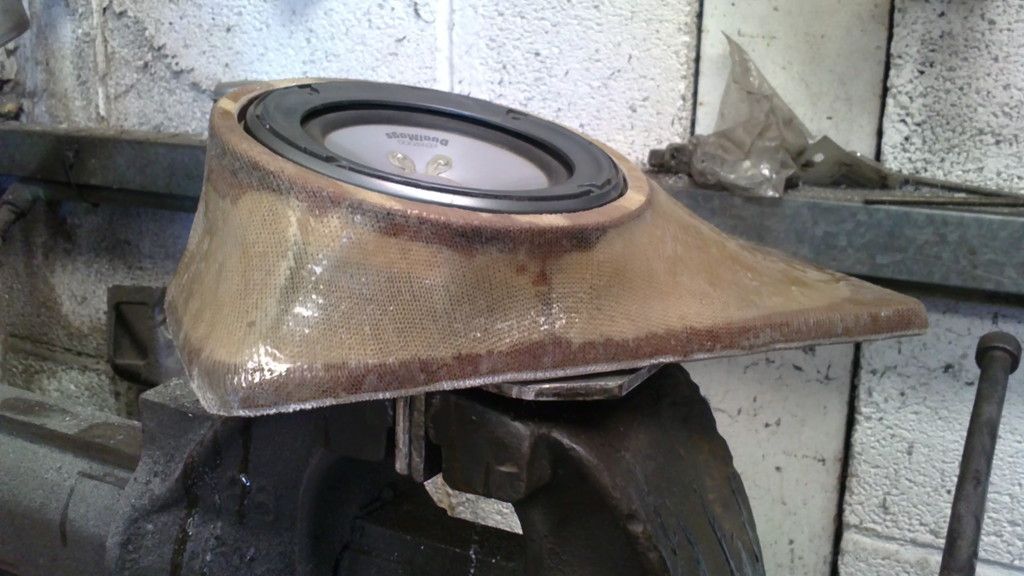 then when that was set it was covered in some acoustic cloth and screwed on to the door cards that also got a coating of resin on the inside to stiffen those up as well  Currently on the look out for some grey alcantara to re cover the door pods with, but nowhere seems to stock it so I can check the colour compared to the Garnny interior  The pods have definately made an improvement to the sound though, as when I take out the sub box for boot space, the speakers themselves chuck out a decent amount of bass for just 4 13cm component speakers  |
| |
|
|
|
|
eurogranada
Europe
To tinker or not to tinker, that is the question...
Posts: 2,556
|
|
|
|
Nice, I had a similar solution... I chose a different location though as I did not want holes in my door cards. Also I used matting to reinforce the pods. I need to get them covered still. There was too little give in the alcantara or even the vinyl for me to get a result that was up to my standard... This post (scroll down a little) shows mine for the footwells: retrorides.proboards.com/post/2184738/thread. The granada has plenty of space there, even more so now I turned it into an automatic. |
| |
|
|
mk2cossie
Club Retro Rides Member
Posts: 3,061  Club RR Member Number: 77
|
|
|
|
Nice, I had a similar solution... I chose a different location though as I did not want holes in my door cards. Also I used matting to reinforce the pods. I need to get them covered still. There was too little give in the alcantara or even the vinyl for me to get a result that was up to my standard... This post (scroll down a little) shows mine for the footwells: retrorides.proboards.com/post/2184738/thread. The granada has plenty of space there, even more so now I turned it into an automatic. The door cards are still uncut from fitting the door pods, just a few screw holes through the carpetted area that wont be seen should I decide to remove them  My friend is a dab hand at trimming interior parts with alcantara, and has suggested using brush on glue instead of spray can stuff. Welder friend has got a pot of glue that should have ACME Glue written on the side of it. Smells lovely and held the carpet on to his wooden trims in his day van conversion very well  |
| |
|
|
mk2cossie
Club Retro Rides Member
Posts: 3,061  Club RR Member Number: 77
|
|
Aug 22, 2016 12:47:46 GMT
|
|
|
| |
|
|
mk2cossie
Club Retro Rides Member
Posts: 3,061  Club RR Member Number: 77
|
|
Aug 23, 2016 12:42:16 GMT
|
Before the welder had broken, there was a bit of progress about a fortnight ago  There was the rear screen surround completed a bit more, all the repair sections have been cut out and laid in place to check for fit and the nearside corner was buttoned up to. The rear screen has a drain either side to allow water out from between the screen rubber and the metal work of the lower section of surround. There's about 3 layers there I seem to recall, once the rot was cut out there was then the reconstruction of the scabby bits underneath this is the lowest panel which is also the part the water drains to and runs down the side of the boot opening from. Managed to get an action shot as well  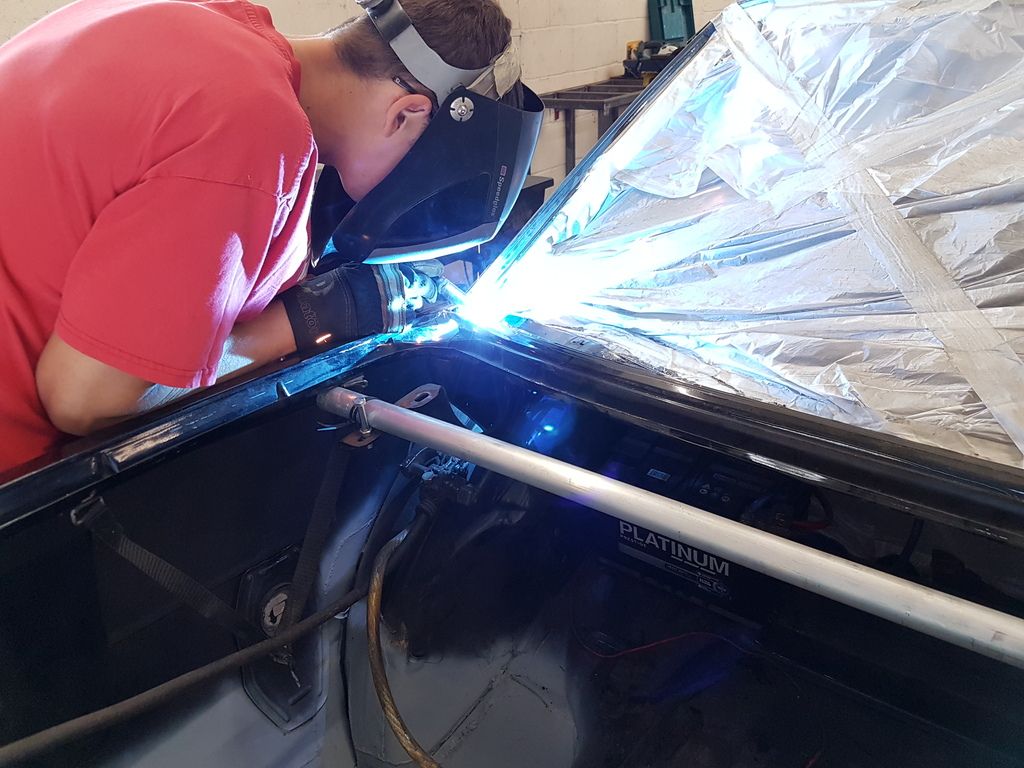 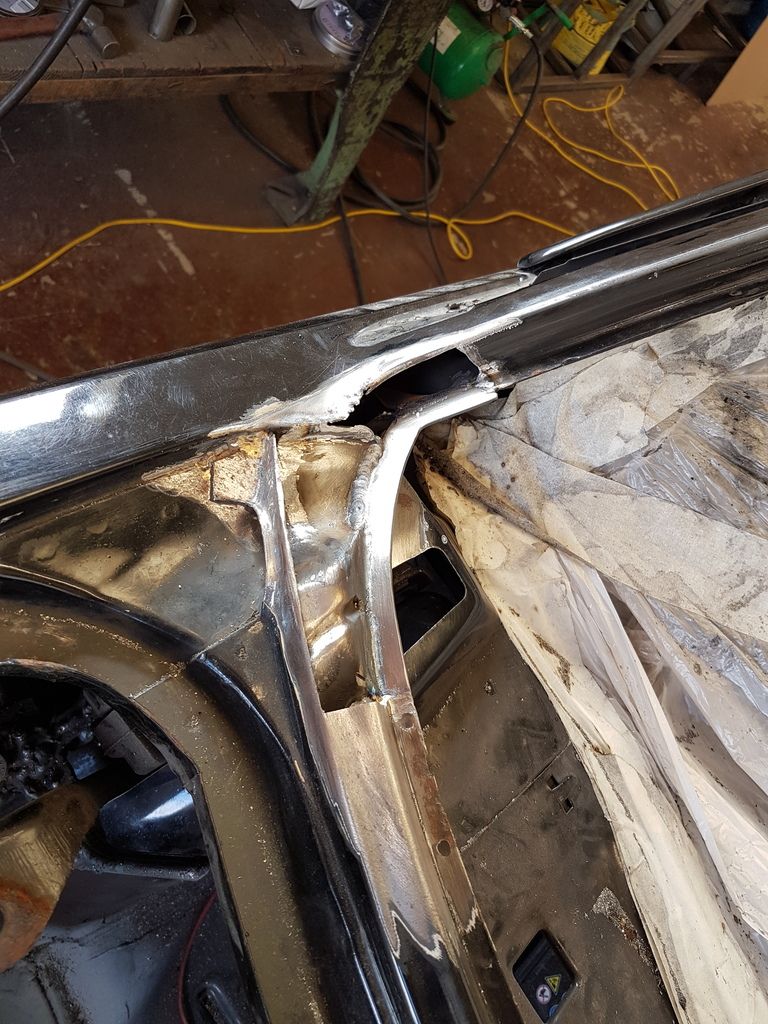 Then the start of the middle/outer skin began  And rather than just drilling a hole to the lower screen panel section, Dave decided to slice, bent, weld and grind this little panel  That looks like this fitted up 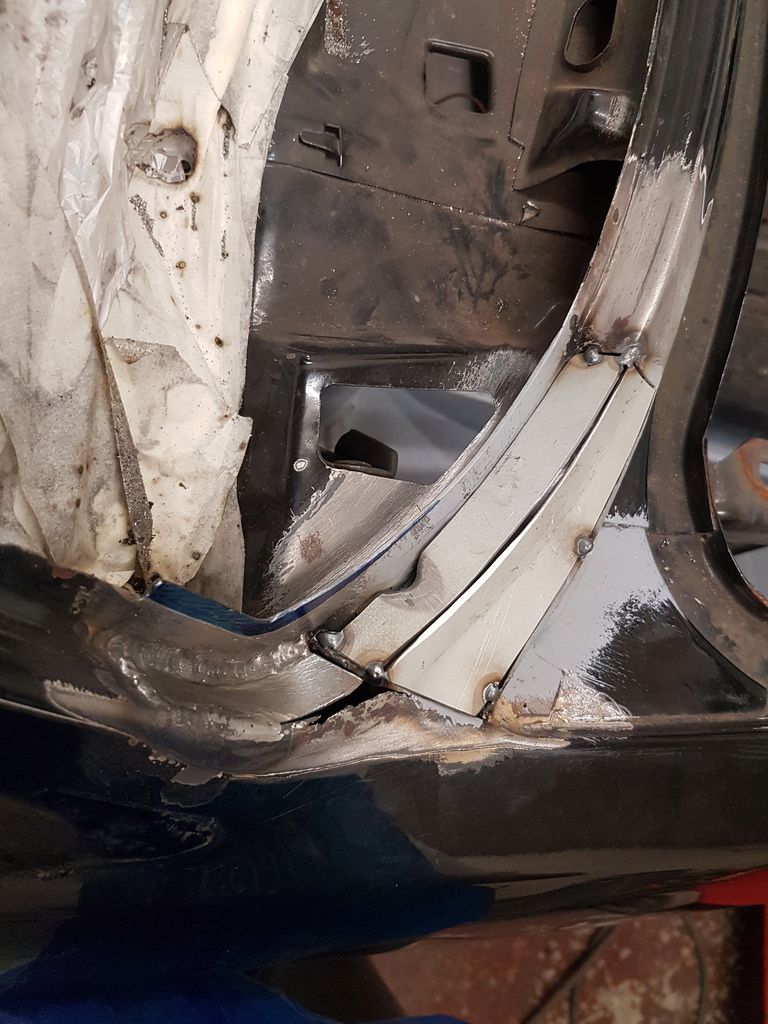 Also a small patch out from the offside screen area  And one to the boot floor where the water had leaked in and attacked! 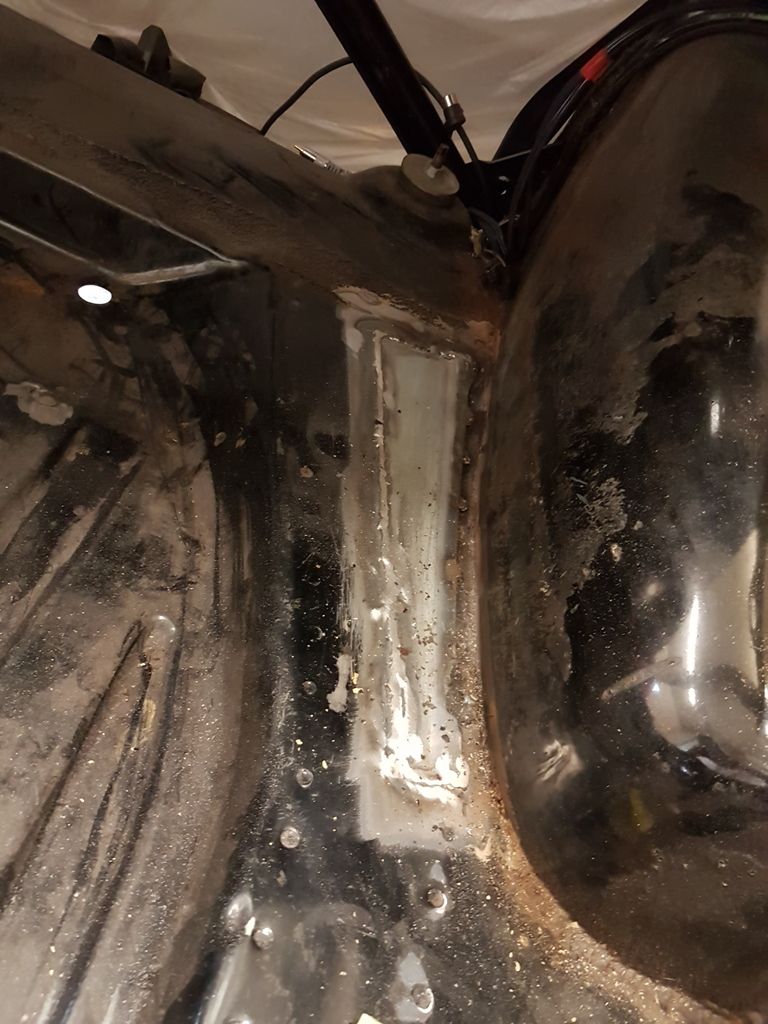 The rear wheel arches got a rub down and a coating of Loctite rust remedy, and that goes on a treat and shows quickly the new and old metal 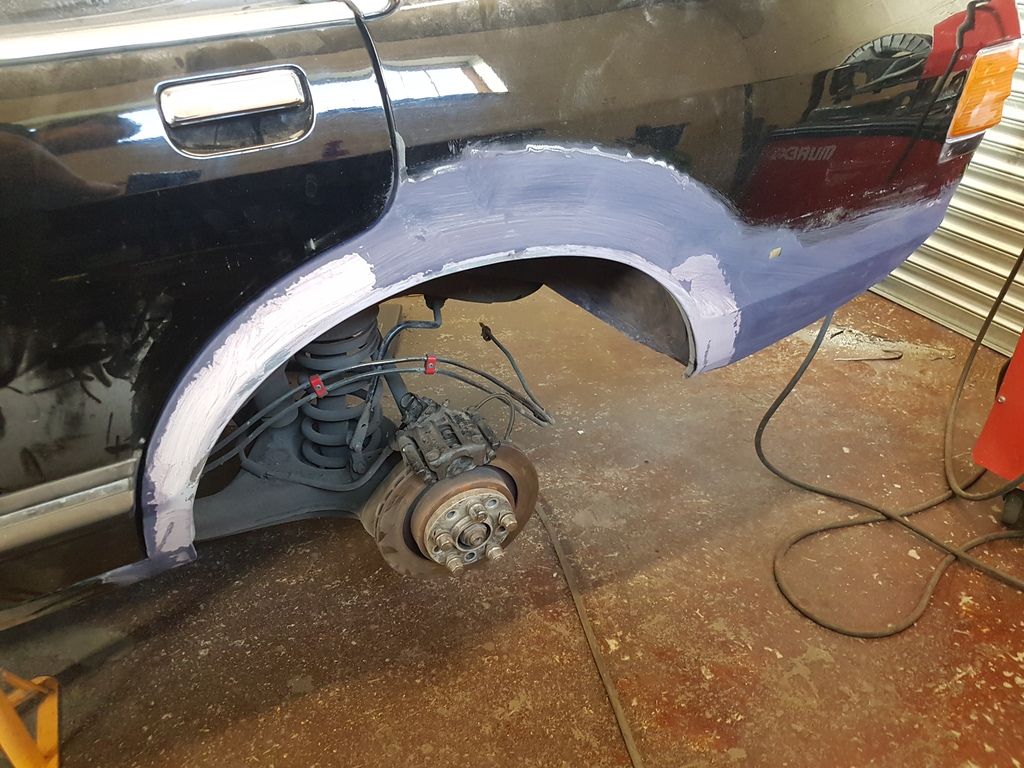  So although it didnt seem a great deal of progress, much was done to help other parts progress along at least, and hopefully means that they will take less time as well |
| |
|
|
mr
Posted a lot
  
Posts: 1,619
|
|
|
|
|
you selling a kidney to pay for all that welding lol........the dr evil "one million dollars" line springs to mind
show us the face you make when the final bill drops in
mine looked a state for .............well,right up until the paint went on so I know what you mean about looks like there's no progress when there's tons of it happening
once finished and painted you'll be scared to take it track side hahahahahahahhahahahahahahaha although if I swap my front discs out I may join you just to see how mine does on a decent surface.would find out who's the loudest too lol
you should keep all rebuild pics for insurance value after its done. vic should be able to give you an owners club certified valuation too mate.
|
| |
Last Edit: Aug 24, 2016 6:31:42 GMT by mr
Got the car from 105 bhp at the crank to 152 at the wheels.nitrous going on next.....if it ain't broke,keep bolting on go faster parts until it is........ www.fordgranadaclubuk.freefo.de |
|
mk2cossie
Club Retro Rides Member
Posts: 3,061  Club RR Member Number: 77
|
|
Aug 24, 2016 12:24:02 GMT
|
you selling a kidney to pay for all that welding lol........the dr evil "one million dollars" line springs to mind show us the face you make when the final bill drops in mine looked a state for .............well,right up until the paint went on so I know what you mean about looks like there's no progress when there's tons of it happening once finished and painted you'll be scared to take it track side hahahahahahahhahahahahahahaha although if I swap my front discs out I may join you just to see how mine does on a decent surface.would find out who's the loudest too lol you should keep all rebuild pics for insurance value after its done. vic should be able to give you an owners club certified valuation too mate. Almost, but not quite yet. Still with all body parts intact and unsold  Although he is charging me (fair enough, he has a house he built to pay for after all), it's not been many solid days yet. Think its 7 or 8 so far. The paint part is going to be the real pain part though, as that may be as much again as the welding cost  We shall see, as Dave is getting the painting main man down to have a look and do a quote when the welding is completed  |
| |
|
|
mk2cossie
Club Retro Rides Member
Posts: 3,061  Club RR Member Number: 77
|
|
Sept 12, 2016 22:50:32 GMT
|
Whilst trying to sort out a memory card for the missus' PS3 to do an update on it I stumbled across an old video file from a Retro Cars/Retro Ford track day  Not amazing quality and the damn thing skips about but thought I'd share it never the less  |
| |
|
|
mr
Posted a lot
  
Posts: 1,619
|
|
Sept 15, 2016 6:52:14 GMT
|
|
car sounds good on the vid but having watched it at brands I can vouch it sounds bloody awesome from the outside too. may join you trackside next year if i've swapped out the solids discs by then
|
| |
Got the car from 105 bhp at the crank to 152 at the wheels.nitrous going on next.....if it ain't broke,keep bolting on go faster parts until it is........ www.fordgranadaclubuk.freefo.de |
|
mr
Posted a lot
  
Posts: 1,619
|
|
Sept 15, 2016 6:54:53 GMT
|
|
from the archives
|
| |
Got the car from 105 bhp at the crank to 152 at the wheels.nitrous going on next.....if it ain't broke,keep bolting on go faster parts until it is........ www.fordgranadaclubuk.freefo.de |
|
mr
Posted a lot
  
Posts: 1,619
|
|
Sept 15, 2016 6:58:00 GMT
|
|
and something even older
|
| |
Got the car from 105 bhp at the crank to 152 at the wheels.nitrous going on next.....if it ain't broke,keep bolting on go faster parts until it is........ www.fordgranadaclubuk.freefo.de |
|
|
|




 )
)


